


User Manual
Electronic Cash Register
CR 1000 series

...designed to Succeed
Dear valued customer!
On behalf of our proud company we wish to welcome you to the QUORION family of fine business machines. We sincerely hope you will appreciate the many benefits of being associated with a distinguished product name that represents both quality and commitment to customer satisfaction.
The QUORION cash register is fully customizable and yet simple to operate. Users can easily adapt it to any type of retail or scanning system. Moreover, our dynamic software generates a compatible environment for a wide array of peripheral devices. It is exactly this versatility and quality that has made us successful among our multinational customers.
It is therefore with great pride that we look forward to continuing our close collaboration with our customers.
Sincerely,
Your QUORION Team
2

Index
Introduction ........................................................... |
5 |
|
Specifications ........................................................ |
6 |
|
1. Keyboard ........................................................... |
7 |
|
1.1 |
Keyboard Layout 8 x 8 ........................................................................... |
7 |
1.2 |
Names of Keys and their Function ........................................................... |
8 |
1.3 |
Control Lock and Control Lock Keys ........................................................ |
9 |
2. Basic Sales Functions........................................ |
10 |
|
2.1 |
Signing on a Clerk ................................................................................ |
10 |
2.2 |
Making a Sale Using an Open Department................................................ |
11 |
2.3 |
Making a Sale Using a Preset Dept./PLU .................................................. |
11 |
2.3.1 Creating a PLU during a Sale ................................................................................... |
12 |
|
2.4 |
Ringing up Multiple items in a Sale ......................................................... |
13 |
2.5 |
Tendering a Sale .................................................................................. |
14 |
3. Voiding and Negative Transactions ...................... |
14 |
|
3.1 |
Clearing a Numeric Entry....................................................................... |
14 |
3.2 |
Correcting the Last Entry ...................................................................... |
15 |
3.3 |
Voiding Items during a Sale ................................................................... |
15 |
3.4 |
Refunding Items outside of a Sale........................................................... |
16 |
3.5 |
Giving Discounts during a Sale .............................................................. |
17 |
3.7 |
Voiding a Complete Sale ....................................................................... |
19 |
4. Advanced Sales Functions.................................. |
19 |
|
4.1 |
Department Shifts ................................................................................ |
19 |
4.2 |
PLU Price Shifts ................................................................................... |
19 |
4.3 |
Foreign Currency Function .................................................................... |
20 |
4.4 |
Holding a cash Sale .............................................................................. |
21 |
4.5 |
Receipt On/Off & Duplicate Receipt......................................................... |
21 |
4.6 |
Time and Date Functions ....................................................................... |
21 |
4.7 |
No Sale Function.................................................................................. |
21 |
4.8 |
Pay-Out and Received on Account.......................................................... |
22 |
4.9 |
Split Tendering Function ....................................................................... |
22 |
4.10 Preset Price Override Function ............................................................. |
23 |
|
|
3 |
|

|
|
|
|
|
5. Programming the Cash |
Register .......................... |
23 |
||
5.1 |
Programming the Date and Time ............................................................ |
23 |
||
5.2 Easy Programming ............................................................................... |
24 |
|||
5.3 |
Programming Files ............................................................................... |
25 |
||
5.4 |
Scanning............................................................................................. |
26 |
||
5.5 |
Programming Network Features ............................................................. |
28 |
||
5.5.1 Activating the Network............................................................................................ |
28 |
|||
5.5.2 Network Size.......................................................................................................... |
29 |
|||
5.5.3 Floating Articles..................................................................................................... |
29 |
|||
5.5.4 Network Reports .................................................................................................... |
29 |
|||
5.5.5 Program Mode 99 ................................................................................................... |
30 |
|||
5.6 |
Training Mode...................................................................................... |
30 |
||
6. System Reports................................................. |
30 |
|||
6.1 |
User Report ......................................................................................... |
31 |
||
6.2 |
Types of System Reports ...................................................................... |
32 |
||
6.3 |
Printing the Electronic Journal ............................................................... |
32 |
||
7. Installing the Cash Register ................................ |
33 |
|||
7.1 |
Dot Matrix Printer ................................................................................. |
33 |
||
7.1.1 Installing of Paper Rolls .......................................................................................... |
33 |
|||
7.1.2 Installing and Replacing of Ribbon Cassette .............................................................. |
34 |
|||
7.2 |
Thermal printer .................................................................................... |
34 |
||
7.2.1 Paper Insertion ...................................................................................................... |
35 |
|||
8. Maintenance ..................................................... |
36 |
|||
8.1 Emergency Drawer Opening .................................................................. |
36 |
|||
8.2 |
Information on the Electromagnetic Compatibility and Safety ..................... |
36 |
||
9. Character Code Charts ....................................... |
37 |
|||
10. Peripheral Devices ........................................... |
37 |
|||
10.1 Activation of a Serial Interface RS 232 ................................................... |
37 |
|||
10.2 Cash Register Network Illustration ........................................................ |
38 |
|||
10.3 Cables............................................................................................... |
41 |
|||
10.3.1 PC-Cable ............................................................................................................. |
41 |
|||
10.3.2 Printer-Cable........................................................................................................ |
41 |
|||
11. Error Messages ............................................... |
42 |
|||
12. Test Routines .................................................. |
42 |
|||
|
4 |
|
||

Introduction
This electronic Cash Register is designed to help your business function smoothly by providing efficient register operations and accurate management reports. Start-up is quick and easy, yet there are many options that can be added and revised so that you can customize your operations for optimum productivity. Here are just a few of the Register’s many valuable features:
∙Up to 100 default departments allow you to categorize merchandise to be sold.
∙Up to 20,000 PLU settings allow for fast, accurate entry of an item and record the items to be sold.
∙Up to 16 clerks.
∙Front and rear display for easy operator and customer viewing.
∙Automatic tax computation available for 8 different tax rates, including add-on and VAT.
∙Periodic management reports provide up-to-date sales analysis, including mid-day, end- of-day, weekly or monthly totals.
∙Memory protection maintains financial records during power outage.
∙Cash Register displays time and automatically prints date and time on the receipt and transaction records.
∙Training mode available for new users.
∙Programmable keyboard - CUSTOMIZATION to meet your requirements.
∙Up top 4 interfaces and fiscal memory expand the usage of your Cash Register.
In general, the functions of the CR 1000 series are the same. There are model-typical differences concerning printers, displays, and keyboards used.
5

Specifications
Display´s
Customer
AMOUNT
19.001 lines 11 characters 7 Segments Display (VFD)
|
|
|
|
|
|
|
|
|
|
|
to display: |
|
|
|
|
|
|
|
|
|
|
|
|
|
|
|
|
|
|
|
|
|
|
|
Amounts, Sub Total, Total, Change Due |
|
|
|
|
|
|
|
|
|
|
|
|
Operator |
|
|
|
|
|
|
VFD or LCD |
||||
|
|
|
|
|
|
|
|
|
|
|
2 lines 16 characters Display (LCD) |
|
|
|
|
|
|
|
|
|
|
|
to display: |
|
|
|
|
|
|
|
|
|
|
|
PLU’s or DEPT’s Name or No. |
|
|
|
|
|
|
|
|
|
|
|
|
|
|
|
|
|
|
|
|
|
|
|
Receipt On (1) or Off (0) |
|
|
|
|
|
|
|
|
|
|
|
|
|
|
|
|
|
|
|
|
|
|
|
1st to 4th Shift Level |
|
|
|
|
|
|
|
|
|
|
|
|
|
|
drinks |
11 |
|
|
|
|||||
|
|
2 |
|
3.78 |
|
|
|
||||
|
|
|
|
|
|
|
|
|
|
|
Amounts, Sub Total, Total, Change Due |
|
|
|
|
|
|
|
|
|
|
|
|
|
|
|
|
|
|
|
|
|
|
|
|
|
|
|
|
|
|
|
|
|
|
|
Number of Repetitions1. Keyboard |
|
|
|
|
|
|
|
|
|
|
|
|
|
|
|
|
|
6 |
||||||

1. Keyboard
The keyboard consists of 64, key locations which are freely programmable by your dealer according to your specific requirements.
1.1 Keyboard Layout 8 x 8
|
|
|
|
8 |
16 |
22 |
26 |
CLERK |
R/A |
|
|
|
|
||
RECEIPT |
JOURNAL |
# |
|
|
|
|
|
A |
B |
C |
D |
|
|||
|
|
||||||
RECPT |
|
|
|
7 |
15 |
21 |
25 |
+ % |
DEPT |
P/O |
|
|
|
|
|
ON/OFF |
SHIFT |
|
|
|
|
||
|
E |
F |
G |
H |
|
||
|
|
CAPS |
|
||||
|
- % |
X |
# |
6 |
14 |
20 |
24 |
|
|
|
|
||||
NS |
|
|
|
|
|||
CURSOR |
SYS |
|
|
|
|
|
|
|
|
J |
K |
L |
|
||
|
NEW |
|
|
5 |
13 |
19 |
23 |
PLU |
|
|
|
|
|||
PRICE |
|
|
|
|
|||
CURSOR |
|
|
TYPE |
M |
N |
O |
|
|
7 |
8 |
9 |
4 |
12 |
18 |
|
REFUND |
|
|
|
FCE |
|||
|
|
|
|
|
|||
|
|
|
P |
Q |
R |
S |
|
|
|
|
|
|
|
|
|
|
4 |
5 |
6 |
3 |
11 |
17 |
|
VOID |
|
|
|
CARD |
|||
|
|
|
|
|
|||
DATE |
|
|
|
T |
U |
V |
W |
|
1 |
2 |
3 |
2 |
10 |
|
|
EC |
|
|
SUB |
CHECK |
|||
|
|
TOTAL |
|||||
|
X |
Y |
|
||||
TIME |
|
|
|
|
|
||
|
|
|
|
|
|||
|
0 |
00 |
, |
1 |
9 |
|
|
CLEAR |
|
|
CASH |
||||
|
|
|
|
Z |
SP |
|
ENTER |
|
|
|
|
|
|
|
|
Default Layout of the 64’ Keyboard
Note: The keys represented in this manual may appear differently on your keyboard due to programming preferences of the end user or the dealer. The keys are to be considered as a functional representation only.
7

1.2 Names of Keys and their Function
Key Label |
Key Name |
Function |
|
|
|
0 |
9 |
Numeric Keys |
- used for entering numbers |
|
... |
|
|
|
|
Receipt Feed Key |
- advances the receipt paper |
|
RECEIPT |
||
|
|
|
|
|
|
Journal Feed Key |
- advances the journal paper |
|
JOURNAL |
||
|
|
|
|
|
Clear |
Clear Key |
- clears incorrect entries before registration and stops |
|
the error alarm |
||
|
|
|
|
|
EC |
Error Correct Key |
- deletes the last registration immediately after |
|
registration |
||
|
|
|
|
|
Void |
Void Key |
- voids a previously entered transaction before |
|
finalization |
||
|
|
|
|
|
X |
Multiplication/Time |
- used for multiplication and displaying of the time |
|
Key |
||
|
|
|
|
|
Clerk |
Clerk Sign-On Key |
- used to enter a preset clerk ID numeric code no. |
|
PLU |
PLU Price Entry Key |
- used to manually change a preset PLU price |
|
Enter |
||
|
|
|
|
|
PLU |
Price-Look-Up Key |
- used to access preset PLU items |
|
1 |
Department Keys |
- used to enter single or multiple items into the |
|
|
respective departments |
|
|
|
|
|
|
RA |
Received-On- |
- records payments received by cash, check or credit |
|
Account |
cards |
|
|
|
||
|
PO |
Paid-Out Key |
- used to record all cash paid out from the drawer |
|
+ % |
Percent Plus-Key |
- used to add preset or manually entered percentage |
|
to an item or sub total |
||
|
|
|
|
|
- % |
Percent Minus-Key |
- used to deduct a preset or manually entered |
|
percentage from an item or sub total |
||
|
|
|
|
|
( - ) |
Minus or Coupon |
- used to deduct a preset or manually entered |
|
Key |
amount |
|
|
|
||
|
# |
No Sale Key |
- used to print a reference code number or to open |
|
NS |
the cash drawer |
|
|
|
||
|
Sub |
Sub Total Key |
- displays the sub total during operations & prints 2nd |
|
receipt |
||
|
Total |
|
|
|
|
|
8 |
|
|
|
|
Key Label |
Key Name |
|
Function |
|
|
|
|
Cash |
|
Cash Key |
- used for finalization of all registrations and |
||
|
transactions in cash |
||||
|
|
|
|||
Check |
|
Check Key |
- used to tender payments made by check |
||
Card |
|
Card Key |
- used to tender payments made by card |
||
Dept |
|
Department Shift Key |
- used to shift the levels of direct keys |
||
Shift |
|
(e.g. 1st |
level: dep. 1...25, 2nd level: dep. 26...50) |
||
FCE |
|
Foreign Currency |
- calculate amounts in foreign currency |
||
|
Exchange |
||||
|
|
|
|
||
Hold |
|
Hold Key |
- temporarily holds a sale, can be recalled later on |
||
Recpt |
|
Receipt On/Off Key |
- receipt printer can be switched on or off |
||
On/Off |
|
||||
|
|
Scroll Keys |
- used for scrolling on the display to make a selection |
||
CURSOR |
CURSOR |
||||
|
|
|
|||
|
|
Page Up/Down Keys |
- used for paging up or down on the display |
||
PAGE |
PAGE |
||||
|
|
|
|||
Note: The keys above represent the default configuration. Actual keys may vary depending upon your customized keyboard layout (See Programming Manual).
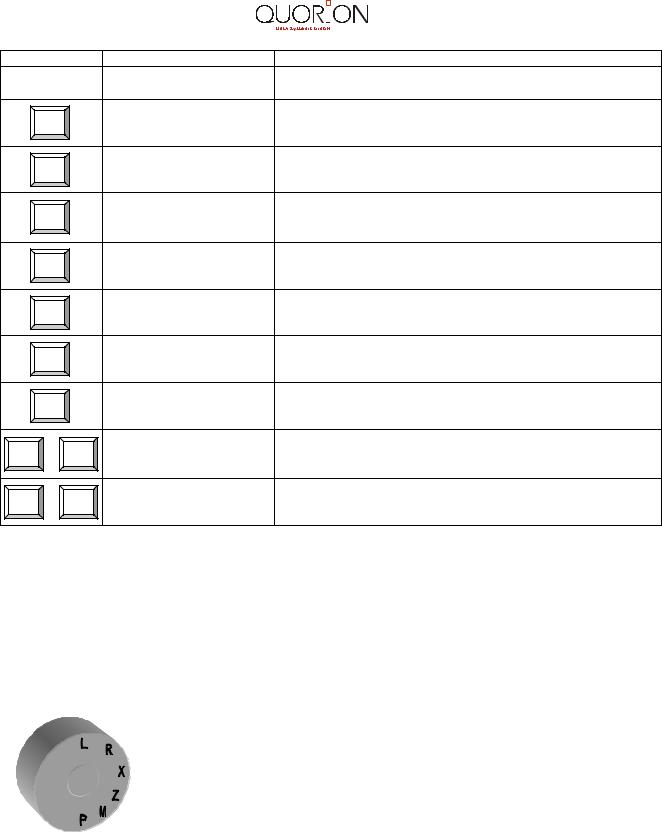
1.3 Control Lock and Control Lock Keys
The control lock controls the operation of your Cash Register. It has six different positions for various operation modes. Each of the keys provide access to specific modes.
Control Lock
The following keys are provided:
OP |
- Operator key for modes: |
L - R - X |
OW |
- Manager key for modes: |
L - R - X - Z - M |
OWP - Owner Program key for modes: L - R - X - Z - M - P
9

|
|
|
|
|
|
Key Pos. |
Display |
|
|
Mode/Function |
|
|
|
|
|||
L |
|
- Lock Mode – turns off the Cash Register and disables all |
|||
|
operations. All data is maintained in the memory. |
||||
|
|
||||
R |
SALE MODE |
- Registration – Transaction Mode - used for all |
|||
17 - 04 - 36 |
registrations and transactions (see Registration). |
||||
|
|||||
X |
REPORT X |
- Read Mode – used to print daily sales information reports |
|||
at any time without clearing the totals (see Reports). |
|||||
|
|
||||
Z |
REPORT Z |
- Reset Mode – used to read daily and periodic sales |
|||
information with clearing of totals. |
|||||
|
|
||||
M |
Manager |
- Manager options are opened, which are closed in other |
|||
modes. Opens functions that have been programmed to |
|||||
|
|
be accessed by the manager only. |
|||
P |
Programming |
- Program Mode - used for programming of system function |
|||
flags, DEPT, PLU, Logo, names and change of keyboard |
|||||
|
|
layout. |
|||
2. Basic Sales Functions
2.1 Signing on a Clerk
A clerk can be described in cash register terminology as the person who is assigned to the cash register. Every transaction made by that person is recorded and a report can be printed out at the end of a shift. The report will then show the total sales amount that each clerk registered.
The default factory setting is Clerk number 1. The user can change the Clerk in 4 distinct ways, depending upon how the cash register has been programmed.
Option 1:
If a general Clerk Key exists on the keyboard, enter first the clerk number and then press the Clerk Key.
Example: Activate Clerk 5, press 5 followed by the Clerk Key.
5 |
Clerk |
The programmed clerk name will appear on the display.
10
Option2:
Press the general Clerk Key on the keyboard. Depending on how many character lines the display has, the clerk names will be listed. Scroll down until the appropriate name has been found and press the Clerk Key again to confirm the selection.
Option3:
You can also program the specific Clerk Key on the keyboard. Simply press the correct Clerk Key to activate that person.
Option4: A Clerk can also sign on by inserting the specific clerk key in the control lock.
Note: It is possible to enforce a compulsory clerk for each transaction. This simply means that the users have to identify themselves before every transaction.
2.2 Making a Sale Using an Open Department
An open department refers to a department with an undetermined selling price. Items which have not been programmed are categorized into such departments. The salesperson determines the price during registration.
Example: To enter a price of $2 for department 3, press the unit price including the cents, followed by the department key.
2 |
0 |
0 |
3 |
1 |
Department 3 |
2,00 |
--------------------------------- |
|
|
|
|
1 |
Total |
2,00 |
|
Cash |
2,00 |
|
2.3 Making a Sale Using a Preset Dept./PLU
If a price has already been programmed in the cash register for a specific department or PLU, simply press the key. To ring up PLU’s which do not appear on the keyboard, press the PLU number followed by the PLU Key. If a PLU has a barcode programmed to it, then the Barcode number becomes the PLU Number.
1 PLU 241 5,00
----------------------------------
1 Total |
5,00 |
Cash 5,00
11

Example: To ring up PLU 241, press the PLU number followed by the PLU Key.
2 |
4 |
1 |
PLU |
2.3.1 Creating a PLU during a Sale
Occasionally, a salesperson may have to enter a new item, which has not been programmed into the cash register. In such a case, your cash register will automatically prompt you to create this item. Press the Subtotal Key to confirm or the Cancel Key to exit the prompt. Once confirmed the cash register will ask you for the price. Upon entry of the price, press the Subtotal Key again to confirm. Then, enter the department that the PLU is linked to, press Subtotal to confirm. If the cash register has been programmed to allow for new PLU name programming during registration, you will be presented with the chance to enter a name for the PLU you are creating. Alternatively, the PLU will inherit the name of the department that it is linked to.
Subtotal again once you are finished. The cash register will thereafter store the new PLU for future transactions.
Example: Creation of PLU 123, Cola, with a price of $1.50, linked to Department 3 with PLU programming active.
1 |
2 |
3 |
PLU |
…
then the display will prompt you to create, if PLU is not programmed.
Sub |
Total |
Enter the price...
Sub |
Total |
1 |
5 |
0 |
3 |
Sub |
|
Total |
||
|
12
Enter the Department to be linked to...
C |
O |
L |
A |
Sub |
Total |
And finally the PLU name
Note: The name of the PLU has to be entered using the Letter Keys on your Keyboard
2.4 Ringing up Multiple items in a Sale
Instead of pressing the same item repeatedly, the salesperson can make use of the
Multiplication Key. Enter the quantity first to be rung up, followed then by the Multiplication Key and then the item.
Example: To ring up an open department of $3.50 five times.
5 |
X |
3 |
1 |
5 |
0 |
Example: To ring up a preset PLU 25 not programmed on the keyboard 3 times.
3 |
X |
2 |
5 |
PLU |
|
13
 Loading...