

Page 1
3MP WI-FI MINI CAMERA
QUICK START GUIDE
ENGLISH
Page 2

WELCOME!
Congratulations on your latest purchase and welcome to the Q-See family.
Prepare to see the superior clarity and resolution provided by the latest Wi-Fi
series camera. This guide includes everything you will need to help get your
camera up and running right out of the box. We are excited to have you on
board, and thank you for choosing Q-See!
Page 3

WHAT’S INCLUDED
Setup is simple, fast, and designed to get you monitoring your home or business in no time.
• (1) QCW3MP16 Wi-Fi Camera
• (1) USB Power Adapter
• (1) Micro USB Cable
• (1) 16GB Micro SD Card
• (1) Mounting Sticker
• (1) Mounting Hardware
Page 4

GET CONNECTED
Find the desired location for your camera to be placed. If you are going to be mounting the camera,
please use the included mounting hardware to secure the camera rmly to the wall. Please make sure
to go through all of the steps and test the system completely before mounting the cameras.
Use the provided micro USB cable and USB power adapter to power the camera. Plug the
power adapter into a surge protector and plug the micro USB end of the cable into the camera
and wait until the indicator light begins to ash. You are now ready to setup the camera.
IMPORTANT: Go through all of the steps to setup and test your system before mounting any cameras
or hardware. Always visit www.q-see.com/support to nd the most recent guides and up-to-date
support for your Q-See products.
4
Page 5
5
Page 6

STEP 1
The rst step to this exciting journey is to
register your device on the Q-See Support
Portal at www.q-see.com/register. The
username and password used to register
your device are not the same ones used to
log in to your camera. Please write down
your username and password in the space
provided below:
Username:
Password:
6
You will receive regular updates about the
3
latest rmware version for your camera.
Registering your product will streamline
3
warranty claims and support requests by
syncing your registered product with your
account.
You will be able to receive customized
3
support for your device.
You can easily nd other Q-See products
3
that are compatible with your device.
Page 7

STEP 2
DOWNLOAD & INSTALL THE QC VIEW APP
NOTE: Ensure that your mobile device is connected to the
Wi-Fi network you wish to use for your camera.
Download the QC View App from the App Store on your mobile
device. Once the app has been installed select the Menu button
in the top left corner, followed by Device Manager.
NOTE: If you already have a QCW Wi-Fi NVR, this camera will
automatically try to connect to it. Start using the NVR quick
start guide to complete setup. If you would like to use this as
a standalone device, disconnect or power o your Wi-Fi NVR
before proceeding.
*All screenshots in this guide are from the QC View app on iOS.
7
Page 8

STEP 3
ADD A NEW DEVICE
In Device Manager, press the “+” in the top
right corner to add a new device. Select “Wi-Fi
conguration” and create a name for your
camera. Tap the QR code icon in the SN eld
and then scan the QR code located on the
back camera panel (see page 14 the for QR
code location). Once the QR code has been
scanned, complete the remaining username
and password elds and hit next: (default)
Username: admin (default)
Password: admin (default)
8
Page 9

STEP 4
CONFIGURE YOUR WI-FI
Your mobile device must be
connected to the same Wi-Fi
network you wish to use for your
Wi-Fi camera. Enter the Wi-Fi
Password for your network then
select Next.
NOTE: If you are experiencing an issue connecting to your Wi-Fi network due to distance, Q-See
recommends adding a Wi-Fi Extender to improve the Wi-Fi signal and bandwidth.
9
Page 10

STEP 5
START LIVE PREVIEW
Once your device has been added successfully,
select Start Live Preview to view the feed from
your camera.
1010
Page 11

STEP 6
VIEW THE LIVE VIDEO FEED
Your camera has been set up successfully. You
can now access your camera feed anytime and
anywhere using the QC View App.
1111
Page 12

STEP 7
ADD TO AN EXISTING QC NVR SYSTEM
If you would like to add this camera
to your existing QC Series NVR, log
in to your NVR and go to Remote
Devices. Select your camera from
the device list and click Add. The
camera feed will appear on your
NVR. The NVR has to be connected
to the same network as your mobile
device for the initial setup process.
Visit www.q-see.com/support to
verify if your system is compatible
with this camera.
12
*This screenshot is from a QC Series NVR.
Page 13

ADDITIONAL FEATURES
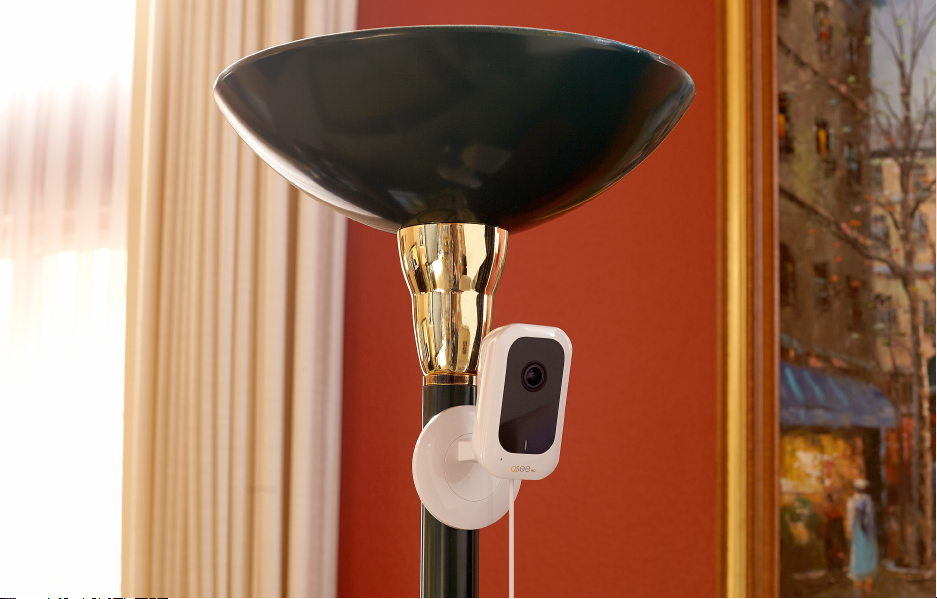
BASE ADJUSTMENT AND TWO-WAY TALK
The Wi-Fi Mini Camera features an adjustable
magnetic base which can be easily attached
to any metal surface, or mounted with metal
screws to the desired location. The LED
indicator light will ensure that your camera is
connected to Wi-Fi. The camera’s microphone
and speaker will enable you to both hear and
speak through your camera for two-way audio
purposes, giving you enhanced control over
the security of the location.
CAMERA
LENS
LED
INDICATOR
MICROPHONE
SPEAKER
Page 14

ADDITIONAL FEATURES
PORTS & RESETTING YOUR CAMERA
Your camera’s micro USB port is conveniently
located beneath the QR code on the back of
the housing, and the micro SD memory card
slot is found on the bottom of your camera for
easy access. Your device also comes with
a “reset” button situated at the back of the
camera (beneath the bar code), allowing you to
easily change Wi-Fi networks, or deal with any
connectivity issues that you may encounter.
Press and hold the reset button for 5 seconds
in order to reset the camera to its original
factory settings.
14
ADJUSTABLE
MAGNETIC BASE
MICRO SD
CARD SLOT
MICRO USB
PORT
QR CODE
RESET
BUTTON
Page 15

WARRANTY & SUPPORT
Q-See is always here to answer your questions and take your valued suggestions. Our
focus is providing excellent customer support and we are always working to improve our
customers’ experience.
Please do not hesitate to call us at 1-877-998-3440 Monday-Friday 6:00 AM - 7:00 PM PST.
Visit us at www.q-see.com/support for 24/7 support and access to our Support Portal.
DISCLAIMER: Although Q-See has made every eort to ensure that the information in this guide was correct at the time of print-
ing, Q-See does not assume any liability to any party for any loss, damage, or disruption caused by any errors, omissions, or typos
that may occur.
15
Page 16

Rev. 2/22/17, QCW4
 Loading...