


Thank you for choosing Chronos CD Series2. This manual
will get you up and running in no time and explains how to
make the most of Chronos CD’s great features. If you need
additional help with topics not covered in this manual, please
visit the Pure support pages at support.pure.com.

Safety information
1. Familiarise yourself with all of the safety information and instructions before using the radio. When passing
this radio on to others, please include all documents.
2. The apparatus shall not be exposed to dripping or splashing and that no objects filled with liquids, such as
vases, shall be placed on the apparatus.
If liquid or water is spilled on to the radio, switch it off at the mains immediately, disconnect the mains plug
and contact your dealer.
Never touch the plug or the radio itself with wet hands. Never pull the power cable when disconnecting the
power adaptor from the power supply.
3. The batteries (battery pack or batteries installed) shall not be exposed to excessive heat such as sunshine,
fire or the like
4. Using the radio in rooms or climates with high humidity and temperatures may cause condensation to form
inside the radio, which can damage the radio.
Use apparatus in moderate climates only.
5. Avoid extreme degrees of temperature,either hot or cold. Place the device well away from heat sources
such as radiators or gas/electric fires. No naked flame sources, such as lighted candles, should be placed
on the apparatus
6. The mains power adapter is used as the disconnect device, the disconnect device shall remain readily
operable.
Fit the mains adaptor to an easily accessible socket located near the radio and ONLY use the mains power
adapter supplied.
7. Use only power supplies listed in the user instructions. (Model ZDD09150, ZDD09150BS,
KSAD0900150W1UV-1, KSAD0900150W1UK, SW0901500-N01 or SW0901500-NM)
8. Ensure that the available supply voltage corresponds with the required operational voltage of the radio
before use.
9. Disconnect your radio from the power supply if you will not use your radio for a long period of time (e.g. if
you are going on holiday).
10. Always unplug your radio from the mains socket before cleaning. When cleaning the radio, do not use any
type of abrasive pad or abrasive cleaning solutions as these may damage the radio’s surface.
11. To reduce the risk of electric shock, do not remove any screws as there are no user-serviceable parts
inside. Refer servicing to qualified personnel.
CAUTION
Danger of explosion if battery is incorrectly replaced. Replace only with the same or equivalent type.
WARNING
Do not ingest the battery, Chemical Burn Hazard (The remote control supplied with) This product contains
a coin/button cell battery. If the coin/button cell battery is swallowed, it can cause severe internal burns
in just 2 hours and can lead to death. Keep new and used batteries away from children. If the battery
compartment does not close securely, stop using the product and keep it away from children.
If you think batteries might have been swallowed or placed inside any part of the body, seek immediate
medical attention.
Potentially serious risk to your personal safety. To avoid possible injury or death, obey all safety notices with this symbol.
Caution. Read the user manual before use.
Pantone
Cool Grey 7C
Where to switch on or off the product, or put it in standby.
9V DC 1.5A
9V DC power supply input, 1.5 amps.
DC conenctor polarity, the centre of the connector terminal is positive.
Symbols on the product and in the user manual

1
Contents
2 Controls, connectors and display
2 Controls and connectors
3 Remote control
3 Screen display
4 Setting up
5 Listening to digital radio
5 Selecting your source
5 Changing stations
5 Changing the information shown on-screen
5 Using Autotune
5 Using Presets
6 Listening to FM radio
6 Changing stations
6 Changing the information shown on-screen
6 Switching between stereo and mono
6 Using Presets
7 Listening to a CD
7 Playing an audio CD
7 Listening to an Auxiliary source
8 Setting the alarms
8 Setting an alarm
8 Snoozing an alarm
9 Changing the alarm snooze time
9 Stopping an alarm
9 Using the sleep timer
9 Cancelling the sleep timer
10 Additional settings and features
10 Setting bass and treble
10 Setting backlight options
10 Checking the software version and updating
10 Setting the clock
10 Using the PowerPort
11 Hints and tips
11 Resetting your Chronos CD
11 Trimming stations
11 Technical specifications
2
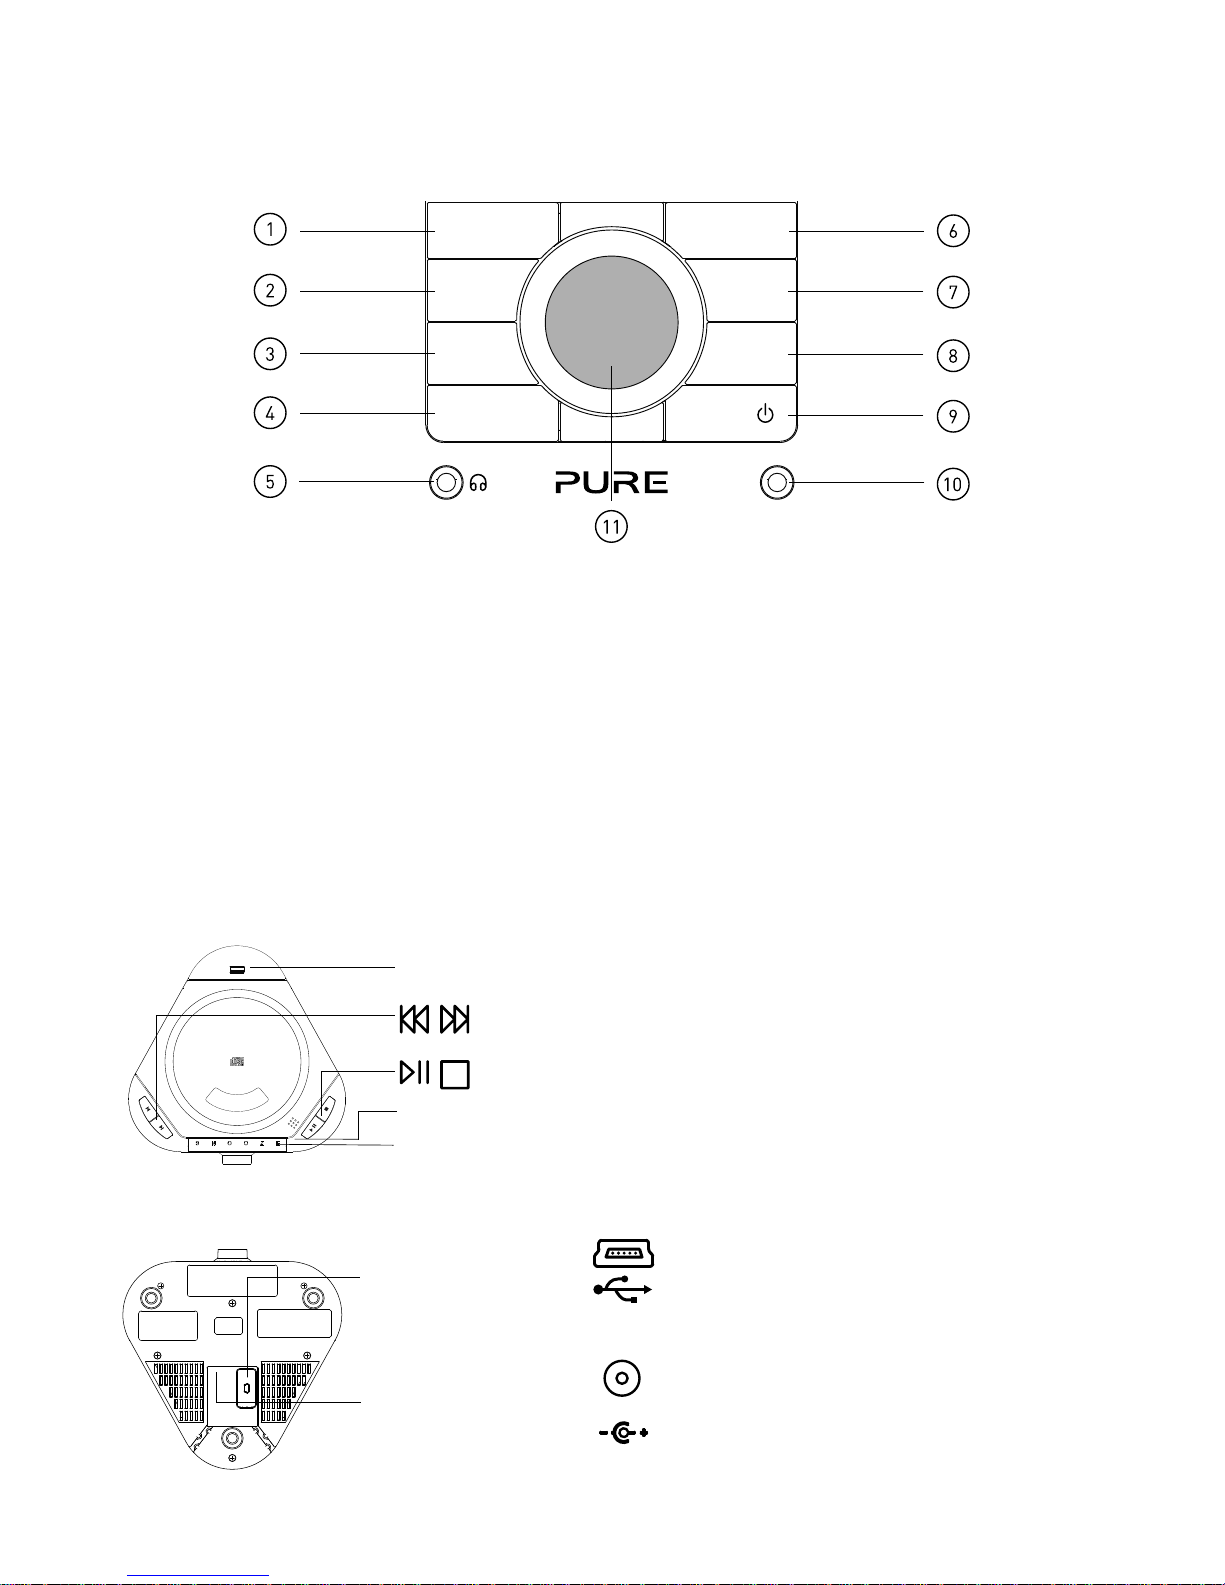
Controls, connectors and display
Controls and connectors
Aux-in
Source
Volume
Presets
Menu
Stations
Alarms
Sleep
1. Press to display volume level and then
turn dial to adjust
2. Store and select preset stations
3. Enter options menu
4. Switch between DAB/FM/CD/Auxiliary
source
5. 3.5mm stereo headphone socket
6. Enter station list (digital radio) or tuning
(FM)
7. Enter alarm setup
8. Set sleep timer
9. Switch between Standby and On
10. 3.5mm auxiliary input socket
11. Navigation dial. Rotate to navigate
menus and adjust volume or settings.
Push to confirm selections
Top
Snooze Snooze an alarm
PowerPort for compatible USB accessories
PowerPort
Open/Clo se
Play/pause & stop
Skip forward/backwards. Hold for fast forward or rewind
Underneath
USB input socket
(mini B type) for
software updates
9V DC
Power input socket
for supplied 9V DC
mains adapter
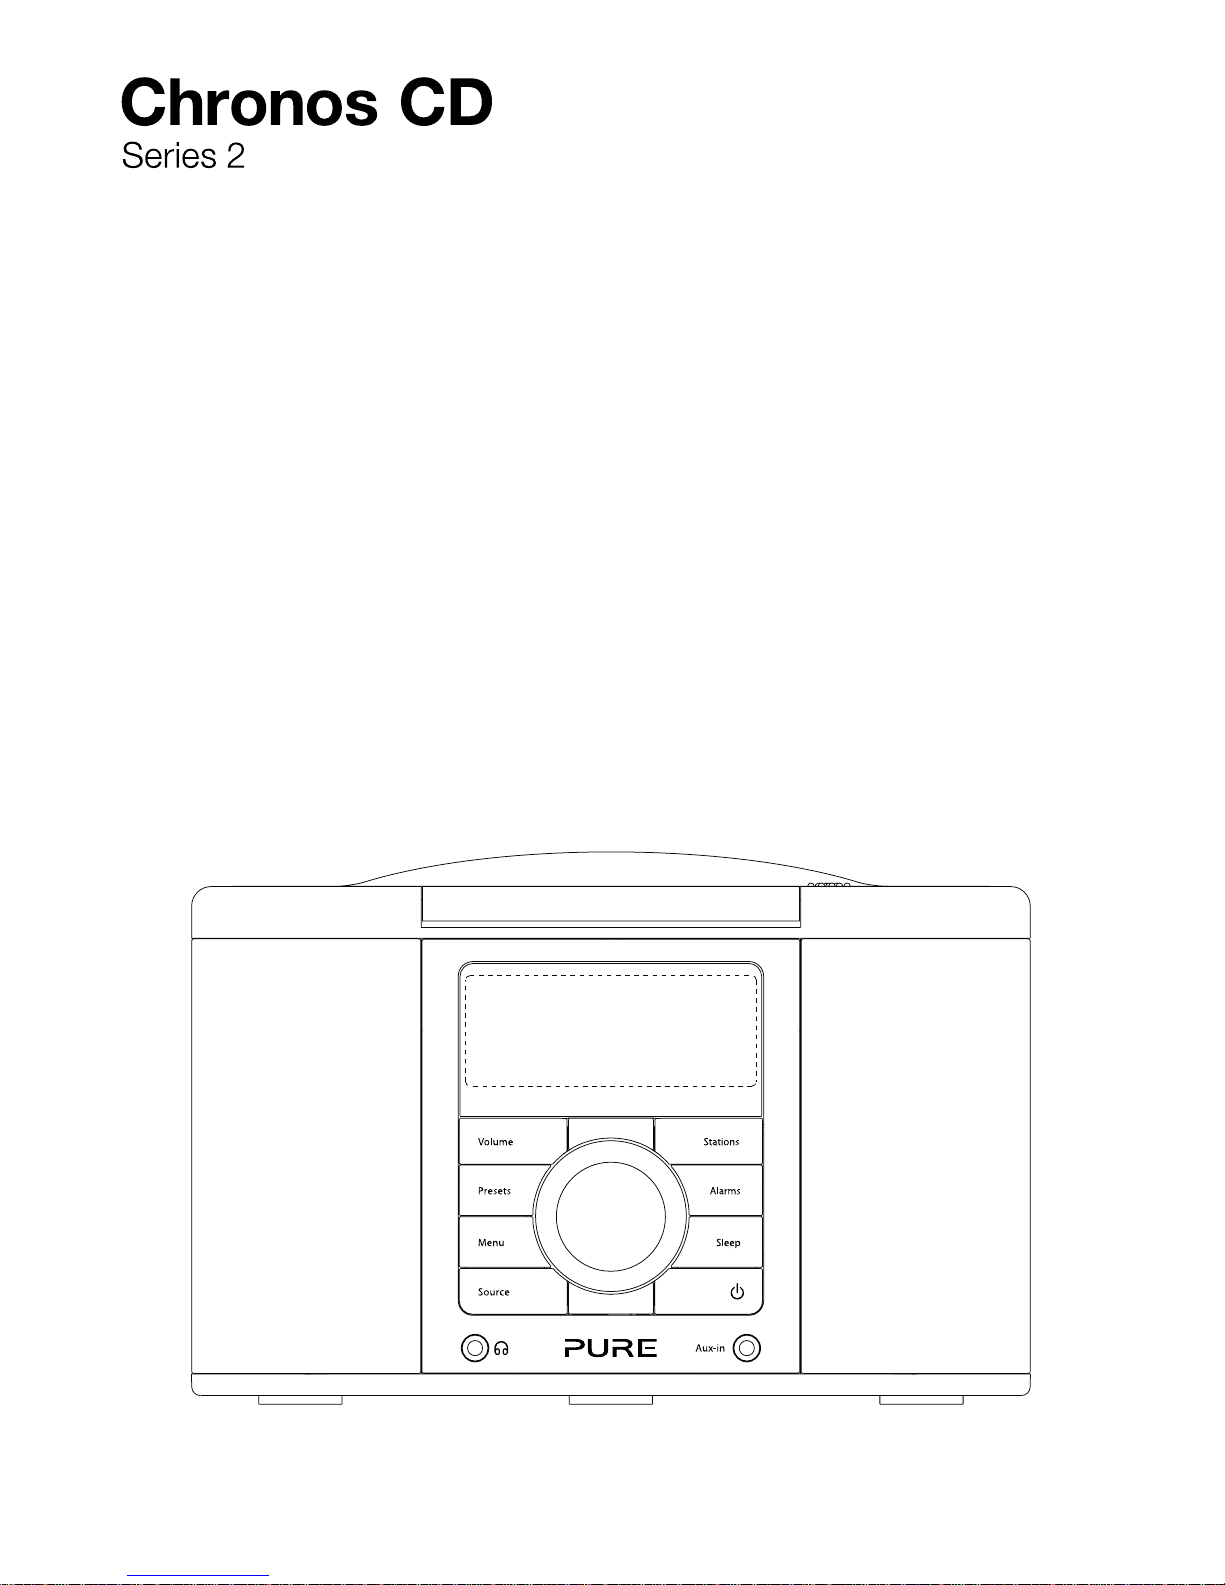
Chronos CD
Series 2
Open Open/close the CD door

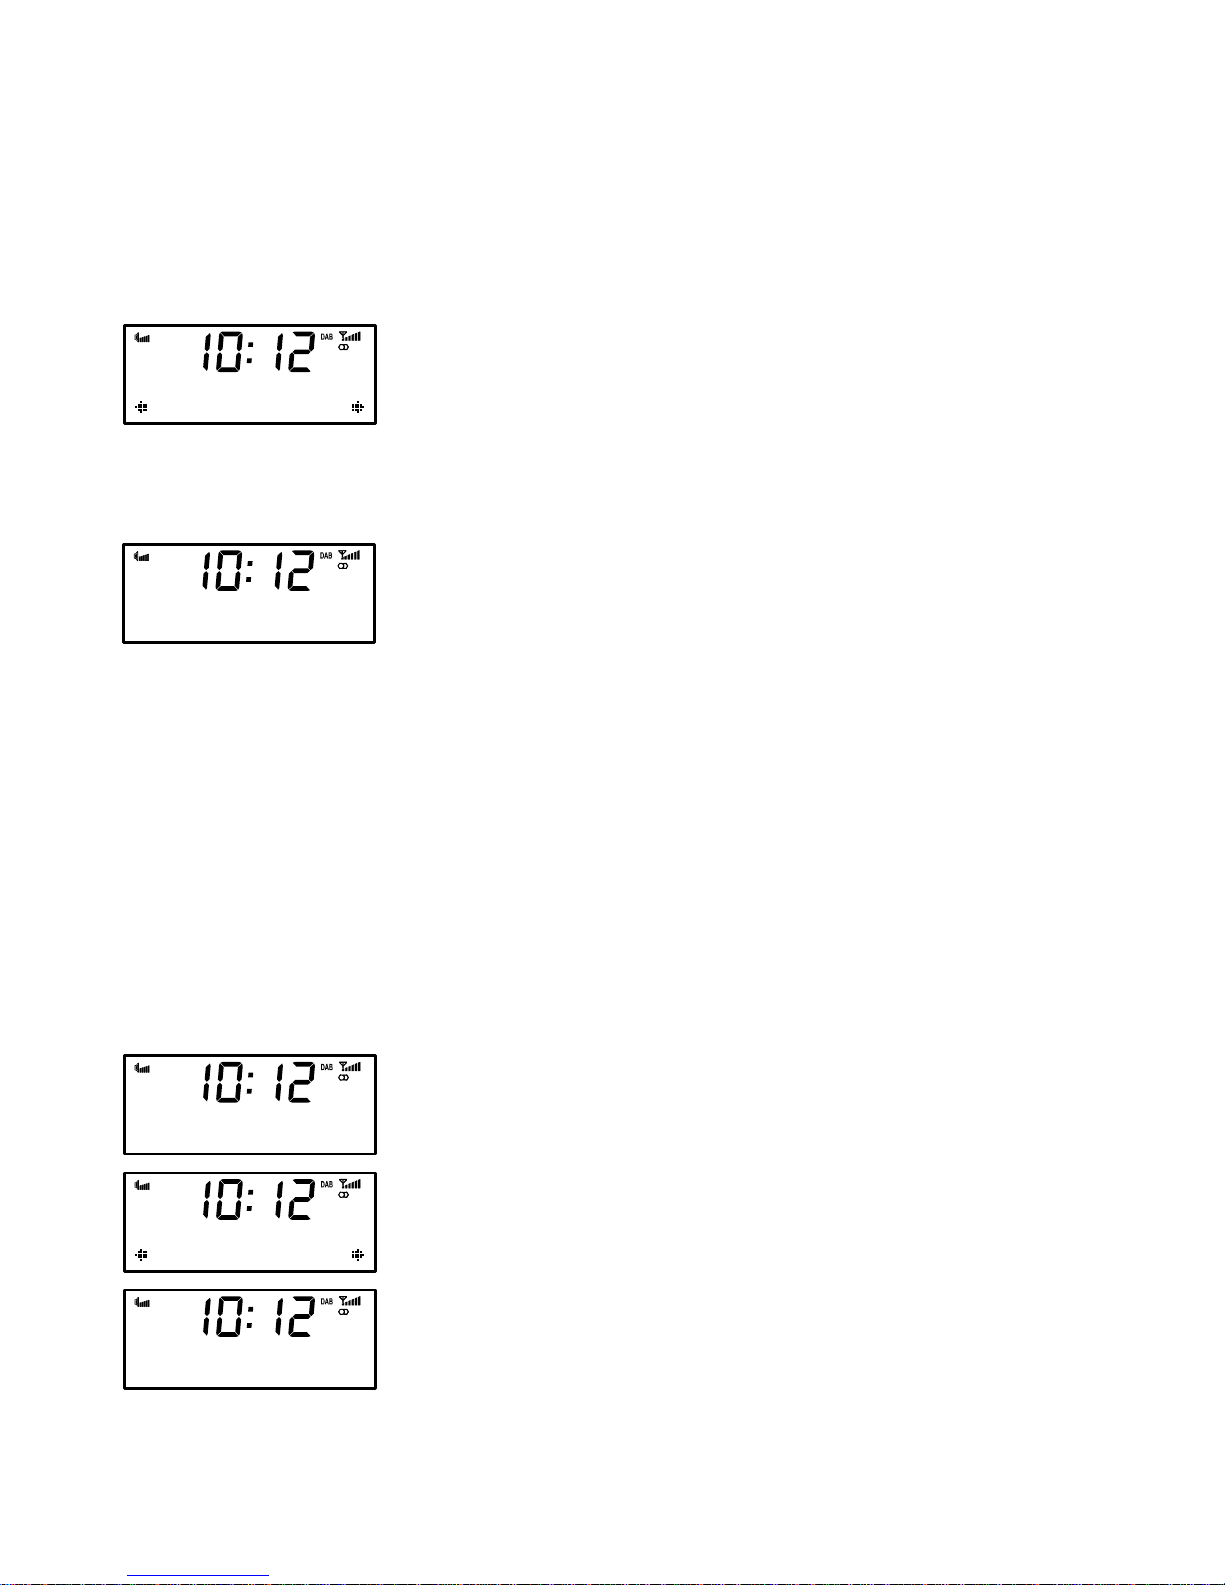
3
Screen display
AM/PM
indicator
Select
Vol
Vol
Source
Menu
Menu Enter options menu
− / +
Select Change station/tune (DAB/FM source)
Play/Pause
Shuffle
Repeat mode – current track, all tracks, off
Mute
Skip forward/backwards.
Hold for fast forward or rewind
+ / − Adjust volume level up/down
Stop
Remote control
With the Chronos CD remote, you can control all functions of your radio and CD playback.
Radio 1
Now playing: Gl
CD
Volume level
indicator
Alarm active
indicators (1,2,3,4)
DAB, FM, CD, AUX
source indicators
Stereo/mono indicator
Current
time
Signal strength
indicator
Sleep timer/
Snooze active
Menu/text/information display
Source Select the source
Standby Switch between Standby and On

4
Wait until Chronos CD completes an Autotune for available digital radio stations
(about one minute).
Autotune... 45
Pop radio
text the show on
Uncoil the aerial wire and hang it vertically, then connect the mains adapter to the
bottom of the unit as shown.
1
Plug the mains adapter into the mains supply.
2
Chronos CD has four available languages: English, French, German and Italian.
Press Menu, then use the Navigation dial to scroll to Language and push to
confirm. Choose your Language using the Navigation dial and push to confirm. The
language will change immediately.
5
Language
Deutsch
Setting up
Source
Volume
Presets
Menu
Stations
Alarms
Sleep
Aux-in
4
Press the Standby button , if necessary, to switch the unit on.
3
9V DC
Chronos CD
Series 2
5
Listening to digital radio
Selecting your source
Press the Source button and repeat to change the audio source: DAB/FM/CD/Auxiliary.
Changing stations
1. Press Stations and use the Navigation dial to browse through
the list of available stations.
2. Push the Navigation dial to tune in.
Changing the information shown on-screen
Chronos CD can display different information relating to the DAB station you are listening to.
To change the information shown:
1. Press Menu and select Display.
2. Use the Navigation dial to cycle through the following options
and push to select one:
Scrolling text: Scrolling information broadcast by the station.
Signal strength: A bar indicating the current digital radio signal
strength.
Signal quality: The quality of the signal received.
Date: The current date.
Using Autotune
If you lose a station signal, or wish to update your station list, you can perform an Autotune
to retune all digital radio stations. Press the Menu button, then scroll to and select Autotune.
Push the Navigation dial to confirm.
Using Presets
Store up to 15 DAB and 15 FM radio stations for quick access to
your favourites.
Setting a Preset
1. Tune to the station you want to store. Press and hold Presets
until you see store preset on the screen.
2. Use the Navigation dial to select the preset number you wish to
save to.
3. Push the Navigation dial to confirm. The display will change to
a confirmation message, e.g., Preset 1 saved.
Selecting a preset
To listen to a station you have stored to a preset, press the Presets button once to access the
‘preset recall’ screen. Use the Navigation dial to scroll to and select the relevant preset.
Radio 2
Jazz radio
Jazz radio
Your jazz favour
Rock Radio
The greatest...
Store Preset
2: (Empty)
Rock Radio
Preset 2 stored

6
Changing stations
103.5MHz
Classical music
89.05MHz
Scanning...
FM tuning mode
Manual Tune
Listening to FM radio
Changing the information shown on-screen
Chronos CD can display different information relating to the FM station you are listening to.
To change the information shown:
1. Press Menu and select Display.
2. Use the Navigation dial to cycle through the following options and push to select one:
Radio Text: Scrolling text and information broadcast by the station.
Date: The current date.
Switching between stereo and mono
Select Stereo (default) or Mono signal mode − mono may improve
audio clarity where stereo signals are weak.
To switch between FM Stereo and Mono modes, Press Menu and
select FM stereo mode.
Using Presets
Store up to 15 DAB and 15 FM radio stations for quick access to your favourites. You set
presets in the same way as for digital radio stations (Page 5).
To change stations, press the Stations button, then rotate the
Navigation dial.
When listening to FM there are two tuning modes, Manual and
Seek (default):
Seek: Rotating the Navigation dial scans to the next/previous
station.
Manual: Rotating the Navigation dial tunes down or up in steps
of 0.05 MHz
By default, Chronos CD is set to Seek.
To change the tuning mode, press Menu when listening to FM and
select FM tuning mode.
FM stereo mode
Mono

7
Listening to a CD
Chronos CD can play ordinary audio CDs, CD-R and CD-RW discs.
Before playing a CD, remove the adhesive tape securing the CD door and remove the CD
mechanism transit card from inside the CD compartment.
Open/Clos e
PowerPort
Open/Close
PowerPort
PowerPort
Playing an audio CD
To play a CD, press the button. The track number and track
duration are shown below the time.
To pause a track, press the
button.
To stop a CD, press the
button. The total number of tracks and
the total duration of the CD are displayed.
To skip backwards to the previous track or forwards to the next
track, press the
or button.
When a track is playing, you can press and hold the
or button
to fast rewind or fast forward the track.
Listening to an Auxiliary source
You can attach an auxiliary device, such as a MP3 player, to your Chronos CD using the
3.5mm Aux in socket. Use the Chronos CD volume controls to adjust listening volume, and the
controls on the device to control playback.
001 00:09
001 00:10
Pause
012 74:30
Stop

8
Setting the alarms
Chronos CD has four alarms. When activated, an alarm either switches the radio on (if in
standby) and tunes to a digital radio or FM radio station, activates and plays your CD (if
inserted) or sounds a beeping alarm tone.
Setting an alarm
1. Press the Alarm button and repeat to select the alarm you wish
to adjust (1-4). This will start the alarm setup.
2. Using the Navigation dial, set the following options for your
alarm:
On/Off: Toggle the alarm on or off
On time: Set the time you want the alarm to start (hours:mins)
Source: Choose DAB (digital radio), FM, CD or tone as the
sound source you want to use for the alarm
Last Used/Preset: For digital radio and FM source, choose
a station for the alarm to play. ‘Last Used’ will tune to the last
station received by the radio.‘Preset’ lets you select one of your
saved stations
Once: The alarm will sound at the time you have selected and
not repeat
Daily: Every day
Weekdays: Monday-Friday, every week
Weekends: Weekends (Sat-Sun) only
3. Finally, adjust the volume level for the alarm (represented by a
bar on-screen) using the Navigation dial and push to confirm.
You can see which alarms are currently switched on by looking at
the numbered alarm icons on the screen.
Snoozing an alarm
When an alarm is sounding press the Snooze button to silence
the alarm for ten minutes (the default snooze time). The remaining
time left until the alarm sounds again is shown at the bottom of the
display. Hold the Snooze button down to cancel snooze.
Alarm 4 Setup
Alarm On
Alarm 1 is currently set

9
Changing the alarm snooze time
You can change how long the alarm snoozes for. Press Menu, scroll
to and select Snooze time, then adjust the snooze time between 5
and 30 minutes using the Navigation dial.
Stopping an alarm
When an alarm is sounding press either the Standby or Alarm button to stop the alarm
sounding.
Using the sleep timer
The sleep timer switches your radio into standby after a number of
minutes has elapsed.
Press the Sleep button and repeat to choose the duration of
the sleep timer (Off/15/30/45/60/90 minutes), then push the
Navigation dial to confirm.
Cancelling the sleep timer
Press and hold the Sleep button for 2 seconds.
Snooze time
10 minutes
Set sleep time
Sleep Off
Set sleep time
30 minutes
Sleep timer is active

10
Setting bass and treble
To adjust the bass and treble output of your Chronos CD, press
Menu, then scroll and select Audio. Select either Bass or Treble
and use the Navigation dial to adjust from -3 to +3 and push to
confirm.
Setting backlight options
To adjust screen backlight of your Chronos CD, press Menu, then
scroll and select Backlight.
The backlight menu has two options:
Timeout: Set the length of time that the backlight remains on after a
button press, from always on (On) up to 180 seconds.
Level: Set the brightness level of the backlight, from 1-5 or Auto
(default). In Auto mode the backlight will be adjusted by the light
sensor on your radio.
Checking the software version and updating
To check the software version of your Chronos CD, press Menu
then scroll to and select SW version. This will display the current
version on screen. Press any button to exit.
Software upgrades may be issued to provide enhanced functions
or improve performance. To upgrade, press Menu, then scroll and
select Software Upgrade and follow the instructions provided with
the upgrade software. Register your product and include an e-mail
address to receive notification of upgrades or visit our website at
http://support.pure.com.
Note: USB upgrade requires a PC running Windows XP/Vista and a suitable USB cable (not
included).
Setting the clock
Your Chronos CD will set its clock using a digital radio or FM signal. If these are not available,
it is possible to set the clock manually by selecting ‘Clock’ from the menu at any time. Choose
12 or 24 hour clock, set the date and select a date format: day-month-year or month-day-year.
Using the PowerPort
Your Chronos CD features a PowerPort, which is able to power standard USB devices such as
fans and mobile phone chargers.
PowerPort
Note: PowerPort does not support USB hubs.
Bass
+2
Timeout
45 sec
Level
Auto
SW Version
V1.0.0.2
Additional settings and features

11
Resetting your Chronos CD
Resetting your radio removes all presets, stored stations and alarm settings and resets all
options to defaults. To reset:
1. Press the Menu button and select Factory reset.
2. Choose Yes and push the Navigation dial to confirm the reset.
Trimming stations
Unavailable digital radio stations are indicated by ? before the station name (e.g., ?Rock radio).
To remove unavailable stations from the station list:
1. Press the Menu button then scroll to and select Trim stations.
2. Choose ‘Yes’ and push the Navigation dial to confirm.
Factory reset?
No <Yes>
Trim?
No <Yes>
Hints and tips
Technical specifications
Radio Digital (DAB/DAB+) & FM
Frequencies Digital Band III 174–240 MHz,
FM 87.5-108 MHz
CD Player Plays CD/CD-R/CD-RW audio only.
Speakers 2 x 5W custom-tuned.
Input connectors 9V DC power adapter socket. 3.5mm Aux in socket. USB connection
(Mini-B type) for product upgrades only.
Output connectors 3.5mm stereo output for headphones.
PowerPort for compatible USB accessories. (5V, max 500mA).
Software version V5.2_M
Presets 15 digital radio and 15 FM presets.
LCD display 16 x 2 character LCD display, large clock and feature icons, light
sensor.
Mains power adapter Adapter: Input AC 100 - 240 V~,50/60 Hz;
Output DC 9V
, 1.5 A; Main unit: DC 9V , 1.5 A
Dimensions 125 mm high x 195 mm wide x 185 mm deep.
Aerial Wire aerial attached.
Remote Infrared remote control.
Approvals
CE marked. Hereby, Pure International Ltd, declares that this Band II
LPD radio, model Pure Chronos CD Series 2 is in compliance with the
essential requirements of RED, 2014/53/EU.
The Declaration of Conformity may be consulted at
http://www.pure.com/about/red

12
Copyright
Copyright 2017 by Pure International Limited. All rights reserved. No part of this publication may be copied
or distributed, transmitted, transcribed, stored in a retrieval system, or translated into any human or
computer language, in any form or by any means, electronic, mechanical, magnetic, manual or otherwise,
or disclosed to third parties without the express written permission of Pure International Limited.
Trademarks
Chronos CD, the Chronos CD logo, Pure & the Pure logo are trademarks or registered trademarks of Pure
International Limited. All other product names are trademarks of their respective companies.
Warranty information
Pure International Limited warrants to the end user that this product will be free from defects in materials
and workmanship in the course of normal use for a period of three years from the date of purchase. This
guarantee covers breakdowns due to manufacturing or design faults; it does not apply in cases such as
accidental damage, however caused, wear and tear, negligence, adjustment, modification or repair not
authorised by us. Please visit www.pure.com/register to register your product with us. Should you have a
problem with your unit please contact your supplier or contact Pure Support at the address shown on the
rear of this manual.
Disclaimer
Pure International Limited makes no representation or warranties with respect to the content of this
document and specifically disclaims any implied warranties of merchantability or fitness for any particular
purpose. Further, Pure International Limited reserves the right to revise this publication and to make
changes in it from time to time without obligation of Pure International Limited to notify any person or
organization of such revisions or changes.
Disposal of Waste Electrical & Electronic Equipment
This symbol on the product or on its packaging indicates that this product should not be
treated as household waste. Instead it should be handed over to a suitable collection point
for the recycling of electrical and electronic equipment. By ensuring this product is disposed
of correctly, you will help prevent potential negative consequences for the environment and
human health, which could otherwise be caused by inappropriate waste handling of this
product. The recycling of materials will help to conserve natural resources. For more detailed
information about recycling of this product, please contact your local council office, your
household waste disposal service or the shop where you purchased the product.


Pure International Limited
Concept House
Home Park Road
Kings Langley
Herts, WD4 8UD
United Kingdom
http://support.pure.com

105SN_02
www.pure.com
support.pure.com
 Loading...