

Canceling the transmission ...............................................1
For F-560/520
Sending a Fax using the Address Book ............................2
Sending to an e-mail address using the Address Book .....4
Basic copy .........................................................................6
Scan to an e-mail address .................................................7
Scan to a network folder ....................................................9
Scann to an FTP server ...................................................12
PC faxing .........................................................................15
PC printing .......................................................................16
Clearing a paper jam .......................................................17
Clearing a document jam ..................................................20

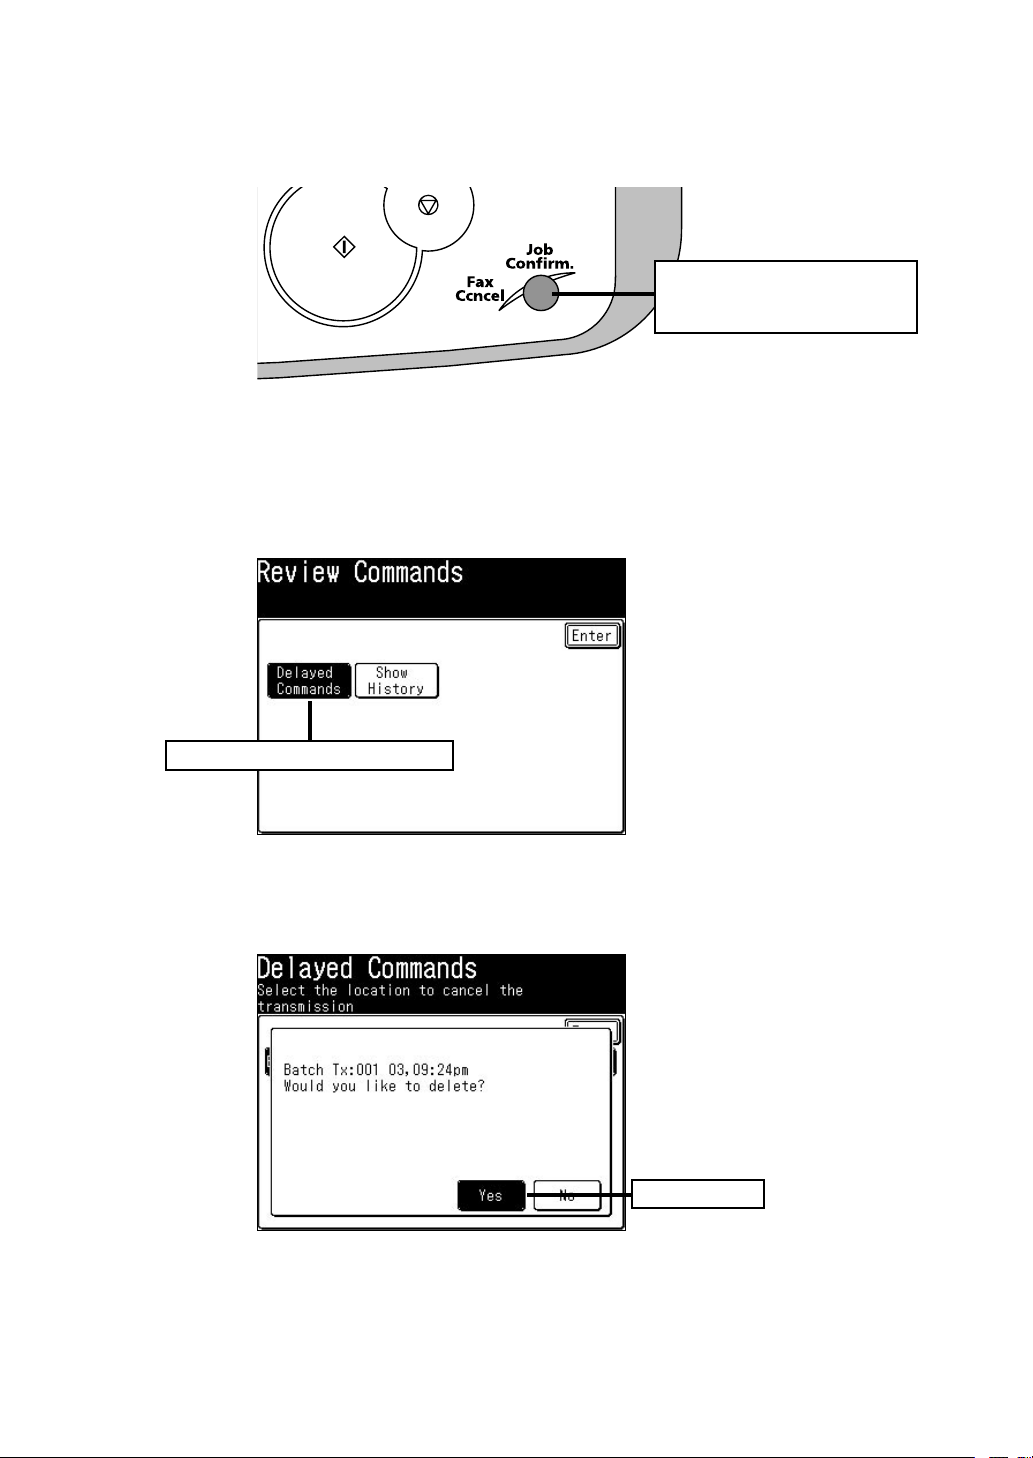
Canceling the transmission
1 Press [Fax Cancel/Job Confirm.].
Press [Fax Cancel/ Job
Cinfirm]
If your machine is currently transmitting, skip to step 5.
2
To cancel a scheduled job, proceed to the next step.
Press [Delayed Commands].
3
Press [Delayed Commands]
Select the command to be canceled.
4
Press [Yes].
5
Press [Yes]
1
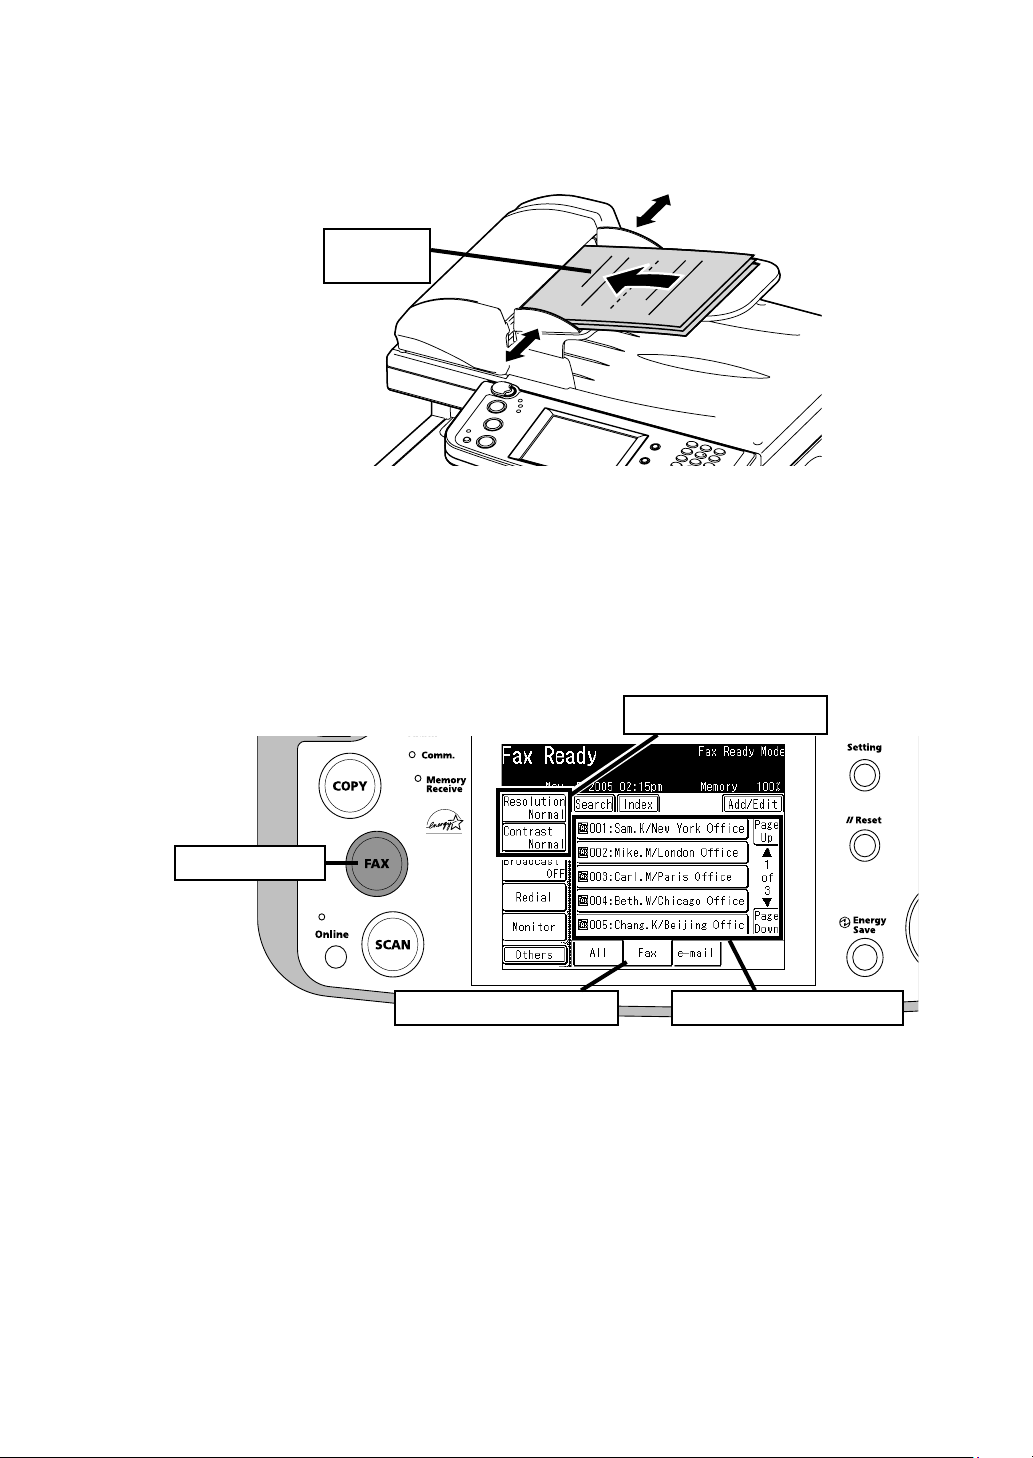
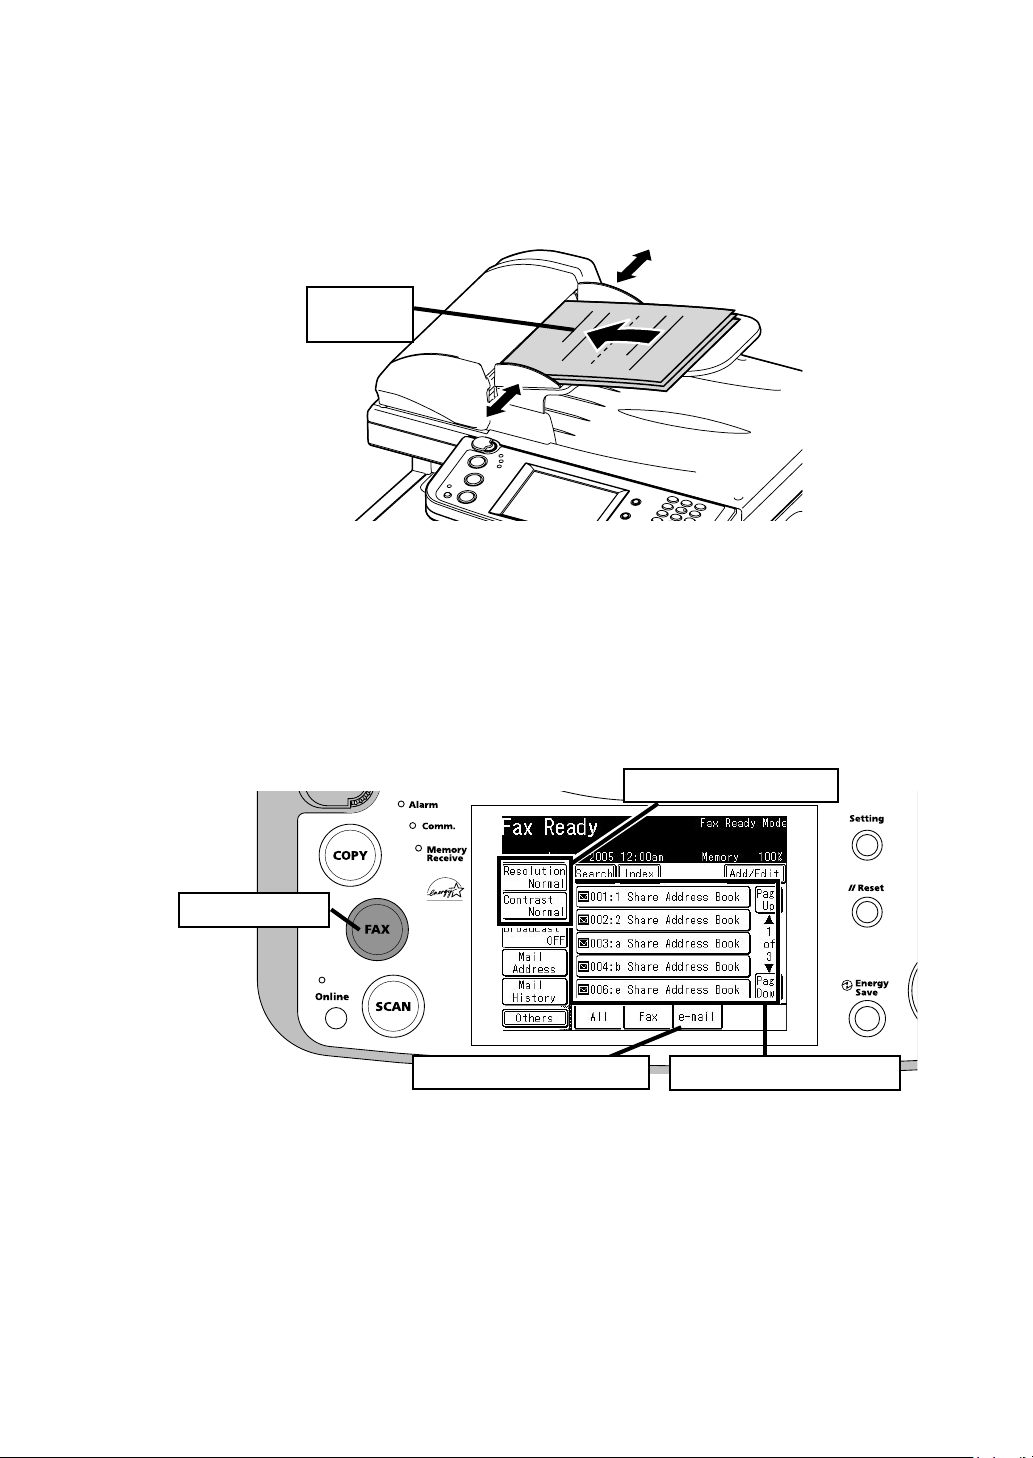
Sending a Fax using the Address Book
1 Set the document.
Face up
Press [Fax] on the control panel.
2
Select the “Fax” tab at the bottom of the display.
3
Adjust any additional fax settings (ex. Resolution, Contrast).
4
Select the destination.
5
2 Press [Fax]
3 Select the “Fax” tab
4 Adjust if needed
5 Select the destination
2
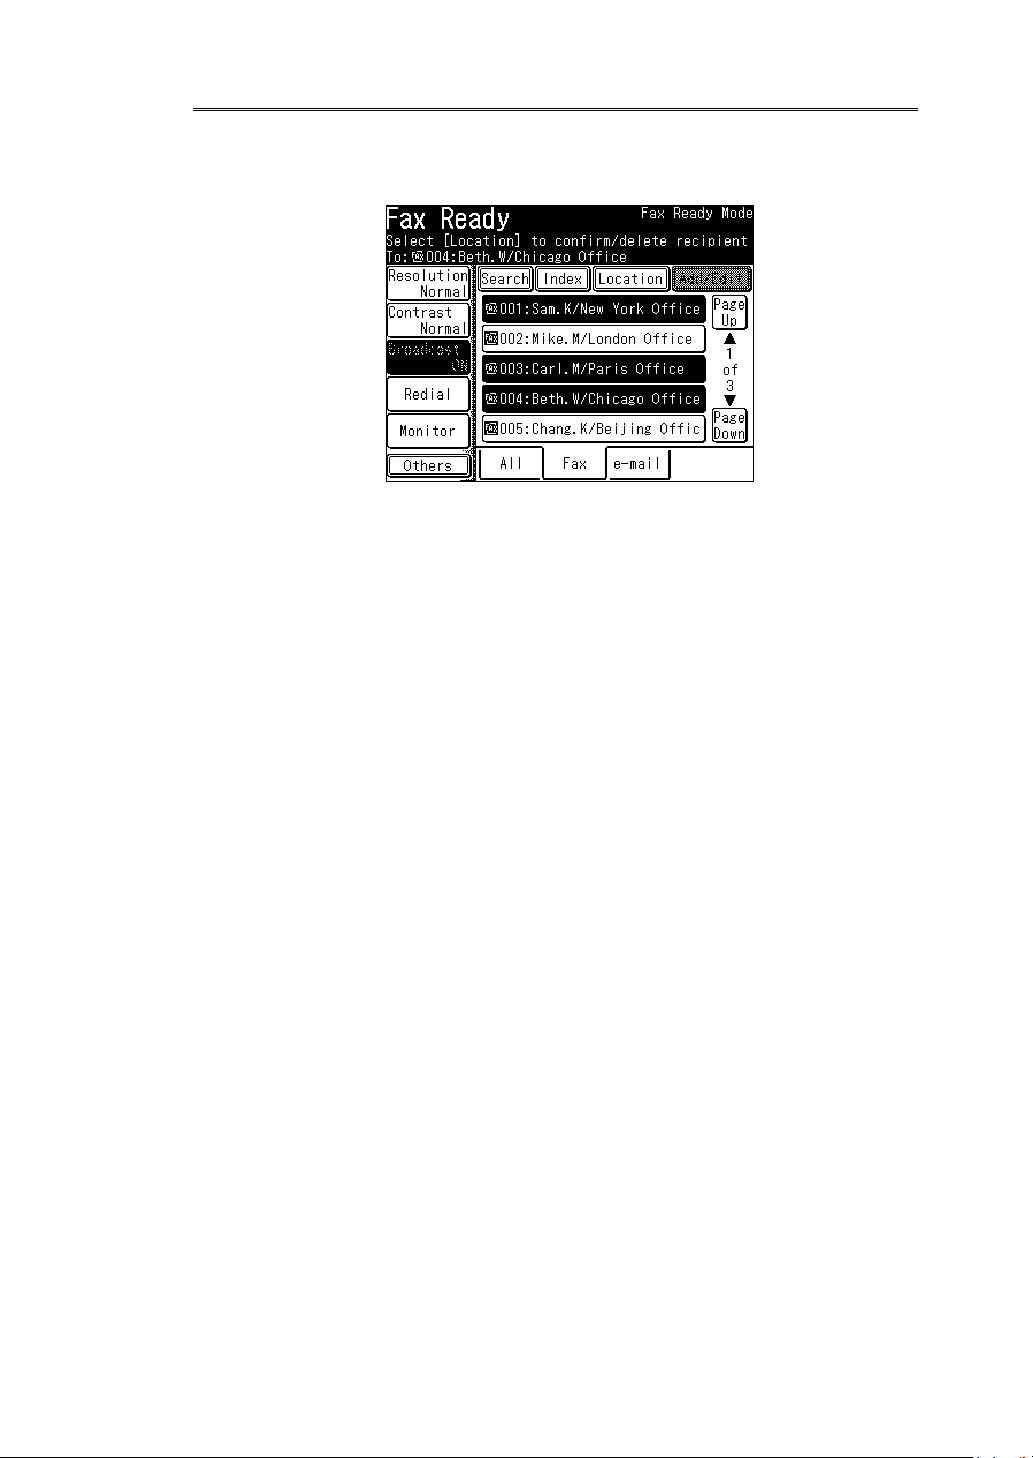
Operating Tip
To send a fax to multiple destinations, press [Broadcast] to toggle
this button to [ON]. You can select multiple locations by simply touching them. Press [Start] on the control panel to begin the transmission.
3
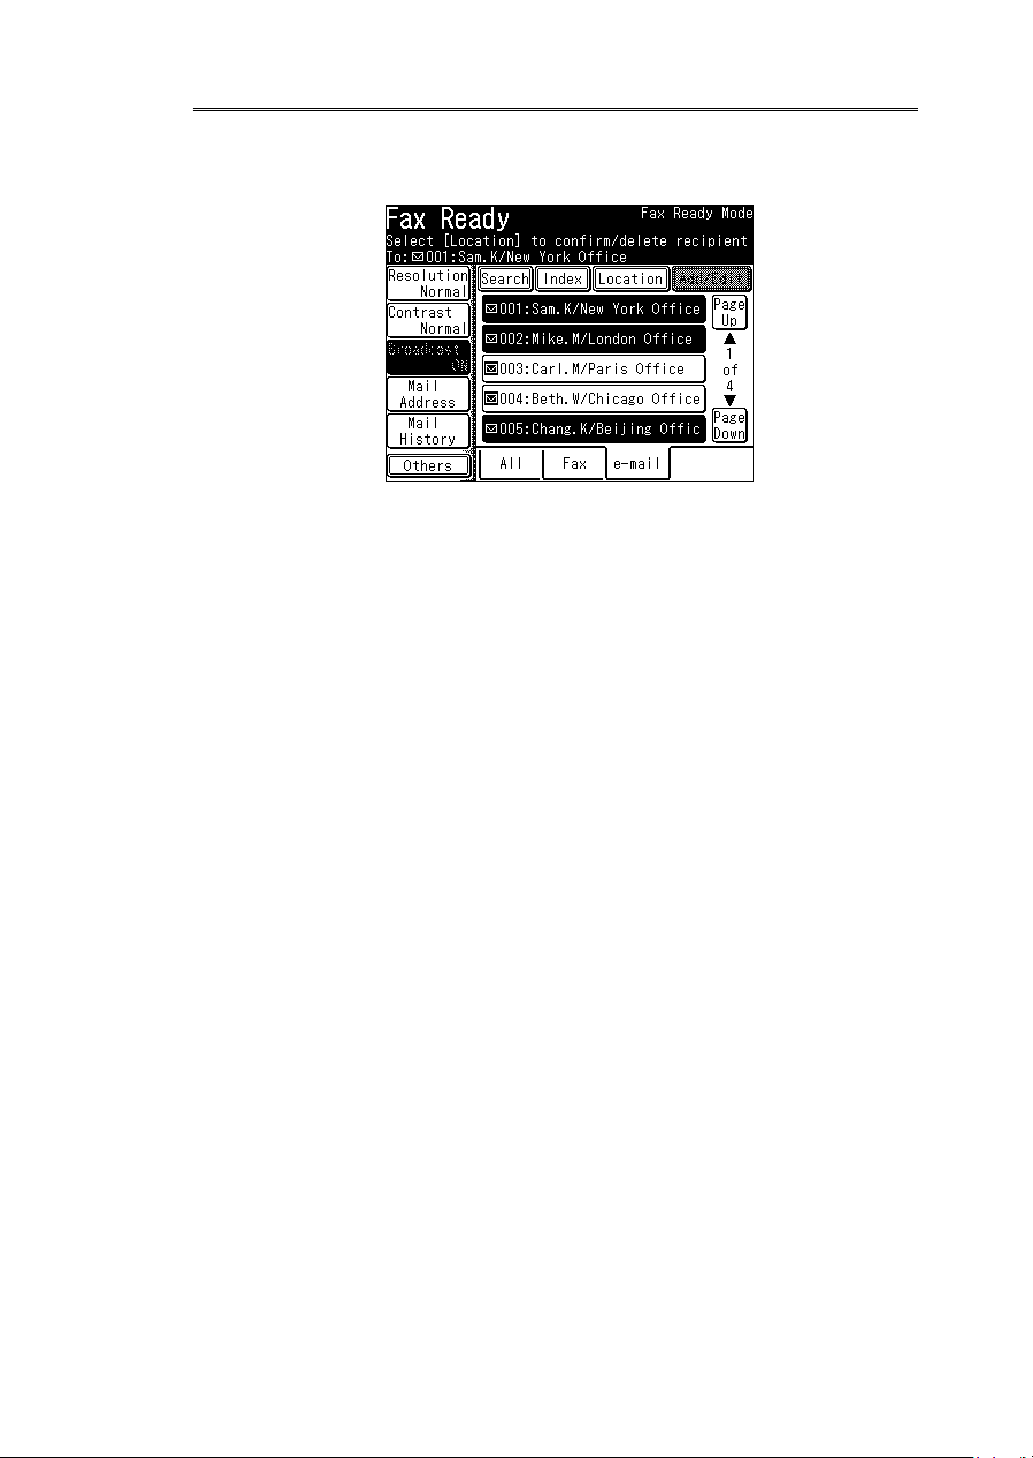
Sending to an e-mail address using the Address Book
1 Set the document.
Face up
Press [FAX] on the control panel.
2
Select the “e-mail” tab at the bottom of the display.
3
Adjust any additional settings (ex. Resolution, Contrast).
4
Select the destination.
5
2 Press [Fax]
3 Select the “e-mail” tab
4 Adjust if needed
5 Select the destination
4
Operating Tip
To send a fax to multiple destinations, press [Broadcast] to toggle
this button to [ON]. You can select multiple locations by simply touching them. Press [Start] on the control panel to begin the transmission.
5
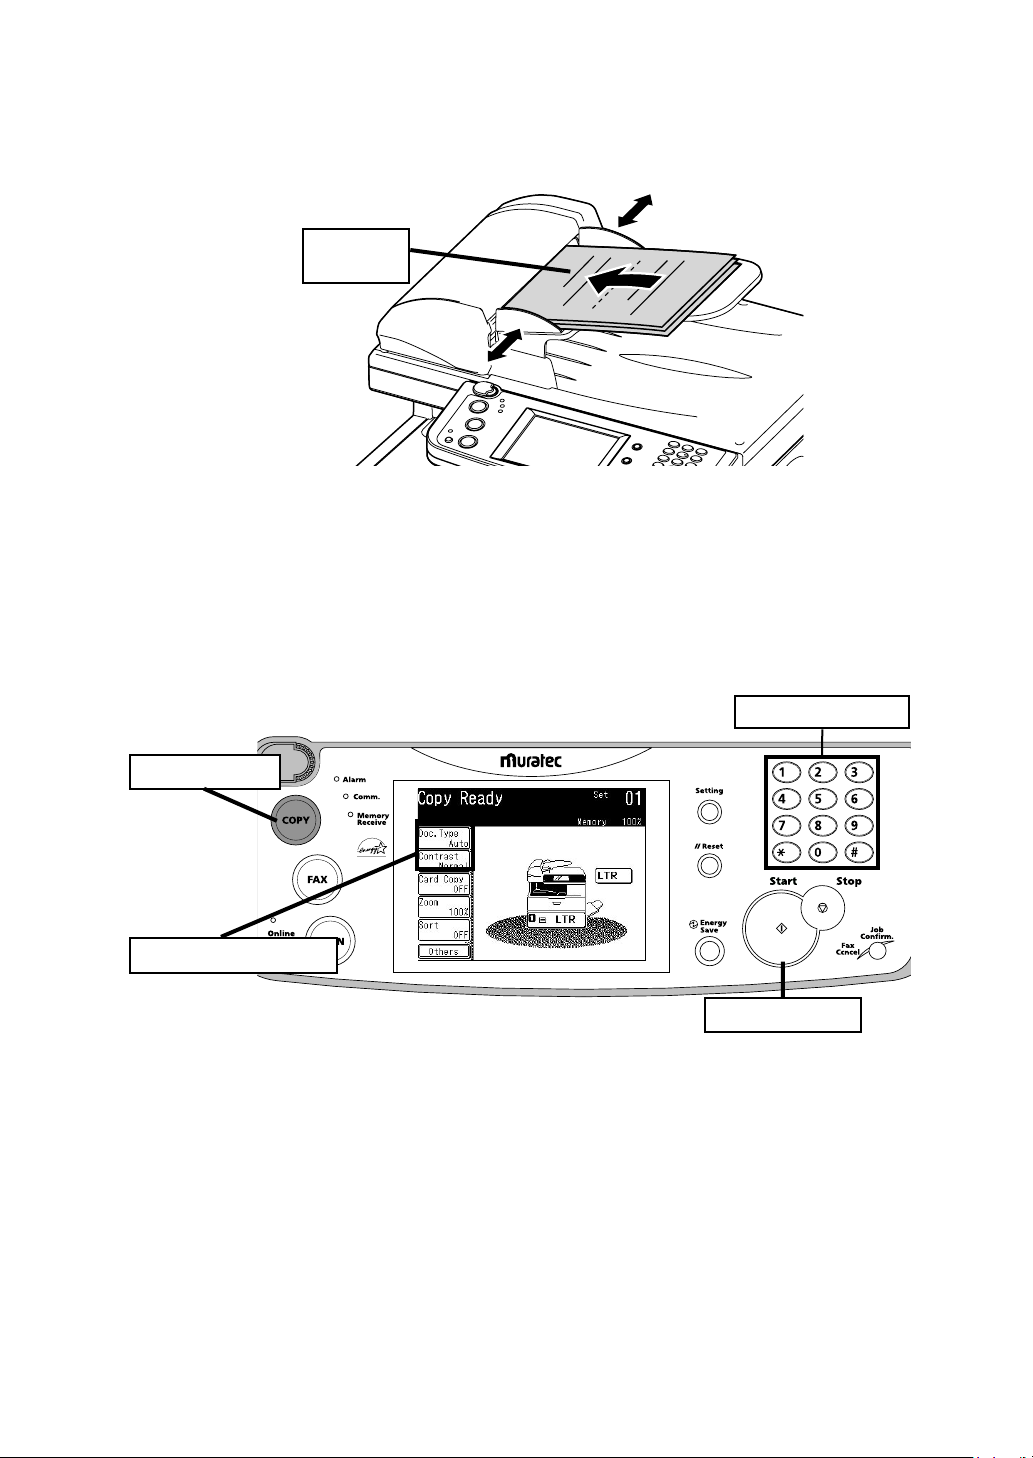
Basic copy
1 Set the document.
Face up
2 Press [COPY] on the control panel.
Enter the number of copies using the numeric keys.
3
Adjust any addtional settings (ex. Resolution, Contrast).
4
Press [Start].
5
2 Press [Copy]
4 Adjust if needed
3 Enter number
5 Press [Start]
6

Scan to an e-mail address
1 Set the document.
Face up
Press [SCAN] on the control panel.
2
Press [e-mail].
3
2 Press [Scan]
3 Press [e-mail]
7

Adjust any additional settings (ex. Resolution, Contrast).
4
Press [Mail Address].
5
Enter the desired e-mail address.
6
Press [Enter].
7
Press [Start].
8
4 Adjust if needed
5 Press [Mail Address]
8 Press [Start]
6 Enter the e-mail address
Operating Tip
By pressing [Color], you can scan color images.
7 Press [Enter]
8

Scan to a network folder
1 Set the document.
Face up
Press [SCAN] on the control panel.
2
Press [Folder].
3
2 Press [Scan]
3 Press [folder]
9

Adjust any additional settings (ex. Resolution, Contrast).
4
Press [Browse].
5
4 Adjust if needed 5 Press [Browse]
Select the network directory that contains your desired folder.
6
• To scroll, use [Page Up] and [Page Down].
7 Select the folder you wish to scan to.
NOTE:
10
The folder that is highlighted is the folder the machine will scan to.
• To go up one step, press [Back].
• To return to the first screen, press [Root].
i

8 Press [Start].
10 Press [Start]
Operating Tip
A user name and password may be required to login folders.
• Select [User Name] and enter the user name. Press [Enter].
• If your machine is on a windows domain contolled network,
add the domain name after the user name by attaching an “@”,
like “sam@dom_muratec”.
• Select [Password] and enter the password. Press [Enter].
By pressing [Color], you can scan color images.
11

Scann to an FTP server
1 Set the document.
Face up
Press [SCAN] on the control panel.
2
Press [FTP].
3
12
2 Press [Scan]
3 Press [FTP]

Adjust any additonal settings (ex. Resolution, Contrast).
4
5 Press [Host].
4 Adjust if needed 5 Press [Host]
6 Press [Link].
7 Enter the link to the FTP server.
• Begin your entry with “//”.
• The “/(slash)” is found in the [Symbol] menu. To switch back to
alpha charcters, press [Alpha].
8 Press [Enter].
9 Press [User name]. Enter the user name and press [Enter].
Press [Password]. Enter the password and press [Enter].
10
11 Press [Enter].
11 Press [Enter]
6 Press [Link]
8 Press [Enter]
7 Enter the link
9 Enter the user name
10 Enter the password
13

12 Press [Start].
Operating Tip
By pressing [Color], you can scan color images.
12 Press [Start]
14

PC faxing
NOTE: In order to PC fax,
prior to attampting this function.
1 Open the document you want to send.
Select [Print] from the File menu.
2
Select “Muratec XXX Fax” as the printer.
3
(XXX: Your machine model such as F-520)
Click [Print].
4
The “Fax Transmission Settings” dialog appears.
you must have the driver installed on your PC
5 Enter the destinations fax number or e-mail address.
6 Click [Send].
15

PC printing
NOTE: In order to PC print,
prior to attampting this function.
1 Open the document you want to send.
Select [Print] from the File menu.
2
Select “Muratec XXX” as the printer.
3
(XXX: Your machine model such as F-520)
Click [Print].
4
you must have the driver installed on your PC
16

Clearing a paper jam
CAUTION: When you open the side cover to remove the paper, DO NOT touch the fuser
roller. The fuser unit is very hot.
IMPORTANT: Do not touch the drum cartridge surface. Scratches or smudges will result in
poor print quality.
Open the side cover.
1
Release the lever
When the second cassette has jammed
Carefully remove the jammed paper.
2
Jammed in the feed area
Jammed in the fuser area
Jammed in the paper exit area
17

If you cannot reach the jammed paper:
Remove the cassette from the machine.
3
Remove the paper.
4
Pull the cassette out,
and lift
Re-insert the paper cassette.
5
Align the cassette to the
guides, and push it back
Close the side cover
18

Jammed in the bypass tray
Pull the paper out of the machine.
1
Open and close the front cover.
2
19
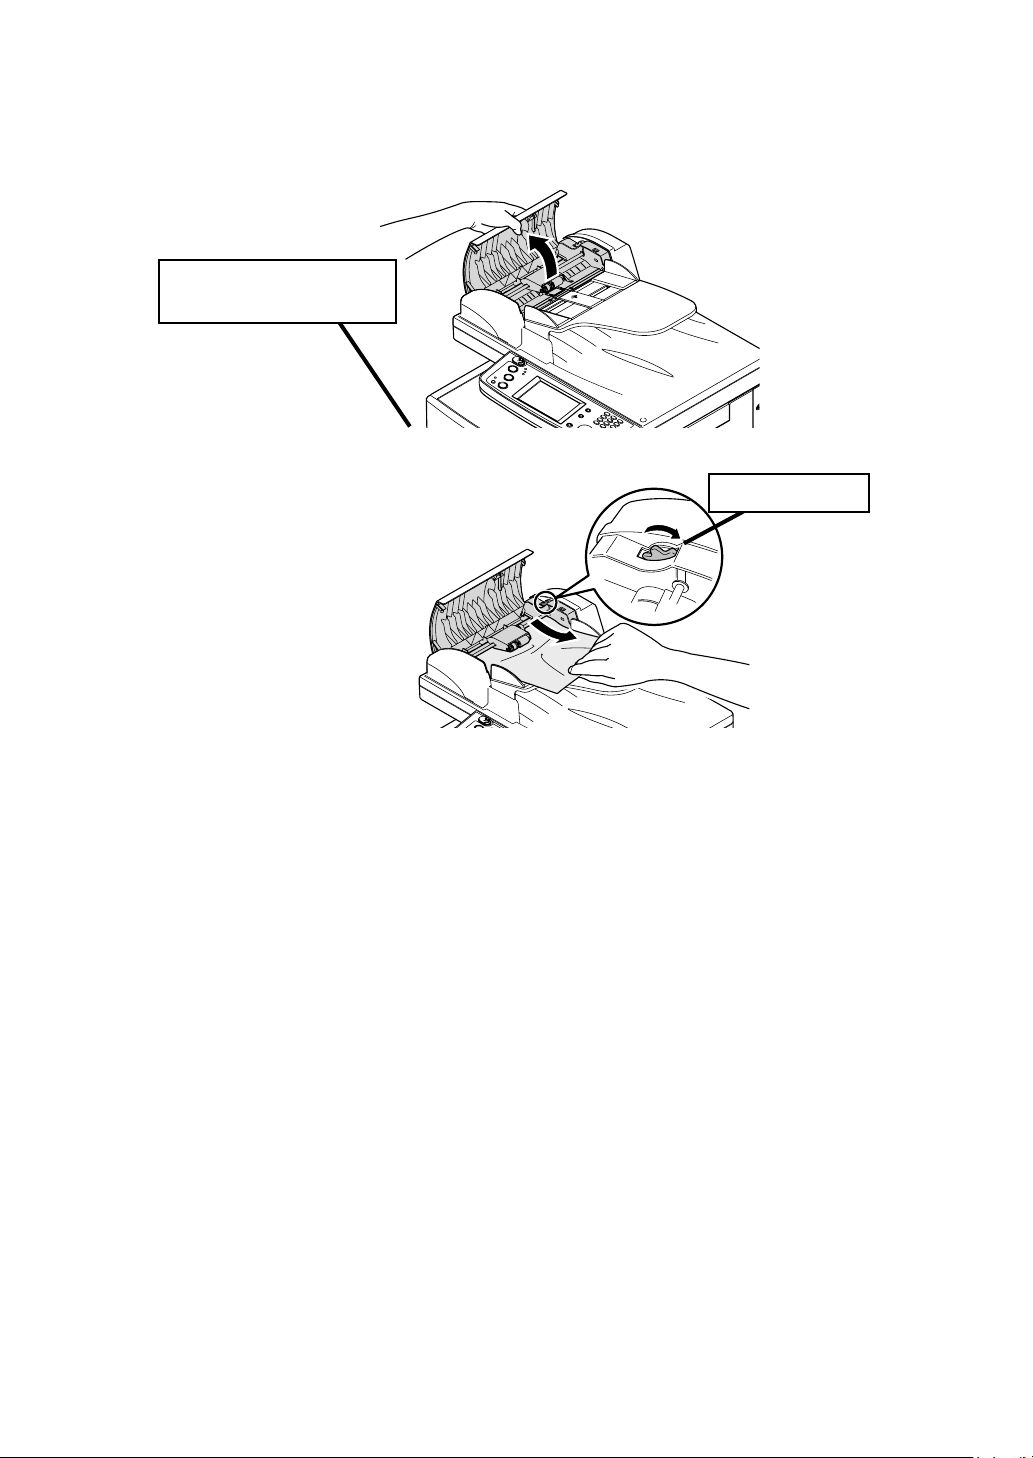
Clearing a document jam
Open the ADF cover.
1
Pull the flapper release
lever
Remove the document.
2
Turn the knob
Close the ADF cover.
3
• If a “Check Message” page prints out, re-send the document
beginning with the noted page.
• When the display asks you whether to continue, select [Yes] or
[No]. If you select [Yes], the display will indicate from which
page you should execute the job.
20

21

Muratec America, Inc.
0 3 1 9 8 1 9 2 6 3 0 0
3301 East Plano Parkway
Suite 100
Plano, Texas 75074
http://www.muratec.com
©Muratec America, Inc. 2005 Printed in China.
DA7-90350-60
OMF520QRG
 Loading...