

Page 1
DM Series
Constant Connection (LAN Connection)
EN FR DE
Installation and Operator Guide
SV NO DA FI IT
Page 2

Contents
EN
Introduction
What are the benets of Constant Connection?
Is it secure?
What do I need to tell my Network/IT Department Administrator?
Will I need to change the settings on my Mailing Machine?
Will my Mailing Machine work without a network connection?
What Mailing Machines work with Constant Connection?
Before you begin...
Network Conguration
Physical network connection
Installation
Step 1 - Physically connect your system to the network socket
Operation
Using Constant Connection
Problems?
Revert to using an analogue telephone line
Reference
Network administrator needs the MAC address
File extensions and URLs that the network/rewall needs to allow
Ports and protocols needed by Constant Connection
Step 2 - Congure the static IP address
Step 3 - Congure your system to use the network connection
Step 4 - Check that the network connection is working
SDC876B Constant Connection (LAN Connection) Guide
Click on any of the subjects in the contents list to jump
straight to that section.
<< Return to Contents
Page 3
Introduction
EN
What are the benets of Constant Connection?
Constant Connection allows you to connect your Mailing System via an Ethernet
(LAN) port instead of via a PC or an analogue telephone line.
You will obtain much quicker connection speeds when your Mailing System
connects to Pitney Bowes for services such as; Postage by Phone®, System
Updates, Features On Demand, Electronic Postal Inspection and Data Centre
Information Exchange. In addition, because your Mailing System will be connected
to your network, you’ll no longer need to have a PC nearby and powered on or a
dedicated analogue phone line for the Mailing System.
This means that if you’re paying line rental for a single analogue phone line solely
for the Mailing System, you will no longer need it.
Is it secure?
Yes, the system has been approved by ICSA, a company specialising in custom
evaluation and certication testing services for information technology products.
You can download the full report from www.pitneybowes.co.uk
What do I need to tell my Network/IT Department Administrator?
Depending on your network type, your Network Administrator will need to congure
the network to support dynamic or static IP addressing and allow access to these
ports to function:
TCP 80 (http), TCP 443 (https), TCP 21 (ftp), TCP 53 (DNS)
You will need details of the subnet mask and default gateway. If a proxy server is
used, please ensure that this connection bypasses the proxy server.
If necessary, check with your Network Administrator that the network settings can
be congured as described. Any network changes required should be made before
installing Constant Connection (see ‘Before you begin...’ on the following page).
Will my Mailing Machine work without a network connection?
Yes, you can still use an analogue phone line to perform downloads and updates.
See the “Problems?’ section of this guide for more information.
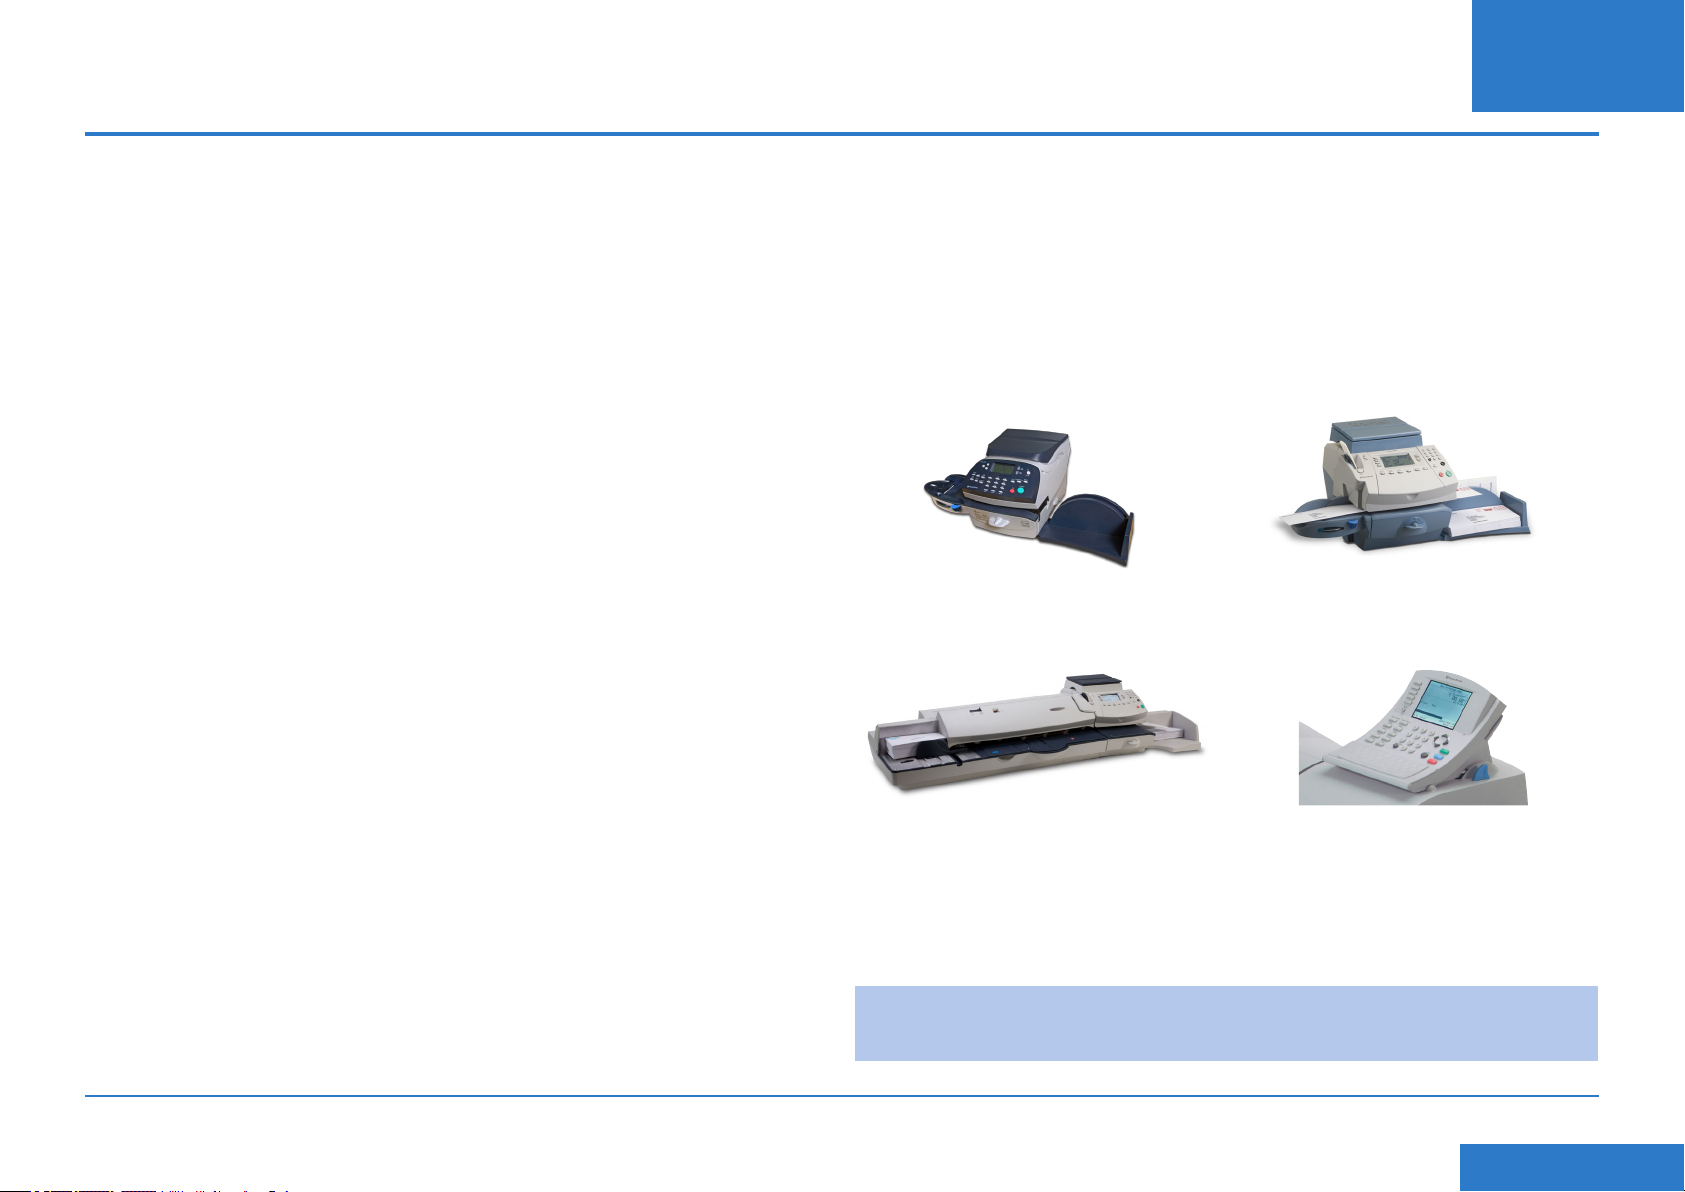
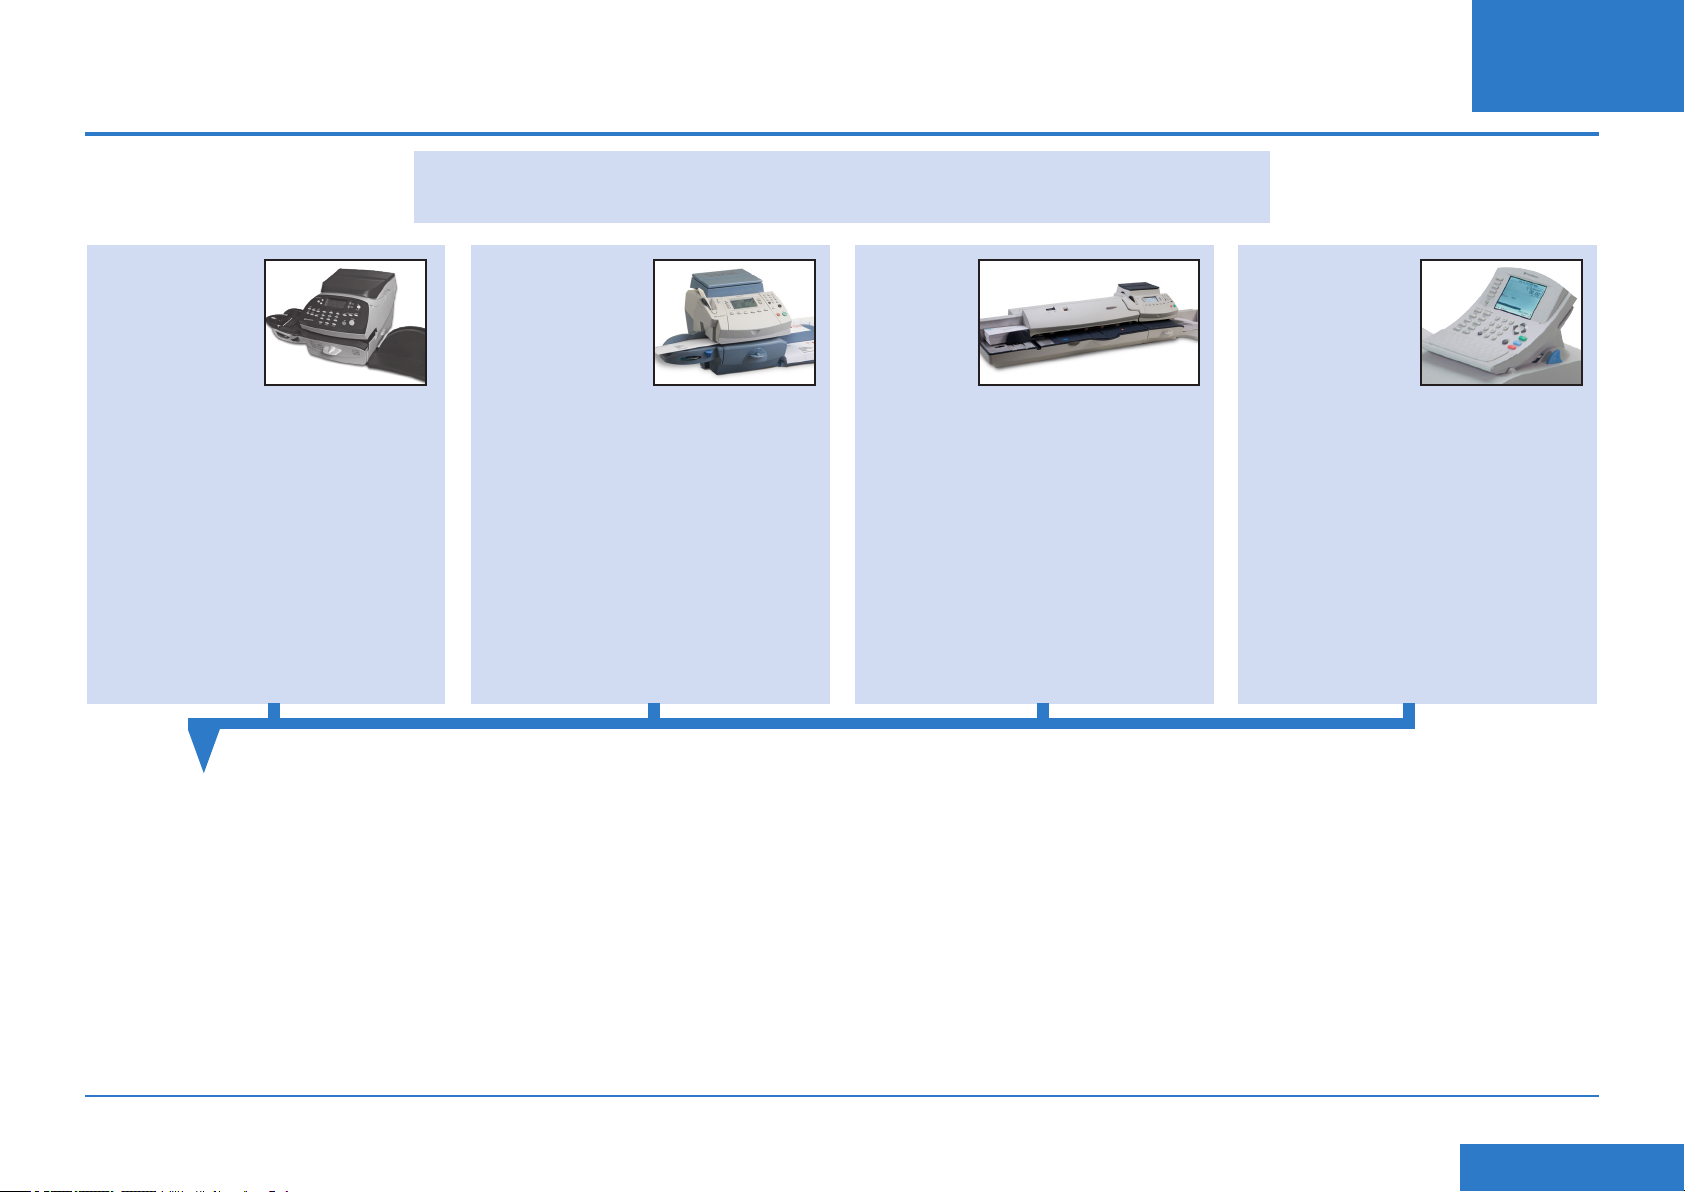
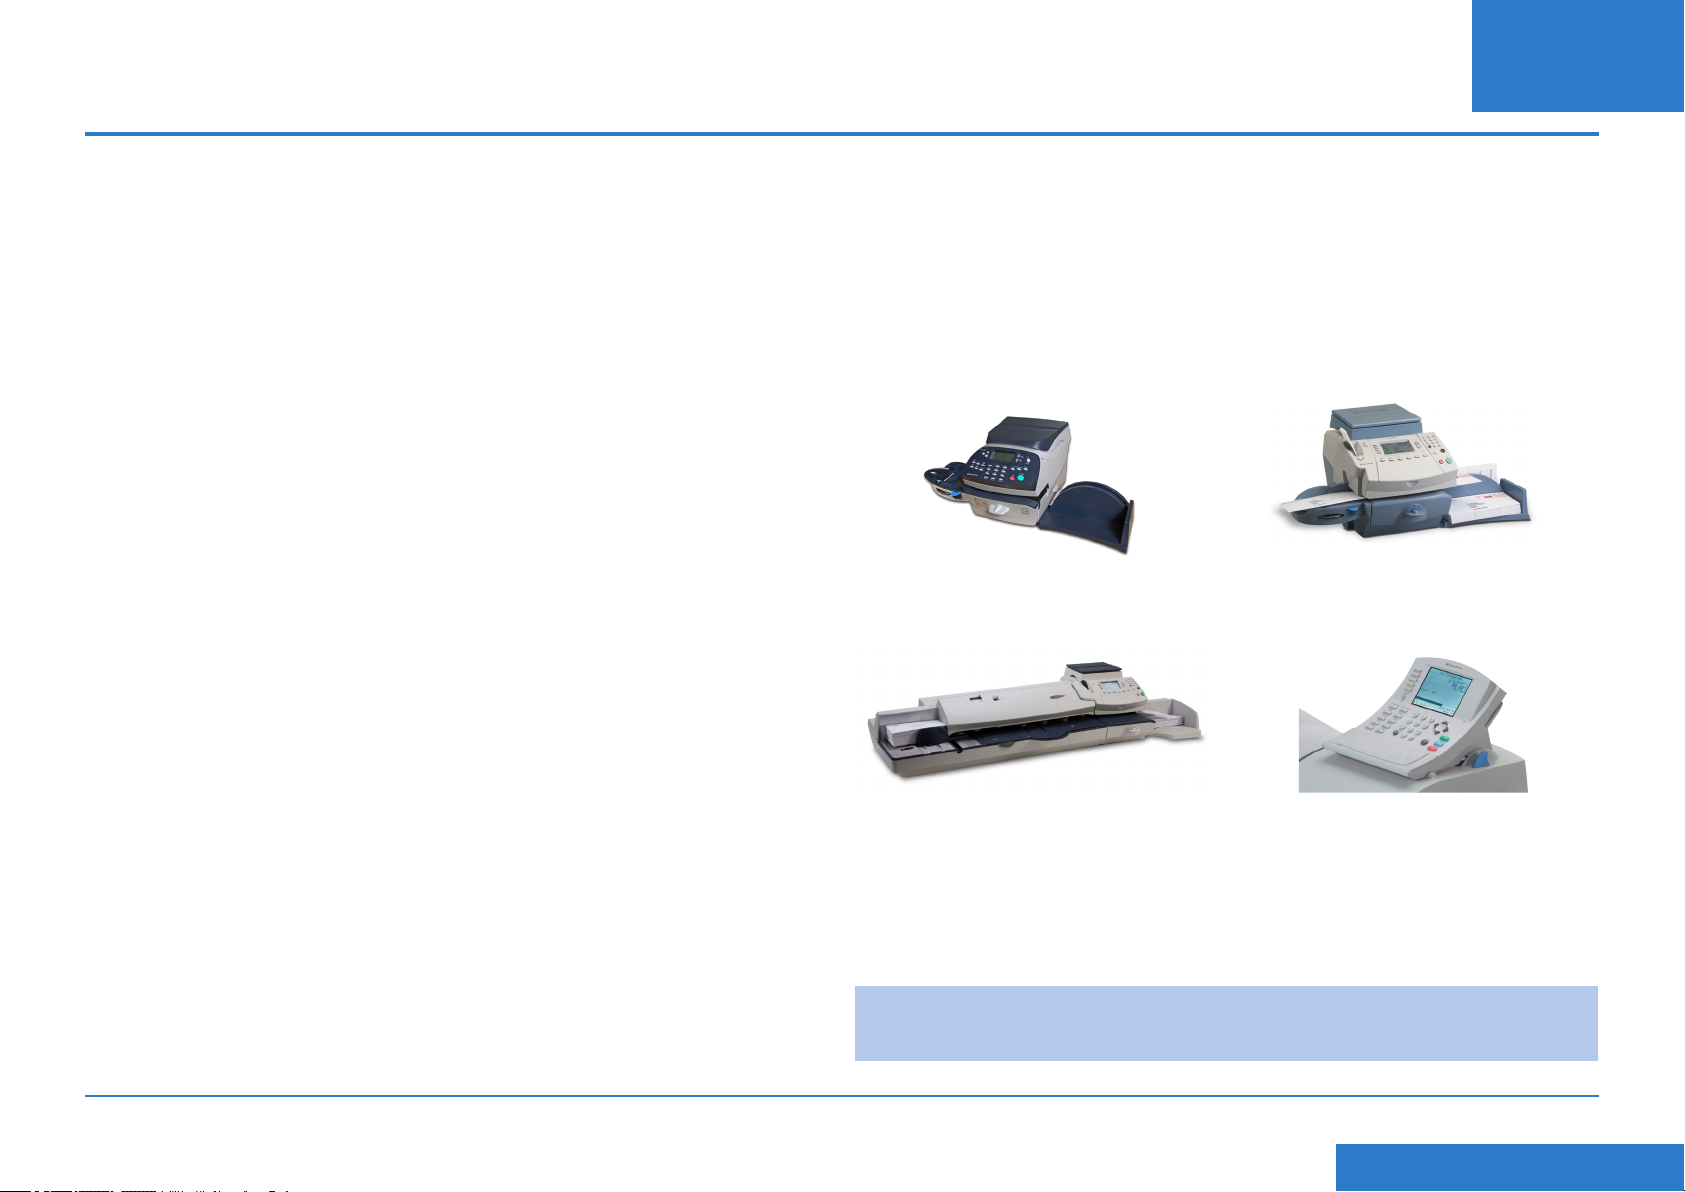
What Mailing Machines work with Constant Connection?
This guide covers use of Constant Connection on the following products:
DM220i series
DM475 and DM450+ series
DM300c and DM400c series
DM500 to DM1000 series
IntelliLink™ Control Centre
Will I need to change the settings on my Mailing Machine?
Yes, depending on your network type you will need to change settings on your
Mailing System. Full instructions are provided later in this guide.
SDC876B Constant Connection (LAN Connection) Guide
IMPORTANT: Availability of products varies by country. Inclusion of a product in
this guide does not guarantee availability within your country.
<< Return to Contents
Page 4

Before you begin...
EN
To make your installation proceed as smoothly as possible, please take a few
minutes to conrm that all necessary steps have been taken to prepare:
Network conguration
You may need the help of your Network/IT Administrator to complete the information
below.
This checklist ensures that your network settings have been made and, where
necessary, you have a note of the settings to allow the Mailing System to be
congured.
How is the IP address being allocated to your Mailing System?
Dynamically
or
Statically (Tick box as appropriate)
For static IP addresses, you will need the following information:
IP address . . .
Ports to this IP Address are open for
TCP 80 (http)
TCP 443 (https)
TCP 21 (ftp)
TCP 53 (DNS lookup)
Physical network connection
Network connection point is within 5 metres of the Mailing System.
Subnet mask . . .
Default gateway . . .
SDC876B Constant Connection (LAN Connection) Guide
<< Return to Contents
Page 5

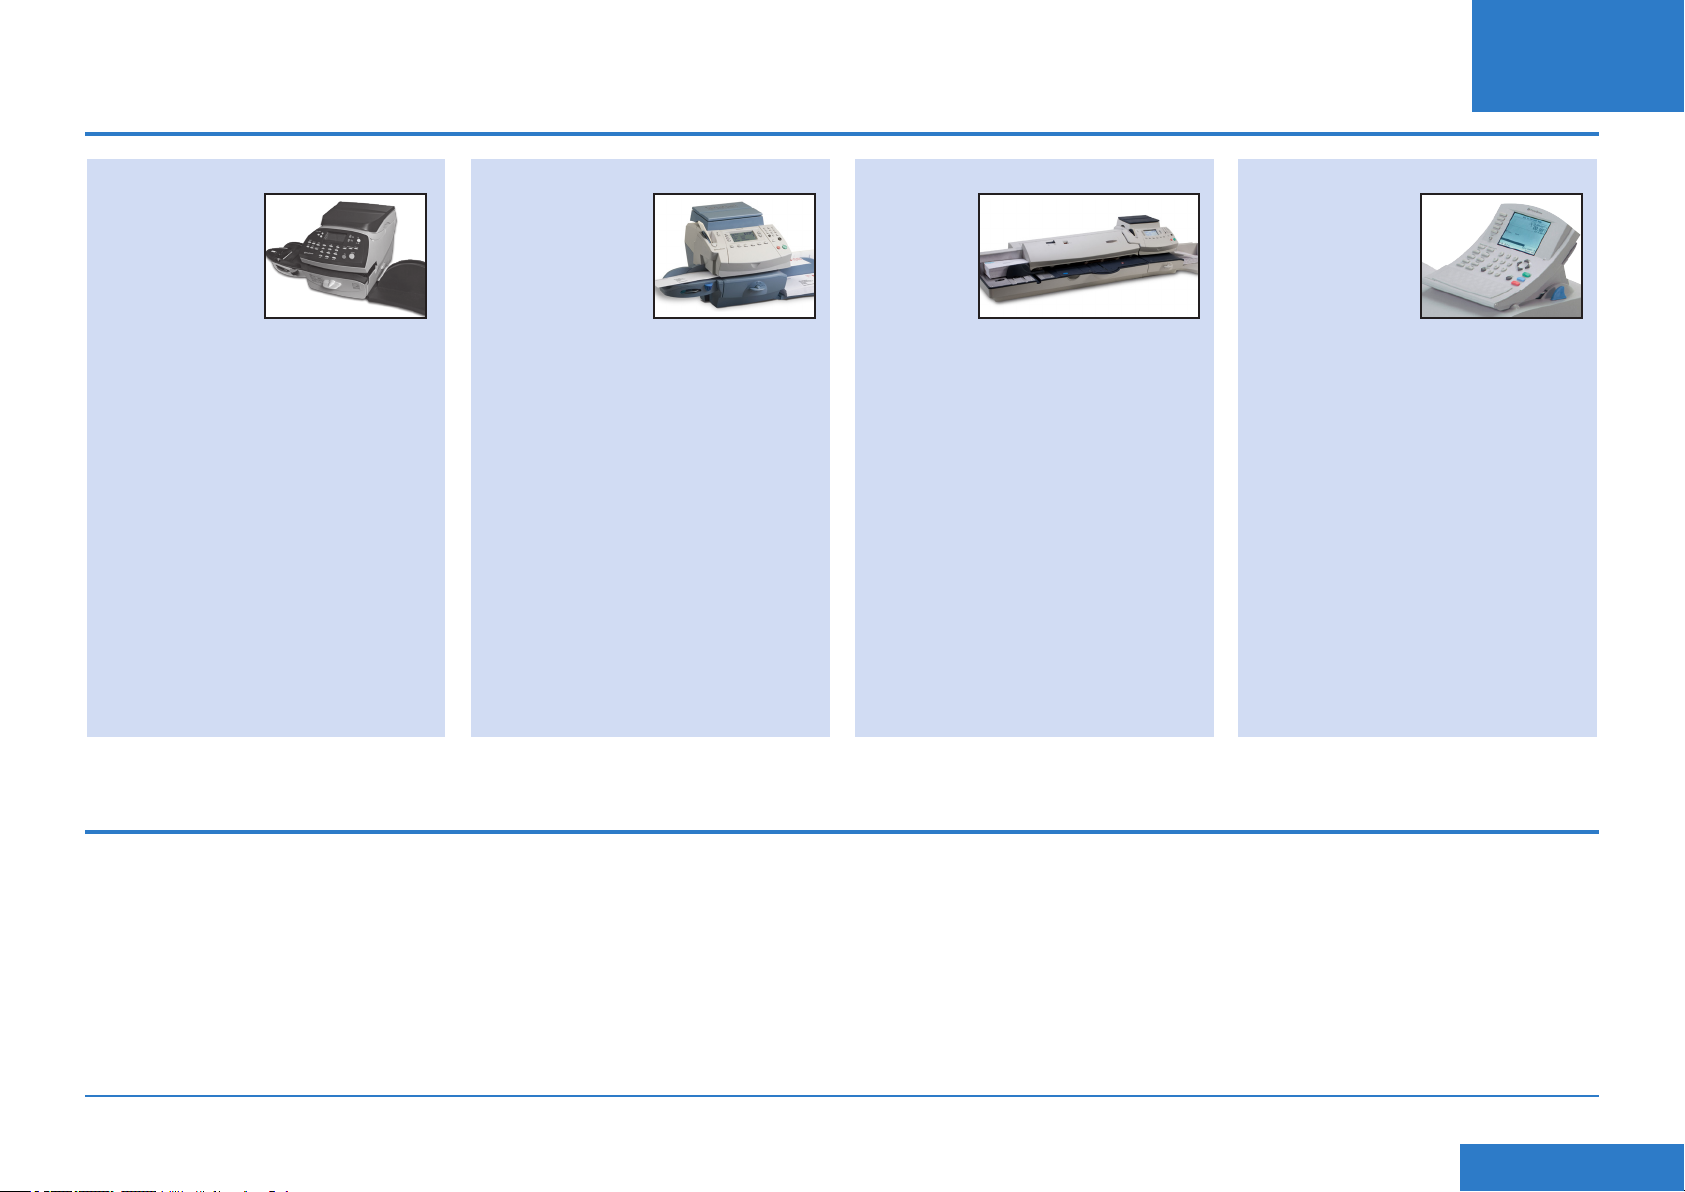
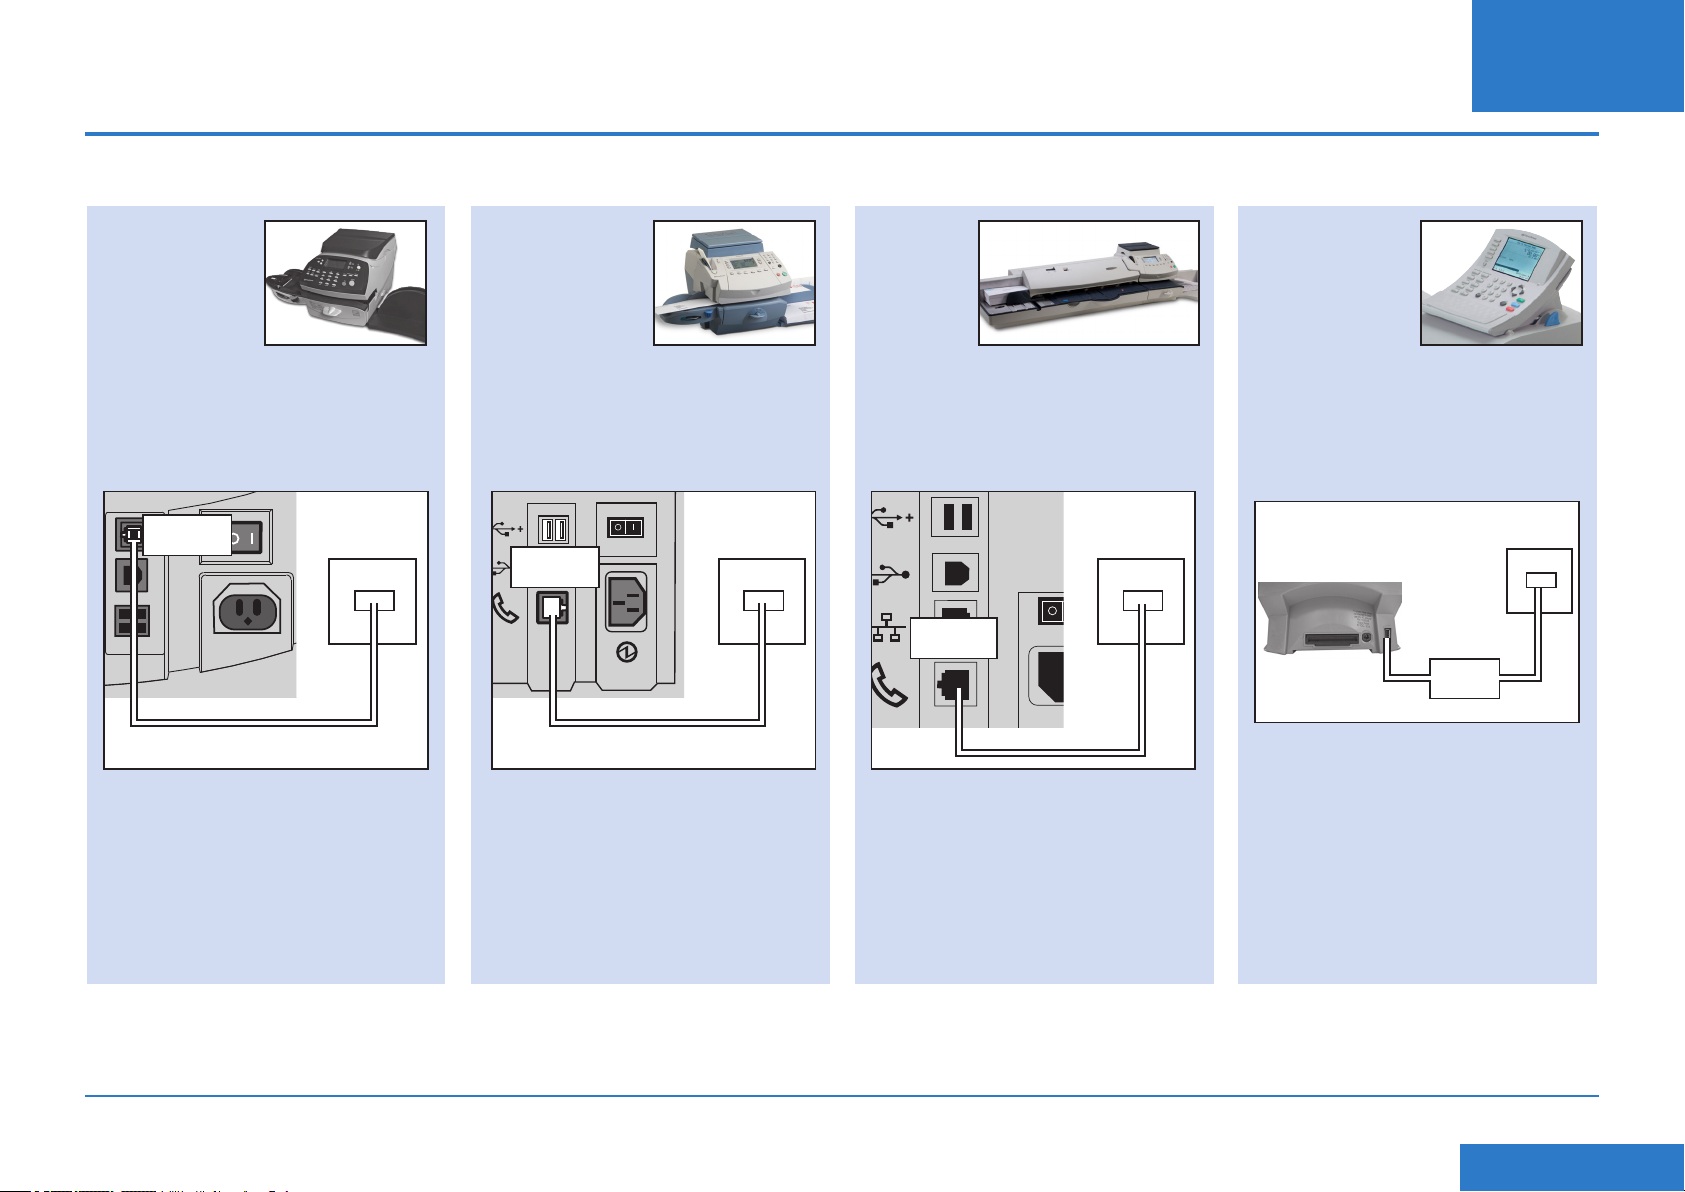
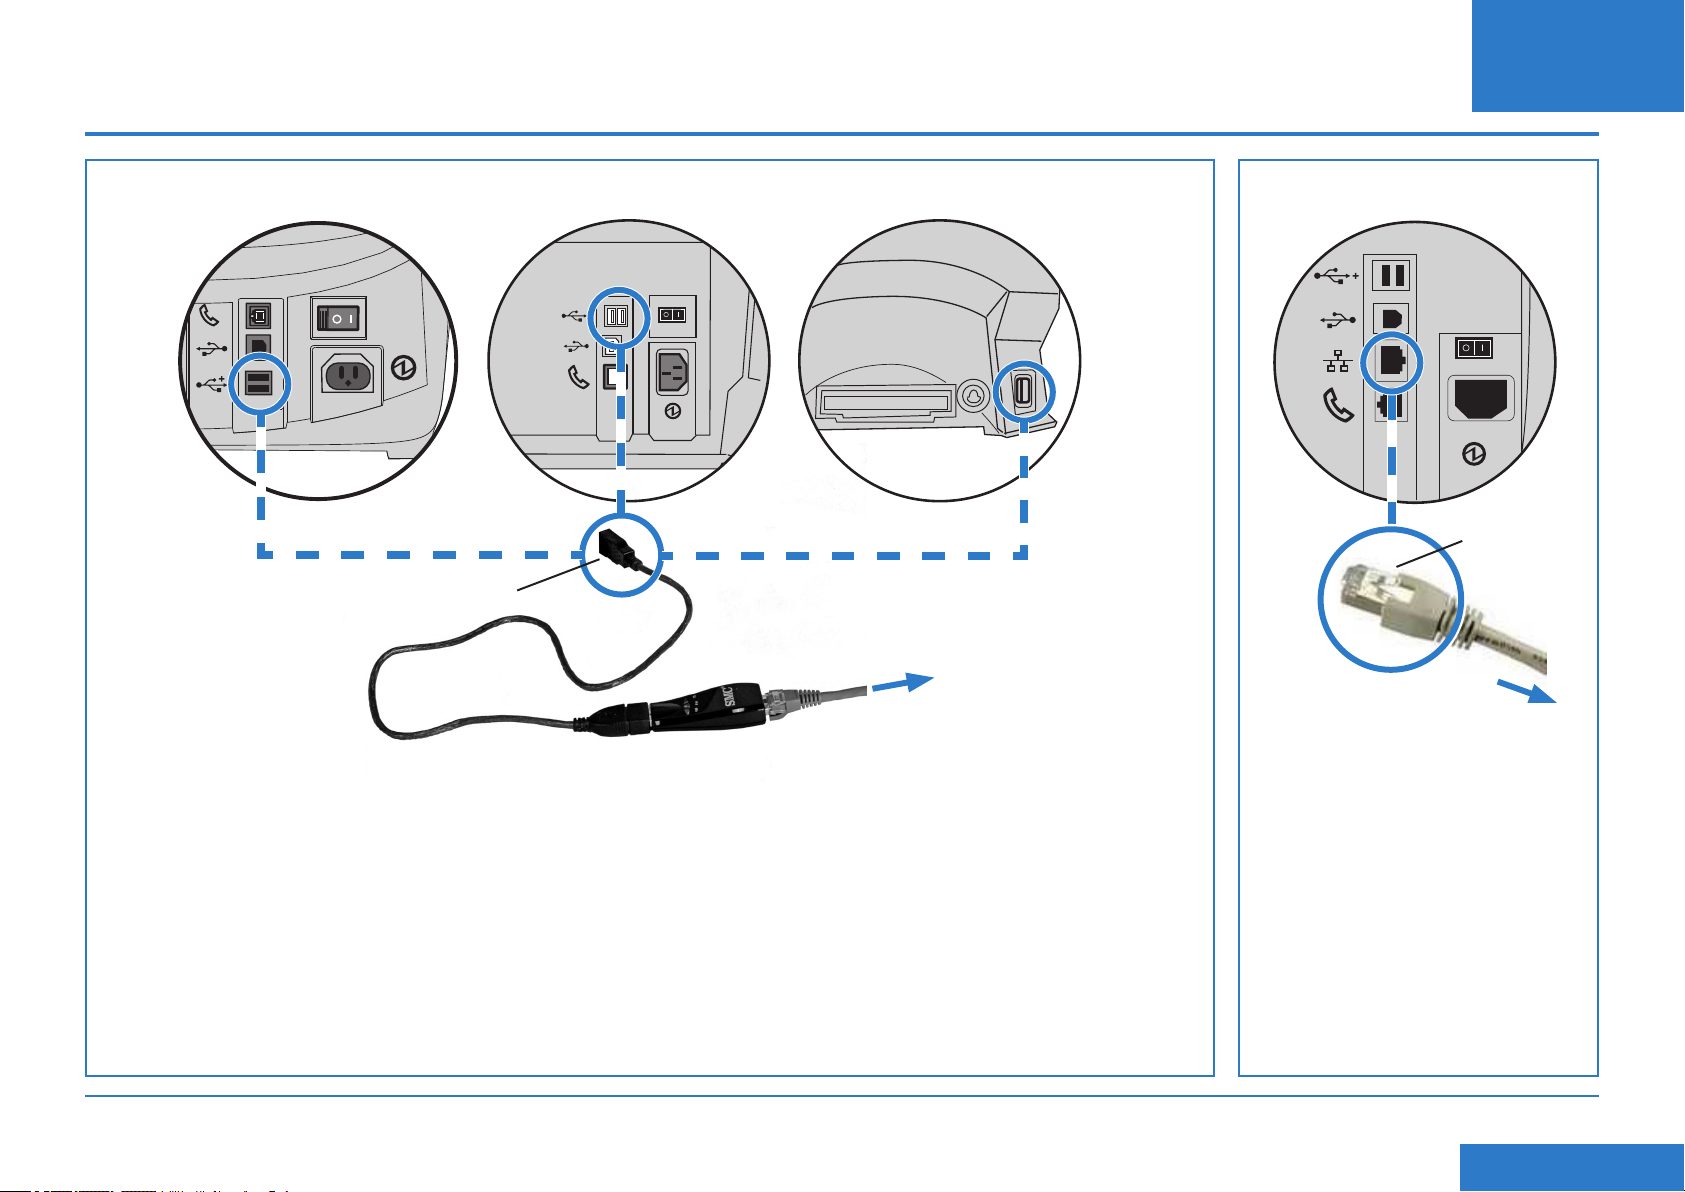
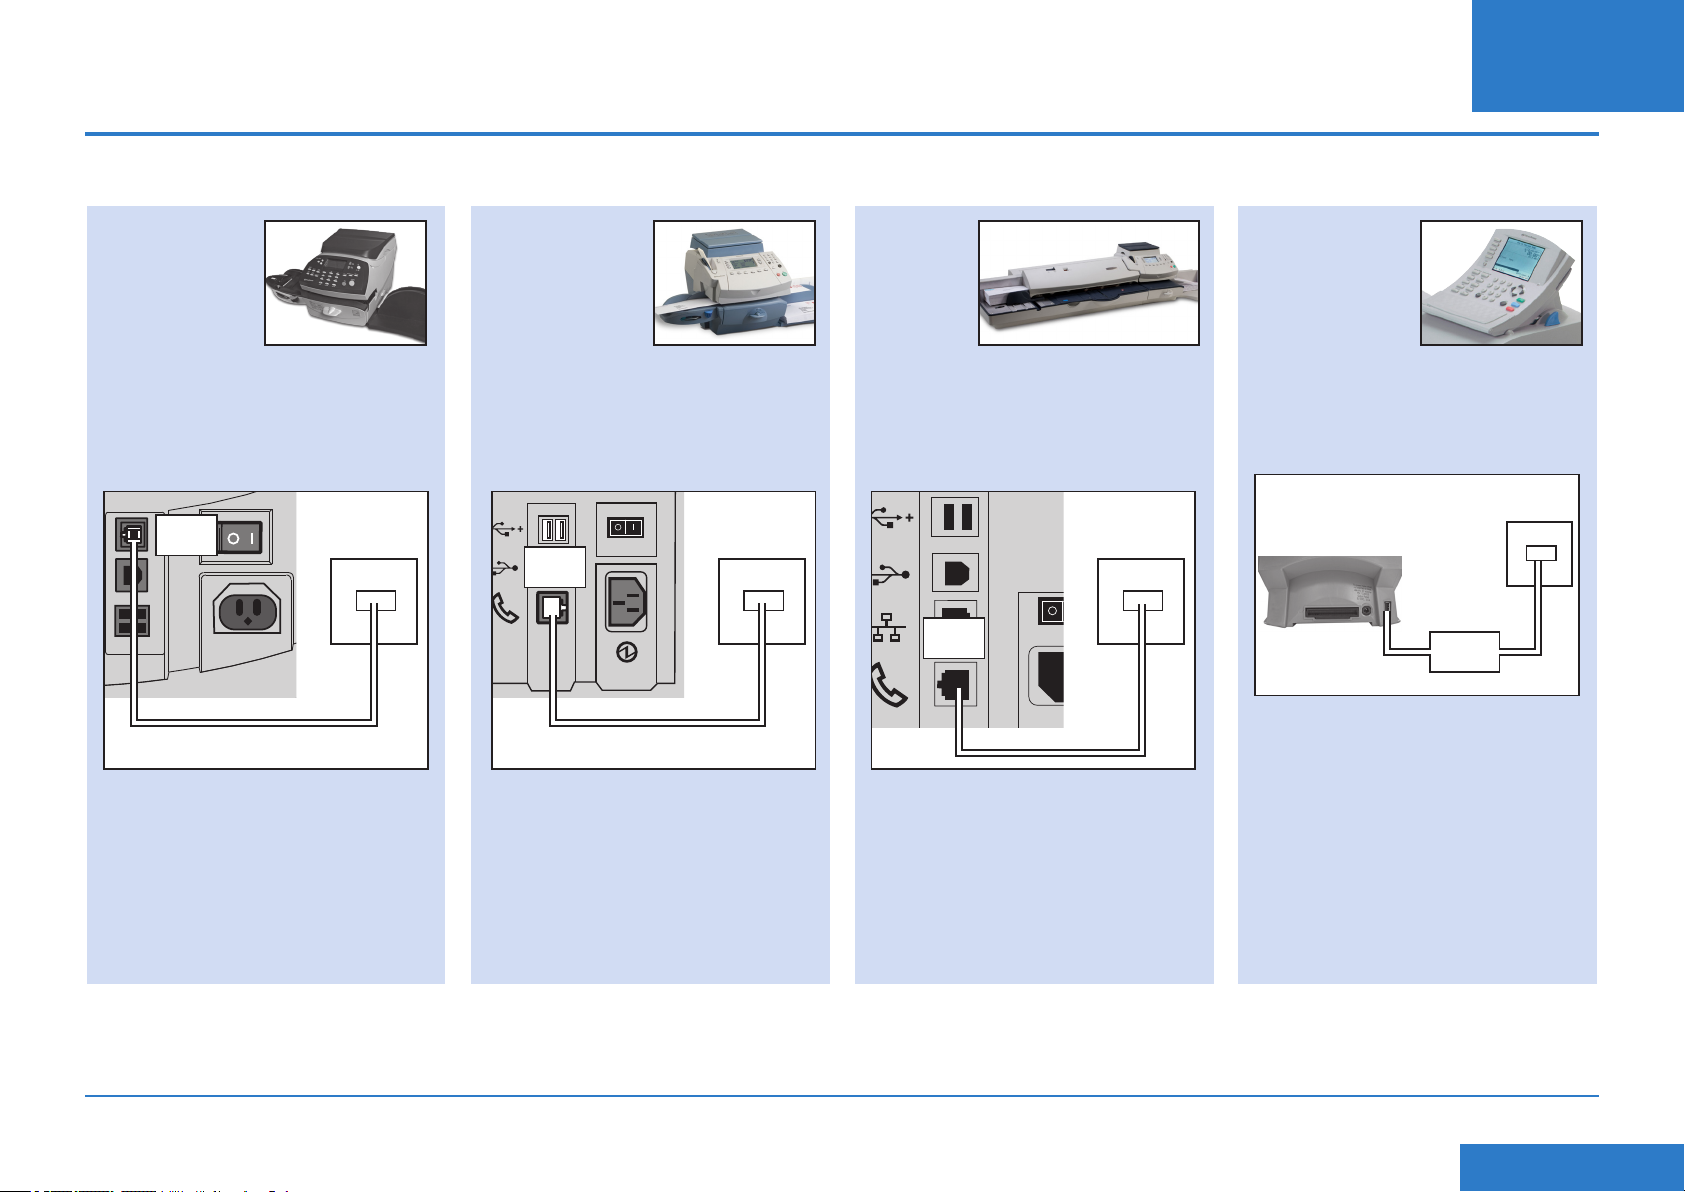
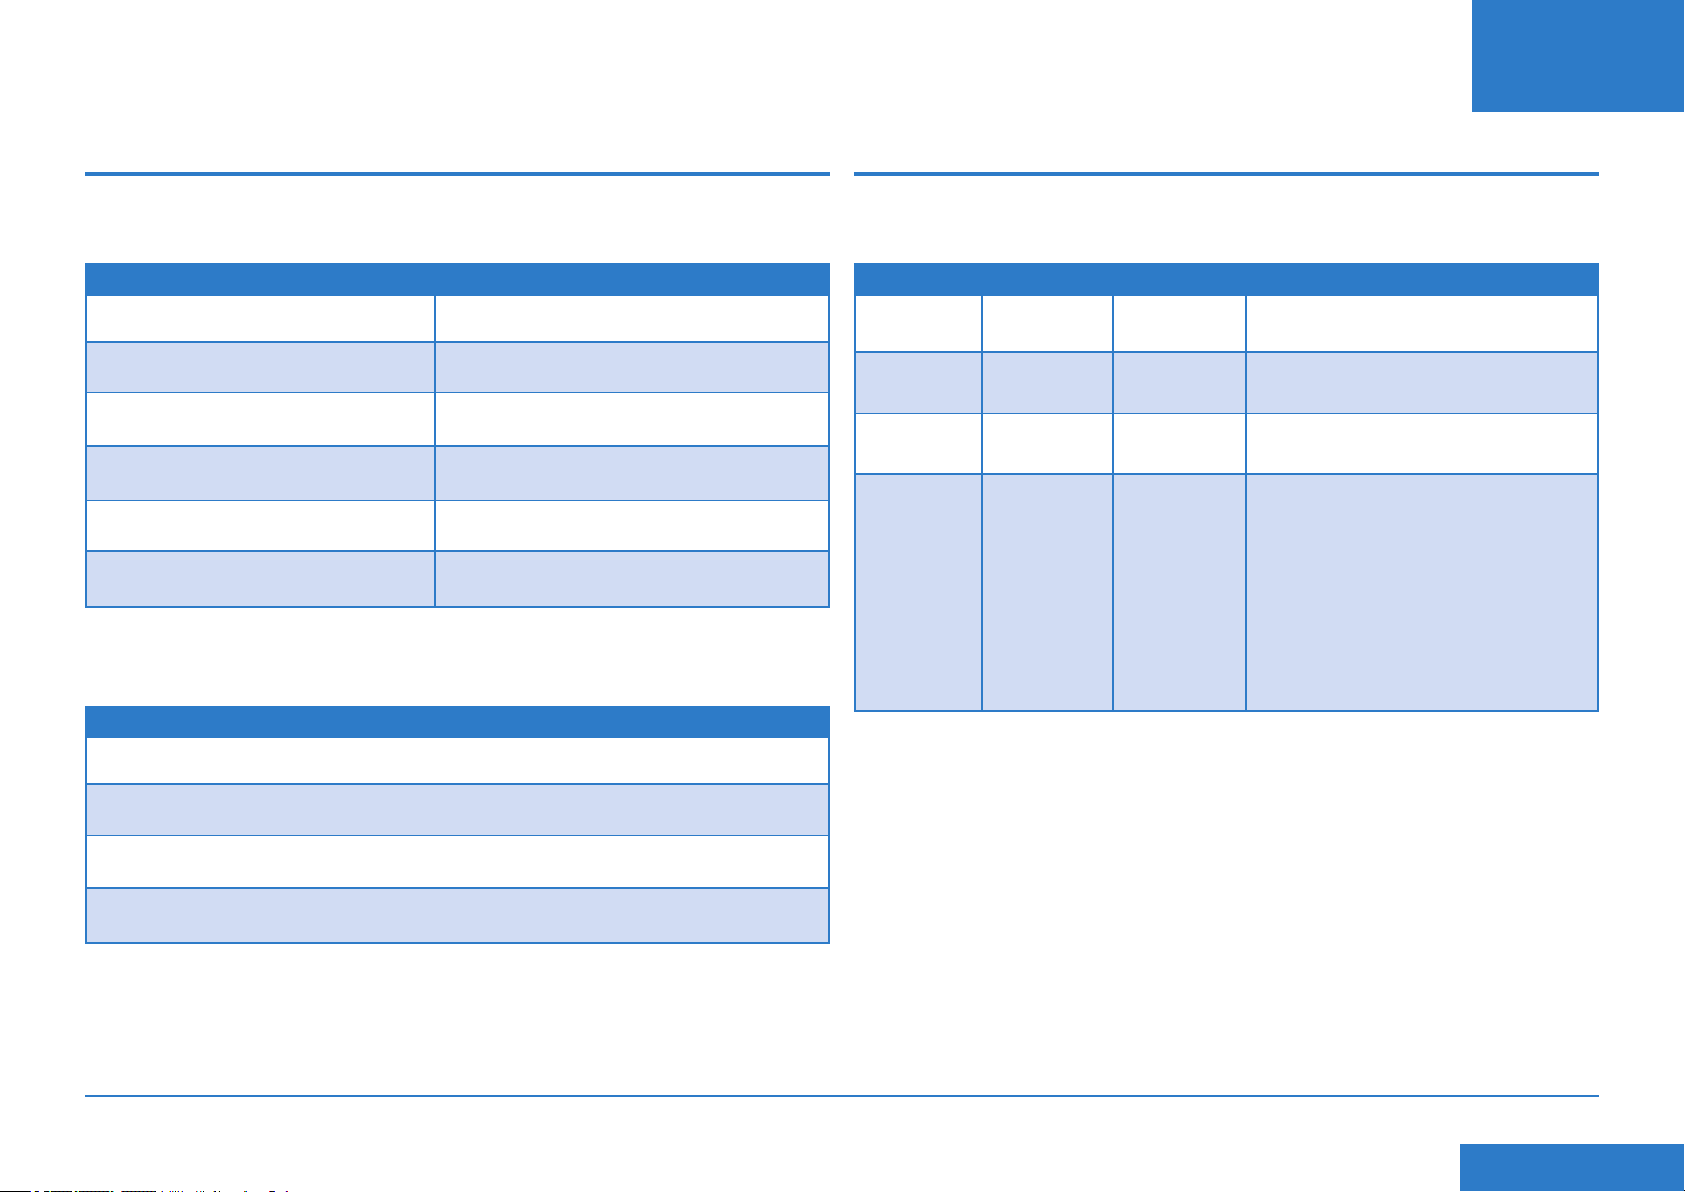
Installation Step 1: Physically connect your system to the network socket
EN
DM220i series DM300c and DM400c series DM475/DM450+ onlyDM500 to DM1000
USB cable supplied
with network
adapter
Plug into USB port on
Mailing System
Network Adapter
IntelliLink® Control Centre
Ethernet cable
Plug directly
into system
LAN port
Connect to your
router or network
wall socket
Connect to your
router or network
wall socket
1. Turn off power to the System.
2. Plug the Ethernet cable into your router or network wall
socket.
3. Attach the Network Adapter to the Ethernet cable and
then plug the Network Adapter into one of the USB
Ports on the Mailing System using the short USB cable
that comes with the Adapter.
NOTE: On the DM500-DM1000, preferably use the port
on the rear of the IntelliLink® Control Centre if this is
not already in use.
SDC876B Constant Connection (LAN Connection) Guide
4. Turn the System power back on.
5. Once the System starts and displays the Mail Run/
Home screen, the LED’s on the Network Adapter
should light up or icker within 15 seconds. This
indicates there is a connection to the Network.
1. Turn off power to the System.
2. Plug the Ethernet cable into your
router or network wall socket.
3. Plug the other end of the cable
into the LAN port on the rear of
the system.
4. Turn the System power back on.
<< Return to Contents
Page 6
Installation - Step 2 Congure the static IP address
This step is only required if you are using a static IP address for the Mailing Machine. If you
are using dynamic IP address allocation, you can go straight to step 3 on the next page.
EN
DM220i series DM300c and
1. Press Options.
2. Press Page Down.
3. Press Page Down again.
4. Select Connect - Data Centre.
5. Select LAN Settings.
6. Select Get IP.
7. Select Manually.
8. Select IP Address/IP Addr, then, on all models but the DM220i, press C to
clear the existing entry. Key in your static IP address as shown in ‘Before you
begin’ in this guide. Press Enter or Accept to conrm the new setting.
NOTE: Key in the complete IP address, including the decimal points separating
the IP address parts. By doing this, the display will automatically jump to the
next section of the IP address if one or more sections contain fewer than 3
digits.
9. Select Subnet Mask/Subnet, then, on all models but the DM220i, press C to
clear the existing entry. Key in your subnet mask settings, as shown in ‘Before
you begin’ in this guide, in the same way as the IP address. Press Enter or
Accept to conrm.
DM400c series
1. Press Options.
2. Press Page Down.
3. Select Data Centre Options.
4. Press Page Down.
5. Select Network Settings.
6. Select Get IP.
7. Select Specify Address
Manually.
DM475/
DM450+
1. Press Options.
2. Press Page Down.
3. Select Data Centre Options.
4. Press Page Down.
5. Select Network Settings.
6. Select Get IP.
7. Select Specify Address
Manually.
10. Select Default Gateway/Gateway, then, on all models but the DM220i, press C
to clear the existing entry. Key in your default gateway, as shown in ‘Before you
begin’ in this guide, in the same way as the IP address above. Press Enter or
Accept to conrm.
11. If requested, press Enter again to conrm the settings.
12. Press the Left Arrow or Home key to exit the setup menu.
DM500 to DM1000
IntelliLink® Control
Centre
1. Press the Options key.
2. Select Set Up.
3. Select Phone/Network Set Up.
4. Press the Down Arrow and
select Network Settings.
5. Select Mailing System Network
Settings.
6. Select Get IP Address.
7. Select Specify an IP Address.
SDC876B Constant Connection (LAN Connection) Guide
<< Return to Contents
Page 7

Installation - Step 3 Congure your system to use the network connection
EN
DM220i series DM300c and
No action is required to congure
the DM220i system.
DM400c series
1. Press Options.
2. Press Page Down.
3. Select Data Centre Options.
4. Press Page Down.
5. Select Connection Mode and
set to Auto.
6. Press Home to return to the
Home Screen.
DM475/
DM450+
1. Press Options.
2. Press Page Down.
3. Select Data Centre Options.
4. Press Page Down.
5. Select Connection Mode and
set to Auto.
6. Press Home to return to the
Home Screen.
DM500 to DM1000
IntelliLink® Control
Centre
1. Press the Options key.
2. Select Set Up.
3. Select Phone/Network Set Up.
4. Select Modem Type.
5. Select Use LAN.
6. Select OK, Restart now. The
Mailing System will restart.
SDC876B Constant Connection (LAN Connection) Guide
<< Return to Contents
Page 8
Installation - Step 4 Check that the network connection is working
EN
DM220i series DM300c and
1. Press the Add Postage key.
2. Select Check PbP Balance.
The system connects to
the Pitney Bowes servers
to access your Postage by
Phone account. If the network
connection is working correctly,
the balance of your Postage by
Phone account displays.
3. Select Continue to exit.
DM400c series
1. Press the Rell Postage key.
2. Select Check PbP Balance.
The system connects to
the Pitney Bowes servers
to access your Postage by
Phone account. If the network
connection is working correctly,
the balance of your Postage by
Phone account displays.
3. Select Continue to exit.
DM475/
DM450+
1. Press the Rell Postage key.
2. Select Check PbP Balance.
The system connects to
the Pitney Bowes servers
to access your Postage by
Phone account. If the network
connection is working correctly,
the balance of your Postage by
Phone account displays.
3. Select Continue to exit.
DM500 to DM1000
IntelliLink® Control
Centre
1. Press the Funds key.
2. Select Postage by Phone
Balance. The system connects
to the Pitney Bowes servers
to access your Postage by
Phone account. If the network
connection is working correctly,
the balance of your Postage by
Phone account displays.
3. Select Done to exit.
Using Constant Connection
Once installed and tested as described above, Constant Connection provides a
permanent, fast, connection for your Mailing System.
All operating procedures for updating system software, checking your Postage by
Phone balance and Relling Postage, etc. are exactly as described in the main
Operating Guide for the system.
SDC876B Constant Connection (LAN Connection) Guide
<< Return to Contents
Page 9

Problems? - Revert to using an analogue telephone line
If, for any reason, your network is unavailable, you can set the Mailing System to use an analogue phone line for Postage Rell, etc.
EN
DM220i series DM300c and
1. Connect a telephone cable from
an analogue telephone wall
socket to the phone port on the
rear of your system.
phone
port
wall
socket
2. Disconnect the USB cable/USB
adapter from the rear of the
system.
DM400c series
1. Connect a telephone cable from
an analogue telephone wall
socket to the phone port on the
rear of your system.
phone
port
2. Disconnect the USB cable/USB
adapter from the rear of the
system.
wall
socket
DM475/
DM450+
1. Connect a telephone cable from
an analogue telephone wall
socket to the phone port on the
rear of your system.
wall
socket
phone
port
2. Disconnect the network cable
from the rear of the system.
DM500 to DM1000
IntelliLink® Control
Centre
1. Connect a telephone cable from
an analogue telephone wall
socket to your system using the
USB modem supplied with your
system.
wall
socket
USB
modem
2. Press Options.
3. Select Set Up.
4. Select Phone/Network Set Up.
5. Select Modem Type.
6. Select USB.
7. Select OK, Restart now. The
Mailing System will restart.
All operating procedures for updating system software, checking your Postage by Phone balance and Relling Postage, etc. are exactly as described in the main Operating
Guide for the system. You will notice a reduction in speed of these operations when using an analogue phone line.
SDC876B Constant Connection (LAN Connection) Guide
<< Return to Contents
Page 10

EN
Reference - Network administrator needs MAC address
In rare circumstances your Network Administrator may require the MAC Address of the Constant Connection network adapter. This can be obtained in the following way:
DM220i series DM300c and
1. Press Options.
2. Press Page Down twice.
3. Select Connect - Data Centre.
4. Select LAN Settings.
5. Press Page Down.
6. The network adapter’s MAC
address will be displayed. Take
a note of this for your Network
Administrator.
7. Press Home to return to the
Home Screen.
DM400c series
1. Press Options.
2. Press Page Down.
3. Select Data Centre Options.
4. Press Page Down.
5. Select Network Settings.
6. The network adapter’s MAC
address will be displayed. Take
a note of this for your Network
Administrator.
7. Press Home to return to the
Home Screen.
DM475/
DM450+
1. Press Options.
2. Press Page Down.
3. Select Data Centre Options.
4. Press Page Down.
5. Select Network Settings.
6. The network adapter’s MAC
address will be displayed. Take
a note of this for your Network
Administrator.
7. Press Home to return to the
Home Screen.
DM500 to DM1000
IntelliLink® Control
Centre
1. Press Options.
2. Select Set Up.
3. Select Phone/Network Set Up.
4. Press the Down Arrow and
select Network Settings.
5. Select Mailing System
Network Settings.
6. Select MAC Address. The
network adapter’s MAC address
will be displayed. Take a
note of this for your Network
Administrator.
7. Press the Left Arrow key to
exit the setup menu.
SDC876B Constant Connection (LAN Connection) Guide
<< Return to Contents
Page 11

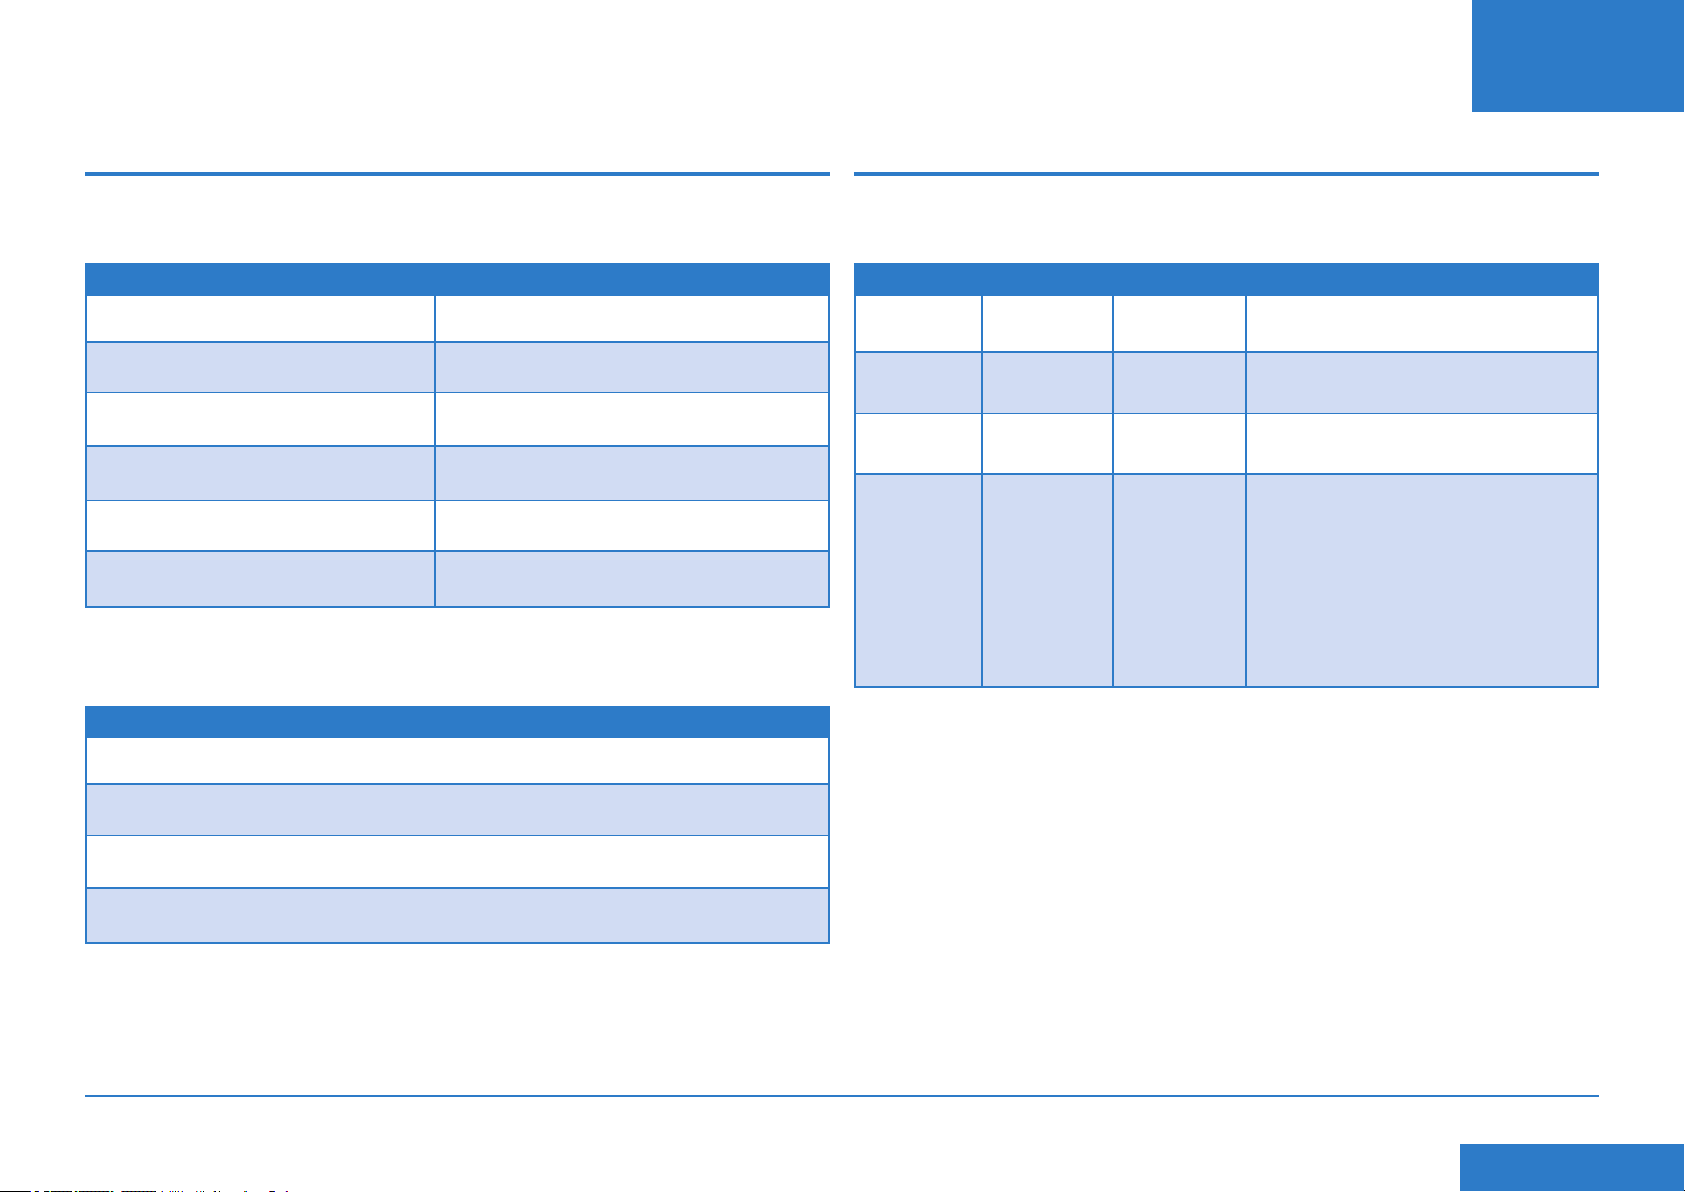
Reference - File extensions and URLs that
EN
Reference - Ports and protocols
the network/rewall needs to allow
Constant Connection uses the following le extensions that must be allowed
through your network and rewall:
Type Extension
DEC .dcz
EMD .zmd
Graphics .gar
Rate Manager .rmz
CCD .bin
Snippet le .GAU
The following ‘top level’ domains must also be accessible through your network and
rewall:
Any URL containing the following:
needed by Constant Connection
Constant Connection uses the following ports and protocols that must be allowed
through your network and rewall:
Type Protocol Port Function
DNS UDP 53 Postage by Phone and Web Services
HTTP TCP 80 Postage by Phone and Web Services
HTTPS TCP 443 Postage by Phone
FTP TCP 21 Software and Rates Updates,
Graphic uploads.
Firewall must be set to Active mode
and to allow ephemeral ports.
NOTE: Active ftp is used. Firewalls
must be set to be ‘ftp aware’.
pb.com
pitneybowes.co.uk
pbcomet.com
pitneybowes.eu.com
NOTE: URLs accessed by your Pitney Bowes system may contain the above
strings anywhere within the URL. Firewalls must therefore be set to allow trafc to
any URL containing the above domains. Your rewall may need to be congured
using “wildcards”, for example *pb.com*
SDC876B Constant Connection (LAN Connection) Guide
<< Return to Contents
Page 12

Inhalt
DE
Einleitung
Was sind die Vorteile einer konstanten Verbindung?
Ist es sicher?
Welche Informationen benötige ich für meinen Netzwerk-/ITAdministrator?
Muß ich Einstellungen an meiner Frankiermaschine ändern?
Arbeitet meine Frankiermaschine ohne Netzwerk-Verbindung?
Welche Frankiermaschine arbeitet mit einer konstanten Verbindung?
Vor Inbetriebnahme
Netzwerkkonguration
Physikalische Netzwerkverbindung
Bedienung
Konstante Verbindung nutzen
Probleme?
Kehren Sie zur Nutzung einer analogen Telefonleitung zurück
Referenz
Der Netzwerk-Administrator benötigt die MAC Adresse
Dateierweiterungen und URLs für das Netzwerk/die Firewall zulassen
Anschlüsse und Protokolle werden von der konstanten Verbindung
genutzt
Installation
Schritt 1 - Physikalischer Anschluß ihres Systems an die
Netzwerkbuchse
Schritt 2 - Kongurieren der statischen IP- Adresse
Schritt 3 - Kongurieren sie ihr System um eine Netzwerk-Verbindung
zu nutzen.
Schritt 4 - Überprüfen sie die Funktion der Netzwerk-Verbindung
SDC876B Konstante Verbindung (LAN Verbindung) Anleitung
Klicken sie auf ein Thema in der Liste um direkt zu dem
Kapitel zu gelangen.
<< Zurück zum Inhalt
Page 13

EINLEITUNG
DE
Was sind die Vorteile einer konstanten Verbindung?
Die konstante Verbindung ermöglicht ihnen, ihr Frankiersystem über einen
Ethernet (LAN) Anschluß zu verbinden, anstelle eines PC´s oder einer analogen
Telefonleitung.
Sie erreichen eine höhere Verbindungsgeschwindigkeit wenn sie ihr Frankiersystem
mit Pitney Bowes verbinden für Services wie Portophon, System Updates, neue
Features, elektronische Postinspektionen und Datencenter - Informationen.
Weiterhin benötigen sie keinen zusätzlichen PC in der Nähe ihres Systems oder
eine analoge Telefonleitung, da ihr Frankiersystem mit dem Netzwerk verbunden ist.
Sollten Sie eine separate, analoge Telefonleitung für das Frankiersystem
eingerichtet haben und dafür extra bezahlen, wird diese nicht mehr benötigt.
Ist es sicher?
Ja, das System wurde von ICSA überprüft.
Der Bericht kann heruntergeladen werden unter www.pitneybowes.co.uk
Welche Informationen benötige ich für meinen Netzwerk-/ITAdministrator?
Abhängig von dem Netzwerktyp wird der Netzwerk-Administrator das Netzwerk für
dynamische oder statische IP-Adressen kongurieren:
TCP 80 (http), TCP 443 (https), TCP 21 (ftp), TCP 53 (DNS)
Sie benötigen detaillierte Informationen der Subnet-Mask und dem Standard-
Gateway. Wenn ein Proxy-Server genutzt wird, stellen Sie sicher das die
Verbindung den Proxy-Server umgeht.
Wenn erforderlich, überprüfen Sie mit dem Netzwerk-Administrator, ob die
Netzwerkeinstellungen wie beschrieben durchgeführt werden können. Alle
erforderlichen Änderungen am Netzwerk sollten vor der Installation der konstanten
Verbindung gemacht werden (siehe ‘Bevor Sie beginnen...’ auf der nachfolgenden
Seite).
Arbeitet meine Frankiermaschine ohne Netzwerk-Verbindung?
Ja, sie können eine analoge Telefonleitung für Downloads und Updates nutzen.
Schlagen sie in dem Kapitel “Probleme?’ dieser Anleitung nach.
Welche Frankiermaschine arbeitet mit einer konstanten
Verbindung?
Diese Anleitung deckt die Nutzung der konstanten Verbindung bei folgenden
Produkten ab:
DM220i Serie
DM475 und DM450+ Serie
DM300c und DM400c Serie
DM500 bis DM1000 Serie
IntelliLink™
Muß ich Einstellungen an meiner Frankiermaschine ändern?
Ja, in Abhängigkeit von ihrem Netzwerk müssen Einstellungen an dem
Frankiersystem geändert werden. Alle Anweisungen sind in den nachfolgenden
Kapiteln dieser Anleitung beschrieben.
SDC876B Konstante Verbindung (LAN Verbindung) Anleitung
WICHTIG: Die Produkte können Länderspezisch variieren. Eventuell sind nicht
alle Produkte in ihrem Land erhältlich.
<< Zurück zum Inhalt
Page 14

Vor Inbetriebnahme
DE
Um einen reibungslosen Installationsablauf zu gewährleisten, nehmen sie
sich bitte ein paar Minuten und überprüfen sie ob alle erforderlichen Schritte
für die Vorbereitung durchgeführt wurden:
Netzwerkkonguration
Eventuell benötigen Sie die Hilfe Ihres Netzwerk/IT-Administrator um die unten
genannten Informationen zu vervollständigen.
Diese Checkliste gewährleistet, das die Netzwerkeinstellungen durchgeführt wurden
und, wenn erforderlich, etwaige Einstellungen festgehalten wurden, damit das
Frankiersystem konguriert werden kann.
Wie ist die IP-Adresse Ihrem Frankiersystem zugewiesen?
Dynamisch
oder
Statisch (Häkchen setzen)
Für statische IP-Adressen benötigen Sie folgende Informationen:
IP-Adresse . . .
Ports zu dieser IP-Adresse sind offen für
TCP 80 (http)
TCP 443 (https)
TCP 21 (ftp)
TCP 53 (DNS lookup)
Physikalische Netzwerkverbindung
Der Anschluß zur Netzwerk-Verbindung bendet sich innerhalb von 5
Metern zur Frankiermaschine.
Subnetzmaske . . .
Standard-Gateway . . .
SDC876B Konstante Verbindung (LAN Verbindung) Anleitung
<< Zurück zum Inhalt
Page 15

Schritt 1 - Physikalischer Anschluß ihres Systems an die Netzwerkbuchse
DE
DM220i Serie DM300c und DM400c Serie Nur DM475/DM450+DM500 bis DM1000
Stecken sie den Stecker
am USB-Anschluß ihrer
Frankiermaschine ein
Das USB-Kabel wird
mit dem Netzwerk-
Adapter geliefert
Netzwerk-Adapter
Ethernet-Kabel[]
IntelliLink®
Verbinden sie mit
ihrem Router oder
der NetzwerkAnschlußbuchse
Stecken sie den
Stecker direkt
in den LAN-
Anschluß ihres
Systems
Verbinden sie mit
ihrem Router oder
der NetzwerkAnschlußbuchse
1. Schalten sie das System aus.
2. Stecken sie das Ethernet-Kabel in ihren Router oder
die Netzwerk-Anschlußbuchse.
3. Schliessen sie den Netzwerk-Adapter an das EthernetKabel an und stecken sie den Netzwerk-Adapter in
einen USB-Anschluß des Frankiersystems. Nutzen sie
das kurze USB-Kabel, welches dem Adapter beiliegt.
HINWEIS: Bei DM500-DM1000 nutzen sie vorrangig
den Anschluß an der Rückseite für IntelliLink® , wenn
dieser nicht genutzt ist.
SDC876B Konstante Verbindung (LAN Verbindung) Anleitung
4. Schalten sie das System wieder ein.
5. Wenn das System hochgefahren ist und den HomeScreen bzw. Frankiermodus anzeigt, sollten die LED’s
am Netzwerkadapter aueuchten oder ca. 15 Sek.
blinken. Dies zeigt eine Verbindung zum Netzwerk an.
1. Schalten sie das System aus.
2. Stecken sie das EthernetKabel in ihren Router oder die
Netzwerk-Anschlußbuchse.
3. Stecken sie das andere Ende
des Kabels in den LANAnschlußport an der Rückseite
des Systems.
4. Schalten sie das System wieder
ein.
<< Zurück zum Inhalt
Page 16

Installation - Schritt 2 Kongurieren der statischen IP-Adresse
Dieser Schritt ist erforderlich wenn Sie eine statische IP-Adresse für das Frankiersystem nutzen.
Wenn Sie eine dynamische IP-Adresse nutzen, fahren Sie direkt mit Schritt 3 auf der nächsten Seite fort.
DE
DM220i Serie DM300c und
1. Drücken Sie Optionen.
2. Drücken Sie Seite weiter.
3. Drücken Sie Seite weiter
nochmals.
4. Auswahl Verbinden -
Datenzentrum.
5. Auswahl LAN Einstellungen.
6. Auswahl IP-Adresse
7. Auswahl Manuell.
8. Auswahl IP-Adresse/IP Adr, dann, bei allen Modellen außer DM220i, drücken
Sie C um die aktuelle Eingabe zu löschen. Geben Sie die Statische IP-Adresse
ein, wie in ´Bevor Sie beginnen´ in dieser Anleitung beschrieben. Drücken Sie
Enter oder Akzeptieren um die Einstellungen zu bestätigen.
HINWEIS: Geben Sie die komplette IP-Adresse ein, einschließlich der
Dezimal-Punkte, die die IP-Adresse aufteilt. In der Anzeige springt der Cursor
automatisch zur nächsten Sektion der IP-Adresse um wenn eine oder mehrere
Sektionen weniger als 3 Ziffern beinhalten.
9. Auswahl Subnet-Mask/Subnet, dann, bei allen Modellen außer DM220i,
drücken Sie C um die aktuelle Eingabe zu löschen. Geben Sie Ihre SubnetMask- Einstellungen, wie in ‘Bevor Sie beginnen’ in dieser Anleitung
beschrieben, in gleicher Art und Weise wie die IP-Adresse ein. Drücken Sie
Enter oder Akzeptieren um die Einstellungen zu bestätigen.
DM400c Serie
1. Drücken Sie Optionen.
2. Drücken Sie Seite weiter.
3. Auswahl Datencenter Optionen.
4. Drücken Sie Seite weiter.
5. Auswahl
Netzwerkeinstellungen.
6. Auswahl IP einholen
7. Auswahl Adresse manuell
eingeben.
DM475/
DM450+
1. Drücken Sie Optionen.
2. Drücken Sie Seite weiter.
3. Auswahl Datencenter Optionen.
4. Drücken Sie Seite weiter.
5. Auswahl
Netzwerkeinstellungen.
6. Auswahl IP-Adresse
7. Auswahl Adresse manuell
eingeben.
10. Auswahl Standard Gateway/Gateway, dann, bei allen Modellen außer
DM220i, drücken Sie C um die aktuelle Eingabe zu löschen. Geben Sie Ihr
Standard Gateway, wie in ‘Bevor Sie beginnen’ in dieser Anleitung beschrieben,
in gleicher Art und Weise wie die IP-Adresse ein. Drücken Sie Enter oder
Akzeptieren um die Einstellungen zu bestätigen.
11. Wenn gefordert, die Enter -Taste nochmals zur Bestätigung der Einstellungen
drücken.
12. Drücken sie die Pfeil nach links Taste zum Beenden.
DM500 bis DM1000
IntelliLink®
1. Drücken sie die Taste Optionen.
2. Auswahl Einstellungen.
3. Auswahl Telefon/
Netzwerkeinstellung.
4. Drücken Sie Pfeil nach unten
und wählen sie
Netzwerkeinstellungen.
5. Auswahl Frankiersystem
Netzwerkeinstellungen.
6. Auswahl IP-Adresse holen.
7. Auswahl Geben Sie eine IP
Adresse an.
SDC876B Konstante Verbindung (LAN Verbindung) Anleitung
<< Zurück zum Inhalt
Page 17

Installation - Schritt 3 Kongurieren sie ihr System um eine Netzwerk-Verbindung zu
DE
DM220i Serie DM300c und
Für das System DM220i ist keine
Einstellung erforderlich.
DM400c Serie
1. Drücken Sie Optionen.
2. Drücken Sie Seite weiter.
3. Auswahl Datenzentrum
Optionen.
4. Drücken Sie Seite weiter.
5. Auswahl Verbindungs-Modus
auf Auto setzen.
6. Drücken Sie Beenden ,um zum
Startbildschirm zurückzukehren.
DM475/
DM450+
1. Drücken Sie Optionen.
2. Drücken Sie Seite weiter.
3. Auswahl Datenzentrum
Optionen.
4. Drücken Sie Seite weiter.
5. Auswahl Verbindungs-Modus
auf Auto setzen.
6. Drücken Sie Beenden um zum
Startbildschirm zurückzukehren.
DM500 bis DM1000
IntelliLink®
1. Drücken sie die Taste Optionen.
2. Auswahl Einstellungen.
3. Auswahl Telefon/
Netzwerkeinstellung.
4. Auswahl Modem Typ.
5. Auswahl LAN nutzen.
6. Auswahl OK, jetzt neu starten.
Das System startet neu.
SDC876B Konstante Verbindung (LAN Verbindung) Anleitung
<< Zurück zum Inhalt
Page 18

Installation - Schritt 4 Kontrollieren sie die Funktion der Netzwerk-Verbindung
DE
DM220i Serie DM300c und
1. Drücken Sie die Taste
Guthaben laden.
2. Auswahl Guthabenabfrage.
Das System baut eine
Verbindung zu den Pitney
Bowes Servern auf. Wenn
die Netzwerkverbindung
korrekt arbeitet, werden die
Zählerstände im Display
angezeigt.
3. Auswahl Fortfahren zum
Beenden.
DM400c Serie
1. Drücken Sie die Taste
Guthaben laden.
2. Auswahl Guthabenabfrage.
Das System baut eine
Verbindung zu den Pitney
Bowes Servern auf. Wenn
die Netzwerkverbindung
korrekt arbeitet, werden die
Zählerstände im Display
angezeigt.
3. Auswahl Fortfahren zum
Beenden.
DM475/
DM450+
1. Drücken Sie die Taste
Guthaben laden.
2. Auswahl Guthabenabfrage.
Das System baut eine
Verbindung zu den Pitney
Bowes Servern auf. Wenn
die Netzwerkverbindung
korrekt arbeitet, werden die
Zählerstände im Display
angezeigt.
3. Auswahl Fortfahren zum
Beenden.
DM500 bis DM1000
IntelliLink®
1. Taste Zählerstände drücken.
2. Auswahl Guthabenabfrage.
Das System baut eine
Verbindung zu den Pitney
Bowes Servern auf. Wenn
die Netzwerkverbindung
korrekt arbeitet, werden die
Zählerstände im Display
angezeigt.
3. Auswahl Fertig zum Beenden.
Konstante Verbindung nutzen
Wenn installiert und getestet wie beschrieben, bietet die konstante Verbindung eine
permanente und schnelle Verbindung für ihr Frankiersystem.
Alle Vorgehensweisen und Abläufe für Systemsoftware-Updates,
Guthabenabfragen, Guthabenladungen etc. sind in der Bedienungsanleitung des
Frankiersystems beschrieben.
SDC876B Konstante Verbindung (LAN Verbindung) Anleitung
<< Zurück zum Inhalt
Page 19
Probleme? - Kehren Sie zur Nutzung einer analogen Telefonleitung zurück
Wenn sie keine Netzwerkverbindung herstellen können, you can set the Mailing System to use an analogue phone line for Postage Rell, etc.
DE
DM220i Serie DM300c und
1. Verbinden Sie das Telefonkabel
einer analogen Telefonleitung
mit dem entsprechenden
Anschluß an der Rückseite des
Frankiersystems.
Telefon
Anschluss
Wand
Anschlußdose
2. Trennen sie das USB-Kabel/
USB-Adapter an der Rückseite
des Frankiersystems.
DM400c Serie
1. Verbinden Sie das Telefonkabel
einer analogen Telefonleitung
mit dem entsprechenden
Anschluß an der Rückseite des
Frankiersystems.
Telefon
Anschluss
2. Trennen sie das USB-Kabel/
USB-Adapter an der Rückseite
des Frankiersystems.
Wand
Anschlußbuchse
DM475/
DM450+
1. Verbinden Sie das Telefonkabel
einer analogen Telefonleitung
mit dem entsprechenden
Anschluß an der Rückseite des
Frankiersystems.
Wand
Anschlußdose
Telefon
Anschluss
2. Trennen sie das NetzwerkKabel an der Rückseite des
Frankiersystems.
DM500 bis DM1000
IntelliLink®
1. Verbinden sie das Telefonkabel
von einer analogen Telefonleitung
mit ihrem System. Nutzen sie
dazu das mitgelieferte USBModem.
Wand
Anschlußbuchse
USB
Modem
2. Drücken Sie Optionen.
3. Auswahl Einstellungen.
4. Auswahl Telefon/
Netzwerkeinstellung.
5. Auswahl Modem Typ.
6. Wählen Sie USB aus.
7. Auswahl OK, jetzt neu starten.
Das System startet neu.
Alle Vorgehensweisen und Abläufe für Systemsoftware-Updates, Guthabenabfragen, Guthabenladungen etc. sind in der Bedienungsanleitung des Frankiersystems
beschrieben. Wenn sie eine analoge Telefonleitung benutzen wird die Systemgeschwindigkeit reduziert.
SDC876B Konstante Verbindung (LAN Verbindung) Anleitung
<< Zurück zum Inhalt
Page 20
Referenz - Netzwerkadministrator benötigt eine MAC Adresse
Unter Umständen benötigt ihr Netzwerkadministrator die MAC Adresse der konstanten Verbindung/des Netzwerkadapters. Diese ist wie folgt ersichtlich:
DE
DM220i Serie DM300c und
1. Drücken Sie Optionen.
2. Drücken Sie zweimal die Taste
Seite weiter.
3. Auswahlect Verbinden mit
Datenzentrum.
4. Auswahl LAN Einstellungen.
5. Drücken Sie Seite weiter.
6. Die MAC Adresse des
Netzwerkadapters wird
angezeigt. Notieren Sie diese
für Ihren Netzwerkadministrator.
7. Drücken Sie Beenden, um zum
Startbildschirm zurückzukehren.
DM400c Serie
1. Drücken Sie Optionen.
2. Drücken Sie Seite weiter.
3. Auswahl Datencenter
Optionen.
4. Drücken Sie Seite weiter.
5. Auswahl
Netzwerkeinstellungen.
6. Die MAC Adresse des
Netzwerkadapters wird
angezeigt. Notieren Sie diese
für Ihren Netzwerkadministrator.
7. Drücken Sie Beenden, um zum
Startbildschirm zurückzukehren.
DM475/
DM450+
1. Drücken Sie Optionen.
2. Drücken Sie Seite weiter.
3. Auswahl Datencenter
Optionen.
4. Drücken Sie Seite weiter.
5. Auswahl
Netzwerkeinstellungen.
6. Die MAC Adresse des
Netzwerkadapters wird
angezeigt. Notieren Sie diese
für Ihren Netzwerkadministrator.
7. Drücken Sie Beenden, um zum
Startbildschirm zurückzukehren.
DM500 bis DM1000
IntelliLink®
1. Drücken Sie Optionen.
2. Auswahl Einstellungen.
3. Auswahl Telefon/
Netzwerkeinstellung.
4. Drücken Sie Pfeil nach
unten und wählen sie
Netzwerkeinstellungen.
5. Auswahl Frankiersystem
Netzwerkeinstellungen.
6. Die MAC Adresse des
Netzwerkadapters wird angezeigt.
Notieren Sie diese für Ihren
Netzwerkadministrator.
7. Drücken sie die Pfeil nach links
Taste zum Beenden.
SDC876B Konstante Verbindung (LAN Verbindung) Anleitung
<< Zurück zum Inhalt
Page 21
Referenz - Dateierweiterungen und URLs
DE
Referenz - Anschlüsse und Protokolle
für das Netzwerk/die Firewall
Die konstante Verbindung nutzt folgende Ports und Protokolle welche von ihrem
Netzwerk und den Firewall-Einstellungen zugelassen werden müssen:
Typ Erweiterung
DEC .dcz
EMD .zmd
Graken .gar
Gebührenmanager .rmz
CCD bin
Datei-Mitschnitt .GAU
Auf folgende ‘Top Level’ Domains muß der Zugriff durch ihr Netzwerk und die
Firewalleinstellungen gewährleistet sein:
Jede URL, die folgendes beinhaltet:
werden von der konstanten Verbindung genutzt
Die konstante Verbindung nutzt folgende Ports und Protokolle welche von ihrem
Netzwerk und den Firewall-Einstellungen akzeptiert werden müssen:
Typ Protokoll Anschluss Funktion
DNS UDP 53 Portophon und Web Services
HTTP TCP 80 Portophon und Web Services
HTTPS TCP 443 Portophon
FTP TCP 21 Software und Gebühren-Updates,
Graken hochladen.
Firewall muß auf Modus aktiv gesetzt
sein und temporäre Ports zulassen.
HINWEIS: Aktive ftp wird genutzt.
Firewalls müssen eingestellt sein auf
‘ftp erkennen’.
pb.com
pitneybowes.co.uk
pbcomet.com
pitneybowes.eu.com
HINWEIS: URLs mit Zugriff von Ihrem Pitney Bowes System können vorstehende
Strings irgendwo innerhalb der URL enthalten. Firewall-Einstellungen müssen daher
so konguriert sein, das jede URL , welche die vorstehenden Domainen enthält,
erlaubt ist. Ihre Firewall muß evtl. für die Nutzung von “wildcards”, z. Bsp. *pb.com*
konguriert sein.
SDC876B Konstante Verbindung (LAN Verbindung) Anleitung
<< Zurück zum Inhalt
Page 22

Innehåll
SV
Introduktion
Vad är fördelarna med Constant Connection?
Är det säkert?
Vad behöver jag berätta för min nätverks-/IT-adminstratör?
Behöver jag ändra inställningarna i min frankeringsmaskin?
Fungerar min frankeringsmaskin utan nätverksanslutning?
Vilka frankeringsmaskiner fungerar med Constant Connection?
Innan du börjar ...
Nätverkskonguration
Fysisk nätverksanslutning
Installation
Steg 1 - Anslut systemet fysiskt till nätverksuttaget
Funktion
Använd Constant Connection
Problem
Problem? - Använd en analog telefonlinje.
Referens
Nätverksadministratör behöver MAC-adress
Referens - Filextensioner och URLs som nätverk/brandvägg behöver
tillåta
Referens - Portar och protokoll behövs av Constant Connection
Steg 2 - Kongurera den statiska IP-adressen
Installation - Steg 3 Kongurera ditt system för nätverksanslutning
Installation - Steg 4 Kontrollera att nätverksanslutningen fungerar
SDC876B Guide för Constant Connection (LAN Connection)
Klicka på något av ämnena i innehållsförteckningen om du
vill hoppa direkt till det avsnittet.
<< Återgå till Innehåll
Page 23

Introduktion
SV
Vad är fördelarna med Constant Connection?
Med Constant Connection kan du ansluta din frankeringmaskin via en ethernetport
(LAN) i stället för via en dator eller en analog telefonlinje.
Du kommer att få mycket högre anslutningshastighet när frankeringsmaskinen
ansluts till Pitney Bowes för tjänster såsom Postage by Phone®,
systemuppdateringar, funktioner On Demand, elektroniska postinspektion och
informationsutbyte via Datacenter. Och eftersom din frankeringsmaskin kommer att
vara ansluten till nätverket, kommer du inte längre att behöva ha en påslagen dator i
närheten eller en särskild analog telefonlinje för frankeringsmaskinen.
Detta innebär att om du betalar abonnemang för en analog telefonlinje enbart för
frankeringssystemet, kommer du inte längre att behöva det.
Är det säkert?
Ja, systemet har godkänts av ICSA, ett företag som specialiserat sig på
skräddarsydda utvärderingar och certieringstesttjänster för IT-produkter.
Du kan ladda ned hela rapporten från www.pitneybowes.co.uk
Vad behöver jag berätta för min nätverks-/IT-adminstratör?
Beroende på din typ av nätverk, kommer nätverksadministratören att behöva
kongurera nätverk för att stödja dynamisk eller statisk IP-adressering och ge
tillgång till dessa portar för att det ska fungera:
TCP 80 (http), TCP 443 (https), TCP 21 (ftp), TCP 53 (DNS)
Du kommer att behöva uppgifter om subnätmask och standardgateway. Om en
proxyserver används, se till att denna anslutning går förbi proxyservern.
Om det behövs bör du kolla med din nätverksadministratör att
nätverksinställningarna kan kongureras enligt beskrivningen. Alla
nätverksförändringar bör göras innan du installerar Constant Connection (se "Innan
du börjar ..." på nästa sida).
Fungerar min frankeringsmaskin utan nätverksanslutning?
Ja, du kan fortfarande använda en analog telefonlinje för att utföra nedladdningar
och uppdateringar. Se avsnittet "Problem?" I den här guiden för mer information.
Vilka frankeringsmaskiner fungerar med Constant Connection?
Denna guide beskriver användning av Constant Connection med följande produkter:
DM220i-serien
DM475 och DM450+ serierna
DM300c och DM400c-serierna
DM500 till DM1000-serierna
IntelliLink™ Control Centre
Behöver jag ändra inställningarna i min frankeringsmaskin?
Ja, beroende på din nätverkstyp kommer du att behöva ändra inställningar i din
frankeringsmaskin. Fullständiga instruktioner nns senare i denna guide.
SDC876B Guide för Constant Connection (LAN Connection)
Viktigt: Tillgången till produkter varierar från land till land. Att en produkt nns
med i denna guide är ingen garanti för att den nns att få i ditt land.
<< Återgå till Innehåll
Page 24

Innan du börjar ...
SV
För att göra din installation så smidigt som möjligt, bör du ta några minuter
för att bekräfta att alla nödvändiga åtgärder har vidtagits för att förbereda:
Nätverkskonguration
Du kan behöva hjälp av din nätverks-/IT-administratör för att slutföra informationen
nedan.
Denna checklista säkerställer att dina nätverksinställningar har gjorts och, vid
behov, har du en notering om inställningarna så att frankeringsmaskinen kan
kongureras.
Hur är IP-adressen allokerad i frankeringsmaskinen?
Dynamiskt
eller
Statiskt (Sätt en bock i lämplig ruta)
För statisk IP-address, behöver du följande information:
IP-adress . . .
Portar till denna IP-adress är öppna för
TCP 80 (http)
TCP 443 (https)
TCP 21 (ftp)
TCP 53 (DNS lookup)
Fysisk nätverksanslutning
Nätverksanslutningspunkten är inom 5 meter från frankeringsmaskinen.
Subnätmask . . .
Standardgateway . . .
SDC876B Guide för Constant Connection (LAN Connection)
<< Återgå till Innehåll
Page 25
Steg 1 - Anslut systemet fysiskt till nätverksuttaget
SV
DM220i-serien DM300c och DM400c-serierna DM475/DM450+ endastDM500 till DM1000
IntelliLink® Control Centre
Sätt in i USB-porten i
frankeringsmaskinen
Ethernetkabel
USB-kabel med
nätverksadapter
Nätverksadapter
Anslut till din
router eller
nätverksvägguttag
Sätt in direkt i
systemets LAN-
port
Anslut till din
router eller
nätverksvägguttag
1. Stäng av strömmen till systemet.
2. Sätt i ethernetkabeln i din router eller
nätverksvägguttag.
3. Fäst nätverksadaptern i ethernetkabeln och sätt
sedan i nätverksadaptern i en av USB-portarna i
frankeringsmaskinen med den korta USB-kabeln som
medföljer adaptern.
OBS! På DM500-DM1000, bör man helst använda
porten på baksidan av mätaren om den inte redan är
upptagen.
SDC876B Guide för Constant Connection (LAN Connection)
4. Slå på strömmen till systemet igen.
5. När systemet startar och visar Brevbehandling/
Hemskärm, bör LED-lamporna på nätverksadaptern
lysa eller blinka inom 15 sekunder. Detta visar att det
nns en anslutning till nätverket.
1. Stäng av strömmen till systemet.
2. Sätt i ethernetkabeln i din router
eller nätverksvägguttag.
3. Sätt i andra ändan av kabeln
i LAN-porten på baksidan av
maskinen.
4. Slå på strömmen på systemet
igen.
<< Återgå till Innehåll
Page 26

Installation - Steg 2 Kongurera den statiska IP-adressen
Detta steg krävs endast om du använder en statisk IP-adress till frankeringsmaskinen. Om du
använder en dynamisk IP-adressallokering, kan du gå direkt till steg 3 på nästa sida.
SV
DM220i-serien DM300c och
1. Tryck på Alternativ.
2. Tryck Nedåt.
3. Tryck Nedåt igen.
4. Välj Anslut - Datacenter.
5. Välj LAN-inställningar.
6. Välj Skaffa IP.
7. Välj Manuelll.
8. Välj IP-adress/IP-adr., och tryck sedan, på alla modeller utom DM220i-serien,
på C för att nollställa bentlig inmatning. Skriv in din statiska IP-adress enligt
"Innan du börjar" i denna guide. Tryck på Enter eller Acceptera för att bekräfta
den nya inställningen.
OBS! Skriv in den fullständiga IP-adressen, inklusive decimalpunkter som delar
upp IP-adressens delar. Genom att göra detta kommer displayen automatiskt att
hoppa till nästa avsnitt av IP-adressen om en eller era avsnitt innehåller färre
än 3 siffror.
9. Välj Subnätmask/Subnet, och sedan, på alla modeller utom DM220iserien, tryck C för att nollställa den bentliga inmatningen. Skriv in
subnätsmaskinställningarna, enligt "Innan du börjar" i denna guide, på samma
sätt som IP-adressen. Tryck på Enter eller Acceptera för bekräftelse.
DM400c-serierna
1. Tryck på Alternativ.
2. Tryck Nedåt.
3. Välj Datacenteralternativ.
4. Tryck Nedåt.
5. Väljt Nätverksinställningar.
6. Välj Skaffa IP.
7. Välj Specicera adress
manuellt.
DM475/
DM450+
1. Tryck på Alternativ.
2. Tryck Nedåt.
3. Välj Datacenteralternativ.
4. Tryck Nedåt.
5. Väljt Nätverksinställningar.
6. Välj Skaffa IP.
7. Välj Specicera adress
manuellt.
10. Välj Subnätmask/Subnet, och sedan, på alla modeller utom DM220iserien, tryck C för att nollställa den bentliga inmatningen. Skriv in
subnätsmaskinställningarna, enligt "Innan du börjar" i denna guide, på samma
sätt som IP-adressen. Tryck på Enter eller Acceptera för bekräftelse.
11. Tryck Enter för att bekräfta inställningarna, om det behövs.
12. Tryck på Vänsterpils- tangenten för att gå ur inställningsmenyn.
DM500 till DM1000
IntelliLink® Control
Centre
1. Tryck på Alternativ-tangenten.
2. Välj Inställning.
3. Välj Inställning av telefon/
Nätverk.
4. Tryck på Nedåtpil och välj
Nätverksinställningar.
5. Välj Frankeringssystemets
nätverksinställningar.
6. Välj Skaffa IP-adress.
7. Välj Specicera en IP-adress.
SDC876B Guide för Constant Connection (LAN Connection)
<< Återgå till Innehåll
Page 27

Installation - Steg 3 Kongurera ditt system för nätverksanslutning
SV
DM220i-serien DM300c och
Det behövs ingen åtgärd för att
kongurera DM220i-serien.
DM400c-serierna
1. Tryck på Alternativ.
2. Tryck Nedåt.
3. Välj Datacenteralternativ.
4. Tryck Nedåt.
5. Välj Connection Mode och
inställningen Auto.
6. Tryck på Hem för att återgå till
Hemdisplayen.
DM475/
DM450+
1. Tryck på Alternativ.
2. Tryck Nedåt.
3. Välj Datacenteralternativ.
4. Tryck Nedåt.
5. Välj Connection Mode och
inställningen Auto.
6. Tryck på Hem för att återgå till
Hemdisplayen.
DM500 till DM1000
IntelliLink® Control
Centre
1. Tryck på Alternativ-tangenten.
2. Välj Inställning.
3. Välj Inställning av telefon/
Nätverk.
4. Välj modemtyp.
5. Välj Använd LAN.
6. Välj OK, Starta om nu.
Frankeringssystemet kommer
att starta om.
SDC876B Guide för Constant Connection (LAN Connection)
<< Återgå till Innehåll
Page 28

Installation - Steg 4 Kontrollera att nätverksanslutningen fungerar
SV
DM220i-serien DM300c och
1. Tryck på Ladda porto-
tangenten.
2. Välj Kontrollera PbP-saldo.
Systemet ansluts till Pitney
Bowes för att ansluta till ditt
Postage by Phone-konto. Om
nätverksanslutningen fungerar
korrekt, visas saldot på Postage
by Phone-kontot.
3. Välj Fortsätt för att gå ur.
DM400c-serierna
1. Tryck på Ladda porto-
tangenten.
2. Välj Kontrollera PbP-saldo.
Systemet ansluts till Pitney
Bowes för att ansluta till ditt
Postage by Phone-konto. Om
nätverksanslutningen fungerar
korrekt, visas saldot på Postage
by Phone-kontot.
3. Välj Fortsätt för att gå ur.
DM475/
DM450+
1. Tryck på Ladda porto-
tangenten.
2. Välj Kontrollera PbP-saldo.
Systemet ansluts till Pitney
Bowes för att ansluta till ditt
Postage by Phone-konto. Om
nätverksanslutningen fungerar
korrekt, visas saldot på Postage
by Phone-kontot.
3. Välj Fortsätt för att gå ur.
DM500 till DM1000
IntelliLink® Control
Centre
1. Tryck på Porto- tangenten.
2. Välj Kontrollera PbP-saldo.
Systemet ansluts till Pitney
Bowes för att ansluta till ditt
Postage by Phone-konto. Om
nätverksanslutningen fungerar
korrekt, visas saldot på Postage
by Phone-kontot.
3. Välj Klar för att gå ur.
Använd Constant Connection
När, Constant Connection installerats och testats enligt ovanstående beskrivning,
har man en permanent och snabb anslutning för frankeringssystemet.
Alla procedurer för uppdatering av systemets mjukvara, kontroll av Postage by
Phone-saldot och laddning av porto, fungerar exakt enligt handboken för systemet.
SDC876B Guide för Constant Connection (LAN Connection)
<< Återgå till Innehåll
Page 29
Problem? - Använd en analog telefonlinje
Om ditt nätverk, av någon anledning, inte går att komma in på, kan du använda en analog telefonlinje för laddning av porto, osv. till frankeringsmaskinen
SV
DM220i-serien DM300c och
1. Anslut en telefonsladd från ett
analogt telefonvägguttag till
telefonuttaget på baksidan av
frankeringsmaskinen.
telefon
port
vägg
uttag
2. Dra ut USB-kabeln/USBadaptern på baksidan av
maskinen.
DM400c-serierna
1. Anslut en telefonsladd från ett
analogt telefonvägguttag till
telefonuttaget på baksidan av
frankeringsmaskinen.
telefon
port
2. Dra ut USB-kabeln/USBadaptern på baksidan av
frankeringsmaskinen.
vägg
uttag
DM475/
DM450+
1. Anslut en telefonsladd från ett
analogt telefonvägguttag till
telefonuttaget på baksidan av
frankeringsmaskinen.
vägg
uttag
telefon
port
2. Dra ut nätverkskabeln på
baksidan av maskinen.
DM500 till DM1000
IntelliLink® Control
Centre
1. Anslut en telefonsladd från ett
analogt telefonvägguttag till
maskinen med USB-modemet
som medföljer systemet.
vägg
uttag
USB
Modem
2. Tryck på Alternativ.
3. Välj Inställning.
4. Välj Inställning av telefon/
Nätverk.
5. Välj modemtyp.
6. Välj USB.
7. Välj OK, Starta om nu.
Frankeringssystemet kommer att
starta om.
Alla procedurer för uppdatering av systemets mjukvara, kontroll av Postage by Phone-saldot och laddning av porto, fungerar exakt enligt handboken för systemet.
Du kommer att notera att dessa funktioner går långsammare när man använder en analog linje.
SDC876B Guide för Constant Connection (LAN Connection)
<< Återgå till Innehåll
Page 30

Referens - Nätverksadministratörer behöver MAC-adress
I sällsynta fall kan din nätverksaministratör behöva MAC-adressen till Constant Connections nätverksadapter. Den kan erhållas på följande sätt:
SV
DM220i-serien DM300c och
1. Tryck på Alternativ.
2. Tryck Nedåt två gånger.
3. Välj Anslut - Datacenter.
4. Välj LAN-inställningar.
5. Tryck Nedåt.
6. Nätverksadapterns MAC-adress
visas. Notera denna för din
nätverksadministratör.
7. Tryck på Hem för att återgå till
Hemdisplayen.
DM400c-serierna
1. Tryck på Alternativ.
2. Tryck Nedåt.
3. Välj Datacenteralternativ.
4. Tryck Nedåt.
5. Välj Nätverksinställningar.
6. Nätverksadapterns MAC-adress
visas. Notera denna för din
nätverksadministratör.
7. Tryck på Hem för att återgå till
Hemdisplayen.
DM475/
DM450+
1. Tryck på Alternativ.
2. Tryck Nedåt.
3. Välj Datacenteralternativ.
4. Tryck Nedåt.
5. Välj Nätverksinställningar.
6. Nätverksadapterns MAC-adress
visas. Notera denna för din
nätverksadministratör.
7. Tryck på Hem för att återgå till
Hemdisplayen.
DM500 till DM1000
IntelliLink® Control
Centre
1. Tryck på Alternativ.
2. Välj Inställning.
3. Välj Inställning av telefon/
Nätverk.
4. Tryck på Nedåtpil och välj
Nätverksinställningar.
5. Välj Frankeringssystemets
nätverksinställningar.
6. Välj MAC-adress.
Nätverksadapterns MAC-adress
visas. Notera detta för din
nätverksadministratör.
7. Tryck på Vänsterpils-
tangenten för att gå ur
inställningsmenyn.
SDC876B Guide för Constant Connection (LAN Connection)
<< Återgå till Innehåll
Page 31
Referens - Filextensioner och URLs som
SV
Referens - Portar och protokoll
nätverk/brandvägg behöver tillåta
Constant Connection använder följande lextensioner som måste tillåtas i ditt
nätverk och din brandvägg:
Typ Extension
Decimal .dcz
EMD .zmd
Grak .gar
Rate Manager .rmz
CCD FACK
Snippetl .GAU
Följande "toppnivådomäner" måste också vara åtkomliga i ditt nätverk och din
brandvägg:
Alla URL som innehåller följande:
behövs av Constant Connection
Constant Connection använder följande lextensioner som måste tillåtas i ditt
nätverk och din brandvägg:
Typ Protokoll port Funktion
DNS UDP 53 Postage by Phone och webbtjänster
HTTP TCP 80 Postage by Phone och webbtjänster
HTTPS TCP 443 Postage by Phone
FTP TCP 21 Uppdateringar av mjukvara och
porton, grakuppladdningar.
Brandväggen måste ställas in på
Aktivt läge och på att tillåta yktiga
portar.
OBS! Aktiv ftp används. Brandväggar
måste ställas in så de blir "ftpmedvetna".
pb.com
pitneybowes.co.uk
pbcomet.com
pitneybowes.eu.com
OBS! URLs med åtkomst via Pitney Bowes system kan innehålla ovanstående
strängar var som helst i en URL. Brandväggar måste därför vara inställda så att de
tillåter trak till alla URLs som innehåller ovanstående domäner. Din brandvägg kan
behöva kongureras med "Wildcards", t.ex. *pb.com*
SDC876B Guide för Constant Connection (LAN Connection)
<< Återgå till Innehåll
Page 32
Innhold
NO
Innledning
Hva er fordelen med fast tilkobling?
Er det trygt?
Hva trenger du å fortelle nettverksansvarlig/IT avdelingen?
Trenger man å endre oppsettet på frankeringsmaskinen?
Vil frankeringsmaskinen virke uten en nettverksforbindelse?
Hvilke frankeringsmaskiner virker med fast tilkobling?
Før du begynner
Nettverkskongurasjon
Fysisk nettverkstilkobling
Installasjon
Steg 1 - Fysisk koble frankeringsmaskinen til en nettverkskontakt
Drift
Bruk fast tilkobling
Problemer
Gå tilbake til å bruke en analog telefonlinje
Referanse
Nettverksadministrator trenger MAC adressen
Filtyper og URLer nettverket/brannmuren må tillate
Porter og protokoller som kreves for fast tilkobling
Steg 2 - Kongurer den statiske IP addressen
Steg 3 - Kongurer frankeringsmaskinen til å bruke nettverkstilkobling
Steg 4 - Sjekk at nettverkstilkoblingen virker
SDC876B Fast tilkobling (LAN tilkobling) Guide
Klikk på et av fagene i innholdslisten for å hoppe rett til
denne seksjonen.
<< Tilbake til innhold
Page 33

Innledning
NO
Hva er fordelen med fast tilkobling?
Fast tilkobling tillater å koble opp frankeringsmaskinen via Ethernet (LAN) port
istedenfor PC meterkommunikasjon eller en analog telefonlinje.
Du vil få mye raskere tilkoblingshastighet når frankeringsmaskinen kobles til Pitney
Bowes for tjenester som; Postage by phone®, System oppdatering, elektronisk
inspeksjon, og Datasenter informasjon. I tillegg, fordi frankeringsmaskinen kobles
til ditt nettverk, vil du ikke lenger trenge å ha en PC i nærheten eller en dedikert
analog telefonlinje for frankeringsmaskinen.
Dette betyr at hvis du betaler linjeleie for en enkelt analog telefonlinje utelukkende
for frankeringsmaskinen, kan denne avvikles.
Er det trygt?
Ja, frankeringsmaskinen har blitt godkjent av ICSA, et selskap som spesialiserer
seg på evalueringer, sertisering og testing av IT-produkter.
Du kan laste ned full rapport fra www.pitneybowes.co.uk
Hva trenger du å fortelle nettverksansvarlige/IT avdelingen?
Avhengig av nettverket, vil nettverksadministrator kongurere nettverket til å støtte
dynamisk eller statisk IP-adresse og gi tilgang til følgende porter for at det skal
fungere:
TCP 80 (http), TCP 443 (https), TCP 21 (ftp), TCP 53 (DNS)
Du trenger detaljer om subnet mask og standard gateway. Hvis en proxy-server
brukes, må det sørges for at denne forbindelsen omgår proxy-serveren..
Om nødvendig, sjekk med nettverksansvarlig at nettverksinnstillinger kan
kongureres som beskrevet. Eventuelle nødvendige endringer av nettverket må
gjøres før du installerer fast tilkobling (see ‘Før du begynner...’ på neste side).
Vil frankeringsmaskinen virke uten en nettverksforbindelse?
Ja, du kan fremdeles bruke en analog telefonlinje for å utføre nedlastinger og
oppdateringer. Se "Problemer?"- Delen av denne veiledningen for mer informasjon.
Hvilke frankeringsmaskiner virker med fast tilkobling?
Denne guiden dekker bruk av fast tilkobling på følgende produkter:
DM220i serien
DM475 og DM450+ serien
DM300c og DM400c serien
DM500 til DM1000 serien
IntelliLink™ Kontrollsenter
Trenger man å endre oppsettet på frankeringsmaskinen?
Ja, avhengig av nettverkstypen må innstillingene endres på frankeringsmaskinen.
Full instruksjon gis senere i denne guiden.
SDC876B Fast tilkobling (LAN tilkobling) Guide
VIKTIG: Tilgjengelighet av produkter varierer fra land til land. Inkludering av et
produkt i denne guiden garanterer ikke tilgjengelighet innenfor ditt land.
<< Tilbake til innhold
Page 34

Før du begynner
NO
For å gjøre installasjonen så enkel som mulig, ber vi om at dere bruker noen
minutter på å bekrefte at alle nødvendige skritt er tatt for å forberede:
Nettverkskongurasjon
Du kan trenge hjelp fra nettverksadministrator/IT-avdelingen for å fullføre
informasjonen nedenfor.
Denne sjekklisten sikrer at nettverksinnstillingen har blitt gjort og, om nødvendig,
har du et notat av innstillingene for kongurering av frankeringsmaskinen.
Hvordan er IP-adressen blitt allokert til frankeringsmaskinen?
Dynamisk
eller
Statisk (Kryss av det som passer)
For statisk IP adresse, trenger du følgende informasjon:
IP-adresse . . .
Porter som må være åpnet for denne IP Adressen
TCP 80 (http)
TCP 443 (https)
TCP 21 (ftp)
TCP 53 (DNS lookup)
Fysisk nettverkstilkobling
Påse at nettverkspunketet er innenfor 5 meter fra frankeringsmaskinens
plassering.
Nettverksmaske . . .
Standard gateway . . .
SDC876B Fast tilkobling (LAN tilkobling) Guide
<< Tilbake til innhold
Page 35

Installasjons Steg 1 - Fysisk koble frankeringsmaskinen til en nettverkskontakt
NO
DM220i serien DM300c og DM400c serien DM475/DM450+ onlyDM500 til DM1000
IntelliLink® Kontrollsenter
Plugg inn i USB-port på
frankeringsmaskinen
Ethernet-kabel[]
USB-kabelen
som følger med
nettverksadapteret
Nettverksadapter
Kobles til
ruteren eller
nettverksuttak
Plugg kabelen
direkte inn i LAN
utgangen på
nettverksadapteret
Kobles til
ruteren eller
nettverksuttak
1. Skru av frankeringsmaskinen.
2. Plugg Ethernet kabelen inn i ruteren eller nettverkets
vegg kontakt.
3. Fest nettverksadapteret til Ethernet-kabelen og koble
deretter nettverksadapteret til en av USB-portene på
frankeringsmaskinen med den korte USB-kabelen som
følger med adapteret.
MERK: På DM500-DM1000, fortrinnsvis bruk porten
på baksiden av IntelliLink® meteret dersom dette ikke
allerede er i bruk .
SDC876B Fast tilkobling (LAN tilkobling) Guide
4. Skru på frankeringsmaskinen.
5. Når frankeringsmaskinen kommer opp og viser
stratkjermen, bør LED lysene på nettverksadapteret
lyse opp eller imre i løpet av 15 sekunder. Dette
indikerer at det er en forbindelse til nettverket.
1. Skru av frankeringsmaskinen.
2. Plugg Ethernet kabelen inn i
ruteren eller nettverkets vegg
kontakt.
3. Plugg den andre enden
av kabelen inn i LANporten på baksiden av
frankeringsmaskinen.
4. Skru på frankeringsmaskinen.
<< Tilbake til innhold
Page 36

Installasjon - Steg 2 Kongurer den statiske IP addressen
Dette steget er kun nødvendig hvis det brukes en statisk IP-adresse for frankeringsmaskinen.
Hvis det brukes en dynamisk tildelt IP-adresse, kan det gåes rett til steg 3 på neste side.
NO
DM220i serien DM300c og DM400c
1. Trykk Meny.
2. Trykk Side ned.
3. Trykk Side ned igjen.
4. Velg Koble til -Datasenter.
5. Velg LAN oppsett.
6. Velg Få IP.
7. Velg Manuelt.
8. Velg IP Address/IP Adr, Trykk C for å fjerne eksisterende oppføring. Tast inn
den statiske IP-adressen som vist i "Før du begynner" i denne veiledningen.
Trykk Enter eller godta for å bekrefte den nye innstillingen.
MERK: Tast inn komplett IP-adresse, inkludert desimaler som skiller IP-adresse
delene. Ved å gjøre dette, vil displayet automatisk hoppe til neste del av IPadressen hvis en eller ere punkter inneholder færre enn 3 siffer.
9. Velg Subnet Mask/Subnet, Trykk Cfor å fjerne eksisterende oppføring. Tast inn
Subnet masken som vist i "Før du begynner" i denne veiledningen. Trykk Enter
eller godta for å bekrefte den nye innstillingen.
serien
1. Trykk Meny.
2. Trykk Side ned.
3. Velg Datasenter alternativer.
4. Trykk Side ned.
5. Velg Nettverksinnstillinger.
6. Velg Få IP.
7. Velg Angi adresse manuelt.
DM475/
DM450+
1. Trykk Meny.
2. Trykk Side ned.
3. Velg Datasenter alternativer.
4. Trykk Side ned.
5. Velg Nettverksinnstillinger.
6. Velg Få IP.
7. Velg Angi adresse manuelt.
10. Velg Subnet Mask/Subnet, Trykk C for å fjerne eksisterende oppføring. Tast
inn Subnet masken som vist i "Før du begynner" i denne veiledningen. Trykk
Enter eller godta for å bekrefte den nye innstillingen.
11. Dersom det er ønskelig,trykk enterigjen for å bekrefte innstillingene.
12. Trykk Venstre pil eller Hjem tasten for å gå ut av oppsettsmenyen.
DM500 til DM1000
IntelliLink®
Kontrollsenter
1. Trykk Valg tasten.
2. Velg Oppsett.
3. Velg telefon/
Nettverksinnstillinger.
4. Trykk Pil ned og Velg
Nettverksinnstillinger.
5. Velg Frankeringsmaskinens
Nettverksinnstillinger.
6. Velg Få IP Adresse.
7. Velg Angi en IP Adresse.
SDC876B Fast tilkobling (LAN tilkobling) Guide
<< Tilbake til innhold
Page 37

Installasjon - Steg 3 Konguer frankeringsmaskinen til å bruke nettverkstilkobling
NO
DM220i serien DM300c og DM400c
Ingen handling er nødvendig for å
kongurere DM220i.
serien
1. Trykk Meny.
2. Trykk Side ned.
3. Velg Datasenter alternativer.
4. Trykk Side ned.
5. Velg Tilkoblingsmodus og sett
til auto.
6. Trykk Hjem for å gå tilbake til
Hjem-skjermen.
DM475/
DM450+
1. Trykk Meny.
2. Trykk Side ned.
3. Velg Datasenter alternativer.
4. Trykk Side ned.
5. Velg Tilkoblingsmodus og sett
til auto.
6. Trykk Hjem for å gå tilbake til
Hjem-skjermen.
DM500 til DM1000
IntelliLink®
kontrollsenter
1. Trykk Alternativ tasten.
2. Velg Oppsett.
3. Velg telefon/
nettverksinnstillinger.
4. Velg modem type.
5. Velg Bruk LAN.
6. Velg OK, omstart nå.
Frankeringsmaskinen vil foreta
en omstart.
SDC876B Fast tilkobling (LAN tilkobling) Guide
<< Tilbake til innhold
Page 38

Installasjon - Steg 4 Kontroller at nettverkstilkoblingen fungerer
NO
DM220i serien DM300c og DM400c
1. Trykk Legg til porto tasten.
2. Velg Sjekk saldobalanse.
Frankeringsmaskinen kobles
til Pitney Bowes server
for å få tilgang til Postage
by phone kontoen. Hvis
nettverkstilkoblingen fungerer
vises balansen på Postage by
phone kontoen.
3. Velg Fortsett for å avslutte.
serien
1. Trykk Lade porto tasten.
2. Velg Sjekk saldobalanse.
Frankeringsmaskinen kobles
til Pitney Bowes server
for å få tilgang til Postage
by phone kontoen. Hvis
nettverkstilkoblingen fungerer
vises balansen på Postage by
phone kontoen.
3. Velg Fortsett for å avslutte.
DM475/
DM450+
1. Trykk Lade porto tasten.
2. Velg Sjekk saldobalanse.
Frankeringsmaskinen kobles
til Pitney Bowes server
for å få tilgang til Postage
by phone kontoen. Hvis
nettverkstilkoblingen fungerer
vises balansen på Postage by
phone kontoen.
3. Velg Fortsett for å avslutte.
DM500 til DM1000
IntelliLink®
Kontrollsenter
1. Trykk Porto tasten.
2. Velg Sjekk saldobalanse.
Frankeringsmaskinen kobles
til Pitney Bowes server
for å få tilgang til Postage
by phone kontoen. Hvis
nettverkstilkoblingen fungerer
vises balansen på Postage by
phone kontoen.
3. Velg Ferdig for å avslutte.
Bruk fast tilkobling
Når maskinen er installert og testet som beskrevet ovenfor, gir fast tilkobling en
permanent og rask oppkobling for frankeringsmaskinen.
Alle prosedyrer for å oppdatere programvaren på frankeringsmaskinen,
sjekke saldobalanse og etterfylling av porto osv. er akkurat som beskrevet i
Brukerhåndboken for frankeringsmaskinen.
SDC876B Fast tilkobling (LAN tilkobling) Guide
<< Tilbake til innhold
Page 39

Problemer? - Gå tilbake ved hjelp av en analog telefonlinje
Dersom, uansett årsak, nettverket ikke er tilgjengelig, kan du sett frankeringsmaskinen til å bruke en analog telefonlinje for portolading etc.
NO
DM220i serien DM300c og DM400c
1. Koble en telefonkabel fra
et analogt telefonuttak til
telefonutgangen på baksiden av
frankeringsmaskinen.
telefon
port
vegg
kontakt
2. Koble fra USB kabel/USB
adapter på baksiden av
frankeringsmaskinen.
serien
1. Koble en telefonkabel fra
et analogt telefonuttak til
telefonutgangen på baksiden av
frankeringsmaskinen.
telefon
port
2. Koble fra USB kabel/USB
adapter på baksiden av
frankeringsmaskinen.
vegg
kontakt
DM475/
DM450+
1. Koble en telefonkabel fra
et analogt telefonuttak til
telefonutgangen på baksiden av
frankeringsmaskinen.
vegg
kontakt
telefon
port
2. Koble fra nettverkskabelen
på baksiden av
frankeringsmaskinen.
DM500 til DM1000
IntelliLink®
Kontrollsenter
1. Koble en telefonkabel fra et
analogt telefonuttak til din
frankeringsmaskin ved hjelp
av USB modemet levert med
maskinen.
vegg
kontakt
USB-
Modem
2. Trykk Meny.
3. Velg oppsett.
4. Velg telefon/
Nettverksinnstillinger.
5. Velg Modem type.
6. Velg USB.
7. Velg OK, omstart nå.
Frankeringsmaskinen vil foreta
en omstart.
Alle prosedyrer for å oppdatere programvaren på frankeringsmaskinen, sjekke saldobalanse og etterfylling av porto osv. er akkurat som beskrevet i Brukerhåndboken for
frankeringsmaskinen. Det vil merkes en reduksjon i hastigheten av disse oppgaven, når det brukes en analog telefonlinje.
SDC876B Fast tilkobling (LAN tilkobling) Guide
<< Tilbake til innhold
Page 40

Referanse - Nettverksadministrator trenger MAC adressen
I noen tilfeller kan nettverksadministratoren kreve MAC adresse til nettverkskortet for den faste tilkoblingen. Dette kan oppnås på følgende måte:
NO
DM220i serien DM300c og DM400c
1. Trykk Meny.
2. Trykk Side ned to ganger.
3. Velg Koble datasenter.
4. Velg LAN oppsett.
5. Trykk Side ned.
6. Nettverkskortets MACadresse vises. Gi denne til
nettverksadministratoren.
7. Trykk Hjem for å gå tilbake til
Hjem-skjermen.
serien
1. Trykk Meny.
2. Trykk Side ned.
3. Velg Datasenter alternativer.
4. Trykk Side ned.
5. Velg Nettverksinnstillinger.
6. Nettverkskortets MACadresse vises. Gi denne til
nettverksadministratoren.
7. Trykk Hjem for å gå tilbake til
Hjem-skjermen.
DM475/
DM450+
1. Trykk Meny.
2. Trykk Side ned.
3. Velg Datasenter alternativer.
4. Trykk Side ned.
5. Velg Nettverksinnstillinger.
6. Nettverkskortets MACadresse vises. Gi denne til
nettverksadministratoren.
7. Trykk Hjem for å gå tilbake til
Hjem-skjermen.
DM500 til DM1000
IntelliLink®
Kontrollsenter
1. Trykk Meny.
2. Velg Oppsett.
3. Velg telefon/
Nettverksinnstillinger.
4. Trykk Pil ned og Velg
Nettverksinnstillinger.
5. Velg Nettverksinnstillinger
for frankeringsmaskin.
6. Velg MAC Adresse.
Nettverkskortets MACadresse vises. Gi denne til
nettverksadministratoren.
7. Trykk Venstre pil tast for
avslutting av oppsettsmenyen.
SDC876B Fast tilkobling (LAN tilkobling) Guide
<< Tilbake til innhold
Page 41

Referanse - Filtyper og nettadresser
NO
Referanse - Porter og protokoller
nettverket/brannmuren må tillate.
Fast tilkobling bruker følgende ltyper som det må åpnes for i nettverket og
brannmuren:
Type Utvidelse
Des .dcz
EMD .zmd
Grakk .gar
Portotaks administrering .rmz
CCD BIN
Snippet l .GAU
Følgende "øverste nivå" domener må også være tilgjengelig via nettverket og
brannmuren:
Enhver URL som inneholder følgende:
som kreves av fast tilkobling
Fast tilkobling bruker følgende porter og protokoller som det må åpnes for i
nettverket og brannmuren:
Type Protokoll port Funksjon
DNS UDP 53 Postage by phone og Web service
HTTP TCP 80 Postage by phone og Web service
HTTPS TCP 443 Postage by phone
FTP TCP 21 Programvare, portotakst oppdatering
og grakk opplasting.
Brannmuren må være satt til aktiv
modus og tillate yktige porter.
Merk: Aktive ftp brukes. Brannmuren
må være satt til ‘ftp klar’.
pb.com
pitneybowes.co.uk
pbcomet.com
pitneybowes.eu.com
MERK: URL tilgang via din Pitney Bowes frankeringsmaskin kan inneholde de
ovennevte strengene hvor som helst i webadressen. Brannmuren må derfor settes
til å tillate trakk til enhver nettadresse som inneholder de ovennevnte domener. Din
brannmur må kongureres ved hjelp av "wildcards" for eksempel *pb.com*
SDC876B Fast tilkobling (LAN tilkobling) Guide
<< Tilbake til innhold
Page 42

Indhold
DA
Introduktion
Hvilke fordele er der ved netværks tilslutning?
Er det sikkert?
Hvad skal jeg fortælle min netværks/IT afdeling?
Skal jeg ændre i opsætningen af min frankeringsmaskine?
Vil min frankeringsmaskine virke uden netværks tilslutning?
Hvilken frankeringsmaskine virker med netværks tilslutning?
Før du begynder...
Netværks konguration
Fysisk netværksforbindelse
Installation
Step 1 - Fysisk tilslut din frankeringsmaskine til netværkstikket i vægen
I gang
Brug af netværks tilslutning
Problemer
Vend tilbage til analog telefonlinje
Referencer
Netværks administratoren skal bruge MAC adressen
Filer og URLer som skal have adgang gennem netvær/rewall
Porte og protokoller som bruge til netværks tilslutning
Step 2 - Kongurer statisk IP adresse
Step 3 - Kongurer din frankeringsmaskine til at bruge netværks
tilslutning
Step 4 - Tjek at netværk tilslutning virker
SDC876B Netværks Tilslutnings (LAN Tilslutning) Guide
Klik på et af emnerne i indholdsfortegnelsen for at gå
direkte til pågældende afsnit.
<< Tilbage til indholdsfortegenelse
Page 43
Introduktion
DA
Hvad er fordelene ved netværks tilslutning?
Netværks tilslutning tillader dig at tilslutte din frankeringsmaskine gennem Ethernet
(LAN) port istedet for at tilslutte gennem PC eller analog telefonlinje.
Du vilfå meget hurtigere opkoblingshastighed når din frankeringsmaskine tilslutter til
forskellige Pitney Bowes servicer som; Konto balance, system opdateringer, grask
features og data venter informationer. Fordi din frankeringsmaskine er tilsluttet
direkte gennem dit eget netværk så du behøver ikke at have en en analog linje til
din frankeringsmaskine mere.
Dette betyder hvis du betaler for en analog linje til din frankeringsmaskine, har du
ikke længere brug for den.
Er det sikkeret?
Ja systemet er godkendt af ICSA.
Du kan download rapporten her www.pitneybowes.co.uk
Hvad skal jeg fortælle min Netværks/IT afdeling?
Det kommer an på hvilken netværk type, din netværks administrator kan enten
kongurer netværket til at bruge dynamisk eller statisk IP og skal åbne disse porte:
TCP 80 (http), TCP 443 (https), TCP 21 (ftp), TCP 53 (DNS)
Du har brug for information om subnet mask og den default gateway. Hvis en proxy
server bliver brugt venligst sikre at tilslutningen går gennem din proxy server.
Hvis nødvendigt, tjek med din netværks administrator om netværks opsætningen
skal kongurers som beskrevet. Hvilken som helst netværks ændring bør gøres før
installering af netværks opkobling ( se Før du begynder...' på følgende side).
Vil min frankeringsmaskine virke uden netværks tilslutning?
Ja, du kan stdig bruge en analog telefonlinje til at download opdateringer. Se under
"Problemer?" sektionen af denne guide for mere information.
Hvilken frankeringsmaskine virker med netværks tilslutning?
Denne guide dækker over brug af netværks tilslutning på følgende produkter:
DM220i serien
DM475 og DM450+ serien
DM300c og DM400c serien
DM500 til DM1000 serien
IntelliLink™ Kontrol center
Skal jeg ændre opsætning på min frankeringsmaskine?
Ja, det kommer an på din netværks type om du skal ændre opsætningen på din
frankeringsmaskine. En fuld instruktion er tilføjede længere nede i denne guide.
SDC876B Netværks Tilslutnings (LAN Tilslutning) Guide
Vigtigt: Tilgængelige produkter variere fra land til land. indkluderet produkter i
denne guide er ikke en garanti for at det er tilgængeligt i dit land.
<< Tilbage til indholdsfortegenelse
Page 44

Før du begynder...
DA
For at gøre din installation så nem som muligt venligst brug et par minutter på
at bekræfte at alle step er gjort.
Netværk konguration
Du skal muligvis have hjælp fra din netværks/IT afdeling for at færdiggøre
informationen neden under.
Denne tjek liste sikkrer at din netværks opsætning er lavet og hvis nødvendigt
sikkrer at opsætningen er kongureret til frankeringsmaskinen.
Hvordan bliver IP adressen tildelt til frankeringsmaskinen?
Dynamisk
eller
Statisk (Sæt kryds i givetfald)
For statisk IP adresse, har du brug for følgende information:
IP-adresse . . .
Porte som er åbne for denne IP adresse
TCP 80 (http)
TCP 443 (https)
TCP 21 (ftp)
TCP 53 (DNS lookup)
Fysisk netværks tilslutning
Netværk tilslutnings punkt er mere end 5 meter fra frankeringsmaskinen.
Subnet-maske . . .
Default gateway . . .
SDC876B Netværks Tilslutnings (LAN Tilslutning) Guide
<< Tilbage til indholdsfortegenelse
Page 45

Installations Step 1: Tilslut din frankeringsmaskine direkte til netværks stikket
DA
DM220i serien DM300c og DM400c serien DM475/DM450+ kunDM500 til DM1000
Tilsluttes til USB port på
USB kabel sammen
med netværks
adapter
frankeringsmaskinen
Netværks adapter
IntelliLink® Kontrol center
Ethernet-kabel[]
Tilsluttes direkte til
LAN porten på
frankeringsmaskinen
Tilslut din router
eller netværk
stikket
Tilslut din router
eller netværk
stikket
1. Sluk for frankeringsmaskinen.
2. Tilslut Ethernet kablet til din router eller netværks stik.
3. Tilslut Netværks adapteren til Ethernet kablet
og tilslut netværks adapteren til USB porten på
frankeringsmaskinen ved at bruge USB kablet som
kommer sammen med adapteren.
Bemærk: På DM500-DM1000, fortræk at bruge porten
bag på IntelliLink® Kontrol center hvis den ikke bliver
brugt i forvejen.
4. Tænd for frankeringsmaskinen.
SDC876B Netværks Tilslutnings (LAN Tilslutning) Guide
5. Når frankeringsmaskinen er startet og displayet viser
startsskærmen, Vil LEDen på netværks adapteren
lyse op eller blinke i 15 sekunder. Dette indikere der er
tilslutning til netværket.
1. Sluk for frankeringsmaskinen.
2. I sæt Ethernet kablet i din router
eller netværksstikket i vægen.
3. I sæt den anden ende af kablet i
LAN porten bag på maskinen.
4. Tænd for maskinen.
<< Tilbage til indholdsfortegenelse
Page 46

Installation - Step 2 Kongurer den faste IP adresse
Dette step er kun nødvendigt hvis du bruger en statisk IP adresse for din frankeringsmaskine.
Hvis du bruger en dynamisk IP adresse gå direkte til step 3 på næste side.
DA
DM220i serien DM300c og DM400c
1. Tryk Menu.
2. Tryk Side ned.
3. Tryk Side ned igen.
4. Vælg Tilslut - Data Center.
5. Vælg LAN Opsætning.
6. Vælg Hent IP.
7. Vælg Manuelt.
8. Vælg IP Adresse/IP Adr, på alle modeller pånær DM220i, tryk C for at slette
den forgående indtastning, indtast din faste IP adresse som vist i 'Før du
går i gsng' i denne guide. Tryk Enter eller Godkend for at bekræfte de nye
indstillinger.
Bemærk: Tast ind hele IP adressen, inkluderet punktum mellem hvert tal i IP
adressen. Ved at gøre dette vil displayet automatisk springe til næste sektion af
IP adressen hvis en eller ere sektioner indholder mindre end 3 tal.
9. Vælg Subnet Mask/Subnet, pånær, DM220i, tryk C for at slette den
eksisterende indtastning. Indtast din subnet mask opsætning som vist i ‘Før du
går i gang’ i Denne guide på samme måde som IP adressen. Tryk Enter eller
Accept for at bekræfte.
serien
1. Tryk Menu.
2. Tryk Side ned.
3. Vælg Data Center opsætning.
4. Tryk Side ned.
5. Vælg Netværks opsætning.
6. Vælg Hent IP.
7. Vælg Specik Adresse
manuelt.
DM475/
DM450+
1. Tryk Menu.
2. Tryk Side ned.
3. Vælg Data Center opsætning.
4. Tryk Side ned.
5. Vælg Netværks opsætning.
6. Vælg Hent IP.
7. Vælg Specik adresse
manuelt.
10. Vælg Default Gateway/Gateway,pånær DM220i, tryks C for at slette
eksisterende indtastning. Indtast din default gateway, som vist i ‘Før du går
i gang’ i Denne guide, på samme måde som IP adressen. Tryk Enter eller
Accept for at bekræfte.
11. Hvis det ønskes, tryk Enter igen for at bekræfte opsætningen.
12. Tryk venstre pil eller Hjem kna ppen for at exit opsætnings menuen.
DM500 til DM1000
IntelliLink® Kontrol
center
1. Tryk på Menu knappen.
2. Vælg Opsætning.
3. Vælg Telefon/Netværk
opsætning.
4. Tryk Ned og vælg Netværk
opsætning.
5. Vælg Frankeringsmaskine
netværks opsætning.
6. Vælg Hent IP.
7. Vælg Specik en IP adresse.
SDC876B Netværks Tilslutnings (LAN Tilslutning) Guide
<< Tilbage til indholdsfortegenelse
Page 47

Installation - Step 3 Kongurer din maskine til at bruge netværks tilslutning
DA
DM220i serien DM300c og DM400c
Der skal ikke kongurers noget på
DM220i frankeringsmaskine.
serien
1. Tryk Menu.
2. Tryk Side ned.
3. Vælg Data center funktioner.
4. Tryk Side ned.
5. Vælg Tilslutnings funktioner
og slå Auto til.
6. Tryk på Hjem for at vende
tilbage til startskærmbilledet.
DM475/
DM450+
1. Tryk Menu.
2. Tryk side ned.
3. Vælg Data Center funktioner.
4. Tryk Side ned.
5. Vælg Tilslutnings funktioner
og slå Auto til.
6. Tryk på Hjem for at vende
tilbage til startskærmbilledet.
DM500 til DM1000
IntelliLink® Kontrol
Center
1. Tryk Menu knappen.
2. Vælg Opsætning.
3. Vælg Telefon/Netværks
opsætning.
4. Vælg Modem Type.
5. Vælg LAN.
6. Tryk OK, genstart nu.
Frankeringsmaskinen vil
genstarte.
SDC876B Netværks Tilslutnings (LAN Tilslutning) Guide
<< Tilbage til indholdsfortegenelse
Page 48
Installation - Step 4 Tjek at netværks forbindelsen virker
DA
DM220i serien DM300c og DM400c
1. Tryk tilføj porto tasten.
2. Vælg tjek PBP balance.
Frankeringsmaskinen tilslutter
til Pitney Bowes server for at
få adgang til din Postage by
Phone konto. Hvis netværks
tilslutningen virker korekt, vil
balancen for din Postage by
Phone kontoen blive vist.
3. Vælg fortsæt til exit.
serien
1. Tryk Portokøbs knappen.
2. Vælg tjek PbP balance.
Frankeringsmaskinen tilslutter
til Pitney Bowes server for at
få adgang til din Postage by
Phone konto. Hvis netværks
tilslutningen virker korekt, vil
balancen for din Postage by
Phone kontoen blive vist.
3. Vælg fortsæt til exit.
DM475/
DM450+
1. Tryk Portokøbs knappen.
2. Vælg tjek PBP balance.
Frankeringsmaskinen tilslutter
til Pitney Bowes server for at
få adgang til din Postage by
Phone konto. Hvis netværks
tilslutningen virker korekt, vil
balancen for din Postage by
Phone kontoen blive vist.
3. Vælg fortsæt to til exit.
DM500 til DM1000
IntelliLink® Kontrol
Center
1. Tryk Porto tasten.
2. Vælg tjek PBP balance.
Frankeringsmaskinen tilslutter
til Pitney Bowes server for at
få adgang til din Postage by
Phone konto. Hvis netværks
tilslutningen virker korekt, vil
balancen for din Postage by
Phone kontoen blive vist.
3. Vælg færdig til exit.
Brug konstant tilslutning
Når det er installeret og testet som beskrevet ovenfor, netværks tilslutning giver en
permanet, hurtig tilslutning for din frankeringsmaskine.
Alle procedure for opdatering af frankerings softwaren, Tjek konto balance og
portokøb, osv. De skal være præcis som beskrevet i bruger manualen.
SDC876B Netværks Tilslutnings (LAN Tilslutning) Guide
<< Tilbage til indholdsfortegenelse
Page 49

Problemer? - Vend tilbage til brug af analog telefon linie
Hvis netværks tilslutning ikke er tilgængelig, kan du sætte din frankeringsmaskine til en analog telefon linie til portokøb, osv.
DA
DM220i serien DM300c og DM400c
1. Tilslut en telefon ledning fra et
analog telefon stik i væggen
til telefon porten bag på
frankeringsmaskinen.
telefon
stik
væg
stik
2. Tag USB kabel/USB adapter ud
bagpå frankeringsmaskinen.
serien
1. Tilslut en telefon ledning fra et
analog telefon stik i væggen
til telefon porten bag på
frankeringsmaskinen.
telefon
stik
2. Tag USB kabel/USB adapter ud
bagpå frankeringsmaskinen.
Væg
stik
DM475/
DM450+
1. Tilslut en telefon ledning fra
et analog telefonstik i væggen
til telefon porten bagpå
frankeringsmaskinen.
væg
stik
telefon
stik
2. Tag netværks kabelet ud bagpå
frankeringsmaskinen.
DM500 til DM1000
IntelliLink® Kontrol
center
1. Tilslut en telefon ledning fra et
analog telefon stik i væggen
til telefon porten bag på
frankeringsmaskinen.
væg
stik
USB
Modem
2. Tryk indstillinger.
3. Vælg opsætning.
4. Vælg Telefon/Netværk
opsætning.
5. Vælg Modem Type.
6. Vælg USB.
7. Vælg OK, genstart nu.
Frankeringsmaskinen vil
genstarte.
Alle procedure til opdatering af frankeringsmaskinen, tjek af konto balance osv. er som beskrevet i bruger manualen for den frankeringsmaskine. Du vil bemærke en
reduction i hastigheden når der bruges en analog telefon linie.
SDC876B Netværks Tilslutnings (LAN Tilslutning) Guide
<< Tilbage til indholdsfortegenelse
Page 50
Reference- Netværks administrator har brug for en MAC adresse
I sjælende tilfælde kan netværks administartoren kræve en MAC adresse for netværks tilslutningen. Det kan du få på følgende måde.
DA
DM220i serien DM300c og DM400c
1. Tryk Menu.
2. Tryk Side ned to gange.
3. Vælg Tilslut Data Center.
4. Vælg LAN Opsætning.
5. Tryk Side ned.
6. Netværks adapterens MAC
adresse vil blive vist. Noter dette
til din netværks administrator.
7. Tryk på Hjem for at vende
tilbage til startskærmbilledet.
serien
1. Tryk Opsætning.
2. Tryks Side ned.
3. Vælg Data Center opsætning.
4. Tryk Side ned.
5. Vælg Netværks opsætning.
6. Netværks adapterens MAC
adresse vil blive vist. Noter dette
til din netværks administrator.
7. Tryk på Hjem for at vende
tilbage til startskærmbilledet.
DM475/
DM450+
1. Tryk Opsætning.
2. Tryk Side ned.
3. Vælg Data center opsætning.
4. Tryk Side ned.
5. Vælg Netværks opsætning.
6. Netværks adapterens MAC
adresse vil blive vist. Noter dette
til din netværks administrator.
7. Tryk på Hjem for at vende
tilbage til startskærmbilledet.
DM500 til DM1000
IntelliLink® Kontrol
center
1. Tryk Menu.
2. Vælg Opsætning.
3. Vælg Telefon/Netværk
opsætning.
4. Tryk Pil ned og vælg
Netværk opsætning.
5. Vælg Frankerings Netværk
opsætning.
6. Vælg MAC Adresse. Netværks
adapterens MAC adresse vil
blive vist. Noter dette til din
netværks administrator.
7. Tryk Venstre pil tast for at
afslutte menu.
SDC876B Netværks Tilslutnings (LAN Tilslutning) Guide
<< Tilbage til indholdsfortegenelse
Page 51
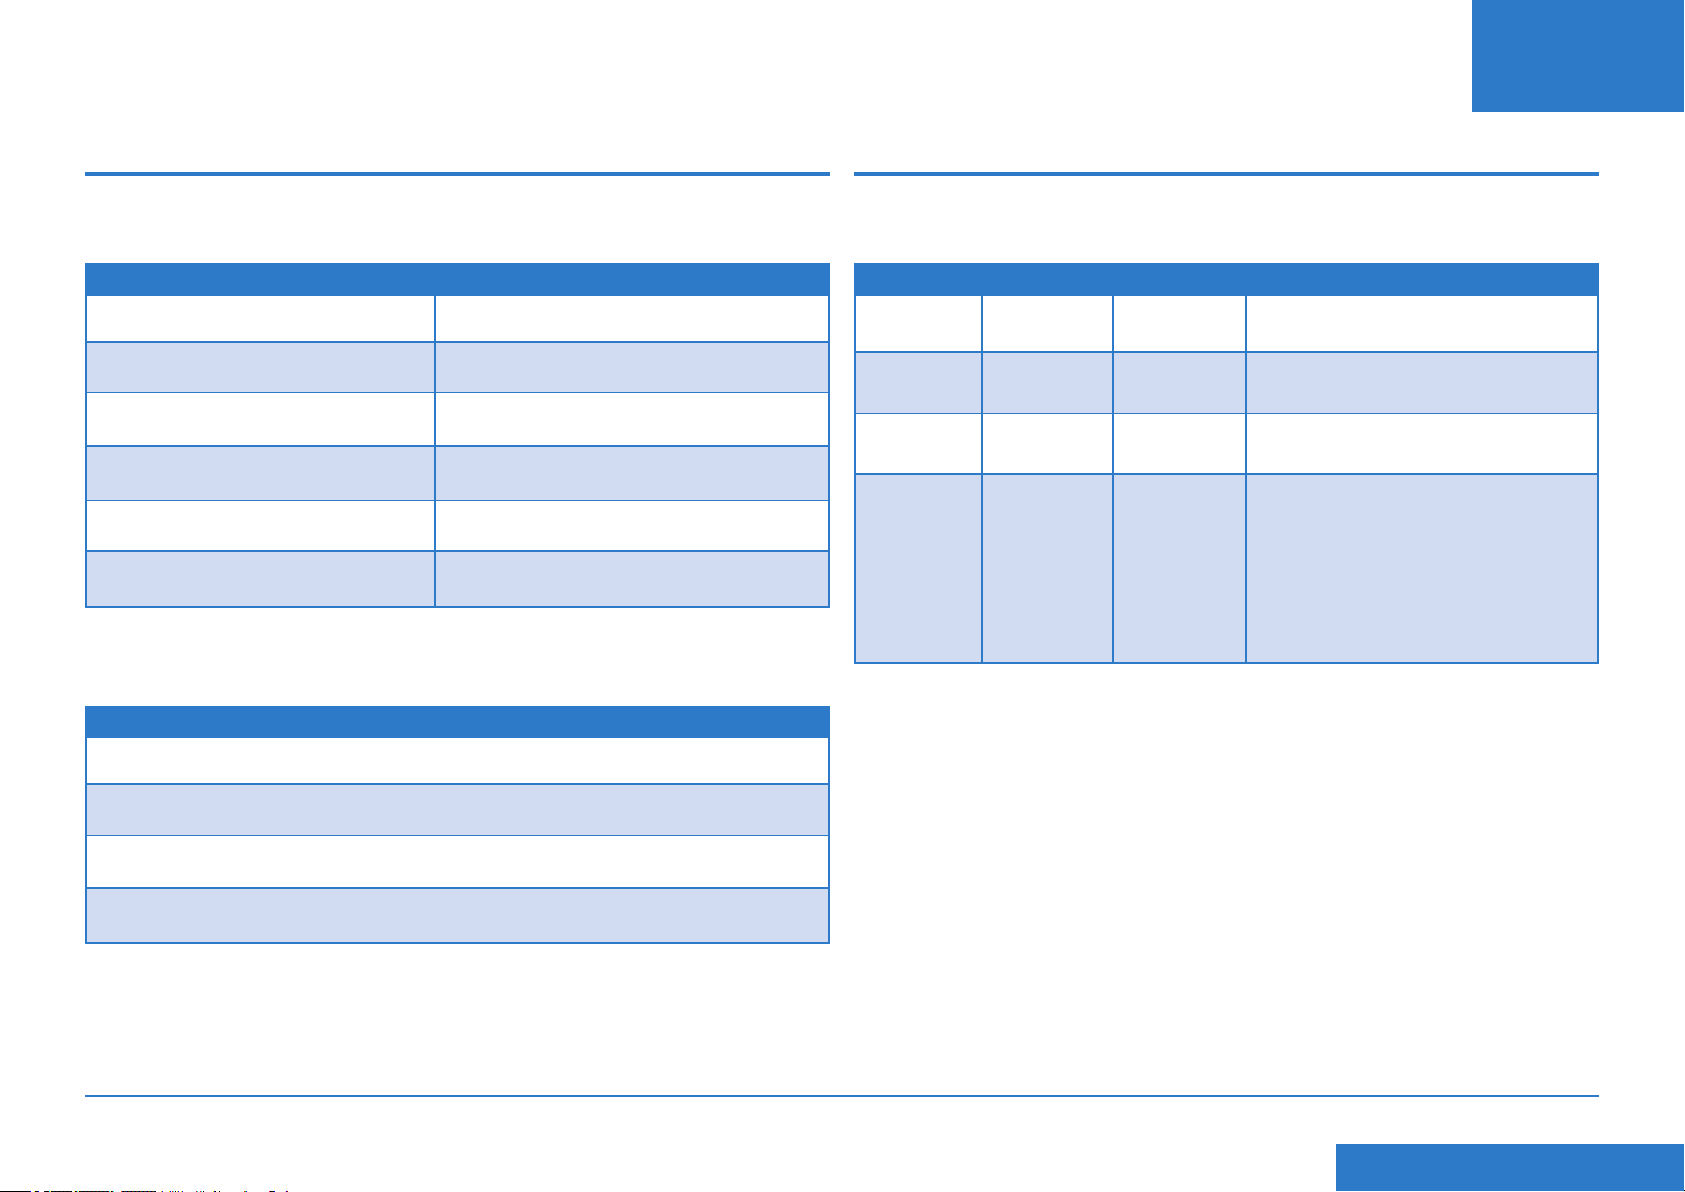
Reference - Filer og webadresser som
DA
Reference - Porte og protokoller
netværk/rewall skal godkende
Netværks forbindelsen bruger følgende ler som skal have adgang gennem jeres
rewall:
Type Udvidelser
Dec .dcz
EMD .zmd
Grak .gar
Takst Manager .rmz
CCD >bin
Snippet l .GAU
Følgende 'top level' domæner skal også være tilgængelig gennem jeres netværk og
rewall:
Enhver URL som indholder følgende:
som skal bruges
Netværks tilslutning bruger følgende porte og protokoller som skal have adgang
gennem jeres netværk og rewall:
Type Protokol stik Funktion
DNS UDP 53 Postage by Phone og Web Services
HTTP TCP 80 Postage by Phone og Web Services
HTTPS TCP 443 Postage by Phone
FTP TCP 21 Software og Takst opdateringer,
Grask uploads.
Firewall skal sættes til aktic og tillade
ygtige porte.
Bemærk:Aktiv FTP bruges. rewall
skal sættes til at tillade aktiv FTP.
pb.com
pitneybowes.co.uk
pbcomet.com
pitneybowes.eu.com
Bemærk: URLer som har adgang til din frankeringsmaskine indholder muligvis de
ovenover strenge sammen med URL. Firewallen skal derfor sættes til at tillade trak
til alle disse URL som indholder foroven domains. Din rewall skal kongurers til at
bruge "wildcards", som for eks. *pb.com*.
SDC876B Netværks Tilslutnings (LAN Tilslutning) Guide
<< Tilbage til indholdsfortegenelse
Page 52

Sisällys
FI
Johdanto
Mitkä ovat Jatkuvan yhteyden hyödyt?
Onko se turvallinen?
Mitä minun tarvitsee kertoa verkon ylläpitäjälle / IT-osastolle?
Tarvitseeko minun muuttaa postitusjärjestelmäni asetuksia?
Toimiiko postitusjärjestelmäni ilman verkkoyhteyttä?
Mitkä postitusjärjestelmät toimivat jatkuvalla yhteydellä?
Ennen kuin aloitat...
Verkon määritykset
Fyysinen verkkoyhteys
Asennus
Vaihe 1 - Liitä järjestelmäsi verkkopistorasiaan
Toiminta
Jatkuvan yhteyden käyttäminen
Ongelmia?
Palaa takaisin analogisen puhelinlinjan käyttöön
Tekniset tiedot
Verkon ylläpitäjä tarvitsee MAC-osoitteen
Tiedostopäätteet ja URLit, jotka verkon / palomuurin tulee sallia
Portit ja protokollat, joita Jatkuva yhteys tarvitsee
Vaihe 2 - Määritä pysyvä IP-osoite
Vaihe 3 - Määritä järjestelmäsi käyttämään verkkoyhteyttä
Vaihe 4 - Tarkista, että verkkoyhteytesi toimii
SDC876B Jatkuvan yhteyden (LAN -yhteys) opas
Napsauta mitä tahansa kohtaa sisältölistassa siirtyäksesi
siihen osioon.
<< Paluu Sisällysluetteloon
Page 53

Johdanto
FI
Mitkä ovat Jatkuvan yhteyden hyödyt?
Jatkuva yhteys mahdollistaa postitusjärjestelmän liittämisen Ethernet (LAN) -porttiin
ilman, että välissä tarvitaan PC:tä tai analogista puhelinlinjaa.
Tulet saamaan nopeammat yhteydet kun postitusjärjestelmäsi yhdistää Pitney
Bowesiin sellaisia palveluita varten kuin Postage by Phone® (Lataa ja postita),
järjestelmän päivitykset, tilatut toiminnot, elektroninen postituksen tarkastus
ja Latauskeskuksen informaation vaihto. Lisäksi, koska postitusjärjestelmäsi
on liitettynä verkkoon, sinulla ei tarvitse enää olla PC:tä lähellä valmiina, eikä
analogista puhelinlinjaa varattuna siihen tarkoitukseen.
Se tarkoittaa, että jos maksat yhden analogisen puhelinlinjan vuokraa pelkästään
postitusjärjestelmän takia, et enää tarvitse sitä.
Onko se turvallinen?
Kyllä, järjestelmä on informaatiojärjestelmien testauksiin ja sertiointeihin
erikoistuneen ICSA:n hyväksymä.
Voit ladata täydellisen selonteon asiasta osoitteesta www.pitneybowes.co.uk
Mitä minun tarvitsee kertoa verkon ylläpitäjälle / IT-osastolle?
Riippuen verkkosi tyypistä, verkkosi ylläpitäjän pitää määritellä verkko käyttämään
joko muuttuvaa tai pysyvää IP-osoitetta, ja hyväksymään pääsy näihin portteihin:
TCP 80 (http), TCP 443 (https), TCP 21 (ftp), TCP 53 (DNS)
Tarvitset aliverkon peitteen ja oletusyhdyskäytävän tiedot. Jos käytät
välityspalvelinta, varmista että tämä yhteys ohittaa välityspalvelimen.
Jos mahdollista, tarkista verkon ylläpitäjältäsi että verkkoasetukset voidaan
määritellä kuten yllä on selitetty. Kaikki tarvittavat verkon muutokset pitäisi tehdä
ennen kuin Jatkuva yhteys asennetaan (katso 'Ennen kuin aloitat...' seuraavalla
sivulla).
Toimiiko postitusjärjestelmäni ilman verkkoyhteyttä?
Kyllä, voit edelleen jatkaa analogisen puhelinlinjan käyttämistä lataamiseen ja
päivittämiseen. Katso lisätietoja tämän oppaan osiosta "Ongelmia?".
Mitkä postitusjärjestelmät voivat käyttää Jatkuvaa yhteyttä?
Tässä oppaassa käsitellään Jatkuvan yhteyden käyttö seuraavilla tuotteilla:
DM220i -sarja
DM475- ha DM450+ -sarjat
DM300c- ja DM400c -sarjat
DM500 - DM1000 -sarjat
IntelliLink™ Ohjauskeskus
Tarvitseeko minun muuttaa postitusjärjestelmäni asetuksia?
Kyllä, riippuen järjestelmäsi tyypistä sinun pitää muuttaa postitusjärjestelmäsi
asetuksia. Täydelliset ohjeet annetaan myöhemmin tässä oppaassa.
SDC876B Jatkuvan yhteyden (LAN -yhteys) opas
TÄRKEÄÄ: Tuotteiden saatavuus riippuu maasta. Tuotteen sisältyminen tähän
oppaaseen ei takaa saatavuutta maassasi.
<< Paluu Sisällysluetteloon
Page 54

Ennen kuin aloitat...
FI
Jotta asennus sujuisi mahdollisimman helposti, käytä muutama minuutti sen
varmistamiseen, että kaikki tarvittavat valmistelut on tehty:
Verkon määritys
Saatat tarvita verkkosi ylläpitäjän / IT-osastosi apua allaolevien tietojen lisäämiseen.
Tämän tarkistuslistan tehtävänä on varmistaa, että verkkoasetuksesi on tehty, ja
että sinulla on tarvittaessa muistiinpanot asetuksista, joilla postitusjärjestelmä on
määritetty.
Miten IP-osoite määritetään postitusjärjestelmällesi?
Vaihtuvasti
tai
Pysyvästi (Rastita asianmukainen ruutu)
Pysyvän IP-osoitteen tapauksessa tarvitset seuraavat tiedot:
IP-osoite . . .
Tämän IP-osoitteen portit ovat auki seuraavilla asetuksilla:
TCP 80 (http)
TCP 443 (https)
TCP 21 (ftp)
TCP 53 (DNS lookup)
Fyysinen verkkoyhteys
Verkon yhteyspiste on viiden metrin sisällä postitusjärjestelmästä.
Aliverkon peite . . .
Oletusyhdyskäytävä . . .
SDC876B Jatkuvan yhteyden (LAN -yhteys) opas
<< Paluu Sisällysluetteloon
Page 55
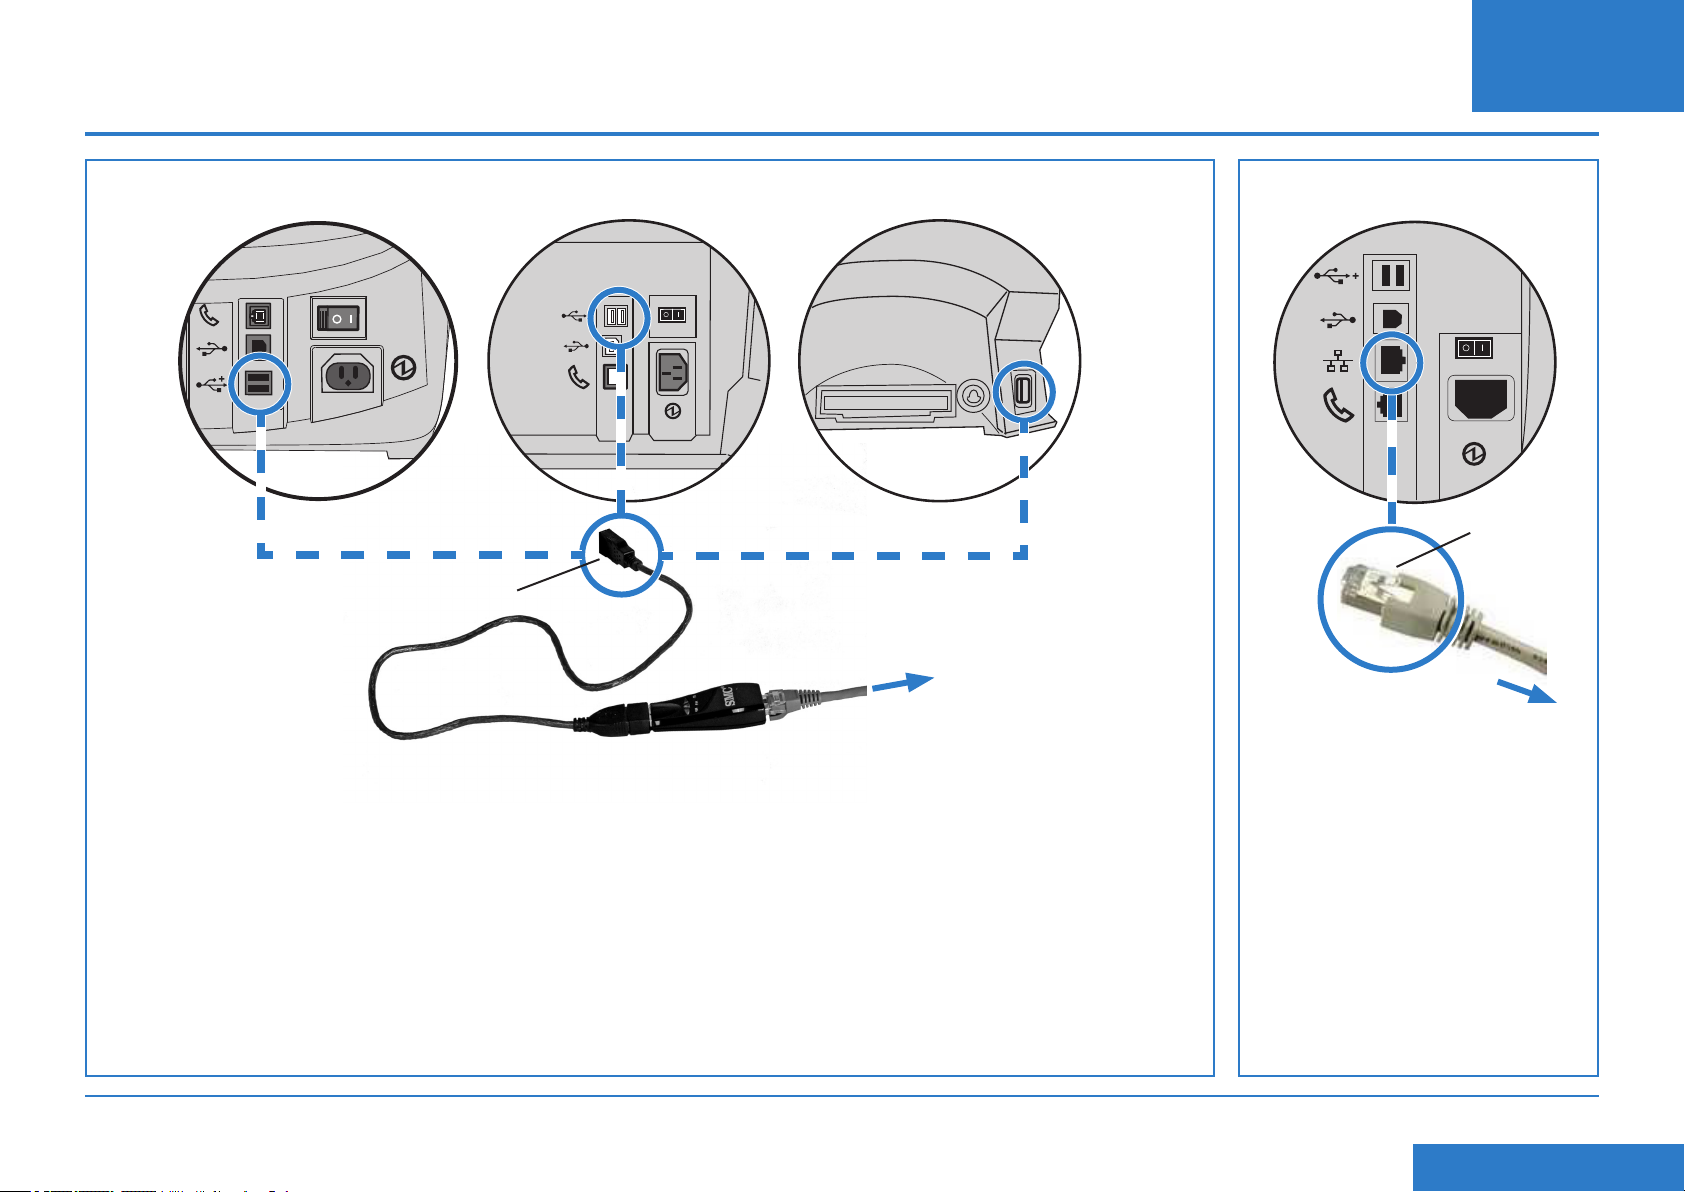
Asennusvaihe 1 - Yhdistä järjestelmäsi verkkopistorasiaan.
FI
DM220i -sarja DM300c- ja DM400c -sarjat Vain DM475/DM450+ DM500 - DM1000
IntelliLink® Ohjauskeskus
Liitä postitusjärjestelmän
USB-porttiin
Ethernet-kaapeli[]
Verkkoadapterilla
varustettu USB-
kaapeli
Verkkoadapteri
Liitä reitittimeesi
tai seinän
verkkopistorasiaan
Liitä suoraan
järjestelmäsi
LAN-porttiin
Liitä reitittimeesi
tai seinän
verkkopistorasiaan
1. Kytke järjestelmän virta pois päältä.
2. Liitä Ethernet-kaapeli reitittimeesi tai seinän
verkkopistorasiaan.
3. Liitä verkkoadapteri Ethernet-kaapeliin ja liitä sitten
verkkoadapteri yhteen postitusjärjestelmän USBporteista käyttämällä adapterin mukana toimitettua,
lyhyttä USB-kaapelia.
HUOMIO: Käytä mieluiten IntelliLink®
Ohjauskeskuksen takana olevaa porttia DM500DM1000:n tapauksessa, jos se ei ole vielä käytössä.
SDC876B Jatkuvan yhteyden (LAN -yhteys) opas
4. Kytke järjestelmän virta takaisin päälle.
5. Kun järjestelmä käynnistyy ja näyttää Postita/Koti
-ruutua, tulisi verkkoadapterin ledien syttyä tai vilkkua
15 sekunnin sisällä. Se kertoo, että yhteys verkkoon on
olemassa.
1. Kytke järjestelmän virta pois
päältä.
2. Liitä Ethernet-kaapeli reitittimeesi
tai seinän verkkopistorasiaan.
3. Liitä kaapelin toinen pää
järjestelmän takaosassa olevaan
LAN-porttiin.
4. Kytke järjestelmän virta takaisin
päälle.
<< Paluu Sisällysluetteloon
Page 56
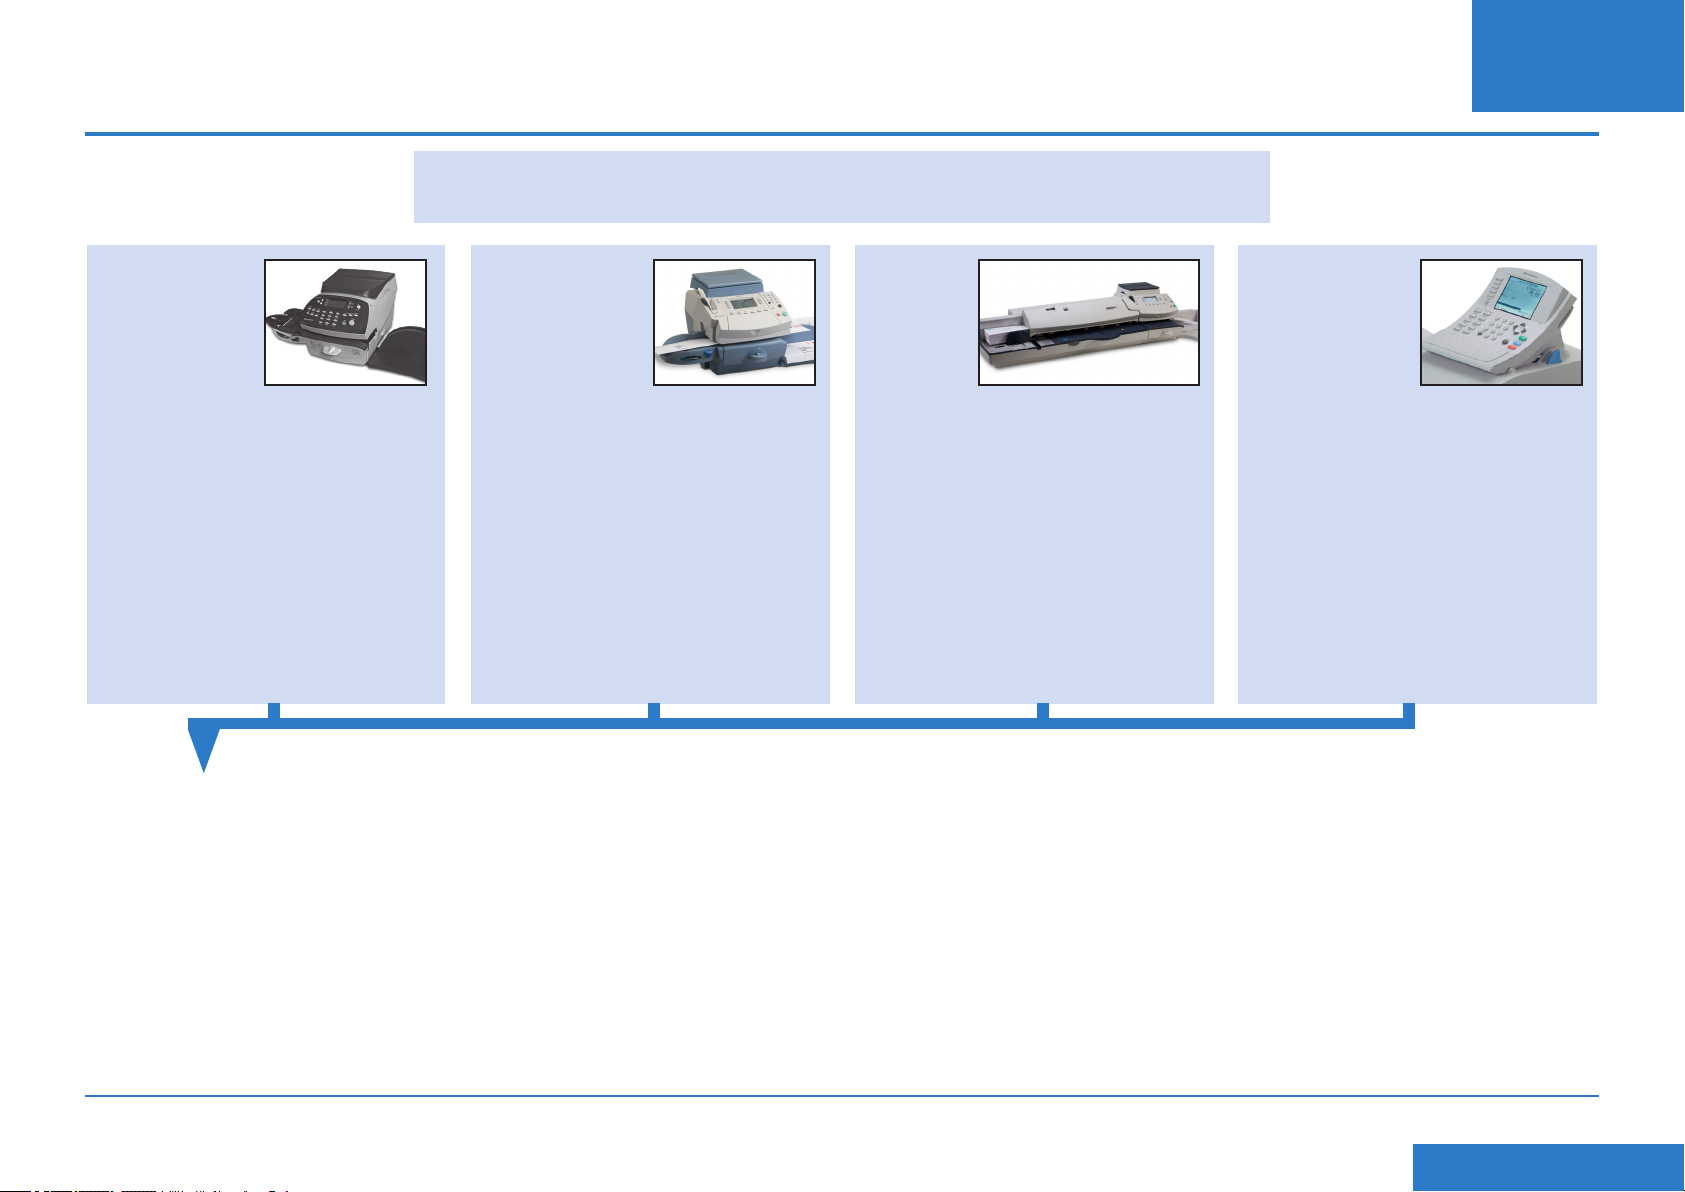
Asentaminen - Vaihe 2 Määritä pysyvä IP-osoite
Tämä vaihe vaaditaan vain, jos käytät pysyvää IP-osoitetta postitusjärjestelmää varten. Jos
käytät vaihtuvaa IP-osoitetta, voit siirtyä suoraan seuraavalle sivulle vaiheeseen 3.
FI
DM220i -sarja DM300c- ja DM400c
1. Paina Valinnat.
2. Paina Sivu alas.
3. Paina Sivu alas uudelleen.
4. Valitse Latauskeskus.
5. Valitse LAN -asetukset.
6. Valitse Hae IP.
7. Valitse Käsin.
8. Valitse IP-osoite/IP Os., ja sitten kaikissa muissa malleissa paitsi DM220i:ssä,
paina C pyyhkiäksesi olemassa olevan syötteen. Kirjoita pysyvä IP-osoitteesi
kuten tämän oppaan kohdassa ‘Ennen kuin aloitat’ on kerrottu. Vahvista uusi
asetus painamalla Syötä tai Kyllä.
HUOMAA: Kirjoita koko IP-osoite, myös pisteet, jotka erottavat IP-osoitteen
osat. Näin näyttö hyppää automaattisesti IP-osoitteen seuraavaan osaan jos
yhdessä tai useammassa osiossa on vähemmän kuin 3 numeroa.
9. Valitse Aliverkon peitto/Aliverkko, ja sitten kaikissa muissa malleissa
paitsi DM220i:ssa, paina C pyyhkiäksesi olemassa olevan syötteen. Kirjoita
aliverkon peiton asetukset, kuten on näytetty tämän oppaan kohdassa ‘Ennen
kuin aloitat’, samalla tavalla kuin syötit IP-osoitteen. Paina Syötä tai Kyllä
vahvistaaksesi.
SDC876B Jatkuvan yhteyden (LAN -yhteys) opas
-sarjat
1. Paina Valikko.
2. Paina Sivu alas.
3. Valitse Datakeskus.
4. Paina Sivu alas.
5. Valitse Verkkoasetukset.
6. Valitse Hae IP.
7. Valitse Määritä osoite käsin.
DM475/
DM450+
1. Paina Valikko.
2. Paina Sivu alas.
3. Valitse Datakeskus.
4. Paina Sivu alas.
5. Valitse Verkkoasetukset.
6. Valitse Hae IP.
7. Valitse Määritä osoite käsin.
10. Valitse Oletuskäytävä/Käytävä, ja sitten, kaikissa muissa malleissa paitsi
DM220i:ssa, paina C pyyhkiäksesi olemassa olevan syötteen. Kirjoita
oletusväylä, kuten on näytetty tämän oppaan kohdassa ‘Ennen kuin aloitat’,
samalla tavalla kuin syötit IP-osoitteen. Paina Syötä tai Kyllä vahvistaaksesi.
11. Jos pyydetään, paina Syötä uudelleen vahvistaaksesi asetukset.
12. Poistu asetusvalikosta painamalla Vasenta nuolinäppäintä ai Paluu
-näppäintä.
DM500 - DM1000
IntelliLink®
Ohjauskeskus
1. Paina Valikko-näppäintä.
2. Valitse Asetus.
3. Valitse Puhelimen/Verkon
asettaminen.
4. Paina Alas-nuolinäppäintä ja
valise Verkkoaseukse.
5. Valitse postitusjärjestelmän
verkkoasetukset.
6. Valitse Hae IP-osoite.
7. Valitse Määritä IP-osoite.
<< Paluu Sisällysluetteloon
Page 57

Asennus - Vaihe 3 Aseta järjestelmä käyttämään verkkoyhteyttä
FI
DM220i -sarja DM300c- ja DM400c
DM220i -järjestelmän asentamiseen
ei tarvita toimenpiteitä.
-sarjat
1. Paina Valikko.
2. Paina Sivu alas.
3. Valitse Datakeskus.
4. Paina Sivu alas.
5. Valitse Yhdistämistapa ja aseta
se arvoon Auto.
6. Palaa aloitusnäyttöön
painamalla Paluu
(Aloitusnäyttö) -painiketta.
DM475/
DM450+
1. Paina Valikko.
2. Paina Sivu alas.
3. Valitse Datakeskus.
4. Paina Sivu alas.
5. Valitse Yhdistämistapa ja aseta
se arvoon Auto.
6. Palaa aloitusnäyttöön
painamalla Paluu
(Aloitusnäyttö) -painiketta.
DM500 - DM1000
IntelliLink®
Ohjauskeskus
1. Paina Valikko-näppäintä.
2. Valitse Asetukset.
3. Valitse Puhelimen/Verkon
asettaminen.
4. Valitse Modeemin tyyppi.
5. Valitse Käytä LAN:ia.
6. Valitse OK, Käynnistä
uudelleen nyt.
Postitusjärjestelmä käynnistyy
uudelleen.
SDC876B Jatkuvan yhteyden (LAN -yhteys) opas
<< Paluu Sisällysluetteloon
Page 58
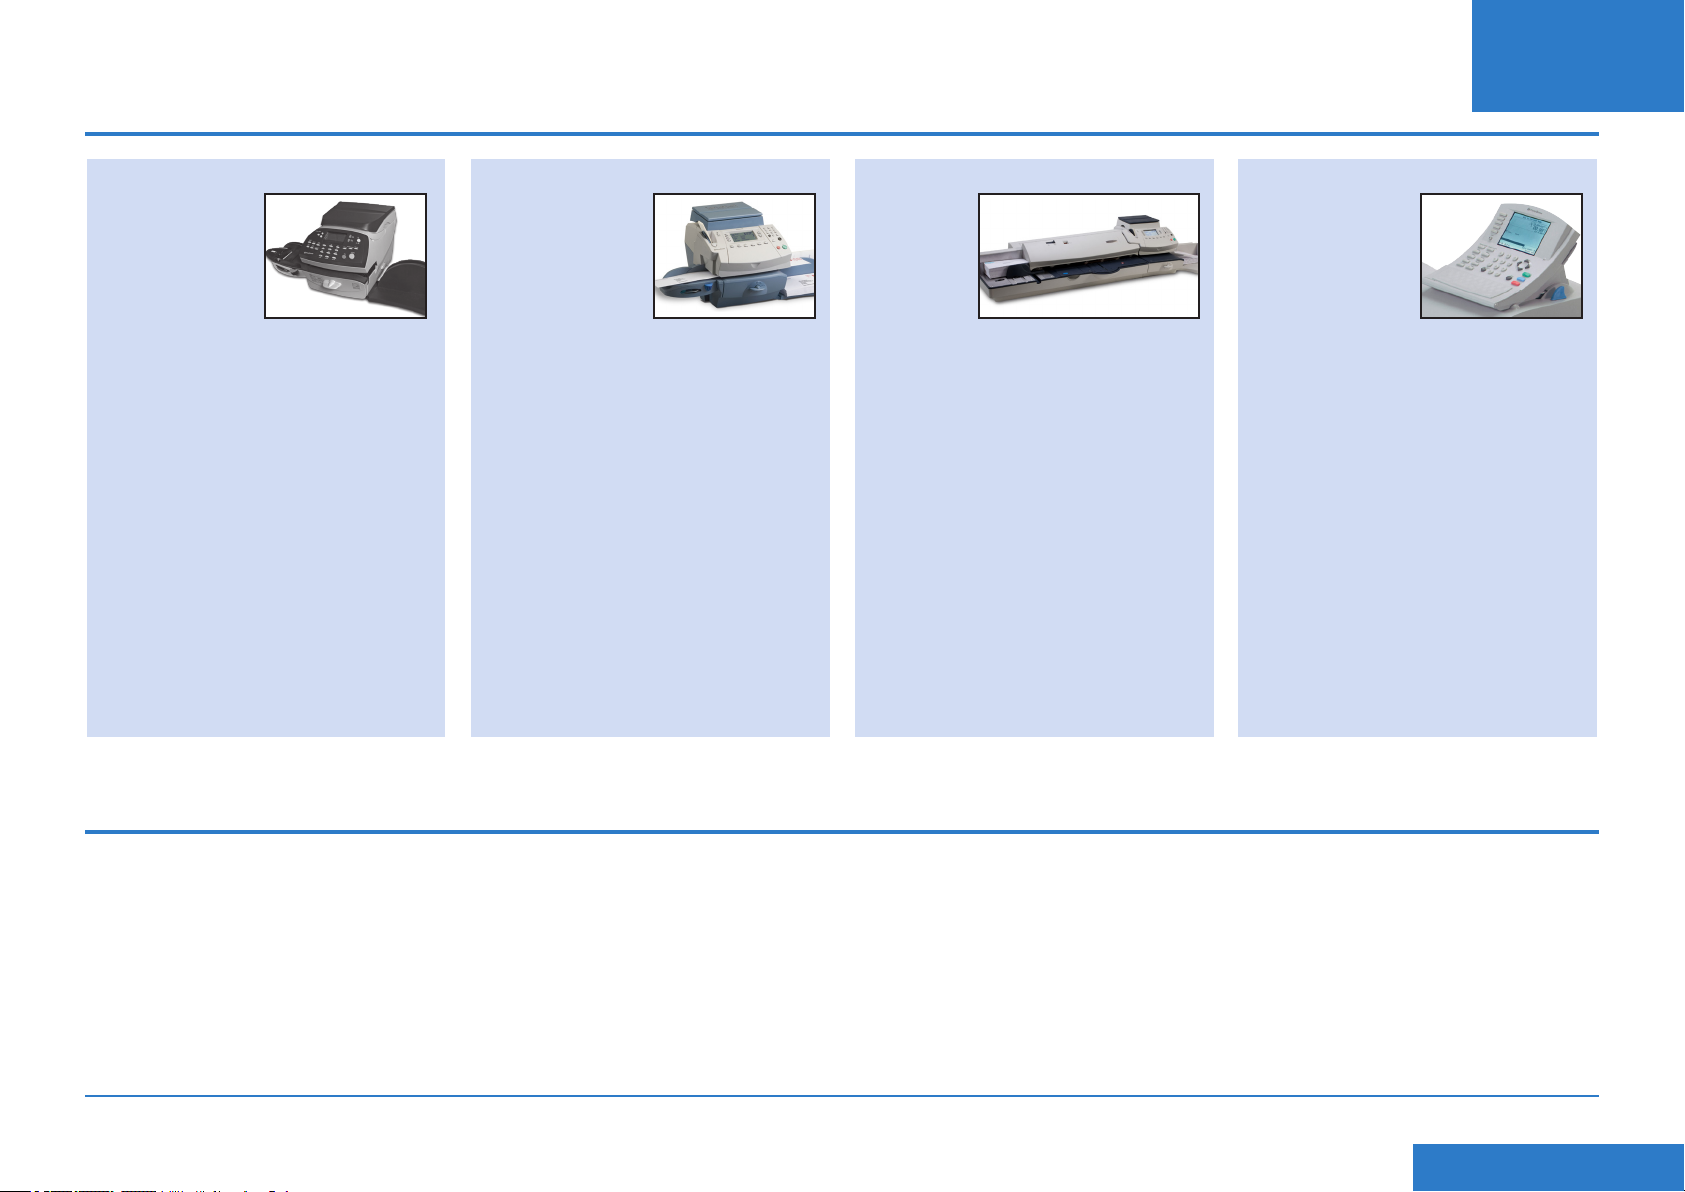
Asentaminen - Vaihe 4 Tarkasta, että verkkoyhteys toimii
FI
DM220i -sarja DM300c- ja DM400c
1. Paina Lisää postimaksu
-näppäintä.
2. Valitse Tarkista PBP-
tase. Järjestelmä yhdistää
Pitney Bowesin palvelimille,
jotta pääset käsiksi
Latauskeskustiliisi. Jos
verkkoyhteys toimii oikein,
Latauskeskustilisi saldo
näytetään.
3. Poistu valitsemalla Jatka.
-sarjat
1. Paina Lisää postimaksu
-näppäintä.
2. Valitse Tarkista PBPtase. Järjestelmä yhdistää
Pitney Bowesin palvelimille,
jotta pääset käsiksi
Latauskeskustiliisi. Jos
verkkoyhteys toimii oikein,
Latauskeskustilisi saldo
näytetään.
3. Poistu valitsemalla Jatka.
DM475/
DM450+
1. Paina Rahanlisäys -näppäintä.
2. Valitse Tarkista PBP-
tase. Järjestelmä yhdistää
Pitney Bowesin palvelimille,
jotta pääset käsiksi
Latauskeskustiliisi. Jos
verkkoyhteys toimii oikein,
Latauskeskustilisi saldo
näytetään.
3. Poistu valitsemalla Jatka.
DM500 - DM1000
IntelliLink® Control
Centre
1. Paina näppäintä Varat .
2. Valitse Latauskeskustilin
saldo. Järjestelmä yhdistää
Pitney Bowesin palvelimille,
jotta pääset käsiksi
Latauskeskustiliisi. Jos
verkkoyhteys toimii oikein,
Latauskeskustilisi saldo
näytetään.
3. Poistu valitsemalla Valmis.
Jatkuvan yhteyden käyttäminen
Kun Jatkuva yhteys on asennettu ja testattu kuten yllä on selitetty, se tarjoaa
pysyvän, nopean yhteyden postitusjärjestelmääsi.
Kaikki käyttötoimenpiteet järjestelmän ohjelmiston päivittämiseksi, Latauskeskustilin
saldon tarkastamiseksi ja postimaksun lisäämiseksi tehdään niin kuin
pääkäyttöohjeessa on selitetty.
SDC876B Jatkuvan yhteyden (LAN -yhteys) opas
<< Paluu Sisällysluetteloon
Page 59

Ongelmia? - Palaa takaisin analogisen puhelinlinjan käyttöön
Jos verkko ei jostain syystä ole käytettävissä, voit asettaa postitusjärjestelmän käyttämään analogista puhelinlinjaa varojen lisäämiseen jne.
FI
DM220i -sarja DM300c- ja DM400c
1. Liitä puhelinkaapeli analogisesta
puhelinpistorasiasta
postitusjärjestelmän takaosassa
olevaan puhelinliitäntään.
puhelin
portti
seinä
pistorasia
2. Irrota USB-kaapeli / USBadapteri postitusjärjestelmän
takaosasta.
-sarjat
1. Liitä puhelinkaapeli analogisesta
puhelinpistorasiasta
postimaksukoneen takaosassa
olevaan puhelinliitäntään.
puhelin
portti
2. Irrota USB-kaapeli / USBadapteri postitusjärjestelmän
takaosasta.
seinä
pistorasia
DM475/
DM450+
1. Liitä puhelinkaapeli analogisesta
puhelinpistorasiasta
postimaksukoneen takaosassa
olevaan puhelinliitäntään.
seinä
pistorasia
puhelin
portti
2. Irrota verkkokaapeli
postimaksukoneen takaosasta.
DM500 - DM1000
IntelliLink®
Ohjauskeskus
1. Liitä puhelinkaapeli analogisesta
puhelinpistorasiasta
postitusjärjestelmään käyttämällä
USB-modeemia, joka lähetettiin
laitteen mukana.
seinä
pistorasia
USB
modeemi
2. Paina Valikko.
3. Valitse Asetus.
4. Valitse Puhelimen/Verkon
asetus.
5. Valitse Modeemin tyyppi.
6. Valitse USB.
7. Valitse OK, Käynnistä uudelleen
nyt. Postitusjärjestelmä
käynnistyy uudelleen.
Kaikki käyttötoimenpiteet järjestelmän ohjelmiston päivittämiseksi, Latauskeskustilin saldon tarkastamiseksi ja postimaksun lisäämiseksi tehdään niin kuin
pääkäyttöohjeessa on selitetty. Näiden toimenpiteiden tekeminen hidastuu kun käytät analogista puhelinlinjaa.
SDC876B Jatkuvan yhteyden (LAN -yhteys) opas
<< Paluu Sisällysluetteloon
Page 60

Tekniset tiedot - Verkon ylläpitäjä vaatii MAC -osoitteen
Joissakin harvoissa tapauksissa verkkosi ylläpitäjä saattaa vaatia Jatkuvan yhteyden -verkkoadapterin MAC -osoitetta. Sen saa selville seuraavalla tavalla:
FI
DM220i -sarja DM300c- ja DM400c
1. Paina Valinnat.
2. Paina Sivu alas kahdesti.
3. Valitse Latauskeskus.
4. Valitse LAN -asetukset.
5. Paina Sivu alas.
6. Verkkoadapterin MAC-osoite
näytetään. Ota se ylös verkon
ylläpitäjää varten.
7. Palaa aloitusnäyttöön
painamalla Paluu
(Aloitusnäyttö) -painiketta.
-sarjat
1. Paina Valikko.
2. Paina Sivu alas.
3. Valitse Datakeskus.
4. Paina Sivu alas.
5. Valitse Verkkoasetukset.
6. Verkkoadapterin MAC-osoite
näytetään. Ota se ylös verkon
ylläpitäjää varten.
7. Palaa aloitusnäyttöön
painamalla Paluu
(Aloitusnäyttö) -painiketta.
DM475/
DM450+
1. Paina Valikko.
2. Paina Sivu alas.
3. ValitseDatakeskus.
4. Paina Sivu alas.
5. Valitse Verkkoasetukset.
6. Verkkoadapterin MAC-osoite
näytetään. Ota se ylos verkon
ylläpitäjää varten.
7. Palaa aloitusnäyttöön
painamalla Paluu
(Aloitusnäyttö) -painiketta.
DM500 - DM1000
IntelliLink®
Ohjauskeskus
1. Paina Valikko.
2. Valitse Asetus.
3. Valitse Puhelimen/Verkon
asettaminen.
4. Paina Alas-nuolinäppäintä
ja valise Verkkoaseukse.
5. Valitse Postitusjärjestelmän
verkkoasetukset.
6. Valitse MAC-osoite.
Verkkoadapterin MAC-osoite
näytetään. Ota se ylos verkon
ylläpitäjää varten.
7. Paina vasenta nuolinäppäintä
poisuaksesi
aseusvalikosa.
SDC876B Jatkuvan yhteyden (LAN -yhteys) opas
<< Paluu Sisällysluetteloon
Page 61

Tekniset tiedot - Tiedostopäätteet ja URLit,
FI
Tekniset tiedot - Portit ja
jotka verkon / palomuurin tulee sallia
Jatkuva yhteys käyttää seuraavia tiedostopäätteitä, joiden tulee päästä verkon ja
palomuurin läpi:
Tyyppi Pääte
DEC .dcz
EMD .zmd
Graikka .gar
Hinnasto .rmz
CCD .bin
palatiedosto .GAU
Seuraaviin ‘korkean luokituksen’ sivustoihin pitää myös olla pääsy verkkosi ja
palomuurisi ohi:
Mikä tahansa URL, johon lukeutuu seuraavat kirjainyhdistelmät:
protokollat, joita Jatkuva yhteys tarvitsee
Jatkuva yhteys käyttää seuraavia portteja ja protokollia, joilla pitää olla pääsy
verkkosi ja palomuurisi läpi:
Tyyppi Protokolla Portti Toiminto
DNS UDP 53 Latauskeskus- ja Web-palvelut
HTTP TCP 80 Latauskeskus- ja Web-palvelut
HTTPS TCP 443 Lataa ja postita
FTP TCP 21 Ohjelmiston ja hintojen päivitykset,
graikan lataukset.
Palomuurin tulee olla asetettuna
Aktiivinen-tilaan ja siinä pitää olla
sallittuna väliaikaiset portit.
HUOMAA: Aktiivinen ftp on käytössä.
Palomuurit tulee asettaa tilaan ‘ftptietoinen’.
pb.com
pitneybowes.co.uk
pbcomet.com
pitneybowes.eu.com
HUOMAA: URLit, joihin Pitney Bowes -järjestelmäsi yrittää päästä, voivat sisältää
ylläolevat kirjainyhdistelmät missä tahansa kohdassa. Palomuurien pitää siksi sallia
liikenne mihin tahansa URL-osoitteeseen, jossa on ylläolevat osoitteet. Palomuurisi
asetuksissa pitää olla korvausmerkit käytössä, esimerkiksi *pb.com*
SDC876B Jatkuvan yhteyden (LAN -yhteys) opas
<< Paluu Sisällysluetteloon
Page 62

Indice
IT
Introduzione
Quali sono i beneci di Constant Connection?
E' sicuro?
Cosa devo dire al mio Amministratore di Rete/IT ?
Devo cambiare impostazioni sulla mia Affrancatrice?
La mia affrancatrice funziona senza una connessione di rete?
Quali affrancatrici utilizzano Constant Connection?
Prima di iniziare...
Congurazione Network
Connessione sica alla rete
Installazione
Step 1 - Connettere il vostro sistema al connettore di rete
Funzionalità
Utilizzando Constant Connection
Problemi
Tornare all'utilizzo della linea telefonica analogica
Riferimento
L'Amministratore di rete richiede un indirizzo MAC
Estensioni File e URLs da abilitare per Rete/Firewall
Porte e protocolli da utilizzare per Constant Connection
Step 2 - Congurare l'indirizzo IP statico
Step 3 - Congurare il vostro sistema per la connessione LAN
Step 4 - Vericare il funzionamento della LAN
SDC876B Guida Constant Connection (Collegamento LAN)
Cliccare su qualunque argomento presente nell’indice per
passare direttamente alla sezione prescelta.
<< Ritorno all'indice
Page 63
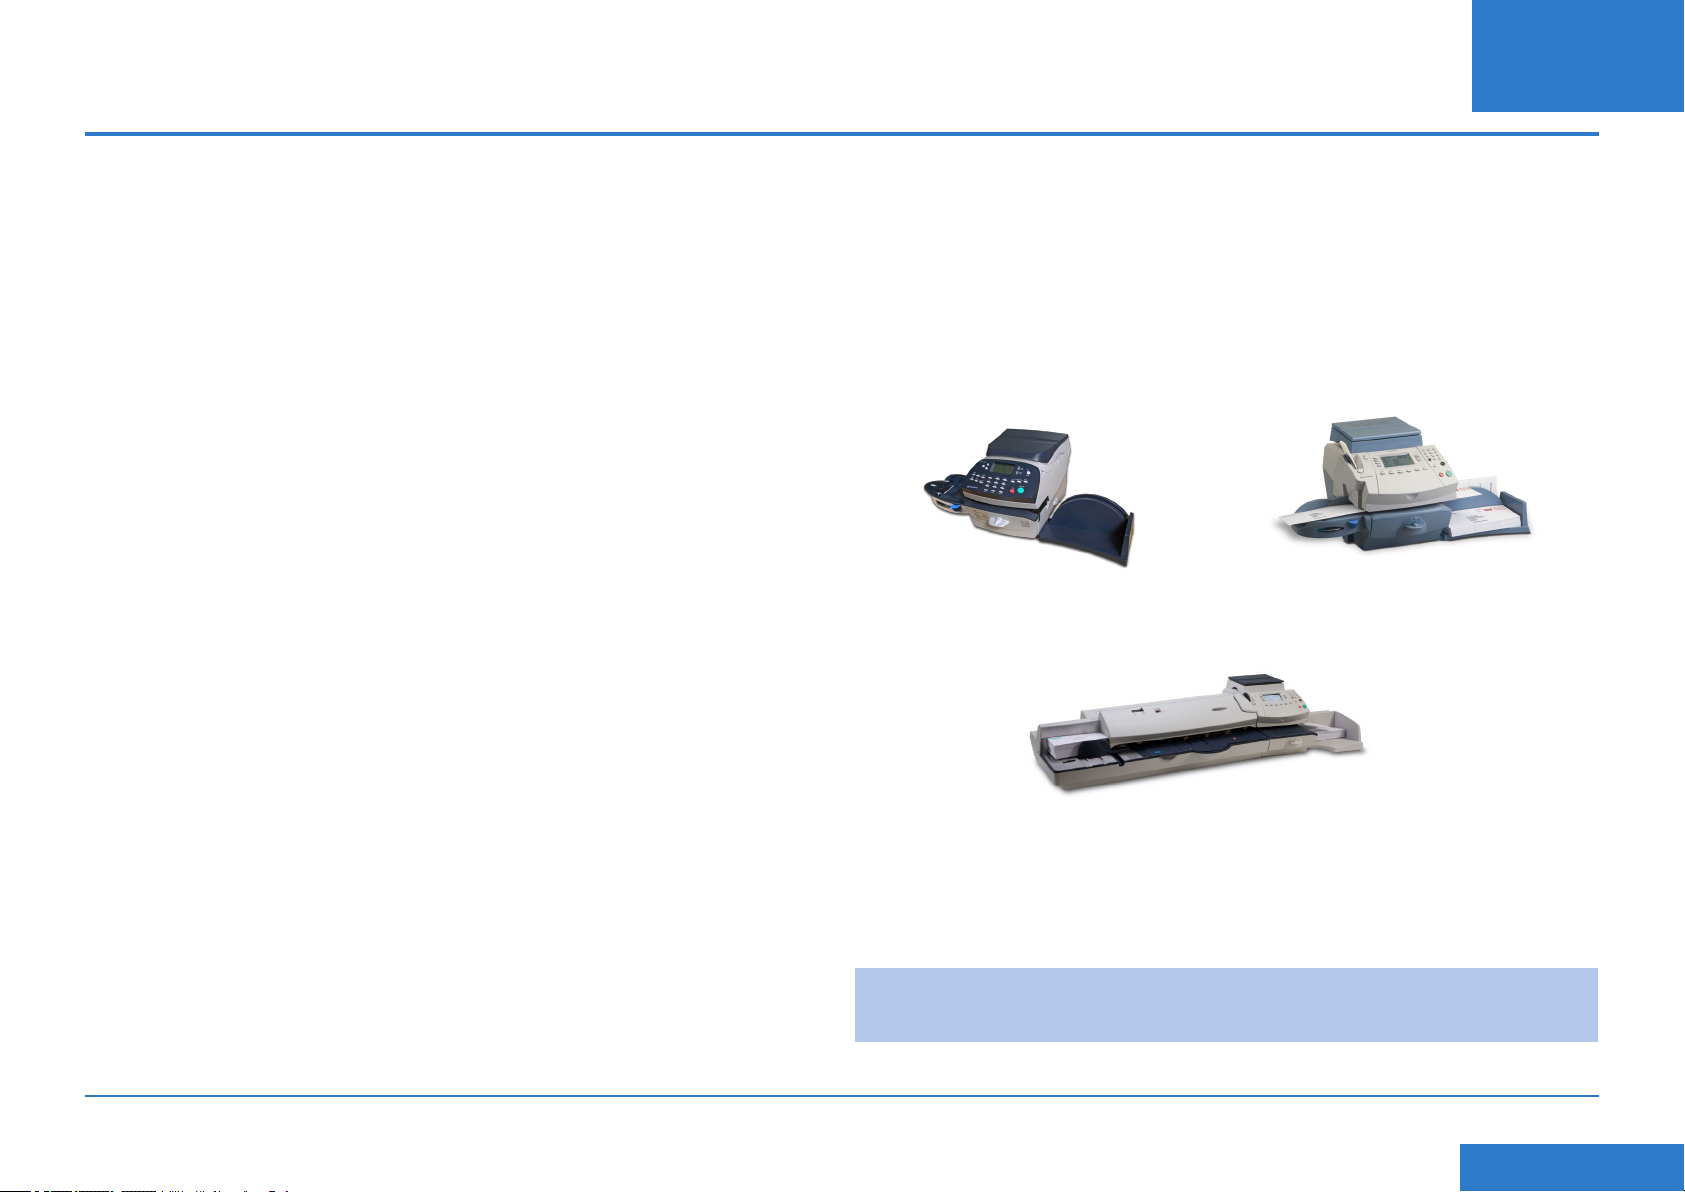
Introduzione
IT
Quali sono i beneci di Constant Connection?
Constant Connection consente di collegare la vostra Affrancatrice tramite una
porta Ethernet (LAN), al posto di una connessione tramite PC o linea telefonica
analogica.
La velocità di connessione sarà migliore quando collegherete la vostra affrancatrice
al server Pitney Bowes per servizi quali:Postage by Phone®, Aggiornamenti tariffari,
Aggiornamemti software, ricariche ecc., Inoltre essendo il vostro sistema connesso
alal rete, non sarnno necessari un PC o una linea telefonica analogica dedicati
all'affrancatrice.
Quindi se al momento staste pagando l'abbonamento per una linea telefonica
analogica solo per l'affrancatrice, potrete disdirla ion quanto non più necessaria.
E' sicura?
Si, il sistema è stato approvato da ICSA, società indipendente specializzata nella
valutazione e certicazione per i prodotti e i servizi legati all'information technology
(IT).
Potete scaricare il report completa da www.pitneybowes.co.uk
Cosa devo dire al mio Amministratore di Rete/IT?
In base al vostro sistema di rete (LAN), il vostro Amministratore di Rete dovrà
congurare la Rete per poter gestire indirizzi IP sia statici che dinamici e consentire
l'accesso alle seguenti porte:
TCP 80 (http), TCP 443 (https), TCP 21 (ftp), TCP 53 (DNS)
Sono nwecessari i dettagli della subnet mask e il gateway predenito. Se viene
utilizzato un server proxy, assicurarsi che sia impostata la funzione bypass proxy
server.
Se necessario, vericare con il vostro amministratore di Rete che il network possa
esssere congurato come descrito. Qualsiais modica alla rete deve essere
eseguita prima dell'instalalzione di Constant Connection (consultare ‘Prima di
iniziare....’ a pagina seguente).
La mia affrancatrice funziona senza una connessione di rete?
Si, potete potete comunque utilizzare una linea telefonoca analogica per
connettervi ai server Pitney Bowes. Consultate la sezione "Problemi?" per maggiori
informazioni.
Quali affrancatrici utilizzano Constant Connection?
Questa guida da informazioni sull' utilizzo di Constant Connection con i seguenti
prodotti:
DM220i series
DM475
DM300c and DM450c series
Devo cambiare impostazioni sulla mia Affrancatrice?
Si, dovrete impostare la vostra affrancatrice in base al tipo di rete che utilizzate.
Dettagliate informazioni sul set up sono incluse in questa guida.
SDC876B Guida Constant Connection (Collegamento LAN)
IMPORTANT: La disponibilità dei prodotti varia da paese a paese. La presenza di
un prodotto in questa guida, non garantisce la sua disponibilità nel vostro paese.
<< Ritorno all'indice
Page 64
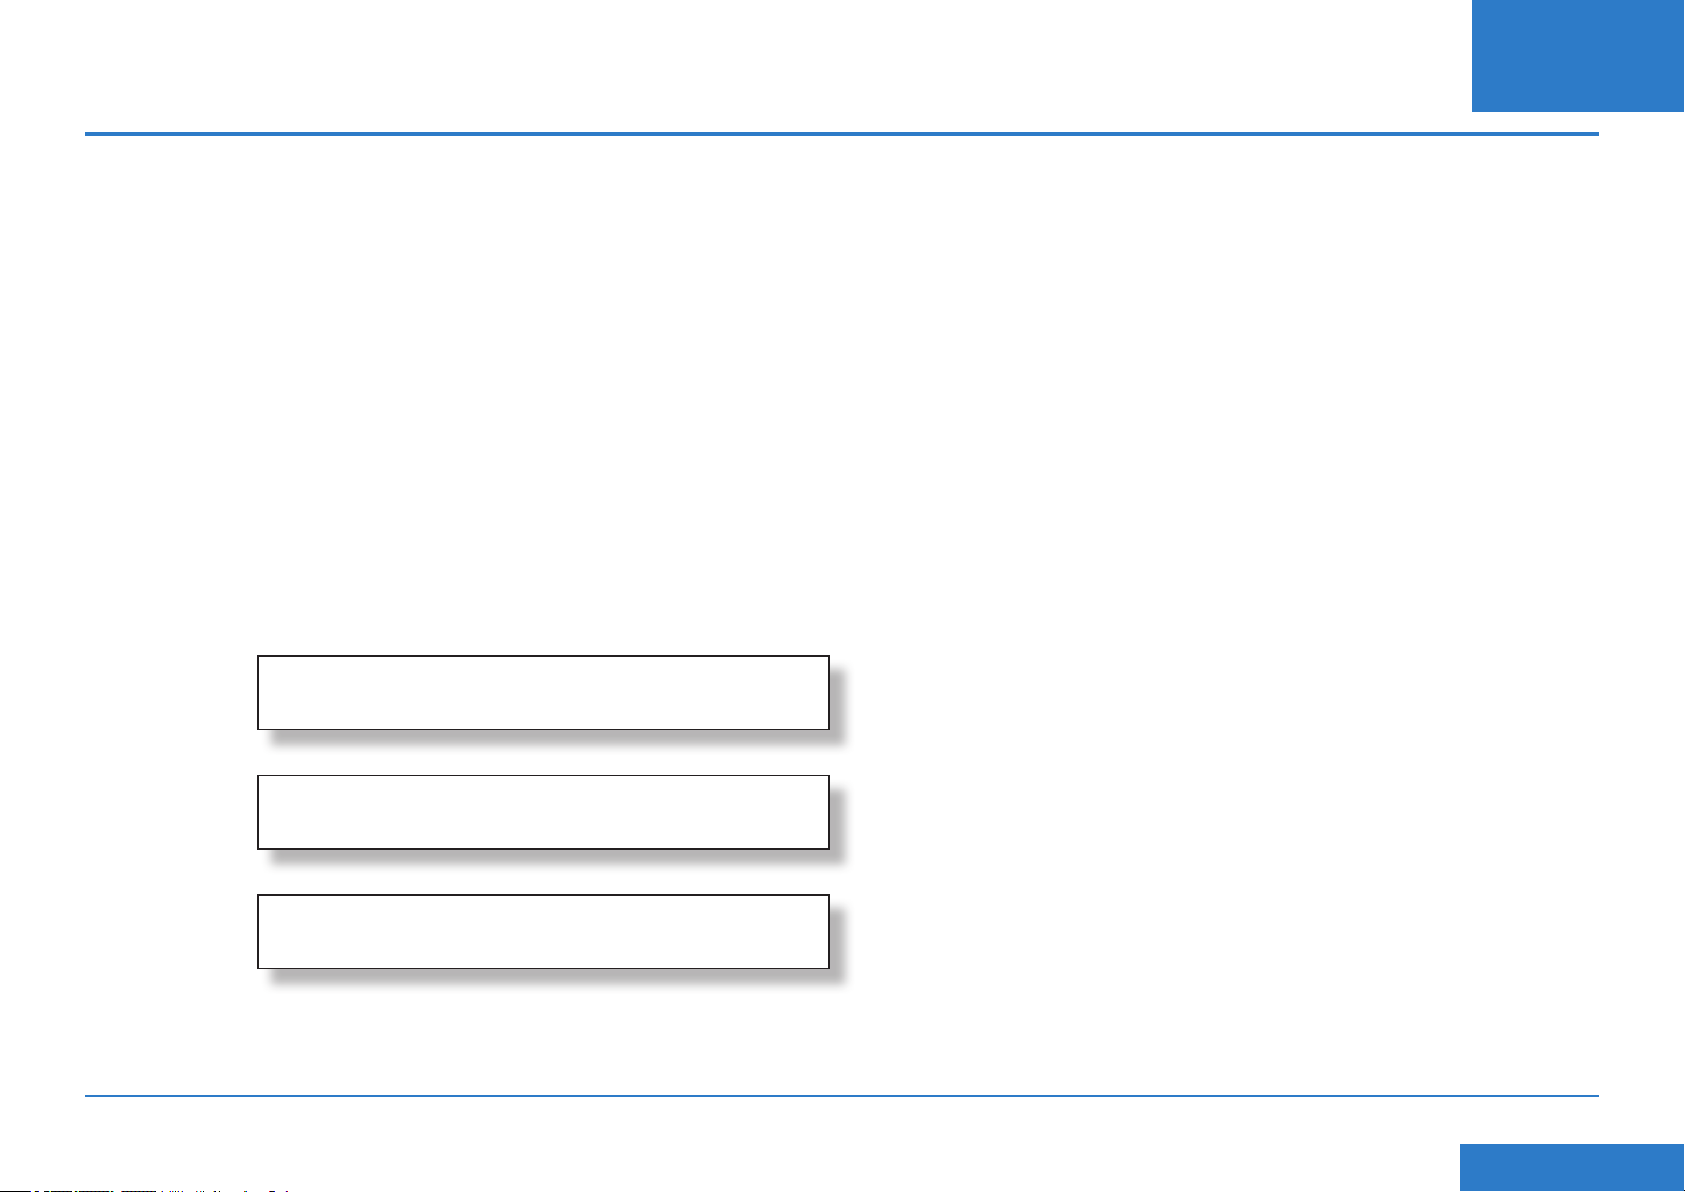
Prima di iniziare
IT
Per far si che la vostra installazione proceda più velocemente possibile,
vericate che prima di iniziaresiano stati eseguiti tutti i seguenti passaggi:
Congurazione Rete
Potreste aver bisogno del supporto del vostro Amministratore di Rete/IT per
completare le seguenti informazioni:
Questa lista vi aiuterà ad assicurarvi che tutte le impostazioni di rete siano state
eseguite e, dove richiesto, tutti i valori d'impostazione siano annotati per poter
congurare la vostra affrancatrice.
Come viene impostato lindirizzo IP nella vostra affrancatrice?
Dinamico
oppure
Statico (Marcate il boxselezionato)
Se si utilizza un indirizzo IP Statico , dovrete avere le seguentui informazioni:
Indirizzo IP: ! . . .
Porte che devono essere aperte per questo indirizzo IP
TCP 80 (http)
TCP 443 (https)
TCP 21 (ftp)
TCP 53 (DNS lookup)
Connessione sica alla rete
Il connettore di rete deve trovarsi a non più di 5 metri dall'affrancatrice.
Subnet Mask . . .
Gateway predenito . . .
SDC876B Guida Constant Connection (Collegamento LAN)
<< Ritorno all'indice
Page 65

Installazione Step 1: Connettere il vostro sistema al connettore di rete
DM220i series DM300c and DM450c series DM475
Collegare alla porta USB
dell'affrancatrice.
IT
Collegare
direttamente
alla porta LAN
dell'affrancatrice
Cavo USB fornito
con l'adattatore di
rete
1. Spegnere l'affrancatrice.
2. Inserire il cavo Ethernet al vostro router o alla presa di
retre.
3. Collegare l'adattatore di rete al cavo Ethernet e quindi
collegare l'adattatore di rete ad una selle porte USB
dell'affrancatrice utilizzandoi il cavetto di prolunga
fornito.
4. Accendere l'affrancatrice.
SDC876B Guida Constant Connection (Collegamento LAN)
Cavo Ethernet, []
Adattatore di rete.
5. Una volta avviata l'affrancatrice e in presenza
dello schermo Home, i LED’s dell'adattatore di rete
dovrebbero accendersi ed iniziare a lampeggiare entro
15 secondi. Questo indica che la connessione con la
rete è attiva.
Collegare al
vostro router o
alla presa di retre
Collegare al
vostro router o
alla presa di retre
1. Spegnere l'affrancatrice.
2. Inserire il cavo Ethernet al vostro
router o alla presa di retre.
3. Collegare l'altro capo del cavo
nella porta LAN della vostra
affrancatrice.
4. Accendere l'affrancatrice.
<< Ritorno all'indice
Page 66
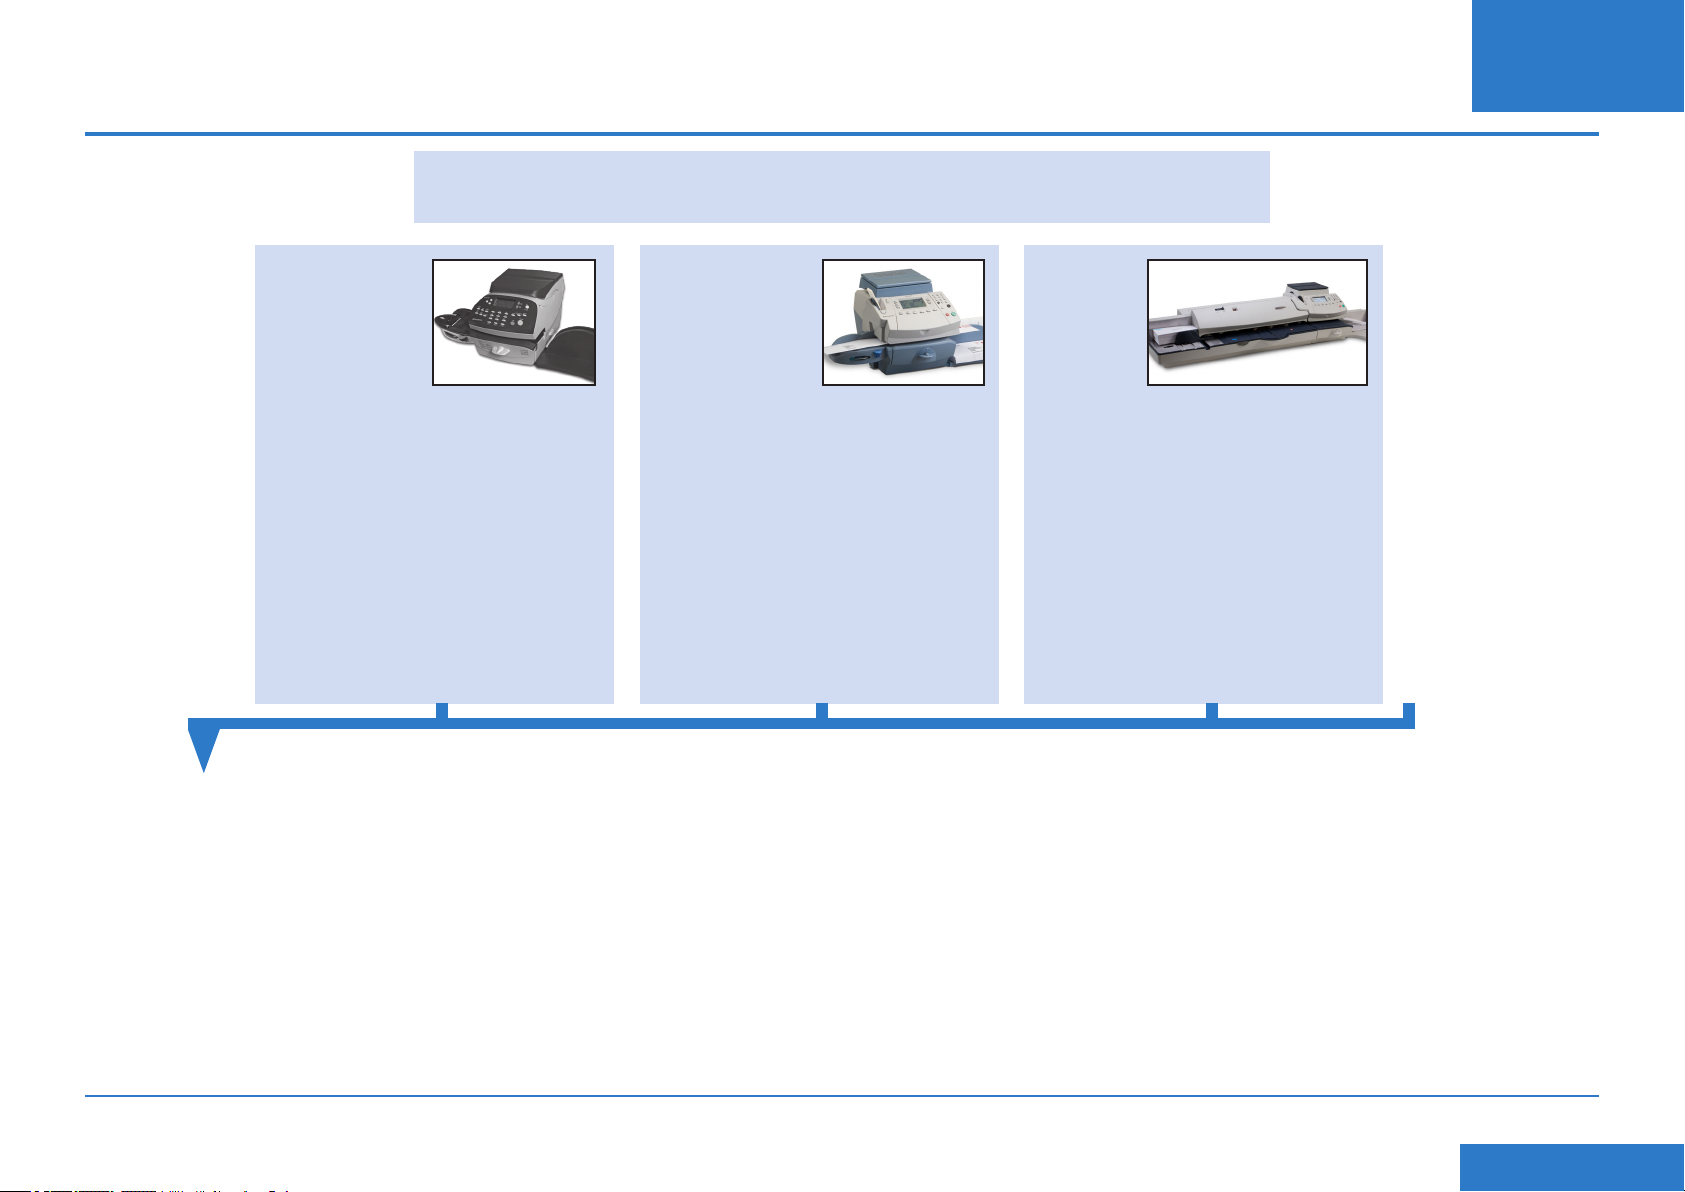
Installzione - Step 2 Congurare l'indirizzo IP statico
Questo step è richiesto solo se si usa un indirizzoIP statico per l'affrancatrice. se utiliozzate un
indirizzo IP dinamico procedete direttamente con lo Step 3.
IT
DM220i series DM300c e DM450c
1. Premere Opzioni.
2. Premere Pag Giu.
3. Premere di nuovo Pag Giu.
4. Selezionare Connessione
Centro dati.
5. Selezionare Imp. Network.
6. Selezionare IP.
7. Selezioanre Manuale.
8. Selezionare IP Address/IP Addr, quindi, su tutti i modelli ad eccezione di
DM220i, premere C per cancelalre i valori esistenti. Imputare il vostro indirizzo
IP statico come registrato nella sezione ‘Prima di Iniziare’ . Premi Invio o
Accetta per confermare le nuove impostazioni.
NOTA: Digitare l'indirizzo IP completo inclusi i punti separatori. In questo modo,
nel caso la sezione contenga meno di 3 digit, il display paserà automaticamente
alla sezione sucessiva.
9. Selezionare Subnet Mask/Subnet, quindi, su tutti i modelli ad eccezione di
DM220i, premere C per cancelalre i valori esistenti. Imputare il vostrosubnet
mask, come registrato nella sezione ‘Prima di Iniziare. Premi Invio o Accetta
per confermare le nuove impostazioni.
series
1. Premere Opzioni.
2. Premere Pag Giu.
3. Selezionare Opzioni Centro
dati.
4. Premere Pag Giu.
5. Selezionare Imp. Network.
6. Selezionare IP.
7. Selezioanre Specica indirizzo
manualmente.
DM475
1. Premere Opzioni.
2. Premere Pag Giu.
3. Selezionare Opzioni Centro
Dati.
4. Premere Pag Giu.
5. Selezionare Opzioni Centro
dati.
6. Selezionare IP.
7. Selezioanre Specica indirizzo
manualmente.
10. Selezionare Default Gateway/Gateway, quindi, su tutti i modelli ad eccezione
di DM220i, premere C per cancelalre i valori esistento. Imputare il vostro
gateway, come registrato nella sezione ‘prima di Iniziare’ . Premi Invio o
Accetta per confermare le nuove impostazioni.
11. Se richiesto premer nuovamente Invio per confermare le impostazioni.
12. Premere la Freccia Sinistra o il Tasto Home per uscire dal menu
impostazioni.
SDC876B Guida Constant Connection (Collegamento LAN)
<< Ritorno all'indice
Page 67
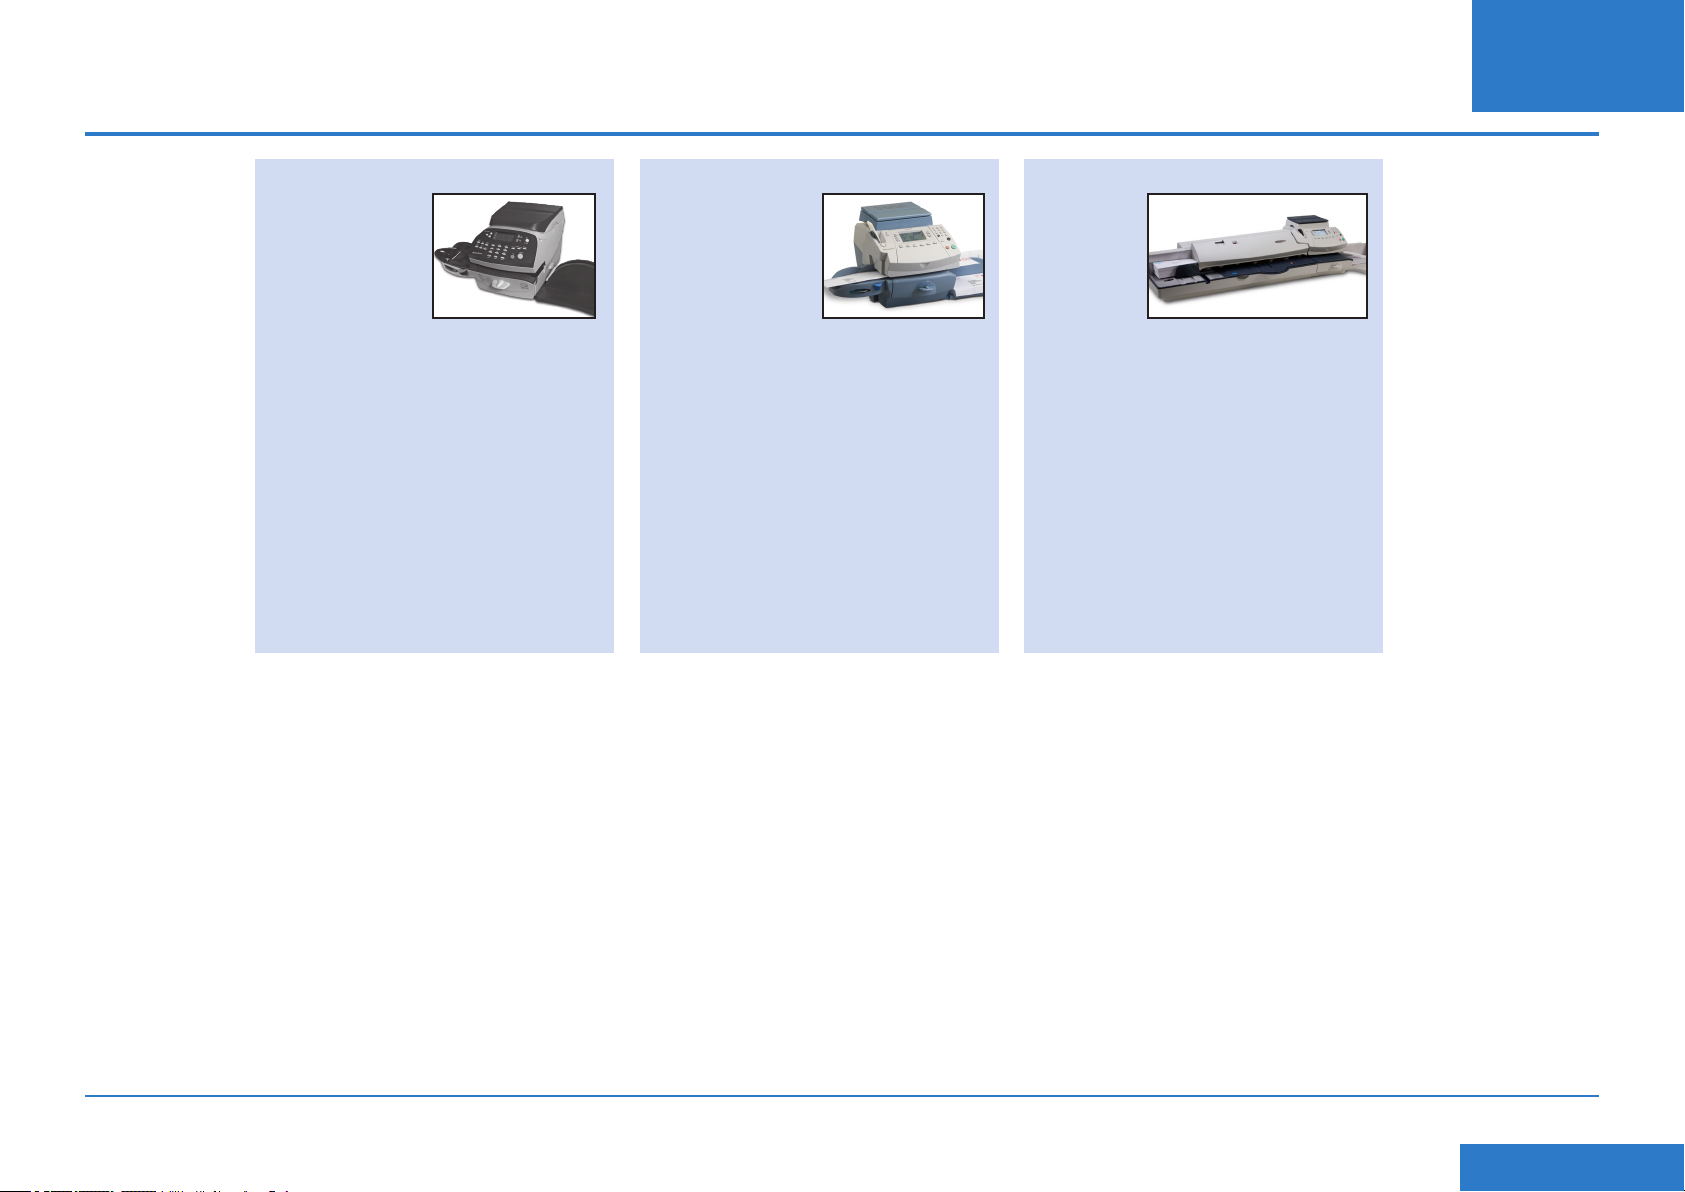
Installazione - Step 3 Congurare il vostro sistema per la connessione LAN
DM220i series DM300c e DM450c DM475
IT
Non è richiesta alcuna operazione
per impostare i sistemi DM220i.
1. Premere Opzioni.
2. Premere Pag Giu.
3. Selezionare Opzioni Centro
Dati.
4. Premere Pag Giu.
5. Selezionare Mod.
Connessione e impostare su
Auto.
6. Premere Home per ritornare
alla videata iniziale.
1. Premere Opzioni.
2. Premere Pag Giu.
3. Selezionare Opzioni Centro
Dati.
4. Premere Pag Giu.
5. Selezionare Mod.
Connessione e impostare su
Auto.
6. Premere Home per ritornare
alla videata iniziale.
SDC876B Guida Constant Connection (Collegamento LAN)
<< Ritorno all'indice
Page 68
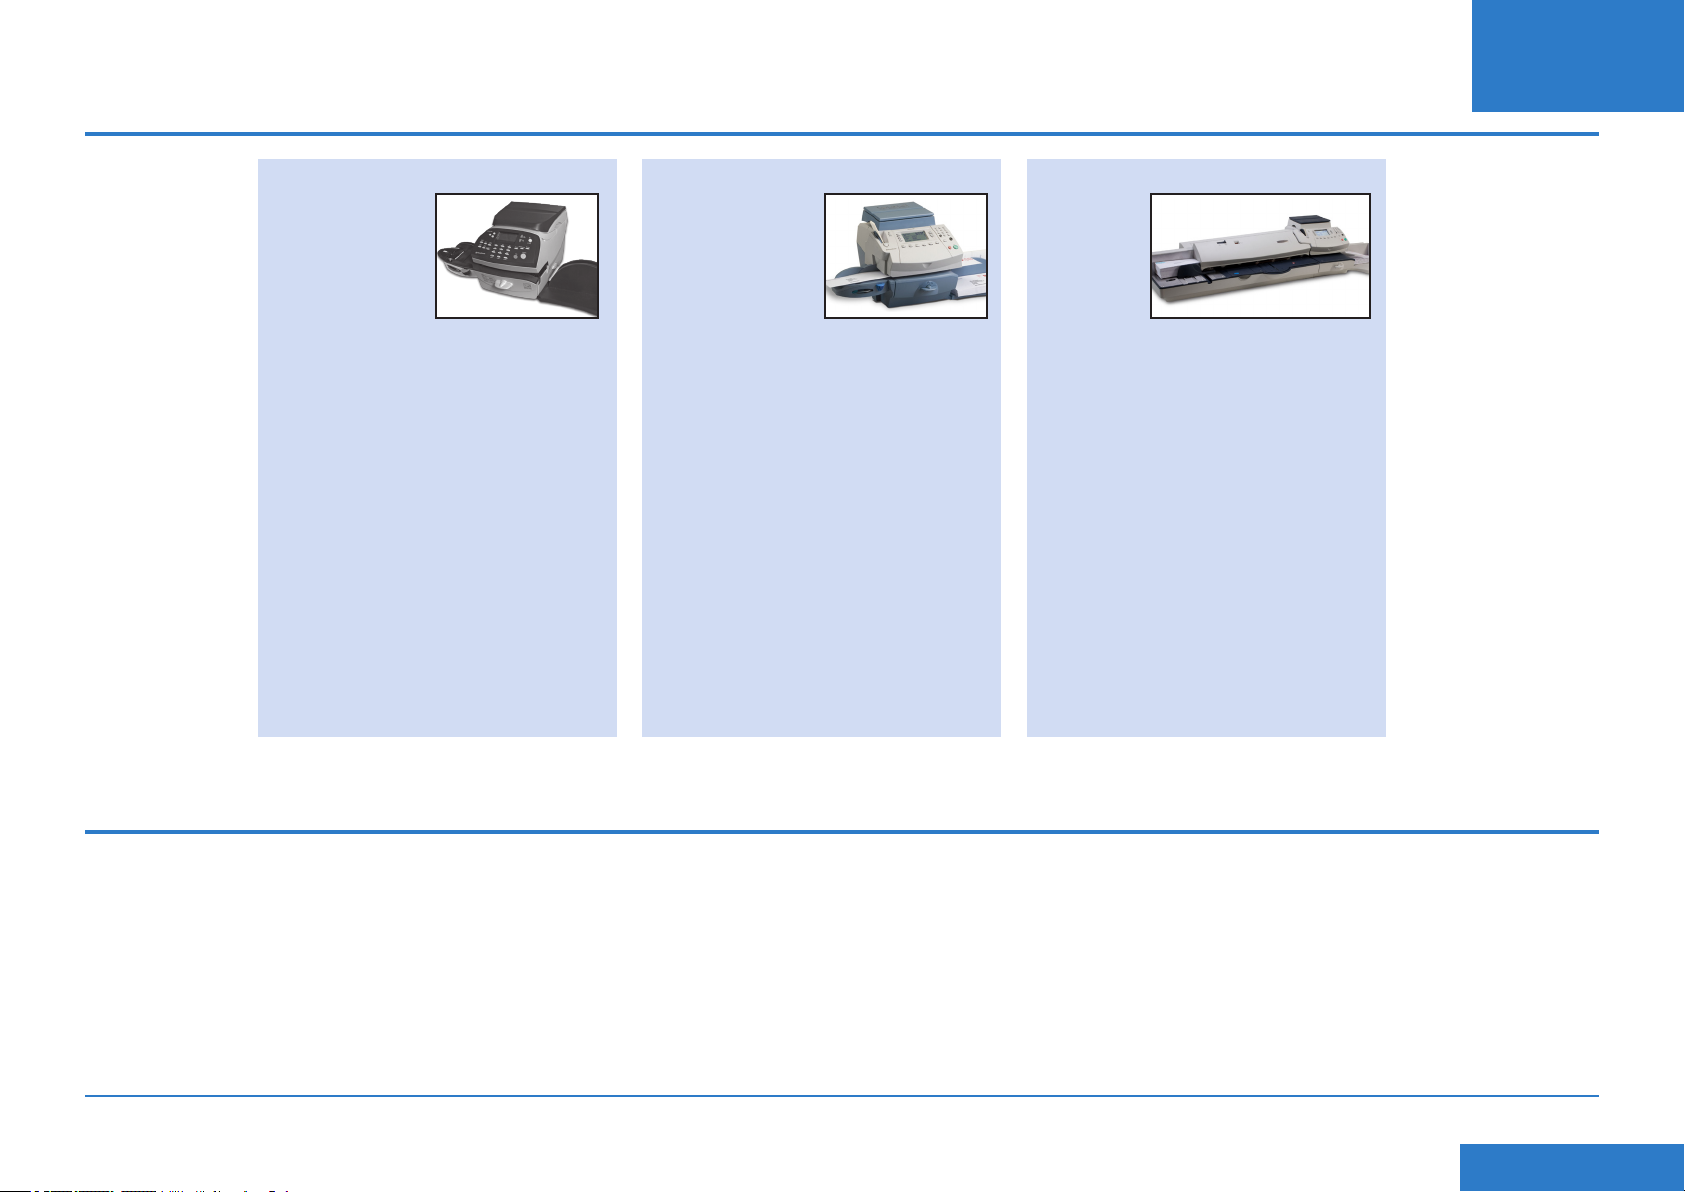
Installazione - Step 4 Vericare il funzionamento della LAN
DM220i series DM300c e DM450c DM475
IT
1. Premere il tasto "Ricarica" .
2. Selezionare Ricarica/Ver.Disp.
PBP. Il sistema si connetterà
al server Pitney Bowes per
accedere al conto PBP. Se la
connessione LAN funziona
correttamente sul display
verrà mostrato il vostro credito
disponibile presso il Centro Dati
PBP.
3. Selezionare Continua per
uscire.
1. Premere il tasto "Ricarica".
2. Selezionare Ricarica/Ver.Disp.
PBP. Il sistema si connetterà
al server Pitney Bowes per
accedere al conto PBP. Se la
connessione LAN funziona
correttamente sul display
verrà mostrato il vostro credito
disponibile presso il Centro Dati
PBP.
3. Selezionare Continua per
uscire.
Utilizzando Constant Connection
Una volta completata l'installazione ed il test come sopra descritto, Constant
Connection consente una connessione veloce e permanente per il vostro Sistema
d'Affrancatura.
Tutte le attività di aggiornamento software, Ricarica, Scarico aggiornamento
tariffario ecc. saranno eseguite esattamente come indicato nella Guida Operatore
del vostro sistema.
1. Premere il tasto "Agg.
Importo" .
2. Seleleziona Contr. bilancio
PBP. Il sistema si connetterà
al server Pitney Bowes per
accedere al conto PBP. Se la
connessione LAN funziona
correttamente sul display
verrà mostrato il vostro credito
disponibile presso il Centro Dati
PBP.
3. Selezionare Continua per
uscire.
SDC876B Guida Constant Connection (Collegamento LAN)
<< Ritorno all'indice
Page 69
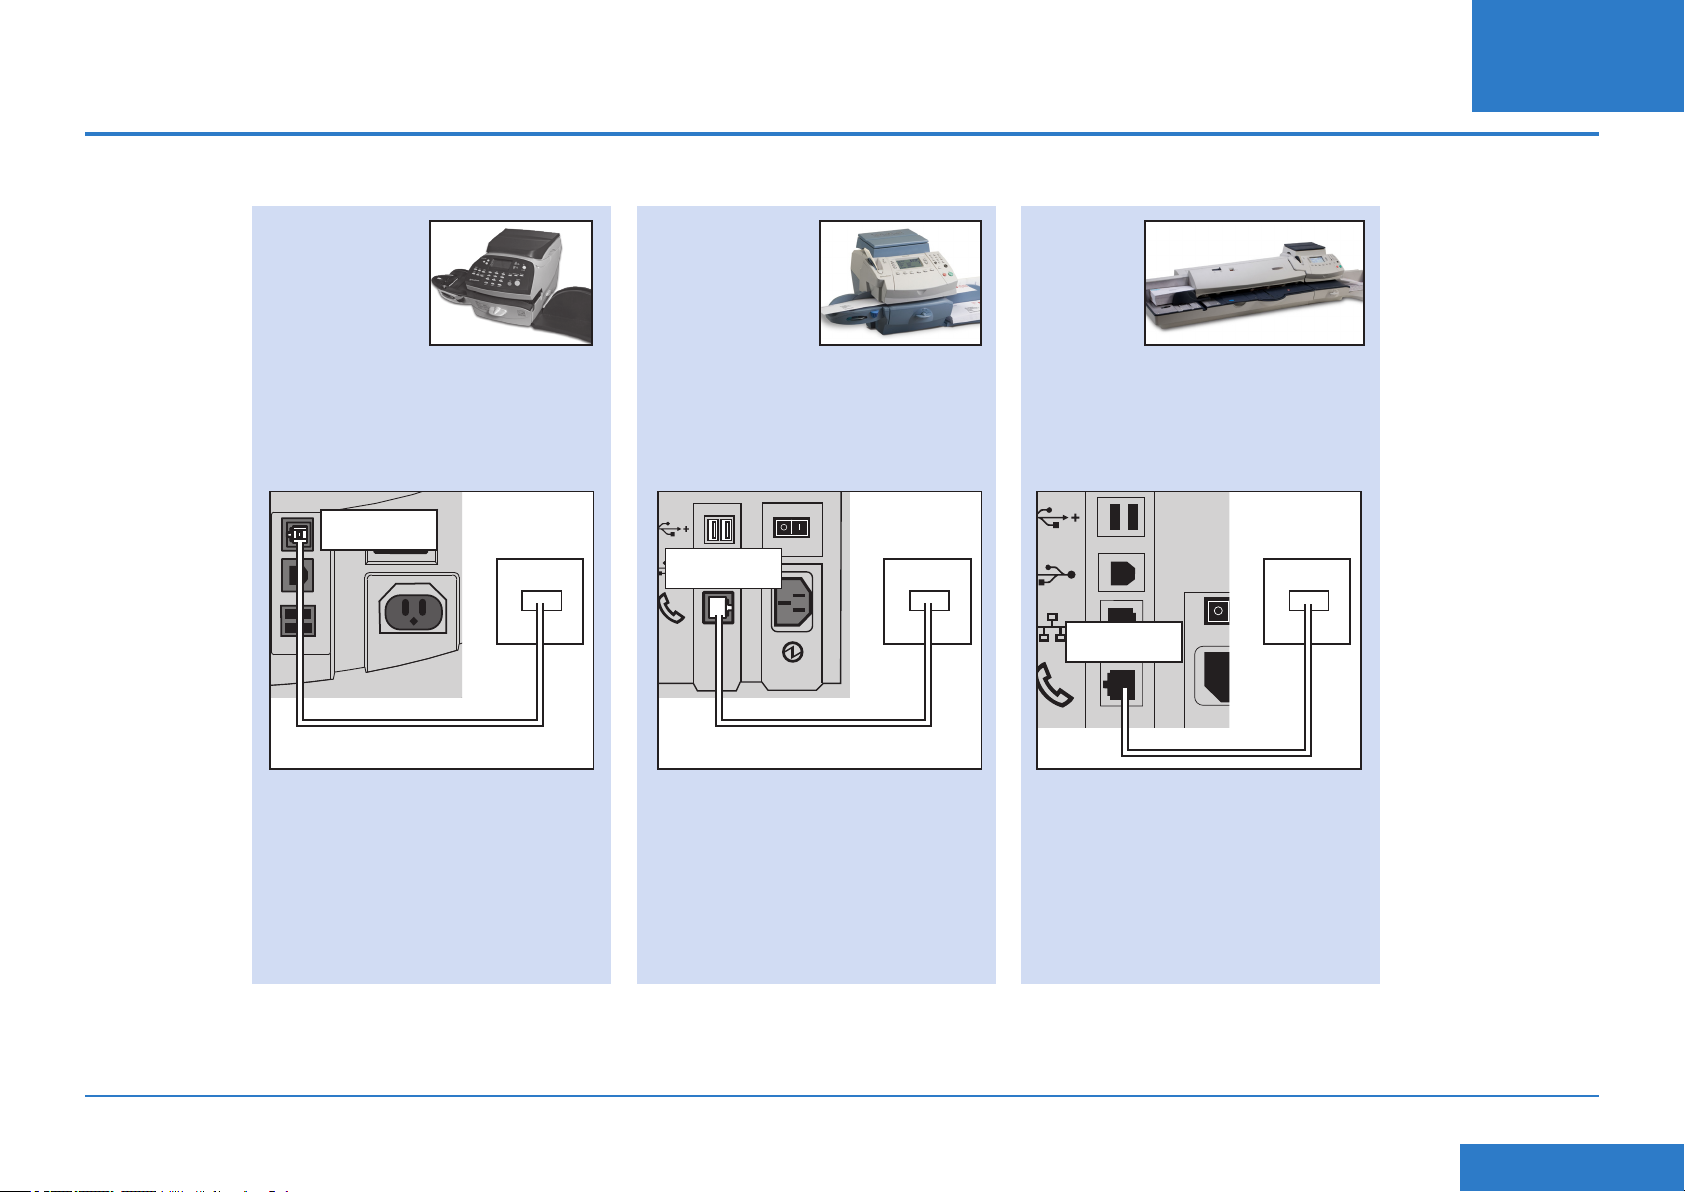
IT
Problemi? - Tornare all'utilizzo della linea telefonica analogica
Se, per qualsiasi ragione, la vostra rete LAN non dovesse funzionare. potete congurare il vostro Sistema d'affrancatura in modo da connettersi al Centro Dati PBP tramite
una linea telefonica analogica.
DM220i series DM300c e DM450c DM475
1. Collegare un cavo telefonico
dalla presa a muro alla presa sul
retro della vostra affrancatrice.
Telefono di
alimentazione
2. Scollegare l'interfaccia di rete
USB dall'affrancatrice.
muro
presa
1. Collegare un cavo telefonico
dalla presa a muro alla presa sul
retro della vostra affrancatrice.
muro
Telefono di
alimentazione
2. Scoollegare l'interfaccia di rete
USB dall'affrancatrice.
presa
1. Collegare un cavo telefonico
dalla presa a muro alla presa sul
retro della vostra affrancatrice.
muro
presa
Telefono di
alimentazione
2. Scollegare il cavo di rete
dall'affrancatrice.
Tutte le attività di aggiornamento software, Ricarica, Scarico aggiornamento tariffario ecc. sarannoe seguite esattamente come indicato nella Guida Operatore del vostro
sistema. Sarà mostrato un messaggio che vi informa di una riduzione di velocità di connessione quando si utilizza una linea telefonica analogica.
SDC876B Guida Constant Connection (Collegamento LAN)
<< Ritorno all'indice
Page 70
Riferimenti - L'Amministratore di rete richiede un indirizzo MAC
In alcune circostanze, il vostro Amministratore di rete potrebbe richiedere l'indirizzo MAC dell'adattatore Constant Connection. Per ottenerlo procedere come segue:
IT
DM220i series DM300c e DM450c
1. Premere Opzioni.
2. Premere due volte Pag.Giu.
3. Selezionare Connessione
Centro Dati.
4. Seleionare Imp. Network.
5. Premere Pag Giu.
6. A questo punto potrete leggere
l'indirizzo MAC annotatelo
e comunicatelo al vostro
Amministratore di rete.
7. Premere Home per ritornare
alla videata iniziale.
series
1. Premere Opzioni.
2. Premere Pag Giu.
3. Selezionare Opzioni Centro
Dati.
4. Premere Pag Giu.
5. Seleionare Imp. Network.
6. A questo punto potrete leggere
l'indirizzo MAC annotatelo
e comunicatelo al vostro
Amministratore di rete.
7. Premere Home per ritornare
alla videata iniziale.
DM475
1. Premere Opzioni.
2. Premere Pag Giu.
3. Selezionare Opzioni Centro
Dati.
4. Premere Pag Giu.
5. Selezionare Imp. Network.
6. A questo punto potrete leggere
l'indirizzo MAC annotatelo
e comunicatelo al vostro
Amministratore di rete.
7. Premere Home per ritornare
alla videata iniziale.
SDC876B Guida Constant Connection (Collegamento LAN)
<< Ritorno all'indice
Page 71

Riferimento - Estensioni File e URLs da
IT
Reiferimento - Porte e protocolli da
abilitare per Rete/Firewall
Constant Connection utilizza le seguenti estensioni che dovranno essere aperte per
il vostro network e rewall:
Tipo Estensione
DEC .dcz
EMD .zmd
Graphics .gar
Rate Manager .rmz
CCD BIN
Snippet le .GAU
Anche i seguenti domini ‘top level’ dovranno essere accessibili tramite il vostro
network e rewall:
Qualsiasi URL che contenga:
utilizzare per Constant Connection
Constant Connection utilizza le seguenti porte e protocolli che dovranno quindi
essere accessibili tramite il vostro network e rewall:
Tipo Protocollo Porta Funzione
DNS UDP 53 Postage by Phone e Web Services
HTTP TCP 80 Postage by Phone e Web Services
HTTPS TCP 443 Postage by Phone
FTP TCP 21 Aggiornamenti Software e Tariffe,
Scarico Graca.
Il Firewall deve essere impostato in
modalità Active per consentire porte
simulate .
NOTA: vengono utilizzati degli Active
ftp.Impostare il Firewalls su ‘ftp
aware’.
pb.com
pitneybowes.co.uk
pbcomet.com
pitneybowes.eu.com
NOTA: Gli URLs a cui si accede tramite il vosto sistema Pitney Bowes possono
contenere le stringhe sopra citate in qualsiasi parte dell'URL. Il Firewalls dovrà
quindi venir settato im modo da permettere il trafco verso qualsiaisi URL
contenente i domini sopra citati. Il vostro rewall potrebbe richiedere di essere
congurato utilizzando “wildcards”, come ad esempio *pb.com*.
SDC876B Guida Constant Connection (Collegamento LAN)
<< Ritorno all'indice
Page 72
Elizabeth Way,
Harlow, Essex, CM19 5BD, UK
For Service or Supplies:
PB Form SDC876B (05-12)
© Pitney Bowes Limited, 2012
This book may not be reproduced in whole or in part in any fashion or stored in a retrieval system of any type
or transmitted by any means, electronically or mechanically, without the express, written permission of Pitney
Bowes.
We have made every reasonable effort to assure the accuracy and usefulness of this guide, however we cannot
assume responsibility for errors or omissions or liability for the misuse or misapplication of our products.
*SDC876B*
 Loading...