

Page 1

DM200L
Installing DM200L
Installation Instructions
Step 1 - Unpack Box Contents
Remove all shipping tape attached to your meter.
Be sure to open the top cover and remove inside shipping tape.
WARNING! Do not apply power until Step 4.
Step 2 - Connect Phone Cord
The DM200L requires an analog phone line. Select a location
for the system near an analog phone line and connect the
phone cord.
The following are usually analog phone lines:
• Fax lines
• Lines used by modems or credit card readers
• Residential phone lines
A phone line splitter is supplied if you want to tap
into the fax line.
Page 1 of 11
Phone
Most phone systems installed in businesses are not analog and
may damage your DM200L. If you are unsure about your phone line,
contact your telephone company or local network administrator.
Step 3 - Connect Power
Plug the power cord into a convenient outlet.
This document is a publication of Pitney Bowes. The use of this information by the recipient or others for purposes other than the repair, adjustment
or operation of Pitney Bowes equipment may constitute an infringement of patent and/or other intellectual property rights of Pitney Bowes or others.
Pitney Bowes assumes no responsibility for any such use of the information. Except as provided in writing, duly signed by an officer of Pitney Bowes,
no license, either express or implied, under any Pitney Bowes or any third party’s patent, copyright, or other intellectual property rights is granted by
providing this information.
SV61352 Rev. B 11/04 ©2004 Pitney Bowes Inc.
Power
1 Elmcroft Road Stamford, CT 06926-0700
Page 2
DM200L - Installing DM200L
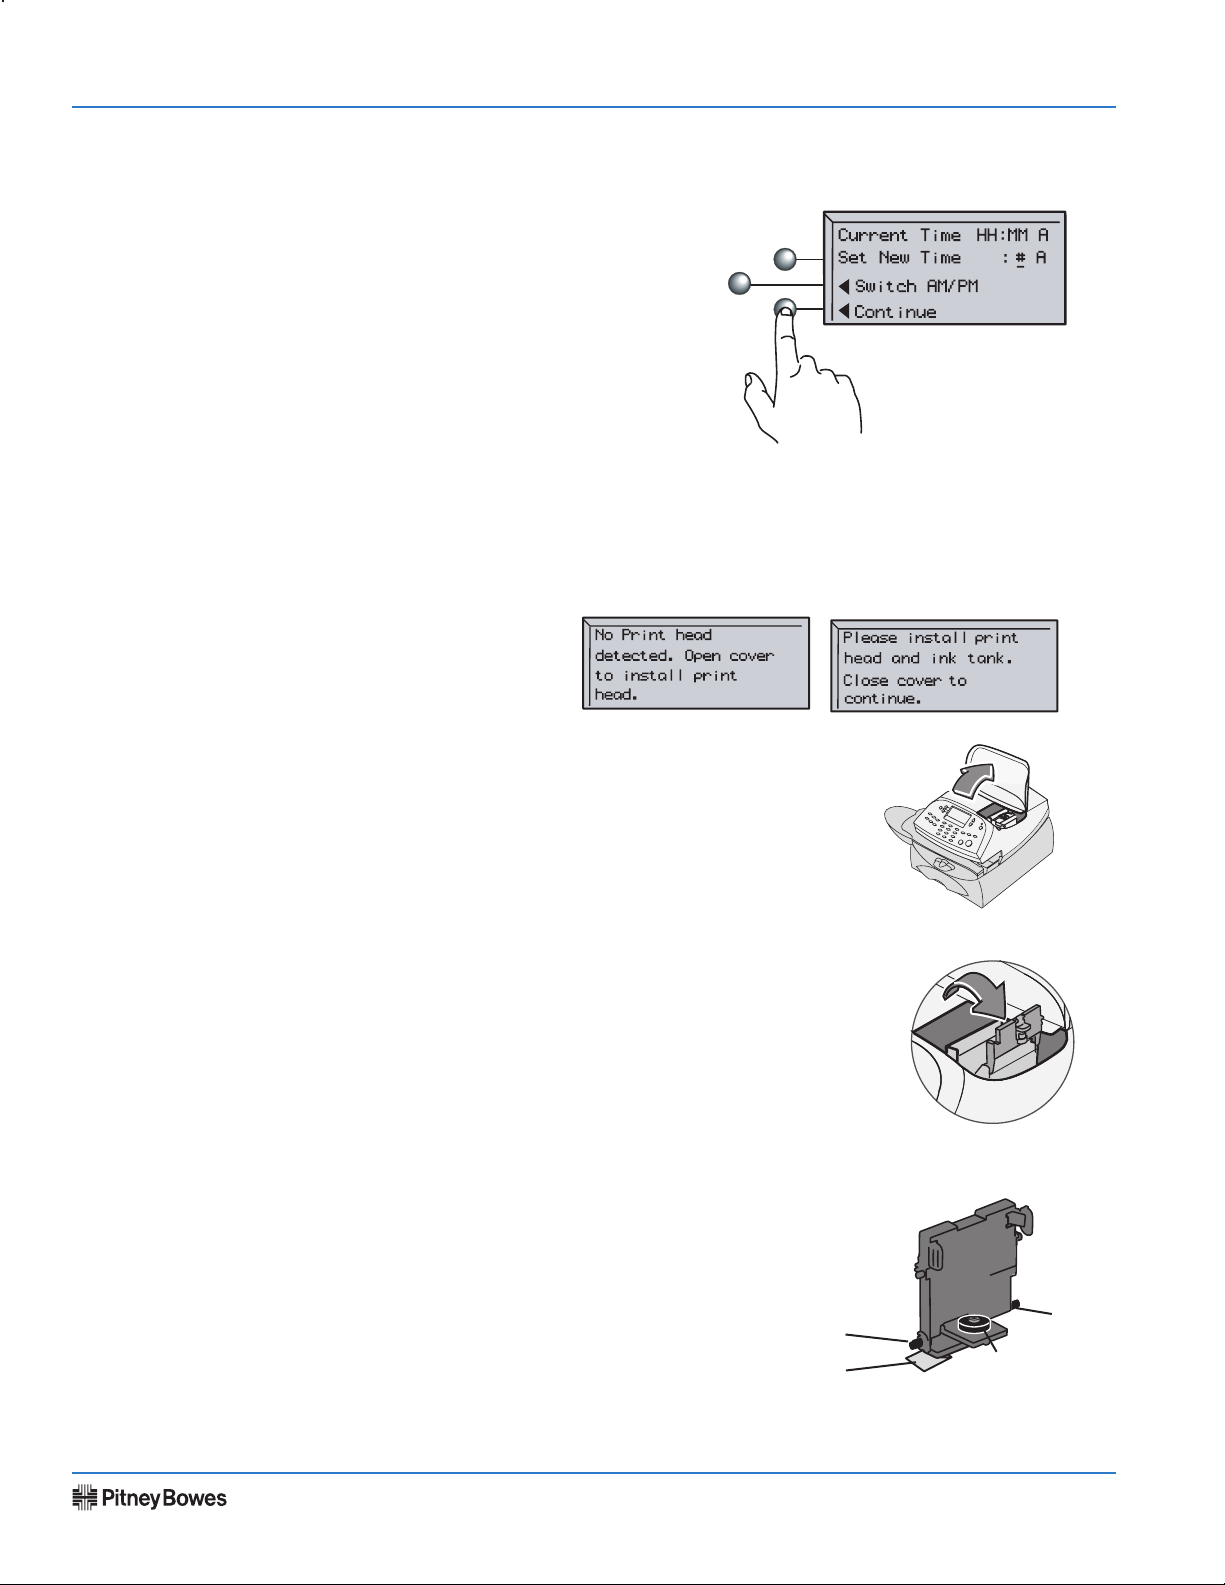
Step 4 - Set Time
After powering on your DM200L, you will see
the following screen.
If the current time on line 1 is correct, select Continue.
If the current time is not correct, enter the correct time on line 2.
Just key in the hours first and then the minutes. Switch between AM
and PM if necessary. Select Continue.
NOTE: Don't forget to check AM/PM setting on line 2.
Step 5 - Install the Print Head
The following screens will appear.
Installation Instructions
Remove weighing platform, then open
access cover.
Flip open the guard.
Remove print head from packaging.
Peg
Tape Strip
Peg
Rubber Washer
SV61352 Rev. B
Page 2 of 11
Page 3

DM200L - Installing DM200L
Remove tape strip from print head.
Slide the print head pegs down into the grooves.
Installation Instructions
Squeeze the tabs on the sides of the print head and push the
print head flush against the wall.
Step 6 - Install the Ink Cartridge
Remove tape on bottom of new ink cartridge.
Lower the cartridge into the cavity. The ridg
es on either side of the cartridge will slide
into the grooves.
-
Tabs
Ridge
SV61352 Rev. B
Ridge
Groove
Page 3 of 11
Page 4
DM200L - Installing DM200L
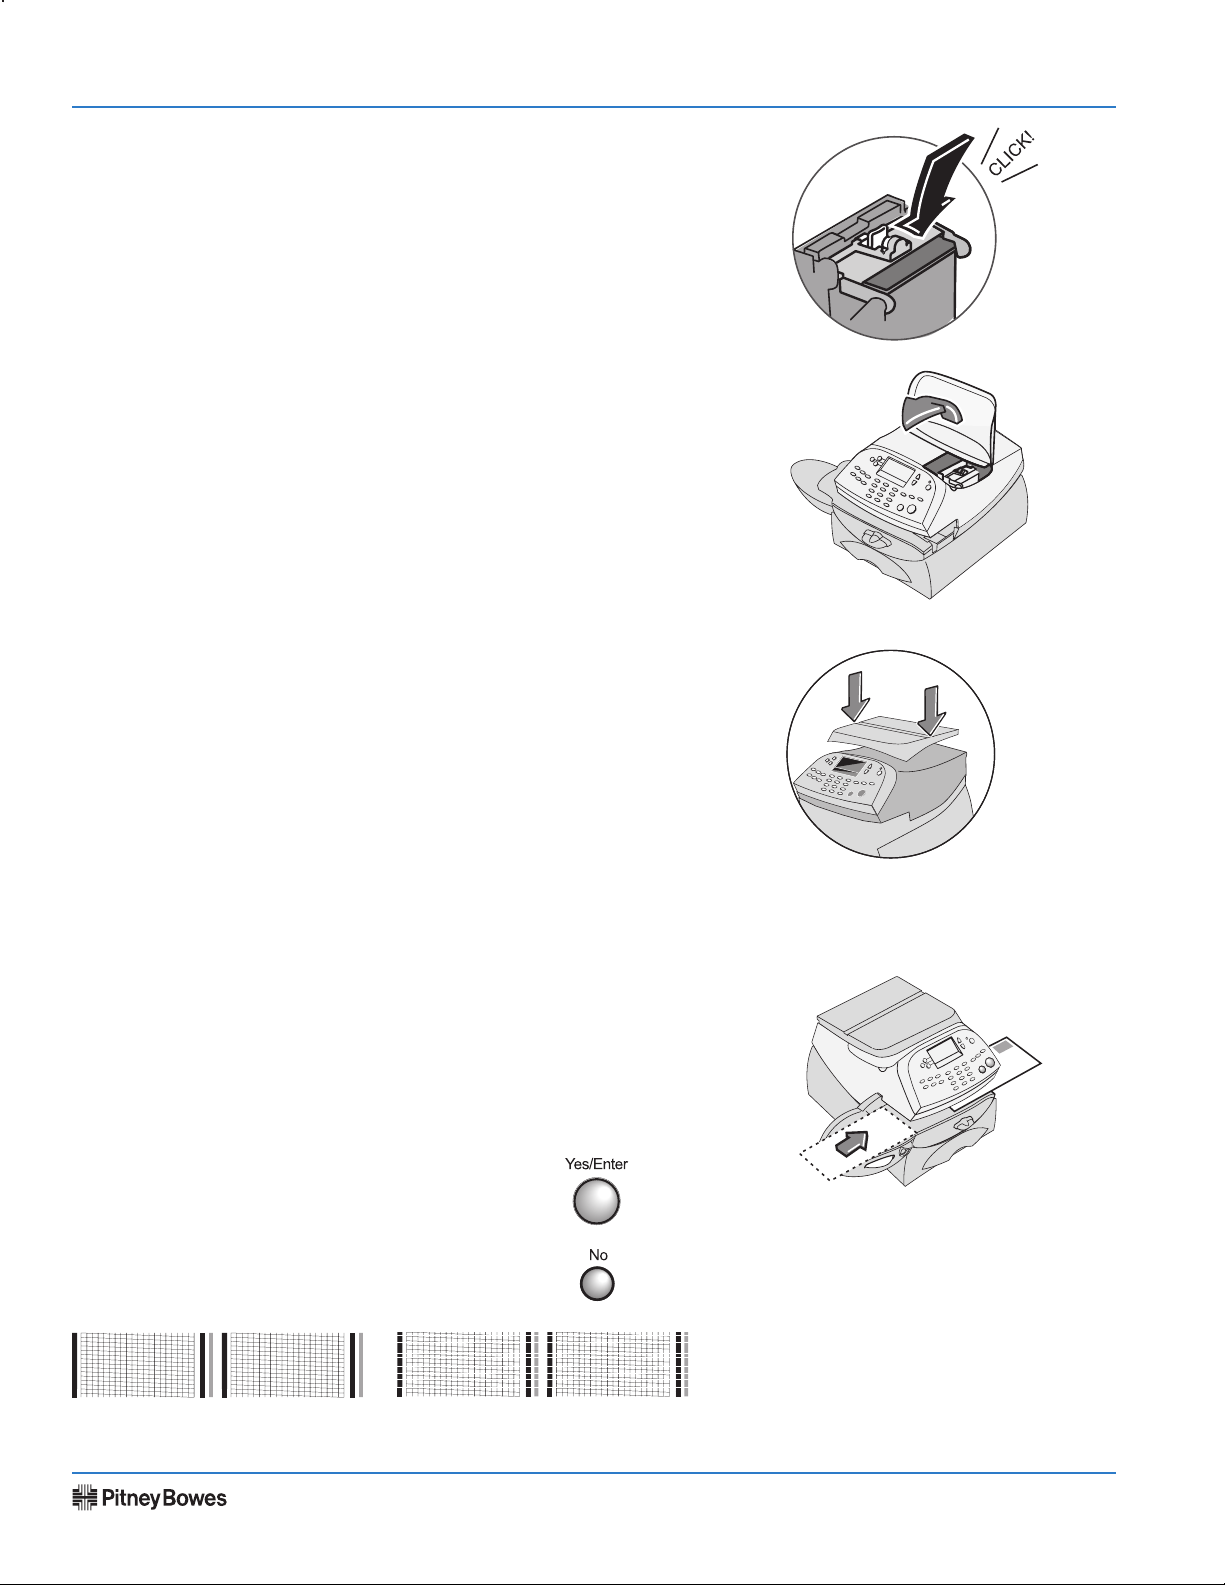
Return the guard back to the operating position and
click to close.
Close the cover and replace the weighing platform. The
system will automatically start the printer installation.
Step 7 - Install Weighing Platform
Installation Instructions
Position the weighing platform as shown. Plug the connector on the
weighing platform into the matching connector on the DM200L.
Step 8 - Create a Test Pattern
When prompted, insert a spare envelope or tape sheet for a
test print.
NOTE: To print correctly, position mail flush against rear
registration wall and gently slide mail to the right on feed
deck. The system will detect the envelope and automatically
guide it through the printing mechanism.
If the test print is good, press Yes on control panel.
If the test print is poor, press
tional maintenance.
No to perform addi-
Good test print - no missing lines Poor test print
SV61352 Rev. B
Page 4 of 11
Page 5

DM200L - Installing DM200L
Step 9 - Scale Location
Key in the correct scale code for your location. Select Continue.
NOTE:The codes can be found in the back of these instructions.
Step 10 - Contact Pitney Bowes Data Center
You have to add postage funds to your meter before you use it.
If your phone requires an outside line (for example, if you have
to dial 9), press the Yes key.
If you select Yes, key in your dialing prefix and select Continue.
If you select No, your system will automatically dial the
Data Center.
NOTE: If you are using the analog phone line as the fax
machine, check if that fax requires a dialing prefix.
Installation Instructions
Step 11 - Check Your Account Balance
Your DM200L system will automatically dial the
Postage By Phone Data Center and after a brief
delay, display your Postage By Phone balance.
Select Continue.
NOTE: If a software system update is avail
able, you will be informed at this time.
Select Get update now.
-
SV61352 Rev. B
Dialing and Connecting
screens will appear
Page 5 of 11
Page 6

DM200L - Installing DM200L
The value-added features and options that you selected as
part of your order will take a few minutes to download.
Select Continue.
Step 12 - Load Postage Into Your System
Installation Instructions
Key in the amount of postage you wish to add. You can enter whole dollar amounts only. Select Continue.
Dialing and Connecting screens will appear.
Press Yes or No.
SV61352 Rev. B
Page 6 of 11
Page 7

DM200L - Installing DM200L
Refill
Receipt
Refill: AUG 24 0 4 11 : 38 A A c cou n t N o : 1 2 000 0
Refill Amount: $ 1 00. 0 0 Me t er N o.: 111114
6
Funds Ava il ab le i n Me te r: $11 5 .00 OC T 2 3 03
Prepaid: $ 9 35. 0 00 11:3 8
A
Additional Funds Av ai la bl e: 0 0 000 0 000 0 0
0
Step 13 - Reset the Power
Installation Instructions
You must unplug and reinsert the power cord after the display
shows "Installation Complete."
Step 14 - Print Your Receipt
If you choose to print a receipt, follow
the display directions.
Power
Step 15 - Congratulations! Your Mailing System is Operational
Select OK. Your system is ready to use.
To customize your postage settings and learn all about
using your DM200L, see the Operating Guide
Continue to the next page if you wish to install the
moistener and position the stacker.
Still have questions?
See Troubleshooting or go to www.pitneyworks.com/P700
or call: 1-800-522-0020. Reference Model P7L1.
.
SV61352 Rev. B
Page 7 of 11
Page 8

DM200L - Installing DM200L
CLICK
!
Install Moistener
Position the moistener on the left side of
the transport deck as shown.
The moistener will click into place.
Fill the moistener reservoir with Pitney
Bowes E-Z Seal sealing solution. You may
fill it later if you don't plan on moisten
ing and sealing envelopes right now.
-
Installation Instructions
Position Stacker
Position the stacker next to the DM200L as
shown. The stacker provides a convenient
location to store your mail, tape sheets, and
operator guide.
Solution
Level
Stacker
SV61352 Rev. B
Page 8 of 11
Page 9

DM200L - Installing DM200L
Locations near a boundary may enter either code.
Scale codes for locations
in the United States
State Code State State CodeCode
Alabama
Illinois
Birmingham and north 13
North of Springfield 16
South of Birmingham 12
Springfield and south 15
Alaska
(see map on pg 15)
Indiana
Arizona
North of Indianapolis 16
Phoenix and north 12
Indianapolis and south 15
South of Phoenix 11
Iowa
Arkansas 13
North of Des Moines 17
California
(see map on pg 15)
Des Moines and south
North of Wichita
Wichita and south
16
15
14
Colorado
Kansas
Denver and north 13
Kentucky 14
South of Denver 12
Louisiana 12
Connecticut 16
Maine 18
Delaware 15
Maryland 15
Florida
Massachusetts 17
W Palm Beach and north 11
Michigan
South of W Palm Beach 10
NW of Lake Michigan 18
Georgia 12
SE of Lake Michigan 17
Hawaii
9
Minnesota 18
Missouri
North of Springfield 15
Springfield and north 14
Montana
Helena and north 18
South of Helena 17
Nebraska 16
Nevada 13
New Hampshire 17
New Jersey 16
New Mexico
11
Idaho
Mississippi
N of Salmon River Mtns. 17
16
Kosciusko and north 13
S of Salmon River Mtns.
South of Kosciusko 12
New York
NE of Colorado River
Kingston and north
17
SE of Colorado River 11
12
South of Kingston
16
Utah 13
17
North Carolina
Vermont
Raleigh and north
South of Raleigh
13
14
North Dakota
18
16
15
North of Roanoke
Virginia
Ohio
Roanoke and south 14
15
Akron and north
Washington DC
15
South of Akron
Washington State
18
Oklahoma
West Virginia
15
North of Oklahoma City
14
Wisconsin
Oklahoma City and south
13
Green Bay and north 18
Oregon
South of Green Bay 17
Salem and north
Wyoming
15
South of Salem 17
18
Pennsylvania 16
Rhode Island 16
South Carolina 13
17
South Dakota
Tennessee
13
Texas
Installation Instructions
SV61352 Rev. B
Page 9 of 11
Page 10

DM200L - Installing DM200L
Nevada 13
New Hampshire 17
New Jersey 16
Location Code = 27
Location Code = 26
Location Code = 23
Anchorage
Location Code = 16
Location Code = 15
Location Code = 14
Location Code = 13
Chico
San Francisco
Modesto
San Luis Obispo
Bakersfield
Scale codes for locations
in Alaska and California
Locations near a boundary may enter either code.
Installation Instructions
SV61352 Rev. B
Page 10 of 11
Page 11

DM200L - Installing DM200L
Troubleshooting
No Dial Tone -
Check that you are using an analog line such as:
a) Fax lines
b) Lines used by modems or credit card readers
c) Residential phone lines
Check that you have entered a dialing prefix if your phone
system needs a code to reach an outside line.
Cannot Reach Data Center -
Check that you have entered a dialing prefix if your phone
system needs a code to reach an outside line.
Not Enough Funds -
You have tried to add more postage than you have in your ac
count at Pitney Bowes.
Installation Instructions
-
To change information entered during setup -
• Press Clear key on numeric keypad
• At Install Not Complete, either go back to the previ
ous step or return to the Install Start.
To clear the dialing prefix -
• Press Clear key on numeric keypad
• At Install Not Complete, select Continue at Last Step.
• At the Dialing Prefix screen, press the key followed by
the Enter key.
SV61352 Rev. B
Page 11 of 11
 Loading...