

Page 1

Owner’s Manual
DVD RECEIVER
DVH-3950MP
English 한글中文
Page 2

Contents
Thank you for buying this Pioneer product.
Please read through these operating instructions so you will know how to operate
your model properly. After you have finished reading the instructions, keep this man-
ual in a safe place for future reference.
Safety note
CAUTION: 5
Precautions of handling discs and player 5
IMPORTANT SAFEGUARDS 6
To ensure safe driving 6
When using a display 6
To avoid battery exhaustion 6
About this unit 6
Visit our website 7
About the
Region code 7
Notes on region code 7
Types of Playable Discs 7
Notes on DVDs and Video CDs 8
Features 8
– About WMA 8
– About MP3 9
– About DivX 9
Symbols used in this manual 9
Control Panel
What’s What 10
Remote control
What’s What 11
Battery installation 13
Using the remote control 13
Before use
Detaching control panel 14
Attaching control panel 14
TV system selection 15
Basic operation
Turning the unit on 16
Turning the unit off 16
Inserting a disc 16
Ejecting a disc 16
Selecting a source 16
Symbol Display 7
Selecting a media type 16
Adjusting the volume 17
Mute 17
Setting the clock 17
Loudness 17
Using the EQ (Equalizer) 17
Adjusting the sound level 18
Changing the general settings 18
Radio operation
Listening to radio stations 19
Storing broadcast frequencies 19
Auto search memory 19
To scan the preset stations 19
To tune in the preset stations 19
CD/MP3/WMA operation
MP3/WMA Disc compatibility with this unit is
limited as follows: 20
Playing an Audio CD and MP3/WMA
disc 20
Pause 21
Skip to next track/file 21
Skip to previous track/file 21
Return to the beginning of the current track/
file 21
Moving to another track/file 21
Search 21
Intro scan 21
Repeat 21
Shuffle 22
CD TEXT/ID3 TAG 22
– To skip to the next or previous folder
MP3 WMA
SET UP menu
Language 23
– Menu Language 23
– Disc Audio/Subtitle/Menu 23
22
2
En
Page 3
Contents
English
Display 24
– TV Aspect 24
– B.L.E. (Black Level Expansion) 24
Audio 24
– Dolby Digital/DTS/MPEG 24
– Dynamic Range Control (DRC) 25
Lock (Parental Control) 25
– Rating 25
– Password 25
– If you forget your password 26
– Area Code 26
Others 26
– PBC 26
– DivX VOD 27
DVD/VCD operation
Displaying Disc Information on-screen 28
Playing a DVD and Video CD 28
Pre-Stop 28
Stop 29
Pause 29
Still picture and frame-by-frame
playback 29
Slow motion 29
Moving to another title
DVD
29
Moving to another chapter/track 29
Skip to next chapter/track 30
Skip to previous chapter/track 30
Return to the beginning of the current
chapter/track 30
Scan 30
Repeat 30
DVD
–
–
- Chapter/Title/Off 30
VCD
- Track/All 30
Time search 31
Disc menu
PBC menu
Camera angle
Changing the audio language
DVD
VCD
DVD
31
31
31
DVD
32
Changing the audio channel
Subtitles
DVD
32
VCD
32
Zoom 32
Photo operation
JPEG/TIFF disc compatibility with this player
is limited as follows: 33
Viewing slide shows 33
Moving to another folder 34
Moving to another file 34
Slide show interval time 34
Repeat 34
Viewing still picture 34
Zoom 34
Rotating the picture 34
Movie operation
DivX® disc compatibility with this player is
limited as follows: 35
Playing a movie file 35
Playing DivX® VOD content 36
Pre-Stop 36
Stop 36
Pause 36
Still picture and frame-by-frame
playback 36
Slow motion 36
Scan 37
Skip 37
Repeat 37
Time search 37
Changing the audio language 38
Subtitles 38
Notice for displaying the DivX subtitle 38
AUX operation
Playing an auxiliary equipment 39
En
3
Page 4

Contents
Installation
DIN front/rear mount 40
DIN Front-mount 40
– Installation with the rubber bush 40
– Removing the unit 40
DIN Rear-mount 41
Connection
Connecting to a car 43
Connecting to auxiliary equipment
(Optional) 46
Additional Information
Troubleshooting 48
Handling guideline of discs and player 49
DVD discs 49
DVD-R/DVD-RW discs 49
AVCHD recorded discs 49
CD-R/CD-RW discs 49
Dual Discs 50
Compressed audio files on the disc 50
– Example of a hierarchy 51
DivX video files 51
Language code list 52
Area code list 53
Specifications 54
4
En
Page 5
Safety note
Section
01
English
CAUTION:
TO REDUCE THE RISK OF ELECTRIC SHOCK
DO NOT SPLIT COVER (OR BACK). NO USER
SERVICEABLE PARTS INSIDE. REFER SERVICING TO QUALIFIED SERVICE PERSONNEL.
The lightning flash with the arrowhead symbol, within an equilateral triangle is intended to alert the user
about the presence of uninsulated
dangerous voltage within the product’s enclosure that may be of sufficient magnitude to constitute a risk
of electric shock.
The exclamation point within an equilateral triangle is intended to alert the
user to the presence of important operating and maintenance (servicing)
instructions in the literature accompanying the appliance.
Always operate the vehicle in a safe
manner. Do not become distracted by
the vehicle while driving, and always
be fully aware of all driving condition.
Do not change settings, or any functions. Pull over in a safe and legal
manner before attempting such operations.
Do not use for many hours at extremely low or high temperature. (-10°C
to 60°C)
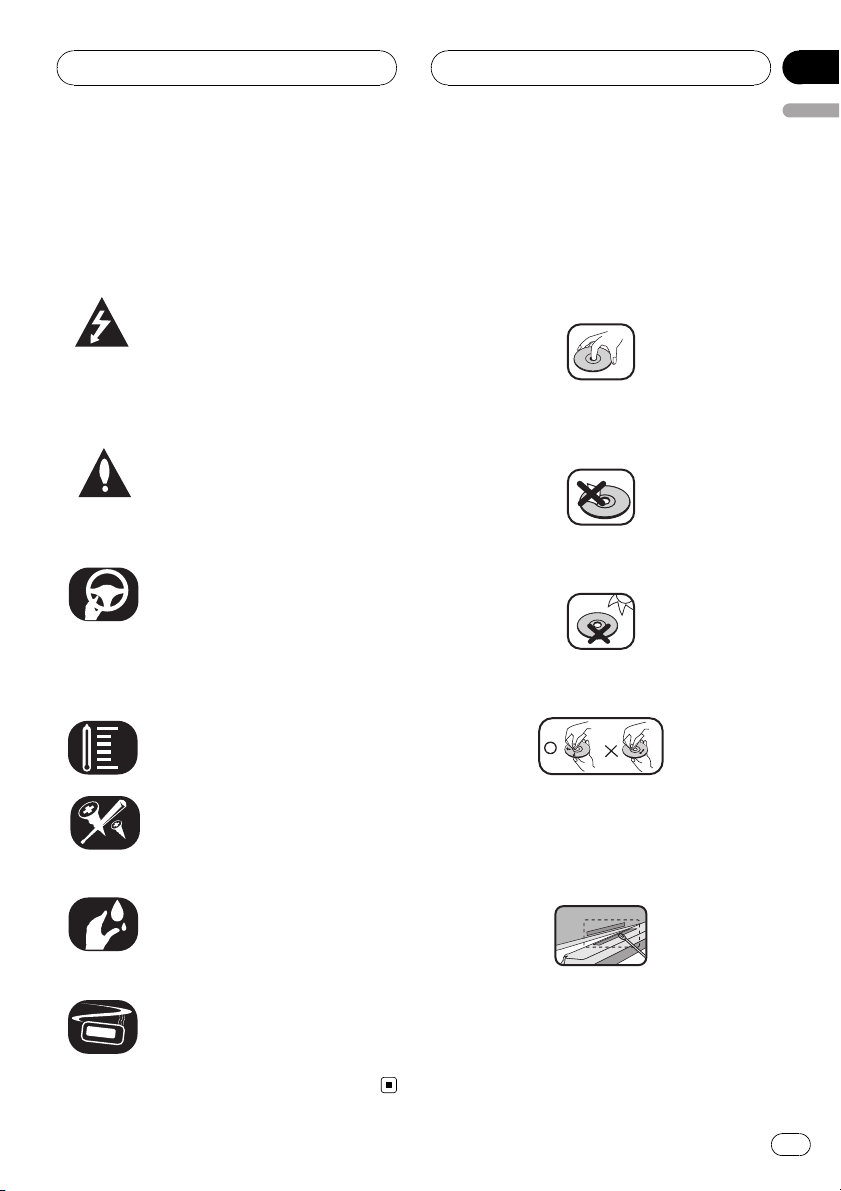
Precautions of handling
discs and player
A defective or soiled disc inserted into the unit
can cause the sound to drop during playback.
Handle the disc by holding its inner and outer
edges.
Do not touch the surface of the unlabeled side
of the disc.
Do not stick paper or tape, etc. on the surface.
Do not expose the disc to direct sunlight or excessive heat.
Clean the disc before playback. Wipe the disc
from the center outward with a cleaning cloth.
To reduce the risk of electric shock,
do not remove the cover or back of
this product. There are no user-serviceable parts inside. Refer ser vicing
to qualified service personnel.
Do not allow this unit to come into
contact with liquids. Electrical shock
could result. Also, damage to this
unit, smoke, and overheating could
result from contact with liquids.
The temperature of unit’s outside can
be extremely high, please use the unit
after proper installation in your vehicle.
Never use solvents such as benzene or alcohol
to clean the disc.
Periodically wipe the contacts on the back of
the control panel with a cotton bud moistened
with alcohol.
En
5
Page 6
Section
01
Safety note
If the unit fails to operate properly, press
RESET using a ball point pen or a similar tool.
RESET
IMPORTANT SAFEGUARDS
WARNING
! Do not attempt to install or service your
display by yourself. Installation or servicing of the display by persons without
training and experience in electronic
equipment and automotive accessories
may be dangerous and could expose you
to the risk of electric shock or other
hazards.
To ensure safe driving
obeyed and this unit’s DVD features should
not be used.
When using a display
WARNING
NEVER install the display in a location that en-
ables the driver to watch images while driving.
To avoid battery exhaustion
Be sure to run the vehicle engine while using
this unit. Using this unit without running the
engine can result in battery drainage.
! When no power is supplied to this unit be-
cause of a replacement of the vehicle battery or for some similar reason, the
microcomputer of this unit is returned to
its initial condition. We recommend that
you transcribe the audio adjustment data.
WARNING
Do not use with vehicles that do not feature an
ACC position.
WARNING
! To avoid the risk of accident and the potential
violation of applicable laws, this unit is not for
use with a video screen that is visible to the
driver.
! To avoid the risk of damage and injury and the
potential violation of applicable laws, this unit
is not for use with a video screen that is visible
to the driver.
! In some countries or states the viewing of
images on a display inside a vehicle even by
persons other than the driver may be illegal.
Where such regulations apply, they must be
6
En
About this unit
CAUTION
! This product contains a laser diode of higher
class than 1. To ensure continued safety, do
not remove any covers or attempt to gain access to the inside of the product. Refer all servicing to qualified personnel.
Page 7
Safety note
Section
01
English
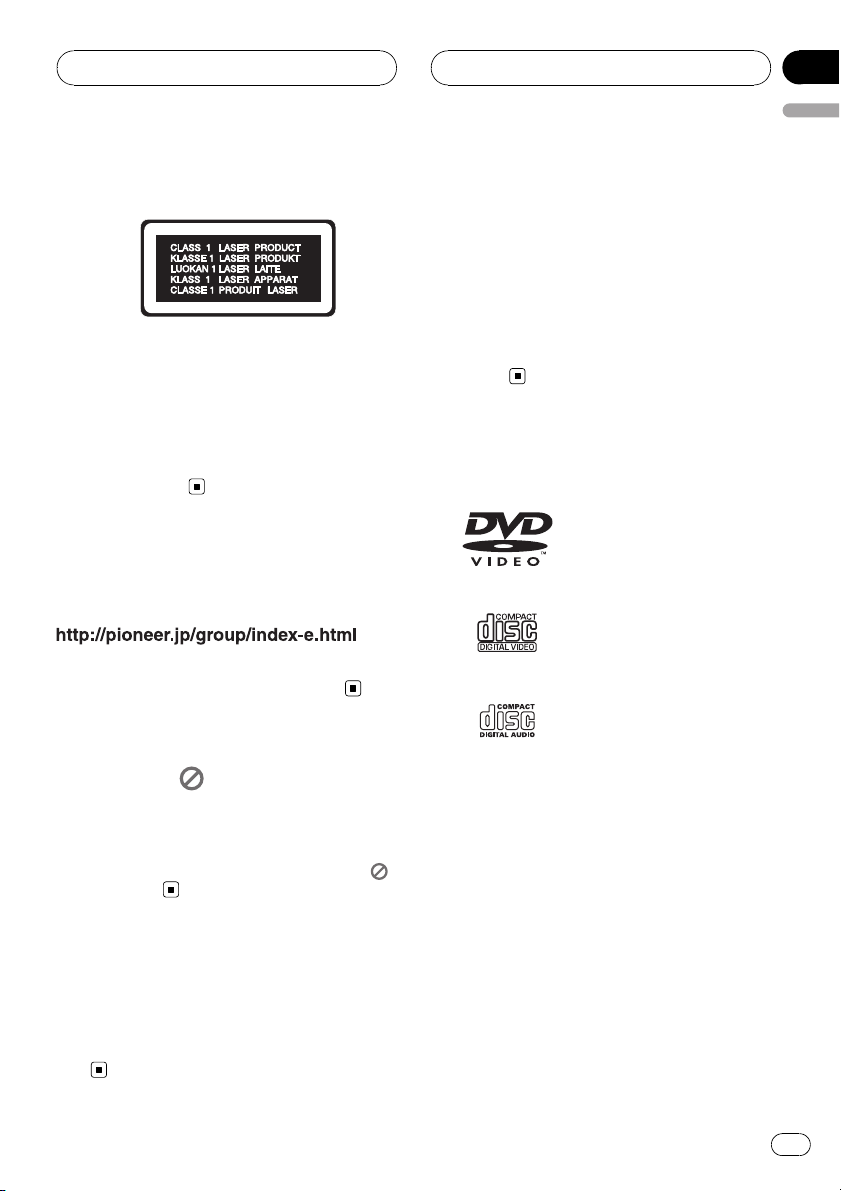
A CLASS 1 LASER PRODUCT label is affixed
to the bottom of this unit.
! Keep this manual handy as a reference for op-
erating procedures and precautions.
! Always keep the volume low enough so that
you can hear sounds from outside the vehicle.
! Protect this unit from moisture.
! If the battery is disconnected or discharged,
the preset memory will be erased and must be
reprogrammed.
Visit our website
Visit us at the following site:
! We offer the latest information about
Pioneer Corporation on our website.
Notes on region code
! Most DVD discs have a globe with one or
more numbers on it clearly visible on the
cover. This number must match your Car
DVD Receiver’s region code or the disc
cannot play.
! If you try to play a DVD with a different re-
gion code from your player, the message
Check Region Code appears on the
screen.
Types of Playable Discs
DVD (12 cm disc)
Video CD (VCD) (12 cm
disc)
Audio CD (12 cm disc)
About the Symbol Display
When you are watching a DVD and attempt to
perform an operation, it may not be performed
due to the programming on the disc. When
this happens, the unit indicates the button
on the screen.
Region code
This unit is designed and manufactured for
playback of region 3 encoded DVD software.
This unit can only play DVD discs labeled 3 or
ALL.
In addition, this unit plays DVD±R, DVD±RW
and CD-R or CD-RW containing audio, compressed audio, photo or movie files.
! Depending on the conditions of the record-
ing equipment or the CD-R/RW (or DVD
±R/±RW) disc itself, some CD-R/RW (or
DVD±R/±RW) discs cannot be played on
the unit.
! Do not attach any seal or label to either
side (the labeled side or the recorded side)
of a disc.
! Do not use irregularly shaped CDs (e.g.,
heart-shaped or octagonal). It may result in
malfunctions.
En
7
Page 8
Section
01
Safety note
Notes
!
! This player can only play back discs bearing
is a trademark of DVD Format/Logo
Licensing Corporation.
the marks shown above.
Notes on DVDs and Video CDs
Some playback operations of DVDs and Video
CDs may be intentionally programmed by software manufacturers.
This unit plays DVDs and Video CDs according
to disc contents designed by the software
manufacturer, therefore some playback features may not be available or other functions
may be added.
Features
Dolby Digital/DTS compatibility
! Manufactured under license from Dolby
Laboratories. “Dolby” and the double-D
symbol are trademarks of Dolby
Laboratories.
Notes
! It is forbidden by law to copy, broadcast,
show, broadcast via cable, play in public, or
rent copyrighted material without permission.
! This product features the copy protection
function developed by Macrovision. Copy protection signals are recorded on some discs.
When playing the pictures of these discs on a
unit, picture noise will appear.
! This product incorporates copyright protection
technology that is protected by method claims
of certain U.S. patents and other intellectual
property rights owned by Macrovision
Corporation and other rights owners. Use of
this copyright protection technology must be
authorized by Macrovision Corporation, and is
intended for home and other limited viewing
uses only unless otherwise authorized by
Macrovision Corporation. Reverse engineering
or disassembly is prohibited.
About WMA
! “DTS” and “DTS Digital Out” are registered
trademarks of DTS, Inc.
8
En
The Windows Media™ logo printed on the box
indicates that this unit can play back WMA
data.
WMA is short for Windows Media Audio and
refers to an audio compression technology
that is developed by Microsoft Corporation.
WMA data can be encoded by using Windows
Media Player version 7 or later.
! Windows Media and the Windows logo are
trademarks or registered trademarks of
Microsoft Corporation in the United States
and/or other countries.
! This unit may not operate correctly depend-
ing on the application used to encode
WMA files.
Page 9
Safety note
Section
01
English
About MP3
Supply of this product only conveys a license
for private, non-commercial use and does not
convey a license nor imply any right to use
this product in any commercial (i.e. revenuegenerating) real time broadcasting (terrestrial,
satellite, cable and/or any other media), broadcasting/streaming via internet, intranets and/
or other networks or in other electronic content distribution systems, such as pay-audio or
audio-on-demand applications. An independent license for such use is required. For details, please visit
http://www.mp3licensing.com.
About DivX
DivX is a compressed digital video format created by the DivX
This unit can play DivX video files recorded on
CD-R/RW/ROM and DVD-R/RW/ROM discs.
Keeping the same terminology as DVD video,
individual DivX video files are called “Titles”.
Keep in mind that when naming flies/titles on
a CD-R/RW or DVD-R/RW disc prior to burning, they will by played in written order by default.
Official DivX
Plays all versions of DivX
®
DivX
6) with standard playback of DivX
media files
! DivX, DivX Certified, and associated logos
are trademarks of DivX, Inc. and are used
under license.
®
video codec from DivX, Inc.
®
Certified product
®
video (including
®
Symbols used in this manual
A section whose title has one of the following
symbols is applicable only to the disc represented by the symbol.
DVD
DVD
VCD
Video CDs
ACD
Audio CDs
MP3
MP3 files
WMA
WMA files
En
9
Page 10
Section
02
Control Panel
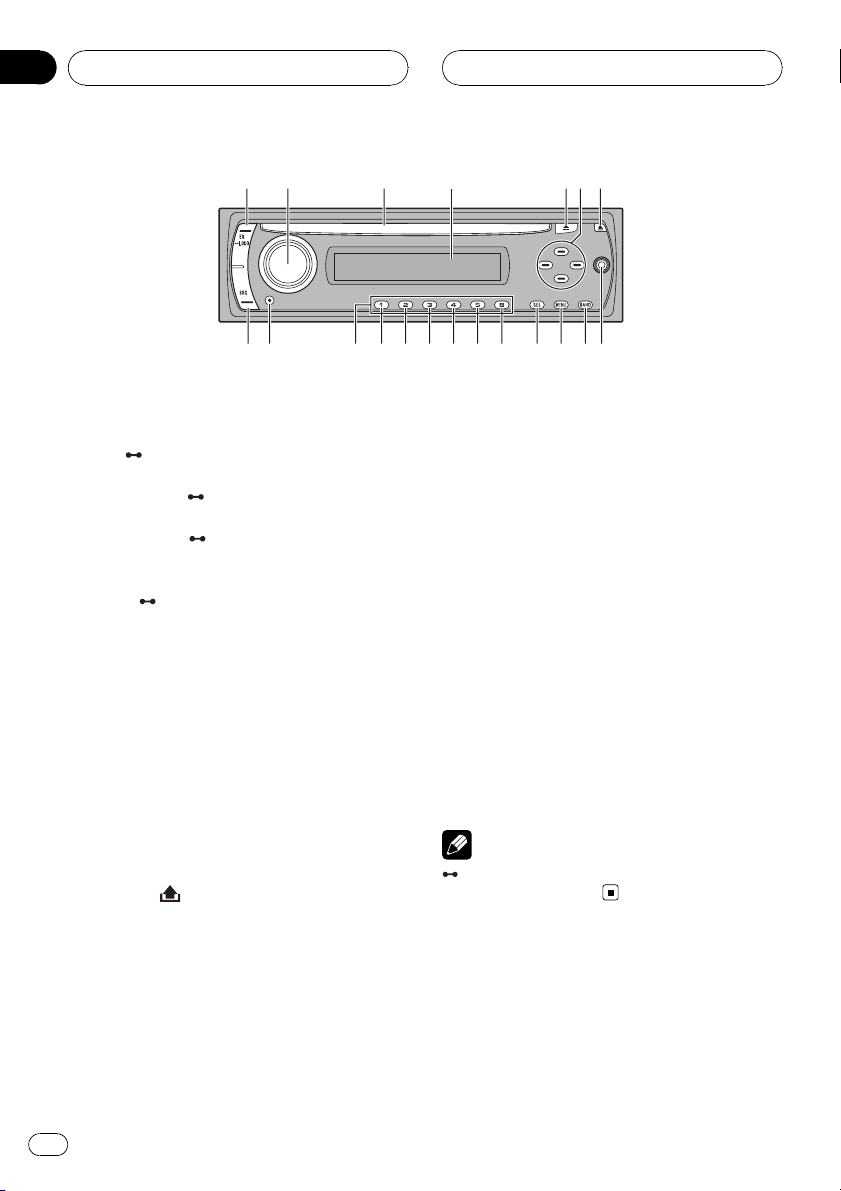
What’s What
1 EQ/ LOUD
! Equalizer (EQ)
! Loudness (
2 VOL/MUTE/
! Volume (VOL)
! Mute (MUTE)
! Off (
3 Disc Slot
4 Display Window
5 Eject h
6 a/b/c/d
! Skip/Search c/d
! Seek/Tune c/d
! Folder Up/Down a/b
! Select (SEL)
7 Release
LOUD)
OFF
OFF)
12 3 567
4
891011121314151617181920
12 D.MENU
13 D.SETUP
14 SHUFFLE
15 Repeat (RPT)
16 Intro Scan (SCAN)
17 ENT/d/PAUSE
! Play/Pause (d/PAUSE)
! Enter (ENT)
18 Preset Station (1 to 6)
19 CLOCK
20 Source (SRC)
Note
indicates the button operation (hold) activates
the particular function.
8 AUX input jack (3.5 mm stereo jack)
9 BAND
10 Menu (MENU)
11 Select (SEL)
10
En
Page 11
Remote control
Section
03
English
1
6
2
3
7
8
4
9
10
5
11
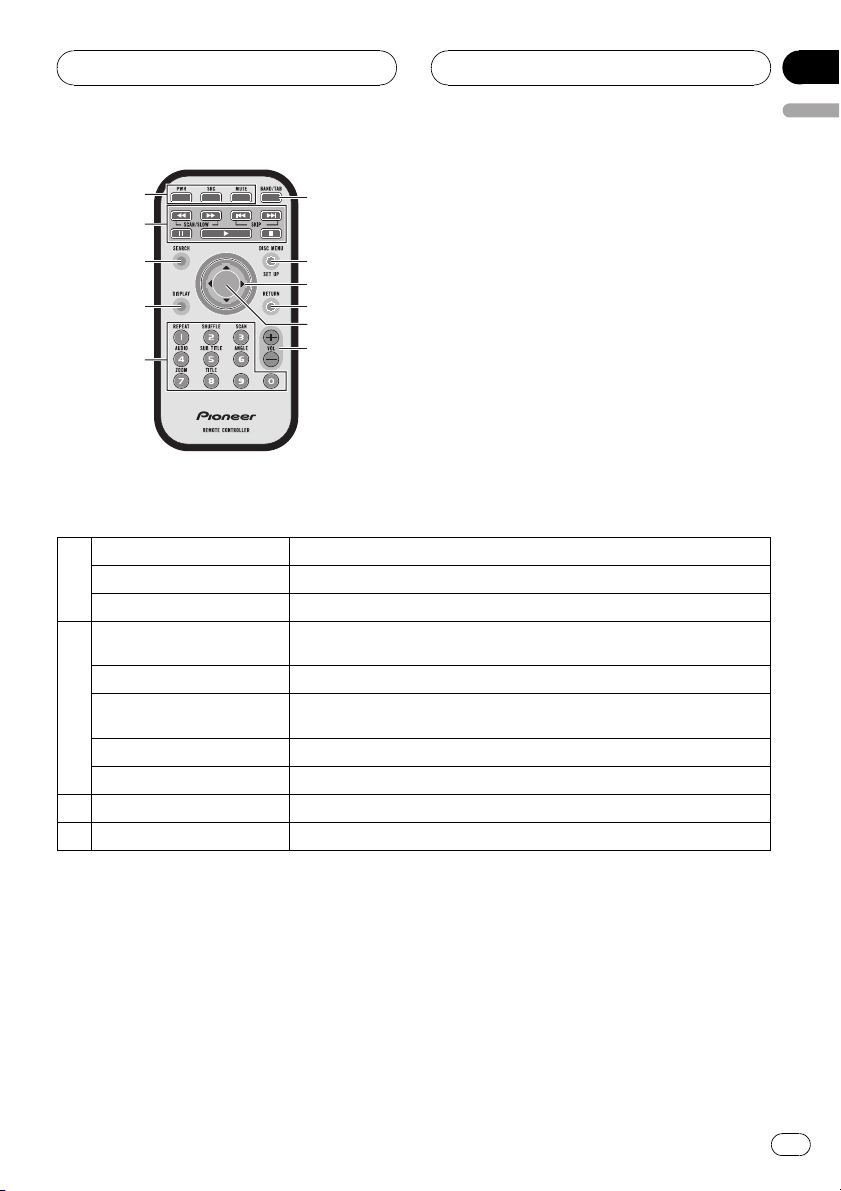
What’s What
PWR Switches the unit ON/OFF.
1
SRC Selects a source.
MUTE Mutes the volume.
SKIP o/p
SCAN/SLOW m/n Backward (Forward) search playback.
2
PAUSE e
PLAY d Starts playback.
STOP g Stops playback.
3 SEARCH Selects a track or file.
4 DISPLAY Accesses On-Screen display.
Goes to the next (previous) chapter, track or file.
Returns to the beginning of the current chapter, track, or file.
Pause playback temporarily.
Press repeatedly for frame-by-frame playback.
En
11
Page 12
Section
03
Remote control
0 to 9 number buttons
REPEAT Repeats chapter, track, title or file.
SHUFFLE Plays tracks or files in random order.
SCAN Plays the first 10 seconds of all track.
5
AUDIO Selects audio language.
SUBTITLE Selects subtitle language.
ANGLE Selects a DVD camera angle if available.
ZOOM Enlarges video image.
TITLE Displays title menu, if available.
6 BAND/TAB
7 DISC MENU/SET UP
8 a/b/c/d (up/down/left/right) Selects an item in the menu.
9 RETURN Displays the menu of a video CD with PBC.
10 ENTER Confirms menu selection.
11 VOL (UP +/ DOWN –) Adjusts the volume level.
Selects numbered items in the menu.
Selects a stored radio station frequency (1 to 6).
Selects three FM and AM bands.
Moves to any other file on the disc with various types of files.
Accesses menu on a DVD disc.
Accesses or removes the Setup menu.
12
En
Page 13

Remote control
Section
03
English
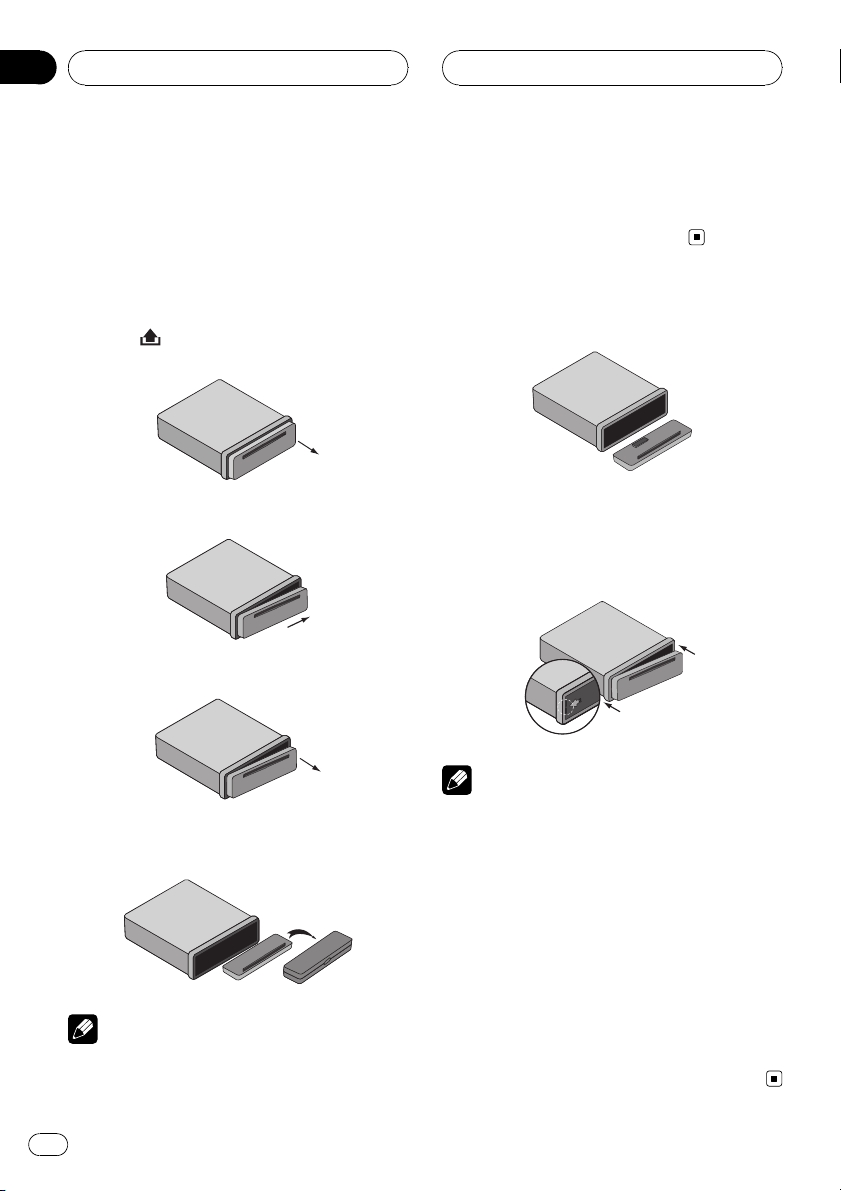
Battery installation
1 Remove the battery holder with a sharp object
such as a ballpoint pen.
2 Install the battery on the battery holder.
3 Install the battery holder back into its original
position.
WARNING
Keep the battery out of the reach of children.
Should the battery be swallowed, consult a doctor immediately.
CAUTION
! Use one CR2025 (3 V) lithium battery.
! Remove the battery if the remote control is not
used for a month or longer.
! Do not leave the product in a hot or humid
place.
! Do not handle the battery with metallic tools.
! Do not store the battery with metallic materi-
als.
! In the event of battery leakage, wipe the re-
mote control completely clean and install a
new battery.
! When disposing of used batteries, please
comply with governmental regulations or environmental public institutions’ rules that
apply in your country/area.
Using the remote control
Point the remote control in the direction of the
control panel to operate.
Important
! Do not store the remote control in high tem-
peratures or direct sunlight.
! Do not let the remote control fall onto the
floor, where it may become jammed under the
brake or accelerator pedal.
En
13
Page 14
Section
04
Before use
Detaching control pa nel
You can detach the control panel when leaving
the car. When detaching or attaching the control panel, be careful not to damage the connector on the back of the control panel and on
the panel holder.
1 Press
panel.
2 Push the control panel to right.
3 Pull the control panel.
(Release) to open the control
For that reason, keep the control panel in its
protective case while detached.
! Do not touch the connectors directly with your
fingers or with any metal device.
Attaching control panel
1 Align the left side of the panel with
stopper.
2 Push the right side or panel into the
unit until it clicks.
2
1
4 Put the detached control panel into the
protective case.
Notes
! The control panel is a precision piece of equip-
ment and can be damaged by shocks or jolts.
14
En
Notes
! When detaching or attaching the control
panel, do not press the display or control buttons.
! The control buttons may not work properly if
the control panel is not attached properly. If
this occurs, gently press the control panel.
! Do not leave the control panel in any area ex-
posed to high temperatures or direct sunlight.
! Do not drop the control panel or subject it to
strong impact.
! Do not allow volatile agents such as benzene,
thinner, or insecticides to come into contact
with the surface of the control panel.
! Do not try to disassemble the control panel.
Page 15

Before use
TV system selection
You must select the appropriate system mode
for your TV system.
When the selected system does not coincide
with the system of your TV, normal colour picture may not be displayed.
! AUTO: Select when the unit is connected
with Multi system TV.
! NTSC: Select when the unit is connected
with NTSC-TV.
! PAL: Select when the unit is connected
with PAL-TV.
1 Press SRC to select the CD/DVD.
2 Press EJECT.
Confirm that no disc is loaded in the built-in
player (NO DISC is displayed).
3 Press and hold ENT/d/PAUSE (e on the
remote control) for more than five seconds.
Each time you press and hold the button for
more than five seconds, the TV system
switches as follows:
PAL —AUTO—NTSC
Section
04
English
En
15
Page 16

Section
05
Basic operation
Turning the unit on
% Press any button (PWR on the remote
control) other than eject h and release
Note
When you insert the disc in the disc slot, the unit
turns on.
Turning the unit off
% Press and hold OFF (PWR on the remote
control).
Inserting a disc
% Draws the disc, and starts playback
automatically.
Notes
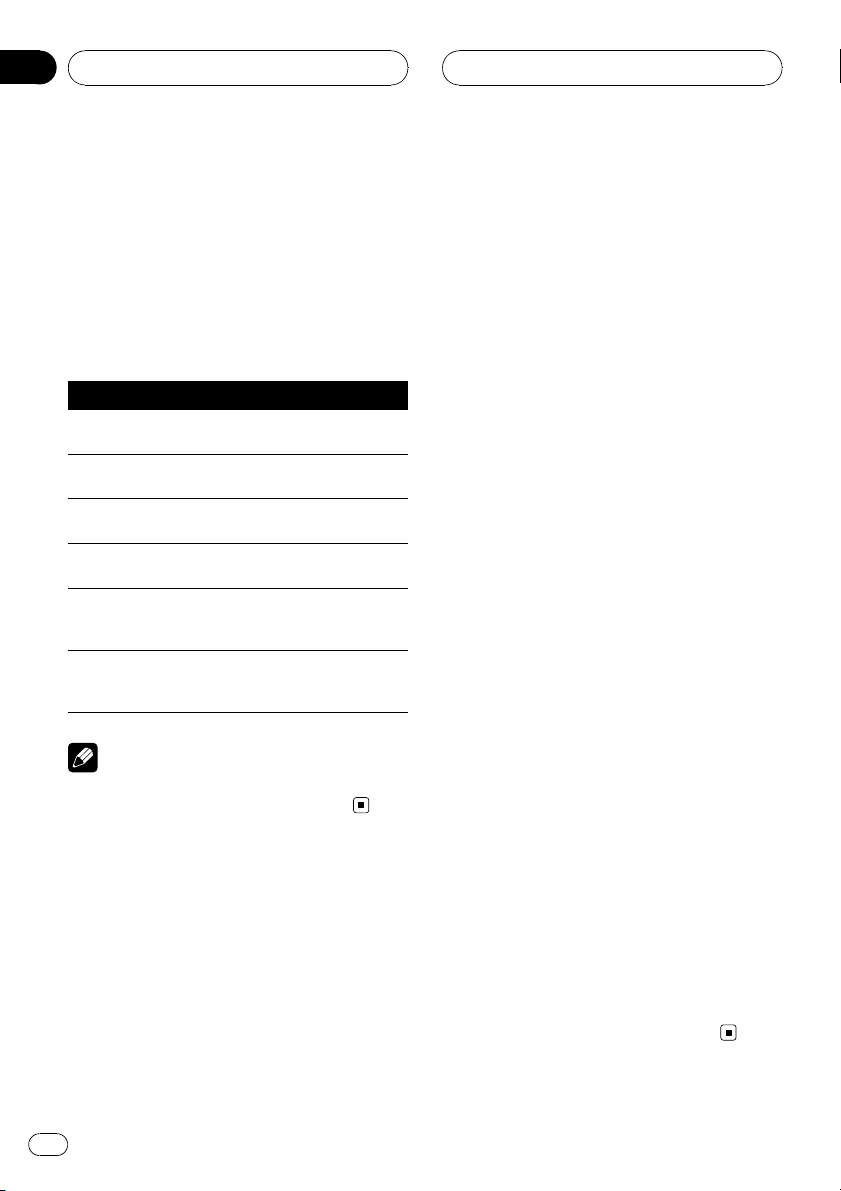
! The DVD player plays one, standard 12-cm
disc at a time. Playing back an 8-cm disc is
not possible with this unit. Playable disc and
adapter are listed in the table below.
12-cm disc 8-cm disc 8-cm disc adapter
Ö ——
Ejecting a disc
% Press h. The disc automatically ejects
from the loading slot.
.
When the disc is ejected by pressing h during
playback, it will be loaded automatically after
10 seconds unless you remove the disc from
the unit.
Selecting a source
% Press SRC to select a source.
Press SRC repeatedly to switch between the
following sources:
Tuner—CD/DVD—AUX (AUX IN)
Selecting a media type
When you select CD/DVD as a source, you
can switch the MUSIC, PHOTO and MOVIE
menu on a disc with audio, photo, and movie
files.
Each menu has a media type indication tab
which shows what media you are selecting.
1
! Do not insert anything other than a disc into
the disc loading slot. Discs which can be
played back are listed on Types of Playable
Discs on page 7.
16
En
1 Media type indication tab
For a disc with only audio files, MUSIC is displayed. If the disc has photo or movie files,
PHOTO tab or MOVIE tab is displayed.
% Press BAND (BAND/TAB on the remote
control) to select other media types.
Page 17
Basic operation
Section
05
English
Adjusting the volume
% Rotate VOL (Press VOL +/– on the re-
mote control) to adjust the sound level.
Note
When you turn the unit off, the current volume
level is automatically memorized. Whenever you
turn the unit on again, it will operate at the memorized volume level.
Mute
1 Press MUTE to cut the sound.
2 To cancel it, press MUTE again.
Setting the clock
1 Press CLOCK.
2 Press and hold CLOCK for more than
one second.
3 Press c to adjust the hour.
# You cannot perform this operation by pressing
the button of the same name on the remote control.
4 Press d to adjust the minute.
# You cannot perform this operation by pressing
the button of the same name on the remote control.
Loudness
% Press and hold EQ/LOUD to reinforce
treble, bass and surround effect.
Loudness off (no display)—loudness on
(LOUD indicator lights)
Using the EQ (Equalizer)
% Press EQ/LOUD repeatedly.
The indicator lights in the following order.
POP—CLASSIC—ROCK—JAZZ—VOCAL—
SALSA—SAMBA—USER1—USER2—off (no
display)
! POP: Optimized for R&B, Soul and Country
music.
! CLASSIC: Optimized for orchestral music.
! ROCK: Optimized for Hard Rock and Heavy
Metal music.
! JAZZ: Sweet sound with soft feeling.
! VOCAL: Powerful realism with strong
sound quality.
! SALSA: Reproduces salsa music acoustics.
! SAMBA: Reproduces samba music acous-
tics.
! USER1: Use the menu to set the sound level
you want.
! USER2: Use the menu to set the sound level
you want.
You can adjust each sound level to your preference. Once you select a USER mode and
then make an adjustment, it automatically
stored for the currently selected USER
mode.
Refer to Adjusting the sound level.
En
17
Page 18
Section
05
Basic operation
Adjusting the sound level
1 Press SEL repeatedly to select the mode
you want to adjust from volume, bass,
middle, treble, balance and fader.
The indicator lights in the following order.
VOL — BAS — MID — TRB — BAL — FAD
2 Rotate VOL (Press VOL +/– on the remote control) to adjust the sound quality.
Indication Turn right Turn left
VOL
BAS
MID
TRB
BAL
FAD
Increase the volume level.
Increase the bass
level.
Increase the middle level.
Increase the treble
level.
Decrease the level
of the left speaker
(s).
Decrease the level
of the front speaker(s).
Decrease the volume level.
Decrease the bass
level.
Decrease the middle level.
Decrease the treble level.
Decrease the level
of the right speaker(s).
Decrease the level
of the rear speaker(s).
Note
When EQ or LOUD is set to Off, you can adjust
the sound level (BAS, MID, TRB) settings.
Changing the general settings
1 Press MENU so that one of menu items
appears.
2 Press MENU repeatedly to scroll between menus.
AUX ON—AUX 0DB—DEMO OFF—
BEEP 2ND
3 Rotate VOL clockwise or counterclockwise to select one of the settings.
The setting displayed on the display window is
set and automatically disappears after about
six seconds.
! AUX (Auxiliary) ON/OFF
It is possible to use auxiliary equipment
with this unit. Activate the auxiliary setting
when using auxiliary equipment connected
to this unit.
AUX ON: When using a auxiliary equipment.
AUX OFF: When not using a auxiliary
equipment.
! AUX (Auxiliary) 0 dB/+6 dB
You can adjust the volume level of each
source to prevent radical changes in volume when switching between sources.
You can set to 0DB or +6DB.
If the input level of the connected component is not high enough, increase the input
level properly. Without adjusting the line
input level, you may be surprised at a loud
sound when you change the source from
the external component to another source.
! DEMO ON/OFF
You can change the initial indication on the
display to information name (function
name, EQ name, etc...) while listen to a
source.
DEMO ON: Displays information name
while listen to source.
DEMO OFF: Cancels the function.
! BEEP 2ND/ALL
Sets the beep sound every time a button is
pressed.
BEEP 2ND: The beep is generated when a
key is long pressed (one sec.).
BEEP ALL: The beep is generated when any
key is pressed.
# You can also select one of the settings by
pressing VOL+/– on the remote control.
18
En
Page 19
Radio operation
Section
06
English
Listening to radio stations
1 Press SRC to select the tuner.
2 Press BAND repeatedly to select a
band.
The indicator lights in the following order.
F1 (FM1)—F2 (FM2)—F3 (FM3)— AM (AM)
3 Auto Search: Press c/d (c/d on the remote control).
When a station is received, searching stops.
4 Manual Search: Press and hold c/d (c/
d on the remote control) until MANUAL
appears, and then press it repeatedly.
The frequencies move up or down step by
step.
# When not operated for six seconds after manual search, the ordinary tuner display is
shown.
Storing broadcast frequencies
You can easily store up to six broadcast frequencies for later recall at the touch of a button.
1 Press BAND to select desired band you
want to store.
Notes
! Up to 18 FM stations, six for each of three FM
bands and six AM stations can be stored in
the memory.
! When a new station is stored in the preset sta-
tion button, the previously preset station is
automatically erased.
Auto search memory
This function lets you automatically store the
six strongest broadcast frequencies.
1 Press a.
The six strongest broadcast frequencies will
be stored under preset buttons 1 to 6 in the
order of their signal strength.
2 To cancel, press a.
To scan the preset stations
1 Press b.
Each preset station appears.
2 To cancel, press b.
2 Select the desired frequency.
3 Press one of preset buttons 1 to 6 and
hold until the beep sound.
The number you have pressed will be displayed in the preset number indicator and
then remain lit. The selected radio station frequency has been stored in memory.
4 Repeat steps 1 to 3 to preset other stations.
The next time, you press the same preset button, the radio station frequency is recalled
from the memory.
To tune in the preset stations
1 Press BAND to select the desired band.
2 Press the desired preset buttons 1 to 6.
The preset station of the preset buttons 1 to 6
is displayed and the preset station is received.
En
19
Page 20

Section
07
CD/MP3/WMA operation
MP3/WMA Disc
compatibility with this unit
is limited as follows:
! Sampling Frequency: 8 kHz to 48 kHz
(MP3), 22.05 kHz to 48 kHz (WMA)
! Bit rate: 8 kbps to 320 kbps (include VBR)
(MP3), 32 kbps to 320 kbps (WMA)
! CD-R/CD-RW physical format should be
ISO9660.
! If you record MP3/WMA files using soft-
ware which cannot create a FILE SYSTEM,
it will not be possible to playback MP3/
WMA files.
MP3/WMA files are not compatible with
packet write data transfer.
! The total number of files or folders on the
disc should be less than 99 (Audio CD),
3 000 (MP3/WMA) and 251 (folder).
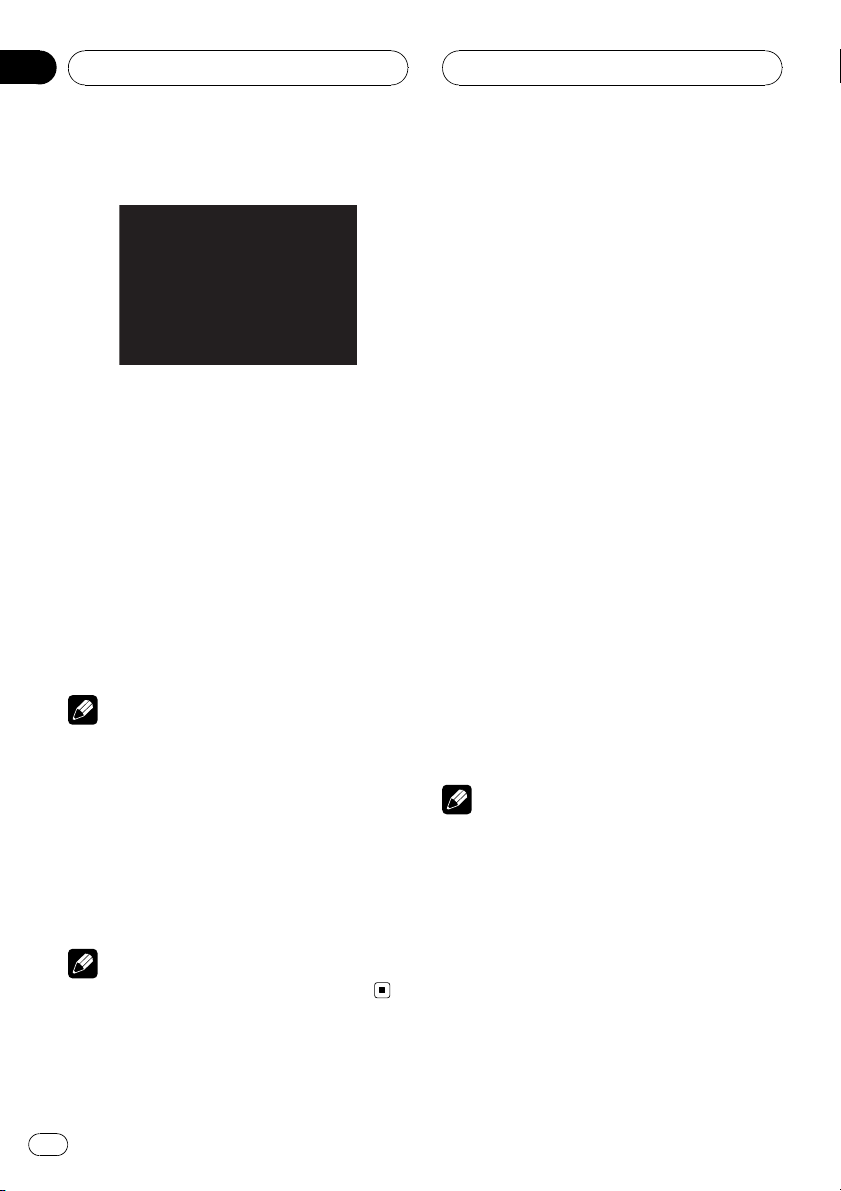
12
5
6
8
10
11
13
3
7
Audio CD mode
14
4
9
12
Note
Customers should also note that permission is required in order to download MP3/WMA files and
music from the Internet. Our company has no
right to grant such permission. Permission
should always be sought from the copyright owner.
Playing an Audio CD and
MP3/WMA disc
The unit can play MP3/WMA formatted recordings.
% Insert a disc in the unit.
READING appears in the display window, and
playback starts automatically.
20
En
MP3/WMA mode
1 Current track number/Total track number
2 Elapsed time
3 Playback status (Play d, Pause e, Scan
n ×4, ×8, m ×4, ×8)
4 Current mode (Repeat, Intro scan, Shuffle)
5 Previous track name
6 Album information in CD-TEXT
7 Current track name
8 Title and artist information in CD-TEXT
9 Next track name
10 Previous file name
11 Current folder name
12 Current file name
13 ID3 TAG information
14 Next file name
Notes
! When a disc contains audio data (CD-DA) and
other format audio data, only the audio data
(CD-DA) can be played back.
MP3 WMA
MP3 WMA
MP3 WMA
MP3 WMA
MP3 WMA
Page 21
CD/MP3/WMA operation
Section
07
English
! If you change the source, CD play also stops
(without ejecting the disc). Next time you select CD as the source, CD play starts from
where playback has been stopped previously.
Pause
1 Press d/PAUSE (e on the remote control) during playback.
2 To return to playback, press d/PAUSE
(PLAYd or e on the remote control).
Skip to next track/file
% Press briefly d (p on the remote con-
trol) to select the next track or file.
Skip to previous track/file
% Press briefly c (o on the remote con-
trol) and press again within four seconds
of playing time.
1 Press SEARCH on the remote control.
2 Press the appropriate numbered button
(0 to 9) to select a track/file number.
Search
% Press and hold c/d (m/n on the re-
mote control) to select the required speed
during playback and then release at the
point you want.
# Backward search: m ×4, m ×8
Forward search: n ×4, n ×8
Intro scan
The first 10 seconds of each tracks/files
(SCAN) or each files in the current selected
folder (
1 Press SCAN.
SCAN
pears on the display window.
# Press and hold SCAN for about two seconds
during playback.
SCAN appears on the display window.
SCAN) on the disc are are played.
ACD
(or SCAN
MP3 WMA
MP3 WMA
) ap-
Return to the beginning of
the current track/file
% Press briefly c (o on the remote con-
trol) after four seconds of playing time.
Moving to another track/file
When a disc has more than one track/file, you
can move to another track/file as follows:
2 Press SCAN again.
SCAN (or
play window and the intro scan is
cancelled.
SCAN) disappears from the dis-
Repeat
The current selected tracks/files (1 RPT)or
folder (
edly.
1 Press RPT during playback.
1 RPT appears on the display window.
RPT) on the disc is played repeat-
En
21
Page 22
Section
07
CD/MP3/WMA operation
# Press and hold RPT for about two seconds
during playback.
RPT appears on the display window.
MP3 WMA
2 Press RPT again.
1 RPT (or
RPT) disappears from the display
window and the repeat mode is cancelled.
Shuffle
All of the tracks/files (SHF) or the current selected folder (
domly.
1 Press SHUFFLE during playback.
ACD
SHF
on the display window.
# Press and hold SHUFFLE for about two sec-
onds during playback.
SHF appears on the display window.
2 Press SHUFFLE again.
SHF (or
window and the random playback is cancelled.
SHF) on the disc is played ran-
(or SHF
MP3 WMA
MP3 WMA
) appears
SHF) disappears from the display
% Press DISPLAY repeatedly during MP3/
WMA/CD TEXT file playback.
To skip to the next or previous
folder
(If there are more than two folders.)
% Press a to skip to the next folder, and
press b to skip to the previous folder.
Time display appearing on the display part when
playing VBR file may vary and there may be some
difference from actual time (both progress time
and VBR are displayed at the same time when
playing file).
MP3 WMA
Note
Note
During random playback, if you press c (o on
remote control), you won’t go back to the previous track.
CD TEXT/ID3 TAG
When playing a disc containing information,
you can see the CD TEXT/ID3 TAG information.
In a ID3 TAG, information about the file (album
title, performer name, song title) is recorded.
In a WMA Content, information about the file
(song title, performer name) is recorded.
If there is no information, NO TEXT will be
shown in the display window.
22
En
Page 23
SET UP menu
Section
08
English
By using the Setup menu, you can make various adjustments to items such as picture and
sound. You can also set a language for the
subtitles and the Setup menu, among other
things.
1 Press D.SETUP.
The Setup menu appears.
# You can perform the same operation by pressing and holding DISC MENU/SET UP on the remote control.
2 Use a/b to select the desired option
then press d to move to the second level.
The screen shows the current setting for the
selected item as well as alternate setting(s).
3 Use a/b to select the second desired
option then press d to move to the third
level.
4 Use a/b to select the desired setting
then press ENT to confirm your selection.
# Some items require additional steps.
5 Press D.SETUP.
The Setup menu ends.
# You can perform the same operation by pressing and holding DISC MENU/SET UP or pressing
PLAYd or RETURN on the remote control.
Note
Press c to go back to the previous level.
Language
Menu Language
Select a language for the setup menu and onscreen display.
If you select a language for the setup menu,
the character set for MP3 tag, WMA tag and
DivX subtitle is also changed according to the
language. Refer to Notice for displaying the
DivX subtitle on page 38.
Disc Audio/Subtitle/Menu
Select the language you prefer for the audio
track of disc, subtitle, and the disc menu.
! Original: Refers to the original language in
which the disc was recorded.
! Other: To select another language, press
number buttons and then ENT to enter the
corresponding 4-digit number according to
the language code list. Refer to page 52.
If you enter the wrong language code,
input the 4-digit number and press any
number button. When ––––appears on
the screen, input the 4-digit number correctly.
! Off: This option is showed only in
Disc Subtitle. If you select Off, disc subti-
tle is not displayed.
En
23
Page 24
Section
08
SET UP menu
Display
TV Aspect
! 16:9: Select when a 16:9 wide TV is con-
nected.
! 4:3 Letter Box: Select when a standard 4:3
TV is connected.
Displays a wide picture with bands on the
upper and lower portions of the screen.
! 4:3 Pan Scan: Select when a standard 4:3
TV is connected.
Automatically displays the wide picture on
the entire screen and cuts off the portions
that do not fit.
Note
In case of DivX file, TV Aspect of 4:3 Letter Box
and 4:3 Pan Scan are the same.
Audio
Each DVD disc has a variety of audio output
options. Set the player’s AUDIO options according to the type of audio system you use.
Dolby Digital/DTS/MPEG
! Bitstream: Select Bitstream if you connect
the optical out jack of this unit to an amplifier or other equipment with a Dolby Digital, DTS or MPEG decoder.
! PCM: Select when connected to a two-
channel digital stereo amplifier. DVDs encoded in Dolby Digital or MPEG will be
automatically downmixed to two-channel
PCM audio.
! Off (for DTS): If you select Off, the DTS sig-
nal is not output through the optical out
jack.
B.L.E. (Black Level Expansion)
To select the black level of playback pictures.
Set your preference and monitor’s ability.
! On: Expanded grey scale.
! Off: Standard grey scale.
Note
The B.L.E. function works NTSC system only.
24
En
Note
This operation menu is not available with this product.
Page 25
SET UP menu
Section
08
English
Dynamic Range Control (DRC)
With the DVD format, you can hear a program’s soundtrack in the most accurate and
realistic presentation, thanks to digital audio
technology. However, you may wish to compress the dynamic range of the audio output
(the difference between the loudest sounds
and the quietest ones). This allows you to listen to a movie at a lower volume without losing clarity of sound. Set DRC to On for this
effect.
Lock (Parental Control)
To access the Rating, Password and
Area Code features, you must input the 4-
digit password you created. If you have not yet
entered a password you are prompted to do
so.
1 Input a 4-digit code and press ENT.
! If you made a mistake before pressing
ENT, press c to delete the digits one by
one.
2 Enter it again and press ENT to verify.
Some discs offer more suitable scenes as an
alternative.
The parental control feature allows you to
block access to scenes below the rating you
input, thereby preventing your children from
being able to view material you believe is unsuitable.
1 Select Rating on the Lock menu then
press d.
2 Select a rating from 1 to 8 using the a/
b.
! Rating 1 to 8: Rating one (1) has the most
restrictions and rating eight (8) is the least
restrictive.
! Unlock: If you select Unlock, parental con-
trol is not active and the disc plays in full.
3 Press ENT to confirm your rating selection.
Note
If you set a rating for the player, all disc scenes
with the same rating or lower are played. Higher
rated scenes are not played unless an alternate
scene is available on the disc. The alternative
must have the same rating or a lower one. If no
suitable alternative is found, playback stops. You
must enter the 4-digit password or change the
rating level in order to play the disc.
Rating
Some movies contain scenes that may not be
suitable for children to view. Many of these
discs contain parental control information
that applies to the complete disc or to certain
scenes on the disc. Movies and scenes are
rated from 1 to 8, depending on the country.
Password
You can enter or change password.
To make a new password:
1 Select Password on the Lock menu and then
press d.
2 Press ENT when the New option is high-
lighted.
3 Enter a new password using the number but-
tons then press ENT.
4 Enter the password again to verify.
En
25
Page 26
Section
08
SET UP menu
To change the password:
1 Select Password on the Lock menu and then
press d.
2 Press ENT when the Change option is high-
lighted.
3 Enter a current password using the numbered
buttons then press ENT.
4 Enter a new password using the numbered
buttons then press ENT.
5 Enter the password again to verify.
If you forget your password
If you forget your password you can clear it
using the following steps.
1 Press D.SETUP.
The Setup menu appears.
# You can perform the same operation by pressing and holding DISC MENU/SET UP on the remote control.
2 Input the 6-digit number “210499” and
the password is cleared.
3 Enter a new password. Refer to To
make a new password: on the previous
page.
Area Code
Enter the code of the area whose standards
were used to rate the DVD video disc, according to the area code. Refer to Area code list on
page 53.
4 Press ENT and select the second character using a/b.
5 Press ENT to confirm your country code
selection.
Others
PBC
Set Playback Control (PBC)toOn or Off.
! On: Video CDs with PBC are played accord-
ing to the PBC.
! Off: Video CDs with PBC are played in the
same way as Audio CDs.
Note
The PBC function is only available for playing the
Video CD 2.0.
1 Select Area Code on the Lock menu
then press d.
2 Follow the step 2 as shown on Rating
on the previous page.
3 Select the first character using a/b.
26
En
Page 27

SET UP menu
DivX VOD
We provide you the DivX®VOD (Video On Demand) registration code that allows you to
rent and purchase videos based on the DivX
VOD service. For more information, visit
www.divx.com/vod.
1 Select DivX VOD option and then press
d.
2 Press ENT while Show Code is selected
and the registration code will appear.
Use the registration code to purchase or rent
the videos from DivX
www.divx.com/vod.
3 Press ENT to exit.
Note
All the downloaded videos from DivX
only be played back on this unit.
®
VOD service at
®
VOD can
Section
08
English
®
En
27
Page 28
Section
09
DVD/VCD operation
Displaying Disc
Information on-screen
You can display various information about the
disc loaded on-screen.
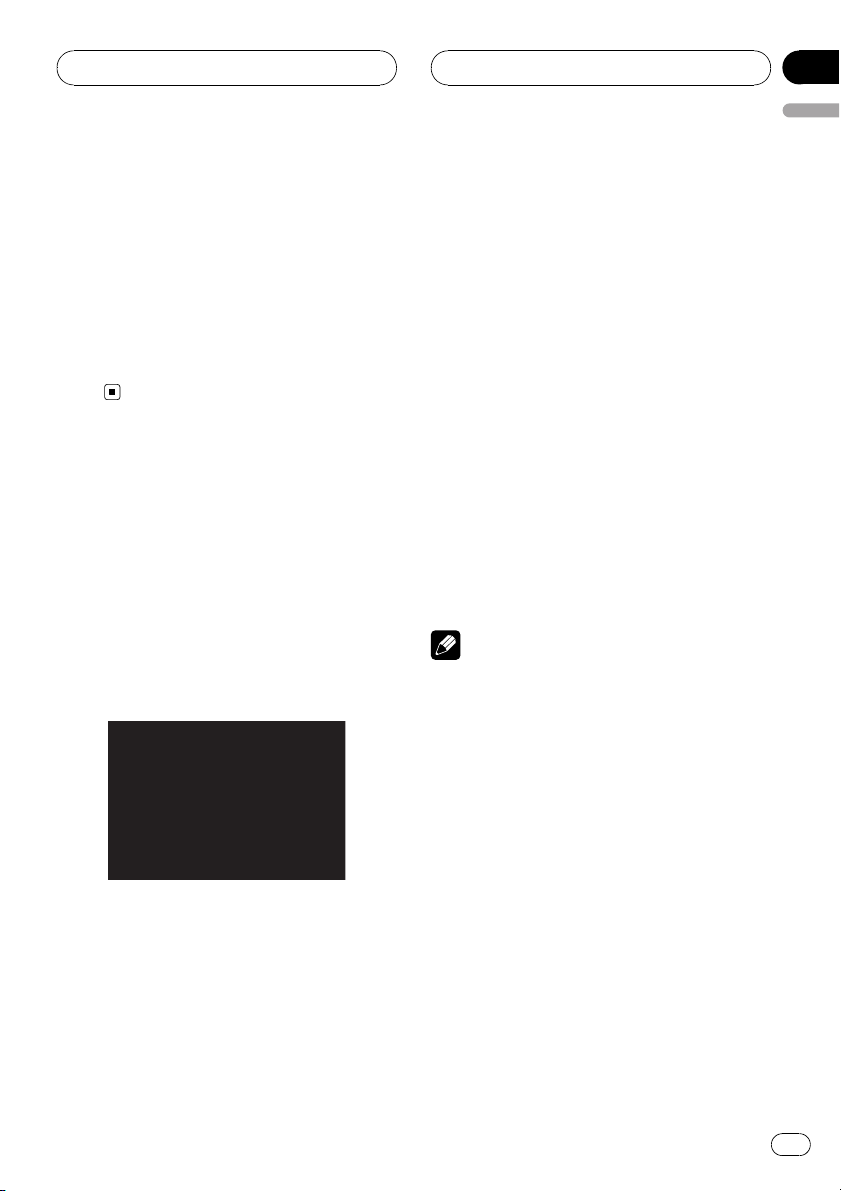
1
2
3
4
5
6
1 Title: Current title number/total number of ti-
tles
2 Chapter (Track): Current chapter (or track)
number/total number of chapters (or tracks)
3 Time: Elapsed playing time
4 Audio: Selected audio language or channel
5 Subtitle: Selected subtitle
6 Angle: Selected angle/total number of angles
1 Press DISPLAY on the remote control
during playback.
# The displayed items differ depending on the
disc type or playing status.
2 Press a/b to select an item.
3 Press c/d to change or select the setting.
# You can also use 0 to 9 if appropriate.
# For some functions, press ENT to execute the
setting.
Notes
! If any button is not pressed for a few seconds,
the on-screen display disappears.
! Some discs may not provide all of the features
on the on-screen display example shown
above.
On a Video CD 2.0 with PBC, PBC will be displayed instead of the track number. Refer to
PBC on page 26.
Playing a DVD and Video CD
% Insert a disc in the unit.
READING appears on the display window, and
playback starts automatically.
# If playback does not start, press d/PAUSE (d
on the remote control).
# In some cases, the disc menu might appear
instead.
Notes
! The menu screen may be displayed first after
loading a DVD or Video CD 2.0 which offers a
menu.
! If any button is not pressed after a disc is
ejected, a disc is loaded automatically in
about 10 seconds.
! If parental control is set and the disc is not
within the rating settings you must input the
password. (See Lock (Parental Control) on
page 25).
! DVDs may have a region code. Your player
does not play discs that have a region code
different from your player. About the region
code, refer to Region code on page 7.
Pre-Stop
1 Press g on the remote control during
playback.
Pre-Stop appears in the display window.
28
En
Page 29
DVD/VCD operation
Section
09
English
2 To return to playback, if you press d/
PAUSE (PLAYd on the remote control) on
the Pre-Stop mode, it will be played from
this point you stop.
Stop
1 Press g on the Pre-Stop mode.
2 To return to playback, if you press d/
PAUSE (PLAYd on the remote control), it
will be played from the beginning of the
disc.
Pause
1 Press d/PAUSE (e on the remote control) during playback.
2 To return to playback, press d/PAUSE
(PLAYd on the remote control).
Still picture and frame-byframe playback
1 Press d/PAUSE (e on the remote control) during playback.
The unit will now go into the PAUSE mode.
Slow motion
1 Press d/PAUSE (e on the remote control) during playback.
The unit will now go into the PAUSE mode.
2 Use m/n on the remote control to
select the required speed:
s 1/16, s 1/8, s 1/4, or s 1/2 (backward),
or t 1/16, t 1/8, t 1/4, or t 1/2 (forward)
# With a Video CD, the Slow speed changes: t
1/16, t 1/8, t 1/4 or t 1/2 (forward).
3 To exit Slow Motion mode, press d/
PAUSE (PLAYd on the remote control).
Note
Slow motion playback in reverse is not possible
with Video CDs.
Moving to another title
When a disc has more than one title, you can
move to another title as follows:
1 Press DISPLAY on the remote control
and then press a/b to select the menu
item (title).
2 Press the appropriate numbered button
(0 to 9) to select a title number.
DVD
2 You can advance the picture frame-byframe by pressing e on the remote control
repeatedly.
3 To return normal playback, press d/
PAUSE (PLAYd on the remote control).
Moving to another chapter/
track
When a title on a disc has more than one
chapter or a disc has more than one track, you
can move to another chapter/track as follows:
En
29
Page 30
Section
09
DVD/VCD operation
% Press c/d (o/p on the remote con-
trol) briefly during playback to select the
next chapter/track or to return to the beginning of the current chapter/track.
% Press c (o on the remote control)
twice briefly to step back to the previous
chapter/track.
% To go directly to any chapter during
playback, press DISPLAY and press a/b to
select the chapter/track icon. Then, input
the chapter/track number or use c/d (o/
p on the remote control).
Notes
! For two-digit numbers, press the numbered
buttons (0 to 9) in rapid succession.
! On a Video CD with PBC, you must set PBC to
Off on the setup menu. Refer to PBC on page
26.
Skip to next chapter/track
% Press briefly d (p on the remote con-
trol) to select the next chapter or track.
Skip to previous chapter/track
% Press briefly c (o on the remote con-
trol) and press again within four seconds
of playing time.
Scan
1 Press m/n on the remote control
during playback.
2 Press m/n repeatedly on the remote control to select the required speed:
m ×2, m ×4, m ×8, m ×16, m ×32,
m ×100 (backward) or n ×2, n ×4, n
×8, n ×16, n ×32, n ×100 (forward)
# With a Video CD, the scan speed changes:
m ×2, m ×4, m ×8, (backward) or n ×2,
n ×4, n ×8, (forward).
3 To return to normal playback, press d/
PAUSE (PLAYd on the remote control).
Repeat
DVD
- Chapter/Title/Off
The default settings is Off.
1 To repeat the chapter currently playing,
press RPT (REPEAT on the remote control).
The Chapter icon appears on the TV screen.
2 To repeat the title currently playing,
press RPT (REPEAT on the remote control)
again.
The Title icon appears on the TV screen.
3 To exit the repeat mode, press RPT
(REPEAT on the remote control) again.
The Off icon appears on the TV screen.
Return to the beginning of
the current chapter/track
% Press briefly c (o on the remote con-
trol) after four seconds of playing time.
30
En
VCD
- Track/All
The default settings is All.
1 To repeat the track currently playing,
press RPT (REPEAT on the remote control).
The Track icon appears on the TV screen.
Page 31

DVD/VCD operation
Section
09
English
2 To exit the repeat mode, press RPT
(REPEAT on the remote control) again.
The All icon appears on the TV screen.
Note
On a Video CD with PBC, you must set PBC to
Off on the setup menu. Refer to PBC on page
26.
Time search
The Time Search function allows you to start
playing at any chosen time on the disc.
1 Press DISPLAY on the remote control
during playback.
The on-screen display appears on the screen.
The Time Search box shows the elapsed playing time of the current disc.
2 Within 10 seconds, press a/b to select
the Time Search icon in the on-screen display.
The – : ––: ––appears in the Time Search
box.
Disc menu
DVDs may offer menus that allow you to access special features.
1 Press D.MENU (DISC MENU/SET UP on
the remote control).
The disc menu is displayed.
2 Use a/b/c/d to highlight your selection, then press ENT.
3 To remove the disc menu, press
D.MENU (DISC MENU/SET UP on the remote control) again.
PBC menu
% Press DISC MENU/SET UP or RETURN on
the remote control to return to the menu
screen. Menu settings and operating procedures may differ. Follow the instructions
on the each menu screen.
# You also may set PBC to On under setup. See
page 26.
DVD
VCD
3 Within 10 seconds, use the number buttons to enter the required start time.
Enter hours, minutes, and seconds from left to
right in the box.
4 Within 10 seconds, press ENT to confirm the start time.
Playback starts from the selected time on the
disc.
# If you enter an invalid time, playback will continue from the current point.
Note
On a Video CD with PBC, you must set PBC to
Off on the setup menu. Refer to PBC on page
26.
Camera angle
If the disc contains scenes recorded at different camera angles, you can change to a different camera angle during playback.
% Press ANGLE repeatedly on the remote
control during playback to select a desired
angle.
The number of the current angle appears on
the display.
DVD
En
31
Page 32

Section
09
DVD/VCD operation
Changing the audio
language
% Press AUDIO repeatedly on the remote
control during playback to hear a different
audio language.
DVD
Changing the audio
channel
% Press AUDIO repeatedly on the remote
control during playback to hear a different
audio channel (STEREO, Left or Right).
Subtitles
% Press SUBTITLE on the remote control
repeatedly during playback to see the different subtitle languages.
Note
If the icon
on the disc.
VCD
DVD
appears, the feature is not available
Note
The zoom function may not work for some discs.
Zoom
The zoom function allows you to enlarge the
video image.
% Press ZOOM repeatedly during playback or in the pause mode to enlarge the
image.
DVD
!
!
# You can move through the zoomed picture
using a/b/c/d.
32
En
: 100%—400%—1600%
VCD
: 100%—400%
Page 33

Photo operation
Section
10
English
JPEG/TIFF disc compatibility
with this player is limited
as follows:
! Depending upon the size and the number
of JPEG/TIFF files, it could take a long time
for this unit to read the disc’s contents. If
you do not see an on-screen display after
several minutes, some of the files may be
too large — reduce the resolution of the
JPEG/TIFF files to less than 2M pixels as
2 760 × 2 048 pixels and burn another disc.
! The total number of files on the disc should
be less than 3 000.
! Some discs may be incompatible due to a
different recording format or the condition
of disc.
! Ensure that all the selected files have the
.jpg or .tiff extensions when copying into
the disc.
! If the files have .jpe or .jpeg extensions,
please rename them as .jpg file.
! File names without .jpg or .tiff extension
will not be able to be read by this unit. Even
though the files are shown as JPEG or TIFF
image files on the computer.
Viewing slide shows
This unit can play discs with JPEG or TIFF files.
1 Insert a disc in the unit.
For a disc that includes only photo files,
READING appears on the display window, and
slide show starts automatically.
2 Press DISPLAY to show or hide the help
bar while viewing the slide show.
3 Press D.MENU (DISC MENU/SET UP or
STOPgon the remote control) to return to
the menu screen.
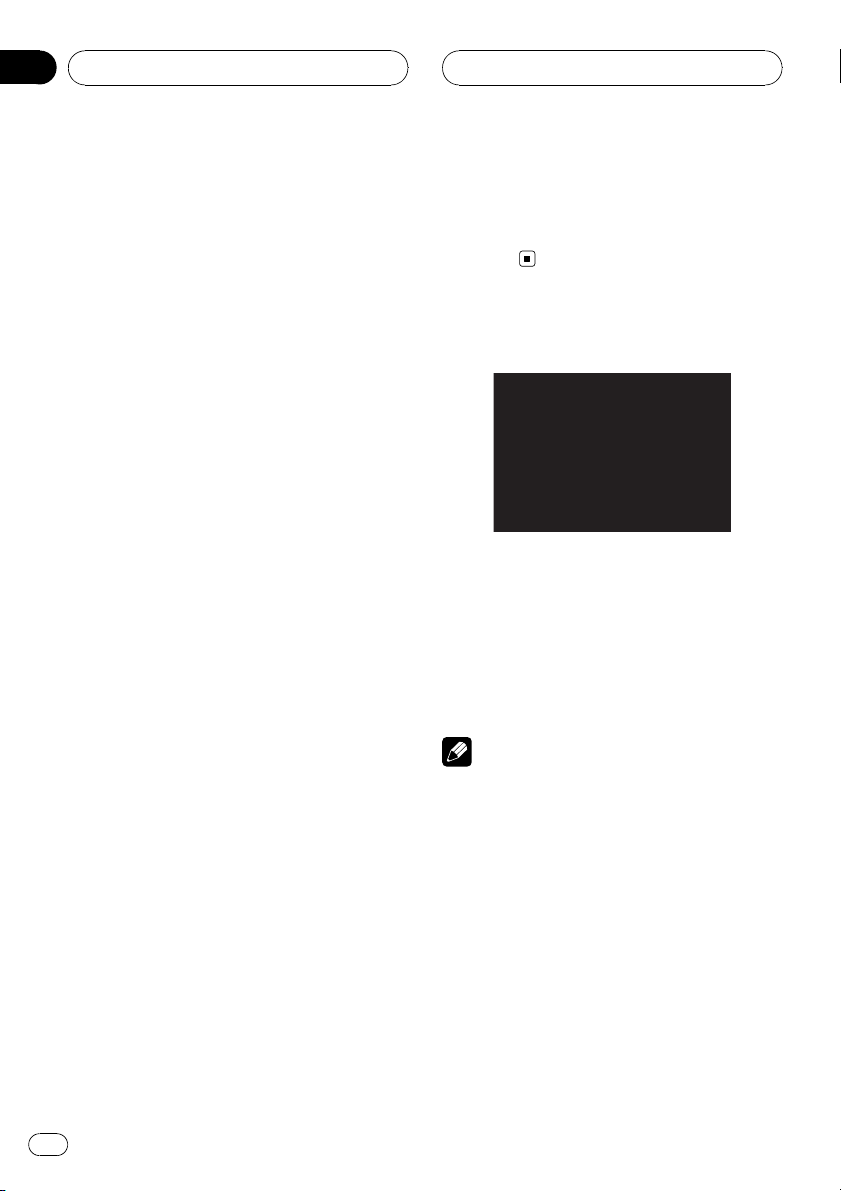
1
2
5
6
7
8
1
2
5
6
7
8
1 Current file number/Total file number
2 Previous file
3 Slide show interval time (SLOW, NORMAL,
FAST, OFF)
4 Repeat mode
5 Current folder name
6 Thumbnail image
7 Current file name
8 Resolution
9 Next file name
3
4
9
PAL
3
4
9
NTSC
En
33
Page 34

Section
10
Photo operation
Note
For a disc that includes audio and movie files, the
media type indicator tabs, MUSIC and MOVIE
will be displayed along with PHOTO. To play the
photo file, select PHOTO and then press ENT/d/
PAUSE (PLAYd on the remote control).
About the the media type indicator tab, refer to
Selecting a media type on page 16.
Moving to another folder
% Press a/b to select the previous or next
folder in the disc.
Moving to another file
% Press c/d to select the previous or next
file in the selected folder.
Slide show interval time
1 Press D.MENU (DISC MENU/SET UP or
STOPgon the remote control) to return to
the menu screen.
2 Press m/n on the remote control to
select the option you want to use.
It shows the slide show interval time:
FAST—OFF—SLOW—NORMAL
(FAST: 3 sec, NORMAL: 8 sec, SLOW:13
sec)
Repeat
% Press RPT (REPEAT on the remote control ) to select the option you want to use.
There are two repeat mode: ALL or FOLDER.
! ALL: Plays repeatedly on the disc.
! FOLDER: Plays repeatedly on the current
folder.
Viewing still picture
1 Press d/PAUSE (e on the remote control) during the slide show.
The player will now go into the pause mode.
# If the slide show interval time is OFF, you can-
not perform this function.
2 To return to the slide show, press d/
PAUSE again (PLAYd on the remote control).
Zoom
% While viewing images, press ZOOM to
enlarge the image (100% — 400%—1600
%).
# You can move through the zoomed picture
using a/b/c/d.
# To cancel the zoom mode, press PLAYd on
the remote control.
Note
The zoom function may not work when the size of
the file is too small.
Rotating the picture
% During watching pictures, press a/b
during showing a picture to rotate the picture clockwise or counter clockwise.
34
En
Page 35

Movie operation
Section
11
English
DivX®disc compatibility
with this player is limited
as follows:
! Available resolution size of the DivX file is
under 720×576 (W×H) pixel.
! The file name of the DivX subtitle is avail-
able by 25 characters.
! If the number of the screen frame is over 30
per 1 second, this unit may not operate normally.
! If the video and audio structure of recorded
file is not interleaved, either video or audio
is outputted.
Playable DivX
.avi, .divx, .div, .asf
Playable subtitle format
.srt, .smi, .ssa, .sub, .txt, .ass
Playable Codec format
DivX3, DivX4, DivX5, Xvid, MP4S
Playable Audio format
Dolby Digital, MP3
! Sampling frequency: 48 kHz (Dolby Digital),
within 8 kHz to 48 kHz (MP3)
! Bit rate: within 64 kbps to 640 kbps (Dolby
Digital), within 8 kbps to 320 kbps (MP3)
®
file
Playing a movie file
This unit can play discs with movie files.
2 Press D.MENU (DISC MENU/SET UP or
STOPgon the remote control) to return to
the menu screen.
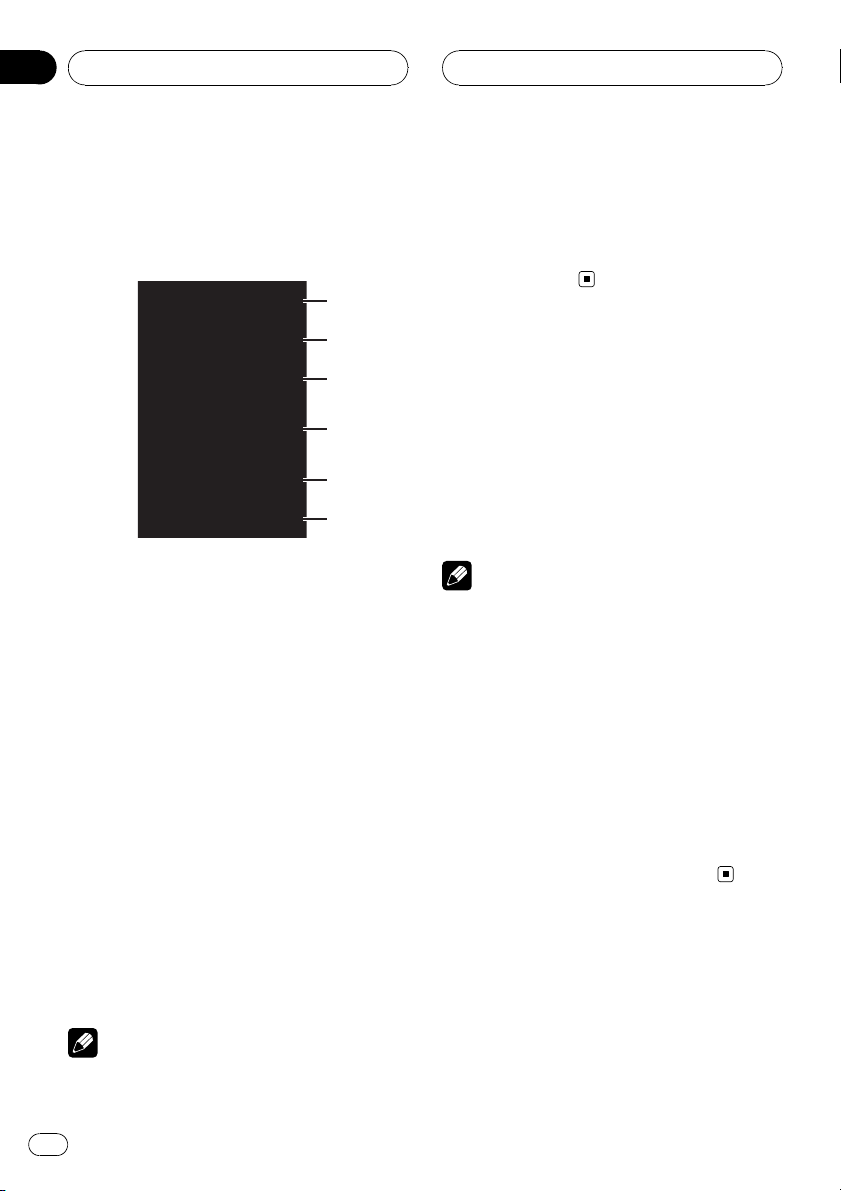
1234
6
1 Current file number/Total file number
2 Elapsed time
3 Playback status (Pre stop eg, stop g)
4 Repeat mode
5 Previous file name
6 Current folder name
7 Current file name
8 Subtitle file name
9 Next file name
Note
For a disc that includes audio and photo files,the
media type indicator tabs, MUSIC and PHOTO
will be displayed along with MOVIE. To play the
movie file, select MOVIE and then press ENT/d/
PAUSE (PLAYd on the remote control).
About the the media type indicator tab, refer to
Selecting a media type on page 16.
5
7
8
9
1 Insert a disc in the unit.
For a disc that includes movie files or movie/
photo files, READING appears in the display
window, and playback starts automatically.
En
35
Page 36

Section
11
Movie operation
Playing DivX®VOD content
Some DivX VOD (video on demand) content
may only be playable a fixed number of times.
When you load a disc containing this type of
DivX VOD content, the remaining number of
plays is shown on-screen and you then have
the option of playing the disc (thereby using
up one of the remaining plays), or stopping. If
you load a disc that contains expired DivX
VOD content (for example, content that has
zero remaining plays), Rental expired is displayed.
! If your DivX VOD content allows an unlim-
ited number of plays, then you may load
the disc into your player and play the con-
tent as often as you like, and no message
will be displayed.
Important
! In order to play DivX VOD content on this unit,
you first need to register the unit with your
DivX VOD content provider. About your regis-
tration code, refer to DivX VOD on page 27.
! DivX VOD content is protected by a DRM (Di-
gital Rights Management) system. This re-
stricts playback of content to specific,
registered devices.
Stop
1 Press g on the Pre-Stop mode.
2 To return to playback, if you press d/
PAUSE (PLAYd on the remote control), it
will be played from the beginning of the
current file.
Pause
1 Press d/PAUSE (e on the remote control) during playback.
2 To return to playback, press d/PAUSE
(PLAYd on the remote control).
Still picture and frame-byframe playback
1 Press d/PAUSE (e on the remote control) during playback.
The unit will now go into the PAUSE mode.
2 You can advance the picture frame-byframe by pressing e on the remote control
repeatedly.
Pre-Stop
1 Press g on the remote control during
playback.
Pre-Stop appears in the display window and
the movie menu appears on the screen.
2 To return to playback, if you press d/
PAUSE (PLAYd on the remote control) on
the Pre-Stop mode, it will be played from
this point you stop.
36
En
3 To return normal playback, press d/
PAUSE (PLAYd on the remote control).
Slow motion
1 Press d/PAUSE (e on the remote control) during playback.
The unit will now go into the PAUSE mode.
Page 37

Movie operation
Section
11
English
2 Use n on the remote control to select
the required speed:
t 1/16, t 1/8, t 1/4, or t 1/2 (forward)
3 To exit Slow Motion mode, press d/
PAUSE (PLAYd on the remote control).
Note
Slow motion playback in reverse is not possible
with movie file.
Scan
1 Press m/n on the remote control
during playback.
2 Press m/n repeatedly on the remote control to select the required speed:
m ×2, m ×4, m ×16, m ×32 (backward) or n ×2, n ×4, n ×16, n ×32
(forward)
3 To return to normal playback, press d/
PAUSE (PLAYd on the remote control).
Skip
% Press c/d (o/p on the remote con-
trol) during playback to select the next file
or to return to the beginning of the current
file.
% Press c (o on the remote control)
twice briefly to step back to the previous
file.
% To go directly to any file on the movie
menu, press SEARCH and then press the
file number you want with number buttons (0 to 9).
Repeat
All files or the folder on the disc is played repeatedly.
The default settings is All.
% To repeat all files of current folder,
press and hold RPT (REPEAT on the remote
control) during playback.
The Folder icon appears on the TV screen.
% To repeat all files of the disc, press RPT
(REPEAT on the remote control) again during playback.
The All icon appears on the TV screen.
% To repeat the current file, press RPT
(REPEAT on the remote control) during
playback.
The File icon appears on the TV screen.
Time search
The Time Search function allows you to start
playing at any chosen time on the file.
1 Press DISPLAY on the remote control
during playback.
The on-screen display appears on the screen.
The Time Search box shows the elapsed playing time of the current disc.
2 Within 10 seconds, press a/b to select
the Time Search icon in the on-screen display.
The – : ––: ––appears in the Time Search
box.
3 Within 10 seconds, use the number buttons to enter the required start time.
Enter hours, minutes, and seconds from left to
right in the box.
En
37
Page 38

Section
11
Movie operation
4 Within 10 seconds, press ENT to confirm the start time.
Playback starts from the selected time on the
file.
# If you enter an invalid time, playback will continue from the current point.
Changing the audio language
% Press AUDIO repeatedly on the remote
control during playback to hear a different
audio language or audio file.
Note
If the icon
on the disc.
appears, the feature is not available
Subtitles
% Press SUBTITLE on the remote control
repeatedly during playback to see the different subtitle languages.
Note
If the icon
on the disc.
appears, the feature is not available
2 Press SUBTITLE on the remote control
to select another character set until the
subtitle is displayed properly.
Number Character set
CP1250 East european latin
CP1251 Cyrillic
CP1252 West european latin
CP1253 Greek
CP1254 Turkish
Notes
! If the subtitle setup menu does not have the
DivX subtitle language that you are going to
play, the subtitle language may not be displayed properly.
! If you select a character set for DivX subtitle,
the setting is also applied to MP3 tag and
WMA tag.
Notice for displaying the
DivX subtitle
If the subtitle does not display properly during
playback, please follow the steps below.
1 Press and hold SUBTITLE on the remote
control for about three seconds.
The number of character set will appear.
38
En
Page 39

AUX operation
Playing an auxiliary
equipment
Before operating the auxiliary equipment using
the following procedure, select the external
input correctly. Refer to AUX (Auxiliary) ON/
OFF on page 18.
You can connect auxiliary equipment to this
unit.
1 Connect the auxiliary equipment to the
auxiliary input on the unit.
AUX input jack (3.5 mm stereo jack)
Section
12
English
Auxiliary equipment (MP3 player, etc.)
2 Press SRC to select the AUX IN.
AUX IN appears in the display.
3 Turn on the connected auxiliary equipment and start playing the source.
4 Adjust the volume.
Note
If the input level of the auxiliary equipment connected to the AUX input jack is not high enough,
adjust the input level properly. Refer to AUX
(Auxiliary) 0 dB/+6 dB on page 18.
En
39
Page 40

Section
13
Installation
Important
! Check all connections and systems before
final installation.
! Do not use unauthorized parts. Use of un-
authorized parts may cause malfunctions.
! Consult your dealer if installation requires dril-
ling of holes or other modifications to the vehi-
cle.
! Do not install this unit where :
— it may interfere with operation of the vehi-
cle.
— it may cause injury to a passenger as a re-
sult of a sudden stop.
! The semiconductor laser will be damaged if it
overheats. Install this unit away from hot
places such as near the heater outlet.
! Optimum performance is obtained when the
unit is installed at an angle of less than 30°.
! The cords must not cover up the area shown
in the figure below. This is necessary to allow
the amplifires to radiate freely.
Do not close this area.
DIN front/rear mount
This unit can be properly installed either from
“Front” (conventional DIN front-mount) or
“Rear” (DIN rear-mount installation, utilizing
threaded screw holes at the sides of unit chassis). For details, refer to the following installation methods.
DIN Front-mount
Installation with the rubber bush
Dashboard
1 Insert the mounting sleeve into the
dashboard.
2 Secure the mounting sleeve by using a
screwdriver to bend the triangular metal
tabs (90°) into place.
! To install more securely, bend the quadran-
gular tabs as necessary.
Mounting sleeve
Rubber bush
Screw
! When installing, to ensure proper heat disper-
sal when using this unit, make sure you leave
ample space behind the rear panel and wrap
any loose cables so they are not blocking the
vents.
40
En
3 Install the unit as illustrated.
Removing the unit
1 Extend top and bottom of the trim ring
outwards to remove the trim ring. (When
reattaching the trim ring, point the side
with a groove downwards and attach it.)
! It becomes easy to remove the trim ring if
the control panel is released.
Page 41

Installation
Section
13
English
Trim ring
2 Insert the supplied extraction keys into
both sides of the unit until they click into
place.
! Insert the extraction keys horizontally to the
unit. Otherwise, they may be stuck between
the mounting sleeve and head unit.
3 Pull the unit out of the dashboard.
DIN Rear-mount
1 Extend top and bottom of the trim ring
outwards to remove the trim ring. (When
reattaching the trim ring, point the side
with a groove downwards and attach it.)
! It becomes easy to remove the trim ring if
the control panel is released.
Trim ring
2 Determine the appropriate position
where the holes on the bracket and the
side of the unit match.
3 Tighten two screws on each side.
! Use either truss screws (5 mm × 6 mm) or
flush surface screws (5 mm × 6 mm), depending on the shape of screw holes in the
bracket.
Screw
Mounting bracket Dashboard or console
En
41
Page 42

Section
14
Connection
Important
! This unit cannot be installed in a vehicle with-
out ACC (accessory) position on the ignition
switch.
C
C
A
O
F
N
F
O
S
T
A
R
T
O
F
N
F
O
S
T
A
R
T
ACC position No ACC position
! Use of this unit in conditions other than the
following could result in fire or malfunction.
— Vehicles with a 12-volt battery and negative
grounding.
— Speakers with 45 W (output value) and 4 W
(impedance value).
! To prevent a short-circuit, overheating or mal-
function, be sure to follow the directions
below.
— Disconnect the negative terminal of the
battery before installation.
— Secure the wiring with cable clamps or ad-
hesive tape. To protect the wiring, wrap adhesive tape around them where they lie
against metal parts.
— Place all cables away from moving parts,
such as gear shift and seat rails.
— Place all cables away from hot places,
such as near the heater outlet.
— Do not pass the yellow cable through a
hole into the engine compartment to connect to a battery.
— Cover any disconnected cable connectors
with insulating tape.
— Do not shorten any cables.
— Never cut the insulation of the power cable
of this unit in order to share the power
with other devices. Current capacity of the
cable is limited.
— Use a fuse of the rating prescribed.
— Never wire the speaker negative cable di-
rectly to ground.
— Never band together multiple speaker’s ne-
gative cables.
! Control signal is output through blue/white
cable when this unit is powered on. Connect it
to an external power amp’s system remote
control or the vehicle’s auto-antenna relay
control terminal (max. 300 mA 12 V DC). If the
vehicle is equipped with a glass antenna, connect it to the antenna booster power supply
terminal.
! Never connect blue/white cable to external
power amp’s power terminal. Also, never connect it to the power terminal of the auto antenna. Otherwise, battery drain or malfunction
may result.
! Black cable is ground. This cable and other
product’s ground cable (especially, high-current products such as power amp) must be
wired separately. Otherwise, fire or malfunction may result if they are accidentally detached.
Cord function may differ according to the product, even if cord color is the same. When connecting this system, be sure to check all
manuals and connect cords correctly.
42
En
Page 43

Connection
Connecting to a car
Before connecting, make sure that the ignition
switch is set to OFF and remove the battery *
terminal to avoid short circuits.
Connecting with the supplied power
cables
15 cm
A
Fuse (10 A)
B
Yellow/black (Phone mute)
Black (chassis ground)
1
357
2
468
1
357
2
468
Section
14
English
To Speaker
To Vehicle
Orange (Illumination)
Red (Accessory)
C
Yellow (Back up)
Blue/white
(System remote control)
DIMMER SWITCH
IGNITION SWITCH
AMPLLIFIER
(Optional)
BATTERY
D
43
En
Page 44

Section
14
Connection
Connecting with the ISO connector
15 cm
Fuse (10 A)
A
1
357
2
468
1
357
2
468
To Speaker
To Vehicle
B
From antenna
Pin and the function of the ISO
connector
To Speaker
1 Rear right +
2 Rear right *
3 Front right +
4 Front right *
5 Front left +
6 Front left *
7 Rear left +
8 Rear left *
To Vehicle
1 Not used.
2 Not used.
3 Phone mute
4 Back up
5 System remote control
6 Illumination
7 Accessory
8 Chassis ground
To the wiring of the vehicle
! Yellow/black (Phone mute)
If you use an equipment with Mute func-
tion, wire this lead to the Audio Mute lead
on that equipment. If not, keep the Audio
Mute lead free of any connections.
! Black (chassis ground)
Connect to a clean, paint-free metal location.
! Orange (Illumination)
Connect to lighting switch terminal.
! Red (Accessory)
Connect to terminal controlled by ignition
switch (12 V DC).
! Yellow (Back up)
Connect to the constant 12 V supply terminal.
! Blue/white (System remote control)
Connect to system control terminal of the
power amp or auto-antenna relay control
terminal (max. 300 mA 12 V DC).
44
En
Page 45

Connection
Section
14
English
Speaker Connections
1 Violet
Rear right+
2 Violet/black
Rear right*
3 Gray
Front right+
4 Gray/black
Front right*
5 White
Front left+
6 White/black
Front left*
7 Green
Rear left+
8 Green/black
Rear left*
Attention
The connector wiring may vary depending on
the car manufacturer, even when ISO connectors are used. We recommend to check the
car’s wiring provision before connecting the
car stereo. Please pay particular attention to
pin 5, where a misconnection might cause damage to the car or radio. Take special care
when installing into ’98 or later VW/Audi/
Skoda/Seat models as there may be a 12 V connection on Pin 5, which could damage the car
stereo or into Ford from ’97 or later, with an
ISO connector, on which damage to the car’s
microcomputers is possible if misconnected.
Use of ISO connector adapters available on the
market may facilitate installation.
En
45
Page 46

Section
14
Connection
Connecting to auxiliary equipment (Optional)
Connect the AUDIO OUTPUT jack of this
unit to the AUDIO INPUT jack of the auxiliary equipment.
Rear left
Rear right
Subwoofer left
Subwoofer right
46
VIDEO OUTPUT
En
Page 47

Connection
! VIDEO OUTPUT: Connect the VIDEO OUT-
PUT connector of this unit to the VIDEO
INPUT connector of the monitor.
Section
14
English
En
47
Page 48

Appendix
Additional Information
Troubleshooting
Symptom Cause Action
Power doesn’t turn on.
The unit doesn’t operate.
The unit does not operate correctly even when the appropriate
remote control buttons are
pressed.
Playback is not possible. The disc is dirty. Clean disc.
No sound is heard.
The volume level will not rise.
The icon
eration is not possible.
The picture stops (pauses) and
the unit cannot be operated.
There’s no sound. The volume level is low. Adjust the volume.
There’s audio and video skipping.
The picture is stretched, the aspect is incorrect.
is displayed, and op-
Leads and connectors are not properly connected.
The fuse is blown. Rectify the problem that caused the fuse to
Noise and other factors are causing
the built-in microprocessor to operate incorrectly.
Battery power is low. Load new battery.
Some operations with certain discs
are prohibited.
The loaded disc is of a type this unit
cannot play.
Cables are not connected correctly. Connect the cables correctly.
The operation is prohibited for the
disc.
The operation is not compatible
with the disc’s organization.
Reading of data has become impossible during playback.
This unit is not firmly secured. Secure this unit firmly.
The aspect setting is incorrect for
the display.
Confirm once more that all connections are
correct.
blow, and then replace it. Be very sure to install the correct fuse with the same rate.
Turn the unit off and then on.
Check with another disc.
Check what type the disc.
This operation is not possible.
This operation is not possible.
After pressing g once, start playback once
more.
Select the appropriate setting for your display.
48
En
Page 49

Additional Information
Appendix
English
Handling guideline of discs
and player
! Use only conventional, fully circular discs.
Do not use shaped discs.
! Use 12-cm disc. Do not use 8-cm disc or an
adapter for 8-cm disc.
! Do not insert anything other than a disc
into the disc loading slot. Discs which can
be played back are listed on Types of Play-
able Discs on page 7.
! Do not use cracked, chipped, warped, or
otherwise damaged discs as they may damage the player.
! Do not touch the recorded surface of the
discs.
! Store discs in their cases when not in use.
! Avoid leaving discs in excessively hot envir-
onments including under direct sunlight.
! Do not attach labels, write on or apply che-
micals to the surface of the discs.
! To clean a disc, wipe the disc with a soft
cloth outward from the center.
! Condensation may temporarily impair the
player’s performance. Leave it to adjust to
the warmer temperature for about one
hour. Also, wipe any dump discs with a soft
cloth.
! Playback of discs may not be possible be-
cause of disc characteristics, disc format,
recorded application, playback environment, storage conditions and so on.
! Road shocks may interrupt disc playback.
! Read the precautions with discs before
using them.
DVD discs
! With some DVD video discs, it may not be
possible to use certain functions.
! It may not be possible to play back some
DVD video discs.
! It is not possible to play back DVD-ROM/
DVD-RAM discs.
DVD-R/DVD-RW discs
! Unfinalized DVD-R/-RW discs which have
been recorded with the Video format (video
mode) cannot be played back.
! For more information about recording
mode, please contact manufacture of DVD
recorder or application.
AVCHD recorded discs
! This unit is not compatible with discs re-
corded in AVCHD (Advanced Video Codec
High Definition) format. Do not insert
AVCHD discs. If inserted, the disc may not
be ejected.
CD-R/CD-RW discs
! When CD-R/CD-RW discs are used, play-
back is possible only for discs which have
been finalized.
! It may not be possible to play back CD-R/
CD-RW discs recorded on a music CD recorder or a personal computer because of
disc characteristics, scratches or dirt on
the disc, or dirt, condensation, etc., on the
lens of this unit.
En
49
Page 50

Appendix
Additional Information
! Playback of discs recorded on a personal
computer may not be possible, depending
on the application settings and the environ-
ment. Please record with the correct for-
mat. (For details, contact the manufacturer
of the application.)
! Playback of CD-R/CD-RW discs may be-
come impossible in case of direct exposure
to sunlight, high temperatures, or the sto-
rage conditions in the vehicle.
! Titles and other text information recorded
on a CD-R/CD-RW disc may not be dis-
played by this unit (in the case of audio
data (CD-DA)).
! Read the precautions with CD -R/CD-RW
discs before using them.
Dual Discs
! Dual Discs are two-sided discs that have a
recordable CD for audio on one side and a
recordable DVD for video on the other.
! Playback of the DVD side is possible with
this unit. However, since the CD side of
Dual Discs is not physically compatible
with the general CD standard, it may not be
possible to play the CD side with this unit.
! Frequent loading and ejecting of a Dual
Disc may result in scratches on the disc.
Serious scratches can lead to playback pro-
blems on this unit. In some cases, a Dual
Disc may become stuck in the disc loading
slot and will not eject. To prevent this, we
recommend you refrain from using Dual
Disc with this unit.
! Please refer to the information from the
disc manufacturer for more detailed infor-
mation about Dual Discs.
Compressed audio files on
the disc
! Depending on the version of Windows
Media Player used to encode WMA files,
album names and other text information
may not be correctly displayed.
! There may be a slight delay when starting
playback of audio files encoded with image
data.
! ISO 9660 Level 1 and 2 compliant. Romeo
and Joliet file systems are both compatible
with this player.
! Multi-session playback is possible.
! Compressed audio files are not compatible
with packet write data transfer.
! Only 64 characters from the beginning can
be displayed as a file name (including the
extension such as .wma or .mp3) or a folder
name.
! Folder selection sequence or other opera-
tion may be altered depending on the encoding or writing software.
! Regardless of the length of blank section
between the songs of original recording,
compressed audio discs will play with a
short pause between songs.
! File extensions such as .wma or .mp3 must
be used properly.
50
En
Page 51

Additional Information
Appendix
English
Example of a hierarchy
: Folder
: Compressed audio file
Level 1 Level 2 Level 3 Level 4
! This unit assigns folder numbers. The user
cannot assign folder numbers.
! It is possible to play back up to 251 folders
on one disc.
! It is possible to play back up to 3 000 files
on one disc.
DivX video files
! Depending on the file information composi-
tion such as the number of audio stream,
there may be a slight delay in the start of
playback on discs.
! Some special operation may be prohibited
because of the composition of DivX files.
! DivX files downloaded only from DivX part-
ner site are guarantee of proper operation.
Unauthorized DivX file may not operate
properly.
! DRM rental file cannot be operated until
starting playing back.
! DivX VOD file playback requires ID code of
this unit to DivX VOD provider. About ID
code, refer to DivX VOD on page 27.
! File extensions such as .avi, .divx, .div, .xvid
or .asf must be used properly.
! For more details about DivX, visit the follow-
ing site:
http://www.divx.com/
En
51
Page 52

Appendix
Additional Information
Language code list
Enter the appropriate code number for the initial settings Disc Audio, SUBTITLE and/or
Menu (See the page 23).
Language and the code Language and the code Language and the code Language and the code
Abkhazian 6566 Fiji 7074 Lingala 7678 Singhalese 8373
Afar 6565 Finnish 7073 Lithuanian 7684 Slovak 8375
Afrikaans 6570 French 7082 Macedonian 7775 Slovenian 8376
Albanian 8381 Frisian 7089 Malagasy 7771 Somali 8379
Ameharic 6577 Galician 7176 Malay 7783 Spanish 6983
Arabic 6582 Georgian 7565 Malayalam 7776 Sudanese 8385
Armenian 7289 German 6869 Maltese 7784 Swahili 8387
Assamese 6583 Greek 6976 Maori 7773 Swedish 8386
Aymara 6588 Greenlandic 7576 Marathi 7782 Tagalog 8476
Azerbaijani 6590 Guarani 7178 Moldavian 7779 Tajik 8471
Bashkir 6665 Gujarati 7185 Mongolian 7778 Tam il 8465
Basque 6985 Hausa 7265 Nauru 7865 Tatar 8484
Bengali; Bangla 6678 Hebrew 7387 Nepali 7869 Telugu 8469
Bhutani 6890 Hindi 7273 Norwegian 7879 Thai 8472
Bihari 6672 Hungarian 7285 Oriya 7982 Tibetan 6679
Breton 6682 Icelandic 7383 Panjabi 8065 Tigrinya 8473
Bulgarian 6671 Indonesian 7378 Pashto, Pushto 8083 Ton g a 8479
Burmese 7789 Interlingua 7365 Persian 7065 Turkish 8482
Byelorussian 6669 Irish 7165 Polish 8076 Turkmen 8475
Cambodian 7577 Italian 7384 Portuguese 8084 Tw i 8487
Catalan 6765 Japanese 7465 Quechua 8185 Ukrainian 8575
Chinese 9072 Javanese 7487 Rhaeto-Romance 8277 Urdu 8582
Corsican 6779 Kannada 7578 Rumanian 8279 Uzbek 8590
Croatian 7282 Kashmiri 7583 Russian 8285 Vietnamese 8673
Czech 6783 Kazakh 7575 Samoan 8377 Volapük 8679
Danish 6865 Kirghiz 7589 Sanskrit 8365 Welsh 6789
Dutch 7876 Korean 7579 Scots Gaelic 7168 Wolof 8779
English 6978 Kurdish 7585 Serbian 8382 Xhosa 8872
Esperanto 6979 Laothian 7679 Serbo-Croatian 8372 Yiddish 7473
Estonian 6984 Latin 7665 Shona 8378 Yoruba 8979
Faroese 7079 Latvian, Lettish 7686 Sindhi 8368 Zulu 9085
52
En
Page 53

Additional Information
Area code list
Enter the appropriate code number for the initial setting Area Code (See the page 26).
Area and the code Area and the code Area and the code Area and the code
Afghanistan AF Ethiopia ET Malaysia MY Saudi Arabia SA
Argentina AR Fiji FJ Maldives MV Senegal SN
Australia AU Finland FI Mexico MX Singapore SG
Austria AT France FR Monaco MC Slovak Republic SK
Belgium BE Germany DE Mongolia MN Slovenia SI
Bhutan BT Great Britain GB Morocco MA South Africa ZA
Bolivia BO Greece GR Nepal NP South Korea KR
Brazil BR Greenland GL Netherlands NL Spain ES
Cambodia KH
Canada CA Hong Kong HK New Zealand NZ Sweden SE
Chile CL Hungary HU Nigeria NG Switzerland CH
China CN India IN Norway NO Taiwan TW
Colombia CO Indonesia ID Oman OM Thailand TH
Congo CG Israel IL Pakistan PK Turkey TR
Costa Rica CR Italy IT Panama PA Uganda UG
Croatia HR Jamaica JM Paraguay PY Ukraine UA
Czech Republic CZ Japan JP Philippines PH United States US
Denmark DK Kenya KE Poland PL Uruguay UY
Ecuador EC Kuwait KW Portugal PT Uzbekistan UZ
Egypt EG Libya LY Romania RO Vietnam VN
El Salvador SV Luxembourg LU Russian Federation RU Zimbabwe ZW
Heard and McDonald Islands HM
Netherlands Antilles AN Sri Lanka LK
Appendix
English
En
53
Page 54

Appendix
Additional Information
Specifications
General
Rated power source ............... 14.4 V DC
Grounding system ................... Nega tive type
Max. current consumption
..................................................... 10.0 A
Dimensions (W × H × D):
DIN
Chassis ..................... 1 78 × 50 × 169 mm
Nos e ........................... 188 × 58 × 2 2 mm
D
Chassis ..................... 1 78 × 50 × 177 mm
Nos e ........................... 171 × 46 × 1 4 mm
Weight .......................................... 1.7 k g
Audio
Maximum power output ....... 45 W × 4
Load impedance ...................... 4 W
DVD Player
Region number ........................ 3
Frequency response ............... 2 0 Hz to 2 0 kHz
Signal-to-noise ratio ............... 90 dB
Distortion ..................................... 0. 1 % ( 1 kH z)
Number of channels .............. 2 (st ereo)
Channel separation (1 kHz)
..................................................... 70 dB
FM tuner
Freq ue nc y range ...................... 87.5 MHz to 108 MHz
Usable sensitivity ..................... 12 dBµV
S/N ratio ....................................... 55 dB
Distortion ..................................... 0. 7 %
Note
Specifications and the design are subject to modifications without notice due to improvements.
AM tuner
Freq ue nc y range ...................... 522 k Hz to 1 620 kHz
Usable sensitivity ..................... 28 dBµV
S/N ratio ....................................... 45 dB
AUX
Frequency response ............... 2 0 Hz to 2 0 kHz
S/N ratio ....................................... 80 dB
Distortion ..................................... 0.05 %
Channel separation (1 kHz)
..................................................... 45 dB
Maximum input level ............. 1 .2 V (35 kW)
54
En
Page 55

目錄
感謝
惠購先鋒產品。
請閱讀以下的操作說明以了解本型號的正確操作方法。
存,以備日後參考。
閱讀完畢後,請妥善保
中文
安全注意事項
處理光碟與播放器的注意事項 58
重要安全措施 58
行駛安全注意事項 59
使用顯示幕時 59
防止電池耗盡 59
關於本機 59
歡迎造訪本公司網站 59
關於
符號顯示 59
區域代碼 59
區域代碼的注意事項 60
可播放光碟的類型 60
DVD 和 VCD 注意事項 60
特點 60
– 關於 WMA 61
– 關於 MP3 61
– 關於 DivX 61
本手冊使用的符號 61
控制面板
按鈕功能 62
遙控器
按鈕功能 63
安裝電池 65
使用遙控器 65
使用前
拆下控制面板 66
裝上控制面板 66
選擇電視系統 66
基本操作
開啟本機 68
關閉本機 68
插入光碟 68
退出光碟 68
選擇播放源 68
選擇媒體類型 68
調整音量 68
靜音 69
設定時鐘 69
響度 69
使用EQ(等化器) 69
調整音量 69
變更一般設定 69
廣播操作
收聽廣播電台 71
儲存廣播頻率 71
自動搜尋記憶體 71
預設電台檢索 71
調諧預設電台 71
CD/MP3/WMA 操作
本機的 MP3/WMA 光碟相容性受以下限
制: 72
播放音樂 CD 和 MP3/WMA 光碟 72
暫停 72
跳至下一個曲目/檔案 73
跳至上一個曲目/檔案 73
回到目前曲目/檔案的開頭 73
移動到其他曲目/檔案 73
搜尋 73
快速檢索 73
重複 73
隨機 73
CD TEXT/ID3 TAG 74
– 跳至前一個或次一個資料
MP3 WMA
夾
設定選單
Language 75
– Menu Language 75
– Disc Audio/Subtitle/Menu 75
Display 75
– TV Aspect 75
– B.L.E.(黑階延伸) 76
Audio 76
– Dolby Digital/DTS/MPEG 76
– 動態範圍控制(DRC) 76
Lock(成人控制) 76
– Rating 76
– Password 77
74
Zhtw
55
Page 56

目錄
– 如果忘記密碼 77
– Area Code 77
Others 77
– PBC 77
– DivX VOD 78
DVD/VCD 操作
在螢幕上顯示光碟資訊 79
播放 DVD 和 VCD 79
預先停止 79
停止 79
暫停 80
靜態影像和逐格播放 80
慢動作 80
移動到其他標題
DVD
80
移動至其他章節/曲目 80
跳到下一個章節/曲目 80
跳到上一個章節/曲目 81
回到目前章節/曲目的開頭 81
掃描 81
重複 81
DVD
–
–
- Chapter/Title/Off 81
VCD
- Track/All 81
時間搜尋 81
DVD
VCD
DVD
DVD
82
DVD
VCD
82
82
82
82
82
光碟選單
PBC選單
攝影角度
變更音訊語言
變更音訊頻道
字幕
放大 82
圖片操作
本播放器的JPEG/TIFF光碟相容性受以下限
制: 83
檢視幻燈片 83
移動到其他資料夾 84
移動到其他檔案 84
幻燈片間隔時間 84
重複 84
檢視靜態圖像 84
放大 84
旋轉圖像 84
影片操作
本播放器的 DivX 光碟相容性受以下限
制: 85
播放影片檔案 85
播放DivX VOD內容 85
預先停止 86
停止 86
暫停 86
靜態影像和逐格播放 86
慢動作 86
掃描 86
跳過 87
重複 87
時間搜尋 87
變更音訊語言 87
字幕 87
顯示 DivX 字幕的注意事項 87
AUX 操作
播放輔助設備 89
安裝
DIN 前/後座 90
DIN 前座 90
– 使用橡皮套管安裝 90
– 移除本機 90
DIN 後座 91
連接
連接至車輛 93
連接到輔助設備(選配) 96
附加資訊
故障排除 97
光碟與播放器的操作指南 98
DVD碟片 98
DVD-R/DVD-RW碟片 98
以 AVCHD 格式錄製的光碟 98
CD-R/CD-RW碟片 98
雙面碟 98
碟片上的壓縮音頻檔案 99
56
Zhtw
Page 57

目錄
– 階層實例 99
DivX視頻檔案 99
語言代碼清單 100
區域代碼清單 101
規格 102
中文
Zhtw
57
Page 58

節
01
安全注意事項
為避免觸電,請勿拆下機蓋(或後蓋)。使用
者不可自行維修內部的零件。所有維修事宜應
交由合格的專業人員處理。
內含箭頭端閃電的三角形警示標誌,
是用來提醒用戶產品機殼內有未經絕
緣的電壓,其強度可能足以導致電
擊。
內含驚嘆號的三角形警示標誌,是用
來提醒用戶翻閱本機隨附手冊中重要
的操作和維護(保養)說明。
駕駛車輛時,務必保持謹慎小心的態
度。請勿在行駛時為了車輛而分心,
您必須專心於行駛狀況上。切勿變更
任何設定或功能。試圖在車上操作本
機前,請依照相關規定先將車輛安全
地停靠在路邊。
請勿在極低溫或極高溫的環境下長時
間使用本機。(-10°C 到 60°C)
為避免發生電擊,請勿拆下本產品的
機蓋或背蓋。用戶不可以自行維修內
部的零件。所有維修事宜應交由合格
的專業人員處理。
本機不可濺到液體, 否則可能會導致
電擊發生, 還可能導致機器損壞、冒
煙和過熱等情形。
本機外表可能會產生極高的溫度,在
其已安裝於車輛上後,始可使用本
機。
請勿在該面上粘貼紙片或膠帶。
光碟不可受到太陽直曬或接觸高溫。
播放前請先清潔光碟。請用軟布從中心向外擦
拭光碟。
請勿使用汽油或酒精等溶劑清潔光碟。
定期以棉花棒沾濕酒精擦拭控制面板後方的接
觸點。
如果本機無法正常運作,以原子筆筆尖或類似
工具按RESET按鈕。
RESET
處理光碟與播放器的注意事項
若將受損或髒污的光碟插入本機,會導致播放
時出現聲音中斷的情形。
手持光碟的位置在光碟的內緣和外緣。
請勿觸碰光碟未貼標籤的那一面。
58
Zhtw
重要安全措施
警告
! 請勿自行安裝或維修顯示幕。若未經電氣設
備與汽車配件方面的專門培訓,或具有相關
的工作經驗即貿然安裝或維修顯示幕,則會
發生危險,導致觸電或其他事故。
Page 59

安全注意事項
節
01
行駛安全注意事項
警告
! 為避免發生意外事故及誤觸相關法令,本機
未配備供駕駛觀看的螢幕。
! 為避免發生損傷及誤觸相關法令,本機未配
備供駕駛觀看的螢幕。
! 在某些國家,在車上觀看顯示器所播放的影
片可能受到法令禁止,即使是駕駛以外的乘
員亦是如此。請遵守這些法令,並且不應在
車上使用本機的 DVD 功能。
使用顯示幕時
警告
不可將顯示幕安裝在駕駛在駕車時可以看到影像
的位置。
防止電池耗盡
使用本機時請務必啟動汽車引擎。在未啟動汽
車引擎時使用本機會造成電池放電。
! 因更換車輛電瓶或其他類似原因而無法向
本機供電時,本機的微機會返回初始狀
態。 建議您轉錄音頻調節資料。
警告
請勿使用未配備ACC位置的車輛。
本機底部粘貼有 CLASS 1 LASER PRODUCT
(一級鐳射產品)標籤。
! 請將本手冊保存於隨手可取之處,以備查閱
操作步驟及注意事項。
! 請務必保持在適當的音量,以能聽見車外的
聲響為準。
! 請注意本機的防潮。
! 如果電池未接通或電量用完,預設記憶將被
刪除,必須重新設定。
歡迎造訪本公司網站
本公司網址如下:
! 本公司網站提供有關先鋒公司的最新資
訊。
關於 符號顯示
您在觀賞 DVD 的同時若想要執行操作時,可能
會因為磁碟的程式設計而無法執行操作。在這
種情況下,本機將在螢幕上指示按鈕
。
中文
關於本機
小心
! 本產品包含有 1 級以上的鐳射二極管。為了
保證安全,切勿拆下任何機蓋或者試圖接觸
本機內部。所有維修事宜應交由專業人員處
理。
區域代碼
本機乃是針對區域3編碼 DVD 軟體設計與製
造。本機僅能播放貼有3或ALL標籤的 DVD 光
碟。
Zhtw
59
Page 60

節
01
安全注意事項
區域代碼的注意事項
! 大多數DVD光碟在封面處都有明顯可見的球
狀標誌,其上有一或多個號碼。此號碼必
須與您車用DVD接收機的區域代碼相同,否
則無法播放該光碟。
! 如果您嘗試播放的DVD的區域代碼與播放器
不同,顯示幕上將出現Check Region
Code訊息。
可播放光碟的類型
DVD(12 cm 光碟)
VCD(12 cm 光碟)
音樂 CD(12 cm 光碟)
此外,本機可播放內含音訊、壓縮音訊、相片
或影片檔案的DVD±R、DVD±RW和CD-R或CDRW。
! 視錄影設備的條件或 CD-R/RW(或 DVD±R/
±RW)光碟本身而定,有些 CD-R/RW(或
DVD±R/±RW)光碟無法在本機中播放。
! 請勿在光碟任一面(標籤面或錄製面)上
粘貼貼紙或標籤。
! 請勿使用不規則形狀的 CD(例如心形或八
邊形)。這些光碟可能會導致機器故障。
注意
!
是 DVD Format/Logo Licensing
Corporation 的商標。
! 本播放器僅能播放有以上標記的光碟。
DVD 和 VCD 注意事項
有些 DVD 和 VCD 的播放操作可能已由軟體製造
商設定。
本機將根據軟體製造商設計的光碟內容來播放
DVD 和 VCD,因此可能無法使用部份播放功
能,也或許可新增其他功能。
特點
杜比數位/DTS 相容性
! 由Dolby Laboratories授權製造。「杜
比」、「Dolby」與雙D標誌是Dolby
Laboratories的商標。
! “DTS”和“DTS Digital Out”為數碼影院
系統公司(DTS, Inc.)的註冊商標。
注意
! 若未獲得許可,依法禁止拷貝、廣播、展
示、有線廣播、公開播放或出租受版權保護
的資料。
! 本產品配備Macrovision開發的防拷功能。防
拷訊號錄製在某些光碟上。使用本機播放這
些光碟的影像時,影像會出現雜訊。
! 本產品採用了版權保護技術,它受到
Macrovision Corporation 和其他權利所有人
的特定美國專利和其他知識產權等的方法專
利保護。此版權保護技術必須經由
Macrovision Corporation 授權方能使用,而
且若未經 Macrovision Corporation 專門授
權,應僅限於家庭和其他有限觀賞使用。禁
止對其進行還原工程或反向組譯。
60
Zhtw
Page 61

安全注意事項
節
01
關於 WMA
印製在包裝盒上之 Windows Media™ 標 誌表示
本機可播放 WMA 資料。
WMA 為 Windows Media Audio 的縮寫,係指由
Microsoft Corporation 開發的音訊壓縮技
術。WMA 資料可透過 Windows Media Player 7
或以上版本加以編碼。
! 「Windows Media」和「Windows」標誌皆
為 Microsoft Corporation 在美國和/或
其他國家之商標或註冊商標。
! 本機可能會因為用於編碼 WMA 檔案的應用
程式而無法正常運作。
關於 MP3
本產品之供應僅針對私人、非商業的使用提供
授權許可,除此之外,並未提供授權許可,或
暗示任何權利供使用者將本產品用於任何商業
(即創造營收)即時播放(陸上、衛星、有線
和/或任何其他媒體)、透過網際網路、內部
網路和/或其他網路的廣播/資料流,或其他
電子內容傳播系統,例如付費音訊或隨選音訊
應用程式。此類用途須另行授權許可。詳情請
參閱
http://www.mp3licensing.com。
訊檔案稱為「標題」。請記住,在燒錄前為
CD-R/RW或DVD-R/RW光碟中的檔案/標題命名
時,它們將根據預設值依照寫入順序來播放。
官方 DivX
用 DivX
本的 DivX
®
認證產品
®
媒體檔案的標準播放可以播放所有版
®
視訊(包括 DivX®)。
! 「DivX」、「DivX Certified」 和相關標
誌皆為 DivX, Inc. 的商標,須經授權方可
使用。
本手冊使用的符號
章節的標題上出現以下符號時,表示該節的說
明僅適用於標有該符號的光碟。
DVD
DVD
VCD
VCD
ACD
音樂 CD
MP3
MP3 檔案
WMA
WMA 檔案
中文
關於 DivX
DivX係一種由DivX. Inc.的DivX®視訊編碼創
造的壓縮數位視訊格式。本機可播放以CD-R/
RW/ROM和DVD-R/RW/ROM光碟錄製的DivX視訊檔
案。使用與DVD視訊相同的術語,單一DivX視
Zhtw
61
Page 62

節
02
控制面板
按鈕功能
1 EQ/ LOUD
! 等化器(EQ)
! 響度(
2 VOL/MUTE/
! 音量(VOL)
! 靜音(MUTE)
! 關閉(
3 光碟槽
4 顯示視窗
5 退出h
6 a/b/c/d
! 跳過/搜尋c/d
! 搜尋/調頻c/d
! 資料夾向上/向下a/b
! 選擇(SEL)
7 釋放
LOUD)
OFF
OFF)
12 3 567
4
891011121314151617181920
12 D.MENU
13 D.SETUP
14 SHUFFLE
15 重複(RPT)
16 快速檢索(SCAN)
17 ENT/d/PAUSE
! 播放/暫停(d/PAUSE)
! 輸入(ENT)
18 預設電台(1 至 6)
19 CLOCK
20 播放源(SRC)
注意
表示按鈕操作(按住)啟動特定功能。
8 AUX輸入 插孔(3.5 mm立體聲插孔)
9 BAND
10 選單(MENU)
11 選擇(SEL)
62
Zhtw
Page 63

遙控器
節
03
1
6
2
3
7
8
4
9
10
5
11
按鈕功能
PWR 開啟/關閉本機。
1
SRC 選擇播放源。
MUTE 使用靜音。
SKIP o/p
SCAN/SLOW m/n 往後(往前)搜尋播放。
2
PAUSE e
PLAY d 開始播放。
STOP g 停止播放。
3 SEARCH 選擇曲目或檔案。
4 DISPLAY 存取螢幕顯示。
進入下一個(上一個)章節、曲目或檔案。
回到目前章節、曲目或檔案的開頭。
暫停播放。
反覆按以進行逐格播放。
中文
Zhtw
63
Page 64

節
03
遙控器
0至9數字鍵
REPEAT 重複播放章節、曲目、標題或檔案。
SHUFFLE 隨機播 放曲目或檔案。
SCAN 播放所有曲目的前 10 秒。
5
AUDIO 選擇音訊語言。
SUBTITLE 選擇字幕語言。
ANGLE 如果有此功能,可選擇 DVD 攝影角度。
ZOOM 放大視訊影像。
TITLE 如果有此功能,可顯示標題選單。
6 BAND/TAB
7 DISC MENU/SET UP
a/b/c/d(上/下/左/
8
右)
9 RETURN 顯示具有 PBC 功能的 VCD 選單。
10 ENTER 確認選單選項。
11 VOL(增加 +/ 降低 -) 調整音量。
在選單中選擇項目的編號。
選擇已儲存的廣播電台頻率(1到6)。
選擇3個FM和AM波段。
移到具有多種檔案類型的光碟上的任何其他檔案。
在 DVD 光碟中存取選單。
存取或移除設定選單。
在選單中選擇項目。
64
Zhtw
Page 65

遙控器
節
03
安裝電池
1 使用例如原子筆等的尖銳物體拉出電池托
盤。
2 將電池安裝在電池托盤上。
3 將電池托盤裝回原來的位置。
警告
請將電池存放在兒童拿不到的地方。萬一誤吞電
池,請立即就醫。
重要
! 請勿將遙控器存放在高溫或陽光直射的區域
中。
! 請勿讓遙控器掉落到底板上,否則它可能會
卡在煞車或油門踏板之下。
中文
小心
! 請使用CR2025 (3 V)鋰電池。
! 遙控器至少一個月不使用時,請取出電池。
! 請勿將本產品置於高熱或潮濕的地方。
! 請勿用金屬工具夾取電池。
! 請勿將電池存放在金屬置物盒中。
! 如果發生電池漏液,請將遙控器徹底拭淨並
裝上新電池。
! 處理用過的電池時,請遵循貴國或貴地區的
政府法規或環境公共組織的條例。
使用遙控器
將遙控器對著控制面板進行操作。
Zhtw
65
Page 66

節
04
使用前
拆下控制面板
下車時,您可以拆下控制面板。拆下或安裝控
制面板時,請謹慎小心,以免損壞控制面板背
面和面板支架上的接頭。
1 按
2 將控制面 板往右推。
3 拉出控制 面板。
4 將拆下的 控制面板放 入保護盒中 。
(釋放)以打開控制面板。
裝上控制面板
1 將面板左 端對準制動 器。
2 將右端或 面板推入本 機中,直到 卡入定
位。
2
1
注意
! 拆下或安裝控制面板時,請勿按顯示或控制
按鈕。
! 如果控制面板安裝不正確,控制按鈕可能無
法運作。如果發生這種情形,請輕按控制面
板。
! 請勿將控制面板放置在高溫或陽光直射的區
域中。
! 請勿摔落前面板或使它承受過大的撞擊力
道。
! 請避免讓控制面板的表面接觸到揮發性溶
劑,如甲苯、稀釋劑或殺蟲劑。
! 請勿試圖分解控制面板。
注意
! 控制面板是整個裝置中最精密的部份,會因
為震動或顛簸而損壞。因此,拆下控制面板
後,請將其裝入防護箱中。
! 請避免手指或任何金屬裝置觸碰接頭。
66
Zhtw
選擇電視系統
您必須為您的電視系統選擇正確的系統模式。
當所選的系統不符合您電視的系統時,可能不
會顯示正常的彩色畫面。
! AUTO:當本機與多系統電視連接時選擇
此項。
Page 67

使用前
! NTSC:當本機與 NTSC 電視連接時選擇此
項。
! PAL:當本機與 PAL 電視連接時選擇此項。
節
04
1 按SRC選擇CD/DVD。
2 按EJECT。
確認內置式播放器內未裝入光碟(顯示
NO DISC)。
3 按住ENT/d/PAUSE(遙控器上的e)五秒
以上。
每次按住按鈕超過五秒時,電視系統的切換如
下所示:
PAL -AUTO-NTSC
中文
Zhtw
67
Page 68

節
05
基本操作
開啟本機
% 按下退出h以外的任何按鈕(遙控器上的
PWR),然後放開
注意
當您將光碟插入光碟槽時,即開啟本機。
。
關閉本機
% 按住OFF(遙控器上的PWR)。
插入光碟
% 送入光碟,並且開始自動播放。
注意
! DVD 播放機一次播放一張標準 12 厘米的碟
片。 本機無法播放 8 厘米的碟片。 可播放的
碟片及適配器列於下表中。
12 厘米的碟片8 厘米的碟
片
Ö --
8 厘米碟片適配器
選擇播放源
% 按SRC選擇播放源。
反覆按SRC可在以下播放源之間切換:
調諧器-CD/DVD-AUX(AUX IN)
選擇媒體類型
選擇CD/DVD作為播放源時,您可以在有音訊、
相片和影片檔案的光碟上切換MUSIC、
PHOTO和MOVIE選單。
每個選單都有顯示您選擇哪一種媒體的媒體類
型指示標籤。
1
1 媒體類型指示標籤
對於只有音訊檔案的光碟,顯示MUSIC。如
果光碟中有相片或影片檔案,將顯示PHOTO
標籤或MOVIE標籤。
! 光碟槽中請勿插入 CD 以外的任何物品。可播
放的光碟列於第60頁上
型
。
可播放光碟的類
退出光碟
% 按h。光碟將自動從光碟槽中退出。
在播放期間按h退出光碟時,如果未從本機中
取出光碟,10 秒後將自動載入光碟槽。
68
Zhtw
% 按BAND(遙控器上的BAND/TAB)以選
擇其他媒體類型。
調整音量
% 旋轉VOL(按遙控器的VOL +/-)可調整
音量。
注意
關閉本機時,將自動記憶目前的音量。下次開啟
本機時,將以記憶的音量來操作。
Page 69

基本操作
節
05
靜音
1 按MUTE 可關閉聲音 。
2 若要取消 靜音,再按 一次MUTE 。
設定時鐘
1 按CLOCK。
2 按住CLOCK1 秒以上。
3 按c可調整小時。
# 您無法以按下遙控器的同一個按鈕執行此操
作。
4 按d可調整分鐘。
# 您無法以按下遙控器的同一個按鈕執行此操
作。
響度
% 按住EQ/LOUD可增強高音、低音和環繞
音效。
響度關閉(無顯示)-響度開啟(LOUD指示
燈亮起)
! SAMBA:重現森巴音樂的風采。
! USER1:使用此選單可設定想要的音量。
! USER2:使用此選單可設定想要的音量。
您可以依照喜好調整每種音量。當您選擇
USER模式並進行調整時,該音量便自動儲
存為目前所選USER模式的音量。
請參見
調整音量
。
調整音量
1 重複按SEL可選擇想要調整的模式,包括
音量、低音、中音、高音、平衡和漸弱。
指示燈依下列順序亮起。
VOL-BAS-MID-TRB-BAL-FAD
2 旋轉VOL(按遙控器的VOL +/-)可調整
音質。
指示 右轉 左轉
VOL 增加音量。 降低音量。
BAS 增加低音音量。 降低低音音量。
MID 增加中音音量。 降低中音音量。
TRB 增加高音音量。 降低高音音量。
BAL
FAD
降低左揚聲器的
音量。
降低前揚聲器的
音量。
降低右揚聲器的
音量。
降低後揚聲器的
音量。
中文
使用EQ(等化器)
% 重複按EQ/LOUD。
指示燈依下列順序亮起。
POP-CLASSIC-ROCK-JAZZ-VOCAL-
SALSA-SAMBA-USER1-USER2-關閉
(無顯示)
! POP:可優化 R&B、靈魂和民族音樂。
! CLASSIC:可優化管絃樂曲。
! ROCK:可優化搖滾和重金屬音樂。
! JAZZ:帶給人柔和感受的恬適音樂。
! VOCAL:呈現具高音質的真實感。
! SALSA:重現莎莎音樂的風采。
注意
當EQ或LOUD設定為關閉時,便可調整音量
(BAS、MID、TRB)設定。
變更一般設定
1 按MENU,將出現選單項目之一。
2 重複按下 MENU 可在選單之間進行切換。
AUX ON-AUX 0DB-DEMO OFF-
BEEP 2ND
Zhtw
69
Page 70

節
05
基本操作
3 順時針或 逆時針轉動 VOL以選 擇其中一個
設定。
選定顯示在顯示窗上的設定,然後在大約六秒
後自動消失。
! 輔助開啟/關閉
本機可搭配輔助設備使用。使用與本機連
接的輔助設備時,請啟動輔助設定。
AUX ON:使用輔助設備時啟動。
AUX OFF:未使用輔助設備時啟動。
! 輔助 0 dB/+6 dB
您可以調整每個播放源的音量,以免除在
播放源之間進行切換時音量忽大忽小的情
形。
您可以設定為0DB或+6DB。
如果連接裝置的輸入音量不夠高,請視需
要調高輸入音量。若未調整線性輸入音
量,當您從外部裝置切換至其他播放源
時,音量將會變得非常大聲。
! 示範開啟/關閉
聆聽播放源時,您可以將螢幕上的初始模
式變更為資訊名稱(功能名稱、EQ 名稱
等)。
DEMO ON:聆聽播放源時會顯示資訊名
稱。
DEMO OFF:取消功能。
! 嗶聲長按/全部
設定每次按下按鍵時所發出的嗶聲。
BEEP 2ND:按住按鍵不放時將發出嗶聲
(一秒)。
BEEP ALL:按任何按鍵時將發出嗶聲。
# 按遙控器上的VOL+/-同樣可選擇其中一個設
定。
70
Zhtw
Page 71

廣播操作
節
06
收聽廣播電台
1 按SRC選擇調諧器。
2 重複按BAND可選擇頻帶。
指示燈依下列順序亮起。
F1 (FM1)-F2 (FM2)-F3 (FM3)- AM (AM)
3 自動搜尋 : 按c/d(遙控器上的c/
d)。
接收到電台訊號時,即停止搜尋。
4 手動搜尋 : 按住c/d(遙控器上的c/
d)直到顯示幕上出現MANUAL,然後重複
按該鍵。
頻率將逐格向上或向下移動。
# 手動搜尋後,當有六秒的時間未執行任何操
作時,則顯示普通的調諧器顯示畫面。
儲存廣播頻率
您可以輕鬆儲存最多六個廣播頻道,以後只需
觸摸按鈕即可將其調出。
1 按BAND以選擇想要儲存的頻帶。
2 選擇想要 的頻率。
自動搜尋記憶體
此功能可讓您自動儲存 6 個收訊最強的廣播頻
率。
1 按a。
6個收訊最強的廣播頻率將依照訊號強弱程度
儲存在預設按鈕1到6中。
2 若要取消 ,請按a。
預設電台檢索
1 按b。
將出現所有的預設電台。
2 若要取消 ,請按b。
調諧預設電台
1 按BAND以選擇所要的頻帶。
2 按所要的 1到6預設按鈕。
顯示預設電台的預設按鈕1到6,並可收聽預
設電台。
中文
3 按預設按 鈕1到6之一並按住,直到嗶聲響
起。
在預設號碼指示燈中,按下的號碼將會顯示,
然後持續亮起。所選的廣播電台頻率已儲存在
記憶體中。
4 若要預設 其他電台, 請重複步驟 1 到 3。
以後按該預設按鈕時,即可從記憶體中叫出該
廣播電臺頻率。
注意
! 最多18個FM電台(3個FM波段各6個)以及6個
AM電台可儲存在記憶體中。
! 當預設電台按鈕中已儲存新電台時,將自動
刪除先前預設的電台。
Zhtw
71
Page 72

節
07
CD/MP3/WMA 操作
本機的 MP3/WMA 光碟相容性
受以下限制:
! 取樣頻率: 8 kHz 到 48 kHz(MP3)、
22.05 kHz 到 48 kHz(WMA)
! 位元率: 8 kbps 到 320 kbps(包括 VBR)
(MP3)、32 kbps 到 320 kbps(WMA)
! CD-R/CD-RW 實體格式應為 ISO9660。
! 如果您使用無法建立「檔案系統」的軟體
來錄製 MP3/WMA檔案,將無法播放MP3/WMA
檔案。
MP3/WMA檔案不適用封包寫入數據傳送。
! 光碟上的檔案或資料夾總數應少於99個
(音樂CD)、3 000個(MP3/WMA)和251個
(資料夾)。
注意
客戶也應注意,要從網際網路上下載MP3/WMA檔
案和音樂需獲得許可。本公司無權授予這類許
可。請務必向版權所有者尋求許可。
播放音樂 CD 和 MP3/WMA 光碟
本機可以播放MP3/WMA格式的錄音內容。
10
11
12
13
1 目前的曲目編號/總曲目數
2 已播放時間
3 播放狀態(播放d、暫停e、掃描
n×4、×8、m×4、×8)
4 目前的模式(重複、快速檢索、隨機)
5 上一個曲目名稱
6 CD-TEXT 中的專輯資訊
7 目前的曲目名稱
8 CD-TEXT 中的標題和歌手資訊
9 下一個曲目名稱
10 前一個檔案名稱
11 目前的資料夾名稱
12 目前的檔案名稱
13 ID3 TAG 資訊
14 下一個檔案名稱
MP3 WMA
MP3 WMA
MP3 WMA
MP3 WMA
MP3 WMA
14
MP3/WMA模式
% 在裝置中插入光碟。
顯示視窗中將出現READING,並且開始自動
播放。
3
7
音樂CD模式
72
12
5
6
8
Zhtw
注意
! 光碟含有音訊資料(CD-DA)和其他格式的音
訊資料時,只播放音訊資料(CD-DA)。
! 如果變更播放源,CD播放功能也會停止(但
不會退出光碟)。下次選擇CD作為播放源
4
時,將從上次停止的地方開始播放CD。
暫停
9
1 在播放期 間按下d/PAUSE(遙控器上的
e)。
2 若要回到 播放,請按 d/PAUSE(遙控器上
的PLAYd或e)。
Page 73

CD/MP3/WMA 操作
節
07
跳至下一個曲目/檔案
% 快速按d(遙控器上的p)可選擇下一
個曲目或檔案。
跳至上一個曲目/檔案
% 快速按c(遙控器上的o),然後在播
放後4秒內再按一次。
回到目前曲目/檔案的開頭
% 播放 4 秒後,快速按c(遙控器上的
o)。
移動到其他曲目/檔案
當光碟中有一個以上的曲目/檔案時,您可以
依照以下步驟在曲目/檔案之間移動:
1 按遙控器 上的SEARCH。
2 按對應的 數字按鈕( 0到9)以選擇曲目/
檔案編號。
快速檢索
可播放光碟中目前所選資料夾( SCAN)中
每個曲目/檔案(SCAN)或每個檔案的前 10
秒。
1 按SCAN 。
顯示視窗中會出現SCAN
MP3 WMA
# 在播放期間按住SCAN約 2 秒。
顯示視窗中將出現SCAN。
2 再按一次 SCAN。
顯示視窗中的SCAN(或
消了快速檢索。
)。
ACD
(或 SCAN
MP3 WMA
SCAN)消失且取
重複
可重複播放光碟中目前所選的曲目/檔案
(1 RPT)或資料夾(
1 在播放期 間按RPT 。
顯示視窗中將出現1 RPT。
# 在播放期間按住RPT約 2 秒。
顯示視窗中將出現 RPT。
2 再按一次 RPT。
顯示視窗中的1 RPT(或
了重複模式。
RPT)。
MP3 WMA
RPT)消失且取消
中文
搜尋
% 在播放期間,按住c/d(遙控器上的m/
n)想要的速度,然後在想要的位置上放開
按鈕。
# 往後搜尋: m ×4、m ×8
往前搜尋:n ×4、n ×8
隨機
可隨機播放光碟中所有的曲目/檔案(SHF)
或目前所選的資料夾(
1 在播放期 間按SHUFFLE。
顯示視窗中會出現SHF
MP3 WMA
# 在播放期間按住SHUFFLE約 2 秒。
WMA
顯示視窗中將出現SHF。
)。
SHF)。
ACD
(或 SHF
MP3
Zhtw
73
Page 74

節
07
CD/MP3/WMA 操作
2 再按一次 SHUFFLE。
顯示視窗中的SHF(或
機播放。
注意
在隨機播放期間如果按c(遙控器上的o),
將不會回到上一個曲目。
SHF)消失且取消隨
CD TEXT/ID3 TAG
播放含有資訊的光碟時,可以檢視 CD TEXT/
ID3 TAG 資訊。
在 ID3 TAG 中,有關檔 案(專輯名 稱、歌手姓
名、歌曲名稱)的資訊錄製於其中。
在 WMA 內容中,有關檔案(歌曲名稱、歌手姓
名)的資訊錄製於其中。
如果當中沒有任何資訊,顯示視窗中將顯示
NO TEXT。
% 在播放MP3/WMA/CD TEXT檔案期間重
複按DISPLAY。
跳至前一個或次一個資料夾
(如果資料夾有 2 個以上。)
% 按a可跳至次一個資料夾,而按b可跳至
前一個資料夾。
注意
播放 VBR 時顯示視窗中出現的時間顯示可能不盡
相同,且可能與實際時間有所出入(播放檔案
時,將同時顯示播放進度時間和 VBR)。
74
Zhtw
MP3 WMA
Page 75

設定選單
節
08
設定選單可讓您對圖像和聲音等各種項目進行
調整。此外,您也可以設定字幕和設定選單的
語言。
1 按D.SETUP。
將出現設定選單。
# 按住遙控器上的DISC MENU/SET UP同樣可執
行此操作。
2 使用a/b選擇所要的選項,然後按d以
移動至第二層。
畫面上將顯示所選項目目前的設定,以及替換
設定。
3 使用a/b選擇第二個所要的選項,然後
按d以移動至第三層。
4 使用a/b選擇所要的設定,然後按ENT
以確認您的選項。
# 有些項目多出一些步驟。
5 按D.SETUP。
將關閉設定選單。
# 按住遙控器上的DISC MENU/SET UP或按
PLAYd或RETURN同樣可執行此操作。
注意
按c返回上一層。
Menu Language
選擇設定選單和螢幕顯示的語言。
如果選擇設定選單的語言,MP3標籤、WMA標籤
和DivX字幕的字元集也會隨著語言改變。 請
參見第87頁上
顯示 DivX 字幕的注意事項
。
Disc Audio/Subtitle/Menu
選擇喜好的光碟曲目、字幕和光碟選單的語
言。
! Original:指光碟錄製時所用的原始語言。
! Other:若要選擇其他語言,根據語言代碼
清單所列的語言代碼,按數字鍵後再按
ENT,輸入對應的4位數字。請參見第100
頁。
如果輸入錯誤的語言代碼,請輸入4位數
字,然後按任一個數字鍵。––––出現在
顯示幕上時,正確地輸入4位數字。
! Off:此選項僅顯示在Disc Subtitle中。 如
果您選擇Off,則不會顯示光碟字幕。
Display
中文
Language
TV Aspect
! 16:9:連接 16:9 電視時的選項。
! 4:3 Letter Box:連接標準的 4:3 電視時
的選項。
顯示螢幕上方和下方出現條狀物的寬畫
面。
! 4:3 Pan Scan:連接標準的 4:3 電視時的
選項。
Zhtw
75
Page 76

節
08
設定選單
自動顯示全螢幕的寬畫面,並裁去不適合
的部份。
注意
如果是DivX檔案,4:3 Letter Box和4:3 Pan Scan
的TV Aspect相同。
B.L.E.(黑階延伸)
可選擇播放畫面的黑階。設定偏好設定和顯示
器的能力。
! On:延伸灰階。
! Off:設定標準灰階。
注意
B.L.E.功能僅用於 NTSC 系統。
Audio
每個 DVD 光碟均有許多音訊輸出選項。請根據
所使用的音訊系統類型來設定播放器的音訊
(AUDIO)選項。
! Off(適用於 DTS): 如果選擇Off,DTS
訊號將不會透過光纖輸出插孔輸出。
注意
本操作選單不適用於本產品。
動態範圍控制(DRC)
DVD 格式可讓您聆聽最精準的音軌並呈現臨場
感效果,而這應歸功於數位音訊技術。然而,
您可能想要壓縮音訊輸出的動態範圍(最大聲
和最小聲之間的差異)。這可讓您以較小的音
量聆聽電影配樂,而且絲毫無損聽覺上的清晰
度。如要達到此效果,請將DRC設定為
On。
Lock(成人控制)
若要使用Rating、Password和Area Code功
能,必須輸入您建立的4位數密碼。 如果尚未
輸入密碼,將出現要求建立密碼的提示。
1 輸入 4 碼密碼並按ENT。
! 如果在按ENT前輸入錯誤數字,按c以
逐一將其刪除。
2 重新輸入並按ENT以確認。
Dolby Digital/DTS/MPEG
! Bitstream:如果連接本機的光纖輸出插孔
與放大器或其他配備杜比數位、DTS 或
MPEG 解碼器的設備,選擇Bitstream。
! PCM:連接雙聲道數位音響放大器時的選
項。以杜比數位或 MPEG 編碼的 DVD 將自動
向下混音至雙聲道 PCM 音訊中。
76
Zhtw
Rating
有些電影中會有兒童不宜的畫面。許多光碟含
有可套用整個光碟或其中特定場景的成人控制
資訊。電影和場景的分級範圍介於 1 到 8 級,
各國的分級制度因國情而定。有些光碟另有更
普級的版本。
Page 77

設定選單
節
08
成人控制功能可讓您封鎖電影等級低於輸入值
的存取,因此可防止您的小孩觀看您認為不適
宜的內容。
1 在 Lock 選單上選擇 Rating,然後按 d。
2 用a/b從1至8中選擇電影等級。
! Rating 1至8: 第一級(1)的限制最為嚴
格,而第八級(8)的限制則最為鬆散。
! Unlock:如果選擇Unlock,將不會啟動成
人控制,且將完整播放光碟。
3 按ENT 以確認您的等級選項。
注意
如果為播放器設定等級,將播放該等級以下的所
有光碟場景。高於該等級的場景將不會被播放,
除非光碟中提供替代場景。替代場景的等級必須
相等或低於該等級。如果搜尋不到適合的替代場
景,將會停止播放。您必須輸入 4 碼密碼或更改
等級,方能播放光碟。
Password
您可以輸入或變更密碼。
建立新密碼:
1 在Lock選單中選擇Password,然後按d。
2 當New選項反白時,按下ENT。
3 用數字鍵輸入新密碼,然後按ENT。
4 再輸入一次密碼以確認。
1 按D.SETUP。
將出現設定選單。
# 按住遙控器上的DISC MENU/SET UP同樣可執
行此操作。
2 輸入6位數字「210499」即可清除密碼。
3 輸入新密 碼。請參見 本頁上
碼:
。
建立新密
Area Code
輸入區域代碼,其代表的標準用於依照區域代
碼DVD視訊光碟進行電影分級。請參見第101頁
上
區域代碼清單
1 在Lock選單中選擇Area Code,然後按
d。
2 請進行上一頁上
2。
3 用a/b選擇第一個字元。
4 用a/b按ENT並選擇第二個字元。
5 按ENT 以確認您的國家代碼選項。
。
Rating
中所說明的步驟
Others
中文
更改密碼:
1 在Lock選單中選擇Password,然後按d。
2 當Change選項反白時,按下ENT。
3 用數字鍵輸入目前的密碼,然後按ENT。
4 用數字鍵輸入新密碼,然後按ENT。
5 再輸入一次密碼以確認。
如果忘記密碼
如果忘記密碼,您可以使用下列步驟清除它。
PBC
設定播放控制(PBC)為On或Off。
Zhtw
77
Page 78

節
08
設定選單
! On:依照 PBC 播放具有 PBC 功能的 VCD。
! Off:以播放音樂 CD 的方式播放具有 PBC
功能的 VCD。
注意
PBC功能僅用於播放 VCD 2.0 時。
DivX VOD
我們提供您 DivX®VOD(隨選視訊)登錄代
碼,可讓您利用 DivX
影片。有關更多資訊,請上
www.divx.com/vod。
1 選擇DivX VOD選項然後按d。
2 選擇Show Code後按ENT。將出現登錄代
碼。
請用此登錄代碼,在www.divx.com/vod 上向
®
DivX
VOD 服務購買或承租影片。
®
VOD 服務來承租並購買
3 按ENT 即可離開。
注意
所有從 DivX
放。
78
Zhtw
®
VOD 下載的影片,僅能以本機播
Page 79

DVD/VCD 操作
節
09
在螢幕上顯示光碟資訊
您可以在螢幕上顯示光碟的各種資訊。
1
2
3
4
5
6
1 標題: 目前標題編號/總標題數
2 章節(曲目): 目前章節(或曲目)編號/
總章節(或曲目)數
3 時間: 已播放的時間
4 音頻: 選擇的音訊語言或頻道
5 字幕: 選擇的字幕
6 視角: 選擇的視角編號/總視角數
1 在播放期 間按下遙控 器上的DISPLAY。
# 顯示的項目因光碟類型或播放狀態而異。
2 按下a/b選擇項目。
3 按下c/d以變更或選擇設定。
# 在適當情況下,您也可以使用按鈕0到9。
# 部分功能可按下ENT執行設定。
播放 DVD 和 VCD
% 在裝置中插入光碟。
顯示視窗中出現READING,並且開始自動播
放。
# 如果未開始播放,按d/PAUSE(遙控器上的
d)。
# 有時候則可能會出現光碟選單。
注意
! 載入提供選單的 DVD 或 VCD 2.0 後,可能會先
顯示選單畫面。
! 如果退出光碟後未按下任何按鈕,將在約 10
秒後自動載入光碟。
! 如果已設定成人控制且光碟不在電影等級設
定值範圍內,您必須輸入密碼。(請參見第
76頁上
Lock(成人控制)
! DVD可能有區域代碼。本播放器無法播放區域
代碼與本機不同的光碟。關於區域代碼,請
參見第59頁上
區域代碼
)。
。
預先停止
1 在播放期 間按下遙控 器上的g 。
顯示視窗中將出現Pre-Stop。
2 若要繼續 播放,如果 在Pre-Stop模式中按
PLAYd/PAUSE(遙控器上的d),將從停止
點播放。
中文
注意
! 如果在數秒內未按下任何按鈕,螢幕功能選
單就會消失。
! 部分光碟可能無法完整提供圖例中的螢幕顯
示功能。
在提供PBC功能的VCD 2.0中, 將顯示PBC,而
非曲目編號。 請參見第77頁上
PBC
。
停止
1 按Pre-Stop模式上的g。
2 若要繼續 播放,如果 按d/PAUSE(遙控器
上的PLAYd),將從頭播放。
Zhtw
79
Page 80

節
09
DVD/VCD 操作
暫停
1 在播放期 間按下d/PAUSE(遙控器上的
e)。
2 若要繼續 播放,按d/PAUSE(遙控器上的
PLAYd)。
靜態影像和逐格播放
1 在播放期 間按下d/PAUSE(遙控器上的
e)。
本機現在將進入PAUSE模式。
2 您可以重 複按遙控器 上的e,以逐格往前
播放畫面。
3 若要繼續 播放,按d/PAUSE(遙控器上的
PLAYd)。
慢動作
1 在播放期 間按下d/PAUSE(遙控器上的
e)。
本機現在將進入PAUSE模式。
2 使用遙控 器上的m/n來選 擇所需的速
度:
s 1/16、s 1/8、s 1/4,或s 1/2(往
後),或t 1/16、t 1/8、t 1/4,或t 1/
2(往前)
# 播放 VCD 時,慢動作的速度則變更為: t1/
16、t1/8、t1/4 或 t1/2(往前)。
移動到其他標題
當光碟有一個以上的標題時,便可依照以下步
驟移動至其他標題:
1 按遙控器 上的DISPLAY,然後再按a/b以
選擇選單項目(標題)。
2 按對應的 數字鍵(0 至9 )選擇標題號
碼。
DVD
移動至其他章節/曲目
當光碟中標題有一個以上的章節,或光碟有一
個以上的曲目時,便可依照以下步驟移動至其
他章節/曲目:
% 在播放期間快速按c/d(遙控器上的o/
p)選擇下一個章節/曲目或回到目前章節
/曲目的開頭。
% 快速按兩下c(遙控器上的o)返回上
一個章節/曲目。
% 若要在播放期間直接前往任何章節,請按
DISPLAY,然後按a/b以選擇章節/曲目圖
示。然後輸入章節/曲目號碼或使用c/d
(遙控器上的o/p)。
注意
! 對於兩位數,請快速地連續按數字鍵(0至
9)。
! 在提供PBC功能的VCD中,必須在設定選單中
將PBC設定成Off。請參見第77頁上
PBC
。
3 若要離開 Slow Motion模式,請按PLAY
d/PAUSE(遙控器上的d)。
注意
播放 VCD 時,無法使用慢動作倒帶播放。
80
Zhtw
跳到下一個章節/曲目
% 快速按d(遙控器上的p)可選擇下一
個章節或曲目。
Page 81

DVD/VCD 操作
節
09
跳到上一個章節/曲目
% 快速按c(遙控器上的o),然後在播
放後4秒內再按一次。
回到目前章節/曲目的開頭
% 播放 4 秒後,快速按c(遙控器上的
o)。
掃描
1 在播放期 間按遙控器 上的m/n。
2 重複按遙 控器上的m /n選擇想要的速
度:
m ×2、m ×4、m ×8、m ×16、m
×32、m ×100(往後)或n ×2、n
×4、n ×8、n ×16、n ×32、n
×100(往前)
# 播放VCD時,掃描速度則變更為: m ×2、
m ×4、m ×8(往後)或n ×2、n
×4、n ×8(往前)。
3 若要繼續 正常播放, 按PLAYd/PAUSE
(遙控器上的d)。
3 若要結束 重播模式, 再按一次RPT(遙控
器上的REPEAT)。
電視螢幕上將出現Off圖示。
VCD
- Track/All
預設值是All。
1 若要重複 播放目前的 曲目,按RPT(遙控
器上的REPEAT)。
電視螢幕上將出現Track圖示。
2 若要結束 重播模式, 再按一次RPT(遙控
器上的REPEAT)。
電視螢幕上將出現All圖示。
注意
在提供PBC功能的VCD中,必須在設定選單中將
PBC設定成Off。請參見第77頁上
PBC
。
時間搜尋
時間搜尋功能可讓您在光碟上任何選擇的時間
開始播放。
1 在播放期 間按下遙控 器上的DISPLAY。
螢幕顯示會出現在螢幕上。
時間搜尋方塊將顯示目前光碟已播放的時間。
中文
重複
DVD
- Chapter/Title/Off
預設值是Off。
1 若要重複 播放目前的 章節,按RPT(遙控
器上的REPEAT)。
電視螢幕上將出現Chapter圖示。
2 若要重複 播放目前的 標題,再按 一次RPT
(遙控器上的REPEAT)。
電視螢幕上將出現Title圖示。
2 在 10 秒內,按下a/b以在螢幕顯示中選
擇時間搜尋圖示。
– : ––: ––將出現在時間搜尋方塊中。
3 在10 秒內,使用數字鍵輸入所需的開始時
間。
由左至右在方塊中輸入小時、分鐘,與秒數。
4 在 10 秒內,按下ENT以確認開始時間。
播放會在光碟上所選擇的時間點開始。
# 如果您輸入了無效的值,播放會從目前的時
間點繼續。
Zhtw
81
Page 82

節
09
DVD/VCD 操作
注意
在提供PBC功能的VCD中,必須在設定選單中將
PBC設定成Off。請參見第77頁上
光碟選單
DVD
PBC
。
DVD 可能提供選單讓您使用特殊功能。
1 按D.MENU(遙控器上的
DISC MENU/SET UP)。
光碟選單會隨即顯示。
2 使用a/b/c/d來反白您的選擇,然後按
下ENT。
3 如果要讓 光碟選單消 失,請再按 一次
D.MENU(遙控器上的
DISC MENU/SET UP)。
PBC選單
VCD
% 按遙控器上的DISC MENU/SET UP或
RETURN以返回選單畫面。選單設定和操作程
序可能不同。請遵照每個選單畫面上的指示。
# 您也可以在設定選單中將PBC設定為開啟。請
參見第77頁。
攝影角度
DVD
如果光碟內含有從不同攝影角度錄製的場景,
您可以在播放時切換到不同的攝影角度。
% 在播放期間,反覆按下遙控器上的ANGLE
以選擇想要的視角。
顯示幕上會出現目前的視角編號。
變更音訊語言
DVD
% 在播放期間,反覆按下遙控器上的AUDIO
以切換到不同的音訊語言。
變更音訊頻道
VCD
% 在播放期間,反覆按下遙控器上的AUDIO
以切換到不同的音訊頻道(STEREO、Left或
Right)。
字幕
DVD
% 在播放期間,反覆按下遙控器上的
SUBTITLE以切換到不同的字幕語言。
注意
若
圖示出現,則本功能不適用於該片光碟。
放大
放大功能可讓您放大視訊影像。
% 在播放期間或暫停模式中重複按ZOOM以
放大影像。
DVD
!
!
# 您可以使用a/b/c/d在放大的圖像中移
動。
放大功能在有些光碟上可能無法運作。
: 100%-400%-1600%
VCD
: 100%-400%
注意
82
Zhtw
Page 83

圖片操作
節
10
本播放器的JPEG/TIFF光碟相容
性受以下限制:
! 視JPEG/TIFF檔案大小與數量而定,本裝置
可能需要花費一段時間才能讀取光碟內
容。如果您在數分鐘後還沒有看到螢幕功
能選單,則表示部分檔案可能過大。請降
低JPEG/TIFF檔案的解析度,使其少於2M像
素(或低於2 760 × 2 048像素),並另外
燒錄光碟。
! 光碟上的檔案總數應少於3 000。
! 部分光碟可能因為不同的錄製格式或光碟
條件而不相容。
! 將檔案複製到光碟中時,請確認所有選取
的檔案都有.jpg或.tiff副檔名。
! 如果檔案副檔名為 .jpe 或 .jpeg,請重新
命名為 .jpg 檔案。
! 本機無法讀取沒有.jpg或.tiff副檔名的檔
案名稱。 即使檔案在電腦上顯示為JPEG或
TIFF影像檔案。
檢視幻燈片
本機可以播放有JPEG或TIFF檔案的光碟。
1 在裝置中 插入光碟。
播放只有相片檔案的光碟時,READING出現
在顯示視窗上,並且以幻燈片放映方式自動開
始播放。
2 觀看幻燈 片時,按DISPLAY以顯示或隱藏
說明列。
3 按D.MENU(遙控器上的
DISC MENU/SET UP或STOPg)以返回選單
畫面。
1
2
5
6
7
8
1
2
5
6
7
8
1 目前的檔案編號/總檔案數
2 前一個檔案
3 幻燈片間隔時間(SLOW、NORMAL、
FAST、OFF)
4 重複模式
5 目前的資料夾名稱
6 縮圖影像
7 目前的檔案名稱
8 解析度
9 下一個檔案名稱
3
4
9
PAL
3
4
9
NTSC
中文
注意
對於包含音訊和影片檔案的光碟,媒體類型指示
標籤MUSIC和MOVIE將與PHOTO一起顯示。若
要播放相片檔案,請選擇PHOTO,然後按ENT/
d/PAUSE(遙控器上的PLAYd)。
關於媒體類型指示標籤,請參見第68頁上
體類型
。
選擇媒
Zhtw
83
Page 84

節
10
圖片操作
移動到其他資料夾
% 按下a/b以在光碟中選擇前一個或次一
個資料夾。
移動到其他檔案
% 按下c/d以在選取的資料夾中選擇前一
個或次一個檔案。
幻燈片間隔時間
1 按D.MENU(遙控器上的
DISC MENU/SET UP或STOPg)以返回選單
畫面。
2 在遙控器 上按下m/ n以選擇您要使用
的選項。
顯示幻燈片間隔時間:
FAST-OFF-SLOW-NORMAL
(FAST:3 秒、NORMAL:8 秒、SLOW:13
秒)
重複
% 按下RPT(遙控器上的REPEAT)以選擇您
要使用的選項。
共有兩種重複模式: ALL或FOLDER。
! ALL: 反覆播放光碟的內容。
! FOLDER: 反覆播放目前資料夾的內容。
放大
% 檢視影像時,按ZOOM以放大影像(100
%-400%-1600%)。
# 您可以使用a/b/c/d在放大的圖像中移
動。
# 若要取消放大模式,按遙控器上的PLAYd。
注意
如果檔案大小太小,放大功能可能無法運作。
旋轉圖像
% 在觀看圖像期間,按下a/b以在顯示圖
片時順時針或逆時針旋轉圖像。
檢視靜態圖像
1 在幻燈片 播放期間按 下d/PAUSE(遙控
器上的e)。
播放器將進入暫停模式。
# 如果幻燈片播放間隔時間是OFF,則您無法執
行此功能。
2 若要回到 幻燈片,請 再按下d/PAUSE(遙
控器上的PLAYd)。
84
Zhtw
Page 85

影片操作
節
11
本播放器的 DivX®光碟相容性受
以下限制:
! DivX 檔案可用的解析度在 720×576
(W×H) 像素以下。
! DivX字幕的檔案名稱可使用25個字元。
! 若螢幕格數大於每 1 秒 30 格,本裝置可能
無法正常操作。
! 若未插入錄製檔案的視訊及音訊結構,則
只會輸出視訊或音訊。
可播放的 DivX
.avi、.divx、.div、.asf
可播放的字幕格式
.srt、.smi、.ssa、.sub、.txt、.ass
可播放的編碼格式
DivX3、DivX4、DivX5、Xvid、MP4S
可播放的音訊格式
杜比數位、MP3
! 取樣頻率: 48 kHz(杜比數位),8 kHz到
48 kHz之內(MP3)
! 位元率: 64 kbps到640 kbps之內(杜比數
位),8 kbps到320 kbps之內(MP3)
®
檔案
播放影片檔案
本機可以播放有影片檔案的光碟。
1 在裝置中 插入光碟。
播放包含影片或影片/相片檔案的光碟時,
READING出現在顯示視窗中,並且自動開始
播放。
2 按D.MENU(遙控器上的
DISC MENU/SET UP或STOPg)以返回選單
畫面。
1234
6
1 目前的檔案編號/總檔案數
2 已播放時間
3 播放狀態(預先停止eg、停止g)
4 重複模式
5 前一個檔案名稱
6 目前的資料夾名稱
7 目前的檔案名稱
8 字幕檔案名稱
9 下一個檔案名稱
注意
對於包含音訊和相片檔案的光碟,媒體類型指示
標籤MUSIC和PHOTO將與MOVIE一起顯示。若
要播放影片檔案,請選擇MOVIE,然後按ENT/
d/PAUSE(遙控器上的PLAYd)。
關於媒體類型指示標籤,請參見第68頁上
體類型
。
5
7
8
9
選擇媒
播放DivX®VOD內容
某些DivX VOD(隨選視訊系統)內容可能只能
播放固定的次數。 當您裝入含有此類DivX VOD
內容的碟片時,剩餘的播放次數會在屏顯示,
您可以選擇播放碟片(從而用掉剩餘播放次數
中的一次)或者停止。 如果您裝入含有已過
期DivX VOD內容(例如,剩餘播放次數為零的
內容)的碟片,會顯示Rental expired。
中文
Zhtw
85
Page 86

節
11
影片操作
! 如果您的DivX VOD內容可以無限次播放,
則您可以將碟片裝入播放器,然後任意播
放內容,不會顯示任何訊息。
重要
! 為了在本機上播放DivX VOD內容,您首先需要
將您的DivX VOD內容提供商登記於本機內。
有關登記代碼,請參見第78頁上
! DivX VOD內容受DRM(數字版權管理)系統保
護。 限制只能在特定的已登記設備上播放內
容。
DivX VOD
。
預先停止
1 在播放期 間按下遙控 器上的g 。
Pre-Stop出現在顯示窗中,而且影片選單出現
在畫面上。
2 若要繼續 播放,如果 在Pre-Stop模式中按
PLAYd/PAUSE(遙控器上的d),將從停止
點播放。
停止
1 按Pre-Stop模式上的g。
靜態影像和逐格播放
1 在播放期 間按下d/PAUSE(遙控器上的
e)。
本機現在將進入PAUSE模式。
2 您可以重 複按遙控器 上的e,以逐格往前
播放畫面。
3 若要繼續 播放,按d/PAUSE(遙控器上的
PLAYd)。
慢動作
1 在播放期 間按下d/PAUSE(遙控器上的
e)。
本機現在將進入PAUSE模式。
2 使用遙控 器上的n選 擇所需的速 度:
t 1/16、t 1/8、t 1/4或t 1/2(往前)
3 若要離開 Slow Motion模式,請按PLAY
d/PAUSE(遙控器上的d)。
注意
播放影片檔案時,無法使用慢動作倒帶播放。
2 若要繼續 播放,如果 按d/PAUSE(遙控器
上的PLAYd),將從頭播放目前的檔案。
暫停
1 在播放期 間按下d/PAUSE(遙控器上的
e)。
2 若要繼續 播放,按d/PAUSE(遙控器上的
PLAYd)。
86
Zhtw
掃描
1 在播放期 間按遙控器 上的m/n。
2 重複按下 遙控器上的 m/n來選擇所需
的速度:
m ×2、m ×4、m ×16、m ×32(往
後)或n ×2、n ×4、n ×16、n
×32(往前)
3 若要繼續 正常播放, 按PLAYd/PAUSE
(遙控器上的d)。
Page 87

影片操作
節
11
跳過
% 在播放期間,按下c/d(遙控器上的
o/p)以選擇下一個檔案或回到目前檔
案的開頭。
% 快速按下c(遙控器上的o)兩次以回
到前一個檔案中。
% 若要直接在影片選單上播放任何檔案,請
按SEARCH,然後以數字鍵(0到9)按下您要
播放的檔案編號。
重複
可重複播放光碟上的所有檔案或資料夾。
預設值是All。
% 若要重複目前資料夾的所有檔案,請在播
放期間按住RPT(遙控器上的REPEAT)。
電視螢幕上將出現Folder圖示。
% 若要重複光碟的所有檔案,請在播放期間
按住RPT(遙控器上的REPEAT)。
電視螢幕上將出現All圖示。
% 若要重複目前的檔案,請在播放期間按下
RPT(遙控器上的REPEAT)。
電視螢幕上將出現File圖示。
3 在10 秒內,使用數字鍵輸入所需的開始時
間。
由左至右在方塊中輸入小時、分鐘,與秒數。
4 在 10 秒內,按下ENT以確認開始時間。
播放會在檔案上所選擇的時間點開始。
# 如果您輸入了無效的值,播放會從目前的時
間點繼續。
變更音訊語言
% 在播放期間,反覆按下遙控器上的AUDIO
以切換到不同的音訊語言或音訊檔案。
注意
若
圖示出現,則本功能不適用於該片光碟。
字幕
% 在播放期間,反覆按下遙控器上的
SUBTITLE以切換到不同的字幕語言。
注意
若
圖示出現,則本功能不適用於該片光碟。
中文
時間搜尋
時間搜尋功能可讓您在檔案上任何選擇的時間
開始播放。
1 在播放期 間按下遙控 器上的DISPLAY。
螢幕顯示會出現在螢幕上。
時間搜尋方塊將顯示目前光碟已播放的時間。
2 在 10 秒內,按下a/b以在螢幕顯示中選
擇時間搜尋圖示。
– : ––: ––將出現在時間搜尋方塊中。
顯示 DivX 字幕的注意事項
如果在播放期間字幕未正確顯示,請依照下列
步驟執行。
1 按住遙控 器上的SUBTITLE約三秒鐘。
將出現字元集的編號。
Zhtw
87
Page 88

節
11
影片操作
2 按遙控器 上SUBTITLE以選擇其他字元集,
直到字幕正常顯示為止。
編號 字元集
CP1250 東歐拉丁語
CP1251 斯拉夫語
CP1252 西歐拉丁語
CP1253 希臘語
CP1254 土耳其語
注意
! 若字幕設定選單沒有您要播放的 DivX 字幕語
言,字幕語言可能無法正確顯示。
! 如果選擇DivX字幕的字元集,設定也會套用
到MP3標籤和WMA標籤中。
88
Zhtw
Page 89

AUX 操作
播放輔助設備
在使用下列步驟操作輔助設備前,請先正確地
選擇外部輸入。請參見第70頁上輔助開啟/關
閉。
您可以連接輔助設備到本機上。
1 將輔助設 備連接至本 機的輔助輸 入。
AUX輸入插孔(3.5 mm立體聲插孔)
節
12
中文
輔助設備(MP3播放器等)
2 按SRC選擇AUX IN。
AUX IN在顯示幕中出現。
3 打開連線 的輔助設備 並開始播放 。
4 調整音量 。
注意
若連接到AUX輸入插孔的輔助設備輸入音量不夠
大,請適當地調整輸入音量。請參見第70頁上
助 0 dB/+6 dB
。
輔
Zhtw
89
Page 90

節
13
安裝
重要
! 最後安裝之前,請檢查所有的連接和系統。
! 請勿操作未獲授權使用的部分。操作未獲授
權使用的部分可能導致故障。
! 若安裝需要在車輛上鑽孔或進行其他修改,
請洽詢您的經銷商。
! 請勿將本機安裝在:
— 可能會干擾車輛操作的位置。
— 因突然停車可能會傷及乘客的位置。
! 半導體鐳射在過熱的狀況下可能會損壞。請
勿將本機安裝在受熱位置,例如暖風機出口
附近。
! 當本機以小於 30° 角安裝時,會獲得最佳效
能。
! 電纜不得覆蓋住下圖中顯示的區域。如此才
能讓放大器不受干擾地播送音效。
請勿關閉此區域。
! 為了確保在使用本機時能有適當的散熱,在
安裝時,請確認您有在後面板後方留下足夠
的空間,並纏住鬆散的纜線,以防其堵住出
風口。
ᮽӛ⭁᱿ἇ⿵
Ⴜኈ
DIN 前/後座
本機可由「前」(傳統 DIN 前座)或「後」
(DIN 後座安裝,使用機身側的螺絲孔)方正
確安裝。有關詳情,請參閱以下的安裝方
法。
DIN 前座
使用橡皮套管安裝
1 將座套插 入儀表板中 。
2 使用螺絲 起子折彎三 角形金屬突 出部位
(90°)至定位,藉以固定座套。
! 若要使安裝更牢固,必要時折彎四角形突
出部位。
3 依照圖示 方式安裝本 機。
移除本機
1 將遮飾環 的頂部及底 部往外拉, 以移除遮
飾環。(若您要重新裝上遮飾環,請對準有向
下溝槽的側邊並接上遮飾環。)
! 當控制面板卸除時,移除飾環會比較容
易。
90
Zhtw
Page 91

安裝
遮飾環
2 將隨附的 抽取鑰匙插 入本機的兩 側,使其
卡至定位。
! 將抽取鑰匙水平插入本機中。否則可能卡
在座套和主機之間。
3 將本機拉 出儀表板。
節
13
2 選定適當 的位置,讓 托架孔與本 機側面密
合。
中文
3 鎖緊各邊 的兩顆螺絲 。
! 使用十字槽螺絲(5mm×6mm)或平面螺
絲(5mm×6mm),取決於托架上螺絲孔
的形狀。
螺絲
DIN 後座
1 將遮飾環 的頂部及底 部往外拉, 以移除遮
飾環。(若您要重新裝上遮飾環,請對準有向
下溝槽的側邊並接上遮飾環。)
! 當控制面板卸除時,移除飾環會比較容
易。
遮飾環
托架 儀表板或操縱台
Zhtw
91
Page 92

節
14
連接
重要
! 本機無法安裝在點火開關沒有ACC(附加位
置)的車輛中。
C
C
A
O
F
N
F
O
S
T
A
R
T
O
F
N
F
O
S
T
A
R
T
ACC 位置 無 ACC 位置
! 如未能於以下條件中使用本機,將可能導致
火災或故障。
— 配備 12 伏特電池與負接地的車輛。
— 45 W(輸出值)與4 W(阻抗值)的揚聲
器。
! 為防止短路,過熱或故障發生,請務必遵守
下列指示。
— 安裝之前請斷開電池的負極。
— 以電纜夾或膠帶固定纜線。為保護纜線,
請以膠帶包覆纜線與金屬部位接觸的部
分。
— 請勿將電纜置於活動部件上,比如汽車排
檔與座位扶手。
— 請勿將電纜置於受熱位置,比如暖風機出
口附近。
— 請勿將黃色電纜透過引擎室的孔連接至電
池。
— 以絕緣膠帶包覆任何未連接的纜線接頭。
— 請勿縮短電纜長度。
— 切勿為了與其他裝置共用電源而割開本機
電源線絕緣層。纜線的電流負載量有一定
限度。
— 請使用規定額定值的保險絲。
— 請勿將揚聲器負極線直接接地。
— 請勿將多個揚聲器的負極線綑紮在一起。
! 當本機電源開啟時,控制信號會透過藍/白
色纜線輸出。請將其連接至外部變壓系統遙
控器或車輛的自動天線中繼控制端子(最大
300 mA 12 V DC)。若車輛配備有玻璃天線,
請將其連接至天線增強電源端子。
! 切勿將藍/白纜線連接到外部的變壓電源端
子。同時,請避免將其連接到自動天線的電
源端子。否則電池可能耗盡。
! 黑色電纜接地。此電纜與其他產品的接地電
纜(尤其是功率放大器等高強度電流產品)
必須分別佈線。否則,萬一它們斷開的話,
可能會造成火災或產生故障。
因產品而異,即使線纜顏色相同,其功能也會
不同。連接本系統時,確保查閱說明書後再正
確連接電纜。
92
Zhtw
Page 93

連接
連接至車輛
在連接前,請確認點火開關設定在關的位置,
並移除電池*端子以避免短路。
以隨附的電源線連接
節
14
中文
Zhtw
93
Page 94

節
14
以 ISO 接頭連接
連接
來自天線
插腳與 ISO 接頭功能
接往揚聲器
1 右後置 +
2 右後置 *
3 右前置 +
4 右前置 *
5 左前置 +
6 左前置 *
7 左後置 +
8 左後置 *
接往車輛
1 不使用。
2 不使用。
3 耳機靜音
4 備份
5 系統遙控器
6 冷光
7 配件
8 機身接地
接往車輛配線
! 黃/黑(耳機靜音)
如果您使用有靜音功能的設備,請將此引
線接到設備的音訊靜音引線。否則請勿連
接音訊靜音引線。
! 黑(機身接地)
連接到乾淨、無塗料的金屬部位。
! 橙(冷光)
連接到照明開關端子。
! 紅(配件)
連接到由點火開關(12 V DC)控制的端
子。
! 黃(備份)
連接到固定的 12 V 電源端子。
! 藍/白(系統遙控器)
連接到變壓器或自動天線中繼控制端子的
系統遙控器端子(最大 300 mA 12 V DC)。
揚聲器連線
1 紫
右後置+
2 紫/黑
右後置*
94
Zhtw
Page 95

連接
3 灰
右前置+
4 灰/黑
右前置*
5 白
左前置+
6 白/黑
左前置*
7 綠
左後置+
8 綠/黑
左後置*
注意
接頭佈線可能依車輛製造商而有所不同,即使
使用 ISO 接頭亦然。建議您先閱讀車輛的配線
規定,再行連接至車輛的音響設備。請特別注
意 5 號插腳,連接錯誤可能導致車輛或無線電
設備受損。在安裝到 98 年或之後出廠的 VW/
Audi/Skoda/Seat 車型上時,必須特別注意,
因為 5 號插腳為 12 V 連線,可能損傷車輛音響
設備。同時亦須注意 97 年之後出場的福特汽
車,其 ISO 接頭在連接錯誤時可能會損及車輛
的微電腦。使用市面上可獲得的 ISO 接頭轉接
器可能會便於您進行安裝。
節
14
中文
Zhtw
95
Page 96

節
14
連接
連接到輔助設備(選配)
將本機的音訊輸出插孔連接到輔助設備的音訊
輸入插孔。
! 視訊輸出: 將本機的視訊輸出接頭連接到
監視器的視訊輸入接頭。
96
Zhtw
Page 97

附加資訊
故障排除
症狀 原因 措施
電源未打開。
本機無法操作。
在按下正確的遙控器按鈕後,亦
無法正確操作本機。
無法播放。 光碟髒污。 清潔碟片。
引線與接頭未適當連接。 請再次確認所有線路連接正確無誤。
保險絲燒毀。 請解決導致保險絲燒毀的問題,再行更換保
噪音及其他因素導致內建的微處理
器無法正確運作。
電池電量過低。 請更換新電池。
特定光碟的部分操作無法使用。 請試試看其他光碟。
放入的光碟是本機無法播放的類型。請檢查光碟類型。
險絲。請務必確認您安裝了相同功率的保險
絲。
關機後再開機。
附錄
中文
聽不到音效。
音量無法提高。
顯示了
圖像停止(暫停)且本機無法操作。在播放時無法讀取資料。 按下g一次後,播放又再度開始。
無音效。 音量過低。 調整音量。
有跳過的音訊及視訊。 本機未固定好。 請固定好本機。
圖像被拉長,比例不正確。 顯示器的比例設定不正確。 請為您的顯示器選擇正確的設定。
圖示,且無法操作。 光碟無法使用該類操作。 無法進行此種操作。
纜線未正確連接。 請以正確方式連接纜線。
操作不相容於光碟系統。 無法進行此種操作。
Zhtw
97
Page 98

附錄
附加資訊
光碟與播放器的操作指南
! 請僅使用傳統,正圓碟片。請勿使用異形
碟片。
! 使用12 cm 光碟。請勿使用8cm光碟或8cm
光碟的轉接器。
! 光碟槽中請勿插入 CD 以外的任何物品。可
播放的光碟列於第60頁上
型
。
! 請勿使用開裂,缺口,扭曲,或存在其他
缺陷的碟片,否則它們會損壞播放機。
! 請勿觸摸碟片的錄製面。
! 碟片不使用時請存放在其護套中。
! 謹防將碟片遺忘在極其高溫的環境(包括
直射陽光之下)。
! 請勿在碟片表面粘貼標籤,書寫或使用化
學藥品。
! 清潔碟片時,請用軟布從中心向外擦拭碟
片。
! 結露可能會暫時影響播放機之效能。請將
其放置約一小時,以適應較高的溫度。同
時,請用軟布擦拭受潮的碟片。
! 由於碟片特性,碟片格式,錄製的應用軟
體,播放環境,存放條件等原因,碟片可
能無法播放。
! 道路顛簸會中斷碟片的播放。
! 使用碟片之前,請閱讀注意事項。
可播放光碟的類
DVD碟片
! 對於某些DVD影碟,有些功能可能會無效。
! 某些DVD影碟可能會無法播放。
! DVD-ROM/DVD-RAM碟片無法播放。
DVD-R/DVD-RW碟片
! 已以視頻格式(視頻模式)錄製,但尚未
封片的DVD-R/-RW碟片無法播放。
! 有關錄製模式的詳情,請聯繫DVD錄影機或
應用軟體製造商。
以 AVCHD 格式錄製 的 光碟
! 本機與以 AVCHD(前瞻視訊編碼高解析)
格式錄製的光碟不相容。請勿插入 AVCHD
光碟。否則,光碟可能會無法退出。
CD-R/CD-RW碟片
! 使用CD-R/CD-RW碟片時,僅有已最終完成
的碟片可進行播放。
! 由於碟片特性,碟片上之刮痕或塵垢,或
本機鏡片上之塵垢或結露等,用音樂CD錄
製機或個人電腦錄製的CD-R/CD-RW碟片可
能無法正常播放。
! 根據應用軟體設定和環境,用個人電腦錄
製的碟片可能無法播放。請使用正確的格
式錄製。(有關詳情,請與應用軟體製造
商聯繫。)
! 由於直射陽光,高溫,或車內的存放條
件,CD-R/CD-RW碟片可能會無法播放。
! 本機可能會無法顯示CD-R/CD-RW碟片上錄
製的標題與其他文字資訊(在音頻數據
「CD-DA」情況下)。
! 使用CD-R/CD-RW碟片之前,請閱讀注意事
項。
雙面碟
! 雙面碟有兩面,一面為音訊的可燒錄 CD,
另一面為視訊的可燒錄 DVD。
! 本機可播放雙面碟的 DVD 面。但由於雙面
碟的 CD 面與一般的 CD 標準不相容,因此
本機可能無法播放 CD 面。
98
Zhtw
Page 99

附加資訊
附錄
! 經常裝入並退出雙面碟可能會刮壞光碟。
嚴重的刮痕會導致本機無法播放光碟。有
時候雙面碟可能會卡在光碟槽中而無法退
出。為防止這種情形發生,建議您不要在
本機中播放雙面碟。
! 有關雙面碟的詳情,請參閱光碟製造商提
供的資訊。
碟片上的壓縮音頻檔案
! 因用於WMA檔案編碼的Windows Media Play-
er的版本之故,唱片集名稱與其他文字資
訊可能無法正常顯示。
! 開始播放用影像數據編碼的音頻檔案時可
能會略有延遲。
! 與ISO 9660 Level 1與2相容。Romeo與Jo-
liet檔案系統都與本機兼容。
! 可進行多段式播放。
! 壓縮音頻檔案不適用封包寫入數據傳送。
! 檔案名(包括 .wma或.mp3等擴展名)或檔
案夾名稱僅顯示前64個字元。
! 檔案夾選擇順序或其他操作可能會因編碼
或寫入軟體而異。
! 無論原始錄製歌曲之間空白部分的長短,
壓縮音頻播放時歌曲之間都將出現短暫的
暫停。
! .wma或.mp3等擴展名必須正確使用。
階層實例
:檔案夾
:壓縮音頻檔案
! 本機指定檔案夾編號。用戶無權指定檔案
夾編號。
! 從一張光碟最多可播放251個資料夾。
! 從一張光碟最多可播放3 000個檔案。
DivX視頻檔案
! 視檔案資訊構成(如視頻流數目等)情況
不同,碟片開始播放時間可能會略有延
遲。
! DivX檔案構成可能會禁止某些特殊的操
作。
! 僅從DivX合作網址下載的DivX檔案可保證
正常操作。 未經授權的DivX檔案可能無法
正常操作。
! 開始播放後才可操作DRM租用檔案。
! DivX VOD檔案播放需要DivX VOD供應商提供
給本機的ID代碼。 有關ID代碼,請參見第
78頁上
DivX VOD
! 必須正確使用.avi、.divx、.div、.xvid
或.asf副檔名。
! 有關DivX的詳情,請訪問:
http://www.divx.com/
。
中文
Zhtw
99
Page 100

附錄
附加資訊
語言代碼清單
輸入正確的初始設定代碼編號Disc Audio、
SUBTITLE及/或Menu(請參閱第75頁)。
語言與代碼 語言與代碼 語言與代碼 語言與代碼
阿布哈西亞語 6566 斐濟語 7074 林格拉語 7678 錫蘭語 8373
阿法爾語 6565 芬蘭語 7073 立陶宛語 7684 斯洛伐克語 8375
南非荷蘭語 6570 法語 7082 馬其頓語 7775 斯洛維尼亞語 8376
阿爾巴尼亞語 8381 弗利然語 7089 馬拉加西語 7771 索馬利語 8379
阿姆哈拉語 6577 加里西亞語 7176 馬來語 7783 西班牙語 6983
阿拉伯語 6582 喬治亞語 7565 馬來亞拉姆語 7776 蘇丹語 8385
亞美尼亞語 7289 德語 6869 馬爾他語 7784 斯華西里語 8387
阿薩姆語 6583 希臘語 6976 毛利語 7773 瑞典語 8386
愛依瑪拉語 6588 格林蘭語 7576 馬拉地語 7782 塔加拉族語 8476
亞塞拜然語 6590 瓜拉尼語 7178 摩爾達維亞語 7779 塔吉克語 8471
巴什克爾語 6665 古吉拉特語 7185 蒙古語 7778 坦米爾語 8465
巴斯克語 6985 豪薩語 7265 諾魯語 7865 韃靼語 8484
孟加拉語;孟加拉 6678 希伯來語 7387 尼泊爾語 7869 泰盧固語 8469
不丹語 6890 北印度語 7273 挪威語 7879 泰語 8472
比哈爾語 6672 匈牙利語 7285 奧里雅語 7982 藏語 6679
不列塔尼語 6682 冰島語 7383 旁遮普語 8065 提格利尼亞語 8473
保加利亞語 6671 印尼語 7378 帕施圖語,帕施圖 8083 東加語 8479
緬甸語 7789 人工國際語 7365 波斯語 7065 土耳其語 8482
白俄羅斯語 6669 愛爾蘭語 7165 波蘭語 8076 土庫曼語 8475
柬埔寨語 7577 義大利語 7384 葡萄牙語 8084 契維語 8487
嘉泰羅尼亞語 6765 日語 7465 蓋楚瓦語 8185 烏克蘭語 8575
中文 9072 爪哇語 7487 里托羅曼語 8277 烏都語 8582
科西嘉語 6779 坎那達語 7578 羅馬尼亞語 8279 烏茲別克語 8590
克羅埃西亞語 7282 喀什米爾語 7583 俄語 8285 越南語 8673
捷克語 6783 哈薩克語 7575 薩摩牙語 8377 沃拉普克語 8679
丹麥語 6865 吉爾吉斯語 7589 梵語 8365 威爾斯語 6789
荷蘭語 7876 韓語 7579 蘇格蘭蓋爾語 7168 窩羅夫語 8779
英語 6978 庫德語 7585 塞爾維亞語 8382 科薩語 8872
世界語 6979 寮國語 7679
愛沙尼亞語 6984 拉丁語 7665 邵納語 8378 優魯巴語 8979
法羅語 7079 拉脫維亞語 7686 信德語 8368 祖魯語 9085
塞爾維亞-克羅地亞語
8372
意第緒語 7473
100
Zhtw
 Loading...