

Page 1

Owner’s Manual
Manual de instrucciones
DVD RDS RECEIVER
RADIO DVD
DVH-3900MP
English Español
Page 2
Contents
Thank you for buying this Pioneer product.
Please read through these operating instructions so you will know how to operate
your model properly. After you have finished reading the instructions, keep this man-
ual in a safe place for future reference.
Safety note
CAUTION: 5
Precautions of handling discs and player 5
IMPORTANT SAFEGUARDS 6
To ensure safe driving 6
When using a display 6
To avoid battery exhaustion 7
About this unit 7
Visit our website 7
About the
Region code 7
Notes on region code 7
Types of Playable Discs 8
Notes on DVDs and Video CDs 8
Features 8
– About WMA 9
– About MP3 9
– About DivX 9
Symbols used in this manual 10
Control Panel
What’s What 11
Remote control
What’s What 12
Battery installation 14
Using the remote control 14
Before use
Detaching control panel 15
Attaching control panel 15
TV system selection 16
Basic operation
Turning the unit on 17
Turning the unit off 17
Inserting a disc 17
Ejecting a disc 17
Selecting a source 17
Symbol Display 7
Selecting a media type 17
Adjusting the volume 18
Mute 18
Checking the clock 18
Loudness 18
Using the EQ (Equalizer) 18
Adjusting the sound level 18
Changing the general settings 19
Radio operation
Listening to radio stations 21
Storing broadcast frequencies 21
Auto search memory 21
To scan the preset stations 21
To tune in the preset stations 21
RDS operation
RDS display options 22
PTY (Program Type) function 22
TA (Traffic Announcement identification)
function 22
CD/MP3/WMA operation
MP3/WMA Disc compatibility with this unit is
limited as follows: 23
Playing an Audio CD and MP3/WMA
disc 23
Pause 24
Skip to next track/file 24
Skip to previous track/file 24
Return to the beginning of the current track/
file 24
Moving to another track/file 24
Search 24
Intro scan 24
Repeat 24
Shuffle 25
CD TEXT/ID3 TAG 25
2
En
Page 3

Contents
– To skip to the next or previous folder
MP3 WMA
SET UP menu
Language 26
– Menu Language 26
– Disc Audio/Subtitle/Menu 26
Display 27
– TV Aspect 27
– B.L.E. (Black Level Expansion) 27
Audio 27
– Dolby Digital/DTS/MPEG 27
– Dynamic Range Control (DRC) 28
Lock (Parental Control) 28
– Rating 28
– Password 28
– If you forget your password 29
– Area Code 29
Others 29
– PBC 29
– DivX VOD 30
DVD/VCD operation
Displaying Disc Information on-screen 31
Playing a DVD and Video CD 31
Pre-Stop 31
Stop 32
Pause 32
Still picture and frame-by-frame
playback 32
Slow motion 32
Moving to another title
Moving to another chapter/track 32
Skip to next chapter/track 33
Skip to previous chapter/track 33
Return to the beginning of the current
chapter/track 33
Scan 33
Repeat 33
25
DVD
32
DVD
–
–
- Chapter/Title/Off 33
VCD
- Track/All 33
Time search 34
DVD
DVD
VCD
DVD
35
34
34
34
DVD
VCD
35
35
Disc menu
PBC menu
Camera angle
Changing the audio language
Changing the audio channel
Subtitles
Zoom 35
Photo operation
JPEG/TIFF disc compatibility with this player
is limited as follows: 36
Viewing slide shows 36
Moving to another folder 37
Moving to another file 37
Slide show interval time 37
Repeat 37
Viewing still picture 37
Zoom 37
Rotating the picture 37
Movie operation
DivX® disc compatibility with this player is
limited as follows: 38
Playing a movie file 38
Playing DivX® VOD content 39
Pre-Stop 39
Stop 39
Pause 39
Still picture and frame-by-frame
playback 39
Slow motion 39
Scan 40
Skip 40
Repeat 40
Time search 40
Changing the audio language 41
English
En
3
Page 4

Contents
Subtitles 41
Notice for displaying the DivX subtitle 41
AUX operation
Playing an auxiliary equipment 42
Installation
DIN front/rear mount 43
DIN Front-mount 43
– Installation with the rubber bush 43
– Removing the unit 43
DIN Rear-mount 44
Connection
Connecting to a car 46
Connecting to auxiliary equipment
(Optional) 48
Additional Information
Troubleshooting 50
Handling guideline of discs and player 51
DVD discs 51
DVD-R/DVD-RW discs 51
AVCHD recorded discs 51
CD-R/CD-RW discs 51
Dual Discs 52
Compressed audio files on the disc 52
– Example of a hierarchy 53
DivX video files 53
Language code list 54
Area code list 55
Specifications 56
4
En
Page 5
Safety note
If you want to dispose this product, do not mix
it with general household waste. There is a separate collection system for used electronic
products in accordance with legislation that requires proper treatment, recovery and recycling.
Private households in the member states of
the EU, in Switzerland and Norway may return
their used electronic products free of charge
to designated collection facilities or to a retailer (if you purchase a similar new one).
For countries not mentioned above, please
contact your local authorities for the correct
method of disposal.
By doing so you will ensure that your disposed
product undergoes the necessary treatment,
recovery and recycling and thus prevent potential negative effects on the environment
and human health.
Section
01
English
The exclamation point within an equilateral triangle is intended to alert the
user to the presence of important operating and maintenance (servicing)
instructions in the literature accompanying the appliance.
Always operate the vehicle in a safe
manner. Do not become distracted by
the vehicle while driving, and always
be fully aware of all driving condition.
Do not change settings, or any functions. Pull over in a safe and legal
manner before attempting such operations.
Do not use for many hours at extremely low or high temperature. (-10°C
to 60°C)
To reduce the risk of electric shock,
do not remove the cover or back of
this product. There are no user-serviceable parts inside. Refer servicing
to qualified service personnel.
Do not allow this unit to come into
contact with liquids. Electrical shock
could result. Also, damage to this
unit, smoke, and overheating could
result from contact with liquids.
CAUTION:
TO REDUCE THE RISK OF ELECTRIC SHOCK
DO NOT SPLIT COVER (OR BACK). NO USER
SERVICEABLE PARTS INSIDE. REFER SERVICING TO QUALIFIED SERVICE PERSONNEL.
The lightning flash with the arrowhead symbol, within an equilateral triangle is intended to alert the user
about the presence of uninsulated
dangerous voltage within the product’s enclosure that may be of sufficient magnitude to constitute a risk
of electric shock.
The temperature of unit’s outside can
be extremely high, please use the unit
after proper installation in your vehicle.
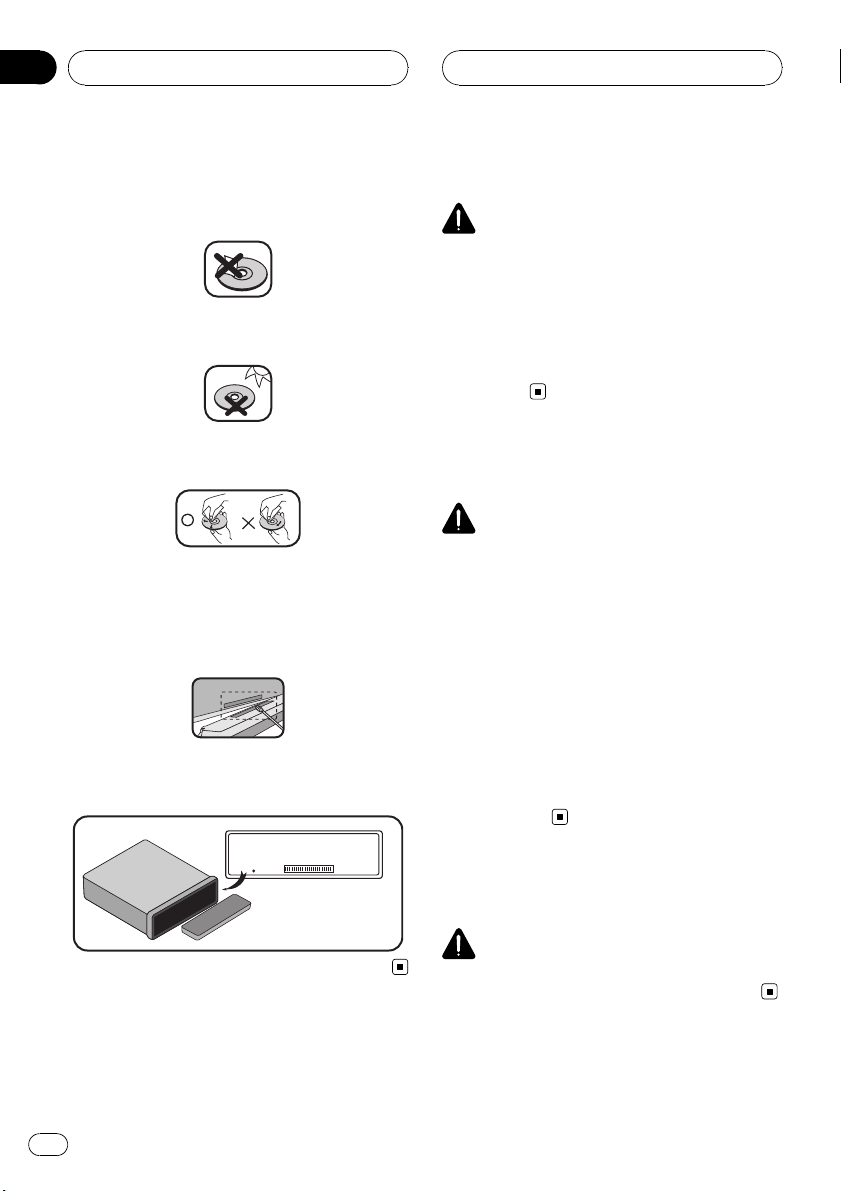
Precautions of handling
discs and player
A defective or soiled disc inserted into the unit
can cause the sound to drop during playback.
Handle the disc by holding its inner and outer
edges.
En
5
Page 6
Section
01
Safety note
Do not touch the surface of the unlabeled side
of the disc.
Do not stick paper or tape, etc. on the surface.
Do not expose the disc to direct sunlight or excessive heat.
Clean the disc before playback. Wipe the disc
from the center outward with a cleaning cloth.
Never use solvents such as benzene or alcohol
to clean the disc.
Periodically wipe the contacts on the back of
the control panel with a cotton bud moistened
with alcohol.
If the unit fails to operate properly, press
RESET using a ball point pen or a similar tool.
IMPORTANT SAFEGUARDS
WARNING
! Do not attempt to install or service your
display by yourself. Installation or servicing of the display by persons without
training and experience in electronic
equipment and automotive accessories
may be dangerous and could expose you
to the risk of electric shock or other
hazards.
To ensure safe driving
WARNING
! To avoid the risk of accident and the potential
violation of applicable laws, this unit is not for
use with a video screen that is visible to the
driver.
! To avoid the risk of damage and injury and the
potential violation of applicable laws, this unit
is not for use with a video screen that is visible
to the driver.
! In some countries or states the viewing of
images on a display inside a vehicle even by
persons other than the driver may be illegal.
Where such regulations apply, they must be
obeyed and this unit’s DVD features should
not be used.
RESET
When using a display
WARNING
NEVER install the display in a location that en-
ables the driver to watch images while driving.
6
En
Page 7
Safety note
Section
01
English
To avoid battery exhaustion
Be sure to run the vehicle engine while using
this unit. Using this unit without running the
engine can result in battery drainage.
! When no power is supplied to this unit be-
cause of a replacement of the vehicle battery or for some similar reason, the
microcomputer of this unit is returned to
its initial condition. We recommend that
you transcribe the audio adjustment data.
WARNING
Do not use with vehicles that do not feature an
ACC position.
About this unit
CAUTION
! This product contains a laser diode of higher
class than 1. To ensure continued safety, do
not remove any covers or attempt to gain access to the inside of the product. Refer all servicing to qualified personnel.
A CLASS 1 LASER PRODUCT label is affixed
to the bottom of this unit.
Visit our website
Visit us at the following site:
! Register your product. We will keep the de-
tails of your purchase on file to help you
refer to this information in the event of an
insurance claim such as loss or theft.
! We offer the latest information about
Pioneer Corporation on our website.
About the Symbol Display
When you are watching a DVD and attempt to
perform an operation, it may not be per formed
due to the programming on the disc. When
this happens, the unit indicates the button
on the screen.
Region code
This unit is designed and manufactured for
playback of region 2 encoded DVD sof tware.
This unit can only play DVD discs labeled 2 or
ALL.
! The Pioneer CarStereo-Pass is for use only in
Germany.
! Keep this manual handy as a reference for op-
erating procedures and precautions.
! Always keep the volume low enough so that
you can hear sounds from outside the vehicle.
! Protect this unit from moisture.
! If the battery is disconnected or discharged,
the preset memory will be erased and must be
reprogrammed.
Notes on region code
! Most DVD discs have a globe with one or
more numbers on it clearly visible on the
cover. This number must match your Car
DVD Receiver’s region code or the disc
cannot play.
! If you try to play a DVD with a different re-
gion code from your player, the message
Check Region Code appears on the
screen.
En
7
Page 8
Section
01
Safety note
Types of Playable Discs
DVD (12 cm disc)
Video CD (VCD) (12 cm
disc)
Audio CD (12 cm disc)
In addition, this unit plays DVD±R, DVD±RW
and CD-R or CD-RW containing audio, compressed audio, photo or movie files.
! Depending on the conditions of the record-
ing equipment or the CD-R/RW (or DVD
±R/±RW) disc itself, some CD-R/RW (or
DVD±R/±RW) discs cannot be played on
the unit.
! Do not attach any seal or label to either
side (the labeled side or the recorded side)
of a disc.
! Do not use irregularly shaped CDs (e.g.,
heart-shaped or octagonal). It may result in
malfunctions.
Notes
!
! This player can only play back discs bearing
is a trademark of DVD Format/Logo
Licensing Corporation.
the marks shown above.
This unit plays DVDs and Video CDs according
to disc contents designed by the software
manufacturer, therefore some playback features may not be available or other functions
may be added.
Features
Dolby Digital/DTS compatibility
! Manufactured under license from Dolby
Laboratories. “Dolby” and the double-D
symbol are trademarks of Dolby
Laboratories.
! “DTS” and “DTS Digital Out” are registered
trademarks of DTS, Inc.
Notes
! It is forbidden by law to copy, broadcast,
show, broadcast via cable, play in public, or
rent copyrighted material without permission.
! This product features the copy protection
function developed by Macrovision. Copy protection signals are recorded on some discs.
When playing the pictures of these discs on a
unit, picture noise will appear.
Notes on DVDs and Video CDs
Some playback operations of DVDs and Video
CDs may be intentionally programmed by software manufacturers.
8
En
Page 9
Safety note
Section
01
English
! This product incorporates copyright protection
technology that is protected by method claims
of certain U.S. patents and other intellectual
property rights owned by Macrovision
Corporation and other rights owners. Use of
this copyright protection technology must be
authorized by Macrovision Corporation, and is
intended for home and other limited viewing
uses only unless otherwise authorized by
Macrovision Corporation. Reverse engineering
or disassembly is prohibited.
About WMA
The Windows Media™ logo printed on the box
indicates that this unit can play back WMA
data.
WMA is short for Windows Media Audio and
refers to an audio compression technology
that is developed by Microsoft Corporation.
WMA data can be encoded by using Windows
Media Player version 7 or later.
! Windows Media and the Windows logo are
trademarks or registered trademarks of
Microsoft Corporation in the United States
and/or other countries.
! This unit may not operate correctly depend-
ing on the application used to encode
WMA files.
casting/streaming via internet, intranets and/
or other networks or in other electronic content distribution systems, such as pay-audio or
audio-on-demand applications. An independent license for such use is required. For details, please visit
http://www.mp3licensing.com.
About DivX
DivX is a compressed digital video format created by the DivX
This unit can play DivX video files recorded on
CD-R/RW/ROM and DVD-R/RW/ROM discs.
Keeping the same terminology as DVD video,
individual DivX video files are called “Titles”.
Keep in mind that when naming flies/titles on
a CD-R/RW or DVD-R/RW disc prior to burning, they will by played in written order by default.
Official DivX
Plays all versions of DivX
®
DivX
6) with standard playback of DivX
media files
! DivX, DivX Certified, and associated logos
are trademarks of DivX, Inc. and are used
under license.
®
video codec from DivX, Inc.
®
Certified product
®
video (including
®
About MP3
Supply of this product only conveys a license
for private, non-commercial use and does not
convey a license nor imply any right to use
this product in any commercial (i.e. revenuegenerating) real time broadcasting (terrestrial,
satellite, cable and/or any other media), broad-
En
9
Page 10
Section
01
Safety note
Symbols used in this manual
A section whose title has one of the following
symbols is applicable only to the disc represented by the symbol.
DVD
DVD
VCD
Video CDs
ACD
Audio CDs
MP3
MP3 files
WMA
WMA files
10
En
Page 11
Control Panel
Section
02
English
12 3 567
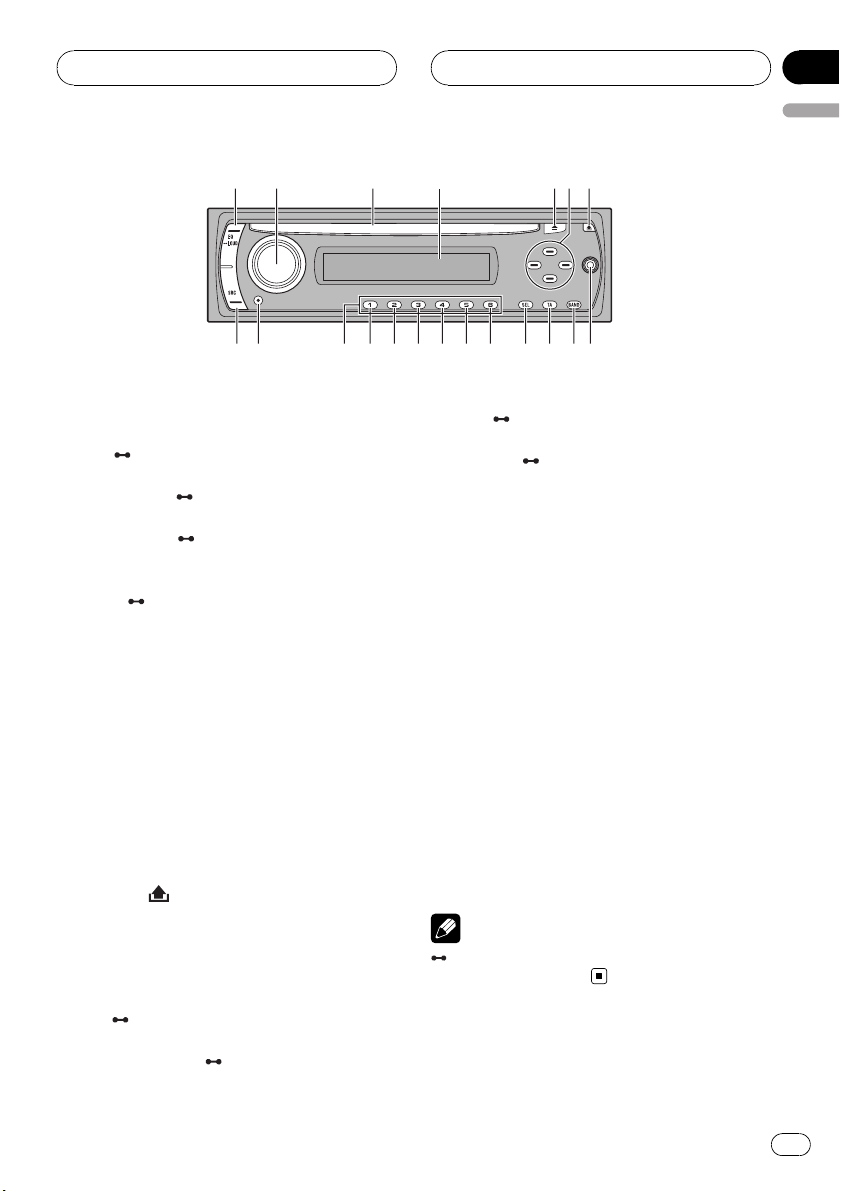
What’s What
1 EQ/ LOUD
! Equalizer (EQ)
! Loudness (
2 VOL/MUTE/
! Volume (VOL)
! Mute (MUTE)
! Off (
3 Disc Slot
4 Display Window
5 Eject h
6 a/b/c/d
! Skip/Search c/d
! Seek/Tune c/d
! Folder Up/Down a/b
! Select (SEL)
7 Release
8 AUX input jack (3.5 mm stereo jack)
9 BAND
LOUD)
OFF
OFF)
4
891011121314151617181920
11 SEL/
! Select (SEL)
! Menu (
12 D.MENU
13 D.SETUP
14 SHUFFLE
15 Repeat (RPT)
16 Intro Scan (SCAN)
17 ENT/d/PAUSE
! Play/Pause (d/PAUSE)
! Enter (ENT)
18 Preset Station (1 to 6)
19 Display (DISP)
20 Source (SRC)
the particular function.
MENU
MENU)
Note
indicates the button operation (hold) activates
10 TA/
PTY
! Traffic Announcement (TA )
! Program Type (
PTY)
En
11
Page 12
Section
03
Remote control
1
6
2
3
7
8
4
9
10
5
11
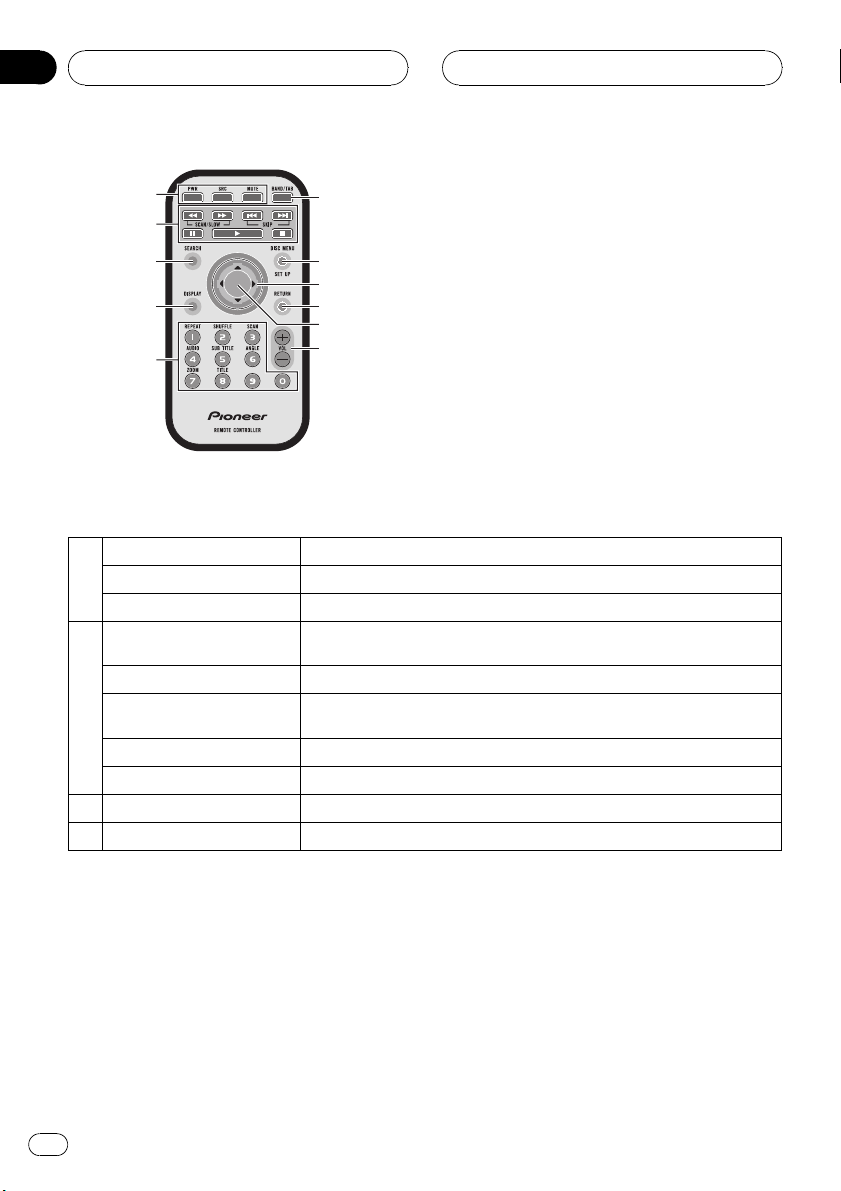
What’s What
PWR Switches the unit ON/OFF.
1
SRC Selects a source.
MUTE Mutes the volume.
SKIP o/p
SCAN/SLOW m/n Backward (Forward) search playback.
2
PAUSE e
PLAY d Starts playback.
STOP g Stops playback.
3 SEARCH Selects a track or file.
4 DISPLAY Accesses On-Screen display.
Goes to the next (previous) chapter, track or file.
Returns to the beginning of the current chapter, track, or file.
Pause playback temporarily.
Press repeatedly for frame-by-frame playback.
12
En
Page 13
Remote control
Section
03
English
0 to 9 number buttons
REPEAT Repeats chapter, track, title or file.
SHUFFLE Plays tracks or files in random order.
SCAN Plays the first 10 seconds of all track.
5
AUDIO Selects audio language.
SUB TITLE Selects subtitle language.
ANGLE Selects a DVD camera angle if available.
ZOOM Enlarges video image.
TITLE Displays title menu, if available.
6 BAND/TAB
7 DISC MENU/SET UP
8 a/b/c/d (up/down/left/right) Selects an item in the menu.
9 RETURN Displays the menu of a video CD with PBC.
10 ENTER Confirms menu selection.
11 VOL (UP +/ DOWN –) Adjusts the volume level.
Selects numbered items in the menu.
Selects a stored radio station frequency (1 to 6).
Selects three FM and MW bands.
Moves to any other file on the disc with various types of files.
Accesses menu on a DVD disc.
Accesses or removes the Setup menu.
En
13
Page 14
Section
03
Remote control
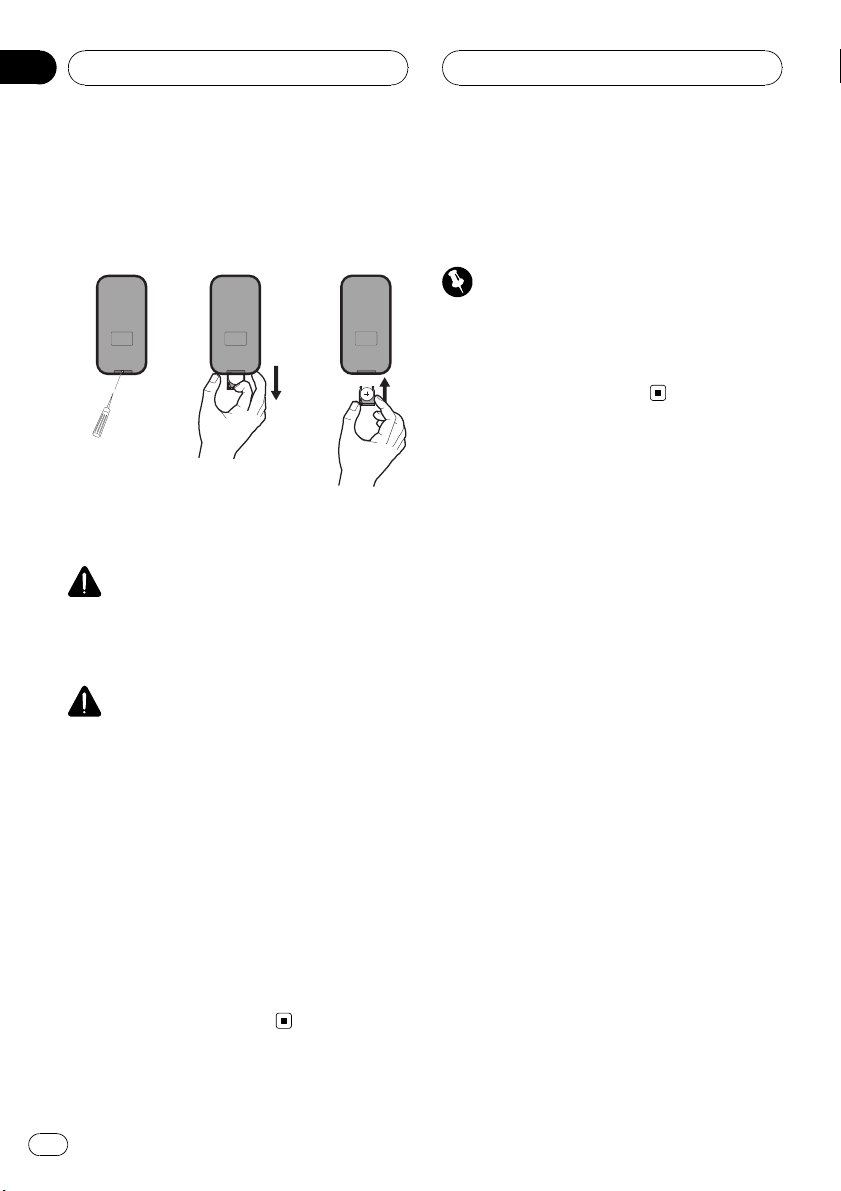
Battery installation
1 Remove the battery holder with a sharp object
such as a ballpoint pen.
2 Install the battery on the battery holder.
3 Install the battery holder back into its original
position.
WARNING
Keep the battery out of the reach of children.
Should the battery be swallowed, consult a doctor immediately.
CAUTION
! Use one CR2025 (3 V) lithium battery.
! Remove the battery if the remote control is not
used for a month or longer.
! Do not leave the product in a hot or humid
place.
! Do not handle the battery with metallic tools.
! Do not store the battery with metallic materi-
als.
! In the event of battery leakage, wipe the re-
mote control completely clean and install a
new battery.
! When disposing of used batteries, please
comply with governmental regulations or environmental public institutions’ rules that
apply in your country/area.
Using the remote control
Point the remote control in the direction of the
control panel to operate.
Important
! Do not store the remote control in high tem-
peratures or direct sunlight.
! Do not let the remote control fall onto the
floor, where it may become jammed under the
brake or accelerator pedal.
14
En
Page 15
Before use
Section
04
English
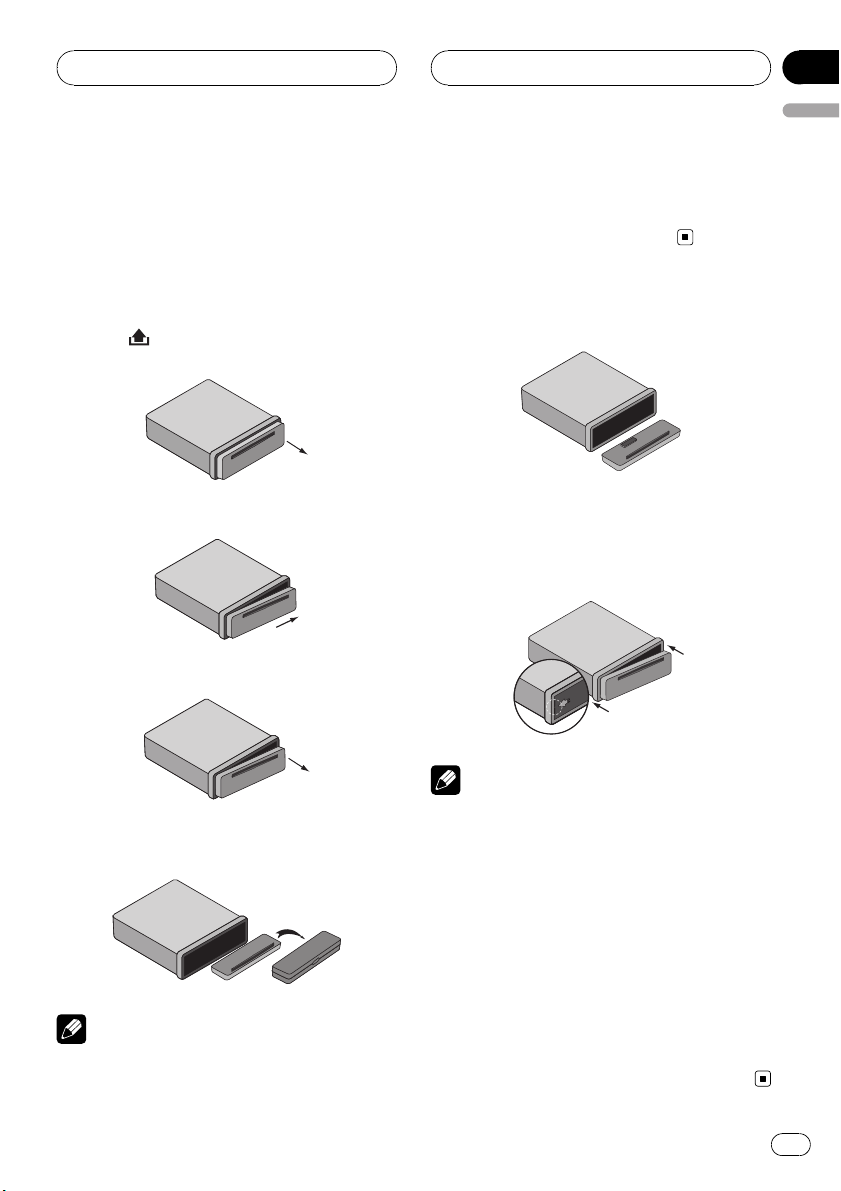
Detaching control panel
You can detach the control panel when leaving
the car. When detaching or attaching the control panel, be careful not to damage the connector on the back of the control panel and on
the panel holder.
1 Press
panel.
2 Push the control panel to right.
3 Pull the control panel.
(Release) to open the control
For that reason, keep the control panel in its
protective case while detached.
! Do not touch the connectors directly with your
fingers or with any metal device.
Attaching control panel
1 Align the left side of the panel with
stopper.
2 Push the right side or panel into the
unit until it clicks.
2
1
4 Put the detached control panel into the
protective case.
Notes
! The control panel is a precision piece of equip-
ment and can be damaged by shocks or jolts.
Notes
! When detaching or attaching the control
panel, do not press the display or control buttons.
! The control buttons may not work properly if
the control panel is not attached properly. If
this occurs, gently press the control panel.
! Do not leave the control panel in any area ex-
posed to high temperatures or direct sunlight.
! Do not drop the control panel or subject it to
strong impact.
! Do not allow volatile agents such as benzene,
thinner, or insecticides to come into contact
with the surface of the control panel.
! Do not try to disassemble the control panel.
En
15
Page 16

Section
04
Before use
TV system selection
You must select the appropriate system mode
for your TV system.
When the selected system does not coincide
with the system of your TV, normal colour picture may not be displayed.
! AUTO: Select when the unit is connected
with Multi system TV.
! NTSC: Select when the unit is connected
with NTSC-TV.
! PAL: Select when the unit is connected
with PAL-TV.
1 Press SRC to select the CD/DVD.
2 Press EJECT.
Confirm that no disc is loaded in the built-in
player (NO DISC is displayed).
3 Press and hold ENT/d/PAUSE (e on the
remote control) for more than five seconds.
Each time you press and hold the button for
more than five seconds, the TV system
switches as follows:
PAL —AUTO—NTSC
16
En
Page 17
Basic operation
Section
05
English
Turning the unit on
% Press any button (PWR on the remote
control) other than eject h and release
Note
When you insert the disc in the disc slot, the unit
turns on.
Turning the unit off
% Press and hold OFF (PWR on the remote
control).
Inserting a disc
% Draws the disc, and starts playback
automatically.
Notes
! The DVD player plays one, standard 12-cm
disc at a time. Playing back an 8-cm disc is
not possible with this unit. Playable disc and
adapter are listed in the table below.
12-cm disc 8-cm disc 8-cm disc adapter
Ö ——
Ejecting a disc
% Press h. The disc automatically ejects
from the loading slot.
.
When the disc is ejected by pressing h during
playback, it will be loaded automatically after
10 seconds unless you remove the disc from
the unit.
Selecting a source
% Press SRC to select a source.
Press SRC repeatedly to switch between the
following sources:
Tuner—CD/DVD—AUX (AUX IN)
Selecting a media type
When you select CD/DVD as a source, you
can switch the MUSIC, PHOTO and MOVIE
menu on a disc with audio, photo, and movie
files.
Each menu has a media type indication tab
which shows what media you are selecting.
1
! Do not insert anything other than a disc into
the disc loading slot. Discs which can be
played back are listed on Types of Playable
Discs on page 8.
1 Media type indication tab
For a disc with only audio files, MUSIC is displayed. If the disc has photo or movie files,
PHOTO tab or MOVIE tab is displayed.
% Press BAND (BAND/TAB on the remote
control) to select other media types.
En
17
Page 18
Section
05
Basic operation
Adjusting the volume
% Rotate VOL (Press VOL +/– on the re-
mote control) to adjust the sound level.
Note
When you turn the unit off, the current volume
level is automatically memorized. Whenever you
turn the unit on again, it will operate at the memorized volume level.
Mute
1 Press MUTE to cut the sound.
2 To cancel it, press MUTE again.
Checking the clock
% You can see the clock pressing DISP on
the control panel.
Note
If the RDS broadcasting with CT (Clock Time) information is received by the unit, the clock will be
updated automatically in the display window. Unless, NO CLOCK appears in the display window.
Loudness
% Press and hold EQ/LOUD to reinforce
treble, bass and surround effect.
Loudness off (no display)—loudness on
(LOUD indicator lights)
Using the EQ (Equalizer)
% Press EQ/LOUD repeatedly.
The indicator lights in the following order.
POP—CLASSIC—ROCK—JAZZ—VOCAL—
SALSA—SAMBA—USER1—USER2—off (no
display)
! POP: Optimized for R&B, Soul and Country
music.
! CLASSIC: Optimized for orchestral music.
! ROCK: Optimized for Hard Rock and Heavy
Metal music.
! JAZZ: Sweet sound with soft feeling.
! VOCAL: Powerful realism with strong
sound quality.
! SALSA: Reproduces salsa music acoustics.
! SAMBA: Reproduces samba music acous-
tics.
! USER1: Use the menu to set the sound level
you want.
! USER2: Use the menu to set the sound level
you want.
You can adjust each sound level to your preference. Once you select a USER mode and
then make an adjustment, it automatically
stored for the currently selected USER
mode.
Refer to Adjusting the sound level.
Adjusting the sound level
1 Press SEL/MENU repeatedly to select
the mode you want to adjust from volume,
bass, middle, treble, balance and fader.
The indicator lights in the following order.
VOL — BAS — MID — TRB — BAL — FAD
18
En
Page 19
Basic operation
Section
05
English
2 Rotate VOL (Press VOL +/– on the remote control) to adjust the sound quality.
Indication Turn right Turn left
VOL
BAS
MID
TRB
BAL
FAD
Increase the volume level.
Increase the bass
level.
Increase the middle level.
Increase the treble
level.
Decrease the level
of the left speaker
(s).
Decrease the level
of the front speaker(s).
Decrease the volume level.
Decrease the bass
level.
Decrease the middle level.
Decrease the treble level.
Decrease the level
of the right speaker(s).
Decrease the level
of the rear speaker(s).
Note
When EQ or LOUD is set to Off, you can adjust
the sound level (BAS, MID, TRB) settings.
Changing the general settings
1 Press and hold SEL/MENU so that one
of menu items appears.
2 Press SEL/MENU repeatedly to scroll between menus.
AF ON—REG ON—TA ALARM—PI SOUND—
AUX ON—AUX 0DB—DEMO OFF—
BEEP 2ND
3 Rotate VOL clockwise or counterclockwise to select one of the settings.
The setting displayed on the display window is
set and automatically disappears after about
six seconds.
! AF (Alternative Frequency) ON/OFF
When the reception quality drops, the tuner
automatically changes to another station in
the network, broadcasting a better reception quality, using the PI and AF codes.
AF ON: Wherever you drive, you can continue to listen to the same program without
interruptions.
AF OFF: Only station name will be displayed. In case of poor reception no alternative station can be used.
! REG (Region) ON/OFF
REG ON: The unit switches to another station, within the same network, broadcasting
the same program when the receiving signals from the current station become weak.
REG OFF: The unit switches to another station, within the same network when the receiving signals from the current station
become weak. (This mode, the program
may differ from the one currently received.)
! TA(Traffic Announcement) ALARM/
SEEK
TA ALARM: When a newly tuned station
has no TP information for five seconds, a
double beep sound is output.
TA SEEK: When the newly tuned station
does not receive TP information for five seconds, the receiver retunes to the next station.
! PI (Program Identification) SOUND/
MUTE
PI SOUND: If the sound of a station with different PI is heard intermittently, the receiver
mutes the sound after one second.
PI MUTE: If the sound of a station with different PI is heard intermittently, the receiver
mutes the sound right now.
! AUX (Auxiliary) ON/OFF
It is possible to use auxiliary equipment
with this unit. Activate the auxiliary setting
when using auxiliary equipment connected
to this unit.
AUX ON: When using a auxiliary equipment.
En
19
Page 20

Section
05
Basic operation
AUX OFF: When not using a auxiliary
equipment.
! AUX (Auxiliary) 0 dB/+6 dB
You can adjust the volume level of each
source to prevent radical changes in volume when switching between sources.
You can set to 0DB or +6DB.
If the input level of the connected component is not high enough, increase the input
level properly. Without adjusting the line
input level, you may be surprised at a loud
sound when you change the source from
the external component to another source.
! DEMO ON/OFF
You can change the initial indication on the
display to information name (function
name, EQ name, etc...) while listen to a
source.
DEMO ON: Displays information name
while listen to source.
DEMO OFF: Cancels the function.
! BEEP 2ND/ALL
Sets the beep sound every time a button is
pressed.
BEEP 2ND: The beep is generated when a
key is long pressed (one sec.).
BEEP ALL: The beep is generated when any
key is pressed.
# You can also select one of the settings by
pressing VOL+/– on the remote control.
20
En
Page 21
Radio operation
Section
06
English
Listening to radio stations
1 Press SRC to select the tuner.
2 Press BAND repeatedly to select a
band.
The indicator lights in the following order.
F1 (FM1)—F2 (FM2)—F3 (FM3)— MW (MW)
3 Auto Search: Press c/d (c/d on the remote control).
When a station is received, searching stops.
4 Manual Search: Press and hold c/d (c/
d on the remote control) until MANUAL
appears, and then press it repeatedly.
The frequencies move up or down step by
step.
# When not operated for six seconds after manual search, the ordinary tuner display is
shown.
Storing broadcast frequencies
You can easily store up to six broadcast frequencies for later recall at the touch of a button.
Notes
! Up to 18 FM stations, six for each of three FM
bands and six MW stations can be stored in
the memory.
! When a new station is stored in the preset sta-
tion button, the previously preset station is
automatically erased.
Auto search memory
This function lets you automatically store the
six strongest broadcast frequencies.
1 Press a.
ASM appears in the display window.
The six strongest broadcast frequencies will
be stored under preset buttons 1 to 6 in the
order of their signal strength.
2 To cancel, press a.
To scan the preset stations
1 Press b.
Each preset station appears.
1 Press BAND to select desired band you
want to store.
2 Select the desired frequency.
3 Press one of preset buttons 1 to 6 and
hold until the beep sound.
The number you have pressed will be displayed in the preset number indicator and
then remain lit. The selected radio station frequency has been stored in memory.
4 Repeat steps 1 to 3 to preset other stations.
The next time, you press the same preset button, the radio station frequency is recalled
from the memory.
2 To cancel, press b.
To tune in the preset stations
1 Press BAND to select the desired band.
2 Press the desired preset buttons 1 to 6.
The preset station of the preset buttons 1 to 6
is displayed and the preset station is received.
En
21
Page 22

Section
07
RDS operation
RDS display options
In normal RDS operation the display will indicate the station name. Pressing DISP enables
you to cycle through the various data types in
the following sequence:
CT—PTY—RT—FREQUENCY (When PS is not
received.)
! CT (Time controlled by the channel)
! PTY (Program type recognition)
! RT (Radio text recognition)
! PS (Program Service name)
PTY (Program Type) function
To select a certain program type out of the reception band, the following procedure can be
used.
1 Press and hold TA/PTY to select a program types.
2 After, press and hold TA/PTY repeatedly for selecting each mode.
Music group—Speech group—Search off
3 Press one of preset buttons 1 to 6 repeatedly.
Each time this button is pressed, the display
mode changes as follows:
No. Music group
1 POP M, ROCK M
2 EASY M, LIGHT M
3 CLASSICS, OTHER M
4 JAZZ, COUNTRY
5NATIONM, OLDIES
6 FOLK M
No. Speech group
1 NEWS, AFFAIRS, INFO
2 SPORT, EDUCATE, DRAMA
3 CULTURE, SCIENCE, VARIED
4 WEATHER, FINANCE, CHILDREN
5 SOCIAL, RELIGION, PHONE IN
6 TRAVEL, LEISURE, DOCUMENT
Note
! RDS is only available for FM reception.
TA (Traffic Announcement
identification) function
TA function allows the unit to switch to traffic
annoucement (TA) from the current source
(Another FM station, CD, or other connected
components).
% To switch the TA function on or off,
press TA/PTY.
Notes
! If TP (Traffic Program identification) indicator
lights up, TA reception is activated.
! TA reception will not work if you are listening
to an MW station.
22
En
Page 23
CD/MP3/WMA operation
MP3/WMA Disc
compatibility with this unit
is limited as follows:
! Sampling Frequency: 8 kHz to 48 kHz
(MP3), 22.05 kHz to 48 kHz (WMA)
! Bit rate: 8 kbps to 320 kbps (include VBR)
(MP3), 32 kbps to 320 kbps (WMA)
! CD-R/CD-RW physical format should be
ISO9660.
! If you record MP3/WMA files using soft-
ware which cannot create a FILE SYSTEM,
it will not be possible to playback MP3/
WMA files.
MP3/WMA files are not compatible with
packet write data transfer.
! The total number of files or folders on the
disc should be less than 99 (Audio CD),
3 000 (MP3/WMA) and 251 (folder).
12
5
6
8
10
11
13
3
7
Audio CD mode
14
Section
08
English
4
9
12
Note
Customers should also note that permission is required in order to download MP3/WMA files and
music from the Internet. Our company has no
right to grant such permission. Permission
should always be sought from the copyright owner.
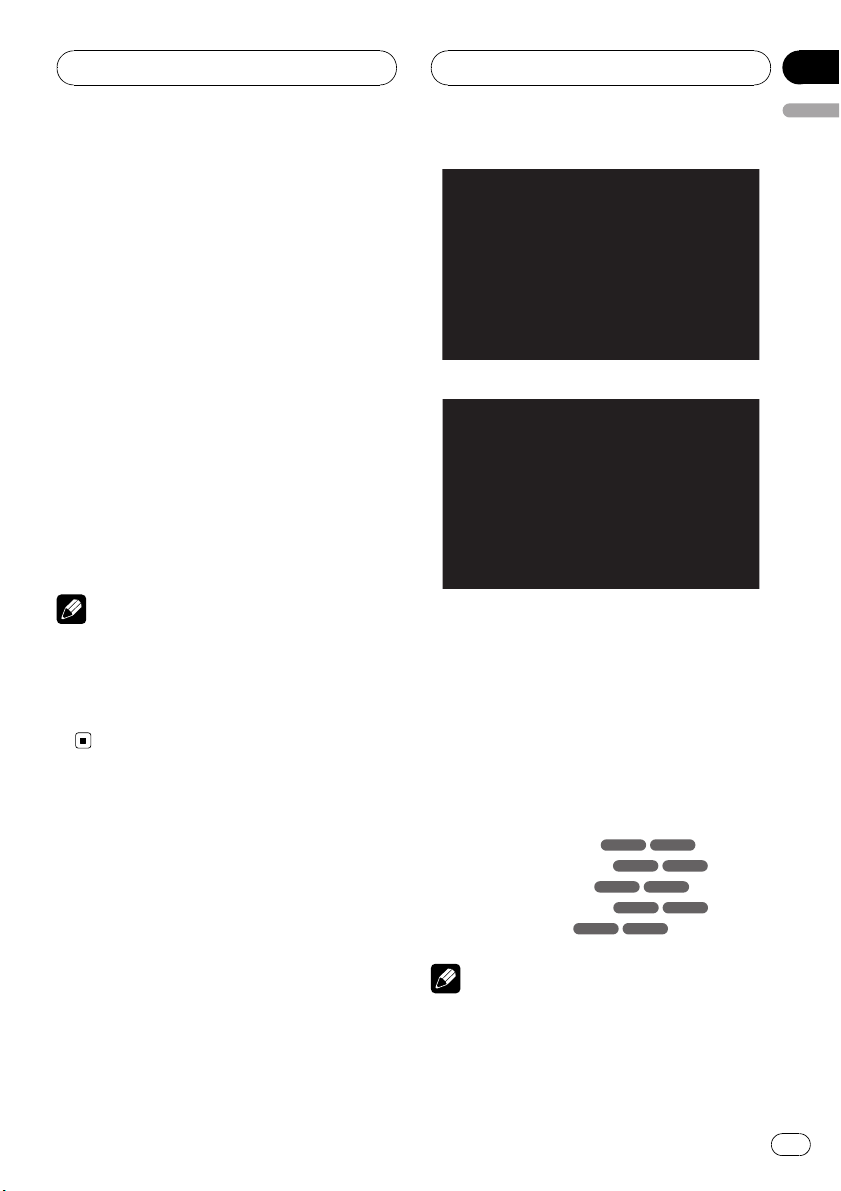
Playing an Audio CD and
MP3/WMA disc
The unit can play MP3/WMA formatted recordings.
% Insert a disc in the unit.
READING appears in the display window, and
playback starts automatically.
MP3/WMA mode
1 Current track number/Total track number
2 Elapsed time
3 Playback status (Play d, Pause e, Scan
n ×4, ×8, m ×4, ×8)
4 Current mode (Repeat, Intro scan, Shuffle)
5 Previous track name
6 Album information in CD-TEXT
7 Current track name
8 Title and artist information in CD-TEXT
9 Next track name
10 Previous file name
11 Current folder name
12 Current file name
13 ID3 TAG information
14 Next file name
Notes
! When a disc contains audio data (CD-DA) and
other format audio data, only the audio data
(CD-DA) can be played back.
MP3 WMA
MP3 WMA
MP3 WMA
MP3 WMA
MP3 WMA
En
23
Page 24
Section
08
CD/MP3/WMA operation
! If you change the source, CD play also stops
(without ejecting the disc). Next time you select CD as the source, CD play starts from
where playback has been stopped previously.
Pause
1 Press d/PAUSE (e on the remote control) during playback.
2 To return to playback, press d/PAUSE
(PLAYd or e on the remote control).
Skip to next track/file
% Press briefly d (p on the remote con-
trol) to select the next track or file.
Skip to previous track/file
% Press briefly c (o on the remote con-
trol) and press again within four seconds
of playing time.
1 Press SEARCH on the remote control.
2 Press the appropriate numbered button
(0 to 9) to select a track/file number.
Search
% Press and hold c/d (m/n on the re-
mote control) to select the required speed
during playback and then release at the
point you want.
# Backward search: m ×4, m ×8
Forward search: n ×4, n ×8
Intro scan
The first 10 seconds of each tracks/files
(SCAN) or each files in the current selected
folder (
1 Press SCAN.
SCAN
pears on the display window.
# Press and hold SCAN for about two seconds
during playback.
SCAN appears on the display window.
SCAN) on the disc are played.
ACD
(or SCAN
MP3 WMA
MP3 WMA
) ap-
Return to the beginning of
the current track/file
% Press briefly c (o on the remote con-
trol) after four seconds of playing time.
Moving to another track/file
When a disc has more than one track/file, you
can move to another track/file as follows:
24
En
2 Press SCAN again.
SCAN (or
play window and the intro scan is
cancelled.
SCAN) disappears from the dis-
Repeat
The current selected tracks/files (1 RPT)or
folder (
edly.
1 Press RPT during playback.
1 RPT appears on the display window.
RPT) on the disc is played repeat-
Page 25
CD/MP3/WMA operation
Section
08
English
# Press and hold RPT for about two seconds
during playback.
RPT appears on the display window.
MP3 WMA
2 Press RPT again.
1 RPT (or
RPT) disappears from the display
window and the repeat mode is cancelled.
Shuffle
All of the tracks/files (SHF) or the current selected folder (
domly.
1 Press SHUFFLE during playback.
ACD
SHF
on the display window.
# Press and hold SHUFFLE for about two sec-
onds during playback.
SHF appears on the display window.
2 Press SHUFFLE again.
SHF (or
window and the random playback is cancelled.
SHF) on the disc is played ran-
(or SHF
MP3 WMA
MP3 WMA
) appears
SHF) disappears from the display
% Press DISP repeatedly during MP3/
WMA/CD TEXT file playback.
To skip to the next or previous
folder
(If there are more than two folders.)
% Press a to skip to the next folder, and
press b to skip to the previous folder.
Time display appearing on the display part when
playing VBR file may vary and there may be some
difference from actual time (both progress time
and VBR are displayed at the same time when
playing file).
MP3 WMA
Note
Note
During random playback, if you press c (o on
remote control), you won’t go back to the previous track.
CD TEXT/ID3 TAG
When playing a disc containing information,
you can see the CD TEXT/ID3 TAG information.
In a ID3 TAG, information about the file (album
title, performer name, song title) is recorded.
In a WMA Content, information about the file
(song title, performer name) is recorded.
If there is no information, NO TEXT will be
shown in the display window.
En
25
Page 26
Section
09
SET UP menu
By using the Setup menu, you can make various adjustments to items such as picture and
sound. You can also set a language for the
subtitles and the Setup menu, among other
things.
1 Press D.SETUP.
The Setup menu appears.
# You can perform the same operation by pressing and holding DISC MENU/SET UP on the remote control.
2 Use a/b to select the desired option
then press d to move to the second level.
The screen shows the current setting for the
selected item as well as alternate setting(s).
3 Use a/b to select the second desired
option then press d to move to the third
level.
4 Use a/b to select the desired setting
then press ENT to confirm your selection.
# Some items require additional steps.
5 Press D.SETUP.
The Setup menu ends.
# You can perform the same operation by pressing and holding DISC MENU/SET UP or pressing
PLAYd or RETURN on the remote control.
Note
Press c to go back to the previous level.
Language
Menu Language
Select a language for the setup menu and onscreen display.
If you select a language for the setup menu,
the character set for MP3 tag, WMA tag and
DivX subtitle is also changed according to the
language. Refer to Notice for displaying the
DivX subtitle on page 41.
Disc Audio/Subtitle/Menu
Select the language you prefer for the audio
track of disc, subtitle, and the disc menu.
! Original: Refers to the original language in
which the disc was recorded.
! Other: To select another language, press
number buttons and then ENT to enter the
corresponding 4-digit number according to
the language code list. Refer to page 54.
If you enter the wrong language code,
input the 4-digit number and press any
number button. When ––––appears on
the screen, input the 4-digit number correctly.
! Off: This option is showed only in
Disc Subtitle. If you select Off, disc subti-
tle is not displayed.
26
En
Page 27
SET UP menu
Section
09
English
Display
TV Aspect
! 16:9: Select when a 16:9 wide TV is con-
nected.
! 4:3 Letter Box: Select when a standard 4:3
TV is connected.
Displays a wide picture with bands on the
upper and lower portions of the screen.
! 4:3 Pan Scan: Select when a standard 4:3
TV is connected.
Automatically displays the wide picture on
the entire screen and cuts off the portions
that do not fit.
Note
In case of DivX file, TV Aspect of 4:3 Letter Box
and 4:3 Pan Scan are the same.
Audio
Each DVD disc has a variety of audio output
options. Set the player’s AUDIO options according to the type of audio system you use.
Dolby Digital/DTS/MPEG
! Bitstream: Select Bitstream if you connect
the optical out jack of this unit to an amplifier or other equipment with a Dolby Digital, DTS or MPEG decoder.
! PCM: Select when connected to a two-
channel digital stereo amplifier. DVDs encoded in Dolby Digital or MPEG will be
automatically downmixed to two-channel
PCM audio.
! Off (for DTS): If you select Off, the DTS sig-
nal is not output through the optical out
jack.
B.L.E. (Black Level Expansion)
To select the black level of playback pictures.
Set your preference and monitor’s ability.
! On: Expanded grey scale.
! Off: Standard grey scale.
Note
The B.L.E. function works NTSC system only.
Note
This operation menu is not available with this product.
En
27
Page 28

Section
09
SET UP menu
Dynamic Range Control (DRC)
With the DVD format, you can hear a program’s soundtrack in the most accurate and
realistic presentation, thanks to digital audio
technology. However, you may wish to compress the dynamic range of the audio output
(the difference between the loudest sounds
and the quietest ones). This allows you to listen to a movie at a lower volume without losing clarity of sound. Set DRC to On for this
effect.
Lock (Parental Control)
To access the Rating, Password and
Area Code features, you must input the 4-
digit password you created. If you have not yet
entered a password you are prompted to do
so.
1 Input a 4-digit code and press ENT.
! If you made a mistake before pressing
ENT, press c to delete the digits one by
one.
2 Enter it again and press ENT to verify.
Some discs offer more suitable scenes as an
alternative.
The parental control feature allows you to
block access to scenes below the rating you
input, thereby preventing your children from
being able to view material you believe is unsuitable.
1 Select Rating on the Lock menu then
press d.
2 Select a rating from 1 to 8 using the a/
b.
! Rating 1 to 8: Rating one (1) has the most
restrictions and rating eight (8) is the least
restrictive.
! Unlock: If you select Unlock, parental con-
trol is not active and the disc plays in full.
3 Press ENT to confirm your rating selection.
Note
If you set a rating for the player, all disc scenes
with the same rating or lower are played. Higher
rated scenes are not played unless an alternate
scene is available on the disc. The alternative
must have the same rating or a lower one. If no
suitable alternative is found, playback stops. You
must enter the 4-digit password or change the
rating level in order to play the disc.
Rating
Some movies contain scenes that may not be
suitable for children to view. Many of these
discs contain parental control information
that applies to the complete disc or to certain
scenes on the disc. Movies and scenes are
rated from 1 to 8, depending on the country.
28
En
Password
You can enter or change password.
To make a new password:
1 Select Password on the Lock menu and then
press d.
2 Press ENT when the New option is high-
lighted.
3 Enter a new password using the number but-
tons then press ENT.
4 Enter the password again to verify.
Page 29

SET UP menu
Section
09
English
To change the password:
1 Select Password on the Lock menu and then
press d.
2 Press ENT when the Change option is high-
lighted.
3 Enter a current password using the numbered
buttons then press ENT.
4 Enter a new password using the numbered
buttons then press ENT.
5 Enter the password again to verify.
If you forget your password
If you forget your password you can clear it
using the following steps.
1 Press D.SETUP.
The Setup menu appears.
# You can perform the same operation by pressing and holding DISC MENU/SET UP on the remote control.
2 Input the 6-digit number “210499” and
the password is cleared.
3 Enter a new password. Refer to To
make a new password: on the previous
page.
Area Code
Enter the code of the area whose standards
were used to rate the DVD video disc, according to the area code. Refer to Area code list on
page 55.
4 Press ENT and select the second character using a/b.
5 Press ENT to confirm your country code
selection.
Others
PBC
Set Playback Control (PBC)toOn or Off.
! On: Video CDs with PBC are played accord-
ing to the PBC.
! Off: Video CDs with PBC are played in the
same way as Audio CDs.
Note
The PBC function is only available for playing the
Video CD 2.0.
1 Select Area Code on the Lock menu
then press d.
2 Follow the step 2 as shown on Rating
on the previous page.
3 Select the first character using a/b.
En
29
Page 30
Section
09
SET UP menu
DivX VOD
We provide you the DivX®VOD (Video On Demand) registration code that allows you to
rent and purchase videos based on the DivX
VOD service. For more information, visit
www.divx.com/vod.
1 Select DivX VOD option and then press
d.
2 Press ENT while Show Code is selected
and the registration code will appear.
Use the registration code to purchase or rent
the videos from DivX
www.divx.com/vod.
3 Press ENT to exit.
Note
All the downloaded videos from DivX
only be played back on this unit.
®
VOD service at
®
VOD can
®
30
En
Page 31

DVD/VCD operation
Section
10
English
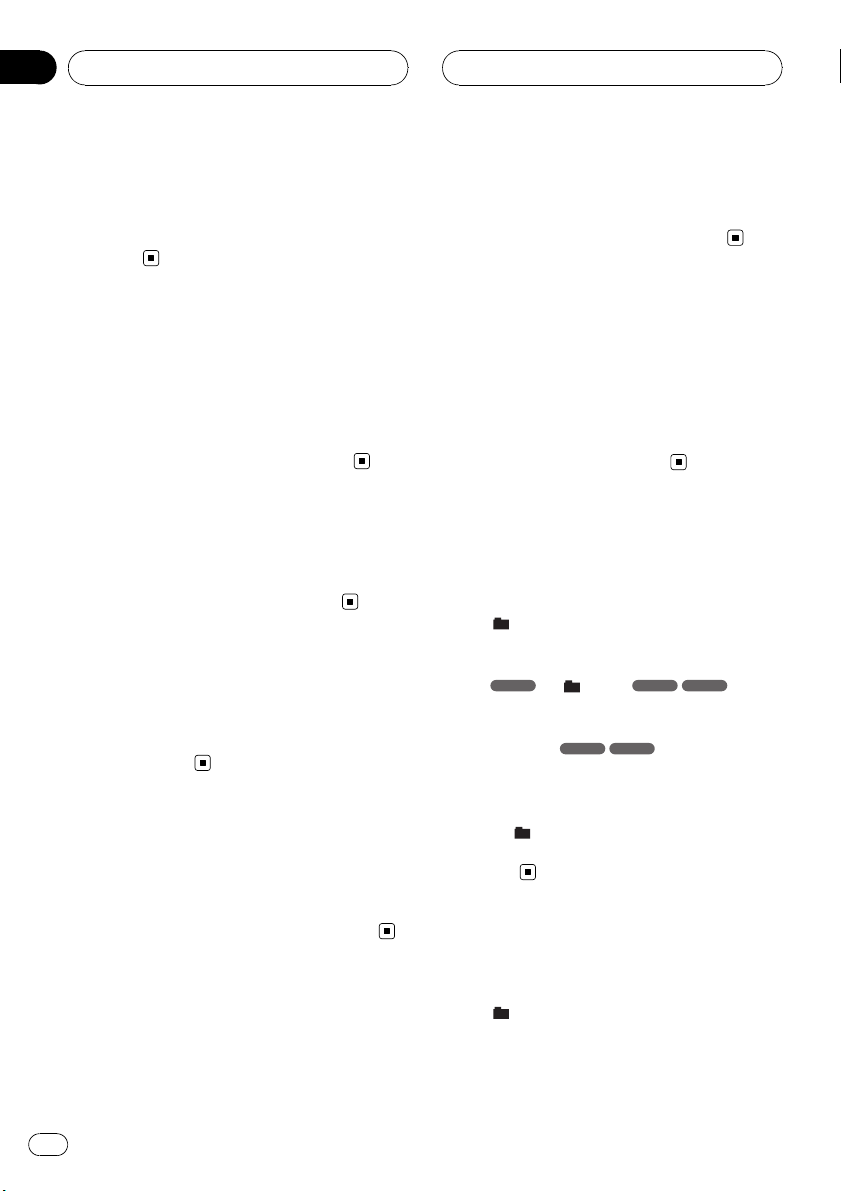
Displaying Disc
Information on-screen
You can display various information about the
disc loaded on-screen.
1
2
3
4
5
6
1 Title: Current title number/total number of ti-
tles
2 Chapter (Track): Current chapter (or track)
number/total number of chapters (or tracks)
3 Time: Elapsed playing time
4 Audio: Selected audio language or channel
5 Subtitle: Selected subtitle
6 Angle: Selected angle/total number of angles
1 Press DISPLAY on the remote control
during playback.
# The displayed items differ depending on the
disc type or playing status.
2 Press a/b to select an item.
3 Press c/d to change or select the setting.
# You can also use 0 to 9 if appropriate.
# For some functions, press ENT to execute the
setting.
Notes
! If any button is not pressed for a few seconds,
the on-screen display disappears.
! Some discs may not provide all of the features
on the on-screen display example shown
above.
On a Video CD 2.0 with PBC, PBC will be displayed instead of the track number. Refer to
PBC on page 29.
Playing a DVD and Video CD
% Insert a disc in the unit.
READING appears on the display window, and
playback starts automatically.
# If playback does not start, press d/PAUSE (d
on the remote control).
# In some cases, the disc menu might appear
instead.
Notes
! The menu screen may be displayed first after
loading a DVD or Video CD 2.0 which offers a
menu.
! If any button is not pressed after a disc is
ejected, a disc is loaded automatically in
about 10 seconds.
! If parental control is set and the disc is not
within the rating settings you must input the
password. (See Lock (Parental Control) on
page 28).
! DVDs may have a region code. Your player
does not play discs that have a region code
different from your player. About the region
code, refer to Region code on page 7.
Pre-Stop
1 Press g on the remote control during
playback.
Pre-Stop appears in the display window.
En
31
Page 32

Section
10
DVD/VCD operation
2 To return to playback, if you press d/
PAUSE (PLAYd on the remote control) on
the Pre-Stop mode, it will be played from
this point you stop.
Stop
1 Press g on the Pre-Stop mode.
2 To return to playback, if you press d/
PAUSE (PLAYd on the remote control), it
will be played from the beginning of the
disc.
Pause
1 Press d/PAUSE (e on the remote control) during playback.
2 To return to playback, press d/PAUSE
(PLAYd on the remote control).
Still picture and frame-byframe playback
1 Press d/PAUSE (e on the remote control) during playback.
The unit will now go into the PAUSE mode.
Slow motion
1 Press d/PAUSE (e on the remote control) during playback.
The unit will now go into the PAUSE mode.
2 Use m/n on the remote control to
select the required speed:
s 1/16, s 1/8, s 1/4, or s 1/2 (backward),
or t 1/16, t 1/8, t 1/4, or t 1/2 (forward)
# With a Video CD, the Slow speed changes: t
1/16, t 1/8, t 1/4 or t 1/2 (forward).
3 To exit Slow Motion mode, press d/
PAUSE (PLAYd on the remote control).
Note
Slow motion playback in reverse is not possible
with Video CDs.
Moving to another title
When a disc has more than one title, you can
move to another title as follows:
1 Press DISPLAY on the remote control
and then press a/b to select the menu
item (title).
2 Press the appropriate numbered button
(0 to 9) to select a title number.
DVD
2 You can advance the picture frame-byframe by pressing e on the remote control
repeatedly.
3 To return normal playback, press d/
PAUSE (PLAYd on the remote control).
32
En
Moving to another chapter/
track
When a title on a disc has more than one
chapter or a disc has more than one track, you
can move to another chapter/track as follows:
Page 33

DVD/VCD operation
Section
10
English
% Press c/d (o/p on the remote con-
trol) briefly during playback to select the
next chapter/track or to return to the beginning of the current chapter/track.
% Press c (o on the remote control)
twice briefly to step back to the previous
chapter/track.
% To go directly to any chapter during
playback, press DISP (DISPLAY on the remote control) and press a/b to select the
chapter/track icon. Then, input the chapter/track number or use c/d.
Notes
! For two-digit numbers, press the numbered
buttons (0 to 9) in rapid succession.
! On a Video CD with PBC, you must set PBC to
Off on the setup menu. Refer to PBC on page
29.
Skip to next chapter/track
% Press briefly d (p on the remote con-
trol) to select the next chapter or track.
Skip to previous chapter/track
% Press briefly c (o on the remote con-
trol) and press again within four seconds
of playing time.
Scan
1 Press m/n on the remote control
during playback.
2 Press m/n repeatedly on the remote control to select the required speed:
m ×2, m ×4, m ×8, m ×16, m ×32,
m ×100 (backward) or n ×2, n ×4, n
×8, n ×16, n ×32, n ×100 (forward)
# With a Video CD, the scan speed changes:
m ×2, m ×4, m ×8, (backward) or n ×2,
n ×4, n ×8, (forward).
3 To return to normal playback, press d/
PAUSE (PLAYd on the remote control).
Repeat
DVD
- Chapter/Title/Off
The default settings is Off.
1 To repeat the chapter currently playing,
press RPT (REPEAT on the remote control).
The Chapter icon appears on the TV screen.
2 To repeat the title currently playing,
press RPT (REPEAT on the remote control)
again.
The Title icon appears on the TV screen.
3 To exit the repeat mode, press RPT
(REPEAT on the remote control) again.
The Off icon appears on the TV screen.
Return to the beginning of
the current chapter/track
% Press briefly c (o on the remote con-
trol) after four seconds of playing time.
VCD
- Track/All
The default settings is All.
1 To repeat the track currently playing,
press RPT (REPEAT on the remote control).
The Track icon appears on the TV screen.
En
33
Page 34

Section
10
DVD/VCD operation
2 To exit the repeat mode, press RPT
(REPEAT on the remote control) again.
The All icon appears on the TV screen.
Note
On a Video CD with PBC, you must set PBC to
Off on the setup menu. Refer to PBC on page
29.
Time search
The Time Search function allows you to start
playing at any chosen time on the disc.
1 Press DISPLAY on the remote control
during playback.
The on-screen display appears on the screen.
The Time Search box shows the elapsed playing time of the current disc.
2 Within 10 seconds, press a/b to select
the Time Search icon in the on-screen display.
The – : ––: ––appears in the Time Search
box.
Disc menu
DVDs may offer menus that allow you to access special features.
1 Press D.MENU (DISC MENU/SET UP on
the remote control).
The disc menu is displayed.
2 Use a/b/c/d to highlight your selection, then press ENT.
3 To remove the disc menu, press
D.MENU (DISC MENU/SET UP on the remote control) again.
PBC menu
% Press DISC MENU/SET UP or RETURN on
the remote control to return to the menu
screen. Menu settings and operating procedures may differ. Follow the instructions
on the each menu screen.
# You also may set PBC to On under setup. See
page 29.
DVD
VCD
3 Within 10 seconds, use the number buttons to enter the required start time.
Enter hours, minutes, and seconds from left to
right in the box.
4 Within 10 seconds, press ENT to confirm the start time.
Playback starts from the selected time on the
disc.
# If you enter an invalid time, playback will continue from the current point.
Note
On a Video CD with PBC, you must set PBC to
Off on the setup menu. Refer to PBC on page
29.
34
En
Camera angle
If the disc contains scenes recorded at different camera angles, you can change to a different camera angle during playback.
% Press ANGLE repeatedly on the remote
control during playback to select a desired
angle.
The number of the current angle appears on
the display.
DVD
Page 35

DVD/VCD operation
Section
10
English
Changing the audio
language
% Press AUDIO repeatedly on the remote
control during playback to hear a different
audio language.
DVD
Changing the audio
channel
% Press AUDIO repeatedly on the remote
control during playback to hear a different
audio channel (STEREO, Left or Right).
Subtitles
% Press SUB TITLE on the remote control
repeatedly during playback to see the different subtitle languages.
Note
If the icon
on the disc.
VCD
DVD
appears, the feature is not available
Note
The zoom function may not work for some discs.
Zoom
The zoom function allows you to enlarge the
video image.
% Press ZOOM repeatedly during playback or in the pause mode to enlarge the
image.
DVD
!
!
# You can move through the zoomed picture
using a/b/c/d.
: 100%—400%—1600%
VCD
: 100%—400%
En
35
Page 36

Section
11
Photo operation
JPEG/TIFF disc compatibility
with this player is limited
as follows:
! Depending upon the size and the number
of JPEG/TIFF files, it could take a long time
for this unit to read the disc’ s contents. If
you do not see an on-screen display after
several minutes, some of the files may be
too large — reduce the resolution of the
JPEG/TIFF files to less than 2M pixels as
2 760 × 2 048 pixels and burn another disc.
! The total number of files on the disc should
be less than 3 000.
! Some discs may be incompatible due to a
different recording format or the condition
of disc.
! Ensure that all the selected files have the
.jpg or .tiff extensions when copying into
the disc.
! If the files have .jpe or .jpeg extensions,
please rename them as .jpg file.
! File names without .jpg or .tiff extension
will not be able to be read by this unit. Even
though the files are shown as JPEG or TIFF
image files on the computer.
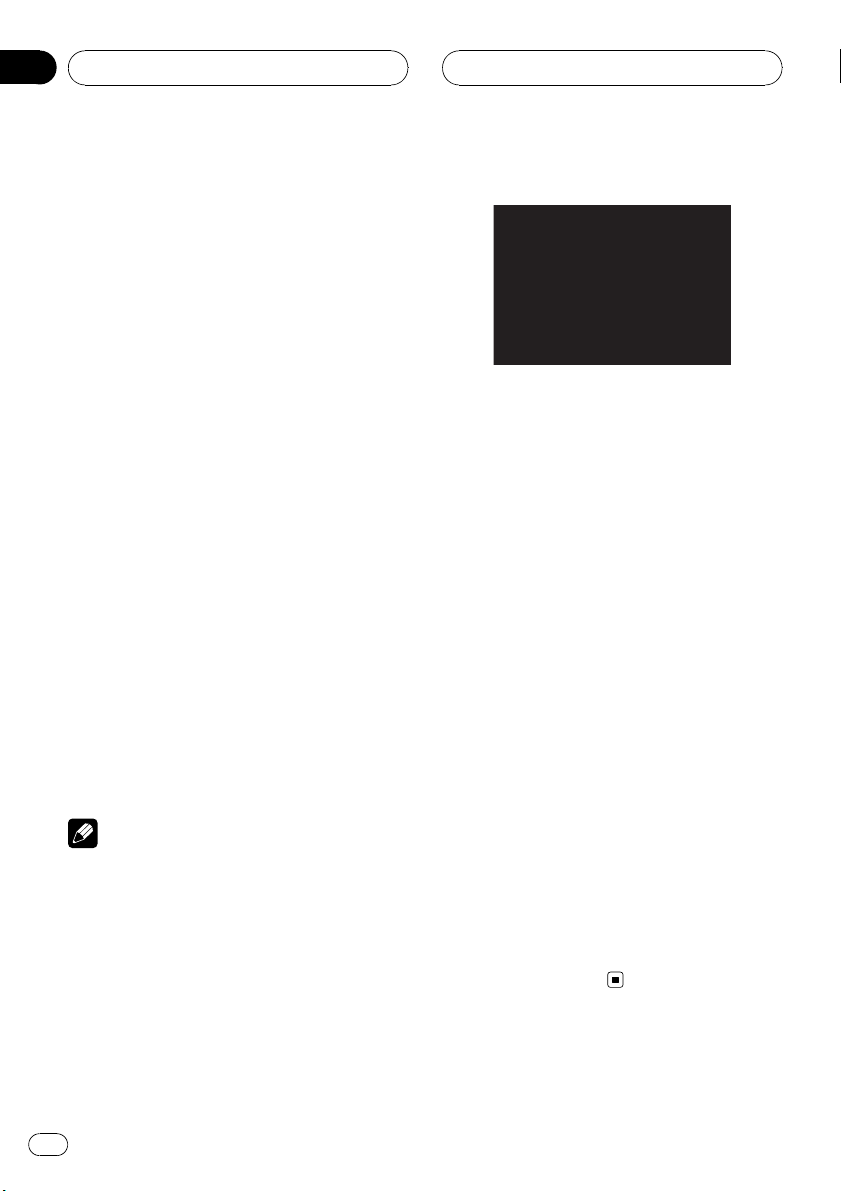
Viewing slide shows
This unit can play discs with JPEG or TIFF files.
1 Insert a disc in the unit.
For a disc that includes only photo files,
READING appears on the display window, and
slide show starts automatically.
2 Press DISPLAY to show or hide the help
bar while viewing the slide show.
3 Press D.MENU (DISC MENU/SET UP or
STOPgon the remote control) to return to
the menu screen.
1
2
5
6
7
8
1
2
5
6
7
8
1 Current file number/Total file number
2 Previous file
3 Slide show interval time (SLOW, NORMAL,
FAST, OFF)
4 Repeat mode
5 Current folder name
6 Thumbnail image
7 Current file name
8 Resolution
9 Next file name
3
4
9
PAL
3
4
9
NTSC
36
En
Page 37

Photo operation
Section
11
English
Note
For a disc that includes audio and movie files, the
media type indicator tabs, MUSIC and MOVIE
will be displayed along with PHOTO. To play the
photo file, select PHOTO and then press ENT/d/
PAUSE (PLAYd on the remote control).
About the the media type indicator tab, refer to
Selecting a media type on page 17.
Moving to another folder
% Press a/b to select the previous or next
folder in the disc.
Moving to another file
% Press c/d to select the previous or next
file in the selected folder.
Slide show interval time
1 Press D.MENU (DISC MENU/SET UP or
STOPgon the remote control) to return to
the menu screen.
2 Press m/n on the remote control to
select the option you want to use.
It shows the slide show interval time:
FAST—OFF—SLOW—NORMAL
(FAST: 3 sec, NORMAL: 8 sec, SLOW:13
sec)
Repeat
% Press RPT (REPEAT on the remote control ) to select the option you want to use.
There are two repeat mode: ALL or FOLDER.
! ALL: Plays repeatedly on the disc.
! FOLDER: Plays repeatedly on the current
folder.
Viewing still picture
1 Press d/PAUSE (e on the remote control) during the slide show.
The player will now go into the pause mode.
# If the slide show interval time is OFF, you can-
not perform this function.
2 To return to the slide show, press d/
PAUSE again (PLAYd on the remote control).
Zoom
% While viewing images, press ZOOM to
enlarge the image (100% — 400%—1600
%).
# You can move through the zoomed picture
using a/b/c/d.
# To cancel the zoom mode, press PLAYd on
the remote control.
Note
The zoom function may not work when the size of
the file is too small.
Rotating the picture
% During watching pictures, press a/b
during showing a picture to rotate the picture clockwise or counter clockwise.
En
37
Page 38

Section
12
Movie operation
DivX®disc compatibility
with this player is limited
as follows:
! Available resolution size of the DivX file is
under 720×576 (W×H) pixel.
! The file name of the DivX subtitle is avail-
able by 25 characters.
! If the number of the screen frame is over 30
per 1 second, this unit may not operate normally.
! If the video and audio structure of recorded
file is not interleaved, either video or audio
is outputted.
Playable DivX
.avi, .divx, .div, .asf
Playable subtitle format
.srt, .smi, .ssa, .sub, .txt, .ass
Playable Codec format
DivX3, DivX4, DivX5, Xvid, MP4S
Playable Audio format
Dolby Digital, MP3
! Sampling frequency: 48 kHz (Dolby Digital),
within 8 kHz to 48 kHz (MP3)
! Bit rate: within 64 kbps to 640 kbps (Dolby
Digital), within 8 kbps to 320 kbps (MP3)
®
file
Playing a movie file
This unit can play discs with movie files.
2 Press D.MENU (DISC MENU/SET UP or
STOPgon the remote control) to return to
the menu screen.
1234
6
1 Current file number/Total file number
2 Elapsed time
3 Playback status (Pre stop eg, stop g)
4 Repeat mode
5 Previous file name
6 Current folder name
7 Current file name
8 Subtitle file name
9 Next file name
Note
For a disc that includes audio and photo files,the
media type indicator tabs, MUSIC and PHOTO
will be displayed along with MOVIE. To play the
movie file, select MOVIE and then press ENT/d/
PAUSE (PLAYd on the remote control).
About the the media type indicator tab, refer to
Selecting a media type on page 17.
5
7
8
9
1 Insert a disc in the unit.
For a disc that includes movie files or movie/
photo files, READING appears in the display
window, and playback starts automatically.
38
En
Page 39

Movie operation
Section
12
English
Playing DivX®VOD content
Some DivX VOD (video on demand) content
may only be playable a fixed number of times.
When you load a disc containing this type of
DivX VOD content, the remaining number of
plays is shown on-screen and you then have
the option of playing the disc (thereby using
up one of the remaining plays), or stopping. If
you load a disc that contains expired DivX
VOD content (for example, content that has
zero remaining plays), Rental expired is displayed.
! If your DivX VOD content allows an unlim-
ited number of plays, then you may load
the disc into your player and play the content as often as you like, and no message
will be displayed.
Important
! In order to play DivX VOD content on this unit,
you first need to register the unit with your
DivX VOD content provider. About your registration code, refer to DivX VOD on page 30.
! DivX VOD content is protected by a DRM (Di-
gital Rights Management) system. This restricts playback of content to specific,
registered devices.
Stop
1 Press g on the Pre-Stop mode.
2 To return to playback, if you press d/
PAUSE (PLAYd on the remote control), it
will be played from the beginning of the
current file.
Pause
1 Press d/PAUSE (e on the remote control) during playback.
2 To return to playback, press d/PAUSE
(PLAYd on the remote control).
Still picture and frame-byframe playback
1 Press d/PAUSE (e on the remote control) during playback.
The unit will now go into the PAUSE mode.
2 You can advance the picture frame-byframe by pressing e on the remote control
repeatedly.
Pre-Stop
1 Press g on the remote control during
playback.
Pre-Stop appears in the display window and
the movie menu appears on the screen.
2 To return to playback, if you press d/
PAUSE (PLAYd on the remote control) on
the Pre-Stop mode, it will be played from
this point you stop.
3 To return normal playback, press d/
PAUSE (PLAYd on the remote control).
Slow motion
1 Press d/PAUSE (e on the remote control) during playback.
The unit will now go into the PAUSE mode.
En
39
Page 40

Section
12
Movie operation
2 Use n on the remote control to select
the required speed:
t 1/16, t 1/8, t 1/4, or t 1/2 (forward)
3 To exit Slow Motion mode, press d/
PAUSE (PLAYd on the remote control).
Note
Slow motion playback in reverse is not possible
with movie file.
Scan
1 Press m/n on the remote control
during playback.
2 Press m/n repeatedly on the remote control to select the required speed:
m ×2, m ×4, m ×16, m ×32 (backward) or n ×2, n ×4, n ×16, n ×32
(forward)
3 To return to normal playback, press d/
PAUSE (PLAYd on the remote control).
Skip
% Press c/d (o/p on the remote con-
trol) during playback to select the next file
or to return to the beginning of the current
file.
% Press c (o on the remote control)
twice briefly to step back to the previous
file.
% To go directly to any file on the movie
menu, press SEARCH and then press the
file number you want with number buttons (0 to 9).
Repeat
All files or the folder on the disc is played repeatedly.
The default settings is All.
% To repeat all files of current folder,
press and hold RPT (REPEAT on the remote
control) during playback.
The Folder icon appears on the TV screen.
% To repeat all files of the disc, press RPT
(REPEAT on the remote control) again during playback.
The All icon appears on the TV screen.
% To repeat the current file, press RPT
(REPEAT on the remote control) during
playback.
The File icon appears on the TV screen.
Time search
The Time Search function allows you to start
playing at any chosen time on the file.
1 Press DISPLAY on the remote control
during playback.
The on-screen display appears on the screen.
The Time Search box shows the elapsed playing time of the current disc.
2 Within 10 seconds, press a/b to select
the Time Search icon in the on-screen display.
The – : ––: ––appears in the Time Search
box.
3 Within 10 seconds, use the number buttons to enter the required start time.
Enter hours, minutes, and seconds from left to
right in the box.
40
En
Page 41

Movie operation
Section
12
English
4 Within 10 seconds, press ENT to confirm the start time.
Playback starts from the selected time on the
file.
# If you enter an invalid time, playback will continue from the current point.
Changing the audio language
% Press AUDIO repeatedly on the remote
control during playback to hear a different
audio language or audio file.
Note
If the icon
on the disc.
appears, the feature is not available
Subtitles
% Press SUB TITLE on the remote control
repeatedly during playback to see the different subtitle languages.
Note
If the icon
on the disc.
appears, the feature is not available
2 Press SUB TITLE on the remote control
to select another character set until the
subtitle is displayed properly.
Number Character set
CP1250 East european latin
CP1251 Cyrillic
CP1252 West european latin
CP1253 Greek
CP1254 Turkish
Notes
! If the subtitle setup menu does not have the
DivX subtitle language that you are going to
play, the subtitle language may not be displayed properly.
! If you select a character set for DivX subtitle,
the setting is also applied to MP3 tag and
WMA tag.
Notice for displaying the
DivX subtitle
If the subtitle does not display properly during
playback, please follow the steps below.
1 Press and hold SUB TITLE on the remote
control for about three seconds.
The number of character set will appear.
En
41
Page 42

Section
13
AUX operation
Playing an auxiliary
equipment
Before operating the auxiliary equipment using
the following procedure, select the external
input correctly. Refer to AUX (Auxiliary) ON/
OFF on page 19.
You can connect auxiliary equipment to this
unit.
1 Connect the auxiliary equipment to the
auxiliary input on the unit.
AUX input jack (3.5 mm stereo jack)
Auxiliary equipment (MP3 player, etc.)
2 Press SRC to select the AUX IN.
AUX IN appears in the display.
3 Turn on the connected auxiliary equipment and start playing the source.
4 Adjust the volume.
Note
If the input level of the auxiliary equipment connected to the AUX input jack is not high enough,
adjust the input level properly. Refer to AUX
(Auxiliary) 0 dB/+6 dB on page 20.
42
En
Page 43

Installation
Section
14
English
Important
! Check all connections and systems before
final installation.
! Do not use unauthorized parts. Use of un-
authorized parts may cause malfunctions.
! Consult your dealer if installation requires dril-
ling of holes or other modifications to the vehicle.
! Do not install this unit where :
— it may interfere with operation of the vehi-
cle.
— it may cause injury to a passenger as a re-
sult of a sudden stop.
! The semiconductor laser will be damaged if it
overheats. Install this unit away from hot
places such as near the heater outlet.
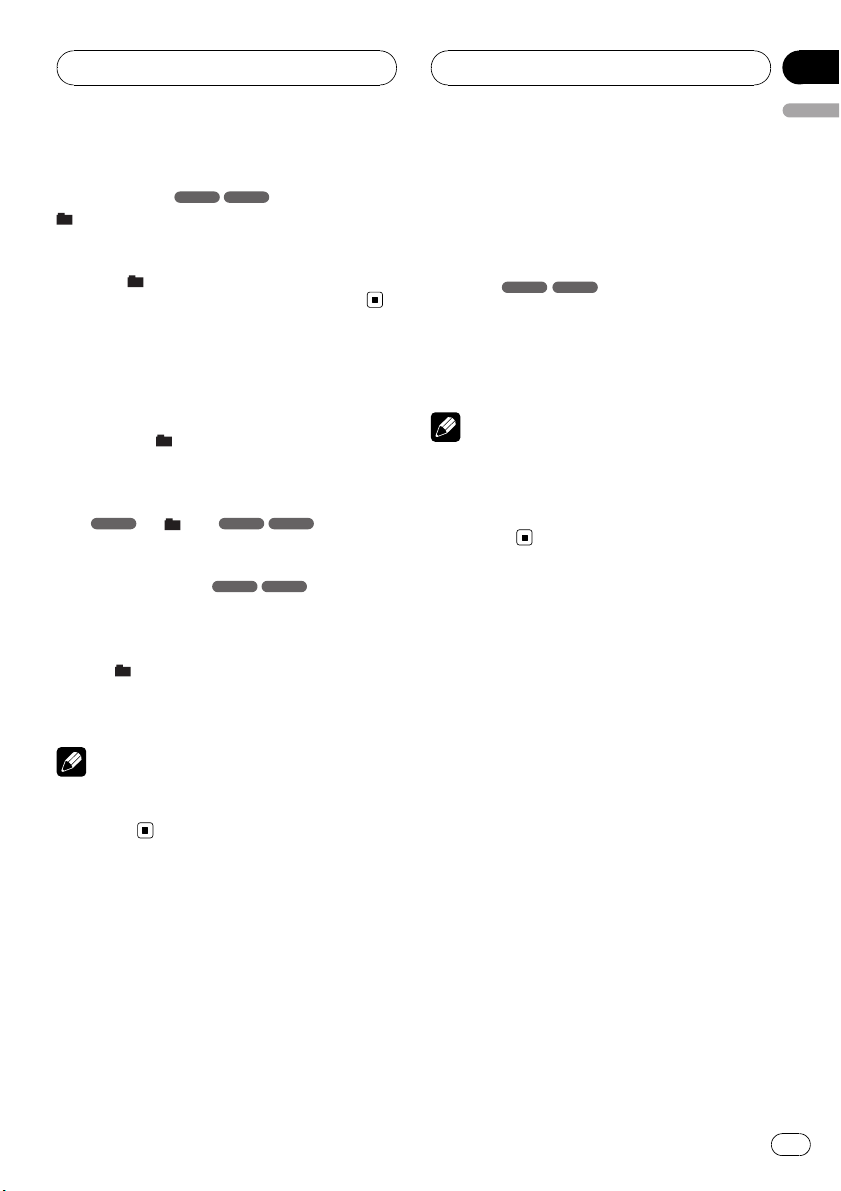
! Optimum performance is obtained when the
unit is installed at an angle of less than 30°.
! The cords must not cover up the area shown
in the figure below. This is necessary to allow
the amplifires to radiate freely.
Do not close this area.
DIN Front-mount
Installation with the rubber bush
Dashboard
1 Insert the mounting sleeve into the
dashboard.
2 Secure the mounting sleeve by using a
screwdriver to bend the triangular metal
tabs (90°) into place.
! To install more securely, bend the quadran-
gular tabs as necessary.
3 Install the unit as illustrated.
Removing the unit
1 Extend top and bottom of the trim ring
outwards to remove the trim ring. (When
reattaching the trim ring, point the side
with a groove downwards and attach it.)
! It becomes easy to remove the trim ring if
the control panel is released.
Mounting sleeve
Rubber bush
Screw
DIN front/rear mount
This unit can be properly installed either from
“Front” (conventional DIN front-mount) or
“Rear” (DIN rear-mount installation, utilizing
threaded screw holes at the sides of unit chassis). For details, refer to the following installation methods.
Trim ring
En
43
Page 44

Section
14
Installation
2 Insert the supplied extraction keys into
both sides of the unit until they click into
place.
! Insert the extraction keys horizontally to the
unit. Otherwise, they may be stuck between
the mounting sleeve and head unit.
3 Pull the unit out of the dashboard.
DIN Rear-mount
1 Extend top and bottom of the trim ring
outwards to remove the trim ring. (When
reattaching the trim ring, point the side
with a groove downwards and attach it.)
! It becomes easy to remove the trim ring if
the control panel is released.
2 Determine the appropriate position
where the holes on the bracket and the
side of the unit match.
3 Tighten two screws on each side.
! Use either truss screws (5 mm × 6 mm) or
flush surface screws (5 mm × 6 mm), de-
pending on the shape of screw holes in the
bracket.
Screw
Mounting bracket Dashboard or console
44
Trim ring
En
Page 45

Connection
Section
15
English
Important
! This unit cannot be installed in a vehicle with-
out ACC (accessory) position on the ignition
switch.
C
C
A
O
F
N
F
O
S
T
A
R
T
O
F
N
F
O
S
T
A
R
T
ACC position No ACC position
! Use of this unit in conditions other than the
following could result in fire or malfunction.
— Vehicles with a 12-volt battery and negative
grounding.
— Speakers with 45 W (output value) and 4 W
(impedance value).
! To prevent a short-circuit, overheating or mal-
function, be sure to follow the directions
below.
— Disconnect the negative terminal of the
battery before installation.
— Secure the wiring with cable clamps or ad-
hesive tape. To protect the wiring, wrap adhesive tape around them where they lie
against metal parts.
— Place all cables away from moving parts,
such as gear shift and seat rails.
— Place all cables away from hot places,
such as near the heater outlet.
— Do not pass the yellow cable through a
hole into the engine compartment to connect to a battery.
— Cover any disconnected cable connectors
with insulating tape.
— Do not shorten any cables.
— Never cut the insulation of the power cable
of this unit in order to share the power
with other devices. Current capacity of the
cable is limited.
— Use a fuse of the rating prescribed.
— Never wire the speaker negative cable di-
rectly to ground.
— Never band together multiple speaker’s ne-
gative cables.
! Control signal is output through blue/white
cable when this unit is powered on. Connect it
to an external power amp’s system remote
control or the vehicle’s auto-antenna relay
control terminal (max. 300 mA 12 V DC). If the
vehicle is equipped with a glass antenna, connect it to the antenna booster power supply
terminal.
! Never connect blue/white cable to external
power amp’s power terminal. Also, never connect it to the power terminal of the auto antenna. Otherwise, battery drain or malfunction
may result.
! Black cable is ground. This cable and other
product’s ground cable (especially, high-current products such as power amp) must be
wired separately. Otherwise, fire or malfunction may result if they are accidentally detached.
Cord function may differ according to the product, even if cord color is the same. When connecting this system, be sure to check all
manuals and connect cords correctly.
En
45
Page 46

Section
15
Connection
Connecting to a car
Before connecting, make sure that the ignition
switch is set to OFF and remove the battery *
terminal to avoid short circuits.
Connecting with the ISO connector
E
15 cm
A
15 cm
Fuse (10 A)
B
1
357
2
468
1
357
2
468
To Speaker
To Vehicle
From antenna
Pin and the function of the ISO
connector
To Speaker
1 Rear right +
2 Rear right *
3 Front right +
4 Front right *
5 Front left +
6 Front left *
7 Rear left +
8 Rear left *
To Vehicle
1 Not used.
2 Not used.
3 Phone mute
4 Back up
5 System remote control
6 Illumination
7 Accessory
8 Chassis ground
46
En
Wired remote input
Hard-wired remote control adaptor can be
connected (sold separately).
To Speaker
1 Violet
Rear right+
2 Violet/black
Rear right*
Page 47

Connection
3 Gray
Front right+
4 Gray/black
Front right*
5 White
Front left+
6 White/black
Front left*
7 Green
Rear left+
8 Green/black
Rear left*
Attention
The connector wiring may vary depending on
the car manufacturer, even when ISO connectors are used. We recommend to check the
car’s wiring provision before connecting the
car stereo. Please pay particular attention to
pin 5, where a misconnection might cause damage to the car or radio. Take special care
when installing into ’98 or later VW/Audi/
Skoda/Seat models as there may be a 12 V connection on Pin 5, which could damage the car
stereo or into Ford from ’97 or later, with an
ISO connector, on which damage to the car’s
microcomputers is possible if misconnected.
Use of ISO connector adapters available on the
market may facilitate installation.
Section
15
English
En
47
Page 48

Section
15
Connection
Connecting to auxiliary equipment (Optional)
Connect the AUDIO OUTPUT jack of this
unit to the AUDIO INPUT jack of the auxiliary equipment.
Rear left
Rear right
Subwoofer left
Subwoofer right
48
VIDEO OUTPUT
En
Page 49

Connection
! VIDEO OUTPUT: Connect the VIDEO OUT-
PUTconnector of this unit to the VIDEO
INPUT connector of the monitor.
Section
15
English
En
49
Page 50

Appendix
Additional Information
Troubleshooting
Symptom Cause Action
Power doesn’t turn on.
The unit doesn’t operate.
The unit does not operate correctly even when the appropriate
remote control buttons are
pressed.
Playback is not possible. The disc is dirty. Clean disc.
No sound is heard.
The volume level will not rise.
The icon
eration is not possible.
The picture stops (pauses) and
the unit cannot be operated.
There’s no sound. The volume level is low. Adjust the volume.
There’s audio and video skip-
ping.
The picture is stretched, the as-
pect is incorrect.
is displayed, and op-
Leads and connectors are not properly connected.
The fuse is blown. Rectify the problem that caused the fuse to
Noise and other factors are causing
the built-in microprocessor to operate incorrectly.
Battery power is low. Load new battery.
Some operations with certain discs
are prohibited.
The loaded disc is of a type this unit
cannot play.
Cables are not connected correctly. Connect the cables correctly.
The operation is prohibited for the
disc.
The operation is not compatible
with the disc’s organization.
Reading of data has become impossible during playback.
This unit is not firmly secured. Secure this unit firmly.
The aspect setting is incorrect for
the display.
Confirm once more that all connections are
correct.
blow, and then replace it. Be very sure to install the correct fuse with the same rate.
Turn the unit off and then on.
Check with another disc.
Check what type the disc.
This operation is not possible.
This operation is not possible.
After pressing g once, start playback once
more.
Select the appropriate setting for your display.
50
En
Page 51

Additional Information
Appendix
English
Handling guideline of discs
and player
! Use only conventional, fully circular discs.
Do not use shaped discs.
! Use 12-cm disc. Do not use 8-cm disc or an
adapter for 8-cm disc.
! Do not insert anything other than a disc
into the disc loading slot. Discs which can
be played back are listed on Types of Play-
able Discs on page 8.
! Do not use cracked, chipped, warped, or
otherwise damaged discs as they may damage the player.
! Do not touch the recorded surface of the
discs.
! Store discs in their cases when not in use.
! Avoid leaving discs in excessively hot envir-
onments including under direct sunlight.
! Do not attach labels, write on or apply che-
micals to the surface of the discs.
! To clean a disc, wipe the disc with a soft
cloth outward from the center.
! Condensation may temporarily impair the
player’s performance. Leave it to adjust to
the warmer temperature for about one
hour. Also, wipe any dump discs with a soft
cloth.
! Playback of discs may not be possible be-
cause of disc characteristics, disc format,
recorded application, playback environment, storage conditions and so on.
! Road shocks may interrupt disc playback.
! Read the precautions with discs before
using them.
DVD discs
! With some DVD video discs, it may not be
possible to use certain functions.
! It may not be possible to play back some
DVD video discs.
! It is not possible to play back DVD-ROM/
DVD-RAM discs.
DVD-R/DVD-RW discs
! Unfinalized DVD-R/-RW discs which have
been recorded with the Video format (video
mode) cannot be played back.
! For more information about recording
mode, please contact manufacture of DVD
recorder or application.
AVCHD recorded discs
! This unit is not compatible with discs re-
corded in AVCHD (Advanced Video Codec
High Definition) format. Do not insert
AVCHD discs. If inserted, the disc may not
be ejected.
CD-R/CD-RW discs
! When CD-R/CD-RW discs are used, play-
back is possible only for discs which have
been finalized.
! It may not be possible to play back CD-R/
CD-RW discs recorded on a music CD recorder or a personal computer because of
disc characteristics, scratches or dirt on
the disc, or dirt, condensation, etc., on the
lens of this unit.
En
51
Page 52

Appendix
Additional Information
! Playback of discs recorded on a personal
computer may not be possible, depending
on the application settings and the environment. Please record with the correct format. (For details, contact the manufacturer
of the application.)
! Playback of CD-R/CD-RW discs may be-
come impossible in case of direct exposure
to sunlight, high temperatures, or the storage conditions in the vehicle.
! Titles and other text information recorded
on a CD-R/CD-RW disc may not be displayed by this unit (in the case of audio
data (CD-DA)).
! Read the precautions with CD -R/CD-RW
discs before using them.
Dual Discs
! Dual Discs are two-sided discs that have a
recordable CD for audio on one side and a
recordable DVD for video on the other.
! Playback of the DVD side is possible with
this unit. However, since the CD side of
Dual Discs is not physically compatible
with the general CD standard, it may not be
possible to play the CD side with this unit.
! Frequent loading and ejecting of a Dual
Disc may result in scratches on the disc.
Serious scratches can lead to playback problems on this unit. In some cases, a Dual
Disc may become stuck in the disc loading
slot and will not eject. To prevent this, we
recommend you refrain from using Dual
Disc with this unit.
! Please refer to the information from the
disc manufacturer for more detailed information about Dual Discs.
Compressed audio files on
the disc
! Depending on the version of Windows
Media Player used to encode WMA files,
album names and other text information
may not be correctly displayed.
! There may be a slight delay when starting
playback of audio files encoded with image
data.
! ISO 9660 Level 1 and 2 compliant. Romeo
and Joliet file systems are both compatible
with this player.
! Multi-session playback is possible.
! Compressed audio files are not compatible
with packet write data transfer.
! Only 64 characters from the beginning can
be displayed as a file name (including the
extension such as .wma or .mp3) or a folder
name.
! Folder selection sequence or other opera-
tion may be altered depending on the encoding or writing software.
! Regardless of the length of blank section
between the songs of original recording,
compressed audio discs will play with a
short pause between songs.
! File extensions such as .wma or .mp3 must
be used properly.
52
En
Page 53

Additional Information
Appendix
English
Example of a hierarchy
: Folder
: Compressed audio file
Level 1 Level 2 Level 3 Level 4
! This unit assigns folder numbers. The user
cannot assign folder numbers.
! It is possible to play back up to 251 folders
on one disc.
! It is possible to play back up to 3 000 files
on one disc.
DivX video files
! Depending on the file information composi-
tion such as the number of audio stream,
there may be a slight delay in the start of
playback on discs.
! Some special operation may be prohibited
because of the composition of DivX files.
! DivX files downloaded only from DivX part-
ner site are guarantee of proper operation.
Unauthorized DivX file may not operate
properly.
! DRM rental file cannot be operated until
starting playing back.
! DivX VOD file playback requires ID code of
this unit to DivX VOD provider. About ID
code, refer to DivX VOD on page 30.
! File extensions such as .avi, .divx, .div, .xvid
or .asf must be used properly.
! For more details about DivX, visit the follow-
ing site:
http://www.divx.com/
En
53
Page 54

Appendix
Additional Information
Language code list
Enter the appropriate code number for the initial settings Disc Audio, SUBTITLE and/or
Menu (See the page 26).
Language and the code Language and the code Language and the code Language and the code
Abkhazian 6566 Fiji 7074 Lingala 7678 Singhalese 8373
Afar 6565 Finnish 7073 Lithuanian 7684 Slovak 8375
Afrikaans 6570 French 7082 Macedonian 7775 Slovenian 8376
Albanian 8381 Frisian 7089 Malagasy 7771 Somali 8379
Ameharic 6577 Galician 7176 Malay 7783 Spanish 6983
Arabic 6582 Georgian 7565 Malayalam 7776 Sudanese 8385
Armenian 7289 German 6869 Maltese 7784 Swahili 8387
Assamese 6583 Greek 6976 Maori 7773 Swedish 8386
Aymara 6588 Greenlandic 7576 Marathi 7782 Tagalog 8476
Azerbaijani 6590 Guarani 7178 Moldavian 7779 Tajik 8471
Bashkir 6665 Gujarati 7185 Mongolian 7778 Tamil 8465
Basque 6985 Hausa 7265 Nauru 7865 Tatar 8484
Bengali; Bangla 6678 Hebrew 7387 Nepali 7869 Telugu 8469
Bhutani 6890 Hindi 7273 Norwegian 7879 Thai 8472
Bihari 6672 Hungarian 7285 Oriya 7982 Tibetan 6679
Breton 6682 Icelandic 7383 Panjabi 8065 Tigrinya 8473
Bulgarian 6671 Indonesian 7378 Pashto, Pushto 8083 Ton g a 8479
Burmese 7789 Interlingua 7365 Persian 7065 Turkish 8482
Byelorussian 6669 Irish 7165 Polish 8076 Turkmen 8475
Cambodian 7577 Italian 7384 Portuguese 8084 Twi 8487
Catalan 6765 Japanese 7465 Quechua 8185 Ukrainian 8575
Chinese 9072 Javanese 7487 Rhaeto-Romance 8277 Urdu 8582
Corsican 6779 Kannada 7578 Rumanian 8279 Uzbek 8590
Croatian 7282 Kashmiri 7583 Russian 8285 Vietnamese 8673
Czech 6783 Kazakh 7575 Samoan 8377 Volapük 8679
Danish 6865 Kirghiz 7589 Sanskrit 8365 Welsh 6789
Dutch 7876 Korean 7579 Scots Gaelic 7168 Wolof 8779
English 6978 Kurdish 7585 Serbian 8382 Xhosa 8872
Esperanto 6979 Laothian 7679 Serbo-Croatian 8372 Yiddish 7473
Estonian 6984 Latin 7665 Shona 8378 Yoruba 8979
Faroese 7079 Latvian, Lettish 7686 Sindhi 8368 Zulu 9085
54
En
Page 55

Additional Information
Area code list
Enter the appropriate code number for the initial setting Area Code (See the page 29).
Area and the code Area and the code Area and the code Area and the code
Afghanistan AF Ethiopia ET Malaysia MY Saudi Arabia SA
Argentina AR Fiji FJ Maldives MV Senegal SN
Australia AU Finland FI Mexico MX Singapore SG
Austria AT France FR Monaco MC Slovak Republic SK
Belgium BE Germany DE Mongolia MN Slovenia SI
Bhutan BT Great Britain GB Morocco MA South Africa ZA
Bolivia BO Greece GR Nepal NP South Korea KR
Brazil BR Greenland GL Netherlands NL Spain ES
Cambodia KH
Canada CA Hong Kong HK New Zealand NZ Sweden SE
Chile CL Hungary HU Nigeria NG Switzerland CH
China CN India IN Norway NO Taiwan TW
Colombia CO Indonesia ID Oman OM Thailand TH
Congo CG Israel IL Pakistan PK Turkey TR
Costa Rica CR Italy IT Panama PA Uganda UG
Croatia HR Jamaica JM Paraguay PY Ukraine UA
Czech Republic CZ Japan JP Philippines PH United States US
Denmark DK Kenya KE Poland PL Uruguay UY
Ecuador EC Kuwait KW Portugal PT Uzbekistan UZ
Egypt EG Libya LY Romania RO Vietnam VN
El Salvador SV Luxembo urg LU Russian Federation RU Zimbabwe ZW
Heard and McDonald Islands HM
Netherlands Antilles AN Sri Lanka LK
Appendix
English
En
55
Page 56

Appendix
Additional Information
Specifications
General
Rated power source ............... 14.4 V DC
Grounding system ................... Negative type
Max. current consumption
..................................................... 10.0 A
Dimensions (W × H × D):
DIN
Chassis ..................... 178 × 50 × 169 mm
Nose ........................... 188 × 58 × 22 mm
D
Chassis ..................... 178 × 50 × 177 mm
Nose ........................... 171 × 46 × 14 mm
Weight .......................................... 1.7 kg
Audio
Maximum power output ....... 45 W × 4
Load impedance ...................... 4 W
DVD Player
Region number ........................ 2
Frequency response ............... 20 Hz to 20 kHz
Signal-to-noise ratio ............... 90 dB
Distortion .....................................0.1 % (1 kHz)
Number of channels .............. 2 (stereo)
Channel separation (1 kHz)
..................................................... 70 dB
FM tuner
Frequency range ...................... 87.5 MHz to 108 MHz
Usable sensitivity ..................... 12 dBµV
S/N ratio ....................................... 55 dB
Distortion .....................................0.7 %
Note
Specifications and the design are subject to modifications without notice due to improvements.
MW tuner
Frequency range ...................... 522 kHz to 1 620 kHz
Usable sensitivity ..................... 28 dBµV
S/N ratio ....................................... 45 dB
AUX
Frequency response ............... 20 Hz to 20 kHz
S/N ratio ....................................... 80 dB
Distortion .....................................0.05 %
Channel separation (1 kHz)
..................................................... 45 dB
Maximum input level ............. 1.2 V (35 kW)
56
En
Page 57

Contenido
Gracias por haber comprado este producto Pioneer.
Lea con detenimiento estas instrucciones sobre el funcionamiento del aparato,
para que pueda darle el mejor uso posible. Una vez que las haya leído, conserve
este manual en un lugar seguro para consultarlo en el futuro.
Español
Nota sobre seguridad
Precauciones para el manejo de discos y del
reproductor 60
INSTRUCCIONES DE SEGURIDAD
IMPORTANTES 61
Para garantizar la conducción segura del
vehículo 61
Cuando se utilice un display 62
Para evitar la descarga de la batería 62
Acerca de esta unidad 62
Visite nuestro sitio Web 62
Acerca de la visualización del símbolo
63
Código de región 63
Notas sobre el código de región 63
Tipos de discos reproducibles 63
Notas a cerca de los discos DVD y vídeo
CD 64
Características 64
– Acerca de WMA 64
– Acerca de MP3 65
– Acerca de DivX 65
Símbolos utilizados en este manual 65
Carátula
Qué es cada cosa 66
Mando a distancia
Qué es cada cosa 67
Instalación de la batería 69
Uso del mando a distancia 69
Antes del uso
Extracción de la carátula 70
Fijación de la carátula 70
Selección del sistema de TV 71
Funcionamiento básico
Encendido de la unidad 72
Apagado de la unidad 72
Introducción de un disco 72
Expulsión de un disco 72
Selección de una fuente 72
Selección de un tipo de soporte 72
Ajuste del volumen 73
Silencio 73
Comprobación del reloj 73
Sonoridad 73
Uso del EQ (ecualizador) 73
Ajuste del nivel de sonido 74
Cambio de los ajustes generales 74
Utilización de la radio
Escucha de las emisoras de radio 76
Almacenamiento de frecuencias 76
Memoria de búsquedas automáticas 76
Para explorar las emisoras
presintonizadas 77
Para sintonizar las emisoras
presintonizadas 77
Funcionamiento de RDS
Opciones de visualización de RDS 78
Función PTY (Tipo de programa) 78
Función TA (Identificación de anuncio de
tráfico) 78
Funcionamiento de CD/MP3/WMA
La compatibilidad de discos MP3/WMA con
esta unidad tiene las limitaciones
siguientes: 79
Reproducción de un CD de audio y disco
MP3/WMA 79
Pausa 80
Saltar a siguiente pista/fichero 80
Saltar a la pista/fichero anterior 80
Retorno al inicio de la pista/fichero
actual 80
Cambio a otra pista/fichero 80
Buscar 80
Buscar Intro 80
Repetir 81
Selección aleatoria 81
CD TEXT/ID3 TAG 81
57
Es
Page 58

Contenido
– Para saltar a la carpeta siguiente o
anterior
Menú SET UP (Configuración)
Language 82
– Menu Language 82
– Disc Audio/Subtitle/Menu 82
Display 83
– TV Aspect 83
– B.L.E. (Expansión del nivel de
negro) 83
Audio 83
– Dolby Digital/DTS/MPEG 83
– Control de gama dinámica (DRC) 84
Lock (Control de padres) 84
– Rating 84
– Password 85
– Si olvida su contraseña 85
– Area Code 85
Others 85
– PBC 85
– DivX VOD 86
Utilización del DVD/VCD
Visualización de la información del disco en
pantalla 87
Reproducción de un DVD y vídeo CD 87
Pre-Stop 88
Parada 88
Pausa 88
Imagen fija y reproducción cuadro a
cuadro 88
Cámara lenta 88
Cambio a otro título
Cambio a otro capítulo/pista 89
Saltar al capítulo/pista siguiente 89
Saltar al capítulo/pista anterior 89
Retorno al inicio del capítulo/pista
actual 89
Exploración 89
Repetir 90
–
MP3 WMA
DVD
- Chapter/Title/Off 90
DVD
81
88
VCD
–
- Track/All 90
Búsqueda por tiempo 90
Menú del disco
Menú PBC
Ángulo de cámara
Cambio del idioma del audio
Cambio del canal del audio
Subtítulos
VCD
DVD
DVD
91
91
DVD
91
91
VCD
DVD
91
91
Zoom 91
Visionado de fotografías
La compatibilidad JPEG/TIFF con este
reproductor tiene las limitaciones
siguientes: 92
Visualización de slideshows 92
Cambio a otra carpeta 93
Cambio a otro fichero 93
Tiempo de intervalo de slideshow 93
Repetir 93
Visualización de imágenes fijas 93
Zoom 93
Giro de la imagen 93
Funcionamiento con películas
La compatibilidad de discos DivX® con este
reproductor tiene las limitaciones
siguientes: 94
Reproducción de un fichero de película 94
Reproducción de contenido del DivX®
VOD 95
Pre-Stop 95
Parada 95
Pausa 95
Imagen fija y reproducción cuadro a
cuadro 95
Cámara lenta 96
Exploración 96
Saltar 96
Repetir 96
Búsqueda por tiempo 96
Cambio del idioma del audio 97
Subtítulos 97
58
Es
Page 59

Contenido
Nota para la visualización de subtítulos
DivX 97
Utilización de AUX
Reproducción con un equipo auxiliar 98
Instalación
Montaje delantero/posterior de DIN 99
Montaje delantero DIN 99
– Instalación en la arandela de
goma 99
– Retiro de la unidad 100
Montaje trasero DIN 100
Conexión
Conexión a un coche 102
Conexión a un equipo auxiliar
(Opcional) 104
Información adicional
Solución de problemas 105
Pautas para el manejo de discos y del
reproductor 106
Discos DVD 106
Discos DVD-R/DVD-RW 106
Discos grabados con el formato
AVCHD 106
Discos CD-R/CD-RW 107
Discos dobles 107
Archivos de audio comprimidos en el
disco 107
– Ejemplo de una jerarquía 108
Ficheros de vídeo DivX 108
Lista de códigos de idiomas 109
Lista de códigos de área 110
Especificaciones 111
Español
59
Es
Page 60

Sección
01
Nota sobre seguridad
Si desea deshacerse de este producto, no lo
mezcle con los residuos generales de su
hogar. De conformidad con la legislación vigente, existe un sistema de recogida distinto
para los productos electrónicos que requieren
un procedimiento adecuado de tratamiento,
recuperación y reciclado.
Las viviendas privadas en los estados miembros de la UE, en Suiza y Noruega pueden devolver gratuitamente sus productos
electrónicos usados en los centros de recolección previstos o bien en una tienda minorista
(si adquieren un producto similar nuevo).
En el caso de los países que no se han mencionado en el párrafo anterior, póngase en
contacto con las autoridades locales a fin de
conocer el método de eliminación correcto.
Al actuar siguiendo estas instrucciones, se
asegurará de que el producto eliminado se someta a los procesos de tratamiento, recuperación y reciclaje necesarios, evitando de este
modo efectos potencialmente negativos en el
entorno y la salud humana.
PARA REDUCIR EL RIESGO DE DESCARGAS
ELÉCTRICAS, NO RETIRE LA TAPA (O LA CUBIERTA TRASERA) NO INCLUYE NINGUNA
PIEZA EN SU INTERIOR QUE PUEDA SER REPARADA POR EL USUARIO. CONSULTE A UN
SERVICIO TÉCNICO AUTORIZADO.
El rayo con una cabeza de flecha,
dentro de un triángulo equilátero,
alerta al usuario de la presencia de
tensión eléctrica peligrosa no aislada
dentro de la caja del producto, y que
puede ser de la magnitud suficiente
para constituir un riesgo de descarga
eléctrica.
El símbolo de exclamación dentro de
un triángulo equilátero alerta al usuario de la presencia de instrucciones
de uso y mantenimiento (servicio) importantes en la información escrita
que acompaña al aparato.
Utilice el vehículo siempre de forma
segura. No se distraiga durante la
conducción, y preste en todo momento atención a las condiciones de la
carretera. No cambie los ajustes o las
funciones. Pare el vehículo de forma
segura y sin cometer infracciones
antes de realizar las operaciones citadas.
No lo utilice durante demasiadas
horas con temperaturas extremadamente bajas o altas. (-10°C a 60°C)
Para reducir el riesgo de descargas
eléctricas, no retire la tapa o la cubierta trasera de este producto. No
hay en el interior piezas que puedan
ser reparadas por el usuario. Consulte a un servicio técnico autorizado.
No permita que esta unidad entre en
contacto con líquidos, ya que ello
puede producir una descarga eléctrica. Además, el contacto con líquidos
puede causar daños en la unidad,
humo y recalentamiento.
La temperatura del exterior de la unidad puede ser extremadamente alta;
utilícela sólo después de su correcta
instalación en el vehículo.
Precauciones para el manejo
de discos y del reproductor
Un disco defectuoso o sucio introducido en la
unidad puede hacer que baje el volumen del
sonido durante la reproducción.
60
Es
Page 61

Nota sobre seguridad
Sección
01
Sujete el disco por sus bordes interiores y exteriores.
No toque la superficie del lado no etiquetado
del disco.
No pegue papel, cinta, etc. en la superficie.
No exponga el disco a la luz solar directa o a
calor excesivo.
Limpie el disco antes de su reproducción. Limpie el disco desde el centro hacia fuera con un
paño.
No utilice disolventes, como por ejemplo bencina o alcohol, para limpiar el disco.
Limpie periódicamente los contactos de la
parte trasera de la carátula con un bastoncillo
de algodón humedecido en alcohol.
Si la unidad no funciona correctamente, presione RESET con la punta de un bolígrafo o similar.
Español
RESET
INSTRUCCIONES DE
SEGURIDAD IMPORTANTES
ADVERTENCIA
! No trate de instalar o reparar el display
usted mismo. La instalación o la reparación del display por parte de personas sin
cualificación y experiencia en equipos
electrónicos y accesorios para automóviles puede ser peligrosa y puede exponerle
al riesgo de sufrir una descarga eléctrica u
otros peligros.
Para garantizar la conducción
segura del vehículo
ADVERTENCIA
! Para evitar el riesgo de accidente y la posible
violación de las leyes pertinentes, esta unidad
no debe usarse con una pantalla que sea visible para el conductor.
! Para evitar el riesgo de daños y lesiones y la
posible violación de las leyes pertinentes, esta
unidad no debe usarse con una pantalla que
sea visible para el conductor.
Es
61
Page 62

Sección
01
Nota sobre seguridad
! En algunos países o estados, puede ser ilícita
la visualización de imágenes en un display
dentro de un vehículo, incluso por otras personas que no sean el conductor. En los casos en
que resulten aplicables, estas normas deben
respetarse y no deben usarse las funciones de
DVD de esta unidad.
Cuando se utilice un display
ADVERTENCIA
NUNCA instale el display trasero en un lugar
que permita al conductor ver imágenes mientras
conduce.
Para evitar la descarga de
la batería
Asegúrese de que el motor del vehículo esté
en marcha cuando utilice esta unidad. En
caso contrario, se podría agotar la batería.
! Si se interrumpe la alimentación eléctrica
de esta unidad por una sustitución de la
batería del vehículo o por un motivo similar,
el microprocesador de la unidad vuelve a
su estado inicial. Le recomendamos que
transcriba los datos de ajuste de audio.
dad continua, no extraiga ninguna tapa ni intente acceder a la parte interna del producto.
Solicite a personal cualificado que realice el
servicio técnico.
Hay pegada una etiqueta CLASS 1 LASER
PRODUCT en la parte inferior de esta unidad.
! El CarStereo-Pass Pioneer es para usarse sólo
en Alemania.
! Conserve este manual a mano para que
pueda consultar los procedimientos de operación y las precauciones cuando sea necesario.
! Mantenga siempre el volumen lo suficiente-
mente bajo como para que pueda escuchar
los sonidos que provienen del exterior del vehículo.
! Proteja esta unidad de la humedad.
! Si se desconecta o se descarga la batería, la
memoria preajustada se borrará y deberá ser
reprogramada.
Visite nuestro sitio Web
Visítenos en el siguiente sitio:
ADVERTENCIA
No utilice la unidad con un vehículo que no cuente con la posición ACC.
Acerca de esta unidad
PRECAUCIÓN
! Este producto contiene un diodo de láser de
clase superior a 1. Para garantizar la seguri-
62
Es
! Registre su producto. Conservaremos los
datos de su compra archivados para que
pueda consultar esta información en caso
de que deba efectuar un reclamo a la compañía de seguros por pérdida o robo.
! En nuestro sitio Web ofrecemos la informa-
ción más reciente acerca de Pioneer
Corporation.
Page 63

Nota sobre seguridad
Sección
01
Acerca de la visualización
del símbolo
Si al ver un DVD intenta realizar una operación, es posible que la programación del disco
no permita hacerla. Cuando esto ocurre, la
unidad indica el botón
en la pantalla.
Código de región
Esta unidad ha sido diseñada y fabricada para
la reproducción de software de DVD con el código de región 2. Esta unidad sólo puede reproducir discos DVD con la etiqueta 2 o
ALL.
Notas sobre el código de
región
! La mayor parte de los discos DVD tienen
un globo con uno o más números claramente visible en su cubierta. Este número
debe coincidir con el código de región de
la radio DVD para automóvil; de lo contrario, no podrá reproducirse el disco.
! Si intenta reproducir un DVD con un códi-
go de región diferente al de su reproductor,
se mostrará en la pantalla el mensaje
Check Region Code.
Tipos de discos reproducibles
DVD (disco de 12 cm)
Vídeo CD (VCD) (disco de 12
cm)
CD de audio (disco de 12
cm)
Además, esta unidad reproduce DVD±R, DVD
±RW y CD-R o CD-RW con títulos de audio,
audio comprimido, ficheros de fotografías o
películas.
! Dependiendo de las condiciones del equi-
po de grabación o el propio disco CD-R/
RW (o DVD±R/±RW), algunos discos CDR/RW (o DVD±R/±RW) no se pueden reproducir en esta unidad.
! No coloque ningún sello o etiqueta en nin-
guno de los lados (el lado etiquetado o el
lado grabado) de un disco.
! No utilice CDs con forma irregular (p. ej.,
forma de corazón u octogonal). Pueden
producirse fallos de funcionamiento.
Notas
!
! En este reproductor sólo se pueden utilizar los
es una marca comercial de DVD For-
mat/Logo Licensing Corporation.
discos que tienen las marcas antes
mencionadas.
Español
63
Es
Page 64

Sección
01
Nota sobre seguridad
Notas a cerca de los discos
DVD y vídeo CD
Algunas operaciones de reproducción de los
DVDs y vídeo CDs pueden estar programadas
de forma intencionada por los fabricantes de
software.
Esta unidad reproduce DVDs y vídeo CDs de
acuerdo con los contenidos del disco diseñados por el fabricante del software y, por lo
tanto, pueden no estar disponibles algunas
funciones de reproducción o añadirse
otras.
Características
Compatibilidad Dolby Digital/DTS
! Fabricado bajo licencia de Dolby
Laboratories. “Dolby” y el símbolo de la
doble D son marcas comerciales de Dolby
Laboratories.
! “DTS” y “DTS Digital Out” son marcas regis-
tradas de DTS, Inc.
Notas
! La legislación prohíbe copiar, transmitir, mos-
trar o transmitir a través cable, exhibir en público o alquilar material protegido por
derechos de autor sin consentimiento.
! Este producto incluye la función de protec-
ción de copia desarrollada por Macrovision.
Algunos discos tienen grabadas señales de
protección de copia. Cuando se reproduzcan
las fotografías incluidas en estos discos en
una unidad, aparecerá ruido en la imagen.
! Este producto incorpora tecnología de protec-
ción de derechos de autor amparada por las
reivindicaciones de métodos de determinadas
patentes de los EE.UU. y otros derechos de
propiedad intelectual de Macrovision
Corporation y otros titulares. Esta tecnología
se debe utilizar con la autorización de
Macrovision Corporation y sólo está concebida para su uso doméstico y para otros usos limitados de visualización, salvo que
Macrovision Corporation autorice lo contrario.
Queda prohibido el desmontaje o la ingeniería
inversa.
Acerca de WMA
El logo de Windows Media™ impreso en la
caja indica que esta unidad puede reproducir
datos WMA.
WMA es la abreviatura de Windows Media
Audio, y se refiere a la tecnología de compresión de audio desarrollada por Microsoft
Corporation. Los datos WMA se pueden cifrar
con la versión 7 o posterior del Windows
Media Player.
! Windows Media y el logo de Windows son
marcas comerciales o registradas de
Microsoft Corporation en los EE.UU. y/o en
otros países.
! Esta unidad puede no funcionar correcta-
mente, dependiendo de la aplicación utilizada para codificar ficheros WMA.
64
Es
Page 65

Nota sobre seguridad
Sección
01
Acerca de MP3
La venta de este producto sólo otorga una licencia para su uso privado, no comercial. No
otorga ninguna licencia ni concede ningún
derecho a utilizar este producto en transmisiones comerciales (es decir, lucrativas) en tiempo real (terrestres, vía satélite, por cable y/o
por cualquier otro medio), transmisiones/
streaming por Internet, intranets y/u otras
redes o en otros sistemas de distribución de
contenido electrónico, como por ejemplo, aplicaciones de pago por escucha (pay-audio) o
audio bajo demanda (audio-on-demand). Se
necesita una licencia independiente para su
uso comercial. Para obtener más información,
visite
http://www.mp3licensing.com.
Acerca de DivX
DivX es un formato de vídeo digital comprimido desarrollado por el códec de vídeo DivX
DivX, Inc. Esta unidad puede reproducir ficheros de vídeo DivX grabados en discos CD-R/
RW/ROM y DVD-R/RW/ROM. Manteniendo la
misma terminología que la de DVD vídeo, los
ficheros de vídeo DivX se denominan “ Títulos”.
Cuando ponga nombres a los ficheros/títulos
de un disco CD-R/RW o DVD-R/RW antes de
grabarlos, tenga en cuenta que, de forma predeterminada, se reproducirán en orden de escritura.
Producto oficial DivX
®
Certified
Reproduce todas las versiones de vídeo DivX
(incluido DivX®6) con reproducción estándar
de ficheros de medios DivX
®
®
de
! DivX, DivX Certified y los logotipos asocia-
dos son marcas comerciales de DivX, Inc. y
se utilizan bajo licencia.
Símbolos utilizados en este
manual
Una sección cuyo título tiene uno de los símbolos siguientes es aplicable sólo al disco representado por el símbolo.
DVD
DVD
VCD
Vídeo CDs
ACD
CDs de audio
MP3
Ficheros MP3
WMA
Ficheros WMA
®
Español
65
Es
Page 66

Sección
02
Carátula
12 3 567
Qué es cada cosa
1 EQ/ LOUD
! Ecualizador (EQ)
! Sonoridad (
2 VOL/MUTE/
! Volumen (VOL)
! Silencio (MUTE)
! Apagar (
3 Ranura de discos
4 Ventana del display
5 Expulsar h
6 a/b/c/d
! Saltar/Búsqueda c/d
! Búsqueda/Sintonizar c/d
! Carpeta arriba/abajo a/b
! Seleccionar (SEL)
7 Soltar
8 Conector de entrada AUX (conector estéreo de 3,5 mm)
9 BAND
LOUD)
OFF
OFF)
4
891011121314151617181920
11 SEL/
! Seleccionar (SEL)
! Menú (
12 D.MENU
13 D.SETUP
14 SHUFFLE
15 Repetir (RPT)
16 Buscar Intro (SCAN)
17 ENT/d/PAUSE
! Reproducción/Pausa (d/PAUSE)
! Ingresar (ENT)
18 Presintonizar emisora (1 a 6)
19 Visualización (DISP)
20 Fuente (SRC)
se activa la función específica.
MENU
MENU)
Nota
indica que si se mantiene presionado el botón,
10 TA/
66
PTY
! Anuncio de tráfico (TA)
! Tipo de programa (
Es
PTY)
Page 67

Mando a distancia
Sección
03
1
6
2
3
7
8
4
9
10
5
11
Qué es cada cosa
PWR Enciende/apaga la unidad.
1
SRC Selecciona una fuente.
MUTE Silencia el volumen.
SKIP o/p
SCAN/SLOW m/n Reproducción de búsqueda hacia atrás (adelante).
2
PAUSE e
PLAY d Inicia la reproducción.
STOP g Detiene la reproducción.
3 SEARCH Selecciona una pista o fichero.
4 DISPLAY Se accede a la pantalla OSD.
Salta a la pista, capítulo o fichero siguiente (anterior).
Vuelve al inicio de la pista, capítulo o fichero actual.
Realiza una pausa temporal en la reproducción.
Presione repetidamente para una reproducción cuadro a cuadro.
Español
67
Es
Page 68

Sección
03
Mando a distancia
Botones numéricos 0 a 9
REPEAT Repite el capítulo, pista, título o fichero.
SHUFFLE Reproduce pistas o ficheros en orden aleatorio.
SCAN Reproduce los 10 primeros segundos de todas las pistas.
5
AUDIO Selecciona el idioma del audio.
SUB TITLE Selecciona un idioma de subtítulos.
ANGLE Selecciona un ángulo de cámara en el DVD, si está disponible.
ZOOM Amplía la imagen de vídeo.
TITLE Muestra el menú del título, si está disponible.
6 BAND/TAB
7 DISC MENU/SET UP
a/b/c/d (arriba/abajo/iz-
8
quierda/derecha)
9 RETURN Visualiza el menú de un vídeo CD con PBC.
10 ENTER Confirma la selección del menú.
11 VOL (ARRIBA +/ ABAJO –) Ajusta el nivel del volumen.
Selecciona los elementos numerados en el menú.
Selecciona la frecuencia de una emisora de radio guardada (1 a 6).
Selecciona tres bandas FM y MW.
Se desplaza a otro fichero en el disco que incluye varios tipos de ficheros.
Accede al menú de un disco DVD.
Accede o sale del menú de configuración.
Selecciona un elemento del menú.
68
Es
Page 69

Mando a distancia
Sección
03
Instalación de la batería
1 Extraiga la tapa de la batería con un objeto afi-
lado, por ejemplo un bolígrafo.
2 Coloque la batería en el soporte.
3 Vuelva a poner el soporte de la batería en su
posición original.
ADVERTENCIA
Mantenga la batería fuera del alcance de los
niños. En caso de ingestión accidental de la batería, consulte a un médico de inmediato.
PRECAUCIÓN
! Utilice una sola batería de litio CR2025 (3 V).
! Extraiga la batería si no piensa utilizar el
mando a distancia durante un mes o más
tiempo.
! No deje el producto en un lugar con tempera-
turas elevadas o humedad.
! No manipule la batería con herramientas me-
tálicas.
! No guarde la batería con materiales metáli-
cos.
! En el caso de que se produzca una fuga de
fluido de la batería, limpie completamente el
mando a distancia e instale una batería
nueva.
! Para deshacerse de las baterías usadas, cum-
pla con los reglamentos gubernamentales o
las normas ambientales pertinentes de las
instituciones públicas, aplicables en su país/
zona.
Español
Uso del mando a distancia
Apunte el mando a distancia hacia la carátula
para hacer funcionar la unidad.
Importante
! No guarde el mando a distancia en lugares ex-
puestos a altas temperaturas o a la luz solar
directa.
! No deje caer el mando a distancia al suelo, ya
que puede quedar atascado debajo del freno
o del acelerador.
69
Es
Page 70

Sección
04
Antes del uso
Extracción de la carátula
Puede extraer la carátula cuando abandone el
vehículo. Al extraer o colocar la carátula,
tenga cuidado de no dañar los conectores de
la parte trasera de la carátula y el soporte.
1 Presione
la.
2 Presione la carátula hacia la derecha.
3 Tire de la carátula.
4 Coloque la carátula extraíble en el estuche.
(Soltar) para abrir la carátu-
Fijación de la carátula
1 Alinee el lado derecho de la carátula
con el tope.
2 Presione el lado derecho de la carátula
hasta oír un clic.
2
1
Notas
! Para soltar o colocar la carátula, no presione
sobre el display o los botones de control.
! Los botones de control podrían fallar si no se
coloca correctamente la carátula. Si esto ocurre, presione ligeramente la carátula.
! No deje la carátula expuesta a temperaturas
elevadas o a la luz solar directa.
! No deje que se caiga al suelo ni la someta a
impactos fuertes.
! No permita que agentes volátiles, como la
bencina, disolventes o insecticidas entren en
contacto con la superficie de la carátula.
! No intente desmontar la carátula.
Notas
! La carátula es una pieza de precisión y puede
sufrir daños si se somete a golpes o sacudidas. Por esa razón, guárdela en su estuche
cuando la retire.
! No toque los conectores directamente con los
dedos o con cualquier objeto metálico.
70
Es
Page 71

Antes del uso
Selección del sistema de TV
Debe seleccionar el modo de sistema apropiado para su sistema de TV.
Cuando el sistema seleccionado no coincida
con el sistema de su TV, quizás no se muestre
la imagen de color normal.
! AUTO: Seleccionar cuando la unidad esté
conectada a un sistema de TV múltiple.
! NTSC: Seleccionar cuando la unidad esté
conectada a TV NTSC.
! PAL: Seleccionar cuando la unidad esté co-
nectada a TV PAL.
1 Presione SRC para seleccionar el CD/
DVD.
2 Presione EJECT.
Verifique que no haya ningún disco cargado
en el reproductor incorporado (se muestra
NO DISC).
Sección
04
Español
3 Mantenga presionado ENT/d/PAUSE (e
en el mando a distancia) durante más de
cinco segundos.
Cada vez que mantenga presionado el botón
durante más de cinco segundos, el sistema de
TV cambia su ajuste de la siguiente manera:
PAL —AUTO—NTSC
71
Es
Page 72

Sección
05
Funcionamiento básico
Encendido de la unidad
% Presione cualquier botón (PWR en el
mando a distancia) que no sea el de expulsar h y suelte
Nota
Al introducir el disco en la ranura, se enciende el
aparato.
.
Apagado de la unidad
% Mantenga presionado OFF (PWR en el
mando a distancia).
Introducción de un disco
% Introduce el disco y comienza la reproducción automáticamente.
Notas
! El reproductor de DVD reproduce un disco es-
tándar de 12 cm de una vez. No es posible reproducir un disco de 8 cm en esta unidad. El
disco reproducible y el adaptador se indican
en la tabla siguiente.
Expulsión de un disco
% Presione h. El disco se expulsa automá-
ticamente de la ranura de carga.
Cuando se expulsa el disco al presionar h durante la reproducción, se cargará automáticamente después de 10 segundos, si no se retira
de la unidad.
Selección de una fuente
% Presione SRC para seleccionar una fuente.
Presione SRC repetidamente para cambiar
entre las siguientes fuentes:
Sintonizador—CD/DVD—AUX (AUX IN)
Selección de un tipo de
soporte
Cuando seleccione CD/DVD como fuente,
puede activar el menú MUSIC, PHOTO y
MOVIE en un disco con ficheros de audio, fotografías o películas.
Cada menú tiene una pestaña indicadora del
tipo de soporte, que muestra el soporte seleccionado.
Disco de
12 cm
! No coloque ningún otro elemento que no sea
un disco en la ranura de carga de discos. Los
discos que pueden reproducirse se describen
en Tipos de discos reproducibles en la página
63.
72
Es
Disco de 8cmAdaptador de
disco de 8 cm
Ö ——
1
1 Pestaña de indicación de tipo de medio
Page 73

Funcionamiento básico
Sección
05
En un disco que sólo tenga ficheros de audio,
se mostrará MUSIC. Si el disco tiene ficheros
de fotografías o películas, se visualiza la pestaña PHOTO olaMOVIE.
% Presione BAND (BAND/TAB en el
mando a distancia) para seleccionar otros
tipos de soporte.
Ajuste del volumen
% Gire VOL (presione VOL +/– en el
mando a distancia) para ajustar el volumen
del sonido.
Nota
Cuando se apaga la unidad, se memoriza automáticamente el nivel de volumen actual. Cuando
encienda la unidad de nuevo, funcionará con el
nivel de volumen memorizado.
Silencio
1 Presione MUTE para silenciar el sonido.
2 Para cancelar el silenciamiento, vuelva
a presionar MUTE.
Comprobación del reloj
% Puede ver el reloj presionando DISP en
el mando a distancia.
Nota
Si la unidad recibe transmisión RDS con información CT (hora del reloj), se mostrará automáticamente el reloj en la ventana del display. A menos
que NO CLOCK aparezca en la ventana del
display.
Español
Sonoridad
% Mantenga presionado EQ/LOUD para
aumentar el efecto de agudos, graves y surround.
Sonoridad desactivada (sin display)—sonoridad activada (se enciende LOUD)
Uso del EQ (ecualizador)
% Presione EQ/LOUD repetidamente.
El indicador se enciende en el orden siguiente.
POP—CLASSIC—ROCK—JAZZ—VOCAL—
SALSA—SAMBA—USER1—USER2—apaga-
do (sin display)
! POP: Optimizado para R&B, Soul y música
Country.
! CLASSIC: Optimizado para música orques-
tal.
! ROCK: Optimizado paro rock duro y heavy
metal.
! JAZZ: Sonido dulce y suave.
! VOCAL: Realismo con una potente calidad
de sonido.
! SALSA: Reproduce la acústica de música
salsa.
! SAMBA: Reproduce la acústica de música
samba.
! USER1: Utilice el menú para ajustar el nivel
de sonido deseado.
! USER2: Utilice el menú para ajustar el nivel
de sonido deseado.
Puede ajustar cada nivel de sonido a sus
preferencias. Cuando haya seleccionado un
modo USER y realizado un ajuste, se guardará automáticamente para el modo USER
que esté seleccionado en ese momento.
73
Es
Page 74

Sección
05
Funcionamiento básico
Consulte Ajuste del nivel de sonido.
Ajuste del nivel de sonido
1 Presione SEL/MENU repetidamente
para seleccionar el modo que desea ajustar
entre volumen, graves, medios, agudos,
balance y fader.
El indicador se enciende en el orden siguiente.
VOL — BAS — MID — TRB — BAL — FAD
2 Gire VOL (presione VOL +/– en el
mando a distancia) para ajustar la calidad
del sonido.
Indicación
VOL
BAS
MID
TRB
BAL
FAD
Gire a la derecha
Aumenta el nivel
de volumen.
Aumenta el nivel
de graves.
Aumenta el nivel
de medios.
Aumenta el nivel
de agudos.
Baja el nivel del
(los) altavoz(es) izquierdo(s).
Baja el nivel del
(los) altavoz(es)
delantero(s).
Nota
Cuando EQ o LOUD se ajustan en Desactivado,
se pueden realizar ajustes del nivel de sonido
(BAS, MID, TRB).
Gire a la izquierda
Baja el nivel de volumen.
Baja el nivel de
graves.
Baja el nivel de
medios.
Baja el nivel de
agudos.
Baja el nivel del
(los) altavoz(es)
derecho(s).
Baja el nivel del
(los) altavoz(es)
trasero(s).
Cambio de los ajustes
generales
1 Mantenga presionado SEL/MENU hasta
que se muestre un elemento de menú.
2 Presione SEL/MENU repetidamente
para desplazarse entre los menús.
AF ON—REG ON—TA ALARM—PI SOUND—
AUX ON—AUX 0DB—DEMO OFF—
BEEP 2ND
3 Gire VOL hacia la derecha o hacia la izquierda para seleccionar uno de los ajustes.
El valor mostrado en la ventana del display se
ajusta y desaparece automáticamente después de unos seis segundos.
! AF (Frecuencia Alternativa) ON/OFF
Cuando se reduce la calidad, el sintonizador cambia automáticamente a otra emisora de la red, transmitiendo una mejor
calidad de recepción, utilizando los códigos
PI y AF.
AF ON: Mientras conduce, podrá continuar
escuchando el mismo programa sin interrupciones.
AF OFF: Sólo se mostrará el nombre de la
emisora. Si la recepción es de baja calidad,
no puede utilizarse ninguna emisora alternativa.
! REG (Región) ON/OFF
REG ON: La unidad cambia a otra emisora,
en la misma red, emitiendo el mismo programa cuando la señal recibida de la emisora actual pierde fuerza.
REG OFF: La unidad cambia a otra emisora,
en la misma red, cuando la señal recibida
de la emisora actual pierde fuerza. (De este
modo, el programa puede ser diferente del
que se está recibiendo.)
! TA (Anuncio de tráfico) ALARM/SEEK
TA ALARM: Cuando una emisora que se
acaba de sintonizar no tenga información
TP durante cinco segundos, se emitirá un
doble aviso sonoro.
74
Es
Page 75

Funcionamiento básico
Sección
05
TA SEEK: Cuando la emisora sintonizada
no recibe información TP durante cinco segundos, el receptor resintoniza a la emisora
siguiente.
! PI (Identificación de programa)
SOUND/MUTE
PI SOUND: Si el sonido de una emisora con
PI diferente se oye de forma intermitente, el
receptor silencia el sonido después de un
segundo.
PI MUTE: Si el sonido de una emisora con
PI diferente se oye de forma intermitente, el
receptor silencia el sonido en ese mismo
momento.
! AUX (Auxiliar) ON/OFF
Se puede utilizar equipo auxiliar con esta
unidad. Active el ajuste auxiliar si utiliza
equipo auxiliar conectado a esta unidad.
AUX ON: Cuando se utiliza un equipo auxiliar.
AUX OFF: Cuando no se utiliza un equipo
auxiliar.
! AUX (Auxiliar) 0 dB/+6 dB
Puede ajustar del nivel de volumen de cada
fuente para evitar cambios radicales en el
volumen cuando se cambia entre las fuentes.
Es posible seleccionar 0DB ó +6DB.
Si el nivel de entrada del componente conectado no es lo bastante alto, aumente el
nivel de entrada correctamente. Si no ajusta el nivel de entrada de línea, puede verse
sorprendido por un sonido elevado cuando
cambie la fuente del componente externo a
otra fuente.
! DEMO ON/OFF
Puede cambiar la indicación inicial del display a la información de nombre (nombre
de función, nombre de EQ, etc...) mientras
escucha una fuente.
DEMO ON: Muestra el nombre de la información mientras escucha una fuente.
DEMO OFF: Cancela la función.
! BEEP 2ND/ALL
Ajusta el sonido del aviso sonoro cada vez
que se presiona un botón.
BEEP 2ND: El aviso sonoro se genera cuando se presiona una tecla el tiempo suficiente (un segundo).
BEEP ALL: El aviso sonoro se genera cuan-
do se presiona cualquier tecla.
# También se puede seleccionar uno de los
ajustes presionando VOL+/– en el mando a
distancia.
Español
75
Es
Page 76

Sección
06
Utilización de la radio
Escucha de las emisoras de
radio
1 Presione SRC para seleccionar el sintonizador.
2 Presione BAND repetidamente para seleccionar una banda.
El indicador se enciende en el orden siguiente.
F1 (FM1)—F2 (FM2)—F3 (FM3)— MW (MW)
3 Búsqueda automática: Presione c/d
(c/d en el mando a distancia).
Cuando se recibe una emisora, termina la búsqueda.
4 Búsqueda manual: Mantenga presionado c/d (c/d en el mando a distancia)
hasta que aparezca MANUAL, y presiónelo
repetidamente.
Las frecuencias aumentan o disminuyen paso
a paso.
# La visualización normal del sintonizador se
muestra cuando éste no se utiliza durante seis
segundos después de una búsqueda manual.
Almacenamiento de
frecuencias
Es posible almacenar fácilmente hasta seis
frecuencias de emisoras y recuperarlas posteriormente simplemente pulsando un botón.
1 Presione BAND para seleccionar la
banda deseada que desea memorizar.
2 Seleccione la frecuencia deseada.
3 Presione uno de los botones de presintonía 1a6ymanténgalo presionado hasta
escuchar el aviso sonoro.
El número seleccionado destellará en el indicador del número de presintonía y quedará iluminado. La frecuencia de la emisora de radio
seleccionada se ha almacenado en la memoria.
4 Repita los pasos 1 a 3 para presintonizar otras emisoras.
La próxima vez que presione el mismo botón
de presintonización, la memoria recuperará la
frecuencia de la emisora.
Notas
! Se pueden almacenar en la memoria hasta 18
emisoras FM, seis por cada una de las tres
bandas FM, y seis emisoras MW.
! Cuando se almacena una nueva emisora en el
botón de ajuste de presintonías, se borra automáticamente la emisora presintonizada anteriormente.
Memoria de búsquedas
automáticas
Esta función le permite almacenar automáticamente las seis frecuencias con la señal de
emisión más fuerte.
1 Presione a.
ASM aparece en el display.
Las seis frecuencias de las emisoras más fuertes se almacenarán en los botones de presintonización 1 a 6 en orden según la intensidad
de las señales.
76
2 Para cancelar, presione a.
Es
Page 77

Utilización de la radio
Para explorar las emisoras
presintonizadas
1 Presione b.
Aparece cada emisora presintonizada.
2 Para cancelar, presione b.
Para sintonizar las
emisoras presintonizadas
1 Presione BAND para seleccionar la
banda deseada.
2 Presione el botón de presintonización
deseado 1 a 6.
Se muestra la emisora presintonizada del
botón de presintonización 1 a 6 y se recibe
esa emisora.
Sección
06
Español
77
Es
Page 78

Sección
07
Funcionamiento de RDS
Opciones de visualización
de RDS
En el funcionamiento RDS normal, el display
indicará el nombre de la emisora. Presionando
DISP se podrá desplazar a través de los diferentes tipos información en la secuencia siguiente:
CT—PTY—RT—FREQUENCY (Cuando PS no
se recibe.)
! CT (Hora controlada por el canal)
! PTY (Reconocimiento del tipo de progra-
ma)
! RT (Reconocimiento de texto de radio)
! PS (Nombre del servicio de programa)
Función PTY (Tipo de
programa)
Para seleccionar un cierto tipo de programa
de la banda de recepción, se puede utilizar el
procedimiento siguiente.
1 Mantenga presionado TA/PTY para seleccionar un tipo de programa.
2 A continuación, mantenga presionado
TA/PTY repetidamente para seleccionar
cada modo.
Grupo de música—Grupo de habla—Búsqueda desactivada
No. Grupo de música
5NATIONM, OLDIES
6 FOLK M
No. Grupo de habla
1 NEWS, AFFAIRS, INFO
2 SPORT, EDUCATE, DRAMA
3 CULTURE, SCIENCE, VARIED
4 WEATHER, FINANCE, CHILDREN
5 SOCIAL, RELIGION, PHONE IN
6 TRAVEL, LEISURE, DOCUMENT
Nota
! El RDS sólo está disponible para la recepción
de FM.
Función TA (Identificación
de anuncio de tráfico)
La función TA permite a la unidad cambiar a
anuncio de tráfico (TA) desde la fuente actual
(otra emisora FM, CD, u otros componentes
conectados).
% Para activar o desactivar la función TA,
presione TA/PTY.
3 Presione varias veces uno de los botones de presintonización 1 a 6.
Cada vez que se presiona este botón, el modo
de visualización cambia del modo siguiente:
No. Grupo de música
1 POP M, ROCK M
2 EASY M, LIGHT M
3 CLASSICS, OTHER M
4 JAZZ, COUNTRY
78
Es
Notas
! Si se ilumina el indicador TP (Identificación
de programa de tráfico), se activa la recepción
de TA.
! La recepción de TA no funcionará si está escu-
chando una emisora MW.
Page 79

Funcionamiento de CD/
MP3/WMA
La compatibilidad de discos
MP3/WMA con esta unidad
tiene las limitaciones
siguientes:
! Frecuencia de muestreo: 8 kHz a 48 kHz
(MP3), 22,05 kHz a 48 kHz (WMA)
! Velocidad de grabación: 8 kbps a 320 kbps
(incluye VBR) (MP3), 32 kbps a 320 kbps
(WMA)
! El formato físico del CD-R/CD-RW deberá
ser ISO9660.
! Si graba ficheros MP3/WMA utilizando
software que no pueda crear un SISTEMA
DE FICHEROS, no será posible la reproducción de ficheros MP3/WMA.
Los ficheros MP3/WMA no son compatibles con la transferencia de datos en formato Packet Write.
! El número total de ficheros o carpetas en el
disco debe ser inferior a 99 (Audio CD),
3 000 (MP3/WMA) y 251 (carpeta).
Nota
Es necesario obtener permiso para descargar ficheros y música MP3/WMA de Internet. Nuestra
compañía no puede conceder estos permisos. Es
necesario obtener siempre permiso del propietario de los derechos de autor.
Reproducción de un CD de
audio y disco MP3/WMA
La unidad puede reproducir grabaciones en
MP3/WMA.
% Inserte un disco en la unidad.
READING aparece en el display y se inicia la
reproducción automáticamente.
3
12
5
1 Número de pista actual/Número total de
pistas
2 Tiempo transcurrido
3 Estado de reproducción (Reproducir d,
Pausa e, Explorar n ×4, ×8, m ×4,
×8)
4 Modo actual (Repetir, Buscar Intro, Selec-
ción aleatoria)
5 Nombre de pista anterior
6 Información del álbum en CD-TEXT
7 Nombre de la pista actual
8 Información de título e intérprete en CD-
TEXT
9 Nombre de pista siguiente
10 Nombre del fichero anterior
11 Nombre de la carpeta actual
12 Nombre del fichero actual
13 Información de ID3 TAG
14 Nombre del fichero siguiente
6
7
8
Modo CD audio
10
11
13
Modo MP3/WMA
MP3 WMA
4
9
12
14
MP3 WMA
MP3 WMA
MP3 WMA
MP3 WMA
Sección
08
Español
79
Es
Page 80

Sección
08
Funcionamiento de CD/
MP3/WMA
Notas
! Cuando un disco contiene datos de audio
(CD-DA) y datos de audio en otro formato, sólamente se pueden reproducir los datos de
audio (CD-DA).
! Si cambia la fuente, también se para la repro-
ducción del CD (sin expulsar el CD). Cuando
vuelva a seleccionar CD como fuente, la reproducción del CD se iniciará en el punto en el
que se ha detenido anteriormente.
Pausa
1 Presione d/PAUSE (e en el mando a distancia) durante la reproducción.
2 Para volver a la reproducción, presione
d/PAUSE (PLAYd o e en el mando a
distancia).
Saltar a siguiente pista/fichero
% Presione brevemente d (p en el
mando a distancia) para seleccionar la siguiente pista o fichero.
Saltar a la pista/fichero
anterior
% Presione brevemente c (o en el
mando a distancia) y vuelva a presionarlo
después de cuatro segundos de tiempo de
reproducción.
Retorno al inicio de la pista/
fichero actual
% Presione brevemente c (o en el
mando a distancia) después de cuatro segundos de tiempo de reproducción.
Cambio a otra pista/fichero
Cuando un disco tiene más de una pista/fichero, puede cambiar a otra pista/fichero del
modo siguiente:
1 Presione SEARCH en el mando a distancia.
2 Presione el botón numerado apropiado
(0 a 9) para seleccionar un número de
pista/fichero.
Buscar
% Mantenga presionado c/d (m/n en
el mando a distancia) para seleccionar la
velocidad deseada durante la reproducción
y suelte en el punto deseado.
# Búsqueda hacia atrás: m ×4, m ×8
Búsqueda hacia delante: n ×4, n ×8
Buscar Intro
Se reproducen los 10 primeros segundos de
cada pista/fichero (SCAN) o de cada fichero
de la carpeta seleccionada en este momento
(
SCAN) en el disco.
80
1 Presione SCAN.
SCAN Aparece
WMA
) en el display.
# Mantenga presionado SCAN aproximadamen-
te dos segundos durante la reproducción.
WMA
Es
ACD
(o SCAN
MP3
MP3
Page 81

Funcionamiento de CD/
MP3/WMA
Sección
08
SCAN aparece en el display.
2 Presione SCAN de nuevo.
SCAN (o
SCAN) desaparece del display y se
cancela Buscar Intro.
Repetir
Se reproducen repetidamente las pistas/ficheros seleccionados (1 RPT) o la carpeta (
RPT) del disco.
1 Presione RPT durante la reproducción.
1 RPT aparece en el display.
# Mantenga presionado RPT aproximadamente
dos segundos durante la reproducción.
WMA
RPT aparece en el display.
MP3
2 Presione RPT de nuevo.
1 RPT (o
RPT) desaparece del display y se
cancela el modo de repetición.
Selección aleatoria
Se reproducen de forma aleatoria todas las
pistas/ficheros (SHF) en la carpeta seleccionada (
SHF) del disco.
1 Presione SHUFFLE durante la reproducción.
SHF Aparece
en el display.
# Mantenga presionado SHUFFLE aproximada-
mente dos segundos durante la reproducción.
MP3 WMA
SHF aparece en el display.
2 Presione SHUFFLE de nuevo.
SHF (o
cancela el modo de reproducción aleatoria.
ACD
(o SHF
MP3 WMA
SHF) desaparece del display, y se
)
Nota
Durante la reproducción aleatoria, si pulsa c
(o en el mando a distancia), no se volverá a la
pista anterior.
CD TEXT/ID3 TAG
Cuando se reproduce un disco que contiene
información, puede ver la información CD
TEXT/ID3 TAG.
En una ID3 TAG, se graba información acerca
del fichero (título del álbum, nombre del intérprete, título de la canción).
En un Contenido WMA, se graba información
acerca del fichero (título de la canción, nombre del intérprete).
Si no hay información, se muestra NO TEXT
en el display.
% Presione DISP repetidamente durante
la reproducción del fichero MP3/WMA/CD
TEXT.
Para saltar a la carpeta
siguiente o anterior
(Si hay más de dos carpetas.)
% Presione a para saltar a la carpeta si-
guiente, y presione b para saltar a la carpeta anterior.
Nota
La visualización del tiempo que aparece en la
parte del display durante la reproducción de un fichero VBR puede variar, y pueden existir algunas
diferencias con respecto al tiempo real (se muestran el tiempo de progreso y el VBR al mismo
tiempo durante la reproducción del fichero).
MP3 WMA
Español
81
Es
Page 82

Sección
09
Menú SET UP
(Configuración)
Con el menú Configuración, se pueden realizar diversos ajustes en elementos como la
imagen y el sonido. También se puede seleccionar un idioma para los subtítulos y el menú
Setup, entre otras cosas.
1 Presione D.SETUP.
Aparece el menú Configuración.
# También puede realizar la misma operación
manteniendo presionado DISC MENU/SET UP en
el mando a distancia.
2 Utilice a/b para seleccionar la opción
deseada y presione d para pasar al segundo nivel.
La pantalla muestra el ajuste actual para el
elemento seleccionado, así como el(los) ajuste(s) alternativos.
3 Utilice a/b para seleccionar la segunda
opción deseada y presione d para pasar al
tercer nivel.
4 Utilice a/b para seleccionar el ajuste
deseado y presione ENT para confirmar su
selección.
# Algunos elementos requieren pasos adicionales.
5 Presione D.SETUP.
Finaliza el menú Configuración.
# También puede realizar la misma operación
manteniendo presionado DISC MENU/SET UP o
presionando PLAYd o RETURN en el mando a
distancia.
Nota
Presione c para regresar al nivel anterior.
Language
Menu Language
Seleccione un idioma para el menú Configuración y la pantalla OSD.
Si selecciona un idioma para el menú de configuración, el conjunto de caracteres para las
etiquetas MP3, etiquetas WMA y subtítulos
DivX también cambia de acuerdo con el
dioma. Consulte Nota para la visualización de
subtítulos DivX en la página 97.
Disc Audio/Subtitle/Menu
Seleccione el idioma deseado para la pista de
audio del disco, subtítulos, y el menú del
disco.
! Original: Hace referencia al idioma origi-
nal en el que se ha grabado el disco.
! Other: Para seleccionar otro idioma, pre-
sione los botones numéricos y, a continuación, ENT para introducir el número de 4
dígitos correspondiente, de acuerdo con la
lista de códigos de idiomas. Consulte la página 109.
Si introduce el código de idioma incorrecto, introduzca el número de 4 dígitos y presione cualquier botón de número. Cuando
––––aparezca en la pantalla, introduzca
correctamente el número de 4 dígitos.
! Off: Esta opción sólo se muestra en
Disc Subtitle. Si selecciona Off, no se vi-
sualizarán los subtítulos del disco.
82
Es
Page 83

Menú SET UP
(Configuración)
Sección
09
Display
TV Aspect
! 16:9: Seleccionar cuando se conecta una
TV de 16:9 de anchura.
! 4:3 Letter Box: Seleccionar cuando se co-
necta una TV de 4:3 estándar.
Muestra una imagen ancha con bandas en
las partes superior e inferior de la pantalla.
! 4:3 Pan Scan: Seleccionar cuando se co-
necta una TV de 4:3 estándar.
Visualiza automáticamente la imagen
ancha en la pantalla completa y corta las
partes que no se ajustan.
Nota
En el caso de un fichero DivX, TV Aspect de
4:3 Letter Box y 4:3 Pan Scan son los mismos.
Audio
Cada disco DVD tiene diferentes opciones de
salida de audio. Seleccione las opciones
AUDIO del reproductor de acuerdo con el tipo
de sistema de audio utilizado.
Dolby Digital/DTS/MPEG
! Bitstream: Seleccionar Bitstream si se co-
necta la toma de salida óptica de esta unidad a un amplificador u otros equipos con
Dolby Digital, DTS o decodificador MPEG.
! PCM: Seleccionar cuando se conecta a un
amplificador estéreo digital de dos canales.
Los DVDs codificados en Dolby Digital o
MPEG se mezclarán automáticamente a
audio PCM de dos canales.
! Off (para DTS): Si selecciona Off, la señal
DTS no se emite a través de la toma de salida óptica.
Español
B.L.E. (Expansión del nivel de
negro)
Para seleccionar el nivel de negro de las imágenes reproducidas. Seleccione su preferencia y la capacidad del monitor.
! On: Escala de grises expandida.
! Off: Escala de grises estándar.
Nota
La función B.L.E. funciona sólo en el sistema
NTSC.
Nota
Este menú no está disponible con este producto.
Es
83
Page 84

Sección
09
Menú SET UP
(Configuración)
Control de gama dinámica (DRC)
Con el formato DVD, puede oír una banda sonora de un programa con la presentación más
precisa y realista, gracias a la tecnología de
audio digital. Sin embargo, quizás desee comprimir la gama dinámica de la salida de audio
(la diferencia entre los sonidos más fuertes y
los más débiles). Esto le permite escuchar
una película con un volumen más bajo sin
perder claridad de sonido. Ajuste DRC en On
para este efecto.
Lock (Control de padres)
Para acceder a las funciones Rating,
Password y Area Code, debe introducir el có-
digo de seguridad de 4 dígitos que ha creado.
Si aún no ha introducido un código de seguridad, se le pide que lo haga.
1 Introduzca un código de 4 dígitos y presione
ENT.
! Si ha cometido un error antes de presio-
nar ENT, presione c para borrar los dígitos uno por uno.
2 Introdúzcalo de nuevo y presione ENT para ve-
rificar.
las y las escenas se califican entre 1 y 8, dependiendo del país Algunos discos ofrecen
escenas más adecuadas como alternativa.
La función de control de padres le permite bloquear el acceso a escenas por debajo de la calificación introducida, evitando así que sus
hijos puedan visionar material que usted no
considera adecuado.
1 Seleccione Rating en el menú Lock y
presione d.
2 Seleccione una calificación de 1 a 8 utilizando a/b.
! Rating 1 a 8: La calificación uno (1)esla
más restrictiva y la calificación ocho (8)es
la menos restrictiva.
! Unlock: Si selecciona Unlock, el control de
padres no está activo y el disco se reproduce completamente.
3 Presione ENT para confirmar la calificación seleccionada.
Nota
Si selecciona una calificación para el reproductor, se reproducirán todas las escenas del disco
con esa calificación o inferior. No se reproducirán
las escenas con una calificación más elevada, a
menos que se disponga de una escena alternativa en el disco. La alternativa deberá tener la
misma calificación o inferior. Si no se encuentra
una alternativa adecuada, se parará la reproducción. Debe introducir la contraseña de 4 dígitos o
cambiar el nivel de calificación para reproducir el
disco.
Rating
Algunas películas contienen escenas que pueden no ser adecuadas para los niños. Muchos
de estos discos contienen información de control de padres que se aplica a la totalidad del
disco o ciertas escenas del mismo. Las pelícu-
84
Es
Page 85

Menú SET UP
(Configuración)
Sección
09
Password
Puede introducir o cambiar la contraseña.
Para crear una contraseña nueva:
1 Seleccione Password en el menú Lock y pre-
sione d.
2 Presione ENT cuando se haya resaltado la op-
ción New.
3 Introduzca una nueva contraseña con los bo-
tones numéricos y presione ENT.
4 Introduzca de nuevo la contraseña para verifi-
car.
Para cambiar la contraseña:
1 Seleccione Password en el menú Lock y pre-
sione d.
2 Presione ENT cuando se haya resaltado la op-
ción Change.
3 Introduzca la contraseña actual con los boto-
nes numéricos y presione ENT.
4 Introduzca una nueva contraseña con los bo-
tones numéricos y presione ENT.
5 Introduzca de nuevo la contraseña para verifi-
car.
Si olvida su contraseña
Si ha olvidado su contraseña, puede borrarla
con los pasos siguientes.
Area Code
Introduzca el código del área cuyas normas se
utilizaron para identificar el disco de DVD
vídeo, según el código de área. Consulte Lista
de códigos de área en la página 110.
1 Seleccione Area Code en el menú Lock
y presione d.
2 Siga el paso 2 como se mue stra en
Rating en la página anterior.
3 Seleccione el primer carácter utilizando
a/b.
4 Presione ENT y seleccione el segundo
carácter utilizando a/b.
5 Presione ENT para confirmar la selección del código de país.
Others
Español
1 Presione D.SETUP.
Aparece el menú Configuración.
# También puede realizar la misma operación
manteniendo presionado DISC MENU/SET UP en
el mando a distancia.
2 Introduzca el número de 6 dígitos
“210499” y se borrará la contraseña.
3 Ingrese una nueva contraseña. Consulte Para crear una contraseña nueva: en
esta página.
PBC
Ajuste el control de reproducción (PBC)enOn
o Off.
! On: Los vídeo CDs con PBC se reproducen
según el PBC.
! Off: Los vídeo CDs con PBC se reproducen
del mismo modo que los CDs de audio.
Es
85
Page 86

Sección
09
Menú SET UP
(Configuración)
Nota
La función PBC sólo está disponible para la reproducción de Vídeo CD 2.0.
DivX VOD
Le facilitamos el código de registro de DivX
VOD (Video On Demand) que le permite alquilar y comprar vídeos basados en el servicio
®
DivX
VOD. Para más información, visite
www.divx.com/vod.
1 Seleccione la opción DivX VOD y, a continuación, presione d.
2 Presione ENT con Show Code seleccionado y se mostrará el código de registro.
Utilice el código de registro para comprar o alquilar vídeos del servicio DivX
®
VOD en
www.divx.com/vod.
3 Presione ENT para salir.
Nota
Los vídeos descargados de DivX
drán reproducir en esta unidad.
®
VOD sólo se po-
®
86
Es
Page 87

Utilización del DVD/VCD
Sección
10
Visualización de la
información del disco en
pantalla
Se pueden mostrar diferentes informaciones
acerca del disco cargadas en pantalla.
1
2
3
4
5
6
1 Título: Número del título actual/número total
de títulos
2 Capítulo (pista): Numero del capítulo (o pista)
actual/numero total de capítulos (o pistas)
3 Tiempo: Tiempo de reproducción transcurrido
4 Audio: Idioma o canal de audio seleccionados
5 Subtítulos: Subtítulos seleccionados
6 Ángulo: Ángulo seleccionado/número total de
ángulos
1 Presione DISPLAY en el mando a distancia durante la reproducción.
# Los elementos visualizados difieren según el
tipo de disco o el estado de reproducción.
2 Presione a/b para seleccionar un elemento.
3 Presione c/d para cambiar o seleccionar el ajuste.
# Si es necesario, puede utilizar los botones 0 a
9.
# Para algunas funciones, presione ENT para
ejecutar el ajuste.
Notas
! Si no se pulsa ningún botón durante unos se-
gundos, desaparece la visualización en pantalla.
! Algunos discos tal vez no proporcionen todas
la funciones de OSD del ejemplo que se
muestra más arriba.
En un Vídeo CD 2.0. con PBC, se muestra PBC
en vez de el número de pista. Consulte PBC en
la página 85.
Reproducción de un DVD y
vídeo CD
% Inserte un disco en la unidad.
Aparece READING en el display y se inicia la
reproducción automáticamente.
# Si la reproducción no da comienzo, presione
d/PAUSE (d en el mando a distancia).
# En algunos casos, puede mostrarse el disco
del menú.
Notas
! Puede mostrarse la pantalla del menú en pri-
mer lugar, después de cargar un DVD o un
Vídeo CD 2.0 que ofrezca un menú.
! Si no se presiona ningún botón después ex-
pulsarse un disco, se carga un disco automáticamente aproximadamente en 10 segundos.
! Si está activo el control de padres y el disco
no está dentro de los ajustes de calificación,
debe introducir la contraseña. (Consulte Lock
(Control de padres) en la página 84).
! Los DVD pueden tener un código de región. El
reproductor no reproduce discos con un código de región diferente al de su reproductor.
Consulte Código de región en la página 63
para obtener información sobre el código de
región.
Español
87
Es
Page 88

Sección
10
Utilización del DVD/VCD
Pre-Stop
1 Presione g en el mando a distancia durante la reproducción.
Pre-Stop aparece en el display.
2 Para volver a la reproducción, si presiona d/PAUSE (PLAYd en el mando a distancia) en el modo Pre-Stop, se reanudará la
reproducción desde este punto de
parada.
Parada
1 Presione g en el modo Pre-Stop.
2 Para volver a la reproducción, si presiona d/PAUSE (PLAYd en el mando a distancia), se reanudará la reproducción desde el
inicio del disco.
Pausa
1 Presione d/PAUSE (e en el mando a distancia) durante la reproducción.
2 Para volver a la reproducción, presione
d/PAUSE (PLAYd en el mando a
distancia).
2 Puede hacer avanzar la imagen cuadro
a cuadro presionando e en el mando a distancia repetidamente.
3 Para volver a la reproducción normal,
presione d/PAUSE (PLAYd en el mando a
distancia).
Cámara lenta
1 Presione d/PAUSE (e en el mando a distancia) durante la reproducción.
La unidad cambiará al modo PAUSE.
2 Utilice m/n en el mando a distancia
para seleccionar la velocidad necesaria:
s 1/16, s 1/8, s 1/4, ó s 1/2 (atrás), ó t
1/16, t 1/8, t 1/4, ó t 1/2 (adelante)
# Con un vídeo CD, la velocidad lenta cambia:
t 1/16, t 1/8, t 1/4 ó t 1/2 (adelante).
3 Para salir del modo Slow Motion, presione d/PAUSE (PLAYd en el mando a distancia).
Nota
No es posible la reproducción a cámara lenta en
retroceso en los vídeo CDs.
Imagen fija y reproducción
cuadro a cuadro
1 Presione d/PAUSE (e en el mando a distancia) durante la reproducción.
La unidad cambiará al modo PAUSE.
88
Es
Cambio a otro título
Cuando un disco tiene más de un título,
puede cambiar a otro título del modo siguiente:
1 Presione DISPLAY en el mando a distancia y después presione a/b para seleccionar el elemento del menú (título).
DVD
Page 89

Utilización del DVD/VCD
Sección
10
2 Presione el botón numerado apropiado
(0 a 9) para seleccionar un número de
título.
Cambio a otro capítulo/pista
Cuando un título de un disco tiene más de un
capítulo o un disco tiene más de una pista,
puede cambiar a otro capítulo/pista del modo
siguiente:
% Presione brevemente c/d (o/p en
el mando a distancia) durante la reproducción para seleccionar el siguiente capítulo/
pista o volver al inicio del capítulo/pista actual.
% Presione c (o en el mando a distan-
cia) dos veces brevemente para volver al
capítulo/pista anterior.
% Para ir directamente a cualquier capítulo durante la reproducción, presione DISP
(DISPLAY en el mando a distancia) y presione a/b para seleccionar el icono del capítulo/pista. Después, introduzca el número de
capítulo/pista o utilice c/d.
Notas
! Para números de dos dígitos, presione los bo-
tones numerados (0 a 9) en sucesión rápida.
! En un vídeo CD con PBC, es necesario ajustar
PBC a Off en el menú de configuración. Con-
sulte PBC en la página 85.
Saltar al capítulo/pista
siguiente
% Presione brevemente d (p en el
mando a distancia) para seleccionar la siguiente pista o fichero.
Saltar al capítulo/pista
anterior
% Presione brevemente c (o en el
mando a distancia) y vuelva a presionarlo
después de cuatro segundos de tiempo de
reproducción.
Retorno al inicio del
capítulo/pista actual
% Presione brevemente c (o en el
mando a distancia) después de cuatro segundos de tiempo de reproducción.
Exploración
1 Presione m/n en el mando a distancia durante la reproducción.
2 Presione m/n repetidamente en el
mando a distancia para seleccionar la velocidad necesaria:
m ×2, m ×4, m ×8, m ×16, m ×32,
m ×100 (hacia atrás) o n ×2, n ×4,
n ×8, n ×16, n ×32, n ×100 (hacia
delante)
# Con un Vídeo CD, la velocidad de búsqueda
cambia: m ×2, m ×4, m ×8, (hacia atrás) o
n ×2, n ×4, n ×8, (hacia delante).
Español
89
Es
Page 90

Sección
10
Utilización del DVD/VCD
3 Para volver a la reproducción normal,
presione d/PAUSE (PLAYd en el mando a
distancia).
Repetir
DVD
- Chapter/Title/Off
El ajuste predefinido es Off.
1 Para repetir el capítulo que se está reproduciendo, presione RPT (REPEAT en el
mando a distancia).
Aparece el icono Chapter en la pantalla de TV.
2 Para repetir el título que se está reproduciendo, presione RPT (REPEAT en el
mando a distancia) de nuevo.
Aparece el icono Title en la pantalla de TV.
3 Para salir del modo de repetición, presione RPT (REPEAT en el mando a distancia)
de nuevo.
Aparece el icono Off en la pantalla de TV.
VCD
- Track/All
El ajuste predefinido es All.
1 Para repetir la pista que se está reproduciendo, presione RPT (REPEAT en el
mando a distancia).
Aparece el icono Track en la pantalla de TV.
2 Para salir del modo de repetición, presione RPT (REPEAT en el mando a distancia)
de nuevo.
Aparece el icono All en la pantalla de TV.
Nota
En un vídeo CD con PBC, es necesario ajustar
PBC a Off en el menú de configuración. Consulte
PBC en la página 85.
Búsqueda por tiempo
La función de búsqueda por tiempo le permite
iniciar la reproducción en cualquier momento
dado del disco.
1 Presione DISPLAY en el mando a distancia durante la reproducción.
Se muestra la pantalla OSD.
El cuadro de búsqueda por tiempo muestra el
tiempo de reproducción transcurrido del disco
actual.
2 En un tiempo de 10 segundos, presione
a/b para seleccionar el icono de búsqueda
por tiempo en la pantalla OSD.
Aparece – : ––: ––en el cuadro de búsqueda
por tiempo.
3 En 10 segundos, utilice los botones numéricos para introducir el tiempo de inicio
deseado.
Introduzca las horas, minutos y segundos de
izquierda a derecha en el cuadro.
4 En 10 segundos, presione ENT para confirmar el tiempo de inicio.
La reproducción se inicia en el tiempo seleccionado en el disco.
# Si se introduce un tiempo no válido, la reproducción continuará desde el punto actual.
Nota
En un vídeo CD con PBC, es necesario ajustar
PBC a Off en el menú de configuración. Consulte
PBC en la página 85.
90
Es
Page 91

Utilización del DVD/VCD
Sección
10
Menú del disco
Los DVDs pueden ofrecer menús que le permiten el acceso a funciones especiales.
1 Presione D.MENU (DISC MENU/SET UP
en el mando a distancia).
Se muestra el menú del disco.
2 Utilice a/b/c/d para resaltar su selección, y presione ENT.
3 Para salir del menú del disco, presione
D.MENU (DISC MENU/SET UP en el mando
a distancia) de nuevo.
Menú PBC
% Presione DISC MENU/SET UP o RETURN
en el mando a distancia para volver a la
pantalla principal. Los ajustes del menú y
los procedimientos de uso pueden ser diferentes. Siga las instrucciones de cada pantalla de menú.
# También puede activar el PBC en la configuración. Consulte la página 85.
VCD
DVD
Cambio del idioma del
audio
% Presione AUDIO repetidamente en el
mando a distancia durante la reproducción
para oír un idioma del audio diferente.
DVD
Cambio del canal del audio
VCD
% Presione AUDIO repetidamente en el
mando a distancia durante la reproducción
para oír un canal de audio diferente
(STEREO, Left o Right).
Subtítulos
% Presione SUB TITLE en el mando a distancia durante la reproducción para seleccionar los diferentes idiomas de subtítulos.
Nota
Si aparece el icono
ble en el disco.
DVD
, la función no está disponi-
Español
Ángulo de cámara
Si el disco contiene escenas grabadas desde
diferentes ángulos de cámara, puede cambiar
a un ángulo de cámara diferente durante la reproducción.
% Presione ANGLE repetidamente en el
mando a distancia durante la reproducción
para seleccionar un ángulo deseado.
Se muestra en el display el número de ángulo
actual.
DVD
Zoom
La función de zoom le permite ampliar la imagen de vídeo.
% Presione ZOOM repetidamente durante
la reproducción o en modo pausa para ampliar la imagen.
DVD
!
!
# Puede moverse a través de la zona ampliada
utilizando a/b/c/d.
Es posible que la función de zoom no funcione
en algunos discos.
: 100%—400%—1600%
VCD
: 100%—400%
Nota
Es
91
Page 92

Sección
11
Visionado de fotografías
La compatibilidad JPEG/TIFF
con este reproductor tiene
las limitaciones siguientes:
! Dependiendo del tamaño y del número de
ficheros JPEG/TIFF, puede ser necesario un
tiempo prolongado para que la unidad lea
los contenidos del disco. Si no aparece un
mensaje en pantalla después de varios minutos, puede que algunos de los ficheros
sean demasiado grandes; reduzca la resolución de los ficheros JPEG/TIFF a menos
de 2 megapíxeles, por ejemplo 2 760 x 2 048
píxeles, y grabe otro disco.
! El número total del ficheros en el disco de-
berá ser inferior a 3 000.
! Algunos discos pueden ser incompatibles
debido a un formato de grabación diferente
o el estado del disco.
! Asegúrese de que todos los ficheros selec-
cionados tienen la extensión .jpg o .tiff al
realizar la copia al disco.
! Si los ficheros tienen extensiones .jpe o
.jpeg, cámbielas a .jpg.
! Los nombres de ficheros sin extensión .jpg
o .tiff no se podrán leer en esta unidad. No
será posible leerlos incluso si aparecen
como ficheros de imagen JPEG o TIFF en el
ordenador.
Visualización de slideshows
Esta unidad puede reproducir discos que tengan ficheros JPEG o TIFF.
1 Inserte un disco en la unidad.
Para un disco que incluye sólo archivos fotográficos, READING aparece en el display, y el
slideshow comienza automáticamente.
2 Presione DISPLAY para mostrar u
ocultar la barra de ayuda mientras visualiza el slideshow.
3 Presione D.MENU (DISC MENU/SET UP
o STOPg en el mando a distancia) para volver a la pantalla principal.
1
2
5
6
7
8
1
2
5
6
7
8
1 Número de fichero actual/Número total de
ficheros
2 Fichero anterior
3 Tiempo de intervalo de slideshow (SLOW,
NORMAL, FAST, OFF)
4 Modo de repetición
5 Nombre de la carpeta actual
6 Imagen en miniatura
7 Nombre del fichero actual
8 Resolución
9 Nombre del fichero siguiente
3
4
9
PAL
3
4
9
NTSC
92
Es
Page 93

Visionado de fotografías
Sección
11
Nota
En un disco que incluya ficheros de audio y película, se mostrarán las pestañas indicadoras de
tipo de soporte, MUSIC y MOVIE, junto con
PHOTO. Para reproducir el fichero de fotografía,
seleccione PHOTO y luego presione ENT/d/
PAUSE (PLAYd en el mando a distancia).
Consulte Selección de un tipo de soporte en la página 72 para la pestaña indicadora del tipo de
soporte.
Cambio a otra carpeta
% Presione a/b para seleccionar la carpe-
ta siguiente o anterior del disco.
Cambio a otro fichero
% Presione c/d para seleccionar el fichero
siguiente o anterior de la carpeta
seleccionada.
Tiempo de intervalo de
slideshow
1 Presione D.MENU (DISC MENU/SET UP
o STOPg en el mando a distancia) para volver a la pantalla principal.
2 Presione m/n en el mando a distancia para seleccionar la opción que desea
utilizar.
Muestra el tiempo de intervalo del slideshow:
FAST—OFF—SLOW—NORMAL
(FAST: 3 seg., NORMAL: 8 seg., SLOW:13
seg.)
Repetir
% Presione RPT (REPEAT en el mando a
distancia) para seleccionar la opción que
desea utilizar.
Existen dos modos de repetición: ALL o
FOLDER.
! ALL: Reproduce el disco de forma repetida.
! FOLDER: Reproduce de forma repetida la
carpeta actual.
Visualización de imágenes
fijas
1 Presione d/PAUSE (e en el mando a distancia) durante el slideshow.
El reproductor cambiará al modo de pausa.
# Si el tiempo de intervalo del slideshow es OFF,
no puede utilizarse esta función.
2 Para volver al slideshow, presione d/
PAUSE de nuevo (PLAYd en el mando a
distancia).
Zoom
% Durante la visualización de imágenes,
presione ZOOM para ampliar la imagen
(100%—400%—1600%).
# Puede moverse a través de la zona ampliada
utilizando a/b/c/d.
# Para cancelar el modo de zoom, presione
PLAYd en el mando a distancia.
Nota
Es posible que la función de zoom no funcione
cuando el tamaño del fichero es demasiado
pequeño.
Giro de la imagen
% Durante la visualización de imágenes,
presione a/b para girar la fotografía en la
dirección de las agujas del reloj o en la dirección contraria.
Español
93
Es
Page 94

Sección
12
Funcionamiento con
películas
La compatibilidad de discos
®
DivX
con este reproductor
tiene las limitaciones
siguientes:
! El tamaño de resolución disponible de los
ficheros DivX es inferior a 720×576 (Anch×Alt) píxeles.
! El nombre del fichero de los subtítulos de
DivX puede tener hasta 25 caracteres.
! Si el numero de cuadros de pantalla es su-
perior a 30 por segundo, la unidad podría
no funcionar con normalidad.
! Si la estructura de vídeo y audio del fichero
grabado no está intercalada, se emiten el
vídeo o el audio.
Ficheros DivX
.avi, .divx, .div, .asf
Formato de subtítulos reproducibles
.srt, .smi, .ssa, .sub, .txt, .ass
Formatos de códecs reproducibles
DivX3, DivX4, DivX5, Xvid, MP4S
Formatos de audio reproducibles
Dolby Digital, MP3
! Frecuencia de muestreo: 48 kHz (Dolby Di-
gital), desde 8 kHz hasta 48 kHz (MP3)
! Velocidad de grabación: desde 64 kbps
hasta 640 kbps (Dolby Digital), desde 8
kbps hasta 320 kbps (MP3)
®
reproducibles
Reproducción de un fichero
de película
Esta unidad puede reproducir discos con ficheros de películas.
1 Inserte un disco en la unidad.
Para un disco que incluye ficheros de vídeo o
ficheros fotográficos y de vídeo, READING
aparece en el display y la reproducción comienza automáticamente.
2 Presione D.MENU (DISC MENU/SET UP
o STOPg en el mando a distancia) para volver a la pantalla principal.
1234
6
1 Número de fichero actual/Número total de
ficheros
2 Tiempo transcurrido
3 Estado de reproducción (Pre stop eg, stop
g)
4 Modo de repetición
5 Nombre del fichero anterior
6 Nombre de la carpeta actual
7 Nombre del fichero actual
8 Nombre del fichero de subtítulos
9 Nombre del fichero siguiente
Nota
En un disco que tenga ficheros de audio y fotografía, aparecerán las pestañas indicadoras de
tipo de soporte, MUSIC y PHOTO, junto con
MOVIE. Para reproducir el fichero de película, seleccione MOVIE y presione ENT/d/PAUSE
(PLAYd en el mando a distancia).
Consulte Selección de un tipo de soporte en la página 72 para la pestaña indicadora del tipo de
soporte.
5
7
8
9
94
Es
Page 95

Funcionamiento con
películas
Sección
12
Reproducción de contenido
®
del DivX
Parte del contenido de DivX VOD (vídeo bajo
demanda) tal vez pueda reproducirse solamente un número fijo de veces. Cuando carga
un disco que tiene este tipo de contenido DivX
VOD, el número de reproducciones restante
se muestra en la pantalla, y luego, usted tiene
la opción de reproducir el disco (mediante el
uso de una de reproducciones restantes) o
bien detenerlo. Si carga un disco con contenido DivX VOD caducado (por ejemplo, contenido sin reproducciones restantes), se
visualizará Rental expired.
! Si el contenido DivX VOD permite un nú-
mero ilimitado de reproducciones, usted
podrá cargar el disco en su reproductor y
reproducir el contenido tantas veces como
usted quiera , y no se visualizará ningún
mensaje.
Importante
! Para reproducir el contenido DivX VOD en
esta unidad, tendrá que registrar primero la
unidad con el proveedor del contenido de
DivX VOD. Consulte DivX VOD en la página
86 para obtener información sobre su código
de registro.
! El contenido de DivX VOD está protegido por
un sistema DRM (administración de derechos
digitales). Esto limita la reproducción del contenido a los dispositivos específicos
registrados.
VOD
2 Para volver a la reproducción, si presiona d/PAUSE (PLAYd en el mando a distancia) en el modo Pre-Stop, se reanudará la
reproducción desde este punto de
parada.
Parada
1 Presione g en el modo Pre-Stop.
2 Para volver a la reproducción, si presiona d/PAUSE (PLAYd en el mando a distancia), se reanudará la reproducción desde el
inicio del fichero actual.
Pausa
1 Presione d/PAUSE (e en el mando a distancia) durante la reproducción.
2 Para volver a la reproducción, presione
d/PAUSE (PLAYd en el mando a
distancia).
Imagen fija y reproducción
cuadro a cuadro
1 Presione d/PAUSE (e en el mando a distancia) durante la reproducción.
La unidad cambiará al modo PAUSE.
Español
Pre-Stop
1 Presione g en el mando a distancia durante la reproducción.
Pre-Stop aparece en el display, y el menú de
película aparece en la pantalla.
2 Puede hacer avanzar la imagen cuadro
a cuadro presionando e en el mando a distancia repetidamente.
3 Para volver a la reproducción normal,
presione d/PAUSE (PLAYd en el mando a
distancia).
Es
95
Page 96

Sección
12
Funcionamiento con
películas
Cámara lenta
1 Presione d/PAUSE (e en el mando a distancia) durante la reproducción.
La unidad cambiará al modo PAUSE.
2 Utilice n en el mando a distancia para
seleccionar la velocidad necesaria:
t 1/16, t 1/8, t 1/4, o t 1/2 (adelante)
3 Para salir del modo Slow Motion, presione d/PAUSE (PLAYd en el mando a distancia).
Nota
No es posible la reproducción a cámara lenta en
retroceso con un fichero de película.
Exploración
1 Presione m/n en el mando a distancia durante la reproducción.
2 Presione m/n repetidamente en el
mando a distancia para seleccionar la velocidad necesaria:
m ×2, m ×4, m ×16, m ×32 (hacia
atrás) o n ×2, n ×4, n ×16, n ×32
(hacia delante)
3 Para volver a la reproducción normal,
presione d/PAUSE (PLAYd en el mando a
distancia).
% Presione c (o en el mando a distan-
cia) dos veces brevemente para volver al fichero anterior.
% Para ir directamente a un archivo en el
menú de película, presione SEARCH y luego
presione el número de fichero que desee
con los botones numéricos (0 a 9).
Repetir
Todos los ficheros o la carpeta en el disco se
reproducen repetidamente.
El ajuste predeterminado es All.
% Para repetir todas los archivos de la carpeta actual, mantenga presionado RPT
(REPEAT en el mando a distancia) durante
la reproducción.
Aparece el icono Folder en la pantalla de TV.
% Para repetir todos los ficheros del disco,
presione de nuevo RPT (REPEAT en el
mando a distancia) durante la reproducción.
Aparece el icono All en la pantalla de TV.
% Para repetir la pista actual, presione
RPT (REPEAT en el mando a distancia) durante la reproducción.
Aparece el icono File en la pantalla de TV.
Saltar
% Presione c/d (o/p en el mando a
distancia) durante la reproducción para seleccionar el siguiente fichero o volver al inicio del fichero actual.
96
Es
Búsqueda por tiempo
La función de búsqueda por tiempo le permite
iniciar la reproducción en cualquier momento
dado del disco.
1 Presione DISPLAY en el mando a distancia durante la reproducción.
Se muestra la pantalla OSD.
Page 97

Funcionamiento con
películas
Sección
12
El cuadro de búsqueda por tiempo muestra el
tiempo de reproducción transcurrido del disco
actual.
2 En un tiempo de 10 segundos, presione
a/b para seleccionar el icono de búsqueda
por tiempo en la pantalla OSD.
Aparece – : ––: ––en el cuadro de búsqueda
por tiempo.
3 En 10 segundos, utilice los botones numéricos para introducir el tiempo de inicio
deseado.
Introduzca las horas, minutos y segundos de
izquierda a derecha en el cuadro.
4 En 10 segundos, presione ENT para confirmar el tiempo de inicio.
La reproducción se inicia en el tiempo seleccionado en el fichero.
# Si se introduce un tiempo no válido, la reproducción continuará desde el punto actual.
Cambio del idioma del audio
% Presione AUDIO repetidamente en el
mando a distancia durante la reproducción
para oír un idioma del audio o fichero de
audio diferente.
Nota
Si aparece el icono
ble en el disco.
, la función no está disponi-
Nota para la visualización
de subtítulos DivX
Si no se muestran los subtítulos correctamente durante la reproducción, siga estos pasos.
1 Mantenga presionado SUB TITLE en el
mando a distancia aproximadamente durante tres segundos.
Se mostrará el número del conjunto de caracteres.
2 Presione SUB TITLE en el mando a distancia para seleccionar otro conjunto de caracteres hasta que se muestren
correctamente los subtítulos.
Número Conjunto de caracteres
CP1250 Latino Europa del Este
CP1251 Cirílico
CP1252 Latino Europa occidental
CP1253 Griego
CP1254 Turco
Español
Nota
Si aparece el icono
ble en el disco.
, la función no está disponi-
Subtítulos
% Presione SUB TITLE en el mando a distancia durante la reproducción para seleccionar los diferentes idiomas de subtítulos.
Notas
! Si el menú de configuración de subtítulos no
incluye el idioma de subtítulos DivX que va a
reproducir, los subtítulos tal vez no se visualicen correctamente.
! Si selecciona un conjunto de caracteres para
los subtítulos DivX, ese conjunto también se
aplica a las etiquetas MP3 y WMA.
Es
97
Page 98

Sección
13
Utilización de AUX
Reproducción con un
equipo auxiliar
Antes de utilizar el equipo auxiliar con el procedimiento siguiente, seleccione correctamente la
entrada externa. Consulte AUX (Auxiliar) ON/
OFF en la página 75.
Puede conectar equipos auxiliares a esta unidad.
1 Conecte el equipo auxiliar a la entrada
auxiliar de la unidad.
Conector de entrada AUX (conector estéreo de 3,5
mm)
Equipo auxiliar (reproductor MP3, etc).
2 Presione SRC para seleccionar AUX IN.
AUX IN aparece en el display.
3 Encienda el equipo auxiliar conectado
para comenzar la reproducción de la fuente.
4 Ajuste el volumen.
Nota
Si el nivel de entrada del equipo auxiliar conectado a la toma de entrada AUX no es lo bastante
alto, ajuste el nivel de entrada correctamente.
Consulte AUX (Auxiliar) 0 dB/+6 dB en la página 75.
98
Es
Page 99

Instalación
Sección
14
Importante
! Compruebe todas las conexiones y sistemas
antes de la instalación final.
! No utilice piezas no autorizadas. El uso de pie-
zas no autorizadas puede causar fallos de funcionamiento.
! Consulte a su concesionario si para la instala-
ción es necesario taladrar orificios o hacer
otras modificaciones al vehículo.
! No instale esta unidad en un lugar donde:
— pueda interferir con la conducción del ve-
hículo.
— pueda lesionar a un pasajero como conse-
cuencia de un frenazo brusco.
! El láser semiconductor se dañará si se sobre-
calienta. Instale esta unidad alejada de zonas
que alcancen altas temperaturas, como cerca
de la salida del calefactor.
! Se logra un rendimiento óptimo si la unidad
se instala en un ángulo inferior a 30°.
! Los cables no deben cubrir el área que se
muestra en la figura siguiente. Es necesario
que los amplificadores radien libremente.
No cierre este área.
lación de montaje posterior de DIN, utilizando
agujeros roscados para tornillos en los laterales del bastidor de la unidad). Para obtener detalles, consulte los siguientes métodos de
instalación.
Montaje delantero DIN
Instalación en la arandela de goma
Salpicadero
1 Inserte el manguito de montaje en el
salpicadero.
2 Fije el manguito de montaje utilizando
un destornillador para doblar las pestañas
metálicas triangulares (90°) y colocarlas en
su lugar.
! Para realizar una instalación más firme,
doble las pestañas cuadrangulares.
Manguito de montaje
Arandela de goma
Tornillo
Español
Montaje delantero/
posterior de DIN
Esta unidad se puede instalar adecuadamente
ya sea de manera “delantera” (montaje delantero convencional de DIN) o “posterior” (insta-
3 Instale la unidad según la ilustración.
99
Es
Page 100

Sección
14
Instalación
Retiro de la unidad
1 Extienda hacia afuera la parte superior
e inferior del aro de guarnición para retirarlo. (Al volver a colocar el anillo de guarnición, oriente el lado que tiene una ranura
hacia abajo y colóquelo.)
! Resulta más fácil retirar el anillo de guarni-
ción si se suelta la carátula.
Anillo de guarnición
2 Inserte en ambos lados de la unidad las
llaves de extracción provistas hasta que se
escuche un ligero chasquido.
! Inserte las llaves de extracción horizontal-
mente en la unidad. De lo contrario, se pueden atascar entre el manguito de montaje y
la unidad principal.
3 Extraiga la unidad del salpicadero.
Montaje trasero DIN
1 Extienda hacia afuera la parte superior
e inferior del aro de guarnición para retirarlo. (Al volver a colocar el anillo de guarnición, oriente el lado que tiene una ranura
hacia abajo y colóquelo.)
! Resulta más fácil retirar el anillo de guarni-
ción si se suelta la carátula.
Anillo de guarnición
2 Determine la posición correcta, de
modo que los orificios del soporte y del lateral de la unidad coincidan.
3 Apriete los dos tornillos en cada lado.
! Utilice tornillos de cabeza redonda (5 mm
× 6 mm) o tornillos de cabeza embutida (5
mm × 6 mm), según la forma de los orifi-
cios roscados del soporte.
Tornillo
100
Carcasa Salpicadero o consola
Es
 Loading...