

Philips Expanium AZ-2558 Operation User's Manual

SUPPLIED ACCESSORIES
– remote control
– USB cable
– video cable
– CD-ROM USB PC LINK installers
– AC mains lead
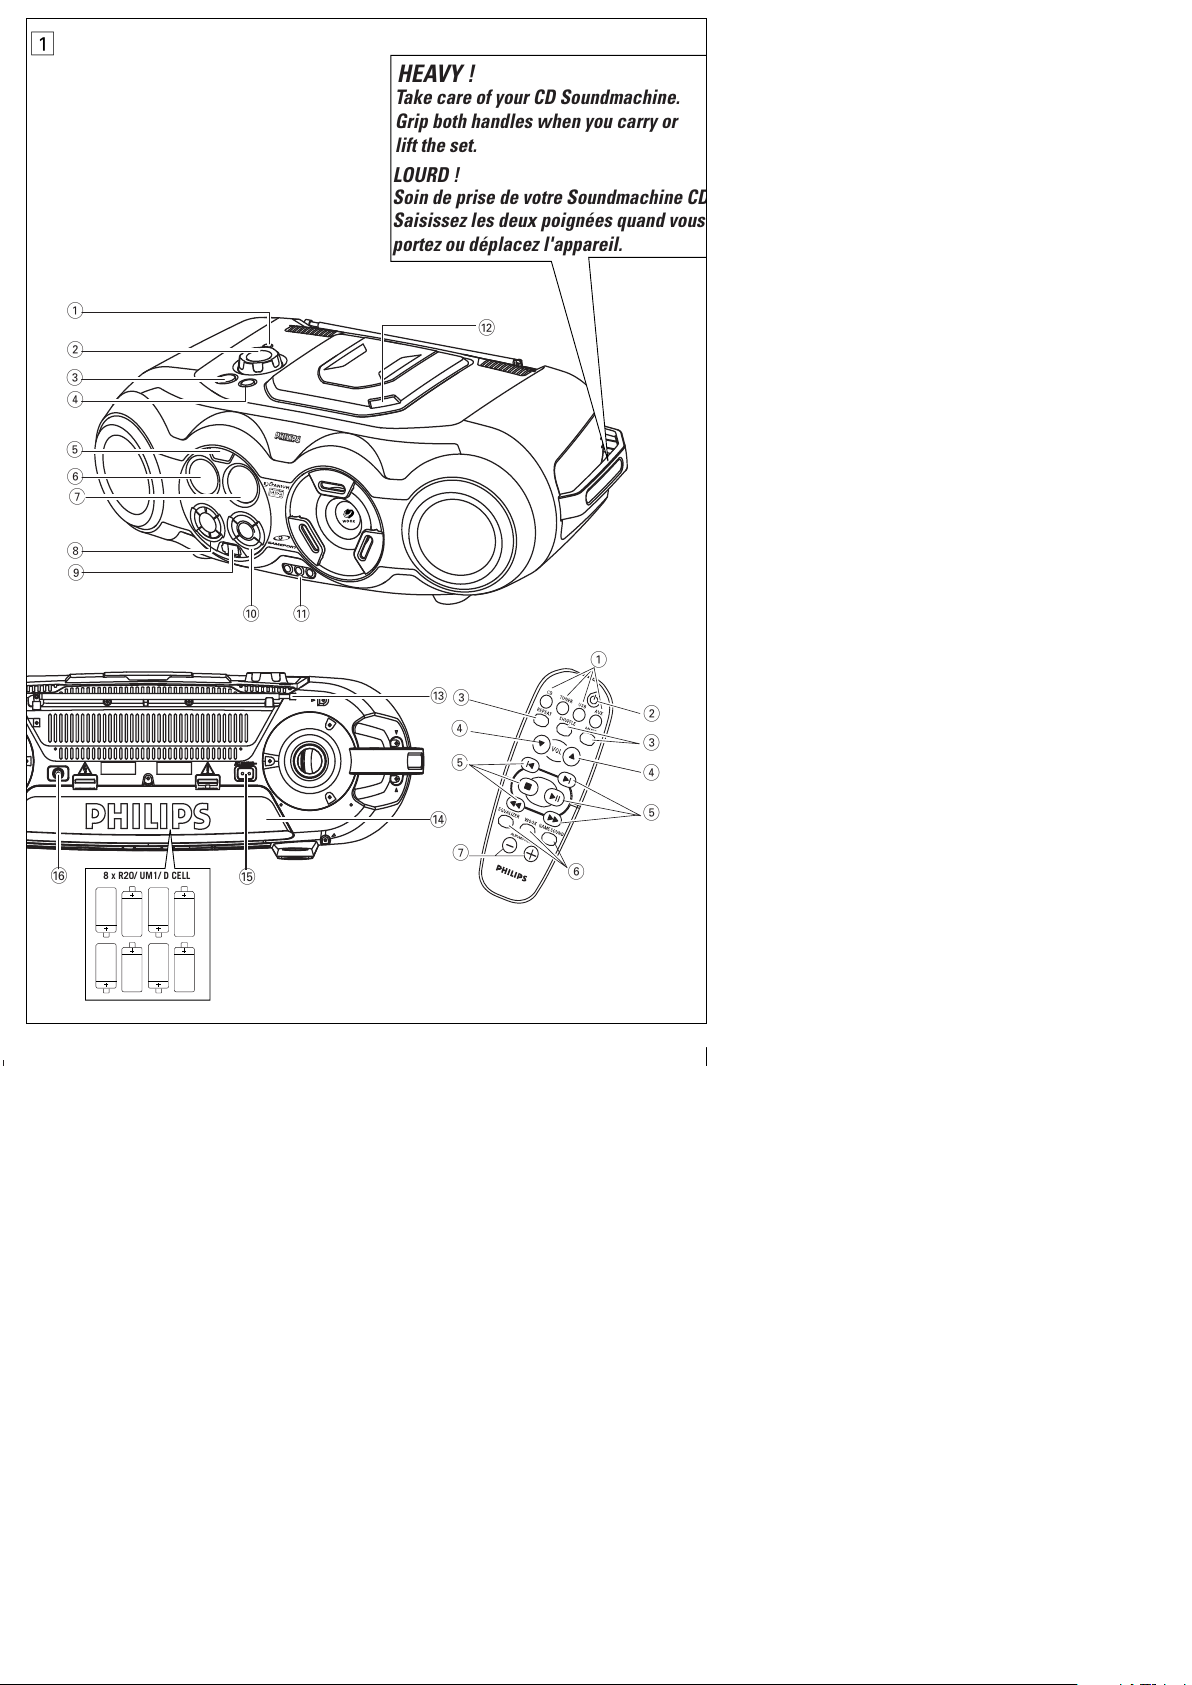
TOP AND FRONT PANEL (See 1)
1p- 3.5 mm stereo headphone jack.
Note: The speakers will be muted when headphones
are connected to the set.
2 VOLUME
-adjust volume level or equalizer level
(BASS/ MID /HIGH)
3 STANDBY ON y - switch the set on/ off.
4 SOURCE - selects sound source for functions: CD/
TUNER/ USB PC LINK/ GAME •AUX
5 IR SENSOR -infrared sensor for remote control
6 LCD Display - shows the status of the set
7 [dB]: - display to indicate bass power.
8 ALBUM /PRESET -, +:
MP3 only :- select previous / next album.
TUNER :-select a previous / next preset station.
SEARCH ∞ , §
MP3-CD / CD :
- searches backward or forward ;
- skips to the beginning of a current track/
previous/ later track.
USB PC LINK -skips to the beginning of a
previous/ later track.
TUNER : -
tunes to radio stations
2;- s
tarts or pauses
MP3-CD
/ CD / USB PC LINK
playback
9 - stop MP3-CD
/ CD / USB PC LINK
playback;
- erases a MP3-CD/CD program.
MODE :
- selects different MP3-CD play modes: e.g. repeat
or shuffle order.
9 USB - connect the supplied USB cable here to the
USB port of your computer
0 GAMESOUND - select sound effects: BLAST/
PUNCH/ SPEED/ NORMAL in GAME •AUX mode
WOOX - selects special bass enhancement on/ off
EQUALIZER -selects bass, mid and high
frequencies.
PROG
MP3-CD / CD : -p
programmed songs;
TUNER : -
programs radio stations.
BAND / DISPLAY
BAND : - selects waveband
DISPLAY: - display MP3-CD functions
! AUDIO IN ( LEFT / RIGHT) -LINE-IN jack for
external audio appliance.
VIDEO IN - to keep video plug in place
@ OPEN•CLOSE – press to open/ close CD door
BACK PANEL (See 1)
# Telescopic antenna - improved FM reception
$ Battery compartment - for 8 batteries, type
R-20, UM-1 or D-cells
% AC MAINS - inlet for power cord
^ VIDEO OUT- connect to the VIDEO IN jack on a
TV or VCR for viewing or recording.
REMOTE CONTROL (See 1)
1 CD - selects MP3-CD
TUNER - selects tuner source / wavebands
USB - selects USB PC LINK
AUX - selects GAME •AUX
2 y -switches the set to standby / on if set
operating on AC power. (Switches set off only if
battery powered)
3 REPEAT -repeat all tracks in USB PC LINK source
or selects the repeat modes in CD source
SHUFFLE -plays MP3-CD
order in CD / USB PC LINK source
MUTE - interrupts/ resumes sound
4 VOL 4, 3 -- adjust volume level or adjust equalizer
level (BASS/ MID /HIGH)
5 ¡ , ™ -select previous/ next track in MP3-CD
USB PC LINK playback
9 - stop MP3-CD / CD / USB PC LINK playback;
- erases a MP3-CD / CD program.
2; - starts or pauses MP3-CD / CD / USB PC LINK
playback
5 / 6 -searches backwards/ forwards within a
MP3-CD / CD track.
TUNER: -
tunes to radio stations
English CONTROL
AZ2558
AZ2558MP3-CD Soundmachine
az2558/00(A) 15/4/03 16:48 Page 1
All manuals and user guides at all-guides.com
all-guides.com
How to get MP3 music
Either download legal MP3 music from the internet or
convert your audio CD into MP3 format with any MP3
encoder software, and then record onto a CD-R(W).
• To achieve a good sound quality a bit rate of at
least 128kbps is recommended for MP3 files.
• Some encoder software offer an option to protect
music files, i.e. the files can only be played on the
computer which created them. If you burn such
files on a CD-ROM, you cannot play them on this
set. Make sure to deactivate the protection option
in the encoder software before creating the music
files. In this case you are responsible for
adherence to all local or international copyrights.
When burning the MP3-CD
• To avoid problems with playback or missing files,
make sure the file names are typed in English text
characters and that the MP3 files end with .mp3
• Use a writing software capable of recording MP3
track titles (files) in numerical and alphabetical
order. For details on using the software, refer to
the operating instructions of the software.
• When recording on a CD-RW, make sure that you
close (finalize) all sessions in order for the set to
read and play your tracks.
7.0, MusicMatch.
• Recordings created on e.g. PacketWriting and
Package Writing.
Playing MP3-CD & CD
This CD player plays Audio Discs including
CD-R(W)s, and MP3 CD-ROMs.
• CD-I, CDV, VCD, DVD or computer CDs, are not
possible.
1. Press
STANDBY ON y
select CD SOURCE.
2. Press OPEN•CLOSE to open the CD door.
] is displayed when the CD door is
open.
3. Insert a CD with the printed side facing up and press
down on OPEN
•
CLOSE to close the CD door.
]Display show ,when reading disc
contents;
]Display : if no disc inserted/
disc incorrectly inserted.,
]Display : or
if disc damaged / dirty:.
– throughout CD operation;
– throughout MP3-CD operation;
– In CD stop mode: total track number and total
playback time.
USB PC LINK USB PC LINK
Printed in China
CLASS 1
LASER PRODUCT
AZ 2558
3140 115 3053 2
4. The installation guide will appear automatically. If it
does not, go to the CD-ROM drive in Windows
Explorer and double click on the USB PC LINK.exe.
Then perform the following steps:
– Select your desired language from the list.
– Select installer driver.
– Select installer MusicMatch jukebox.
– Select other options (Tutorial, Free goodies,
FAQ).
Note:
- You are advised to read the MusicMatch tutorial
before using it for the first time. Make sure the
volume on your PC is suitably adjusted to ensure
sound output on the set. For optimum performance,
the equalizer function in MusicMatch should be set to
a low level.
5. Launch MUSICMATCH JUKEBOX and create
your own playlist of favorite songs by dragging and
dropping the music track from anywhere on your PC
into the playlist window.
Note:
-- If you encounter any problem using the USB PC LINK,
please refer to the FAQ (Frequently Asked Questions)
stored in your USB PC LINK installer disc or visit
www.audio.philips.com for the latest FAQ updates .
After setup, refer to "Connecting to USB PC Link"
for details on the USB PC LINK operations.
Enable digital CD audio output
Before playing CDs on your PC’s CD-ROM drive, it is
necessary to configure your PC’s hardware as follows:
For Windows ME/ 2000/ XP
1. Enter the system panel menu and select
'SYSTEM', 'PROPERTIES', 'HARDWARE',
'DEVICE MANAGER', 'CD-ROM DRIVES' and
'PROPERTIES'.
For Windows 98 SE
2. Check the Enable digital CD audio for this CD-
ROM device setting option is selected (enabled).
Note:-For windows 98 SE you may need to refer
to your PC's manual for correct configura-
tion.
Connecting to USB PC Link (See 9)
The USB PC LINK allows you to playback your music col-
lection from the PC via the powerful amplifier and speak-
ers of this set.
IMPORTANT!
Make sure the MusicMatch software has been
installed. Refer to "Quick Setup Guide" for the
USB PC Link.
1. Turn on your set and computer .
] Check your PC volume is suitably adjusted and
not set to minimum / mute.
2. Press SOURCE (USB on the remote control) once
or more to select USB PC LINK .
3. If correctly connected your PC will automatically
launch MUSICMATCH JUKEBOX.
] If the audio streaming is detected, the current
track name scrolls .
] If scrolls for a while, check
the connection between your PC and set.
4. Press
¡ or ™
until the desired track in the playlist
is highlighted.
5. Press 2;to start playback.
] The track time appears and the track name
scrolls once.
Note: The display only supports English charac-
ters in uppercase.
6. If you want to see the track details displayed press
MODE.
During playback,
– Press SHUFFLE on the remote control to play all
available tracks in the playlist in random order.
– Press REPEAT on the remote control to repeat
playback all the tracks in the playlist.
7. To cancel play modes/ stop playback, press
select another sound sources.
3
5
6
7
8
9
0
!
#
$
^
%
1
2
4
@
8 x R20/ UM1/ D CELL
2
1
7
5
3
4
5
6
4
3
LOURD !
Soin de prise de votre Soundmachine CD
Saisissez les deux poign
ées quand vous
portez ou déplacez l'appareil.
Take care of your CD Soundmachine.
Grip both handles when you carry or
lift the set.
HEAVY !
1
Deutsch
All manuals and user guides at all-guides.com
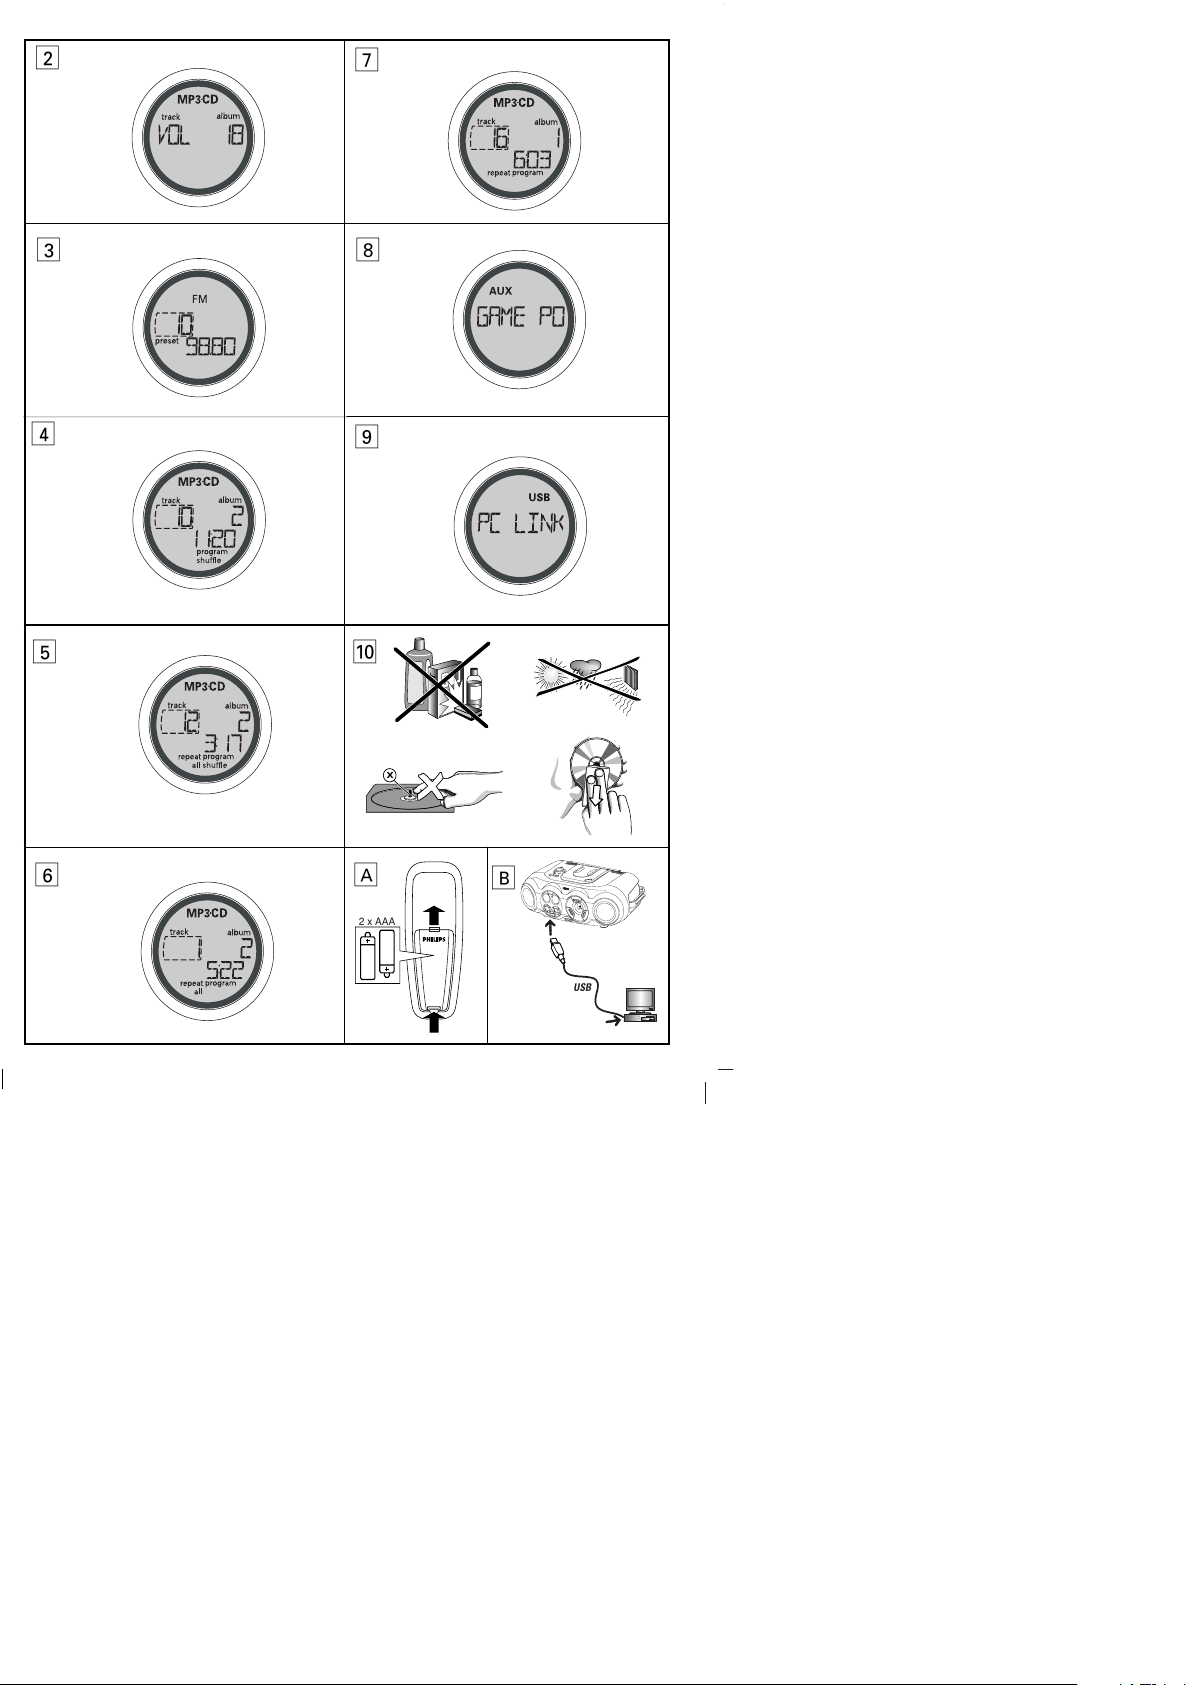
2 x AAA
2
3
4
5
A
X
0
6
8
9
US
B
B
7
Français
ATTENTION
L'emploi de commandes ou de réglages, ainsi toute utilisation ou procédure
autres que décrits dans ce mode d’emploi, peut entraîner une exposition
dangereuse aux radiations ou encore un fonctionnement non conforme aux
normes de sécurité.
Cet appareil est conforme aux normes de la Communauté
Européenne en matière d’interférences radio.
IMPORTANT!
Toute modification effectuée sans l’accord préalable de fabricant peut annuler
toute possibilité pour le consommateur d’utiliser cet appareil.
All manuals and user guides at all-guides.com
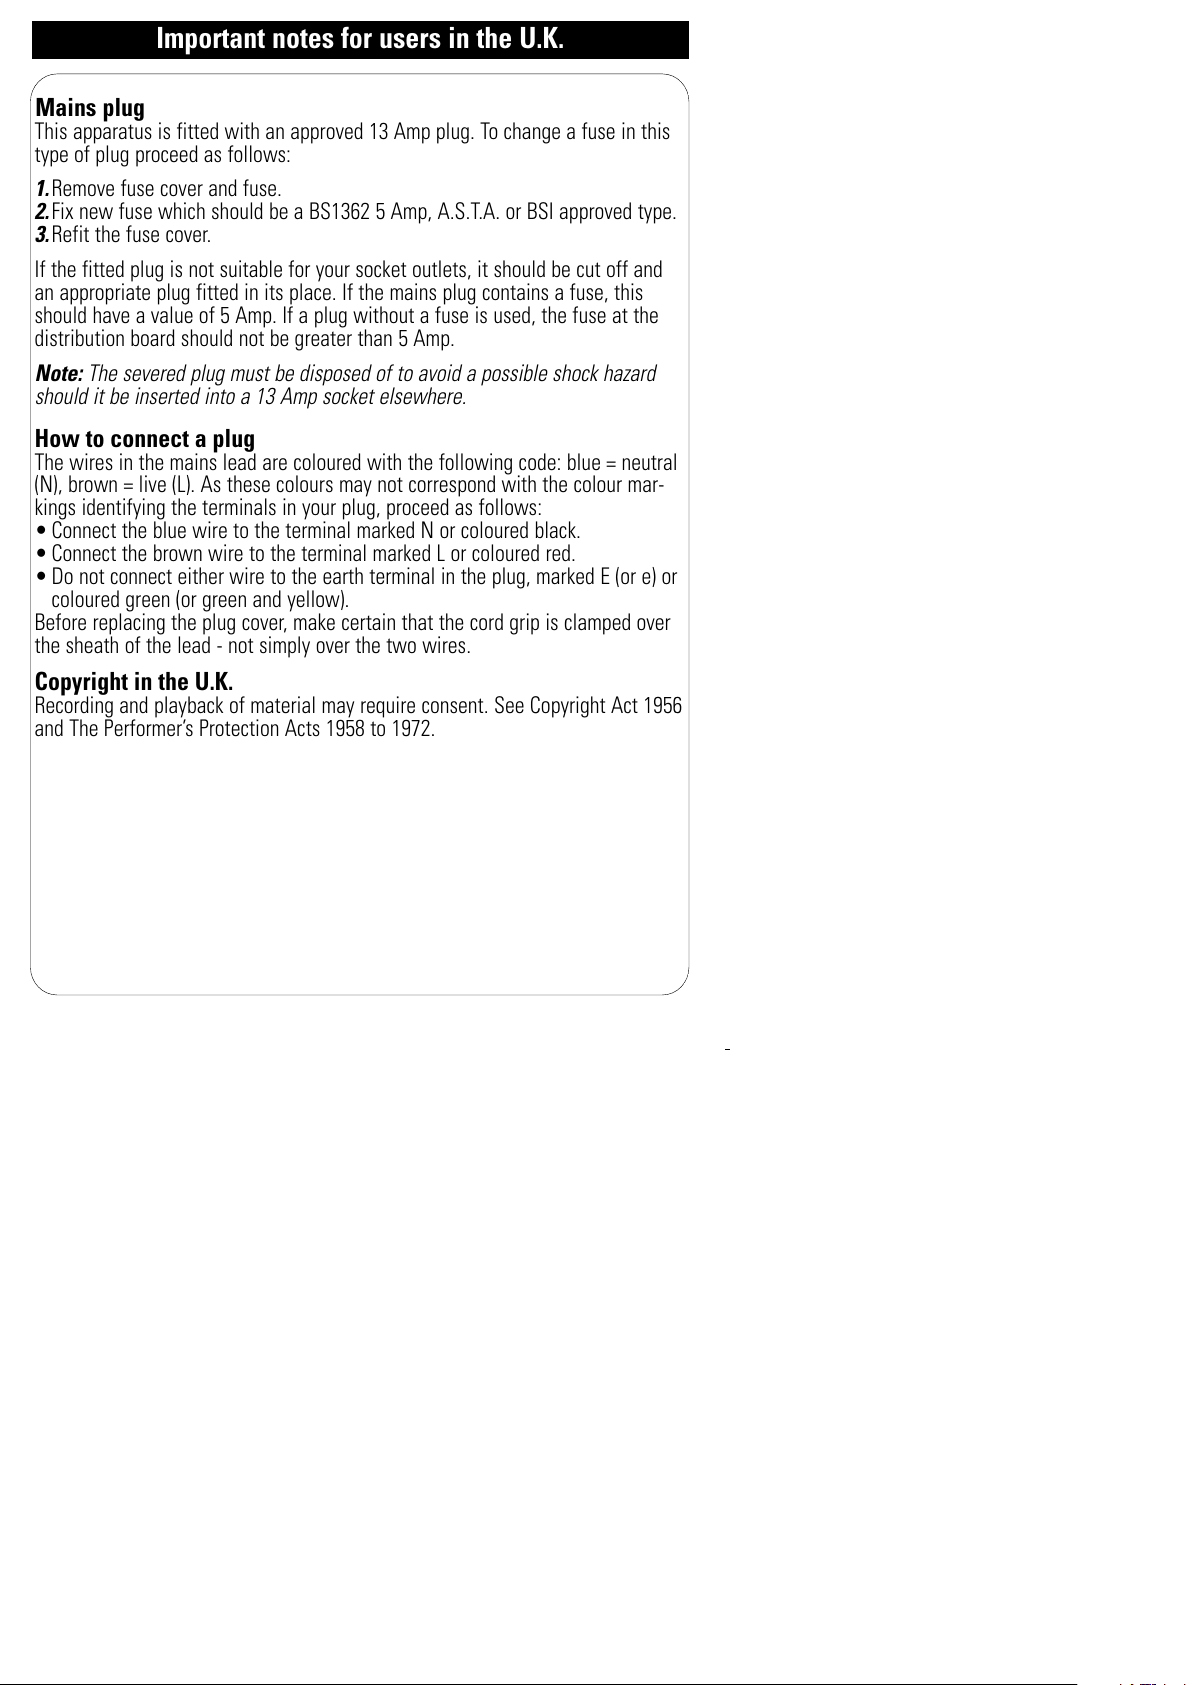
Mains plug
This apparatus is fitted with an approved 13 Amp plug. To change a fuse in this
type of plug proceed as follows:
1.Remove fuse cover and fuse.
2.Fix new fuse which should be a BS1362 5 Amp, A.S.T.A. or BSI approved type.
3.Refit the fuse cover.
If the fitted plug is not suitable for your socket outlets, it should be cut off and
an appropriate plug fitted in its place. If the mains plug contains a fuse, this
should have a value of 5 Amp. If a plug without a fuse is used, the fuse at the
distribution board should not be greater than 5 Amp.
Note: The severed plug must be disposed of to avoid a possible shock hazard
should it be inserted into a 13 Amp socket elsewhere.
How to connect a plug
The wires in the mains lead are coloured with the following code: blue = neutral
(N), brown = live (L). As these colours may not correspond with the colour mar-
kings identifying the terminals in your plug, proceed as follows:
• Connect the blue wire to the terminal marked N or coloured black.
• Connect the brown wire to the terminal marked L or coloured red.
• Do not connect either wire to the earth terminal in the plug, marked E (or e) or
coloured green (or green and yellow).
Before replacing the plug cover, make certain that the cord grip is clamped over
the sheath of the lead - not simply over the two wires.
Copyright in the U.K.
Recording and playback of material may require consent. See Copyright Act 1956
and The Performer’s Protection Acts 1958 to 1972.
Important notes for users in the U.K.
All manuals and user guides at all-guides.com
 Loading...