

Parkside PWS 125 D3 Translation Of The Original Instructions

ANGLE GRINDER PWS 125 D3
ANGLE GRINDER
Translation of the original instructions
KOTNI BRUSILNIK
Prevod originalnega navodila za uporabo
UHLOVÁ BRÚSKA
Preklad originálneho návodu na obsluhu
IAN 280250
SAROKCSISZOLÓ
Az originál használati utasítás fordítása
ÚHLOVÁ BRUSKA
Překlad originálního provozního návodu
WINKELSCHLEIFER
Originalbetriebsanleitung

Before reading, unfold the page containing the illustrations and familiarise yourself with all functions of the
device.
Olvasás előtt kattintson az ábrát tartalmazó oldalra és végezetül ismerje meg a készülék mindegyik
funkcióját.
Pred branjem odprite stran s slikami in se nato seznanite z vsemi funkcijami naprave.
Před čtením si otevřete stranu s obrázky a potom se seznamte se všemi funkcemi přístroje.
Pred čítaním si odklopte stranu s obrázkami a potom sa oboznámte so všetkými funkciami prístroja.
Klappen Sie vor dem Lesen die Seite mit den Abbildungen aus und machen Sie sich anschließend mit allen
Funktionen des Gerätes vertraut.
GB Translation of the original instructions Page
HU Az originál használati utasítás fordítása Oldal
SI Prevod originalnega navodila za uporabo Stran
CZ Překlad originálního provozního návodu Strana
SK Preklad originálneho návodu na obsluhu Strana
DE / AT / CH Originalbetriebsanleitung Seite
4
23
43
63
82
101
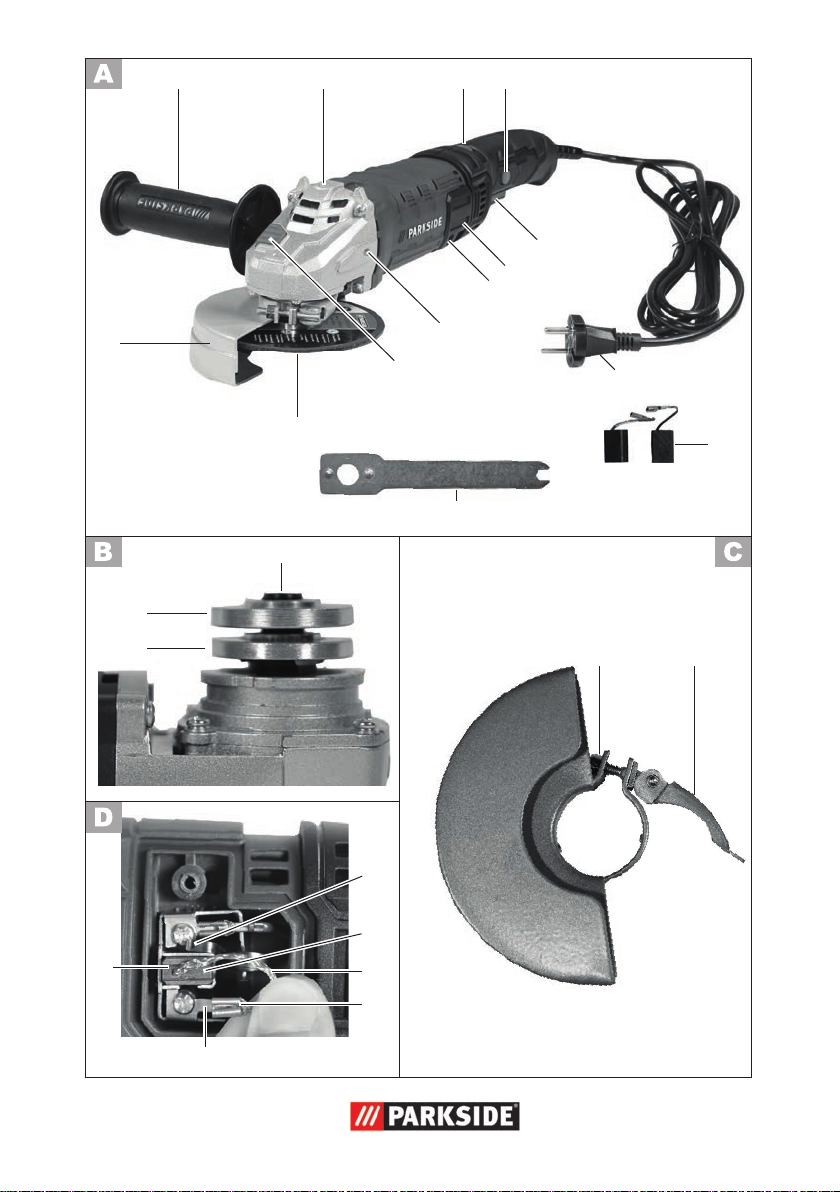
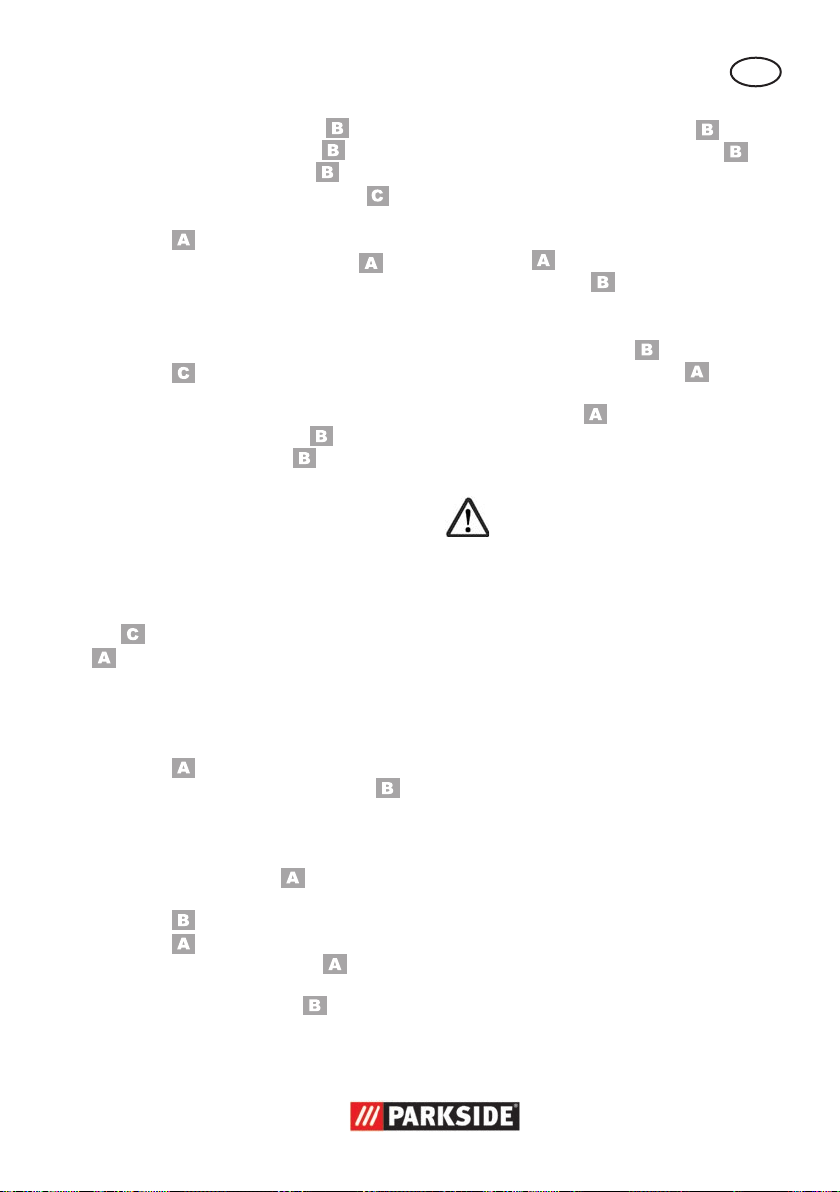
1 2
4
3
5
6
7
14
16
15
17
11
20
8
9
13
18
10
12
19
21
22
23
25
24

GB
Content
Introduction ................................. 4
Intended purpose ......................... 4
General description ...................... 5
Extent of the delivery ........................5
Description of function ......................5
Overview ........................................5
Technical Data .............................. 5
Notes on safety............................6
Symbols and icons ...........................6
General Safety Directions
for Power Tools ................................7
Safety instructions for all applications ....9
Additional safety instructions ...........10
Residual risks .................................11
Additional safety instructions
for all applications .........................11
Special safety instructions
for grinding and cutting ..................12
Other special safety instructions
for cutting grinding .........................13
Additional safety instructions
for sanding ...................................13
Additional safety instructions
for polishing ..................................13
Additional safety instructions
for working with wire brushes ..........13
Practical tips .............................. 14
Assembly ................................... 14
Mount handgrip .............................14
Assemble / set protective hood ........14
Installing / changing disc ...............15
Operation .................................. 15
Turning on and off ..........................16
Cleaning and servicing ............... 17
Cleaning .......................................17
Servicing ......................................17
Storage ......................................17
Waste disposal and
environmental protection ...........18
Troubleshooting ......................... 18
Replacement parts/Accessories .. 19
Guarantee .................................21
Repair-Service ............................22
Service-Center ............................ 22
Importer ....................................22
Translation of the original
EC declaration of conformity ....122
Introduction
Congratulations on the purchase of your
new device. With it, you have chosen a
high quality product.
During production, this equipment has
been checked for quality and subjected to
a nal inspection. The functionality of your
equipment is therefore guaranteed.
The operating instructions constitute part of
this product. They contain important information on safety, use and disposal.
Before using the product, familiarise yourself with all of the operating and safety
instructions. Use the product only as de-
scribed and for the applications specied.
Keep this manual safely and in the event
that the product is passed on, hand over
all documents to the third party.
Intended purpose
The angle grinder is a tool for cutting,
scrubbing and brushing metal, concrete or
tiles without using water. The device is for
use as a Sander, wire brush and polishing
provided.
The device is not intended for any other
types of applications (e.g. grinding with
unsuitable grinding tools, grinding with a
coolant solution, grinding or cutting hazardous materials such as asbestos).
4

GB
The device is intended to be used by do-ityourselfers. It was not designed for heavy
commercial use. The tool is to be used by
adults. Children over the age of 16 may
not use the tool except under supervision.
The manufacturer is not liable for damages
caused by an improper use or incorrect
operation of this device.
General description
See the front fold-out page for
illustrations.
Extent of the delivery
Carefully unpack the appliance and check
that it is complete:
- Device
- Handgrip
- Protective hood
- Chuck key
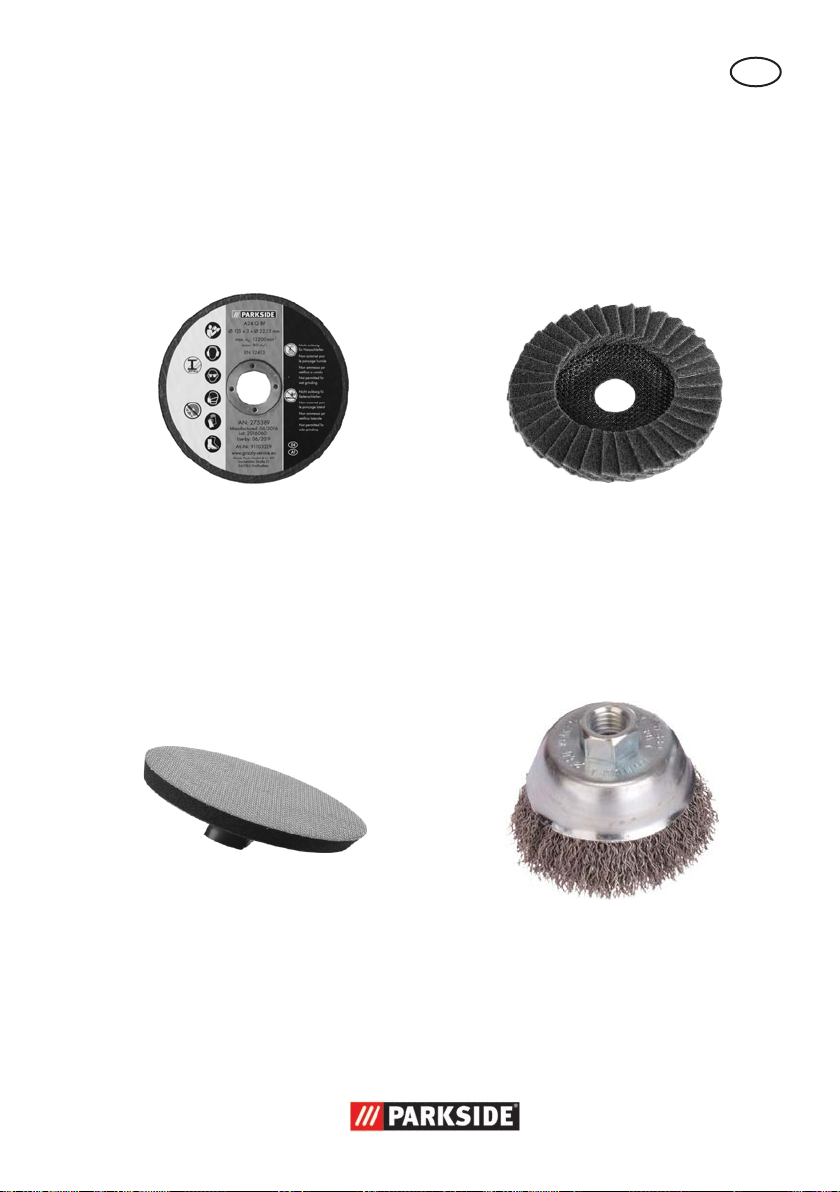
- Cutting disc
- Carbon brushes
- Instructions for use
Description of function
The angle grinder is made for cutting,
scrubbing or brushing metal. There is a
special disc for each of the separate applications. Please refer to the information
from the disc manufacturer.
Please refer to the descriptions below for
information about the operating devices.
Overview
1 Handgrip
2 Threads for handgrip
3 Speed regulator
4 Switch block
5 On/off switch
6 Maintenance coverage
7 Screw
8 Threads for handgrip
9 Spindle stop button
10 Power plug
11 Cutting disc
12 Carbon brushes
13 Chuck key
14 Protective hood
15 Mounting ange
16 Clamping nut
17 Mounting spindle
18 Adjustment nut
19 Tightening lever
20 Compression spring
21 Carbon brush
22 Groove for compression spring
23 Connection
24 Contact shoe
25 Contact plug
Technical data
Angle grinder PWS 125 D3:
Rated input voltage ...230-240 V~, 50 Hz
Power input ............................ 1200 W
Idling speed (n) ............3000-12000 min
Dimensions of the cutting/
roughing discs .......... Ø 125 x 22,23 mm
Thickness of the cutting/
roughing discs ....................... max. 6 mm
Grinding spindle thread ...................M14
Thread length
of the grinding spindle .......... max. 12 mm
Safety class .....................................
Protection category......................... IP 20
Sound pressure level
(L
) ................... 93,2 dB(A); KpA= 3 dB
pA
Sound power level (L
WA
)
measured ........ 104,3 dB(A); K
guaranteed .........................107 dB(A)
Vibration (a
) ... 12,104 m/s2; K= 1,5m/s
h
= 3 dB
WA
II
-1
2
5
GB
The vibration values represent maximum values which have been determined with the supplied blade. The actual vibration values may
vary depending on the used accessories.
The vibration values are still affected by the
handling for the user‘s.
Cutting disc (included):
Idling speed n
............. max.12200 min
0
-1
Disc speed ....................... max. 80 m/s*
Outer diameter ................... Ø 125 mm
Bore hole ........................ Ø 22,23 mm
Thickness ...................................3 mm
*
The grinding disc must keep a rotational
speed of 80 m/s.
Levels of noise and vibration were determined according to the norms and regulations
in the declaration of conformity.
The vibration emission value has been measured according to a standardised testing
method and may be used for comparison
with another electric tool.
The indicated vibration emission value may
also be used for an introductory assessment
of the exposure.
Warning:
The vibration emission value whilst
actually using the electrical tool may
vary from the given values independently of the type and way in which
the electric tool is used.
Safety measures for the protection of
the operator are to be determined
that are based on an estimate of the
actual exposure under the real operating conditions (for this, all parts of
the operating cycle are to be taken
into account, for example, times in
which the electric tool is turned off,
and those during which it is turned
on but running without a load).
Notes on safety
Caution! When using power tools,
observe the following basic safety
measures for the prevention of electric
shocks and the risk of injury and re.
Please read all these instructions before using this electric tool and please
keep the safety instructions.
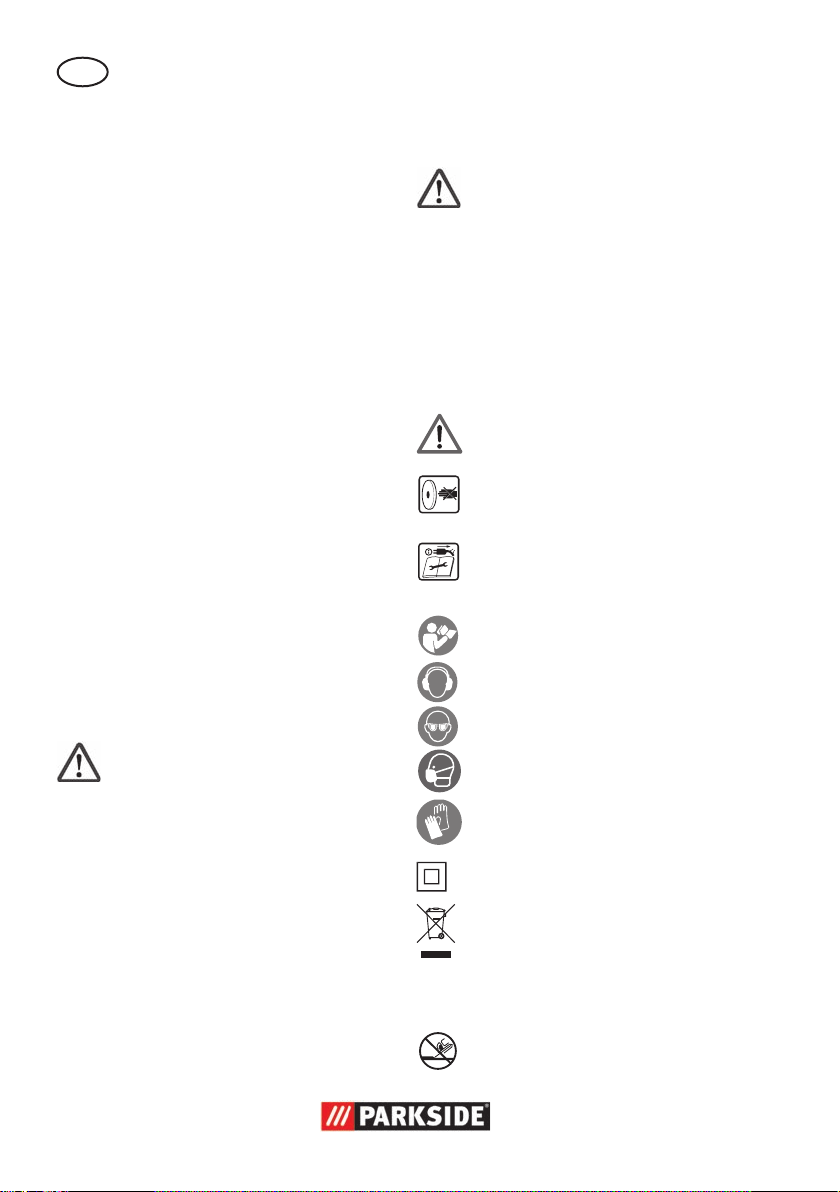
Symbols and icons
Symbols on the device:
Warning!
Risk of injury from the rotating tool!
Keep hands away.
Warning! Electric shock hazard.
Always unplug the device before
working on it.
Read the manual!
Wear ear protection
Wear eye protection
Wear breathing protection
Risk of cuts!
Wear cut-resistant gloves.
Safety class II
Electrical machines do not belong
with domestic waste.
Other symbols on the
cutting disc:
Do not use for side grinding
6
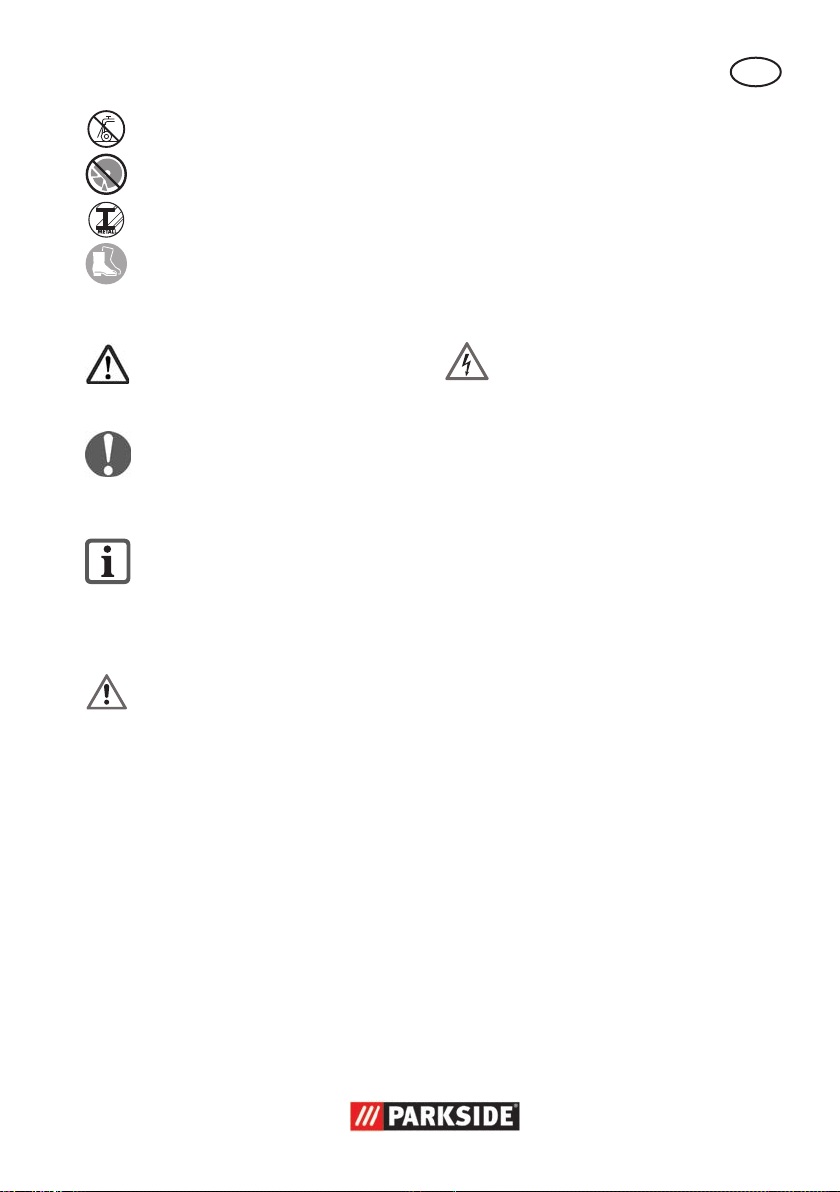
GB
Do not use for wet grinding
Do not use defective discs
Suitable for metal
Wear safety shoes
Symbols used in the instructions:
Hazard symbols with informa-
tion on prevention of personal
injury and property damage
Precaution symbol (explanation of
precaution instead of exclamation
mark) with information on prevention of harm / damage.
Notice symbol with information on
how to handle the device properly.
General Safety Directions for
Power Tools
WARNING! READ ALL SAFETY
DIRECTIONS AND INSTRUCTIONS. Omissions in the compliance
with safety directions and instructions
can cause electrical shock, re and/
or severe injuries.
Retain all safety directions and instructions for future use.
The term „power tool“ in the warnings refers
to your mains-operated (corded) power tool
or battery-operated (cordless) power tool).
Work area safety :
• Keep work area clean and well lit.
Cluttered or dark areas invite accidents.
• Do not operate power tools in
explosive atmospheres, such as in
the presence of ammable Iiquids,
gases or dust. Power tools create
sparks which may ignite the dust or fumes.
• Keep children and bystanders
away while operating a power
tool. Distractions can cause you to lose
control.
Electrical safety :
CAUTION! The following states how
to avoid accidents and injuries due to
electric shock:
• Power tool plugs must match the
outlet. Never modify the plug in
any way. Do not use any adapter plugs with earthed (grounded) power tools. Unmodied plugs
and matching outlets will reduce risk of
electric shock
• Avoid body contact with earthed
or grounded surfaces, such as
pipes, radiators, ranges and ref-
rigerators. There is an increased risk
of electric shock if your body is earthed
or grounded.
• Do not expose power tools to
rain or wet conditions. Water entering a power tool will increase the risk
of electric shock.
• Do not abuse the cord. Never
use the cord for carrying, pulling
or unplugging the power tool.
Keep cord away from heat, oil,
sharp edges or moving parts.
Damaged or entangled cords increase
the risk of electric shock.
• When operating a power tool
outdoors, use an extension cord
suitable for outdoor use. Use of a
cord suitable for outdoor use reduces
the risk of electric shock.
7

GB
• If operating a power tool in a
damp location is unavoidable,
use a residual current device
(RCD) protected supply. Use of an
RCD reduces the risk of electric shock.
Use a circuit breaker with a current limit
of 30 mA or less.
Personal safety:
CAUTION! The following states how
to avoid accidents and injuries:
• Stay alert, watch what you are
doing and use common sense
when operating a power tool.
Do not use a power tool while
you are tired or under the inuence of drugs, alcohol or medi-
cation. A moment of inattention white
operating power tools may result in
serious personal injury.
• Use personal protective equip-
ment. Always wear eye protection. Protective equipment such as dust
mask, non-skid safety shoes, hard hat, or
hearing protection used for appropriate
conditions will reduce personal injuries.
• Prevent unintentional starting.
Ensure the switch is in the offposition before connecting to
power source and/or battery
pack, picking up or carrying the
tool. Carrying power tools with your
nger on the switch or energising power tools that have the switch on invites
accidents.
• Remove any adjusting key or
wrench before turning the power tool on. A wrench or a key left
attached to a rotating part of the power
tool may result in personal injury.
• Do not overreach. Keep proper
footing and balance at all times.
This enables better control of the power
tool in unexpected situations.
• Dress properly. Do not wear
loose clothing or jewellery. Keep
your hair, clothing and gloves
away from moving parts. Loose
clothes, jewellery or long hair can be
caught in moving parts.
• If devices are provided for the
connection of dust extraction
and collection facilities, ensure
these are connected and properly used. Use of dust collection can
reduce dust-related hazards.
Power tool use and care :
• Do not force the power tool. Use
the correct power tool for your
application. The correct power tool
will do the job better and safer at the
rate for which it was designed.
• Do not use the power tool if the
switch does not turn it on and
off. Any power tool that cannot be
controlled with the switch is dangerous
and must be repaired.
• Disconnect the plug from the po-
wer source and/or the battery
pack from the power tool befo-
re making any adjust -ments,
changing accessories, or storing
power tools. Such preventive safety
measures reduce the risk of starting the
power tool accidentaIly.
• Store idle power tools out of the
reach of children and do not allow persons unfamiliar with the
power tool or these instructions
to operate the power tool. Power
tools are dangerous in the hands of untrained users.
• Maintain power tools. Check
for misalignment or binding
8

GB
of moving parts, breakage of
parts and any other condition
that may affect the power tool’s
operation. If damaged, have the
power tool repaired before use.
Many accidents are caused by poorly
maintained power tools.
• Keep cutting tools sharp and
clean. Properly maintained cutting
tools with sharp cutting edges are less
Iikely to bind and are easier to control.
• Use the power tool, accessories
and tool bits etc. in accordance
with these instructions, taking
into account the working conditions and the work to be performed. Use of the power tool for
operations different from those intended
could result in a hazardous situation.
Service:
• Have your power tool serviced
by a qualied repair person
using only identical replacement
parts. This will ensure that the safety
of the power tool is maintained.
Safety instructions for all
applications
Common safety instructions for
grinding, sanding, working with
wire brushes polishing and cutting
grinders:
• This electric tool is to be used as
a grinder, sander, wire brush,
polisher and cutting grinder.
Follow all safety instructions,
directives, illustrations and facts
which you receive with the device. If you do not follow these instruc-
tions, an electrical shock, re and/or
serious injury may occur.
• Do not use any accessories that
are not specically intended and
recommended for this electric
tool by the manufacturer. Simply
because an accessory can be attached
to your electric tool does not guarantee
safe operation.
• The allowable rotation speed
of the attachment tools must be
at least as high as the highest
rotation speed indicated on the
electric tool. Accessories that run fas-
ter than the allowable speed can break
and y apart.
• The outside diameter and thickness of the attachment tool must
correspond to the dimensions
indicated for your electric tool.
Attachment tools which are wrongly
dimensioned cannot be sufciently
shielded or controlled.
• Attachment tools with threaded
attachment must t the threading of the grinding spindle
exactly. For attachment tools
which are mounted through a
ange, the diameter of the hole
in the attachment tool must t
the mounting diameter of the
ange. Attachment tools which cannot
be precisely attached to the electric tool
turn unevenly, vibrate very strongly and
can ultimately lead to a loss of control.
• Never use damaged attachment
tools. Check attachment tools
such as grinding discs for chip-
ping or cracks, grinding plates
for cracks, wear or strong abra-
sion and wire brushes for loose
or broken wires before using
them. If the electric tool or the
attachment tool falls off, check
whether it is damaged or, use
an undamaged attachment tool.
9

GB
If you have checked the attach-
ment tool and attached it, keep
yourself and any nearby persons
beyond the level of the rotating
attachment tool and allow the device to run for 1 min. at the highest rotational speed. Damaged tools
usually break during this test period.
• Wear personal safety equipment. Depending on the appli-
cation, use full face shields, eye
protection or safety goggles. In
so far as it is appropriate, wear
dust masks, ear protection,
gloves or special aprons which
keep small grinding and material particles away from you. Eyes
should be protected from the foreign
matter which can be caused to y during the various applications. Dust or
breathing masks should lter the dust
that is created during operation. If you
are exposed to loud noise for a long
time, you may suffer hearing loss.
• Ensure that other people are at
a safe distance to your working
area. Anyone who enters the working area should wear personal
protective equipment. Broken bits from
the piece being worked or broken attach-
ment tools can y away and cause injuries
even beyond the direct working area.
• Hold the electric tool only by the
insulated gripping surfaces when
performing work in which the
cutting tool may come into contact
with hidden wiring or its own
cord. Contact with a live wire can also
cause a charge in metal parts of the
device and result in an electric shock.
• Keep the cord away from the rotating attachment tool. If you lose
control of the device, the power cord
can become separated or caught and
your hand or arm may be pulled into
the rotating attachment tool.
• Never put the electric tool down
before the attachment tool has
come to a full stop. The rotating at-
tachment tool can come into contact with
the surface upon which it is set, whereby
you could lose control of the electric tool.
• Never allow the electric tool to
run while you are carrying it.
Your clothing may accidentally come
into contact with the rotating attachment
tool and get caught and the attachment
tool could drill into your body.
• Clean the ventilation slots of
your electric tool routinely. The
motor air pulls dust into the housing
and, should too much metallic dust collect, could cause electrical hazards.
• Never use the electric tool near
ammable material. Sparks could
ignite this material.
• Do not use attachment tools
which require liquid coolant.
Using water or another liquid coolant
could lead to electrical shock.
Additional safety instructions
• Connect the appliance only to a power
socket with a residual current circuit
breaker of rated residual current no
more than 30 mA.
• Keep power cords and extension cords
away from the disc. If they are damaged
or cut through, immediately pull the plug
from the outlet. Do not touch the cable
before it has been disconnected from the
power supply. Risk of electric shock!
• If the replacement of the supply cord is
necessary, this has to be done by the
manufacturer or his agent in order to
avoid a safety hazard.
1 0

GB
• Only use grinding discs where the indicated rotational speed is at least as
high as what has been specied on the
name plate of the device.
• Carry out a visual inspection of the grinding disc before use. Do not use any damaged or deformed grinding discs. Replace
any damaged or worn grinding discs.
• Make sure that the sparks produced by
grinding do not present a danger, e.g.
reach people or ignite ammable substances.
•
Always wear safety goggles, safety gloves,
respiratory protection and ear protection
when grinding, brushing and cutting.
• Never keep the ngers between the
grinding disc and spark protection or in
close proximity to the protective hoods.
There is a risk of crushing.
• The rotating parts of the device cannot
be covered due to functional reasons.
Therefore, proceed cautiously and hold
the workpiece rmly in order to avoid
slipping which could cause your hands to
come into contact with the grinding disc.
• The workpiece gets hot during grinding. Do not touch the machined area,
allow it to cool down. There is a risk of
burning. Do not use coolants or the like.
• If you are tired or have consumed alcohol or tablets, do not work with the
device. Always have a break on time.
• Switch the device off and remove the
mains plug
- to loosen a blocked insertion tool,
- if the connection line is damaged or
entangled,
- in case of unusual sounds.
RESIDUAL RISKS
Even if properly operating and handling
this electric tool, some residual risks will
remain. Due to its construction and build,
this electric tool may present the following
hazards:
a) Lung damage if suitable respiratory pro-
tection is not worn.
b) Hearing damage if suitable ear protec-
tion is not worn.
c) Damage to health due to
- touching the area of the grinding tool
which is not covered;
- ejection of parts of workpieces or
damaged grinding discs.
d) Health injuries which result from swin-
ging hand and arm, in the event that
the device is used over a longer period
of time or is not used and maintained
properly.
Warning! During operation, this
electric tool generates an electro-
magnetic eld which, under certain
circumstances, may impair the functionality of active or passive medical
implants. To reduce the risk of serious or lethal injuries, we recommend
that persons with medical implants
consult their doctor and the manufacturer of their medical implant
before operating the machine.
Additional safety instructions
for all applications
Kickback and corresponding
precautions
Kickback is the sudden reaction from a
chopping or blocked grinder attachment
such as a grinding disc, grinding plate,
wire brush etc. Chopping or blocking leads
to sudden stopping of the rotating attachment. This causes an uncontrolled electric
tool to accelerate in a direction counter to
the rotational direction of the attachment
tool. If, for example, a grinding disc cuts
1 1

GB
into the workpiece or blocks it, the edge of
the grinding disc that digs into the workpiece can get caught and, through that,
break off the grinding disc or cause a kickback. The grinding disc then moves towards
or away from the operator, depending on
the direction of rotation of the disc at the
blocked spot. Here, the grinding discs can
also break. A kickback is caused by wrongly or incorrectly operating the electric tool.
It can be avoided by suitable cautionary
measures, such as described below.
a) Hold the electric tool very rmly and
bring your body and your arm into a
position in which you can resist the kickback force. Always use the supplemental
handle if available to give you the best
control over kickback force or reaction
time during acceleration. The operator
can master the kickback and reaction
force through suitable precautions.
b) Never bring your hands near a rotating
attachment tool. The attachment tool
can run over your hand in the kickback.
c) Keep your body away from the area
in which the electric tool would move
during a kickback. The kickback drives
the electric tool in the counter-direction
to the rotation of the grinding disc at
the blocked spot.
d) Work particularly cautiously in corner
areas or where there are sharp corners etc. Prevent the attachment tools
from recoiling from the workpiece and
jamming. The rotating attachment tool
tends to jam when near corners, sharp
edges or when it recoils from such. This
causes a loss of control or kickback.
e) Do not use chain or toothed saw bla-
des. Such attachment tools frequently
cause a kickback or loss of control over
the electric tool.
Special safety instructions for
grinding and cutting
a) Use only grinders which have been
approved for your electric tool and the
protective hood intended for these grinders. Grinders which are not intended
for the electric tool may not be sufciently shielded and are unsafe.
b) Depressed Center grinding wheels must
be pre-assembled so that their surface
not above the level of the edge of the
guard stands out. An improperly mounted grinding wheel, which extends beyond the level of the edge of the guard,
not sufciently shielded.
c) The protective hood must be securely
attached to the electric tool and adjusted so that the greatest level of safety
is reached, i.e., the smallest possible
amount of the grinder is exposed to the
operator. The protective hood should
protect the operator from broken bits
and accidental contact with the grinder.
d) Grinders may only be used for the
recommended attachment options. For
example: Never grind with the side
surface of a cutting disc. Cutting discs
are for cutting material using the edge
of the disc. Pushing sideways on these
grinders can break them.
e) Always use undamaged clamping an-
ges of the correct size and shape for
the grinding disc you selected. Suitable
anges support the grinding disc and
thus reduce the danger of the grinding
disc breaking. Flanges for cutting discs
can be distinguished from anges for
other grinding discs.
f) Do not use worn grinding discs for
larger electric tools. Grinding discs for
larger electric tools are not set up for
the higher rotation speeds of smaller
electric tools and can break.
1 2

GB
Other special safety instructions
for cutting grinding
a) Avoid blocking the cutting disc or pres-
sing down too hard. Do not make any
excessively deep cuts. Overloading the
cutting disc increases wear and its tendency to tilt or block and, with that, to
kickback or break the grinder.
b) Avoid the area in front of and behind
the rotating cutting disc. When you
move the cutting disc by itself in the
workpiece, in the event that the electric
tool kicks back with the rotating disc, it
can spin directly towards you.
c) If the cutting disc jams, or you interrupt
your work, switch the device off and
hold it until the disc has come to a full
stop. Never try to pull the cutting disc
out of the cut while it is still running,
because it can kick back. Identify and
correct the cause of the jamming.
d) Do not switch the electric tool on again
as long as it is in the workpiece. Allow
the cutting disc to rst reach its full
rotational speed before you carefully
resume with the cutting. Otherwise, the
disc may catch, spring away from the
workpiece or cause a kickback.
e) Support plates or workpieces to reduce
the risk of kickback from a jammed cutting disc. Large workpieces may bend
under their own weight. The workpiece
must be supported on both sides of the
disc, near the cutting disc as well as
also at the edge.
f) Be particularly careful for pocket cuts in
existing walls or other areas where you
cannot see what is there. The cutting
disc may cause a kickback when it cuts
into gas or water lines, electrical lines
or other hidden objects.
Additional safety instructions
for sanding
Special safety instructions for
sanding:
• Do not use overly large sandpaper sheets; follow the
manufacturer‘s information for
sandpaper sizes. Sandpaper sheets
which extend beyond the sanding plate
can cause injuries and can block, tear
the sandpaper, or cause kickback.
Additional safety instructions
for polishing
Special safety instructions for
polishing:
• Let no loose parts of the polishing bonnet, particularly attachment strings. If you shorten
the fastening cords verse defrost
oder. Loose, revolving attachment
strings can capture your ngers or become entangled in the workpiece.
Additional safety instructions
for working with wire brushes
Special safety instructions for
working with wire brushes:
• Be aware that the wire brushes
also lose wire pieces during typical use. Do not overload the wires by pressing down too hard.
Flying wire pieces can very easily penetrate thin clothing and/or your skin.
• If a protective hood is recom-
mended, do not allow the wire
brushes and the protective hood
to touch each other. The diameter
1 3
GB
of plate and cup brushes can enlarge if
too much pressure and centrifugal force
is exerted.
Practical tips
Scrubbing wheels:
Never use a cutting wheel for
scrubbing !
The device must only be
operated with the protective hood mounted when the
rough grinding wheel is used.
Exert only moderate pressure on the workpiece. Move the device evenly back and forth.
A working angle of 30° to 40° achieves
the best results for scrub grinding.
Cutting disc:
Never use a scrubbing wheel
for cutting !
The device must only be
operated with the protective
hood mounted when the cutting disc is used.
Only certied, bre-reinforced cutting or
grinding discs may be used.
In general, work with small scrubs. Exert
only moderate pressure on the workpiece.
Always work in the counter-direction. This
ensures that the device is not pushed out of
the cut through lack of control.
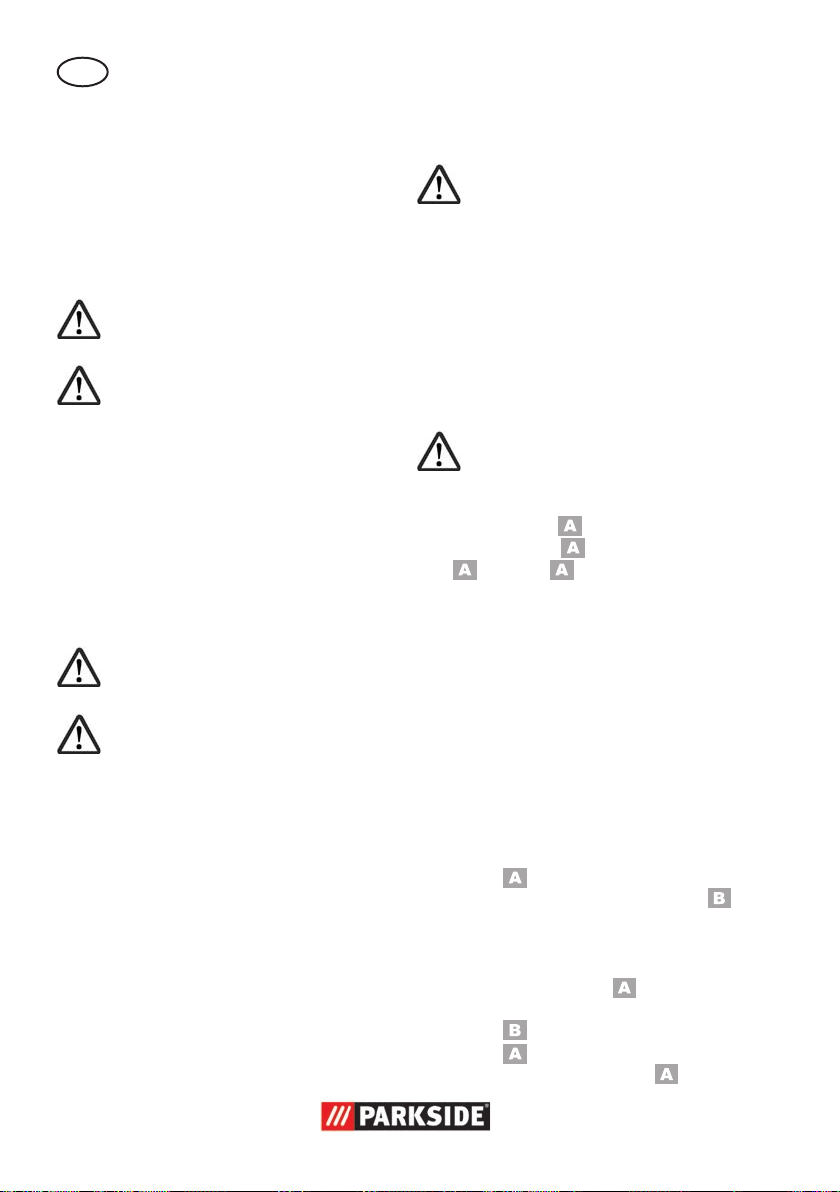
Assembly
Caution! Risk of injury!
- Ensure that you have sufcient
space in which to work, and that
you do not endanger other people.
- All hoods and protective devices
must be assembled properly before commissioning.
-
Mount handgrip
Depending on the method of working, tighten the handgrip (
thread on the left (
tion
Assemble/set protective hood
Adjust the protective hood such that any
sparks or detached parts cannot hit either
the user or any bystanders.
The protective hood must also be positioned such that the sparks cannot ignite
combustible parts, including those in the
surroundings.
1. Press the spindle stop button
(
2. Turn the mounting spindle (
3. Release the clamping nut
(
(
Disconnect the mains plug before
changing the setting on the device
The device must only be operated with the handgrip mounted.
1) on to the handgrip
8), right (see illustra-
) or top ( 2) of the device.
9).
17) until the spindle lock xed
the mounting spindle. Keep and
continue to hold down the spindle lock button (
16) with the chuck key
13). You can release the
spindle lock button (
9)
9).
1 4
GB
4. Take off the locknut ( 16) and
the adapter ange (
the spindle ange (
5.
6. Place the protective hood
7. Turn the protective hood (
8. Close the tightening lever
(
9. Install the locknut (
10. Readjust the position of the pro-
If needed, the tension on the adjustment
nut (
(
Open the tightening lever ( 19).
(
14) on the positioning holes.
into the working position. The
closed side of the protective hood
must always face the operator.
19) again. The protective
hood should not be able to be
turned any more.
adapter ange (
se order.
tective hood if you nd during
use that it does not provide optimum protection.
18) can be set. Use the chuck key
13) for this.
15) from
17).
14)
16) and
15) in rever-
Installing/changing disc
1. Press the spindle stop button
(
2. Turn the mounting spindle (
3. Release the clamping nut
(
(
4. Set the desired disc onto the
9).
17) until the spindle lock xed
the mounting spindle. Keep and
continue to hold down the spindle lock button (
16) with the chuck key
13). You can release the
spindle lock button (
mounting ange (
on the disc should always face
the device.
9)
9).
15). label
5. Set the clamping nut (
on the mounting spindel (
17) again. The at side of the
clamping nut must face the attachment tool.
6. Press the spindle stop button
(
9) and turn the mounting
spindle (
toggle button holds the spindle
ange in a xed position. Pull the
clamping nut (
using the chuck key (
You can let go of the spindle lock
button (
17), until the spindle
16) tight again
9).
16)
13).
Operation
Caution! Risk of injury!
- Always remove the mains plug
before working on the tool.
- Only use grinding discs and accessories recommended by the manufacturer. Using other attachment
tools and other accessories can
represent a risk of injury for you.
- Only use grinding tools which
bear information about the
manufacturer, type of binding,
dimension and permitted number
of revolutions.
- Only use grinding discs where
the printed rotational speed is at
least as high as what has been
specied on the name plate of
the device.
- Do not use any broken, cracked,
or otherwise damaged grinding
discs.
- Never operate the device without protective equipment.
- Support the plates or workpieces
in order to reduce the risk of
kickback from a jammed cutting
disc. Large workpieces may
1 5
GB
bend under their own weight.
The workpiece must be supported on both sides of the disc, not
only near the cutting disc, but
also at the edge.
Keep your hands away from
the disc when the device is in
operation. Risk of injury.
Information on replacement:
• Never operate the device without
protective equipment.
• Ensure that the rotation speed stated on the grinding disc (
the same or higher than the nominal rotation speed of the device.
•
• Only use awless grinding discs
• Never re-drill a locating hole which
• Never use separate bushings or
• Do not use any saw blades.
• To clamp the grinding tools
• Always reassemble the device
Ensure that the grinding disc dimensions match those of the device.
(ringing test: when you strike the
grinding disc with a plastic hammer, it results in a clear sound).
is too small to make it larger.
adapters in order to make grinding discs with a hole that is too
large t the device.
only use the clamping ange
provided. The pads between
the clamping ange and the
grinding tools must be made of
elastic materials e.g., rubber,
soft cardboard etc.
completely after replacing the
grinding disc.
11) is
Wear protective gloves when chan-
ging the grinding discs in order to
avoid cutting damages.
The grinding disc nut must not be
screwed too tightly in order to avoid breaking the disc and nut.
Turning on and off
Make sure that the power supply
voltage matches the voltage rating
indicated on the device‘s type plate.
Connect the machine to the power
supply.
1. Press the on switch (
device. Press the on/off switch (
2. To turn it off, release the on-off button.
The device turns off.
After switching on the device, wait until the
device has reached its max. speed. Only
then should you start with the work.
The disc still runs even after
the device has been switched
off. Risk of injury.
Trial run:
Always carry out a trial run before carry-
ing out your rst grinding procedure and
after every disc replacement. Switch the
device off immediately if the grinding disc
is not rotating smoothly, if considerable
vibration occurs or if you hear abnormal
noises.
4) to start the
5).
Switch the device off and remove
the mains plug. Allow the device to
cool down.
1 6
GB
Cleaning and servicing
Pull the mains plug before any ad-
justments, maintenance or repair.
Have any work on the device
that is not described in this instruction guide performed by
a professional. Only use original parts. Allow the device
to cool off before any maintenance or cleaning is undertaken. There is a risk of burning!
Always check the device before using it for
obvious deciencies such as loose, worn
or damaged parts, correct the positioning
of screws or other parts. Examine the
grinding disc in particular. Exchange the
damaged parts.
Cleaning
Do not use any cleaning agent or
solvent. Chemical substances can
etch the plastic parts of the device.
Never clean the device under running water.
• Thoroughly clean the device after every
use.
• Clean the ventilation openings and the
surface of the device with a soft brush
or cloth.
Servicing
Replacing carbon brushes
1. Loosen the screw ( 7) of the
maintenance cover (
2. Remove the maintenance cover (
6).
3. Lift the compression spring (20)
out of the groove for the spring
(22) the carbon brush (21).
4. Remove the contact plug (25) of
the contact shoe (24).
5. Pull out the brush (21) from the
guide.
6. Insert a new carbon brush (21)
into the guide.
7. Place the connector (23) in a
bow in the groove for the compression spring (22) past. Lead
the connector (23) through the
side opening of the leadership.
8. Slide the contact plug (25) on
the contact shoe (24).
9. Replace the compression spring
(20) on the nut of the compression spring (22) the carbon brush
(21).
10. Reattach the screw (
maintenance cover (
11. Repeat the procedure 1 to 10
on the other side of the unit. The
carbon brushes are always in
pairs to share.
6).
7) the
6)
Storage
• Store the appliance in a dry place well
out of reach of children.
• Grinding discs must be dry and stored
upright and should never be stacked.
Switch off the appliance and dis-
connect the power supply. Let the
appliance cool down.
1 7
GB
Waste disposal
and environmental
protection
Be environmentally friendly. Return the tool,
accessories and packaging to a recycling
centre when you have nished with them.
Electrical machines do not belong
with domestic waste.
• Hand over the device at an utilization
location. The plastic and metal parts
employed can be separated out and
thus recycled use can be implemented.
Ask our Service-Center for details.
• Defective units returned to us will be disposed of for free.
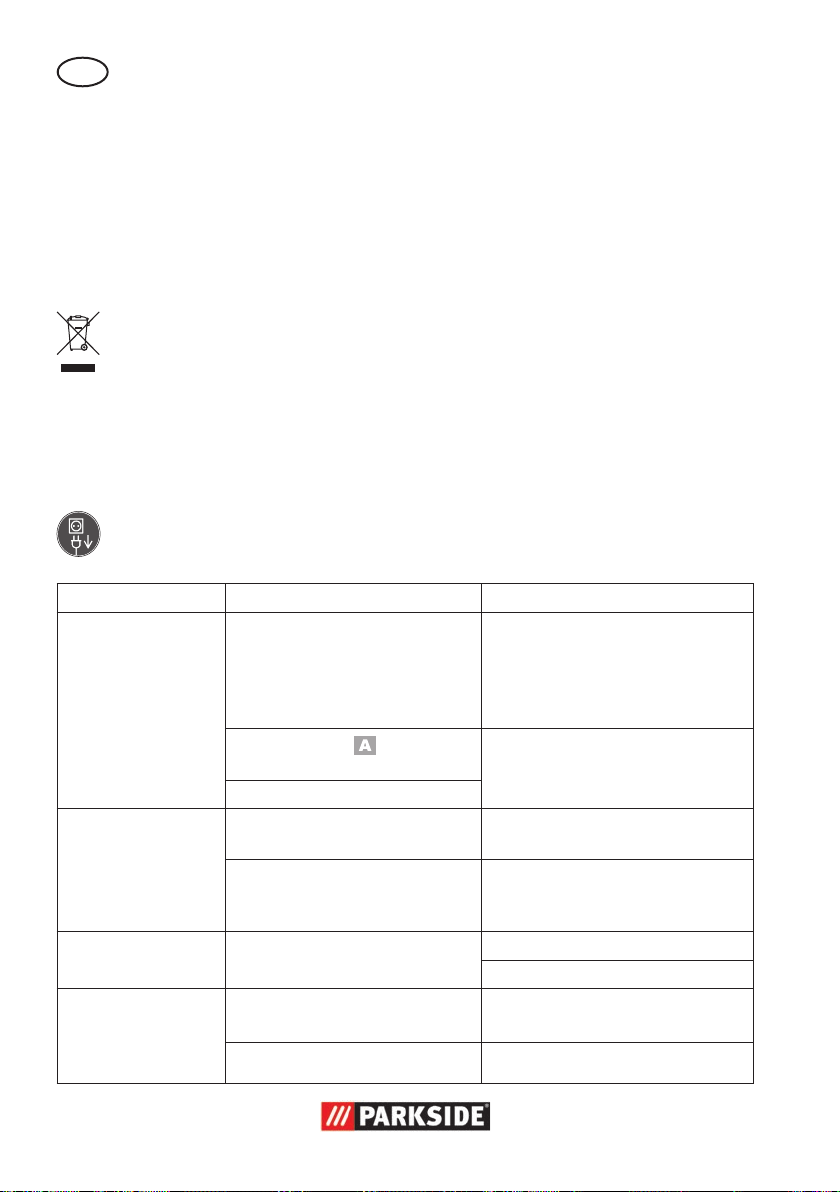
Troubleshooting
Always unplug the shredder before working on it.
Risk of electric shock!
Problems Possible Cause Error correction
Check the socket, mains cable,
line, mains plug, repairs to be
carried out by qualied electrician if necessary, check main
circuit breaker.
Repair by Customer Care
Tighten grinding disc nut (see
„Changing disc“)
Remove blockages
Reduce pressure on grinding tool
Workpiece unsuitable
Tighten grinding disc nut (see
„Changing disc“)
Device doesn‘t start
Grinding tool does
not move although
the engine is running
Engine is slower
and stops
Grinding disc does
not rotate smoothly,
abnormal noises
can be heard
Mains voltage missing
Main circuit breaker is tripped
On/off switch (
defective
Engine faulty
Grinding disc nut is loose
Workpiece, remaining workpieces or remaining grinding tools
block drive
Device is overloaded through
workpiece
Grinding disc nut is loose
Grinding disc is defective Change grinding disc
5) may be
1 8
GB
Replacement parts / Accessories
Spare parts and accessories can be obtained at
www.grizzly-service.eu
If you do not have internet access, please contact the Service Centre via telephone
(see “Service-Center” page 22). Please have the order number mentioned below ready.
Cutting disc
Item.-No.: 91103210
Idling speed n
............. max.12200 min
0
Disc speed ......................... max. 80 m/s
Outer diameter ...................... Ø 125 mm
Bore hole ........................... Ø 22,23 mm
Thickness cutting/roughing discs max. 6 mm
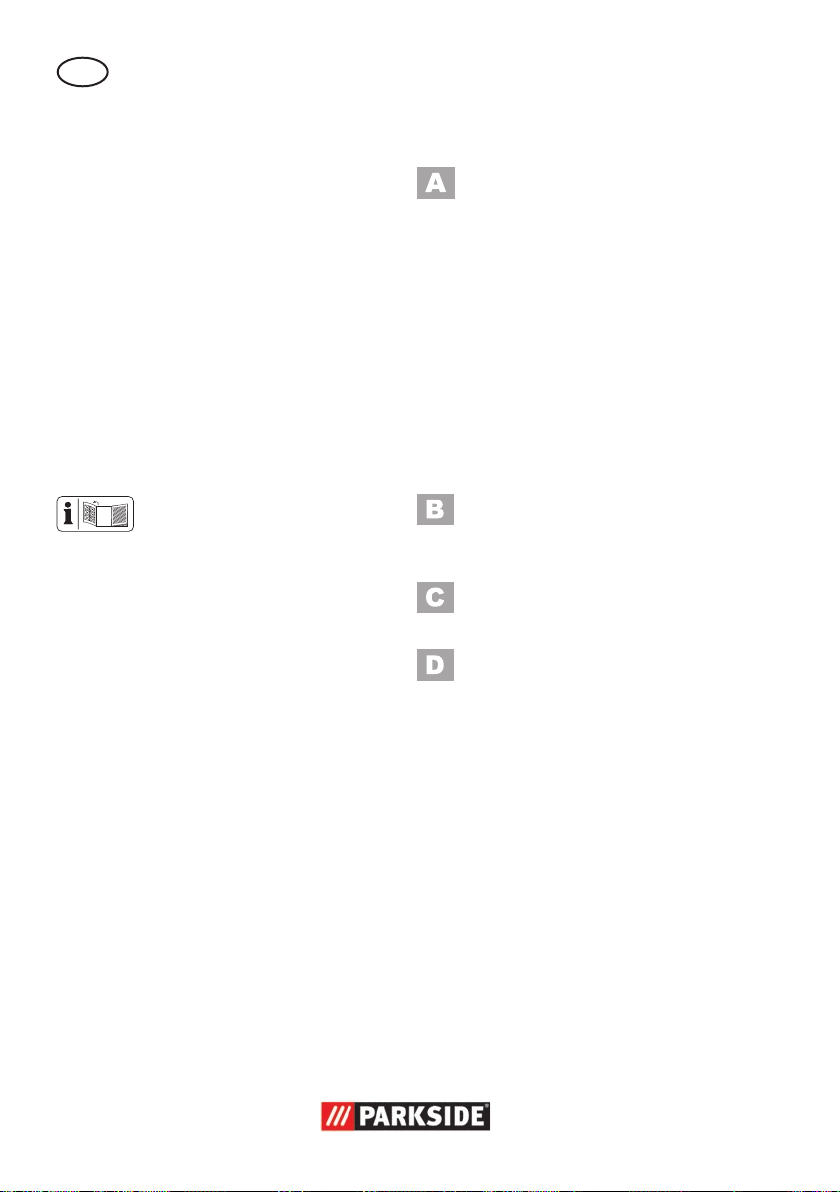
Mounting plate for sandpaper
Item.-No.: 91103212
Idling speed n
0
................................... max.12000 min
Disc speed ......................... max. 80 m/s
Outer diameter ...................... Ø 125 mm
Spindle thread ................................ M14
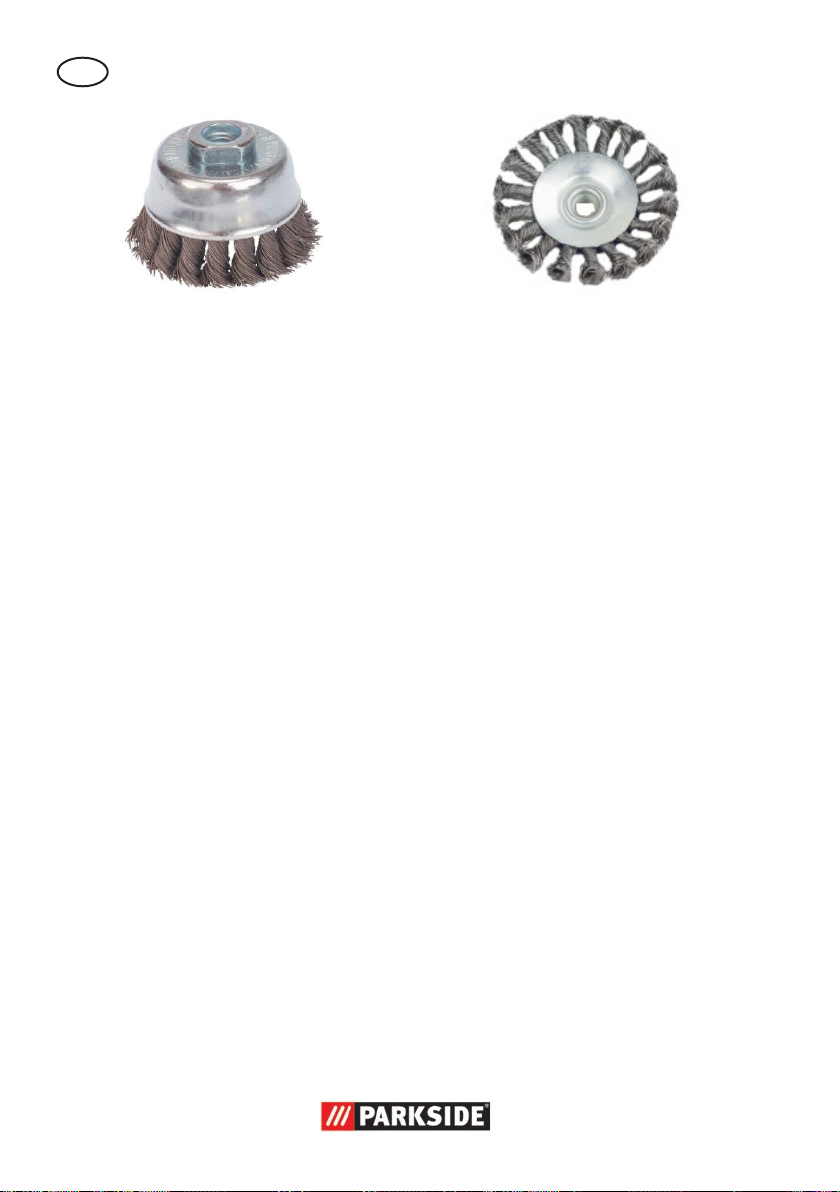
Flap disc
Item.-No.: 91103211
-1
Idling speed n
............. max.12200 min
0
Disc speed ......................... max. 80 m/s
Outer diameter ...................... Ø 125 mm
Bore hole ........................... Ø 22,23 mm
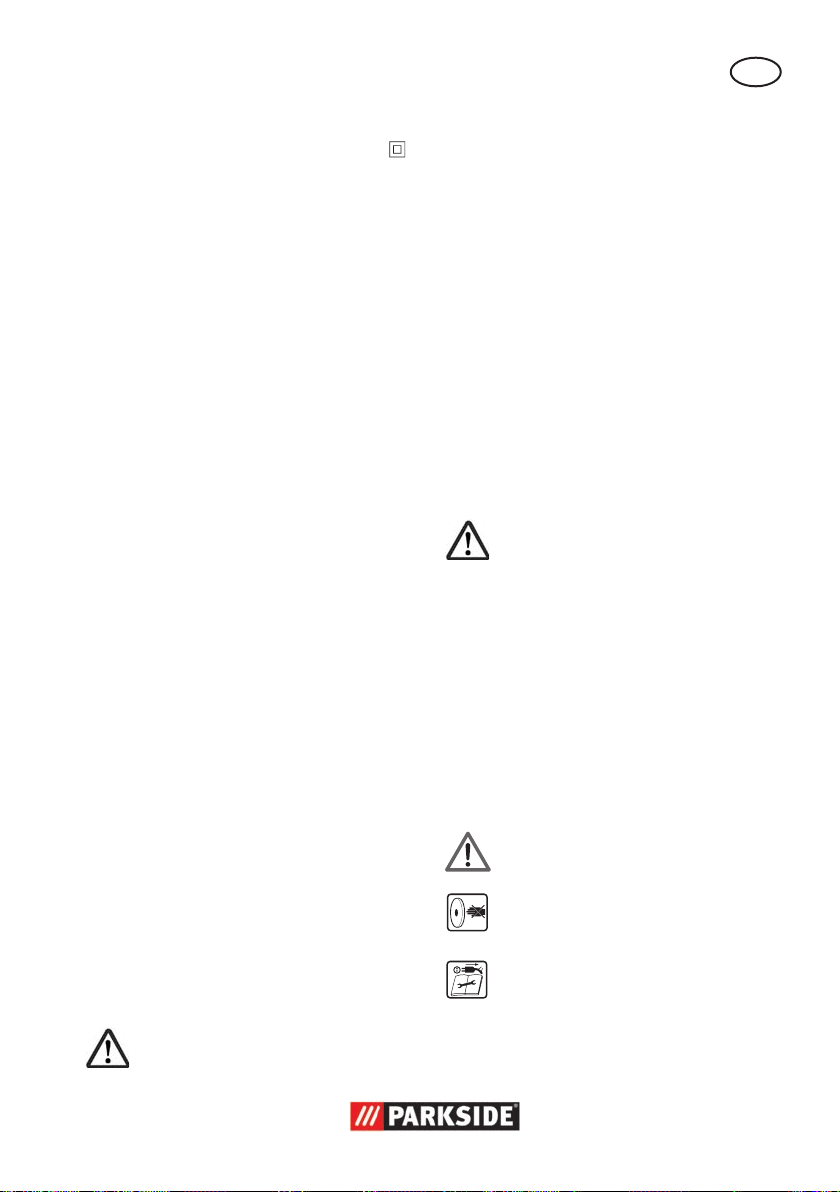
Cup brush, crimped wire
Item.-No.: 91103213
Idling speed n
-1
................................... max.12500 min
0
Disc speed ......................... max. 52 m/s
Spindle thread ................................ M14
-1
-1
1 9
GB
Cup brush, braided wire
Item.-No.: 91103214
Idling speed n
............. max.12500 min
0
Disc speed ......................... max. 50 m/s
Spindle thread ................................ M14
Disc brush, braided wire
Item.-No.: 91103215
-1
Idling speed n
............. max.11000 min
0
Disc speed ......................... max. 75 m/s
Outer diameter ...................... Ø 115 mm
Bore hole ........................... Ø 22,23 mm
-1
2 0

GB
Guarantee
Dear Customer,
This equipment is provided with a 3-year
guarantee from the date of purchase.
In case of defects, you have statutory rights
against the seller of the product. These
statutory rights are not restricted by our
guarantee presented below.
Terms of Guarantee
The term of the guarantee begins on the
date of purchase. Please retain the original
receipt. This document is required as proof
of purchase.
If a material or manufacturing defect
occurs within three years of the date of
purchase of this product, we will repair or
replace – at our choice – the product for
you free of charge. This guarantee requires
the defective equipment and proof of purchase to be presented within the three-year
period with a brief written description of
what constitutes the defect and when it occurred.
If the defect is covered by our guarantee,
you will receive either the repaired product
or a new product. No new guarantee period begins on repair or replacement of the
product.
Guarantee Period and Statutory
Claims for Defects
The guarantee period is not extended by
the guarantee service. This also applies for
replaced or repaired parts. Any damages
and defects already present at the time of
purchase must be reported immediately after unpacking. Repairs arising after expiry
of the guarantee period are chargeable.
Guarantee Cover
The equipment has been carefully produced
in accordance with strict quality guidelines
and conscientiously checked prior to delivery.
The guarantee applies for all material and
manufacturing defects. This guarantee does
not extend to cover product parts that are
subject to normal wear and may therefore
be considered as wearing parts (e.g. grind-
ing disc, the clamping anges) or to cover
damage to breakable parts (e.g. switches).
This guarantee shall be invalid if the product has been damaged, used incorrectly or
not maintained. Precise adherence to all of
the instructions specied in the operating
manual is required for proper use of the
product. Intended uses and actions against
which the operating manual advises or
warns must be categorically avoided.
The product is designed only for private
and not commercial use. The guarantee will
be invalidated in case of misuse or improper handling, use of force, or interventions
not undertaken by our authorised service
branch.
Processing in Case of Guarantee
To ensure efcient handling of your query,
please follow the directions below:
• Please have the receipt and item number (IAN 280250) ready as proof of
purchase for all enquiries.
• Please nd the item number on the rating plate.
• Should functional errors or other defects occur, please initially contact the
service department specied below by
telephone or by e-mail. You will then
receive further information on the processing of your complaint.
• After consultation with our customer
service, a product recorded as defective
2 1

GB
can be sent postage paid to the service
address communicated to you, with the
proof of purchase (receipt) and speci-
cation of what constitutes the defect
and when it occurred. In order to avoid
acceptance problems and additional
costs, please be sure to use only the address communicated to you. Ensure that
the consignment is not sent carriage
forward or by bulky goods, express or
other special freight. Please send the
equipment inc. all accessories supplied
at the time of purchase and ensure adequate, safe transport packaging.
Repair Service
For a charge, repairs not covered by
the guarantee can be carried out by
our service branch, which will be happy to
issue a cost estimate for you.
We can handle only equipment that has
been sent with adequate packaging and
postage.
Attention: Please send your equipment to
our service branch in clean condition and
with an indication of the defect.
Equipment sent carriage forward or by
bulky goods, express or other special
freight will not be accepted.
We will dispose of your defective devices
free of charge when you send them to us.
Service-Center
Service Great Britain
GB
Tel.: 0871 5000 720
(£ 0.10/Min.)
E-Mail: grizzly@lidl.co.uk
IAN 280250
Importer
Please note that the following address is
not a service address. Please initially con-
tact the service centre specied above.
Grizzly Tools GmbH & Co. KG
Stockstädter Straße 20
63762 Großostheim
Germany
www.grizzly-service.eu
2 2

Tartalom
H U
Bevezető .................................... 23
Rendeltetés ................................ 23
Általános leírás .......................... 24
Szállítási terjedelem .......................24
Működés leírása ............................24
Áttekintés ......................................24
Műszaki adatok ......................... 24
Biztonsági tudnivalók ................25
Szimbólumok és ábrák ...................25
Általános biztonsági tudnivalók
elektromos szerszámgépekhez .........26
Biztonsági utasítások
minden alkalmazáshoz ...................28
További biztonsági utasítások ..........30
MARADÉK RIZIKÓ .........................31
További biztonsági utasítások
minden alkalmazáshoz ..............31
Visszaütés és megfelelő
biztonsági utasítások .....................31
Speciális biztonsági utasítások
csiszoláshoz és csiszoló
vágáshoz ................................... 32
Egyéb speciális biztonsági
utasítások csiszoló vágáshoz ...........32
Kiegészítő biztonsági utasítások
csiszolópapírral történő
csiszoláshoz ..................................33
Kiegészítő biztonsági utasítások
polírozáshoz .................................33
Kiegészítő biztonsági utasítások
drótkefével történő munkavégzéshez ...33
Munka utasítások ...................... 34
Összeszerelés ............................34
Markolat felszerelése ......................34
Védőburkolat felszerelése/beállítása ..34
Korong felszerelése/cseréje.............35
Használat ..................................35
Be- és kikapcsolás ..........................36
Tisztítás és karbantartás ............ 37
Tisztítás .........................................37
Karbantartás .................................37
Tárolás .......................................37
Eltávolítás és környezetvédelem .. 38
Hibakeresés ...............................38
Pótalkatrészek / Tartozékok ......39
Jótállási tájékoztató ................... 41
Az eredeti CE megfelelőségi
nyilatkozat fordítása ................ 123
Bevezető
Gratulálunk az Ön által megvásárolt új
berendezéshez. Ezzel egy kiváló minőségű
termék mellett döntött.
A jelen készülék minőségét a gyártás alatt
ellenőrizték és alávetették egy végső ellenőrzésnek. Ezzel a készülék működőképessége biztosított.
A használati útmutató a termék
részét képezi. Fontos utasításokat
tartalmaz a biztonságra, a hasz-
nálatra és a hulladékeltávolításra
vonatkozóan. A termék használata
előtt ismerkedjen meg az összes
kezelési és biztonsági útmutatással. A terméket csak a leírtaknak
megfelelően és a megadott hasz-
nálati területen lehet alkalmazni.
Őrizze meg jól az útmutatót és a
termék harmadik személynek való
továbbadása esetén mellékelje az
összes dokumentumot.
Rendeltetés
A sarokcsiszoló készülék fémek, beton
vagy kőlapok vágására, durva csiszolására és súrolására szolgál, víz használata
nélkül. A készüléket csiszolópapírként,
drótkefével vagy polírozásra történő használatra tervezték.
2 3
H U
Minden más típusú felhasználásra (pl. nem
megfelelő csiszoló szerszámokkal vagy
hűtőfolyadékkal történő csiszolás, egészségre
veszélyes anyagok, mint pl. azbeszt csiszolása vagy vágása) a készülék nem alkalmas.
A készüléket a barkács szektorban történő
használatra és nem folyamatos ipari használatra tervezték.
A készüléket felnőttek használhatják. 16
éven felüli atalkorúak csak felügyelet mellett használhatják a készüléket.
A gyártó nem vállal felelősséget nem
rendeltetésszerű használatból vagy helytelen kezelésből eredő károkért.
Általános leírás
Az ábrák az elülső lehajtható
oldalon találhatók.
Szállítási terjedelem
Csomagolja ki a készüléket és ellenőrizze
teljességét. Gondoskodjon a csomagolóanyag szabályszerű hulladékként történő
elhelyezéséről.
- készülék
- markolat
- védőburkolat
- szorítókulcs
- vágókorong
- 2 csere szénkefe
- használati utasítás
Működés leírása
A sarokcsiszoló fémek vágására, durva
csiszolására és súrolására alkalmas. Az
egyes alkalmazásokhoz speciális koron-
gok állnak rendelkezésre. Kérjük, vegye
gyelembe a korong-gyártó információit.
A kezelőelemek funkciójával kapcsolatosan, kérjük, olvassa el a következő leírást.
Áttekintés
1 markolat
2 markolat csavarmenete
3 fordulatszám szabályozó
4 újraindítás-gátló
5 be-/kikapcsoló
6 szervizfedél
7 csavar
8 markolat csavarmenete
9 orsótengely kioldógomb
10 hálózati csatlakozó
11 vágókorong
12 csere szénkefe
13 szorítókulcs
14 védőburkolat
15 befogó karima
16 szorítóanya
17 orsótengely
18 állítóanya
19 szorítókar
20 nyomórugó
21 szénkefe
22 horony a nyomórugóhoz
23 csatlakozó
24 csatlakozó papucs
25 csatlakozódugó
Műszaki adatok
Sarokcsiszoló PWS 125 D3:
Névleges bemeneti
feszültség ................. 230-240 V~, 50 Hz
Teljesítményfelvétel ................... 1200 W
Üresjárati fordulatszám
(n) ..............................3000-12000 min
Vágó-/nagyoló-korongok
mérete ......................Ø 125 x 22,23 mm
Vágó-/nagyoló-korongok
vastagsága ...........................max. 6 mm
Csiszolóorsó-menet .......................... M14
-1
2 4
H U
Csiszolóorsó menethossza ..... max. 12 mm
Védelmi osztály ................................
II
Védelmi mód ................................. IP 20
Hangnyomásszint
(L
) ................... 93,2 dB(A); KpA= 3 dB
pA
Hangteljesítményszint (L
mért ................ 104,3 dB(A); K
WA
)
= 3 dB
WA
garantált .............................107 dB(A)
Vibráció (a
) .... 12,104 m/s2; K= 1,5 m/s
h
A rezgésértékekre vonatkozóan olyan maximális értékekről van szó, amelyek a mellékelt vágókoronggal lettek meghatározva.
A tényleges rezgésértékek a használt tartozékoktól függően eltérhetnek.
A rezgésértékeket ezek kívül a felhasználó
eszközkezelése is befolyásolja.
Vágókorong:
Üresjárati fordulatszám n
. max.12200 min
0
Korong sebesség ............... max. 80 m/s*
Külső átmérő ...................... Ø 125 mm
Furat ...............................Ø 22,23 mm
Vastagság .................................. 3 mm
*
A csiszolókorongnak ki kell bírnia 80 m/s-es
forgási sebességet.
A zaj- és rezgésszint értékek a
megfelelőségi nyilatkozatban megnevezett szabványoknak és előírásoknak
megfelelően kerültek meghatározásra.
A megadott rezgés kibocsátási érték egy
szabványosított mérési módszerrel került
megállapításra és felhasználható az elektromos kéziszerszám egy másik készülékkel
történő összehasonlítására.
A megadott rezgés kibocsátási érték a
kimaradás előzetes megbecsüléséhez is
felhasználható.
Figyelem:
A rezgés kibocsátási érték az elektromos kéziszerszám használata
során eltérhet a megadott értéktől,
az elektromos kéziszerszám alkalmazásától függően. A kezelő
védelme érdekében biztonsági intézkedéseket kell hozni, amelyek a
tényleges felhasználási körülmények
során történő kimaradás becslésén
alapulnak (ugyanakkor a működési
2
ciklus minden részét, például azokat
az időszakokat is gyelembe kell
venni, amikor az elektromos kézis-
zerszám ki van kapcsolva, vagy
amikor a kéziszerszám be van ugyan kapcsolva, de ténylegesen nincs
használatban).
Biztonsági tudnivalók
-1
FIGYELEM! Villamos szerszámok
használata során az áramütés, a sérülés- és a tűzveszély elleni védelem
érdekében következő alapvető biztonsági intézkedéseket kell gyelem-
be venni.
Az elektromos kéziszerszám használata előtt, olvassa el ezeket az
utasításokat, és jól őrizze meg a biz-
tonsági utasításokat.
Szimbólumok és ábrák
A készüléken található képjelek:
Figyelem!
Sérülésveszély forgó szerszám mi-
att! A kezeit tartsa távol
Figyelem! Fennáll az áramütés ves-
zélye! A készüléken végzett minden
munka előtt ki kell húzni a hálózati
csatlakozó dugót
2 5
H U
A kezelési utasítást el kell olvasni!
Viseljen fülvédőt
Viseljen szem
Viseljen maszkot
Vágási sérülések miatti veszély! Viseljen vágásbiztos kesztyűket
Védőcsoport II
Elektromos gépek nem tartoznak a
háztartási hulladékba
Egyéb jelzések a
vágókorongon:
Nem használható oldal-csiszolásra
Általános biztonsági
tudnivalók elektromos
szerszámgépekhez
FIGYELMEZTETÉS! Olvasson el
minden biztonsági tudnivalót
és utasítást. A biztonsági tudniva-
lók és utasítások betartásának elmulasztása áramütést, tüzet és/vagy
súlyos sérüléseket okozhat.
A jövőbeni használat érdekében
őrizzen meg minden biztonsági
tudnivalót és útmutatót.
A biztonsági tudnivalókban alkalmazott
„elektromos szerszámgép“ fogalom hálózatról működtetett elektromos szerszámgépekre (hálózati kábellel) és akkuval
működtetett elektromos szerszámgépekre
(hálózati kábel nélkül) vonatkozik.
Nem használható nedves
csiszolásra
Ne használjon hibás korongot
Fémhez alkalmas
Viseljen védőcipőt
Az utasításban található
szimbólumok :
Veszélyre gyelmeztető jel a
személyi sérülések és anyagi
károk elkerülése érdekében.
Tilalmi jel (a felkiáltó jel helyett a
tilalom magyarázata) a károk elhárítására vonatkozó adatokkal.
Utaló jelek a készülék jobb kezelé-
sére vonatkozó információkkal.
2 6
1) MUNKAHELYI BIZTONSÁG
a) Munkaterületét mindig tartsa tisztán és
jól megvilágítva. A rendetlenség vagy a
megvilágítatlan munkaterületek balesetekhez vezethetnek.
b) Ne dolgozzon az elektromos szerszám-
géppel robbanásveszélyes környezetben,
ahol éghető folyadékok, gázok vagy po-
rok találhatók. Az elektromos szerszám-
gépek szikrákat hoznak létre, melyek
meggyújthatják a port vagy a gőzöket.
c) Az elektromos szerszámgép használata kö-
zben tartsa távol a gyermekeket és az egyéb személyeket. Ha elvonják a gyelmét,
elveszítheti a szerszámgép feletti uralmat.
2) ELEKTROMOS BIZTONSÁG
Vigyázat: Így kerülheti el az áramü-
tés miatt bekövetkező baleseteket és
sérüléseket:

H U
a) Az elektromos szerszámgép csatlakozó
dugójának passzolnia kell a dugaszoló
aljzatba. A dugót semmilyen módon
sem szabad módosítani. Ne használjon
adapterdugókat védőföldelt elektromos
szerszámgépekkel együtt. A módosítás
nélküli dugók és a megfelelő dugaszoló aljzatok csökkentik az áramütés
kockázatát.
b) Kerülje teste érintkezését a földelt felüle-
tekkel, mint pl. csövekkel, fűtőtestekkel,
tűzhelyekkel és hűtőszekrényekkel.
Megnő az áramütés veszélyének
kockázata, ha az Ön teste földelve van.
c) Az elektromos szerszámgépeket esőtől
és nedvességtől távol kell tartani. Nő az
áramütés kockázata, ha víz hatol be az
elektromos szerszámgépbe.
d) Ne használja a kábelt rendeltetésétől
eltérő célokra, az elektromos szerszámgép hordozásához, felakasztásához
vagy a dugó dugaszoló aljzatból történő
kihúzásához. Tartsa távol a kábelt hőtől,
olajtól, éles peremektől vagy mozgásban
lévő készülékelemektől. A sérült vagy
összegabalyodott kábelek növelik az áramütés kockázatát.
e) Ha egy elektromos szerszámgéppel a
szabadban akar dolgozni, csak olyan
hosszabbító kábelt használjon, amely
külső terekben is alkalmazható. A kültéri
használatra alkalmas hosszabbító kábel
alkalmazása csökkenti az áramütés
kockázatát.
f) Ha elkerülhetetlen egy elektromos
szerszámgép nedves környezetben
történő használata, alkalmazzon egy olyan hibaáramvédő kapcsolót, melynek ki-
oldási árama 30 mA vagy alacsonyabb.
Egy hibaáramvédő kapcsoló használata
csökkenti az áramütés kockázatát.
3) SZEMÉLYEK BIZTONSÁGA
Vigyázat: Így kerülheti el a balesete-
ket és a sérüléseket::
a) Legyen gyelmes, ügyeljen arra, hogy
mit csinál és végezze a munkát racionálisan az elektromos szerszámgéppel. Soha
ne használjon elektromos szerszámgépet,
ha fáradt, illetve kábítószerek, alkohol
vagy gyógyszerek hatása alatt áll. Egy
elektromos szerszámgép használata
közben egyetlen gyelmetlen pillanat is
komoly sérülésekhez vezethet.
b) Hordjon személyi védőfelszerelést és
mindig egy védőszemüveget. A személyi
védőfelszerelés, mint a pormaszk, a
csúszásálló biztonsági cipők, a védősisak
vagy a hallásvédő viselése, az elektromos szerszámgép mindenkori fajtája és
alkalmazása függvényében, csökkenti a
sérülések kockázatát.
c) Kerülje a véletlen üzembe helyezést.
Győződjön meg arról, hogy az elektromos szerszámgép ki van kapcsolva,
mielőtt áramellátásra és/vagy akkura
csatlakoztatja, felemeli vagy hordozza.
Balesetekhez vezethet, ha az elektromos
szerszámgép hordozása közben a kapcsolón tartja az ujját, vagy a készüléket be-
kapcsolva csatlakoztatja az áramellátásra.
d) Az elektromos szerszámgép bekapcso-
lása előtt távolítsa el a beállító szerszá-
mokat vagy a csavarkulcsot. A forgó
készülékrészekben lévő szerszám vagy
kulcs sérülésekhez vezethet.
e) Kerülje az abnormális testtartást. Gondo-
skodjon a stabil álló helyzetről és mindenkor tartsa meg egyensúlyát. Így váratlan
helyzetekben jobban tudja kontrollálni az
elektromos szerszámgépet.
f) Viseljen megfelelő ruházatot. Ne viseljen
bő ruházatot vagy ékszereket. Haját,
ruházatát és kesztyűit tartsa távol a
2 7

H U
mozgásban lévő alkotóelemektől. A
mozgásban lévő alkotóelemek elkaphatják a laza ruházatot, az ékszereket vagy
a hosszú hajat.
g) Ha lehetőség van porszívó és porgyűjtő
szerkezetek felszerelésére, győződjön
meg arról, hogy azok csatlakoztatva van-
nak és szabályszerűen kerülnek alkalmazásra. Porelszívó alkalmazása csökkentheti a por miatti veszélyeztetéseket.
4) AZ ELEKTROMOS SZERSZÁMGÉP
ALKALMAZÁSA ÉS KEZELÉSE
a) Ne terhelje túl a készüléket. Munkájához
használja az annak megfelelő elektromos
szerszámgépet. A megfelelő elektromos
szerszámgéppel jobban és biztonsá-
gosabban dolgozhat a megadott teljesít-
ménytartományban.
b) Ne használjon olyan elektromos
szerszámgépet, melynek meghibásodott
a kapcsolója. A nem be- vagy kikapcsol-
ható elektromos szerszámgép veszélyes
és meg kell javíttatni.
c) Húzza ki a dugót a dugaszoló aljzatból
és/vagy vegye ki az akkut, mielőtt készülék-beállításokat végez, tartozékelemeket
cserél vagy elrakja a készüléket. Ez az
óvintézkedés megakadályozza az elektromos szerszámgép véletlen beindulását.
d) A használaton kívül lévő elektromos
szerszámgépek tárolása gyermekek által
el nem érhető helyen történjen. Ne engedje, hogy olyan személyek használják a
készüléket, akik azt nem ismerik és jelen
utasításokat nem olvasták el. Az elektro-
mos szerszámgépek veszélyesek, ha azokat tapasztalatlan személyek használják.
e) Az elektromos szerszámgépeket ápol-
ja gondosan. Ellenőrizze, hogy a
mozgatható alkotóelemek kifogástala-
nul működjenek, és ne szoruljanak,
illetve hogy ne legyenek eltörve vagy
olyan mértékben megsérülve alkotóele-
mek, hogy az csorbítsa az elektromos
szerszámgép működését. A készülék használata előtt a sérült alkotóelemeket javít-
tassa meg. Számos baleset okát a rosszul
karbantartott elektromos szerszámgépek
képezik.
f) A vágószerszámokat tartsa élesen és tisz-
tán. A gondosan ápolt, éles vágóélekkel
rendelkező vágószerszámok kevésbé
szorulnak be és könnyebben vezethetők.
g) Az elektromos szerszámgépet, a tarto-
zékokat, a behelyezhető szerszámokat
stb. alkalmazza jelen utasításoknak
megfelelően. Eközben vegye gyelembe
a munkafeltételeket és a kivitelezendő tevékenységet. Az elektromos szerszámgépek rendeltetés szerinti alkalmazásoktól
eltérő célra történő használata veszélyes
szituációkat teremthet.
5) VEVŐSZOLGÁLAT
a) Elektromos szerszámgépe javíttatásához
csak szakképzett szakszemélyzetet és
csak eredeti pótalkatrészeket vegyen
igénybe. Ezzel biztosított, hogy az elektromos szerszámgép biztonságos marad.
Biztonsági utasítások minden
alkalmazáshoz
Általános biztonsági utasítások
csiszoláshoz, csiszolópapírral
történő csiszoláshoz, drótkefével
történő munkákhoz és csiszoló
vágáshoz:
• Ez az elektromos kéziszerszám csiszolóként, csiszolópapírként, drótkefeként
és csiszoló-vágó gépként használható.
Vegyen gyelembe minden, a készülékkel együtt szállított biztonsági gyelmeztetést, utasítást, ábrát és adatot.
2 8

H U
Az alábbi utasítások gyelmen kívül
hagyása áramütést, tüzet és/vagy súlyos
sérülést okozhat.
• Ne használjon olyan tartozékokat, ame-
lyeket a gyártó nem kifejezetten ehhez
az elektromos kéziszerszámhoz tervezett és ajánlott. Csak mert a tartozékot
az elektromos kéziszerszámhoz tudja
rögzíteni, még nem garantálja annak
biztonságos használatát.
• Az elektromos kéziszerszám megen-
gedett fordulatszámának legalább
olyan magasnak kell lennie, mint az
elektromos kéziszerszámon megadott
legnagyobb fordulatszám. Az olyan
tartozékok, amelyek a megengedettnél
gyorsabban forognak, széttörhetnek és
szét repülhetnek.
• A betétszerszám külső átmérőjének
és vastagságának meg kell egyeznie
az Ön elektromos kéziszerszámának
megadott méreteivel. A nem megfelelő
méretű betétszerszámokat nem lehet
megfelelően eltakarni vagy irányítani.
• A menetes betéttel rendelkező betéts-
zerszámnak pontosan illeszkednie kell
a csiszolótengely menetére. Az olyan
betétszerszámok esetén, amelyeket
egy karimával kell felszerelni, a betétszerszám lyukátmérőjének illeszkednie
kell a karima befogó-átmérőjéhez. Az
olyan betétszerszámok, amelyek nincsenek pontosan rögzítve az elektromos
kéziszerszám tengelyéhez, egyenletlenül
forognak, nagyon erősen rezegnek és
előfordulhat, hogy a kezelő ezáltal elveszíti uralmát a készülék felett.
•
Ne használjon sérült betétszerszámokat.
Minden használat előtt ellenőrizze a
betétszerszámokat: ellenőrizze a csiszolókorong esetleges töréseit és repedéseit, a
csiszolótányér repedéseit, kopását vagy
elhasználódását, a drótkefék laza vagy
eltörött drótszálait. Ha az elektromos kéziszerszám vagy betétszerszám leesett,
ellenőrizze, hogy nem sérült-e meg vagy
ellenkező esetben használjon egy ép
betétszerszámot. Miután ellenőrizte és
beállította az elektromos kéziszerszámot,
tartózkodjon Ön és a közelben lévő sze
mélyek a forgó betétszerszám síkján kívül,
és járassa a készüléket 1 percig maximális
fordulatszámmal. A sérült betétszerszámok
általában ez a próbaidő alatt eltörnek.
• Viseljen személyi védőfelszerelést. Alkalmazástól függően, viseljen arcvédőt,
szemvédőt vagy védőszemüveget. Adott
esetben viseljen porvédő maszkot,
hallásvédőt, védőkesztyűt vagy speciális
kötényt, amelyek megvédik Önt a kisebb
lecsiszolt és anyagi részecskéktől. Védeni kell a szemet a kirepülő idegen testek
ellen, amelyek a különböző alkalmazá-
sok során keletkezhetnek. A por- vagy
légzésvédő maszknak meg kell szűrni a
használat során keletkező port. A hosszan
tartó erős zaj halláskárosodást okozhat.
• Ügyeljen arra, hogy más személyek
megfelelő távolságban legyenek az Ön
munkaterületétől. Mindenkinek, aki belép
a munkaterületre személyi védőfelszerelést
kell viselni. A munkadarab letört részei
vagy az eltört betétszerszámok kirepülhetnek és sérülést okozhatnak a közvetlen
munkaterületen kívül is.
• Az elektromos kéziszerszámot csak a
szigetelt markoló felületénél fogja meg,
ha olyan munkát végez, ahol a betétszerszám rejtett kábelekbe vagy a készülék saját hálózati kábelébe ütközhet. A
feszültség alatt álló kábellel való érintkezés a készülék fém részeit is feszültség
alá helyezheti és áramütést okozhat.
• A hálózati kábelt tartsa távol a forgó
betétszerszámoktól. Ha elveszíti uralmát
a készülék felett, előfordulhat, hogy el-
-
2 9

H U
vágja a hálózati kábelt vagy beleakad
a hálózati kábelbe és keze vagy karja a
forgó betétszerszámhoz ér.
• Soha ne tegye le addig az elektromos
kéziszerszámot, amíg a betétszerszám
teljesen le nem állt. A forgó betétszerszám hozzáérhet a támasztó felüle-
thez, ami által elveszítheti uralmát az
elektromos kéziszerszám felett.
• Ne működtesse az elektromos kéziszerszámot miközben viszi. Ruházata véletlenül hozzáérhet és beleakadhat a forgó betétszerszámba és a betétszerszám
belefúródhat a testébe.
• Rendszeresen tisztítsa meg az elektro-
mos kéziszerszám szellőzőnyílásait. A
motor ventilátora port szív a készülékházba és a nagyobb mennyiségű fémpor felhalmozódása elektromos veszélyt
okozhat.
• Ne használja az elektromos kéziszerszámot gyúlékony anyagok közelében. A
szikrák meggyújthatják ezeket az anyagokat.
• Ne használjon olyan betétszerszámokat,
amelyek hűtőfolyadékot igényelnek. Víz
vagy más hűtőfolyadék használata áramütést okozhat.
További biztonsági utasítások
• A készüléket csak olyan hibaáramvédő
szerkezettel (FI relé) rendelkező csat-
lakozóaljzathoz csatlakoztassa, amit
30 mA-t meg nem haladó névleges
hibaáram-erősségre méreteztek.
• A hálózati kábelt és hosszabbító kábelt
tartsa távol a korongtól. A hálózati ká-
bel sérülése vagy kettévágása esetén,
azonnal húzza ki a hálózati kábelt a
csatlakozóaljzatból. Addig ne érjen a
vezetékhez, amíg le nem választotta az
elektromos hálózatról.
Elektromos áramütés veszélye.
• A veszélyek elkerülése érdekében a csatlakozó vagy csatlakozókábel cseréjét
mindig az elektromos készülék gyártójával vagy az ügyfélszolgálattal kell
elvégeztetni.
• Csak olyan csiszolókorongot használjon, amelynek a feltüntetett fordulatszáma legalább olyan magas, mint a
készülék adattábláján megadott érték.
• Használat előtt szemrevételezze a
csiszolókorongot. Ne használjon sérült
vagy deformálódott csiszolókorongot.
Cserélje ki a kopott csiszolókorongot.
• Ügyeljen arra, hogy a csiszolás során
keletkező szikra ne jelentsen veszélyt,
például ne érjen személyeket vagy ne
gyújtson meg gyúlékony anyagokat.
• Csiszolás, súrolás és vágás során
mindig viseljen védőszemüveget,
védőkesztyűt, légzésvédőt és fülvédőt.
• Soha ne nyúljon a csiszolókorong és
szikrafogó közé vagy a védőburkolat
közelébe. Zúzódás veszélye áll fenn.
• A készülék forgó alkatrészeit funkcioná-
lis okokból nem lehet lefedni. Cseleked-
jen tehát óvatosan, és tartsa erősen a
munkadarabot, hogy elkerülje a munkadarab megcsúszását, ami által keze a
csiszolókoronghoz érhet.
• A munkadarab csiszolás közben felforrósodik. Ne érintse meg a megmunkált
részt, hagyja kihűlni. Égési sérülés
veszélye áll fenn. Ne használjon
hűtőfolyadékot vagy hasonlókat.
• Ne dolgozzon a készülékkel, ha fáradt
vagy alkohol, illetve gyógyszer befolyása
alatt áll. Tartson mindig időben szünetet.
• Kapcsolja ki a készüléket és húzza ki a
hálózati csatlakozót
- egy blokkolt szerszám kioldásához,
- ha a csatlakozó kábel sérült vagy összegabalyodott,
- szokatlan zajok esetén.
3 0
 Loading...