

Page 1
COMPRESSEUR PKZ 180 B2
COMPRESSEUR
Traduction des instructions d’origine
COMPRESSOR
Translation of the original instructions
IAN 108972
KOMPRESSOR
Originalbetriebsanleitung
Page 2

Avant de lire le mode d'emploi, ouvrez la page contenant les illustrations et familiarisez-vous ensuite avec
toutes les fonctions de l'appareil.
Klappen Sie vor dem Lesen die Seite mit den Abbildungen aus und machen Sie sich anschließend mit allen
Funktionen des Gerätes vertraut.
Before reading, unfold the page containing the illustrations and familiarise yourself with all functions of
the device.
FR / BE Traduction des instructions d’origine Page 1
DE / AT / CH Originalbetriebsanleitung Seite 13
GB Translation of the original instructions Page 25
Page 3

Page 4

Table des matières
Introduction . . . . . . . . . . . . . . . . . . . . . . . . . . . . . . . . . . . . . . . . . . . . . . . . . . . . . . 2
Utilisation conforme à l'usage prévu . . . . . . . . . . . . . . . . . . . . . . . . . . . . . . . . . . . . . . . . . . . . . 2
Équipement . . . . . . . . . . . . . . . . . . . . . . . . . . . . . . . . . . . . . . . . . . . . . . . . . . . . . . . . . . . . . . . . . 2
Matériel livré . . . . . . . . . . . . . . . . . . . . . . . . . . . . . . . . . . . . . . . . . . . . . . . . . . . . . . . . . . . . . . . 2
Caractéristiques techniques . . . . . . . . . . . . . . . . . . . . . . . . . . . . . . . . . . . . . . . . . . . . . . . . . . . . 2
Avertissements de sécurité généraux pour l'outil . . . . . . . . . . . . . . . . . . . . . . . 3
1. Sécurité de la zone de travail . . . . . . . . . . . . . . . . . . . . . . . . . . . . . . . . . . . . . . . . . . . . . . . . 3
2. Sécurité électrique . . . . . . . . . . . . . . . . . . . . . . . . . . . . . . . . . . . . . . . . . . . . . . . . . . . . . . . . . 3
3. Sécurité des personnes . . . . . . . . . . . . . . . . . . . . . . . . . . . . . . . . . . . . . . . . . . . . . . . . . . . . . 4
4. Utilisation et entretien de l'outil . . . . . . . . . . . . . . . . . . . . . . . . . . . . . . . . . . . . . . . . . . . . . . . 4
5. Maintenance et entretien . . . . . . . . . . . . . . . . . . . . . . . . . . . . . . . . . . . . . . . . . . . . . . . . . . . . 5
Avertissements de sécurité spécifi ques à l'outil . . . . . . . . . . . . . . . . . . . . . . . . . . . . . . . . . . . . . . 5
Avertissements de sécurité pour le travail avec de l'air comprimé et des pistolets de souffl age 5
Utilisation . . . . . . . . . . . . . . . . . . . . . . . . . . . . . . . . . . . . . . . . . . . . . . . . . . . . . . . 6
Allumer et éteindre . . . . . . . . . . . . . . . . . . . . . . . . . . . . . . . . . . . . . . . . . . . . . . . . . . . . . . . . . . . 6
Gonfl er . . . . . . . . . . . . . . . . . . . . . . . . . . . . . . . . . . . . . . . . . . . . . . . . . . . . . . . . . . . . . . . . . . . . 7
Maintenance et nettoyage . . . . . . . . . . . . . . . . . . . . . . . . . . . . . . . . . . . . . . . . . . 9
Entreposage . . . . . . . . . . . . . . . . . . . . . . . . . . . . . . . . . . . . . . . . . . . . . . . . . . . . . 9
Mise au rebut . . . . . . . . . . . . . . . . . . . . . . . . . . . . . . . . . . . . . . . . . . . . . . . . . . .10
Garantie . . . . . . . . . . . . . . . . . . . . . . . . . . . . . . . . . . . . . . . . . . . . . . . . . . . . . . . 10
Maintenance . . . . . . . . . . . . . . . . . . . . . . . . . . . . . . . . . . . . . . . . . . . . . . . . . . . . 10
Importateur . . . . . . . . . . . . . . . . . . . . . . . . . . . . . . . . . . . . . . . . . . . . . . . . . . . . . 10
Traduction de la déclaration de conformité originale . . . . . . . . . . . . . . . . . . .11
FR
PKZ 180 B2
1
Page 5

COMPRESSEUR PKZ 180 B2
FR
Introduction
Nous vous félicitons pour l'achat de votre
nouvel appareil. Ainsi, vous venez d'opter
pour un produit de grande qualité.
Le mode d'emploi fait partie de ce produit.
Il contient des remarques importantes concernant la
sécurité, l'usage et la mise au rebut. Avant l'usage
du produit, veuillez vous familiariser avec toutes les
consignes d'utilisation et de sécurité. N'utilisez le
produit que conformément aux consignes et pour
les domaines d'utilisation prévus. Si vous cédez le
produit à un tiers, remettez-lui également tous les
documents.
Utilisation conforme à l'usage prévu
L'outil est destiné à gonfl er les pneus de voiture,
de vélo, les matelas pneumatiques, les ballons
de sport, les bateaux pneumatiques, etc. à l'aide
des adaptateurs fournis. Toute utilisation autre ou
modifi cation de l'outil est considérée comme non
conforme et s'accompagne de risques d'accident
non négligeables. Nous déclinons toute responsabilité pour des dommages causés résultant d'une
utilisation non conforme. L'outil n'est pas conçu
pour un usage commercial.
REMARQUE
►
Le mode d'emploi doit être conservé en permanence à proximité immédiate du compresseur
et être à la disposition du personnel opérateur.
Équipement
Interrupteur Marche / Arrêt (avec voyant de
contrôle intégré)
Poignée de transport
Compartiment pour accessoires
Fiche secteur
Tuyau à air comprimé à coupleur rapide
Pieds
Manomètre avec pistolet
Valve de décharge
Connecteur d'air comprimé
Tuyau avec dispositif de fermeture rapide à levier
Gâchette
Buse d'adaptation
Buse d'adaptation
Buse d'adaptation
Buse de rallonge
Adaptateur universel
Adaptateur universel
Adaptateur pour le jeu de buses
Aiguille à ballon
Adaptateur pour valve
Matériel livré
1 compresseur PKZ 180 B2
(tuyau à air comprimé et cordon d'alimentation incl.)
1 pistolet à air comprimé (avec manomètre)
1 buse de rallonge
1 aiguille à ballon
1 adaptateur pour valve
3 buses d'adaptation
1 adaptateur pour le jeu de buses
2 adaptateurs universels
1 mode d'emploi
Caractéristiques techniques
Tension nominale: 230 V ∼ 50 Hz
Puissance du moteur : 1,1 KW
Mode d'opération : S3 15 % 10 min.
Vitesse de rotation du
compresseur: 3550 min
Pression de service: max. 8 bar
Puissance d'aspiration
théo.: 180 l / min.
Indice de protection: IP20
Classe de protection: I
Poids de l'outil: 5,8 kg
Mode d'opération S3 - 15% - 10min: S3 = service
intermittent sans infl uence du processus de démarrage. Cela signifi e que pendant une période de
10 min. le temps d'opération max. s'élève à 15%
(1,5 min.).
-1
2
PKZ 180 B2
Page 6
Informations sur le niveau de bruit :
Valeur de mesure pour les bruits déterminés conformément à la norme EN ISO 2151. Le niveau de
bruit A pondéré typique de l'outil électrique est de:
Niveau de pression
acoustique: L
Incertitude: K = 3 dB (A)
Niveau de puissance
acoustique: L
Incertitude: K = 3 dB (A)
Porter des protections acoustiques !
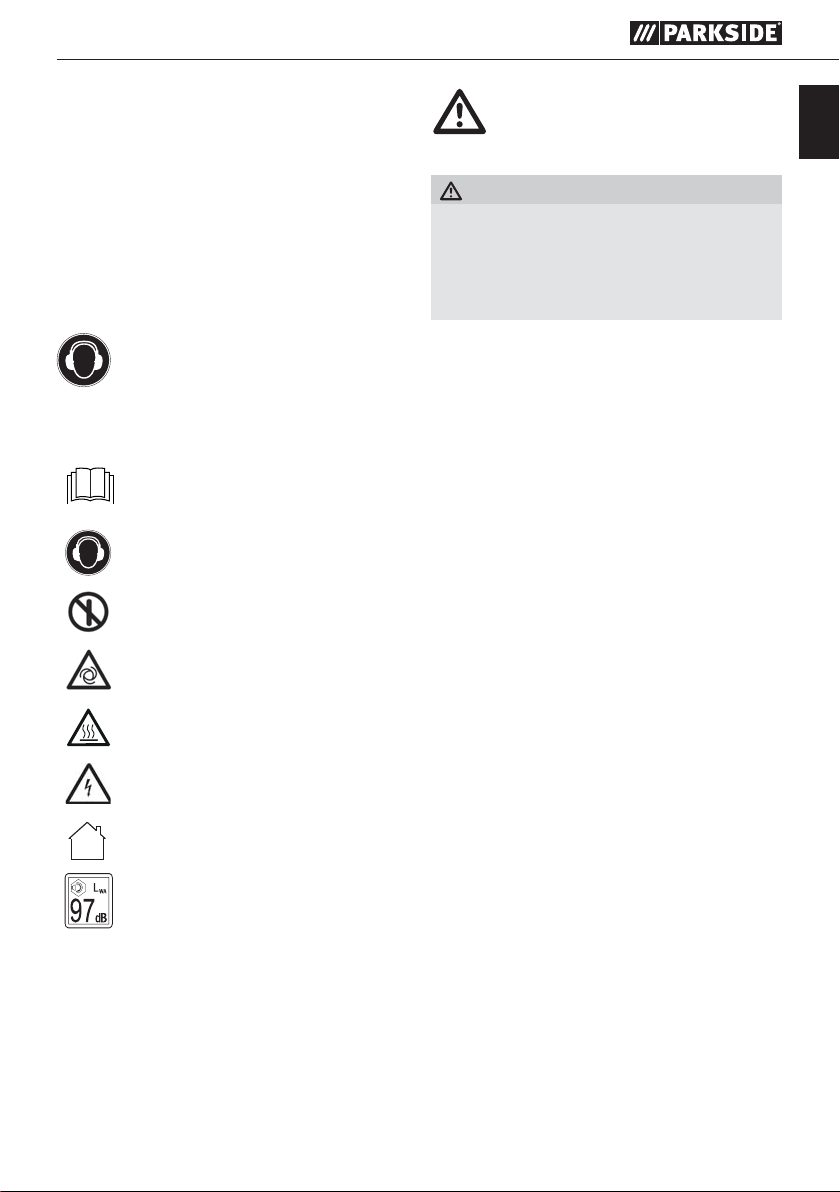
Explications des plaques signalétiques sur
l‘outil!
= 75,2 dB (A)
PA
= 95,2 dB (A)
WA
Avant la mise en service, lire le
mode d'emploi d'origine et les
avertissements de sécurité!
Porter des protections acoustiques !
Ne pas commencer
Compressor peut sans
avertissement de démarrage
Les surfaces chaudes présentent
un risque !
Avertissement face à la tension
électrique !
Utiliser uniquement dans les
espaces intérieurs!
Indication du niveau de puissance acoustique LWA en dB.
Avertissements de
sécurité généraux
pour l'outil
AVERTISSEMENT!
► Lire tous les avertissements de sécurité et toutes
les instructions. Ne pas suivre les avertissements et instructions peut donner lieu à un
choc électrique, un incendie et/ou une blessure sérieuse.
Conserver tous les avertissements et toutes
les instructions pour pouvoir s'y reporter
ultérieurement.
Le terme "outil" dans les avertissements fait référence
à votre outil électrique alimenté par le secteur (avec
cordon d'alimentation) ou votre outil fonctionnant
sur batterie (sans cordon d'alimentation).
1. Sécurité de la zone de travail
a) Conserver la zone de travail propre et bien
éclairée. Les zones en désordre ou sombres
sont propices aux accidents.
b) Ne pas faire fonctionner les outils électriques
en atmosphère explosive, par exemple en
présence de liquides infl ammables, de gaz ou
de poussières. Les outils électriques produisent
des étincelles qui peuvent enfl ammer les poussières ou les fumées.
c) Maintenir les enfants et les personnes pré-
sentes à l'écart pendant l'utilisation de l'outil.
Les distractions peuvent vous faire perdre le
contrôle de l'outil.
2. Sécurité électrique
a) Il faut que les fi ches de l'outil électrique soient
adaptées au socle. Ne jamais modifi er la
fi che de quelque façon que ce soit.
Ne pas utiliser d'adaptateurs avec des outils à
branchement de terre. Des fi ches non modifi ées
et des socles adaptés réduiront le risque de
choc électrique.
b) Éviter tout contact du corps avec des surfaces
reliées à la terre telles que les tuyaux, les
radiateurs, les cuisinières et les réfrigérateurs.
Il existe un risque accru de choc électrique si
votre corps est relié à la terre.
FR
PKZ 180 B2
3
Page 7

c) Ne pas exposer les outils à la pluie ou à des
FR
conditions humides. La pénétration d'eau à
l'intérieur d'un outil augmentera le risque de
choc électrique.
d) Ne pas maltraiter le cordon. Ne jamais utiliser
le cordon pour porter, tirer ou débrancher
l'outil. Maintenir le cordon à l'écart de la chaleur, du lubrifi ant, des arêtes ou des parties
en mouvement. Des cordons endommagés ou
emmêlés augmentent le risque de choc électrique.
e) Lorsqu'on utilise un outil à l'extérieur, utiliser
un prolongateur adapté à l'utilisation extérieure. L'utilisation d'un cordon adapté à l'utilisa-
tion extérieure réduit le risque de choc électrique.
f) Si l'usage d'un outil dans un emplacement
humide est inévitable, utiliser une alimentation protégée par un dispositif à courant diff érentiel résiduel (RCD). L'usage d'un RCD réduit
le risque de choc électrique.
3. Sécurité des personnes
a) Rester vigilant, regarder ce que vous êtes en
train de faire et faire preuve de bon sens dans
votre utilisation de l'outil. Ne pas utiliser un
outil lorsque vous êtes fatigué ou sous l'emprise de drogues, d'alcool ou de médicaments.
Un moment d'inattention en cours d'utilisation
d'un outil peut entraîner des blessures graves des
personnes.
b) Utiliser un équipement de sécurité. Toujours
porter une protection pour les yeux. Les
équipements de sécurité tels que les masques
contre les poussières, les chaussures de sécurité
antidérapantes, les casques ou les protections
acoustiques utilisés pour les conditions appropriées réduiront les blessures de personnes.
c) Éviter tout démarrage intempestif. S'assurer
que l'interrupteur est en position arrêt avant
de brancher l'outil au secteur et/ou au bloc
de batteries, de le ramasser ou de le porter.
Porter les outils en ayant le doigt sur l'interrupteur
ou brancher des outils dont l'interrupteur est en
position marche est source d'accidents.
d) Retirer toute clé de réglage avant de mettre
l'outil en marche. Une clé laissée fi xée sur une
partie tournante de l'outil peut donner lieu à
des blessures de personnes.
e) Ne pas se précipiter. Garder une position
et un équilibre adaptés à tout moment. Cela
permet un meilleur contrôle de l'outil dans des
situations inattendues.
f) S'habiller de manière adaptée. Ne pas porter
de vêtements amples ou de bijoux. Garder les
cheveux, les vêtements et les gants à distance
des parties en mouvement.
Des vêtements amples, des bijoux ou les cheveux
longs peuvent être pris dans des parties en
mouvement.
g) Si des dispositifs sont fournis pour le raccor-
dement d'équipements pour l'extraction et la
récupération des poussières, s'assurer qu'ils
sont connectés et correctement utilisés. Utiliser
des collecteurs de poussière peut réduire les
risques dus aux poussières.
4. Utilisation et entretien de l'outil
a) Ne pas forcer l'outil. Utiliser l'outil adapté
à votre application. L'outil adapté réalisera
mieux le travail et de manière plus sûre au
régime pour lequel il a été construit.
b) Ne pas utiliser l'outil si l'interrupteur ne permet
pas de passer de l'état de marche à arrêt et
vice versa. Tout outil qui ne peut pas être com-
mandé par l'interrupteur est dangereux et il
faut le réparer.
c) Débrancher la fi che de la source d'alimen-
tation en courant et/ou le bloc de batteries
de l'outil avant tout réglage, changement
d'accessoires ou avant de ranger l'outil. De
telles mesures de sécurité préventives réduisent
le risque de démarrage accidentel de l'outil.
d) Conserver les outils à l'arrêt hors de la portée
des enfants et ne pas permettre à des personnes ne connaissant pas l'outil ou les présentes
instructions de le faire fonctionner. Les outils
sont dangereux entre les mains d'utilisateurs
novices.
e) Observer la maintenance de l'outil. Vérifi er
qu'il n'y a pas de mauvais alignement ou de
blocage des parties mobiles, des pièces cassées ou toute autre condition pouvant aff ecter
le fonctionnement de l'outil. En cas de dommages, faire réparer l'outil avant de l'utiliser.
De nombreux accidents sont dus à des outils
mal entretenus.
4
PKZ 180 B2
Page 8

f) Garder aff ûtés et propres les outils permet-
tant de couper. Des outils destinés à couper
correctement entretenus avec des pièces coupantes tranchantes sont moins susceptibles de
bloquer et sont plus faciles à contrôler.
g) Utiliser l'outil, les accessoires et les lames etc.,
conformément à ces instructions, en tenant
compte des conditions de travail et du travail
à réaliser. L'utilisation de l'outil pour des opé-
rations diff érentes de celles prévues pourrait
donner lieu à des situations dangereuses.
5. Maintenance et entretien
a) Faire entretenir l'outil par un réparateur
qualifi é utilisant uniquement des pièces de
rechange identiques. Cela assurera que la
sécurité de l'outil est maintenue.
b) Confi ez toujours le remplacement de la fi che
ou de la conduite de raccordement au fabricant de l'outil ou à son service après-vente.
Cela assurera que la sécurité de l'outil est maintenue.
Avertissements de sécurité spécifi ques
à l'outil
■ Cet outil ne doit pas être utilisé par des enfants
ni par des personnes ayant des capacités physiques, sensorielles ou mentales réduites ou un
manque d'expérience. Les enfants ne doivent pas
jouer avec l'outil. Le nettoyage et la maintenance
ne doivent pas être confi és à des enfants.
■ Évitez d'utiliser le compresseur à des températures
inférieures à + 5 degrés.
■ Ne laissez jamais le compresseur travailler sans
surveillance.
■ Assurez-vous que l'interrupteur Marche / Arrêt
est éteint lors du raccordement au circuit électrique.
■ Attention ! N'opérez le compresseur que pour
des périodes relativement courtes. Une longue
opération ininterrompue de plus de 10 min.
surchauff e l'appareil. Éteignez immédiatement
l'outil et laissez-le refroidir pendant au moins
10 min.
■ Risque d'accident ! Ne faites pas gonfl er les
objets à un niveau de pression supérieur à celui
prévu. Ils risquent sinon d'éclater et d'entraîner
des blessures et / ou des dommages matériels.
■ Ne dépassez pas le régime admissible du com-
presseur. Ne gonfl ez pas de pneus de camions,
de tracteurs ou d'autres pneus de grande taille.
■ Ne travaillez pas de matériaux qui sont poten-
tiellement facilement infl ammables ou explosifs.
■ N'utilisez jamais l'appareil à d'autres fi ns que
celles prévues.
■ L'appareil doit toujours être propre, sec et
exempt d'huile ou de graisse.
■ N'utilisez jamais d'essence ou d'autres liquides
infl ammables pour nettoyer l'appareil ! Les
vapeurs qui demeurent dans l'appareil peuvent
être allumées par des étincelles et entraîner
l'explosion de l'appareil.
■ Soyez vigilant ! N'utilisez en aucun cas l'outil
lorsque vous n'êtes pas concentré ou lorsque
vous vous sentez mal.
Avertissements de sécurité pour le
travail avec de l'air comprimé et des
pistolets de souffl age
■ RISQUE D'ÉLECTROCUTION! N'utilisez pas
l'appareil lorsque le cordon d'alimentation
ou la fi che secteur sont endommagés.
■ RISQUE D'ÉLECTROCUTION! Ne touchez
pas le cordon d'alimentation s'il est endommagé ou sectionné durant l'utilisation.
Débranchez immédiatement la fi che secteur et
faites ensuite réparer l'appareil par un technicien spécialisé ou par le service après-vente
compétent.
■ RISQUE D'ÉLECTROCUTION! N'utilisez pas
l'outil lorsqu'il est humide ni dans un environnement humide.
■ RISQUE D'ÉLECTROCUTION! Lorsque vous
travaillez à l'extérieur, branchez l'appareil
à un fusible de protection (FI) à courant de
fuite avec un courant de déclenchement ne
dépassant pas 30 mA. Utilisez exclusivement
une rallonge homologuée pour l'extérieur.
■ Ne portez pas l'appareil par le cordon d'ali-
mentation et ne le suspendez pas au cordon
d'alimentation. Faites toujours passer le cordon d'alimentation à l'arrière de l'appareil.
Sinon, l'appareil peut être endommagé.
FR
PKZ 180 B2
5
Page 9
■ Le condenseur et les conduites atteignent des
FR
températures élevées en cours d'opération.
Tout contact peut entraîner des brûlures.
■ Les gaz ou vapeurs aspirés par le condenseur
doivent être maintenus exempts d'impuretés
susceptibles d'entraîner des incendies ou des
explosions dans le condenseur.
■ Au moment de détacher le coupleur du tuyau,
il faut bien tenir le connecteur du tuyau avec la
main, pour éviter les accidents par un tuyau qui
rebondirait.
■ Veillez toujours à porter des lunettes de protec-
tion au moment de travailler avec le pistolet de
souffl age. Les corps étrangers et les particules
délogées par souffl age peuvent facilement
provoquer des accidents.
■ Ne pas diriger le pistolet de souffl age vers des
personnes ou tenter de nettoyer des vêtements.
■ Vérifi er les raccords et les conduites d'alimenta-
tion. L'ensemble des unités de maintenance et
coupleurs doit être conforme aux grandeurs de
l'outil en termes de pression et de quantité d'air.
Une pression trop faible entrave le bon fonctionnement de l'outil, une pression trop élevée peut
entraîner des dommages matériels et des accidents de personnes. Protégez les tuyaux contre
les plis, étranglements, solvants et arêtes aiguës.
■ Veillez à ce que les colliers des tuyaux soient
toujours fermement serrés. Des colliers mal serrés
ou endommagés peuvent laisser s'échapper l'air
de manière incontrôlée.
■ Remplacez immédiatement tout tuyau endom-
magé. Une conduite d'alimentation endommagée
peut provoquer des mouvements incontrôlés de
la part du tuyau à air comprimé et causer des
accidents.
■ Ne respirez pas directement l'air d'échappement.
■ Le tuyau doit être conçu pour résister au minimum
à 150% de la pression maximale générée dans
le système.
■ L'outil et le tuyau d'amenée doivent être dotés
d'un coupleur de tuyau afi n d'éliminer entièrement la pression lors de la séparation du tuyau
de raccordement.
■ ATTENTION ! Un système à air comprimé sous-
dimensionné peut réduire l'effi cience de votre outil.
■ Évitez d'exposer vos yeux à l'air d'échappement.
L'air d'échappement peut contenir de l'eau,
de l'huile, des particules métalliques ou des
impuretés du compresseur. Il peut en résulter
des risques pour votre santé.
AVERTISSEMENT!
► Faites attention au moment de déposer l'outil!
Déposez toujours l'appareil de manière à ce
qu'il ne repose par sur l'interrupteur Marche /
Arrêt . Dans certaines circonstances, ceci
peut entraîner l'activation accidentelle de
l'outil, ce qui peut présenter un certain
nombre de dangers.
Utilisation
REMARQUE
L'outil vibre en cours d'opération. C'est pour-
►
quoi, nous vous recommandons de le poser
en cours d'opération. A cette fi n, l'appareil
dispose de quatre pieds .
♦ Prélevez les accessoires nécessaires dans le
compartiment à accessoires .
Allumer et éteindre
Mise en marche de l'appareil :
♦ Pour l'allumer, mettez l'interrupteur Marche /
Arrêt en position "I". Le voyant de contrôle
intégré s'allume.
Éteindre l'appareil :
♦ Mettez l'interrupteur Marche / Arrêt en posi-
tion "O" pour l'éteindre. Le voyant de contrôle
intégré s'éteint.
ATTENTION !
► Attention ! L'outil n'est pas adapté pour un
usage continu. Pour que le moteur n'atteigne
pas des températures inadmissibles, l'outil ne
peut être utilisé que de la manière suivante:
sur une période de service de 10 minutes,
l'appareil ne peut être opéré que 15 % du
temps avec sa puissance nominale absorbée,
c'est-à-dire 1,5 minutes. Le reste du temps
(phase de refroidissement 8,5 minutes),
l'appareil refroidit à nouveau.
6
PKZ 180 B2
Page 10
Tuyau à air comprimé à coupleur rapide
Branchement:
♦ Glissez le connecteur d'air comprimé dans
le coupleur rapide du tuyau à air comprimé ,
le manchon s'avance automatiquement.
Débranchement:
♦ Tirez le manchon du coupleur rapide du tuyau
à air comprimé vers l'arrière et retirez le
connecteur d'air comprimé .
ATTENTION!
► Attention ! Au moment de retirer le coupleur
rapide du tuyau à air comprimé , le connecteur doit être maintenu fermement pour éviter
tout accident par le rebond du tuyau.
Gonfl er
sans adaptateur
Valve Schrader, valve de voiture
♦ Mettez l'interrupteur Marche / Arrêt sur "I".
Le voyant de contrôle intégré s'allume.
♦ Lisez le niveau d'air comprimé accumulé sur le
manomètre .
♦ Mettez l'interrupteur Marche / Arrêt sur
"O", dès que le niveau d'air comprimé correct
ou admissible est atteint. Le voyant de contrôle
intégré s'éteint.
♦ Appuyez sur le système de fermeture rapide à
levier et retirez-le de la valve.
♦ Retirez la fi che secteur du compresseur de
la prise secteur.
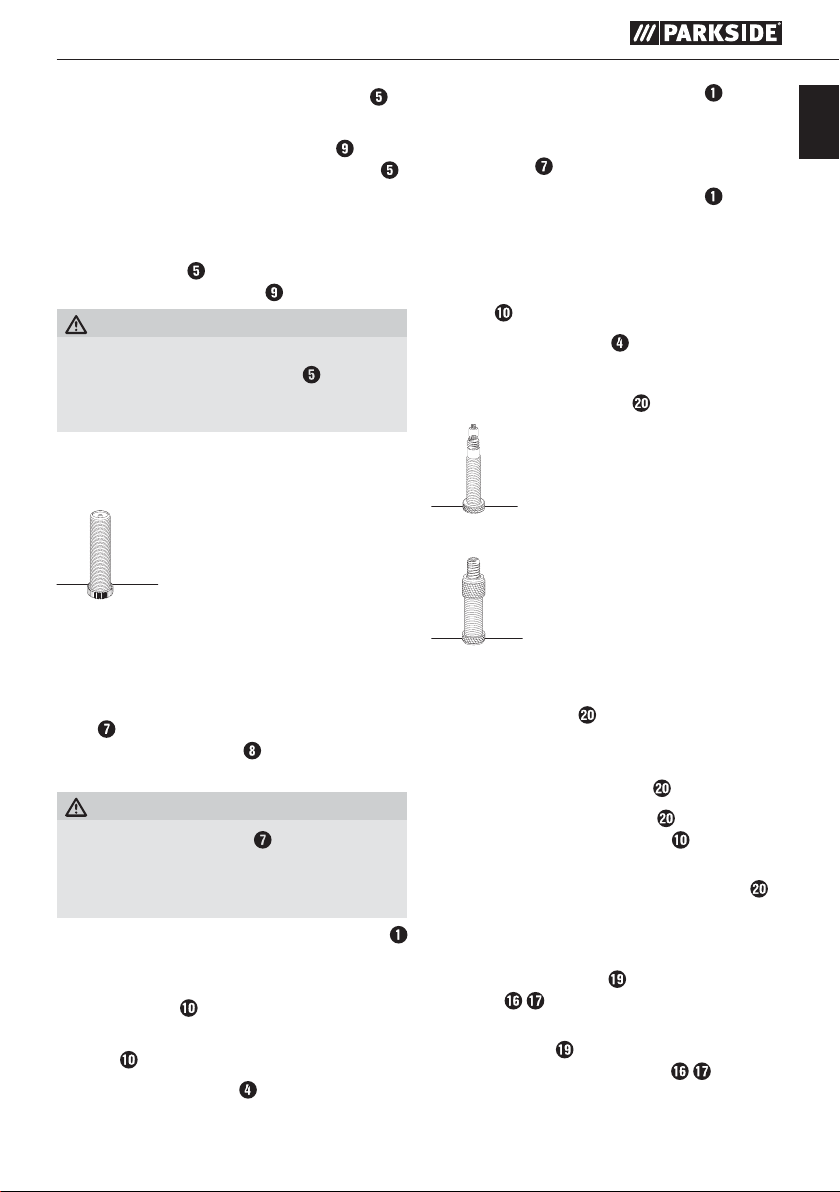
avec adaptateur de valve
Valve Sclaverand, valve Presta
FR
Domaine d'utilisation :
Ce domaine d'utilisation permet de gonfl er les pneus
de voiture de manière simple et rapide. Le mano-
sert à contrôler la pression des pneus. La
mètre
valve de décharge intégrée permet d'abaisser
une pression des pneus trop élevée.
ATTENTION!
► Attention, le manomètre n'est pas calibré!
Après avoir gonfl é les pneus, veuillez immédiatement contrôler la pression, par ex. à une
station-service.
♦ Assurez-vous que l'interrupteur Marche / Arrêt
se trouve bien sur "O".
♦ Pour l'installer, appuyez le dispositif de fermeture
rapide à levier
♦ Appuyez le dispositif de fermeture rapide à
levier sur la valve, puis relâchez-le.
♦ Insérez la fi che secteur du compresseur dans
une prise secteur.
vers le bas.
PKZ 180 B2
Valve Dunlop, valve de vélo
Domaine d'utilisation :
L'adaptateur de valve permet de gonfl er aisément
les pneus de vélo.
♦ Pour travailler avec les valves fi gurant ci-dessus,
utilisez l'adaptateur de valve .
♦ Insérez l’adaptateur de valve dans le dispo-
sitif de fermeture rapide à levier
le à nouveau.
♦ Appuyez maintenant l’adaptateur de valve
sur la valve.
♦ Pour gonfl er, procédez comme décrit ci-dessus.
avec l'aiguille à ballon
universel
Domaine d'utilisation :
L'aiguille à ballon
ballons. Les adaptateurs universels
servir à gonfl er des matelas pneumatiques ou
d'autres objets similaires.
/ adaptateur
peut servir à gonfl er diff érents
et relâchez-
peuvent
7
Page 11

♦ Pour l'installer, appuyez le dispositif de fermeture
FR
rapide à levier vers le bas.
♦ Insérez l'aiguille à ballon ou les adaptateurs
universels dans le dispositif de fermeture
rapide à levier
♦ Pour gonfl er, procédez comme décrit ci-dessus.
REMARQUE
►
Pour éviter d'endommager la valve, nous
vous recommandons d'humidifi er légèrement
l'aiguille à ballon avant de l'introduire.
avec buse de rallonge
Domaine d'utilisation :
La buse de rallonge
souffl age de cavités ou d'espaces diffi cilement
accessibles, ainsi qu'au nettoyage d'outils de travail
sales. La gâchette réglable en continu permet
un dosage très précis de l'air comprimé.
Pour utiliser la buse de rallonge , il faut d'abord
dévisser le tuyau avec le dispositif de fermeture à
levier rapide
♦ Vissez à présent la buse de rallonge dans
le pistolet avec manomètre .
avec buse d'adaptation
Domaine d'utilisation :
La buse d'adaptation
valves d'un diamètre intérieur à partir de 8 mm.
Vous pouvez utiliser la buse d'adaptation par
ex. pour des matelas pneumatiques, des piscines
gonfl ables ou des bateaux pneumatiques.
♦ Pour l'installer, appuyez le dispositif de fermeture
rapide à levier vers le bas.
♦ Insérez l'adaptateur dans le dispositif de
fermeture rapide à levier puis relâchez-le
à nouveau.
♦ Vis à présent l'adaptateur
d'adaptation
♦ Pour gonfl er, procédez comme décrit ci-dessus.
et relâchez-le à nouveau.
est destinée au nettoyage/
du pistolet avec manomètre
est adaptée à toutes les
dans la buse
.
avec buse d'adaptation
Domaine d'utilisation :
La buse d'adaptation peut être utilisée avec
tous les bateaux pneumatiques, canoës ou autres
grands articles tels que par ex. des piscines, qui
sont dotés d'une valve à visser.
♦ Pour l'installer, appuyez le dispositif de fermeture
rapide à levier vers le bas.
♦ Insérez l'adaptateur dans le dispositif de
fermeture rapide à levier puis relâchez-le à
nouveau.
♦ Vis à présent l'adaptateur
d'adaptation
♦ Pour gonfl er, procédez comme décrit ci-dessus.
avec buse d'adaptation
Domaine d'utilisation :
Vous pouvez placer la buse d'adaptation dans
une valve d'aération. Vous les trouverez avec d'autres
.
valves (valve standard, valve à visser,...) sur des
articles très volumineux, tels que par ex. des matelas gonfl ables.
♦ Pour l'installer, appuyez le dispositif de fermeture
rapide à levier vers le bas.
♦ Insérez l'adaptateur dans le dispositif de
fermeture rapide à levier puis relâchez-le à
nouveau.
♦ Vis à présent l'adaptateur dans la buse
d'adaptation .
♦ Pour gonfl er, procédez comme décrit ci-dessus.
.
dans la buse
8
PKZ 180 B2
Page 12
Maintenance et nettoyage
AVERTISSEMENT! RISQUE DE BLES-
SURES! Éteindre et débrancher l'outil
avant d'eff ectuer des travaux.
■ N'utilisez pas d'objets pointus pour nettoyer
l'outil. Aucun liquide ne doit pénétrer à l'intérieur de l'outil. Sinon, il peut être endommagé.
Ne faites eff ectuer le remplacement des brosses
à charbon que par le service après-vente ou un
atelier de service après-vente homologué.
A part cela, l'outil ne nécessite aucune maintenance particulière.
■ Veillez à ce que l'outil soit entièrement refroidi,
sinon, il y a un risque de brûlure.
■ Avant tous travaux de nettoyage et de mainte-
nance, l'outil doit être mis hors pression. Pour ce
faire, ouvrez la valve de décharge , jusqu'à
ce que plus aucun air ne s'échappe.
■ Nettoyez régulièrement l'outil, de préférence
directement une fois le travail terminé.
■ Nettoyez le corps avec un chiff on doux, n'uti-
lisez en aucun cas de l'essence, du dissolvant
ou des produits nettoyants qui agressent le
plastique.
■ Veillez à ce qu'il n'y ait pas d'eau qui pénètre
à l'intérieur de l'outil.
■ Les ouvertures de ventilation doivent toujours
être dégagées.
REMARQUE
►
Les pièces détachées non listées (par ex.
brosses charbon, interrupteur) peuvent être
commandées auprès de notre ligne téléphonique du service après-vente.
REMARQUE
Aucune maintenance n'est nécessaire pour cet
outil. N'ouvrez en aucun cas l'outil. La réparation
de l'outil devra exclusivement être confi ée à une
succursale de service agréée ou au service clientèle. Si l'un des défaillances décrites ci-dessous
devait se produire, il convient de respecter ce
qui suit:
♦ Laissez l'appareil refroidir et attendez un court
instant pour neutraliser l'énergie résiduelle.
♦ Assurez-vous que l'outil se trouve dans un état
sûr.
Analyse des erreurs
Erreurs Solution
1. L'appareil
ne fonctionne pas
2. Pression de
service trop
faible
3. Les outils ne
fonctionnent
pas
1. Vérifi er la tension secteur.
Vérifi er la fonctionnalité
de l'ensemble des câbles,
fusibles et de la prise
secteur.
2. Éviter d'utiliser une rallonge
trop longue.
3. Ne pas utiliser l'outil à une
température inférieure à
+ 5 degrés.
4. Éviter toute surchauff e du
moteur. Laisser le moteur
refroidir.
Vérifi er les joints et le clapet
anti-retour et le cas échéant,
les faire remplacer.
Vérifi er les tuyaux et le coupleur rapide ainsi que les outils
et le cas échéant, les faire
remplacer.
Entreposage
REMARQUE
Entreposez l'outil dans un environnement sec
►
et sûr. Avant l'entreposage, vous devez aérer
l'outil ainsi que tous les accessoires à air
comprimé raccordés.
■ Retirez la fi che secteur, aérez l'outil et tous les
accessoires à air comprimé raccordés.
■ Déposez l'outil de telle manière qu'il ne peut
pas être mis en service par des personnes non
autorisées.
FR
♦ Débranchez l'outil de toute alimentation éner-
gétique.
PKZ 180 B2
9
Page 13

Mise au rebut
FR
L'emballage se compose de matières
recyclables. Il peut être éliminé dans les
conteneurs de recyclage locaux.
Ne jetez pas les outils électriques
dans les déchets ménagers !
Conformément à la directive européenne
2012/19/EU, les outils électriques usagés doivent
faire l'objet d'un tri et d'un recyclage respectueux
de l'environnement.
Se renseigner auprès de votre mairie ou des services
de votre commune pour connaître les possibilités
de mise au rebut de votre appareil usagé.
Garantie
Cet appareil est garanti 3 ans à partir de la
date d'achat. L'appareil a été fabriqué avec
soin et consciencieusement contrôlé avant
sa livraison. Veuillez conserver le ticket de
caisse en guise de preuve d'achat. Dans le
cas où la garantie s'applique, veuillez appeler
le service après-vente compétent. Cette condition doit être respectée pour assurer l'expédition gratuite de votre marchandise.
La prestation de garantie s'applique uniquement
aux vices de matériau ou de fabrication, et non
aux dégâts de transport, aux pièces d'usure ou aux
dégâts subis par des pièces fragiles telles que les
commutateurs ou les accus. Le produit est destiné
uniquement à un usage privé et ne répond pas à
un usage professionnel. La garantie est annulée
en cas de manipulation incorrecte et inappropriée,
d'usage de la force et en cas d'intervention non
réalisée par notre centre de service après-vente
agréé. Vos droits légaux ne sont pas restreints par
la présente garantie. L'exercice de la garantie ne
prolonge pas la période de garantie.
Cette disposition s'applique également aux pièces
remplacées ou réparées. Signalez sans attendre
toute anomalie éventuelle sur le matériel au moment
de l'achat, au plus tard deux jours après la date
d'achat. Toute réparation fera l'objet d'une facturation après expiration de la période de garantie.
Maintenance
Service France
Tel.: 0800 919270
E-Mail: kompernass@lidl.fr
IAN 108972
Heures de service de notre hotline :
du lundi au vendredi de 8 h à 20 h (HEC)
Importateur
KOMPERNASS HANDELS GMBH
BURGSTRASSE 21
44867 BOCHUM
GERMANY
www.kompernass.com
10
PKZ 180 B2
Page 14

Traduction de la déclaration de
conformité originale
Nous soussignés, KOMPERNASS HANDELS GMBH,
responsables du document: M. Semi Uguzlu,
BURGSTR. 21, 44867 BOCHUM, DEUTSCHLAND,
déclarons par la présente que ce produit est en conformité avec les normes, documents normatifs et
directives CE suivants:
Directive Machines
(2006 / 42 / EC)
Directive européenne sur les basses tensions
(2006 / 95 / EC)
Compatibilité électromagnétique
(2014 / 30 / EU)
Directive RoHS
(2011 / 65 / EU)
Normes harmonisées appliquées:
EN 1012-1: 2010
EN 60204-1/A1: 2009
EN 55014-1/A2: 2011
EN 55014-2/A2: 2008
EN 61000-3-2/A2: 2009
EN 61000-3-3: 2013
FR
Désignation du modèle de la machine:
Compresseur PKZ 180 B2
Année de construction: 11 - 2014
Numéro de série: IAN 108972
Bochum, le 17/11/2014
Semi Uguzlu
-Responsable qualitéSous réserve de modifi cations techniques à des fi ns
d'amélioration.
PKZ 180 B2
11
Page 15

12
PKZ 180 B2
Page 16

Inhaltsverzeichnis
Einleitung . . . . . . . . . . . . . . . . . . . . . . . . . . . . . . . . . . . . . . . . . . . . . . . . . . . . . . . 14
Bestimmungsgemäßer Gebrauch . . . . . . . . . . . . . . . . . . . . . . . . . . . . . . . . . . . . . . . . . . . . . . . 14
Ausstattung . . . . . . . . . . . . . . . . . . . . . . . . . . . . . . . . . . . . . . . . . . . . . . . . . . . . . . . . . . . . . . . . 14
Lieferumfang . . . . . . . . . . . . . . . . . . . . . . . . . . . . . . . . . . . . . . . . . . . . . . . . . . . . . . . . . . . . . . . 14
Technische Daten . . . . . . . . . . . . . . . . . . . . . . . . . . . . . . . . . . . . . . . . . . . . . . . . . . . . . . . . . . . 14
Allgemeine Sicherheitshinweise für Elektrowerkzeuge . . . . . . . . . . . . . . . . . . 15
1. Arbeitsplatz-Sicherheit . . . . . . . . . . . . . . . . . . . . . . . . . . . . . . . . . . . . . . . . . . . . . . . . . . . . . 15
2. Elektrische Sicherheit . . . . . . . . . . . . . . . . . . . . . . . . . . . . . . . . . . . . . . . . . . . . . . . . . . . . . . 15
3. Sicherheit von Personen . . . . . . . . . . . . . . . . . . . . . . . . . . . . . . . . . . . . . . . . . . . . . . . . . . . . 16
4. Verwendung und Behandlung des Elektrowerkzeugs . . . . . . . . . . . . . . . . . . . . . . . . . . . . . 16
5. Service . . . . . . . . . . . . . . . . . . . . . . . . . . . . . . . . . . . . . . . . . . . . . . . . . . . . . . . . . . . . . . . . . 17
Gerätespezifi sche Sicherheitshinweise . . . . . . . . . . . . . . . . . . . . . . . . . . . . . . . . . . . . . . . . . . . 17
Sicherheitshinweise zum Arbeiten mit Druckluft und Ausblaspistolen . . . . . . . . . . . . . . . . . . . . 17
Bedienung . . . . . . . . . . . . . . . . . . . . . . . . . . . . . . . . . . . . . . . . . . . . . . . . . . . . . .18
Ein- und ausschalten . . . . . . . . . . . . . . . . . . . . . . . . . . . . . . . . . . . . . . . . . . . . . . . . . . . . . . . . . 18
Aufpumpen . . . . . . . . . . . . . . . . . . . . . . . . . . . . . . . . . . . . . . . . . . . . . . . . . . . . . . . . . . . . . . . . 19
Wartung und Reinigung . . . . . . . . . . . . . . . . . . . . . . . . . . . . . . . . . . . . . . . . . . . 20
Lagerung . . . . . . . . . . . . . . . . . . . . . . . . . . . . . . . . . . . . . . . . . . . . . . . . . . . . . . . 21
Entsorgung . . . . . . . . . . . . . . . . . . . . . . . . . . . . . . . . . . . . . . . . . . . . . . . . . . . . . 21
Garantie . . . . . . . . . . . . . . . . . . . . . . . . . . . . . . . . . . . . . . . . . . . . . . . . . . . . . . . 22
Service . . . . . . . . . . . . . . . . . . . . . . . . . . . . . . . . . . . . . . . . . . . . . . . . . . . . . . . . . 22
Importeur . . . . . . . . . . . . . . . . . . . . . . . . . . . . . . . . . . . . . . . . . . . . . . . . . . . . . . 22
Original-Konformitätserklärung . . . . . . . . . . . . . . . . . . . . . . . . . . . . . . . . . . . .23
DE
AT
CH
PKZ 180 B2
13
Page 17

KOMPRESSOR PKZ 180 B2
Einleitung
Wir beglückwünschen Sie zum Kauf Ihres
DE
AT
Die Bedienungsanleitung ist Teil dieses Produkts. Sie
CH
enthält wichtige Hinweise für Sicherheit, Gebrauch
und Entsorgung. Machen Sie sich vor der Benutzung
des Produkts mit allen Bedien- und Sicherheitshinweisen vertraut. Benutzen Sie das Produkt nur wie
beschrieben und für die angegebenen Einsatzbereiche. Händigen Sie alle Unterlagen bei Weitergabe
des Produkts an Dritte mit aus.
Bestimmungsgemäßer Gebrauch
Das Gerät ist zum Aufpumpen von Autoreifen,
Fahrradreifen, Luftmatratzen, Sportbällen, Schlauchbooten, etc. unter Verwendung der mitgelieferten
Adapter geeignet. Jede andere Verwendung oder
Veränderung des Gerätes gilt als nicht bestimmungsgemäß und birgt erhebliche Unfallgefahren. Für
aus bestimmungswidriger Verwendung entstandene
Schäden übernehmen wir keine Haftung. Das Gerät
ist nicht für den gewerblichen Einsatz bestimmt.
Ausstattung
neuen Gerätes. Sie haben sich damit für ein
hochwertiges Produkt entschieden.
HINWEIS
►
Die Bedienungsanleitung muss ständig in
unmittelbarer Nähe des Kompressors aufbewahrt werden und dem Bedienpersonal zur
Verfügung stehen.
EIN-/ AUS - Schalter
(mit intergrierter Kontrollleuchte)
Transportgriff
Zubehörfach
Netzstecker
Druckluftschlauch mit Schnellkupplung
Standfüße
Manometer mit Pistole
Ablassventil
Druckluft-Anschlussstecker
Schlauch mit Hebel-Schnellverschluss
Abzugshebel
Adapterdüse
Adapterdüse
Adapterdüse
Verlängerungsdüse
Universaladapter
Universaladapter
Düsenadapter für das Düsenset
Ballnadel
Ventiladapter
Lieferumfang
1 Kompressor PKZ 180 B2
(inkl. Druckluftschlauch und Anschlusskabel)
1 Druckluftpistole (mit Manometer)
1 Verlängerungsdüse
1 Ballnadel
1 Ventiladapter
3 Adapterdüsen
1 Adapter für das Düsenset
2 Universaladapter
1 Betriebsanleitung
Technische Daten
Nennspannung: 230 V ∼ 50 Hz
Motorleistung: 1,1 KW
Betriebsart: S3 15 % 10 min.
Kompressor-Drehzahl: 3550 min
Betriebsdruck: max. 8 bar
Theo. Ansaugleistung: 180 l / min.
Schutzart: IP20
Schutzklasse: I
Gerätegewicht: 5,8 kg
Betriebsart S3 - 15% - 10min: S3 = Aussetzbetrieb
ohne Einfl uss des Anlaufvorganges. Dies bedeutet,
dass während eines Zeitraums von 10 min die
max. Betriebszeit 15% (1,5 Min) beträgt.
Geräuschinformationen:
Messwert für Geräusch ermittelt entsprechend
EN ISO 2151. Der A-bewertete Geräuschpegel
des Elektrowerkzeugs beträgt typischerweise:
Schalldruckpegel: L
Unsicherheit: K = 3 dB (A)
Schallleistungspegel: LWA = 95,2 dB (A)
Unsicherheit: K = 3 dB (A)
Gehörschutz tragen!
PA
-1
= 75,2 dB (A)
14
PKZ 180 B2
Page 18

Erläuterungen der Hinweisschilder auf dem Gerät!
Vor Inbetriebnahme
Originalbetriebsanleitung und
Sicherheitshinweise lesen!
Gehörschutz tragen!
Nicht anlassen
Kompressor kann ohne
Warnung anlaufen
Gefährdung durch heiße Oberfl ächen!
Warnung vor elektrischer
Spannung!
Nur in Innenräumen verwenden!
Angabe des Schallleistungspegels
LWA in dB.
Allgemeine
Sicherheitshinweise
für Elektrowerkzeuge
WARNUNG!
► Lesen Sie alle Sicherheitshinweise und Anwei-
sungen. Versäumnisse bei der Einhaltung der
Sicherheitshinweise und Anweisungen können
elektrischen Schlag, Brand und/oder schwere
Verletzungen verursachen.
Bewahren Sie alle Sicherheitshinweise und
Anweisungen für die Zukunft auf.
Der in den Sicherheitshinweisen verwendete Begriff
„Elektrowerkzeug“ bezieht sich auf netzbetriebene
Elektrowerkzeuge (mit Netzkabel) und auf akkubetriebene Elektrowerkzeuge (ohne Netzkabel).
1. Arbeitsplatz-Sicherheit
a) Halten Sie Ihren Arbeitsbereich sauber und
gut beleuchtet. Unordnung und unbeleuchtete
Arbeitsbereiche können zu Unfällen führen.
b) Arbeiten Sie mit dem Elektrowerkzeug nicht in
explosionsgefährdeter Umgebung, in der sich
brennbare Flüssigkeiten, Gase oder Stäube
befi nden. Elektrowerkzeuge erzeugen Funken, die
den Staub oder die Dämpfe entzünden können.
c) Halten Sie Kinder und andere Personen wäh-
rend der Benutzung des Elektrowerkzeugs
fern. Bei Ablenkung können Sie die Kontrolle
über das Gerät verlieren.
2. Elektrische Sicherheit
a) Der Anschlussstecker des Elektrowerkzeuges
muss in die Steckdose passen. Der Stecker
darf in keiner Weise verändert werden.
Verwenden Sie keine Adapterstecker gemeinsam mit schutzgeerdeten Elektrowerkzeugen.
Unveränderte Stecker und passende Steckdosen
verringern das Risiko eines elektrischen Schlages.
b) Vermeiden Sie Körperkontakt mit geerdeten
Oberfl ächen, wie von Rohren, Heizungen,
Herden und Kühlschränken. Es besteht ein
erhöhtes Risiko durch elektrischen Schlag, wenn
Ihr Körper geerdet ist.
c) Halten Sie Elektrowerkzeuge von Regen oder
Nässe fern. Das Eindringen von Wasser in ein
Elektrogerät erhöht das Risiko eines elektrischen
Schlages.
d) Zweckentfremden Sie das Kabel nicht, um
das Elektrowerkzeug zu tragen, aufzuhängen
oder um den Stecker aus der Steckdose zu
ziehen. Halten Sie das Kabel fern von Hitze,
Öl, scharfen Kanten oder sich bewegenden
Geräteteilen. Beschädigte oder verwickelte Kabel
erhöhen das Risiko eines elektrischen Schlages.
e) Wenn Sie mit einem Elektrowerkzeug im
Freien arbeiten, verwenden Sie nur Verlängerungskabel, die auch für den Außenbereich
zugelassen sind. Die Anwendung eines für den
Außenbereich geeigneten Verlängerungskabels
verringert das Risiko eines elektrischen Schlages.
f) Wenn der Betrieb des Elektrowerkzeuges in
feuchter Umgebung nicht vermeidbar ist, verwenden Sie einen Fehlerstromschutzschalter.
Der Einsatz eines Fehlerstromschutzschalters vermindert das Risiko eines elektrischen Schlages.
DE
AT
CH
PKZ 180 B2
15
Page 19

3. Sicherheit von Personen
a) Seien Sie stets aufmerksam, achten Sie darauf,
was Sie tun und gehen Sie mit Vernunft an die
DE
AT
CH
Arbeit mit einem Elektrowerkzeug. Benutzen
Sie kein Elektrowerkzeug, wenn Sie müde sind
oder unter dem Einfl uss von Drogen, Alkohol
oder Medikamenten stehen. Ein Moment der
Unachtsamkeit beim Gebrauch des Elektrowerkzeuges kann zu ernsthaften Verletzungen führen.
b) Tragen Sie persönliche Schutzausrüstung und
immer eine Schutzbrille. Das Tragen persönlicher
Schutzausrüstung wie Staubmaske, rutschfeste
Sicherheitsschuhe, Schutzhelm oder Gehörschutz,
je nach Art und Einsatz des Elektrowerkzeuges,
verringert das Risiko von Verletzungen.
c) Vermeiden Sie eine unbeabsichtigte Inbetrieb-
nahme. Vergewissern Sie sich, dass das Elektrowerkzeug ausgeschaltet ist, bevor Sie es an die
Stromversorgung anschließen, es aufnehmen
oder tragen. Wenn Sie beim Tragen des Elektro-
werkzeuges den Finger am Schalter haben oder
das Gerät bereits eingeschaltet an die Stromversorgung anschließen, kann dies zu Unfällen führen.
d) Entfernen Sie Einstellwerkzeuge oder Schrau-
benschlüssel, bevor Sie das Elektrowerkzeug
einschalten. Ein Werkzeug oder Schlüssel, der
sich in einem drehenden Geräteteil befi ndet,
kann zu Verletzungen führen.
e) Vermeiden Sie eine abnormale Körperhaltung.
Sorgen Sie für einen sicheren Stand und halten
Sie jederzeit das Gleichgewicht. Dadurch kön-
nen Sie das Elektrowerkzeug in unerwarteten
Situationen besser kontrollieren.
f) Tragen Sie geeignete Kleidung. Tragen Sie
keine weite Kleidung oder Schmuck. Halten
Sie Haare, Kleidung und Handschuhe fern
von sich bewegenden Teilen. Lockere Kleidung,
Schmuck oder lange Haare können von sich
bewegenden Teilen erfasst werden.
g) Wenn Staubabsaug- und -auff angeinrichtun-
gen montiert werden können, vergewissern
Sie sich, dass diese angeschlossen sind und
richtig verwendet werden. Die Verwendung
einer Staubabsaugung kann Gefährdungen
durch Staub verringern.
4. Verwendung und Behandlung des
Elektrowerkzeugs
a) Überlasten Sie das Gerät nicht. Verwenden
Sie für Ihre Arbeit das dafür bestimmte
Elektrowerkzeug. Mit dem passenden Elektro-
werkzeug arbeiten Sie besser und sicherer im
angegebenen Leistungsbereich.
b) Benutzen Sie kein Elektrowerkzeug, dessen
Schalter defekt ist. Ein Elektrowerkzeug, das
sich nicht mehr ein- oder ausschalten lässt, ist
gefährlich und muss repariert werden.
c) Ziehen Sie den Stecker aus der Steckdose,
bevor Sie Geräteeinstellungen vornehmen,
Zubehörteile wechseln oder das Gerät weglegen. Diese Vorsichtsmaßnahme verhindert den
unbeabsichtigten Start des Elektrowerkzeuges.
d) Bewahren Sie unbenutzte Elektrowerkzeuge
außerhalb der Reichweite von Kindern auf.
Lassen Sie Personen das Gerät nicht benutzen,
die mit diesem nicht vertraut sind oder diese
Anweisungen nicht gelesen haben. Elektro-
werkzeuge sind gefährlich, wenn sie von
unerfahrenen Personen benutzt werden.
e) Pfl egen Sie Elektrowerkzeuge mit Sorgfalt.
Kontrollieren Sie, ob bewegliche Teile einwandfrei funktionieren und nicht klemmen, ob Teile
gebrochen oder so beschädigt sind, dass die
Funktion des Elektrowerkzeuges beeinträchtigt
ist. Lassen Sie beschädigte Teile vor dem Einsatz
des Gerätes reparieren. Viele Unfälle haben ihre
Ursache in schlecht gewarteten Elektrowerkzeugen.
f) Halten Sie Schneidwerkzeuge scharf und
sauber. Sorgfältig gepfl egte Schneidwerkzeuge
mit scharfen Schneidkanten verklemmen sich
weniger und sind leichter zu führen.
g) Verwenden Sie Elektrowerkzeug, Zubehör,
Einsatzwerkzeuge usw. entsprechend diesen
Anweisungen. Berücksichtigen Sie dabei die
Arbeitsbedingungen und die auszuführende
Tätigkeit. Der Gebrauch von Elektrowerkzeugen
für andere als die vorgesehenen Anwendungen
kann zu gefährlichen Situationen führen.
16
PKZ 180 B2
Page 20

5. Service
a) Lassen Sie Ihr Elektrowerkzeug nur von quali-
fi ziertem Fachpersonal und nur mit OriginalErsatzteilen reparieren. Damit wird sicherge-
stellt, dass die Sicherheit des Elektrowerkzeugs
erhalten bleibt.
b) Lassen Sie den Austausch des Steckers oder
der Anschlussleitung immer vom Hersteller des
Elektrowerkzeugs oder seinem Kundendienst
ausführen. Damit wird sichergestellt, dass die
Sicherheit des Elektrowerkzeugs erhalten bleibt.
Gerätespezifi sche Sicherheitshinweise
■ Dieses Gerät kann nicht von Kindern sowie von
Personen mit verringerten physischen, sensorischen oder mentalen Fähigkeiten oder Magel
an Erfahrung und Wissen benutzt werden.
Kinder dürfen nicht mit dem Gerät spielen.
Reinigung und Benutzerwartung dürfen nicht
von Kindern durchgeführt werden.
■ Vermeiden Sie den Einsatz des Kompressors bei
Temperaturen unter + 5 Grad.
■ Lassen Sie den Kompressor nie unbeaufsichtigt
arbeiten.
■ Vergewissern Sie sich, das der EIN-/ AUS -
Schalter beim Anschluss an das Stromnetz
ausgeschaltet ist.
■ Vorsicht! Betreiben Sie den Kompressor nur für
kurze Zeit. Ein langer, ununterbrochener Betrieb
von mehr als 10 Min. überhitzt das Gerät.
Schalten Sie das Gerät sofort aus und lassen
Sie es min. 10 Min. abkühlen.
■ Verletzungsgefahr! Lassen Sie die aufzupum-
penden Gegenstände nicht über den für sie
vorgesehenen Druck aufpumpen. Diese können
platzen und zu Verletzungen und / oder materiellen Schäden führen.
■ Überschreiten Sie nicht den zulässigen Leistungs-
bereich des Kompressors. Pumpen Sie keine
LKW-, Traktor- oder sonstige große Reifen auf.
■ Bearbeiten Sie keine Materialien, die potentiell
leicht entfl ammbar oder explosiv sind oder sein
könnten.
■ Verwenden Sie das Gerät niemals zweckentfremdet.
■ Das Gerät muss stets sauber, trocken und frei
von Öl oder Schmierfetten sein.
■ Verwenden Sie zur Reinigung des Gerätes
niemals Benzin oder andere entfl ammbare
Flüssigkeiten! Im Gerät verbliebene Dämpfe
können durch Funken entzündet werden und zur
Explosion des Gerätes führen.
■ Seien Sie aufmerksam! Benutzen Sie das Gerät
in keinem Fall, wenn Sie unkonzentriert sind
oder sich unwohl fühlen.
Sicherheitshinweise zum Arbeiten mit
Druckluft und Ausblaspistolen
■ STROMSCHLAGGEFAHR! Betreiben Sie das
Gerät nicht mit beschädigtem Netzkabel oder
Netzstecker.
■ STROMSCHLAGGEFAHR! Berühren Sie
nicht das Netzkabel, wenn es während des
Betriebs beschädigt oder durchtrennt wird.
Ziehen Sie sofort den Netzstecker und lassen
Sie das Gerät anschließend ausschließlich von
einem Fachmann oder der zuständigen Servicestelle reparieren.
■ STROMSCHLAGGEFAHR! Betreiben Sie das
Gerät nicht wenn es feucht ist und auch nicht
in feuchter Umgebung.
■ STROMSCHLAGGEFAHR! Schließen Sie,
wenn Sie im Freien arbeiten, das Gerät über
einen Fehlerstrom (FI) - Schutzschalter mit
maximal 30 mA Auslösestrom an. Verwenden
Sie nur ein für den Außenbereich zugelassenes
Verlängerungskabel.
■ Tragen Sie das Gerät nicht am Netzkabel
und hängen Sie es nicht am Netzkabel auf.
Führen Sie das Netzkabel immer nach hinten
vom Gerät weg. Andernfalls kann das Gerät
beschädigt werden.
■ Verdichter und Leitungen erreichen im Betrieb
hohe Temperaturen.
Berührungen führen zu Verbrennungen.
■ Die vom Verdichter angesaugten Gase oder
Dämpfe sind frei von Beimengungen zu halten,
die in dem Verdichter zu Bränden oder Explosionen führen können.
■ Beim Lösen der Schlauchkupplung ist das
Kupplungsstück des Schlauches mit der Hand
festzuhalten, um Verletzungen durch den zurückschnellenden Schlauch zu vermeiden.
DE
AT
CH
PKZ 180 B2
17
Page 21

DE
AT
CH
■ Bei Arbeiten mit der Ausblaspistole Schutzbrille tra-
gen. Durch Fremdkörper und weggeblasene Teile
können leicht Verletzungen verursacht werden.
■ Mit der Ausblaspistole keine Personen anblasen
oder Kleidung am Körper reinigen.
■ Prüfen Sie Anschlüsse und Versorgungsleitungen.
Sämtliche Wartungseinheiten, Kupplungen und
Schläuche müssen in Bezug auf Druck und Luftmenge entsprechend den Gerätekennwerten ausgelegt sein. Zu geringer Druck beeinträchtigt die
Funktion des Gerätes, zu hoher Druck kann zu
Sachschäden und Verletzungen führen. Schützen
Sie die Schläuche vor Knicken, Verengungen,
Lösungsmitteln und scharfen Kanten.
■ Achten Sie darauf, dass Schlauchschellen immer
fest angezogen sind. Nicht festgezogene oder
beschädigte Schlauchschellen können die Luft
unkontrolliert entweichen lassen.
■ Ersetzen Sie einen beschädigten Schlauch unver-
züglich. Eine schadhafte Versorgungsleitung kann
zu einem herumschlagenden Druckluftschlauch
führen und Verletzungen verursachen.
■ Atmen Sie die Abluft nicht direkt ein.
■ Der Schlauch muss mindestens auf 150 %
des im Systems erzeugten Maximaldruckes
ausgelegt sein.
■ Das Werkzeug und der Zuführschlauch müssen
mit einer Schlauchkupplung versehen sein, so
dass der Druck beim Trennen des Kupplungsschlauches vollständig abgebaut ist.
■ ACHTUNG! Ein unterdimensioniertes Druckluftsys-
tem kann die Effi zienz Ihres Gerätes vermindern.
■ Vermeiden Sie es, die Abluft in die Augen
zu bekommen. Die Abluft des Gerätes kann
Wasser, Öl, Metallpartikel oder Verunreinigungen aus dem Kompressor enthalten. Dies kann
Gesundheitsschäden verursachen.
WARNUNG!
► Seien Sie vorsichtig beim ablegen des Gerä-
tes! Legen Sie das Gerät immer so ab, dass
es nicht auf dem EIN-/ AUS - Schalter zum
liegen kommt. Unter Umständen könnte dies
ein versehentliches Aktivieren des Gerätes
nach sich ziehen, was wiederum zu Gefahren
führen könnte.
Bedienung
HINWEIS
►
Das Gerät vibriert während des Betriebs.
Legen Sie es deshalb während Betriebs hin.
An der Unterseite des Gerätes befi nden sich
hierfür vier Standfüße .
♦ Entnehmen Sie das benötigte Zubehör aus dem
Zubehörfach .
Ein- und ausschalten
Gerät einschalten:
♦ Stellen Sie den EIN-/ AUS - Schalter
Einschalten auf die Position „I“. Die intergrierte
Kontrollleuchte leuchtet.
Gerät ausschalten:
♦ Stellen Sie den EIN-/ AUS - Schalter zum
Ausschalten auf die Position „O“. Die intergrierte
Kontrollleuchte erlischt.
ACHTUNG!
► Achtung! Das Gerät ist nicht für den Dauerbe-
trieb geeignet. Um den Motor nicht unzulässig
zu erwärmen, darf das Gerät nur folgendermaßen benutzt werden: Innerhalb eines Betriebszeitraums von 10 Minuten darf das Gerät nur
15 % des Zeitraums mit der Nennaufnahmeleistung betrieben werden, d.h. 1,5 Minuten. Im
Rest des Zeitraums (Abkühlphase 8,5 Minuten)
kühlt das Gerät wieder ab.
Druckluftschlauch mit Schnellkupplung
Anschließen:
♦ Schieben Sie den Druckluft-Anschlussstecker
in die Schnellkupplung des Druckluftschlauchs
, die Hülse springt automatisch nach vorne.
Trennen:
♦ Ziehen Sie die Hülse an der Schnellkupplung
des Druckluftschlauchs zurück und entfernen
Sie den Druckluft-Anschlussstecker .
ACHTUNG!
► Achtung! Beim Lösen der Schnellkupplung des
Druckluftschlauchs ist das Kupplungsstück
festzuhalten, um Verletzungen durch den
zurückschnellenden Schlauch zu vermeiden.
zum
18
PKZ 180 B2
Page 22

Aufpumpen
ohne Adapter
Schraderventil, Autoventil
Einsatzbereich:
Dieser Einsatzbereich ermöglicht ein einfaches und
genaues Befüllen von Autoreifen. Das Manometer
dient zur Kontrolle des Reifendrucks. Mit dem integrierten Ablassventil
Reifendruck zu senken.
ACHTUNG!
► Achtung, das Manometer ist nicht geeicht!
Bitte kontrollieren Sie nach dem Befüllen sofort
den Reifendruck, z. B. an einer Tankstelle.
♦ Stellen Sie sicher, dass der EIN-/ AUS - Schalter
auf „O“ steht.
♦ Drücken Sie den Hebel-Schnellverschluss
zum Aufsetzen nach unten.
♦ Setzen Sie den Hebel-Schnellverschluss
auf das Ventil und und lassen Sie ihn danach
wieder los.
♦ Stecken Sie den Netzstecker des Kompres-
sors in eine Netzsteckdose.
♦ Schalten Sie den EIN-/ AUS - Schalter auf „I“.
Die intergrierte Kontrollleuchte leuchtet.
♦ Lesen Sie am Manometer den aufgebauten
Luftdruck ab.
♦ Schalten Sie den EIN-/ AUS - Schalter auf
„O“, sobald der richtige bzw. zulässige Luftdruck
erreicht ist. Die intergrierte Kontrollleuchte erlischt.
♦ Drücken Sie den Hebel-Schnellverschluss
und ziehen Sie diesen vom Ventil.
♦ Ziehen Sie den Netzstecker des Kompres-
sors aus der Netzsteckdose.
ist es möglich, einen zu hohen
mit Ventildapter
Sclaverandventil, Rennventil
Dunlopventil, Fahrradventil
Einsatzbereich:
Der Ventiladapter
Befüllen von Fahrradreifen.
♦ Verwenden Sie zum Aufpumpen der oben
abgebildeten Ventile den Ventildapter .
♦ Setzen Sie den Ventildapter in den Hebel-
Schnellverschluss ein und und lassen Sie ihn
danach wieder los.
♦ Drücken Sie jetzt den Ventildapter auf das
Ventil.
♦ Zum Aufpumpen gehen Sie wie oben beschrie-
ben vor.
mit Ballnadel
Einsatzbereich:
Die Ballnadel
unterschiedlichen Bällen verwendet werden. Die
Universaladapter
Luftmatratzen und ähnlichem verwendet werden.
♦ Drücken Sie den Hebel-Schnellverschluss
zum Aufsetzen nach unten.
♦ Setzen Sie die Ballnadel oder die Universa-
ladapter
ein und und lassen Sie ihn danach wieder los.
♦ Zum Aufpumpen gehen Sie wie oben beschrie-
ben vor.
HINWEIS
►
Um Beschädigungen des Ventils zu vermeiden,
sollten Sie die Ballnadel vor dem Einführen
etwas anfeuchten.
ermöglicht ein einfaches
/ Universaladapter
kann zum Aufpumpen von
können zum Befüllen von
in den Hebel-Schnellverschluss
DE
AT
CH
PKZ 180 B2
19
Page 23

mit Verlängerungsdüse
Einsatzbereich:
Die Verlängerungsdüse
von Hohlräumen oder schwer zugänglichen Stellen,
DE
sowie zum Reinigen von verschmutzten Arbeitsgeräten.
AT
Der stufenlos bedienbare Abzugshebel ermöglicht
CH
eine exakte Dosierung der Druckluft.
Um die Verlängerungsdüse
muss zuerst der Schlauch mit dem Hebel-Schnellverschluss aus der Pistole mit Manometer
abgeschraubt werden.
♦ Schrauben Sie nun die Verlängerungsdüse in
die Pistole mit Manometer ein.
mit Adapterdüse
Einsatzbereich:
Die Adapterdüse
Innendurchmesser ab 8 mm geeignet. Sie können
die Adapterdüse z. B. für Luftmatratzen, Pools
oder auch für Boote verwenden.
♦ Drücken Sie den Hebel-Schnellverschluss
zum Aufsetzen nach unten.
♦ Setzen Sie den Düsenadapter in den Hebel-
Schnellverschluss
danach wieder los.
♦ Schrauben Sie jetzt den Düsenadapter in die
Adapterdüse
♦ Zum Aufpumpen gehen Sie wie oben beschrie-
ben vor.
mit Adapterdüse
Einsatzbereich:
Die Adapterdüse können Sie für alle handelsüblichen Badeboote, Kajaks oder andere große
Artikel, wie z. B. Pools, die mit einem Schraubventil
ausgestattet sind, verwenden.
♦ Drücken Sie den Hebel-Schnellverschluss
zum Aufsetzen nach unten.
♦ Setzen Sie den Düsenadapter in den Hebel-
Schnellverschluss ein und und lassen Sie ihn
danach wieder los.
♦ Schrauben Sie jetzt den Düsenadapter in die
Adapterdüse .
ist zum Reinigen/Ausblasen
zu verwenden,
ist für alle Ventile mit einem
ein und und lassen Sie ihn
.
♦ Zum Aufpumpen gehen Sie wie oben beschrie-
ben vor.
mit Adapterdüse
Einsatzbereich:
Die Adapterdüse
ventil einsetzen. Dieses fi nden Sie zusammen mit anderen Ventilen (Standardventil, Schraubventil,...) auf
großvolumigen Artikeln, wie z. B. einem Flockbett.
♦ Drücken Sie den Hebel-Schnellverschluss
zum Aufsetzen nach unten.
♦ Setzen Sie den Düsenadapter in den Hebel-
Schnellverschluss ein und und lassen Sie ihn
danach wieder los.
♦ Schrauben Sie jetzt den Düsenadapter in die
Adapterdüse .
♦ Zum Aufpumpen gehen Sie wie oben beschrie-
ben vor.
können Sie in ein Entlüftungs-
Wartung und Reinigung
WARNUNG! VERLETZUNGSGEFAHR!
Schalten Sie vor allen Arbeiten am
Gerät das Gerät aus und ziehen Sie
den Netzstecker.
■ Verwenden Sie keine scharfen Gegenstände
zur Reinigung des Gerätes. Es dürfen keine
Flüssigkeiten in das Innere des Gerätes gelangen. Andernfalls kann das Gerät beschädigt
werden. Lassen Sie den Austausch der Kohlebürsten ausschließlich durch die Servicestelle
oder eine anerkannte Fachwerkstatt durchführen.
Ansonsten ist das Gerät wartungsfrei.
■ Achten Sie darauf, dass das Gerät komplett
abgekühlt ist, ansonsten besteht Verbrennungsgefahr.
■ Vor allen Reinigungs- und Wartungsarbeiten ist
das Gerät drucklos zu machen. Verwenden Sie
hierzu das Ablassventil , bis keine Luft mehr
entweicht.
■ Reinigen Sie das Gerät regelmäßig, am besten
immer direkt nach Abschluss der Arbeit.
■ Reinigen Sie das Gehäuse mit einem trockenen
Tuch – verwenden Sie auf keinen Fall Benzin, Lösungsmittel oder Reiniger, die Kunststoff angreifen.
20
PKZ 180 B2
Page 24

■ Achten Sie darauf, dass kein Wasser in das
Innere des Gerätes gelangt.
■ Lüftungsöff nungen müssen immer frei sein.
HINWEIS
Nicht aufgeführte Ersatzteile (wie z. B.
►
Kohlebürsten, Schalter) können Sie über
unsere Service - Hotline bestellen.
HINWEIS
Für dieses Gerät ist keine Wartung notwendig.
Öff nen Sie das Gerät keinesfalls. Das Gerät darf
nur von einer autorisierten Service-Niederlassung
bzw. dem Kundendienst repariert werden. Sollte
einer der unten beschriebenen Fehler auftreten
ist folgendes zu beachten:
♦ Trennen Sie das Gerät von jeglicher Energiever-
sorgung.
♦ Lassen Sie das Gerät abkühlen und warten Sie eine
kurze Zeit, um die Restenergie zu neutralisieren.
♦ Stellen Sie sicher, dass sich das Gerät in einem
sicheren Zustand befi ndet.
Fehleranalyse
Fehler Lösung
1. Gerät läuft
nicht
2. Zu geringer
Arbeitsdruck
3. Werkzeuge
funktionieren
nicht
1. Netzspannung überprüfen.
Alle Kabel, Sicherung und
Netzsteckdose auf Funktionalität prüfen.
2. Keine zu langen Verlängerungskabel benutzen.
3. Das Gerät nicht unter + 5
Grad Umgebungstemperatur
verwenden.
4. Überhitzung des Motors
vermeiden. Motor abkühlen
lassen.
Dichtungen sowie Rückschlagventil überprüfen und ggf.
austauschen lassen.
Schläuche, Schnellkupplung
sowie Werkzeuge überprüfen
und ggf. austauschen lassen.
Lagerung
HINWEIS
Lagern Sie das Gerät in einer trockenen und
►
sicheren Umgebung. Vor der Einlagerung
sollten Sie das Gerät sowie alle angeschlossenen Druckluftwerkzeuge entlüften.
■ Ziehen Sie den Netzstecker, entlüften Sie das
Gerät und alle angeschlossenen Druckluftwerkzeuge.
■ Stellen Sie das Gerät so ab, dass dieser nicht
von Unbefugten in Betrieb genommen werden
kann.
Entsorgung
Die Verpackung besteht aus umweltfreund-
lichen Materialien. Sie kann in den örtlichen
Recyclebehältern entsorgt werden.
Werfen Sie Elektrowerkzeuge nicht
in den Hausmüll!
Gemäß Europäischer Richtlinie 2012/19/EU
müssen verbrauchte Elektrowerkzeuge getrennt
gesammelt und einer umweltgerechten Wiederverwertung zugeführt werden.
Möglichkeiten zur Entsorgung des ausgedienten
Gerätes erfahren Sie bei Ihrer Gemeinde- oder
Stadtverwaltung.
DE
AT
CH
PKZ 180 B2
21
Page 25

Garantie
Sie erhalten auf dieses Gerät 3 Jahre Garantie
ab Kaufdatum. Das Gerät wurde sorgfältig
produziert und vor Anlieferung gewissenhaft
DE
geprüft. Bitte bewahren Sie den Kassenbon als
AT
Nachweis für den Kauf auf. Bitte setzen Sie sich
CH
im Garantiefall mit Ihrer Servicestelle telefonisch
in Verbindung. Nur so kann eine kostenlose
Einsendung Ihrer Ware gewährleistet werden.
Die Garantieleistung gilt nur für Material- oder
Fabrikationsfehler, nicht aber für Transportschäden,
Verschleißteile oder für Beschädigungen an
zerbrechlichen Teilen, z. B. Schalter oder Akkus.
Das Produkt ist lediglich für den privaten und nicht
für den gewerblichen Gebrauch bestimmt. Bei
missbräuchlicher und unsachgemäßer Behandlung,
Gewaltanwendung und bei Eingriff en, die nicht von
unserer autorisierten Service-Niederlassung
vorgenommen wurden, erlischt die Garantie. Ihre
gesetzlichen Rechte werden durch diese Garantie
nicht eingeschränkt. Die Garantiezeit wird durch
die Gewährleistung nicht verlängert. Dies gilt auch
für ersetzte und reparierte Teile. Eventuell schon
beim Kauf vorhandene Schäden und Mängel
müssen sofort nach dem Auspacken gemeldet
werden, spätestens aber zwei Tage nach
Kaufdatum. Nach Ablauf der Garantiezeit anfallende Reparaturen sind kostenpfl ichtig.
Service
Service Deutschland
Tel.: 0800 5435 111 (Kostenfrei aus dem
dt. Festnetz/Mobilfunknetz)
E-Mail: kompernass@lidl.de
IAN 108972
Service Österreich
Tel.: 0820 201 222 (0,15 EUR/Min.)
E-Mail: kompernass@lidl.at
IAN 108972
Service Schweiz
Tel.: 0842 665566 (0,08 CHF/Min.,
Mobilfunk max. 0,40 CHF/Min.)
E-Mail: kompernass@lidl.ch
IAN 108972
Erreichbarkeit Hotline:
Montag bis Freitag von 8:00 Uhr – 20:00 Uhr (MEZ)
Importeur
KOMPERNASS HANDELS GMBH
BURGSTRASSE 21
44867 BOCHUM
GERMANY
www.kompernass.com
22
PKZ 180 B2
Page 26

OriginalKonformitätserklärung
Wir, KOMPERNASS HANDELS GMBH, Dokumentenverantwortlicher: Herr Semi Uguzlu, BURGSTR. 21,
44867 BOCHUM, DEUTSCHLAND, erklären hiermit,
dass dieses Produkt mit den folgenden Normen,
normativen Dokumenten und EG-Richtlinien
übereinstimmt:
Maschinenrichtlinie
(2006 / 42 / EC)
EG-Niederspannungsrichtlinie
(2006 / 95 / EC)
Elektromagnetische Verträglichkeit
(2014 / 30 / EU)
RoHS Richtlinie
(2011 / 65 / EU)
Angewandte harmonisierte Normen:
EN 1012-1: 2010
EN 60204-1/A1: 2009
EN 55014-1/A2: 2011
EN 55014-2/A2: 2008
EN 61000-3-2/A2: 2009
EN 61000-3-3: 2013
DE
AT
CH
Typbezeichnung der Maschine:
Kompressor PKZ 180 B2
Herstellungsjahr: 11 - 2014
Seriennummer: IAN 108972
Bochum, 17.11.2014
Semi Uguzlu
- Qualitätsmanager Technische Änderungen im Sinne der Weiterent-
wicklung sind vorbehalten.
PKZ 180 B2
23
Page 27

24
PKZ 180 B2
Page 28

Contents
Introduction . . . . . . . . . . . . . . . . . . . . . . . . . . . . . . . . . . . . . . . . . . . . . . . . . . . . . 26
Intended use . . . . . . . . . . . . . . . . . . . . . . . . . . . . . . . . . . . . . . . . . . . . . . . . . . . . . . . . . . . . . . . 26
Features . . . . . . . . . . . . . . . . . . . . . . . . . . . . . . . . . . . . . . . . . . . . . . . . . . . . . . . . . . . . . . . . . . 26
Package contents . . . . . . . . . . . . . . . . . . . . . . . . . . . . . . . . . . . . . . . . . . . . . . . . . . . . . . . . . . . 26
Technical data . . . . . . . . . . . . . . . . . . . . . . . . . . . . . . . . . . . . . . . . . . . . . . . . . . . . . . . . . . . . . 26
General Power Tool Safety Warnings . . . . . . . . . . . . . . . . . . . . . . . . . . . . . . . 27
1. Work area safety . . . . . . . . . . . . . . . . . . . . . . . . . . . . . . . . . . . . . . . . . . . . . . . . . . . . . . . . . 27
2. Electrical safety . . . . . . . . . . . . . . . . . . . . . . . . . . . . . . . . . . . . . . . . . . . . . . . . . . . . . . . . . . 27
3. Personal safety . . . . . . . . . . . . . . . . . . . . . . . . . . . . . . . . . . . . . . . . . . . . . . . . . . . . . . . . . . . 27
4. Power tool use and care . . . . . . . . . . . . . . . . . . . . . . . . . . . . . . . . . . . . . . . . . . . . . . . . . . . 28
5. Service . . . . . . . . . . . . . . . . . . . . . . . . . . . . . . . . . . . . . . . . . . . . . . . . . . . . . . . . . . . . . . . . . 28
Device-specifi c safety instructions . . . . . . . . . . . . . . . . . . . . . . . . . . . . . . . . . . . . . . . . . . . . . . . 28
Safety instructions for working with compressed air and blow-out guns . . . . . . . . . . . . . . . . . 29
Operation . . . . . . . . . . . . . . . . . . . . . . . . . . . . . . . . . . . . . . . . . . . . . . . . . . . . . . 30
Switching on and off . . . . . . . . . . . . . . . . . . . . . . . . . . . . . . . . . . . . . . . . . . . . . . . . . . . . . . . . 30
Infl ation . . . . . . . . . . . . . . . . . . . . . . . . . . . . . . . . . . . . . . . . . . . . . . . . . . . . . . . . . . . . . . . . . . 30
Maintenance and cleaning . . . . . . . . . . . . . . . . . . . . . . . . . . . . . . . . . . . . . . . . . 32
Storage . . . . . . . . . . . . . . . . . . . . . . . . . . . . . . . . . . . . . . . . . . . . . . . . . . . . . . . . 33
Disposal . . . . . . . . . . . . . . . . . . . . . . . . . . . . . . . . . . . . . . . . . . . . . . . . . . . . . . . . 33
Warranty . . . . . . . . . . . . . . . . . . . . . . . . . . . . . . . . . . . . . . . . . . . . . . . . . . . . . . . 33
Service . . . . . . . . . . . . . . . . . . . . . . . . . . . . . . . . . . . . . . . . . . . . . . . . . . . . . . . . . 33
Importer . . . . . . . . . . . . . . . . . . . . . . . . . . . . . . . . . . . . . . . . . . . . . . . . . . . . . . . 33
Translation of the original Conformity Declaration . . . . . . . . . . . . . . . . . . . . .34
GB
PKZ 180 B2
25
Page 29

COMPRESSOR PKZ 180 B2
Introduction
Congratulations on the purchase of your
new appliance. You have selected a high
quality product.
The operating instructions are part of this product.
They contain important information on safety, usage
and disposal. Before using the product, familiarise
GB
yourself with all handling and safety instructions.
Use the product only as described and for the range
of applications specifi ed. Hand over all documents
when the product is passed on to a third party.
Intended use
This appliance is designed for infl ating car tires,
bicycle tires, infl atable mattresses, sport balls, infl atable dinghies, etc. in conjunctions with the supplied
adapter. Any other usage of or modifi cation to the
appliance is deemed to be improper and carries
signifi cant risk of accidents. The manufacturer accepts no responsibility for damage(s) resulting from
improper usage. The appliance is not intended for
commercial use.
NOTE
►
Store these operating instructions in the immediate vicinity of the compressor and make
them available to all operators.
Features
ON/OFF switch with integrated control lamp
Carrying handle
Accessory compartment
Mains plug
Compressed air hose with quick coupler
Stand
Manometer with gun
Release valve
Compressed air connector
Hose with lever quick coupler
Trigger
Adapter nozzle
Adapter nozzle
Adapter nozzle
Extension nozzle
Universal adapter
Universal adapter
Nozzle adapter for the nozzle set
Ball needle
Valve adapter
Package contents
1 compressor PKZ 180 B2
(incl. compressed air hose and connection cable)
1 compressed air gun (with manometer)
1 extension nozzle
1 ball needle
1 valve adapter
3 adapter nozzles
1 adapter for the nozzle set
2 universal adapters
Operating instructions
Technical data
Rated voltage: 230 V ~ 50 Hz
Rated power: 1.1 KW
Operating mode: S3 15% 10 min.
Compressor
revolutions: 3550 min
Operating pressure: max. 8 bar
Theo. Intake capacity: 180 l/min.
Protection rating: IP20
Protection class: I
Appliance weight: 5.8 kg
Operating mode S3 - 15% - 10min: S3 = intermittent
operation without the impact of the start-up.
This means that during a period of 10 minutes, the
maximum operating time is 15% (1.5min).
Noise information:
Noise measurement value determined in accordance
with EN ISO 2151. The A-rated noise level of the
power tool is typically as follows:
Sound pressure level: L
Uncertainty: K = 3 dB (A)
Sound power level: L
Uncertainty: K = 3 dB (A)
Wear ear protection!
PA
WA
-1
= 75.2 dB (A)
= 95.2 dB (A)
26
PKZ 180 B2
Page 30

Explanation of the symbols on the appliance!
Read the original operating instructions and safety instructions
before initial operation.
Wear ear protection!
Do not start
Compressor can start without
warning
Risk of burns caused by hot
surfaces!
Warning: electrical voltage!
Only for indoor use!
Sound power level LWA data
in dB.
General Power Tool
Safety Warnings
WARNING!
► Read all safety warnings and all instructions. Fail-
ure to follow the warnings and instructions may
result in electric shock, fi re and/or serious injury.
Save all warnings and instructions for future
reference.
The term "power tool" in the warnings refers to your
mains-operated (corded) power tool or batteryoperated (cordless) power tool.
1. Work area safety
a) Keep work area clean and well lit. Cluttered
or dark areas invite accidents.
b) Do not operate power tools in explosive at-
mospheres, such as in the presence of fl ammable liquids, gases or dust. Power tools cre-
ate sparks which may ignite the dust or fumes.
c) Keep children and bystanders away while
operating a power tool. Distractions can cause
you to lose control.
2. Electrical safety
a) Power tool plugs must match the outlet.
Never modify the plug in any way.
Do not use any adapter plugs with earthed
(grounded) power tools. Unmodifi ed plugs
and matching outlets will reduce risk of electric
shock.
b) Avoid body contact with earthed or grounded
surfaces, such as pipes, radiators, ranges and
refrigerators. There is an increased risk of elec-
tric shock if your body is earthed or grounded.
c) Do not expose power tools to rain or wet
conditions. Water entering a power tool will
increase the risk of electric shock.
d) Do not abuse the cord. Never use the cord for
carrying, pulling or unplugging the power
tool. Keep cord away from heat, oil, sharp
edges or moving parts. Damaged or entangled
cords increase the risk of electric shock.
e) When operating a power tool outdoors, use
an extension cord suitable for outdoor use.
Use of a cord suitable for outdoor use reduces
the risk of electric shock.
f) If operating a power tool in a damp location
is unavoidable, use a residual current device
(RCD) protected supply. Use of an RCD re-
duces the risk of electric shock.
3. Personal safety
a) Stay alert, watch what you are doing and
use common sense when operating a power
tool. Do not use a power tool while you are
tired or under the infl uence of drugs, alcohol
or medication. A moment of inattention while
operating power tools may result in serious
personal injury.
b) Use personal protective equipment. Always
wear eye protection. Protective equipment such
as dust mask, non-skid safety shoes, hard hat,
or hearing protection used for appropriate
conditions will reduce personal injuries.
c) Prevent unintentional starting. Ensure the
switch is in the off -position before connecting
to power source and/or battery pack, picking
up or carrying the tool. Carrying power tools
with your fi nger on the switch or energising power
tools that have the switch on invites accidents.
GB
PKZ 180 B2
27
Page 31

d) Remove any adjusting key or wrench before
turning the power tool on. A wrench or a key
left attached to a rotating part of the power tool
may result in personal injury.
e) Do not overreach. Keep proper footing and
balance at all times. This enables better control
of the power tool in unexpected situations.
f) Dress properly. Do not wear loose clothing or
GB
jewellery. Keep your hair, clothing and gloves
away from moving parts. Loose clothes, jewel-
lery or long hair can be caught in moving parts.
g) If devices are provided for the connection of
dust extraction and collection facilities, ensure
these are connected and properly used.
Use of dust collection can reduce dust-related
hazards.
4. Power tool use and care
a) Do not force the power tool. Use the correct
power tool for your application. The correct
power tool will do the job better and safer at
the rate for which it was designed.
b) Do not use the power tool if the switch does not
turn it on and off . Any power tool that cannot
be controlled with the switch is dangerous and
must be repaired.
c) Disconnect the plug from the power source
and/or the battery pack from the power tool
before making any adjustments, changing
accessories, or storing power tools. Such
preventive safety measures reduce the risk of
starting the power tool accidentally.
d) Store idle power tools out of the reach of
children and do not allow persons unfamiliar
with the power tool or these instructions to
operate the power tool. Power tools are
dangerous in the hands of untrained users.
e) Maintain power tools. Check for misalignment
or binding of moving parts, breakage of parts
and any other condition that may aff ect the
power tool’s operation. If damaged, have
the power tool repaired before use. Many ac-
cidents are caused by poorly maintained power
tools.
f) Keep cutting tools sharp and clean. Properly
maintained cutting tools with sharp cutting edges
are less likely to bind and are easier to control.
g) Use the power tool, accessories and tool bits
etc. in accordance with these instructions,
taking into account the working conditions
and the work to be performed. Use of the
power tool for operations diff erent from those
intended could result in a hazardous situation.
5. Service
a) Have your power tool serviced by a qualifi ed
repair person using only identical replacement parts. This will ensure that the safety of
the power tool is maintained.
b) Always arrange for the exchange of the plug
or the power cord to be carried out by the
manufacturer of the appliance or by its approved customer services. This will ensure that
the safety of the power tool is maintained.
Device-specifi c safety instructions
■ This appliance may not be used by children or
people with reduced physical, sensory or mental capabilities or a lack of experience and knowledge.
Children must not use the appliance as a plaything.
Cleaning and user maintenance tasks may not be
carried out by children unless they are supervised.
■ Avoid using the compressor at temperatures
below +5 degrees.
■ Never leave the compressor unsupervised while
it is in use.
■ Ensure that the ON/OFF switch is turned off
when connecting to the mains power supply.
■ Caution! Operate the compressor only for a
short time. The appliance may overheat if operated continuously for longer than 10 minutes.
Switch the appliance off immediately and allow
it to cool down for at least 10 minutes.
■ Risk of injury! Do not pump any objects up to
more than the intended pressure. They could
burst and cause injury and/or material damage.
■ Do not exceed the permissible output range of
the compressor. Do not pump up any lorry,
tractor or other large tires.
■ Do not work with any materials that are or could
be easily infl ammable or explosive.
■ Never use the appliance for purposes other
than the ones for which it was designed.
28
PKZ 180 B2
Page 32

■ The appliance must always be kept clean, dry
and free from oil or grease.
■ Never use gasoline or other infl ammable liquids
to clean the unit! Vapours remaining in the appliance could be ignited by sparks and lead to
the explosion of the appliance!
■ Remain alert at all times! Never use the appli-
ance when you are distracted or don’t feel well.
Safety instructions for working with
compressed air and blow-out guns
■ RISK OF ELECTRIC SHOCK! Do not operate
the appliance with a damaged power cord
or mains plug.
■ RISK OF ELECTRIC SHOCK! Never touch the
power cord during operation if it is damaged
or cut. Pull out the plug immediately and then
have the appliance repaired by a specialist or
the responsible service centre.
■ RISK OF ELECTRIC SHOCK! Never operate
the appliance if it is damp or in a humid
environment.
■ RISK OF ELECTRIC SHOCK! When working
outdoors, connect the appliance via a fault
current circuit breaker with a maximum tripping current of 30mA. Use only an extension
cord approved for outdoor use.
■ Do not carry the appliance by the power cord
and never hang it up by the power cord. Always
route the power cord away from the appliance
to the rear. The appliance could be damaged.
■ The compressor and hoses can get very hot dur-
ing operation. Touching them can cause burns.
■ The gases or vapours sucked in by the compres-
sor intake must be kept free of admixtures that
could lead to fi res or explosions inside the
compressor.
■ When removing the hose coupling, always hold
the hose coupling fi rmly to avoid injury caused
by the hose fl ying off .
■ When working with the blow-out gun, wear
goggles. Foreign bodies and blown out particles can easily cause injuries.
■ Do not direct the blow-out gun at people or use
it to clean clothing you are wearing.
■ Check all connections and supply lines. All
maintenance units, couplings and hoses must
correspond to the appliance parameters in
terms of pressure and air fl ow. Excessively low
pressure will adversely aff ect the function of the
appliance; excessively high pressure can cause
property damage and personal injury. Protect
the hoses against kinking, constriction, solvents
and sharp edges.
■ Ensure that the hose clamps are always tight.
Loose or damaged hose clamps can allow air
to escape in an uncontrolled manner.
■ Replace a damaged hose immediately. A faulty
supply line can cause a compressed-air hose to
thrash about and cause personal injury.
■ Do not breathe in the exhaust air directly.
■ The hose must be designed for at least 150% of
the maximum pressure generated in the system.
■ The tool and the supply hose must be fi tted with
a hose coupling that allows the pressure of the
coupling hose to be dispersed completely during
disconnection.
■ WARNING! An undersized compressed air sys-
tem will reduce the effi ciency of your appliance.
■ Avoid getting exhaust air in your eyes.
The exhaust air from the appliance may contain
water, oil, metal particles or impurities from the
compressor. This can cause damage to health.
WARNING!
► Take care when putting down the appliance!
Always put the appliance down so it does not
lie on the ON/OFF switch . Under certain
circumstances, this could cause an accidental
activation of the appliance which, in turn,
could lead to hazards.
GB
PKZ 180 B2
29
Page 33

Operation
NOTE
►
The appliance vibrates during operation.
Therefore, always put it down during operation. There are four feet on the bottom of
the appliance for this purpose.
GB
♦ Remove the required accessories from the ac-
cessory compartment .
Switching on and off
Switching the appliance on:
♦ Move the ON/OFF switch into the position
"I" to switch the appliance on. The integrated
control lamp lights up.
Switching the appliance off :
♦ Move the ON/OFF switch into the position
"O" to switch the appliance off . The integrated
control lamp goes out.
CAUTION!
► Caution! This appliance is not designed for
continuous operation. To prevent the motor
from overheating, the appliance may only be
used as follows: within a period of 10 minutes the appliance may only be operated at
the rated power input for 15% of the period,
in other words, 1.5 minutes. During the rest of
the time period (cooling phase 8.5 minutes),
the appliance cools down again.
Compressed air hose with quick coupler
Connecting:
♦ Push the compressed air connector into the
quick coupler of the compressed air hose ,
the sleeve automatically springs forwards.
Cutting:
♦ Pull back the sleeve on the quick coupler of
the compressed air hose and remove the
compressed air connector .
CAUTION!
► Caution! When disconnecting the quick
coupler of the compressed air hose , hold
the coupler fi rmly to prevent injuries caused
by the hose fl ying off .
Infl ation
with adapter
Schrader valve, car tire valve
Area of use:
This application allows for a simple and accurate
infl ation of car tires. The manometer
check the tire pressure. Thanks to the integrated
release valve
pressure if it is too high.
ATTENTION!
► Please note, the manometer is not cali-
brated! After infl ation, always check the tire
pressure immediately, for example, at a petrol
station.
♦ Ensure that the ON/OFF switch is set to "O".
♦ Press the lever quick coupler downwards to
attach it.
♦ Place the lever quick coupler onto the valve
and then release the lever.
♦ Insert the mains plug of the compressor into
a mains power socket.
♦ Switch the ON/OFF switch to "I". The inte-
grated control lamp lights up.
♦ Read the air pressure from the manometer .
♦ Switch the ON/OFF switch to "O" as soon
as the correct or permissible air pressure has
been reached. The integrated control lamp
goes out.
♦ Press down the lever quick coupler and pull
it off the valve.
♦ Remove the mains plug from the mains
power socket.
it is possible to reduce the tire
is used to
30
PKZ 180 B2
Page 34

using the valve adapter
Sclaverand valve, race valve
Dunlop valve, bicycle valve
Area of use:
The valve adapter
bicycle tires.
♦ Use the valve adapter to pump to the valves
shown above.
♦ Connect the valve adapter into the lever
quick coupler and then release it.
♦ Start by pressing the valve adapter onto the
valve.
♦ Infl ate as described above.
using the ball needle
Area of use:
The ball needle
balls. The universal adapters
infl ate air mattresses or similar.
♦ Press the lever quick coupler downwards to
attach it.
♦ Insert the ball needle or one of the universal
adapters
and then release it.
♦ Infl ate as described above.
NOTE
►
To avoid damage to the valve, you should
moisten the ball needle before insertion.
facilitates easy infl ation of
/ universal adapters
can be used to infl ate various
can be used to
into the lever quick coupler
with the extension nozzle
Area of use:
The extension nozzle
blowing out of concealed spaces or hard-to-reach
areas, as well as for the cleaning of contaminated
equipment. The infi nitely variable trigger allows
an exact dosage of the compressed air.
If you want to use the extension nozzle , you
must fi rst unscrew the hose with the lever quick
coupler from the gun with the manometer .
♦ Now screw on the extension nozzle into the
gun with the manometer .
using the adapter nozzle
Area of use:
The adapter nozzle
with an internal diameter of 8 mm. You can use
the adapter nozzle for items such as infl atable
mattresses, pools and also boats.
♦ Press the lever quick coupler downwards to
attach it.
♦ Insert the nozzle adapter into the lever quick
coupler and then release it.
♦ Screw the nozzle adapter into the adapter
nozzle
♦ Infl ate as described above.
using the adapter nozzle
Area of use:
You can use the adapter nozzle for all commercially available bathing boots, kayaks or other
large items, such as pools, that are equipped with
a screw valve.
♦ Press the lever quick coupler downwards to
attach it.
♦ Insert the nozzle adapter into the lever quick
coupler and then release it.
♦ Screw the nozzle adapter into the adapter
nozzle .
♦ Infl ate as described above.
.
is used for the cleaning/
is suitable for all valves
GB
PKZ 180 B2
31
Page 35

using the adapter nozzle
Area of use:
You can insert the adapter nozzle in a vent
valve. You will fi nd this together with other valves
(standard valve, screw valve, ...) on large-volume
items, for example an infl atable mattress.
♦ Press the lever quick coupler downwards to
GB
attach it.
♦ Insert the nozzle adapter into the lever quick
coupler and then release it.
♦ Screw the nozzle adapter into the adapter
nozzle .
♦ Infl ate as described above.
Maintenance and cleaning
WARNING! RISK OF INJURY! Switch
the appliance off and remove the
power plug before commencing any
work to the appliance.
■ Do not use any sharp objects to clean the
appliance. Never permit fl uids to penetrate
inside the appliance. The appliance could be
damaged. The carbon brushes should only be
replaced by the service centre or an authorised
specialist workshop. Apart from this, the appliance is maintenance-free.
■ Ensure that the appliance has cooled down
completely, otherwise there is a risk of burns.
■ The appliance must be depressurised before
all cleaning and maintenance tasks. To do this,
open the release valve until no more air
escapes.
■ Clean the appliance regularly, preferably im-
mediately after completion of the work.
■ Clean the housing with a dry cloth – do NOT
use petrol, solvents or cleaners that can attack
the plastic.
■ Ensure that no water gets into the appliance.
■ Ventilation openings must never be obstructed.
NOTE
Replacement parts not listed (such as carbon
►
brushes, switch) can be ordered via our
service hotline.
NOTE
This appliance is maintenance free. Never open
the appliance. The appliance may only be repaired by an authorised service centre or Customer Service. If one of the faults listed below
occurs, note the following:
♦ Disconnect the appliance from any power
supply.
♦ Allow the appliance to cool down and wait a
short while for the residual energy to neutralise.
♦ Ensure that the appliance is in good working
condition.
Troubleshooting
Fault Solution
1. Appliance
does not
run
2. Working
pressure
too low
3. Tools do
not work
1. Check your power supply.
Check that all cables, fuses
and the mains socket are in
working order.
2. Do not use excessively long
extension cables.
3. Do not use the appliance
at temperatures below
+5 degrees.
4. Avoid overheating the
motor. Allow the motor
to cool down.
Check the seals and the nonreturn valve. Replace these if
necessary.
Check the hoses, quick coupler
and the tools. Replace these if
necessary.
32
PKZ 180 B2
Page 36

Storage
NOTE
Store the appliance in a dry and secure envir-
►
onment. Before storage, the appliance and
all connected compressed air tools should
be bled.
■ Disconnect the mains power plug and then
bleed the appliance and all connected compressed air tools.
■ Store the appliance so that it cannot be used by
unauthorised persons.
Disposal
The packaging consists of environmentally
friendly material. It can be disposed of in
the local recycling containers.
Do not dispose of power tools in
your normal household waste!
European Directive 2012/19/EU requires that
worn-out power tools be collected separately and
recycled in an environmentally compatible manner.
Your local community or municipal authorities can
provide information on how to dispose of the wornout appliance.
Warranty
You are provided a 3-year warranty on this
appliance, valid from the date of purchase.
This appliance has been manufactured with
care and inspected meticulously prior to
delivery. Please retain your receipt as proof
of purchase. In the event of a warranty claim,
please contact your Customer Service unit by
telephone. This is the only way to guarantee
free return of your merchandise.
The warranty only covers claims for material and
manufacturing defects, not for damage sustained
during carriage, components subject to wear and
tear or damage to fragile components such as
switches or batteries. This appliance is intended
solely for private use and not for commercial
deployment. The warranty shall be deemed void in
the case of misuse or improper handling, use of
force or interventions which were not carried out
by one of our authorised Service centres. Your
statutory rights are not restricted by this warranty.
The warranty period is not extended in as a result
of repairs carried out under the warranty. This also
applies to replaced and repaired components. Any
damage or defects present at the time of purchase
must be reported immediately after unpacking, but
no later than two days after the date of purchase.
Repairs carried out after expiry of the warranty
period shall be subject to charge.
GB
PKZ 180 B2
Service
Service Great Britain
Tel.: 0871 5000 720 (£ 0.10/Min.)
E-Mail: kompernass@lidl.co.uk
IAN 108972
Hotline availability:
Monday to Friday 08:00 - 20:00 (CET)
Importer
KOMPERNASS HANDELS GMBH
BURGSTRASSE 21
44867 BOCHUM
GERMANY
www.kompernass.com
33
Page 37

Translation of the original
Conformity Declaration
We, KOMPERNASS HANDELS GMBH, Custodian
of Documents: Mr. Semi Uguzlu, BURGSTR. 21,
44867 BOCHUM, GERMANY, hereby declare that
this product complies with the following standards,
normative documents and EC directives:
Machinery Directive
GB
(2006/42/EC)
EC Low Voltage Regulations
(2006/95/EC)
EMC (Electromagnetic Compatibility)
(2014 / 30 / EU)
RoHS Directive
(2011/65/EU)
Applied harmonised standards:
EN 1012-1: 2010
EN 60204-1/A1: 2009
EN 55014-1/A2: 2011
EN 55014-2/A2: 2008
EN 61000-3-2/A2: 2009
EN 61000-3-3: 2013
Type designation of machine:
Compressor PKZ 180 B2
Year of manufacture: 11 - 2014
Serial number: IAN 108972
Bochum, 17/11/2014
Semi Uguzlu
- Quality Manager The right to eff ect technical changes in the context
of further development is reserved.
34
PKZ 180 B2
Page 38

KOMPERNASS HANDELS GMBH
BURGSTRASSE 21
44867 BOCHUM
DEUTSCHLAND / GERMANY
www.kompernass.com
Version des informations
Stand der Informationen · Last Information Update:
11 / 2014 · Ident.-No.: PKZ180B2-112014-1
IAN 108972
2
 Loading...