

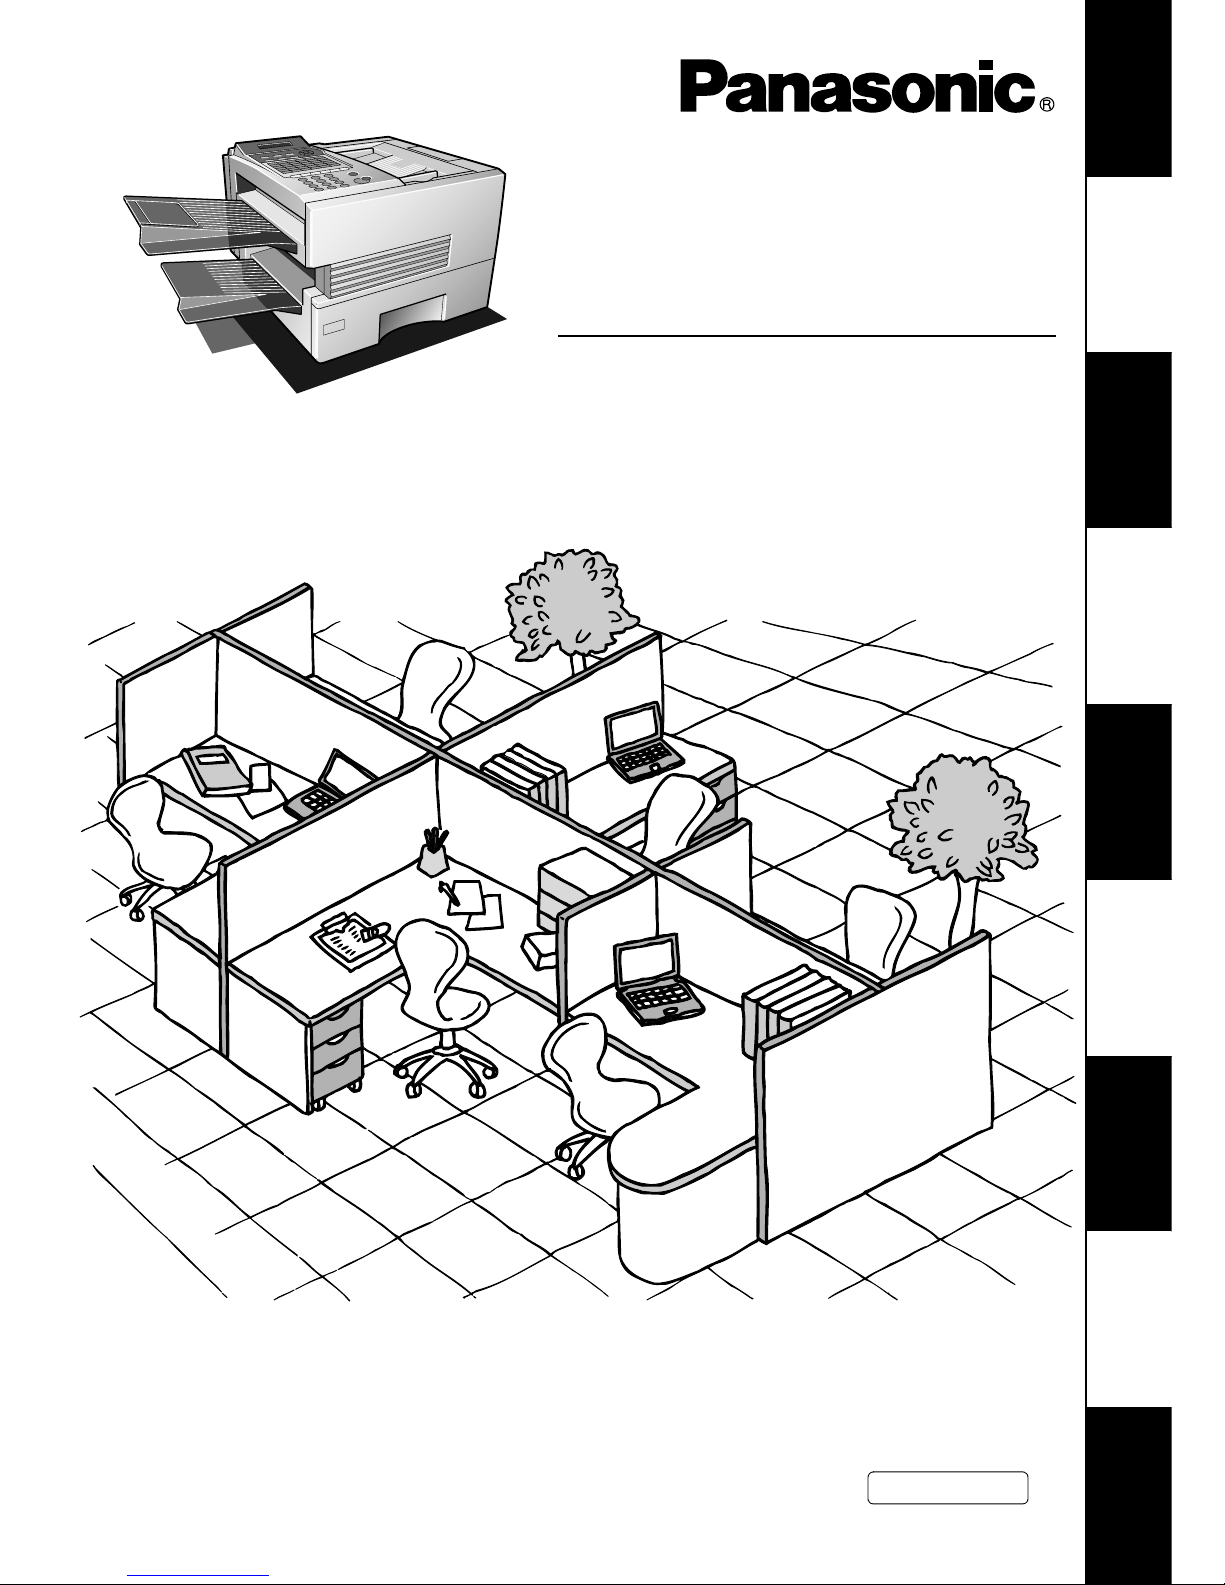
Panasonic UF-890/990, UF-990 Operating Instructions Manual
Operating Instructions
Before operating this equipment, please read these instructions completely and keep these operating
instructions for future reference.
Facsimile
Model No. UF-890/990
(For Facsimile)
English
Getting to Know
Your Machine
Installing Your
Machine
Programming
Your Machine
Basic OperationsAdvanced
Features
Network FeaturesPrint out Journals
and Lists
Problem Solving Appendix
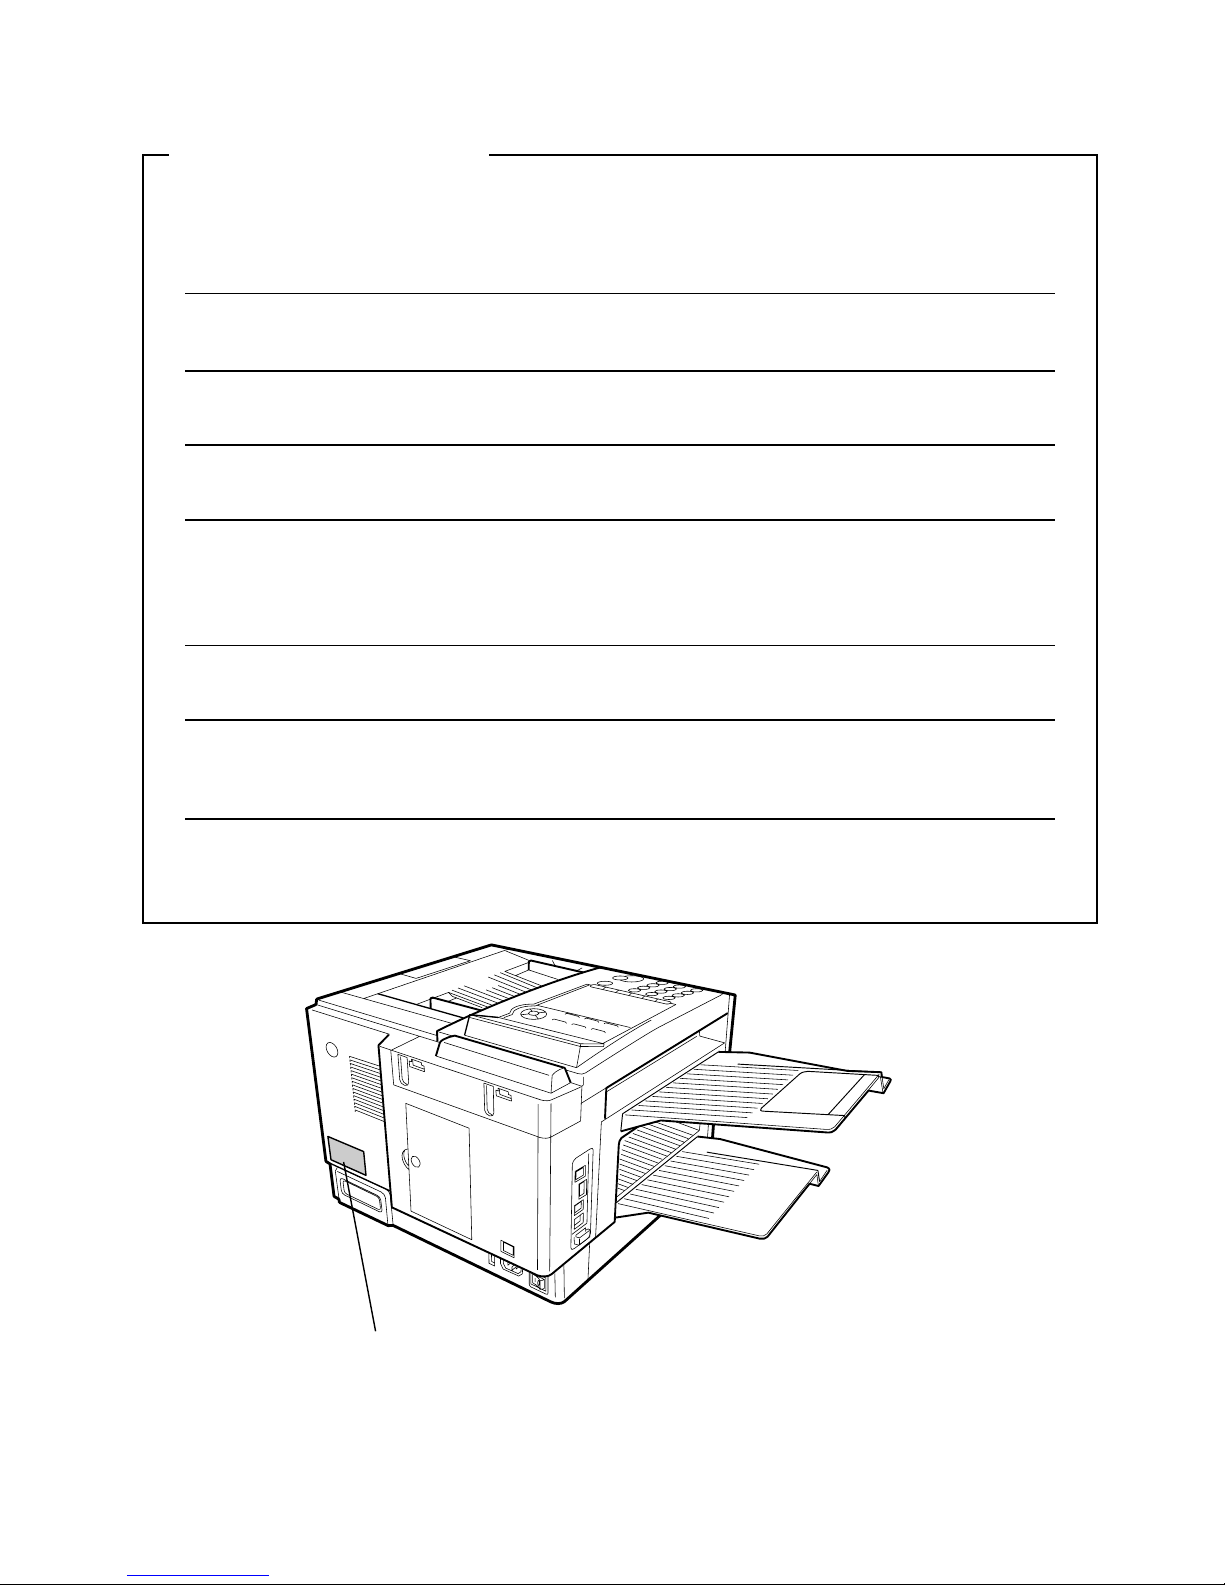
IMPORTANT INFORMATION
When requesting information, supplies or service always refer to the model and serial number of your
machine. The model and serial number plate (Main Name Plate) is located on the machine as shown below.
For your convenience, space is provided below to record information you may need in the future.
Model No.
Serial No.
Date of Purchase
Dealer
Address
Telephone Number
() –
Supplies Telephone Number
() –
Service Telephone Number
() –
Model and Serial Number
Copyright © 2001-2002 by Matsushita Graphic Communication Systems, Inc.
All rights reserved. Unauthorized copying and distribution is a violation of law. Printed in Japan.
The contents of these Operating Instructions are subject to change without notice.

3
Table of Contents
Safety Information.......................................................................................................... 9
Precaution....................................................................................................................... 11
Function Key................................................................................................................... 12
External View .................................................................................................................. 13
Control Panel .................................................................................................................. 14
Main Unit and Accessories............................................................................................ 16
Installing the Accessories ............................................................................................. 17
Installing the Toner Cartridge ....................................................................................... 18
Loading the Recording Paper ....................................................................................... 20
Paper Specifications....................................................................................... 20
Connecting the Telephone Line Cable and Power Cord............................................. 22
Setting the Dialing Method (Tone or Pulse)................................................................. 24
Adjusting the Volume .................................................................................................... 25
Setting the Monitor Volume ............................................................................ 25
Setting the Ringer Volume ............................................................................. 25
User Parameters............................................................................................................. 26
General Description........................................................................................ 26
Setting the Date and Time.............................................................................. 26
Setting Your LOGO ........................................................................................ 27
Setting Your Character ID .............................................................................. 28
Setting Your ID Number (Fax Telephone Number) ........................................ 29
One-Touch/Abbreviated Dialing Numbers ................................................................... 30
Entering One-Touch/Abbreviated Dialing Numbers ....................................... 30
Editing One-Touch/Abbreviated Dialing Numbers.......................................... 32
Printing Out a Directory Sheet........................................................................ 34
Customizing Your Machine ........................................................................................... 35
General Description........................................................................................ 35
Setting the Fax Parameters........................................................................... 35
Fax Parameter Table...................................................................................... 36
Getting to Know Your Machine
Installing Your Machine
Programming Your Machine

Table of Contents
4
Loading Documents....................................................................................................... 40
Documents You Can Send ............................................................................ 40
Documents You Cannot Send ....................................................................... 40
How to Load Documents................................................................................ 41
Basic Transmission Settings ........................................................................................ 42
General Description ....................................................................................... 42
Contrast ......................................................................................................... 42
Resolution ...................................................................................................... 42
Halftone.......................................................................................................... 43
Verification Stamp .......................................................................................... 43
Communication Journal (COMM. JOURNAL) ............................................... 44
Sending Documents....................................................................................................... 45
General Description ....................................................................................... 45
Memory Transmission.................................................................................... 45
Direct Transmission ....................................................................................... 52
Voice Mode Transmission.............................................................................. 55
Transmission Reservation ............................................................................. 57
Redialing ........................................................................................................ 60
Receiving Documents.................................................................................................... 61
General Description ....................................................................................... 61
Automatic Reception ...................................................................................... 61
Manual Reception .......................................................................................... 61
Print Reduction .............................................................................................. 62
Selecting the Print Reduction Mode............................................................... 62
Receiving Oversize Documents..................................................................... 63
Substitute Memory Reception ........................................................................ 64
Print Collation Mode....................................................................................... 64
Making Copies ............................................................................................................... 65
Batch Transmission....................................................................................................... 66
General Description ....................................................................................... 66
Real-time Batch Transmission ....................................................................... 66
Delayed Batch Transmission ......................................................................... 66
Timer Controlled Communications .............................................................................. 67
General Description ....................................................................................... 67
Deferred Transmission................................................................................... 67
Deferred Polling ............................................................................................. 68
Polling ............................................................................................................................. 69
General Description ....................................................................................... 69
Setting the Polling Password ......................................................................... 69
Preparing to be Polled ................................................................................... 70
To Poll Documents from Another Station....................................................... 71
Basic Operations
Advanced Features

Table of Contents
5
Program Keys ................................................................................................................. 72
General Description........................................................................................ 72
Setting for Group Dialing ................................................................................ 72
Setting for Deferred Transmission.................................................................. 73
Setting for Deferred Polling ............................................................................ 74
Setting for Normal Polling............................................................................... 75
Setting for One-Touch Key............................................................................. 76
Changing or Erasing the Program Key Settings............................................. 77
Edit File Mode ................................................................................................................. 78
General Description........................................................................................ 78
Printing a File List........................................................................................... 78
Viewing the Contents of a File List ................................................................. 79
Changing the Start Time or the Station of a File ............................................ 80
Deleting a File ................................................................................................ 82
Printing Out a File........................................................................................... 83
Adding Documents into a File ........................................................................ 84
Retry an Incomplete File ................................................................................ 85
Access Code................................................................................................................... 86
General Description........................................................................................ 86
Setting the Access Code ................................................................................ 86
Operating Your Machine with the Access Code (Restrict all operations) ...... 87
Operating Your Machine with the Access Code
(Restrict access of Fax Parameters and Journal) ......................................... 87
Receive To Memory........................................................................................................ 88
General Description........................................................................................ 88
Setting the RCV To Memory Password.......................................................... 88
Setting RCV To Memory ................................................................................ 88
Printing Out Documents ................................................................................. 89
Distinctive Ring Detector (DRD) ................................................................................... 90
General Description........................................................................................ 90
Fax Cover Sheet ............................................................................................................. 91
General Description........................................................................................ 91
To use the Fax Cover Sheet .......................................................................... 91
PIN Code Access............................................................................................................ 93
General Description........................................................................................ 93
Selecting the Access Method (Prefix or Suffix) .............................................. 93
Dialing with a PIN Code ................................................................................. 94
Fax Forward .................................................................................................................... 95
Setting Fax Forward ....................................................................................... 95
File Transmission........................................................................................................... 96
General Description........................................................................................ 96
Storing the Document(s) ................................................................................ 96
Sending the Stored Document(s) ................................................................... 97
Deleting the Stored Document(s) ................................................................... 98
Printing the Stored Document(s) .................................................................... 98

Table of Contents
6
Department Code ........................................................................................................... 99
General Description ....................................................................................... 99
Setting the Department Code ........................................................................ 100
Changing or Erasing the Department Code ................................................... 101
Sending Document with Department Code.................................................... 103
Sending Document with Department Code (Voice Mode Transmission) ....... 104
Printing a Department Code List.................................................................... 105
Printing a Department Code Journal.............................................................. 106
Multiple LOGO ................................................................................................................ 108
General Description ....................................................................................... 108
Setting the Multiple LOGO ............................................................................. 108
Changing or Erasing the Multiple LOGO ....................................................... 109
Sending Document with Multiple LOGO ........................................................ 110
Printing a Multiple Logo List........................................................................... 111
Selective Reception ....................................................................................................... 112
General Description ....................................................................................... 112
Setting the Selective Reception. .................................................................... 112
Password Communications .......................................................................................... 113
General Description ....................................................................................... 113
Compatibility with Other Machines................................................................. 113
Setting Password Transmission .................................................................... 114
Setting Password Reception .......................................................................... 115
Using Password Transmission....................................................................... 116
Using Password Reception ............................................................................ 117
Confidential Mailbox ...................................................................................................... 118
General Description ....................................................................................... 118
Confidential Mailbox....................................................................................... 118
Sending a Confidential Document to a Remote Station's Mailbox ................. 119
Polling a Confidential Document from a Remote Station's Mailbox ............... 120
Receiving a Confidential Document to Your Machine's Mailbox .................... 121
Storing a Confidential Document in Your Machine's Mailbox ........................ 122
Printing Out a Confidential Document from Your Machine's Mailbox ............ 123
Deleting a Confidential Document Stored in Your Machine's Mailbox ........... 124
Sub-Addressing.............................................................................................................. 125
General Description ....................................................................................... 125
To set the Sub-address into a One-Touch/ABBR. Dialing Numbers.............. 126
To send a Document with Sub-address......................................................... 127
Network Features

Table of Contents
7
Journals and Lists.......................................................................................................... 128
General Description........................................................................................ 128
Transaction Journal........................................................................................ 128
Individual Transmission Journal (IND. XMT JOURNAL) ................................ 129
Communication Journal (COMM. JOURNAL) ................................................ 132
One-Touch/Abbreviated and Directory Search List........................................ 134
Program List ................................................................................................... 137
FAX Parameter List ........................................................................................ 138
Troubleshooting ............................................................................................................. 139
Information Codes .......................................................................................... 141
Clearing a Recording Paper Jam ................................................................... 144
Clearing a Document Jam .............................................................................. 145
Cleaning the Document Scanning Area ......................................................... 146
Cleaning the Printer Roller ............................................................................. 147
Adjusting the Automatic Document Feeder (ADF) ......................................... 148
Verification Stamp .......................................................................................... 149
Replacing the Lithium Battery ........................................................................ 150
Checking the Telephone Line......................................................................... 151
Specifications .................................................................................................................152
Recording Paper Specifications ................................................................................... 155
Options and Supplies .................................................................................................... 156
Installing the Memory Card (Flash Memory Card and/or DRAM Card) .......... 158
FCC Notice for User in USA .......................................................................................... 159
Notice to User in Canada............................................................................................... 161
Glossary .......................................................................................................................... 163
ITU-T Image No. 1 ........................................................................................................... 166
Index ................................................................................................................................ 167
Print out Journals and Lists
Problem Solving
Appendix

memo
8

9
Getting to Know
Your Machine
Getting to Know Your Machine
Safety Information
WARNING
!
denotes a potential hazard that could result in serious injury or death.
• TO PREVENT FIRE OR SHOCK, DO NOT EXPOSE THIS PRODUCT TO RAIN OR ANY TYPE OF
MOISTURE.
• TO MINIMIZE THE POSSIBILITY OF SHOCK OR DAMAGE TO THE MACHINE, IT MUST BE PROPERLY
GROUNDED.
• THIS PRODUCT UTILIZES A LASER. ONLY QUALIFIED SERVICE PERSONNEL SHOULD ATTEMPT TO
SERVICE THIS DEVICE DUE TO POSSIBLE EYE INJURY.
CAUTION-USE OF CONTROLS OR ADJUSTMENTS OR PERFORMANCE OF PROCEDURES OTHER
THAN THOSE SPECIFIED HEREIN MAY RESULT IN HAZARDOUS RADIATION EXPOSURE.
• THE MAIN PLUG ON THIS EQUIPMENT MUST BE USED TO DISCONNECT THE MAIN POWER.
PLEASE ENSURE THAT THE SOCKET OUTLET IS INSTALLED NEAR THE EQUIPMENT AND SHALL
BE EASILY ACCESSIBLE.
• MAKE SURE THAT THE MACHINE IS INSTALLED IN A SPACIOUS OR WELL VENTILATED ROOM SO
AS NOT TO INCREASE THE AMOUNT OF OZONE IN THE AIR. SINCE OZONE IS HEAVIER THAN AIR,
IT IS RECOMMENDED THAT AIR AT FLOOR LEVEL BE VENTILATED.
Manufacturer's name and address
Factory ID
Product complies with DHHS Rules 21
CFR Subchapter J in effect at date
of manufacture.

Safety Information
10
CAUTION
!
denotes hazards that could result in minor injury or damage to the machine.
• TO REDUCE THE RISK OF SHOCK OR FIRE, USE ONLY NO. 26 AWG OR LARGER TELEPHONE LINE
CABLE.
• DISCONNECT ALL POWER TO THE MACHINE BEFORE COVER(S) ARE REMOVED. REPLACE THE
COVER(S) BEFORE THE UNIT IS RE-ENERGIZED.
• THIS PRODUCT CONTAINS A LITHIUM BATTERY. DANGER OF EXPLOSION IF BATTERY IS
INCORRECTLY REPLACED.
REPLACE ONLY WITH THE SAME OR EQUIVALENT TYPE. DISPOSE OF USED BATTERIES
ACCORDING TO THE INSTRUCTIONS OF YOUR LOCAL SOLID WASTE OFFICIALS.
When using your telephone equipment, basic safety precautions should always be followed to reduce the risk
of fire, electric shock and injury to persons, including the following:
• DO NOT USE THIS PRODUCT NEAR WATER, FOR EXAMPLE, NEAR A BATH TUB, WASH BOWL,
KITCHEN SINK OR LAUNDRY TUB, IN A WET BASEMENT OR NEAR A SWIMMING POOL.
• AVOID USING A TELEPHONE (OTHER THAN A CORDLESS TYPE) DURING AN ELECTRICAL STORM.
THERE MAY BE A REMOTE RISK OF ELECTRIC SHOCK FROM LIGHTNING.
• DO NOT USE THE TELEPHONE TO REPORT A GAS LEAK IN THE VICINITY OF THE LEAK.
• USE ONLY THE POWER CORD INDICATED IN THIS MANUAL.
IMPORTANT SAFETY INSTRUCTIONS
!
11
Getting to Know
Your Machine
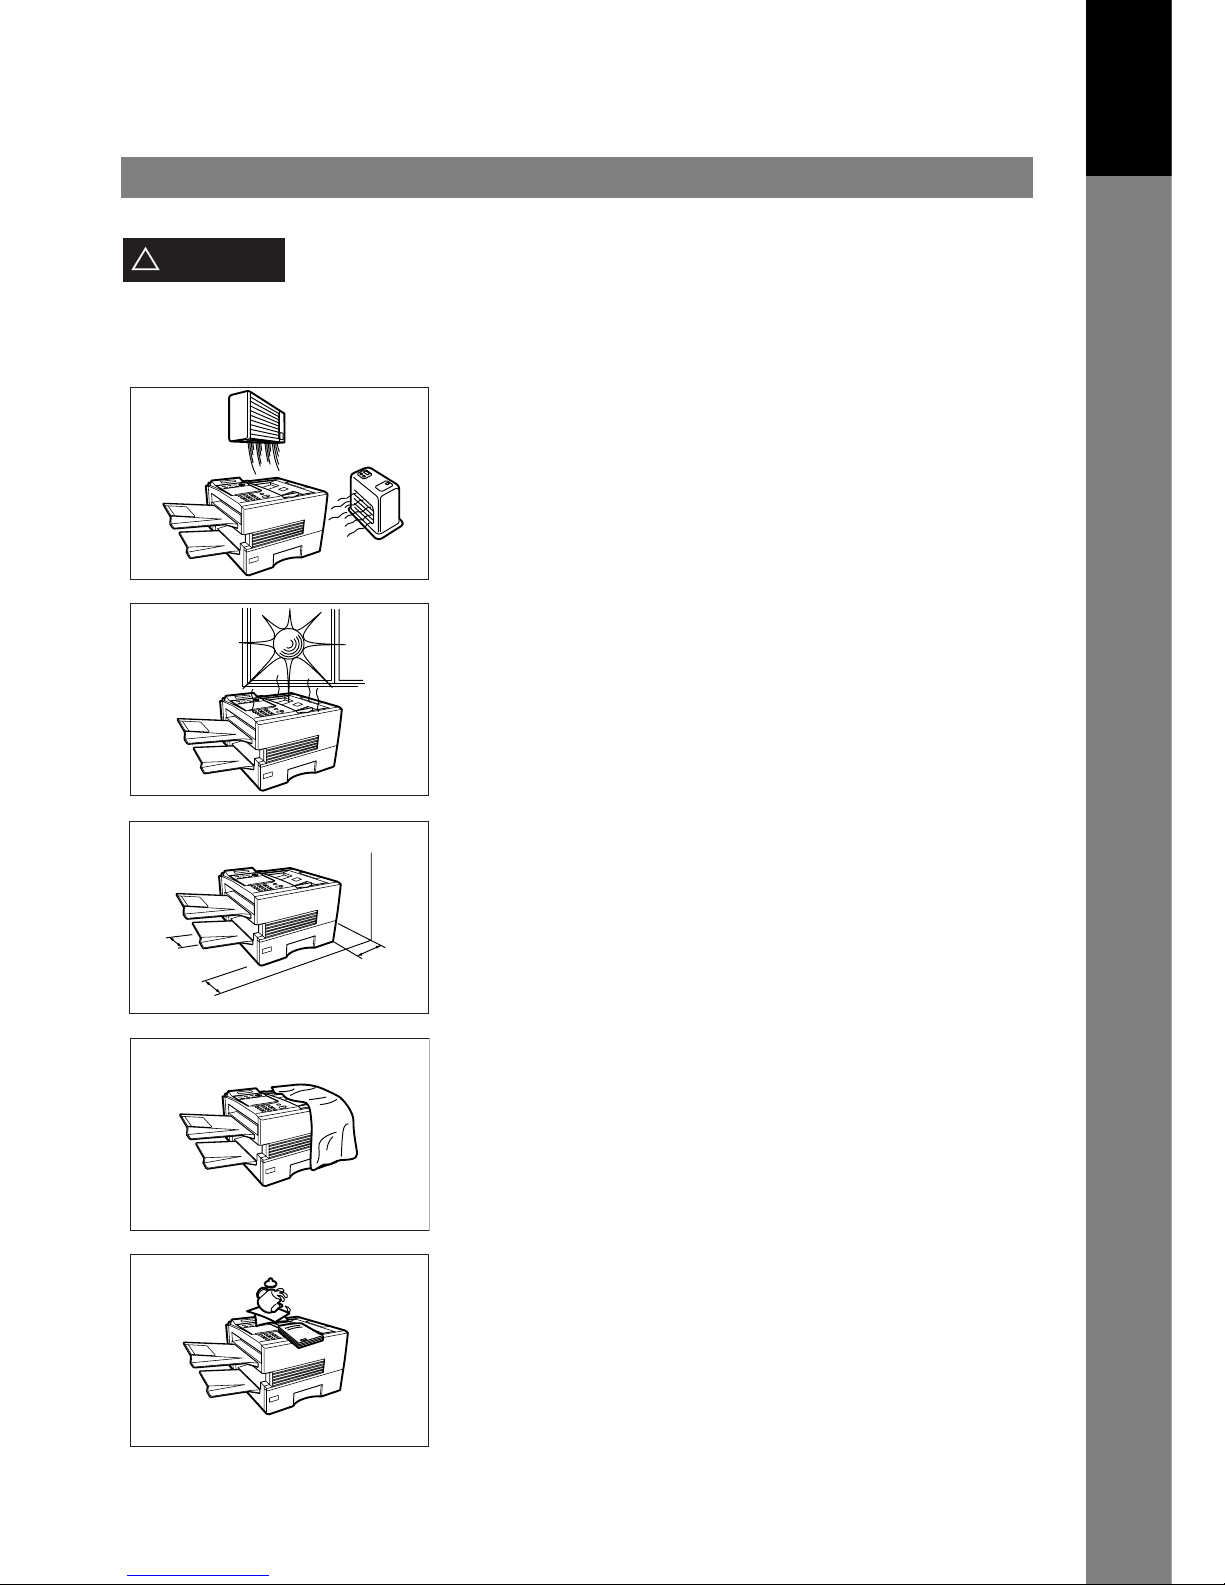
Precaution
CAUTION
!
denotes hazards that could result in minor injury or damage to the machine.
Do not install the machine near heating or an air conditioning unit.
Avoid exposure to direct sunlight.
Install the machine on a flat surface, leave at least 4 inches (10 cm) of space
between the machine and other objects.
Do not block the ventilation openings.
Do not place heavy objects or spill liquids on the machine.

12
Function Key
Any function can be started by first pressing and then enter the function number, or by
pressing or scroll key repeatedly until the desired function appears on the display.
NOTE
1. If Fax Parameter is not preset to the Valid position, which enables you to use the function, the
display will not show the function.
FUNCTION
FUNCTION
2
1
3
6
7
8
9
Deferred Communication
1 = XMT
2 = Polling
Set Mode
1 = User Parameters
• Date & Time
• Logo
• Character ID
• ID Number (Fax Telephone Number)
2 = One-Touch/Abbreviated Numbers
3 = Program Keys
4 = Fax Parameters
5 = Not Used
6 = Cleaning Printer Roller
Polling
1 = Polling
2 = Polled
Printout
1 = Journal (Print/View)
2 = One-Touch/Abbreviated/
Directory Search List
3 = Program List
4 = Fax Parameter List
5 = Not used
6 = Individual XMT Journal
7 = Directory Sheet
Advanced Communication
1 = Not Used
2 = Confidential Communication
3 = File Transmission
Select Mode
1 = Communication Journal = OFF/ON/INC
2 = Not Used
3 = Cover Sheet = OFF/ON
4 = Password-XMT = OFF/ON (See Note 1)
5 = RCV to Memory = OFF/ON/PRINT
Edit File Mode
1 = File List (Print/View)
2 = Change Time/Station
3 = Delete File
4 = Print File
5 = Add Document
6 = Retry Incomplete File

13
Getting to Know
Your Machine
External View
ADF Door
Handset
(Available as an option, see page 156.)
Control Panel
Document Return Tray
Recording Paper Tray
Document Guides
Document Sub Tray
Printer Cover
250 sheets Recording Paper Cassette
(Available as an option, see page 156.)
500 sheets Recording Paper Cassette
(Available as an option, see page 156.)
Recording Paper Cassette
(Standard)
14
Control Panel
PAUSE
REDIAL ABBR
SUB-ADDR
FLASH
MONITOR
FUNCTION CLEAR SET
SPACE SYMBOLS CAPS
B
H
N
T
Z
A01
07
13
19
25
31
P5
02
08
14
20
26
32
P6
03
09
15
21
27
P1
P7
04
10
16
22
28
P2
P8
05
11
17
23
29
P3
06
12
18
24
30
P4
G
M
S
Y
C
I
O
U
D
J
P
V
AAOU
E
K
Q
W
F
L
R
X
VOLUME
+
-
DIRECTORY
SEARCH
STAMPMEMORY
HALFTONE
RESOLUTIONCONTRAST
LIGHTER FINE QUALITY
DARKER
ON LINE TONER ALARM
S-FINE FAST
START
STOP
COPY
123
456
789
0
ABC DEF
JKL MNO
TUV WXY
OPER
GHI
PRS
TONE
ON LINE
TONER
ALARM
SPACE
SYMBOLS
CAPS
SPACE SYMBOLS CAPS
01
07
13
19
25
31
P5
02
08
14
20
26
32
P6
03
09
15
21
27
P1
P7
04
10
16
22
28
P2
P8
05
11
17
23
29
P3
06
12
18
24
30
P4
LINE
SELECT
LCD Display
Indicates date and time, or the current
operation.
Blinks when the machine is
transmitting a document or
receiving.
Lights when trouble occurs.
(See page 139)
Blinks when the remaining toner
is getting low and lights when
the toner is running out.
(See page 18)
One-Touch Keys (01-32)
Used for One-Touch Dialing.
(See page 48 and 53)
Program Keys (P1-P8)
Used to record long dialing procedures or
Group Dialing Number keys.
(See page 72 to 77)
Character Keys
The One-Touch Keys and Program Keys
also serve as character and symbol input
keys which are used to record your
LOGO, character ID and station name.
The character key template is printed on
the panel under the directory sheet cover.
Used to insert a space while
entering LOGO, character ID
and station name.
Used to switch between upper
and lower character set.
Used to enter a symbol (, ' & (
) : ; + - . /) for LOGO, character
ID and station name. Use or
to select the symbols.
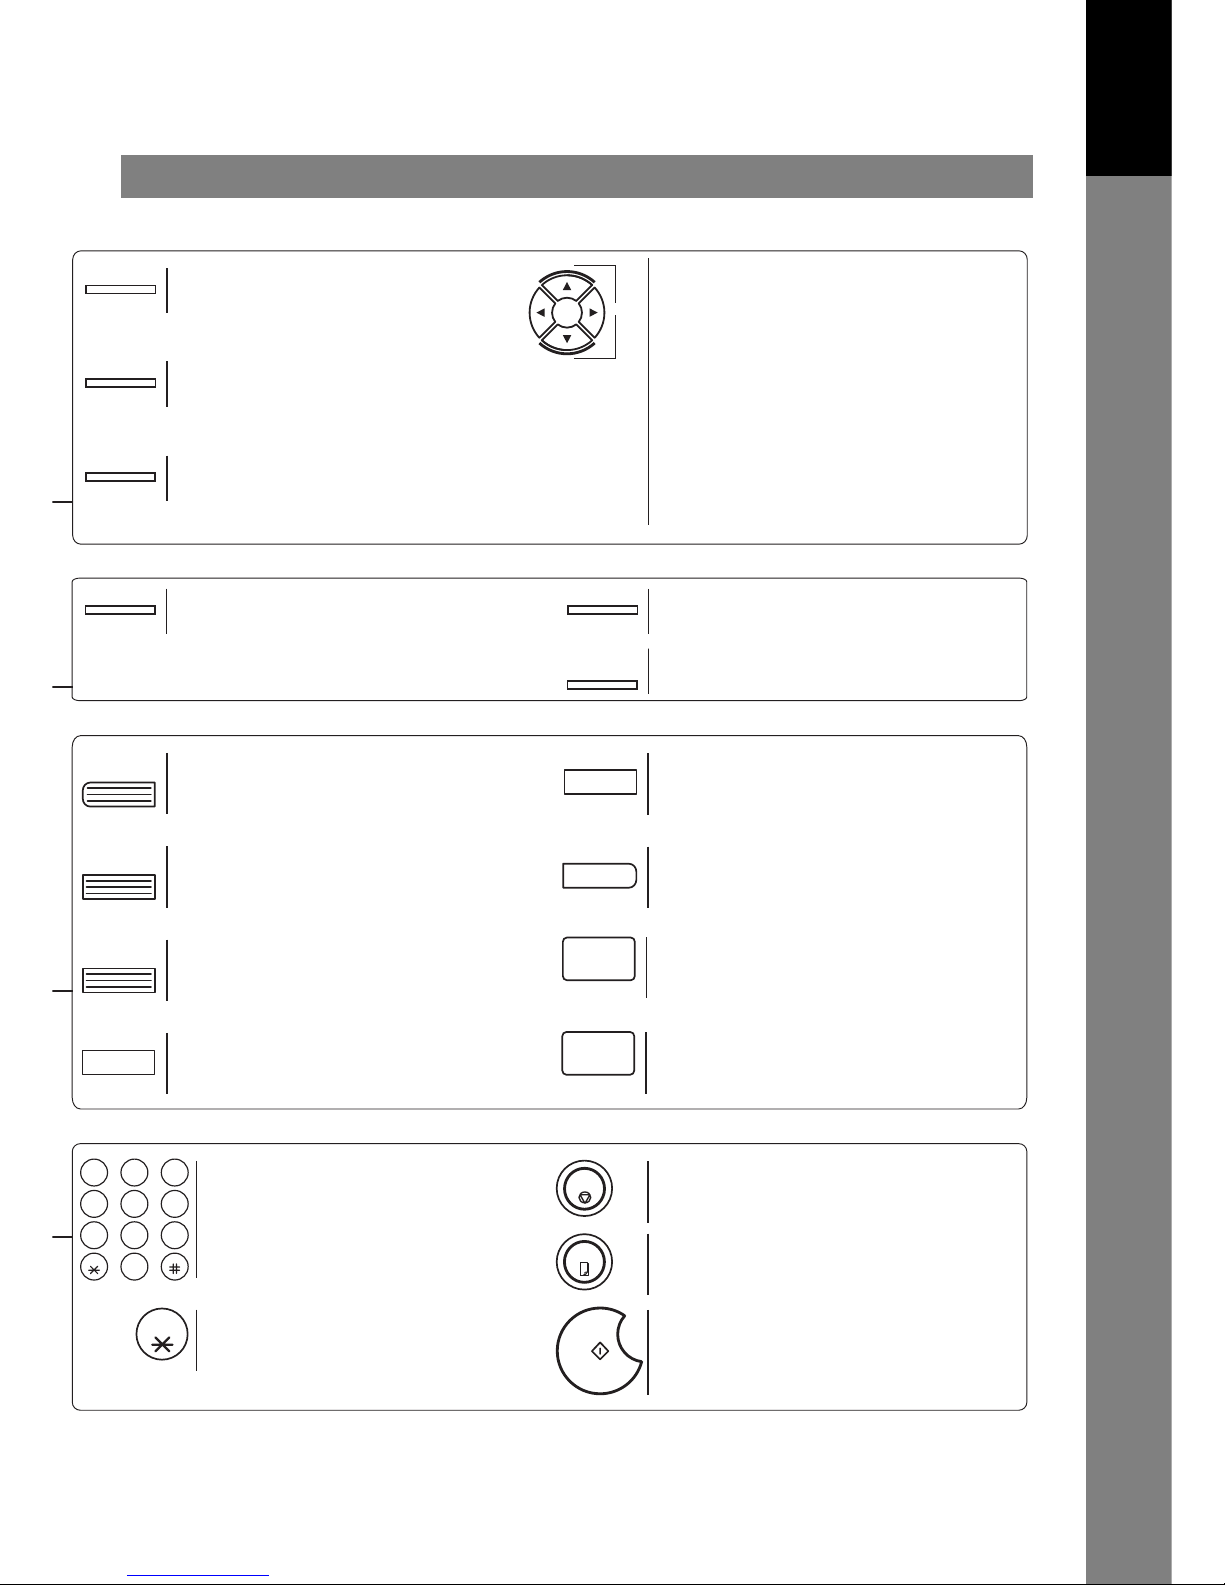
Control Panel
15
Getting to Know
Your Machine
VOLUME
+
-
CONTRAST
HALFTONE
RESOLUTION
MEMORY
DIRECTORY
SEARCH
STAMP
PAUSE
REDIAL
ABBR
SUB-ADDR
FLASH
FUNCTION
CLEAR
SET
LINE
SELECT
MONITOR
123
456
789
0
ABC DEF
JKL MNO
TUV WXY
OPER
GHI
PRS
TONE
TONE
STOP
COPY
START
Used to set Normal, Lighter, or Darker.
(See page 42)
Used to select either memory or direct
communication.
(See page 45 to 51)
Used to enter a pause when recording or
dialing a telephone number, or to redial
the last dialed number. (See page 60)
Used to erase the previously entered input.
Used to set operations.
Used to select the communication port.
Available for UF-990 only if the Optional G3
Communication Port Kit has been installed.
(See page 156)
Used to cancel operations. When it is pressed,
the machine will return to standby.
Used to start operations.
Used to make copies.
(See page 65)
Used to start On-Hook Dialing. (See page 56)
Used to start Abbreviated Dialing.
(See page 49 and 53)
Used to separate the Sub-address from
the telephone number when dialing, or to
access some features of your PBX.
Used to start or select the function and
sub-functions.
These functions are explained in detail on
page 12.
Used for manual number dialing,
recording phone numbers, and numerical
entries.
Used to temporarily change the Dialing
Mode to Tone when Pulse mode is set.
Used to turn the verification stamp ON or
OFF. (See page 43)
Used to search for a station name.
(See page 50 and 54)
Used for the following:
• Adjust the monitor and ringer volume.
(See page 25)
• Move the cursor while entering numbers and
characters.
• Search the station name for Directory Search
Dialing.
• Confirm the entered station for multi-station
communication.
• Select functions.
• Confirm the current communication modes
(e.g. Page number, ID, Dialed Telephone
number, File number) when the unit is ON
LINE.
Used to set Standard, Fine, Super-Fine.
(See page 42)
Provides OFF, QUALITY or FAST settings
for halftone documents. (See page 43)
16
Installing Your Machine
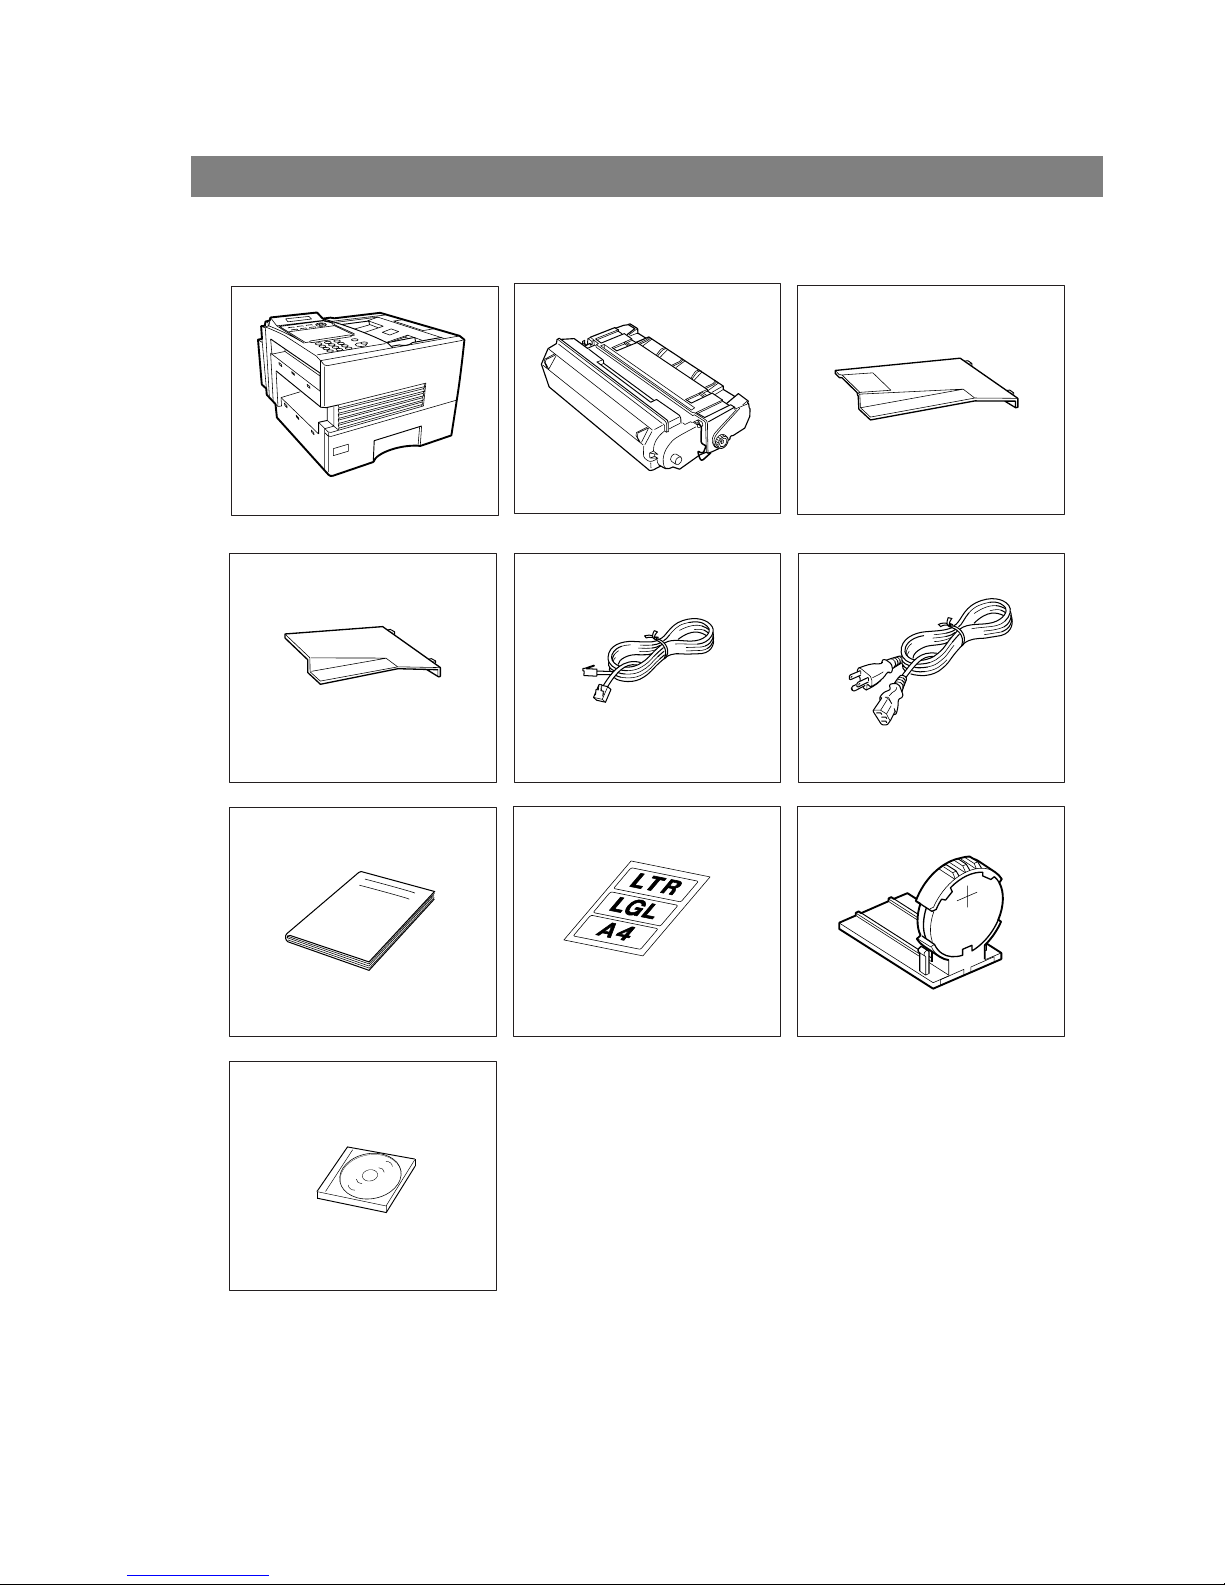
Main Unit and Accessories
Unpack the carton and check that you have all the accessories illustrated.
Machine
Toner Cartridge
Document Return Tray
Recording Paper Tray Telephone Line Cable Power Cord
Operating Instructions
Paper Size Label
Lithium Battery and Holder
CD-ROM
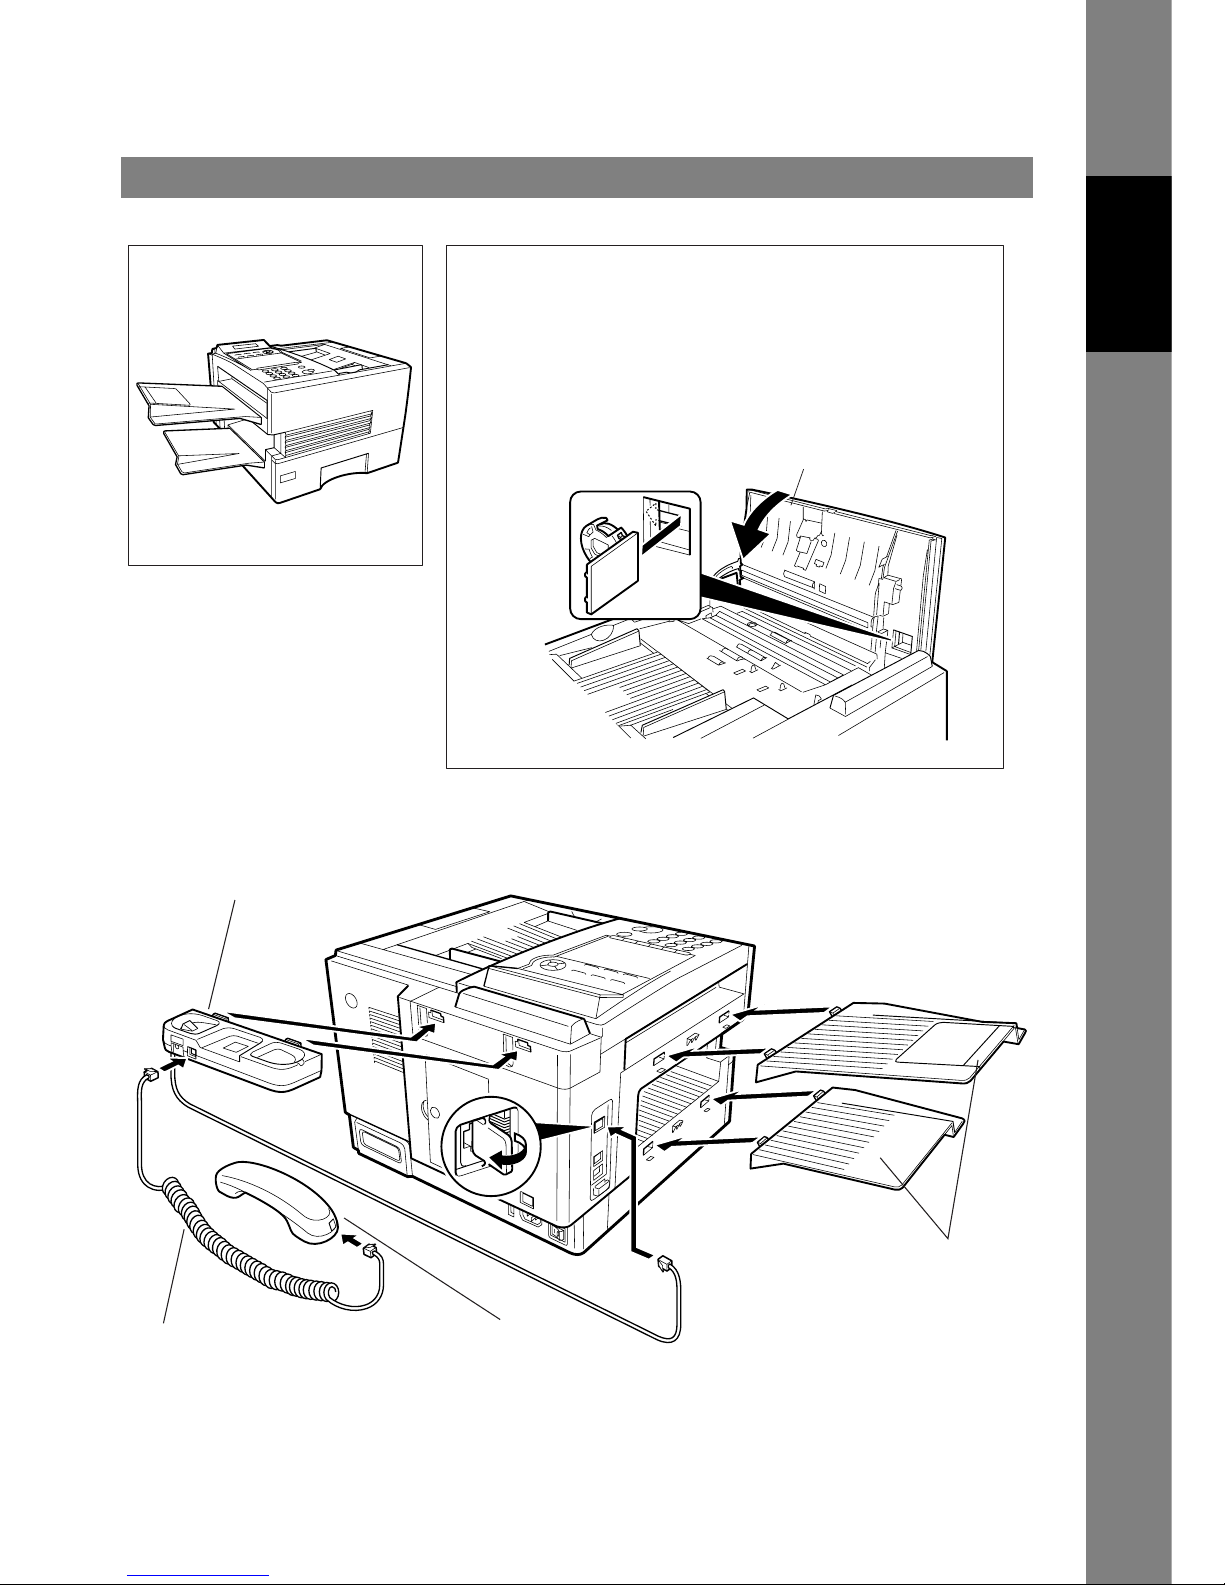
17
Installing Your
Machine
Installing the Accessories
Final Installed View
ADF Door
Installing the Lithium Battery
(This battery is used to backup the clock during power failures,
see page 150)
(1) Open the ADF Door.
(2) Install the Battery Holder, slide it to the Left until it latches and
close the ADF Door.
Handset Cradle
[Available as an Option]
Hook the projections into the square holes
on the machine.
Connect the cable into the HANDSET jack
on the machine.
Document Return and
Recording Paper Trays
Hook the projections into the
square holes on the machine.
Handset
[Available as an Option]
Handset Cord
[Available as an Option]
18
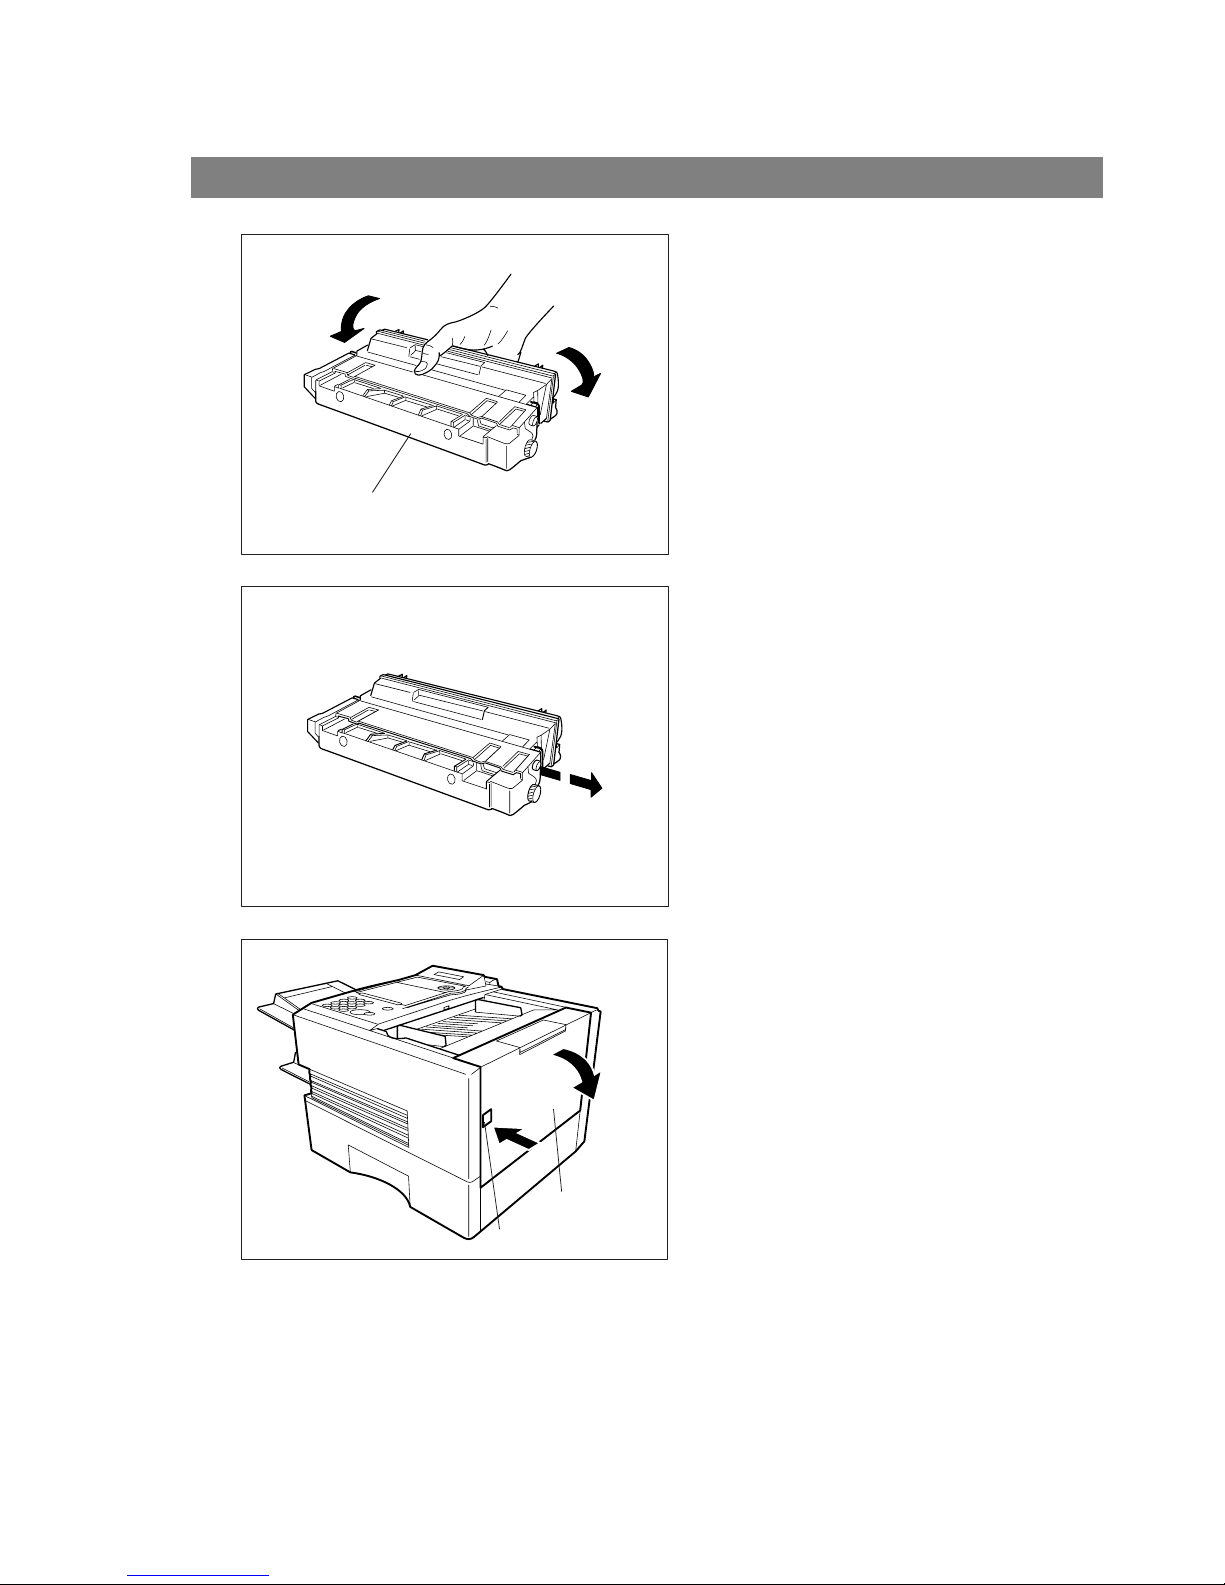
Installing the Toner Cartridge
1
Unpack the Toner Cartridge and rock it back
and forth as shown for 5 or 6 times to even the
toner inside.
2
Remove the protective seal.
Note: Pull on the seal slowly and straight
out.
3
Push the Release Button to open the Printer
Cover.
Toner Cartridge
Printer Cover
Release Button
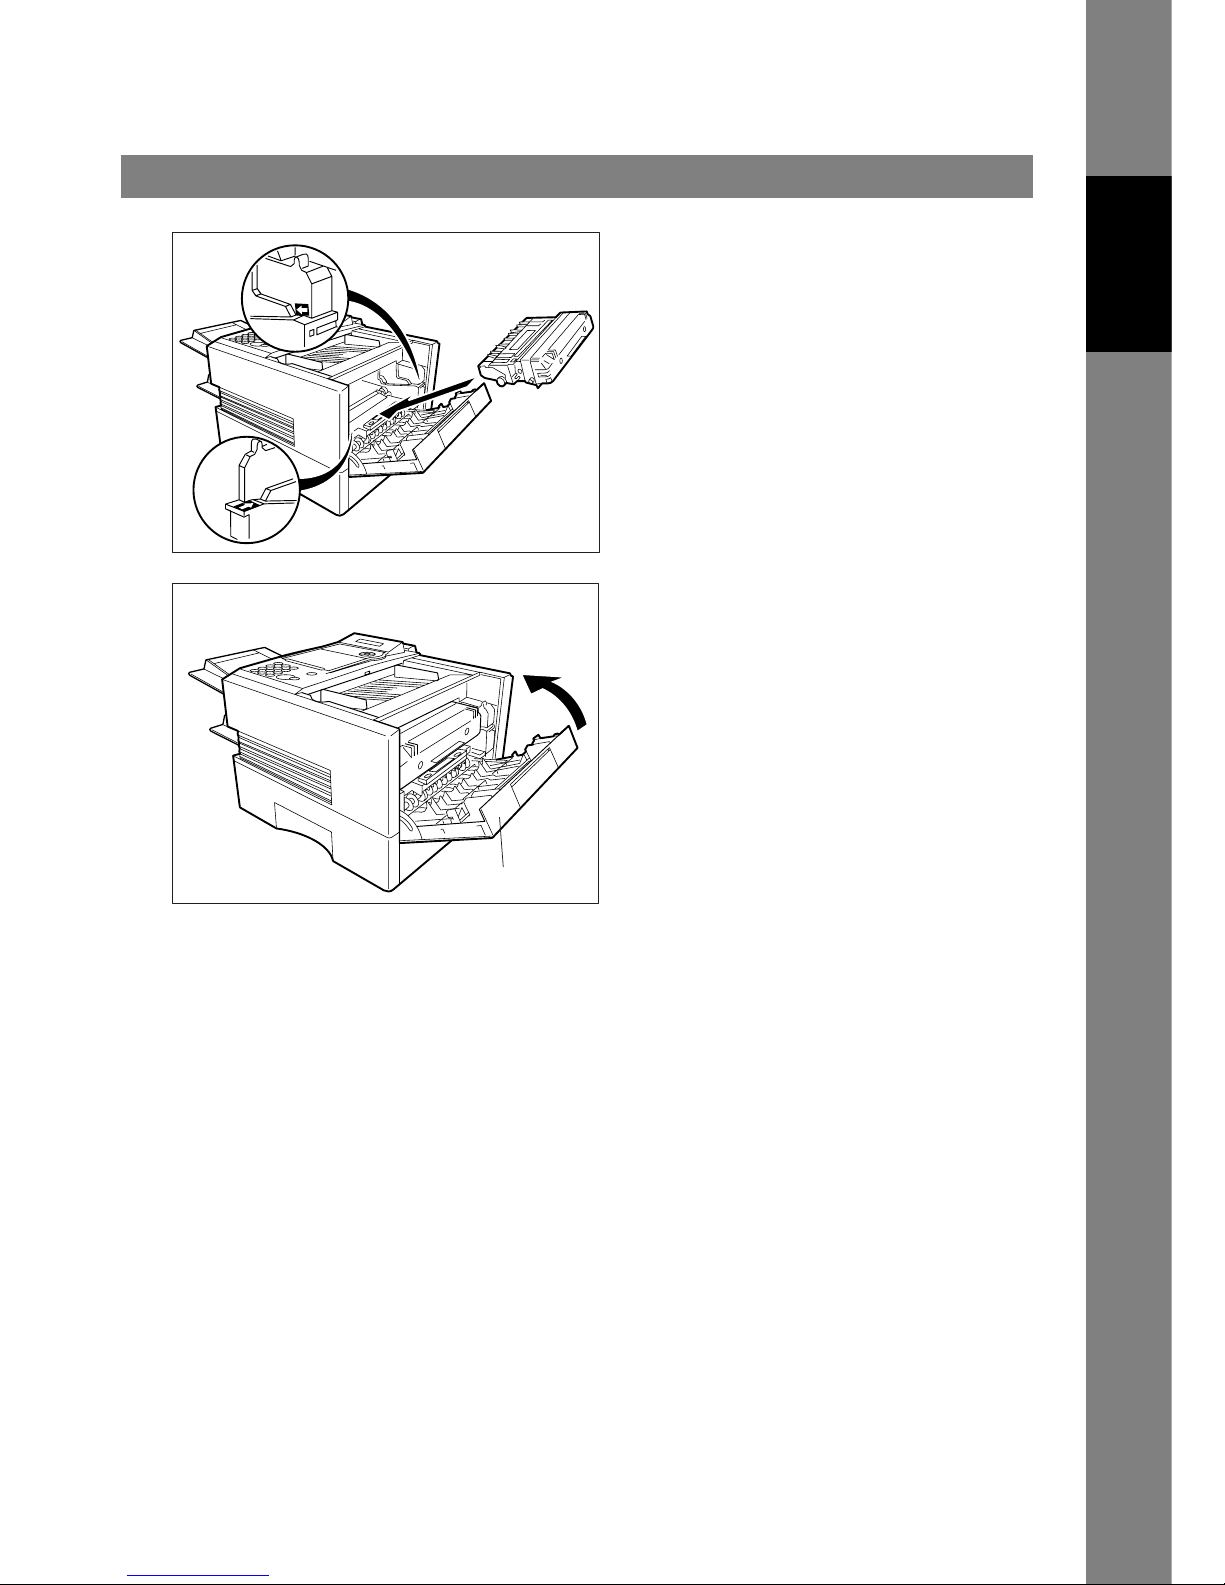
Installing the Toner Cartridge
19
Installing Your
Machine
4
Align the arrow and the projection on both
sides as shown and insert the Toner Cartridge
into the machine.
5
Close the Printer Cover firmly.
6
If you are replacing the Toner Cartridge, it is recommended
to clean the Printer Roller to maintain good printing quality.
To clean the Printer Roller, follow the procedure on page
147
.
Printer Cover
20
Loading the Recording Paper
In general, most bond papers will produce excellent results. Most photocopy papers will also work very well.
There are many "name" and "generic" brands of paper available. We recommend that you test various
papers until you obtain the results you are looking for. For detailed recommended paper specifications, see
page 155.
How to Load the Recording Paper
Paper Specifications
1
Slide out the Paper Cassette from the machine.
2
Adjust the Paper Length Guide to the proper paper
size (A4, LTR, or LGL).
For LGL size paper, remove the Paper Length
Guide and store it in the provided slot in the front
left side of the Paper Cassette.
If reloading the same size of paper, skip the step 2
and 3.
3
Adjust the Paper Width Guide and Clip to the
proper paper (A4, or LTR/LGL).
The factory default for the Paper Width Guide and
Clip are on LTR/LGL position. For A4 paper size,
adjust by following the steps below.
1. Replace the Paper Width Guide into the
proper slot (A4 or LTR/LGL).
2. Release the Paper Width Clip latch.
3. Pull upwards to remove the Paper Width Clip.
4. Replace the Paper Width Clip into the A(A4)
or L(LTR/LGL) slot.
5. Push down on the Paper Width Clip to latch it
in place.
Paper Cassette
Paper Length Guide
A
L
A
L
Paper Width Guide
Paper Width Clip
Loading the Recording Paper
21
Paper Specifications
Installing Your
Machine
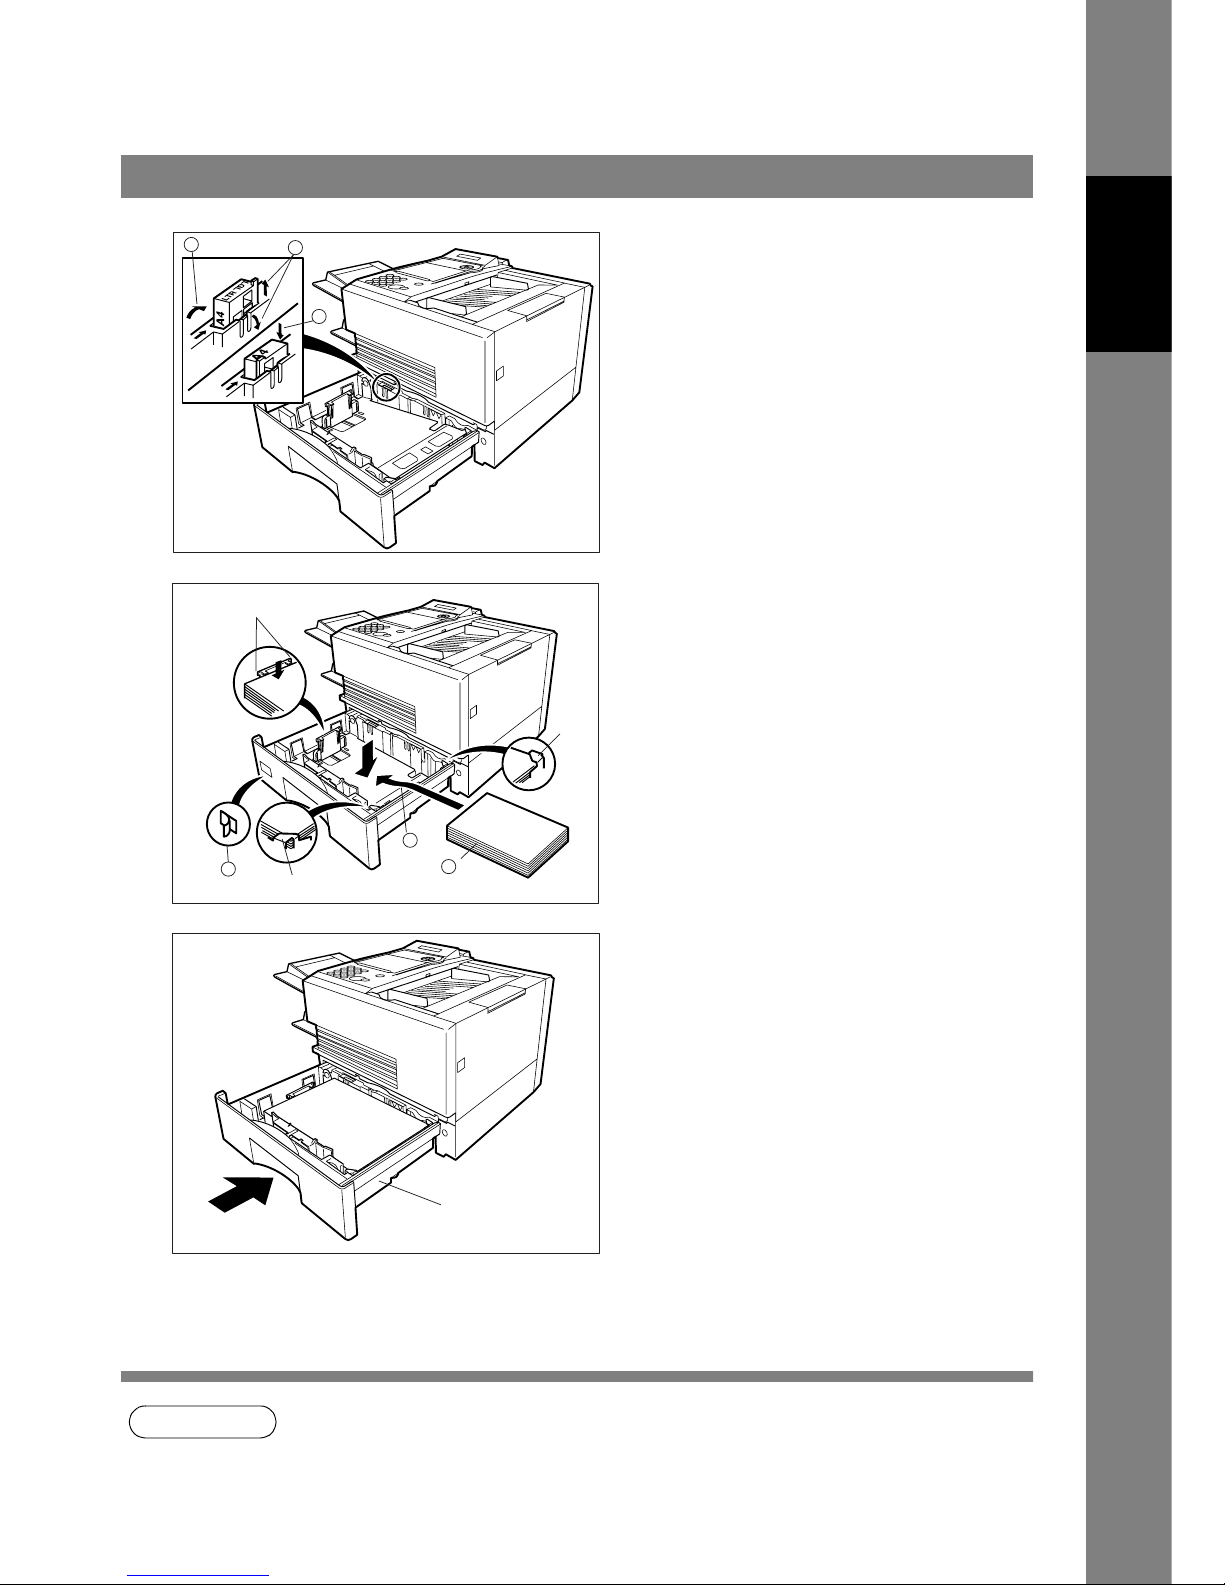
NOTE
1. Your machine will properly print on A4, Letter and Legal size paper only. If other size of paper
(B4, B5, A5) is used, your machine may not print properly.
4
1. Release the hook and remove the Paper Size
Selector.
2. Rotate the Paper Size Selector until the
appropriate setting marked on the Selector is
facing upward and the wording is upright.
3. Reinstall the Paper Size Selector.
5
1. Push the Pressure Plate until it is locked
down.
2. Load the paper into the Paper Cassette.
Caution:Make sure that the paper is set
under the clips of the Paper
Cassette. You can load about 500
sheets with standard weight paper
(20 lb. weight). For paper
specification see page 155.
3. Set the proper paper size label.
6
Slide the Paper Cassette into the machine.
1
2
3
1
2
3
Clip
Clip
Clip
Recording Paper
Paper Cassette
22
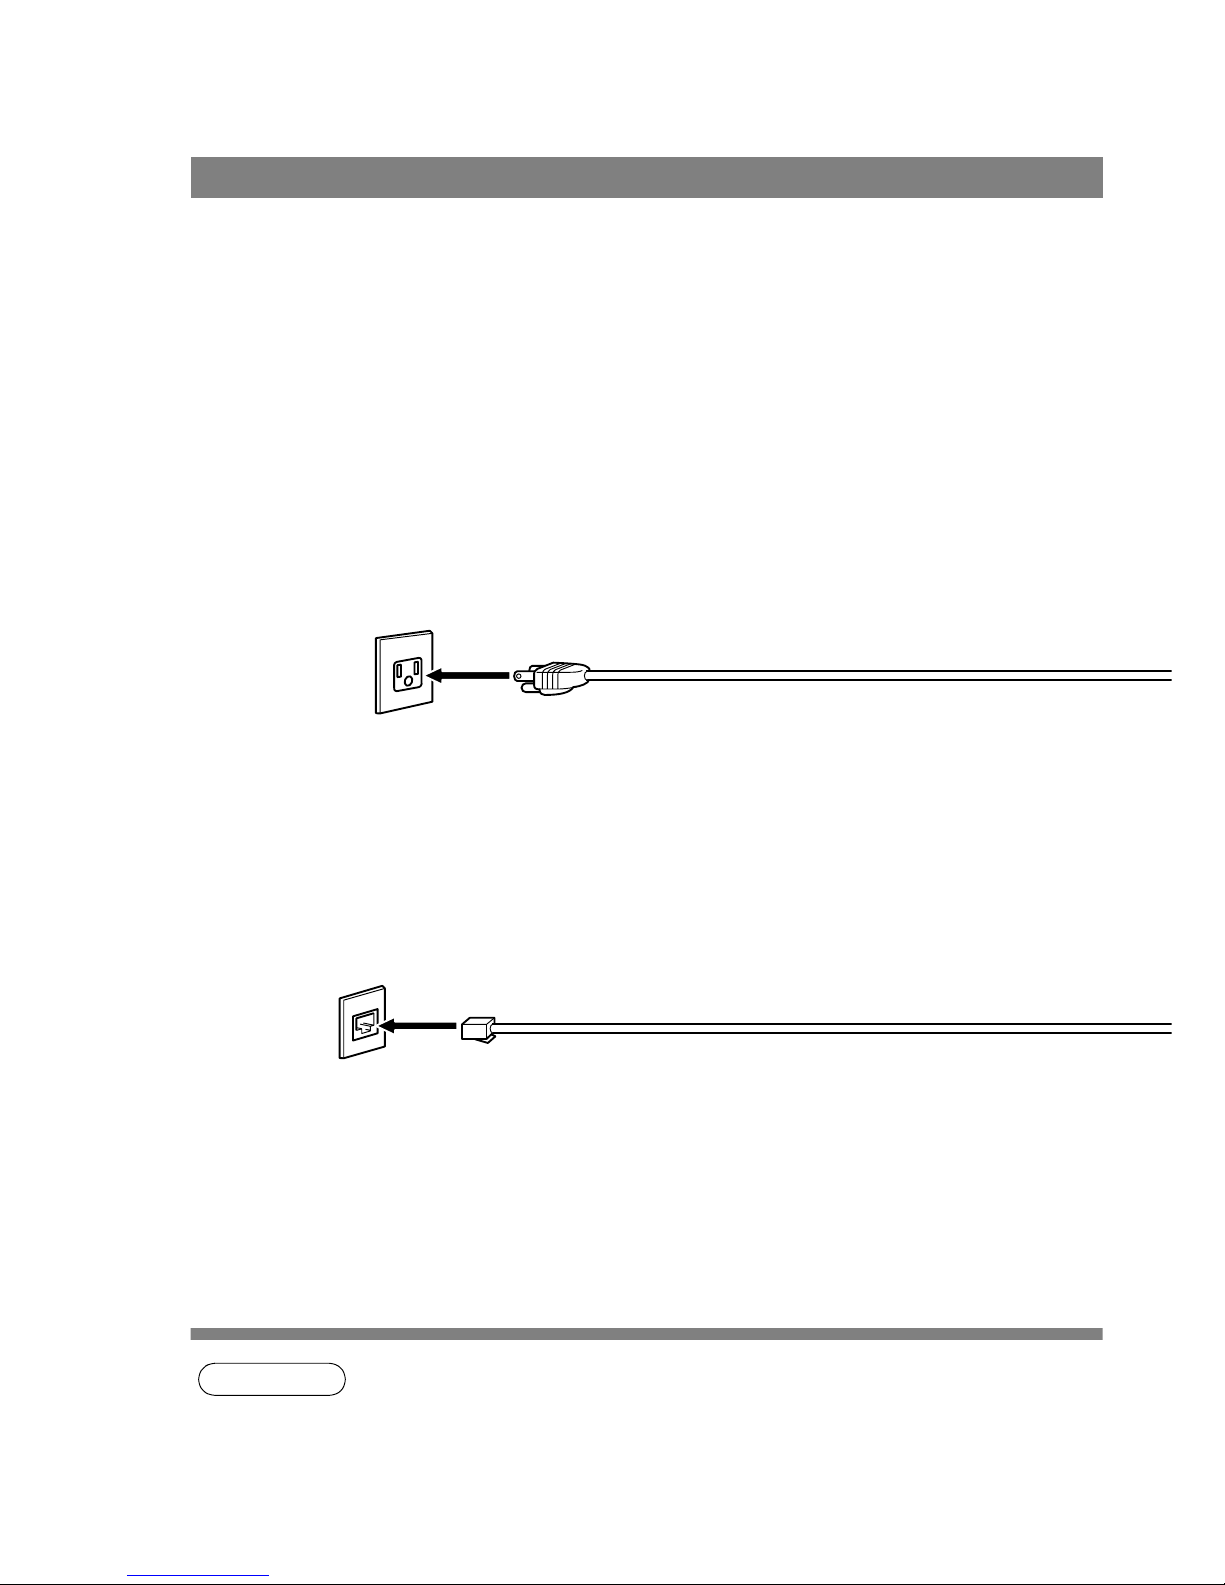
Connecting the Telephone Line Cable and Power Cord
■ Power Cord
Plug one end of the power cord into an ordinary 3 prong AC outlet and the other end into the receptacle on
the rear of the machine.
Warning: This apparatus must be properly grounded through an ordinary 3 prong AC outlet.
Do not break off the earth (ground) prong to fit a 2 prong outlet.
■ Telephone Line Cable
Plug one end of the telephone line cable into the "RJ-11C" telephone jack supplied by the telephone
company and the other end into the LINE jack on the left side of the machine.
NOTE
1. Your machine uses little power and you should keep it ON at all times.
Power Cord (Included)
Telephone Line Cable (Included)
RJ-11C Telephone Jack

Connecting the Telephone Line Cable and Power Cord
23
Installing Your
Machine
Power Switch
After connecting all cables and
Power Cord, turn the power
switch ON.
Note
Attach the cables to the
Hook to prevent recording
paper jam.
External Telephone (Optional)
You can connect an additional standard single
line telephone to the machine.
To connect the telephone, break off the
protective tab on the TEL jack.
24
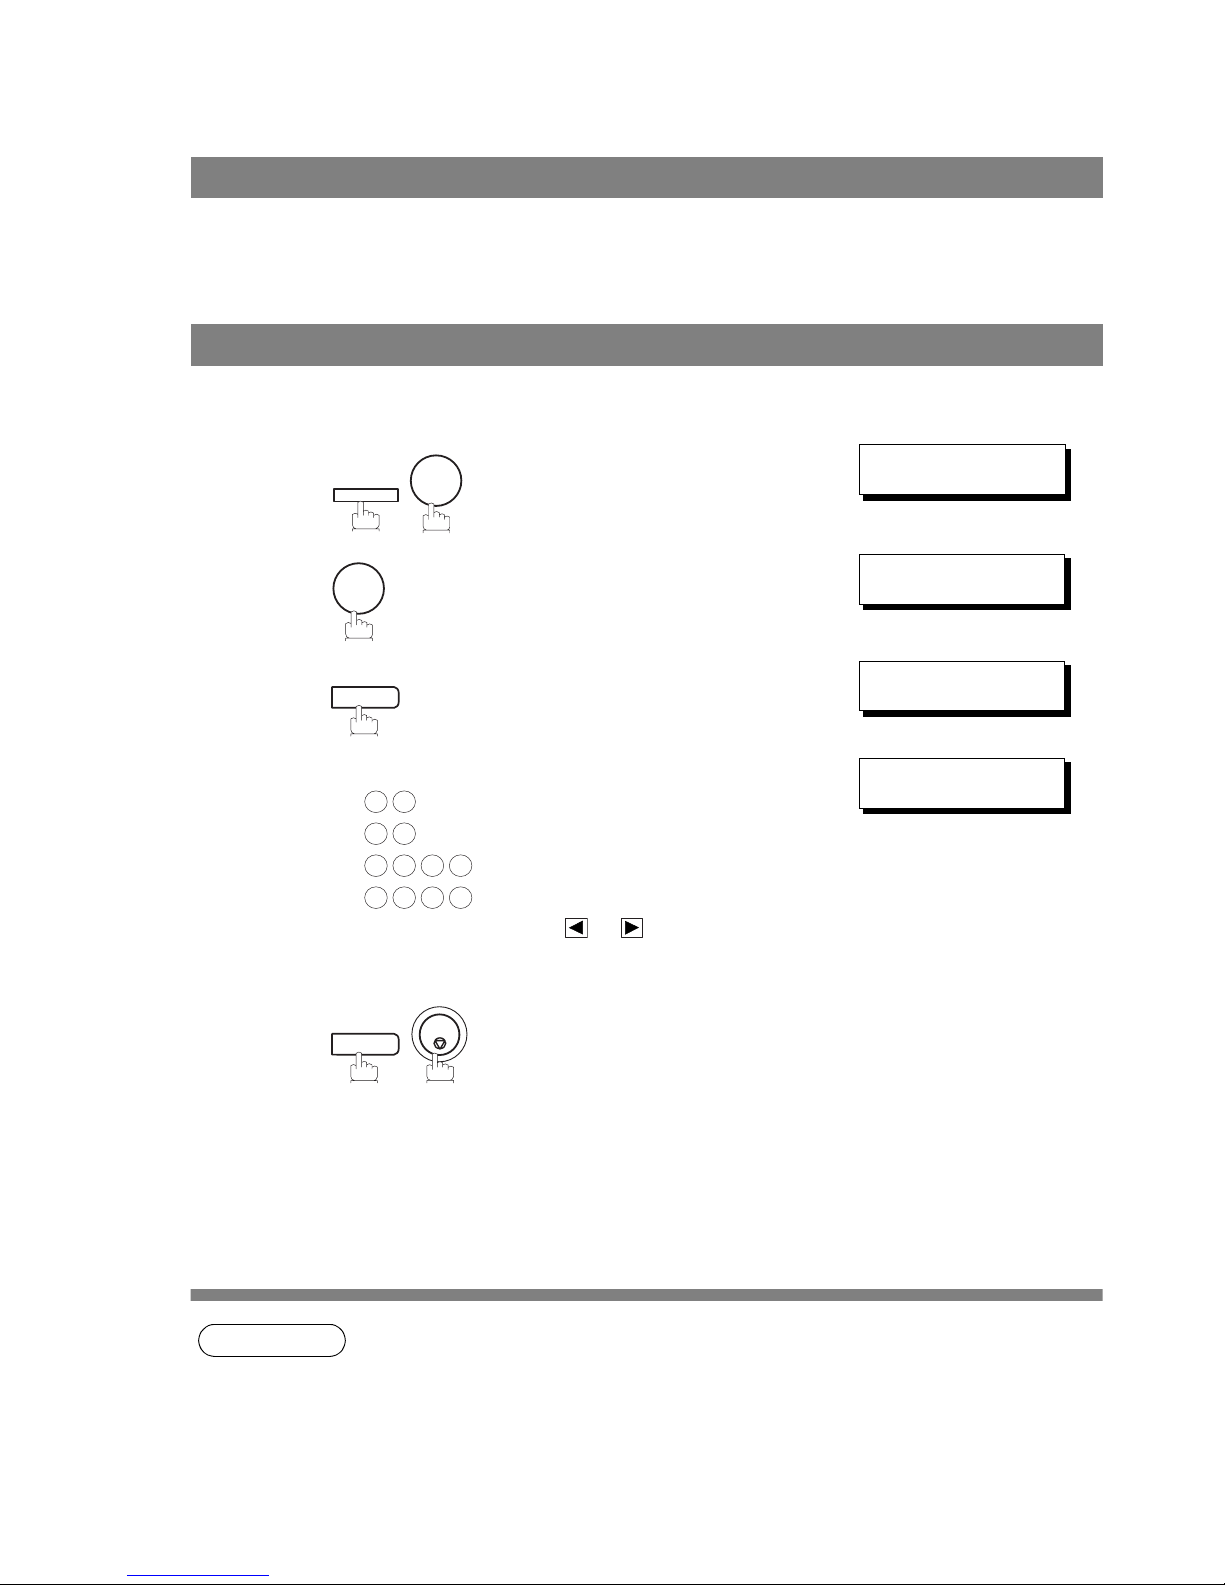
Setting the Dialing Method (Tone or Pulse)
Your machine can operate with either of two dialing methods (Tone or Pulse), depending on the type of
telephone line you are connected to. If you need to change the dialing method to Tone or Pulse, follow the
procedure below.
1
SET MODE (1-6)
ENTER NO. OR
∨ ∧
2
FAX PARAMETER(01-99)
NO.=
❚
3
06 DIALING METHOD
2:TONE
4
for “PULSE“.
or
for “TONE“.
06 DIALING METHOD
1:PULSE
or
06 DIALING METHOD
2:TONE
5
FUNCTION
7
4
SET
0
6
SET
1
2
SET
STOP
25
Installing Your
Machine
Adjusting the Volume
You can adjust the monitor and ringer volume on your machine. The built-in speaker enables you to hear the
dial tone, dialing signals, and busy tone. The ringer sounds when your machine receives a call.
NOTE
1. You can also adjust the volume of the key touch tone and the volume of the buzzer in the Fax
Parameter No. 10 (KEY/BUZZER VOLUME). (See page 36)
Setting the Monitor Volume
1
You will hear the dial tone through the speaker.
* MONITOR *
❚
2
repeatedly to raise the volume.
or
repeatedly to lower the volume.
MONITOR VOLUME
LOW [
❚❚❚❚❚❚❚❚
] HIGH
MONITOR VOLUME
LOW [ ] HIGH
3
Setting the Ringer Volume
1
Standby
MAR-12-2002 15:00
00%
2
repeatedly to raise the volume.
or
repeatedly to lower the volume.
RINGER VOLUME
(((( ))))
RINGER VOLUME
3
MONITOR
VOLUME
+
-
VOLUME
+
-
MONITOR
VOLUME
+
-
VOLUME
+
-
STOP
26
User Parameters
Your facsimile machine has several basic settings (User Parameters) to help you keep records of the
documents you send or receive. For example, the built-in clock keeps the current date and time, and your
LOGO and ID Number help to identify you when you send or receive documents.
At standby the display will show the date and time. Once the standby display is set, it will automatically be
updated.
NOTE
1. The clock of your machine is equipped with D.S.T.(Daylight Saving Time) system. So, your
clock will automatically set the time forward from 2:00 AM to 3:00 AM on the first Sunday of
April and set the time back from 2:00 AM to 1:00 AM on the last Sunday of October.
If your state does not use the D.S.T. system, change the Fax Parameter No. 35 (DAYLIGHT
TIME) to "Invalid" .
2. The current Date & Time must be set because it is required by the Telephone Consumer Act of
1991. (For details, see FCC NOTICE at the end of this Operating Instructions)
General Description
Setting the Date and Time
1
SET MODE (1-6)
ENTER NO. OR
∨ ∧
2
1:USER PARAMETERS?
PRESS SET TO SELECT
3
DATE & TIME
❚
1-01-2001 00:00
4
Enter the new date and time.
Ex: Month: March
Date: 12th
Year: 2002
Time: 3:00 PM
If you make a mistake, use or to move the cursor
over the incorrect number, then overwrite it with a correct
one.
DATE & TIME
03-12-2002 15:00
5
FUNCTION
7
1
SET
0 3
1 2
2 0 0
2
1 5 0 0
SET
STOP

User Parameters
27
Installing Your
Machine
When you send a document, your LOGO appears on the top of the copy printed out at the other station.
The LOGO helps to identify you to someone who receives your document.
NOTE
1. Your Company Name or your name must be set as your LOGO because it is required by the
Telephone Consumer Act of 1991. (For details, see FCC NOTICE at the end of this Operating
Instructions)
Setting Your LOGO
1
SET MODE (1-6)
ENTER NO. OR
∨ ∧
2
1:USER PARAMETERS?
PRESS SET TO SELECT
3
repeatedly until display shows;
LOGO
❚
4
Enter your LOGO (max. 25 characters and digits) by using
the Character keys.
Ex:
If you make a mistake, use or to move the cursor
one space beyond the incorrect character, press
then re-enter the new character.
If more than 19 characters are entered, the left side
characters will scroll off the display.
LOGO
PANASONIC
❚
5
FUNCTION
7
1
SET
P
A N A S O N I C
CLEAR
SET
STOP

User Parameters
28
If the remote machine has a Character ID capabilities, when you are sending or receiving, your Character ID
will appear on the remote machine's display and the remote machine's Character ID will appear on your
display.
NOTE
1. The special characters of Å, Ä, Ö, Ü, Æ, è and é cannot be used for Character ID.
Setting Your Character ID
1
SET MODE (1-6)
ENTER NO. OR
∨ ∧
2
1:USER PARAMETERS?
PRESS SET TO SELECT
3
repeatedly until display shows;
CHARACTER ID
❚
4
Enter your Character ID (max. 16 characters and digits)
by using the Character keys.
Ex:
If you make a mistake, use or to move the cursor
beyond the incorrect character, press then reenter the new character.
CHARACTER ID
HEAD OFFICE
❚
5
FUNCTION
7
1
SET
H
E A D SPACE O F F I C E
CLEAR
SET
STOP
User Parameters
29
Installing Your
Machine
If the remote machine does not have a Character ID but it has an ID Number, when sending or receiving,
your ID Number will appear on the remote machine's display and their ID Number will appear on your
display.
We suggest you use your facsimile telephone number as your ID number. (max. 20 digits)
NOTE
1. You may use to enter a "+" character at the beginning of the ID number to indicate the
following digit(s) for your country code.
Ex :+1 201 555 1212 +1 for U.S.A. country code.
+81 3 111 2345 +81 for Japan country code.
2. Your Fax Telephone Number must be set as your ID Number because it is required by the
Telephone Consumer Act of 1991. (For details, see FCC NOTICE at the end of this Operating
Instructions)
Setting Your ID Number (Fax Telephone Number)
1
SET MODE (1-6)
ENTER NO. OR
∨ ∧
2
1:USER PARAMETERS?
PRESS SET TO SELECT
3
repeatedly until display shows;
ID NO.
❚
4
Enter your ID (max. 20 digits) by using the keypad and
key to enter a space between numbers.
Ex:
If you make a mistake, use or to move the cursor
one space beyond the incorrect number, press
then re-enter the new number.
ID NO.
201 555 1212
❚
5
FUNCTION
7
1
SET
SPACE
2 0 1
SPACE
5 5 5
SPACE
1 2 1 2
CLEAR
SET
STOP
30
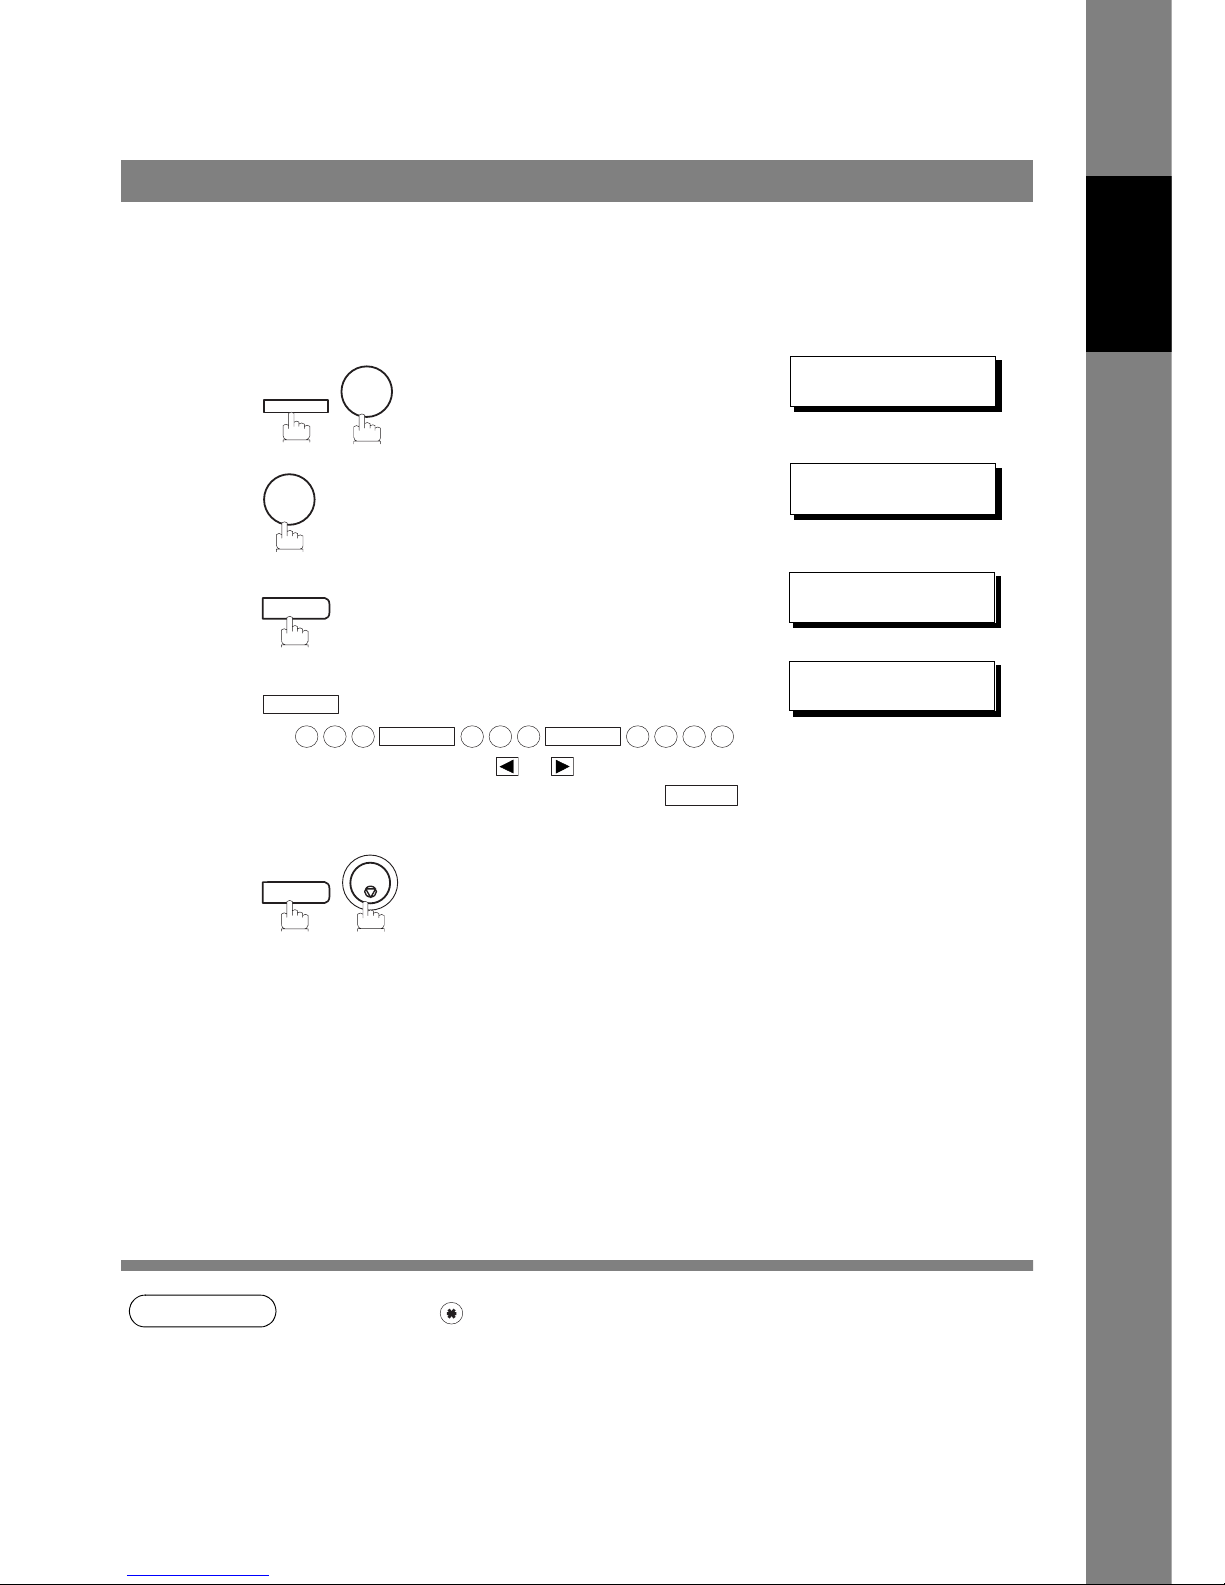
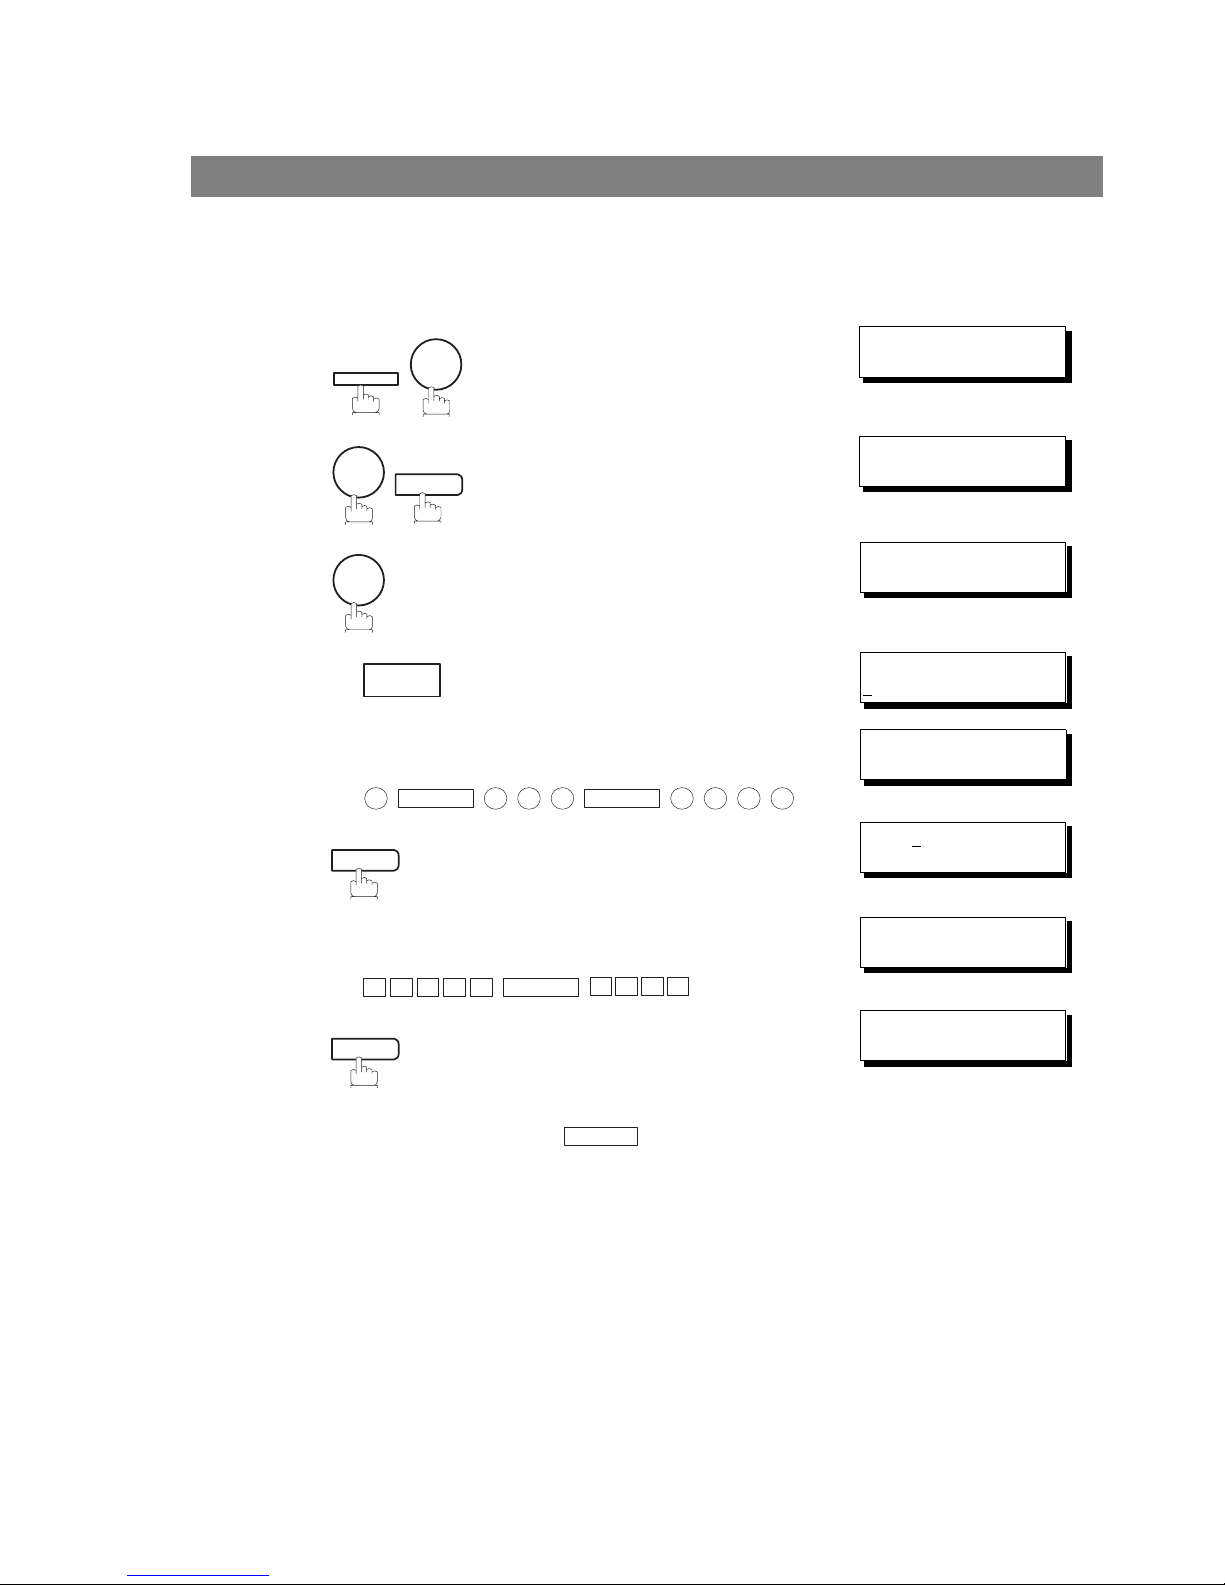
Programming Your Machine
One-Touch/Abbreviated Dialing Numbers
One-Touch and Abbreviated Dialing are two fast ways of dialing full telephone numbers. To use these
dialing methods, you must first store the telephone number using the following procedure.
Entering One-Touch/Abbreviated Dialing Numbers
To enter a One-Touch key, follow the steps below
1
SET MODE (1-6)
ENTER NO. OR
∨ ∧
2
1:ONE-TOUCH
2:ABBR NO.
3
ONE-TOUCH< >
PRESS ONE-TCH OR
∨ ∧
4
Ex:
<01>
E
NTER TEL. NO.
5
Enter the telephone number
(up to 36 digits including pauses and spaces).
Ex:
<01>
9-555 1234
❚
6
<01> ENTER NAME
9-555 1234
7
Enter the station name using character keys
(up to 15 characters).
Ex:
<01> SALES DEPT
❚
9-555 1234
8
To record another number, repeat step 4 to 8.
To return to standby, press .
ONE-TOUCH< >
PRESS ONE-TCH OR
∨ ∧
FUNCTION
7
2
SET
1
01
9
PAUSE
5 5 5
SPACE
1 2 3 4
SET
S
A L E S
SPACE
E P TD
SET
STOP
 Loading...