

Panasonic TY-TP42P30K, TY-TP65P30K, TY-TP50P30K, TY-TP60P30K INSTALLATION Manual
Touch Panel Driver Software
Installation Manual
Touch Panel
Model No.
TY-TP42P30K
TY-TP50P30K
TY-TP60P30K
TY-TP65P30K
Thank you for your purchase of a Panasonic product.
● Please read this manual and the instructions for the touch panel carefully to use the
product correctly and safely.
English

Contents
Getting Started ...................................................................................................... 3
1. Operating Environment ................................................................................... 4
2. Before Installation ........................................................................................... 4
3. Touch Panel Driver Installation ....................................................................... 5
4. Tpdrv Mouse Emulation Service Installation ................................................. 9
5. TouchPanel Setting Program ........................................................................ 13
5-1. Operation Condition Display .................................................................................. 13
5-2. Mode Settings ......................................................................................................... 14
5-3. View Settings .......................................................................................................... 17
5-4. Pen Settings ........................................................................................................... 18
5-5. Advanced Settings .................................................................................................. 19
5-6. Calibration .............................................................................................................. 19
5-7. Cursor Adjustment .................................................................................................. 20
6. Uninstallation .................................................................................................. 21
6-1. Windows XP ........................................................................................................... 21
6-2. Windows Vista ........................................................................................................ 22
7. Troubleshooting ............................................................................................. 23
2

Getting Started
Thank you for your purchase of the Touch Panel.
To use the product connecting with a Windows XP or Vista computer, the touch panel driver must
be installed.
Install the driver according to this manual.
For Windows7, the driver does not need to be installed.
The touch panel driver enables the output data from the touch panel converted to the protocol
compatible with the Microsoft serial mouse to provide the application program a user interface
equivalent to a mouse. Therefore the existing application can be operated with the touch panel and
touch panel application developments can be carried out using a mouse.
The operation settings for the touch panel can be changed using the setting program.
This manual is intended to the users familiar with Microsoft Windows operations.
For details on the Windows operations, please refer to your Windows manual etc.
Note
1. Any part or all of this manual or driver software may not be copied without the prior consent of
Panasonic Corporation.
2. The contents of this manual or driver software may be changed for improvement without
notice.
3. Panasonic Corporation do not take any responsibilities for any failure of device, data
corruption, or damage caused by these failures due to improper use of this driver software by
the customer or a third party unless the liability is imposed by law.
4. The company and product names mentioned in this manual are the trademarks or registered
trademarks of their respective companies.
5. Every possible care has been taken to prepare this manual however if you fi nd any mistake or
omission, please contact the address stated at the end of this document.
6. We will exchange any manual with the pages out of order or missing.
Microsoft, Windows XP, and Windows Vista are registered trademarks of Microsoft Corporation
in the USA and other countries.
Other company and product names mentioned in this manual are the trademarks or registered
trademarks of their respective owners.
™ and ® marks are not indicated in this manual.
3

1. Operating Environment
1) Computer: IBM PC/AT compatible with USB port(s) and CD-ROM drive. A model with any of
the following OS.
OS
2) This product and a pointing device such as a PS/2 mouse which does not use a communication
port can be used concurrently without interfering each other.
3) A USB port must be operating successfully prior to the driver installation.
4) Other applications which use a communication port may not be used concurrently with this
product.
5) Log in to your Windows computer as an "Administrator" at installation or uninstallation.
6) The display or details of the screen may be different depending on the OS version or settings.
: Microsoft Windows XP 32 bit or 64bit version (SP2 or later), Windows Vista 32 bit
or 64 bit version
2. Before Installation
Installation procedure differs depending on the OS. Please follow the procedures below.
1) Install the touch panel driver.
2) Connect the USB cable for the touch panel to the computer.
Read the Touch Panel Instruction Manual for details on how to connect the cable.
3) Install the Tpdrv Mouse Emulation Service if using Windows Vista.
4) When the computer is restarted, the driver software starts up and the calibration screen
appears.
After the calibration, the touch panel is ready for use.
5) If any older version of the driver has been installed, uninstall the old one before installing the
newer version driver. Refer to "6. Uninstallation" for details on uninstallation.
4
3. Touch Panel Driver Installation
The dedicated installer is supplied for the touch panel driver.
The installation starts when "setup.exe" under the English folder of the supplied CD is started.
Note: If any older version of the driver is installed, uninstall the old one before installing the newer
version driver. Refer to "6. Uninstallation" for details on uninstallation.
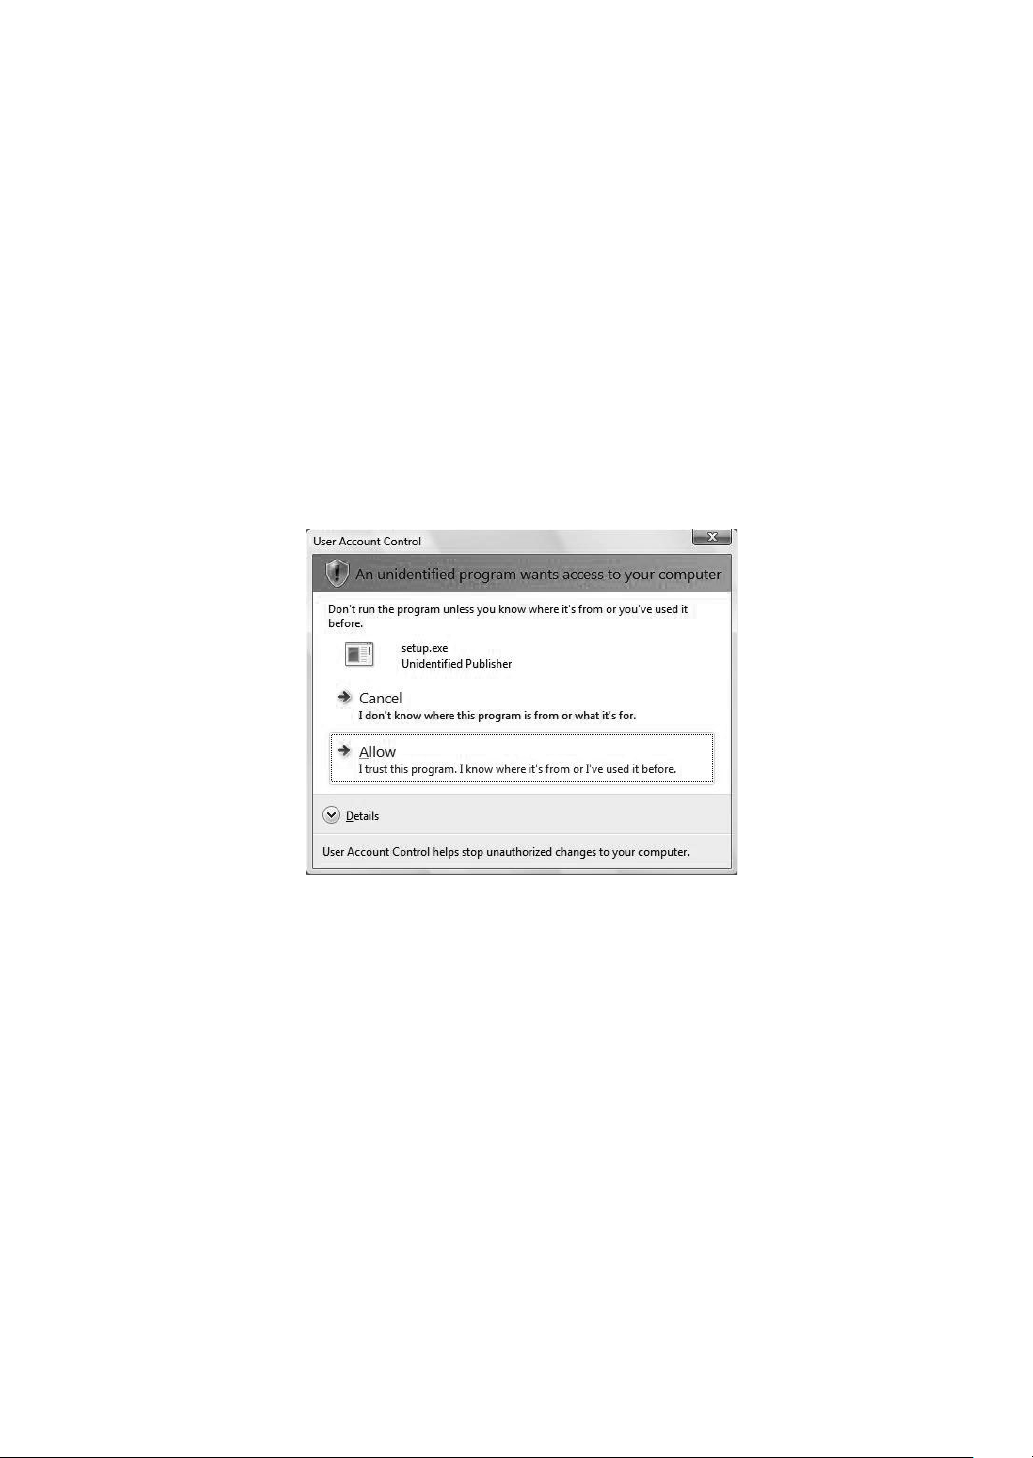
To install on a Windows Vista computer, the User Account Control screen appears fi rst.
Click [Allow].
5
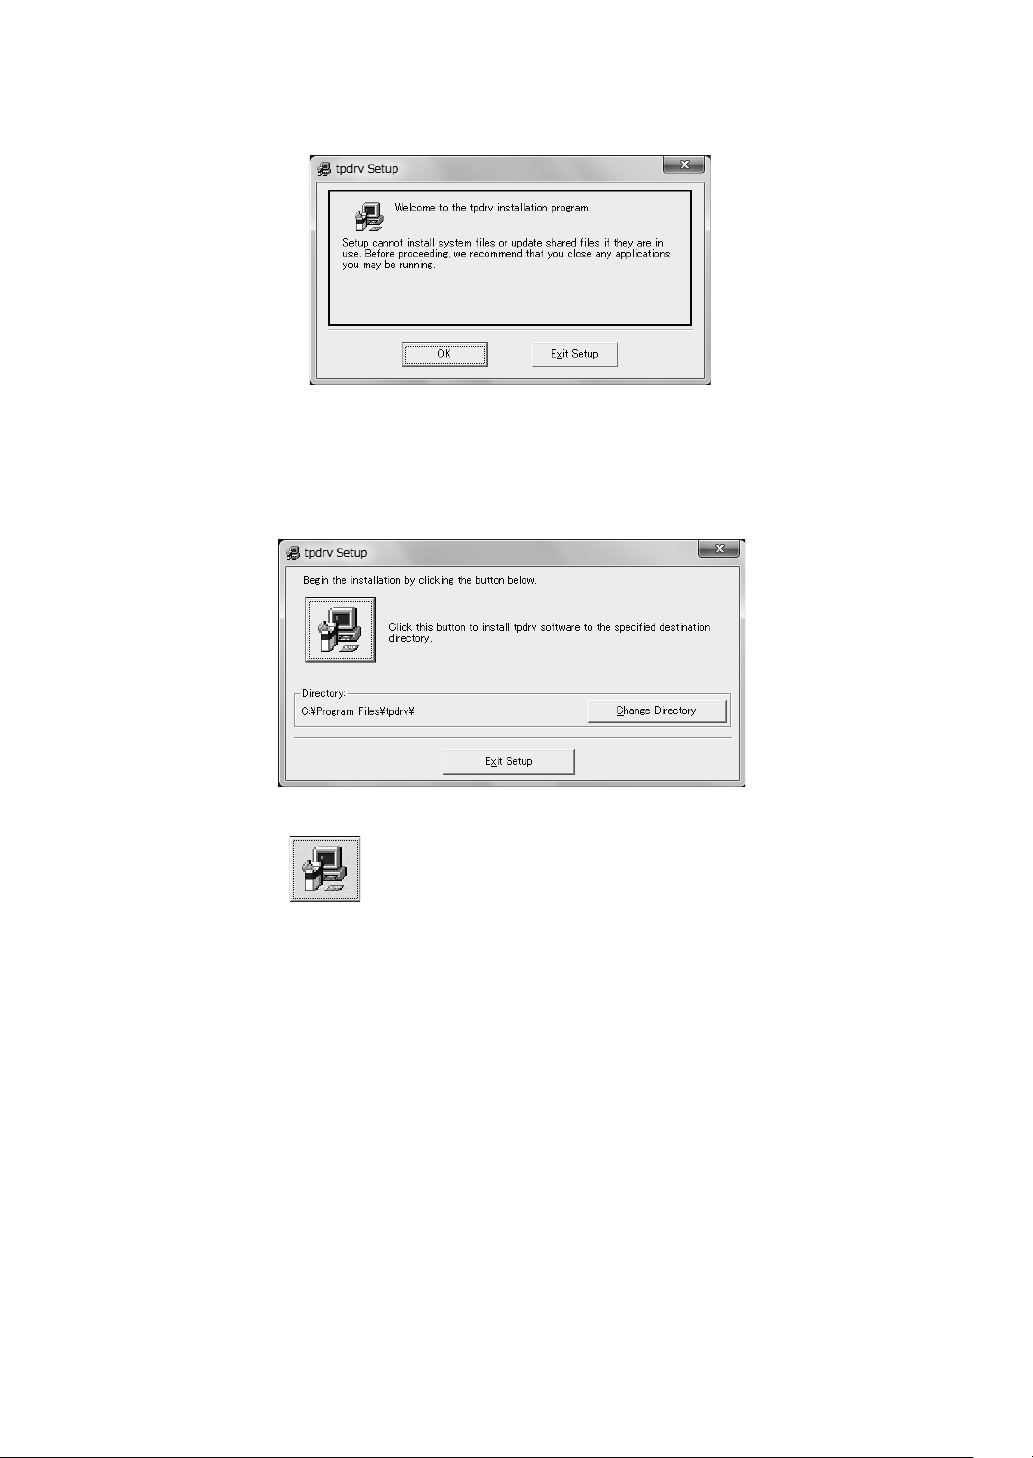
Below is the screen to start up the setup program. Click the [OK] button.
Below is the screen to select the setup directory. Do not change the directory.
6
Click this button.
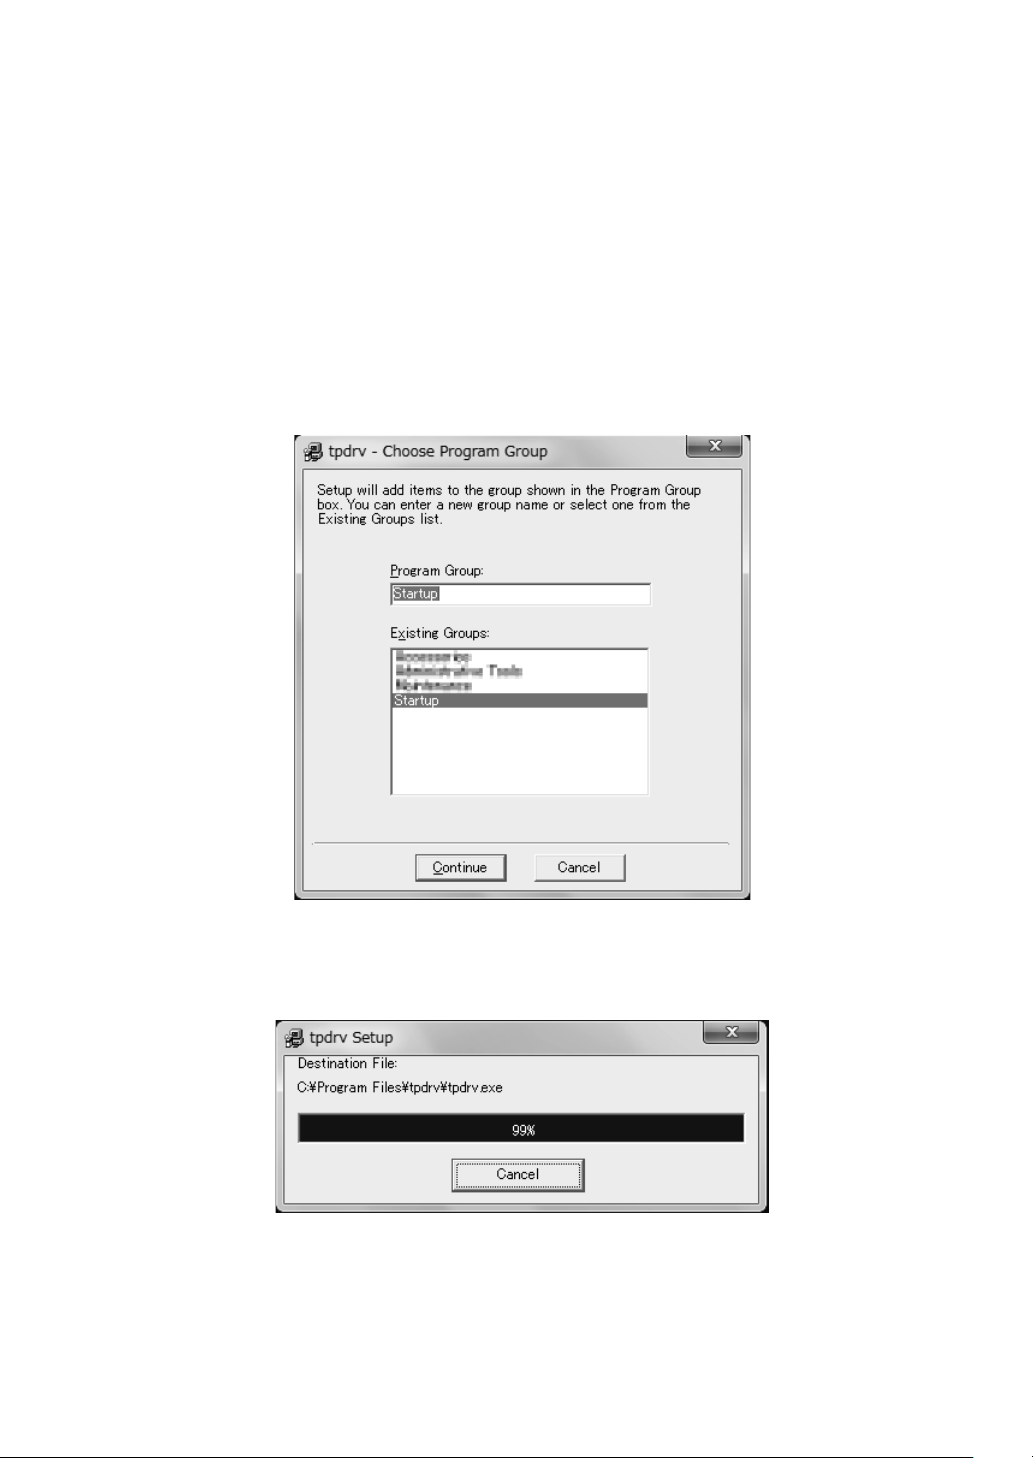
Below is the screen to select the program group. By default the program will be registered as a
startup program.
For both Windows XP and Windows Vista, the program is registered to "Startup".
This setting enables the driver software starts up automatically when the computer is started so
that the touch panel can be used.
Please note that if the program is registered in other than the Startup group, it will not start up
automatically.
Click [Continue].
Required fi les will be set up.
7

Installation is completed. Click the [OK] button to complete the installation.
If using Windows XP, restart the computer. The driver software starts the operation after the
computer is restarted.
For Windows Vista, do not restart the computer but perform the installation procedures explained
in "4. Tpdrv Mouse Emulation Service".
When the touch panel driver is used for the first time, the calibration screen appears after the
driver software is started.
After the calibration, the touch panel is ready for use.
Refer to "5-6. Calibration" for more details about calibration.
8
 Loading...