

Page 1
Operating
Instructions
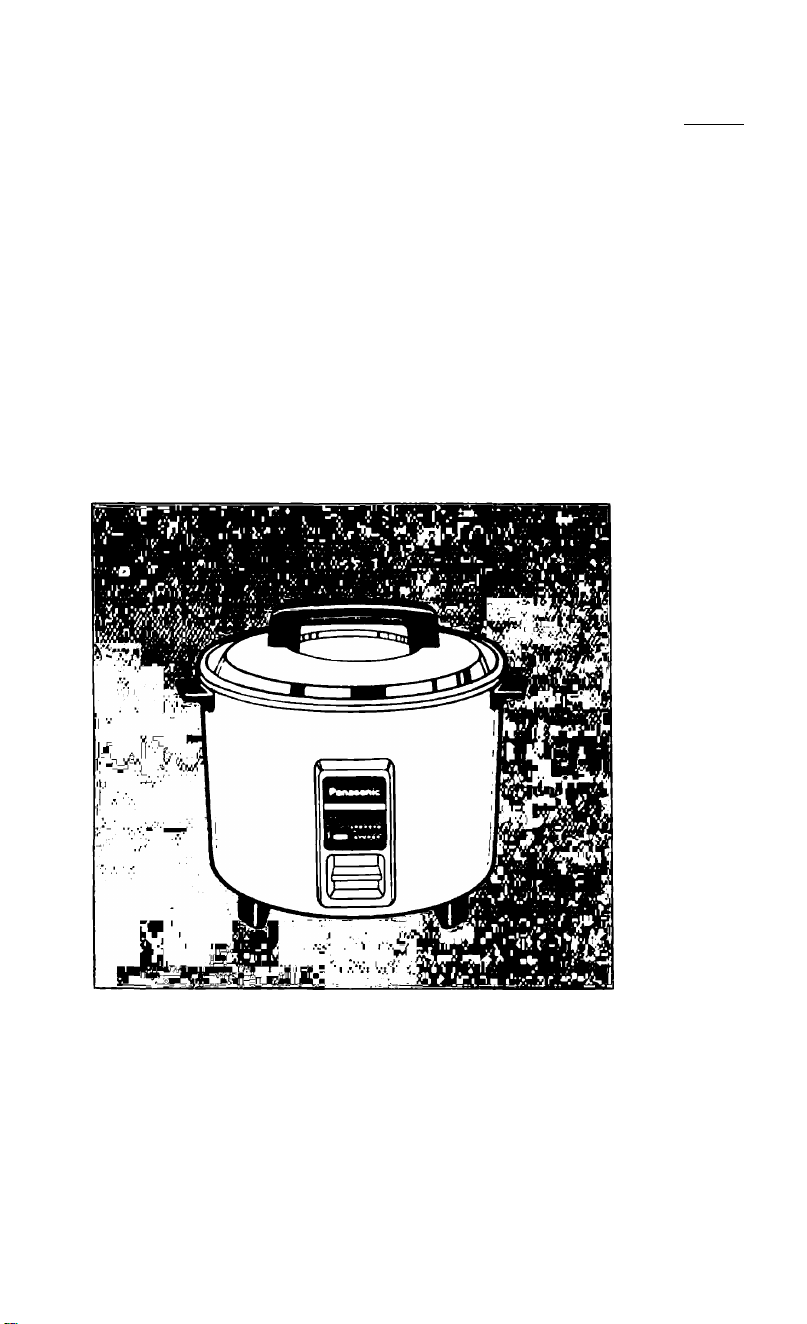
Rice Cooker/Steamer
SR-W18FXP
(PCP^
Panasonic.
Before using this cooker, please read these instructions completely. ENGLISH P.3 - 4
Antes de usar la marmita, lea estas instrucciones hasta el final. ESPAÑOL P.5 - 6
Page 2

IMPORTANT SAFEGUARDS
When using electrical appliances, basic safety precautions should
always be followed including the following
1 Read all instructions
2 Do not touch hot surfaces Use handles or knobs
3 To protect against electrical shock, do not immerse cord, plugs, and Rice
Cooker/Steamer, except lid and pan, in water or other liquid
4 Close supervision is necessary when any appliance is used by or near
children
5 Unplug from outlet when not in use and before cleaning Allow to cool
before putting on or taking off parts
6 Do not operate any appliance with a damaged cord or plug or after
the appliance malfunctions or has been damaged in any manner
Return appliance to the nearest authorized service facility for
examination, repair, or adjustment
7 The use of accessory attachments not recommended by the appliance
manufacturer may cause injuries
8 Do not use outdoors
9 Do not let cord hang over edge of table or counter, or touch hot surfaces
10 Do not place on or near a hot gas or electric burner, or in a heated oven
11 Extreme caution must be used when moving an appliance containing
hot oil or other hot liquids
12, Plug cord into the wall outlet To disconnect, turn any control to "off",
then remove plug from wall outlet
13 Do not use appliance for other than intended use
14. SAVE THESE INSTRUCTIONS
This product IS intended for household use
------------------
A A short power supply cord set is to be provided to reduce the risk resulting
from becoming entangled in or tripping over a longer cord
B Longer cord set or extension cords are available and may be used if care is
exercised in their use
C If a longer cord set or extension cord is used,
(1) the marked electrical rating of the cord set or extension cord should be at
least as great as the electrical rating of the appliance,
(2) the longer cord should be arranged so that it will not drape over the
countertop or tabletop where it can be pulled on by children or tripped
over unintentionally
This appliance has a polarized plug (one blade is wider than the other)
As a safety feature, this plug will fit in a polarized outlet only one way
If the plug does not fit fully in the outlet, reverse the plug
If It still does not fit, contact a qualified electrician
Do not attempt to defeat this safety feature
NOTE
-------------------
Page 3
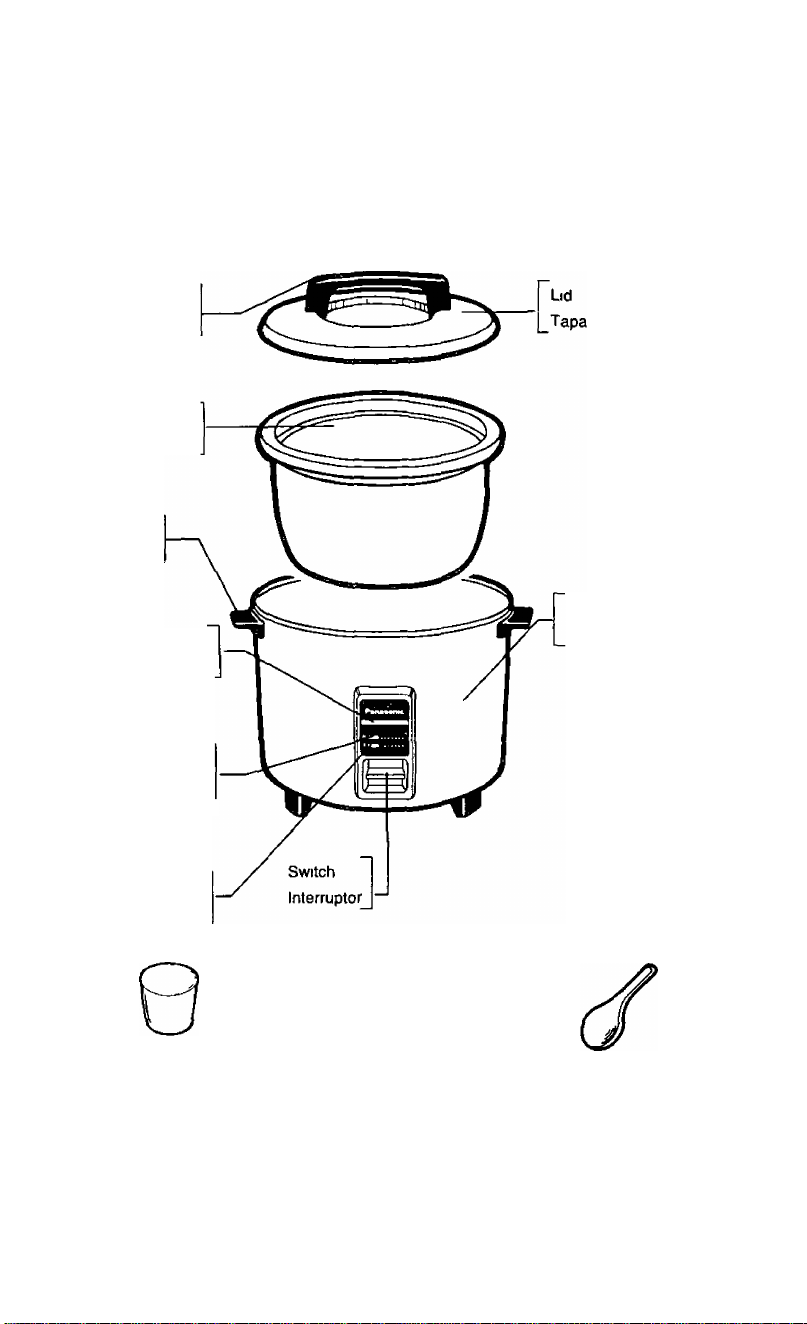
PARTS IDENTIFICATION
IDENTIFICACION DE LAS PARTES
Lid handle
Asa de la tapa
Pan
Recipiente
Handle
Manija
Power indicator lamp
Luz indicadora de fuerza
Body
Cuerpo de la marmita
Rice Cooking indicator
Indicator de cocción
del arroz _
Keep Warm indicator
Indicador en caliente
Measuring cup
(approx 6floz/180ml)
Taza medidora
(aprox 6tloz/180m))
Steaming plate
Placa de vapor
Rice scoop
Paleta para
sacar el arroz
Page 4

HOW то USE
Measure nee with the provided measuring cup One cup of uncooked rice makes
approximately 3 cups of cooked nee Rinse nee in a separate bowl until water becomes
relatively clear
2 Place rinsed rice in the pan Add water according to the following standard
eg when using 19 qts (i 8L)capacity rice cooker
Using the markings on the pan
e g To cook 6 cups of rice, nnse the rice,
put It into the pan and then and water
to LEVEL INDICATOR 6
LEVEL INDICATOR
MAX LEVEL
Do not cook more
than this amount
(eg 1 8L Type)
Adjust water quantity to your taste
0 Set the pan in the cooker To place correctly on the heater, turn
the pan gently to right and left Cover with the lid and let rice
soak approximately 30 minutes
Using the measunng cup
Raw nee by cup
10 cups
8 cups
6 cups 6-6 >/4 cups
4 cups
2 cups
Plug in
The power indicator lamp tights
Do not plug in until ready to cook
Othenwise, nee may be ruined
О
Water to be added
10*10‘/4 cups
8-8V4 cups
4-4‘/4 cups
2-274 cups
If the pan IS not in the cooker, cooking will not begin
0 Press the switch The “Rice^
Cooking” indicator (Orange)^
tells you cooking has
started j
0 When rice is done, the switch will pop up
The “Keep Warm” i nd icator changes to orange
to signal “Keep Warm” function is working
7 After the switch pops up, leave the lid closed for at least 15 minutes to steam rice
3 Unplug after use Grasp plug, not the cord
A
Page 5

CAUTION
»Make sure that the pan is sitting properly in
the cooker
If the pan IS not positioned correctly, the
switch may click off too soon or the heater
may be damaged
►Do not leave the steaming plate between
the heater and the pan
Your rice cooker has been designed
with a thermal fuse which may shut the
heater off in these cases
•Be sure the switch is off before removing
the pan
Replace all damaged parts immediately
2
Do not leave the lid down-side up in places
3
subjected to direct sunlight
If direct light ts subjected to the concave side of
the lid, It may focus on furniture, walls, etc, and
damages may result
Do not tilt the rice-cooker on its edge or place it upside down with its power supply plug
connected, as this may cause damage
__________
Foreign matter
The pan should
not be caught on
the ledge above
the heater
^
steaming plate
WRONG
Heater
The pan should
not be caught on
the edge ot the
body
KEEP WARM FUNCTION
•After cooking is completed, "Keep Warm” automatically functions until the cord is unplugged
•Always unplug before taking the pan out of the cooker
•Do not switch to “Rice Cooking” again during “Ifeep Warm” function
• Do not keep nee warm for more than 5 hours
•Do not use “Keep Warm” function to reheat cold rice
HOW TO USE STEAMING PLATE
•Place the steaming plate in the pan Pour water below the steaming plate to steam food
Cover with the lid and switch on
•To reheat cold rice, use this steaming function only
HOW TO CLEAN
1 Unplug before cleaning
2 5?oak the pan and the steaming plate in hot water to loosen cooked-on rice
3 Do not immerse ^he body in water or any other liquid Wipe with a damp cloth
4 Do not use abrasive cleaners or steel wool Clean with non-metal brush or sponge
Page 6

COMO USAR
Medir el arroz con la taza medidora incluida Una taza de arroz crudo proporciona
1
aproximadamente 3 tazas de arroz cocido Lavar el arroz en otro recipiente hasta que el
agua se vuelva relativamente clara
Introduzca el arroz lavado en el recipiente Añada agua de acuerdo con tas normas
2
siguientes
ej cuando emplee una olla para cocer arroz con una capacidad de 1,9 qts (i 8L)
Empleo de las marcas del recipiente Empleo de la taza medidora
P e|, Para cocinar 6 tazas de arroz, lave éste
en el recipiente y añada agua hasta “6"
de la INDICACIÓN DE NIVEL DE AGUA
INDICADOR DE NIVEL
NIVEL I^AXIMO No
cocer mas de esta cantidad
(ei Tipo de 1 8L)
Ajuste la cantidad de agua a su gusto
Introducir el recipiente en la marmita Para asentarlo correctamente sobre
el hornillo, hacer girar suavemente el recipiente a derecha e izquierda ^ '
Poner la tapa Dejar que el arroz se humedezca unos 30 minutos
Enchufar al suministro de fuerza
Se prende la luz del indicador
No conectar hasta que el arroz este
listo para cocer De otra manera puede
deteriorarse
Arroz por tazas
10 tazas
8 tazas 8-8‘/4 tazas
6 tazas
4 tazas
2 tazas
Agua añadida
IO-IOV4 tazas
6-6‘/4 tazas
4-4'/4 tazas
2-2‘/4 tazas
Recipiente
Si el recipiente on está dentro de la marmita, no comenzará la cocción
C Presionar hacia abajo la
palanca del interruptor ^
El indicador naranja
DE COCCION DEL ARROZ I
muestra que comenzó a ^
cocerse
C Cuando se haya cocido el arroz, el interruptor
se moverá hacia arriba El indicador EN
CALIENTE cambia a color naranja para
indicar ta función EN CALIENTE
Después que el interruptor se mueva hacia arriba, dejar la marmita cubierta durante
unos 15 minutos para que el arroz se sature de vapor
0 Desconectar el cable después de usar la marmita Tirar del enchufe, no del cable
Page 7

PRECAUCIONES
»Asegurarse de que el recipiente está bien
asentado sobre el hornillo eléctrico de la
marmita.
Si el recipiente no está bien asentado, el
interruptor puede subir antes de lo debido o
se quede dañar el calentador u hornillo
eléctrico.
el recipiente está
atascado en el
• No ponga la placa de vapor entre el
hornillo y el recipiente.
Su marmita para arroz se ha disenñado
con un fusible termal para que se
desactive el hornillo en casos semejantes.
• S’assurer, avant d’enlever la casserole, que
l’interrupteur est coupé.
Recambiar inmediatamente las partes dañadas.
2
No deje el lado inferior de la tapa hacia arriba en
3
lugares sujetos a la luz directa del sol.
Si la luz directa cae sobre el lado cóncavo de la
tapa, puede proyectarse sobre los muebles,
paredes, etc., y puede resultar en daños.
Ne pas incliner l’auto-cuiseur à riz sur sa bordure ni le placer à l'envers quand sa fiche
4
d’alimentation est branchée car cela pourrait l’endommager.
borde sobre el
hornillo.
Placa
de vapor
Hornillo
El recipiente está
apoyado en el la
boca del cuerpo
de la marmita.
FUNCION EN CALIENTE
• Después de completar la cocción del arroz, la función EN CALIENTE para mantenerlo en este
estado funciona automáticamente hasta que se desenchufa el aparato.
• Desenchufar siempre antes de sacar el recipiente fuera de la marmita.
• No cambiar a COCCION DEL ARROZ durante la función de EN CALIENTE.
•No mantener el arroz en caliente por más de 5 horas.
• No usar la función EN CALIENTE para calentar el arroz frío.
COMO USAR LA PLACA DE VAPOR
• Poner la placa de vapor en el fondo del recipiente. Verter agua en la parte inferior para
calentar el alimento al vapor. Tapar la marmita y aplicar el interruptor.
• Para calentar el arroz frío, usar sólo la placa de vapor.
COMO LIMPIAR LA MARMITA
1. Desenchufar antes de hacer la limpieza.
2. Enjuagar el recipiente y la placa de vapor con agua caliente para que se desprenda el arroz
adherido.
3. No sumergir la marmita en el agua. Fregarla con un paño húmedo.
4. No usar detergentes abrasivos o estropajos metálicos. Limpiar con un cepillo no metálico o
con una esponja.
6
Page 8

SPECIFICATIONS ESPECIFICACIONES
Model No.
N* de
modelo
SR-W18FXP
Power
supply
Alimen
tación
120V AC
Power
consumed
Consumo
600W
Capacity
Capacidad
0.38- 1.9qts.
(0.36- 1.8L)
Dimensions
(H X W X D)
Dimensions
(Al X An X Prf)
10im" X 12i/4" X 10m’
(26 X 31 X 27cm)
Weight
Peso
4.81 bs.
(2.2kg)
Accessories
Accesorios
Measuring
cup
(approx.
6fl.oz./180ml)
Taza
medidora
(aprox. 6fl.oz./
180ml)
Steaming Plate
Place de vapor
Rice Scoop
Paleta para
sacar el
arroz
PANASONIC CONSUMER ELECTRONICS COMPANY,
DIVISION OF MATSUSHITA ELECTRIC CORPORATION OF AMERICA
One Panasonic Way, Secaucus,
New Jersey 07094
QYOOA139
Printed in India
 Loading...