

Page 1
Operating Instructions
Instrucciones de funcionamiento
Bruksanvisning
Betjeningsvejledning
Käyttöohjeet
Instrukcja obsługi
Návod k obsluze
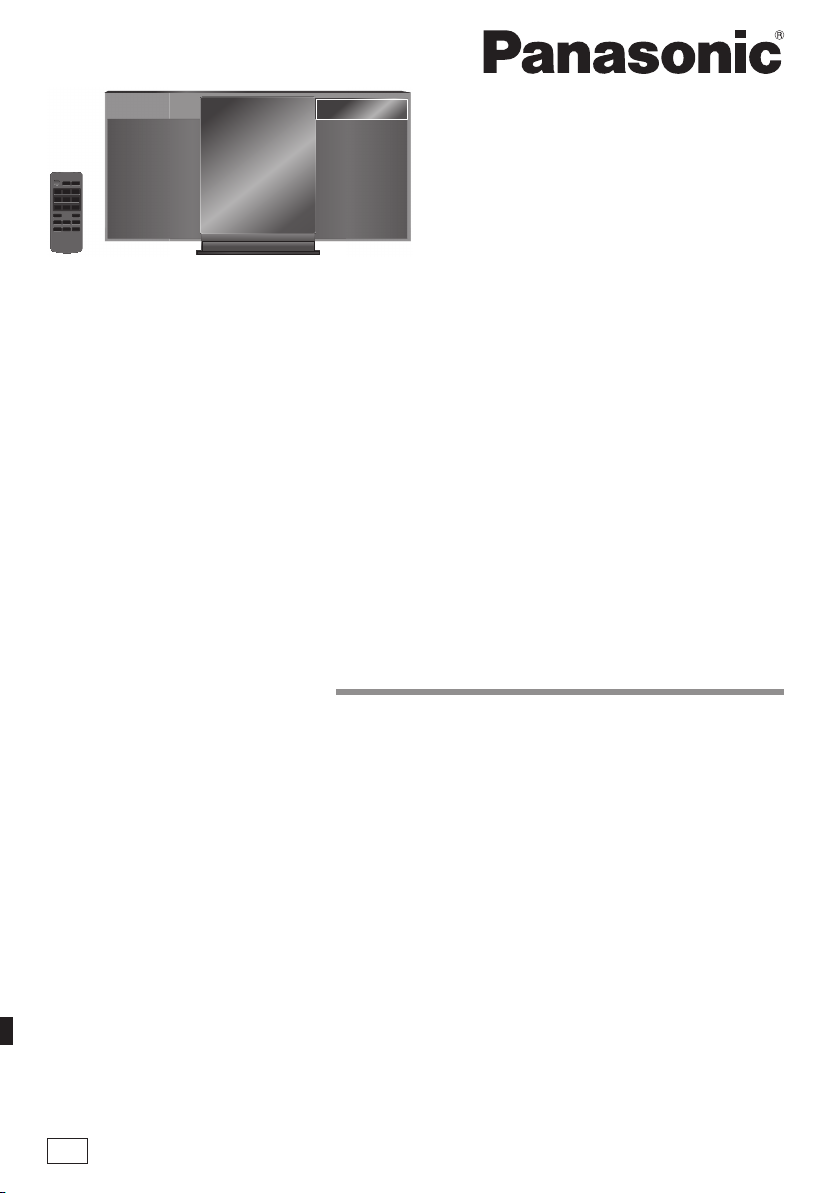
Compact Stereo System
Sistema estéreo compacto
Kompakt stereosystem
Kompakt stereo-system
Kompakti stereojärjestelmä
Kompaktowy zestaw stereo
Kompaktní stereo systém
Thank you for purchasing this product.
For optimum performance and safety, please read these
instructions carefully.
Please keep this manual for future reference.
Muchísimas gracias por haber adquirido este aparato.
Lea con atención estas instrucciones para obtener las
máximas prestaciones y seguridad.
Guarde este manual para su consulta en el futuro.
Tack för valet av denna apparat.
Läs igenom bruksanvisningen noga för bästa resultat och
för säkerhets skull.
Spara denna bruksanvisning.
Tak fordi du har valgt dette produkt.
Læs venligst denne betjeningsvejledning omhyggeligt,
således at optimal ydelse og sikkerhed opnås.
Gem vejledningen til senere brug.
EC
Model No. SC-HC17
Kiitos, että hankit tämän tuotteen.
Lue nämä ohjeet huolellisesti parhaan suorituskyvyn ja
turvallisuuden takaamiseksi.
Säilytä ohje tulevaa tarvetta varten.
Dziękujemy za zakupienie tego produktu.
Proszę dokładnie zapoznać się z tą instrukcją obsługi,
aby jak najlepiej wykorzystać to urządzenie i zapewnić
jego bezpieczne użytkowanie.
Prosimy o zachowanie niniejszej instrukcji obsługi.
Niniejsza instrukcja została opracowana na podstawie
oryginalnej publikacji firmy Panasonic Corporation.
Děkujeme za zakoupení tohoto výrobku.
Pro dosažení optimálního výkonu a z bezpečnostních
důvodu si pečlivě přečtěte tyto pokyny.
Uschovejte si prosím tento návod k obsluze.
RQT9678-1E
Page 2
Do the procedures with the remote control. You can also
use the buttons on the main unit if they are the same.
Your system and the illustrations can look differently.
ENGLISHENGLISH
Safety precautions
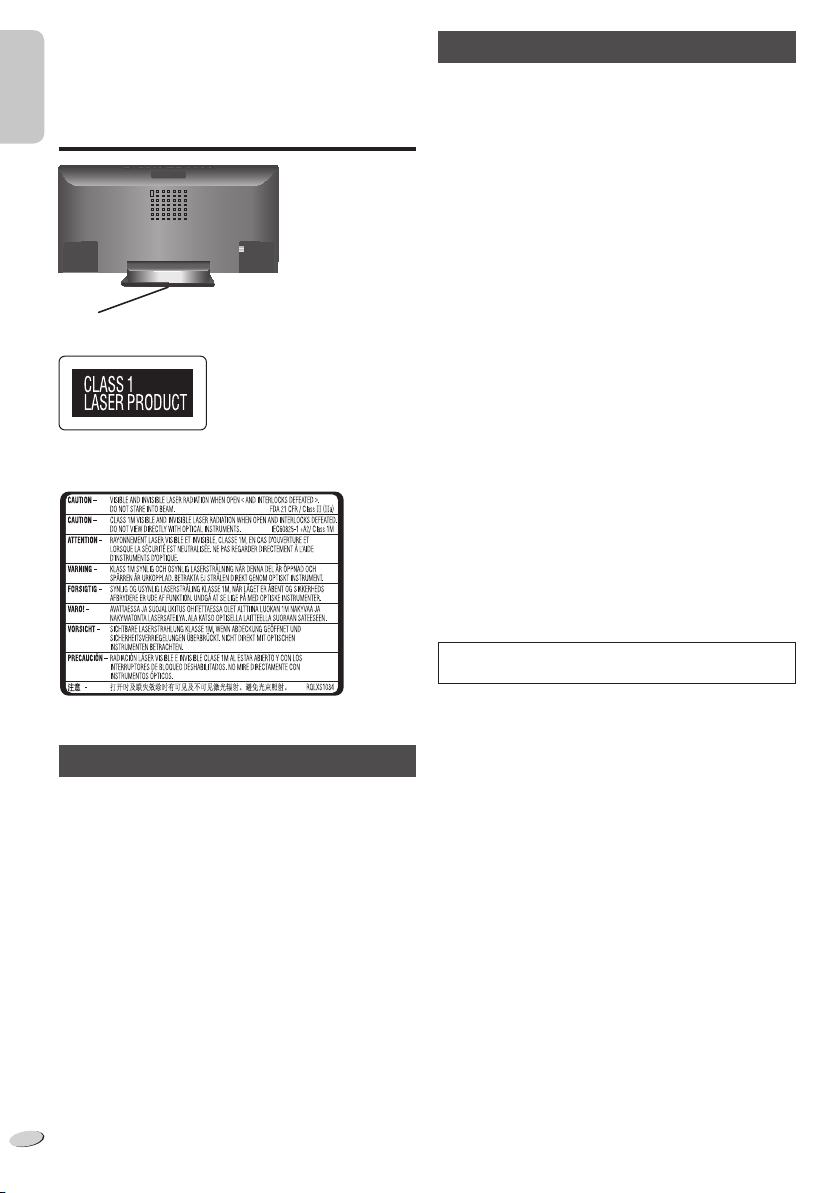
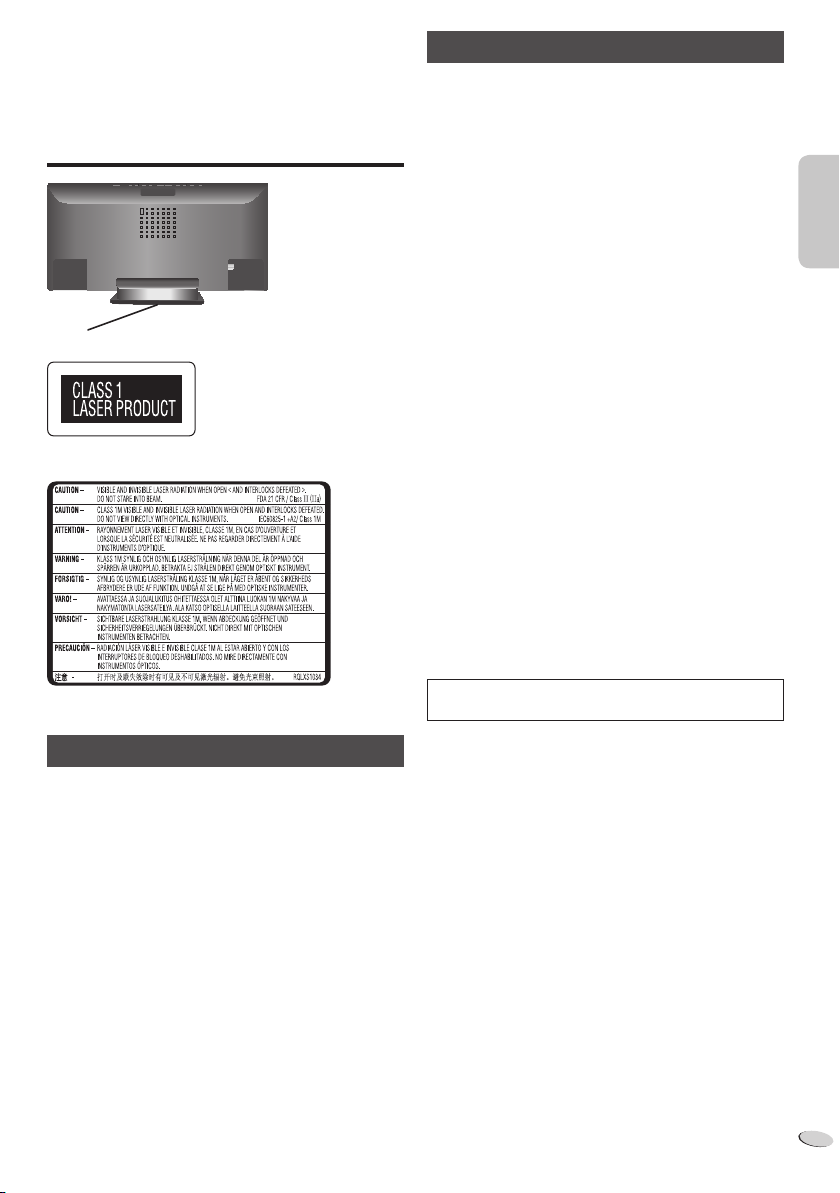
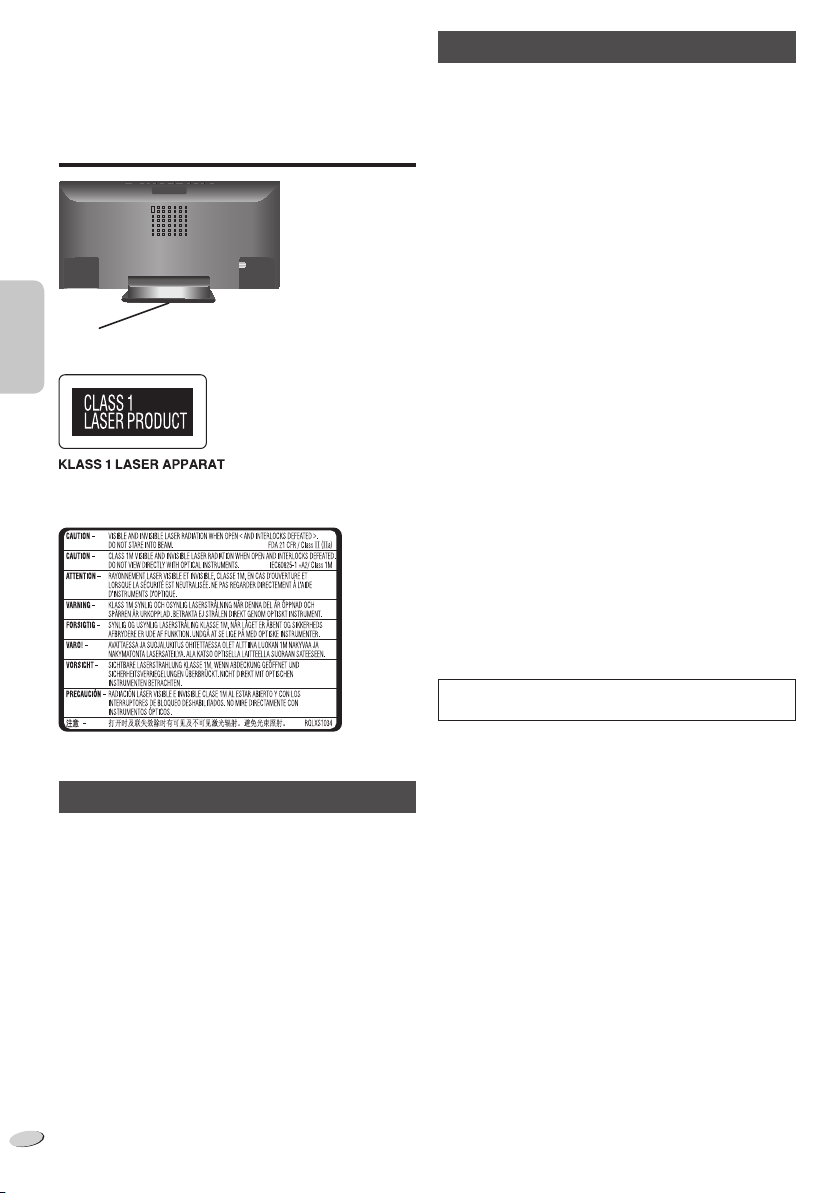
Bottom of product
Produktets underside
Inside of product
Produktets innside
CAUTION!
Unit
• To reduce the risk of fire, electric shock or product
damage,
– Do not install or place this unit in a bookcase, built-in
cabinet or in another confined space. Ensure this unit is
well ventilated.
– Do not obstruct this unit’s ventilation openings with
newspapers, tablecloths, curtains, and similar items.
– Do not place sources of naked flames, such as lighted
candles, on this unit.
• This unit is intended for use in moderate climates.
• Install this unit so that the AC mains lead can be
unplugged from the socket outlet immediately if any
problem occurs.
• This unit may receive radio interference caused by mobile
telephones during use. If such interference occurs, please
increase separation between this unit and the mobile
telephone.
• This unit utilizes a laser. Use of controls or adjustments
or performance of procedures other than those specified
herein may result in hazardous radiation exposure.
Battery
• Danger of explosion if battery is incorrectly replaced.
Replace only with the type recommended by the
manufacturer.
• When disposing the batteries, please contact your local
authorities or dealer and ask for the correct method of
disposal.
• Do not heat or expose to flame.
• Do not leave the battery(ies) in a car exposed to direct
sunlight for a long period of time with doors and windows
closed.
WARNING!
Unit
• To reduce the risk of fire, electric shock or product
damage,
– Do not expose this unit to rain, moisture, dripping or
splashing.
– Do not place objects filled with liquids, such as vases,
on this unit.
– Use only the recommended accessories.
– Do not remove covers.
– Do not repair this unit by yourself. Refer servicing to
qualified service personnel.
Battery
• Risk of fire, explosion and burns. Do not recharge,
disassemble, heat above 60°C or incinerate.
• Keep the Button-Type battery out of the reach of children.
Never put Button-Type battery in mouth. If swallowed call
your doctor.
RQT9678
2
2
Product Identification Marking is located on the bottom
of the unit.
Page 3
ENGLISH
NORSK
Table of contents
ADVARSEL!
• For å redusere faren for brann, elektrisk støt eller skade
på apparatet:
– Dette apparatet må ikke utsettes for regn, fuktighet,
drypp eller sprut.
– Ikke plasser objekter som er fylt med væske, som vaser,
på apparatet.
– Bruk kun anbefalt tilbehør.
– Fjern ikke deksler.
– Dette apparatet må ikke repareres på egen hånd.
Overlat servicearbeider til kvalifisert servicepersonell.
FORSIKTIG!
• For å redusere faren for brann, elektrisk støt eller skade
på apparatet:
– Ikke plasser apparatet i en bokhylle, et innebygget
kabinett eller et annet lukket sted. Pass på at apparatet
er godt ventilert.
– Apparatets ventilasjonsåpninger må ikke dekkes til med
aviser, duker, gardiner eller lignende.
– Plasser ikke åpen ild, slik som levende lys, oppå
apparatet.
• Dette apparatet er beregnet til bruk under moderate
klimaforhold.
• Strømuttaket må befinne seg i nærheten slik at den
lett kan kobles fra uttaket umiddelbart om det oppstår
problemer.
• Dette apparatet anvender en laser. Betjening av kontroller,
justeringer eller andre inngrep enn de som er beskrevet i
denne bruksanvisning, kan føre til farlig bestråling.
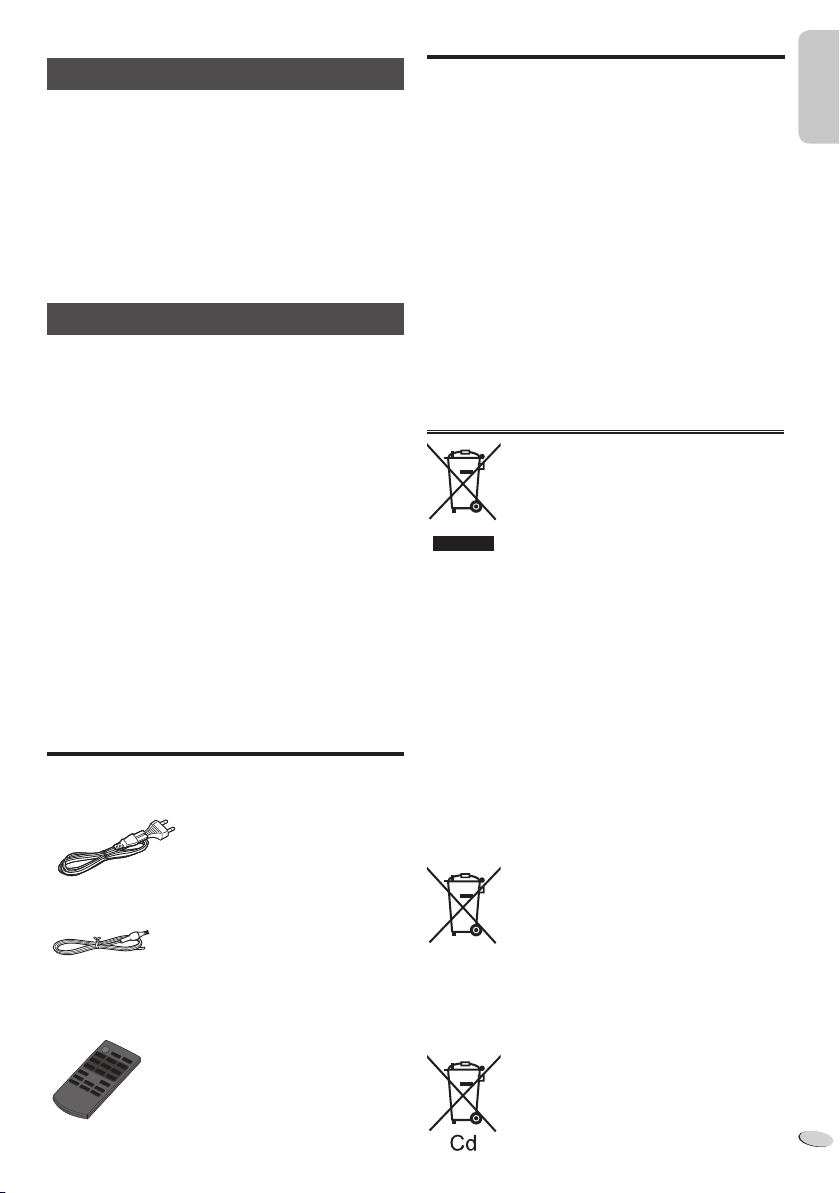
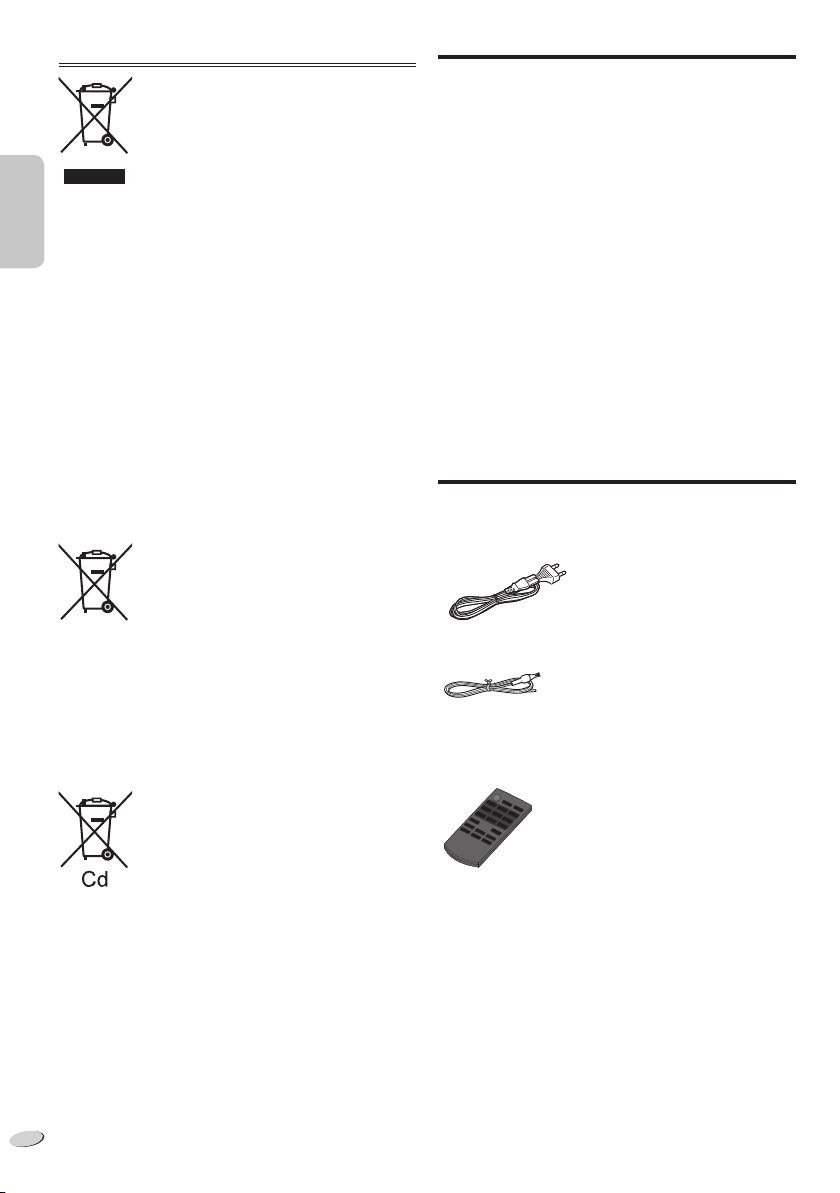
Supplied accessories
Check and identify the supplied accessories.
1 x AC mains lead
1 x FM indoor antenna
1 x Remote control
(with a battery)
(N2QAYC000060)
Safety precautions ........................................2
Supplied accessories ....................................3
Overview of controls .....................................4
Getting started ...............................................5
Disc, USB .......................................................5
Radio ...............................................................7
Sound effects .................................................7
Clock and timers............................................8
Troubleshooting ............................................8
Maintenance ...................................................9
Specifications ..............................................10
Information for Users on Collection and Disposal of
Old Equipment and used Batteries
These symbols on the products, packaging,
and/or accompanying documents mean that
used electrical and electronic products and
batteries should not be mixed with general
household waste.
For proper treatment, recovery and recycling
of old products and used batteries, please
take them to applicable collection points, in
accordance with your national legislation and
the Directives 2002/96/EC and 2006/66/EC.
By disposing of these products and batteries
correctly, you will help to save valuable
resources and prevent any potential
negative effects on human health and the
environment which could otherwise arise from
inappropriate waste handling.
For more information about collection and
recycling of old products and batteries, please
contact your local municipality, your waste
disposal service or the point of sale where
you purchased the items.
Penalties may be applicable for incorrect
disposal of this waste, in accordance with
national legislation.
For business users in the European Union
If you wish to discard electrical and electronic
equipment, please contact your dealer or
supplier for further information.
[Information on Disposal in other
Countries outside the European Union]
These symbols are only valid in the European
Union. If you wish to discard these items,
please contact your local authorities or dealer
and ask for the correct method of disposal.
Note for the battery symbol (bottom two
symbol examples):
This symbol might be used in combination
with a chemical symbol. In this case it
complies with the requirement set by the
Directive for the chemical involved.
ENGLISH
RQT9678
3
3
Page 4
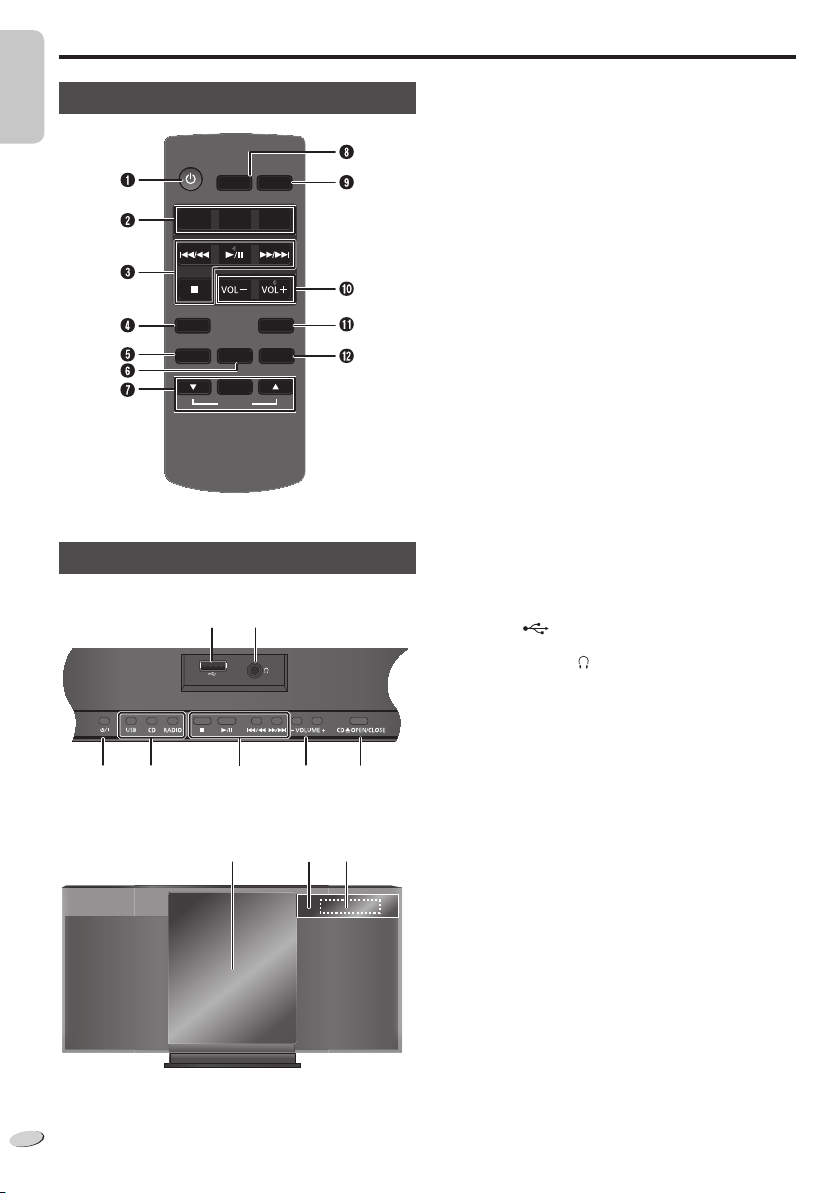
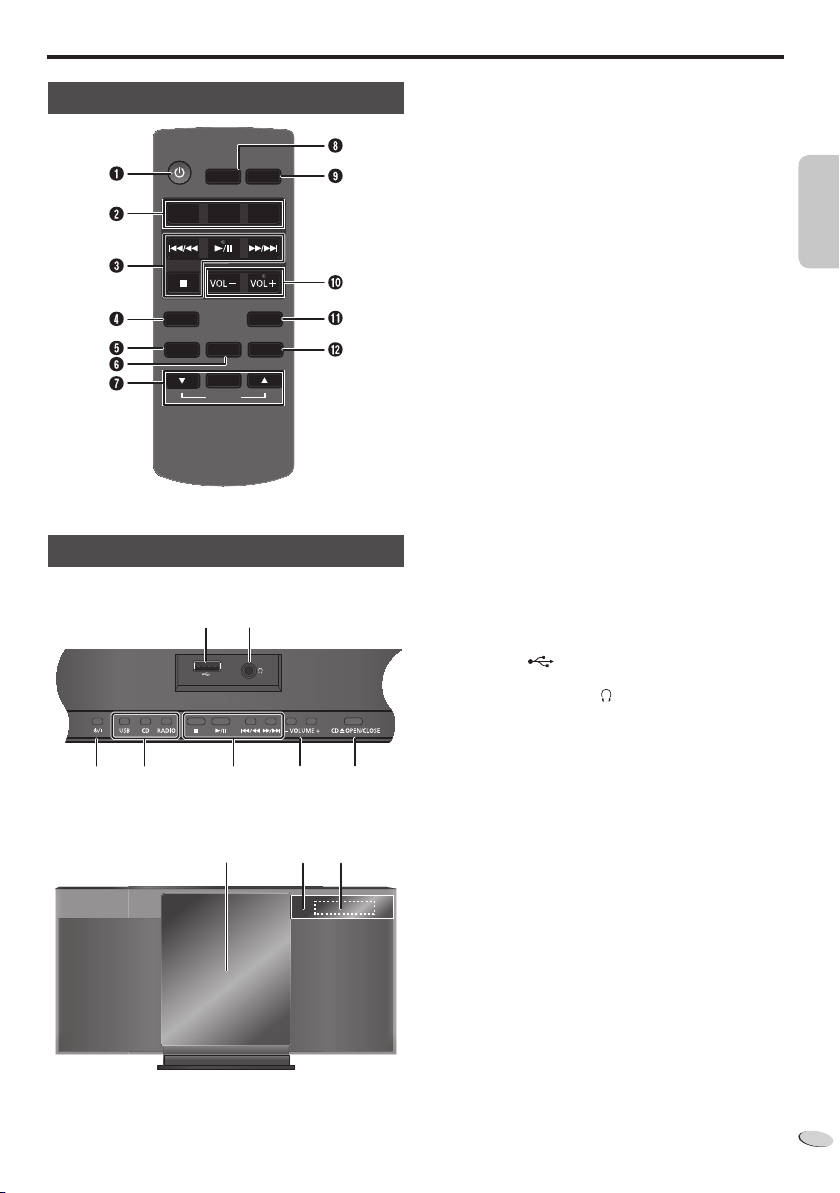
Overview of controls
Remote control
ENGLISHENGLISH
Main unit
Top view
AB OJC
Front view
SLEEP
USB
CD
DISPLAY
SOUND
OK
ALBUM
P Q R
DIMMER
RADIO
MUTESETUP
PLAY MENU
NM
A Standby/on switch [`], [1]
• Press to switch the unit from on to standby mode or
vice versa. In standby mode, the unit is still consuming
a small amount of power.
B Select audio source
C Basic playback control
D View the clock and timer options
E View information
F Select the sound effects
G Select the option
Skip album
H Set the sleep timer
I Decrease the brightness of the display panel
• Press the button again to cancel.
J Adjust the volume of the system
K Mute the sound of the system
• Press the button again to cancel.
• “MUTE” is also cancelled when you adjust the volume
or when you switch off the system.
L View the play menu
View the radio options
M USB port ( )
N Headphones jack ( )
• Plug type: Ø 3.5 mm stereo (not supplied)
• Avoid listening for prolonged periods of time to prevent
hearing damage.
• Excessive sound pressure from earphones and
headphones can cause hearing loss.
• Listening at full volume for long periods may damage
the user’s ears.
O Open or close the sliding door
P Sliding door
Q Remote control sensor
• Maximum range: 7 m directly in front
R Display panel
RQT9678
4
4
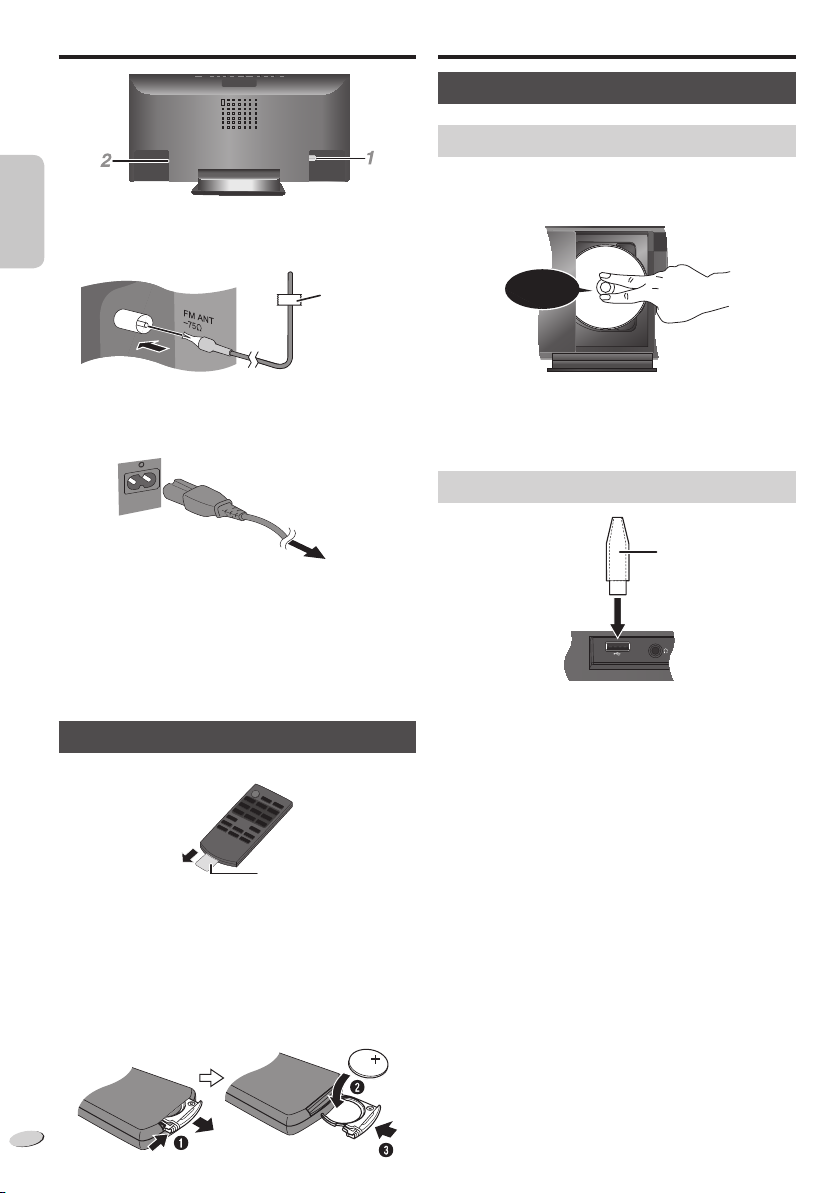
Page 5
ENGLISH
Getting started
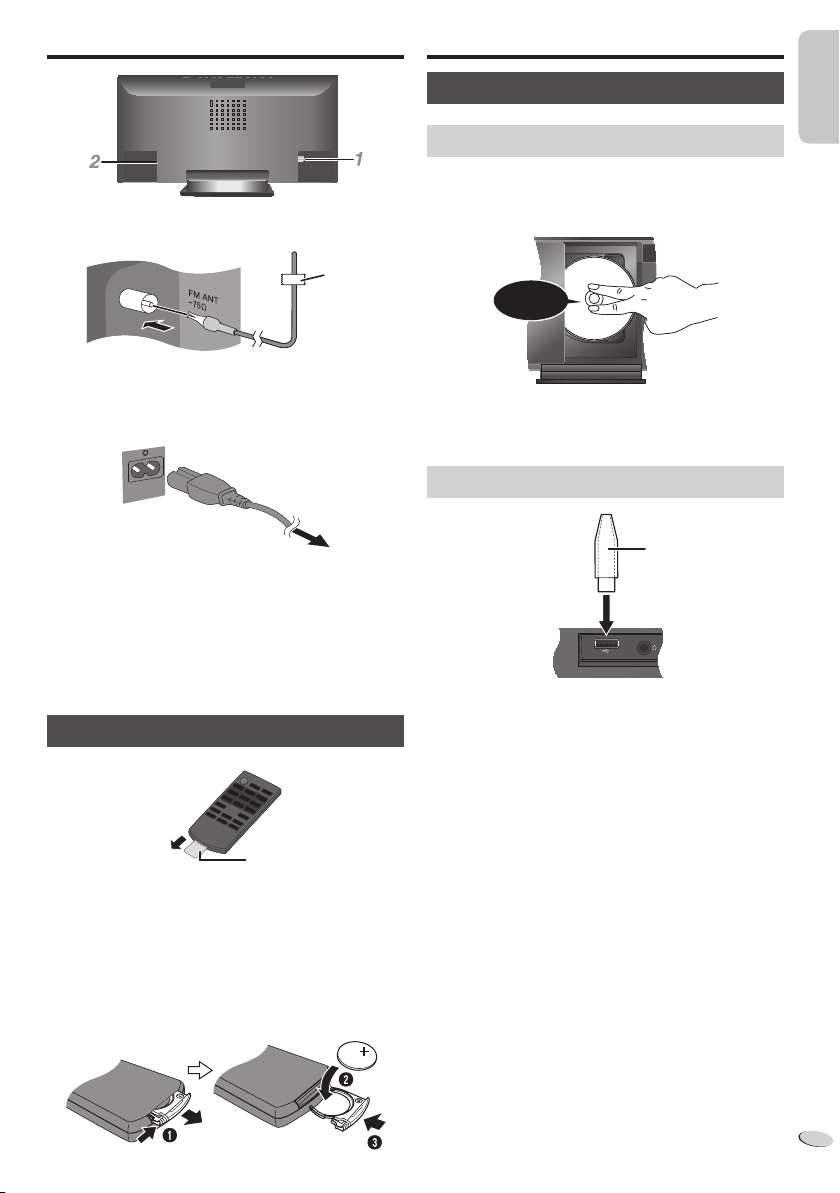
1 Connect the FM indoor antenna.
Place the antenna where reception is best.
2 Connect the AC mains lead.
Power consumption in standby mode: 0.2 W
(approximate)
Do not use an AC mains lead from other equipment.
Tape
Disc, USB
Inserting or removing media
Disc
Press [CD x OPEN/CLOSE] on the main unit to open the
sliding door.
Put in a disc with the label facing towards you.
Click!
Note:
Keep fingers away from the sliding door when it is closing.
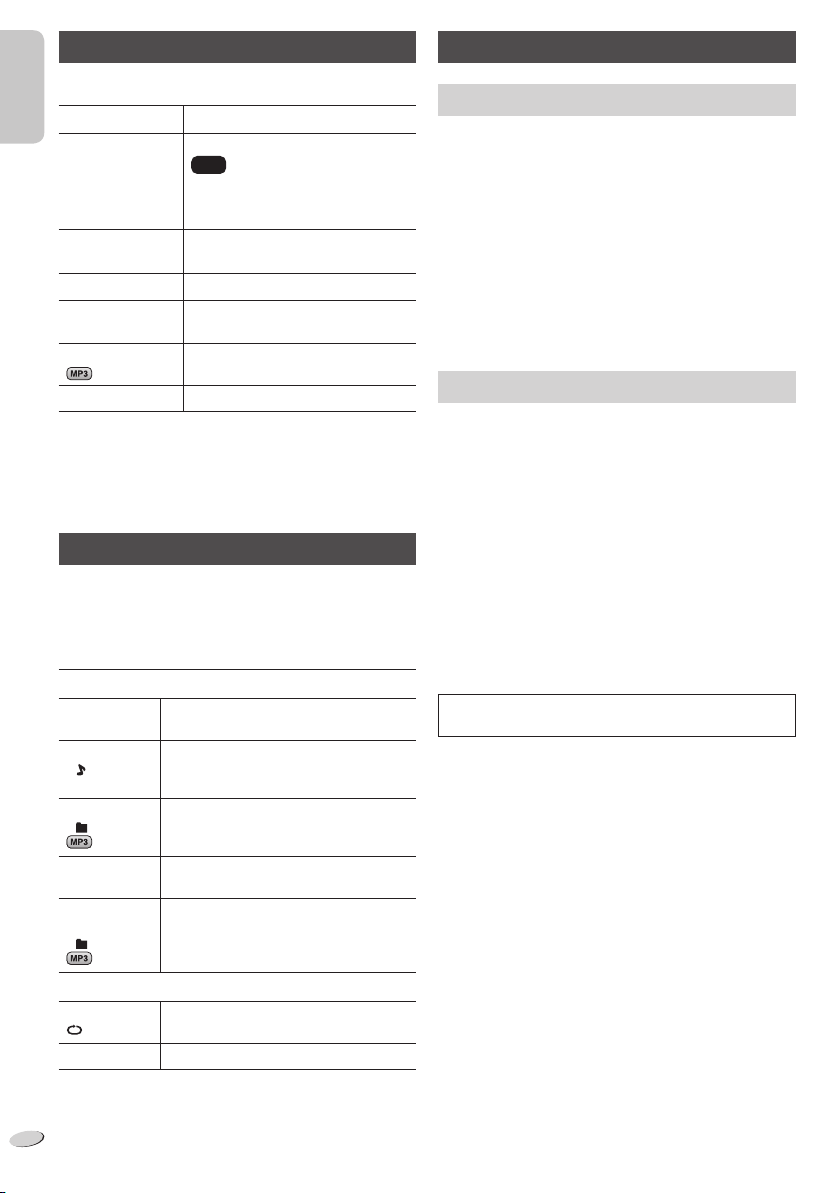
USB
ENGLISH
Note:
To household mains socket
• Some settings return to default when you disconnect the
system.
• These speakers do not have magnetic shielding. Do
not put them near TVs, PCs or other equipment easily
influenced by magnetism.
• You cannot remove the net of the speakers.
Preparing the remote control
Before using
Insulation sheet
Replacing the battery
Replace with a new battery (CR2025 lithium battery).
1 While pressing the stopper, pull out the battery
holder.
2 Insert a new battery with the (+) side facing up.
3 Push the battery holder back fully.
CR2025
USB device
(not supplied)
Note:
Do not use a USB extension cable. The system cannot
recognise USB device connected through a cable.
RQT9678
5
5
Page 6
Basic playback
Compatible media
Press [CD] or [USB] to select the source.
Play
ENGLISHENGLISH
Stop
Pause
Skip track
Search through
track
Skip album
View information Press [DISPLAY].
Note:
• Maximum characters that can be shown: approximately 32
• This system supports ver. 1.0, 1.1 and 2.3 ID3 tags.
• Text data that the system does not support can show
differently.
Press [4/9].
Press [8].
USB
:
The track is memorised.
“RESUME” is shown.
Press two times to stop fully.
Press [4/9].
Press again to continue playback.
Press [2/3] or [5/6].
Press and hold [2/3] or
[5/6].
Press [R, T].
Play menu
1 Press [PLAY MENU] to select “PLAYMODE” or
“REPEAT”.
2 Press [R, T] and then press [OK] to select the
desired mode.
PLAYMODE
OFF
PLAYMODE
1-TRACK
1
1-ALBUM
1
Play all tracks.
Play one selected track.
Press [2/3] or [5/6] to select
the track.
Play one selected album.
Press [R, T] to select the album.
Disc
• This system can play CD-R/RW with CD-DA or MP3
format content.
• Some CD-R/RW cannot be played because of the
condition of the recording.
• MP3 files are defined as tracks and folders are defined as
albums.
• This system can access up to:
– CD-DA : 99 tracks
– MP3 : 999 tracks, 255 albums (including root folder)
• Disc must conform to ISO9660 level 1 or 2 (except for
extended formats).
• Recordings will not necessarily be played in the order you
recorded them.
and 20 sessions
USB
• Compatible USB devices which are defined as mass
storage class:
– USB devices that support bulk-only transfer
– USB devices that support USB 2.0 full speed
• Files are defined as tracks and folders are defined as
albums.
• Track must have the extension “.mp3” or “.MP3”.
• This system can access up to:
– 255 albums (including root folder)
– 2500 tracks
– 999 tracks in one album
• CBI (Control/Bulk/Interrupt) is not supported.
• NTFS file system is not supported (only FAT 12/16/32 file
system is supported).
• Some files can fail to work because of the sector size.
MPEG Layer-3 audio coding technology licensed from
Fraunhofer IIS and Thomson.
RANDOM
RND
1-ALBUM
RANDOM
1 RND
REPEAT
ON REPEAT
OFF REPEAT Cancel repeat playback.
Note:
• During random playback, you cannot skip to tracks which
RQT9678
have been played.
6
• The setting returns to default when you open the sliding
door.
6
Play all tracks randomly.
Play all tracks in one selected album
randomly.
Press [R, T] to select the album.
Repeat playback.
Page 7
ENGLISH
Radio
30 FM stations can be preset.
Preparation
Connect the FM indoor antenna (Z page 5).
Press [RADIO].
Automatic presetting
1 Press [PLAY MENU] to select “A.PRESET”.
2 Press [R, T] to select “LOWEST” or “CURRENT”
frequency.
LOWEST : To begin auto preset from the lowest
CURRENT : To begin auto preset from the current
To change the frequency, refer to “Manual tuning and
presetting”.
3 Press [OK] to start presetting.
The tuner presets all the stations it can receive into the
channels in ascending order.
To cancel, press [8].
frequency.
frequency
.
Improving the sound quality
1 Press [PLAY MENU] to select “FM MODE”.
2 Press [R, T] to select “MONO” and then press [OK].
To cancel, select “STEREO”.
“MONO” is also cancelled when you change the
frequency.
To memorise the setting
Continue with steps 4 through 6 of “Manual tuning and
presetting”.
Checking the signal status
Press [PLAY MENU] to select “FM STATUS” and then
press [OK].
FM The FM signal is in monaural.
The system is not tuned in to a station.
FM ST The FM signal is in stereo.
FM MONO “MONO” is selected as the “FM MODE”.
ENGLISH
Manual tuning and presetting
1 Press [PLAY MENU] to select “TUNEMODE”.
2 Press [R, T] to select “MANUAL” and then press
[OK].
3 Press [2/3] or [5/6] to tune in to the
station.
To tune automatically, press and hold the button until the
frequency starts changing quickly.
“STEREO” is shown when the system is tuned in to a
stereo broadcast.
To preset the station
4 Press [OK].
5 Press [R, T] to select a preset number.
6 Press [OK].
Do steps 3 through 6 again to preset more stations.
Note:
A station previously stored is overwritten when another
station is stored in the same preset number.
Selecting a preset station
1 Press [PLAY MENU] to select “TUNEMODE”.
2 Press [R, T] to select “PRESET” and then press
[OK].
3 Press [2/3] or [5/6] to select the preset
station.
RDS broadcasting
This system can show the text data transmitted by the radio
data system (RDS) available in some areas.
Press [DISPLAY].
PS Station name
PTY Program type
FREQ Frequency
Note:
RDS may not be available if reception is poor.
Sound effects
1 Press [SOUND] to select a sound effect.
2 Press [R, T] to select the desired setting.
PRESET EQ “HEAVY” : Adds punch to rock.
“SOFT” : For background music.
“CLEAR” : Clarifies higher frequencies.
“VOCAL” : Adds gloss to vocal.
“FLAT” : Cancels the sound effect.
BASS “BASS -4” to “BASS +4”.
TREBLE “TREBLE-4” to “TREBLE+4”.
D.BASS “ON D.BASS” or “OFF D.BASS”.
SURROUND “ON SURROUND” or “OFF SURROUND”.
RQT9678
7
7
Page 8
Clock and timers
Setting the clock
This is a 24-hour clock.
ENGLISHENGLISH
1 Press [SETUP] to select “CLOCK”.
2 Press [R, T] to set the time.
3 Press [OK].
To show the clock for a few seconds
Press [SETUP] to select “CLOCK” and then press [OK].
Note:
Reset the clock regularly to maintain accuracy.
Sleep timer
The sleep timer switches off the system after the set time.
Press [SLEEP] to select the setting (in minutes).
To cancel, select “OFF”.
SLEEP 30 → SLEEP 60 → SLEEP 90 → SLEEP120
Note:
• The remaining time is always shown on the display.
The display changes temporarily when you perform other
operations.
• The sleep timer can be used together with the play timer.
• The sleep timer always comes first. Be sure not to set an
overlap of timers.
OFF
Play timer
You can set the timer to come on at a certain time to wake
you up.
Preparation
Set the clock.
1 Press [SETUP] to select “TIMER ADJ”.
2 Press [R, T] to set the start time.
3 Press [OK].
4 Do steps 2 and 3 again to set the end time.
To start the timer
1 Prepare the audio source you want to listen to and
set the volume.
2 Press [SETUP] to select “TIMER SET”.
3 Press [R, T] to select “SET” and then press [OK].
“#” is shown.
The system must be switched off for the timer to
operate.
Check the
settings
Cancel 1. Press [SETUP] to select “TIMER SET”.
Note:
• The timer starts at a low volume and increases gradually
to the preset level.
• The timer comes on at the set time every day if the timer
is on.
• If you switch off the system and switch on again while a
timer is in operation, the timer will not stop at the end time.
RQT9678
1. Press [SETUP] to select “TIMER ADJ”.
2. Press [OK].
2. Press [R, T] to select “OFF” and then
press [OK].
8
8
Auto off function
This function switches off the system (except in radio
source) if you do not use the system for approximately
30 minutes.
CD USB
1 Press [SETUP] to select “AUTO OFF”.
2 Press [R, T] to select “ON” or “OFF” and then press
[OK].
Troubleshooting
Before requesting service, make the following checks. If
you are in doubt about some of the check points, or if the
solutions indicated do not solve the problem, consult your
dealer for instructions.
Common problems
No operations can be done with the remote control.
• Examine that the battery is installed correctly.
• The remote control and this unit are using different codes
(Z page 9, “REMOTE ”).
Sound is distorted or no sound.
• Adjust the volume of the system.
• Switch off the system, determine and correct the cause,
then switch the system on again. It can be caused by
straining of the speakers through excessive volume or
power, and when using the system in a hot environment.
A “humming” sound can be heard during playback.
• An AC mains lead or fluorescent light is near the cable.
Keep other appliances and cords away from the cable of
this system.
Disc
Display not shown correctly.
Playback does not start.
• You did not put the disc in correctly. Put it in correctly.
• Disc is dirty. Clean the disc.
• Replace the disc if it is scratched, warped, or
non-standard.
• There is condensation. Let the system dry for 1 to 2 hours.
Page 9
ENGLISH
USB
The USB device or the contents in it cannot be read.
• The format of the USB device or the contents in it is/are
not compatible with the system.
• USB devices with storage capacity of more than 32 GB
cannot work in some conditions.
Slow operation of the USB device.
• Large content size or large memory USB device takes
longer time to read.
The elapsed time shown is different from the actual play
time.
• Transfer the data to another USB device or backup the
data and reformat the USB device.
Radio
A beat sound is heard.
• Switch off the TV or move it away from the system.
• Move mobile telephones away from the unit if the
interference is apparent.
Main unit displays
“--:--”
• You connected the AC mains lead for the first time or there
was a power failure recently. Set the clock.
“ADJUST CLOCK”
• Clock is not set. Adjust the clock accordingly.
“ADJUST TIMER”
• Play timer is not set. Adjust the play timer accordingly.
“ERROR”
• An incorrect operation was done. Read the instructions
and try again.
“F61”
• There is a power supply problem.
“USB OVER CURRENT ERROR”
• The USB device is drawing too much power. Remove the
USB device. Switch the system off and on again.
“NODEVICE”
• The USB device is not connected. Examine the
connection.
“NO DISC”
• You have not put in a disc.
“NO PLAY”
• You have put in a disc that the system cannot play.
• You have inserted a USB device that cannot be played.
Examine the content. You can only play supported format.
• If there are more than 255 albums or folders (audio
and non-audio), some of the MP3 files in these albums
cannot be read and played. Transfer these music albums
to another USB device. Alternatively, reformat the USB
device and save these music albums prior to saving the
other non-audio folders.
“NOT MP3/ERROR”
• An unsupported MP3 format. The system will skip that
track and play the next one.
“REMOTE ” (“ ” stands for a number.)
• The remote control and this unit are using different codes.
Change the code of the remote control.
– When “REMOTE 1” is shown, press and hold [OK] and
[T] for a minimum of 4 seconds.
– When “REMOTE 2” is shown, press and hold [OK] and
[R] for a minimum of 4 seconds.
“–VBR–”
• The system cannot show the remaining play time for
variable bit rate (VBR) tracks.
Memory reset (initialisation)
Reset the memory when the following situations occur:
• There is no response when buttons are pressed.
• You want to clear and reset the memory contents.
1 Disconnect the AC mains lead.
Wait 3 minutes before you continue with step 2.
2 While you press and hold [1] on the main unit,
connect the AC mains lead again.
“– – – – – – – –” is shown.
3 Release [1].
All the settings are set back to the factory preset.
It is necessary to set the memory items again.
Remote control code
When other Panasonic equipment responds to the remote
control of this system, change the remote control code for
this system.
To set the code to “REMOTE 2”
1 Press and hold [CD] on the main unit and [R] on
the remote control until “REMOTE 2” is shown.
2 Press and hold [OK] and [R] for a minimum of
4 seconds.
To set the code to “REMOTE 1”
1 Press and hold [CD] on the main unit and [T] on
the remote control until “REMOTE 1” is shown.
2 Press and hold [OK] and [T] for a minimum of
4 seconds.
Maintenance
To clean this system, wipe with a soft, dry cloth.
• Never use alcohol, paint thinner or benzine to clean this
system.
• Before using chemically treated cloth, read the instructions
that came with the cloth carefully.
ENGLISH
RQT9678
9
9
Page 10
Specifications
Amplifier section
RMS output power stereo mode
ENGLISHENGLISH
Front Ch (both ch driven)
5 W per channel (6
Total RMS stereo mode power 10 W
), 1 kHz, 10% THD
Tuner section
Preset station FM 30 stations
Frequency modulation (FM)
Frequency range
87.50 MHz to 108.00 MHz (50 kHz step)
Antenna terminals 75
(unbalanced)
Terminals section
USB port
USB standard USB 2.0 full speed
Media file format support MP3 (*.mp3)
USB device file system FAT12, FAT16, FAT32
USB port power 500 mA (max)
Headphones jack
Terminal Stereo, 3.5 mm jack
Disc section
Disc played (8 cm or 12 cm)
CD, CD-R/RW (CD-DA, MP3
Pick up
Wavelength 790 nm (CD)
Laser power CLASS I
NORSK
Bølgelengde 790 nm (CD)
Laserstyrke Ingen farlig stråling sendes ut
(med sikkerhets-beskyttelse)
Audio output (Disc)
Number of channels 2 ch (FL, FR)
FL = Front left channel
FR = Front right channel
MPEG-1 Layer 3, MPEG-2 Layer 3
General
Power supply AC 220 to 240 V, 50 Hz
Power consumption 12 W
Dimensions (W x H x D) 400 mm x 213 mm x 110 mm
[D = 72 mm (min)]
Mass 1.9 kg
Operating temperature range 0°C to +40°C
Operating humidity range
35% to 80% RH (no condensation)
Power consumption in standby mode
0.2 W (approximate)
Note:
• Specifications are subject to change without notice.
Mass and dimensions are approximate.
• Total harmonic distortion is measured by the digital
spectrum analyzer.
)
Speaker section
Type 1 way, 1 speaker system (bass reflex)
Speaker unit(s)
Full range 8 cm cone type x 1/ch
Impedance 6
RQT9678
10
10
Page 11
Realice los procedimientos con el mando a distancia.
También puede utilizar los botones en la unidad
principal si son los mismos.
Su sistema y las ilustraciones pueden parecer diferentes.
Precauciones de seguridad
Parte inferior del aparato
Parte interior del aparato
¡CUIDADO!
Unidad
• Para reducir el riesgo de incendios, descargas eléctricas o
daños en el producto,
– Para mantener bien ventilada esta unidad, no la instale
ni la ponga en un estante de libros, mueble empotrado u
otro espacio de dimensiones reducidas.
– No obstruya las aberturas de ventilación de la unidad
con periódicos, manteles, cortinas u objetos similares.
– No coloque objetos con llama descubierta, una vela por
ejemplo, encima de la unidad.
• Esta unidad ha sido diseñada para ser utilizada en climas
moderados.
• Instale esta unidad de forma que el cable de alimentación
de CA se pueda desconectar de la toma de corriente
inmediatamente si ocurre algún problema.
• Esta unidad puede tener interferencias causadas
por teléfonos móviles durante su utilización. Si tales
interferencias resultan evidentes, aumente la separación
entre la unidad y el teléfono móvil.
• Esta unidad utiliza un láser. Usar los controles, hacer los
ajustes o los pasos requeridos en forma diferente de la
aquí expuesta puede suponer en exposición peligrosa a
la radiación.
Pila
• Hay peligro de explosión si se sustituye incorrectamente
la pila. Solo sustituir con el mismo tipo recomendado por
el fabricante.
• Al desechar las baterías, por favor contacte con sus
autoridades locales o distribuidor y consulte el método
correcto de eliminación.
• No caliente o exponga a las llamas.
• No deje la(s) pila(s) en un automóvil expuesto a luz solar
directa durante un largo período de tiempo con las puertas
y ventanas cerradas.
ESPAÑOLESPAÑOL
¡ADVERTENCIA!
Unidad
• Para reducir el riesgo de incendios, descargas eléctricas o
daños en el producto,
– No exponga este aparato a la lluvia, humedad, goteo o
salpicaduras.
– No coloque encima del mismo objetos con líquidos
como, por ejemplo, floreros.
– Utilice solamente los accesorios recomendados.
– No quite las tapas.
– No reparar esta unidad usted mismo. Solicite las
reparaciones al personal de servicio cualificado.
Pila
• Riesgo de incendio, explosión o quemaduras. No cargue,
desarme, caliente a más de 60°C ni la incinere.
• Mantenga la pila tipo botón fuera del alcance de los niños.
No la ponga nunca en la boca. Si alguien se la traga,
llame a un médico.
La marca de identificación del producto se encuentra en
la parte inferior de la unidad.
RQT9678
2
11
Page 12
Información para Usuarios sobre la Recolección y
Eliminación de aparatos viejos y baterías usadas
Estos símbolos en los productos, embalajes
y/o documentos adjuntos, significan que
los aparatos eléctricos y electrónicos y las
baterías no deberían ser mezclados con los
desechos domésticos.
Para el tratamiento apropiado, la
recuperación y el reciclado de aparatos
viejos y baterías usadas, observe las normas
de recolección aplicables, de acuerdo a
su legislación nacional y a las Directivas
ESPAÑOLESPAÑOL
2002/96/CE y 2006/66/CE.
Al desechar estos aparatos y baterías
correctamente, estará ayudando a preservar
recursos valiosos y a prevenir cualquier
potencial efecto negativo sobre la salud
de la humanidad y el medio ambiente que,
de lo contrario, podría surgir de un manejo
inapropiado de los residuos.
Para mayor información sobre la recolección
y el reciclado de aparatos y baterías viejos,
por favor, contacte con su comunidad local,
su servicio de eliminación de residuos o con
el comercio donde adquirió estos aparatos.
Podrán aplicarse penas por la eliminación
incorrecta de estos residuos, de acuerdo a la
legislación nacional.
Para usuarios empresariales en la Unión
Europea
Si usted desea descartar aparatos eléctricos
y electrónicos, por favor contacte a su
distribuidor o proveedor a fin de obtener
mayor información.
[Informacion sobre la Eliminación en otros
Países fuera de la Unión Europea]
Estos símbolos solo son válidos dentro
de la Unión Europea. Si desea desechar
estos objetos, por favor contacte con sus
autoridades locales o distribuidor y consulte
el método correcto de eliminación.
Nota sobre el símbolo de la bateria (abajo,
dos ejemplos de símbolos):
Este símbolo puede ser usado en
combinación con un símbolo químico.
En este caso, el mismo cumple con los
requerimientos establecidos por la Directiva
para los químicos involucrados.
Contenido
Precauciones de seguridad ..........................2
Accesorios suministrados............................3
Controles ........................................................4
Primeros pasos..............................................5
Disco, USB .....................................................5
Radio ...............................................................7
Efectos de sonido ..........................................7
Reloj y temporizadores .................................8
Solución de problemas .................................9
Mantenimiento .............................................10
Especificaciones .........................................10
Accesorios suministrados
Por favor, compruebe e identifique los accesorios
suministrados.
1 x Cable de alimentación de CA
1 x Antena interior de FM
1 x Mando a distancia
(con una pila)
(N2QAYC000060)
RQT9678
3
12
Page 13
ESPAÑOL
Controles
Mando a distancia
USB
DISPLAY
Unidad principal
Vista superior
AB OJC
Vista frontal
SLEEP
DIMMER
RADIO
CD
MUTESETUP
SOUND
PLAY MENU
OK
ALBUM
NM
P Q R
A Botón de alimentación en espera/conectada [`], [1]
• Pulse este botón para cambiar del modo de
alimentación conectada al modo de alimentación en
espera o viceversa. En el modo de alimentación en
espera, el aparato consume una pequeña cantidad de
corriente.
B Seleccionar fuente de audio
C Control de reproducción básico
D Ver las opciones de reloj y temporizador
E Ver la información
F Seleccionar los efectos de sonido
G Seleccionar la opción
Saltar álbum
H Poner el temporizador para dormir
I Reducir el brillo del panel de visualización
• Vuelva a pulsar el botón para cancelar.
J Ajustar el volumen del sistema
K Silenciar el sonido del sistema
• Vuelva a pulsar el botón para cancelar.
• “MUTE” también se cancela cuando se ajusta el
volumen o se apaga el aparato.
L Ver el menú de reproducción
Ver las opciones de radio
M Puerto USB ( )
N Entrada de auriculares ( )
• Tipo de clavija: estéreo de Ø 3,5 mm (no suministrada)
• Procure evitar utilizarlos mucho rato con el fin de
evitar lesiones auditivas.
• La presión sonora excesiva de los auriculares puede
causar pérdida de audición.
• Escuchar a alto volumen durante mucho tiempo puede
dañar sus oídos.
O Abre o cierra la puerta corrediza
P Puerta corrediza
Q Sensor de mando a distancia
• Distancia máxima: 7 m directamente delante de la
unidad
R Visualizador
ESPAÑOL
RQT9678
4
13
Page 14
Primeros pasos
1 Conecte la antena interior de FM.
Coloque la antena en la posición que ofrezca la mejor
recepción.
ESPAÑOLESPAÑOL
Cinta
adhesiva
Disco, USB
Introducir o quitar medios
Disco
Pulse [CD x OPEN/CLOSE] en la unidad principal para
abrir la puerta corrediza.
Ponga un disco con la etiqueta hacia usted.
¡Haga clic!
2 Conecte el cable de alimentación de CA.
Consumo en el modo de espera: 0,2 W (aproximados)
No utilice el cable de alimentación CA de otro equipo.
A la toma de CA
Nota:
• Alguna configuración vuelve por defecto después de
desconectar el sistema.
• Estos altavoces no disponen de blindaje magnético. No
lo ponga cerca de la TV, el PC u otros equipos afectados
fácilmente por el magnetismo.
• No puede quitar la rejilla de los altavoces.
Preparación del mando a distancia
Antes de la utilización
Lámina aislante
Sustituir la pila
Sustituya la pila con una nueva (CR2025 pila de litio).
1 Mientras aprieta el tapón, saque el soporte de la
pila.
2 Coloque una pila nueva con el lado (+) hacia arriba.
3 Empuje de vuelta a su sitio el soporte de la pila.
CR2025
Nota:
Mantenga los dedos alejados de la puerta corrediza al
cerrarla.
USB
Dispositivo USB
(no suministrado)
Nota:
No use un cable de extensión USB. El sistema no puede
reconocer dispositivos USB conectados mediante cable.
RQT9678
5
14
Page 15
ESPAÑOL
Reproducción básica
Pulse [CD] o [USB] para seleccionar la fuente.
Reproducir
Parada
Pausar
Saltar pista
Buscar por pista
Saltar álbum
Ver la
información
Nota:
• Caracteres máximos que se pueden mostrar:
aproximadamente 32
• Este sistema soporta etiquetas ID3 ver. 1.0, 1.1 y 2.3.
• Los datos de texto que no soporta el sistema se pueden
mostrar de manera diferente.
Pulse [4/9].
Pulse [8].
USB
:
Se memorizará la pista.
Se muestra “RESUME”.
Pulse dos veces para parar
totalmente.
Pulse [4/9].
Vuelva a pulsar para continuar la
reproducción.
Pulse [2/3] o [5/6].
Mantenga pulsado [2/3] o
[5/6].
Pulse [R, T].
Pulse [DISPLAY].
Menú de reproducción
1 Pulse [PLAY MENU] para seleccionar “PLAYMODE”
o “REPEAT”.
2 Pulse [R, T] y después pulse [OK] para confirmar el
modo deseado.
PLAYMODE
OFF
PLAYMODE
1-TRACK
1
1-ALBUM
1
Reproduce todas las pistas.
Reproduce una pista seleccionada.
Pulse [2/3] o [5/6] para
seleccionar la pista.
Reproduce un álbum seleccionado.
Pulse [R, T] para seleccionar el álbum.
Nota:
• Durante la reproducción aleatoria, no se puede saltar a
pistas que ya hayan sido reproducidas.
• La configuración vuelve por defecto cuando abre la puerta
corrediza.
Medios compatibles
Disco
• Este sistema puede reproducir CD-R/RW con contenido
de formato CD-DA o MP3.
• Algunos CD-R/RW no se pueden reproducir debido a la
condición de la grabación.
• Los archivos MP3 se definen como pistas y las carpetas
se definen como álbum.
• Este sistema puede acceder a un máximo:
– CD-DA : 99 pistas
– MP3 : 999 pistas, 255 álbumes (incluida la carpeta
raíz) y 20 sesiones
• Los discos deben cumplir con la norma ISO9660 nivel 1 ó
2 (excepto para los formatos extendidos).
• Las grabaciones no se reproducirán necesariamente en el
orden de grabación.
USB
• Dispositivos compatibles USB definidos como tipo de
almacenamiento masivo:
– Dispositivos USB que soportan solo transferencia en
masa
– Dispositivos USB que soportan USB 2.0 a velocidad
plena
• Los archivos se definen como pistas y las carpetas se
definen como álbum.
• La pista debe tener la extensión “.mp3” o “.MP3”.
• Este sistema puede acceder a un máximo:
– 255 álbumes (incluida la carpeta raíz)
– 2500 pistas
– 999 pistas en un álbum:
• CBI (en inglés, Control/Bulk/Interrupt) no se admite.
• El sistema de archivo NTFS no está admitido (solo el
sistema de archivo FAT 12/16/32 está admitido).
• Algunos archivos pueden no funcionar debido al tamaño
del sector.
Tecnología de codificación de audio MPEG Layer-3
licenciado de Fraunhofer IIS y Thomson.
ESPAÑOL
RANDOM
RND
1-ALBUM
RANDOM
1 RND
REPEAT
ON REPEAT
OFF REPEAT Cancela la repetición de reproducción.
Reproduce aleatoriamente todas las
pistas.
Reproduce aleatoriamente todas las
pistas de un álbum seleccionado.
Pulse [R, T] para seleccionar el álbum.
Repetición de reproducción.
RQT9678
6
15
Page 16
Radio
Se pueden presintonizar 30 emisoras FM.
Preparación
Conecte la antena interior de FM (Z página 5).
Pulse [RADIO].
Preconfiguración automática
1 Pulse [PLAY MENU] para seleccionar “A.PRESET”.
ESPAÑOLESPAÑOL
2 Pulse [R, T] para seleccionar la frecuencia
“LOWEST” o “CURRENT”.
LOWEST : Para comenzar la presintonización desde la
CURRENT : Para comenzar la presintonización desde la
Para cambiar la frecuencia, consulte “Sintonización y
presintonización manual”.
3 Pulse [OK] para iniciar la presintonización.
El sintonizador presintonizará en los canales, en orden
ascendente, todas las emisoras que pueda recibir.
Para cancelar, pulse [8].
Sintonización y presintonización manual
1 Pulse [PLAY MENU] para seleccionar
“TUNEMODE”.
2 Pulse [R, T] para seleccionar “MANUAL” y después
pulse [OK].
3 Pulse [2/3] o [5/6] para sintonizar la
emisora.
Para sintonizar automáticamente, mantenga pulsado
el botón hasta que la frecuencia comience a cambiar
rápidamente.
“STEREO” se visualizará cuando el sistema esté
sintonizado en una emisión en estéreo.
Para presintonizar la emisora
4 Pulse [OK].
5 Pulse [R, T] para seleccionar un número
predefinido.
6 Pulse [OK].
Lleve a cabo los pasos 3 al 6 de nuevo para predefinir
más emisoras.
Nota:
Una emisora almacenada previamente se sobrescribe
cuando otra emisora se almacena en el mismo número
predefinido.
Selección de una emisora presintonizada
1 Pulse [PLAY MENU] para seleccionar
“TUNEMODE”.
2 Pulse [R, T] para seleccionar “PRESET” y después
pulse [OK].
RQT9678
3 Pulse [2/3] o [5/6] para seleccionar la
7
emisora predefinida.
16
frecuencia más baja.
frecuencia actual
.
Mejorar la calidad de sonido
1 Pulse [PLAY MENU] para seleccionar “FM MODE”.
2 Pulse [R, T] para seleccionar “MONO” y después
pulse [OK].
Para cancelar, seleccione “STEREO”.
“MONO” también se cancela cuando cambia la
frecuencia.
Para memorizar la configuración
Continúe con los pasos del 4 al 6 de “Sintonización y
presintonización manual”.
Comprobar el estado de señal
Pulse [PLAY MENU] para seleccionar “FM STATUS” y
después pulse [OK].
FM La señal FM es monoaural.
El sistema no está sintonizado en una
emisora.
FM ST La señal FM está en estéreo.
FM MONO “MONO” se selecciona como el
“FM MODE”.
Emisiones RDS
Este sistema puede mostrar los datos de texto transmitidos
por el sistema de datos de radio (RDS) disponible en
algunas zonas.
Pulse [DISPLAY].
PS Nombre de la emisora
PTY Tipo de programa
FREQ Frecuencia
Nota:
RDS puede no estar disponible si la recepción es pobre.
Efectos de sonido
1 Pulse [SOUND] para seleccionar un efecto de
sonido.
2 Pulse [R, T] para seleccionar el ajuste deseado.
PRESET EQ “HEAVY” : Añade potencia al rock.
“SOFT” : Para música de fondo.
“CLEAR” : Aporta nitidez a las frecuencias
superiores.
“VOCAL” : Añade brillo a las voces.
“FLAT” : Cancela el efecto de sonido.
BASS “BASS -4” a “BASS +4”.
TREBLE “TREBLE-4” a “TREBLE+4”.
D.BASS “ON D.BASS” o “OFF D.BASS”.
SURROUND “ON SURROUND” o “OFF SURROUND”.
Page 17
ESPAÑOL
Reloj y temporizadores
Puesta en hora
Este es un reloj de sistema de 24 horas.
1 Pulse [SETUP] para seleccionar “CLOCK”.
2 Pulse [R, T] para configurar la hora.
3 Pulse [OK].
Para visualizar el reloj durante unos segundos
Pulse [SETUP] para seleccionar “CLOCK” y después pulse
[OK].
Nota:
Vuelva a poner en hora el reloj con regularidad para
mantener su precisión.
Temporizador de dormir
El temporizador de dormir apaga el sistema después del
tiempo predefinido.
Pulse [SLEEP] para seleccionar el ajuste (en minutos).
Para cancelar, seleccione “OFF”.
SLEEP 30 → SLEEP 60 → SLEEP 90 → SLEEP120
Nota:
• El tiempo restante siempre se muestra en la pantalla.
La pantalla cambia temporalmente cuando realiza otras
operaciones.
• El temporizador de dormir se puede utilizar junto con el
temporizador de reproducción.
• El temporizador para dormir siempre va primero.
Asegúrese de no superponer los temporizadores.
OFF
ESPAÑOL
Temporizador de reproducción
Puede ajustar la hora para activarse a una hora
determinada y despertarle.
Preparación
Configure el reloj.
1 Pulse [SETUP] para seleccionar “TIMER ADJ”.
2 Pulse [R, T] para ajustar la hora de inicio.
3 Pulse [OK].
4 Lleve a cabo los pasos 2 y 3 de nuevo para ajustar la
hora de finalización.
Para iniciar el temporizador
1 Prepare la fuente de audio que desea escuchar y
ajuste el volumen.
2 Pulse [SETUP] para seleccionar “TIMER SET”.
3 Pulse [R, T] para seleccionar “SET” y después
pulse [OK].
Se muestra “#”.
El sistema debe estar apagado para que funcione el
temporizador.
Comprobar la
configuración
Cancelar 1. Pulse [SETUP] para seleccionar
1. Pulse [SETUP] para seleccionar
“TIMER ADJ”.
2. Pulse [OK].
“TIMER SET”.
2. Pulse [R, T] para seleccionar “OFF”
y después pulse [OK].
Función de apagado automático
Esta función apaga el sistema (excepto en fuente de radio)
si no utiliza el sistema aprox. durante 30 minutos.
CD USB
1 Pulse [SETUP] para seleccionar “AUTO OFF”.
2 Pulse [R, T] para seleccionar “ON” (activación) o
“OFF” (desactivación) y después pulse [OK].
Nota:
• El temporizador se inicia a bajo volumen y aumenta
gradualmente al nivel preestablecido.
• Si el temporizador está activo, se encenderá todos los
días a la hora fijada.
• Si apaga el sistema y lo enciende de nuevo mientras el
temporizador está en funcionamiento, el temporizador no
se parará en el tiempo final.
RQT9678
8
17
Page 18

Solución de problemas
Antes de solicitar el servicio de reparaciones haga las
comprobaciones indicadas abajo. Si tiene alguna duda
acerca de algunos de los puntos de comprobación o si las
soluciones indicadas no resuelven el problema, consulte a
su distribuidor para obtener instrucciones.
Problemas comunes
No se puede realizar ninguna operación con el mando
a distancia.
• Compruebe que la pila está correctamente instalada.
ESPAÑOLESPAÑOL
• El mando a distancia y esta unidad están usando
diferentes códigos (Z derecho, “REMOTE ”).
El sonido está distorsionado o no hay sonido.
• Ajuste el volumen del sistema.
• Apague el sistema, determine y corrija la causa, y a
continuación vuelva a encender el sistema. Se puede
causar por sobrecargar los altavoces con una potencia o
volumen excesivos, y por utilizar la unidad en un ambiente
caliente.
Se puede oír un zumbido durante la reproducción.
• Un cable de alimentación de CA o fluorescente está cerca
del cable. Mantenga los otros aparatos y cables alejados
del cable de este sistema.
Disco
Visualizador no mostrado correctamente.
No se inicia la reproducción.
• No ha puesto el disco correctamente. Póngalo
correctamente.
• El disco está sucio. Limpie el disco.
• Sustituya el disco si está rayado, deformado o no es un
disco convencional.
• Hay condensación. Deje secarse el sistema entre 1 y 2
horas.
USB
El dispositivo USB o los contenidos en él no se puede
reproducir.
• El formato del dispositivo USB o el contenido en él no es/
son compatibles con el sistema.
• Los dispositivos USB con capacidad de almacenamiento
de más de 32 GB no pueden funcionar en las mismas
condiciones.
Funcionamiento lento del dispositivo USB.
• Lleva más tiempo leer los archivos grandes o los
dispositivos USB con mucha memoria.
El tiempo transcurrido mostrado es diferente del tiempo
real de reproducción.
• Transfiera los datos a otro dispositivo USB o haga una
copia de seguridad de los datos y reformatee el dispositivo
de USB.
Visualizaciones de unidad principal
“--:--”
• Conectó el cable de alimentación de CA por primera vez
o se produjo un fallo recientemente en la alimentación.
Configure el reloj.
“ADJUST CLOCK”
• El reloj no está configurado. Ajuste el reloj correctamente.
“ADJUST TIMER”
• El temporizador de reproducción no está configurado.
Ajuste el temporizador de reproducción correctamente.
“ERROR”
• Se ha llevado a cabo una operación incorrecta. Lea las
instrucciones y vuelva a intentarlo.
“F61”
• Hay un problema de suministro de corriente.
“USB OVER CURRENT ERROR”
• El dispositivo USB está utilizando demasiada energía.
Retire el dispositivo USB. Apague el sistema y vuelva a
encenderla.
“NODEVICE”
• El dispositivo USB no está conectado. Compruebe la
conexión.
“NO DISC”
• No ha puesto un disco.
“NO PLAY”
• Ha puesto un disco que el sistema no puede reproducir.
• Ha insertado un dispositivo USB que no se puede
reproducir. Compruebe el contenido. Solo puede
reproducir formato admitido.
• Si hay más de 255 álbumes o carpetas (de audio o no),
algunos de los archivos MP3 de estos álbumes podrían
no leerse ni reproducirse. Transfiera estos álbumes
de música a otro dispositivo USB. Alternativamente,
reformatee el dispositivo USB y guarde estos álbumes de
música antes de guardar las otras carpetas que no son
de audio.
“NOT MP3/ERROR”
• Un formato MP3 no admitido. El sistema omitirá esa pista
y reproducirá la siguiente.
“REMOTE ” (“ ” significa un número.)
• El mando a distancia y esta unidad están usando
diferentes códigos. Cambie el código del mando a
distancia.
– Cuando aparezca “REMOTE 1”, mantenga pulsado [OK]
y [T] durante por lo menos 4 segundos.
– Cuando aparezca “REMOTE 2”, mantenga pulsado [OK]
y [R] durante por lo menos 4 segundos.
“–VBR–”
• El sistema no puede mostrar el tiempo de reproducción
restante para las pistas con velocidad de bits variable
(VBR).
Radio
Se oye un sonido rítmico.
RQT9678
• Apague el televisor o apártelo del sistema.
9
• Separe los teléfonos móviles de la unidad si las
interferencias resultan evidentes.
18
Page 19
ESPAÑOL
Restablecer la memoria del sistema
(inicialización)
Restablezca la memoria cuando ocurran las siguientes
situaciones:
• Los botones no funcionan.
• Usted desea borrar y restablecer el contenido de la
memoria.
1 Desconecte el cable de alimentación de CA.
Espere 3 minutos antes de seguir con el paso 2.
2 Mientras mantiene pulsado [1] en la unidad
principal, conecte la cable de alimentación de CA
de nuevo.
Se muestra “– – – – – – – –”.
3 Suelte [1].
Todos los ajustes vuelven a los valores predeterminados
de fábrica.
Es necesario configurar los elementos de memoria de
nuevo.
Código de mando a distancia
Cuando otro equipo Panasonic responda al mando a
distancia de este sistema, cambie el código del mando a
distancia de este sistema.
Para poner el código a “REMOTE 2”
1 Mantenga pulsado [CD] en la unidad principal y
[R] en el mando a distancia hasta que aparezca
“REMOTE 2”.
2 Mantenga pulsado [OK] y [R] durante por lo menos
4 segundos.
Para poner el código a “REMOTE 1”
1 Mantenga pulsado [CD] en la unidad principal y
[T] en el mando a distancia hasta que aparezca
“REMOTE 1”.
2 Mantenga pulsado [OK] y [T] durante por lo menos
4 segundos.
Mantenimiento
Utilice un paño suave y seco para limpiar este sistema.
• No utilice nunca alcohol, diluyente de pintura o gasolina
para limpiar este sistema.
• Antes de utilizar un paño impregnado químicamente, lea
con atención, las instrucciones del mismo.
Especificaciones
Sección del amplificador
Modo estéreo de potencia de salida RMS
Canal frontal (ambos canales accionados)
5 W por canal (6
Potencia total del modo estéreo RMS 10 W
distorsión armónica total del 10%
Sección del sintonizador
Emisora presintonizada 30 emisoras de FM
Modulación de frecuencia (FM)
Gama de frecuencias
87,50 MHz a 108,00 MHz (en pasos de 50 kHz)
Terminales de antena 75
Sección de terminales
Puerto USB
Estándar USB USB 2.0 velocidad total
Soporte de formato de archivos de medios MP3 (*.mp3)
Sistema de archivos de dispositivo USB
FAT12, FAT16, FAT32
Corriente puerto USB 500 mA (máx)
Entrada de auriculares
Terminal Estéreo, entrada de 3,5 mm
Sección de disco
Discos reproducidos (8 cm o 12 cm)
CD, CD-R/RW (CD-DA, MP3
Dispositivo de lectura
Longitud de onda 790 nm (CD)
Potencia de láser CLASS I
Salida de audio (Disco)
Número de canales 2 canales (FL, FR)
FL = Canal izquierdo frontal
FR = Canal derecho frontal
MPEG-1 Layer 3, MPEG-2 Layer 3
Sección de altavoz
Tipo Sistema de 1 altavoz de 1 vía (reflector de bajos)
Altavoz(ces)
Gama completa Tipo cónico de 8 cm x 1/canal
Impedancia 6
Generalidades
Alimentación 220 a 240 V CA, 50 Hz
Consumo energético 12 W
Dimensiones (An x Al x Prf) 400 mm x 213 mm x 110 mm
[Prf = 72 mm (min)]
Peso 1,9 kg
Gama de temperaturas de funcionamiento 0°C a +40°C
Gama de humedades de funcionamiento
35% a 80% humedad relativa (sin condensación)
Consumo en el modo de espera
0,2 W (aproximados)
Nota:
• Las especificaciones están sujetas a cambios sin previo
aviso.
El peso y las dimensiones son aproximados.
• La distorsión armónica total se mide con el analizador de
espectro digital.
), 1 kHz,
(desequilibrado)
)
ESPAÑOL
RQT9678
10
19
Page 20
Utför procedurerna med fjärrkontrollen. Du kan även
använda knapparna på huvudenheten om de är samma
knappar.
Ditt system och bilderna kan se olika ut.
Säkerhetsföreskrifter
Apparatens undersida
Produktets underside
SVENSKASVENSKA
Apparatens insida
Produktets innside
FÖRSIKTIGHET!
Enhet
• För att reducera risken för brand, elektrisk stöt eller
produktskada:
– För att apparaten ska få god ventilation, installera eller
placera den inte i en bokhylla, ett inbyggt skåp eller i
andra begränsade utrymmen.
– Se till att enhetens ventilationsöppningar inte är
förtäppta av tidningar, bordsdukar, gardiner eller
liknande föremål.
– Ställ inga föremål med öppen låga, så som ett tänt
stearinljus, ovanpå enheten.
• Denna enhet är avsedd för användning på platser med
tempererat klimat.
• Installera denna enhet så att AC-strömsladden kan
kopplas ur från uttaget direkt om något problem uppstår.
• Det kan inträffa att den här enheten under användningen
tar emot radiostörningar, orsakade av mobiltelefoner.
Öka avståndet mellan enheten och mobiltelefonen om
störningarna är uppenbara.
• I denna produkt används laser. Om apparaten och dess
funktioner används eller justeras på annat sätt än vad som
specificeras i denna bruksanvisning kan den avge farlig
strålning.
Batteri
• Explosionsrisk förekommer om batteriet inte sätts i
korrekt. Ersätt endast med sort som rekommenderas av
tillverkaren.
• När du gör dig av med batterierna, var god kontakta dina
lokala myndigheter eller din lokala återförsäljare och fråga
efter rätt metod för avfallshantering.
• Värm inte upp och utsätt inte batteriet för öppen eld.
• Lämna inte batteriet(/erna) i en bil som utsätts för direkt
solljus under en längre period med dörrar och fönster
stängda.
VARNING!
Enhet
• För att reducera risken för brand, elektrisk stöt eller
produktskada:
– Utsätt inte den här apparaten för regn, fukt, droppar eller
skvätt.
– Placera inga föremål fyllda med vätska, som t.ex. vaser,
på denna enhet.
– Använd endast rekommenderade tillbehör.
– Avlägsna inte höljen.
– Försök inte reparera denna enhet på egen hand. Låt
utbildad servicepersonal utföra service och reparationer.
Batteri
• Risk för brand, explosion och brännskador. Får inte laddas
om, demonteras, värmas upp över 60°C eller förbrännas.
• Håll knappbatterierna utom räckhåll för barn. Stoppa aldrig
ett knappbatteri i munnen. Om det sväljs ska du kontakta
din läkare.
RQT9678
2
20
Produktens identifieringsmärkning är placerad på
undersidan av enheten.
Page 21

SVENSKA
NORSK
Innehållsförteckning
ADVARSEL!
• For å redusere faren for brann, elektrisk støt eller skade
på apparatet:
– Dette apparatet må ikke utsettes for regn, fuktighet,
drypp eller sprut.
– Ikke plasser objekter som er fylt med væske, som vaser,
på apparatet.
– Bruk kun anbefalt tilbehør.
– Fjern ikke deksler.
– Dette apparatet må ikke repareres på egen hånd.
Overlat servicearbeider til kvalifisert servicepersonell.
FORSIKTIG!
• For å redusere faren for brann, elektrisk støt eller skade
på apparatet:
– Ikke plasser apparatet i en bokhylle, et innebygget
kabinett eller et annet lukket sted. Pass på at apparatet
er godt ventilert.
– Apparatets ventilasjonsåpninger må ikke dekkes til med
aviser, duker, gardiner eller lignende.
– Plasser ikke åpen ild, slik som levende lys, oppå
apparatet.
• Dette apparatet er beregnet til bruk under moderate
klimaforhold.
• Strømuttaket må befinne seg i nærheten slik at den
lett kan kobles fra uttaket umiddelbart om det oppstår
problemer.
• Dette apparatet anvender en laser. Betjening av kontroller,
justeringer eller andre inngrep enn de som er beskrevet i
denne bruksanvisning, kan føre til farlig bestråling.
Medföljande tillbehör
Var god kontrollera och pricka av de medföljande
tillbehören.
1 x AC-strömsladd
1 x FM-inomhusantenn
1 x Fjärrkontroll
(med ett batteri)
(N2QAYC000060)
Säkerhetsföreskrifter ....................................2
Medföljande tillbehör ....................................3
Beskrivning av kontrollerna .........................4
Komma igång .................................................5
Skiva, USB......................................................5
Radio ...............................................................7
Ljudeffekter ....................................................7
Klocka och timer............................................8
Felsökningsschema ......................................9
Underhåll ......................................................10
Specifikationer .............................................10
Information för användare om hopsamling och
avfallshantering av gammalt material och använda
batterier
Dessa symboler på produkter, förpackningar
och/eller medföljande dokument betyder
att man inte ska blanda elektriska och
elektroniska produkter eller batterier med
vanliga hushållssopor.
För att gamla produkter och använda batterier
ska hanteras och återvinnas på rätt sätt ska
man ta dem till passande uppsamlingsställe
i enlighet med nationella bestämmelser och
direktiven 2002/96/EC och 2006/66/EC.
När du kasserar dessa produkter och
batterier på rätt sätt hjälper du till att spara
på värdefulla resurser och förebygga en
potentiell negativ inverkan på människors
hälsa och på miljön som annars skulle kunna
uppstå p.g.a. otillbörlig avfallshantering.
För mer information om uppsamling
och återvinning av gamla produkter och
batterier, var god kontakta din kommun, din
avfallshanterare eller det försäljningsställe
där du köpte din artikel.
Olämplig avfallshantering kan beläggas med
straff i enlighet med nationella bestämmelser.
För affärsanvändare inom den Europeiska
Unionen
Om du vill kassera elektrisk eller elektronisk
utrustning, var god kontakta din återförsäljare
eller leverantör för ytterligare information.
[Information om avfallshantering i länder
utanför den Europeiska unionen]
Dessa symboler är endast giltiga inom den
Europeiska Unionen. Om du vill kassera
dessa föremål, var god kontakta dina lokala
myndigheter eller din lokala återförsäljare och
fråga efter rätt metod för avfallshantering.
Notering till batterisymbolen (nedtill, två
symbolexempel):
Denna symbol kan användas i kombination
med en kemisk symbol. I detta fall uppfyller
den de krav som ställs upp i direktivet för den
aktuella kemikalien.
SVENSKA
RQT9678
3
21
Page 22

Beskrivning av kontrollerna
Fjärrkontroll
SVENSKASVENSKA
Huvudenhet
Bild ovanifrån
AB OJC
Bild framifrån
SLEEP
USB
CD
DISPLAY
SOUND
OK
ALBUM
P Q R
DIMMER
RADIO
MUTESETUP
PLAY MENU
NM
A Strömställare standbyläge/på [`], [1]
• Tryck på knappen för att ställa apparaten i standbyläge
då den är på, eller tvärtom. Apparaten förbrukar en
aning ström även när den står i standbyläge.
B Välj ljudkälla
C Grundläggande uppspelningskontroll
D Visa klock- och timeralternativ
E Visa information
F Välj ljudeffekter
G Välj alternativet
Hoppa över album
H Ställ in insomningstimern
I Sänk ljusstyrkan på displaypanelen
• Tryck på knappen igen för att avbryta.
J Justera systemets volym
K Stäng av ljudet från systemet
• Tryck på knappen igen för att avbryta.
• ”MUTE” avbryts även då du justerar volymen eller då
du stänger av systemet.
L Visa uppspelnings-meny
Visa radioalternativen
M USB-port ( )
N Hörlursuttag ( )
• Typ av kontaktplugg: Ø 3,5 mm stereo (medföljer ej)
• Undvik att lyssna en längre tid för att förhindra
hörselskador.
• För starkt ljudtryck från öronsnäckor och hörlurar kan
orsaka hörselskador.
• Lyssning på full volym under längre perioder kan
skada användarens öron.
O Öppna eller stäng skjutluckan
P Skjutlucka
Q Fjärrkontrollsensor
• Maximal räckvidd: 7 m framför enheten
R Displaypanel
RQT9678
4
22
Page 23

SVENSKA
Komma igång
1 Anslut FM-inomhusantennen.
Placera antennen på en plats där du får bäst
mottagning.
Skiva, USB
Sätta i eller avlägsna media
Skiva
Tryck på [CD x OPEN/CLOSE] på huvudenheten för att
öppna skjutluckan.
Sätt i en skiva med etiketten vänd mot dig.
Självhäftande
tejp
2 Anslut AC-strömsladden.
Effektförbrukning i standbyläge: 0,2 W (ungefär)
Använd inte en AC-strömsladd från någon annan
utrustning.
Till vägguttaget
Observera:
• En del inställningar återgår till den ursprungliga då du
kopplar ur systemet.
• De här högtalarna är inte magnetiskt avskärmade. Placera
dem inte nära TV-apparater, datorer eller andra apparater
som lätt påverkas av magnetism.
• Högtalarnas nät kan inte tas bort.
Förbereda fjärrkontrollen
Före användning
Klicka!
Observera:
Håll fingrarna borta från skjutluckan när den stängs.
USB
USB-enhet
(medföljer ej)
Observera:
Använd inte en USB-förlängningskabel. Systemet kan inte
känna igen en USB-enhet ansluten genom en kabel.
SVENSKA
Isoleringsfilm
Byta ut batteriet
Byt ut mot ett nytt batteri (CR2025 litiumbatteri).
1 Medan du trycker på stopparen drar du ut
batterihållaren.
2 Sätt i ett nytt batteri med (+)-polen uppåt.
3 Tryck tillbaka batterihållaren hela vägen.
CR2025
RQT9678
5
23
Page 24

Grundläggande uppspelning
Kompatibel media
Tryck på [CD] eller [USB] för att välja källan.
Spela
Stopp
Pausa
Hoppa över spår
Söka igenom
spår
Hoppa över
SVENSKASVENSKA
album
Visa information Tryck på [DISPLAY].
Observera:
• Maximalt antal tecken som kan visas: cirka 32
• Detta system stödjer ver. 1.0, 1.1 och 2.3 ID3-taggar.
• Textdata som systemet inte stödjer kan visas olika.
Tryck på [4/9].
Tryck på [8].
USB
:
Det spåret minneslagras.
”RESUME” visas.
Tryck två gånger för att stoppa helt.
Tryck på [4/9].
Tryck en gång till för att fortsätta
uppspelning.
Tryck på [2/3] eller [5/6].
Tryck och håll nere [2/3] eller
[5/6].
Tryck på [R, T].
Uppspelnings-meny
1 Tryck på [PLAY MENU] för att välja ”PLAYMODE”
eller ”REPEAT”.
2 Tryck på [R, T] och tryck sedan på [OK] för att välja
det önskade läget.
PLAYMODE
OFF
PLAYMODE
1-TRACK
1
1-ALBUM
1
Spela upp alla spår.
Spela upp ett valt spår.
Tryck på [2/3] eller [5/6] för
att välja spår.
Spela upp ett valt album.
Tryck på [R, T] för att välja album.
Skiva
• Detta system kan spela upp CD-R/RW med CD-DA- eller
MP3-formatinnehåll.
• Vissa CD-R/RW kan inte spelas upp på grund av
inspelningens skick.
• MP3-filer definieras som spår, och mappar definieras som
album.
• Detta system kan tillgå upp till:
– CD-DA : 99 spår
– MP3 : 999 spår, 255 album (inklusive rotmappen) och
20 inspelningstillfällen
• Skivorna måste överensstämma med ISO9660 nivå 1 eller
2 (förutom utökade format).
• Inspelningar spelas inte nödvändigtvis upp i den ordning
du spelade in dem.
USB
• Kompatibla USB-enheter som definieras som
masslagringsenheter:
– USB-enheter som stöder endast bulköverföring
– USB-enheter som stöder USB 2.0 full hastighet
• Filer definieras som spår, och mappar definieras som
album.
• Spår måste ha ändelsen ”.mp3” eller ”.MP3”.
• Detta system kan tillgå upp till:
– 255 album (inklusive rotmapp)
– 2500 spår
– 999 spår på ett album
• CBI (på engelska Control/Bulk/Interrupt) stöds ej.
• NTFS-filsystem stöds inte (endast FAT 12/16/32-filsystem
stöds).
• Vissa filer kanske inte fungerar pga. sektorstorleken.
MPEG Layer-3-ljudkodningsteknik licenserad från
Fraunhofer IIS och Thomson.
RANDOM
RND
1-ALBUM
RANDOM
1 RND
REPEAT
ON REPEAT
OFF REPEAT Avbryt repetera uppspelning.
Observera:
RQT9678
• Under slumpmässig uppspelning går det inte att hoppa till
spår som har spelats upp.
6
• Inställningen återgår till den ursprungliga när du öppnar
skjutdörren.
24
Spela upp alla spår slumpvis.
Spela upp alla spår på ett valt album
slumpvis.
Tryck på [R, T] för att välja album.
Repetera uppspelning.
Page 25

SVENSKA
Radio
30 FM-stationer kan ställas in som förval.
Förberedelser
Anslut FM-inomhusantennen (Z sidan 5).
Tryck på [RADIO].
Automatisk förinställning
1 Tryck på [PLAY MENU] för att välja ”A.PRESET”.
2 Tryck på [R, T] för att välja ”LOWEST” eller
”CURRENT”-frekvens.
LOWEST : För att börja automatisk förinställning från
CURRENT : För att börja automatisk förinställning från
För att ändra frekvensen, se ”Manuell
stationsinställning och förinställning”.
3 Tryck på [OK] för att starta förinställningen.
Radion förinställer alla stationer den kan mottaga på
kanalerna i stigande ordning.
För att avbryta, tryck på [8].
den lägsta frekvensen.
den aktuella frekvensen
.
Förbättra ljudkvaliteten
1 Tryck på [PLAY MENU] för att välja ”FM MODE”.
2 Tryck på [R, T] för att välja ”MONO” och tryck
sedan på [OK].
För att avbryta, välj ”STEREO”.
”MONO”-läget avbryts också om du ändrar frekvensen.
För att minneslagra inställningen
Fortsätt med steg 4 till 6 för ”Manuell stationsinställning och
förinställning”.
Kontrollera signalstatus
Tryck på [PLAY MENU] för att välja ”FM STATUS” och
tryck sedan på [OK].
FM FM-signalen är i mono.
Ingen kanal är inställd på systemet.
FM ST FM-signalen är i stereo.
FM MONO ”MONO” är valt som ”FM MODE”.
SVENSKA
Manuell stationsinställning och
förinställning
1 Tryck på [PLAY MENU] för att välja ”TUNEMODE”.
2 Tryck på [R, T] för att välja ”MANUAL” och tryck
sedan på [OK].
3 Tryck på [2/3] eller [5/6] för att söka upp
stationen.
För att söka upp automatiskt, tryck och håll nere
knappen tills frekvensen börjar ändras snabbt.
”STEREO” visas när en sändning i stereo ställs in på
systemet.
För att förinställa station
4 Tryck på [OK].
5 Tryck på [R, T] för att välja ett förvalsnummer.
6 Tryck på [OK].
Utför steg 3 till 6 igen för att förvalsinställa fler stationer.
Observera:
En tidigare lagrad station skrivs över när en annan station
lagras på samma förinställningsnummer.
Välja en förinställd station
1 Tryck på [PLAY MENU] för att välja ”TUNEMODE”.
2 Tryck på [R, T] för att välja ”PRESET” och tryck
sedan på [OK].
3 Tryck på [2/3] eller [5/6] för att välja
förvalsstationen.
RDS-sändningar
Detta system kan visa de textdata som sänds via det
radiodatasystem (RDS) som finns tillgängligt i vissa
områden.
Tryck på [DISPLAY].
PS Stationsnamn
PTY Programtyp
FREQ Frekvens
Observera:
RDS kanske inte finns tillgänglig om mottagningen är dålig.
Ljudeffekter
1 Tryck på [SOUND] för att välja en ljudeffekt.
2 Tryck på [R, T] för att välja önskad inställning.
PRESET EQ ”HEAVY” : Ökar bastrycket för rock.
”SOFT” : För bakgrundsmusik.
”CLEAR” : Höga frekvenser blir tydligare.
”VOCAL” : Lägger till glans i sången.
”FLAT” : Avbryter ljudeffekten.
BASS ”BASS -4” till ”BASS +4”.
TREBLE ”TREBLE-4” till ”TREBLE+4”.
D.BASS ”ON D.BASS” eller ”OFF D.BASS”.
SURROUND ”ON SURROUND” eller
”OFF SURROUND”.
RQT9678
7
25
Page 26

Klocka och timer
Inställning av klockan
Klockan har 24-timmarsvisning.
1 Tryck på [SETUP] för att välja ”CLOCK”.
2 Tryck på [R, T] för att ställa in tiden.
3 Tryck på [OK].
För att visa klockan ett par sekunder
Tryck på [SETUP] för att välja ”CLOCK” och tryck sedan på
[OK].
Observera:
Ställ om klockan regelbundet för att upprätthålla
noggrannheten.
Insomningstimer
Insomningstimern stänger av systemet efter den inställda
tiden.
Tryck på [SLEEP] för att välja inställning (i minuter).
För att avbryta, välj ”OFF”.
SLEEP 30 → SLEEP 60 → SLEEP 90 → SLEEP120
Observera:
• Den återstående tiden visas alltid på displayen.
Displayen ändras tillfälligt när du utför andra funktioner.
• Insomningstimern kan användas tillsammans med
uppspelningstimern.
• Insomningstimern kommer alltid först. Se till så att tiderna
inte överlappar varandra.
OFF
SVENSKASVENSKA
Uppspelningstimer
Du kan ställa in timern till att sättas på vid en viss tid för att
väcka dig.
Förberedelser
Ställ in klockan.
1 Tryck på [SETUP] för att välja ”TIMER ADJ”.
2 Tryck på [R, T] för att ställa in starttiden.
3 Tryck på [OK].
4 Utför steg 2 och 3 igen för att ställa in sluttid.
För att starta timern
1 Förbered ljudkällan du vill lyssna på, och ställ in
volymen.
2 Tryck på [SETUP] för att välja ”TIMER SET”.
3 Tryck på [R, T] för att välja ”SET” och tryck sedan
på [OK].
”#” visas.
Systemet måste vara avstängt för att timern ska fungera.
Kontrollera
inställningarna
Avbryta 1. Tryck på [SETUP] för att välja
Observera:
• Timern startar på en låg volym och höjs gradvis till den
förinställda nivån.
• Timern sätts igång vid inställd tid varje dag om timern är
på.
• Om du stänger av systemet och sätter på det igen medan
timern är igång, stoppar inte timern vid sluttiden.
1. Tryck på [SETUP] för att välja
”TIMER ADJ”.
2. Tryck på [OK].
”TIMER SET”.
2. Tryck på [R, T] för att välja ”OFF”
och tryck sedan på [OK].
Automatisk avstängningsfunktion
Med denna funktion stängs systemet av (utom om radio
är källan) om du inte använder systemet under ungefär
30 minuter.
CD USB
1 Tryck på [SETUP] för att välja ”AUTO OFF”.
2 Tryck på [R, T] för att välja ”ON” (på) eller ”OFF”
(av) och tryck sedan på [OK].
RQT9678
8
26
Page 27

SVENSKA
Felsökningsschema
Utför följande kontroller innan du begär service. Om
du tvekar över några av kontrollpunkterna, eller om de
angivna åtgärderna inte löser problemet, rådgör med din
återförsäljare för närmare anvisningar.
Vanliga problem
Inga funktioner kan utföras med fjärrkontrollen.
• Kontrollera att batteriet är rätt isatt.
• Fjärrkontrollen och den här enheten använder olika koder
(Z höger, ”REMOTE ”).
Ljudet förvrängs eller inget ljud hörs.
• Justera systemets volym.
• Stäng av systemet, undersök orsaken till felet och rätta
till det, och sätt sedan på systemet igen. Det kan bero på
överbelastning av högtalarna på grund av alltför hög volym
eller uteffekt, eller att systemet använts på en alltför varm
plats.
Ett ”surrande” ljud hörs under uppspelning.
• En AC-strömsladd eller ett fluorescerande ljus finns i
närheten av kabeln. Håll andra apparater och sladdar på
avstånd från detta systems kabel.
Skiva
Displayen visar inte korrekt.
Uppspelningen startar inte.
• Du har inte satt i skivan riktigt. Sätt i den riktigt.
• Skivan är smutsig. Rengör skivan.
• Byt ut skivan om den är repig, böjd eller av annat format
än standardformat.
• Det förekommer kondens. Låt systemet torka i 1 till 2
timmar.
USB
USB-enheten eller innehållet på den kan ej läsas.
• Formatet för USB-enheten eller innehållet är inte
kompatibelt med systemet.
• USB-enheter med lagringskapaciteter på mer än
32 gigabyte fungerar inte under vissa förhållanden.
USB-enheten fungerar långsamt.
• Stor innehållsstorlek och stor USB-enhet tar längre tid att
läsa.
Den förflutna tiden som visas skiljer sig från den
faktiska uppspelningstiden.
• Överför datan till en annan USB-enhet eller
säkerhetskopiera datan och formatera om USB-enheten.
Huvudenhetens displayvisning
”--:--”
• Antingen har du satt i AC-strömsladden för första gången,
eller så har det varit strömavbrott nyligen. Ställ in klockan.
”ADJUST CLOCK”
• Klockan är inte inställd. Justera klockan i enlighet därmed.
”ADJUST TIMER”
• Uppspelningstimern är inte inställd. Justera
uppspelningstimern i enlighet därmed.
”ERROR”
• Ett felaktigt förfarande utfördes. Läs bruksanvisningen och
försök igen.
”F61”
• Det förekommer ett strömförsörjningsproblem.
”USB OVER CURRENT ERROR”
• USB-enheten drar för mycket ström. Avlägsna USBenheten. Stäng av och sätt på systemet igen.
”NODEVICE”
• USB-enheten är inte ansluten. Kontrollera anslutningen.
”NO DISC”
• Du har inte satt i en skiva.
”NO PLAY”
• Du har satt i en skiva som systemet inte kan spela upp.
• Du har satt i en USB-enhet som inte kan spelas upp.
Kontrollera innehållet. Du kan endast spela upp format
som det finns stöd för.
• Om det finns mer än 255 album eller mappar (ljud eller
icke-ljud), kan inte en del av MP3-filerna på dessa album
läsas och spelas upp. Överför dessa musikalbum till en
annan USB-enhet. Alternativt, omformatera USB-enheten
och spara dessa musikalbum innan du sparar de andra
ickeljudmapparna.
”NOT MP3/ERROR”
• Ett MP3-format utan stöd. Systemet kommer att hoppa
över det spåret och spela upp nästa.
”REMOTE ” (” ” står för ett nummer.)
• Fjärrkontrollen och den här enheten använder olika koder.
Byt koden på fjärrkontrollen.
– När ”REMOTE 1” visas, tryck och håll nere [OK] och [T]
i minst 4 sekunder.
– När ”REMOTE 2” visas, tryck och håll nere [OK] och [R]
i minst 4 sekunder.
”–VBR–”
• Systemet kan inte visa den återstående speltiden för spår
med variabelt bitvärde (VBR = Variable Bit Rate).
SVENSKA
Radio
Det hörs ett dunkande ljud.
• Stäng av TV:n eller flytta den bort från systemet.
• Flytta på mobiltelefoner så att de befinner sig borta från
enheten om störningar uppstår.
RQT9678
9
27
Page 28

Minnesåterställning (initialisering)
Återställ minnet om någon av följande situationer skulle
uppstå:
• Det händer ingenting när knapparna trycks in.
• Du vill radera och återställa innehållet i minnet.
1 Dra ur AC-strömsladden.
Vänta 3 minuter innan du fortsätter med steg 2.
2 Medan du trycker och håller nere [1] på
huvudenheten ansluter du AC-strömsladden igen.
”– – – – – – – –” visas.
3 Släpp [1].
Alla inställningar ställs tillbaka till de fabriksinställda
värdena.
Minnesposterna behöver ställas in igen.
Fjärrkontrollkod
SVENSKASVENSKA
Om annan Panasonic-utrustning svarar på fjärrkontrollen till
det här systemet, byt fjärrkontrollkoden för det här systemet.
För att ställa in koden till ”REMOTE 2”
1 Tryck och håll nere [CD] på huvudenheten och [R]
på fjärrkontrollen tills ”REMOTE 2” visas.
2 Tryck och håll nere [OK] och [R] i minst 4 sekunder.
För att ställa in koden till ”REMOTE 1”
1 Tryck och håll nere [CD] på huvudenheten och [T]
på fjärrkontrollen tills ”REMOTE 1” visas.
2 Tryck och håll nere [OK] och [T] i minst 4 sekunder.
Underhåll
Torka av systemet med en mjuk torr trasa för att göra rent
systemet.
• Använd aldrig alkohol, målarthinner eller ren bensin för att
rengöra detta system.
• Innan kemiskt behandlade rengöringsdukar används,
bör anvisningarna som medföljer duken läsas igenom
noggrant.
RQT9678
10
28
Specifikationer
Förstärkardel
RMS-uteffekt stereoläge
Främre Kanal (båda kanaler drivna)
5 W per kanal (6
Total RMS-stereolägeseffekt 10 W
Tunerdel
Förinställda stationer FM 30 stationer
Frekvensmodulering (FM)
Frekvensomfång
87,50 MHz till 108,00 MHz (i steg om 50 kHz)
Antennuttag 75
Uttagsdel
USB-port
USB-standard USB 2.0 full hastighet
Mediafilformatstöd MP3 (*.mp3)
USB-enhet filsystem FAT12, FAT16, FAT32
USB-port ström 500 mA (max.)
Hörlursuttag
Uttag Stereo, 3,5 mm-uttag
Skivdelen
Skivor som kan spelas (8 cm eller 12 cm)
CD, CD-R/RW (CD-DA, MP3
Pickup
Våglängd 790 nm (CD)
Laserstyrka Ingen farlig strålning
(när säkerhetsspärren är inkopplad)
Lasereffekt CLASS I
NORSK
Bølgelengde 790 nm (CD)
Laserstyrke Ingen farlig stråling sendes ut
(med sikkerhets-beskyttelse)
Ljudutgång (Skiva)
Antal kanaler 2 kanaler (FL, FR)
FL = Främre vänster kanal
FR = Främre höger kanal
MPEG-1 Layer 3, MPEG-2 Layer 3
Högtalardel
Typ 1-vägs, 1-elementsystem (basreflex)
Högtalarenhet(er)
Full räckvidd 8 cm kontyp x 1/kanal
Impedans 6
Allmänt
Nätdel Växelström 220 till 240 V, 50 Hz
Effektförbrukning 12 W
Yttermått (B x H x D) 400 mm x 213 mm x 110 mm
[D = 72 mm (min)]
Vikt 1,9 kg
Temperaturområde för drift 0°C till +40°C
Luftfuktighetsområde för drift
35% till 80% RH (ingen kondens)
Effektförbrukning i standbyläge 0,2 W (ungefär)
Observera:
• Tekniska data kan ändras utan föregående meddelande.
Angivna vikter och mått är ungefärliga.
• Den totala harmoniska distorsionen har uppmätts med en
digital spektralanalysator.
), 1 kHz, 10% THD
(obalanserat)
)
Page 29

Foretag procedurerne med fjernbetjeningen. Du kan
også bruge knapperne på hovedenheden, hvis de er
ens.
Dit system og illustrationerne kan se anderledes ud.
Sikkerhedsforskrifter
Påsat under apparatet
Indersiden af apparatet
BEMÆRK!
Apparatet
• For at mindske risikoen for brand, elektrisk stød eller
beskadigelse af produktet:
– Lad være med at stille det i et skab eller et andet lille,
lukket rum. Placér apparatet på et godt ventileret sted.
– Tildæk ikke apparatets ventilationsåbninger med aviser,
duge, gardiner og lignende ting.
– Anbring ikke kilder til åben ild, som for eksempel tændte
stearinlys, oven på apparatet.
• Dette apparat er beregnet til brug i et moderat klima.
• Enheden skal installeres således, at strømledningen
straks kan tages ud af stikkontakten, hvis der opstår
problemer.
• Dette apparat kan modtage radiointerferens forårsaget af
mobiltelefoner under brug. Hvis interferens forekommer,
bedes du venligst øge afstanden mellem apparatet og
mobiltelefonen.
• I dette apparat anvendes en laser. Brug af
betjeningsknapper eller reguleringer eller fremgangsmåder
udover de i denne betjeningsvejledning angivne, kan
medføre fare for bestråling.
Batteri
• Fare for eksplosion, hvis batteriet ikke udskiftes korrekt.
Udskift kun med den type, der anbefales af fabrikanten.
• Når batterierne skal bortskaffes, bedes du kontakte de
lokale myndigheder eller forhandleren for at få oplysninger
om den korrekte bortskaffelsesmetode.
• Batteriet må ikke opvarmes eller udsættes for åben ild.
• Undlad at efterlade batteriet/batterierne i en bil i direkte
sollys i en længere periode med døre og vinduer lukket.
DANSKDANSK
ADVARSEL!
Apparatet
• For at mindske risikoen for brand, elektrisk stød eller
beskadigelse af produktet:
– Undlad at udsætte apparatet for regn, fugt, dryp eller
tilsprøjtning.
– Undlad at placere væskefyldte genstande som f.eks.
vaser oven på apparatet.
– Benyt kun anbefalet tilbehør.
– Undlad at fjerne kabinettet.
– Forsøg ikke at udføre reparationer selv. Service må kun
udføres af autoriseret servicepersonale.
Batteri
• Risiko for brand, eksplosion og forbrænding. Må ikke
genoplades, adskilles, opvarmes til mere end 60° C eller
brændes.
• Batterier af knaptypen skal opbevares utilgængeligt for
børn. Put aldrig batterier af knaptypen i munden. Søg
læge, hvis batterier sluges.
Produktets id-nummer befinder sig på undersiden af
enheden.
RQT9678
2
29
Page 30

Brugerinformation om indsamling og bortskaffelsse af
elektronikskrot og brugte batterier
Disse symboler på produkter, emballage og/
eller ledsagedokumenter betyder, at brugte
elektriske og elektroniske produkter og
batterier ikke må smides ud som almindeligt
husholdningsaffald.
Sådanne gamle produkter og batterier skal
indleveres til behandling, genvinding resp.
recycling i henhold til gældende nationale
bestemmelser samt direktiverne 2002/96/EF
og 2006/66/EF.
Ved at bortskaffe sådanne produkter og
batterier på korrekt vis hjælper du med til at
beskytte værdifulde ressourcer og imødegå
de negative påvirkninger af det menneskelige
helbred og miljøet, som vil kunne være følgen
af usagkyndig affaldsbehandling.
Ønsker du mere udførlig information om
indsamling og recycling af gamle produkter
og batterier, kan du henvende dig til din
kommune, deponeringsselskabet eller stedet,
hvor du har købt produkterne.
Usagkyndig bortskaffelse af elektronikskrot
og batterier kan eventuelt udløse bødeforlæg.
Indholdsfortegnelse
Sikkerhedsforskrifter ....................................2
Medfølgende tilbehør ....................................3
Overblik over betjeningsknapper.................4
Kom godt i gang ............................................5
CD, USB ..........................................................5
Radio ...............................................................7
Lydeffekter .....................................................7
Ur og timere ...................................................8
Fejlfinding ......................................................9
Vedligeholdelse ...........................................10
Specifikationer .............................................10
Medfølgende tilbehør
DANSKDANSK
For kommercielle brugere i Den
Europæiske Union
Når du ønsker at kassere elektriske eller
elektroniske apparater, bedes du henvende
dig til din forhandler eller leverandør for
nærmere information.
[Information om bortskaffelse i lande uden
for Den Europæiske Union]
Disse symboler gælder kun inden for Den
Europæiske Union. Ønsker du at kassere
sådanne produkter, bedes du forhøre dig hos
din forhandler eller kommune med henblik på
en hensigtsmæssig bortskaffelse.
Information om batterisymbol (to
eksempler nedenfor):
Dette symbol kan optræde sammen med et
kemisk symbol. I så fald opfylder det kravene
for det direktiv, som er blevet fastlagt for det
pågældende kemikalie.
Kontrollér og identificer venligst det medfølgende
tilbehør.
1 x Strømledning
1 x FM-indendørsantenne
1 x Fjernbetjening
(med et batteri)
(N2QAYC000060)
RQT9678
3
30
Page 31

DANSK
Overblik over betjeningsknapper
Fjernbetjening
Hovedenhed
Set fra toppen
AB OJC
Set forfra
SLEEP
USB
CD
DISPLAY
SOUND
OK
ALBUM
P Q R
DIMMER
RADIO
MUTESETUP
PLAY MENU
NM
A Standby/Tænd afbryder [`], [1]
• Tryk for at tænde/slukke for apparatet. Der bruges en
smule strøm, når apparatet står i standby.
B Vælg lydkilde
C Grundlæggende afspilningskontrol
D Vis urets og timerens funktioner
E Vis oplysninger
F Vælg lydeffekter
G Vælg funktionen
Spring et album over
H Indstil sleep-timeren
I Reducer belysningen på displaypanelet
• Tryk på tasten igen for at annullere.
J Reguler systemets lydstyrke
K Dæmp systemets lyd
• Tryk på tasten igen for at annullere.
• "MUTE" bliver også annulleret, når du regulerer
lydstyrken, eller når du slukker systemet.
L Vis afspilningsmenuen
Vis radioens funktioner
M USB-port ( )
N Stik til hovedtelefoner ( )
• Stiktype: Ø 3,5 mm stereo (medfølger ikke)
• Forebyg høreskader ved at undgå at lytte i længere
tidsrum ad gangen.
• Kraftigt lydtryk fra høretelefoner og hovedtelefoner kan
medføre tab af hørelsen.
• Det kan give høreskader at lytte for fuld styrke i
længere tid.
O Åbn eller luk skydedøren
P Skydedør
Q Fjernbetjeningssensor
• Maksimal afstand: 7 meter direkte foran
R Displaypanel
DANSK
RQT9678
4
31
Page 32

Kom godt i gang
1 Tilslut FM-indendørsantennen.
Placer antennen, hvor modtagelsen er bedst.
CD, USB
Isætning eller udtagning af medie
CD
Tryk på [CD x OPEN/CLOSE] på hovedenheden for at
åbne skydedøren.
Sæt en CD i og lad mærkatet vende opad.
Tape
2 Tilslut strømledningen.
Strømforbrug i standby-tilstand: 0,2 W (ca.)
Undlad at anvende strømledning fra andet udstyr.
DANSKDANSK
Til stikkontakten
Bemærk:
• Nogle indstillinger vender tilbage til standard, efter du har
frakoblet systemet.
• Disse højttalere er ikke magnetisk afskærmede. De må
ikke placeres i nærheden af tv’er, pc’er eller andet udstyr,
som let bliver påvirket af magnetisme.
• Du kan ikke fjerne højttalernes netbeklædning.
Klargøring af fjernbetjeningen
Inden brug
Klik!
Bemærk:
Hold fingrene væk fra skydedøren, når den lukker.
USB
USB-enhed
(medfølger ikke)
Bemærk:
Brug ikke et USB-forlængerkabel. Systemet kan ikke
genkende en USB-enhed, som er forbundet gennem et
kabel.
Beskyttelsesplastik
Udskiftning af batteri
Der må indsættes et nyt batteri (CR2025 lithium-batteri).
1 Mens der trykkes på stopanordningen, skal batteriet
trækkes ud af batteriholderen.
2 Isæt et nyt batteri med plussiden (+) opad.
3 Skub batteriholderen helt tilbage.
CR2025
RQT9678
5
32
Page 33

DANSK
Grundlæggende afspilning
Tryk på [CD] eller [USB] for at vælge kilde.
Afspil
Stop
Pause
Spring sporet
over
Søg gennem
spor
Spring et album
over
Vis oplysninger Tryk på [DISPLAY].
Bemærk:
• Det maksimale antal bogstaver, som kan vises, er cirka
32.
• Dette system understøtter ver. 1.0, 1.1 og 2.3 ID3-mærker.
• Tekstdata, som systemet ikke understøtter, kan blive vist
anderledes.
Tryk på [4/9].
Tryk på [8].
USB
:
Sporet gemmes i hukommelsen.
"RESUME" vises.
Tryk to gange for helt at stoppe.
Tryk på [4/9].
Tryk igen for at fortsætte
afspilningen.
Tryk på [2/3] eller [5/6].
Tryk på [2/3] eller [5/6]
og hold den nede.
Tryk på [R, T].
Afspilningsmenu
1 Tryk på [PLAY MENU] for at vælge "PLAYMODE"
eller "REPEAT".
2 Tryk på [R, T] og tryk derefter på [OK] for at vælge
den ønskede tilstand.
PLAYMODE
OFF
PLAYMODE
1-TRACK
1
1-ALBUM
1
Afspil alle spor.
Afspiller et valgt spor.
Tryk på [2/3] eller [5/6] for
at vælge sporet.
Afspiller et valgt album.
Tryk på [R, T] for at vælge albummet.
Bemærk:
• Under afspilning i tilfældig rækkefølge, kan du ikke skifte til
spor, der allerede er afspillet.
• Indstillingen vender tilbage til standard, når du åbner
skydedøren.
Kompatibelt medie
CD
• Dette system kan afspille CD-R/RW med CD-DA eller
MP3-formatindhold.
• Visse CD-R/RW kan ikke afspilles på grund af
optagelsestilstanden.
• MP3-filer defineres som spor, og mapper defineres som
albums.
• Dette system kan åbne op til:
– CD-DA : 99 spor
– MP3 : 999 spor, 255 albummer (inklusive rod-
mapper) og 20 sessioner
• CD'en skal være i overensstemmelse med ISO9660
niveau 1 eller 2 (med undtagelse af udvidede formater).
• Optagelser vil ikke nødvendigvis blive afspillet i den
rækkefølge, du optog dem.
USB
• Kompatible enheder, som defineres som
masselagringsklasse:
– USB-enheder, som kun understøtter masseoverførsel
– USB-enheder, som understøtter USB 2.0 med fuld
hastighed
• Filer defineres som spor, og mapper defineres som
albums.
• Sporet skal have filendelsen ".mp3" eller ".MP3".
• Dette system kan åbne op til:
– 255 albummer (inklusive rod-mapper)
– 2500 spor
– 999 spor på et album
• CBI (på engelsk Control/Bulk/Interrupt) understøttes ikke.
• NTFS-filsystemet er ikke understøttet (kun
FAT 12/16/32-filsystemet er understøttet).
• Nogle filer fungerer muligvis ikke på grund af
sektorstørrelsen.
MPEG Layer-3 lydafspillerens indkodningsteknologi er
autoriseret af Fraunhofer IIS og Thomson.
DANSK
RANDOM
RND
1-ALBUM
RANDOM
1 RND
REPEAT
ON REPEAT
OFF REPEAT Annuller gentaget afspilning.
Afspiller alle spor i tilfældig rækkefølge.
Afspil alle spor på et valgt album i
tilfældig rækkefølge.
Tryk på [R, T] for at vælge albummet.
Gentaget afspilning.
RQT9678
6
33
Page 34

Radio
Der kan forindstilles 30 FM-stationer.
Klargøring
Tilslut FM-indendørsantennen (Z side 5).
Tryk på [RADIO].
Automatisk programmering
1 Tryk på [PLAY MENU] for at vælge "A.PRESET".
2 Tryk på [OK] for at vælge "LOWEST" eller
"CURRENT" frekvens.
LOWEST : For at starte automatisk forindstilling fra den
CURRENT : For at starte automatisk forindstilling fra den
Ændre frekvensen, se "Manuel indstilling af stationer
og programmering".
3 Tryk på [OK] for at starte indstilling af forvalg.
Tuneren lagrer alle de stationer, den kan modtage, i
kanaler med stigende frekvens.
For at annullere, tryk på [8].
laveste frekvens.
aktuelle frekvens
.
Forbedre lydkvaliteten
1 Tryk på [PLAY MENU] for at vælge "FM MODE".
2 Tryk på [R, T] for at vælge "MONO" og tryk derefter
på [OK].
For at annullere, vælg "STEREO".
"MONO" bliver også annulleret, når du ændrer
frekvensen.
Sådan gengives indstillingen
Fortsæt med trin 4 til 6 af "Manuel indstilling af stationer og
programmering".
Kontrol af signalstatus
Tryk på [PLAY MENU] for at vælge "FM STATUS" og tryk
derefter på [OK].
FM FM-signalet er i mono.
Systemet er ikke stillet ind på en station.
FM ST FM-signalet er i stereo.
FM MONO "MONO" er valgt som "FM MODE".
DANSKDANSK
Manuel indstilling af stationer og
programmering
1 Tryk på [PLAY MENU] for at vælge "TUNEMODE".
2 Tryk på [R, T] for at vælge "MANUAL" og tryk
derefter på [OK].
3 Tryk på [2/3] eller [5/6] for at stille ind på
stationen.
For at indstille automatisk, tryk og hold knappen nede,
indtil frekvensen begynder at skifte hurtigt.
"STEREO" bliver vist, når systemet er stillet ind på en
stereoudsendelse.
Sådan forindstilles stationen
4 Tryk på [OK].
5 Tryk på [R, T] for at vælge et forindstillet nummer.
6 Tryk på [OK].
Udfør trin 3 til 6 igen for at forindstille flere stationer.
Bemærk:
En station, der tidligere er blevet gemt, bliver overskrevet,
når en anden station bliver gemt i det samme forindstillede
nummer.
Valg af en forvalgt station
1 Tryk på [PLAY MENU] for at vælge "TUNEMODE".
2 Tryk på [R, T] for at vælge "PRESET" og tryk
derefter på [OK].
3 Tryk på [2/3] eller [5/6] for at vælge den
RQT9678
forindstillede station.
7
34
RDS-udsendelser
Dette system kan vise tekstdata, som sendes via radioens
datasystem (RDS) i visse områder.
Tryk på [DISPLAY].
PS Stationsnavn
PTY Programtype
FREQ Frekvens
Bemærk:
Det er ikke sikkert, at RDS er tilgængelig, hvis modtagelsen
er dårlig.
Lydeffekter
1 Tryk på [SOUND] for at vælge en lydeffekt.
2 Tryk på [R, T] for at vælge den ønskede indstilling.
PRESET EQ "HEAVY" : Føjer slagkraft til rockmusik.
"SOFT" : Til baggrundsmusik.
"CLEAR" : Fremhæver de højeste
frekvenser.
"VOCAL" : Føjer glans til stemmer.
"FLAT" : Annullerer lydeffekten.
BASS "BASS -4" til "BASS +4".
TREBLE "TREBLE-4" til "TREBLE+4".
D.BASS "ON D.BASS" eller "OFF D.BASS".
SURROUND "ON SURROUND" eller
"OFF SURROUND".
Page 35

DANSK
Ur og timere
Indstilling af ur
Dette system er udstyret med et 24-timers digitalur.
1 Tryk på [SETUP] for at vælge "CLOCK".
2 Tryk på [R, T] for at indstille tiden.
3 Tryk på [OK].
Vise uret i nogle få sekunder
Tryk på [SETUP] for at vælge "CLOCK" og tryk derefter på
[OK].
Bemærk:
Stil uret regelmæssigt, så det går præcist.
Sleep-timer
Sleep-timeren slår systemet fra efter den indstillede tid.
Tryk på [SLEEP] for at vælge indstillingen (i minutter).
For at annullere, vælg "OFF".
SLEEP 30 → SLEEP 60 → SLEEP 90 → SLEEP120
Bemærk:
• Den resterende tid vises på displayet. Displayet ændres
midlertidigt, når du udfører andre handlinger.
• Sleep-timeren kan bruges sammen med
afspilnings-timeren.
• Sleep-timeren har altid første prioritet. Sørg for at
tidspunkterne ikke overlapper hinanden.
OFF
Afspilnings-timer
Du kan sætte timeren til at starte på et bestemt tidspunkt for
at vække dig.
Klargøring
Stil uret.
1 Tryk på [SETUP] for at vælge "TIMER ADJ".
2 Tryk på [R, T] for at indstille starttidspunktet.
3 Tryk på [OK].
4 Udfør trin 2 og 3 igen for at indstille
afslutningstidspunktet.
Start af timeren
1 Klargør den lydkilde, du vil lytte til, og indstil
lydstyrken.
2 Tryk på [SETUP] for at vælge "TIMER SET".
3 Tryk på [R, T] for at vælge "SET" og tryk derefter
på [OK].
"#" vises.
Systemet skal være slukket, for at timeren kan virke.
Kontroller
indstillingerne
Annullere 1. Tryk på [SETUP] for at vælge
1. Tryk på [SETUP] for at vælge
"TIMER ADJ".
2. Tryk på [OK].
"TIMER SET".
2. Tryk på [R, T] for at vælge "OFF"
og tryk derefter på [OK].
Automatisk slukning
Denne funktion slukker systemet (undtagen hvis radio
er valgt som kilde), hvis du ikke anvender systemet i ca.
30 minutter.
CD USB
1 Tryk på [SETUP] for at vælge "AUTO OFF".
2 Tryk på [R, T] for at vælge "ON" (tændt) eller "OFF"
(slukket) og tryk derefter på [OK].
DANSK
Bemærk:
• Timeren starter med en lav lydstyrke, og den stiger
gradvist til det forindstillede niveau.
• Timeren starter på det angivne tidspunkt hver dag, hvis
timeren er tændt.
• Hvis du slukker systemet og derefter tænder det
igen, mens en timer er aktiv, stopper timeren ikke på
afslutningstidspunktet.
RQT9678
8
35
Page 36

Fejlfinding
Udfør nedenstående tjek, inden du sender apparatet til
reparation. Rådfør dig med din forhandler, hvis du er i tvivl
om nogen af kontrolpunkterne, eller hvis problemet ikke kan
løses gennem de angivne løsninger.
Almindelige problemer
Ingen funktioner kan foretages med fjernbetjeningen.
• Undersøg, om batteriet er sat i på korrekt vis.
• Fjernbetjeningen og denne enhed bruger forskellige koder
(Z højre, "REMOTE ").
Lyden er forvrænget, eller der er ingen lyd.
• Reguler systemets lydstyrke.
• Sluk systemet, fastslå og korriger årsagen, og tænd og
sluk derefter for enheden igen. Det kan forårsages af
overbelastning af højttalerne på grund af for høj lydstyrke
eller kraft eller på grund af anvendelse af systemet i for
varme omgivelser.
En "summende" lyd kan høres under afspilning.
• Der er en strømledning eller et lysstofrør tæt på enheden.
Hold andet udstyr og andre ledninger væk fra dette
systems kabel.
DANSKDANSK
CD
Displayet bliver ikke vist korrekt.
Afspilningen starter ikke.
• Du har ikke indsat CD'en korrekt. Indsæt den korrekt.
• CD'en er snavset. Rengør CD'en.
• Udskift CD'en, hvis den er ridset, skæv eller ikke er
cirkelrund.
• Der er kondens. Lad systemet tørre i 1 til 2 timer.
USB
USB-enheden eller indholdet kan ikke aflæses.
• Formatet for USB-enheden eller indholdet er ikke
kompatibelt med systemet.
• USB-enheder med en lagringskapacitet på mere end
32 GB fungerer ikke i nogen tilstande.
Langsom funktion af USB-enheden.
• Stort indhold eller en USB-enhed med meget hukommelse
tager længere tid at aflæse.
Den forløbne tid, som vises, er anderledes end den
aktuelle spilletid.
• Overfør dataene til en anden USB-enhed eller tag
sikkerhedskopi af dataene og genformater USB-enheden.
Hovedenheden viser
"--:--"
• Strømledningen er sat i for første gang, eller der har været
en strømafbrydelse for nylig. Stil uret.
"ADJUST CLOCK"
• Uret er ikke indstillet. Indstil uret.
"ADJUST TIMER"
• Afspilnings-timer er ikke indstillet. Indstil
afspilnings-timeren.
"ERROR"
• Der blev foretaget en ukorrekt funktion. Læs
instruktionerne og prøv igen.
"F61"
• Der er et problem med strømforsyningen.
"USB OVER CURRENT ERROR"
• USB-enhed bruger for meget strøm. Fjern din USB-enhed.
Sluk for systemet og tænd for den igen.
"NODEVICE"
• USB-enheden er ikke tilsluttet. Undersøg forbindelsen.
"NO DISC"
• Du har ikke indsat en CD.
"NO PLAY"
• Du har indsat en CD, som systemet ikke kan afspille.
• Du har indsat en USB-enhed, som ikke kan afspilles.
Undersøg indholdet. Du kan kun afspille et understøttet
format.
• Hvis der er mere end 255 albummer eller mapper (lyd
og ikke-lyd), vil nogle MP3-filer på disse albummer ikke
kunne aflæses og afspilles. Overfør disse musikalbummer
til en anden USB-enhed. Alternativt kan du omformatere
din USB-enhed og gemme disse musikalbummer, før du
gemmer de andre mapper uden lydfiler.
"NOT MP3/ERROR"
• Et ikke understøttet MP3-format. Systemet vil springe
dette spor over og afspille det næste spor.
"REMOTE " (" " står for et nummer.)
• Fjernbetjeningen og denne enhed bruger forskellige koder.
Ændre koden på fjernbetjeningen.
– Når "REMOTE 1" vises, skal du trykke på [OK] og [T] og
holde dem nede i mindst 4 sekunder.
– Når "REMOTE 2" vises, skal du trykke på [OK] og [R] og
holde dem nede i mindst 4 sekunder.
"–VBR–"
• Systemet kan ikke vise den resterende spilletid for spor
med variabel bithastighed (VBR).
Radio
En hyletone høres.
• Sluk for fjernsynet eller flyt det væk fra systemet.
• Hvis der forekommer interferens, skal du flytte
mobiltelefoner væk fra enheden.
RQT9678
9
36
Page 37

DANSK
Nulstilling af hukommelsen (initialisering)
Hukommelsen skal nulstilles, når de følgende situationer
forekommer:
• Hvis der ikke er nogen reaktion, når der trykkes på
tasterne.
• Hvis du vil slette og nulstille hukommelsens indhold.
1 Tag stikket til strømledningen ud.
Vent 3 minutter, før du fortsætter med trin 2.
2 Mens du trykker og holder [1] nede på
hovedenheden, skal du koble strømledningen til
igen.
"– – – – – – – –" vises.
3 Slip [1].
Alle indstillingerne er genindstillet til
fabriksindstillingerne.
Hukommelsespunkterne skal indstilles igen.
Fjernbetjeningskode
Når andet Panasonic-udstyr reagerer på dette systems
fjernbetjening, skal du ændre fjernbetjeningens kode på
dette system.
Sådan indstilles koden til "REMOTE 2"
1 Tryk og hold [CD] på hovedenheden og [R] nede på
fjernbetjeningen, indtil "REMOTE 2" vises.
2 Tryk på [OK] og [R] og hold dem nede i mindst
4 sekunder.
Sådan indstilles koden til "REMOTE 1"
1 Tryk og hold [CD] på hovedenheden og [T] nede på
fjernbetjeningen, indtil "REMOTE 1" vises.
2 Tryk på [OK] og [T] og hold dem nede i mindst
4 sekunder.
Specifikationer
Forstærkersektion
RMS udgangseffekt, stereo-tilstand
Frontkanal (begge kanaler drevet)
5 W pr. kanal (6
Total effekt af RMS stereo-tilstand 10 W
Tunersektion
Forindstillet station FM 30 stationer
Frekvensmodulation (FM)
Frekvensområde 87,50 MHz til 108,00 MHz (50 kHz trin)
Antenneterminaler 75
Terminal-sektion
USB-port
USB-standard USB 2.0 med fuld hastighed
Understøttet mediefilformat MP3 (*.mp3)
Filsystem for USB-enhed FAT12, FAT16, FAT32
Strøm til USB-port 500 mA (maks.)
Stik til hovedtelefoner
Terminal Stereo, 3,5 mm jackstik
CD-sektion
CD'er, som kan afspilles (8 cm eller 12 cm)
CD, CD-R/RW (CD-DA, MP3
Pickup
Bølgelængde 790 nm (CD)
Lasereffekt Ingen farlig stråling
(med sikkerhedsbeskyttelse)
Laserstyrke CLASS I
Lydudgang (CD)
Antal kanaler 2 kanaler (FL, FR)
FL = Venstre frontkanal
FR = Højre frontkanal
MPEG-1 Layer 3, MPEG-2 Layer 3
), 1 kHz, 10 % THD
(ubalanceret)
)
DANSK
Vedligeholdelse
Hvis systemet er snavset, rengøres det med en blød, tør
klud.
• Brug aldrig sprit, lakfortynder eller benzen til at rengøre
dette system.
• Før du anvender en kemisk imprægneret klud, bør du
omhyggeligt læse betjeningsvejledningen, som fulgte med
kluden.
Højttalersektion
Type 1-vejs, 1-højttalersystem (basrefleks)
Højttalerenhed(er)
Fuldt område 8 cm kegletype x 1/kanal
Impedans 6
Generelt
Strømforsyning AC 220 til 240 V, 50 Hz
Strømforbrug 12 W
Mål (B x H x D) 400 mm x 213 mm x 110 mm
[D = 72 mm (min)]
Vægt 1,9 kg
Driftstemperaturområde 0° C til +40° C
Driftsluftfugtighedsområde
35 % til 80 % RH (ingen kondensering)
Strømforbrug i standby-tilstand 0,2 W (ca.)
Bemærk:
• Specifikationerne kan ændres uden varsel.
Vægt og mål er omtrentlige.
• THD (total harmonisk forvrængning) er målt med den
digitale frekvensanalysator.
RQT9678
10
37
Page 38

Suorita toiminnot kaukosäätimellä. Voit myös käyttää
pääyksikön painikkeita, jos ne ovat samat.
Oma järjestelmäsi voi näyttää erilaiselta kuin kuvissa
esitetty.
Turvallisuustoimet
Tuotteen pohjassa
Tuotteen sisällä
HUOMIO!
Laite
• Vähennä tulipalon, sähköiskun tai laitteiston
vahingoittumisen vaaraa:
– Älä asenna tai laita tätä laitetta kabinettityyppiseen
kirjakaappiin tai muuhun suljettuun tilaan, jotta tuuletus
onnistuisi.
– Älä peitä laitteen tuuletusaukkoja sanomalehdellä,
pöytäliinalla, verholla tai muulla vastaavalla esineellä.
– Älä aseta palavaa kynttilää tai muuta avotulen lähdettä
laitteen päälle.
• Tämä laite on tarkoitettu käytettäväksi leudossa
ilmastossa.
• Asenna laite siten, että vaihtovirtajohto voidaan irrottaa
pistorasiasta välittömästi ongelmien ilmetessä.
• Tämä laite saattaa olla altis matkapuhelinten käytön
aikana aiheuttamille radiohäiriöille. Jos häiriöitä esiintyy,
siirrä laite kauemmas matkapuhelimesta.
• Tämä on laserlaite. Muiden kuin tässä määritettyjen
hallinta- tai säätötoimintojen käyttö tai toimenpiteiden
suoritus saattaa aiheuttaa vaarallisen altistumisen
säteilylle.
Paristo
• Pariston virheellinen vaihto saattaa aiheuttaa
räjähdysvaaran. Korvaa se vain valmistajan suosittelemilla
paristotyypeillä.
• Kun hävität paristoja, ota yhteys paikallisiin viranomaisiin
tai jälleenmyyjään ja kysy heiltä oikea hävitystapa.
• Älä kuumenna tai altista avotulelle.
• Älä jätä paristoja suorassa auringonpaisteessa olevaan
autoon, jonka ovet ja ikkunat ovat pitkään suljettuina.
SUOMISUOMI
VAROITUS!
Laite
• Vähennä tulipalon, sähköiskun tai laitteiston
vahingoittumisen vaaraa:
– Tätä laitetta ei saa altistaa sateelle, kosteudelle,
roiskeille tai tippuville nesteille.
– Älä aseta laitteen päälle nestettä sisältäviä esineitä,
kuten maljakoita.
– Käytä vain suositeltuja lisävarusteita.
– Älä avaa laitteen koteloa.
– Älä korjaa laitetta itse. Anna huolto pätevän
huoltohenkilön tehtäväksi.
Paristo
• Tulipalo-, räjähdys- ja palovammavaara. Älä lataa
uudelleen, pura, altista yli 60 °C lämmölle tai polta.
• Säilytä nappiparistot lasten ulottumattomissa. Älä koskaan
pane nappiparistoa suuhun. Jos nielet pariston, ota yhteys
lääkäriin.
RQT9678
2
38
Tuotteen tunnistemerkinnät sijaitsevat laitteen pohjassa.
Page 39

SUOMI
Tietoja vanhojen laitteiden ja käytettyjen paristojen
keräyksestä ja hävittämisestä
Nämä merkinnät tuotteissa, pakkauksissa
ja/tai niihin liitetyissä dokumenteissa
tarkoittavat, että käytettyjä sähkö- ja
elektroniikkalaitteita sekä paristoja ei tule
sekoittaa tavalliseen kotitalousjätteeseen.
Vanhojen tuotteiden ja käytettyjen paristojen
asianmukainen käsittely, talteen ottaminen
ja kierrätys edellyttävät niiden viemistä
tarjolla oleviin keräyspisteisiin kansallisten
määräysten sekä direktiivien 2002/96/EC ja
2006/66/EC mukaisesti.
Kun hävität tuotteet ja paristot
asianmukaisesti, autat säilyttämään
arvokkaita luonnonvaroja sekä ehkäisemään
ihmisen terveydelle ja ympäristölle haitallisia
vaikutuksia, joita vääränlainen jätteenkäsittely
voi aiheuttaa.
Ota yhteys asuinkuntasi viranomaisiin,
jätteenkäsittelystä vastaavaan tahoon tai
tuotteiden ostopaikkaan saadaksesi lisätietoja
vanhojen tuotteiden ja paristojen keräyksestä
ja kierrätyksestä.
Tuotteiden epäasianmukaisesta
hävittämisestä saattaa seurata kansallisessa
lainsäädännössä määrätty rangaistus.
Yrityksille Euroopan unionissa
Lisätietoja sähkö- ja elektroniikkalaitteiden
hävittämisestä saat jälleenmyyjältä tai
tavarantoimittajalta.
[Tietoja hävittämisestä Euroopan unionin
ulkopuolella]
Nämä merkinnät ovat voimassa
ainoastaan Euroopan unionin alueella.
Ota yhteys paikallisiin viranomaisiin tai
jälleenmyyjään saadaksesi tietoja oikeasta
jätteenkäsittelymenetelmästä.
Paristomerkintää koskeva huomautus (alla
kaksi esimerkkiä merkinnöistä):
Tämä merkki voi olla käytössä yhdessä
kemiallisen merkinnän kanssa. Siinä
tapauksessa merkki noudattaa kyseistä
kemikaaliakoskevan direktiivin vaatimuksia.
Sisältö
Turvallisuustoimet .........................................2
Toimitetut lisävarusteet ................................3
Hallintatoimintojen yleiskatsaus ..................4
Käytön aloitus ................................................5
Levy, USB .......................................................5
Radio ...............................................................7
Äänitehosteet .................................................7
Kello ja ajastukset .........................................8
Vianmääritys ..................................................9
Ylläpito ..........................................................10
Tekniset tiedot .............................................10
Toimitetut lisävarusteet
Tarkista toimitetut lisävarusteet.
1 x Vaihtovirtajohto
1 x FM-sisäantenni
1 x Kaukosäädin
(sisältää pariston)
(N2QAYC000060)
SUOMI
RQT9678
3
39
Page 40

Hallintatoimintojen yleiskatsaus
Kaukosäädin
Pääyksikkö
Näkymä yläpuolelta
SUOMISUOMI
AB OJC
Näkymä etupuolelta
SLEEP
USB
CD
DISPLAY
SOUND
OK
ALBUM
P Q R
DIMMER
RADIO
MUTESETUP
PLAY MENU
NM
A Valmiustila-/virtakytkin [`], [1]
• Painamalla kytkintä voit siirtää laitteen valmiustilaan
tai palauttaa sen valmiustilasta. Valmiustilassa laite
kuluttaa edelleen pienen määrän virtaa.
B Valitsee äänilähteen
C Perustoistotoiminnot
D Näyttää kellon ja ajastimen asetukset
E Näyttää tiedot
F Valitsee äänitehosteet
G Valitsee asetuksen
Ohittaa albumin
H Asettaa uniajastimen
I Vähentää näyttöpaneelin kirkkautta
• Peruuta painamalla painiketta uudelleen.
J Säätää järjestelmän äänenvoimakkuutta
K Vaimentaa järjestelmän äänen
• Peruuta painamalla painiketta uudelleen.
• ”MUTE” peruuntuu myös, kun äänenvoimakkuutta
säädetään tai laite sammutetaan.
L Näyttää toistovalikon
Näyttää radion asetukset
M USB-portti ( )
N Kuulokeliitäntä ( )
• Pistoketyyppi: Ø 3,5 mm:n stereo (ei toimiteta)
• Vältä pitkäaikaista kuulokkeilla kuuntelua
kuulovaurioiden estämiseksi.
• Liiallinen äänenpaine korvanapeista tai kuulokkeista
saattaa aiheuttaa kuulon heikkenemistä.
• Pitkäaikainen täydellä äänenvoimakkuudella kuuntelu
saattaa vahingoittaa käyttäjän korvia.
O Avaa tai sulkee liukuluukun
P Liukuluukku
Q Kaukosäätimen tunnistin
• Enimmäisetäisyys: 7 m suoraan edestä
R Näyttöpaneeli
RQT9678
4
40
Page 41

SUOMI
Käytön aloitus
1 Liitä FM-sisäantenni.
Sijoita antenni paikkaan, jossa vastaanotto on paras.
Levy, USB
Median asettaminen ja poistaminen
Levy
Avaa liukuluukku painamalla pääyksikön
[CD x OPEN/CLOSE]-painiketta.
Aseta levy laitteeseen nimipuoli itseesi päin.
Teippi
2 Liitä vaihtovirtajohto.
Virrankulutus valmiustilassa: 0,2 W (noin)
Älä käytä muille laitteille tarkoitettuja vaihtovirtajohtoja.
Verkkovirtapistorasiaan
Huomautus:
• Osa asetuksista palautuu oletusasetuksiin, kun irrotat
järjestelmän verkkovirrasta.
• Näissä kaiuttimissa ei ole magneettisuojausta. Älä sijoita
niitä televisioiden, tietokoneiden tai muiden sellaisten
laitteiden läheisyyteen, joihin magneettikenttä vaikuttaa
helposti.
• Kaiutinten verkkoa ei voi poistaa.
Kaukosäätimen valmistelu
Ennen käyttöä
Naps!
Huomautus:
Pidä sormesi poissa liukuluukun välistä, kun se sulkeutuu.
USB
USB-laite
(ei toimiteta)
Huomautus:
Älä käytä USB-jatkojohtoa. Järjestelmä ei voi tunnistaa
USB-laitetta, joka on liitetty johdolla.
SUOMI
Eristysarkki
Pariston vaihtaminen
Vaihda paristo uuteen (CR2025-litiumparisto).
1 Pidä lukitussalpaa painettuna ja vedä pariston
pidike ulos.
2 Aseta uusi paristo (+)-puoli ylöspäin.
3 Paina pariston pidike kokonaan sisään.
CR2025
RQT9678
5
41
Page 42

Perustoisto
Yhteensopiva media
Valitse lähde painamalla [CD] tai [USB].
Toista
Pysäytä
Tauko
Ohita raita
Selaa raitaa
Ohita albumi
Näyttää tiedot Paina [DISPLAY].
Huomautus:
• Näytettävien merkkien enimmäismäärä: noin 32
• Tämä järjestelmä tukee versioiden 1.0, 1.1 ja 2.3
ID3-tunnisteita.
• Tekstitiedot, joita järjestelmä ei tue, saattavat näkyä eri
tavalla.
Paina [4/9].
Paina [8].
USB
:
Raita tallennetaan muistiin.
”RESUME” tulee näyttöön.
Paina kaksi kertaa, jos haluat
pysäyttää toiston kokonaan.
Paina [4/9].
Paina uudelleen toiston
jatkamiseksi.
Paina [2/3] tai [5/6].
Pidä [2/3] tai [5/6]
painettuna.
Paina [R, T].
Toistovalikko
SUOMISUOMI
1 Valitse ”PLAYMODE” tai ”REPEAT” painamalla
[PLAY MENU].
2 Valitse haluttu tila painamalla [R, T] ja sitten [OK].
PLAYMODE
OFF
PLAYMODE
1-TRACK
1
1-ALBUM
1
Toista kaikki raidat.
Toista yksi valittu raita.
Valitse raita painamalla [2/3] tai
[5/6].
Toista yksi valittu albumi.
Valitse albumi painamalla [R, T].
Levy
• Järjestelmä pystyy toistamaan CD-R/RW-levyjä, joilla on
joko CD-DA- tai MP3-muotoista sisältöä.
• Joitakin CD-R/RW-levyjä ei voida toistaa
tallennusmuodosta johtuen.
• MP3-tiedostot näytetään raitoina ja kansiot näytetään
albumeina.
• Tämä järjestelmä pystyy käsittelemään enintään:
– CD-DA : 99 raitaa
– MP3 : 999 raitaa, 255 albumia (mukaan lukien
juurikansion) sekä 20 istuntoa
• Levyn on noudatettava ISO9660-standardin tasoa 1 tai 2
(paitsi laajennetut muodot).
• Tallenteita ei välttämättä toisteta samassa järjestyksessä
kuin ne on tallennettu.
USB
• Yhteensopivat USB-laitteet, jotka on määritetty
massamuistiluokan laitteina:
– USB-laitteet, jotka tukevat vain bulk-siirtoa
– USB-laitteet, jotka tukevat USB 2.0 -standardin täyttä
nopeutta
• Tiedostot näytetään raitoina ja kansiot näytetään
albumeina.
• Raidan tiedostopäätteen on oltava ”.mp3” tai ”.MP3”.
• Tämä järjestelmä pystyy käsittelemään enintään:
– 255 albumia (mukaan lukien juurikansion)
– 2500 raitaa
– 999 raitaa yhdessä albumissa
• CBI-standardia (englanniksi Control/Bulk/Interrupt) ei
tueta.
• NTFS-tiedostojärjestelmää ei tueta (vain FAT 12/16/32
-tiedostojärjestelmää tuetaan).
• Jotkin tiedostot eivät ehkä toimi sektorikoon vuoksi.
MPEG Layer-3 -äänikoodaustekniikka on lisensoitu
Fraunhofer IIS- ja Thomson-yhtiöiltä.
RANDOM
RND
1-ALBUM
RANDOM
1 RND
REPEAT
ON REPEAT
OFF REPEAT Peruuta toistuva toisto.
RQT9678
Huomautus:
• Satunnaistoiston aikana et voi siirtyä raitoihin, jotka on jo
6
toistettu.
• Asetus palautuu oletukseen, kun avaat liukuluukun.
42
Toista kaikki raidat satunnaisessa
järjestyksessä.
Toista yhden valitun albumin kaikki
raidat satunnaisessa järjestyksessä.
Valitse albumi painamalla [R, T].
Toistuva toisto.
Page 43

SUOMI
Radio
Voit esiasettaa 30 FM-asemaa.
Valmistelu
Liitä FM-sisäantenni (Z sivu 5).
Paina [RADIO].
Automaattinen esiasetus
1 Valitse ”A.PRESET” painamalla [PLAY MENU].
2 Valitse taajuudeksi ”LOWEST” tai ”CURRENT”
painamalla [R, T].
LOWEST : Aloittaa automaattisen esiasetuksen
CURRENT : Aloittaa automaattisen esiasetuksen
Katso ohjeet taajuuden muuttamiseen kohdasta
”Manuaalinen viritys ja esiasetukset”.
3 Aloita esiasetusten teko painamalla [OK].
Viritin asettaa kaikki vastaanottamansa asemat kanaviin
nousevassa järjestyksessä.
Peruuta painamalla [8].
matalimmasta taajuudesta.
nykyisestä taajuudesta
.
Äänenlaadun parantaminen
1 Valitse ”FM MODE” painamalla [PLAYMENU].
2 Valitse ”MONO” painamalla [R, T] ja paina sitten
[OK].
Peruuta valitsemalla ”STEREO”.
”MONO”-asetus peruutetaan myös, jos vaihdat taajuutta.
Asetuksen tallennus
Jatka suorittamalla vaiheet 4-6 kohdassa ”Manuaalinen
viritys ja esiasetukset”.
Tarkistetaan signaalin tilaa
Valitse ”FM STATUS” painamalla [PLAY MENU] ja paina
sitten [OK].
FM FM-signaali on monotilassa.
Järjestelmää ei ole viritetty asemalle.
FM ST FM-signaali on stereotilassa.
FM MONO ”FM MODE” -tilaksi valittiin ”MONO”.
Manuaalinen viritys ja esiasetukset
1 Valitse ”TUNEMODE” painamalla [PLAY MENU].
2 Valitse ”MANUAL” painamalla [R, T] ja paina sitten
[OK].
3 Viritä asema painamalla [2/3] tai
[5/6]-painiketta.
Aloita automaattinen viritys pitämällä painiketta
painettuna, kunnes taajuus alkaa vaihtua nopeasti.
Kun järjestelmä on viritetty stereolähetykselle, näytössä
näkyy ”STEREO”.
Aseman esiasettaminen
4 Paina [OK].
5 Valitse esiasetusnumero painamalla [R, T].
6 Paina [OK].
Suorita vaiheet 3-6 uudelleen, jos haluat asettaa muita
asemia.
Huomautus:
Aiemmin tallennettu asema korvataan, jos samaan
esiasetusnumeroon tallennetaan toinen asema.
Esiasetetun aseman valitseminen
1 Valitse ”TUNEMODE” painamalla [PLAY MENU].
2 Valitse ”PRESET” painamalla [R, T] ja paina sitten
[OK].
3 Valitse esiasetettu asema painamalla [2/3] tai
[5/6]-painiketta.
RDS-lähetys
Tämä järjestelmä pystyy näyttämään radiotietojärjestelmän
(RDS) joillakin alueilla lähettämät tekstitiedot.
Paina [DISPLAY].
PS Aseman nimi
PTY Ohjelman tyyppi
FREQ Taajuus
Huomautus:
RDS ei ehkä ole käytettävissä, jos vastaanotto on heikkoa.
Äänitehosteet
1 Valitse äänitehoste painamalla [SOUND].
2 Valitse haluamasi asetus painamalla [R, T].
PRESET EQ ”HEAVY” : Lisää potkua rock-musiikkiin.
”SOFT” : Taustamusiikille.
”CLEAR” : Kirkastaa korkeampia
taajuuksia.
”VOCAL” : Lisää hohtoa lauluun.
”FLAT” : Peruuttaa äänitehosteen.
BASS ”BASS -4” – ”BASS +4”.
TREBLE ”TREBLE-4” – ”TREBLE+4”.
D.BASS ”ON D.BASS” tai ”OFF D.BASS”.
SURROUND ”ON SURROUND” tai
”OFF SURROUND”.
SUOMI
RQT9678
7
43
Page 44

Kello ja ajastukset
Kellon asettaminen
Tämä on 24-tuntinen kello.
1 Valitse ”CLOCK” painamalla [SETUP].
2 Aseta aika painamalla [R, T].
3 Paina [OK].
Kellon näyttäminen muutaman sekunnin ajan
Valitse ”CLOCK” painamalla [SETUP] ja paina sitten [OK].
Huomautus:
Aseta kellonaika usein, jotta se säilyy tarkkana.
Uniajastin
Uniajastin sammuttaa järjestelmän asetetun ajan kuluttua.
Valitse asetus (minuutteina) painamalla [SLEEP].
Peruuta valitsemalla ”OFF”.
SLEEP 30 → SLEEP 60 → SLEEP 90 → SLEEP120
Huomautus:
• Jäljellä oleva aika näytetään aina näytössä.
Näyttö muuttuu väliaikaisesti, kun suoritat muita toimintoja.
• Uniajastinta voidaan käyttää yhdessä toistoajastimen
kanssa.
• Uniajastin on aina etusijalla. Varmista, ettet aseta ajastimia
päällekkäisiksi ajoiksi.
OFF
Toiston ajastin
Voit asettaa ajastimen käynnistymään tiettyyn aikaan ja
herättämään sinut.
Valmistelu
Aseta kellonaika.
1 Valitse ”TIMER ADJ” painamalla [SETUP].
2 Aseta aloitusaika painamalla [R, T].
3 Paina [OK].
4 Suorita vaiheet 2 ja 3 uudelleen ja aseta lopetusaika.
Ajastimen käynnistys
SUOMISUOMI
1 Valmistele äänilähde, jota haluat kuunnella ja aseta
äänenvoimakkuus.
2 Valitse ”TIMER SET” painamalla [SETUP].
3 Valitse ”SET” painamalla [R, T] ja paina sitten [OK].
”#” tulee näyttöön.
Järjestelmä on sammutettava, jotta ajastin toimisi.
Tarkista
asetukset
Peruuta 1. Valitse ”TIMER SET” painamalla
Huomautus:
• Ajastin aloittaa toiston matalalla äänenvoimakkuudella ja
lisää äänenvoimakkuutta vähitellen asetettuun tasoon.
• Ajastin käynnistyy asetettuun aikaan päivittäin, jos ajastin
on käytössä.
• Jos sammutat järjestelmän ja käynnistät sen uudelleen
ajastimen ollessa käynnissä, ajastin ei lopeta toistoa
lopetusaikaan.
1. Valitse ”TIMER ADJ” painamalla
[SETUP].
2. Paina [OK].
[SETUP].
2. Valitse ”OFF” painamalla [R, T] ja
paina sitten [OK].
Automaattisammutustoiminto
Tämä toiminto kytkee järjestelmän pois päältä (radiolähdettä
lukuun ottamatta), jos et käytä järjestelmää n. 30 minuuttiin.
CD USB
1 Valitse ”AUTO OFF” painamalla [SETUP].
2 Valitse ”ON” (päällä) tai ”OFF” (pois) painamalla
[R, T] ja paina sitten [OK].
RQT9678
8
44
Page 45

SUOMI
Vianmääritys
Tee seuraavat tarkistukset ennen kuin pyydät huoltoa. Jos et
ole varma joistakin tarkistettavista kohdista, tai jos annetut
ratkaisut eivät ratkaise ongelmaa, pyydä jälleenmyyjältä
ohjeita.
Yleisiä ongelmia
Mitään toimintoja ei voi suorittaa kaukosäätimellä.
• Tarkista, että paristo on asetettu oikein.
• Kaukosäädin ja tämä laite käyttävät eri koodeja
(Z oikealle, ”REMOTE ”).
Ääni on vääristynyt tai ääntä ei kuulu.
• Säätää järjestelmän äänenvoimakkuutta.
• Sammuta järjestelmä, määritä ja korjaa ongelman syy
ja käynnistä järjestelmä uudelleen. Ongelma voi johtua
kaiutinten toimimisesta äärirajoilla, kun äänenvoimakkuus
tai teho on liian suuri, sekä kun järjestelmää käytetään
kuumassa ympäristössä.
Toiston aikana kuuluu ”hurinaa”.
• Vaihtovirtajohto tai loistevalolamppu on johdon lähellä.
Pidä muut laitteet ja johdot erillään tämän järjestelmän
johdosta.
Levy
Näyttö ei näy oikein.
Toisto ei ala.
• Et asettanut levyä oikein laitteeseen. Aseta se oikein.
• Levy on likainen. Puhdista levy.
• Vaihda levy, jos se on naarmuuntunut, vääntynyt tai se ei
ole standardin mukainen.
• Laitteessa on tiivistynyttä kosteutta. Anna järjestelmän
kuivua 1-2 tuntia.
USB
USB-laitetta tai sen sisältöä ei voi lukea.
• USB-laitteen tai sen sisällön muoto ei ole yhteensopiva
järjestelmän kanssa.
• USB-laitteet, joiden tallennuskapasiteetti on yli 32 Gt, eivät
toimi kaikissa olosuhteissa.
USB-laite toimii hitaasti.
• Suurikokoisen sisällön tai suurikapasiteettisen USBlaitteen luku kestää pidempään.
Näytetty kulunut aika ei ole sama kuin todellinen
toistoaika.
• Siirrä tiedot toiseen USB-laitteeseen tai varmuuskopioi
tiedot ja alusta USB-laite uudelleen.
Pääyksikön näytöt
”--:--”
• Olet liittänyt vaihtovirtajohdon ensimmäistä kertaa tai virta
on katkennut hiljattain. Aseta kellonaika.
”ADJUST CLOCK”
• Kelloa ei ole asetettu. Aseta kello asianmukaisesti.
”ADJUST TIMER”
• Toistoajastinta ei ole asetettu. Aseta toistoajastin
asianmukaisesti.
”ERROR”
• Virheellinen toiminto suoritettiin. Lue ohjeet ja yritä
uudelleen.
”F61”
• Virtalähteessä on ongelma.
“USB OVER CURRENT ERROR”
• USB-laite käyttää liikaa virtaa. Poista USB-laite. Sammuta
järjestelmä ja käynnistä se uudelleen.
”NODEVICE”
• USB-laitetta ei ole liitetty. Tarkista liitäntä.
”NO DISC”
• Et ole asettanut levyä laitteeseen.
”NO PLAY”
• Olet asettanut laitteeseen levyn, jota se ei pysty
toistamaan.
• Olet liittänyt laitteeseen USB-laitteen, jota ei voida toistaa.
Tarkista sisältö. Voit toistaa vain tuettuja muotoja.
• Jos albumeja tai kansioita on yli 255 (oli niissä
äänitiedostoja tai ei), joitakin MP3-tiedostoja näissä
kansioissa ei voida lukea ja toistaa. Siirrä nämä
musiikkialbumit toiseen USB-laitteeseen. Vaihtoehtoisesti
voit alustaa USB-laitteen uudelleen ja tallentaa
musiikkialbumit ennen muita kansioita, jotka eivät sisällä
äänitiedostoja.
”NOT MP3/ERROR”
• MP3-muoto, jota ei tueta. Järjestelmä ohittaa raidan ja
toistaa seuraavan raidan.
”REMOTE ” (” ” tarkoittaa numeroa.)
• Kaukosäädin ja tämä laite käyttävät eri koodeja. Muuta
kaukosäätimen koodia.
– Kun näytössä näkyy ”REMOTE 1”, pidä [OK]- ja [T]-
painiketta painettuna vähintään 4 sekuntia.
– Kun näytössä näkyy ”REMOTE 2”, pidä [OK]- ja [R]-
painiketta painettuna vähintään 4 sekuntia.
”–VBR–”
• Järjestelmä ei voi näyttää jäljellä olevaa toistoaikaa
muuttuvaa bittinopeutta (VBR) käyttäville raidoille.
SUOMI
Radio
Kuulet nakuttavan äänen.
• Sammuta televisio tai siirrä se kauemmas järjestelmästä.
• Siirrä matkapuhelimet pois laitteen läheisyydestä, jos ne
aiheuttavat häiriöitä.
RQT9678
9
45
Page 46

Muistin tyhjennys (alustus)
Tyhjennä muisti seuraavissa tilanteissa:
• Painikkeita painettaessa ei tapahdu mitään.
• Haluat tyhjentää muistin sisällön.
1 Irrota vaihtovirtajohto.
Odota kolme minuuttia ennen kuin jatkat vaiheeseen 2.
2 Liitä vaihtovirtajohto laitteeseen samalla, kun pidät
pääyksikön [1]-painiketta painettuna.
”– – – – – – – –” tulee näyttöön.
3 Vapauta [1].
Kaikki asetukset palautetaan tehdasasetuksiin.
Muistiasetukset on tehtävä uudelleen.
Tekniset tiedot
Vahvistinosa
RMS-lähtöteho stereotilassa
Etukanava (molempia kanavia vahvistetaan)
5 W / kanava (6
RMS-kokonaisteho stereotilassa 10 W
Viritinosa
Esiasetetut asemat 30 FM-asemaa
Taajuusmodulaatio (FM)
Taajuusalue 87,50 MHz – 108,00 MHz (50 kHz:n askel)
Antenniliitännät 75
), 1 kHz, 10 %:n THD
(tasapainottamaton)
Kaukosäädinkoodi
Jos muut Panasonic-laitteet häiriintyvät järjestelmän
kaukosäätimen käytöstä, vaihda kaukosäätimen koodi tälle
järjestelmälle.
Koodin vaihtaminen asetukseen ”REMOTE 2”
1 Pidä pääyksikön [CD]-painiketta ja kaukosäätimen
[R]-painiketta painettuna, kunnes näyttöön tulee
”REMOTE 2”.
2 Pidä [OK]- ja [R]-painiketta painettuna vähintään
4 sekuntia.
Koodin vaihtaminen asetukseen ”REMOTE 1”
1 Pidä pääyksikön [CD]-painiketta ja kaukosäätimen
[T]- painiketta painettuna, kunnes näyttöön tulee
SUOMISUOMI
”REMOTE 1”.
2 Pidä [OK]- ja [T]-painiketta painettuna vähintään
4 sekuntia.
Ylläpito
Voit puhdistaa järjestelmän pyyhkimällä sen pehmeällä,
kuivalla liinalla.
• Älä koskaan käytä alkoholia, tinneriä tai bensiiniä
järjestelmän puhdistukseen.
• Ennen kemiallisesti käsiteltyjen liinojen käyttöä lue
huolellisesti liinan mukana tulevat ohjeet.
RQT9678
10
46
Liitäntäosa
USB-portti
USB-standardi USB 2.0 (täysi nopeus)
Mediatiedostojen tuki MP3 (*.mp3)
USB-laitteen tiedostojärjestelmä FAT12, FAT16, FAT32
USB-portin virransyöttö 500 mA (enint.)
Kuulokeliitäntä
Liitäntä Stereo, 3,5 mm:n liitin
Levyosa
Toistettavat levyt (8 cm tai 12 cm)
CD, CD-R/RW (CD-DA, MP3
Lukupää
Aallonpituus 790 nm (CD)
Laserteho CLASS I
Äänentoisto (Levy)
Kanavien määrä 2 kanavaa (FL, FR)
FL = Vasen etukanava
FR = Oikea etukanava
MPEG-1 Layer 3, MPEG-2 Layer 3
)
Kaiutinosa
Tyyppi Yhden kaiuttimen 1-tiejärjestelmä (bassorefleksi)
Kaiutinyksiköt
Täysi ääniala 8 cm:n kartiotyyppinen x 1 / kanava
Impedanssi 6
Yleistä
Virtalähde 220 – 240 V AC, 50 Hz
Virrankulutus 12 W
Mitat (L x K x S) 400 mm x 213 mm x 110 mm
[S = 72 mm (väh.)]
Massa 1,9 kg
Käyttöympäristön lämpötila-alue 0 °C – +40 °C
Käyttöympäristön kosteusalue
35 % – 80 % suht. kosteus (ei tiivistyvä)
Virrankulutus valmiustilassa 0,2 W (noin)
Huomautus:
• Tekniset tiedot voivat muuttua ilman eri ilmoitusta.
Massa ja mitat ovat likimääräisiä arvoja.
• Harmoninen kokonaissärö on mitattu digitaalisella
spektrianalysaattorilla.
Page 47

Opisane procedury należy wykonać za pomocą pilota
zdalnego sterowania. Można również użyć przycisków
na panelu przednim urządzenia, jeśli są identyczne.
Zakupione urządzenie może różnić się od przedstawionego
na ilustracjach.
Środki ostrożności
Spód urządzenia
Wewnątrz urządzenia
UWAGA!
Urządzenie
• Aby ograniczyć niebezpieczeństwo pożaru, porażenia
prądem lub uszkodzenia urządzenia,
– Niniejszego urządzenia nie należy instalować lub
umieszczać w biblioteczce, wbudowanej szafce lub innej
ograniczonej przestrzeni. Należy zapewnić odpowiednią
wentylację urządzenia.
– Nie zasłaniaj otworów wentylacyjnych urządzenia
gazetami, obrusami, zasłonami i podobnymi
przedmiotami.
– Nie umieszczać na urządzeniu źródeł otwartego ognia,
jak np. zapalone świece.
• Urządzenie jest przeznaczone do używania w klimacie
umiarkowanym.
• Urządzenie należy zamontować w taki sposób, aby
w przypadku konieczności odłączenia zasilania możliwe
było niezwłoczne wyjęcie wtyczki z gniazda zasilania.
• To urządzenie może odbierać zakłócenia wywołane
użyciem telefonu komórkowego. Jeżeli takie zakłócenia
wystąpią, wskazane jest zwiększenie odległości pomiędzy
urządzeniem a telefonem komórkowym.
• Urządzenie wykorzystuje promień lasera. Sterowanie,
regulacje lub postępowanie w sposób tutaj nie określony
grozi niebezpiecznym naświetleniem promieniami lasera.
Bateria
• Istnieje niebezpieczeństwo wybuchu w przypadku, gdy
baterie zostaną nieprawidłowo założone. Baterie należy
wymieniać na takie same lub na baterie równorzędnego
typu, zalecane przez producenta.
• Zużyte baterie należy odpowiednio zutylizować. Właściwą
metodę powinny wskazać władze lokalne.
• Nie zbliżać baterii do źródeł ciepła lub ognia.
• Baterii nie należy pozostawiać przez dłuższy czas,
w pojeździe z zamknię
na bezpośrednie promieniowanie słoneczne.
tymi drzwiami i oknami, narażonym
OSTRZEŻENIE!
Urządzenie
• Aby ograniczyć niebezpieczeństwo pożaru, porażenia
prądem lub uszkodzenia urządzenia,
– Nie należy wystawiać urządzenia na działanie deszczu,
wilgoci, kapanie lub zachlapanie.
– Na urządzeniu nie należy umieszczać żadnych
przedmiotów napełnionych płynami, np. dzbanków.
– Należy stosować tylko zalecane akcesoria.
– Nie zdejmować pokrywy.
–Użytkownik nie powinien podejmować się naprawy
urządzenia na własną rękę. Serwis należy zlecić
w autoryzowanym punkcie serwisowym.
Bateria
• Ryzyko pożaru, wybuchu oraz poparzeń. Nie należy
ładować, rozbierać na części, podgrzewać do temperatury
przekraczającej 60°C lub doprowadzać do spalenia.
ży trzymać baterię guzikową poza zasięgiem dzieci.
• Nale
Nigdy nie należy wkładać baterii guzikowej do buzi.
W razie połknięcia należy skontaktować się z lekarzem.
Oznaczenie identyfikacyjne produktu znajduje się na
spodzie urządzeń.
POLSKIPOLSKI
RQT9678
2
47
Page 48

Informacja dla użytkowników o gromadzeniu i
pozbywaniu się zużytych urządzeń i baterii
Niniejsze symbole umieszczane
na produktach, opakowaniach i/lub
w dokumentacji towarzyszącej oznaczają,
że nie wolno mieszać zużytych urządzeń
elektrycznych i elektronicznych oraz baterii
z innymi odpadami domowymi.
W celu zapewnienia właściwego
przetwarzania, utylizacji oraz recyklingu
zużytych produktów i baterii, należy oddawać
je do wyznaczonych punktów gromadzenia
odpadów zgodnie z przepisami prawa
krajowego oraz postanowieniami Dyrektyw
2002/96/WE i 2006/66/WE.
Prawidłowe pozbywanie się w/w produktów
i baterii pomaga oszczędzać cenne zasoby
naturalne i zapobiegać potencjalnemu
negatywnemu wpływowi na zdrowie
człowieka oraz stan środowiska naturalnego,
który towarzyszy niewłaściwej gospodarce
odpadami.
Więcej informacji o zbiórce oraz recyklingu
zużytych produktów i baterii można
otrzymać od władz lokalnych, miejscowego
przedsiębiorstwa oczyszczania lub w punkcie
sprzedaży, w którym użytkownik nabył
przedmiotowe towary.
Za niewłaściwe pozbywanie się powyższych
odpadów mogą grozić kary przewidziane
przepisami prawa krajowego.
Dotyczy użytkowników firmowych
działających na terenie Unii Europejskiej
Chcąc w odpowiedni sposób pozbyć się
urządzeń elektrycznych lub elektronicznych,
należy skontaktować się ze sprzedawcą lub
dostawcą, który udzieli dalszych informacji.
[Informacje o pozbywaniu się w/w
urządzeń w państwach trzecich]
POLSKIPOLSKI
Niniejsze symbole obowiązują wyłącznie
na terenie Unii Europejskiej. Chcąc
pozbyć się w/w urządzeń elektrycznych
lub elektronicznych, należy skontaktować
się z władzami lokalnymi lub sprzedawcą
w sprawie właściwego sposobu wyrzucania
tego rodzaju przedmiotów.
Spis treści
Środki ostrożności ........................................2
Dostarczone wyposażenie ............................3
Opis elementów sterowania .........................4
Na początek....................................................5
Płyty kompaktowe
, USB .................................5
Radio ...............................................................7
Efekty dźwiękowe ..........................................7
Zegar i timer ...................................................8
Rozwiązywanie problemów ..........................9
Konserwacja ................................................10
Dane techniczne ..........................................10
Dostarczone wyposażenie
Sprawdzić i znaleźć poszczególne elementy
dostarczonego wyposażenia.
1 x Przewód zasilania
1 x Antena wewnętrzna FM
1 x Pilot zdalnego sterowania
(z baterią)
(N2QAYC000060)
RQT9678
3
48
Dotyczy symbolu baterii (symbole
przykładowe):
Ten symbol może występować wraz
z symbolem pierwiastka chemicznego.
W takim przypadku spełnia on wymagania
Dyrektywy w sprawie określonego środka
chemicznego.
Page 49

POLSKI
Opis elementów sterowania
Pilot zdalnego sterowania
SLEEP
DIMMER
USB
CD
DISPLAY
SOUND
PLAY MENU
OK
ALBUM
Urządzenie główne
Widok od góry
NM
AB OJC
Widok z przodu
P Q R
RADIO
MUTESETUP
A Przełącznik „STANDBY/ON” [`], [1]
• Naciśnij ten przycisk, aby wyłączyć urządzenie
(przełączyć je w stan gotowości) lub włączyć je
z powrotem. W stanie gotowości urządzenie nadal
pobiera pewną niewielką moc.
B Wybór źródła audio
C Podstawowe elementy sterowania odtwarzaniem
D Wyświetlenie opcji zegara i timera
E Wyświetlanie informacji
F Wybór charakterystykę dźwięku
G Wybór opcji
Pominięcie albumu
H Ustawianie timera wyłączającego
I Zmniejszanie jasności wyświetlacza
• Ponownie naciśnij przycisk, aby anulować wybór.
J Regulacja głośności systemu
K Wyciszanie dźwięku
• Ponownie naciśnij przycisk, aby anulować wybór.
• „MUTE” można wyłączyć również przez regulowanie
głośności lub wyłączając system.
L Wyświetlenie menu odtwarzania
Wyświetlenie opcji radia
M Gniazdo USB ( )
N Gniazdo słuchawek ( )
• Typ wtyku: o średnicy Ø 3,5 mm, stereo (nie należy do
• Należy unikać długotrwałego słuchania, aby zapobiec
uszkodzeniu słuchu.
• Nadmierne ciśnienie akustyczne dźwięku
wydobywającego się ze słuchawek czy słuchawek
nagłownych może powodować utratę słuchu.
• Głośne słuchanie przez dłuższy okres czasu może
doprowadzić do uszkodzeń w uchu wewnętrznym.
wyposażenia)
O Otwieranie lub zamykanie drzwiczek przesuwnych
P Drzwiczki przesuwne
Q Czujnik zdalnego sterowania
• Zasięg maksymalny: 7 m bezpośrednio z przodu
urządzenia
R Wyświetlacz
POLSKI
RQT9678
4
49
Page 50

Na początek
1 Podłącz antenę wewnętrzną FM.
Antenę należy zainstalować w miejscu zapewniającym
najlepszy odbiór.
Płyty kompaktowe
, USB
Zakładanie i wyjmowanie nośnika
Płyty kompaktowe
Naciśnij [CD x OPEN/CLOSE] na urządzeniu, aby
otworzyć drzwiczki przesuwne.
Włóż płytę etykietą do siebie.
2 Podłącz przewód zasilania.
Pobór mocy w trybie gotowości: 0,2 W (około)
Nie stosować przewodów zasilania, pochodzących
z innych urządzeń.
Do domowego gniazdka zasilającego
Uwaga:
• Niektóre ustawienia ulegają zresetowaniu do wartości
domyślnych po odłączeniu urządzenia od zasilania.
• Niniejsze zestawy głośnikowe nie mają ekranu
magnetycznego. Nie należy ich umieszczać
w pobliżu odbiorników telewizyjnych, komputerów ani
innych urządzeń wrażliwych na oddziaływanie pola
magnetycznego.
• Siatki głośników nie są zdejmowalne.
POLSKIPOLSKI
Przygotowanie pilota zdalnego sterowania
Przed rozpoczęciem użytkowania
Ta śma
klejąca
Kliknięcie!
Uwaga:
Trzymaj palce z dala od drzwiczek przesuwnych, gdy są one
zamykane.
USB
Urządzenie USB
(nie należy do
wyposażenia)
Uwaga:
Nie należy używać przedłużacza USB. Nie są obsługiwane
urządzenia USB podłączane za pomocą przewodu.
Powłoka izolacyjną
Wymiana baterii
Wymienić baterię na nową (CR2025 litowa bateria).
1 Naciskając zaczep blokady, wyjąć obsadę baterii.
2 Umieścić nową baterię stroną z symbolem (+) do
góry.
3 Wsunąć obsadę baterii do oporu.
RQT9678
5
50
CR2025
Page 51

POLSKI
Odtwarzanie podstawowe
Naciśnij [CD] lub [USB], aby wybrać źródło.
Odtwarzanie
Zatrzymać
Przerywanie
Pominięcie
utworu
Przeszukiwanie
utworu
Pominięcie
albumu
Wyświetlanie
informacji
Uwaga:
• Maksymalna liczba wyświetlanych znaków: około 32
• Urządzenie obsługuje etykiety w formacie 1.0, 1.1 i 2.3
ID3.
• Dane tekstowe nieobsługiwane przez system mogą być
wyświetlane odmiennie.
Naciśnij [4/9].
Naciśnij [8].
USB
:
Utwór zostanie zapamiętane.
Wyświetlony zostanie symbol
„RESUME”.
Naciśnij dwukrotnie, aby całkowicie
zatrzymać.
Naciśnij [4/9].
Naciśnij ponownie, aby
kontynuować odtwarzanie.
Naciśnij [2/3] lub [5/6].
Naciśnij i przytrzymaj [2/3] lub
[5/6].
Naciśnij [R, T].
Naciśnij [DISPLAY].
Menu odtwarzania
1 Naciśnij [PLAY MENU], aby wybrać „PLAYMODE”
lub „REPEAT”.
2 Naciśnij [R, T], następnie naciśnij [OK], aby wybrać
żądany tryb.
PLAYMODE
OFF
PLAYMODE
1-TRACK
1
1-ALBUM
1
RANDOM
RND
1-ALBUM
RANDOM
1 RND
Odtwarzanie wszystkich utworów.
Odtwarzanie jeden wybrany utwór.
Naciśnij [2/3] lub [5/6], aby
wybrać utwór.
Odtwarzanie jednego wybranego
albumu.
Naciśnij [R, T], aby wybrać album.
Odtwarzanie losowo wszystkich
utworów.
Odtwarzanie losowo wszystkich
utworów w jednym wybranym albumie.
Naciśnij [R, T], aby wybrać album.
REPEAT
ON REPEAT
OFF REPEAT Wyłączanie funkcji powtarzania
Uwaga:
• Podczas odtwarzania w losowej kolejności nie można
przejść do utworów poprzednio odtworzonych.
• Nastawa ta powraca do domyślnej z chwilą odtwarcia
drzwiczek przesuwnych.
Odtwarzanie z powtórzeniem.
odtwarzania.
Obsługiwane nośniki
Płyty kompaktowe
• Urządzenie może odtwarzać płyty CD-R/RW z zawartością
CD-DA lub MP3.
• Niektóre płyty CD-R/RW mogą nie być odtwarzane
z powodu złego stanu nagrania.
• Pliki MP3 są zdefiniowane jako utwór i foldery są
zdefiniowane jako album.
• Urządzenie może odtwarzać do:
– CD-DA : 99 utworów
– MP3 : 999 utworów, 255 albumów (z folderem
• Płyty muszą być zgodne ze standardem ISO9660 poziom
1 lub 2 (z wyjątkiem formatów rozszerzonych).
• Nagrania nie zawsze odtwarzane są w kolejności
nagrywania.
USB
• Kompatybilne urządzenia USB określone jako urządzenia
pamięci masowej:
• Pliki są zdefiniowane jako utwory i foldery są zdefiniowane
jako album.
• Utwory powinny mieć rozszerzenie „.mp3” lub „.MP3”.
• Urządzenie może odtwarzać do:
• CBI (ang. Control/Bulk/Interrupt) nie jest obsługiwany.
• System plików NTFS nie jest obsługiwany (obsługiwany
jest wyłącznie system plików FAT 12/16/32).
• Niektóre pliki mogą nie być obsługiwane z powodu
wielkości sektora.
Technologia kodowania dźwięku MPEG Layer-3 podlega
licencji firmy Fraunhofer IIS i Thomson.
nadrzędnym włącznie) i 20 sesji
– Urządzenia USB obsługujące protokół transferu
Bulk-Only
– Urządzenia USB obsługujące standard USB 2.0 (pełna
prędkość)
– 255 albumów (włącznie z folderem nadrzędnym)
– 2500 utworów
– 999 utworów w jednym albumie
POLSKI
RQT9678
6
51
Page 52

Radio
Można zaprogramować 30 stacji FM.
Przygotowanie
Podłącz antenę zewnętrzną FM (Z strona 5).
Naciśnij [RADIO].
Automatyczne programowanie
1 Naciśnij [PLAY MENU], aby wybrać „A.PRESET”.
2 Naciśnij [R, T], aby wybrać „LOWEST” lub
„CURRENT” częstotliwość.
LOWEST : Uruchomienie automatycznego
CURRENT : Uruchomienie automatycznego
W celu zmiany częstotliwości, zobacz sekcję „Ręczne
strojenie i programowanie stacji”.
3 Naciśnij [OK], aby rozpocząć programowanie.
Tuner zaprogramuje na kanałach, w rosnącej kolejności,
wszystkie stacje, które zdoła odebrać.
Aby anulować, naciśnij [8].
programowania od najniższej częstotliwości.
programowania od bieżącej częstotliwości
Poprawy brzmienia dźwięku
1 Naciśnij [PLAY MENU], aby wybrać „FM MODE”.
2 Naciśnij [R, T], aby wybrać „MONO” następnie
naciśnij [OK].
Aby anulować, wybierz „STEREO”.
Tryb „MONO” jest również anulowany z chwilą zmiany
częstotliwości.
Zapamiętanie nastawy
Kontynuuj kroki 4 do 6 z „Ręczne strojenie i programowanie
stacji”.
Kontrola sygnału wyjściowego
Naciśnij [PLAY MENU], aby wybrać „FM STATUS”
następnie naciśnij [OK].
.
FM Sygnał FM jest w trybie mono.
FM ST Sygnał FM jest w trybie stereo.
FM MONO Tryb „MONO” jest wybrany jako
System nie jest dostrojony do żadnej
stacji.
„FM MODE”.
Ręczne strojenie i programowanie stacji
1 Naciśnij [PLAY MENU], aby wybrać „T UN EM ODE”.
2 Naciśnij [R, T], aby wybrać „MANUAL” następnie
naciśnij [OK].
3 Naciśnij [2/3] lub [5/6], aby dostroić radio
do żądanej stacji.
Aby uruchomić automatyczne strojenie, należy
nacisnąć i przytrzymać ten przycisk, do momentu, gdy
wyświetlana częstotliwość zacznie szybko się zmieniać.
Gdy odbierana jest audycja stereo, wyświetlany jest
komunikat „STEREO”.
POLSKIPOLSKI
Programowanie stacji
4 Naciśnij [OK].
5 Naciśnij [R, T], aby wybrać zaprogramowany
numer.
6 Naciśnij [OK].
Aby zaprogramować więcej stacji, wykonaj ponownie
kroki od 3 do 6.
Uwaga:
Uprzednio zaprogramowana stacja zostanie zastąpiona
nową, zapisaną pod tym samym numerem.
Wybieranie zaprogramowanej stacji
1 Naciśnij [PLAY MENU], aby wybrać „T UN EM ODE”.
2 Naciśnij [R, T], aby wybrać „PRESET” następnie
naciśnij [OK].
RQT9678
3 Naciśnij [2/3] lub [5/6], aby wybrać
zaprogramowaną stację.
7
52
Odbiór RDS
System ten może wyświetlać dane tekstowe nadawane
przez rozgłośnie radiowe (RDS) dostępne w niektórych
rejonach.
Naciśnij [DISPLAY].
PS Nazwa stacji
PTY Typ programu
FREQ Częstotliwość
Uwaga:
Informacje RDS mogą być niedostępne, jeżeli odbiór jest
słaby.
Efekty dźwiękowe
1 Naciśnij [SOUND], aby wybrać żądany efekt
dźwiękowy.
2 Naciśnij [R, T], aby wybrać żądane ustawienie.
PRESET EQ „HEAVY” : Poprawa brzmienia rocka.
„SOFT” : Muzyka w tle.
„CLEAR” : Czystsze brzmienie wysokich
częstotliwości.
„VOCAL” : Poprawa brzmienia śpiewu.
„FLAT” : Wyłącza efekt dźwiękowy.
BASS „BASS -4” do „BASS +4”.
TREBLE „TREBLE-4” do „TREBLE+4”.
D.BASS „ON D.BASS” lub „OFF D.BASS”.
SURROUND „ON SURROUND” lub
„OFF SURROUND”.
Page 53

POLSKI
Zegar i timer
Ustawianie zegara
Jest to zegar 24-godzinny.
1 Naciśnij [SETUP], aby wybrać „CLOCK”.
2 Naciśnij [R, T], aby ustawić czas.
3 Naciśnij [OK].
Aby wyświetlić zegar na kilka sekund
Naciśnij [SETUP], aby wybrać „CLOCK”, następnie naciśnij
[OK].
Uwaga:
Zegar należy regularnie nastawiać, aby zawsze była
ustawiona dokładna godzina.
Timer wyłączający
Timer wyłącza system po upływie ustawionego czasu.
Naciśnij [SLEEP], aby wybrać żądane ustawienie
(w minutach).
Aby anulować, wybierz „OFF”.
SLEEP 30 → SLEEP 60 → SLEEP 90 → SLEEP120
Uwaga:
• Czas pozostały jest zawsze pokazywany na wyświetlaczu.
Podczas wykonywania innych operacji, ekran
wyświetlacza zmienia się co pewien czas.
• Timer wyłączający system może być używany łącznie z
timerem odtwarzania.
• Timer wyłączający ma zawsze priorytet. Należy pamiętać,
aby czasy timerów się nie nakładały.
OFF
Timer odtwarzania
Timer można ustawić w taki sposób, aby o określonej
godzinie urządzenie włączało się i budziło użytkownika.
Przygotowanie
Ustaw zegar.
1 Naciśnij [SETUP], aby wybrać „TIMER ADJ”.
2 Naciśnij [R, T], aby ustawić czas rozpoczęcia.
3 Naciśnij [OK].
4 Powtórz kroki 2 i 3, aby ustawić godzinę
zakończenia.
Aby uaktywnić timer
1 Przygotuj wybrane źródło audio, które chcesz
odtworzyć, i ustaw głośność.
2 Naciśnij [SETUP], aby wybrać „TIMER SET”.
3 Naciśnij [R, T], aby wybrać „SET” następnie
naciśnij [OK].
Wyświetlony zostanie symbol „#”.
Aby timer działał, system musi być wyłączone.
Sprawdzanie
ustawień
Anulowanie 1. Naciśnij [SETUP], aby wybrać
Uwaga:
• Timer rozpoczyna odtwarzanie z niskim poziomem
głośności, który stopniowo rośnie do ustawionego
poziomu.
• Jeśli timer jest aktywny, zadziała codziennie o ustawionej
godzinie.
• W przypadku wyłączenia systemu i włączenia go
ponownie podczas pracy timera, timer nie zatrzyma się
z chwilą upływu ustawionego czasu.
1. Naciśnij [SETUP], aby wybrać
„TIMER ADJ”.
2. Naciśnij [OK].
„TIMER SET”.
2. Naciśnij [R, T], aby wybrać „OFF”
następnie naciśnij [OK].
Funkcja automatycznego
wyłączania
Funkcja ta wyłącza system (z wyjątkiem radia), jeśli nie jest
on używany przez około 30 minut.
CD USB
1 Naciśnij [SETUP], aby wybrać „AUTO OFF”.
2 Naciśnij [R, T], aby wybrać „ON” (włączone) lub
„OFF” (wyłączone) następnie naciśnij [OK].
POLSKI
RQT9678
8
53
Page 54

Rozwiązywanie problemów
Przed oddaniem urządzenia do naprawy należy
przeprowadzić następujące kontrole. W przypadku
wątpliwości, co do niektórych punktów kontrolnych lub jeśli
podane rozwiązania nie eliminują problemu, należy zwrócić
się po wskazówki do sprzedawcy.
„Czynności wykonywane przez zakłady usługowe
polegające na sprawdzeniu: działania, parametrów
technicznych, czyszczeniu głowic i toru taśmy, regulacji
i czyszczeniu mechanizmu, strojeniu programatorów,
wymianie żarówek i bezpieczników—nie są zaliczane do
ilości napraw stanowiących podstawę wymiany sprzętu
zgodnie z §36, pkt. 1.3. Uchwały Nr. 71 Rady Ministrów
z 1983.06.13., opublikowanej w Monitorze Polskim Nr. 21
z 1983.06.29.”
„Uszkodzenia mechaniczne, termiczne, chemiczne
zewnętrznych części metalowych i z tworzyw sztucznych
oraz sznury przyłączeniowe, słuchawkowe—nie podlegają
gwarancji.”
Typowe problemy
Nie działa pilot zdalnego sterowania.
• Sprawdź, czy bateria została prawidłowo włożona.
• Pilot zdalnego sterowania i urządzenie używają różnych
kodów (Z z prawej, „REMOTE ”).
Dźwięk jest zniekształcony lub brak dźwięku.
• Regulacja głośności systemu.
• Wyłączyć urządzenie określić i usunąć przyczynę,
następnie włączyć urządzenie ponownie. Może to
być spowodowane przeciążeniem głośników wskutek
nadmiernego poziomu głośności, zbyt wysokiego zasilania
lub użytkowania systemu w warunkach, w których panuje
zbyt wysoka temperatura.
Podczas odtwarzania słychać „buczenie”.
• Blisko urządzenia znajduje się
prądem przemiennym lub oświetlenie fluorescencyjne.
Utrzymywać przewód zasilania tego urządzenia z dala od
innych urządzeń lub przewodów zasilających.
POLSKIPOLSKI
Płyty kompaktowe
Błędne informacje na wyświetlaczu.
Nie uruchamia się odtwarzanie.
• Płyta nie została włożona prawidłowo. Włóż prawidłowo
płytę.
• Płyta jest zabrudzona. Wyczyść plytę.
• Użyj innej płyty, jeśli jest zarysowana, wygięta lub
niestandardowa.
• Nastąpiło skroplenie pary wodnej. Odczekaj 1 - 2 godzin,
aż skroplona para wodna odparuje z systemu.
USB
Nie można odczytać urządzenia USB lub jego
zawartości.
• Format urządzenia USB lub jego zawartość nie jest
obsługiwana przez system.
• W niektórych przypadkach nie będą obsługiwane
urządzenia USB o pojemności większej niż 32 GB.
RQT9678
Powolne działanie urządzenia USB.
9
• Pliki o dużych rozmiarach lub urządzenia USB z dużą
ilością pamięci wymagają dłuższego czasu wczytywania.
54
przewód zasilania
Wyświetlany czas, który upłynął jest inny niż czas
rzeczywisty.
• Skopiuj dane do innego urządzenia USB lub utwórz kopię
zapasową danych i sformatuj urządzenia USB.
Radio
Słychać dudnienie.
• Wyłącz telewizor lub odsuń go od urządzenia.
• W przypadku występowania zakłóceń odsuń telefon
komórkowy od urządzenia.
Wyświetlacz urządzenia
„--:--”
• Do urządzenia po raz pierwszy podłączono przewód
zasilania lub niedawno wystąpiła przerwa w zasilaniu.
Ustaw zegar.
„ADJUST CLOCK”
• Zegar nie jest ustawiony. Odpowiednio wyreguluj zegar.
„ADJUST TIMER”
• Timer odtwarzania nie jest ustawiony. Odpowiednio
wyreguluj timer odtwarzania.
„ERROR”
• Wykonano niewłaściwą operację. Przeczytaj instrukcję
i spróbuj ponownie.
„F61”
• Wystąpił problem z zasilaniem.
„USB OVER CURRENT ERROR”
• Urządzenia USB pobiera zbyt dużo prądu. Odłączyć
urządzenie USB. Ponownie wyłącz i włącz urządzenie.
„NODEVICE”
• Nie podłączono zewnętrznego urządzenia USB. Sprawdź
zawartość.
„NO DISC”
• Nie włożono płyty.
„NO PLAY”
• Włożona płyta nie jest obsługiwana przez system.
• Podłączono urządzenie USB, które nie może być
odtwarzane. Sprawdź zawartość
wyłącznie utwory o obsługiwanym formacie.
• W przypadku liczby albumów lub folderów większej niż
255 (audio lub nie audio) niektóre z plików w formacie
MP3 nie zostaną odczytane oraz odtworzone. W takim
przypadku należy dokonać transferu tych muzycznych
albumów do innego urządzenia USB. Można również
dokonać formatowania urządzenia USB, i zapisać te
muzyczne albumy w innych folderach, niezawierających
plików audio.
„NOT MP3/ERROR”
• Nieobsługiwany format MP3. Urządzenie pominie ten
utwór i odtworzy następny.
„REMOTE ” („ ” oznacza numer.)
• Pilot zdalnego sterowania i urządzenie używają różnych
kodów. Zmień kod na pilocie zdalnego sterowania.
– Gdy wyświetlony zostanie komunikat „REMOTE 1”,
naciśnij i przytrzymaj [OK] i [T] przynajmniej przez
4 sekundy.
– Gdy wyświetlony zostanie komunikat „REMOTE 2”,
naciśnij i przytrzymaj [OK] i [R] przynajmniej przez
4 sekundy.
. Odtwarzać można
Page 55

POLSKI
„–VBR–”
• Urządzenie nie może wyświetlić pozostałego czasu
odtwarzania dla utworów o zmiennej prędkości strumienia
bitów (VBR – variable bit rate).
Resetowanie pamięci systemu
(inicjalizacja)
W przypadku wystąpienia poniższych objawów należy
zresetować pamięć urządzenia:
• Brak reakcji po naciśnięciu przycisków.
• Chęć wyczyszczenia i wyzerowania zawartości pamięci.
1 Odłącz przewód zasilania.
Odczekaj 3 minuty przed przejściem do kroku 2.
2 Naciskając i przytrzymując [1] na urządzeniu
głównym, podłącz ponownie przewód zasilania.
Wyświetlony zostanie symbol „– – – – – – – –”.
3 Zwolnij [1].
Przywrócone zostaną wszystkie ustawiania fabryczne.
Konieczne będzie ponowne zaprogramowanie pamięci.
Kod zdalnego sterowania
Jeśli na pilota zdalnego sterowania tego systemu reagują
inne urządzenia firmy Panasonic, należy zmienić kod
zdalnego sterowania dla tego systemu.
Aby zmienić kod na „REMOTE 2”
1 Naciśnij i przytrzymaj [CD] na urządzeniu i [R]
na pilocie zdalnego sterowania tak długo, aż
wyświetlony zostanie komunikat „REMOTE 2”.
2 Naciśnij i przytrzymaj [OK] i [R] przynajmniej przez
4 sekundy.
Aby zmienić kod na „REMOTE 1”
1 Naciśnij i przytrzymaj [CD] na urządzeniu i [T]
na pilocie zdalnego sterowania tak długo, aż
wyświetlony zostanie komunikat „REMOTE 1”.
2 Naciśnij i przytrzymaj [OK] i [T] przynajmniej przez
4 sekundy.
Dane techniczne
Sekcja wzmacniacza
Całkowita wyjściowa moc skuteczna w trybie stereo
Kanał przedni (przy użyciu obu kanałów)
5 W na kanał (6 ), 1 kHz, 10%
całkowitego zniekształcenia harmonicznego (THD)
Całkowita moc skuteczna w trybie stereo 10 W
Sekcja tunera
Zaprogramowane stacje FM 30 stacji
Modulacja częstotliwościowa (FM)
Zakres częstotliwości
87,50 MHz do 108,00 MHz (w krokach co 50 kHz)
Gniazda antenowe 75
Sekcja złączy
Gniazdo USB
Standard USB USB 2.0 pełnej prędkości
Obsługiwane formaty plików multimedialnych
MP3 (*.mp3)
System plików urządzenia USB FAT12, FAT16, FAT32
Pobór mocy portu USB 500 mA (maks)
Gniazdo słuchawek
Złącze Stereo, złącze 3,5 mm
Sekcja odtwarzacza płyt CD
Odtwarzane płyty (8 cm lub 12 cm)
CD, CD-R/RW (CD-DA, MP3
Przechwytywanie
Długość fali 790 nm (CD)
Moc lasera CLASS I
Wyjście audio (Płyta)
Liczba kanałów 2 kanały (FL, FR)
FL = Przedni lewy kanał
FR = Przedni prawy kanał
MPEG-1 Layer 3, MPEG-2 Layer 3
Zestawy głośnikowe
Typ System 1-drożny, 1-głośnikowy (bass-reflex)
Głośnik
Szerokopasmowy 8 cm stożkowy x 1/kanał
Impedancja 6
(niezrównoważone)
)
POLSKI
Konserwacja
W celu oczyszczenia urządzenia należy przetrzeć je miękką,
suchą szmatką.
• Do czyszczenia urządzenia nie należy stosować alkoholu,
rozcieńczalnika ani benzyny.
• Przed użyciem chusteczki nasączonej środkiem
chemicznym należy zapoznać się z dołączoną do niej
instrukcją.
Dane ogólne
Zasilanie Prąd przemienny 220 do 240 V, 50 Hz
Pobór mocy 12 W
Wymiary (szer. x wys. x głęb.)
400 mm x 213 mm x 110 mm
[głęb = 72 mm (min)]
Masa 1,9 kg
Zakres temperatur roboczych 0°C do +40°C
Zakres wilgotności roboczych
35% do 80% RH (bez kondensacji)
Pobór mocy w trybie gotowości 0,2 W (około)
Uwaga:
• Dane techniczne mogą ulec zmianie bez powiadomienia.
Masa i wymiary podane są w przybliżeniu.
• Wartość całkowitych zniekształceń harmonicznych została
zmierzona przy użyciu cyfrowego analizatora widma.
RQT9678
10
55
Page 56

Ovládejte dálkovým ovladačem. Jsou-li stejné, můžete
rovněž použít tlačítka na hlavním přístroji.
Váš systém a obrázky se mohou lišit.
Bezpečnostní upozornění
Spodek přístroje
Uvnitř přehrávače
POZOR!
Přístroj
• Abyste snížili nebezpečí vzniku požáru, úrazu elektrickým
proudem nebo poškození přístroje:
– Abyste zajistili dobré ventilační podmínky, nikdy
neinstalujte tento přístroj v knihovně, vestavěné skříni
nebo jiném uzavřeném prostoru.
– Neblokujte ventilační otvory přístroje novinami, ubrusy,
závěsy a jinými materiály.
– Nepokládejte zdroje otevřeného ohně, jako například
hořící svíčky, na přístroj.
• Tento přístroj je konstruován pro použití v mírném klimatu.
• Nainstalujte tento přístroj tak, aby bylo možné okamžitě
odpojit hlavní napájení (AC) ze zásuvky, jestliže by došlo
k problému.
• Tento přístroj může být během používání rušen rádiovou
interferencí, která je způsobena mobilním telefonem.
Jestliže k takovéto interferenci dojde, zajistěte větší
vzdálenost mezi tímto přístrojem a mobilním telefonem.
• Tento přístroj pracuje s laserovým paprskem. Při
nesprávném použití ovládacích prvků, stejně jako při
provádění jiných postupů, než které jsou popsány v tomto
návodu, může dojít k nebezpečnému vyzařování.
Baterie
• V případě nesprávné výměny baterie hrozí nebezpečí
výbuchu. Vyměňujte pouze za typ baterie, který
doporučuje výrobce.
• Při likvidaci baterií se obraťte na místní úřady nebo na
prodejce a informujte se o správném způsobu likvidace.
• Nevystavujte baterie teplu nebo ohni.
• Nenechávejte baterie v automobilu vystavené přímému
slunečnímu světlu po delší dobu, když jsou zavřené dveře
a okna.
UPOZORNĚNÍ!
Přístroj
• Abyste snížili nebezpečí vzniku požáru, úrazu elektrickým
proudem nebo poškození přístroje:
– Nevystavujte tento přístroj dešti, nadměrné vlhkosti,
kapající vodě a postříkání.
– Na přístroj by neměly být umisťovány žádné objekty
ČESKYČESKY
naplněné vodou, jako jsou například vázy.
– Používejte pouze doporučené příslušenství.
– Neodstraňujte kryt přístroje.
– Nepokoušejte se přístroj opravit sami. Opravy
přenechejte kvalifikovaným pracovníkům servisu.
Baterie
• Nebezpečí požáru, výbuchu a popálení. Baterie
nedobíjejte, nerozebírejte, nevystavujte teplotám nad
60 °C a nevhazujte do ohně.
• Knoflíkovou baterii uchovávejte mimo dosah dětí. Nikdy
nedávejte knoflíkovou baterii do úst. Při jejím spolknutí
okamžitě zavolejte lékaře.
RQT9678
2
56
Identifikačni značení výrobku je umístěno na dolní straně
přístroje.
Page 57

ČESKY
Informace pro spotřebitele o sběru a likvidaci odpadu
z elektrických a elektronických zařízení a použitých
baterií z domácností
Tyto symboly na výrobcích, obalech nebo v
průvodní dokumentaci znamenají, že použitá
elektrická a elektronická zařízení a baterie
nepatří do běžného domácího odpadu.
Správná likvidace, recyklace a opětovné
použití jsou možné jen pokud odevzdáte tato
zařízení a použité baterie na místech k tomu
určených, za což neplatíte žádné poplatky, v
souladu s platnými národnímu předpisy a se
Směrnicemi 2002/96/EU a 2006/66/EU.
Správnou likvidací přístrojů a baterií
pomůžete šetřit cenné suroviny a předcházet
možným negativním účinkům na lidské
zdraví a na přírodní prostředí, které jinak
mohou vzniknout při nesprávném zacházení
s odpady.
Další informace o sběru, likvidaci a recyklaci
starých přístrojů a použitých baterií Vám
poskytnou místní úřady, provozovny sběrných
dvorů nebo prodejna, ve které jste toto zboží
zakoupili.
Při nesprávné likvidaci odpadu vám hrozí
pokuta v souladu s národní legislativou a
místními předpisy.
Informace pro právnické osoby se sídlem
v zemích Evropské Unie (EU)
Pokud chcete likvidovat elektrická nebo
elektronická zařízení, obraťte se na prodejce
nebo dodavatele s žádostí o další informace.
[Informace o likvidaci v zemích mimo
Evropskou Unii (EU)]
Tyto symboly platí jen v zemích Evropské
unie. Pokud chcete likvidovat tento produkt,
obraťte se na místní úřady nebo prodejce a
informujte se o správném způsobu likvidace.
Obsah
Bezpečnostní upozornění .............................2
Dodávané příslušenství ................................3
Přehled ovládání ............................................4
První spuštění ................................................5
Disk, USB .......................................................5
Rádio ...............................................................7
Zvukové efekty...............................................7
Hodiny a časovače ........................................8
Odstraňování závad ......................................8
Údržba ............................................................9
Specifikace ......................................Zadní kryt
Dodávané příslušenství
Zkontrolujte si prosím a identifikujte dodávané
příslušenství.
1 x kabel síťového napájení (AC)
1 x FM pokojová anténa
Poznámka k symbolu baterie (symboly
uprostřed a dole):
Tento symbol může být použit v kombinaci
s chemickým symbolem. V tomto případě
splňuje tento symbol legislativní požadavky,
které jsou předepsány pro chemickou látku
obsaženou v baterii.
1 x dálkové ovládání
(s baterií)
(N2QAYC000060)
ČESKY
RQT9678
3
57
Page 58

Přehled ovládání
Dálkové ovládání
Hlavní přístroj
Pohled shora
AB OJC
Pohled zepředu
ČESKYČESKY
SLEEP
USB
CD
DISPLAY
SOUND
OK
ALBUM
P Q R
DIMMER
RADIO
MUTESETUP
PLAY MENU
NM
A Tlačítko přepnutí do pohotovostního režimu/zapnutí
[`], [1]
• Stisknutím tohoto tlačítka se přístroj zapíná z
pohotovostního režimu, nebo naopak vypíná.
V pohotovostním režímu přístroj stále spotřebovává
malé množství el. proudu.
B Volba zdroje zvuku
C Základní přehrávání
D Zobrazení hodin a možností časovače
E Zobrazení informací
F Volba zvukových efektů
G Volba možnosti
Přeskočení alba
H Nastavení časovače vypnutí
I Snížení jasu displeje
• Stiskněte tlačítko znovu pro zrušení funkce.
J Nastavení hlasitosti systému
K Ztlumení zvuku systému
• Stiskněte tlačítko znovu pro zrušení funkce.
• Funkce ztlumení „MUTE“ se rovněž zruší, když
změníte hlastitost nebo když systém vypnete.
L Zobrazení nabídky přehrávání
Zobrazení možností rádia
M USB port ( )
N Konektor pro sluchátka ( )
• Typ konektoru: stereofonní, souosý o průměru
• Dlouhodobý poslech může způsobit poškození sluchu.
• Příliš hlasitá reprodukce ze sluchátek může způsobit
ztrátu sluchu.
• Dlouhodobý poslech na maximální hlasitost může
poškodit sluch uživatele.
Ø 3,5 mm (není v příslušenství)
O Otevření nebo zavření zásuvky
P Zásuvka
Q Snímač dálkového ovladače
• Maximální dosah: 7 m od čelní strany přístroje
R Panel displeje
RQT9678
4
58
Page 59

ČESKY
První spuštění
1 Zapojte FM pokojovou anténu.
Umístěte anténu na místo s nejlepším příjmem signálu.
Disk, USB
Vložení nebo vyjmutí média
Disk
Pro otevření zásuvky na hlavním přístroji stiskněte
[CD x OPEN/CLOSE].
Vložte disk, potiskem nahoru.
Páska
2 Zapojte kabel síťového napájení (AC).
Spotřeba v pohotovostním režimu: 0,2 W (přibližně)
Nepoužívejte kabely síťového napájení (AC) z jiných
zařízení.
Do síťové zásuvky
Poznámka:
• Některá nastavení se po odpojení systému vrátí do
výchozího stavu.
• Tyto reproduktory nemají magnetické stínění.
Nepokládejte do blízkosti TV, PC nebo jiného zařízení
snadno ovlivnitelného magnetismem.
• Síťku nemůžete odpojit od reproduktorů.
Příprava dálkového ovladače
Před použitím
Cvak!
Poznámka:
Při zavírání udržujte prsty mimo zásuvku.
USB
Zařízení USB
(není v
příslušenství)
Poznámka:
Nepoužívejte prodlužovací USB kabel. Systém nedokáže
rozpoznat paměťové zařízení USB připojené kabelem.
Izolační proužek
Výměna baterie.
Vyměňte za novou baterii (CR2025 Li baterie).
1 Stiskněte pojistku uzávěru a vytáhněte držák
baterie.
2 Vložte novou baterii, stranou (+) nahoru.
3 Držák baterie zatlačte zpět.
CR2025
ČESKY
RQT9678
5
59
Page 60

Základní přehrávání
Stiskněte [CD] nebo [USB] pro výbĕr zdroje.
Poznámka:
• Během náhodného přehrávání nelze přeskočit na již
přehrané skladby.
• Při otevření zásuvky se nastavení vrátí do výchozího.
Přehrávání
Zastavení
Pozastavení
Přeskočení
skladby
Vyhledávání ve
skladbě
Přeskočení alba
Zobrazení
informací
Poznámka:
• Maximální počet znaků, které lze zobrazit: přibližně 32
• Tento systém podporuje verzi 1.0, 1.1 a 2.3 ID3 tagů.
• Textové údaje, které systém nepodporuje, se mohou
zobrazit odlišně.
Stiskněte [4/9].
Stiskněte [8].
USB
:
Skladba je uložena do paměti.
Zobrazí se „RESUME“.
Pro úplné zastavení dvakrát
stiskněte.
Stiskněte [4/9].
Pro pokračování přehrávání
stiskněte znovu.
Stiskněte [2/3] nebo
[5/6].
Stiskněte a podržte [2/3] nebo
[5/6].
Stiskněte [R, T].
Stiskněte [DISPLAY].
Nabídka přehrávání
1 Stiskněte [PLAY MENU] pro výběr režimu
„PLAYMODE“ nebo „REPEAT“.
2 Pro výběr požadovaného režimu stiskněte [R, T] a
potom [OK].
PLAYMODE
OFF
PLAYMODE
1-TRACK
1
ČESKYČESKY
1-ALBUM
1
Přehraje všechny skladby.
Přehraje jednu zvolenou skladbu.
Stiskněte [2/3] nebo [5/6]
pro výběr skladby.
Přehraje jedno zvolené album.
Stiskněte [R, T] pro výběr alba.
Kompatibilní média
Disk
• Tento systém umí přehrávat disky CD-R/RW se skladbami
ve formátu CD-DA nebo MP3.
• Některé disky CD-R/RW nelze přehrávat kvůli stavu
nahrávky.
• MP3 soubory jsou definovány jako skladby a složky jsou
definovány jako alba.
• Tento systém umí rozpoznat až:
– CD-DA : 99 skladeb
– MP3 : 999 skladeb, 255 alb (včetně kořenové složky)
a 20 relací
• Disk musí odpovídat normě ISO9660, úroveň 1 nebo 2
(kromě rozšířených formátů).
• Nahrávky nemusí být přehrávány v pořadí, v jakém byly
pořízeny.
USB
• Kompatibilní zařízení USB, která jsou definována jako
paměťová zařízení typu USB:
– USB zařízení, která podporují pouze hromadný přenos
– USB zařízení, která podporují formát USB 2.0
• Soubory jsou definovány jako skladby a složky jsou
definovány jako alba.
• Skladba musí mít příponu „.mp3“ nebo „.MP3“.
• Tento systém umí rozpoznat až:
– 255 alb (včetně kořenové složky)
– 2 500 skladeb
– 999 skladeb na album
• Přenos CBI (v angličtině, Control/Bulk/Interrupt) není
podporován.
• Systém souborů NTFS není podporován (podporován je
pouze systém FAT 12/16/32).
• Některé soubory mohou selhat kvůli velikosti sektoru.
Technologie audio kódování MPEG Layer-3 licencovaná
od Fraunhofer IIS a Thomson.
RANDOM
RND
1-ALBUM
RANDOM
1 RND
REPEAT
ON REPEAT
RQT9678
6
OFF REPEAT Zrušení opakovaného přehrávání.
60
Přehraje všechny skladby v náhodném
pořadí.
Přehraje všechny skladby na jednom
vybraném albu v náhodném pořadí.
Stiskněte [R, T] pro výběr alba.
Opakované přehrávání.
Page 61

ČESKY
Rádio
Předvoleno může být 30 FM stanic.
Příprava
Zapojte FM pokojovou anténu (Z str. 5).
Stiskněte [RADIO].
Automatická předvolba
1 Stiskněte [PLAY MENU] pro výběr „A.PRESET“.
2 Stiskněte [R, T] pro výběr „LOWEST“ nebo
„CURRENT“ frekvence.
LOWEST : Pro spuštění automatického nastavení od
CURRENT : Pro spuštění automatického nastavení od
Změna frekvence, viz „Ruční ladění a předvolby“.
3 Stiskněte [OK] pro zahájení ukládání předvoleb.
Tuner uloží do příslušných kanálů všechny stanice, které
může přijímat, a to ve vzestupném pořadí.
Pro zrušeni stiskněte [8].
nejnižší frekvence.
aktuálně nastavené frekvence
.
Zlepšení kvality zvuku
1 Stiskněte [PLAY MENU] pro výběr „FM MODE“.
2 Stiskněte [R, T] pro výběr „MONO“ a potom
stiskněte [OK].
Pro zrušení vyberte „STEREO“.
„MONO“ se při změně frekvence rovněž zruší.
Uložení nastavení
Pokračujte kroky 4 až 6 „Ruční ladění a předvolby“.
Kontrola stavu signálu
Stiskněte [PLAY MENU] pro výběr „FM STATUS“ a
potom stiskněte [OK].
FM Signál FM je monofonní.
FM ST Signál FM je stereofonní.
FM MONO „MONO“ je vybráno jako „FM MODE“.
Systém není naladěný na stanici.
Ruční ladění a předvolby
1 Stiskněte [PLAY MENU] pro výběr „TUNEMODE“.
2 Stiskněte [R, T] pro výběr „MANUAL“ a potom
stiskněte [OK].
3 Stiskněte [2/3] nebo [5/6] pro naladění
požadované stanice.
Pro automatické ladění tlačítko stiskněte a přidržte,
dokud se frekvence nezačne rychle měnit.
„STEREO“ se zobrazí, když systém ladí stanice ve
stereo vysílání.
Přednastavení stanice
4 Stiskněte [OK].
5 Stiskněte [R, T] pro výběr čísla předvolby.
6 Stiskněte [OK].
Pro nastavení dalších stanic zopakujte kroky 3 až 6.
Poznámka:
Již uložená stanice se přepíše v okamžiku, kdy se pod
stejné číslo předvolby uloží jiná stanice.
Volba předvolené stanice
1 Stiskněte [PLAY MENU] pro výběr „TUNEMODE“.
2 Stiskněte [R, T] pro výběr „PRESET“ a potom
stiskněte [OK].
3 Stiskněte [2/3] nebo [5/6] pro výběr
předvolby stanice.
RDS vysílání
Tento systém zobrazuje textové údaje přenášené rádiovým
datovým systémem (RDS), který je v určitých oblastech k
dispozici.
Stiskněte [DISPLAY].
PS Název stanice
PTY Typ programu
FREQ Frekvence
Poznámka:
Funkce RDS nemusí být dostupná, pokud bude příjem
signálu slabý.
Zvukové efekty
1 Pro výběr zvukového efektu stiskněte [SOUND].
2 Stiskněte [R, T] pro výběr požadovaného nastavení.
PRESET EQ „HEAVY“ : Zdůrazní rockovou hudbu.
„SOFT“ : Pro hudební kulisu.
„CLEAR“ : Zvýrazní vyšší frekvence.
„VOCAL“ : Zvýrazní zpěv.
„FLAT“ : Zruší zvukový efekt.
BASS „BASS -4“ až „BASS +4“.
TREBLE „TREBLE-4“ až „TREBLE+4“.
D.BASS „ON D.BASS“ nebo „OFF D.BASS“.
SURROUND „ON SURROUND“ nebo
„OFF SURROUND“.
ČESKY
RQT9678
7
61
Page 62

Hodiny a časovače
Nastavení hodin
Přístroj ukazuje čas ve formátu 24 hodin.
1 Stiskněte [SETUP] pro v ýběr „CLOCK“.
2 Stiskněte [R, T] pro nastavení času.
3 Stiskněte [OK].
Zobrazení hodin na pár sekund
Stiskněte [SETUP] pro výběr „CLOCK“ a potom stiskněte
[OK].
Poznámka:
Pro zachování přesného času pravidelně kontrolujte
přesnost času
Časovač vypnutí
Časovač vypnutí vypne systém po uplynutí nastavené doby.
Stiskněte [SLEEP] pro výběr nastavení (v minutách).
Pro zrušení vyberte „OFF“.
SLEEP 30 → SLEEP 60 → SLEEP 90 → SLEEP120
Poznámka:
• Na displeji je vždy zobrazen zbývající čas. Zobrazení na
displeji se dočasně změní, když provádíte jiné operace.
• Časovač vypnutí lze používat společně s časovačem
přehrávání.
• Časovač vypnutí má vždy přednost. Dávejte pozor, aby se
nastavení časovačů nepřekrývala.
OFF
Časovač přehrávání
Můžete nastavit časovač, který zajistí zapnutí v určitou dobu
jako budík.
Příprava
Nastavte hodiny.
1 Stiskněte [SETUP] pro v ýběr „TIMER ADJ“.
2 Stiskněte [R, T] pro nastavení času zapnutí.
3 Stiskněte [OK].
4 Pro nastavení konečného času opakujte kroky 2 a 3.
Spuštění časovače
1 Připravte zdroj zvuku, který chcete poslouchat, a
nastavte hlasitost.
2 Stiskněte [SETUP] pro výběr „TIMER SET“.
3 Stiskněte [R, T] pro výběr „SET“ a potom stiskněte
[OK].
Zobrazí se „#“.
Systém musí být vypnutý, aby se časovač aktivoval.
Kontrola
nastavení
Zrušení 1. Stiskněte [SETUP] pro výběr
ČESKYČESKY
Poznámka:
• Časovač spustí přehrávání s nízkou hlasitostí, která se
bude postupně zvyšovat na nastavenou úroveň.
• Časovač se spustí každý den ve stejný čas, pokud je
zapnutý.
• Jestliže systém vypnete a znovu zapnete během doby,
kdy je časovač spuštěný, časovač se v době ukončení
nezastaví.
RQT9678
1. Stiskněte [SETUP] pro výběr
„TIMER ADJ“.
2. Stiskněte [OK].
„TIMER SET“.
2. Stiskněte [R, T] pro výběr „OFF“ a
potom stiskněte [OK].
8
62
Funkce automatického vypnutí
Jestliže systém nepoužíváte přibližně po dobu 30 minut, tato
funkce systém vypne (s výjimkou rádia).
CD USB
1 Stiskněte [SETUP] pro v ýběr „AUTO OFF“.
2 Stiskněte [R, T] pro výběr „ON“ (zapnuto) nebo
„OFF“ (vypnuto) a potom stiskněte [OK].
Odstraňování závad
Před žádostí o opravu proveďte následující kontroly.
Nerozumíte-li některému z popisovaných postupů, nebo
pokud uvedený postup problém nevyřeší, poraďte se s
prodejcem.
Běžné problémy
S dálkovým ovladačem nelze provést žádnou operaci.
• Zkontrolujte, zda jsou baterie vloženy správně.
• Dálkové ovládání a přístroj používají rozdílné kódy
(Z str. 9, „REMOTE “).
Zvuk je nevyvážený nebo se neozývá žádný zvuk.
• Upravte hlasitost systému.
• Vypněte systém, zjistěte a odstraňte příčinu a poté systém
znovu zapněte. Může to být způsobeno přetěžováním
reproduktorů nadměrnou hlasitostí nebo výkonem a
používáním systému v prostředí s příliš vysokou teplotou.
Během přehrávání je slyšet hučení.
• V blízkosti kabelu je vedení síťového napájení (AC) nebo
zářivkové osvětlení. Udržujte ostatní zařízení a kabely v
dostatečné vzdálenosti od kabelu tohoto systému.
Disk
Displej nezobrazuje správně.
Přehrávání se nespustí.
• Disk jste nevložili správně. Vložte ho správně.
• Disk je špinavý. Vyčistěte disk.
• Vyměňte disk, pokud je poškrábaný, zdeformovaný nebo
nestandardní.
• Došlo ke kondenzaci. Nechte systém vyschnout po dobu
1 až 2 hodin.
Page 63

ČESKY
USB
Nelze přečíst zařízení USB nebo jeho obsah.
• Formát zařízení USB nebo jeho obsah není kompatibilní
se systémem.
• Zařízení USB s kapacitou vyšší než 32 GB není za
určitých podmínek podporováno.
Pomalá činnost USB zařízení.
• Velké soubory nebo zařízení USB s velkou kapacitou se
mohou načítat delší dobu.
Zobrazený uplynulý čas se liší od skutečné doby
přehrávání.
• Data zkopírujte na jiné paměťové zařízení USB nebo je
zazálohujte a zařízení USB zformátujte.
Rádio
Je slyšet dunění.
• Vypněte televizor nebo jej odsuňte od systému.
• Dochází-li k zjevnému rušení, umístěte mobilní telefony
na jiné místo.
Displej hlavního přístroje
„--:--“
• Poprvé jste zapojili kabel síťového napájení (AC) nebo
nedávno došlo k výpadku elektrického proudu. Nastavte
hodiny.
„ADJUST CLOCK“
• Hodiny nejsou nastaveny. Nastavte hodiny.
„ADJUST TIMER“
• Časovač přehrávání není nastaven. Nastavte časovač
přehrávání.
„ERROR“
• Byla provedena nesprávná operace. Přečtěte si instrukce
a zkuste to znovu.
„F61“
• Nastal problem s napájením.
„USB OVER CURRENT ERROR“
• Zařízení USB spotřebovává příliš vysoký výkon. Odpojte
zařízení USB. Přístroj vypněte a znovu zapněte.
„NODEVICE“
• Zařízení USB není připojeno. Zkontrolujte připojení.
„NO DISC“
• Nevložili jste disk.
„NO PLAY“
• Vložili jste disk, který systém nemůže přehrát.
• Vložili jste zařízení USB, které nelze přehrát. Zkontrolujte
obsah. Můžete přehrávat pouze podporovaný formát.
• Pokud je zde více než 255 alb nebo složek (zvukových i
nezvukových), nemusí být možné některé MP3 soubory
na těchto albech načíst a přehrát. Přeneste tato hudební
alba na jiné zařízení USB. Alternativně přeformátujte USB
zařízení a uložte tato hudební alba před uložením jiných
složek, které neobsahují zvuk.
„NOT MP3/ERROR“
• Nepodporovaný formát MP3. Systém danou skladbu
přeskočí a přehraje další.
„REMOTE “ („ “ označuje nějaké číslo.)
• Dálkové ovládání a přístroj používají rozdílné kódy.
Změňte kód dálkového ovládání.
– Po zobrazení „REMOTE 1“ stiskněte a přidržte [OK] a
[T] nejméně na 4 sekundy.
– Po zobrazení „REMOTE 2“ stiskněte a přidržte [OK] a
[R] nejméně na 4 sekundy.
„–VBR–“
• Přístroj nemůže zobrazit zbývající čas přehrávání u
skladeb s proměnnou přenosovou rychlostí skladby (VBR).
Resetování paměti (inicializace)
Dojde-li k následujícím situacím, resetujte paměť:
• Stisknutí tlačítek nevyvolá žádnou odezvu.
• Chcete vymazat a resetovat obsah paměti.
1 Odpojte kabel síťového napájení (AC).
Počkejte 3 minuty, než přejdete ke kroku 2.
2 Při stisknutém [1] na hlavním přístroji připojte
kabel síťového napájení (AC) zpět.
Zobrazí se „– – – – – – – –“.
3 Uvolněte [1].
Všechna nastavení se vrátí na původní tovární
nastavení.
Je třeba znovu nastavit položky paměti.
Kód dálkového ovladače
Když další zařízení Panasonic reaguje na dálkový ovladač
tohoto systému, změňte kód ovladače pro tento systém.
Nastavení kódu na „REMOTE 2“
1 Stiskněte a přidržte [CD] na hlavním přístroji a
[R] na dálkovém ovladači, dokud se nezobrazí
„REMOTE 2“.
2 Stiskněte a přidržte [OK] a [R] nejméně na
4 sekundy.
Nastavení kódu na „REMOTE 1“
1 Stiskněte a přidržte [CD] na hlavním přístroji a
[T] na dálkovém ovladači, dokud se nezobrazí
„REMOTE 1“.
2 Stiskněte a přidržte [OK] a [T] nejméně na
4 sekundy.
Údržba
K čištění systému používejte jemný a suchý hadřík.
• Nikdy nepoužívejte k čištění systému líh, ředidlo nebo
technický benzín.
• Před použitím chemicky impregnovaného hadříku si
přečtěte instrukce přiložené k hadříku.
ČESKY
RQT9678
9
63
Page 64

Specifikace
Zesilovač
Výstupní výkon RMS ve stereo režimu
Přední kanál (oba kanály napájeny)
5 W na kanál (6
Celkový výstupní výkon RMS 10 W
), 1 kHz, 10 % THD
Tuner
Předvolby stanic 30 stanic FM
Frekvenční modulace (FM)
Frekvenční rozsah
87,50 MHz až 108,00 MHz (50 kHz/krok)
Anténní konektor 75
(nesymetrický)
Vstup
USB port
Norma USB USB 2.0 plná rychlost
Podporované formáty souborů médií MP3 (*.mp3)
Systém souborů USB zařízení FAT12, FAT16, FAT32
Napájení USB portu 500 mA (max.)
Konektor pro sluchátka
Výstup stereo, konektor 3,5 mm
Disk
Přehrávaný disk (8 cm nebo 12 cm)
CD, CD-R/RW (CD-DA, MP3
Čtení
Vlnová délka 790 nm (CD)
Výkon laseru CLASS I
Audio výstup (disk)
Počet kanálů 2 kanály (FL, FR)
FL = Přední levý kanál
FR = Přední pravý kanál
MPEG-1 Layer 3, MPEG-2 Layer 3
)
Reproduktory
Typ 1pásmový, 1reproduktorový systém (bass reflex)
Reproduktor(y)
Plný rozsah 8 cm kónický x 1/kanál
Impedance 6
Všeobecně
Napájení AC 220 až 240 V, 50 Hz
Spotřeba 12 W
Rozměry (Š x V x H) 400 mm x 213 mm x 110 mm
[H = 72 mm (min.)]
Hmotnost 1,9 kg
Rozsah provozních teplot 0 °C až +40 °C
Rozsah provozní vlhkosti
35 % až 80 % RH (bez kondenzace)
Spotřeba v pohotovostním režimu 0,2 W (přibližně)
Poznámka:
• Technické údaje podléhají změnám bez předchozího
upozornění.
Hmotnost a rozměry jsou přibližné.
• Celkové harmonické zkreslení je měřeno digitálním
spektrálním analyzátorem.
Der tages forbehold for trykfejl.
Pursuant to at the directive 2004/108/EC, article 9(2)
Panasonic Testing Centre
Panasonic Marketing Europe GmbH
Winsbergring 15, 22525 Hamburg, Germany
Panasonic Corporation
Web Site: http://panasonic.net
© Panasonic Corporation 2012
En
Sp
EU
PoFiSw
CzDa
RQT9678-1E
L0112HH1052
 Loading...