

Page 1
Operating Instructions
Instrukcja obsługi
Návod k obsluze
Инструкция по эксплуатации
Інструкція з експлуатації
Compact Stereo System
Dear Customer
Thank you for purchasing this system.
For optimum performance and safety, read these instructions
fully before you connect, operate or adjust this system.
Keep this manual for future reference.
Your system and the illustrations can look differently.
Drogi Kliencie
Dziękujemy Ci za zakupienie tego zestawu.
W celu zapewnienia optymalnej jakości odbioru i
bezpieczeństwa, przed podłączeniem, uruchomieniem lub
zmianą ustawień urządzenia należy dokładnie zapoznać się
z niniejszą instrukcją obsługi.
Prosimy o zachowanie niniejszej instrukcji obsługi.
Zakupione urządzenie może różnić się od przedstawionego
na ilustracjach.
Niniejsza instrukcja została opracowana na podstawie
oryginalnej publikacji firmy Panasonic Corporation.
Vážený Zákazníku
Děkujeme za zakoupení tohoto systému.
Pro optimální využití a bezpečnost si před připojováním,
používáním nebo nastavováním tohoto systému tento návod
pečlivě přečtěte.
Uschovejte si prosím tento návod k obsluze.
Váš systém a obrázky se mohou lišit.
Уважаемый Покупатель
Благодарим Вас за покупку данной системы.
Для обеспечения оптимальных характеристик и
безопасности, внимательно прочтите эти инструкции
перед подключением, работой или настройкой данной
системы.
Сохраните инструкцию для дальнейших справок.
Ваша система может отличаться от представленных
иллюстраций.
Kompaktowy zestaw stereo
Kompaktní stereosystém
Компактная стереосистема
Компактна Cтереосистема
Model No. SC-HC15
Шановний Покупець
Дякуємо за придбання цієї системи.
Для отримання оптимальних характеристик роботи
пристрою і забезпечення безпеки роботи повністю
прочитайте ці інструкції до того, як ви під’єднаєте,
почнете експлуатацію або налаштування цієї системи.
Збережіть цей посібник для майбутнього використання.
Фактичний вигляд вашої системи і ілюстрації системи в
цій інструкції можуть відрізнятися.
EP
RQTX1246-1E
Page 2
ENGLISH
Do the procedures with the remote control. You can also use the
buttons on the main unit if they are the same.
ENGLISH
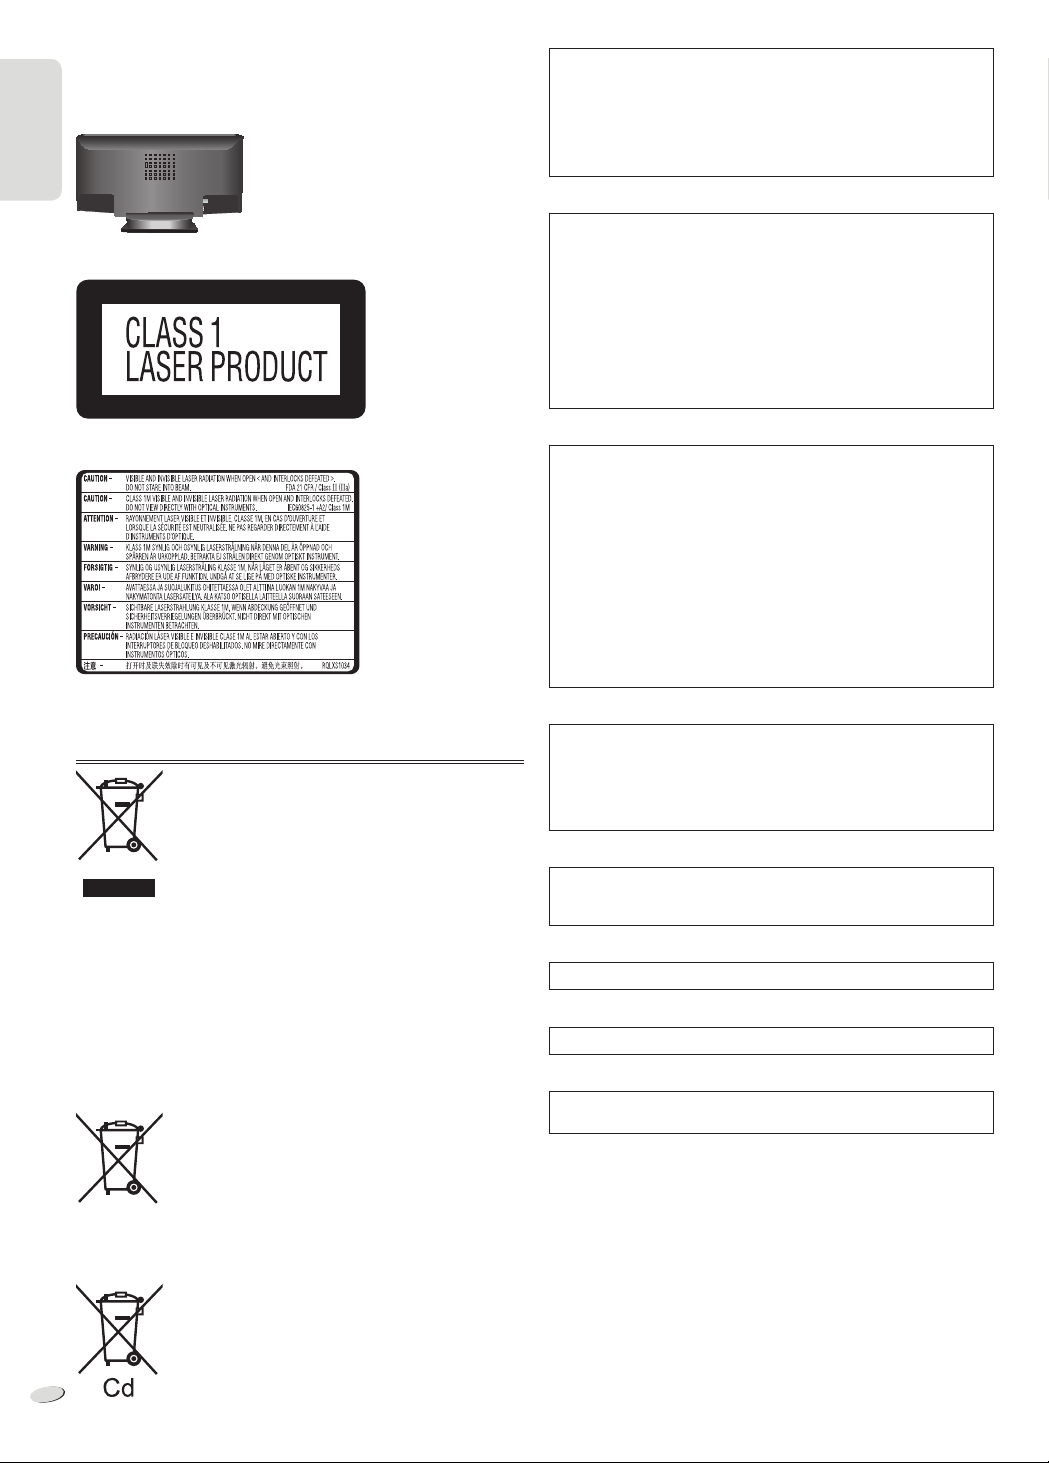
CAUTION!
THIS PRODUCT UTILIZES A LASER.
USE OF CONTROLS OR ADJUSTMENTS OR PERFORMANCE OF
PROCEDURES OTHER THAN THOSE SPECIFIED HEREIN MAY
RESULT IN HAZARDOUS RADIATION EXPOSURE.
DO NOT OPEN COVERS AND DO NOT REPAIR YOURSELF.
REFER SERVICING TO QUALIFIED PERSONNEL.
Bottom of product
Inside of product
Information for Users on Collection and Disposal of Old
Equipment and used Batteries
These symbols on the products, packaging, and/or
accompanying documents mean that used electrical
and electronic products and batteries should not be
mixed with general household waste.
For proper treatment, recovery and recycling of old
products and used batteries, please take them to
applicable collection points, in accordance with your
national legislation and the Directives 2002/96/EC and
2006/66/EC.
By disposing of these products and batteries correctly,
you will help to save valuable resources and prevent
any potential negative effects on human health and
the environment which could otherwise arise from
inappropriate waste handling.
For more information about collection and recycling of
old products and batteries, please contact your local
municipality, your waste disposal service or the point of
sale where you purchased the items.
Penalties may be applicable for incorrect disposal of
this waste, in accordance with national legislation.
For business users in the European Union
If you wish to discard electrical and electronic
equipment, please contact your dealer or supplier for
further information.
[Information on Disposal in other Countries outside
the European Union]
These symbols are only valid in the European Union.
If you wish to discard these items, please contact
your local authorities or dealer and ask for the correct
method of disposal.
Note for the battery symbol (bottom two symbol
examples):
This symbol might be used in combination with a
chemical symbol. In this case it complies with the
RQTX1246
requirement set by the Directive for the chemical
involved.
2
2
WARNING:
TO REDUCE THE RISK OF FIRE, ELECTRIC SHOCK OR
PRODUCT DAMAGE,
• DO NOT EXPOSE THIS APPARATUS TO RAIN, MOISTURE,
DRIPPING OR SPLASHING AND THAT NO OBJECTS FILLED
WITH LIQUIDS, SUCH AS VASES, SHALL BE PLACED ON
THE APPARATUS.
• USE ONLY THE RECOMMENDED ACCESSORIES.
• DO NOT REMOVE THE COVER (OR BACK); THERE ARE NO
USER SERVICEABLE PARTS INSIDE. REFER SERVICING TO
QUALIFIED SERVICE PERSONNEL.
CAUTION!
• DO NOT INSTALL OR PLACE THIS UNIT IN A BOOKCASE,
BUILT-IN CABINET OR IN ANOTHER CONFINED SPACE.
ENSURE THE UNIT IS WELL VENTILATED. TO PREVENT
RISK OF ELECTRIC SHOCK OR FIRE HAZARD DUE TO
OVERHEATING, ENSURE THAT CURTAINS AND ANY OTHER
MATERIALS DO NOT OBSTRUCT THE VENTILATION VENTS.
• DO NOT OBSTRUCT THE UNIT’S VENTILATION OPENINGS
WITH NEWSPAPERS, TABLECLOTHS, CURTAINS, AND
SIMILAR ITEMS.
• DO NOT PLACE SOURCES OF NAKED FLAMES, SUCH AS
LIGHTED CANDLES, ON THE UNIT.
• DISPOSE OF BATTERIES IN AN ENVIRONMENTALLY
FRIENDLY MANNER.
The socket outlet shall be installed near the equipment and easily
accessible.
The mains plug of the power supply cord shall remain readily
operable.
To completely disconnect this apparatus from the AC Mains,
disconnect the power supply cord plug from AC receptacle.
This product may receive radio interference caused by mobile
telephones during use. If such interference is apparent, please
increase separation between the product and the mobile telephone.
THIS UNIT IS INTENDED FOR USE IN MODERATE CLIMATES.
Product identification marking is located on the bottom of unit.
MPEG Layer-3 audio coding technology licensed from Fraunhofer IIS
and Thomson.
Page 3
ENGLISH
Safety precautions
Table of contents
Placement
Set the system up on an even surface away from direct sunlight, high
temperatures, high humidity, and excessive vibration. These conditions
can damage the cabinet and other components, thereby shortening the
service life of the system.
Place it at least 15 cm away from wall surfaces to avoid distortion and
unwanted acoustical effects.
Do not place heavy items on the system.
Voltage
Do not use high voltage power sources. This can overload the system
and cause a fire.
Do not use a DC power source. Check the source carefully when
setting the system up on a ship or other place where DC is used.
AC mains lead protection
Ensure the AC mains lead is connected correctly and not damaged.
Poor connection and lead damage can cause fire or electric shock. Do
not pull, bend, or place heavy items on the lead.
Grasp the plug firmly when unplugging the lead. Pulling the AC mains
lead can cause electric shock.
Do not handle the plug with wet hands. This can cause electric shock.
Foreign matter
Safety precautions ............................................ 3
Supplied accessories ........................................ 3
Preparing the remote control ........................... 3
Overview of controls ......................................... 4
Making the connections .................................... 5
Discs ................................................................... 5
USB ..................................................................... 6
Radio ................................................................... 6
Clock and timers................................................ 7
Sound effects ..................................................... 8
External equipment ........................................... 8
Remote control code ......................................... 8
Troubleshooting guide ...................................... 8
Maintenance ....................................................... 9
Specifications .................................................... 9
Preparing the remote control
ENGLISH
Do not let metal objects fall inside the system. This can cause electric
shock or malfunction.
Do not let liquids get into the system. This can cause electric shock or
malfunction. If this occurs, immediately disconnect the system from the
power supply and contact your dealer.
Do not spray insecticides onto or into the system. They contain
flammable gases which can ignite if sprayed into the system.
Service
Do not attempt to repair this system by yourself. If sound is interrupted,
indicators fail to light, smoke appears, or any other problem that is
not covered in these instructions occurs, disconnect the AC mains
lead and contact your dealer or an authorised service centre. Electric
shock or damage to the system can occur if the system is repaired,
disassembled or reconstructed by unqualified persons.
Extend operating life by disconnecting the system from the power
source if it is not to be used for a long time.
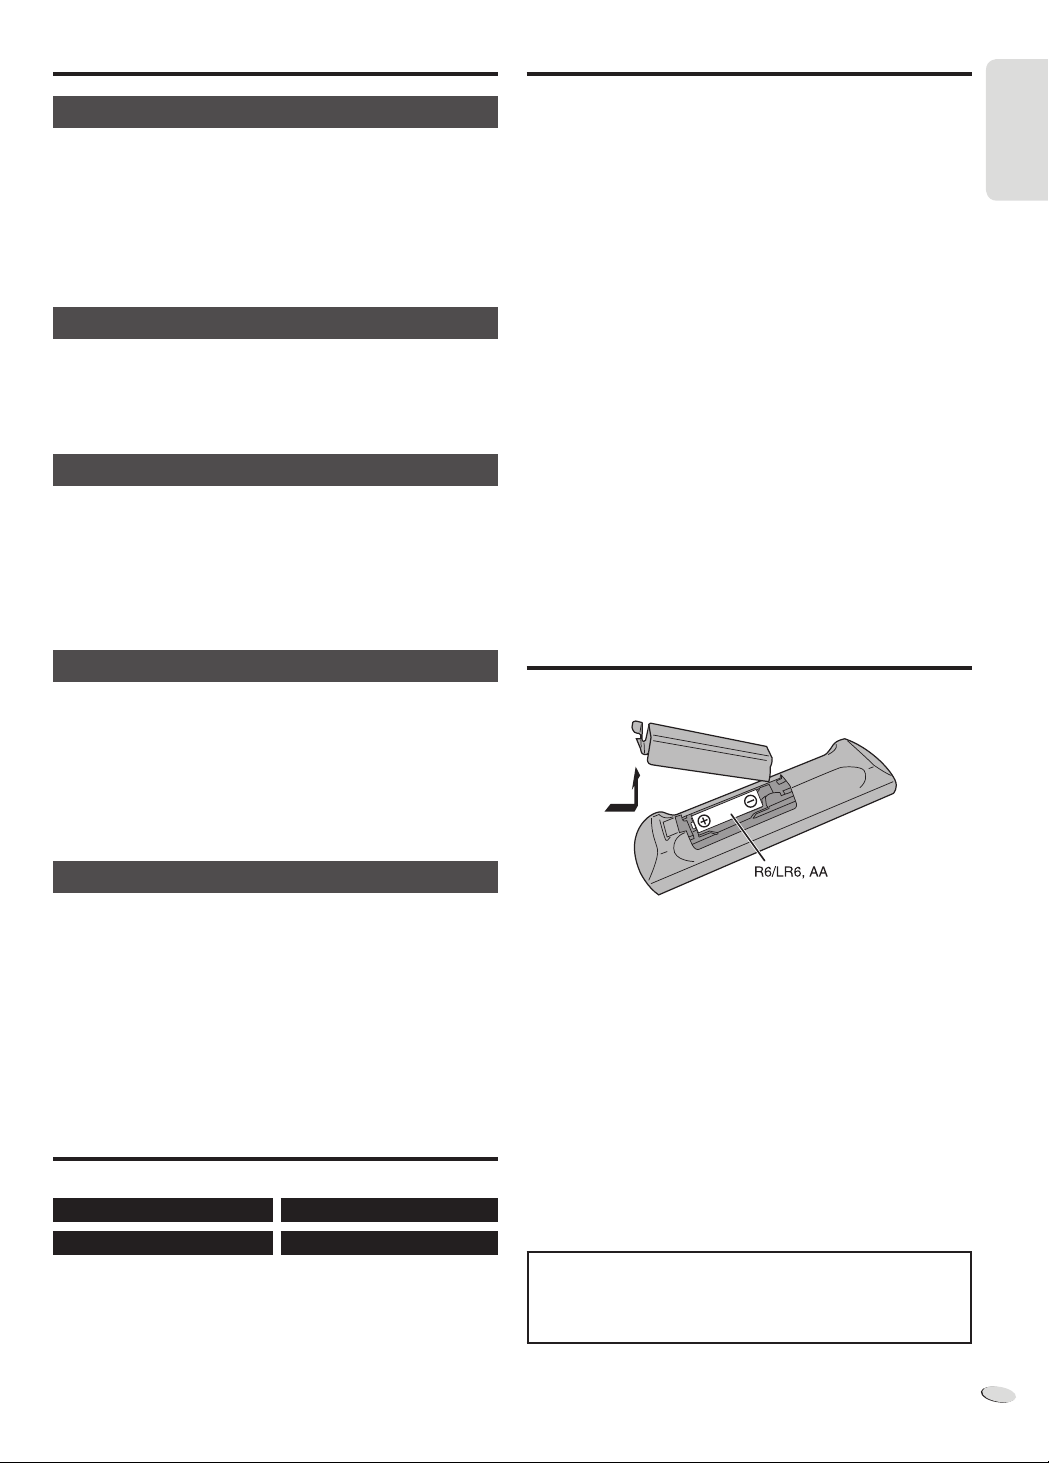
Supplied accessories
Please check and identify the supplied accessories.
1 x AC mains lead
1 x FM indoor antenna
1 x AM loop antenna
1 x Remote control
(N2QAYB000639)
(not included)
Use alkaline or manganese battery.
Install the battery so that the poles (+ and –) align with those in the
remote control.
Point the remote control at the remote control sensor (Z 4), away from
obstacles, at a maximum range of 7 m directly in front of the main unit.
CAUTION!
• Do not break open or short-circuit the battery.
• Do not charge the alkaline or manganese battery.
• Do not use the battery if the cover has peeled off.
• Do not heat or expose to flame.
• Do not leave the battery(ies) in an automobile exposed to direct
sunlight for a long period of time with doors and windows closed.
• Mishandling of battery can cause electrolyte leakage, which can
cause a fire.
• Remove the battery if you do not use the remote control for a long
period of time. Keep in a cool, dark area.
CAUTION!
Danger of explosion if battery is incorrectly replaced. Replace only
with the same or equivalent type recommended by the manufacturer.
Dispose of used batteries according to the manufacturer’s
instructions.
RQTX1246
3
3
Page 4

ENGLISH
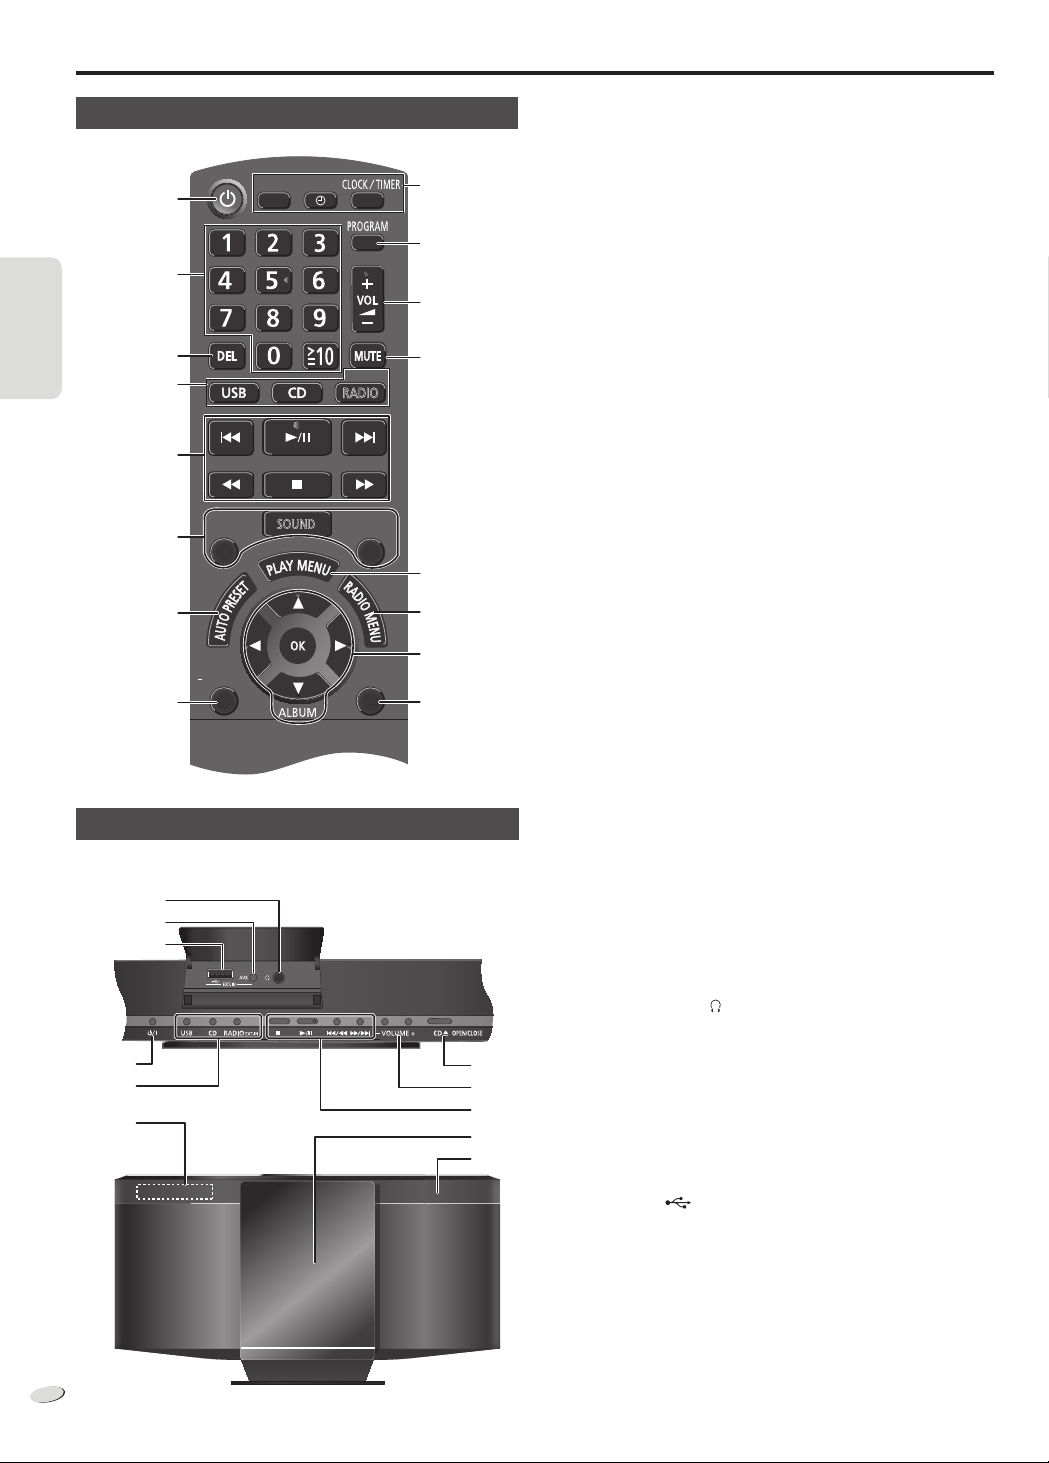
Overview of controls
RADIO
EXT-IN
SOUND
PRESET EQ
D.BASS
DISPLAY
DIMMER
SLEEP
PLAY
AUTO OFF
Remote control
ENGLISH
Main unit
Top view
A
D
U
Front view
A
B
C
D
E
F
G
H
Q
R
S
I
J
K
L
M
N
O
P
T
K
E
V
W
A Standby/on switch [`], [1] (Z 7, 9)
Press to switch the unit from on to standby mode or vice versa. In
standby mode, the unit is still consuming a small amount of power.
B Numeric buttons [1 to 9, 0, ≧10]
To select a 2-digit number
Example: 16: [≧10] → [1] → [6]
C Delete a programmed track (Z 6)
D Select source
[USB]: Select USB (Z 6)
[CD]: Select disc (Z 5)
[RADIO, EXT-IN]: Select radio, USB or AUX (Z 6, 8)
E Basic operation
[4/9]: Playback or pause operation
[8]: Stop playback
[2], [6]: Skip track
Select preset radio station
[3], [5]: Search track
Tune in to the radio station
[2/3], [5/6]: Skip and search track
Select preset radio station
F Select the sound effects (Z 8)
G Auto preset the radio station (Z 7)
H View the information shown on the display panel.
Decrease the brightness of the display panel
Press and hold the button to use this function.
To cancel, press and hold the button again.
I Set the sleep timer (Z 7)
Set the clock and timer (Z 7)
J Set the program function (Z 5, 7)
K Adjust the volume of the system
L Mute the sound of the system
Press the button again to cancel.
“MUTE” is also cancelled when you adjust the volume or when you
switch off the system.
M Set the play menu item (Z 5)
N Set the radio menu item (Z 6)
O [R, T]: Skip album
Adjust clock setting
[Y, U]: Select the item in the menu
[OK]: Confirm the setting
P Automatically switch off the system
This function switches off the system (except in radio source) if you
do not use the system for approximately 30 minutes.
To cancel, press the button two times.
Q Headphones jack ( )
Plug type: Ø 3.5 mm stereo (not included)
• Avoid listening for prolonged periods of time to prevent hearing
damage.
• Excessive sound pressure from earphones and headphones can
cause hearing loss.
• Listening at full volume for long periods may damage the user’s
ears. Be sure to use the supplied or recommended headphones
or earphones.
R AUX jack
S USB port ( )
T Open or close the sliding door
U Display panel
V Sliding door
W Remote control sensor
4
RQTX1246
4
Page 5
ENGLISH
Making the connections
Conserving power
The system consumes approximately 0.2 W when it is in standby mode.
Disconnect the power supply if you do not use the system.
Some settings will be lost after you disconnect the system. You have to
set them again.
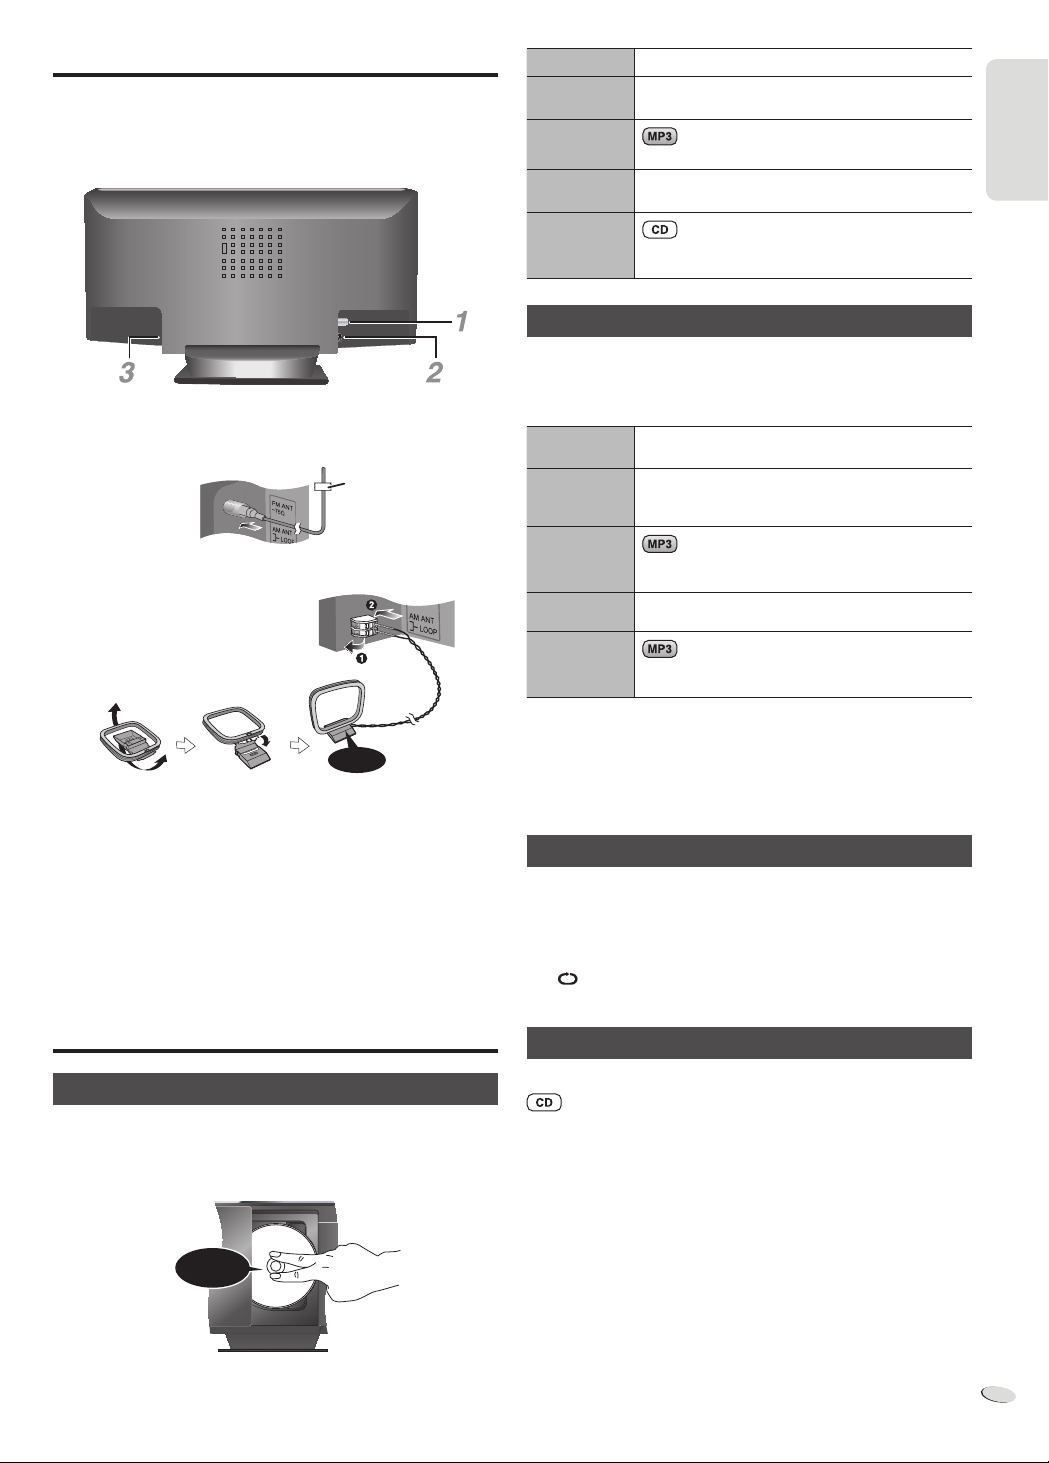
1
Connect the FM indoor antenna.
Place the antenna where reception is best.
Adhesive tape
2
Connect the AM loop antenna.
Stop playback
Pause
playback
Skip album
Skip track
Search
through track
Press [8] during playback.
Press [4/9] during playback.
Press again to continue playback.
Press [R, T].
Press [2] or [6] (main unit: [2/3] or
[5/6]).
Press and hold [3] or [5] (main unit:
[2/3] or [5/6]).
Playmode function
1
Press [PLAY MENU] to select “PLAYMODE”.
2
Press [Y, U] and then press [OK] to select the desired mode.
OFF
PLAYMODE
1-TRACK
1-TR
1-ALBUM
1ALBUM
RANDOM
RND
1- ALBUM
RANDOM
1ALBUM RND
Play all tracks.
Play one selected track on the disc.
Press the numeric buttons to select the track.
Playback starts from the selected track.
Play one selected album on the disc.
Press [R, T
Play a disc randomly.
Play all tracks in one selected album randomly.
Press [R, T
]
to select the album.
]
to select the album.
ENGLISH
Click!
3
Connect the AC mains lead.
Use the included AC mains lead with this system only.
Do not use an AC mains lead from other equipment.
Note:
• These speakers do not have magnetic shielding. Do not put them
near TVs, PCs or other equipment easily influenced by magnetism.
• You cannot remove the net of the speakers.
Discs
Playing discs
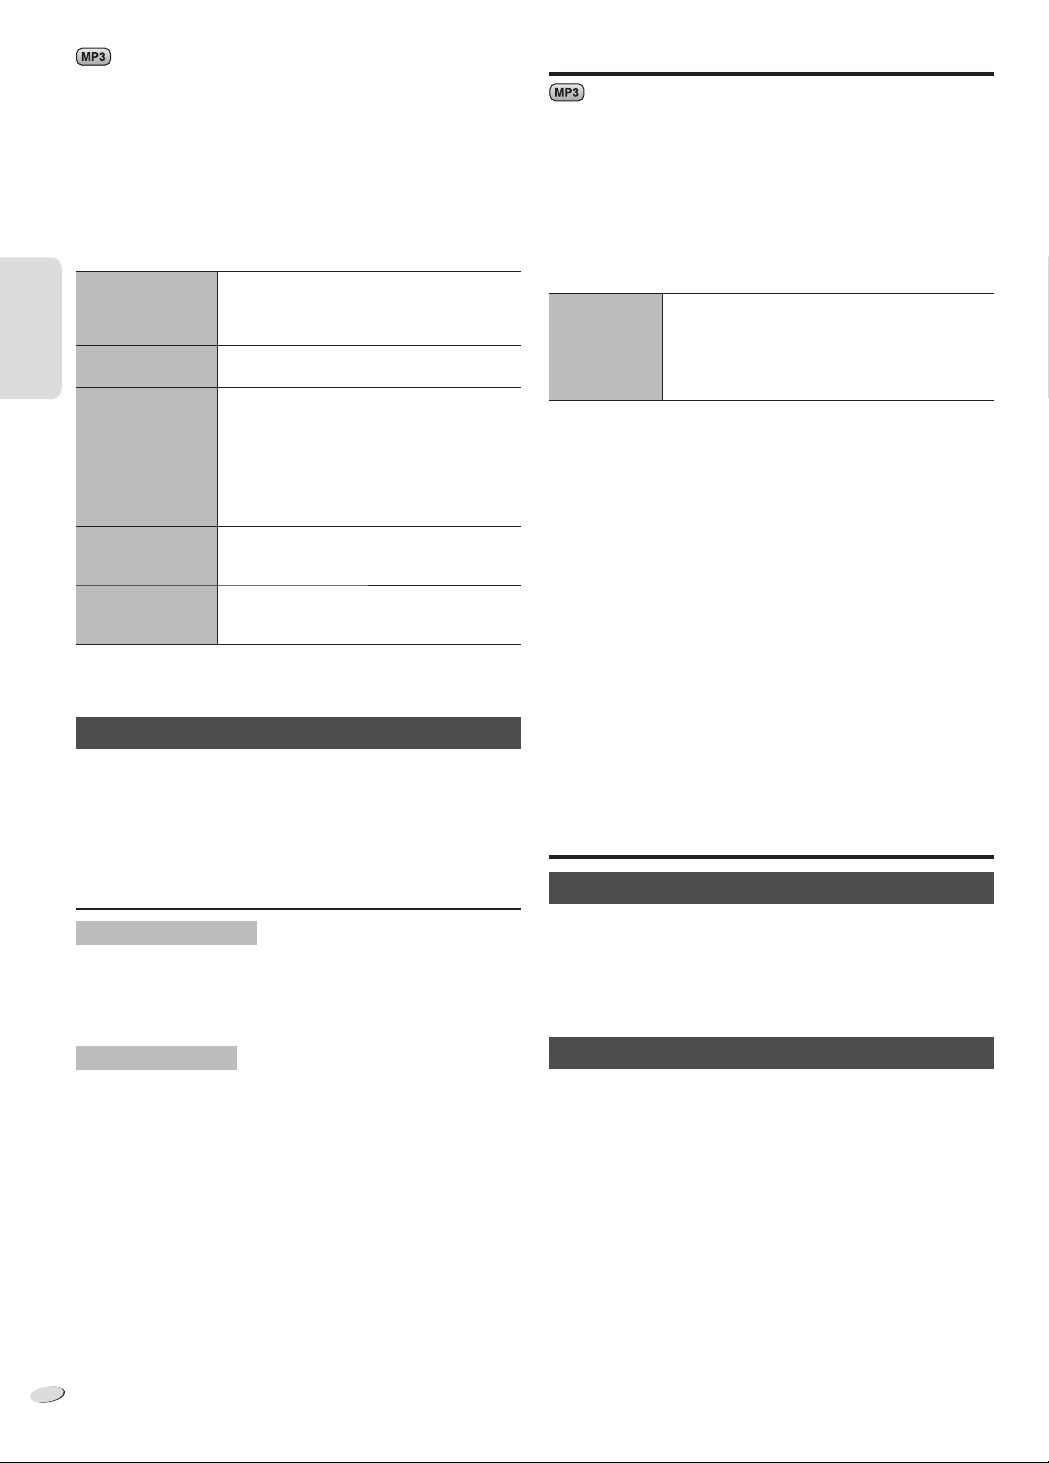
1
Press [CD x , OPEN/CLOSE] on the main unit to open the
sliding door.
Put in a disc with the label facing towards you.
Press [CD x, OPEN/CLOSE] again to close the sliding door.
Click!
Note:
• During random playback, you cannot skip to tracks which have been
played or press the numeric buttons.
• This function does not work with “Program playback”.
• The setting returns to default “OFF PLAYMODE” when you open the
sliding door.
Repeat playback
You can repeat “Program playback” or other selected “Playmode
function”.
1
Press [PLAY MENU] to select “REPEAT”.
2
Press [Y, U] to select “ON REPEAT” and then press [OK].
” is shown.
“
To cancel, select “OFF REPEAT”.
Program playback
This function allows you to program up to 24 tracks.
1
Press [PROGRAM] in the stop mode.
“PGM” is shown.
2
Press the numeric buttons to select the desired track.
Do this step again to program other tracks.
3
Press [4/9] to start playback.
2
Press [CD] and then press [4/9] to start playback.
Keep fingers away from the sliding door when it is closing.
RQTX1246
5
5
Page 6
ENGLISH
1
Press [PROGRAM] in the stop mode.
2
Press [R, T] to select the desired album.
3
Press [6] and then press the numeric buttons to select the
ENGLISH
desired track.
4
Press [OK].
Do steps 2 through 4 again to program other tracks.
5
Press [4/9] to start playback.
Cancel
program mode
Replay the
program
Check
program
contents
Clear the last
track
Clear all
programmed
tracks
Note:
The program memory is cleared when you open the sliding door.
Press [PROGRAM] in the stop mode.
Press [PROGRAM] and then press [4/9].
Press [2] or [6] when “PGM” is shown in the
stop mode.
To check while programming, press [PROGRAM]
two times after “PGM” is shown, then press [2]
or [6].
Press [DEL] in the stop mode.
Press [8] in the stop mode. “CLR ALL” is shown.
Within 5 seconds, press [8] again.
Viewing available information
You can view the available information on the display panel.
Press [DISPLAY].
Note:
• Maximum characters that can be shown: approximately 30
• This system supports ver. 1.0, 1.1 and 2.3 ID3 tags.
• Text data that the system does not support can show differently.
Note on CDs
• This system can access up to 99 tracks.
• This system can play MP3 files and CD-DA format audio CD-R/RW
that have been finalised.
• This system can fail to play some CD-R/RW because of the condition
of the recording.
Note on MP3s
• Files are treated as tracks and folders are treated as albums.
• This system can access up to 999 tracks, 255 albums (including root
folder) and 20 sessions.
• Disc must conform to ISO9660 level 1 or 2 (except for extended
formats).
• To play in a certain order, prefix the folder and file names with 3-digit
numbers in the order you want them to play.
Limitations on MP3 playback
• If you have recorded MP3s on the same disc as CD-DA, only the
format recorded in the first session can be played.
• Some MP3s cannot be played because of the condition of the disc or
recording.
• Recordings will not necessarily be played in the order you recorded
them.
USB
You can connect and play MP3 tracks from your USB mass storage
device.
Do not use a USB extension cable. The system cannot recognise USB
mass storage device connected through a cable.
1
Decrease the volume and connect the USB mass storage
device to the USB port.
2
Press [USB] and then press [4/9] to start playback.
Stop playback
For other operations, refer to “Discs” (Z 5).
Compatible devices
• USB mass storage devices that support bulk-only transfer.
• USB mass storage devices that support USB 2.0 full speed.
Supported format
• Folders are defined as album.
• Files are defined as track.
• Track must have the extension “.mp3” or “.MP3”.
• CBI (Control/Bulk/Interrupt) is not supported.
• NTFS file system is not supported (only FAT 12/16/32 file system is
supported).
• Some files can fail to work because of the sector size.
Note:
• Maximum album: 255 albums (including root folder)
• Maximum track: 2500 tracks
• Maximum track in one album: 999 tracks
Press [8] during playback.
“RESUME” is shown.
Press [4/9] to continue playback.
OR
Press [8] two times to stop the playback fully.
Radio
Manual tuning
1
Press [R ADIO, EXT-IN] to select “FM” or “AM”.
2
Press [3] or [5] to select the frequency of the required
station.
To tune automatically, press and hold the button until the frequency
starts changing quickly.
To improve the sound quality
When “FM” is selected
1
Press [R ADIO MENU] to select “FM MODE”.
2
Press [Y, U] to select “MONO” and then press [OK].
To cancel, select “STEREO”.
• “MONO” is also cancelled when you change the frequency.
• Turn off “MONO” for normal listening.
When “AM” is selected
1
Press [R ADIO MENU] to select “B.PROOF”.
2
Press [Y, U] to select “BP 1” or “BP 2” and then press [OK].
RQTX1246
6
6
Page 7

ENGLISH
RDS broadcasting
Clock and timers
This system can show the text data transmitted by the radio data
system (RDS) available in some areas.
Press [ DISPLAY].
PS
(Station name)
Note:
RDS may not be available if reception is poor.
→
PTY
(Program type)
→
(Frequency)
FREQ
Memory presetting
30 FM and 15 AM stations can be preset.
Preparation
Press [RADIO, EXT-IN] to select “FM” or “AM”.
Automatic presetting
1
Press [OK] to select “LOWEST” or “CURRENT” frequency.
2
Press [AUTO PRESET] to start presetting.
To cancel, press [8].
Manual presetting
1
Press [3] or [5] to tune in to the station.
2
Press [PROGRAM].
3
Press the numeric buttons to select a preset number.
Do steps 1 through 3 again to preset more stations.
The new station replaces any station that occupies the same preset
number.
Selecting a preset station
Press the numeric buttons, [2] or [6] (main unit: [2/3] or
[5/6]) to select the preset station.
AM allocation setting (by main unit only)
This system can also receive AM broadcasts allocated in 10 kHz steps.
1
Press [R ADIO, EXT-IN] to select “FM” or “AM”.
2
Press and hold [RADIO, EXT-IN].
After a few seconds, the display panel shows the current minimum
radio frequency. Release the button when the minimum frequency
changes.
• To go back to the initial setting, do the above steps again.
• After you change the setting, preset frequencies are erased.
Setting the clock
This is a 24-hour clock.
1
Press [CLOCK/TIMER] to select “CLOCK”.
2
Within 10 seconds, press [R, T] to set the time.
3
Press [OK].
Press [CLOCK/TIMER] to show the clock for a few seconds.
Note:
Reset the clock regularly to maintain accuracy.
Sleep timer
The sleep timer switches off the system after the set time.
Press [SLEEP] to select the setting (in minutes).
To cancel, select “OFF”.
30 MIN OFF→120 MIN→→ 60 MIN→90 MIN
To show the remaining time
Press [SLEEP].
Note:
• The sleep timer can be used together with the play timer.
• The sleep timer always comes first. Be sure not to set an overlap of
timers.
Play timer
You can set the timer to come on at a certain time to wake you up.
Switch on the system and set the clock.
Prepare the music source you want to listen to (disc, radio, USB or
AUX) and set the volume.
1
Press [CLOCK/TIMER] to select “#PLAY 1”, “#PLAY 2” or
“#PLAY 3”.
2
Within 10 seconds, press [R, T] to set the start time.
3
Press [OK].
4
Do steps 2 and 3 again to set the end time.
To start the timer
5
Press [#, PLAY] to start “#PLAY 1”, “#PLAY 2” or “#PLAY 3”.
6
Press [`] to switch off the system.
The system must be switched off for the timer to operate.
Change the
settings
Change the
source or
volume
Check the
settings
Cancel
Do steps 1 through 4 and 6 again (Z above).
1) Press [#, PLAY] two times to remove the timer
indicator on the display panel.
2) Change the source or volume.
3) Do steps 5 and 6 (Z above).
Press [CLOCK/TIMER] to select “#PLAY 1”,
“#PLAY 2” or “#PLAY 3”.
Press [#, PLAY] two times to remove the timer
indicator on the display panel.
ENGLISH
Note:
• The play timer starts at a low volume and increases gradually to the
preset level.
• The timer comes on at the set time every day if the timer is on.
• If you switch off the system and switch on again while a timer is in
operation, the timer will not stop at the end time.
RQTX1246
7
7
Page 8
ENGLISH
Sound effects
Changing the sound quality
1
Press [SOUND] to select a sound effect.
ENGLISH
2
Within 3 seconds, press [Y, U] to select the desired setting.
BASS -4 to +4
TREBLE
SURROUND “ON SURROUND” or “OFF SURROUND”
INPUT LEVEL
(For AUX source)
“NORMAL” or “HIGH”
Preset EQ
Press [PRESET EQ] to select a setting.
HEAVY Adds punch to rock
SOFT For background music
CLEAR Clarifies higher frequencies
VOCAL Adds gloss to vocal
FLAT Cancels the sound effect
D.BASS
This function lets you enjoy a powerful bass effect.
Press [D.BASS] to select “ON D.BASS” or “OFF D.BASS”.
External equipment
Using the auxiliary input
You can connect a portable audio equipment and listen to the audio
through this system.
Preparation
Switch off the equalizer (if any) of the portable audio equipment to
prevent sound distortion.
Decrease the volume of the system and the portable audio equipment
before you connect or disconnect the portable audio equipment.
Audio cable
(not included)
1
Connect the portable audio equipment.
Plug type: Ø 3.5 mm stereo
2
Press [RADIO, EXT-IN] to select “AUX”.
3
Play the portable audio equipment.
To adjust the audio input level (Z “Changing the sound quality”).
Select “NORMAL” if the sound is distorted during “HIGH” input level.
Note:
RQTX1246
• Read the operating instructions of the portable audio equipment for
8
details.
• Components and cables are sold separately.
8
Portable audio
equipment
(not included)
Remote control code
When other Panasonic equipment respond to the remote control of this
system, change the remote control code for this system.
Preparation
Press [RADIO, EXT-IN] to select “AUX”.
To set the code to “REMOTE 2”
1
Press and hold [RADIO, EXT-IN] on the main unit and [2] on
the remote control until “REMOTE 2” is shown.
2
Press and hold [OK] and [2] for a minimum of 4 seconds.
To set the code to “REMOTE 1”
1
Press and hold [RADIO, EXT-IN] on the main unit and [1] on
the remote control until “REMOTE 1” is shown.
2
Press and hold [OK] and [1] for a minimum of 4 seconds.
Troubleshooting guide
Before requesting service, make the following checks. If you are in
doubt about some of the check points, or if the solutions indicated do
not solve the problem, consult your dealer for instructions.
■
Common problems
No operations can be done with the remote control.
• Examine that the battery is installed correctly.
Sound is distorted or no sound.
• Increase the volume.
• Switch off the system, determine and correct the cause, then switch
the system on again. It can be caused by straining of the speakers
through excessive volume or power, and when using the system in a
hot environment.
A “humming” sound can be heard during playback.
• An AC mains lead or fluorescent light is near the cable. Keep other
appliances and cords away from the cable of this system.
■
Discs
Display not shown correctly.
Playback does not start.
• You have not put in the disc correctly. Put it in correctly.
• Disc is dirty. Clean the disc.
• Replace the disc if it is scratched, warped, or non-standard.
• There is condensation. Let the system dry for 1 to 2 hours.
The total number of tracks displayed is incorrect.
The disc cannot be read.
Distorted sound is heard.
• You put in a disc that the system cannot play. Change to a playable
disc.
• You put in a disc that has not been finalised.
■
Radio
A beat sound is heard.
• Switch off the TV or move it away from the system.
• Set to “BP 1” or “BP 2” when in AM tuner mode.
A low hum is heard during AM broadcasts.
• Move the antenna away from other cables and cords.
Page 9
ENGLISH
■
USB
The USB mass storage device or the contents in it cannot be read.
• The format of the USB mass storage device or the contents in it is/are
not compatible with the system.
• USB mass storage devices with storage capacity of more than 32 GB
cannot work in some conditions.
Slow operation of the USB mass storage device.
• Large content size or large memory USB mass storage device takes
longer time to read.
The elapsed time shown is different from the actual play time.
• Transfer the data to another USB mass storage device or backup the
data and reformat the USB mass storage device.
■
Main unit displays
“NO PLAY”
• Examine the content. You can only play supported format.
• This system can read and play up to 255 albums or folders (audio and
non-audio).
“F76” or “F61”
• There is a power supply problem.
“ERROR”
• An incorrect operation was done. Read the instructions and try again.
“NOT MP3/ERROR”
• An unsupported MP3 format. The system will skip that track and play
the next one.
“VBR–”
• The system cannot show the remaining play time for variable bit rate
(VBR) tracks.
“NODEVICE”
• The USB mass storage device is not connected. Examine the
connection.
Memory reset (Initialisation)
When the following situations occur, refer to the instructions below to
reset the memory:
• There is no response when buttons are pressed.
• You want to clear and reset the memory contents.
To reset the memory
1
Disconnect the AC mains lead.
(Wait 3 minutes before you continue with step 2.)
2
While you press and hold [1] on the main unit, connect the
AC mains lead again.
“– – – – – – – –” shows on the display panel.
3
Release [1].
All the settings are set back to the factory preset.
It is necessary to set the memory items again.
Specifications
■
Amplifier section
RMS output power stereo mode
Front Ch (both ch driven)
5 W per channel (6
Total RMS stereo mode power 10 W
■
FM/AM tuner, terminals section
Preset station FM 30 stations
AM 15 stations
Frequency modulation (FM)
Frequency range 87.50 MHz to 108.00 MHz (50 kHz step)
Antenna terminals 75
Amplitude modulation (AM)
Frequency range 522 kHz to 1629 kHz (9 kHz step)
520 kHz to 1630 kHz (10 kHz step)
Headphones jack
Terminal Stereo, 3.5 mm jack
AUX (rear)
Terminal Stereo, 3.5 mm jack
■
Disc section
Disc played (8 cm or 12 cm)
CD, CD-R/RW (CD-DA, MP3
MPEG-1 Layer 3, MPEG-2 Layer 3
Pick up
Wavelength 790 nm (CD)
Laser power CLASS 1 (CD)
Audio output (Disc)
Number of channels 2 ch (FL, FR)
FL = Front left channel
FR = Front right channel
■
USB section
USB port
USB Standard USB 2.0 full speed
Media file format support MP3 (
USB device file system FAT 12, FAT 16, FAT 32
USB port power 500 mA (max)
■
Speaker section
Type 1 way, 1 speaker system (bass reflex)
Speaker unit(s)
Full range 8 cm cone type
Impedance 6
Frequency range 60 Hz to 25 kHz (–16 dB)
90 Hz to 22 kHz (–10 dB)
formatted disc)
), 1 kHz, 10% THD
(unbalanced)
.mp3)
ENGLISH
Maintenance
To clean this system, wipe with a soft, dry cloth.
• Never use alcohol, paint thinner or benzine to clean this system.
• Before using chemically treated cloth, read the instructions that came
with the cloth carefully.
■
General
Power supply AC 220 to 240 V, 50 Hz
Power consumption 12 W
Dimensions (W x H x D) 400 mm x 221 mm x 110 mm
[D = 69 mm (min)]
Mass 2.0 kg
Operating temperature range 0°C to +40°C
Operating humidity range 35% to 80% RH (no condensation)
Power consumption in standby mode 0.2 W (approximate)
Note:
1) Specifications are subject to change without notice.
Mass and dimensions are approximate.
2) Total harmonic distortion is measured by the digital spectrum analyzer.
RQTX1246
9
9
Page 10
POLSKI
Opisane procedury należy wykonać za pomocą pilota zdalnego
sterowania. Można również użyć przycisków na panelu przednim
urządzenia, jeśli są identyczne.
Spód urządzenia
POLSKI
Wewnątrz urządzenia
Informacja dla użytkowników o gromadzeniu i pozbywaniu się
zużytych urządzeń i baterii
Niniejsze symbole umieszczane na produktach,
opakowaniach i/lub w dokumentacji towarzyszącej
oznaczają, że nie wolno mieszać zużytych urządzeń
elektrycznych i elektronicznych oraz baterii z innymi
odpadami domowymi.
W celu zapewnienia właściwego przetwarzania,
utylizacji oraz recyklingu zużytych produktów i baterii,
należy oddawać je do wyznaczonych punktów
gromadzenia odpadów zgodnie z przepisami prawa
krajowego oraz postanowieniami Dyrektyw 2002/96/
WE i 2006/66/WE.
Prawidłowe pozbywanie się w/w produktów i baterii
pomaga oszczędzać cenne zasoby naturalne i
zapobiegać potencjalnemu negatywnemu wpływowi na
zdrowie człowieka oraz stan środowiska naturalnego,
który towarzyszy niewłaściwej gospodarce odpadami.
Więcej informacji o zbiórce oraz recyklingu zużytych
produktów i baterii można otrzymać od władz
lokalnych, miejscowego przedsiębiorstwa oczyszczania
lub w punkcie sprzedaży, w którym użytkownik nabył
przedmiotowe towary.
Za niewłaściwe pozbywanie się powyższych odpadów
mogą grozić kary przewidziane przepisami prawa
krajowego.
Dotyczy użytkowników firmowych działających na
terenie Unii Europejskiej
Chcąc w odpowiedni sposób pozbyć się urządzeń
elektrycznych lub elektronicznych, należy
skontaktować się ze sprzedawcą lub dostawcą, który
udzieli dalszych informacji.
[Informacje o pozbywaniu się w/w urządzeń w
państwach trzecich]
Niniejsze symbole obowiązują wyłącznie na
terenie Unii Europejskiej. Chcąc pozbyć się w/w
urządzeń elektrycznych lub elektronicznych, należy
skontaktować się z władzami lokalnymi lub sprzedawcą
w sprawie właściwego sposobu wyrzucania tego
rodzaju przedmiotów.
Dotyczy symbolu baterii (symbole przykładowe):
Ten symbol może występować wraz z symbolem
pierwiastka chemicznego. W takim przypadku spełnia
RQTX1246
on wymagania Dyrektywy w sprawie określonego
środka chemicznego.
2
10
UWAGA!
PRODUKT WYKORZYSTUJE PROMIEŃ LASERA.
STEROWANIE, REGULACJE LUB POSTĘPOWANIE W SPOSÓB
TUTAJ NIE OKREŚLONYGROZI NIEBEZPIECZNYM
NAŚWIETLENIEM PROMIENIAMI LASERA.
PROSIMY NIE OTWIERAĆ OBUDOWY I NIE DOKONYWAĆ
NAPRAW SAMODZIELNIE. PROSIMY POWIERZYĆ NAPRAWY
WYKWALIFIKOWANEMU PERSONELOWI.
OSTRZEŻENIE:
ABY OGRANICZYĆ NIEBEZPIECZEŃSTWO POŻARU,
PORAŻENIA PRĄDEM LUB USZKODZENIA URZĄDZENIA,
• NIE NALEŻY WYSTAWIAĆ URZĄDZENIA NA DZIAŁANIE
DESZCZU, WILGOCI, KAPANIE LUB ZACHLAPANIE;
PONADTO NA URZĄDZENIU NIE NALEŻY USTAWIAĆ
ŻADNYCH NACZYŃ ZAWIERAJĄCYCH PŁYNY, TAKICH JAK
WAZONY.
• NALEŻY STOSOWAĆ TYLKO ZALECANE AKCESORIA.
• NIE ZDEJMOWAĆ POKRYWY (LUB PANELU TYLNEGO);
WEWNĄTRZ URZĄDZENIA NIE MA CZĘŚCI
PRZEZNACZONYCH DO WYMIANY PRZEZ UŻYTKOWNIKA.
SERWIS NALEŻY ZLECIĆ W AUTORYZOWANYM PUNKCIE
SERWISOWYM.
UWAGA!
• NINIEJSZEGO URZĄDZENIA NIE NALEŻY INSTALOWAĆ
LUB UMIESZCZAĆ W BIBLIOTECZCE, WBUDOWANEJ
SZAFCE LUB INNEJ OGRANICZONEJ PRZESTRZENI. ABY
ZAPEWNIĆ PRAWIDŁOWĄ WENTYLACJĘ NALEŻY UPEWNIĆ
SIĘ, ŻE ZASŁONY I INNE MATERIAŁY NIE ZASŁANIAJĄ
OTWORÓW WENTYLACYJNYCH TAK, ABY ZAPOBIEC
RYZYKU PORAŻENIA PRĄDEM LUB POŻARU W WYNIKU
PRZEGRZANIA.
• NIE ZASŁANIAJ OTWORÓW WENTYLACYJNYCH
URZĄDZENIA GAZETAMI, OBRUSAMI, ZASŁONAMI I
PODOBNYMI PRZEDMIOTAMI.
• NIE UMIESZCZAĆ NA URZĄDZENIU ŹRÓDEŁ OTWARTEGO
OGNIA, JAK NP. ZAPALONE ŚWIECE.
• ZUŻYTE BATERIE UTYLIZOWAĆ W SPOSÓB NIE
ZAGRAŻAJĄCY ŚRODOWISKU NATURALNEMU.
Gniazdo zasilania powinno znajdować się blisko urządzenia i być
łatwo dostępne.
Wtyczka przewodu zasilania podłączona do gniazdka powinna być
łatwo dostępna.
Aby całkowicie odłączyć urządzenie od źródła zasilania, należy wyjąć
wtyczkę przewodu zasilania z gniazdka.
To urządzenie może odbierać zakłócenia wywołane użyciem
telefonu komórkowego. Jeżeli takie zakłócenia wystąpią, wskazane
jest zwiększenie odległości pomiędzy urządzeniem a telefonem
komórkowym.
URZĄDZENIE JEST PRZEZNACZONE DO UŻYWANIA W
KLIMACIE UMIARKOWANYM.
Oznaczenie identyfikacyjne produktu znajduje się na spodzie
urządzeń.
Technologia kodowania dźwięku MPEG Layer-3 podlega licencji
firmy Fraunhofer IIS i Thomson.
Page 11

POLSKI
Środki ostrożności
Spis treści
Ustawienie urządzenia
Urządzenie należy ustawić na równej powierzchni, z dala od miejsc
bezpośrednio nasłonecznionych, w których panuje wysoka
temperatura, duża wilgotność lub występują nadmierne drgania. Takie
warunki mogą doprowadzić do uszkodzenia obudowy i innych części i
przez to skrócić czas prawidłowego działania urządzenia.
Aby uniknąć zniekształcenia i innych niekorzystnych efektów
akustycznych, ustawiać urządzenie w odległości przynajmniej 15 cm
od ścian.
Na urządzeniu nie wolno umieszczać żadnych ciężkich przedmiotów.
Napięcie
Nie wolno stosować źródeł zasilania o wysokim napięciu. Można w ten
sposób doprowadzić do przeciążenia urządzenia i spowodować pożar.
Nie wolno stosować zasilania prądem stałym. Przed podłączeniem
urządzenia do zasilania na statku lub w innym miejscu, gdzie
stosowane jest zasilanie prądem stałym, należy sprawdzić dokładnie
parametry źródła zasilania.
Ochrona przewodu zasilania
Należy sprawdzić, czy przewód zasilania jest dobrze podłączony i czy
nie jest uszkodzony. Złe podłączenie lub uszkodzenie przewodu może
być przyczyną pożaru lub porażenia prądem. Nie wolno ciągnąć za
przewód, zginać go ani kłaść na nim ciężkich przedmiotów.
Przy odłączaniu przewodu należy chwycić mocno za wtyczkę.
Ciągnięcie za przewód zasilania grozi porażeniem prądem
elektrycznym.
Nie wolno dotykać wtyczki mokrymi rękoma. Grozi to porażeniem
prądem elektrycznym.
Środki ostrożności ............................................ 3
Dostarczone wyposażenie ................................ 3
Przygotowanie pilota zdalnego sterowania .... 3
Opis elementów sterowania ............................. 4
Podłączenie ........................................................ 5
Płyty kompaktowe ............................................. 5
USB ..................................................................... 6
Radio ................................................................... 6
Zegar i timer ....................................................... 7
Efekty dźwiękowe .............................................. 8
Urządzenia zewnętrzne ..................................... 8
Kod zdalnego sterowania ................................. 8
Rozwiązywanie problemów .............................. 8
Konserwacja ...................................................... 9
Dane techniczne ................................................ 9
Przygotowanie pilota zdalnego sterowania
POLSKI
Obce przedmioty i substancje
Należy uważać, aby do wnętrza urządzenia nie dostały się metalowe
przedmioty. Mogą one być przyczyną porażenia prądem elektrycznym
lub nieprawidłowej pracy urządzenia.
Należy uważać, aby do wnętrza urządzenia nie dostały się substancje
płynne. Mogą one być przyczyną porażenia prądem elektrycznym
lub nieprawidłowej pracy urządzenia. Jeśli do tego dojdzie, należy
natychmiast odłączyć urządzenie od źródła zasilania i skontaktować się
ze sprzedawcą.
Nie wolno rozpylać na powierzchnię urządzenia lub do jego wnętrza
środków owadobójczych. Zawierają one łatwopalne gazy, które mog
zapalić się, jeżeli środek dostanie się do wnętrza urządzenia.
ą
Naprawa
Użytkownik nie powinien podejmować się naprawy urządzenia na
własną rękę. Jeśli dźwięk jest przerywany, wskaźniki nie świecą,
pojawia się dym lub wystąpi problem, który nie został omówiony w
niniejszej instrukcji, należy odłączyć przewód zasilania i skontaktować
się ze sprzedawcą lub autoryzowanym punktem serwisowym.
W przypadku napraw, demontażu lub przeróbek wykonywanych
przez osoby niewykwalifikowane może dojść do porażenia prądem
elektrycznym lub uszkodzenia urządzenia.
Czas eksploatacji urządzenia można wydłużyć odłączając je od źródła
zasilania, kiedy nie jest ono używane przez dłuższy okres.
Dostarczone wyposażenie
Sprawdzić i znaleźć poszczególne elementy dostarczonego
wyposażenia.
1 x Przewód zasilania
1 x Antena wewnętrzna FM
1 x Antena pętlowa AM
1 x Pilot zdalnego sterowania
(N2QAYB000639)
(nie należy do wyposażenia)
Należy stosować baterie alkaliczne lub manganowe.
Załóż baterię tak, aby jej bieguny (+ i –) były zgodne z oznaczeniami
wewnątrz obudowy pilota zdalnego sterowania.
Skieruj pilota w stronę czujnika (Z 4). Maksymalny zasięg, z przodu
urządzenia, wynosi 7 m, gdy na drodze sygnału nie ma żadnych
przeszkód.
UWAGA!
• Nie wolno zwierać biegunów baterii ani jej rozbierać.
• Nie ładować baterii alkalicznych ani manganowych.
• Nie wolno używać baterii, z których została zdjęta warstwa ochronna.
• Nie zbliżać baterii do źródeł ciepła lub ognia.
• Baterii nie należy pozostawiać przez dłuższy czas, w pojeździe z
zamkniętymi drzwiami i oknami, narażonym na bezpośrednie
promieniowanie słoneczne.
• Niewłaściwe obchodzenie się z bateriami, może spowodować wyciek
elektrolitu, co może być przyczyną
• Jeśli pilot ma nie być używany przez dłuższy czas, należy wyjąć z
niego baterię. Przechowywać w chłodnym, ciemnym miejscu.
UWAGA!
Istnieje niebezpieczeństwo wybuchu w przypadku, gdy baterie
zostaną nieprawidłowo założone. Baterie należy wymieniać na
takie same lub na baterie równorzędnego typu, zalecane przez
producenta. Zużytych baterii należy pozbywać się zgodnie z
instrukcjami producenta.
pożaru.
RQTX1246
3
11
Page 12
POLSKI
Opis elementów sterowania
RADIO
EXT-IN
SOUND
PRESET EQ
D.BASS
DISPLAY
DIMMER
SLEEP
PLAY
AUTO OFF
Pilot zdalnego sterowania
A
B
POLSKI
C
D
E
F
G
H
Urządzenie główne
Widok od góry
Q
R
S
A
D
U
Widok z przodu
I
J
K
L
M
N
O
P
T
K
E
V
W
A Przełącznik „STANDBY/ON” [`], [1] (Z 7, 9)
Naciśnij ten przycisk, aby wyłączyć urządzenie (przełączyć je w
stan gotowości) lub włączyć je z powrotem. W stanie gotowości
urządzenie nadal pobiera pewną niewielką moc.
B Przyciski numeryczne [1 do 9, 0, ≧10]
Aby wybrać 2-cyfrowy numer
Przykład: 16: [≧10] → [1] → [6]
C Usuwanie zaprogramowanej ścieżki (Z 6)
D Wybór źródła
[USB]: Wybór USB (Z 6)
[CD]: Wybór płyty (Z 5)
[RADIO, EXT-IN]: Wybór radia, USB lub AUX (Z 6, 8)
E Podstawowe czynności obsługowe
[4/9]: Odtwarzanie i wstrzymywanie odtwarzania (pauza)
[8]: Zatrzymywanie odtwarzania
[2], [6]: Pominięcie utworów
Wybór zaprogramowanej stacji radiowej
[3], [5]: Wyszukaj ścieżkę
Dostrój odbiornik do stacji radiowej
[2/3], [5/6]: Pomiń i przeszukaj ścieżkę
Wybór zaprogramowanej stacji radiowej
F Wybierz charakterystykę dźwięku (Z 8)
G Automatyczne dostrajanie do stacji radiowych (Z 7)
H Wyświetlanie informacji na panelu.
Zmniejszanie jasności wyświetlacza
Naciśnij i przytrzymaj przycisk, aby włączyć funkcję.
Ponownie naciśnij i przytrzymaj przycisk, aby anulować wybór.
I Ustawianie timera wyłączającego (Z 7)
Ustawianie zegara i timera (Z 7)
J Ustawianie funkcji programu (Z 5, 7)
K Regulacja głośności systemu
L Wyciszanie dźwięku
Ponownie naciśnij przycisk, aby anulować wybór.
„MUTE” można wyłączyć również przez regulowanie głośności lub
wyłączając system.
M Ustawienia elementów menu odtwarzania (Z 5)
N Ustawienia elementów menu radia (Z 6)
O [R, T]: Ominięcie albumu
Regulacja ustawień zegara
[Y, U]: Wybór elementu menu
[OK]: Potwierdzenie ustawień
P Automatyczne wyłączanie systemu
Fukcja ta wyłącza system (z wyjątkiem radia) jeśli nie jest on
używany przez około 30 minut.
Aby anulować, naciśnij ten przycisk dwukrotnie.
Q Gniazdo słuchawek ( )
Typ wtyku: średnicy Ø 3,5 mm, stereo (nie należy do wyposażenia)
• Należy unikać długotrwałego słuchania, aby zapobiec
uszkodzeniu słuchu.
• Nadmierne ciśnienie akustyczne dźwięku wydobywającego się ze
słuchawek czy słuchawek nagłownych może powodować utratę
słuchu.
• Głośne słuchanie przez dłuższy okres czasu może doprowadzić
do uszkodzeń w uchu wewnętrznym. Należy używać dołączonych
lub polecanych słuchawek.
R Gniazdo AUX
S Gniazdo USB ( )
T Otwieranie lub zamykanie drzwiczek przesuwnych
U Wyświetlacz
V Drzwiczki przesuwne
W Czujnik zdalnego sterowania
4
12
RQTX1246
Page 13
POLSKI
Podłączenie
Oszczędzanie energii
System zużywa około 0,2 W energii w trybie spoczynku. Gdy system
nie jest używany, należy go odłączać od zasilania.
Po odłączeniu systemu od zasilania niektóre ustawienia zostaną
utracone. Konieczne będzie ich ponowne ustawienie.
2
Naciśnij przycisk [CD], następnie przycisk [4/9], aby
rozpocząć odtwarzanie.
Trzymaj palce z dala od drzwiczek przesuwnych, gdy są one
zamykane.
Zatrzymywanie
odtwarzania
Wstrzymywanie
odtwarzania
Ominięcie
albumu
Pominięcie
utworów
Wyszukiwanie
w utwór
Podczas odtwarzania naciśnij [8].
Podczas odtwarzania naciśnij [4/9].
Naciśnij ponownie, aby kontynuować odtwarzanie.
Naciśnij [R, T].
Naciśnij [2] lub [6] (na urządzeniu:
[2/3] lub [5/6]).
Naciśnij i przytrzymaj [3] lub [5] (na
urządzeniu: [2/3] lub [5/6]).
POLSKI
1
Podłącz antenę wewnętrzną FM.
Antenę należy zainstalować w miejscu zapewniającym najlepszy
odbiór.
Ta śma klejąca
2
Podłącz antenę pętlową AM.
Kliknięcie!
3
Podłącz przewód zasilania.
Do zasilania tego systemu należy stosować wyłącznie dołączony
przewód sieciowy.
Nie stosować przewodów zasilania, pochodzących z innych
urządzeń.
Uwaga:
• Niniejsze zestawy głośnikowe nie mają ekranu magnetycznego.
Nie należy ich umieszczać w pobliżu odbiorników telewizyjnych,
komputerów ani innych urządzeń wrażliwych na oddziaływanie pola
magnetycznego.
• Maskownice głośników nie są zdejmowalne.
Płyty kompaktowe
Odtwarzanie płyt
1
Naciśnij [CD x, OPEN/CLOSE] na urządzeniu, aby otworzyć
drzwiczki przesuwne.
Włóż płytę etykietą do siebie.
Naciśnij ponownie przycisk [CD x, OPEN/CLOSE], aby zamknąć
drzwiczki przesuwne.
Kliknięcie!
Funkcja trybu odtwarzania
1
Naciśnij [PLAY MENU], aby wybrać „PLAYMODE”.
2
Naciśnij przycisk [Y, U], następnie przycisk [OK], aby wybrać
żądany tryb.
OFF
PLAYMODE
1-TRACK
1-TR
1-ALBUM
1ALBUM
RANDOM
RND
1-ALBUM
RANDOM
1ALBUM RND
Uwaga:
• Podczas odtwarzania w losowej kolejności nie można przejść do
utworów poprzednio odtworzonych lub naciśnij przyciski numeryczne.
• Funkcja ta nie działa z włączoną opcją „Odtwarzanie
zaprogramowane”.
• Nastawa ta powraca do domyślnej opcji „OFF PLAYMODE” z chwilą
odtwarcia drzwiczek przesuwnych.
Odtwarzanie wszystkich utworów.
Odtwarzaj jeden wybrany utwór z płyty.
Naciskaj odpowiednie przyciski numeryczne, aby
wybrać utwór.
Odtwarzanie rozpocznie się od wybranegoj utworu.
Odtwarzaj jeden wybrany album z płyty.
Naciśnij [R, T
Odtwarzaj losowo wybraną płytę.
Odtwarzaj losowo wszystkie utwory w jednym
wybranym albumie.
Naciśnij [R, T
]
, aby wybrać album.
]
, aby wybrać album.
Odtwarzanie z powtórzeniem
Można powtarzać „Odtwarzanie zaprogramowane” lub inną wybraną
„Funkcja trybu odtwarzania”.
1
Naciśnij [PLAY MENU], aby wybrać „REPEAT”.
2
Naciśnij przycisk [Y, U], aby wybrać „ON REPEAT” następnie
przycisk [OK].
Wyświetlony zostanie symbol „
Aby anulować, wybierz „OFF REPEAT”.
”.
Odtwarzanie zaprogramowane
Ta funkcja pozwala zaprogramować do 24 utworów.
1
Naciśnij [PROGRAM] w tr ybie zatrzymanym.
Wyświetlony zostanie symbol „PGM”.
2
Za pomocą odpowiednich przycisków numerycznych wybierz
żądany utwór.
Aby zaprogramować nowe utwory należy powtórzyć ten krok.
3
Naciśnij [4/9] aby rozpocząć odtwarzanie.
RQTX1246
5
13
Page 14
POLSKI
1
Naciśnij [PROGRAM] w tr ybie zatrzymanym.
2
Naciśnij [R, T], aby wybrać album.
3
Naciśnij przycisk [6], następnie za pomocą odpowiednich
przycisków numerycznych wybierz żądany utwór.
4
Naciśnij [OK].
Aby zaprogramować nowe utwory należy powtórzyć kroki od 2 do 4.
5
Naciśnij [4/9] aby rozpocząć odtwarzanie.
Wyłączyć tryb
odtwarzania
zaprogramowanych
utworów
Powtórzyć program Naciśnij [PROGRAM], następnie przycisk
POLSKI
Sprawdzić
zawartość
programu
Usunąć ostatni
zaprogramowany
utwór
Usunąć wszystkie
zaprogramowane
utwory
Uwaga:
Pamięć programu zostanie skasowana po otworzeniu drzwiczek
przesuwnych.
Naciśnij [PROGRAM] w trybie zatrzymanym.
[4/9].
Naciśnij przycisk [2] lub [6] gdy w trybie
zatrzymania odtwarzania wyświetlany jest
komunikat „PGM”.
Aby sprawdzić obecny stan podczas
programowania, należy dwukrotnie nacisnąć
przycisk [PROGRAM] po wyświetleniu
komunikatu „PGM”, następnie nacisnąć
przycisk [2] lub [6].
Naciśnij [DEL] w trybie zatrzymanym.
W trybie zatrzymania naciśnij [8]. Wyświetlony
zostanie symbol „CLR ALL”. W ciągu 5 sekund
nacisnąć ponownie przycisk [8].
Wyświetlanie dostępnych informacji
Dostępne informacje można wyświetlać na panelu wyświetlacza.
Naciśnij [DISPLAY].
Uwaga:
• Maksymalna liczba wyświetlanych znaków: około 30
• Urządzenie obsługuje etykiety w formacie 1.0, 1.1 i 2.3 ID3.
• Dane tekstowe nieobsługiwane przez system mogą być wyświetlane
odmiennie.
USB
System umożliwia odtwarzanie plików MP3 z urządzenie pamięci
masowej USB.
Nie należy używać przedłużacza USB. Nie są obsługiwane urządzenie
pamięci masowej USB podłączane za pomocą przewodu.
1
Zmniejszyć poziom głośności i podłącz urządzenie pamięci
masowej USB do portu USB.
2
Naciśnij przycisk [USB], następnie przycisk [4/9], aby
rozpocząć odtwarzanie.
Zatrzymywanie
odtwarzania
Pozostałe czynności obsługowe - zobacz sekcję „Płyty
kompaktowe” (Z 5).
Urządzenia kompatybilne
• Urządzenia pamięci masowej USB obsługujące tryb transferu
„bulk-only”.
• Urządzenia pamięci masowej USB obsługujące standard USB 2.0
pełna prędkość.
Obsługiwane formaty
• Foldery są zdefiniowane jako album.
• Pliki są zdefiniowane jako utwór.
• Utwory powinny mieć rozszerzenie „.mp3” lub „.MP3”.
• Tryb CBI (ang. Control/Bulk/Interrupt) nie jest obsługiwany.
• System plików NTFS nie jest obsługiwany (obsługiwany jest
wyłącznie system plików FAT 12/16/32).
• Niektóre pliki mogą nie być obsługiwane z powodu wielkości sektora.
Uwaga:
• Maksymalna liczba albumów: 255 albumów (włącznie z folderem
• Maksymalna liczba utworów: 2500 utworów
• Maksymalna liczba utworów w jednym albumie: 999 utworów
Podczas odtwarzania naciśnij [8].
Wyświetlony zostanie symbol „RESUME”.
Naciśnij [4/9] aby kontynuować odtwarzanie.
LUB
Naciśnij dwukrotnie przycisk [8], aby całkowicie
zatrzymać odtwarzanie.
nadrzędnym)
Radio
Strojenie ręczne
Uwaga dotycząca płyt CD
• Urządzenie może odtwarzać do 99 utworów.
• To urządzenie może odtwarzać pliki w formacie MP3 oraz płyty audio
CD-R/RW formatu CD-DA poddane finalizacji.
• System ten może nie odtwarzać niektórych płyt CD-R/RW z uwagi na
jakość ich nagrania.
Uwaga dotycząca MP3
• Pliki są traktowane jako utwory, a foldery jako albumy.
• Urządzenie może odtwarzać do 999 utworów, 255 albumów (z
folderem nadrzędnym włącznie) i 20 sesji.
• Płyty muszą być zgodne ze standardem ISO9660 poziom 1 lub 2 (z
wyjątkiem formatów rozszerzonych).
• Aby odtwarzać w określonej kolejnoś
plików 3-cyfrowymi numerami, zgodnymi z zamierzoną kolejnością
odtwarzania.
Ograniczenia dotyczące odtwarzania plików MP3
• Jeżeli pliki w formacie MP3 zostały nagrane na tej samej płycie, na
której nagrano dźwięk w formacie CD-DA, tylko format nagrany w
pierwszej sesji będzie odtwarzany.
• Niektóre utwory MP3 mogą nie być odtwarzane z uwagi na stan płyty
lub nagrania.
• Nagrania nie zawsze odtwarzane są w kolejności nagrywania.
RQTX1246
ci, poprzedź nazwy folderów i
6
14
1
Naciśnij [RADIO, EXT-IN], aby wybrać pasmo „FM” lub „AM”.
2
Naciśnij [3] lub [5], aby wybrać częstotliwość stacji.
Aby uruchomić automatyczne strojenie, należy nacisnąć i
przytrzymać ten przycisk, aż do momentu, gdy wyświetlana
częstotliwość zacznie szybko się zmieniać.
W celu poprawy jakości dźwięku
Jeśli wybrano pasmo „FM”
1
Naciśnij [RADIO MENU], aby wybrać „FM MODE”.
2
Naciśnij przycisk [Y, U], aby wybrać „MONO” następnie
przycisk [OK].
Aby anulować, wybierz „STEREO”.
• Tryb „MONO” jest również anulowany z chwilą zmiany częstotliwości.
• Podczas słuchania w normalnych warunkach tryb „MONO” powinien
być wyłączony.
Jeśli wybrano pasmo „AM”
1
Naciśnij [RADIO MENU], aby wybrać „B.PROOF”.
2
Naciśnij przycisk [Y, U], aby wybrać „BP 1” lub „BP 2”
następnie przycisk [OK].
Page 15

POLSKI
Odbiór RDS
Urządzenie to może wyświetlać dane tekstowe nadawane przez
rozgłośnie radiowe (RDS) dostępny w niektórych rejonach.
Naciśnij [DISPLAY].
PS
(Nazwa stacji)
Uwaga:
Informacje RDS mogą być niedostępne, jeżeli odbiór jest słaby.
→
(Typ programu)
PTY
FREQ
→
(Częstotliwość)
Programowanie stacji
Można zaprogramować 30 stacji FM i 15 stacji AM.
Przygotowanie
Naciśnij [RADIO, EXT-IN], aby wybrać pasmo „FM” lub „AM”.
Automatyczne programowanie
1
Aby wybrać „LOWEST” (najniższą) lub „CURRENT” (aktualną)
częstotliwość, naciśnij [OK].
2
Naciśnij [AUTO PRESET], aby rozpocząć programowanie.
Aby anulować, naciśnij [8].
Ręczne programowanie stacji
1
Naciśnij przycisk [3] lub [5], aby dostroić radio do
żądanej stacji.
2
Naciśnij [PROGRAM].
3
Wybierz żądaną zaprogramowaną stację przyciskiem
numerycznym.
Aby zaprogramować więcej stacji, wykonaj ponownie koki od 1 do
3.
Nowa stacja zastąpi wcześniej zaprogramowaną pod tym samym
numerem.
Wybieranie zaprogramowanej stacji
Naciśnij przyciski numeryczne, [2] lub [6] (na urządzeniu:
[2/3] lub [5/6], aby wybrać zaprogramowaną stację.
Ustawianie stacji w paśmie AM
(tylko poprzez urządzenie główne)
Ten system jest w stanie odbierać stacje radiowe w paśmie AM w
krokach co 10 kHz.
1
Naciśnij [RADIO, EXT-IN], aby wybrać pasmo „FM” lub „AM”.
2
Naciśnij i przytrzymaj [RADIO, EXT-IN].
Po kilku sekundach wyświetlona zostanie bieżąca minimalna
częstotliwość radiowa. Zwolnij przycisk po zmianie minimalnego
zakresu częstotliwości.
• Aby powrócić do ustawień początkowych, należy wykonać ponownie
powyższe kroki.
• Po zmianie ustawień, zaprogramowane częstotliwości zostaną
usunięte.
Zegar i timer
Ustawianie zegara
Jest to zegar 24-godzinny.
1
Naciśnij [CLOCK/TIMER], aby wybrać „CLOCK”.
2
W ciągu 10 sekund naciśnij [R, T] aby ustawićczas.
3
Naciśnij [OK].
Aby wyświetlić zegar na kilka sekund, naciśnij przycisk
[CLOCK/TIMER].
Uwaga:
Zegar należy regularnie nastawiać, aby zawsze była ustawiona
dokładna godzina.
Timer wyłączający
Timer wyłącza system po upływie ustawionego czasu.
Naciśnij przycisk [SLEEP], aby wybrać żądane ustawienie (w
minutach).
Aby anulować, wybierz „OFF”.
30 MIN OFF→120 MIN→→ 60 MIN→90 MIN
Aby wyświetlić pozostały czas
Naciśnij [SLEEP].
Uwaga:
• Timer wyłączenia systemu może być używany łącznie z timerem
odtwarzania.
• Timer wyłączający ma zawsze priorytet. Należy pamiętać, aby czasy
timerów się nie nakładały.
Timer odtwarzania
Timer można ustawić w taki sposób, aby o określonej godzinie
urządzenie włączało się i budziło użytkownika.
Włącz urządzenie i ustaw zegar.
Przygotuj źródło dźwięku do odsłuchu (płyta, radio, USB lub AUX) i
ustaw głośność.
1
Naciśnij [CLOCK/TIMER], aby wybrać „#PLAY 1”, „#PLAY 2”
lub „#PLAY 3”.
2
W ciągu 10 sekund naciśnij [R, T] aby ustawić czas
rozpoczęcia.
3
Naciśnij [OK].
4
Powtórz kroki 2 i 3, aby ustawić godzinę zakończenia.
Aby uaktywnić timer
5
Naciśnij [#, PLAY], aby rozpocząć „#PL AY 1”, „#PLAY 2” lub
„#PLAY 3”.
6
Naciśnij przycisk [`], aby wyłączyć urządzenie.
Aby timer działał, urządzenie musi być wyłączone.
Zmiany
ustawień
Wybieranie
innego źródła
lub głośności
Sprawdzanie
ustawień
Anulowanie
Powtórz kroki od 1 do 4 i 6 (Z patrz wyżej).
1) Naciśnij dwukrotnie przycisk [#, PLAY] tak, aby
symbol timera przestał być wyświetlany.
2) Wybieranie innego źródła lub głośności.
3) Wykonaj kroki 5 i 6 (Z patrz wyżej).
Naciśnij [CLOCK/TIMER], aby wybrać „#PLAY 1”,
„#PLAY 2” lub „#PLAY 3”.
Naciśnij dwukrotnie przycisk [#, PLAY] tak, aby
symbol timera przestał być wyświetlany.
POLSKI
Uwaga:
• Timer odtwarzania rozpoczyna odtwarzanie z niskim poziomem
głośności, który stopniowo rośnie do ustawionego poziomu.
• Jeśli timer jest aktywny, zadziała codziennie o ustawionej godzinie.
• W przypadku wyłączenia systemu i włączenia go ponownie podczas
pracy timera, timer nie zatrzyma się z chwil
czasu.
ą upływu ustawionego
RQTX1246
7
15
Page 16

POLSKI
Efekty dźwiękowe
Zmiana brzmienia dźwięku
1
Naciśnij przycisk [SOUND], aby wybrać żądany efekt
dźwiękowy.
2
W ciągu 3 sekund, naciśnij przycisk [Y, U], aby wybrać żądane
ustawienie.
BASS -4 do +4
TREBLE
SURROUND „ON SURROUND” lub „OFF SURROUND”
INPUT LEVEL
(Dla źródła AUX)
POLSKI
Zaprogramowany korektor (Preset EQ)
Naciśnij [PRESET EQ], aby wybrać jedno z ustawień.
„NORMAL” lub „HIGH”
Kod zdalnego sterowania
Jeśli na pilota zdalnego sterowania tego systemu reagują inne
urządzenia firmy Panasonic, należy zmienić kod zdalnego sterowania
dla tego systemu.
Przygotowanie
Naciśnij [RADIO, EXT-IN], aby wybrać „AUX”.
Aby zmienić kod na „REMOTE 2”
1
Naciśnij i przytrzymaj przycisk [RADIO, EXT-IN] na
urządzeniu i przycisk [2] na pilocie zdalnego sterowania tak
długo, aż wyświetlony zostanie komunikat „REMOTE 2”.
2
Naciśnij i przytrzymaj [OK] i [2] przynajmniej przez 4 sekundy.
Aby zmienić kod na „REMOTE 1”
1
Naciśnij i przytrzymaj przycisk [RADIO, EXT-IN] na
urządzeniu i przycisk [1] na pilocie zdalnego sterowania tak
długo, aż wyświetlony zostanie komunikat „REMOTE 1”.
2
Naciśnij i przytrzymaj [OK] i [1] przynajmniej przez 4 sekundy.
HEAVY Poprawa brzmienia rocka
SOFT Muzyka w tle
CLEAR Czystsze brzmienie wysokich częstotliwości
VOCAL Poprawa brzmienia śpiewu
FLAT Wyłącza efekt dźwiękowy
D.BASS
Funkcja ta pozwala cieszyć się potężnym basem.
Naciśnij [D.BASS], aby wybrać „ON D.BASS” lub „OFF D.BASS”.
Urządzenia zewnętrzne
Korzystanie z wejścia dodatkowego (AUX)
System umożliwia podłączenie i odsłuch zewnętrznego urządzenia
audio.
Przygotowanie
Należy wyłączyć korektor dźwięku urządzenia zewnętrznego (o ile jest
włączony), aby zapobiec zniekształceniom dźwięku.
Zmniejsz głośność systemu i urządzenia zewnętrznego przed ich
podłączeniem lub rozłączeniem.
Rozwiązywanie problemów
Przed oddaniem urządzenia do naprawy należy przeprowadzić
następujące kontrole. W przypadku wątpliwości, co do niektórych
punktów kontrolnych lub jeśli podane rozwiązania nie eliminują
problemu, należy zwrócić się po wskazówki do sprzedawcy.
„Czynności wykonywane przez zakłady usługowe polegające na
sprawdzeniu: działania, parametrów technicznych, czyszczeniu
głowic i toru taśmy, regulacji i czyszczeniu mechanizmu, strojeniu
programatorów, wymianie żarówek i bezpieczników—nie są zaliczane
do ilości napraw stanowiących podstawę wymiany sprzętu zgodnie
z §36, pkt. 1.3. Uchwały Nr. 71 Rady Ministrów z 1983.06.13.,
opublikowanej w Monitorze Polskim Nr. 21 z 1983.06.29.”
„Uszkodzenia mechaniczne, termiczne, chemiczne zewnętrznych
części metalowych i z tworzyw sztucznych oraz sznury przyłączeniowe,
słuchawkowe—nie podlegają gwarancji.”
■
Typowe problemy
Nie działa pilot zdalnego sterowania.
• Sprawdź, czy bateria została prawidłowo włożona.
Dźwięk jest zniekształcony lub brak dźwięku.
• Wyregulować poziom głośności.
• Wyłączyć urządzenie określić i usunąć przyczynę, następnie
włączyć urządzenie ponownie. Może to być spowodowane przez
odkształcenia głośników poprzez nadmierny poziom głośności lub
zasilanie albo użytkowanie urządzenia w gorącym otoczeniu.
Podczas odtwarzania słychać „buczenie”.
• Blisko urządzenia znajduje się przewód zasilania prądem
przemiennym lub oświetlenie fluorescencyjne. Utrzymywać przewód
zasilania tego urzą
zasilających.
dzenia z dala od innych urządzeń lub przewodów
Przewód audio
(nie należy do
wyposażenia)
1
Podłącz zewnętrzne urządzenie dźwiękowe.
Typ wtyku: średnicy Ø 3,5 mm, stereo
2
Naciśnij [RADIO, EXT-IN], aby wybrać „AUX”.
3
Odtwórz przenośne urządzenie audio.
Aby wyregulować poziom dźwięku wejściowego (Z „Zmiana
brzmienia dźwięku”).
Wybierz opcję „NORMAL” (normalna) jeśli w przypadku wyboru opcji
„HIGH” (wysoki) dźwięk jest zniekształcony.
Uwaga:
RQTX1246
• Dalsze szczegóły znajdziesz w instrukcji obsługi urządzenia
8
zewnętrznego.
• Podzespoły i przewody są sprzedawane oddzielnie.
16
Przenośne
urządzenie audio
(nie należy do
wyposażenia)
■
Płyty kompaktowe
Błędne informacje na wyświetlaczu.
Nie uruchamia się odtwarzanie.
• Płyta nie została włożona prawidłowo. Włóż prawidłowo płytę.
• Płyta jest zabrudzona. Wyczyść plytę.
• Użyj innej płyty, jeśli jest zarysowana, wygięta lub niestandardowa.
• Nastąpiło skroplenie pary wodnej. Odczekaj 1 do 2 godziny, aż
skroplona para wodna odparuje.
Całkowita liczba wyświetlanych utworów jest nieprawidłowa.
Płyta nie może być odczytywana.
Słyszalny zniekształcony dźwięk.
• Włożona płyta nie jest obsługiwana przez system. Zmień płytę.
• Włożona płyta nie jest sfinalizowana.
■
Radio
Słychać dudnienie.
• Wyłącz telewizor lub odsuń go od urządzenia.
• Wybierz tryb „BP 1” lub „BP 2” tunera AM.
Podczas odbioru w paśmie AM słychać przydźwięk o niskiej
częstotliwości.
• Odsuń antenę od innych kabli i przewodów.
Page 17

POLSKI
■
USB
Nie można odczytać urządzenie pamięci masowej USB lub jego
zawartości.
• Format urządzenie pamięci masowej USB lub jego zawartość nie jest
obsługiwana przez system.
• W niektórych przypadkach nie będą obsługiwane urządzenie pamięci
masowej USB o pojemności większej niż 32 GB.
Wolna praca urządzenia pamięci masowej USB.
• Pliki o dużych rozmiarach lub urządzenie pamięci masowej USB z
dużą ilością pamięci wymagają dłuższego czasu wczytywania.
Wyświetlany czas, który upłynął jest inny niż czas rzeczywisty.
• Skopiuj dane do innego urządzenie pamięci masowej USB lub utwórz
kopię zapasową danych i sformatuj urządzenie pamięci masowej
USB.
■
Wyświetlacz urządzenia
„NO PLAY”
• Sprawdź zawartość. Odtwarzać można wyłącznie utwory o
obsługiwanym formacie.
• System może odczytywać i odtwarzać maksymalnie 255 albumów lub
folderów (audio i innych niż audio).
„F76” lub „F61”
• Wystąpił problem z zasilaniem.
„ERROR”
• Wykonano niewłaściwą operację. Przeczytaj instrukcję i spróbuj
ponownie.
„NOT MP3/ERROR”
• Nieobsługiwany format MP3. Urządzenie pominie ten utwór i odtworzy
następny.
„VBR–”
• Urządzenie nie może wyświetlić pozostałego czasu odtwarzania dla
utworów o zmiennej prędkości strumienia bitów (VBR – variable bit
rate).
„NODEVICE”
• Nie podłączono zewnętrznego urządzenie pamięci masowej USB.
Sprawdź zawartość.
Zerowanie pamięci systemu (Inicjalizacja)
W następujących sytuacjach należy zapoznać się z poniższymi
instrukcjami, aby wyzerować pamięć:
• Brak reakcji po naciśnięciu przycisków.
• Chęć wyczyszczenia i wyzerowania zawartości pamięci.
Aby wyzerować pamięć systemu
1
Odłącz przewód zasilania.
(Oodczekaj 3 minuty przed przejściem do kroku 2.)
2
Naciskając i przytrzymując [1] na urządzeniu głównym,
podłącz ponownie przewód zasilania.
Na wyświetlaczu pojawi się symbol „– – – – – – – – ”.
3
Zwolnij [1].
Przywrócone zostaną wszystkie ustawiania fabryczne.
Konieczne będzie ponowne zaprogramowanie pamięci.
Dane techniczne
■
Sekcja wzmacniacza
Całkowita wyjściowa moc skuteczna w trybie stereo
Kanał przedni (przy użyciu obu kanałów)
5 W na kanał (6
Całkowita moc skuteczna w trybie stereo 10 W
■
Tuner FM/AM, sekcja złączy
Zaprogramowane stacje FM 30 stacji
AM 15 stacji
Modulacja częstotliwościowa (FM)
Zakres częstotliwości
87,50 MHz do 108,00 MHz (w krokach co 50 kHz)
Gniazda antenowe 75 (niezrównoważone)
Modulacja amplitudowa (AM)
Zakres częstotliwości 522 kHz do 1629 kHz (w krokach co 9 kHz)
520 kHz do 1630 kHz (w krokach co 10 kHz)
Gniazdo słuchawek
Złącze Stereo, złącze 3,5 mm
AUX (tył)
Złącze Stereo, złącze 3,5 mm
■
Sekcja odtwarzacza płyt CD
Odtwarzane płyty (8 cm lub 12 cm)
CD, CD-R/RW (CD-DA, płyta formatowana jako MP3
MPEG-1 Layer 3, MPEG-2 Layer 3
Przechwytywanie
Długość fali 790 nm (CD)
Moc lasera CLASS 1 (CD)
Wyjście audio (Płyta)
Liczba kanałów 2 kanały (FL, FR)
FL = Przedni lewy kanał
FR = Przedni prawy kanał
■
Sekcja USB
Gniazdo USB
Standard USB Standard USB 2.0 pełnej prędkości
Obsługiwane formaty plików multimedialnych MP3 (
System plików urządzenia USB FAT 12, FAT 16, FAT 32
Pobór mocy portu USB 500 mA (maks)
■
Głośnik
Typ System 1-drożny, 1-głośnikowy (bass-reflex)
Głośnik
Szerokopasmow 8 cm stożkowy
Impedancja 6
Zakres częstotliwości 60 Hz do 25 kHz (–16 dB)
90 Hz do 22 kHz (–10 dB)
■
Dane ogólne
Zasilanie Prąd przemienny 220 do 240 V, 50 Hz
Pobór mocy 12 W
Wymiary (Szer. x Wys. x Głęb.) 400 mm x 221 mm x 110 mm
[Głęb. = 69 mm (min)]
Masa 2,0 kg
Zakres temperatur roboczych 0°C do +40°C
Zakres wilgotności roboczych
Od 35% do 80% RH (bez kondensacji)
), 1 kHz, 10% całkowitego zniekształcenia
harmonicznego (THD)
)
.mp3)
POLSKI
Konserwacja
W celu oczyszczenia urządzenia należy przetrzeć je miękką, suchą
szmatką.
• Do czyszczenia urządzenia nie należy stosować alkoholu,
rozcieńczalnika ani benzyny.
• Przed użyciem chusteczki nasączonej środkiem chemicznym należy
zapoznać się z dołączoną do niej instrukcją.
Pobór mocy w trybie gotowości 0,2 W (około)
Uwaga:
1) Dane techniczne mogą ulec zmianie bez powiadomienia.
Masa i wymiary podane są w przybliżeniu.
2) Wartość całkowitych zniekształceń harmonicznych została zmierzona
przy użyciu cyfrowego analizatora widma.
RQTX1246
9
17
Page 18

ČESKY
Ovládejte dálkovým ovladačem. Jsou-li stejné, můžete rovněž
použít tlačítka na hlavním přístroji.
Spodek přístroje
ČESKY
Uvnitř přehrávače
Informace pro spotřebitele o sběru a likvidaci odpadu z
elektrických a elektronických zařízení a použitých baterií z
domácností
Tyto symboly na výrobcích, obalech nebo v průvodní
dokumentaci znamenají, že použitá elektrická a
elektronická zařízení a baterie nepatří do běžného
domácího odpadu.
Správná likvidace, recyklace a opětovné použití jsou
možné jen pokud odevzdáte tato zařízení a použité
baterie na místech k tomu určených, za což neplatíte
žádné poplatky, v souladu s platnými národnímu
předpisy a se Směrnicemi 2002/96/EU a 2006/66/EU.
Správnou likvidací přístrojů a baterií pomůžete šetřit
cenné suroviny a předcházet možným negativním
účinkům na lidské zdraví a na přírodní prostředí, které
jinak mohou vzniknout při nesprávném zacházení s
odpady.
Další informace o sběru, likvidaci a recyklaci starých
přístrojů a použitých baterií Vám poskytnou místní
úřady, provozovny sběrných dvorů nebo prodejna, ve
které jste toto zboží zakoupili.
Při nesprávné likvidaci odpadu vám hrozí pokuta v
souladu s národní legislativou a místními předpisy.
Informace pro právnické osoby se sídlem v zemích
Evropské Unie (EU)
Pokud chcete likvidovat elektrická nebo elektronická
zařízení, obraťte se na prodejce nebo dodavatele s
žádostí o další informace.
[Informace o likvidaci v zemích mimo Evropskou
Unii (EU)]
Tyto symboly platí jen v zemích Evropské unie. Pokud
chcete likvidovat tento produkt, obraťte se na místní
úřady nebo prodejce a informujte se o správném
způsobu likvidace.
Poznámka k symbolu baterie (symboly uprostřed
a dole):
Tento symbol může být použit v kombinaci s
chemickým symbolem. V tomto případě splňuje tento
RQTX1246
2
18
symbol legislativní požadavky, které jsou předepsány
pro chemickou látku obsaženou v baterii.
POZOR!
TENTO VÝROBEK PRACUJE S LASEROVÝM PAPRSKEM.
PŘI NESPRÁVNÉM POUŽITÍ OVLÁDACÍCH PRVKŮ, STEJNĚ
JAKO PŘI PROVÁDĚNÍ JINÝCH POSTUPŮ, NEŽ JSOU
POPSÁNY V TOMTO NÁVODU, MŮŽE DOJÍT K NEBEZPEČNÉMU
VYZAŘOVÁNÍ.
NIKDY NESNÍMEJTE VNĚJŠÍ KRYT A PŘÍSTROJ SAMI
NEOPRAVUJTE. SERVIS PŘENECHTE POUZE KVALIFIKOVANÝM
OSOBÁM V AUTORIZOVANÝCH OPRAVNÁCH.
UPOZORNĚNÍ:
ABYSTE SNÍŽILI NEBEZPEČÍ VZNIKU POŽÁRU, ÚRAZU
ELEKTRICKÝM PROUDEM NEBO POŠKOZENÍ PŘÍSTROJE:
• NEVYSTAVUJTE TOTO ZAŘÍZENÍ DEŠTI, NADMĚRNÉ
VLHKOSTI, KAPAJÍCÍ VODĚ A POSTŘÍKÁNÍ. NA ZAŘÍZENÍ BY
NEMĚLY BÝT UMISŤOVÁNY ŽÁDNÉ OBJEKTY NAPLNĚNÉ
VODOU, JAKO JSOU NAPŘÍKLAD VÁZY.
• POUŽÍVEJTE POUZE DOPORUČENÉ PŘÍSLUŠENSTVÍ.
• NEODSTRAŇUJTE KRYT PŘÍSTROJE (NEBO JEHO
ZADNÍ STRANU); UVNITŘ NEJSOU ŽÁDNÉ SOUČÁSTI,
JEJICHŽ OPRAVU BY MĚL PROVÁDĚT UŽIVATEL. OPRAVY
PŘENECHEJTE KVALIFIKOVANÝM PRACOVNÍKŮM SERVISU.
POZOR!
• ABYSTE ZAJISTILI DOBRÉ VENTILAČNÍ PODMÍNKY, NIKDY
NEINSTALUJTE TENTO PŘÍSTROJ V KNIHOVNĚ, VESTAVĚNÉ
SKŘÍNI NEBO JINÉM UZAVŘENÉM PROSTORU. ZAJISTĚTE,
ABY ZÁVĚSY A VŠECHNY OSTATNÍ MATERIÁLY NEBRÁNILY
V DOBRÉ VENTILACI, ABYSTE PŘEDEŠLI NEBEZPEČÍ
ÚRAZU ELEKTRICKÝM PROUDEM NEBO NEBEZPEČÍ
POŽÁRU, KTERÉ BY MOHLO VZNIKNOUT PŘEHŘÁTÍM
PŘÍSTROJE.
• NEBLOKUJTE VENTILAČNÍ OTVORY PŘÍSTROJE NOVINAMI,
UBRUSY, ZÁVĚSY A JINÝMI MATERIÁLY.
• NEPOKLÁDEJTE ZDROJE OTEVŘENÉHO OHNĚ, JAKO
NAPŘÍKLAD HOŘÍCÍ SVÍČKY, NA PŘÍSTROJ.
• ZBAVTE SE BATERIÍ SPRÁVNÝM ZPŮSOBEM S OHLEDEM
NA ŽIVOTNÍ PROSTŘEDÍ.
Zásuvka by měla být poblíž zařízení a snadno dostupná.
Zástrčka sít’ového přívodu by měla zůstat snadno obsluhovatelná.
Abyste přístroj zcela odpojili od sítě, odpojte zástrčku sít’ového
přívodu ze zásuvky.
Tento výrobek může být během používání rušen rádiovou
interferencí, která je způsobena mobilním telefonem. Jestliže k
takovéto interferenci dojde, zajistěte prosím větší vzdálenost mezi
tímto výrobkem a mobilním telefonem.
TENTO PŘÍSTROJ JE KONSTRUOVÁN PRO POUŽITÍ V MÍRNÉM
KLIMATU.
Identifikačni značení výrobku je umistěno na dolní straně jednotek.
Technologie audio kódování MPEG Layer-3 licencovaná od
Fraunhofer IIS a Thomson.
Page 19

ČESKY
Bezpečnostní upozornění
Obsah
Umístění
Umístěte systém na vodorovný povrch mimo dosah přímého slunečního
záření, vysokých teplot, vlhkosti a přílišných vibrací. Takové prostředí
by mohlo poškodit skříňku přístroje nebo jiné komponenty a zkrátit tak
životnost systém.
Zařízení umístěte nejméně 15 cm od stěny, abyste předešli zkreslení a
nechtěným zvukovým efektům.
Na systém nepokládejte těžké předměty.
Napětí
Nepoužívejte pro napájení zásuvky s vysokým napětím. To může vést k
přetížení systém a způsobit požár.
K napájení nepoužívejte stejnosměrný zdroj. Zkontrolujte pečlivě zdroj,
zapojujete-li systém na lodi nebo podobném místě, kde se používá
stejnosměrný proud.
Ochrana přívodu střídavého proudu
Přesvědčte se, že je síťový kabel řádně zapojen, a že není poškozen.
Špatné připojení nebo poškození kabelu může zapříčinit požár nebo
úraz elektrickým proudem. Za kabel netahejte, neohýbejte ho a
neumísťujte na něj těžké předměty.
Při odpojování kabelu vždy uchopte pevně zástrčku. Tahání za kabel
může způsobit úraz elektrickým proudem.
Nezacházejte s kabelem mokrýma rukama. To může zapříčinit úraz
elektrickým proudem.
Bezpečnostní upozornění ................................. 3
Dodávané příslušenství .................................... 3
Příprava dálkového ovladače ........................... 3
Přehled ovládání ................................................ 4
Provedení zapojení ............................................ 5
Disky ................................................................... 5
USB ..................................................................... 6
Rádio ................................................................... 6
Hodiny a časovače ............................................ 7
Zvukové efekty................................................... 8
Externí vybavení ................................................ 8
Kód dálkového ovládání ................................... 8
Odstraňování závad .......................................... 8
Údržba ................................................................ 9
Specifikace ......................................................... 9
Příprava dálkového ovladače
ČESKY
Cizí předměty
Zabraňte vniknutí kovových předmětů do systém. To může zapříčinit
úraz elektrickým proudem nebo poruchu.
Zabraňte vniknutí kapaliny do systém. To může zapříčinit úraz
elektrickým proudem nebo poruchu. Pokud se tak stane, okamžitě
odpojte systém ze sítě a kontaktujte vašeho prodejce.
Obsahují hořlavý plyn, který by mohl ve styku s přístrojem vzplanout.
Nerozprašujte žádné insekticidy na systém ani do něj.
Servis
Nepokoušejte se systém opravit sami. Pokud přístroj přestane
hrát, kontrolky přestanou svítit, objeví se kouř nebo dojde k jinému
problému, který není popsán v těchto instrukcích, odpojte přístroj ze
sítě a kontaktujte vašeho prodejce nebo autorizovaný servis. Pokud se
nekvalifikovaná osoba snaží rozebrat nebo opravit systém, může dojít k
úrazu elektrickým proudem nebo k poškození systém.
Pokud systém delší dobu nepoužíváte, odpojte ho ze sítě, prodloužíte
tak jeho životnost.
Dodávané příslušenství
Zkontrolujte si prosím a identifikujte dodávané příslušenství.
1 x Kabel přívodu střídavého
proudu
1 x FM pokojová anténa
1 x AM smyčková anténa
1 x Dálkové ovládání
(N2QAYB000639)
(není v příslušenství)
Použijte alkalické nebo manganové baterie.
Vložte baterii tak, aby se póly (+ a –) shodovaly s těmi v dálkovém
ovládání.
Zamiřte na čidlo signálu dálkového ovládání (Z 4) tak, aby v cestě
nebyly překážky, z maximální vzdálenosti 7 m přímo před přístrojem.
POZOR!
• Nerozebírejte ani nezkratujte baterie.
• Manganové nebo alkalické baterie nedobíjejte.
• Nepoužívejte baterie, u nichž se loupe obal.
• Nevystavujte teplu nebo ohni.
• Nenechávejte baterie v automobilu vystavené přímému slunečnímu
světlu po delší dobu, když jsou zavřené dveře a okna.
• Špatné zacházení s bateriemi může způsobit vytékání elektrolytu a
požár.
• Jestliže dálkové ovládání nebudete používat delší dobu, vyjměte z něj
baterie. Skladujte na chladném a tmavém místě.
POZOR!
V případě nesprávné výměny baterie hrozí nebezpečí výbuchu.
Vyměňujte pouze za stejný nebo rovnocenný typ, který doporučuje
výrobce. Použité baterie likvidujte podle pokynů výrobce.
RQTX1246
3
19
Page 20

ČESKY
Přehled ovládání
RADIO
EXT-IN
SOUND
PRESET EQ
D.BASS
DISPLAY
DIMMER
SLEEP
PLAY
AUTO OFF
ČESKY
4
20
Dálkové ovládání
A
B
C
D
E
F
G
H
Hlavní jednotka
Horní pohled
Q
R
S
A
D
U
Přední pohled
RQTX1246
I
J
K
L
M
N
O
P
T
K
E
V
W
A Tlačítko pro vypnutí do pohotovostního režimu/zapnutí [`],
[1] (Z 7, 9)
Stisknutím tohoto tlačítka se přístroj zapíná z pohotovostního
režimu nebo naopak vypíná. V pohotovostním režímu (standby)
přístroj stále spotřebovává malé množství el. proudu.
B Číselná tlačítka [1 až 9, 0, ≧10]
Vybrat 2-ciferné číslo
Příklad: 16: [≧10] → [1] → [6]
C Smazat naprogramovanou stopu (Z 6)
D Vybrat zdroj
[USB]: Vybrat USB (Z 6)
[CD]: Vybrat disk (Z 5)
[RADIO, EXT-IN]: Vybrat rádio, USB nebo AUX (Z 6, 8)
E Základní operace
[4/9]: Přehrávání nebo pauza
[8]: Zastavení přehrávání
[2], [6]: Přeskakování skladeb
Vybrat přednastavenou rozhlasovou stanici
[3], [5]: Vyhledat stopu
Naladit rozhlasovou stanici
[2/3], [5/6]: Přeskočit a vyhledat stopu
Vybrat přednastavenou rozhlasovou stanici
F Volba zvukových efektůc (Z 8)
G Automatické přednastavení rozhlasové stanice (Z 7)
H Zobrazit informace zobrazené na displeji.
Snížit jas displeje
Stiskněte a přidržte tlačítko pro aktivaci této funkce.
Stiskněte a přidržte tlačítko znovu pro zrušení.
I Použití automatického vypnutí (Z 7)
Používání hodin a časovače (Z 7)
J Nastavení programové funkce (Z 5, 7)
K Nastavení hlasitosti systému
L Ztlumit zvuk systému
Stiskněte tlačítko znovu pro zrušení funkce.
„MUTE“ se rovněž zruší když nastavíte hlastitost nebo když systém
vypnete.
M Nastavení menu přehrávání (Z 5)
N Nastavení rozhlasového menu (Z 6)
O [R, T]: Přeskočit album
Nastavení hodin
[Y, U]: Výběr položky z menu
[OK]: Potvrdit nastavení
P Systém automaticky vypnout
Jestliže systém nepoužíváte přibližně po dobu 30 minut, tato funkce
systém vypne (s výjimkou rozhlasu).
Pro zrušení stiskněte tlačítko dvakrát.
Q Konektory pro sluchátka ( )
Typ konektoru: stereofonní, souosý o průměru Ø 3,5 mm (není v
příslušenství)
• Vyvarujte se poslechu na delší dobu, abyste předešli poškození
sluchu.
• Příliš hlasitá reprodukce ze sluchátek může způsobit ztrátu
sluchu.
• Poslouchání na maximální hlasitost po delší dobu může poškodit
sluch uživatele. Ujistěte se, že používáte dodávaná nebo
doporučená sluchátka na uši nebo do uší.
R Konektor AUX
S USB port ( )
T Otevření nebo zavření zásuvky
U Panel displeje
V Zásuvka
W Čidlo dálkového ovladače
Page 21

ČESKY
Provedení zapojení
Napájení
Systém v pohotovostním režimu spotřebuje přibližně 0,2 W. Jestliže
systém nepoužíváte, napájení odpojte.
Některá nastavení se mohou po odpojení systému ztratit. Musíte je
nastavit znovu.
1
Zapojte venkovní anténu FM.
Umístěte anténu tam, kde je příjem nejlepší.
Izolační páska
2
Zapojte AM smyčkovou anténu.
Zastavení
přehrávání
Pozastavení
přehrávání
Přeskočit
album
Přeskakování
skladeb
Vyhledávání
mezi
skladbami
Stiskněte [8] během přehrávání.
Stiskněte [4/9] během přehrávání.
Pro pokračování přehrávání stiskněte znovu.
Stiskněte [R, T].
Stiskněte [2] nebo [6] (hlavní přístroj:
[2/3] nebo [5/6]).
Stiskněte a přidržte [3] nebo [5] (hlavní
přístroj: [2/3] nebo [5/6]).
Funkce režimu přehrávání
1
Stiskněte [PLAY MENU] pro volbu „PLAYMODE“.
2
Pro výběr požadovaného režimu stiskněte [Y, U] a potom [OK].
OFF
PLAYMODE
1-TRACK
1-TR
1-ALBUM
1ALBUM
RANDOM
RND
1-ALBUM
RANDOM
1ALBUM RND
Přehrát všechny skladby.
Přehraje jednu zvolenou skladbu na disku.
Stiskněte číselná tlačítka pro výběr skladeb.
Přehrávání se spustí od vybrané skladeb.
Přehraje jedno zvolené album na disku.
Stiskněte [R, T
Přehraje jeden disk v náhodném pořadí.
Přehraje všechny skladby na jednom vybraném
albu v náhodném pořadí.
Stiskněte [R, T
]
pro výběr alba.
]
pro výběr alba.
ČESKY
Cvak!
3
Zapojte kabel přivodu střídavého proudu.
S tímto systémem používejte pouze kabel přivodu střídavého
proudu, které je jeho součástí.
Nepoužívejte kabel přivodu střídavého proudu jiného zařízení.
Poznámka:
• Tyto reproduktory nemají magnetické stínění. Nepokládejte do
blízkosti TV, PC nebo jiného zařízení snadno ovlivnitelného
magnetismem.
• Síť nemůžete odpojit od reproduktorů.
Disky
Přehrávání disků
1
Pro otevření zásuvky na hlavní jednotce stiskněte
[CD x, OPEN/CLOSE].
Vložte disk, potiskem nahoru.
Pro uzavření zásuvky znovu stiskněte [CD x, OPEN/CLOSE].
Cvak!
Poznámka:
• Během nahodilého přehrávání nelze přeskočit na již přehrané skladby
nebo stiskněte číselná tlačítka.
• Tato funkce nefunguje v „Naprogramované přehrávání“.
• Při otevření zásuvky se nastavení vrací do výchozího „OFF
PLAYMODE“.
Opakované přehrávání
Můžete opakovat „Naprogramované přehrávání“ nebo jinou vybranou
„Funkce režimu přehrávání“.
1
Stiskněte [PLAY MENU] pro volbu „REPEAT“.
2
Stiskněte [Y, U] pro výbĕr „ON REPEAT“ a potom stiskněte
[OK].
Zobrazí se „
Pro zrušeni, vyberte „OFF REPEAT“.
“.
Naprogramované přehrávání
Tato funkce vám umožní naprogramovat až 24 skladeb.
1
Stiskněte [PROGRAM] v režimu zastavení.
Zobrazí se „PGM“.
2
Pro výběr požadované skladby stiskněte číselná tlačítka.
Opakujte tento krok pro naprogramování dalších skladeb.
3
Stiskněte [4/9] pro zahájení přehrávání.
2
Stiskněte [CD] a potom pro spuštění přehrávání stiskněte
[4/9].
Při zavírání udržujte prsty mimo zásuvku.
RQTX1246
5
21
Page 22

ČESKY
1
Stiskněte [PROGRAM] v režimu zastavení.
2
Stiskněte [R, T] pro výběr požadovaného alba.
3
Pro výběr požadované skladby stiskněte [6] a potom
numerická tlačítka.
4
Stiskněte [OK].
Pro naprogramování ostatních skladeb opakujte kroky 2 až 4.
5
Stiskněte [4/9] pro zahájení přehrávání.
Zrušení
programovacího
režimu
Opětovné přehrání
programu
Kontrolu
programových
obsahů
Smazání poslední
skladby
Smazání všech
naprogramovaných
skladeb
ČESKY
Poznámka:
Paměť programu se vymaže po otevření zásuvky na disk.
Stiskněte [PROGRAM] v režimu zastavení.
Stiskněte [PROGRAM] a potom stiskněte
[4/9].
Stiskněte [2] nebo [6] pokud se zobrazí
„PGM“ v režimu zastavení.
Pro kontrolu během programování stiskněte po
zobrazení „PGM“ dvakrát [PROGRAM], potom
stiskněte [2] nebo [6].
Stiskněte [DEL] v režimu zastavení.
Stiskněte [8] v režimu stop. Zobrazí se „CLR
ALL“. Během 5 sekund stiskněte znovu [8].
Zobrazení dostupné informace
Dostupnou informaci lze zobrazit na displeji.
Stiskněte [DISPLAY].
Poznámka:
• Maximální počet znaků, které lze zobrazit: přibližně 30
• Tento systém podporuje verzi 1.0, 1.1 a 2.3 ID3.
• Textové údaje, které systém nepodporuje, se mohou zobrazit různě.
USB
Skladby MP3 můžete připojit a přehrávat ze svého USB zařízení.
Nepoužívejte prodlužovací USB kabel. Systém nedokáže rozpoznat
USB zařízení připojené kabelem.
1
Snižte hlasitost a připojte paměťové zařízení USB k USB
portu.
2
Stiskněte [USB] a potom pro spuštění přehrávání stiskněte
[4/9].
Zastavení
přehrávání
Další operace viz „Disky“ (Z 5).
Kompatibilní zařízení
• Paměťové zařízení USB, která podporují pouze hromadný přenos.
• Paměťové zařízení USB, která podporují formát USB 2.0.
Podporované formáty
• Složky jsou definované jako album.
• Soubory jsou definované jako skladba.
• Skladba musí mít příponu „.mp3“ nebo „.MP3“.
• CBI (v angličtině, Control/Bulk/Interrupt) není podporováno.
• Souborový systém NTFS není podporován (podporován je pouze
souborový systém FAT 12/16/32).
• Některé soubory mohou selhat kvůli velikosti sektoru.
Poznámka:
• Maximální počet alba: 255 albům (včetně kořenové složky)
• Maximální počet skladeb: 2500 skladeb
• Maximální počet skladeb na album: 999 skladeb
Stiskněte [8] během přehrávání.
Zobrazí se „RESUME“.
Stiskněte [4/9] pro pokračování přehrávání.
NEBO
Pro zastavení přehrávání dvakrát stiskněte [8].
Rádio
Ruční ladění
Poznámka k CD
• Tento systém může zpřístupnit až 99 skladeb.
• Tento systém může přehrávat soubory MP3 a CD-DA ve formátu
audio CD-R/RW, které byly ukončeny.
• Tento systém nemůže přehrávat CD-R/RW, a to kvůli stavu nahrávky.
Poznámka k MP3
• Soubory odpovídají skladbám a složky se považují za alba.
• Tento systém má přístup až k 999 skladbám, 255 albům (včetně
kořenového adresáře) a 20 sekcím.
• Disk musí odpovídat normě ISO9660 úroveň 1 nebo 2 (kromě
rozšířených formátů).
• Složce a souborům přiřaďte názvy s trojcifernou předponou v pořadí,
v jakém je chcete přehrát.
Omezení pro přehrávání MP3
• Nahrajete-li MP3 na stejný disk jako CD-DA, bude možné přehrávat
pouze první nahranou skladbu.
• Některé MP3 nelze přehrávat kvůli stavu disku nebo nahrávky.
• Nahrávky nemusí být přehrávány v po
RQTX1246
řadí, v jakém byly pořízeny.
6
22
1
Stiskněte [R ADIO, EXT-IN] pro volbu „FM“ nebo „AM“.
2
Stiskněte [3] nebo [5] pro výběr frekvence požadované
stanice.
Pro automatické ladění tlačítko stiskněte a přidržte dokud se
frekvence nezačne rychle měnit.
Pro zlepšení kvality zvuku
Když je vybráno „FM“
1
Stiskněte [R ADIO MENU] pro výběr „FM MODE“.
2
Stiskněte [Y, U] pro výběr „MONO“ a potom stiskněte [OK].
Pro zrušeni, vyberte „STEREO“.
• „MONO“ se při změně frekvence také změní.
• Vypněte „MONO“ pro normální poslech.
Když je vybráno „AM“
1
Stiskněte [R ADIO MENU] pro výběr „B.PROOF“.
2
Stiskněte [Y, U] pro výběr „BP 1“ nebo „BP 2“ a potom
stiskněte [OK].
Page 23

ČESKY
RDS vysílání
Tento systém může zobrazovat textové údaje přenášené rozhlasovým
datovým systémem (RDS), který je v určitých oblastech k dispozici.
Stiskněte [DISPLAY].
PS
(Název stanice)
Poznámka:
RDS nemusí být dostupný, pokud bude příjem slabý.
→
(Typ program)
PTY
→
(Frekvence)
FREQ
Předvolba paměti
Předvoleno může být 30 FM a 15 AM stanic.
Příprava
Stiskněte [RADIO, EXT-IN] pro volbu „FM“ nebo „AM“.
Automatická předvolba
1
Pro výběr „LOWEST“ (nejnižší) nebo „CURRENT“ (aktuální)
frekvence stiskněte [OK].
2
Stiskněte [AUTO PRESET] pro zahájení předvolby.
Pro zrušeni, stiskněte [8].
Manuální předvolba
1
Pro naladění požadované stanice stiskněte [3] nebo [5].
2
Stiskněte [PROGRAM].
3
Pro výběr skladby stiskněte numerická tlačítka.
Pro nastavení dalších stanic zopakujte kroky 1 až 3.
Stanici, která má stejné číslo předvolby nahradí nová stanice.
Volba přednastavení stanice
Stiskněte numerická tlačítka, [2] nebo [6] (hlavní přístroj:
[2/3] nebo [5/6]) pro výběr předvolby stanice.
Nastavení přiřazení AM (pouze pomocí hlavní jednotky)
Tento systém může rovněž přijímat vysílání AM v krocích po 10 kHz.
1
Stiskněte [R ADIO, EXT-IN] pro volbu „FM“ nebo „AM“.
2
Stiskněte a přidržte [RADIO, EXT-IN].
Po několika sekundách se na displeji zobrazí aktuální minimální
rozhlasová frekvence. Když se minimální frekvence změní, uvolněte
tlačítko.
• Abyste se vrátili zpět na původní nastavení, zopakujte výše uvedené
kroky.
• Po změně nastavení jsou přednastavené frekvence vymazány.
Hodiny a časovače
Nastavení hodin
Toto jsou hodiny s 24 hodinovým ukazatelem.
1
Stiskněte [CLOCK/TIMER] pro zvolení „CLOCK“.
2
Během 10 sekund stiskněte [R, T] pro nastavení času.
3
Stiskněte [OK].
Pro zobrazení hodin na pár sekund stiskněte [CLOCK/TIMER].
Poznámka:
Pro zachování přesného času provádějte pravidelně opravu času.
Automatického vypnutí
Časomíra vypne systém po uplynutí nastavené doby.
Stiskněte [SLEEP] opět pro výběr požadovaného času (v
minutách).
Pro zrušeni, vyberte „OFF“.
30 MIN OFF→120 MIN→→ 60 MIN→90 MIN
Pro zobrazení zbývajícího času
Stiskněte [SLEEP].
Poznámka:
• Časomíru lze použít společně s časomírou přehrávání.
• Časovač automatického vypnutí má vždy přednost. Zkontrolujte, že
nenastavíte překrývání časovačů.
Časovač přehrávání
Můžete nastavit časovač, který zajistí zapnutí v určitou dobu jako budík.
Zapněte systém a nastavte hodiny.
Připravte zdroj hudby, který chcete poslouchat (disk, rádio, USB nebo
AUX) a nastavte hlasitost.
1
Stiskněte [CLOCK/TIMER] pro zvolení „#PLAY 1“, „#PLAY 2“
nebo „#PLAY 3“.
2
Během 10 sekund stiskněte [R, T] pro nastavení času zapnutí.
3
Stiskněte [OK].
4
Pro nastavení konečného času opakujte kroky 2 a 3.
Pro spuštění časovače
5
Pro spuštění „#PLAY 1“, „#PLAY 2“ nebo „# PLAY 3“
stiskněte [#, PLAY].
6
Pro vypnutí systému stiskněte [`].
Systém musí být pro nastavení časovače vypnutý.
Změnu
nastavení
Změnu
zdroje nebo
hlasitosti
Změňte
hlasitosti
Zrušení Pro odebrání ukazatele na displeji dvakrát stiskněte
Opakujte kroky 1 až 4 a 6 (Z viz výše).
1) Pro odebrání ukazatele na displeji dvakrát
stiskněte [#, PLAY].
2) Změnu zdroje nebo hlasitosti.
3) Proveďte kroky 5 a 6 (Z viz výše).
Stiskněte [CLOCK/TIMER] pro zvolení „#PLAY 1“,
„#PLAY 2“ nebo „#PLAY 3“.
[#, PLAY].
ČESKY
Poznámka:
• Časovač přehrávání spustí přehrávání s nízkou hlasitostí a ta se
postupně zvyšuje na nastavenou úroveň.
• Časovač se spustí každý den ve stejný čas, pokud je zapnutý.
• Jestliže systém vypnete a znovu zapnete během doby, kdy je časovač
spuštěný, časovač se v době ukončení nezastaví.
RQTX1246
7
23
Page 24

ČESKY
Zvukové efekty
Změna kvality zvuku
1
Pro výběr zvukového efektu stiskněte [SOUND].
2
Během 3 sekund, stiskněte pro požadované nastavení [Y, U].
BASS -4 až +4
TREBLE
SURROUND „ON SURROUND“ nebo „OFF SURROUND“
INPUT LEVEL
(Pro zdroj AUX)
Předvolba EQ (Preset EQ)
Pro výběr nastavení stiskněte [PRESET EQ].
„NORMAL“ nebo „HIGH“
Kód dálkového ovládání
Když další zařízení Panasonic reaguje na dálkový ovladač tohoto
systému, změňte kód ovladače pro tento systém.
Příprava
Stiskněte [RADIO, EXT-IN] pro volbu „AUX“.
Nastavení kódů na „REMOTE 2“
1
Stiskněte a přidržte [RADIO, EXT-IN] na hlavním zařízení a [2]
na dálkovém ovladači dokud se nezobrazí „REMOTE 2“.
2
Stiskněte a přidržte [OK] a [2] nejméně na 4 sekundy.
Nastavení kódů na „REMOTE 1“
1
Stiskněte a přidržte [RADIO, EXT-IN] na hlavním zařízení a [1]
na dálkovém ovladači dokud se nezobrazí „REMOTE 1“.
2
Stiskněte a přidržte [OK] a [1] nejméně na 4 sekundy.
HEAVY Přidává údernost rocku
SOFT Pro hudební pozadí
CLEAR Vyjasňuje vyšší frekvence
VOCAL Přidává zřetelnost zpěvu
ČESKY
FLAT Zruší zvukový efekt
D.BASS
Tato funkce vás nechá vychutnat si basové efekty.
Stiskněte [D.BASS] pro výběr „ON D.BASS“ nebo „OFF D.BASS“.
Externí vybavení
Používání přídavného vstupu
Do tohoto systému můžete připojit přenosné audio zařízení můžete
připojit přenosné audio zařízení.
Příprava
Abyste předešli zvukové nevyváženosti, vypněte ekvalizér (existuje-li).
Než připojíte nebo odpojíte přenosné audio zařízení snižte hlasitost
systému a přenosného audio zařízení.
Odstraňování závad
Před žádostí o servis proveďte následující kontroly. Jste-li na pochybách
ohlednì nìkteré z níže uvedených kontrol, nebo pokud řešení uvedená
problém nevyřeší, vyžádejte si pokyny od svého prodejce.
■
Běžné problémy
S dálkovým ovladačem nelze provést žádnou operaci.
• Zkontrolujte, zda jsou baterie vloženy správně.
Zvuk je nevyvážený nebo se neozývá žádný zvuk.
• Nastavte hlasitost.
• Vypněte systém, zjistěte a odstraňte příčinu a poté systém znovu
zapněte. Může být způsobeno přetěžováním reproduktorů nadměrnou
hlasitostí nebo výkonem a používáním systému v prostředí s příliš
vysokou teplotou.
Během přehrávání je slyšet hučení.
• V blízkosti přístroje je vedení střídavého proud nebo zářivkové
osvětlení. Udržujte jiná zařízení a kabely mimo přístroj.
■
Disky
Displej nezobrazuje správně.
Přehrávání se nespouští.
• Disk jste nevložili správně. Vložte ho správně.
• Disk je špinavý. Vyčistěte disk.
• Vyměňte disk, pokud je poškrábaný, zdeformovaný nebo
nestandardní.
• Došlo ke kondenzaci. Nechte systém schnout po dobu 1 až 2 hodin.
Celkový počet zobrazených skladeb je nesprávný.
Disk nelze číst.
Je slyšen zkreslený zvuk.
• Vložili jste disk, který systém nemůže přehrát. Vyměňte ho za
přehrávatelný disk.
• Vložili jste disk, který nebyl dokončen.
Audio kabel
(není v
příslušenství)
1
Přehrávání na přenosném audio zařízení.
Typ konektoru: stereofonní, souosý o průměru Ø 3,5 mm
2
Stiskněte [RADIO, EXT-IN] pro volbu „AUX“.
3
Přehrávání na přenosném audio zařízení.
Nastavení úrovně zvukového vstupu (Z „Změna kvality zvuku“).
Je-li zvuk na úrovni vstupu „HIGH“ (hlasitý) nevyvážený, vyberte
„NORMAL“ (normální).
Poznámka:
RQTX1246
• Podrobnosti si přečtěte v návodu k použití přenostného audio
8
zařízení.
• Komponenty a kabely se prodávají odděleně.
24
Přenosné audio
zařízení (není v
příslušenství)
■
Rádio
Je slyšet dunění.
• Vypněte TV nebo jej odsuňte od systému.
• Nastavte na „BP 1“ nebo „BP 2“ v režimu ladění AM.
Ozývá se slabé bzučení během vysílání v pásmu AM.
• Oddělte anténu od dalších kabelů.
Page 25

ČESKY
■
USB
Nelze přečíst zařízení USB nebo jeho obsah.
• Formát zařízení USB nebo jeho obsah není kompatibilní se
systémem.
• Zařízení USB s kapacitou vyšší než 32 GB nemůže fungovat za
stejných podmínek.
Pomalá činnost paměťového zařízení USB
• Velké soubory nebo paměťového zařízení USB s velkou kapacitou se
mohou dlouho načítat.
Zobrazený uplynulý čas se liší od skutečné doby přehrávání.
• Data zkopírujte na jiné zařízení USB nebo je zálohujte a zařízení USB
formátujte.
■
Displej hlavního zařízení
„NO PLAY“
• Zkontrolujte obsah. Můžete přehrávat pouze podporovaný formát.
• Systém může číst a přehrát až 255 alb nebo složek (zvukové a
nezvukové).
„F76“ nebo „F61“
• Nastal problem s napájením.
„ERROR“
• Byla provedena nesprávná operace. Přečtěte si instrukce a zkuste to
znovu.
„NOT MP3/ERROR“
• Nepodporovaný formát MP3. Přístroj danou skladbu přeskočí a
přehrává další.
„VBR–“
• Jednotka nemůže zobrazit zbývající čas přehrávání u skladeb s
proměnnou přenosovou rychlostí (skladby VBR).
„NODEVICE“
• Zařízení USB není připojeno. Zkontrolujte obsah.
Znovunastavení paměti (Inicializace)
Pokud dojde k následujícím situacím, obraťte se na níže uvedený
postup pro znovunastavení paměti:
• Není žádná reakce na stisknutí tlačítek.
• Chcete vymazat a znovunastavit obsah paměti.
Opětovné nastavení paměti
1
Odpojte kabel přivodu střídavého proudu.
(Než budete pokračovat s krokem 2 počkejte 3 minuty.)
2
Při stisknutém [1] na hlavní jednotce připojte přístroj
znovu k síti.
Na displeji se zobrazí „– – – – – – – –“.
3
Uvolněte [1].
Všechna nastavení se vrátí na původní tovární nastavení.
Je třeba znovu nastavit položky paměti.
Specifikace
■
Sekce zesilovače
Výstupní výkon RMS ve stereo režimu
Přední kanál (oba kanály napájeny)
5 W na kanál (6
Celkový výstupní výkon RMS 10 W
■
FM/AM tuner, část svorek
Přednastavení stanic 30 stanic FM
15 stanic AM
Frekvenční modulace (FM)
Frekvenční rozsah 87,50 MHz až 108,00 MHz (50 kHz krok)
Anténní konektor 75
Amplitudová modulace (AM)
Frekvenční rozsah 522 kHz až 1629 kHz (9 kHz krok)
520 kHz až 1630 kHz (10 kHz krok)
Konektory pro sluchátka
Konektor Stereo, konektor 3,5 mm
AUX (zadní)
Konektor Stereo, konektor 3,5 mm
■
Sekce disky přehrávače
Přehrávaný disk (8 cm nebo 12 cm)
CD, CD-R/RW (CD-DA, formátované disky MP3
MPEG-1 Layer 3, MPEG-2 Layer 3
Čtení
Vlnová délka 790 nm (CD)
Výkon laseru CLASS 1 (CD)
Audio výstup (Disk)
Počet kanálů 2 kanálů (FL, FR)
FL = Přední levý kanál
FR = Přední pravý kanál
■
Sekce USB
USB port
Norma USB USB 2.0 plná rychlost
Podporované formáty souborů médií MP3 (
Souborový systém USB zařízení FAT 12, FAT 16, FAT 32
Napájení USB portu 500 mA (max.)
■
Sekce reproduktorů
Typ 1-pásmový, 1-reproduktorový systém (bass reflex)
Reproduktor(y)
Plný rozsah 8 cm kónický
Impedance 6
Frekvenční rozsah 60 Hz až 25 kHz (–16 dB)
90 Hz až 22 kHz (–10 dB)
), 1 kHz, 10% THD
(nesymetrický)
)
.mp3)
ČESKY
Údržba
K vyčištění přístroje použijte jemný a suchý hadřík.
• Nikdy nepoužívejte k čištění systému alkohol, ředidlo nebo technický
benzín.
• Před použitím chemicky impregnované látky si pročtěte instrukce
přiložené k látce.
■
Všeobecně
Napájení AC 220 až 240 V, 50 Hz
Spotřeba 12 W
Rozměry (Š x V x H) 400 mm x 221 mm x 110 mm
[H = 69 mm (min.)]
Hmotnost 2,0 kg
Rozsah provozních teplot 0°C až +40°C
Rozsah provozní vlhkosti 35% až 80% RH (bez kondenzace)
Spotřeba v pohotovostním režimu (standby) 0,2 W (přibližně)
Poznámka:
1) Technické údaje podléhají změnám bez předchozího upozornění.
Hmotnost a rozměry jsou přibližné.
2) Celkové harmonické zkreslení je měřeno digitálním spektrálním
analyzátorem.
RQTX1246
9
25
Page 26

РУССКИЙ
Выполните действия с помощью пульта ДУ. Вы также
можете использовать кнопки, расположенные на основном
устройстве, если они не отличаются.
ВНИМАНИЕ!
В ЭТОМ ИЗДЕЛИИ ИСПОЛЬЗУЕТСЯ ЛАЗЕР.
ПРИМЕНЕНИЕ РЕГУЛИРОВОК И НАСТРОЕК, ОТЛИЧНЫХ
ОТ НИЖЕОПИСАННЫХ, МОЖЕТ ПРИВЕСТИ К ОПАСНОМУ
ЛАЗЕРНОМУ ОБЛУЧЕНИЮ.
НЕ ОТКРЫВАЙТЕ КРЫШКУ И НЕ ПРОИЗВОДИТЕ РЕМОНТ
САМОСТОЯТЕЛЬНО. ОБРАТИТЕСЬ К
КВАЛИФИЦИРОВАННОМУ СПЕЦИАЛИСТУ.
Низ изделия
Внутри аппарата
Информация для покупателя
Название продукции: Компактная стереосистема
РУССКИЙ
Название страны
производителя:
Название производителя: Панасоник Корпорэйшн
Юридический адрес: 1006 Кадома, Осака, Япония
Дата производства: Вы можете уточнить год и месяц по
серийному номеру на табличке.
Пример маркировки—Серийный номер № XX1AXXXXXXX
(X-любая цифра или буква)
Год: Трeтья цифра в серийном номере (1 — 2011, 2 — 2012,
... 0 — 2020)
Месяц: Четвeртая бyква в серийном номере (А — Январь,
В — Февраль, ...L — Декабрь)
Примечание: Сентябрь может указываться как “S” вместо “I”.
Дополнительная информация:
Установленный производителем в порядке п. 2 ст. 5 федерального
закона РФ “О защите прав потребителей” срок службы данного
изделия равен 7 годам с даты производства при условии, что
изделие используется в строгом соответствии с настоящей
инструкцией по эксплуатации и применимыми техническими
стандартами.
Малaйзия
Пожалуйста внимательно
прочитайте инструкцию по
эксплуатации.
ОСТОРОЖНО:
ЧТОБЫ УМЕНЬШИТЬ ОПАСНОСТЬ ВОЗНИКНОВЕНИЯ
ПОЖАРА, ПОРАЖЕНИЯ ЭЛЕКТРИЧЕСКИМ ТОКОМ ИЛИ
ПОВРЕЖДЕНИЯ ИЗДЕЛИЯ,
• НЕ ПОДВЕРГАЙТЕ ЭТОТ АППАРАТ ВОЗДЕЙСТВИЮ
ДОЖДЯ, ВЛАГИ, КАПЕЛЬ ИЛИ БРЫЗГ И НЕ РАЗМЕЩАЙТЕ
НА АППАРАТЕ КАКИЕ-ЛИБО ПРЕДМЕТЫ, НАПОЛНЕННЫЕ
ВОДОЙ, НАПРИМЕР, ВАЗЫ.
• ИСПОЛЬЗУЙТЕ ТОЛЬКО РЕКОМЕНДУЕМЫЕ
ПРИНАДЛЕЖНОСТИ.
• НЕ СНИМАЙТЕ КРЫШКУ (ИЛИ ЗАДНЮЮ КРЫШКУ);
ВНУТРИ НЕТ ДЕТАЛЕЙ ДЛЯ ОБСЛУЖИВАНИЯ
ПОЛЬЗОВАТЕЛЕМ.
К КВАЛИФИЦИРОВАННОМУ ОБСЛУЖИВАЮЩЕМУ
ПЕРСОНАЛУ.
ЗА ОБСЛУЖИВАНИЕМ ОБРАЩАЙТЕСЬ
ВНИМАНИЕ!
• НЕ УСТАНАВЛИВАЙТЕ И НЕ РАЗМЕЩАЙТЕ ДАННОЕ
УСТРОЙСТВО B KHИЖHOM ШKAФУ, BCTPOEHHOM
ШKAФУ ИЛИ ДРУГOM ОГPAHИЧEHHOM ПPOCTPAHCTBE
ДЛЯ TOГO, ЧTOБЬI COXPAHИTЬ УCЛOBИЯ XOPOШEЙ
BEHTИЛЯЦИИ. УДOCTOBEPЬTECЬ, ЧTO ШTOPЬI И
ДPУГИE ПОДОБHЬIE ПPEДMETЬI HE ПPEПЯTCTBУЮT
HOPMAЛЬHOЙ BEHTИЛЯЦИИ
PИCKA ПOPAЖEHИЯ ЭЛЕКТРИЧЕСКИМ ТОКОМ ИЛИ
ВОЗНИКНОВЕНИЯ ПОЖАРА ИЗ-ЗА ПЕРЕГРЕВА.
• НЕ ЗАКРЫВАЙТЕ ВЕНТИЛЯЦИОННЫЕ ОТВЕРСТИЯ
УСТРОЙСТВА ГАЗЕТАМИ, СКАТЕРТЯМИ, ШТОРАМИ И
ПОДОБНЫМИ ПРЕДМЕТАМИ.
• НЕ РАЗМЕЩАЙТЕ НА УСТРОЙСТВЕ ИСТОЧНИКИ
ОТКРЫТОГО ПЛАМЕНИ, НАПРИМЕР, ГОРЯЩИЕ СВЕЧИ.
• УТИЛИЗИРУЙТЕ БАТАРЕЙКИ ЭКОЛОГИЧЕСКИ
БЕЗОПАСНЫМ СПОСОБОМ.
Сетевая розетка должна быть расположена вблизи
оборудования и быть легко доступной.
Вилка сетевого кабеля питания должна оставаться доступной
для быстрого отключения.
Чтобы полностью отключить этот аппарат от сети переменного
тока, отсоедините вилку сетевого кабеля питания от розетки
переменного тока.
Это изделие может принимать радиопомехи, генерируемые
мобильными телефонами. Если такие помехи доставляют
беспокойство, увеличьте, пожалуйста, расстояние между
изделием и мобильным телефоном.
ЭТО УСТРОЙСТВО ПРЕДНАЗНАЧЕНО ДЛЯ ИСПОЛЬЗОВАНИЯ
В УМЕРЕННОМ КЛИМАТЕ.
ДЛЯ ПPEДOTBPAЩEHИЯ
– Если Вы увидите такой символ –
Информация по обращению с отходами для стран, не
входящих в Европейский Союз
Действие этого символа распространяется только на
Европейский Союз.
Если Вы собираетесь выбросить данный продукт,
RQTX1246
узнайте в местных органах власти или у дилера, как
следует поступать с отходами такого типа.
2
26
Идентификационная маркировка продукта расположена в
нижней части устройства.
Технология кодирования аудио сигнала MPEG Layer-3
лицензирована у компаний Fraunhofer IIS и Thomson.
Page 27

РУССКИЙ
Меpы предосторожности
Содержание
Расположение
Установите систему на ровной поверхности в месте, защищенном от
воздействия прямых солнечных лучей, высоких темпеpатуp, высокой
влажности и сильных вибpаций. Влияние вышеуказанных факторов
может привести к повреждению корпуса и других компонентов
устройства и сократить тем самым его службы.
Располагайте устройство на расстоянии не менее, 15 см от стен во
избежание искажений и нежелательных акустических эффектов.
Не ставьте на систему тяжелые предметы.
Напpяжение
Не используйте высоковольтные источники электропитания. Это
может привести к перегрузке системы и возникновению пожаpа.
Не используйте источники питания постоянного тока. Перед
установкой системы на судах или в дpугом месте, где используется
постоянный ток, внимательно пpовеpьте источник электропитания.
Меры предосторожности при обращении с
сетевым кабелем питания переменного тока
Убедитесь в том, что сетевой кабель питания переменного тока
подключен правильно и не поврежден. Плохое подключение, а
также повреждение кабеля может привести к возгоранию или
поражению электрическим током. Не тяните за кабель, не сгибайте
его, а также не кладите на него тяжелые предметы.
При отключении кабеля крепко держите его за вилку
за сетевой кабель переменного тока – это может привести к
поражению электрическим током.
Не прикасайтесь к вилке мокрыми руками. Это может привести к
поражению электрическим током.
. Не тяните
Меpы предосторожности ............................... 3
Принадлежности, поставляемые в
комплекте ...................................................... 3
Подготовка пульта ДУ к работе ..................... 3
Oбзор органов управления ............................ 4
Выполнение соединений ............................... 5
Диски .................................................................. 5
USB ..................................................................... 6
Pадио ................................................................. 6
Часы и таймеры ............................................... 7
Звуковые эффекты ......................................... 8
Внешнее оборудование .................................. 8
Код дистанционного управления ................. 8
Устранение неполадок .................................... 9
Обслуживание .................................................. 9
Технические характеристики ....................... 10
Подготовка пульта ДУ к работе
Постоpонние пpедметы
Не допускайте попадания металлических предметов в систему.
Это может привести к поражению электрическим током или
возникновению неполадок.
Не допускайте попадания жидкостей в систему. Это может
привести к поражению электрическим током или возникновению
неполадок. В случае попадания жидкости в систему немедленно
отключите ее от источника электропитания и обратитесь к
местному дилеру.
pаспыляйте инсектициды на систему или внутрь системы. В их
Не
состав входят горючие газы, которые могут воспламениться при
попадании внутрь системы.
Техническое обслуживание
Не пытайтесь ремонтировать данную систему самостоятельно.
Если прерывается звук, не светятся индикаторы, появился дым или
возникла любая другая неполадка, которая не описана в данной
инструкции, отключите сетевой кабель питания переменного
тока и обратитесь к вашему дилеру или в авторизованный центр
сервисного обслуживания. Выполнение ремонта, демонтажа или
восстановления функций устройства неквалифицированным
персоналом
повреждению системы.
Если система не будет использоваться в течение
продолжительного периода времени, можно продлить срок его
службы, отключив от источника электропитания.
может привести к поражению электрическим током или
Принадлежности, поставляемые в комплекте
Проверьте наличие принадлежностей в комплекте.
1 x Ceтeвoй кабель питания
пеpеменного тока
1 x Комнатная FM-антенна
1 x Pамочнaя AM-антеннa
1 x Пульт ДУ
(N2QAYB000639)
(не входит в
комплект поставки)
Используйте щелочные или марганцевые батарейки.
Вставьте батарейку так, чтобы полярность (+ и –) соответствовала
обозначениям на пульте ДУ.
Направьте пульт ДУ на датчик дистанционного управления (Z 4),
избегая препятствий, с максимального расстояния 7 м
непосредственно на основное устройство.
ВНИМАНИЕ!
• Не разбирайте и не вызывайте короткое замыкание батарейки.
• Не заряжайте щелочную или марганцевую батарейку.
Не используйте батарейку с поврежденным покрытием.
•
• Не нагревайте и не подвергайте воздействию огня.
• Не оставляйте батарейку(и) в автомобилях с закрытыми дверями
и окнами, не защищенных от воздействия прямых солнечных
лучей в течение длительного времени.
• Неправильное обращение с батарейкой может стать причиной
вытекания электролита, который может вызвать пожар.
пульт ДУ не будет использоваться в течение длительного
• Если
времени, извлеките из него батарейку. Храните батарейки в
прохладном темном месте.
ВНИМАНИЕ!
При неправильной установке батареек существует опасность
взрыва. Производите замену, используя только батарейки того
же или равноценного типа, рекомендуемые производителем.
Утилизируйте использованные батарейки согласно
рекомендациям производителя.
РУССКИЙ
RQTX1246
3
27
Page 28

РУССКИЙ
Oбзор органов управления
RADIO
EXT-IN
SOUND
PRESET EQ
D.BASS
DISPLAY
DIMMER
SLEEP
PLAY
AUTO OFF
РУССКИЙ
4
28
Пульт ДУ
A
B
C
D
E
F
G
H
Основной устройство
Вид сверху
Q
R
S
A
D
U
Вид спереди
RQTX1246
I
J
K
L
M
N
O
P
T
K
E
V
W
A Включение питания/переход в режим ожидания [`], [1]
(Z 7, 9)
Нажмите переключатель для перевода устройства из режима
включено в режим ожидания и наоборот. В режиме ожидания
устройство потребляет небольшое количество электроэнергии.
B Цифровые кнопки [1 до 9, 0, ≧10]
Для выбора 2-значного номера
Например: 16: [≧10] → [1] → [6]
C Удаление запрограммированного трека (Z 6)
D Выбор источника
[USB]: Выбор USB (Z 6)
[CD]: Выбор диска (Z 5)
[RADIO, EXT-IN]: Выбор радио, USB или AUX (Z 6, 8)
E Основные операции
[4/9]: Воспроизведение или пауза
[8]: Остановка воспроизведения
[2], [6]: Пропуск трека
Выбор предустановленной радиостанции
[3], [5]: Поиск трека
Настройка на радиостанцию
[2/3], [5/6]: Пропуск и поиск трека
Выбор предустановленной радиостанции
F Выбор звуковых эффектов (Z 8)
G Автоматическая предустановка радиостанции (Z 7)
H Просмотр информации, отображаемой на панели дисплее.
Уменьшение яркости дисплея
Нажмите и удерживайте кнопку, чтобы воспользоваться этой
функцией.
Для отмены нажмите и удерживайте кнопку еще раз.
I Установка таймера сна (Z 7)
Установка часов и таймера (Z 7)
J Установка функции программирования (Z 5, 7)
K Регулировка громкости системы
L Приглушение звука системы
Для отмены нажмите кнопку еще раз.
“MUTE” также отменяется при регулировке громкости или при
выключении системы.
M Установка пункта меню воспроизведения (Z 5)
N Установка пункта меню радио (Z 6)
O [R, T]: Пропуск альбома
Регулировка настройки часов
[Y, U]: Выбор пункта в меню
[OK]: Подтверждение настройки
P Автоматическое выключение системы
Эта функция выключает систему (за исключением случаев,
когда в качестве источника используется радио), если она не
используется примерно 30 минут.
Для отмены нажмите кнопку два раза.
Q Гнездо для наушников ( )
Тип разъема: Ø 3,5 мм, стерео (не входит в комплект поставки)
• Во избежание проблем со слухом не используйте наушники в
течение длительного времени.
• Избыточное звуковое давление, создаваемое в наушниках,
может привести к потере слуха.
• Длительное прослушивание звука на полной громкости
может вызвать повреждение слуха. Используйте только
прилагаемые или рекомендованные наушники.
R Гнездо AUX
S USB-порт ( )
T Открытие или закрытие сдвижной крышки
U Дисплей
V Сдвижная крышка
W Датчик дистанционного управления
Page 29

РУССКИЙ
Выполнение соединений
Экономия электроэнергии
Находясь в режиме ожидания, система потребляет приблизительно
0,2 Вт. Выньте вилку сетевого кабеля питания из розетки, если
система не используется.
После отсоединения системы некоторые настройки будут
потеряны. Их необходимо установить снова.
1
Подключите комнатную FМ-антенну.
Антенну необходимо разместить в зоне наилучшего приема.
Клейкая лента
2
Подключите рамочную AM-антенну.
Щелчок!
3
Подключите сетевой кабель питания переменного
тока.
Используйте с этой системой только сетевой кабель питания
переменного тока, входящий в комплект.
Не используйте сетевой кабель питания переменного тока от
другого оборудования.
Примечание:
• Эти динамики не имеют магнитного экранирования. Не
располагайте их возле телевизоров, персональных компьютеров
или других устройств, на работу которых влияет магнитное поле.
• Сетки динамиков не снимаются
.
Остановка
воспроизведения
Пауза в
воспроизведении
Пропуск альбома
Пропуск трека
Поиск по трекам
Во время воспроизведения нажмите [8].
Во время воспроизведения нажмите [4/9].
Нажмите еще раз, чтобы продолжить
воспроизведение.
Нажмите [R, T].
Нажмите [2] или [6] (основной
устройство: [2/3] или [5/6]).
Нажмите и удерживайте [3] или [5]
(основной устройство: [2/3] или
[5/6]).
Функция режима воспроизведения
1
Нажмите [PLAY MENU], чтобы выбрать “PLAYMODE”.
2
Нажмите [Y, U], а затем нажмите [OK] для выбора
необходимого режима.
OFF
PLAYMODE
1-TRACK
1-TR
1-ALBUM
1ALBUM
RANDOM
RND
1-ALBUM
RANDOM
1ALBUM RND
Примечание:
• Во время воспроизведения в произвольном режие нельзя
пропустить треки, которые уже были воспроизведены или
используйте кнопки с цифрами.
• Эта функция не работает с “Запрограммированное
воспроизведение”.
• При открытии сдвижной крышки настройка сбрасывается к
“OFF PLAYMODE”.
Воспроизведение всех треков.
Воспроизведение одного выбранного трека на
диске.
Используйте кнопки с цифрами для выбора
трека.
Воспроизведение начнется с выбранного трека.
Воспроизведение одного выбранного альбома
на диске.
Нажмите [R, T
Воспроизведение диска в произвольном
порядке.
Воспроизведение всех треков из одного
выбранного альбома в произвольном порядке.
Нажмите [R, T
]
для выбора альбома.
]
для выбора альбома.
РУССКИЙ
Диски
Воспроизведение дисков
1
Нажмите [CD x, OPEN/CLOSE] на основном устройстве для
открытия откидной крышки.
Установите диск так, чтобы этикетка была обращена к вам.
Нажмите [CD x, OPEN/CLOSE] для закрытия сдвижной крышки
еще раз.
Щелчок!
2
Нажмите [CD], а затем нажмите [4/9] для запуска
воспроизведения.
Не следует держать пальцы рядом со сдвижной крышкой во
время ее закрытия.
Повторное воспроизведение
Вы можете повторить “Запрограммированное воспроизведение”
или другую выбранную “Функция режима воспроизведения”.
1
Нажмите [PLAY MENU], чтобы выбрать “REPEAT”.
2
Нажмите [Y, U], чтобы выбрать “ON REPEAT”, а затем
нажмите [OK].
Появится индикация “
Для отмены выберите “OFF REPEAT”.
”.
Запрограммированное воспроизведение
Эта функция позволяет запрограммировать воспроизведение до
24 треков.
1
Нажмите [PROGRAM] в режиме остановки.
Появится индикация “PGM”.
2
Используйте кнопки с цифрами для выбора необходимого
трека.
Выполните это действие еще раз, чтобы запрограммировать
другие треки.
3
Нажмите [4/9], чтобы начать воспроизведение.
RQTX1246
5
29
Page 30

РУССКИЙ
1
Нажмите [PROGRAM] в режиме остановки.
2
Нажмите [R, T], чтобы выбрать необходимый альбом.
3
Нажмите [6], а затем используйте кнопки с цифрами для
выбора необходимого трека.
4
Нажмите [OK].
Выполните действия пунктов со 2 по 4 еще раз, чтобы
запрограммировать другие треки.
5
Нажмите [4/9], чтобы начать воспроизведение.
Отмена режима
программного
воспроизведения
Повторное
воспроизведение
запрограммированного
списка
Проверка
запрограммированного
списка
Удаление
трека
Удаление всех
запрограммированных
треков
Примечание:
Программная память стирается при открытии сдвижной крышки.
последнего
Нажмите [PROGRAM] в режиме
остановки.
Нажмите [PROGRAM], а затем
нажмите [4/9].
Нажмите [2] или [6] при
отображении на дисплее “PGM” в
режиме остановки.
Для выполнения проверки во время
программирования после появления
на дисплее индикации “PGM” нажмите
[PROGRAM] два раза, а затем [2]
или [6].
Нажмите [DEL] в режиме остановки.
Нажмите [8] в режиме остановки.
Появится индикация “CLR ALL”. В
течение 5 секунд нажмите [8] еще раз.
Просмотр доступной информации
Доступную информацию можно просматривать на дисплее.
РУССКИЙ
Нажмите [DISPLAY].
Примечание:
• Максимальное количество символов: примерно 30
• Система поддерживает верс. 1.0, 1.1 и 2.3 ID3 теги.
• Текстовые данные, не поддерживаемые системой, могут
отображаться иначе.
USB
Вы можете подключить запоминающее USB-устройство большой
емкости и воспроизводить с него МР3 треки.
Не используйте удлинительный кабель USB. Система не может
распознать запоминающее USB-устройство большой емкости,
подключенное с помощью кабеля.
1
Уменьшите громкость и подсоедините запоминающее
USB-устройство большой емкости к USB-порту.
2
Нажмите [USB], а затем нажмите [4/9] для запуска
воспроизведения.
Остановка
воспроизведения
Для других операций смотрите раздел “Диски” (Z 5).
Совместимые устройства
• Запоминающие USB-устройства большой емкости,
поддерживающие только групповую пересылку данных.
• Запоминающие USB-устройства большой емкости,
поддерживающие предельную скорость USB 2.0.
Поддерживаемые форматы
• Папки определяются как альбомы.
• Файлы определяются как треки.
• Трек должен иметь расширение “.mp3” или “.MP3”.
• Протокол CBI (на английском языке, Control/Bulk/Interrupt) не
поддерживается.
• Файловая система NTFS не поддерживается (поддерживается
только файловая система FAT 12/16/32).
• Некоторые
Примечание:
• Максимальное количество альбомов: 255 альбомов (включая
• Максимальное количество треков: 2500 треков
• Максимальное количество треков в одном альбоме: 999 треков
Во время воспроизведения нажмите [8].
Появится индикация “RESUME”.
Нажмите [4/9], чтобы продолжить
воспроизведение.
ИЛИ
Нажмите [8] два раза, чтобы полностью
остановить воспроизведение.
файлы могут не работать из-за размера сектора.
корневую папку)
Pадио
Примечание о компакт-дисках
• Эта система может осуществлять доступ к 99 трекам.
• Эта система может воспроизводить диски CD-R/RW с
файлами MP3 или аудиодиски формата CD-DA, которые были
финализированы
• В зависимости от состояния записи воспроизведение некоторых
дисков CD-R/RW на данной системе невозможно.
Примечание об MP3
• Файлы считаются треками, а папки считаются альбомами.
• Эта система может предоставить доступ к 999 трекам, 255
альбомам (включая корневую папку) и 20 сессиям.
• Диск должен соответствовать формату ISO9660 уровень 1 или 2
(за исключением расширенных форматов).
• Для воспроизведения в
начале названий папок и файлов 3-значные номера в том
порядке, в котором вы хотите их воспроизводить.
Ограничения при воспроизведении файлов формата MP3
• Если файлы MP3 были записаны на таком же диске, что и диск
формата CD-DA, воспроизвести можно будет только формат,
записанный при первом сеансе записи.
• В зависимости от
некоторых файлов МР3 невозможно.
• Файлы не обязательно будут воспроизведены в том порядке, в
котором они были записаны.
RQTX1246
.
определенном порядке поставьте в
состояния диска или записи воспроизведение
6
30
Ручная настройка
1
Нажмите [RADIO, EXT-IN] для выбора диапазона “FM” или
“AM”.
2
Нажмите [3] или [5] для настройки на частоту нужной
станции.
Для автоматической настройки нажмите и удерживайте кнопку
до тех пор, пока частота не начнет быстро меняться.
Улучшение качества звука
Если выбрано “FM”
1
Нажмите [RADIO MENU], чтобы выбрать “FM MODE”.
2
Нажмите [Y, U], чтобы выбрать “MONO”, а затем нажмите
[OK].
Для отмены выберите “STEREO”.
• При изменении частоты также происходит отмена “MONO”.
• Выключите режим “MONO” при обычном прослушивании.
Если выбрано “AM”
1
Нажмите [RADIO MENU], чтобы выбрать “B.PROOF”.
2
Нажмите [Y, U], чтобы выбрать “BP 1” или “BP 2”, а затем
нажмите [OK].
Page 31

РУССКИЙ
Радиовещание RDS
Эта система может отображать текстовую информацию системы
передачи данных по каналу радиотрансляции (RDS), которая
доступна в некоторых регионах.
Нажмите [DISPLAY].
PS
(Название станции)
Примечание:
RDS может быть не доступна из-за слабого сигнала.
→
PTY
(Тип программы)
→
FREQ
(Частота)
Предустановка памяти
Вы можете предварительно установить 30 FM-станций и 15
AM-станций.
Подготовка
Нажмите [RADIO, EXT-IN] для выбора диапазона “FM” или “AM”.
Автоматическая предустановка
1
Нажмите [OK], чтобы выбрать “LOWEST” (низшая) или
“CURRENT” (текущая) частоту.
2
Нажмите [AUTO PRESET] для запуска предварительной
установки.
Для отмены нажмите [8].
Ручная предустановка
1
Нажмите [3] или [5] для настройки на станцию.
2
Нажмите [PROGRAM].
3
Для выбора предустановленного номера нажмите
цифровую кнопку.
Повторите действия пунктов с 1 по 3, чтобы предварительно
настроить большее количество станций.
Новая станция заменит другую станцию, занимающую тот же
предустановленный номер.
Выбор предустановленной станции
Нажмите кнопки с цифрами [2] или [6] (основное
устройство: [2/3] или [5/6] для выбора
предустановленной станции.
Настройка на станцию АМ
(только с помощью основного устройства)
Эта система также может принимать АМ радиовещание с шагом
10 кГц.
1
Нажмите [RADIO, EXT-IN] для выбора диапазона “FM” или
“AM”.
2
Нажмите и удерживайте [RADIO, EXT-IN].
Через несколько секунд на дисплее отобразится текущая
минимальная радио частота. Отпустите кнопку, когда минимальная
частота изменится.
• Для возврата к первоначальной настройке выполните указанные
выше действия еще раз.
• После изменения настройки предварительно установленные
частоты удаляются.
Часы и таймеры
Установка времени
Часы показывают вpемя в 24-часовом формате.
1
Нажмите [CLOCK/TIMER] для выбора функции “CLOCK”.
2
Нажмите и в течение 10 секунд удерживайте [R, T], чтобы
установить время.
3
Нажмите [OK].
Нажмите [CLOCK/TIMER] для отображения часов на дисплее в
течение нескольких секунд.
Примечание:
Регулярно переустанавливайте часы для поддержания точности
работы.
Таймер сна
Таймер сна выключает систему после наступления установленного
времени.
Нажмите [SLEEP], чтобы выбрать настройку (в минутах).
Для отмены выберите “OFF”.
30 MIN OFF→120 MIN→→ 60 MIN→90 MIN
Для отображения оставшегося времени
Нажмите [SLEEP].
Примечание:
• Таймер сна может использоваться вместе с таймером
воспроизведения.
• Таймер сна всегда срабатывает первым. Убедитесь, что время
срабатывания таймеров не совпадает.
Таймер воспроизведения
Можно использовать таймер в качестве будильника.
Включите систему и установите время.
Подготовьте музыкальный источник, который хотите прослушать
(диск, радио, USB или AUX), и настройте уровень громкости.
1
Нажмите [CLOCK/TIMER] для выбора функции “#PLAY 1”,
“#PLAY 2” или “#PLAY 3”.
2
Нажмите и в течение 10 секунд удерживайте [R, T], чтобы
установить время начала.
3
Нажмите [OK].
4
Выполните действия пунктов 2 и 3, чтобы установить
время окончания.
Для запуска таймера
5
Нажмите [#, PLAY], чтобы начать “#PLAY 1”, “#PLAY 2”
или “#PLAY 3”.
6
Нажмите [`] для выключения системы.
Чтобы таймер сработал, необходимо выключить систему.
Изменение
настроек
Изменение
источника
или
громкости
Проверка
настроек
Отмена
Примечание:
• Таймер воспроизведения начинает работать на низком
уровне громкости, который постепенно увеличивается до
предварительно установленного уровня.
• Если таймер включен, он будет срабатывать в установленное
время каждый день.
• При выключении системы и повторном включении во время
работы таймера, таймер не остановится на времени
Выполните действия пунктов с 1 по 4 и 6 еще раз
(Z выше).
1) Нажмите [#, PLAY] два раза, чтобы удалить
индикатор таймера с дисплея.
2) Измените источник или громкость.
3) Выполните действия пунктов 5 и 6 (Z выше).
Нажмите [CLOCK/TIMER] для выбора функции
“#PLAY 1”, “#PLAY 2” или “#PLAY 3”.
Нажмите [#, PLAY] два
индикатор таймера с дисплея.
раза, чтобы удалить
окончания.
РУССКИЙ
RQTX1246
7
31
Page 32

РУССКИЙ
Звуковые эффекты
Внешнее оборудование
Изменение качества звука
1
Нажмите [SOUND], чтобы выбрать звуковой эффект.
2
В течение 3 секунд нажмите [Y, U], чтобы выбрать
необходимую настройку.
BASS -4 до +4
TREBLE
SURROUND “ON SURROUND” или “OFF SURROUND”
INPUT LEVEL
(Для источника
AUX)
“NORMAL” или “HIGH”
Предварительная установка эквалайзера
(Preset EQ)
Нажмите [PRESET EQ], чтобы выбрать настройку.
HEAVY Повышает силу звучания рока
SOFT Для музыкального сопровождения
CLEAR Очищает верхние частоты
VOCAL Улучшает качество вокала
FLAT Отменяет звуковой эффект
D.BASS
Эта функция позволяет насладиться эффектом мощных басов.
Нажмите [D.BASS] для выбора “ON D.BASS” или “OFF D.BASS”.
РУССКИЙ
Использование дополнительного входа
Вы можете подключить переносное аудио оборудование и
прослушивать аудио через эту систему.
Подготовка
Для предотвращения искажения звука выключите эквалайзер (если
он имеется) переносного аудио оборудования.
Перед подключением или отключением переносного аудио
оборудования уменьшите громкость системы и переносного аудио
оборудования.
Аудиокабель
(не входит
в комплект
поставки)
1
Подключите портативное аудио оборудование.
Тип разъема: Ø 3,5 мм, стерео
2
Нажмите [RADIO, EXT-IN] для выбора “AUX”.
3
Выполните воспроизведение с переносного аудио
оборудования.
Для регулировки уровня входящего аудио (Z “Изменение
качества звука”).
Выберите настройку “NORMAL” (нормальный), если при включении
уровня “HIGH” (высокий) искажается звук.
Примечание:
• Для получения подробной информации обратитесь к
инструкциями по эксплуатации переносного аудио оборудования.
• Компоненты и кабели приобретаются отдельно.
Переносное аудио
оборудование
(не входит в
комплект поставки)
RQTX1246
8
32
Код дистанционного управления
Если при использовании пульта ДУ этой системы срабатывает
другое оборудование Panasonic, измените код дистанционного
управления для данной системы.
Подготовка
Нажмите [RADIO, EXT-IN] для выбора “AUX”.
Для установки кода на “REMOTE 2”
1
Нажмите и удерживайте на основном устройстве
[RADIO, EXT-IN] и [2] на пульте ДУ до тех пор, пока не
появится индикация “REMOTE 2”.
2
Нажмите и удерживайте [OK] и [2] не менее 4 секунд.
Для установки кода на “REMOTE 1”
1
Нажмите и удерживайте на основном устройстве
[RADIO, EXT-IN] и [1] на пульте ДУ до тех пор, пока не
появится индикация “REMOTE 1”.
2
Нажмите и удерживайте [OK] и [1] не менее 4 секунд.
Page 33

РУССКИЙ
Устранение неполадок
Перед обращением к специалисту по техническому
обслуживанию выполните следующие действия. Если у вас есть
сомнения относительно некоторых пунктов проверки или если
перечисленные действия не решают проблему, обратитесь за
инструкциями к своему дилеру.
■
Общие неисправности
Выполнение операций с помощью пульта ДУ невозможно.
• Проверьте правильность установки батарейки.
Звук искажен или отсутствует.
• Увеличьте уровень громкости.
• Выключите систему, определите и устраните причину неполадки,
а затем повторно включите систему. Возможно, произошла
деформация динамиков из-за чрезмерного уровня громкости или
мощности, а также использования устройства в помещении с
температурой.
высокой
При воспроизведении может появиться “гудение”.
• Рядом с кабелем находится сетевой кабель переменного тока
или флуоресцентная лампа. Размещайте другие приборы и
шнуры подальше от кабеля данной системы.
■
Диски
Дисплей отображается неправильно.
Воспроизведение не начинается.
• Вы вставили диск неправильно. Вставьте его правильно.
• Диск загрязнился. Почистите диск.
• Замените диск, если он поцарапан, деформирован или не
соответствует стандарту.
• Образовался конденсат. Оставьте систему просохнуть на 1 - 2
часа.
Общее количество отображаемых треков неправильно.
Диск не читается.
Звук искажен.
• Вы вставили диск, который
Вставьте воспроизводимый диск.
• Вы вставили диск, который не был финализирован.
■
Pадио
Слышен пульсирующий звук.
• Выключите телевизор или переместите его подальше от системы.
• Если устройство находится в режиме АМ-тюнера, переключите на
“ВР 1” или “ВР 2”.
Во время прослушивания станций в диапазоне АМ слышен
гул.
• Расположите антенну подальше от других кабелей и проводов.
система не может воспроизвести.
■
Индикация на дисплее основного устройства
“NO PLAY”
• Проверьте контент. Возможно воспроизведение только
поддерживаемого формата.
• Эта система может читать и воспроизводить до 255 альбомов
или папок (аудио и не аудио).
“F76” или “F61”
• Существует проблема с электроснабжением.
“ERROR”
• Выполнено неправильное действие. Прочитайте инструкцию и
повторите попытку.
“NOT MP3/ERROR”
• Неподдерживаемый МР3 формат. Трек неподдерживаемого
формата будет пропущен, а воспроизведение перейдет к
следующему треку.
“VBR–”
• Система не отображает оставшееся время воспроизведения для
треков с переменной частотой передачи данных (VBR).
“NODEVICE”
• Запоминающее USB-устройство большой емкости не
подключено. Проверьте соединения.
Сброс памяти (Инициализация)
При возникновении следующих ситуаций выполните
приведенные ниже инструкции для сброса памяти:
• Устройство не срабатывает при нажатии на кнопки.
• Необходимо очистить и сбросить содержимое памяти.
Чтобы сбросить память
1
Отсоедините сетевой кабель питания переменного
тока.
(Прежде чем продолжить выполнение действий пункта 2,
подожите 3 минуты.)
2
Нажимая и удерживая [1] на основном устройстве,
снова подсоедините сетевой кабель питания
переменного тока.
На дисплее появится индикация “– – – – – – – –”.
3
Отпустите [1].
Все настройки сброшены до заводских установок.
Пункты памяти небоходимо установить заново.
РУССКИЙ
■
USB
Запоминающее USB-устройство большой емкости или контент,
содержащийся на нем, не могут быть прочитаны.
• Формат запоминающего USB-устройства большой емкости или
контент, содержащийся на нем, совместим/не совместим с
системой.
• Запоминающее USB-устройство с емкостью хранения более
32 ГБ в некоторых условиях работать не может.
Медленная работа запоминающего USB-устройства большой
емкости.
• Чтение контента
устройства большой емкости может занять больше времени.
Отображаемое истекшее время отличается от фактического
времени воспроизведения.
• Выполните передачу данных на другое запоминающее USBустройство большой емкости или осуществите резервное
копирование данных и переформатируйте запоминающее USBустройство большой емкости.
большого размера или запоминающего USB-
Обслуживание
Для очистки данной системы используйте мягкую сухую ткань.
• Запрещается использовать для очистки системы спирт,
разбавитель для краски или бензин.
• Перед использованием химически обработанной салфетки
обратитесь к инструкции по ее применению.
RQTX1246
9
33
Page 34

РУССКИЙ
Технические характеристики
■
Блок усилителя
Выходная мощность (среднеквадратичная) в стереорежиме
Передний канал (оба канала активны)
5 Вт на канал (6 Ом), 1 кГц, 10% THD
Полная мощность стерео режима RMS 10 Вт
■
Блок тюнера FM/AM и разъемов
Предустановленные станции 30 FM-станций
15 AM-станций
Частотная модуляция (FM)
Диапазон частот От 87,50 MГц до 108,00 MГц (с шагом 50 кГц)
Антенный вход 75 Ом (несогласованный)
Амплитудная модуляция (AM)
Диапазон частот От 522 кГц до 1629 кГц (с шагом 9 кГц)
От 520 кГц до 1630 кГц (с шагом 10 кГц)
Гнездо для наушников
Разъем Стерео, гнездо 3,5 мм
AUX (заднее)
Разъем Стерео, гнездо 3,5
■
Блок дисков
Воспроизводимые диски (8 см или 12 см)
CD, CD-R/RW (форматированные диски CD-DA, MP3
MPEG-1 Layer 3, MPEG-2 Layer 3
Считывающее устройство
Длина волны 790 нм (CD)
Мощность лазера CLASS 1 (CD)
Воспроизведение звука (Диск)
Количество каналов 2 кан. (FL, FR)
FL = Левый передний канал
FR = Правый передний канал
)
мм
■
Блок USB
USB-порт
Стандарт USB Максимальная скорость – USB 2.0
Поддерживаемые форматы файлов MP3 (
Файловая система USB-устройства FAT 12, FAT 16, FAT 32
Питание USB-порта 500 мA (макс)
■
Блок динамиков
Тип 1-полосная система с 1 динамиком (oтражатель басов)
Блок(и) динамиков
Полный диапазон 8 см кoничecкoгo типa
Сопротивление 6 Ом
Диапазон частот От 60 Гц до 25 кГц (–16 дБ)
От 90 Гц до 22 кГц (–10 дБ)
■
Общие параметры
Электропитание Переменный ток от 220 до 240 В, 50 Гц
Потребляемая мощность 12 Вт
Размеры (Ш x В x Г) 400 мм x 221 мм x 110 мм
[Г = 69 mm (мин)]
Масса 2,0 кг
Рабочий диапазон температур От 0°C до +40°C
Рабочий диапазон влажности
От 35% до 80% относительной влажности (без конденсации)
Потребляемая мощность в режиме ожидания
0,2 Вт (приблизительно)
Примечание:
1) Технические характеристики могут быть изменены без
уведомления.
Масса и размеры даны приблизительно.
2) Полный коэффициент гармонических искажений измерен с
помощью цифрового анализатора спектра.
.mp3)
РУССКИЙ
10
34
RQTX1246
Page 35

РУССКИЙ
ИНФОРМАЦИЯ
О СЕРТИФИКАЦИИ ПPOДУКЦИИ
Компактная стереосистема Panasonic модели
ЅС-HC15#### (где “#” = 0-9, A-Z, -, или пробел)
сертиФицирована
ОРГАНОМ ПО СЕРТИФИКАЦИИ ПРОДУКЦИИ “ГОСТ-АЗИЯ”
(Регистрационный номер в Г осреестре – РОСС SG.0001.11BZ02)
СертиФикат соответствия: No POCC MY.BZ02.B09165
СертиФикат соответствия выдан: 25 Февраля 2011 гoда
СертиФикат соответствия
действителен до:
Модели ЅС-HC15#### (где “#” =
0-9, A-Z, -, или пробел) Panasonic
cooтвeтствуют тpeбoваниям
нормативных документов:
Срок cлужбы 7 (ceмь) лeт
25 Февраля 2014 гoда
ГOCT P MЭK 60065-2009,
ГOCT 5651-89 (табл. 1 (поз. 11); табл.
2 (поз. 6, 7))
ГOCT 22505-97, ГOCT P 51515-99,
ГOCT P 51317.3.2-2006 (Разд. 6, 7),
ГOCT P 51317.3.3-2008
РУССКИЙ
RQTX1246
11
35
Page 36

УКРАЇНСЬКА
Виконуйте операції за допомогою пульта дистанційного
керування. Ви також можете використовувати кнопки,
розташовані на основному пристрої, якщо вони виконують
однакові функції.
УBAГA!
У ЦЬОМУ ВИРОБІ ЗАСТОСОВАНО ЛАЗЕР.
ВИКОРИСТАННЯ ОРГАНІВ КЕРУВАННЯ АБО РЕГУЛЮВАННЯ
ЧИ ВИКОНАННЯ ПРОЦЕДУР ІНШИХ, НІЖ ЗАЗНАЧЕНО
ТУТ, МОЖЕ ПРИЗВЕСТИ ДО НЕБЕЗПЕЧНОГО ВПЛИВУ
ВИПРОМІНЮВАННЯ.
НЕ ВІДКРИВАЙТЕ КРИШОК І НЕ ВИКОНУЙТЕ РЕМОНТ
САМОСТІЙНО. ЗВEPTAЙTECЬ ЗA OБCЛУГOBУBAHHЯM ДO
KBAЛІФІKOBAHOГO ПEPCOHAЛY.
Низ виробу
Усереденi виробу
Інформація для покупця
Назва продукції: Компактна Стереосистема
Назва країни виробника: Малайзія
Назва виробника: Панасонік Корпорейшн
Юридична адреса: 1006 Кадома, Осака, Японія
Дата виготовлення: можна уточнити рік та місяць за серійним
номером у табличці.
Приклад маркування—серійний номер № XX1AXXXXXXX
(X - будь-яка цифра чи буква)
Рік: Третя цифра серійного номера (1 — 2011, 2 — 2012,
... 0 — 2020)
Місяць: Четверта буква серійного номера (А — Січень,
В — Лютий, ...L — Грудень)
Примітка: Вересень може бути вказаний як «S» замість «I».
Додаткова інформація: Будь ласка, уважно прочитайте
Встановлений виробником відповідно до п. 2 ст. 5 федерального
закону «Про захист прав споживачів» термін служби цього
виробу дорівнює 7 рокам з дати виготовлення за умови, що виріб
УКРАЇНСЬКА
використовується у суворій відповідності до дійсної інструкції з
експлуатації та технічних стандартів, що застосовуються до цього
виробу.
інструкцію з експлуатації.
Декларація про Відповідність
Вимогам Технічного Регламенту Обмеження Використання деяких
Небезпечних Речовин в електричному та електронному обладнанні
(затвердженого Постановою №1057 Кабінету Міністрів України)
Виріб відповідає вимогам Технічного Регламенту Обмеження
Використання деяких Небезпечних Речовин в електричному та
Вміст небезпечних речовин у випадках, не обумовлених в Додатку
1. свинець (Pb) – не
концентрації до 1000 частин на мільйон;
2. кадмій (Cd) – не перевищує 0,01 % ваги речовини або в
концентрації до 100 частин на мільйон;
3. ртуть (Hg) – не перевищує 0,1 % ваги речовини або в
концентрації до 1000 частин на мільйон;
4. шестивалентний хром (Cr
або в концентрації до 1000 частин на мільйон;
5. полібромбіфеноли (PBB) – не перевищує 0,1 % ваги речовини
RQTX1246
або в концентрації до 1000 частин на мільйон;
2
6. полібромдефенілові ефіри (PBDE) – не перевищує 0,1 % ваги
речовини або в концентрації до 1000 частин на мільйон.
36
електронному обладнанні (ТР ОВНР).
№2 ТР ОВНР, :
перевищує 0,1 % ваги речовини або в
6+
) – не перевищує 0,1 % ваги речовини
ОБЕРЕЖНО:
ЩОБ УНИКНУТИ РИЗИКУ ВИНИКНЕННЯ ПОЖЕЖІ, УРАЖЕННЯ
ЕЛЕКТРИЧНИМ СТРУМОМ АБО ПОШКОДЖЕННЯ ВИРОБУ:
• ЗАПОБІГАЙТЕ ПОТРАПЛЕННЯ НА ПРИСТРІЙ ДОЩОВИХ
КРАПЕЛЬ, ВОЛОГИ АБО БРИЗОК, ТА НЕ СТАВТЕ НА
ПРИСТРІЙ ПРЕДМЕТИ, НАПОВНЕНІ ВОДОЮ, НАПРИКЛАД,
ВАЗИ.
• ВИКОРИСТОВУЙТЕ ТІЛЬКИ РЕКОМЕНДОВАНІ ПРИЛАДДЯ.
• НЕ ЗНІМАЙТЕ КРИШКУ (ЧИ ЗАДНЮ ПАНЕЛЬ); ВСЕРЕДИНІ
НЕМАЄ ДЕТАЛЕЙ, ЯКІ ПОТРЕБУЮТЬ ОБСЛУГОВУВАННЯ
АБО МОЖУТЬ БУТИ
ДОВІРЯЙТЕ РОБОТИ З РЕМОНТУ ТА ОБСЛУГОВУВАННЯ
ТІЛЬКИ КВАЛІФІКОВАНИМ СПЕЦІАЛІСТАМ.
УBAГA!
• HE BCTAHOBЛЮЙTE I HE POЗMIЩУЙTE ЦЕЙ AПAPAT
У KHИЖKOBIЙ ШAФI, BБУДOBAHИX MEБЛЯX AБO B
IHШOMУ OБMEЖEHOMУ ПРОСТОРІ. ПEPEKOHAЙTECЬ,
ЩO AПAPAT ДOБPE BEHTИЛЮЄTЬCЯ. ДЛЯ ЗАПОБIГAHHЯ
HEБEЗПЕKИ УPAЖEHHЯ EЛEKTPИЧHИM CTPУMOM
AБO BИНИKHEHHЯ ПОЖЕЖІ BHAC
ПEPEKOHAЙTECЬ, ЩO ЗABICKИ ЧИ БУДЬ-ЯKI IHШI
MATEPIAЛИ HE ЗАГОРОДЖУЮTЬ BEHTИЛЯЦІЙНІ OTBOPИ.
• HE ЗAГOPOДЖУЙTE BEHTИЛЯЦІЙHI OTBOPИ ГAЗETAMИ,
CKATEPTИHAMИ, ЗABICKAMИ TA ПOДIБHИMИ
ПPEДMETAMИ.
• HE CTABTE ДЖEPEЛA BIДKPИTOГO ПOЛУM’Я
HAПPИKЛAД, ЗАПАЛEHI CBIЧKИ, HA AПAPAT.
• ЛIKBIДУЙTE БATAPEЙKИ EKOЛOГIЧHO ПPИЙHЯTИM
CПOCOБOM.
Штепсельну розетку потрібно встановити біля обладнання та
забезпечити вільний доступ до неї.
Штепсельна вилка шнура живлення повинна бути готова до
виккористання.
Щоб повністю відключити цей пристрій від мережі живлення
змінного струму, вийміть штепсельну вилку зі штепсельної
розетки.
Цeй вирiб може приймати радiоперешкоди, що створюються
мобiльними телефонами пiд час їх використання. Якщо такi
перешкоди є помiтними, будь ласка, збiльшiть вiдстaнь мiж
виpoбом та мобiльним телефоном.
ЦEЙ AПAPAТ ПРИЗHAЧEHИЙ ДЛЯ BИKOPИCTAHHЯ У
ПОМIPHИX KЛlМATИЧHИХ УМОBAХ.
Ідентифікаційне маркування виробу міститься внизу пристроїв.
Технологія аудіокодування MPEG Layer-3 ліцензована
компаніями Fraunhofer IIS і Thomson.
–За наявності цього знаку–
Інформація щодо утилізації в країнах, які не входять в
Європейський Союз
Даний символ дійсний тільки на території
Європейського Союзу.
При потребі утилізації даного виробу зверніться до
місцевого керівництва або дилера щодо правильного
методу її здійснення.
ПОЛАГОДЖЕНІ КОРИСТУВАЧЕМ.
ЛIДOK ПEPEГPIBУ,
,
Page 37

УКРАЇНСЬКА
Заходи безпеки
Зміст
Розташування пристрою
Встановіть пристрій на рівній поверхні у місці, захищеному
від попадання прямого сонячного проміння, впливу високої
температури, підвищеної вологості та надлишкової вібрації. Ці
фактори можуть пошкодити корпус та інші компоненти пристрою і
скоротити строк його служби.
Розташуйте пристрій на відстані не менше, ніж 15 см від стін, щоб
уникнути спотворення звуку та небажаних
Не кладіть важкі предмети на пристрій.
акустичних ефектів.
Напруга
Не використовуйте джерела живлення високої напруги. Це може
призвести до перенапруги пристрою та викликати пожежу.
Не використовуйте джерела живлення постійного струму. Уважно
перевірте джерело живлення перед тим, як встановлювати пристрій
на борту судна або в будь-якому іншому місці, де використовується
постійний струм.
Захист шнура живлення змінного струму
Упевніться, що шнур живлення змінного струму належно
підключений та справний. Поганий контакт та пошкодження кабелю
може спричинити пожежу або ураження електричним струмом. Не
тягніть за кабель, не згинайте його та не кладіть на нього важкі
предмети.
Відключайте шнур живлення тільки за штепсельну вилку.
Витягування за шнур живлення змінного струму може призвести
ураження електричним струмом.
Не беріть штепсельну вилку мокрими руками. Це може призвести
до ураження електричним струмом.
до
Заходи безпеки................................................. 3
Приладдя у комплекті ..................................... 3
Підготовка пульта ДК ...................................... 3
Огляд органів керування ................................ 4
Виконання підключень ................................... 5
Диски .................................................................. 5
USB ..................................................................... 6
Радіо ................................................................... 6
Годинник й таймери ........................................ 7
Звукові ефекти ................................................. 8
Зовнішнє устаткування ................................... 8
Код дистанційного керування ....................... 8
Посібник із усунення несправностей ........... 8
Технічне обслуговування ............................... 9
Технічні характеристики ................................. 9
Підготовка пульта ДК
Сторонні предмети
Не допускайте потрапляння металевих предметів всередину
пристрою. Це може призвести до ураження електричним струмом
або до поломки пристрою.
Не допускайте потрапляння в аппарат рідини. Це може призвести
до ураження електричним струмом або до поломки пристрою. Якщо
це трапилось, негайно відключіть пристрій від джерела живлення та
зверніться до вашого дилера.
Не розпилюйте
містять легкозаймистий газ, який може спалахнути при попаданні у
пристрій.
на пристрій або всередину інсектициди. Вони
Технічне обслуговування
Не намагайтеся відремонтувати пристрій власноруч. У випадку
переривання звуку, згасання індикаторів, появи диму або
виникнення будь-яких інших проблем, які не описані в цій інструкції,
відімкніть шнур живлення змінного струму та зверніться до вашого
дилера або в авторизований центр обслуговування. Ремонт,
розбирання або модифікування пристрою некваліфікованою
особою може призвести до ураження
Щоб подовжити строк служби пристрою, від’єднуйте його від
джерела живлення, коли він не використовується протягом
тривалого часу.
електричним струмом.
Приладдя у комплекті
Перевірте та ідентифікуйте додане приладдя.
1 x Шнур живлення змінного
струму
1 x Кімнатна антена
FM-діапазону
1 x Рамкова антена
AM-діапазону
1 x Пульт ДК
(N2QAYB000639)
(не постачається у комплекті)
Використовуйте лужні або марганцеві батареї.
Налаштуйте батарею таким чином, щоб полюси (+ і –) відповідали
полюсам в пульті дистанційного керування.
Направте пульт дистанційного керування на датчик дистанційного
керування (Z 4), щоб між ними не було будь-яких перешкод.
Пульт працює на максимальній відстані 7 м, якщо знаходится
безпосередньо перед основним пристроєм.
УBAГA!
ламайте і не робіть короткого замикання батареї.
• Не
• Не заряджайте лужні батареї або батареї на основі марганцю.
• Не використовуйте батарею, якщо її кришка відходить.
• Не допускайте нагрівання чи контакту батарей з полум’ям.
• Не залишайте батарею(и) в машині під прямим сонячним
промінням на тривалий термін із закритими вікнами та
• Невідповідне користування батареєю може спричинити витік
електроліту, що може стати причиною пожежі.
• Вийміть батарею, якщо ви не використовуєте дистанційне
керування протягом тривалого періоду часу. Зберігайте в
прохолодному темному місці.
УBAГA!
Якщо батарея встановлена неправильно, існує небезпека
вибуху. Замінюйте її тільки на аналогічну батарейку або
батарейку подібного типу, відповідно до рекомендацій виробника
обладнання. Використані батареї утилізуйте згідно з інструкціями
компанії-виробника.
дверима.
УКРАЇНСЬКА
RQTX1246
3
37
Page 38

УКРАЇНСЬКА
Огляд органів керування
RADIO
EXT-IN
SOUND
PRESET EQ
D.BASS
DISPLAY
DIMMER
SLEEP
PLAY
AUTO OFF
УКРАЇНСЬКА
4
38
Пульт ДК
A
B
C
D
E
F
G
H
Головній пристрій
Вид зверху
Q
R
S
A
D
U
Вид спереду
RQTX1246
I
J
K
L
M
N
O
P
T
K
E
V
W
A Перемикач режиму очікування/увімкнення [`], [1] (Z 7, 9)
Натисніть вимикач, щоб переключити апарат з режиму
увімкнено до режиму очікування і навпаки. Навiть у режимi
очікування апарат споживає невелику кількість електроенергії.
B Цифрові кнопки [1 до 9, 0, ≧10]
Для вибору 2-розрядного числа
Приклад: 16: [≧10] → [1] → [6]
C Видаліть запрограммовану доріжку (Z 6)
D Виберіть джерело сигналу
[USB]: Виберіть USB (Z 6)
[CD]: Виберіть диск (Z 5)
[RADIO, EXT-IN]: Виберіть радіо, USB-роз’єм або роз’єм AUX
(Z 6, 8)
E Основні режими експлуатації
[4/9]: Відтворення або пауза
[8]: Зупинення відтворення
[2], [6]: Пропуск доріжки
[3], [5]: Знайдіть доріжку
[2/3], [5/6]: Пропустіть і знайдіть доріжку
Виберіть попередньо налаштовану радіостанцію
Налаштуйтеся на радіостанцію
Виберіть попередньо налаштовану
радіостанцію
F Виберіть звукові ефекти (Z 8)
G Виберіть функцію автоматичного попереднього налаштування
радіостанцій (Z 7)
H Перегляньте інформацію, яка відображається на дисплеї.
Зменшіть яскравість дисплею
Натисніть і утримуйте кнопку, щоб використати цю функцію.
Для відміни натисніть і утримуйте цю кнопку знову.
I Встановіть таймер режиму очікування (Z 7)
Встановіть годинник і таймер (Z 7)
J Налаштуйте функцію програмування (Z 5, 7)
K Відрегулюйте рівень гучності системи
L Вимкніть звук системи
Натисніть кнопку ще раз, щоб скасувати цю функцію.
Функція тимчасового вимкнення звуку також відміняється, коли
ви регулюєте рівень гучності або коли ви вимикаєте систему.
M Налаштуйте меню відтворення (Z 5)
N Налаштуйте меню радіо (Z 6)
O [R, T]: Пропуск альбома
Налаштуйте годинник
[Y, U]: Виберіть опцію в меню
[OK]: Підтвердіть налаштування
P Автоматичне вимикання системи
Ця функція вимикає систему (окрім випадку, коли джерелом
сигналу є радіо), якщо ви не використовуєте систему приблизно
протягом 30 хвилин.
Для відміни натисніть кнопку два рази.
Q Роз’єм для навушників ( )
Тип штекера: Ø 3,5 мм стерео (не постачається у комплекті)
• Щоб запобігти пошкодженню органів слуху, не слухайте музику
впродовж тривалого часу.
• Надлишковий звуковий тиск у навушниках може спричинити
втрату слуху.
• Прослуховування при повному рівні гучності протягом
тривалого часу може пошкодити слух користувача. Впевніться,
що ви використовуєте навушники, які входять до комплекту
поставки, або рекомендовані навушники.
R Pоз’єм AUX
S USB-роз’єм ( )
T Відкрийте або закрийте розсувні дверцята
U Дисплей
V Розсувні дверцята
W Датчик пульту дистанційного керування
Page 39

УКРАЇНСЬКА
Виконання підключень
Економія електроенергії
Система споживає приблизно 0,2 Вт, коли знаходиться в режимі
очікування. Відімкніть подачу струму, якщо ви не використовуєте
систему.
Після відключення системи деякі налаштування будуть втрачені.
Вам необхідно встановити їх знову.
1
Підключить кімнатну FМ-антену.
Розташуйте антену у місці найкращого прийому сигналу.
Клейка стрічка
2
Натисніть кнопку [CD], а потім натисніть кнопку [4/9], щоб
почати відтворення.
Тримайте пальці подалі від розсувних дверцят, коли вони
закриваються.
Зупинення
відтворення
Пауза
відтворення
Пропуск
альбома
Пропуск
доріжки
Пошук
доріжок на
диску
Натисніть кнопку [8] під час відтворення.
Натисніть кнопку [4/9] під час відтворення.
Натисніть знов, щоб продовжити відтворення.
Натисніть кнопку [R, T].
Натисніть кнопку [2] або [6] (головний
пристрій: [2/3] або [5/6]).
Натисніть i утримуйте [3] або [5] (головний
пристрій: [2/3] або [5/6]).
Функція режиму відтворення
1
Натисніть кнопку [PLAY MENU], щоб вибрати
«PLAYMODE».
2
Натисніть кнопку [Y, U], а потім натисніть кнопку [OK], щоб
вибрати бажаний режим.
2
Підключить рамкову AM-антену.
Клацніть!
3
Підключить кабель живлення змінного струму.
Використовуйте з цією системою кабель подачі живлення
змінного струму, який входить до комплекту поставки.
Не використовуйте кабель подачі живлення змінного струму від
іншого обладнання.
Примітка:
• Ці акустичні системи не мають магнітного екранування. Не ставте
їх біля ТВ, ПК або іншого устаткування, на яке легко впливають
магнітні поля.
• Ви не можете
видалити мережу динаміків.
Диски
Відтворення дисків
1
Натисніть кнопку [CD x, OPEN/CLOSE] на основному
пристрої, щоб відкрити розсувні дверцята.
Вставте диск стороною, щоб етикетка була направлена в ваш
бік.
Натисніть кнопку [CD x, OPEN/CLOSE] знову, щоб закрити
розсувні дверцята.
OFF
PLAYMODE
1-TRACK
1-TR
1-ALBUM
1ALBUM
RANDOM
RND
1-ALBUM
RANDOM
1ALBUM RND
Примітка:
• У випадку відтворення у довільному порядку, неможливо швидко
перейти до тих доріжок, які вже було відтворено або натисніть
числові кнопки.
• Ця функція не працює з функцією «Відтворення за програмою».
• Налаштування повернуться до налаштувань за замовченням при
«OFF PLAYMODE», коли ви відкриєте розсувні дверцята.
Відтворення всіх доріжок.
Відтворення одної вибраної доріжки на диску.
Натискайте кнопки із цифрами для вибору
доріжки.
Відтворення з диска розпочинається з вибраної
доріжки.
Відтворення одного вибраного альбому на диску.
Натисніть кнопку [R, T
Відтворення з одного диска у випадковому
порядку.
Відтворення усіх доріжок з одного вибраного
альбому у випадковому порядку.
Натисніть кнопку [R, T
]
для вибору альбому.
]
для вибору альбому.
Багаторазове відтворення
Ви можете встановити повтор функції «Відтворення за програмою»
або іншої вибраної «функції відтворення».
1
Натисніть кнопку [PLAY MENU], щоб вибрати «REPEAT».
2
Натисніть кнопку [Y, U], щоб вибрати «ON REPEAT», а потім
натисніть кнопку [OK].
» відображається.
«
Для відміни виберіть «OFF REPEAT».
Відтворення за програмою
Ця функція дозволяє запрограмувати відтворення до 24 доріжок.
УКРАЇНСЬКА
Клацніть!
1
Натисніть кнопку [PROGRAM] в режимі зупинки.
Відображається «PGM».
2
Натисніть кнопки з числами, щоб вибрати потрібну доріжку.
Зробіть цей крок знову, щоб запрограмувати інші доріжки.
3
Натисніть кнопку [4/9], щоб почати відтворення.
RQTX1246
5
39
Page 40

УКРАЇНСЬКА
1
Натисніть кнопку [PROGRAM] в режимі зупинки.
2
Натисніть кнопку [R, T] для вибору потрібного альбому.
3
Натисніть кнопку [6], а потім натисніть кнопки з числами,
щоб вибрати потрібні доріжки.
4
Натисніть кнопку [OK].
Зробіть кроки з 2 по 4 знову, щоб запрограмувати інші доріжки.
5
Натисніть кнопку [4/9], щоб почати відтворення.
Скасування
режиму
програмного
відтворення
Повторне
відтворення
програми
Перевірка
програми
Видалення
останньої
доріжки
Стирання всіх
запрограмованих
доріжок
Примітка:
Програмна пам’ять буде очищена, коли ви відкриєте розсувні
дверцята.
Натисніть кнопку [PROGRAM] в режимі
зупинки.
Натисніть кнопку [PROGRAM], а потім
натисніть кнопку [4/9].
Натисніть кнопки [2] або [6], коли в
режимі зупинки на дисплеї відображається
«PGM».
Щоб зробити перевірку під час програмування,
натисніть кнопку [PROGRAM] два рази після
того, як на дисплеї відобразиться напис
«PGM», Потім натисніть кнопки [2] або [6].
Натисніть кнопку [DEL] в режимі зупинки.
Натисніть кнопку [8] у режимі зупинки.
«CLR ALL» відображається. Напротязі 5
секунд натисніть кнопку [8] знову.
Перегляд доступної інформації
Ви можете переглядати наявну інформацію на дисплеї.
Натисніть кнопку [DISPLAY].
Примітка:
• Максимальна кількість символів, які можуть бути відображені,
складає приблизно 30 символів.
• Ця система підтримує версію 1.0, 1.1 і 2.3 теги ID3.
• Текстова інформація про те, що система не підтримує дані, може
відображатися по-різному.
USB
Ви можете під’єднати ваш USB-накопичувач даних і відтворити
доріжки в форматі MP3.
Не використовуйте подовжувальний кабель для USB-роз’єму.
Система не може розпізнати USB-накопичувач даних, який
під’єднаний через кабель.
1
Зменшіть рівень гучності і під’єднайте USB-накопичувач
даних до USB-роз’єму.
2
Натисніть кнопку [USB], а потім натисніть кнопку [4/9], щоб
почати відтворення.
Зупинка
відтворення
Щоб отримати інформацію про інші операції, дивіться розділ
«Диски» (Z 5).
Сумісні пристрої
• USB-накопичувачі даних, які підтримують тільки групову передачу
даних.
• USB-накопичувачі даних, які підтримують повну швидкість в
форматі USB 2.0.
Підтримувані формати
• Папки розглядаються як альбом.
• Файли розглядаються як доріжки.
• Доріжка повинна мати розширення «.mp3» або «.MP3».
• Функція CBI (на англійській мові, Control/Bulk/Interrupt) не
підтримується.
• Файлова система NTFS не підтримується (підтримується тільки
файлова система FAT 12/16/32).
файли можуть не працювати через розмір секторів.
• Деякі
Примітка:
• Максимальна кількість альбомів: 255 альбомів (разом з
• Максимальна кількість доріжок: 2500 доріжок
• Максимальна кількість доріжок в одному альбомі: 999 доріжок
Натисніть кнопку [8] під час відтворення.
Відображається «RESUME».
Натисніть кнопку [4/9], щоб продовжити
відтворення.
АБО
Натисніть кнопку [8] два рази, щоб повністю
зупинити відтворення.
кореневим каталогом)
Радіо
Примітка щодо компакт-дисків
• Цей пристрій може здійснювати доступ до 99
УКРАЇНСЬКА
• Цей пристрій може відтворювати файли в форматі MP3, а також
компакт диски в форматі CD-DA, CD-R та CD-RW, процес запису
яких був фіналізований.
• Ця система може не відтворювати деякі CD-R/RW диски через
спосіб їх запису.
Примітка щодо MP3
• Файли розглядаються як доріжки, а каталоги розглядаються як
альбоми.
• Ця система може отримати доступ до 999 доріжок
(разом з кореневим каталогом) і до 20 сесій.
• Диск має відповідати формату ISO9660, рівень 1 або 2 (за
винятком розширених форматів).
• Для відтворення у визначеному порядку, поставте на початку
назв каталогів та файлів 3-значні номери (префікси) в потрібному
порядку, в якому ви хочете їх відтворювати.
Обмеження щодо відтворення файлів MP3
• Якщо на
• Деякі файли в форматі MP3 не можуть бути відтворені через стан
RQTX1246
• Записи не завжди відтворюються в тому порядку, в якому вони
6
40
диску з файлами у форматі CD-DA були записані файли
MP3, відтворюватимуться лише файли того формату, який був
записаний під час першого сеансу.
диску або запису.
були записані.
доріжок.
, 255 альбомів
Ручна настройка
1
Натисніть кнопку [RADIO, EXT-IN] для вибору діапазону
«FM» aбo «AM».
2
Натискайте кнопку [3] або [5] для настройки на
частоту необхідної станції.
Щоб настроїти автоматично, натисніть і утримуйте кнопку, доки
частота не почне швидко змінюватися.
Покращення якості звуку
Коли вибрана опцiя «FM»
1
Натисніть [RADIO MENU], щоб вибрати «FM MODE».
2
Натисніть кнопку [Y, U], щоб вибрати «MONO», а потім
натисніть кнопку [OK].
Для відміни виберіть «STEREO».
• Режим «MONO» також скасовується, коли Ви змінюєте частоту.
• Вимикайте режим «MONO» під час звичайного прослуховування.
Коли вибрана опцiя «AM»
1
Натисніть [RADIO MENU], щоб вибрати «B.PROOF».
2
Натисніть кнопку [Y, U], щоб вибрати «BP 1» або «BP 2», а
потім натисніть кнопку [OK].
Page 41

УКРАЇНСЬКА
Радіомовлення RDS
Ця система може показати текстові дані, які передаються системою
передічі даних по радіо, що працює в деяких областях.
Натисніть кнопку [DISPLAY].
PS
(Назва радіостанції)
Примітка:
Система передічі даних по радіо може бути недоступна, якщо якість
прийому погана.
→
PTY
(Тип програми)
→
FREQ
(Частота)
Попередні налаштування пам’яті
Можна настроїти 30 станцій FM і 15 станцій AM.
Підготовка
Натисніть кнопку [RADIO, EXT-IN] для вибору діапазону «FM» aбo
«AM».
Автоматична попередня настройка
1
Натисніть кнопку [OK], щоб вибрати опцію «LOWEST»
(найнижча) або «CURRENT» (поточна) частота.
2
Натисніть кнопку [AUTO PRESET], щоб розпочати
попередню настройку.
Для відміни натисніть кнопку [8].
Ручна попередня настройка
1
Натисніть кнопки [3] або [5], щоб налаштуватися на
радіостанцію.
2
Натисніть кнопку [PROGRAM].
3
Натисніть числові кнопки, щоб вибрати номер попередньо
налаштованої радіостанції.
Зробіть кроки з 1 по 3 знову, щоб попередньо налаштувати
більше станцій.
Нова радіостанція замінює будь-яку радіостанцію, яка займає
той же номер попередньо налаштованої радіостанції.
Вибір попередньо налаштованої радіостанції
Натисніть кнопки з числами [2] або [6] (основний
пристрій: [2/3] або [5/6]), щоб вибрати попередньо
налаштовану радіостанцію.
Налаштування станцій АМ
(тільки для головного пристрою)
Ця система також може отримувати сигнал AM із кроком 10 кГц.
1
Натисніть кнопку [RADIO, EXT-IN], щоб вибрати «FM» aбo
«AM».
2
Натисніть і утримуйте кнопку [RADIO, EXT-IN].
Через декілька секунд на дисплеї відображається мінімальна
радіочастота на цей час. Відпустить кнопку, коли мінімальна
частота зміниться.
• Щоб повернутися до початкового налаштування, виконайте
вищенаведені кроки знову.
• Після того, як ви зміните налаштування, попередньо налаштовані
частоти будуть стерті.
Годинник й таймери
Налаштування годинника
Годинник відображає час у 24-годинному форматі.
1
Натисніть кнопку [CLOCK/TIMER] для вибору «CLOCK».
2
Напротязі 10 секунд натисніть кнопку [R, T], щоб
встановити час.
3
Натисніть кнопку [OK].
Натисніть кнопку [CLOCK/TIMER], щоб показати годинник на
декілька секунд.
Примітка:
Для забезпечення точності годинника періодично встановлюйте час.
Таймер режиму очікування
Таймер режиму очікування вимикає систему у встановлений час.
Натисніть кнопку [SLEEP], щоб вибрати налаштування
(у хвилинах).
Для відміни виберіть «OFF».
30 MIN OFF →120 MIN→→ 60 MIN→90 MIN
Щоб показати час, що залишився
Натисніть кнопку [SLEEP].
Примітка:
• Таймер сну може бути використаний разом з таймером
відтворення.
• Таймер режиму очікування завжди вмикається першим.
Впевніться, що ви не встановили час таймерів таким чином, що
вони накладаються один на одного.
Таймер відтворення
Ви можете настроїти таймер, щоб пристрій увімкнувся в заданий
час і розбудив вас.
Увімкніть систему і встановіть годинник.
Підготуйте джерело музики, яке ви хочете прослухати (компактдиск, радіо, USB чи AUX), та налаштуйте рівень гучності.
1
Натисніть кнопку [CLOCK/TIMER] для вибору «#PLAY 1»,
«#PLAY 2» або «#PLAY 3».
2
Напротязі 10 секунд натисніть кнопку [R, T], щоб
встановити час початку відтворення.
3
Натисніть кнопку [OK].
4
Виконайте кроки 2 і 3 знову, щоб встановити час вимкнення.
Щоб запустити таймер
5
Натисніть [#, PLAY], щоб почати «#PLAY 1», «#PLAY 2» або
«#PLAY 3».
6
Натисніть кнопку [`], щоб вимкнути систему.
Система має бути вимкненою, щоб почав працювати таймер.
Зміна
налаштувань
Зміна
джерела
сигналу або
рівня гучності
Перевірка
налаштувань
Скасування
Примітка:
• Таймер відтворення починає відтворення при низькому рівні
гучності. При цьому рівень гучності зростає поступово до
• попередньо налаштованого рівня.
• Якщо таймер увімкнено, він буде спрацьовувати у встановлений
час кожного дня.
• Якщо ви вимикаєте систему і вмикаєте її знову, коли таймер
працює, таймер
завершення.
Виконайте кроки з 1 по 4 і 6 знову (Z вище).
1) Натисніть кнопку [#, PLAY] два рази, щоб
видалити індикатор таймеру на дисплеї.
2) Зміна джерела чи гучності.
3) Зробіть кроки 5 і 6 (Z вище).
Натисніть кнопку [CLOCK/TIMER] для вибору
«#PLAY 1», «#PLAY 2» або «#PLAY 3».
Натисніть кнопку [#, PLAY] два
видалити індикатор таймеру на дисплеї.
не зупинить запис, коли прийде час його
рази, щоб
УКРАЇНСЬКА
RQTX1246
7
41
Page 42

УКРАЇНСЬКА
Звукові ефекти
Зміна якості звуку
1
Натисніть кнопку [SOUND], щоб вибрати звуковий ефект.
2
Напротязі 3 секунд натисніть кнопку [Y, U] щоб вибрати
бажане налаштування.
BASS -4 до +4
TREBLE
SURROUND «ON SURROUND» або «OFF SURROUND»
INPUT LEVEL
(Для джерела AUX)
«NORMAL» або «HIGH»
Попереднє налаштування еквалайзера (Preset EQ)
Натисніть кнопку [PRESET EQ], щоб вибрати налаштування.
HEAVY Додає сили звучанню року
SOFT Для фонової музики
CLEAR Покращує звучання високих частот
VOCAL Додає сили вокалу
FLAT Відміняє звуковий ефект
D.BASS
Ця функція дозволяє вам насолоджуватися потужним ефектом
підсилених низьких частот.
Натисніть кнопку [D.BASS] для вибору індикації «ON D.BASS»
або «OFF D.BASS».
Зовнішнє устаткування
Використання роз’єму AUX
Ви можете під’єднати портативне аудіоустаткування і прослухати
звук, використовуючи цю систему.
Підготовка
Вимкніть еквалайзер (якщо він є) переносного аудіообладнання,
щоб запобігти спотворенню звуку.
Зменшіть рівень гучності системи і портативного аудіоустаткування
перед тим, як ви під’єднаєте або від’єднаєте портативне
аудіоустаткування.
Код дистанційного керування
Коли інше устаткування торгівельної марки Panasonic відповідає
на команди дистанційного керування цієї системи, змініть код
дистанційного керування цією системою.
Підготовка
Натисніть кнопку [RADIO, EXT-IN], щоб вибрати роз`єм «AUX».
Щоб встановити код «REMOTE 2»
1
Натисніть і утримуйте кнопку [RADIO, EXT-IN] на основному
пристрої і кнопку [2] на пульті дистанційного керування,
доки не почне відображатися напис «REMOTE 2».
2
Натисніть і утримуйте кнопку [OK] і [2] напротязі мінімум 4
секунд.
Щоб встановити код «REMOTE 1»
1
Натисніть і утримуйте кнопку [RADIO, EXT-IN] на основному
пристрої і кнопку [1] на пульті дистанційного керування,
доки не почне відображатися напис «REMOTE 1».
2
Натисніть і утримуйте кнопку [OK] і [1] напротязі мінімум 4
секунд.
Посібник із усунення несправностей
Перш ніж звертатися до ремонтної служби, прочитайте надані
нижче поради. Якщо ви маєте сумніви відносно деяких пунктів
перевірки, або якщо перелічені дії не вирішують проблему,
зверніться за інструкціями до свого дилера.
■
Загальні несправності
Неможна виконувати будь-які операції за допомогою пульта
дистанційного керування.
• Перевірте, щоб батарея була встановлена правильно.
Звук спотворений або відсутній.
• Збільшіть рівень гучності.
• Вимкніть систему, визначте і усуньте причину, а потім увімкніть
систему знову. Причиною може бути перегрузка динаміків
через надмірний рівень гучності або надмірну потужність, а
також коли
навколишнього середовища.
Під час відтворення може чутися гул.
• Біля кабелю розташований електричний кабель змінного струму
або флуоресцентна лампа. Тримайте інші побутові прилади і
кабелі подалі від кабелю цієї системи.
система використовується при високій температурі
УКРАЇНСЬКА
Аудіокабель
(не постачається
в комплекті)
1
Під’єднайте переносне аудіообладнання.
Тип штекера: Ø 3,5 мм стерео
2
Натисніть кнопку [RADIO, EXT-IN] щоб вибрати «AUX».
3
Відтворення з портативного аудіообладнання.
Щоб налаштувати рівень вхідного звуку
(Z «Зміна якості звуку»).
Виберіть режим «NORMAL» (нормальний), якщо звук є
спотвореним під час відтворення в режимі «HIGH» (виисокий).
RQTX1246
Примітка:
• Прочитайте інструкції з експлуатації портативного
8
аудіоустаткування для отримання більш детальної інформації.
42
• Компоненти і кабелі продаються окремо.
Портативне
аудіообладнання
(не постачається
в комплекті)
■
Диски
Інформація на дисплеї не відображається правильно.
Відтворення не починається.
• Ви не вставили диск правильно. Вставте його правильно.
• Диск забруднений. Проведіть очистку диску.
• Замініть диск, якщо він подряпаний, деформований чи
нестандартний.
• Існує конденсація. Дозвольте системі висохнути від 1 до 2 годин.
Усі доріжки відображаються неправильно.
Диск не читається.
Чується спотворений звук.
Ви вставляєте диск, який система не може відтворити. Змініть
•
диск на той, який може бути відтворенний.
• Ви вставляєте диск, який не був фіналізований.
Page 43

УКРАЇНСЬКА
■
Радіо
Чути звук вдаряння.
• Вимкніть TB або перемістіть його подалі від системи.
• Налаштуйте на режим «BP 1» або «BP 2», коли тюнер пристрою
працює в режимі AM.
Під час радіомовлення в діапазоні AM чується низький гул.
• Перемістіть антену від інших кабелів і шнурів.
■
USB
USB-накопичувач даних або контент, який в ньому містіиться,
не може бути прочитаний.
• Формат USB-накопичувача даних або контенту, який в ньому
містіиться, є несумісним з системою.
• USB-накопичувачі даних з об’ємом пам’яті більше 32 Гб не
можуть працювати в деяких умовах.
USB-накопичувач даних працює повільно.
• Завантаження великого обсягу даних
USB-накопичувача даних потребує більше часу.
Час відтворення, який відображається на дисплеї,
відрізняється від фактичного часу відтворення.
• Перемістіть дані на інший USB-накопичувач даних або на зробіть
резервне копіювання даних і відформатуйте USB-накопичувач
даних.
■
Відображення інформації на дисплеї
основного пристрою
«NO PLAY»
• Перевірте контент. Ви можете відтворювати тільки формат даних,
який підтримується.
• Ця система може зчитати і відтворити до 255 альбомів або
каталогів (аудіо або іншого типу даних).
«F76» або «F61»
• Виникла проблема з енергопостачанням.
«ERROR»
• Була зроблена некоректна операція. Прочитайте інструкцію та
спробуйте ще раз.
«NOT MP3/ERROR»
• Формат MP3, який не підтримується. Цю доріжку
• після чого почнеться відтворення наступної доріжки.
«VBR–»
• Система не може показати час відтворення, який залишився, для
доріжок зі змінною швидкістю передачі бітів (VBR).
«NODEVICE»
• USB-накопичувач даних, не під’єднаний. Перевірте з’єднання.
Відновлення вмісту пам’яті (ініціалізація)
У разі виникнення поданих далі обставин виконайте наведені
нижче інструкції, щоб відновити вміст пам’яті:
• Відсутня реакція на натискання кнопок.
• Ви бажаєте очистити та відновити вміст пам’яті.
Щоб скинути налаштування в пам’яті
1
Від’єднайте шнур живлення змінного струму.
(Почекайте 3 хвилини перед тим, як продовжити
виконувати крок 2.)
2
Поки ви натиснули і утримуєте кнопку [1] на основному
пристрої, під’єднайте кабель електроживлення знову.
На дисплеї відображається напис « – – – – – – – – ».
3
Відпустіть кнопку [1].
Всі налаштування знову повернулися до налаштувань,
встановлених на заводі-виробнику.
Необхідно ввести відповідні налаштування в пам’яті знову.
або великий об’єм пам’яті
буде пропущено,
Технічні характеристики
■
Секція підсилювача
Середньоквадратичне значення вихідної потужності у
стереорежимі
Передній канал (по обох каналах)
5 Вт на канал (6 Ом), 1 кГц, 10% THD
Середньоквадратичне значення загальної потужності у
стереорежимі 10 Вт
■
Tюнер FM/AM діапазону, роз`єми
Налаштована станція 30 станцій діапазону FM
15 станцій діапазону AM
Частотна модуляція (FM)
Частотний діапазон 87,50 МГц до 108,00 МГц (крок –50 кГц)
Роз`єм антени 75 Ом (незбалансований)
Амплітудна модуляція (AM)
Частотний діапазон 522 кГц до 1629 кГц (крок –9 кГц)
520 кГц до 1630 кГц (крок –10 кГц)
Гніздо для підключення навушників
Роз`єм Стерео, гніздо 3,5 мм
AUX (на задній панелі)
Роз`
єм Стерео, гніздо 3,5 мм
■
Секція диска
Диски, що відтворюються (8 см або 12 см)
CD, CD-R/RW (CD-DA, диски у форматі MP3
MPEG-1 Layer 3, MPEG-2 Layer 3
Відбір
Довжина хвилі 790 нм (CD)
Потужність лазерного випромінювання CLASS 1 (CD)
Аудіовихід (Диск)
Кількість каналів 2 кан. (FL, FR)
FL = Передній лівий канал
FR = Передній правий канал
■
Секція USB
USB-роз`єм
Стандарт USB USB 2.0 з повною швидкістю передачі даних
Підтримка мультимедійних файлів MP3 (
Файлова система USB-пристрою FAT 12, FAT 16, FAT 32
Живлення порту USB 500 мA (макс.)
■
Секція динаміків
Тип 1-полосна система з 1 динаміком (відбиття басу)
Акустична система(и)
Повний діапазон 8 см конічного типу
Загальний опір 6 Ом
Частотний діапазон Від 60 Гц до 25 кГц (–16 дБ)
Від 90 Гц до 22 кГц (–10 дБ)
■
Загальні параметри
Живлення Від 220 до 240 В змінного струму, 50 Гц
Споживана потужність 12 Вт
Габарити (Ш x В x Г) 400 мм x 221 мм x 110 мм
[Г = 69 mm (хвил.)]
Вага 2,0 кг
Робочий діапазон температури Від 0°С до +40°С
Робочий діапазон вологості
Споживання енергії в режимі очікування 0,2 Вт (приблизно)
Від 35% до 80% відносної вологості (без конденсації)
)
.mp3)
УКРАЇНСЬКА
Технічне обслуговування
Щоб очистити цю систему, протріть її м’якою і сухою тканиною.
• Ніколи не використовуйте алкоголь, розчинник для фарб або
бензин, щоб очистити цю систему.
• Перед використанням хімічно обробленої серветки зверніться до
інструкції щодо поводження з нею.
Примітка:
1) Технічні характеристики можуть бути змінені без попередження.
Вага та габарити є приблизними.
2) Сумарне значення коефіцієнта нелінійних спотворень вимірюється
цифровим аналізатором спектру.
RQTX1246
9
43
Page 44

Panasonic Corporation
Web Site: http://panasonic.net
EU
Pursuant to at the directive 2004/108/EC, article 9(2)
Panasonic Testing Centre
Panasonic Marketing Europe GmbH
Winsbergring 15, 22525 Hamburg, Germany
En Po Cz Ru Ur
RQTX1246-1E
L0211CH1031
 Loading...