

Page 1
User Manual/Mode d’emploi
Wired Remote Control/Télécommande câblée
CZ-RD516C-1
User Manual
Wired Remote Control
Mode d’emploi
Télécommande câblée
2-5, 10
6-10
Français English
F569672
Page 2
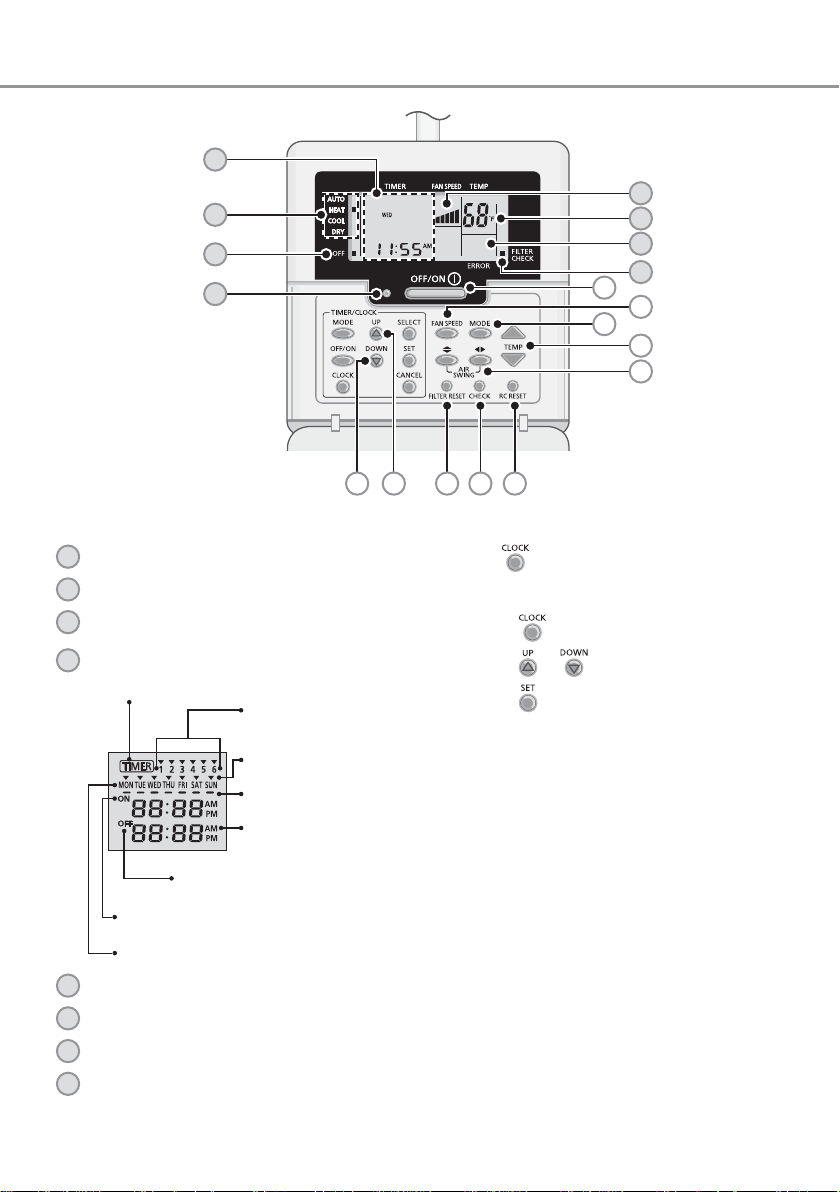
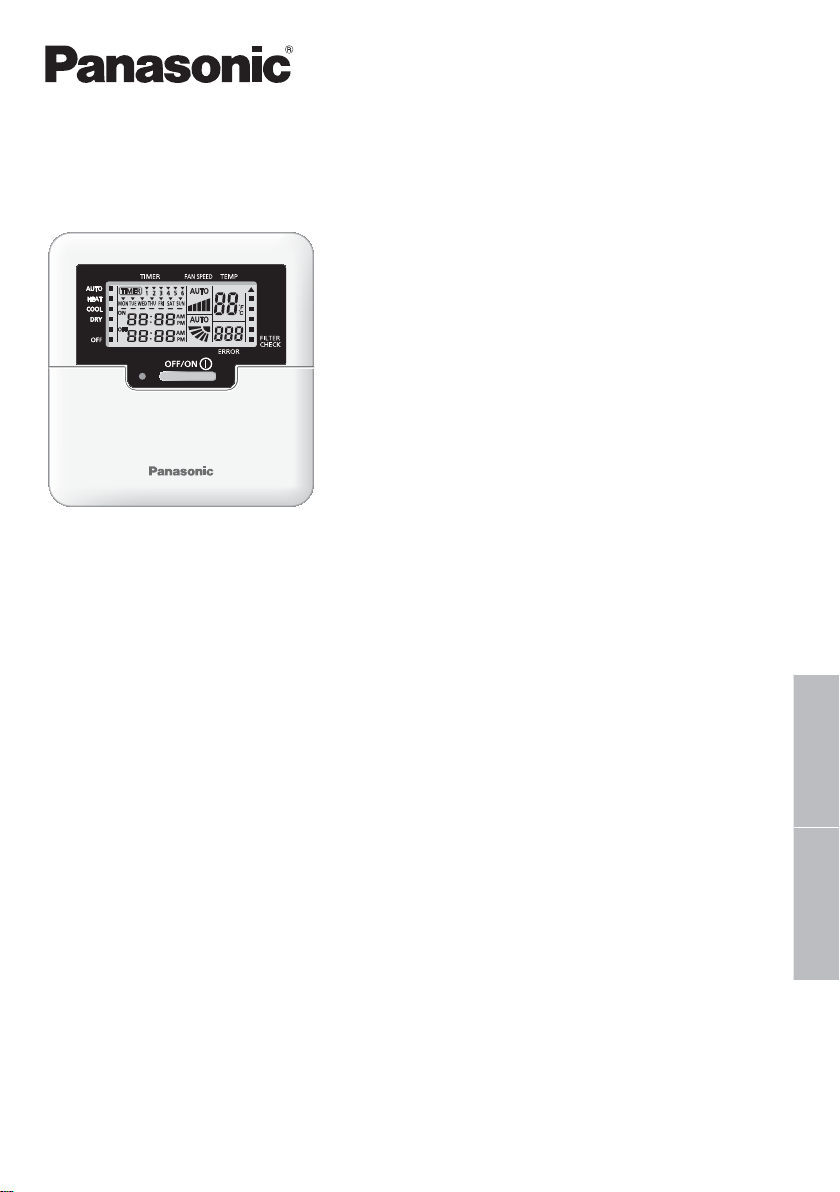
Wired remote control
d
c
b
a
6 7 910 8
e
f
g
h
1
4
3
2
5
Remote Control Display
a
OPERATION LED
b
OFF INDICATOR
OPERATION MODE SELECTION
c
INDICATOR
d
TIMER/CLOCK SETTING DISPLAY
Lights up if Timer operation is selected
6 different
programmes can be
set in a day (1 ~ 6)
Indicates the selected
day
Indicates the next
timer operation day
Time to be selected
(10 minutes step)
OFF Timer . To automatically
switch “OFF” the unit.
ON Timer. To automatically switch “ON”
the unit.
Day to be selected
e
FAN SPEED DISPLAY
f
TEMPERATURE SETTING DISPLAY
g
ERROR CODE DISPLAY
h
FILTER CHECK INDICATOR
Remote Control Preparation
• Press
seconds to show 12-hour (am/pm) or 24-hour
time indication.
1.
2.
3.
4. Repeat steps 2 and 3 to set the current time.
and hold for approximately 5
Press
Press
Press
or to select current day.
to confi rm.
2
Page 3
Press the remote control’s button
1
TO TURN ON OR OFF THE UNIT
• Please be aware of the OFF indication on the
remote control display to prevent the unit from
starting/stopping improperly.
2
TO SET TEMPERATURE
• Selection range: 60°F ~ 86°F.
3
TO SELECT OPERATION MODE
AUTO mode - For your convenience
• Unit selects operation mode during startup
according to temperature setting and room
temperature.
HEAT mode - To enjoy warm air
• Unit takes a while to warm up. The power
indicator blinks during this operation.
COOL mode - To enjoy cool air
• Use curtains to screen off sunlight and outdoor
heat to reduce power consumption during cool
mode.
DRY mode - To dehumidify the environment
• Unit operates at low fan speed to give a gentle
cooling operation.
4
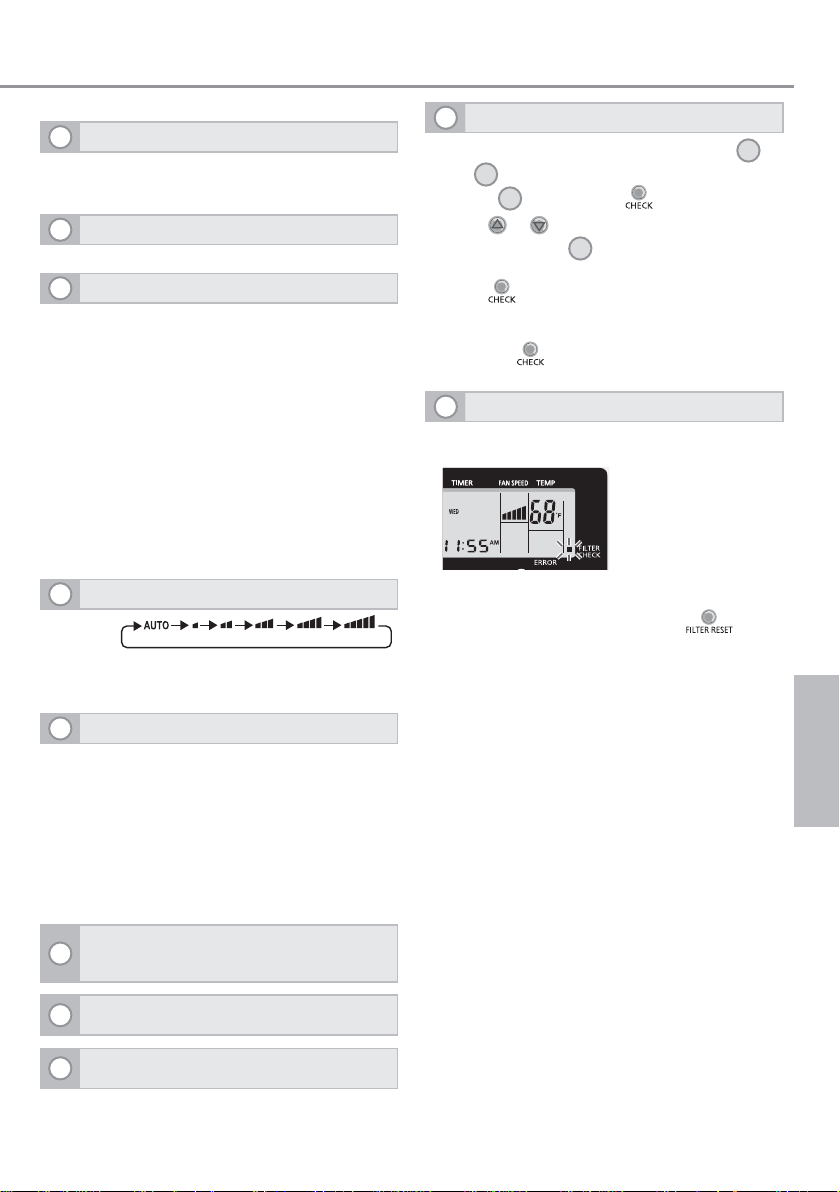
TO SELECT FAN SPEED
FAN SPEED
• For AUTO, the indoor fan speed is
automatically adjusted according to the
operation mode.
5
TO ADJUST AIRFLOW DIRECTION
• Keeps the room ventilated.
• In COOL/DRY mode, if AUTO is set, the louver
swing left/right and up/down automatically.
• In HEAT mode, if AUTO is set, the horizontal
louver fi x at predetermined position. The
vertical louver swing left/right after the
temperature rises.
• For Hide-Away models, AIR SWING buttons
are not in use. Airfl ow direction can not be
adjusted.
Press and hold for approximately 10
6
seconds to show temperature setting in °C
or °F.
9
RETRIEVE ERROR CODE
• During operation, the unit stops and both
and b is OFF indicates abnormality occurs.
1. Ensure a is OFF, press for 5 seconds.
2. Press or . If error code and abnormality
can be identifi ed, a will be ON continuously,
then write down the error code.
3. Press for 5 seconds to quit checking.
4. Turn the unit off and reveal the error code to
authorized dealer.
Note: Press
switch (Not used in normal operation).
10
AIR FILTER MAINTENANCE
Cleaning is needed when “FILTER CHECK”
indicator is ON.
• lt is recommended to clean the air fi lter every 6
weeks.
• After the air fi lter is cleaned, press to
reset.
• Do not operate without an air fi lter.
• Wash/rinse the fi lters gently with water to avoid
damage to the fi lter surface.
• Do not dry the part with a hair dryer or a stove.
• Replace any damaged fi lters.
for 10 seconds to enter AC reset
a
English
Press and hold for 5 seconds to dim or
7
restore the unit’s indicator brightness.
Press to restore the remote control’s
8
default setting.
3
Page 4

To set the timer
DAILY TIMER SETTING
• To turn ON or OFF the unit at a preset time.
1
2
• Press once to change the display from
1
Clock to Timer or vice-versa.
• Press for more than 4 seconds to change
the display from Daily Timer to Weekly
Timer or vice-versa.
2
Select ON or OFF timer
3
Set the time
4
Confi rm
• To cancel ON or OFF timer, press .
• Timer operation is based on the clock set in the
remote control and repeats daily once set.
• The timer closest to the current time will be
activated fi rst.
• If timer is cancelled manually or due to power
failure, you can restore the previous setting by
pressing .
3
4
WEEKLY TIMER SETTING
• Daily timer and weekly timer could not be set at
the same time.
• Promotes energy saving by allowing you to set
up to 6 programmes in any given day.
1. Press TIMER
display to weekly timer.
2. Press TIMER or to select your desired
day.
3. Press to confi rm your selection.
4. “1” will be blinking, press to set programme
1.
5. Press TIMER to select ON or OFF timer.
6. Press TIMER or to select your desired
time.
If you want to set the timer together with your
desired temperature, press to select the
temperature.
7. Press to confi rm programme 1. The selected
day will be highlighted with .
• After 2 seconds, the display will move to the
next programme. Repeat steps 4 to 7 to set
programmes 2 to 6.
• Same timer programme cannot be set in the
same day.
• During timer setup, if no button is pressed within
30 seconds, or if the
setting at that moment is confi rmed and timer
setup is ended.
for 4 seconds to change
button is pressed, the
4
Page 5

OPERATION DETAILS
NOTE
The timer setting will shown at wired remote
control only but not at indoor unit’s TIMER
indicator.
Check Current Timer Programme
Perform the step below to check the timer
programme for a particular day.
1. Press TIMER
2. Press
3. Press TIMER
shown, press to confi rm your selection.
4. Press TIMER
programmes.
to enter timer mode.
to enter day setting.
or until your desired day is
or to check the set
Modify Current Timer Programme or Add
New Timer Programme
1. Press TIMER to enter timer mode.
2. Press
3. Press TIMER
shown.
4. Perform steps 4 to 7 of “WEEKLY TIMER
SETTING” to modify existing timer programme,
or add any timer programme.
to enter day setting.
or until your desired day is
Cancel Current Timer Programme
Perform the step below to cancel the timer
programme for a particular day.
• POWERFUL, QUIET operation setting could be
operate according to wireless remote control.
• When wired remote control is in operation, the
timer setting from wireless remote control will be
cancelled.
1. Press
2. Press TIMER
shown.
3. Press
4. Press TIMER
programme is shown.
Press to cancel the programme and
will disappear.
to enter day.
or until your desired day is
to enter programme setting.
or until your desired
Disable & Enable Weekly Timer
• To disable weekly timer setting, press TIMER
, then press .
• To enable previous weekly timer setting, press
TIMER
, then press .
English
5
Page 6

Information/Informations importantes
Federal Communications Commission Interference Statement
This device complies with part 15 of the FCC Rules. Operation is subject to the following two
conditions: (1) This device may not cause harmful interference, and (2) this device must accept any
interference received, including interference that may cause undesired operation.
This equipment has been tested and found to comply with the limits for a Class B digital device,
pursuant to part 15 of the FCC Rules. These limits are designed to provide reasonable protection
against harmful interference in a residential installation. This equipment generates, uses and can
radiate radio frequency energy and, if not installed and used in accordance with the instructions,
may cause harmful interference to radio communications. However, there is no guarantee
that interference will not occur in a particular installation. If this equipment does cause harmful
interference to radio or television reception, which can be determined by turning the equipment off
and on, the user is encouraged to try to correct the interference by one or more of the following
measures:
• Reorient or relocate the receiving antenna.
• Increase the separation between the equipment and the receiver.
• Connect the equipment to an outlet on a circuit different from that to which the receiver is
connected.
• Consult the dealer or an experienced radio/TV technician for help.
FCC Caution: To assure continued compliance, follow the attached installation instructions. Any
changes or modifi cations not expressly approved by the party responsible for compliance could void
the user’s authority to operate this equipment.
Industry Canada Notice
This Class B digital apparatus complies with Canadian ICES-003.
Avis de la FCC
Cet appareil est conforme à la section 15 des règlements de la FCC. Le fonctionnement est soumis
aux deux conditions suivantes : (1) cet appareil ne doit pas émettre de brouillage nuisible, et (2) cet
appareil doit accepter toute interférence, y compris toute interférence qui pourrait occasionner un
fonctionnement inopportun.
Ce matériel a fait l’objet de tests et il a été trouvé conforme aux limites établies pour un appareil
numérique de la classe B comme il est stipulé à la section 15 des règlements de la FCC. Ces
limites sont conçues pour assurer une protection raisonnable contre le brouillage nuisible dans un
environnement résidentiel. Ce matériel génère, utilise et peut émettre de l’énergie de fréquence
radio et, s’il n’est pas installé et utilisé conformément aux instructions, il peut provoquer un brouillage
nuisible aux communications radio. Cependant, on ne peut garantir que le brouillage n’aura pas
lieu dans le cadre d’une installation particulière. Si ce matériel cause un brouillage nuisible de
la réception radio ou de la télévision, ce qui peut être déterminé en mettant l’appareil hors et en
marche, vous êtes encouragé à remédier à la situation en prenant les mesures suivantes :
• Réorienter ou déplacer l’antenne réceptrice.
• Augmenter la distance entre l’appareil et le récepteur.
• Brancher l’appareil dans une prise d’un circuit différent de celui auquel est branché le récepteur.
• Consulter un revendeur ou un technicien radio/télévision chevronné pour obtenir de l’aide.
Mise en garde de la FCC : Pour assurer la conformité de cet appareil, suivre les directives
d’installation fournies. Tout changement ou toute modifi cation non expressément autorisée par le site
responsable de la conformité risque d’annuler la permission qu’a l’utilisateur de faire fonctionner le
présent appareil.
Avis d’Industrie Canada
Cet appareil numérique de la classe B est conforme à la norme NMB-003 du Canada.
10
Page 7

Website/Site Web: http://www.panasonic.com
For support: http://www.panasonic.ca/english/support
Pour le soutien: http://panasonic.ca/french/support
© Panasonic Corporation 2014
Printed in China
Imprimé en Chine
For inquiries (U.S.A.), please call 1-800-851-1235 (Pour les É.-U.)
Panasonic Corporation
Website: http://panasonic.net/
Panasonic Canada Inc.
F569672
SS0114-0
 Loading...