

Page 1

Getting Started
Page 2

Copyright and Trademark
© 2005 Palm, Inc. All rights reserved.
Palm, Addit, Blazer, Graffiti, HotSync, Palm Powered, Palm OS, the Palm logo, and VersaMail are among the
trademarks or registered trademarks owned by or licensed to Palm, Inc. All other brand and product names
are or may be trademarks of, and are used to identify products or services of, their respective owners.
Wi-Fi is a registered certification mark of the Wi-Fi Alliance. This product contains ACCESS Co., Ltd.’s NetFront
3.0 Internet browser software. Copyright © 1996-2003 ACCESS Co., Ltd. and ACCESS Systems America, Inc.
NetFront is the trademark or registered trademark of ACCESS Co., Ltd. in Japan and in other countries except
the United States of America. NetFront is a registered trademark of NetFront Communications, Inc. in the
United States of America and is used under a license. A portion of this software includes software modules
developed by the Independent JPEG Group. RealNetworks is the owner of all right, title, and interest in the
RealNetworks Marks and RealNetworks logos. No person or entity may reproduce or use (or authorize the
reproduction or use of) the RealNetworks Marks or RealNetworks logos in any manner other than expressly
authorized by RealNetworks. Unauthorized use of RealNetworks Marks or RealNetworks logos is strictly
prohibited.
Disclaimer and Limitation of Liability
Palm, Inc. assumes no responsibility for any damage or loss resulting from the use of this guide.
Palm, Inc. assumes no responsibility for any loss or claims by third parties which may arise through the use
of this software. Palm, Inc. assumes no responsibility for any damage or loss caused by deletion of data as a
result of malfunction, dead battery, or repairs. Be sure to make backup copies of all important data on other
media to protect against data loss.
[
! ]
IMPORTANT
using the accompanying software program(s). Using any part of the software indicates that you
accept the terms of the End User Software License Agreement.
Please read the End User Software License Agreement with this product before
PN: 406-10454-00
T|X Handheld ii
Page 3

Table of Contents
About This Guide ..................................................................vii
Tips for viewing this guide.........................................................................vii
What’s in this guide? .................................................................................viii
Chapter 1: Your Handheld .......................................................1
What’s on my handheld? .............................................................................2
What software do I have?.............................................................................6
Using the status bar....................................................................................12
Rotating the screen.....................................................................................13
Opening applications..................................................................................14
Using the 5-way navigator .........................................................................16
Entering information on your handheld ...................................................18
Entering information using desktop software..........................................20
Using menus ...............................................................................................23
Learn more ..................................................................................................24
Do’s and don’ts ...........................................................................................25
Beyond the basics.......................................................................................28
Chapter 2: Moving Info Between Your Handheld
and Your Computer ................................................................29
Why synchronize information? ..................................................................30
What information is synchronized?...........................................................31
How to synchronize ....................................................................................32
Installing applications to your handheld ..................................................33
Beyond the basics.......................................................................................35
Chapter 3: Your Photo and Video Organizer .......................36
Copying photos and videos .......................................................................37
Viewing photos and videos .......................................................................38
Organizing photos and videos into albums..............................................41
T|X Handheld iii
Page 4

Sending a photo or video using Bluetooth® wireless technology.........44
Beyond the basics.......................................................................................45
Chapter 4: Your MP3 Player ..................................................46
Using Rhapsody as your desktop music application...............................47
Setting up Rhapsody for MP3....................................................................48
Transferring MP3 files to your handheld ..................................................50
Transferring music from a CD to your handheld .....................................54
Playing music on your handheld...............................................................56
Beyond the basics.......................................................................................57
Chapter 5: Your Microsoft Office File Manager ...................58
Creating and managing Office files ...........................................................59
Opening files from within Documents ......................................................60
Beyond the basics.......................................................................................61
Chapter 6: Your Personal Information Organizer ................62
Organizing your personal information......................................................63
Managing your contacts.............................................................................64
Managing your calendar ............................................................................68
Managing your tasks ..................................................................................72
Beyond the basics.......................................................................................75
Chapter 7: Your Memos and Notes ......................................76
Organizing your memos and notes ...........................................................77
Managing your memos ..............................................................................78
Managing your notes .................................................................................80
Beyond the basics.......................................................................................82
Chapter 8: Your Wireless Connections ................................83
What can I do with built-in wireless technology? ....................................84
When would I use Wi-Fi or Bluetooth technology? .................................84
Setting up a Wi-Fi network connection.....................................................86
Accessing email and the web using Wi-Fi® functionality .......................91
T|X Handheld iv
Page 5

Entering basic Bluetooth® settings ...........................................................93
Setting up a Bluetooth® phone connection .............................................94
Accessing email and the web with Bluetooth® wireless technology ....97
Setting up a connection for Bluetooth synchronization ..........................99
Beyond the basics.....................................................................................103
Chapter 9: Your Email..........................................................104
Setting up an account...............................................................................105
Getting and reading email .......................................................................112
Sending an email message......................................................................113
Working with attachments .......................................................................114
Working with Microsoft Exchange ActiveSync ......................................118
Beyond the basics.....................................................................................119
Chapter 10: Your Text Messaging Tool...............................120
Sending a text message ...........................................................................121
Viewing a text message ...........................................................................122
Beyond the basics.....................................................................................123
Chapter 11: Your Web Browser ..........................................124
Accessing a web page ..............................................................................125
Beyond the basics.....................................................................................126
Chapter 12: Your Expandable Storage...............................127
What type of expansion cards can I use? ...............................................128
How can expansion cards help me?........................................................128
Removing an expansion card ..................................................................129
Inserting an expansion card.....................................................................130
Beyond the basics.....................................................................................131
Chapter 13: Your Personal Settings ...................................132
Changing entries in Favorites ..................................................................133
Preventing your handheld from turning on by accident .......................134
Conserving battery power........................................................................135
T|X Handheld v
Page 6

Setting the date and time.........................................................................137
Changing the screen fonts .......................................................................139
Changing the background of your screen ..............................................141
Correcting problems with tapping ..........................................................142
Selecting sound settings ..........................................................................143
Beyond the basics.....................................................................................144
Chapter 14: Common Questions .......................................145
Beyond the basics.....................................................................................150
Product Regulatory Information .........................................151
Index ......................................................................................157
T|X Handheld vi
Page 7

About This Guide
[ ! ]
Before You Begin
Complete the steps in
Read This First in your
handheld package to set
up your handheld and
install the software on
your computer and your
handheld.
This guide tells you everything you need to know to start using your handheld—
from the things you’ll do every day, to the things that make your handheld not
only useful, but fun.
Tips for viewing this guide
Here are some helpful tips for making it easier to read and find information in this guide as you
view it in Adobe
• To magnify the page, click the magnifying glass , move the cursor (which is now a
magnifying glass) over the page, and click repeatedly. Click Previous View ( or depending
on your version of Reader) to return to the original view.
• Click an entry in the Table of Contents or Index to go directly to that section of the guide.
• If you click a link and go to a page in the guide, to return to the page you were on before you
clicked the link, click Previous View ( or depending on your version of Reader).
• When selecting the page(s) to print, be sure to use the file page number shown at the bottom of
your computer screen, not the printed page number. For example, to print the first page of the
Your Handheld chapter, select page 10 (the file page), not page 1 (the printed page).
®
Reader®:
T|X Handheld vii
Page 8
What’s in this guide?
The info in this guide includes step-by-step instructions, links to cross-references, and sidebars.
Step-by-step instructions
Here you’ll find how-to information. Look for these cues in instructions:
Continued
Done
[
! ]
IMPORTANT
[ & ] OPTIONAL A step you might find useful.
NOTE
WINDOWS ONLY
MAC ONLY
Cue that means the procedure continues on the next page.
Cue that signals the end of the procedure. You’re done.
A step that you must follow; otherwise, you could experience an
error or even lose information.
Information that applies only in certain cases or that tells more about
a procedure step.
A procedure or text that applies to one platform only. In most cases,
if you see one heading, check the following or preceding sections for
the other. Sometimes there is no Mac counterpart for a Windows
procedure or text; this feature is not available to Mac users.
Links
Links appear as underlined words throughout this guide. Links in body text or sidebars take you to
other sections of this guide or to the User Guide on the web. The In this chapter list on the first
page of each chapter contains links that send you to a specific section.
T|X Handheld viii
Page 9

[ ! ]
Tip
To access the User Guide,
you need to be connected
to the Internet.
Sidebars
Before You Begin
Things you must complete before you can do the steps described in a procedure or group of
procedures.
Tip
A suggestion on how to use a feature more fully; a shortcut; a pointer to a related feature.
Did You Know?
An interesting fact about the topic being described; may include a link to more information.
Key Term
»
A technical term related to the topic being described. The term may appear in this guide or only
on your handheld.
User Guide
A pointer to the User Guide on the web where you can learn about more things you can do with
an application or feature.
Tips & Tricks
A pointer to a website where you can share info with other handheld users and learn the latest
tips, tricks, and more.
Support
A pointer to the web where you can find help if you experience problems with the features
discussed in the chapter or with your handheld.
T|X Handheld ix
Page 10

CHAPTER 1
I
Your Handheld
n this chapter
What’s on my handheld?
Like a good personal assistant, your
handheld helps you keep track of your
schedule, your business and personal
What software do I have?
Using the status bar
Opening applications
Using the 5-way navigator
Entering information on your
handheld
Entering information using
desktop software
Using menus
Learn more
Do’s and don’ts
Beyond the basics
contacts, your to-do list, even your
Microsoft Office and multimedia files.
Stay productive by carrying more of
your important files and documents.
Get connected with wireless access to
email, text messages, and the web.
View digital photo and video albums
and listen to your favorite music
(expansion card, sold separately,
required for Mac users to listen to
music on their handheld.) And don’t
worry about losing your information—
even if the battery drains completely,
the information stays in your
Benefits
• Carry more of your important
information, and work with it on
the go
• Save time and stay organized
• Travel light
• Never lose important information
• Stay in touch with wireless
connectivity
handheld’s memory. Simply recharge
to access it again.
T|X Handheld 1
Page 11
CHAPTER 1 Your Handheld
Tip
The Favorites application
offers multiple pages of
favorites. Pressing Home
once opens the first page
of Favorites; use the
buttons in the upper-right
corner of the Favorites
screen to go to the other
pages.
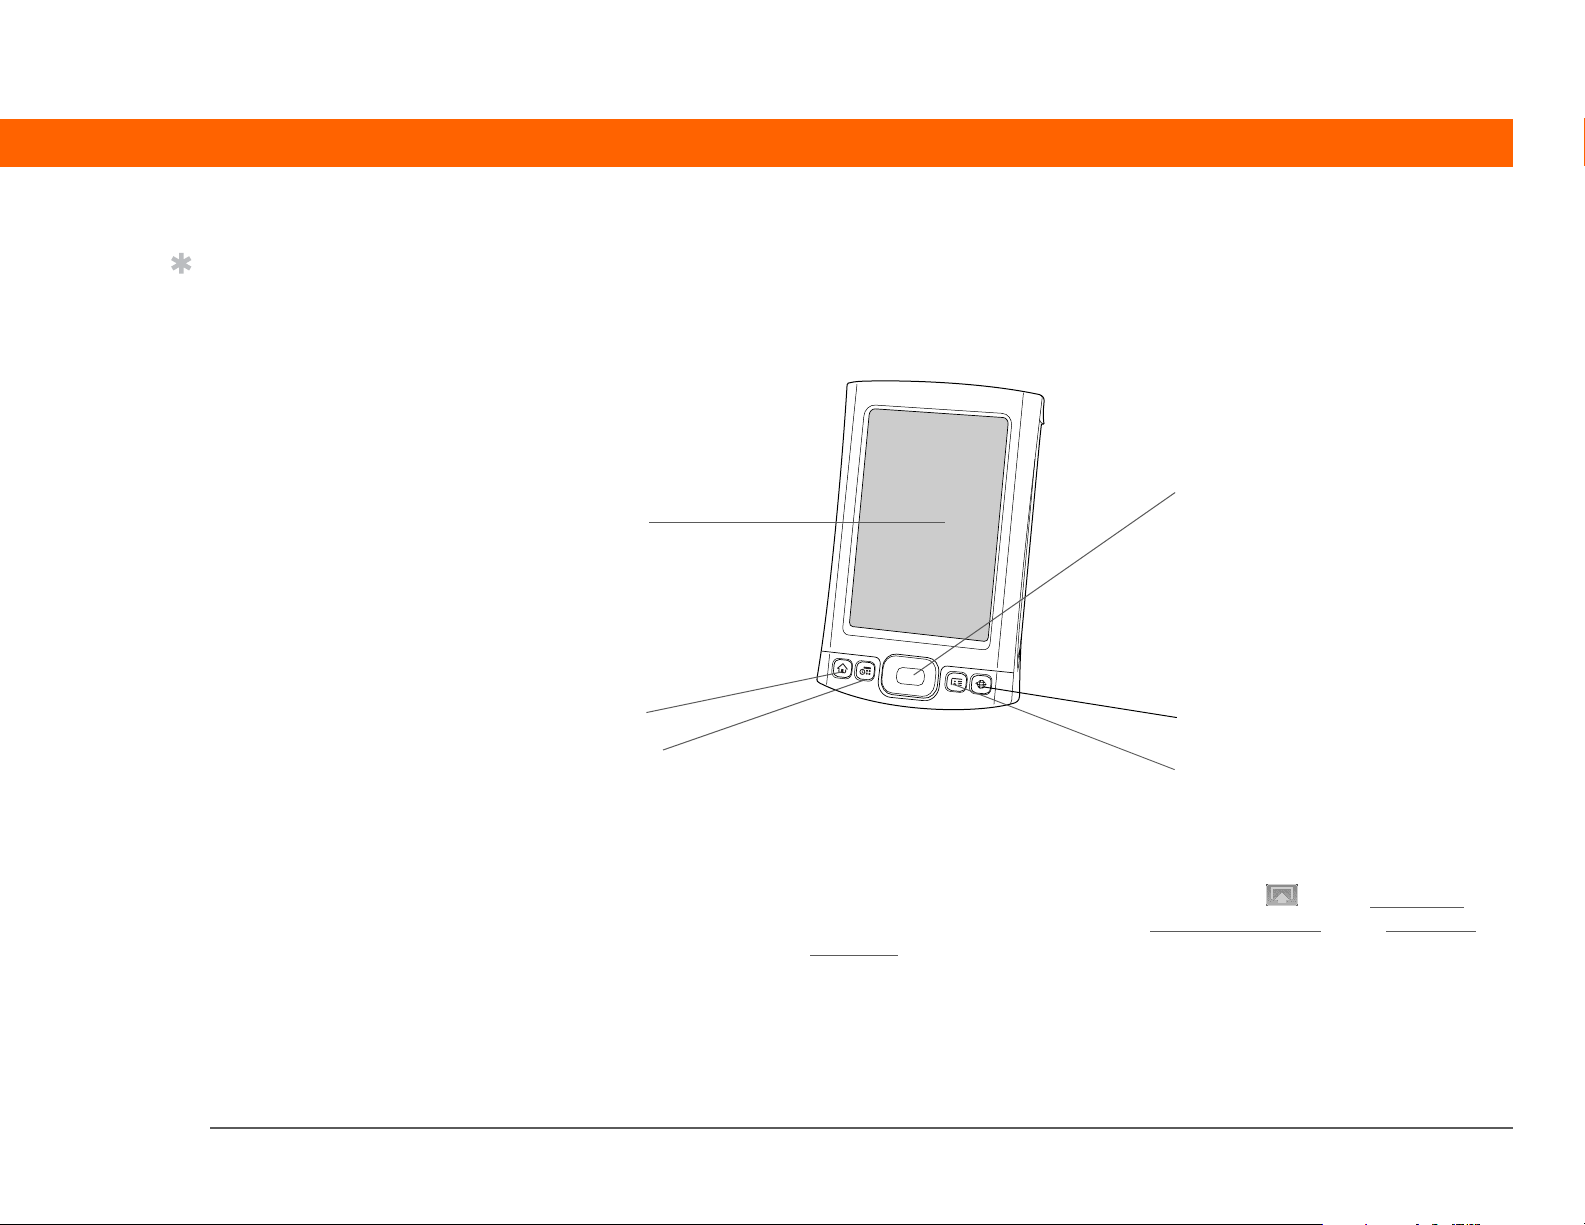
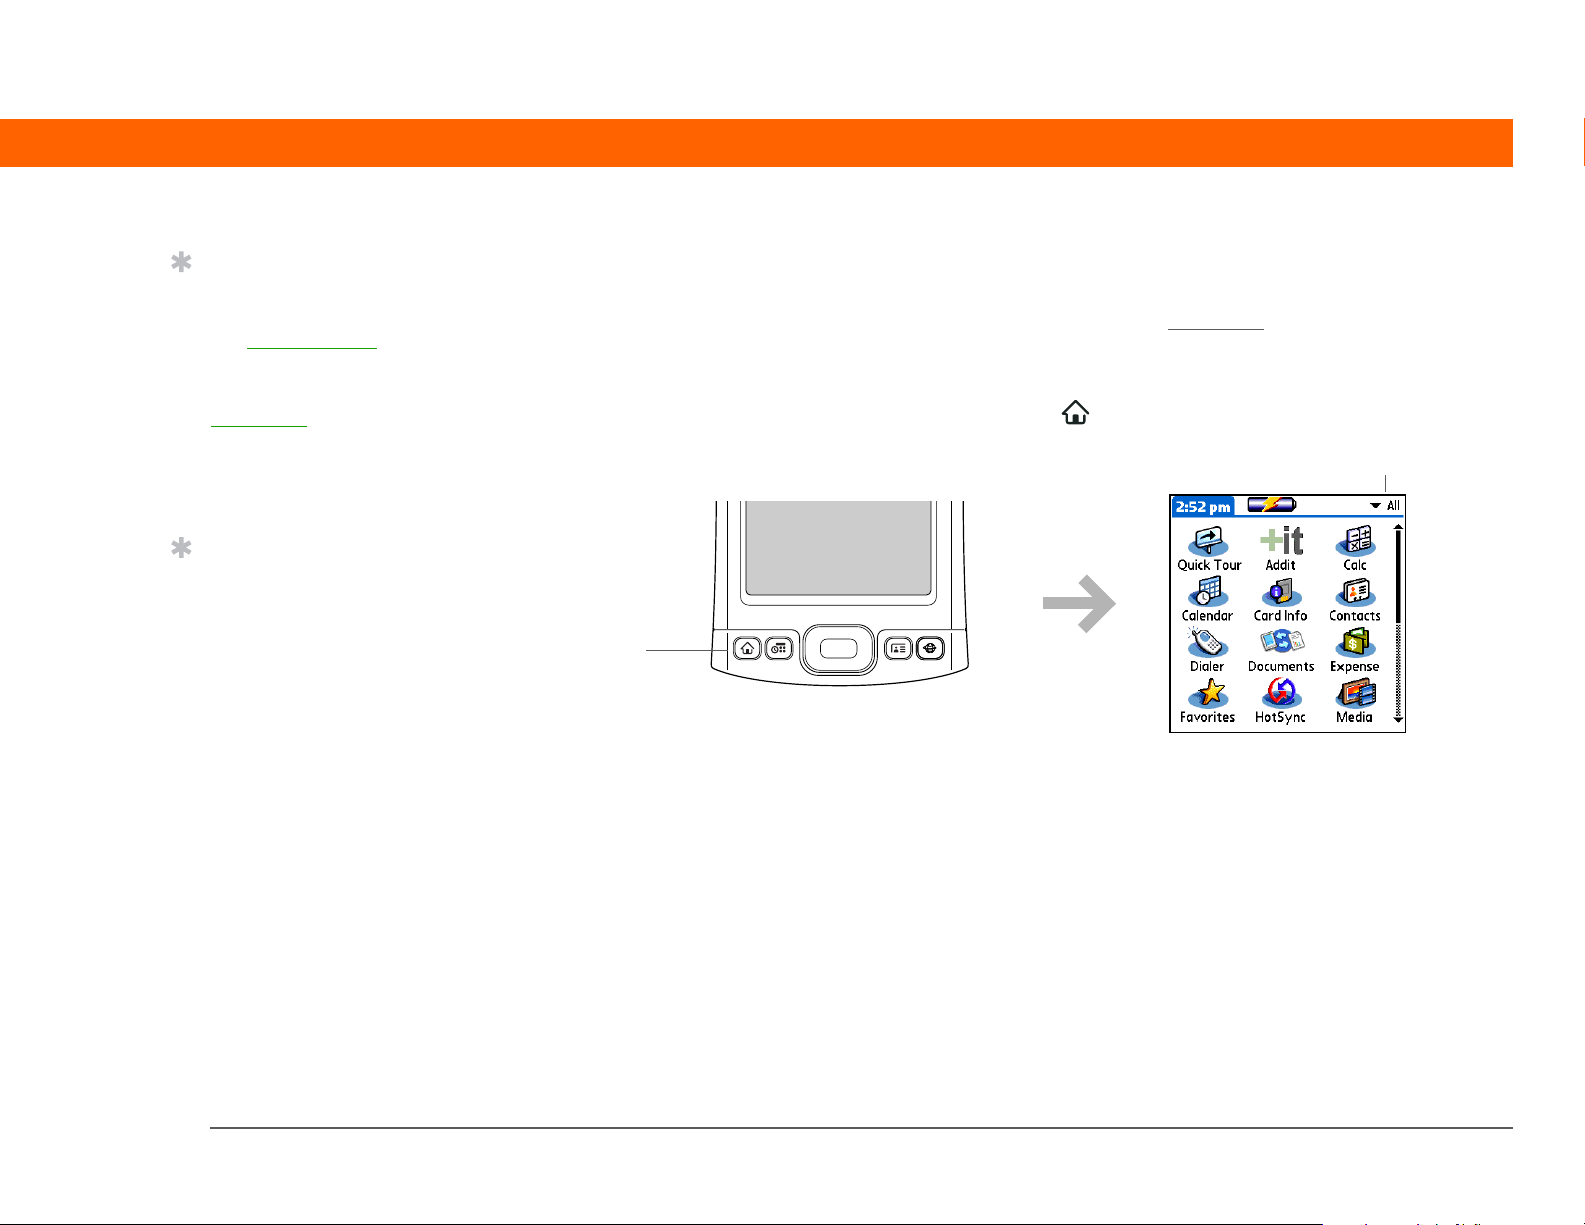
What’s on my handheld?
Front
5-way navigator
Screen
Home
Calendar
Screen Displays the applications and information on your handheld.
The screen is touch-sensitive.
Web
Contacts
Display the input area by tapping the Input icon on the status bar
Use the input area to enter info with Graffiti® 2 writing
keyboard.
Home quick button Press once to open Favorites View, which lets you create a list of the
items you want to quickly access. Favorites View can include
applications and links to the web. Press twice to open Applications
View, where you can see all of the applications on your handheld.
T|X Handheld 2
or the onscreen
.
Page 12

CHAPTER 1 Your Handheld
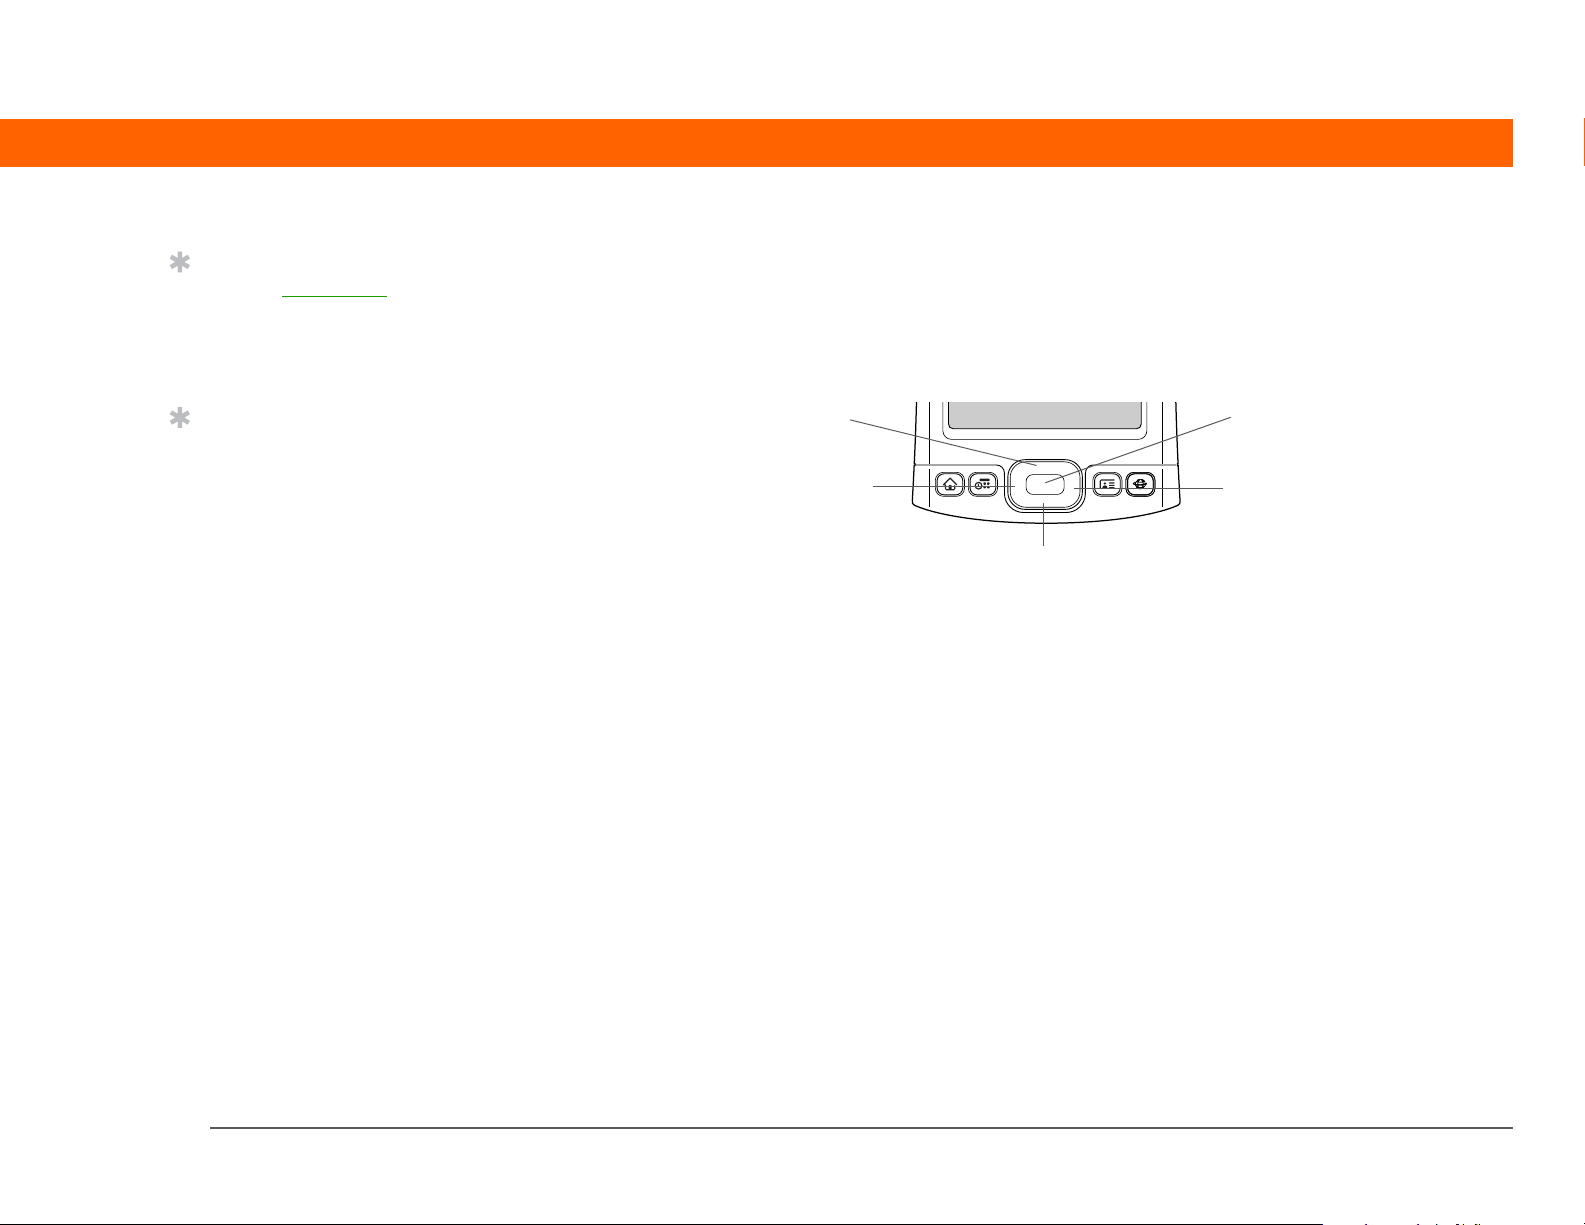
Calendar quick
button
Contacts quick
button
Web quick button Press to turn on your handheld and jump to your home page in the
5-way navigator Lets you move around and display info on the screen. Press Up, Down,
Press to turn on your handheld and jump to today’s schedule.
Press to turn on your handheld and jump to your contacts list.
web browser.
Left, or Right to highlight different items, and press Center to select the
highlighted item.
T|X Handheld 3
Page 13
CHAPTER 1 Your Handheld
Did You Know?
Beaming lets you quickly
share appointments,
addresses, phone
numbers, files, photos,
and more.
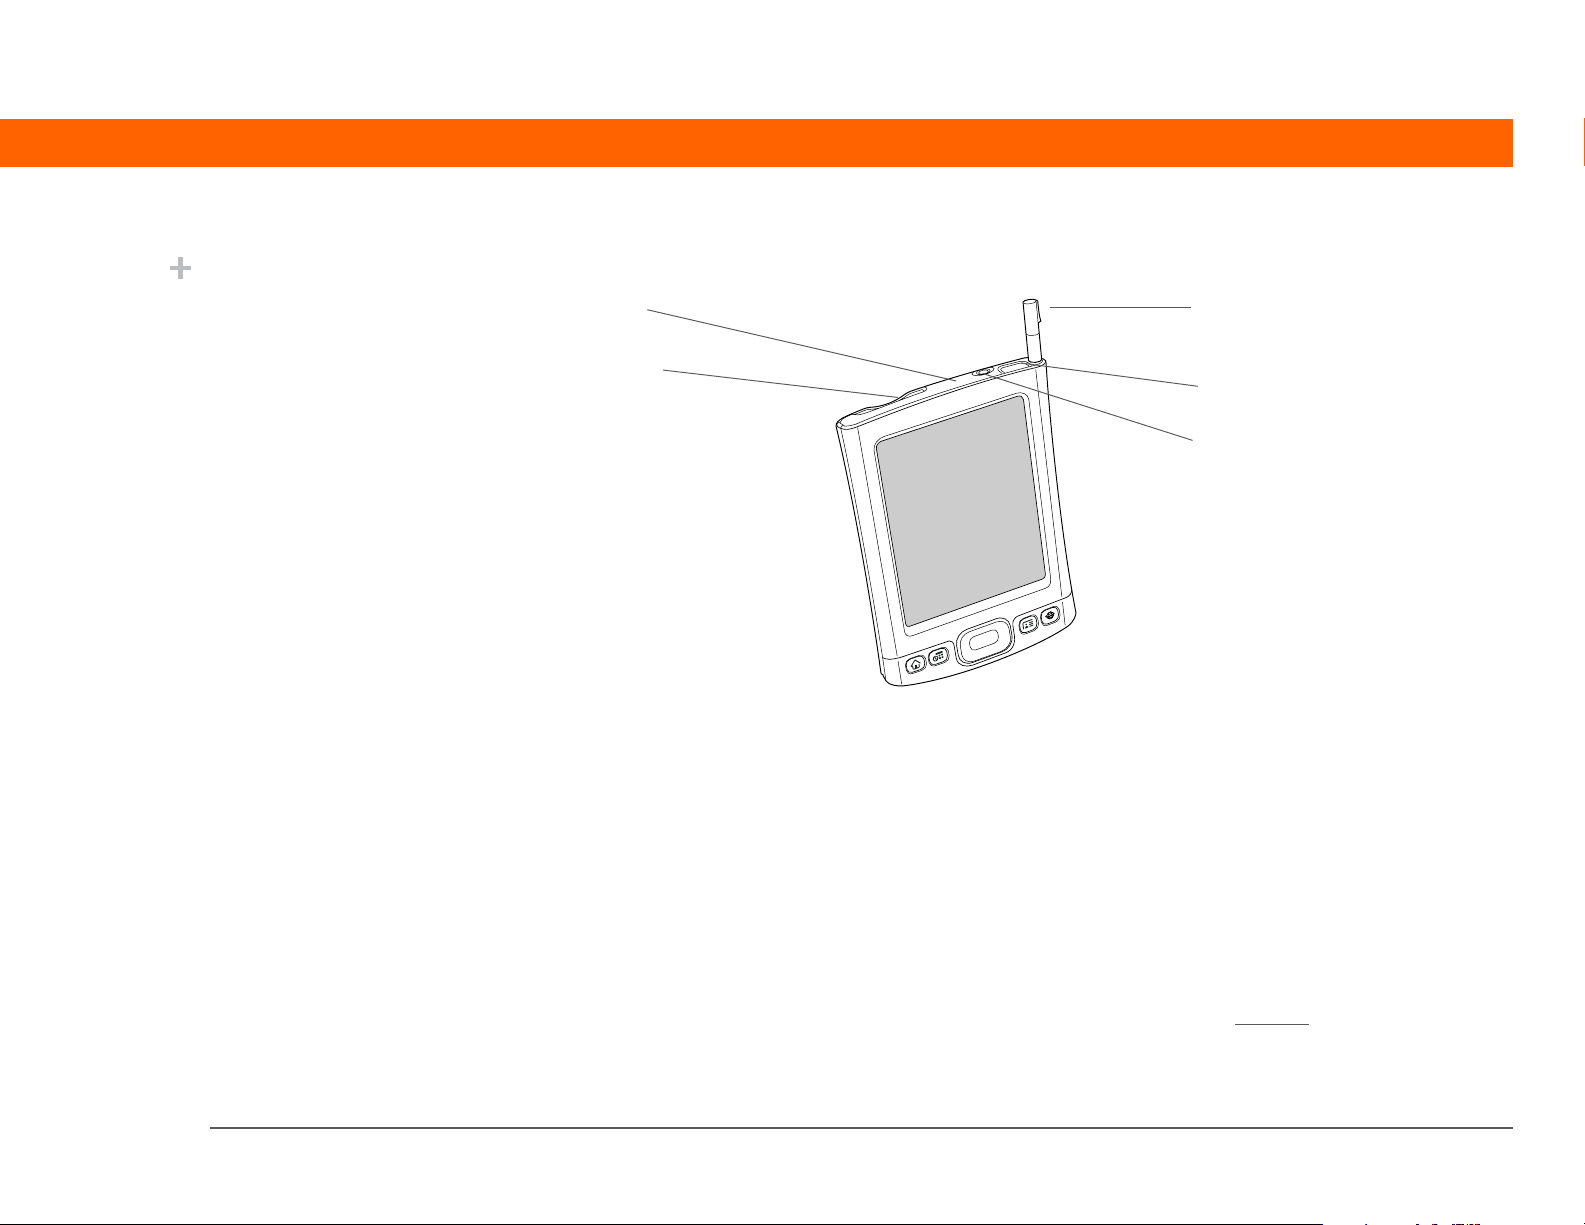
To p
IR port
Expansion
card slot
Expansion card
slot
Lets you insert an expansion card (sold separately) to back up info and
add memory, applications, and accessories to your handheld.
IR port Short for infrared port. Beams information between handhelds and other
devices that have an IR port. Beaming uses infrared technology to send
information between two IR ports that are within a few feet of each other.
Stylus
Headphone
jack
Power button
Stylus Lets you enter information on your handheld. To use the stylus, slide it
out of the slot and hold it as you would a pen or pencil.
Headphone jack Lets you connect standard 3.5 mm headphones (sold separately) to your
handheld so you can listen to music and other audio applications.
Power button Turns your handheld on or off and lets you turn Keylock
on (if active).
When Keylock is on, your handheld does not respond when you press the
quick buttons or tap any icons.
T|X Handheld 4
Page 14
CHAPTER 1 Your Handheld
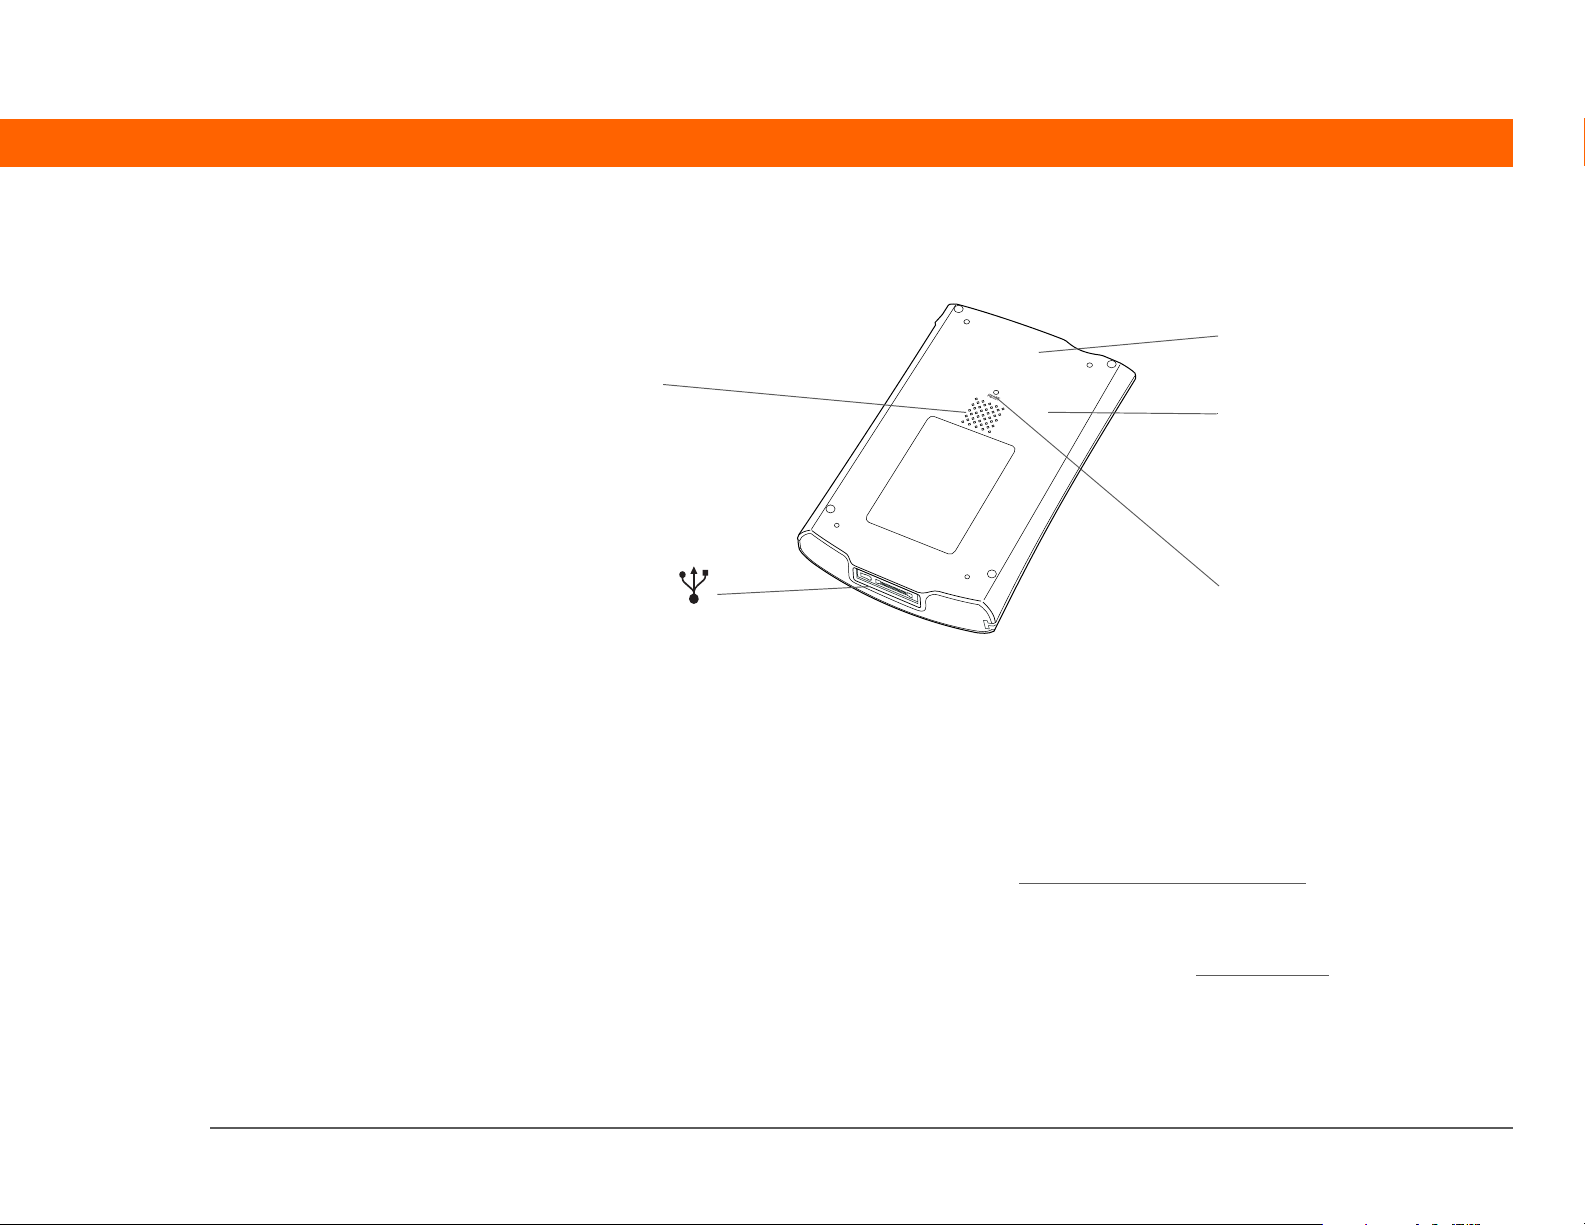
Back
Speaker
Bluetooth radio
(internal)
Wi-Fi radio
(internal)
Multiconnector
Reset
button
Multi-connector Lets you connect the sync cable (included) or a cradle (sold
separately) to your computer or connect the AC charger to an electric
outlet. Connect the sync cable when you want to synchronize, or
exchange, information. Connect the AC charger to keep your
handheld’s battery charged.
Speaker Lets you listen to alarms, game and system sounds, and music.
Bluetooth
(internal)
®
radio
Enables your handheld to connect with other devices (sold
separately) that use Bluetooth wireless technology
. so you can dial
phone numbers directly from Contacts, send and receive email and
text messages, browse the web, and more.
®
Wi-Fi
(internal)
radio
Enables your handheld to connect to a Wi-Fi network to wirelessly
access email, browse the web, and synchronize.
Reset button Resets your handheld if it freezes (stops responding). To do a soft
reset, use the tip of the stylus to gently press the reset button inside
the hole on the back panel of your handheld.
T|X Handheld 5
Page 15

CHAPTER 1 Your Handheld
Tip
Check the User Guide on
the web for complete
instructions on how to
use many of the
applications included
with your handheld.
What software do I have?
Your handheld comes with many applications preinstalled and ready to use. In addition, the
software installation CD that came with your handheld includes desktop software for your
computer and additional software for your handheld. When you set up your handheld you can
install some (or all) of these applications. You can install any of the applications at any time after
you set up your handheld, as well.
Personal information
These applications let you organize your contacts, calendar events, and more, as well as keep
information updated between your handheld and your computer. They are already installed on
your handheld.
0
Calendar Manage your schedule from single entries, like lunch with a friend, to repeating
and extended events, like weekly meetings and holidays. Even color-code your
schedule by category.
Contacts Store names and addresses, phone numbers, email and website addresses—
even add a birthday alarm or a contact’s photo.
Ta s k s Stay on top of your to-do list. Enter things you need to do, prioritize them, set
alarms, and then monitor your deadlines.
Memos Capture information such as meeting notes, lists of books to read, movies to see,
recipes, and anything else you need to write down.
Note Pad Write on the screen in your own handwriting or draw a quick sketch.
Expense Track business or travel expenses and print expense reports after you
synchronize your handheld with your computer.
HotSync
0
®
Synchronize info on your handheld with the info on your computer.
T|X Handheld 6
Page 16

CHAPTER 1 Your Handheld
Tip
Can’t find an application
on your handheld? First
tap the Home icon in the
input area
and select All
from the category pick list
in the upper-right corner
to view all applications on
your handheld (except
the wireless applications,
Wi-Fi and Bluetooth,
which you need to access
from the status bar). If
you don’t see the
application there, you
may need to install it
from the CD.
Productivity
These applications let you carry your office with you, so you can work with crucial information on
the go. They may already be installed on your handheld, or you may need to install them from the
CD.
0
Documents View and edit Microsoft Word and Excel files, and create compatible files that you
can save in Word or Excel format. View and manage PowerPoint files.
Calculator Do basic math calculations such as splitting restaurant bills and figuring tips.
Adobe
®
Reader®
View PDF-compatible files that are tailored to fit your handheld’s screen.
for Palm OS
Multimedia and entertainment
Here is the software that lets you relax and have fun. These applications may already be installed
on your handheld, or you may need to install them from the CD.
0
Media View and organize photos and videos.
Pocket Tunes™ Carry music, create playlists, and listen to music on your handheld. This
application works with the Rhapsody desktop application that you can install
from the CD (Windows only; download required for Rhapsody). Both Mac and
Windows users can use Pocket Tunes on the handheld. (Expansion card, sold
separately, required for Mac users to listen to music on their handheld.)
Handmark
Enjoy hours of entertainment with this solitaire game.
Solitaire
Power by Hand
eReader
Purchase and download eBooks from the web so you can read them when you
want, where you want.
AudiblePlayer Listen to newspapers, audio books, public radio, and more. (Windows only;
download requires Internet connection; additional fees may apply.)
T|X Handheld 7
Page 17
CHAPTER 1 Your Handheld
Tip
To install extra software
from the CD, insert the CD
into your CD drive, and
then do one of the
following:
Windows On the
Discover your device
screen, click Add software
to your device.
Mac Double-click the
Essential Software folder
icon.
Connectivity
These applications let you stay connected by browsing the web, checking your email, and more.
They may already be installed on your handheld, or you may need to install them from the CD.
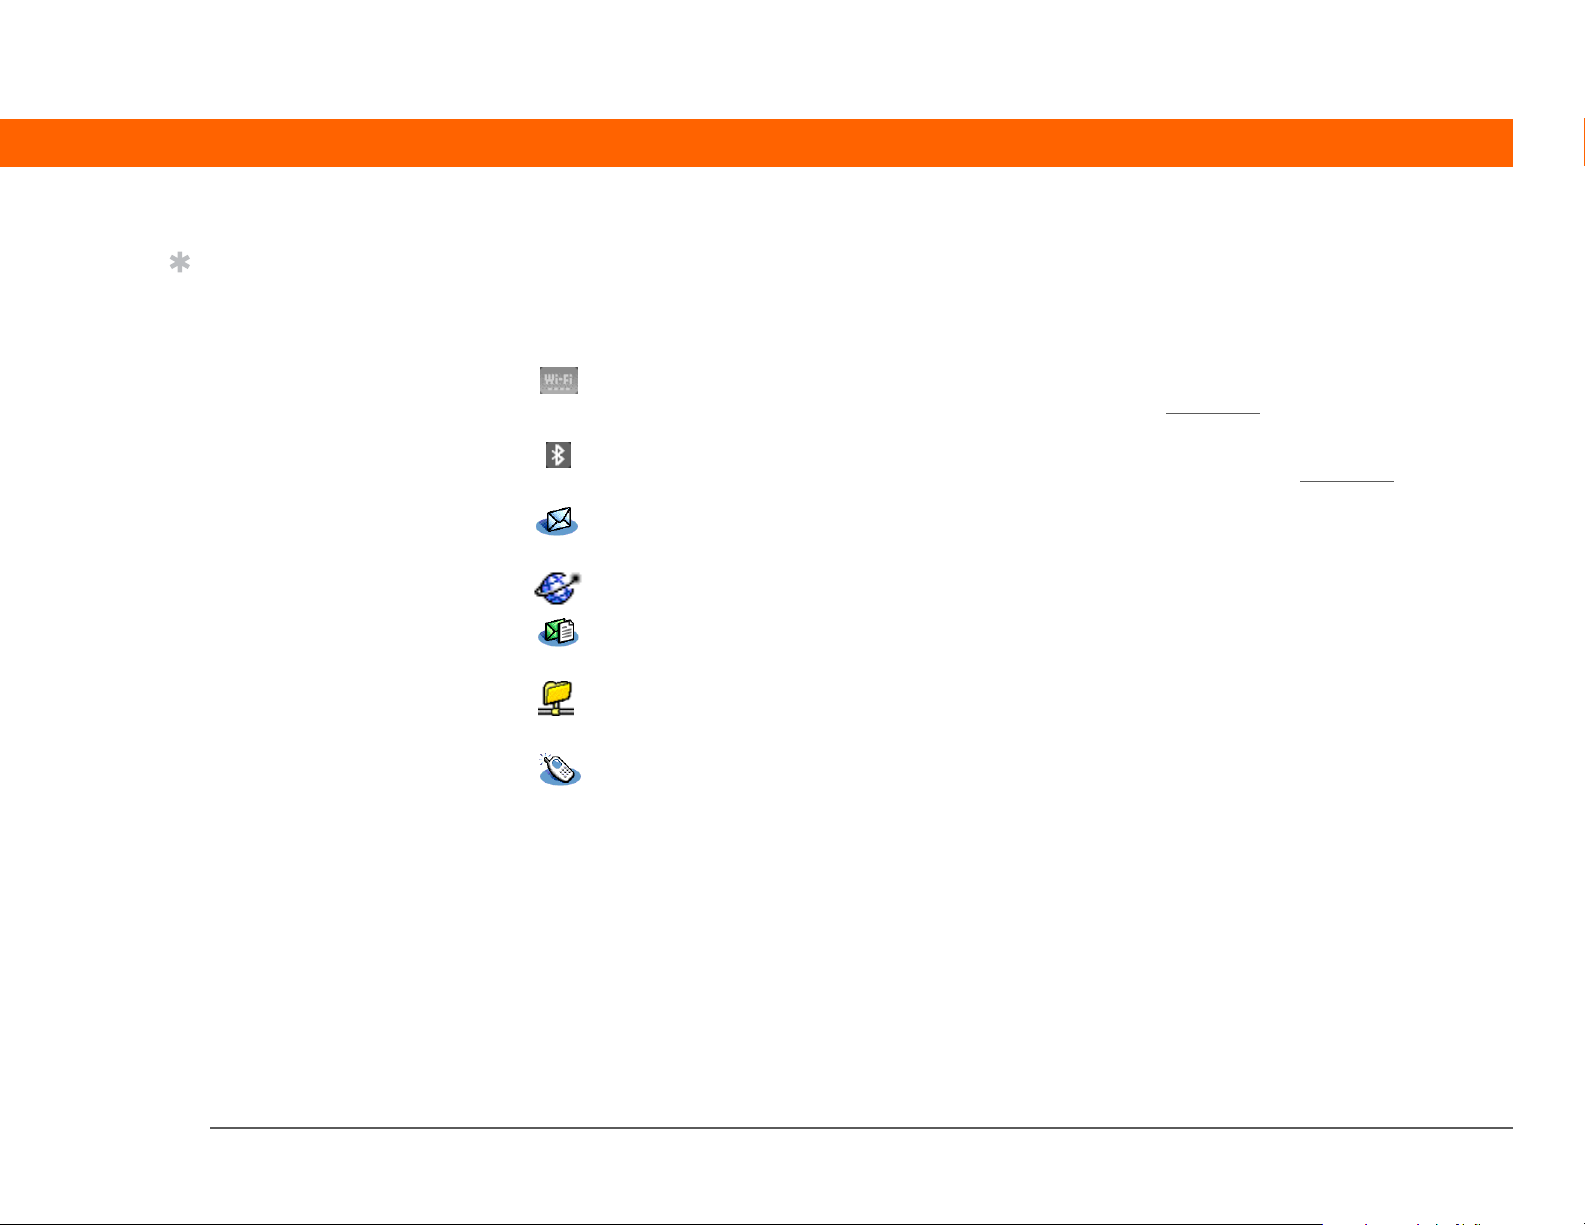
0
Wi-Fi controls Set up wireless connections to a Wi-Fi network for sending and receiving
information. Access these controls from the status bar
Bluetooth
controls
VersaMail
®
Set up wireless connections to a mobile phone, network, or computer for sending
and receiving information. Access these controls from the status bar
Send, receive, and manage email messages wirelessly using your handheld’s
wireless capabilities or by synchronizing with your Windows computer.
Web Browse your favorite websites using your handheld’s wireless capabilities.
SMS Send and receive short text (SMS) messages using your handheld’s wireless
capabilities.
WiFile™ Access your wireless network so that you can download pictures, documents,
and more that are located in shared folders on a networked computer.
Dialer Dial phone numbers directly from your handheld.
.
.
T|X Handheld 8
Page 18
CHAPTER 1 Your Handheld
Tip
After you install an
application and discover
how valuable it is, be sure
to add it to Favorites.
Tip
Use the Enterprise
Software link to check for
new software available
from the Palm enterprise
website.
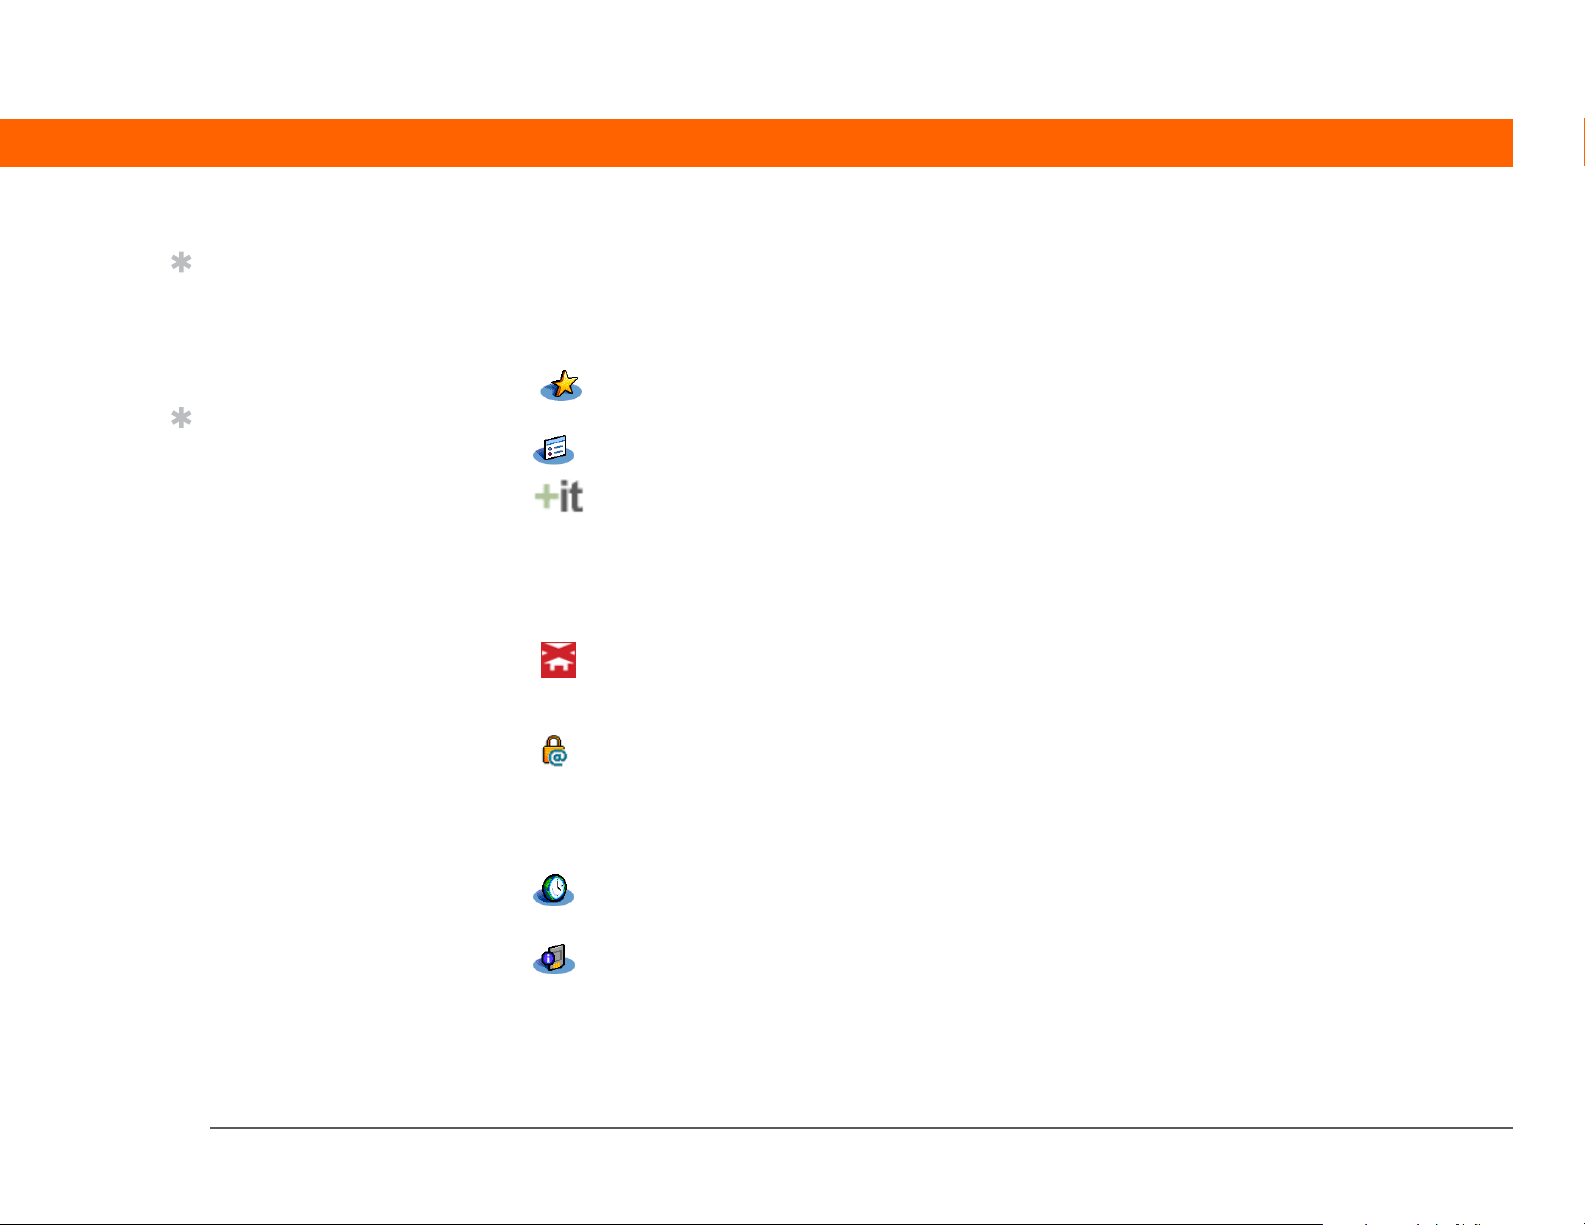
Customization
These applications let you customize your handheld to make it uniquely yours. They may already
be installed on your handheld, or you may need to install them from the CD.
0
Favorites Customize a list of your favorite applications and web pages so that you can
locate and open them quickly.
Prefs Customize your handheld’s sound levels, colors, security, and more.
Addit™ Receive notifications of upgrades and patches and then install them onto your
handheld; obtain personalized news and other information as well as user tips
at a glance; preview, try, and buy software for your handheld. (Windows only for
downloads using the sync cable; both Windows and Mac users can download
software using your handheld’s wireless capabilities. Internet connection
required.)
Handmark
Express
Enterprise
Software link
Download current news as well as information on the weather, stocks, sports,
movies, and more. (Download requires Internet connection and subscription to
service with Handmark.)
Access the Palm enterprise website, where you can purchase corporate software
such as a VPN client; software that provides robust security for Wi-Fi
authentication and connection to a network; and Java Virtual Machine (JVM)
software for running Java applications on your device. (Download requires
Internet connection; additional fees may apply.)
World Clock Set the time in your home city and two other locations, and set an alarm to wake
you up.
Card Info View information about an expansion card seated in the expansion card slot.
T|X Handheld 9
Page 19
CHAPTER 1 Your Handheld
Did You Know?
During CD installation,
you can choose to
synchronize the info in
Contacts, Calendar, Tasks ,
and Memos on your
handheld with info in
Contacts, Calendar, Tasks ,
and Notes in Microsoft
Outlook on your
computer (Windows
only). Other applications
are still synchronized with
Palm Desktop software.
Key Term
»
HotSync®Technology
that allows you to
synchronize the
information on your
handheld with the
information on your
computer.
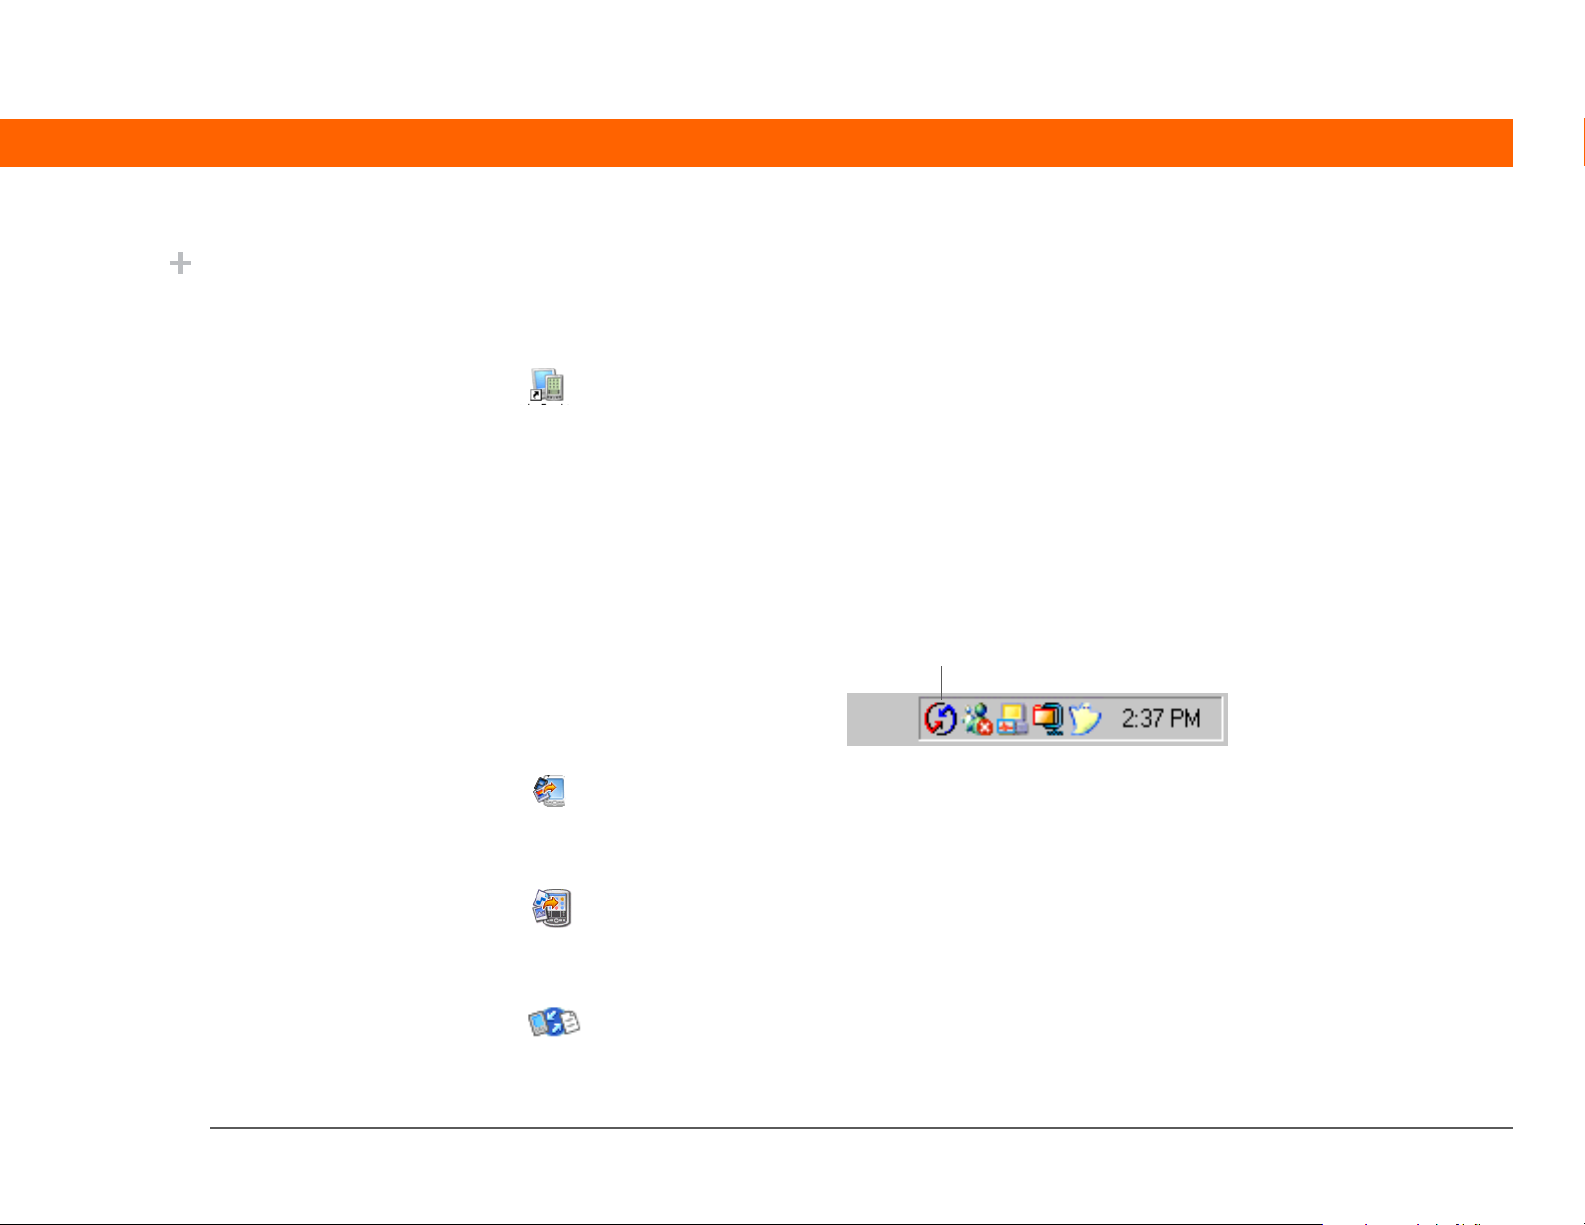
Desktop
The desktop software lets you use your computer to create and manage info for applications on
your handheld. Install this software from the CD.
0
Palm®Desktop software View, enter, manage, and back up info for Calendar, Contacts, Tasks,
Media, Memos, and Expense on your computer. (Expense and Media
are Windows only.) You can also view, manage, and back up info for
Note Pad. When you synchronize your handheld with your computer,
this info is updated in both places. Palm Desktop software is installed
automatically during the initial CD installation process.
®
Manager software, which allows you
Quick Install
(Windows only)
Palm Desktop includes HotSync
to customize the settings for synchronization. You can access HotSync
Manager by selecting its icon in the task bar at the bottom of your
computer screen.
HotSync Manager
Install applications and transfer files from your Windows computer to
your handheld or to an expansion card (sold separately) that is seated
in the expansion card slot. Quick Install is installed automatically
during the initial CD installation process.
Send To Handheld droplet
(Mac only)
Documents To Go Companion desktop software for the Documents application on your
T|X Handheld 10
Install applications and transfer files from your Mac computer to your
handheld or to an expansion card (sold separately) that is seated in the
expansion card slot. The Send To Handheld droplet is installed
automatically during the initial CD installation process.
handheld. Lets you transfer Microsoft Word, Excel, and PowerPoint
files to your handheld, as well as create and edit files.
Page 20

CHAPTER 1 Your Handheld
Did You Know?
Some applications are
automatically assigned
to a category when you
install them. Assign any
application to a category
in Applications
selecting Category in
the App menu. Select
the pick list next to the
application’s name, and
then select a category.
by
Rhapsody
(Windows only)
Windows Media Player
link/Direct X link
(Windows only)
Pocket Tunes plug-in
(Windows only)
Transfer MP3 music files from your computer to your handheld or to
an expansion card (sold separately), and copy music from your CDs
to your computer. This is the desktop companion for the Pocket Tunes
application on your handheld. (Download requires Internet
connection.)
Work with the Media desktop application. These applications are
required for Media to prepare videos for playback on your handheld.
(Download requires Internet connection.)
NOTE
current versions of Windows Media Player and Direct X, even if you
already have Windows Media Player on your computer. These versions
contain all of the components needed to prepare videos for playback
on your handheld.
Works with Rhapsody to convert music files to a format that you can
carry on your handheld so that you can play them using the Pocket
Tunes application on your handheld. (Rhapsody download requires
Internet connection.)
The plug-in installs automatically during the initial CD installation
process. It is included on the CD in case you should ever need to
manually re-install it.
We recommend that you use the links to download the
T|X Handheld 11
Page 21

CHAPTER 1 Your Handheld
Tip
Use the Find dialog box to
locate specific items of
information on your
handheld—for example, a
name or a phone number.
Did You Know?
The System info icon
shows the current time on
the status bar.
Tip
The Wi-Fi controls signalstrength bars show an
exclamation point (!) if
Wi-Fi functionality is
turned on but you are not
connected to a network.
Using the status bar
The status bar at the bottom of the handheld screen gives you access to valuable tools and is
accessible in all views.
Find
Menu
System info
Alert
Bluetooth controls
Wi-Fi controls
Full-screen writing
Screen rotation
Input
0
Find Tap to open the Find dialog box.
Menu Tap to open the menus
System info Tap to open the system information dialog box. The dialog box shows the
date and time, available memory, and battery level, and allows you to turn
system sounds on and off and to adjust screen brightness.
Alert Tap to display the Reminders screen
Bluetooth
controls
Tap to display the Bluetooth
be turned on and off and you can connect to another Bluetooth device. The
icon changes from gray to white when Bluetooth functionality is turned on.
Wi-Fi controls Tap to display the Wi-Fi
connection to a Wi-Fi network. The icon displays “Wi-Fi” if Wi-Fi
functionality is turned off and signal-strength bars if it is turned on.
Full-screen
writing
Screen
Tap to t u rn full-screen writing
characters anywhere onscreen.
Tap to switch between landscape and portrait view
rotation
Input Tap to switch between showing and hiding the input area
display the input area selection menu.
for the current screen.
.
dialog box, where Bluetooth functionality can
dialog box, where you can make a wireless
on and off. When on, you can write Graffiti® 2
.
. Tap and hold to
T|X Handheld 12
Page 22

CHAPTER 1 Your Handheld
Did You Know?
You can customize which
way the screen rotates in
landscape mode by
choosing right- or lefthanded rotation.
Rotating the screen
You can switch between landscape and portrait views by tapping Screen rotation on the status
bar. Landscape view is useful for viewing spreadsheets, email, web pages, and photos.
T|X Handheld 13
Page 23
CHAPTER 1 Your Handheld
Tip
Press Home once to open
Favorites; press Home
twice to open
Applications. Switch
between Favorites and
Applications by pressing
Home.
Did You Know?
You can use a favorite
photo as the background
for Favorites or
Applications View.
Tip
Press and hold the Home
button to see a list of
recently used
applications.
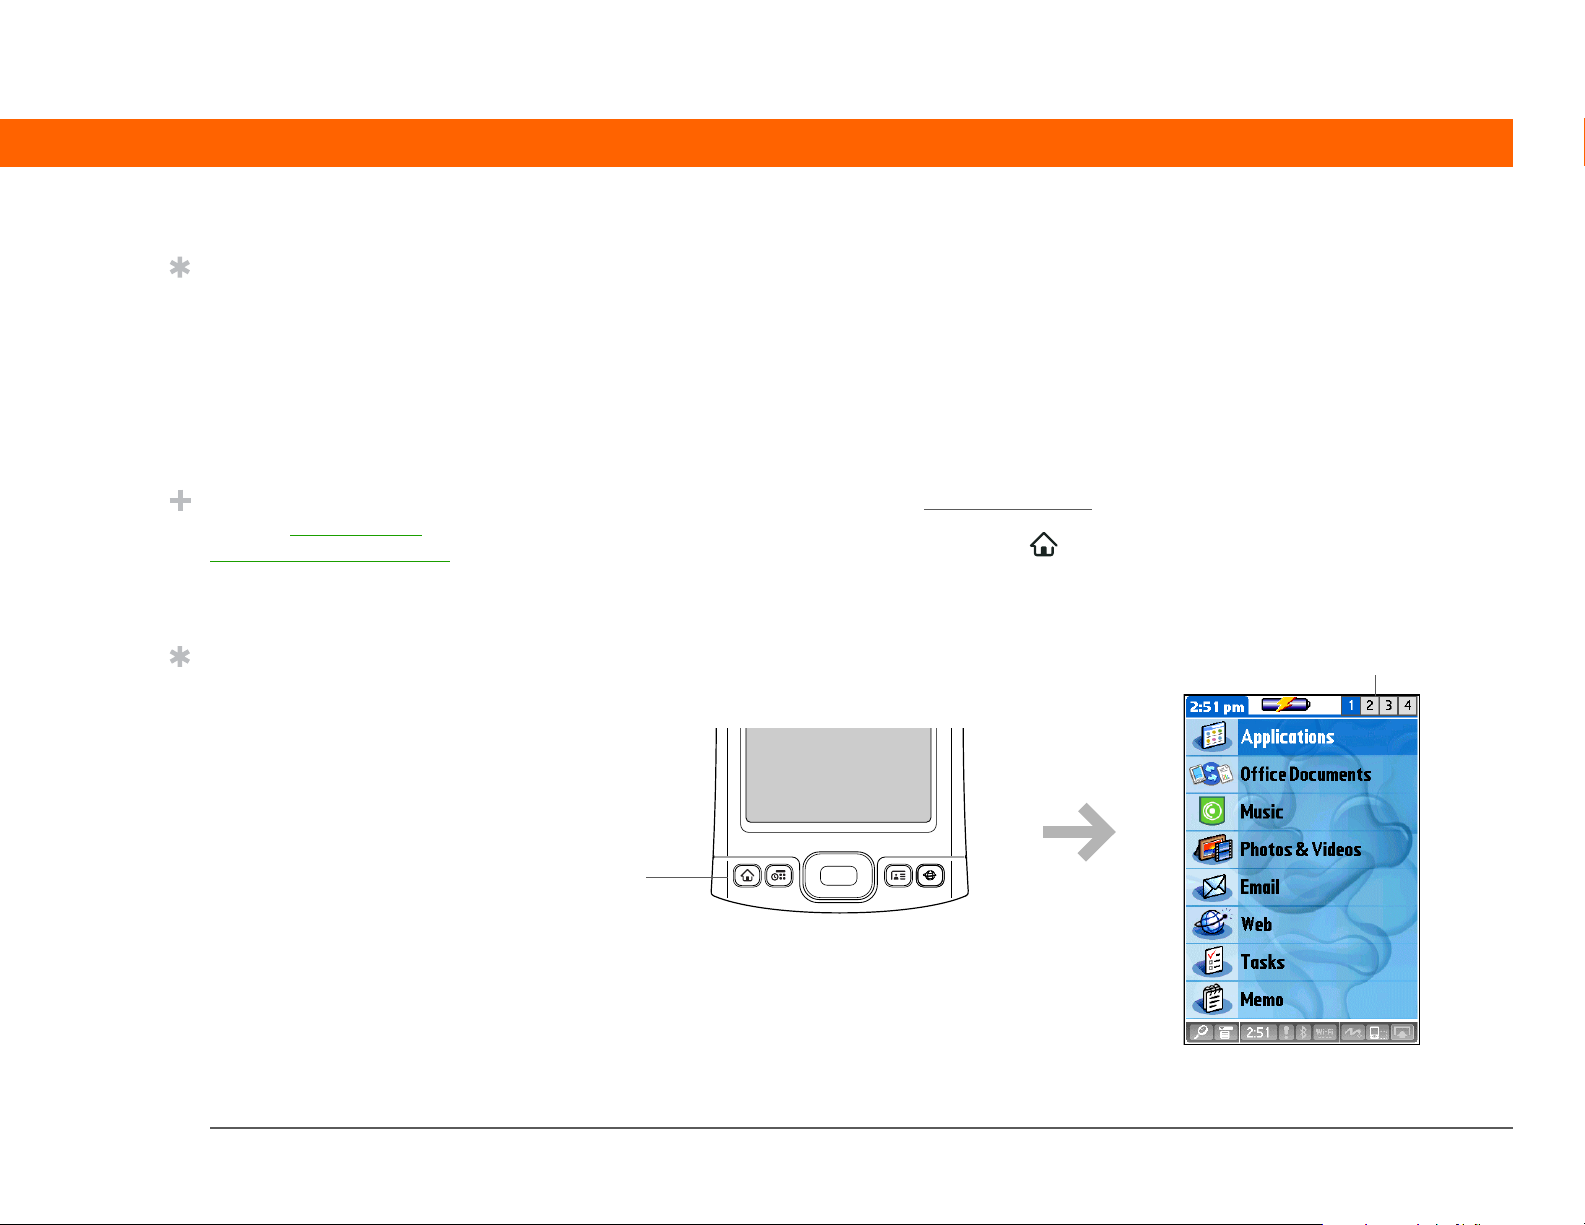
Opening applications
Your handheld lets you display two views to quickly see and open the applications you use most.
Favorites lets you create a list of the items you want to quickly access, while Applications lets you
access all of the applications on your handheld—except the wireless applications, Wi-Fi and
Bluetooth, which you need to access from the status bar.
Using Favorites View
Favorites View can include applications and links to the web. Certain items are included
in Favorites by default, but you can customize the list
To access an item from Favorites, press Home and select an item from the list. Use the 5-way
navigator or select the numbers in the upper-right corner of the screen to move to another page
of favorites.
to contain any items you want.
Select to move to other
pages of favorites
Home
T|X Handheld 14
Page 24
CHAPTER 1 Your Handheld
Tip
You can open individual
applications by pressing
the quick buttons
front of your handheld or
tapping the icons in the
input area
tapping the Home icon is
another way to access
Applications View.
. Note that
on the
Tip
Press Center on the 5-way
to scroll through
application categories.
Using Applications View
The Applications View lets you access all of the applications on your handheld, except the wireless
applications, Wi-Fi and Bluetooth, which you access from the status bar
screen. Use the category pick list in the upper-right corner of the screen to view applications by
category or to view all applications.
To access an item from Applications, press Home twice and select an icon.
Home
and are available on any
Category pick list
T|X Handheld 15
Page 25
CHAPTER 1 Your Handheld
Tip
See the User Guide on the
web for complete details
about using the 5-way on
different types of screens.
Tip
A few onscreen elements
of your handheld can
only be activated by
tapping them with your
stylus, for example, icons
in the input area and on
the status bar.
Using the 5-way navigator
The 5-way navigator lets you access information quickly with one hand and without the stylus.
The 5-way does various things based on which type of screen you’re viewing, and which item on
the screen is highlighted. To use the 5-way, press Up, Down, Left, Right, or Center
Up
Left
Down
On most screens, one item—a button, a list entry, or an entire screen—is highlighted by default.
The highlight identifies what element will be affected by your next action. Use the 5-way to move
the highlight from one item to another onscreen.
Center
Right
.
T|X Handheld 16
Page 26
CHAPTER 1 Your Handheld
Tip
When an entire screen is
highlighted, only the top
and bottom borders
acquire the glow; the left
and right borders do not
show the highlight.
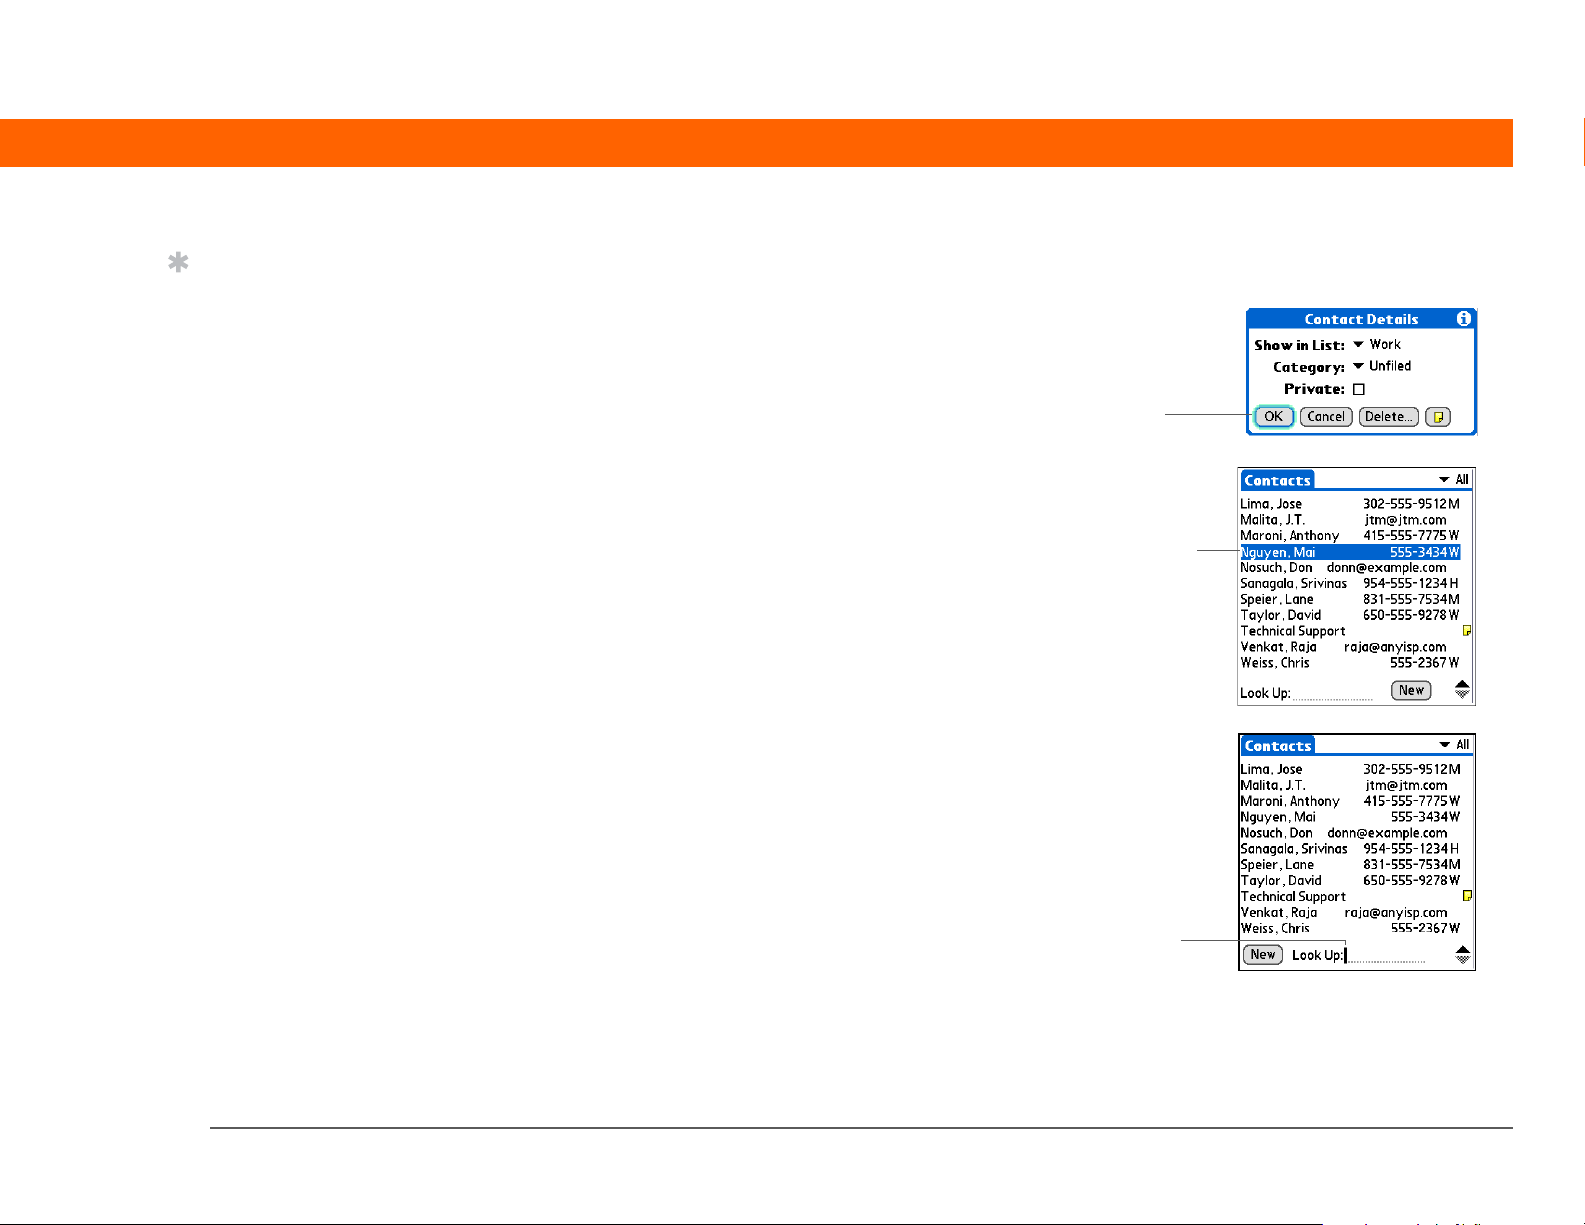
The highlight can take one of three forms, depending on what is highlighted:
Border glow This highlights elements of the user
interface like command buttons, pick lists, and
arrows.
Button
highlighted
with border
glow
Reverse type (white text on a dark background)
This highlights an entry on a list screen or a phone
number, email address, or web link on a web page
or in a message.
Contact list
entry
highlighted
with reverse
type
Blinking cursor The blinking cursor tells you that
you can enter text at that point.
Blinking
cursor
T|X Handheld 17
Page 27
CHAPTER 1 Your Handheld
Tip
Write letters on the left
side of the input area and
numbers on the right.
Uppercase letters go in
the center.
Tip
Display the Graffiti 2 help
screens at any time. Just
draw a single stroke from
the bottom of the input
area to the top of your
handheld’s screen.
Entering information on your handheld
There are several ways to enter information directly on your handheld. The most popular methods
are using Graffiti 2 writing or using the onscreen keyboard from the input area
information directly on your computer and transfer it to your handheld by synchronzing.
. You can also enter
Learning Graffiti® 2 writing
Graffiti 2 writing is a special set of letters, numbers, and symbols that you can use to write directly
on the screen. With only a few minutes of practice, you can learn to use Graffiti 2 writing—and
help is always only a tap away.
0
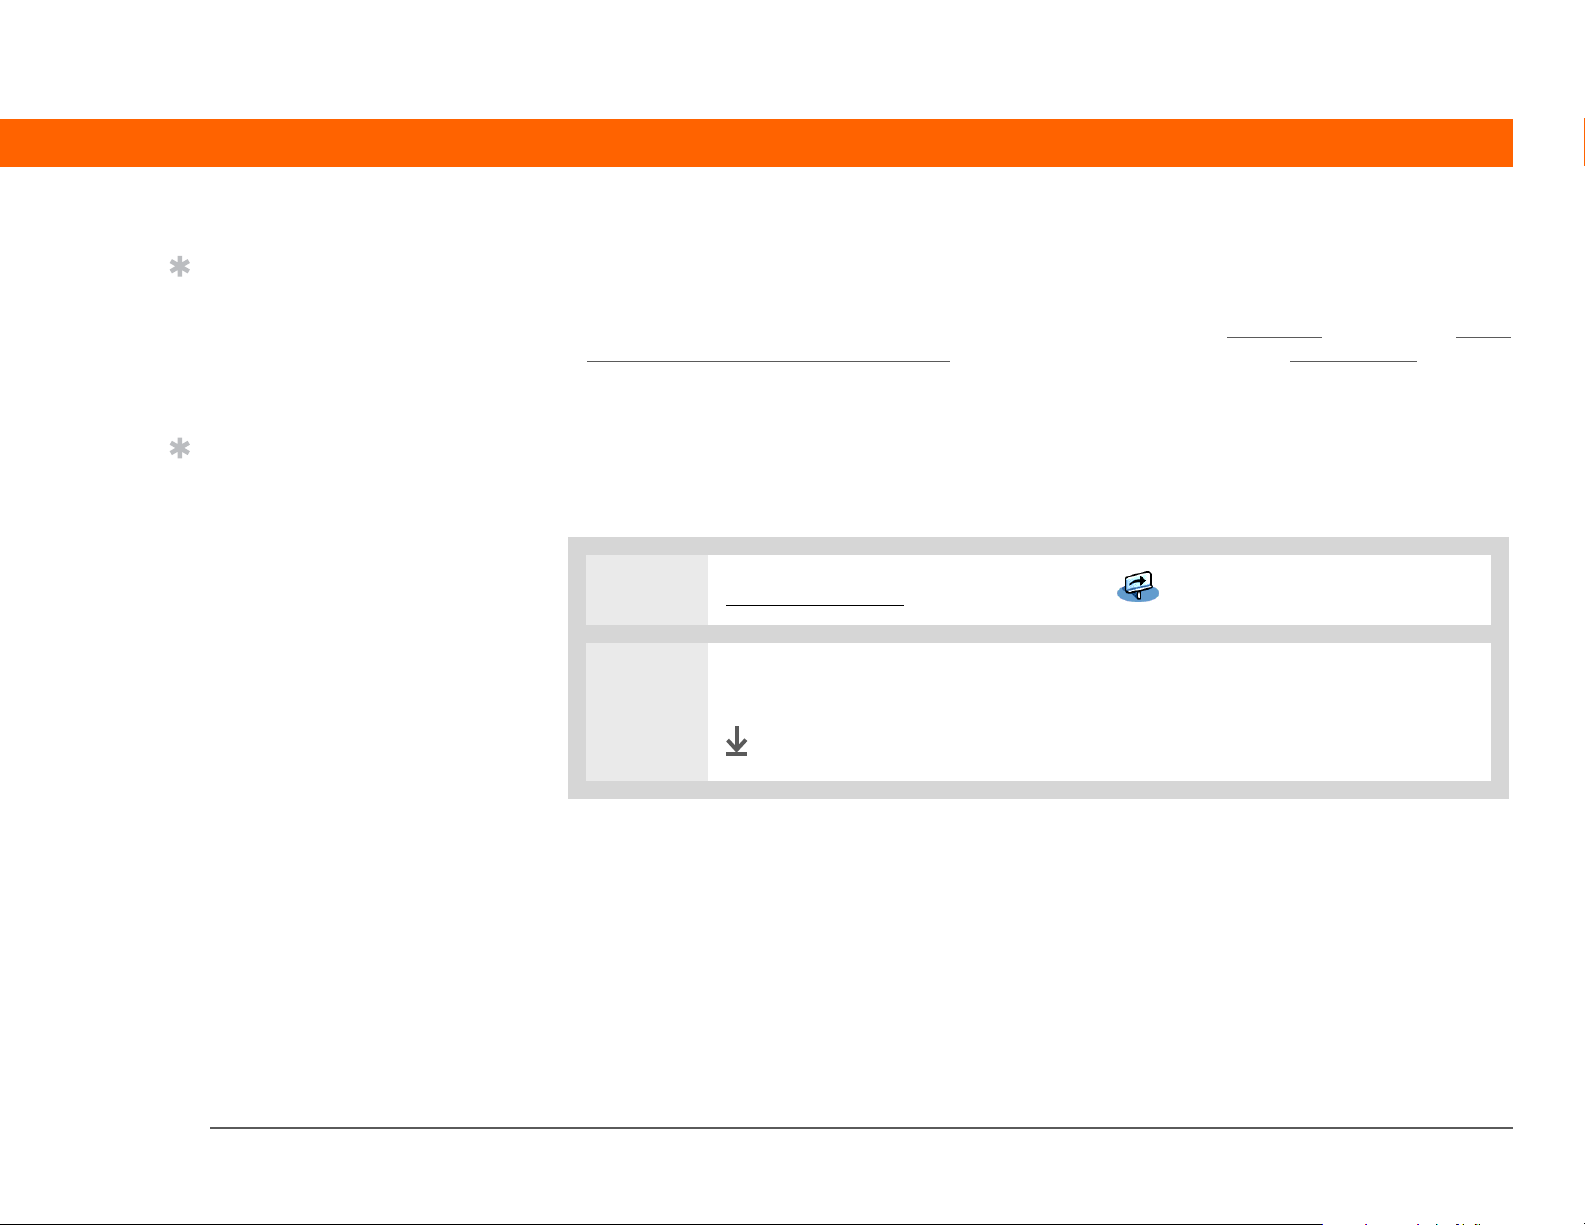
1 Go to Applications and select Quick Tour .
2 Select Writing Tips. Navigate through the screens to learn Graffiti 2 writing.
Done
T|X Handheld 18
Page 28
CHAPTER 1 Your Handheld
Key Term
»
Entry A piece of
information entered in an
application such as a
contact in Contacts or an
appointment in Calendar.
Tip
You can enter text
whenever you see a
blinking cursor on the
screen.
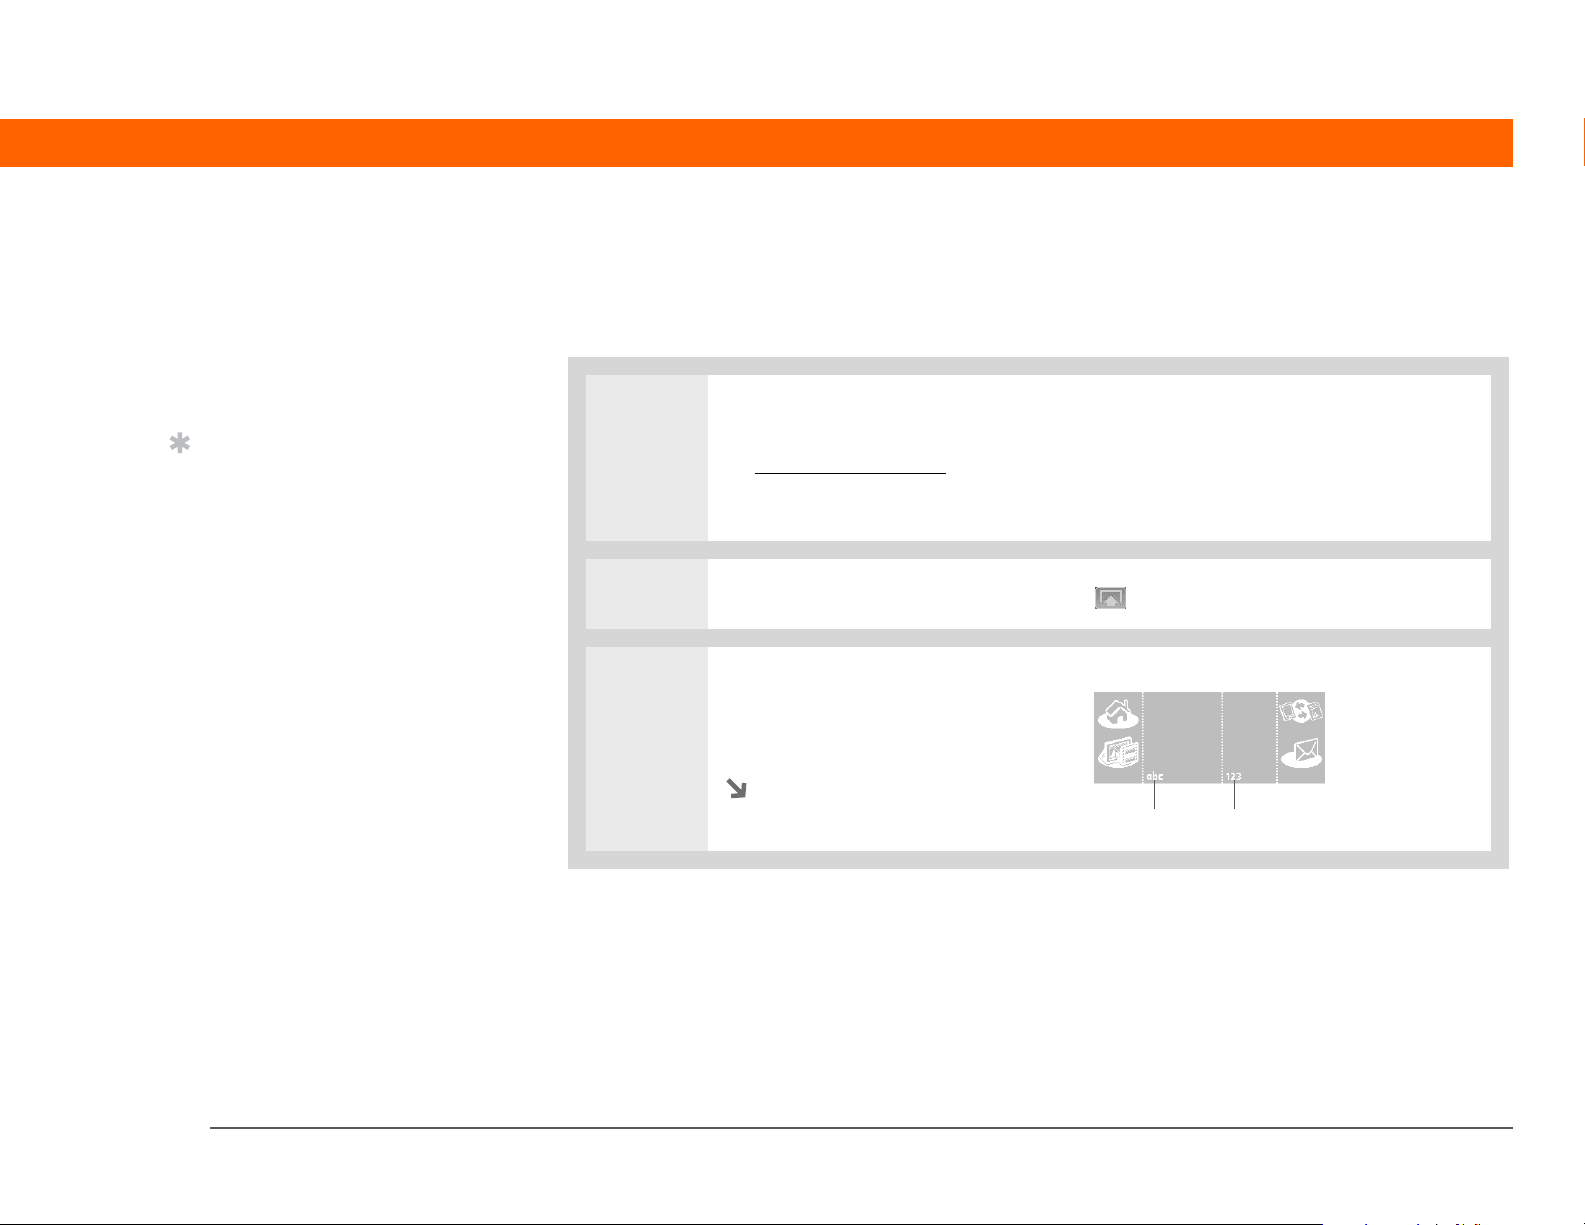
Using the onscreen keyboard
You can use the onscreen keyboard in any application where you need to enter text, numbers, or
symbols on your handheld.
0
1 Open an entry:
a. Open an application
b. Select an entry or tap New.
.
2 If the input area is hidden, select Input on the status bar to open it.
3 Tap abc or 123 to open the
alphabetic or numeric keyboard,
respectively.
Continued
Tap to open keyboards
T|X Handheld 19
Page 29
CHAPTER 1 Your Handheld
Tip
If you have a lot of
information to enter,
4
a portable wireless
keyboard accessory
makes data entry fast and
easy. Visit
www.palm.com/myTX
and click the Accessories
link.
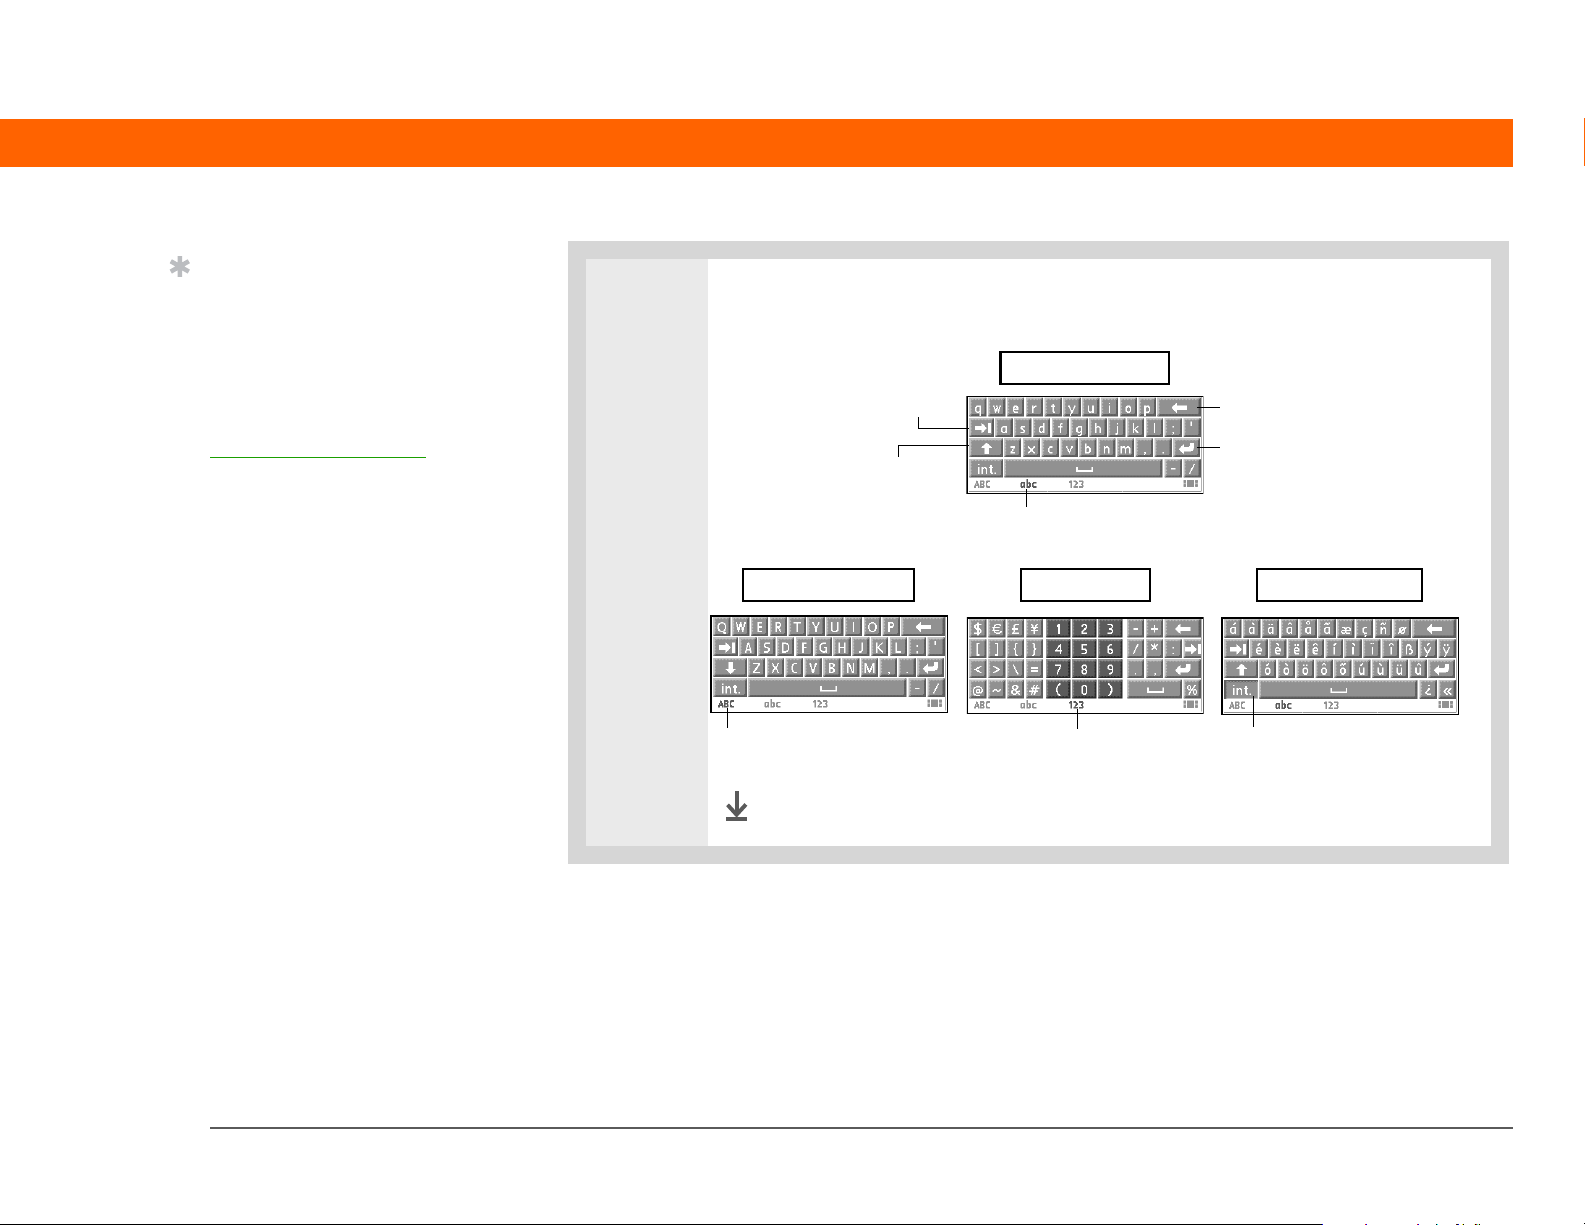
[ & ] OPTIONAL Select from among four separate keyboards.
abc - lowercase
Tab
Caps shift
Tap here to display
lowercase keyboard
Backspace
Enter
ABC - uppercase
Tap here to display
uppercase keyboard
123 - numeric
Tap here to display
numeric keyboard
int. - international
Tap here to display
international keyboard
Done
Entering information using desktop software
Use Palm Desktop or Microsoft Outlook (Windows only) to enter information on your computer in
applications such as Calendar, Contacts, Tasks, and Memos. The info is transferred to the
corresponding handheld application when you synchronize. Information entered in these
applications on the handheld is likewise synchronized with the application in the desktop software.
T|X Handheld 20
Page 30
CHAPTER 1 Your Handheld
Tip
The Palm Desktop online
Help has lots of info
about how to use
Palm Desktop software.
Open the Help menu and
select Palm Desktop Help.
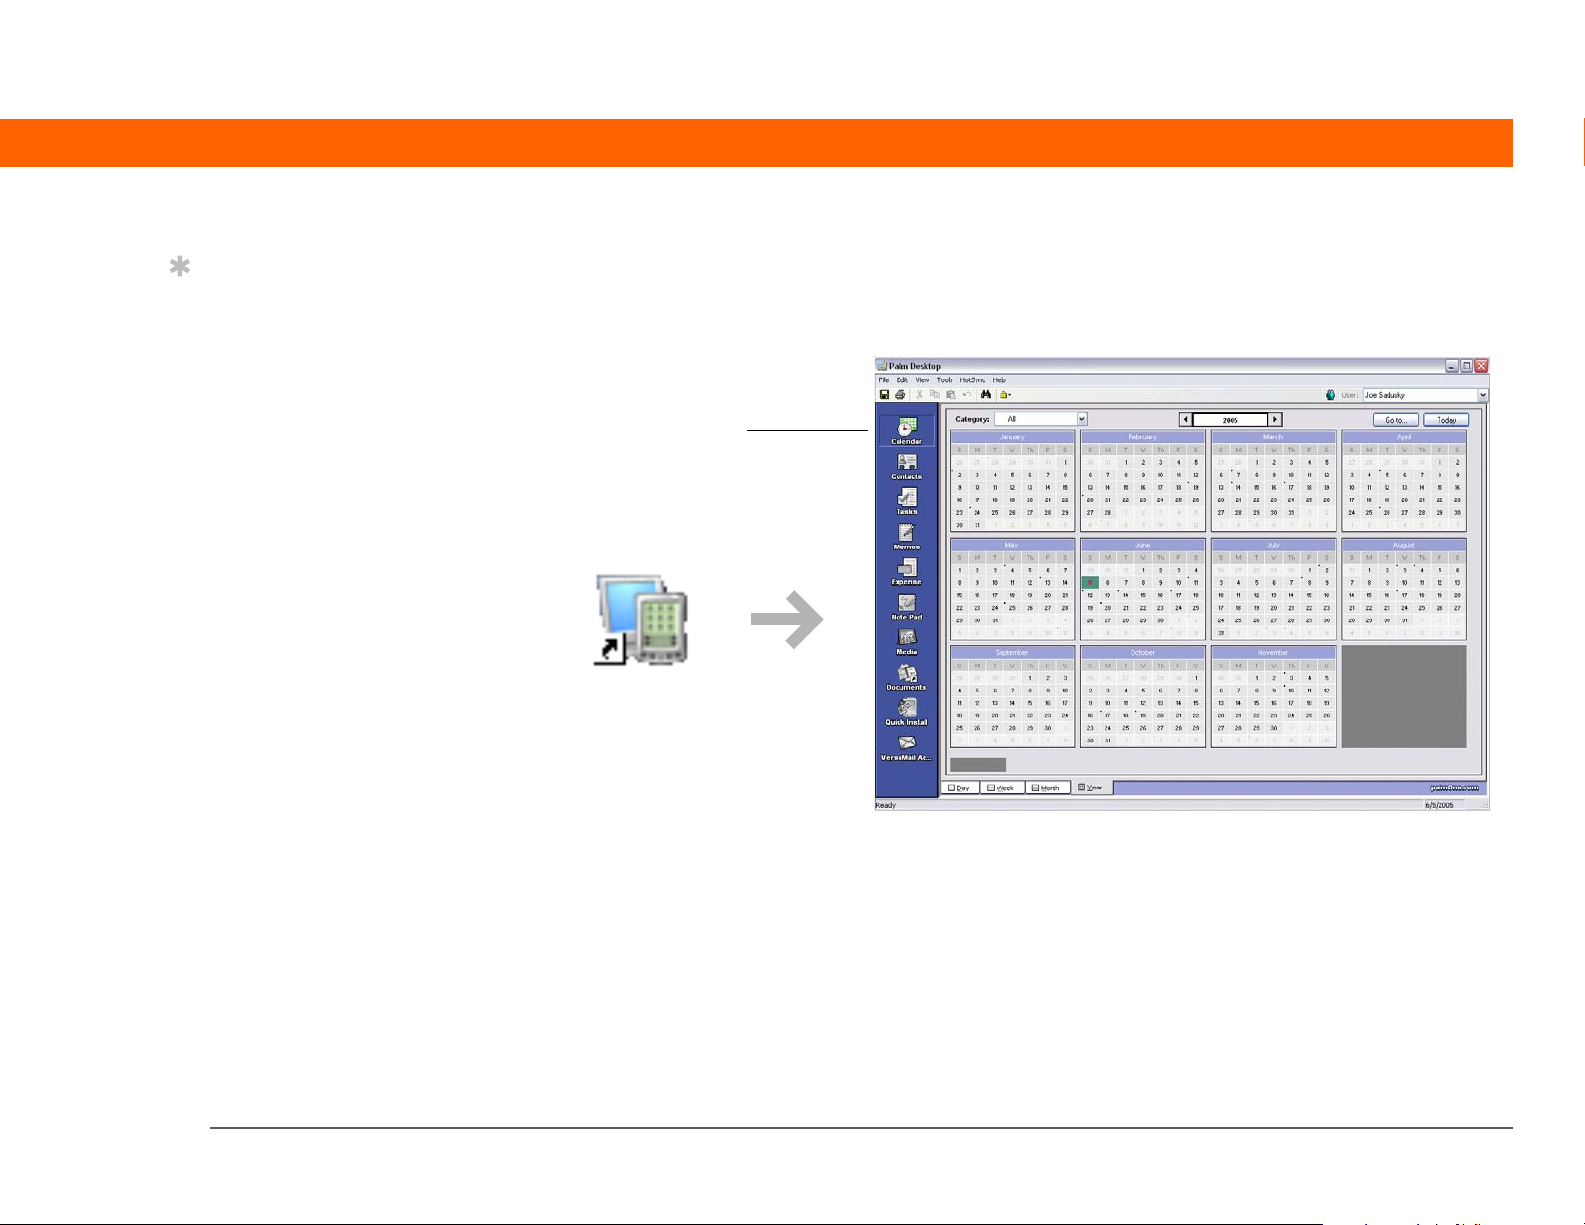
WINDOWS ONLY
Double-click the Palm Desktop icon on your computer desktop, and then click the icons in the
launch bar to access the various applications.
Launch bar
T|X Handheld 21
Page 31

CHAPTER 1 Your Handheld
MAC ONLY
Double-click the Palm Desktop icon in the Palm folder on your computer, and then click the icons in
the launch bar to access the various applications.
Launch bar
T|X Handheld 22
Page 32

CHAPTER 1 Your Handheld
Tip
You can also open the
menus by tapping the
application name in the
upper-left corner of the
screen.
Tip
When the menus are
open, you can use the
5-way navigator to select
menus and menu items.
Using menus
Menus let you access additional commands and settings. They are easy to use, and once you
master them in one application, you know how to use them in all your applications.
0
1 Open an application.
2
Tap Menu on the status bar.
3 Select a menu, and then select a menu item.
Done
T|X Handheld 23
Page 33

CHAPTER 1 Your Handheld
Tip
If you're a Windows user,
you can access the T|X
Handheld Help from the
Start menu. Navigate to
Programs, navigate to the
Palm program group, and
then select Palm T|X
Help. Windows users can
also download the
Getting Started PDF from
www.palm.com/support.
Learn more
The following tools are available to help you learn how to use your handheld and many of the
applications on it.
0
User Guide For everything you need to know about your handheld—all that’s in this guide,
and much more—go to www.palm.com/TX-userguide
Tu t o r i a l Learn to use the popular features of your handheld. The Tutorial includes a
tour of your handheld and step-by-step instructions. Access it from the CD.
Quick Tour Learn about your handheld and how to enter information. Select the Quick Tour
icon in Applications View.
Tips & Tricks Make your handheld uniquely yours. For great tips, software, accessories,
and more, visit www.palm.com/myTX
Support If you’re having problems with anything on your handheld, go to
www.palm.com/support
Manual Install a version of the information you’re reading on your handheld. Install it
from the software installation CD.
On a Windows computer, this is the T|X Handheld Help. On a Mac computer, it is
the Acrobat (PDF) file called Getting Started.
.
.
.
NOTE
different formats.
T|X Handheld 24
The Windows and Mac information is identical; it is just presented in
Page 34

CHAPTER 1 Your Handheld
Do’s and don’ts
To protect your handheld from damage and ensure reliable performance, follow these guidelines.
Do’s
• Use only the stylus to tap the screen—no pens, pencils, paper clips, or other sharp objects.
• Use only the supplied AC charger to charge your handheld.
• Keep the battery charged
• Keep the screen free of dust (or anything else that could make it dirty).
• For general cleaning, use a soft, damp cloth. If the screen becomes dirty, use a soft cloth
moistened with a diluted window-cleaning solution.
• Use only 3.5mm stereo headphones (sold separately) in your handheld’s headphone jack.
• Be sure to get rid of any static electricity buildup
or accessory.
• Synchronize
often to maintain a backup copy of your important information on your computer.
.
before you connect your handheld to any cable
T|X Handheld 25
Page 35

CHAPTER 1 Your Handheld
Don’ts
[
! ]
IMPORTANT
parts inside.
• Do not drop, bang, or otherwise cause a strong impact to your handheld.
• Do not carry your handheld in your back pocket; you might sit on it by mistake.
• Do not let your handheld get wet; don’t leave it in a damp location.
• Do not expose your handheld to very hot or cold temperatures, including placing it near a
heater, leaving it in the trunk of a car, or setting it by a window in direct sunlight.
• Do not carry or use your handheld at extremely high altitudes, unless you’re in an airplane.
Do not open your handheld for any reason. There are no user-serviceable
T|X Handheld 26
Page 36

CHAPTER 1 Your Handheld
Tip
Be sure to charge your
handheld for a full three
hours if it does not turn
on when you press the
power button.
Conserving battery power
If you see an alert on the screen warning you that the battery is low, recharge your handheld.
Also recharge your handheld if it doesn’t turn on when you press the power button.
NOTE
becomes drained to the point that you cannot turn on your handheld. When you recharge your
handheld, all of your existing information reappears.
Conserve battery life by doing any of the following:
• Adjust the screen brightness
• Reduce the Auto-off setting
• Use Keylock to prevent your
•Stop music
• Respond to or cancel alerts
• Turn off Bluetooth wireless technology and Wi-Fi functionality
• Minimize use of the expansion slot
The memory on your handheld is designed to store your information even if the battery
handheld from turning on by accident
or video playback when not in use
promptly
when not in use
T|X Handheld 27
Page 37

CHAPTER 1 Your Handheld
User Guide
For everything you need to
know about your handheld—
all that’s in this guide, and
much more—go to
www.palm.com/TXuserguide.
Tips & Tricks
Make your handheld
uniquely yours. For great
tips, software, accessories,
and more, visit
www.palm.com/myTX
.
Support
If you’re having problems
with your handheld, go to
www.palm.com/support
.
Beyond the basics
Click the link to the User Guide on the web and learn about these related topics:
Entering
Information
Moving
Around
Moving Info • Adding applications to your handheld
Categories Organizing your applications and information by filing them into categories
Privacy Keeping information private by turning on security options
Sharing • Beaming information and applications to other Palm Powered™ devices
Entering information with Graffiti 2 characters
• Working with Favorites and Applications
• Finding information on your handheld
• Deleting applications from your handheld
• Viewing application information
• Sending information and applications to other Bluetooth devices by using
Bluetooth technology on your handheld
Maintaining Caring for your handheld
T|X Handheld 28
Page 38

CHAPTER 2
I
Moving Info Between Your Handheld and Your Computer
n this chapter
Why synchronize
information?
What information is
synchronized?
How to synchronize
Installing applications to
your handheld
Beyond the basics
If you regularly synchronize your
handheld with your computer, you
know what a powerful tool
synchronization is for transferring,
updating, and backing up large
amounts of information on your
handheld.
Synchronizing simply means that
information that has been entered or
updated in one place (your handheld or
your computer) is automatically
updated in the other. There’s no need
to enter information twice.
Benefits
• Quickly enter and update information
on your computer and your handheld
• Install applications
• Protect your information
• Send photos and videos to your
handheld from your desktop
computer
T|X Handheld 29
Page 39

CHAPTER 2 Moving Info Between Your Handheld and Your Computer
Tip
Synchronize Microsoft
Word, PowerPoint, or
Excel files from your
computer and open them
in the Documents
application on your
handheld to view and
edit them at your
convenience.
Why synchronize information?
Quickly enter and update information. Synchronizing updates and exchanges information
between your handheld and Palm® Desktop software
quickly enter a contact list on your computer and then send it to your handheld—no re-entering
necessary!
NOTE
Outlook on your computer (Windows only).
Install applications. With just a few clicks, you can use Quick
Handheld droplet (Mac) to install applications on your handheld or to copy certain types of files
to your handheld.
During CD installation, you can choose to synchronize your
on your computer. For example, you can
handheld with Microsoft
Install (Windows) or the Send To
T|X Handheld
Protect your information. Nothing is worse than losing important information. When you
synchronize information, you create a backup copy. If something happens to your handheld
or your computer, the information is not lost; one tap restores it in both places.
[
! ]
IMPORTANT
up-to-date backup copy of important information.
Be sure to synchronize information frequently so that you always have an
30
Page 40

CHAPTER 2 Moving Info Between Your Handheld and Your Computer
[ ! ]
Before You Begin
Complete the following:
• Perform initial
handheld setup.
• Install Palm Desktop
software and additional
software from the CD.
For setup and installation
procedures, see Read
This First included in
your handheld package.
Key Term
»
Conduit The
synchronization software
that links an application
on your computer with
the same application on
your handheld.
Tip
You can synchronize your
handheld with your
computer wirelessly
using the built-in Wi-Fi
or Bluetooth
on your handheld.
®
technology
What information is synchronized?
When you install Palm Desktop software from the software installation CD, a conduit is installed to
your computer for each of the following applications. The conduits allow you to transfer
information between the application on your handheld and the corresponding application in
Palm Desktop software when you synchronize:
NOTE
During CD installation, you can choose to synchronize your handheld with Microsoft Outlook on
your computer (Windows only). If you do, info from Contacts, Calendar, Tasks, and Memos is
synchronized with info in the same application in Outlook (Memos is called Notes in Outlook).
Information for Expense, Note Pad, and Media is still synchronized with the same application in
Palm Desktop software. You can insert the CD at any time to choose synchronization with Outlook
if you did not do so during the initial installation.
NOTE
You can synchronize more than one handheld with your computer. For example, family members
can all synchronize their handhelds with the same copy of Palm Desktop software. Just make sure
that each handheld has its own username; the desktop software reads the username and
recognizes the handheld during synchronization. Loss of info may occur from sharing the same
username.
®
Information from Expense and Media is synchronized on Windows computers only.
You can also set up the VersaMail
®
application to synchronize with Outlook.
T|X Handheld
31
Page 41

CHAPTER 2 Moving Info Between Your Handheld and Your Computer
Tip
If the Select User dialog
box appears during
synchronization, select
the username whose
information you want to
synchronize, and then
click OK.
Tip
If you need help with
synchronizing, see What
do I do if I can’t
synchronize with my
computer?
How to synchronize
0
1 Connect the USB sync cable to
the USB port on the back of your
computer, and then insert the
other end into your handheld.
2 Synchronize your handheld with
your computer:
a. Press the sync button on the
USB sync cable.
T|X Handheld
b. When synchronization is
complete, a message appears
at the top of your handheld
screen, and you can
disconnect your handheld
from the connector.
Done
32
Page 42

CHAPTER 2 Moving Info Between Your Handheld and Your Computer
Tip
A confirmation dialog
box shows whether the
items will be copied to
your handheld or to an
expansion card. Choose
which handheld will
receive the items by
selecting the username
from the User drop-down
list in the upper-right
corner.
Did You Know?
You can move multiple
applications into the
Quick Install window to
have them ready for
installation the next time
you synchronize.
Installing applications to your handheld
Use Quick Install (Windows) or the Send To Handheld droplet (Mac) to install applications on your
handheld.
Using Quick Install
WINDOWS ONLY
0
1 Click the Quick Install icon on your desktop.
2 Copy the application:
a. Drag and drop the application onto the Quick Install window.
b. When the confirmation dialog box appears, confirm your username,
the application name, and the destination, and then click OK.
T|X Handheld
3 Synchronize to install the application on your handheld.
Done
33
Page 43

CHAPTER 2 Moving Info Between Your Handheld and Your Computer
Tip
Also use the Send To
Handheld droplet to copy
photos, videos, and
music files from your
Mac computer to your
handheld.
Tip
In Mac OS X, you can
make the Send To
Handheld droplet a
permanent part of your
desktop by dragging the
droplet to the Dock. Then
simply drag photos, and
other files you want to
transfer to your
handheld, onto the Dock.
Using the Send To Handheld droplet
MAC ONLY
0
1 Select the application you want to install:
a. Drag and drop the application onto the Send To
Handheld droplet in the Palm folder.
b. In the Send To Handheld dialog box, select your
username and click OK.
2 Synchronize to install the application on your handheld.
Done
T|X Handheld 34
Page 44

CHAPTER 2 Moving Info Between Your Handheld and Your Computer
User Guide
For everything you need to
know about your handheld—
all that’s in this guide,
and much more—go to
www.palm.com/TXuserguide.
Tips & Tricks
Make your handheld
uniquely yours. For great
tips, software, accessories,
and more, visit
www.palm.com/myTX
Support
If you’re having problems
with synchronization or
with anything else on
your handheld, go to
www.palm.com/support
.
.
Beyond the basics
Click the link to the User Guide on the web and learn about these related topics:
Moving Info • Synchronizing your handheld with Microsoft Outlook on your computer
• Synchronizing using the IR port on your handheld
• Using your company’s network to synchronize information
• Choosing whether to synchronize information for a specific application
Wi-Fi Synchronizing wirelessly using your handheld’s built-in Wi-Fi capabilities
Bluetooth Synchronizing wirelessly using your handheld’s built-in Bluetooth
technology
T|X Handheld 35
Page 45

CHAPTER 3
I
Your Photo and Video Organizer
n this chapter
Copying photos and videos
A picture may be worth a thousand
words, but what happens when you
have a lots of pictures—or videos—
Viewing photos and videos
Organizing photos and
videos into albums
Sending a photo or video
using Bluetooth® wireless
technology
Beyond the basics
that you are trying to keep organized?
Or maybe just a few that are so
meaningful that you want to have
instant access to them at any time?
Solve both problems with the Media
application. Media features easy
viewing and organization of still photos
and videos. You can keep your favorite
photos right on your handheld; select
photos as the background for your
Favorites and Applications views and
for Agenda View in Calendar; even
Benefits
• Never be far from your favorite
people or places
• Simplify photo and video
organization
• Store multiple videos and
hundreds of photos
add a photo to a Contacts entry.
T|X Handheld 36
Page 46

CHAPTER 3 Your Photo and Video Organizer
[ ! ]
Before You Begin
You must synchronize
your handheld with your
computer once before
you can copy photos and
videos to your handheld.
Tip
You can also copy photos
and videos to an
expansion card, and then
view them by inserting
the card into your
handheld’s expansion
card slot.
Copying photos and videos
You can copy photos and videos to your handheld in the following ways:
• On a Windows computer, open the Media application from within Palm® Desktop software
drag the photos or videos into the Media window, and then synchronize.
• On a Mac computer, drag the photos or videos onto the Send To
and then synchronize.
On a Windows computer, when you copy a photo in a popular format—such as JPG, BMP, TIFF
(uncompressed), and GIF—to your handheld, the photo is saved on your handheld in its original
format. If you copy a photo in a different format, it is saved on your handheld in JPG format.
On a Mac computer, all photos you copy using the Send To Handheld droplet icon are saved on
your handheld in JPG format.
When you copy a video from your Windows or Mac computer, the video is converted to a format
your handheld can play and is optimized for viewing on the handheld. Note, however, that there
are numerous video formats, and not all types can be converted to a format that’s viewable on
your handheld. To test a video on your Windows computer, try to open and view the video in the
desktop Media application; if you can’t view the video on your computer, you won’t be able to
view the video on your handheld.
Handheld droplet icon,
,
T|X Handheld 37
Page 47

CHAPTER 3 Your Photo and Video Organizer
Tip
Select Slide Show to
display all photos and
videos in an album,
automatically one after
another. Tap a photo or
video to stop the slide
show.
Viewing photos and videos
0
1 Tap Media in the input area.
2 Go to the album where the photo
or video is located:
a. Select either Handheld or
Expansion card .
NOTE
Expansion card icons appear
only if an expansion card is
inserted into your handheld’s
expansion card slot.
b. Select the location pick list at
the top of the screen, and
then select the location of the
photo or video you want to
view. Select All Albums to
view all photos and videos on
your handheld or on the
expansion card.
The Handheld and
Location
pick list
Handheld
Expansion card
Slide Show
Continued
T|X Handheld 38
Page 48

CHAPTER 3 Your Photo and Video Organizer
Tip
If you are viewing a
photo, you can also press
Center to return to the
selection screen.
3 Select the photo or video you want to view. Tap anywhere in the photo or video
to return to the selection screen.
Continued
Select a photo or
video to view
Tap the photo or video
to return to the selection
screen
T|X Handheld 39
Page 49

CHAPTER 3 Your Photo and Video Organizer
Tip
If a video appears
cropped in portrait view,
tap the video to return to
the selection screen,
r
otate the screen to
landscape view, and then
select the video again to
get a full-screen view.
4 [ & ] OPTIONAL Access controls:
• For photos, press Up on the 5-way navigator to zoom in. Press Down to
access the photo controls.
• For videos, press Center to access video controls.
Did You Know?
The input area is
automatically hidden
when you view a video.
Photo
Rotate
Video
Send
Done
T|X Handheld 40
Play or Pause
Full-screen view
Progress indicator
Volume
Send
Page 50

CHAPTER 3 Your Photo and Video Organizer
Tip
If a photo is stored on
your handheld, you can
add it only to an album
located on the handheld.
Likewise, if a photo is
stored on an expansion
card, you can add it only
to an album that is on the
same card.
Organizing photos and videos into albums
0
1 Tap Media in the input area.
2 Select Manage Albums .
Continued
T|X Handheld 41
Page 51

CHAPTER 3 Your Photo and Video Organizer
Tip
If you want to add or
remove photos or videos
in any album, select
Manage Albums from
Thumbnail or List view,
select the album you
want, and then select OK.
Follow the directions in
step 4 for adding or
removing items in an
album.
3 Create an album:
a. Select whether to create the
album on your handheld
(Device) or on an expansion
card inserted into the
expansion card slot (Card).
b. Select New, enter the name of
the new album, and then
select OK.
c. Select OK on the Manage
Albums screen.
4 Add photos or videos to the
album you just created:
a. Select each photo or video
you want to add to the album.
A plus sign appears to the left
of selected items. To remove a
photo or video from the
album, select it again; the plus
sign disappears.
b. Select Done.
Continued
T|X Handheld 42
Select to add
Select + to
remove
Page 52

CHAPTER 3 Your Photo and Video Organizer
5 Move photos or videos within albums:
a. Select the location pick list at the top of the screen, and then select the album
in which you want to move photos or videos.
b. Select the photo you want to move, and then tap and drag with the stylus to
move the photo or video to the desired location.
NOTE
Done
You cannot move photos or videos in All Albums view.
T|X Handheld 43
Page 53

CHAPTER 3 Your Photo and Video Organizer
[ ! ]
Before You Begin
Set up a Bluetooth®
connection on your
handheld.
Did You Know?
There are other ways to
send photos and videos
wirelessly. Attach
items to an email
message. Beam
to other Palm Powered™
devices. Copy the items
to an expansion card
and then insert the card
into another device.
Tip
To send a photo to a
device with which you
have formed a
partnership
Show pick list and then
select Trusted devices on
the Discovery Results
screen.
, select the
the
the items
Sending a photo or video using Bluetooth® wireless technology
You can easily share photos with family and friends. Use your handheld’s built-in Bluetooth
wireless technology to send photos and videos to other wireless devices within range. Sending
a file using wireless technology can take some time, so be patient.
0
1 Tap Media in the input area.
2 Send a photo or video:
a. Select the pick list at the top of
the screen, and then select the
album containing the photos
and/or videos you want to
send.
b. Highlight the photo or video
you want to send.
c. Select Send .
d. Select Bluetooth, and then select OK.
e. Select the device to which you want to send the photo or video, and then
select OK. The file is sent automatically.
Done
T|X Handheld 44
Page 54

CHAPTER 3 Your Photo and Video Organizer
User Guide
For everything you need to
know about your handheld—
all that’s in this guide,
and much more—go to
www.palm.com/TXuserguide.
Tips & Tricks
Make your handheld
uniquely yours. For great
tips, software, accessories,
and more, visit
www.palm.com/myTX
Support
If you’re having problems
with Media or with anything
else on your handheld, go to
www.palm.com/support
.
.
Beyond the basics
Click the link to the User Guide on the web and learn about these related topics:
Media • Viewing photos and videos as thumbnails, lists, albums, and slide shows
• Copying photos and videos to other applications or expansion cards
• Deleting photos and videos
Sharing Sending information using wireless technology on your handheld
Email Sending photos and videos as attachments to email messages
T|X Handheld 45
Page 55

CHAPTER 4
I
Your MP3 Player
n this chapter
Using Rhapsody as your
desktop music application
Setting up Rhapsody for MP3
Are you tired of listening to small talk
during that long commute on the bus
or train? Do you need something
smaller than a CD player when you’re
out for a walk or at the gym? No need
Transferring MP3 files to your
handheld
to buy an expensive MP3 player. Your
handheld can carry lots of your favorite
Transferring music from a CD
to your handheld
songs, and Pocket Tunes™ lets you
play the music on your handheld.
Playing music on your
handheld
Beyond the basics
Simply transfer songs onto your
handheld or an expansion card and
then listen through the built-in speaker
or stereo headphones (sold
separately).
Benefits
• Carry and listen to songs in the
popular MP3 format
• No separate MP3, CD, or mini-disc
player required
• Arrange your favorite songs into
NOTE
files directly to your handheld. You must insert
an expansion card into your handheld’s
expansion card slot, transfer the music files to
the card, and then listen to the files from the
card.
Mac users cannot transfer music
playlists on your handheld
T|X Handheld 46
Page 56

CHAPTER 4 Your MP3 Player
Tip
If you do not have
Internet access, you can
still enjoy music on your
handheld. Use Quick
Install to copy music files
to an expansion card,
insert the card into your
handheld’s expansion
card slot, and then use
the Pocket Tunes
application to listen to the
songs on the card.
Using Rhapsody as your desktop music application
The Pocket Tunes software that comes with your handheld is compatible with the popular MP3
audio file format. If your MP3 files are already on your computer’s hard drive, you need to transfer
them to your handheld to listen to them. You can use Rhapsody as your desktop music application
to transfer files to your handheld.
NOTE
computer desktop.
Rhapsody has many advanced features that make it the recommended desktop music application:
• Rip CDs into MP3 format.
• Easily manage your music library on your desktop computer.
• Create playlists.
• Transfer music from your computer to your handheld.
An Internet connection is required to download Rhapsody and install it on your
T|X Handheld
47
Page 57

CHAPTER 4 Your MP3 Player
[ ! ]
Before You Begin
(Windows only) Perform
the following:
• Install the Rhapsody
desktop application on
your computer. Insert the
software installation CD
and follow the onscreen
instructions for installing
extra software. You
should install this
software even if you
already have a version of
Rhapsody installed on
your computer, because it
contains all of the
components needed to
transfer music files to
your handheld. An
Internet connection is
required to download the
software.
Setting up Rhapsody for MP3
WINDOWS ONLY
To be compatible with Pocket Tunes, Rhapsody settings must be changed to support MP3.
NOTE
the software installation CD. We recommend that you install this version even if you already have
Rhapsody on your computer. If you choose to use a different version, the procedure steps may be
different.
0
The following procedure works with the version of Rhapsody you can download from
1 Prepare your computer and your handheld:
a. Connect your
b. On your handheld, go
Continued
handheld and your computer to the USB sync cable.
to Favorites and select Music .
• After you install the
software,
your handheld with your
computer so that
Rhapsody can recognize
your handheld.
T|X Handheld 48
synchronize
Page 58

CHAPTER 4 Your MP3 Player
2 Set the Rhapsody format setting
on your computer:
a. Open the Rhapsody
b. Click Tools, and then click
c. Click CD Importing & Playing.
d. Select MP3 from the Format
application on your computer.
Preferences.
(codec) drop-down list.
T|X Handheld
Done
e. Click OK.
Select mp3
You have now set up Rhapsody to import and play MP3 files.
49
Page 59

CHAPTER 4 Your MP3 Player
[ ! ]
Before You Begin
(Windows only) You must
set up Rhapsody to
support MP3 files.
Transferring MP3 files to your handheld
The Pocket Tunes software that comes with your handheld is compatible with the popular MP3
audio file format. If your MP3 files are already on your computer’s hard drive, you need to
transfer them to your handheld to listen to them on your handheld.
WINDOWS ONLY
0
1
Prepare your computer and your handheld:
a. Connect your
b. On your handheld, go to Favorites
Continued
handheld and your computer to the USB sync cable.
and select Music .
T|X Handheld 50
Page 60

CHAPTER 4 Your MP3 Player
Tip
If your handheld does not
appear in the drop-down
list in step 2, close
Rhapsody, install the
Pocket Tunes plug-in
from the CD, and then
open Rhapsody again.
2
Prepare Rhapsody on your computer:
a. Open the Rhapsody application.
b. Click the Transfer tab in the Mixer window.
c. Click the Device Preferences button and select your handheld from
the drop-down list.
d. Click the location, such as My Library, where the songs are stored on
your computer.
Select song
location
Select your
handheld
Device
Preference
button
Continued
T|X Handheld 51
Page 61

CHAPTER 4 Your MP3 Player
3
Transfer the files to your
handheld:
a. Drag the song files you
want from the song location
window into the Transfer
window.
b. Click Transfer. The files
are transferred to your
handheld.
[
! ]
IMPORTANT
the sync button on your cable.
Rhapsody is transferring the
files, so there’s no need to do
anything.
Done
Do not press
T|X Handheld 52
Page 62

CHAPTER 4 Your MP3 Player
Tip
You can also use a card
reader accessory (sold
separately) to transfer
MP3 files from your
computer to an
expansion card.
MAC ONLY
Mac users must transfer music files to an expansion card inserted into your handheld’s expansion
card slot.
0
1
2
3
Connect your handheld and your computer to the USB sync cable.
Insert an expansion card into your handheld’s expansion card slot.
Select the MP3 files you want to
transfer:
a. Drag and drop the MP3 files
onto the Send To Handheld
droplet in the Palm folder.
b. In the Send To Handheld
dialog box, select your
username and click OK.
T|X Handheld
4 Synchronize your handheld with your computer.
NOTE
several minutes.
Done
Be patient; transferring music to an expansion card can take
53
Page 63

CHAPTER 4 Your MP3 Player
[ ! ]
Before You Begin
(Windows only) You
must set up Rhapsody to
support MP3 files.
Transferring music from a CD to your handheld
If your songs are on a CD and you want to listen to them on your handheld, use the Rhapsody
desktop application on your computer to convert and transfer the files.
NOTE
computer, and then use the Send To Handheld droplet to transfer the files to your handheld. Music
files should be imported in MP3 format.
WINDOWS ONLY
0
Mac users can use iTunes, included with OS X, to transfer music from a CD to your
1 Access the music CD from Rhapsody on your computer:
a. Open the Rhapsody application.
b. Insert the music CD into your computer’s CD drive.
Continued
T|X Handheld 54
Page 64

CHAPTER 4 Your MP3 Player
Did You Know?
An interactive tutorial on
the software installation
CD guides you through
adding music. Insert the
CD, go to the My Music
section of the tutorial,
and then select Add
music from a CD.
Did You Know?
For tips on using
Rhapsody on your
computer, go to the Help
menu in Rhapsody or
visit www.real.com
.
2 Transfer the songs you want to add to your library:
a. Select the titles you want to transfer from the CD.
b. Click Import CD.
Import
CD
Select
titles
3 Transfer the MP3 files to your handheld.
Done
T|X Handheld 55
Page 65

CHAPTER 4 Your MP3 Player
Did You Know?
Pocket Tunes continues
playing the songs in your
list until it reaches the end
of your list or until you
tap Stop, even if your
handheld screen is off.
Tip
You can upgrade Pocket
Tunes to a version that
supports additional
music file formats, such
as WMA; supports
streaming music; and
includes additional
features such as graphic
equalizers and
bookmarks. For more
information, visit
www.pocket-tunes.com/
palm.
Playing music on your handheld
0
1 Go to Favorites and select Music .
2 Select a song to play:
• To play the current song, tap Play.
• To play a different song, tap Choose song and select a song from the list.
Progress indicator
Play/Pause
Choose song
Previous song
Next song
Volume
Shuffle playlist
3 When you’ve finished listening, tap Stop.
Done
T|X Handheld 56
Page 66

CHAPTER 4 Your MP3 Player
User Guide
For everything you need to
know about your handheld—
all that’s in this guide, and
much more—go to
www.palm.com/TXuserguide
Tips & Tricks
Make your handheld
uniquely yours. For great
tips, software, accessories,
and more, visit
www.palm.com/myTX
Support
If you’re having problems
with Pocket Tunes, go to
www.pocket-tunes.com
.
Beyond the basics
Click the link to the User Guide on the web and learn about these related topics:
Pocket Tunes Creating playlists by choosing which songs to play and the order to play
them in
T|X Handheld 57
Page 67

CHAPTER 5
Your Microsoft Office File Manager
In this chapter
Creating and managing
Office files
Opening files from within
Documents
Beyond the basics
With its ability to store important
information, your handheld lets you
take your office with you—including
your Microsoft Office files. With the
Documents application, you can carry,
view, and edit Microsoft Word and
Excel files directly on your handheld,
and create files that you can save in
native Word or Excel format. You can
also view, carry, and manage
PowerPoint files on your handheld.
You can keep updated copies of the
files on both your handheld and your
computer so that you can work on
them in the most convenient location
any time.
Benefits
• Manage Word, Excel, and PowerPoint
files on your handheld
• Improve productivity by taking
important docs, spreadsheets, and
presentations with you on the go
T|X Handheld 58
Page 68

CHAPTER 5 Your Microsoft Office File Manager
Tip
For complete information
on the Documents To Go
application, click the
application icon on your
computer and then click
Help, or go to
www.dataviz.com
.
Creating and managing Office files
The Documents application provides powerful editing and file management features for Office
files on your handheld. What’s more, Documents makes it easy for you to share files between
your computer and your handheld.
The Documents application has a companion application on your computer called Documents
To Go. Use Documents To Go to transfer files to your handheld when you synchronize.
Here are some of the capabilities of Documents:
NOTE
multiple font sizes and spell check.
• View Word, Excel, and PowerPoint files (DOC, XLS, or PPT).
• Create or edit a Word-compatible document or Excel-compatible spreadsheet on your handheld,
and then save it in the native DOC or XLS format.
• Create a PowerPoint presentation on your computer, use the Documents To Go desktop
application to convert it to a format that is optimized for viewing on your handheld, then
synchronize to transfer the file to your handheld. View or edit the file on your handheld, then
synchronize again to transfer the changes to the original PowerPoint file on your computer.
• Open Office files received as attachments to incoming email messages
outgoing messages.
The Documents application does not support some editing functionality, such as
, and attach files to
T|X Handheld
59
Page 69

CHAPTER 5 Your Microsoft Office File Manager
Tip
When you are working on
a file, save it to your
handheld or to an
expansion card by
selecting Menu, selecting
Save As from the File
menu, and then selecting
the location where you
want to save the file.
Opening files from within Documents
In the Documents application, you can view and open any Word, Excel, or PowerPoint file on your
handheld.
0
1 Tap Documents in the input area.
2 Select the file you want from the
list.
Done
T|X Handheld
60
Page 70

CHAPTER 5 Your Microsoft Office File Manager
User Guide
For everything you need to
know about your handheld—
all that’s in this guide, and
much more—go to
www.palm.com/TXuserguide.
Tips & Tricks
Make your handheld
uniquely yours. For great
tips, software, accessories,
and more, visit
www.palm.com/myTX
Support
If you’re having problems
with Documents, click the
Documents To Go icon on
your computer and then click
Help, or go to
www.dataviz.com
.
.
Beyond the basics
Click the link to the User Guide on the web and learn about these related topics:
Email Sending and receiving Office files as attachments to email messages
T|X Handheld 61
Page 71

CHAPTER 6
I
Your Personal Information Organizer
n this chapter
Organizing your personal
information
Managing your contacts
Managing your calendar
Managing your tasks
Beyond the basics
Say good-bye to paper address books
and calendars. Free yourself from
having to frantically search for a
misplaced address or phone number.
Throw away all of those halfcompleted to-do lists that will never
get done.
Your handheld is all that you need to
organize your personal information
and have it available wherever you go.
You never lose your information, even
if your battery is completely drained.
All of your personal information is
backed up each time you synchronize,
and your information is kept private
when you use your handheld’s security
features. Also, you can easily share
info with others electronically.
Benefits
• Carry all your business and personal
contact information in your hand
• Track current, future, and past
appointments
• Make to-do lists that get done
• Set reminders for appointments,
birthdays, important tasks, and more
T|X Handheld 62
Page 72

CHAPTER 6 Your Personal Information Organizer
Organizing your personal information
You have three powerful tools to help you organize your personal information. These applications
can be synchronized with either Palm
0
®
Desktop software or Microsoft Outlook.
Contacts Easily enter information such as names, addresses, birthdays, and phone
numbers. You can even add photos of your contacts, friends, and loved ones
directly to their contact information. Quickly view, update, and organize contact
information. You can share info with other handhelds and dial phone numbers
or send messages directly from a contact entry using your handheld’s built-in
wireless technology.
Calendar Stay on top of your schedule by creating appointments, setting alarms, and
spotting conflicts in Calendar. You can view your calendar by day, week, or
month, or as an agenda list that combines your list of tasks and email
notifications with your appointments. Schedule repeating meetings or block out a
vacation by creating one event set to repeat at an interval you specify. Color-code
your appointments by category and add notes with helpful information.
Ta s k s Make lists of the things you need to do, and prioritize each task. Track deadlines
and stay focused by setting alarms. This is an easy way to stay on top of your
to-do list.
T|X Handheld 63
Page 73

CHAPTER 6 Your Personal Information Organizer
Tip
If the first character you
enter in the Last Name
or Company field is an
asterisk (*) or another
symbol, that contact
always appears at the top
of the Contacts list. That’s
useful for an entry like
“If Found Call [your
phone number].”
Did You Know?
You can also enter one or
more contacts on your
desktop computer, and
then copy them to your
handheld by
synchronizing
.
Managing your contacts
Enter and organize all of your contact information for easy access and sharing with others.
Adding a contact
0
1
Press Contacts .
2 Add your contact information:
a. Select New.
b. Select each field in which you want to enter information, and enter it. Tap the
scroll arrows to view more fields.
Continued
T|X Handheld 64
Page 74

CHAPTER 6 Your Personal Information Organizer
Did You Know?
If you want a reminder
about a birthday, select
the Reminder box, enter
the number of days
before the birthday that
you want to see the
reminder, and then
select OK.
Tip
Birthdays you enter in
Contacts appear as
untimed events in
Calendar. If you update
the birthday in Contacts,
it is automatically
updated in Calendar
as well.
3 [ & ] OPTIONAL Add a photo:
a. Select the Picture box.
b. Select and add a photo from
the Media application.
4 [ & ] OPTIONAL Add a
birthday:
a. Select the Birthday box.
b. Select the birth year, month,
and date.
Tap here
Tap here
5 After you finish entering all the information you want, select Done.
Done
T|X Handheld 65
That's it. Your handheld automatically saves the contact.
Make sure you have a current backup. Synchronize often.
Page 75

CHAPTER 6 Your Personal Information Organizer
Did You Know?
Phone Lookup in the
Options menu of many
applications lets you add
contact information when
you are creating an entry
in another application.
Locating a contact on your list
0
1 Press Contacts .
2 Search for the contact:
a. Select the Look Up line at the
bottom of the screen and
enter the first letter of the
name you want to find.
b. Enter the second letter of the
name, and so on, until you
can easily scroll to the contact
you want.
3 Select the contact to open it.
Done
T|X Handheld 66
Page 76

CHAPTER 6 Your Personal Information Organizer
Tip
You can create a contact
with your own
information and select it
as your business card by
opening the Record
menu and selecting
Business Card. Beam
your business card to
other handhelds by
holding down the
Contacts button until
the Beam dialog
box appears.
Did You Know?
A Beam command
appears on the leftmost
menu of most
applications. Beam
information such as
photos or appointments.
Tip
You can also send
information to other
devices using your
handheld’s built-in
Bluetooth
technology.
®
wireless
Beaming a contact
0
1 Press Contacts .
2 Beam the contact:
a. Locate the contact
b. Open the menus
c. Select Record, and then select Beam Contact.
d. When the Beam Status dialog box appears, point your handheld’s IR port
directly at the IR port of the other handheld.
NOTE
apart, and there should be a clear path between them. Depending on the
receiving handheld model, not all information may be sent correctly.
For best results, the handhelds should be between 4 and 36 inches
you want to beam.
.
IR port
3 Wait for the Beam Status dialog box to indicate that beaming is complete.
Done
T|X Handheld 67
Page 77

CHAPTER 6 Your Personal Information Organizer
Key Term
»
Event The name for an
entry in the Calendar
application, including
appointments, birthdays,
reminders, recurring
meetings, and so on.
Managing your calendar
Enter appointments to help you organize your time, and then set alarms to remind you before the
event so that you have time to prepare.
Scheduling an appointment
0
Tip
You can also scroll to a
date by pressing Left
or Right on the 5-way
navigator or by tapping
the arrows at the top of
the Day View.
Did You Know?
If you are synchronizing
with Outlook, you can
add time zones
appointments to keep
your calendar current
no matter where you
are traveling.
to your
1 Open Day View:
a. Press Calendar .
b. Tap the Day View icon
Day View icon
Go To
2 [ & ] OPTIONAL If the
appointment is not for today,
select the date of the
appointment:
a. Select Go To.
b. Select the year, month,
and date.
Continued
T|X Handheld 68
Page 78

CHAPTER 6 Your Personal Information Organizer
Tip
To enter reminders,
holidays, anniversaries,
and other events that take
place on a particular date
but not at a particular
time, select No Time.
3 Tap the line next to the time the appointment begins, and enter a description.
4 If the appointment is longer or shorter than an hour, set the duration:
a. In Day View, tap the start time.
Tip
Color-code your calendar.
Tap the bullet next to
the description to file
the appointment in a
category. Each category
has its own color.
Tip
Are you going to a weekly
or multi-day event? You
can select Details and
then select the Repeat
pick list to list the same
event for multiple days.
Done
b. In the Set Time dialog box, select End Time.
c. Select the hour and minute lists to select the time the appointment ends.
d. Select OK.
Start time
Duration
Color-coded bullet
Description
Hour
list
Minute
list
That’s it. Your handheld automatically saves the appointment.
Make sure you have a current backup. Synchronize often.
T|X Handheld 69
Page 79

CHAPTER 6 Your Personal Information Organizer
Tip
Press the Calendar button
repeatedly to cycle
through the Agenda
View, Day View, Week
View, and Month View.
Tip
You can also display Year
View. From Month View,
select Year.
Did You Know?
You can use a favorite
photo as the background
for your Agenda View.
Tip
Calendar opens to
Agenda View by default,
but you can change that
to another view by
selecting Display Options
in the Options menu
.
Checking your schedule
Sometimes you want to look at your schedule for a particular date, while other times you want
to see an overview of a week or month.
0
1 Press Calendar .
2 Tap the icons in the lower-left corner to see four different Calendar views:
Agenda
View
Week View
Day View
Done
T|X Handheld 70
Month View
Page 80

CHAPTER 6 Your Personal Information Organizer
Did You Know?
Setting your alarm
sounds in World Clock
instead of in Calendar
gives you different alarm
sound choices.
Did You Know?
When you set an alarm,
a little alarm clock
appears to the right of
the event description.
Tip
You can beam events to
anyone who has a
handheld with an IR port.
Just open the Record
menu and select Beam
Item or Beam Category.
Setting an alarm to remind you of a scheduled event
0
1 Press Calendar .
2 Go to the event you want to assign an alarm to:
a. From Day View, select Go To.
b. Select the year, month, and date of the event.
c. Tap the event description.
3 Set the alarm:
a. Tap Details.
b. Check the Alarm box.
c. Select the pick list and select
Minutes, Hours, or Days.
d. Enter how many minutes,
hours, or days before the
event you want the alarm to
sound, and then select OK.
Done
T|X Handheld 71
Page 81

CHAPTER 6 Your Personal Information Organizer
Tip
If no task is currently
selected, you can create
a new task simply by
starting to write in the
input area.
Tip
Set an alarm for a task
with a due date. Select
the task, tap Details,
select the Alarm box,
check the Alarm box,
enter the alarm settings,
and then select OK.
Managing your tasks
Create and organize your to-do list, and then track your progress.
Creating a task
0
1 Go to Favorites and select Tasks .
2 Create a task:
a. Select New.
b. Enter a description of the task.
Due date
Long description
New task
Priority number
Note button
3 [ & ] OPTIONAL Assign a priority and due date:
a. Select a priority number (1 is the most important).
b. Select the Due Date pick list, and then select a date from the list, or select
Choose Date to select a date from the calendar.
Done
T|X Handheld 72
That’s it. Your handheld automatically saves the task. Make sure
you have a current backup. Synchronize often.
Page 82

CHAPTER 6 Your Personal Information Organizer
Did You Know?
Overdue tasks have an
exclamation point (!)
next to the due date.
Tip
Create a new category
for tasks by selecting
Edit Categories in the
Category pick list.
Organizing your tasks
Sometimes you want to look at all the things you need to do, while at other times you want to see
only certain types of tasks.
0
1 Go to Favorites and select Tasks .
2 In the Tasks list, select one of these options:
All Displays all your tasks.
Date Displays tasks that are due in a specific time frame. Select the pick list in
the upper-right to select Due Today, Last 7 Days, Next 7 Days, or Past Due.
Category Displays tasks that are assigned to the selected category: Business,
Personal, and so on. Select the pick list in the upper-right to select a different
category.
Done
T|X Handheld 73
Page 83

CHAPTER 6 Your Personal Information Organizer
Tip
You can set Task
Preferences to record the
date that you finish your
tasks, and you can show
or hide finished tasks.
To change these settings,
open the Options menu
and select Preferences.
Marking a task complete
You can check off a task to indicate that you’ve completed it.
0
1 Go to Favorites and select Tasks .
2 Check the box on the left side of
the task.
Done
NOTE
differently. Palm Desktop software checks off all overdue instances of the task, and Microsoft
Outlook checks off only the oldest instance of the task.
Palm®Desktop software and Microsoft Outlook handle completed repeating tasks
T|X Handheld 74
Page 84

CHAPTER 6 Your Personal Information Organizer
User Guide
For everything you need to
know about your handheld—
all that’s in this guide, and
much more—go to
www.palm.com/TXuserguide.
Tips & Tricks
Make your handheld
uniquely yours. For great
tips, software, accessories,
and more, visit
www.palm.com/myTX
.
Support
If you’re having problems
with organizer applications or
with anything else on your
handheld, go to
www.palm.com/support
.
Beyond the basics
Click the link to the User Guide on the web and learn about these related topics:
Contacts • Displaying additional contact fields and defining custom fields
• Using Quick Connect to make a phone call, address and send an email
or text message, or go to a web page directly from a contact
Calendar • Setting a time zone for an individual appointment different from the time
zone of the location you set for your handheld
• Reserving blocks of time for long events like vacations or conferences
Ta s k s • Creating repeating tasks for things you need to do at regular intervals, such
as taking out the trash on Thursday night or filing a weekly status report
• Setting preferences to choose which tasks appear in the Tasks list, whether
to track completion dates, and which alarm sound plays
Categories Organizing items by type and sorting them
Moving Info Transferring information from other applications such as databases,
spreadsheets, and other organizer software
Privacy Keeping information private by turning on security options
Sharing Sending information wirelessly using Bluetooth wireless technology on your
handheld
Email Sending information as attachments to email messages
T|X Handheld 75
Page 85

CHAPTER 7
I
Your Memos and Notes
n this chapter
Organizing your memos and
notes
Managing your memos
Managing your notes
Beyond the basics
Throw away your yellow sticky notes,
lists, and memo pads. You no longer
have to organize your scraps of paper
or search through piles for a misplaced
memo. When an important idea pops
into your head, jot it down it before
you forget.
Your handheld is all that you need to
organize your notes and memos. Also,
you can easily share info with others
electronically.
Benefits
• Capture thoughts on the fly
• Send memos and notes to
colleagues wirelessly
• Synchronize your information to
back it up on your computer
T|X Handheld 76
Page 86

CHAPTER 7 Your Memos and Notes
Organizing your memos and notes
You have two powerful tools to help you organize your memos and notes. Memos can be
synchronized with either Microsoft Outlook (where it is called Notes) or Palm
®
Desktop software.
Note Pad can be synchronized only with Palm Desktop software.
0
Memos Capture information that is meaningful to you, from meeting notes to recipes and
favorite quotations. Memos provides a quick and easy way to enter, store, and
share your important information.
Note Pad Draw freehand and take notes in your personal handwriting. Use Note Pad to do
everything you might do with a piece of paper and a pencil, such as drawing a
quick sketch.
T|X Handheld 77
Page 87

CHAPTER 7 Your Memos and Notes
Tip
In the Memos list, you
can also just start writing
to create a new memo.
The first letter is
automatically capitalized.
Tip
Use Phone Lookup to
quickly add a name and
phone number to a
memo.
Managing your memos
Create memos that are titled and organized so you can easily find them.
Creating a memo
0
1 Go to Favorites and select Memo .
2 Create a memo:
a. Select New.
b. Enter your memo. Tap Enter on the onscreen keyboard or draw the Graffiti®
2 writing Return stroke to move to a new line in the memo.
c. Select Done.
Done
That's it. Your handheld automatically saves the memo. Make sure
you have a current backup. Synchronize often.
T|X Handheld 78
Page 88

CHAPTER 7 Your Memos and Notes
Tip
The Memos list shows
the first line of each
memo, so make sure that
first line is something you
will recognize.
Did You Know?
You can connect your
handheld to a portable
keyboard to easily type
your memos on the go.
To view a variety of
portable keyboards for
your handheld, visit
www.palm.com/myTX
and click the Accessories
link.
Viewing and editing a memo
0
1 Go to Favorites and select Memo .
2 View or edit the memo:
a. In the Memos list, select the memo you want.
b. Read or edit the memo, and then select Done.
Done
T|X Handheld 79
Page 89

CHAPTER 7 Your Memos and Notes
[ ! ]
Before You Begin
Make sure full-screen
writing is turned off. You
cannot create or edit
notes in Note Pad when
full-screen writing is on.
Tip
You can change the color
of the pen and paper
(background). From the
Note Pad list screen, open
the Options menu, select
Preferences, and then
select Color.
Tip
Tap the pen selector to
change the pen width or
to select the eraser.
Managing your notes
You can quickly create handwritten notes and sketches of your thoughts and ideas.
Creating a note
0
1 Go to Applications and select Note Pad .
2 Create a note:
a. Use the stylus to write your
note directly on the handheld
screen.
b. Select the time at the top of
the screen and enter a title
using Graffiti
onscreen keyboard
c. Select Done.
2 writing or the
.
Category box
Time or title
Scroll bar
Pen selector
Eraser
Done
That’s it. Your handheld automatically saves the note. Make sure
you have a current backup. Synchronize often.
T|X Handheld 80
Page 90

CHAPTER 7 Your Memos and Notes
Tip
Sort the Note Pad list
alphabetically, by date,
or manually. Open the
Options menu, select
Preferences, and then
select the Sort by pick list.
If you sort manually, you
can rearrange the list
by dragging notes to
another position in the
list.
Viewing and editing a note
0
1 Go to Applications and select Note Pad .
2 Open the note:
a. Select Done to display the Note Pad list.
b. Select the note you want to view or edit.
3 Read or edit the note, and then select Done.
Done
T|X Handheld 81
Page 91

CHAPTER 7 Your Memos and Notes
User Guide
For everything you need to
know about your handheld—
all that’s in this guide, and
much more—go to
www.palm.com/TXuserguide.
Tips & Tricks
Make your handheld
uniquely yours. For great
tips, software, accessories,
and more, visit
www.palm.com/myTX
.
Support
If you’re having problems
with Memos or Note Pad
or with anything else on
your handheld, go to
www.palm.com/support
.
Beyond the basics
Click the link to the User Guide on the web and learn about these related topics:
Memos • Deleting memos
• Sending memos to your computer by synchronizing, so you can cut text
from a memo and paste it into an application such as Microsoft Word
Notes Setting alarms when you use notes as reminders
Categories Organizing items by type and sorting them
Moving Info Transferring information from other applications such as databases,
spreadsheets, and other organizer software
Privacy Keeping information private by turning on security options
Sharing Sending information wirelessly using Bluetooth
on your handheld
Email Sending information as attachments to email messages
®
wireless technology
T|X Handheld 82
Page 92

CHAPTER 8
I
Your Wireless Connections
n this chapter
What can I do with built-in
wireless technology?
When would I use Wi-Fi or
Bluetooth technology?
Setting up a Wi-Fi network
connection
Entering basic Bluetooth®
settings
Setting up a Bluetooth®
phone connection
Accessing email and the web
with Bluetooth® wireless
technology
Setting up a connection for
Bluetooth synchronization
Beyond the basics
Staying connected means you have
the latest wireless technology at your
fingertips at all times. Now your
handheld can connect you to the
wireless world using either Wi-Fi® or
Bluetooth® wireless technology.
When you’re in range of a network
“hot spot,” use Wi-Fi to access a home,
public, or corporate network. When
you’re with friends who have
compatible devices, use Bluetooth
wireless technology to share your
contacts or your favorite photos.
Benefits
• Connect to home and public wireless
networks
• Connect to your Bluetooth phone
to send text or email messages
or to access the web
• Reduce cable clutter by
synchronizing wirelessly
• Connect to other devices to
share files wirelessly
T|X Handheld 83
Page 93

CHAPTER 8 Your Wireless Connections
Key Term
»
Wi-Fi Wireless
technology that allows
devices such as
handhelds, printers,
and computers to
connect wirelessly to the
Internet and to corporate,
home, and public
networks through
network access points.
Key Term
»
Bluetooth Technology
that enables devices such
as handhelds, mobile
phones, and computers
to connect wirelessly to
each other within a
30-foot range.
What can I do with built-in wireless technology?
Access your corporate network. Whether you are attending a meeting or roaming the hallway,
you can stay connected to the information you need.
Send and receive email messages. Whether you send and receive email messages once a week
or constantly throughout the day, wireless connectivity means that you can share information.
Access the web. Connect to the Internet for news and information in a cafe, in a meeting, or in
your car.
Reduce cable clutter by synchronizing wirelessly. Imagine your desk and workstation without
cable clutter. Wireless technology on your handheld replaces many of the connecting cables with
a wireless connection for tasks such as synchronizing.
Connect to other devices to share files wirelessly. Wouldn’t it be great if you could transfer files
such as photos wirelessly?
When would I use Wi-Fi or Bluetooth technology?
You can make many of the same types of connections—browsing the web, checking email,
synchronizing wirelessly—using either the Wi-Fi or Bluetooth technology on your handheld.
Which one you use depends mainly on your location and circumstances.
Wi-Fi Use Wi-Fi technology when you are in range of a Wi-Fi network access point, often called a
“hot spot.” This can be in a public location such as a cafe, hotel, or airport; at your job over your
company’s network; or at home if you have a wireless network set up.
Bluetooth Use Bluetooth technology when you are not in range of a Wi-Fi network but are able
to make a connection to your mobile phone that is also enabled with Bluetooth technology. This
could be at home, on the road, or anywhere else you are in range of your wireless provider’s data
network.
T|X Handheld 84
Page 94

CHAPTER 8 Your Wireless Connections
Also use your handheld’s Bluetooth technology to connect directly to other Bluetooth devices,
such as computers or handhelds, to send and receive information. Check the documentation
included with the other device for instructions on how to set up the device’s Bluetooth capabilities.
Wi-Fi Bluetooth
Example: You are at an Internet cafe and want to
browse the web. Use your handheld’s Wi-Fi
technology to wirelessly connect to the cafe’s network.
Example: You are out making sales calls and arrive early
for an appointment. Use your handheld’s Bluetooth
technology to connect to your mobile phone and check
your email from the car in the parking lot before you go
into the appointment.
T|X Handheld 85
Page 95

CHAPTER 8 Your Wireless Connections
[ ! ]
Before You Begin
Check with your system
administrator to get the
name of the network, also
known as an SSID, and
the security information,
such as WEP or WPA-PSK
keys.
Tip
Once you have set up a
connection to a network,
connect to it at any time
by opening Wi-Fi
controls, selecting the
network from the
Network pick list, and
then selecting Connect.
Setting up a Wi-Fi network connection
0O
1
Tap Wi-Fi controls on the status bar.
2 Do one of the following:
• If this is the first time you are
setting up a Wi-Fi network
connection, select Yes.
• If you have previously set up
any network connections and
are setting up a new
connection, select the Wi-Fi
pick list, select On, and then
select Scan/Setup.
Your handheld scans for
available networks.
Continued
T|X Handheld 86
Page 96

CHAPTER 8 Your Wireless Connections
Key Term
»
Encryption key A
series of letters and
numbers that enables
data to be encrypted and
then decrypted so it can
be safely shared within a
network. Your handheld
supports two encryption
systems: WEP and WPAPSK.
Did You Know?
A network that does not
appear on the list may be
hidden for security
purposes.
3 Do one of the following:
The network you want is listed
Select the network, and then
select Connect. If the network
does not require an encryption
key, the connection process
begins. When the process is
completed, you are returned to
the application you were in when
you opened the Wi-Fi controls.
You are finished with this
procedure.
If the network requires an
encryption key, select Yes when
asked if you want to enter
security settings. Continue with
step 4.
The network you want is not
listed Select Edit, and then
select Add. Continue with step 4.
Continued
T|X Handheld 87
Page 97

CHAPTER 8 Your Wireless Connections
4 Add the network name or SSID if it does not appear. An SSID is required for
hidden networks.
5 Select a security option:
• If your network does not
require any encryption
settings, select None and go
to step 8.
• If your network requires WEP
encryption, select WEP and go
to step 6.
• If your network requires
WPA-PSK encryption, select
WPA-PSK and go to step 7.
Continued
T|X Handheld 88
Page 98

CHAPTER 8 Your Wireless Connections
Tip
Check with your system
administrator for WEP
encryption information.
6
If you selected WEP in step 5:
a. Select the Key box.
b. Enter the WEP encryption information.
c. Select OK.
Continued
T|X Handheld 89
Page 99

CHAPTER 8 Your Wireless Connections
Tip
Check with your system
administrator for the
WPA-PSK passphrase.
7
If you selected WPA-PSK in step 5:
a. Select the Key box.
b. Assign a passphrase.
c. Select OK.
8
T|X Handheld 90
Select OK in the Edit Wi-Fi
Network or New Wi-Fi Network
dialog box, and then select Yes
when asked if you want to
connect to the network. When
the connection completes, you
are returned to the application
you were in when you opened
the Wi-Fi controls.
Done
Page 100

CHAPTER 8 Your Wireless Connections
Tip
When you enter a URL in
the web browser or select
Get and Send
VersaMail
a connection is
automatically initiated
with the last-used service.
in the
®
application,
Accessing email and the web using Wi-Fi® functionality
After you set up a connection with a Wi-Fi network, you can send and receive email or browse
the web wirelessly using this connection.
NOTE
You mus t also set up an email account
messages.
0
Wi-Fi functionality must be on before you can use it to make wireless connections.
on your handheld before you can send or receive email
1 Open the email application or the web browser.
2
Tap Wi-Fi controls on the status bar.
3 Make sure that Wi-Fi is set to On.
Continued
T|X Handheld 91
 Loading...