

Page 1
Choosing the Radio Station
Tuning into stations automatically
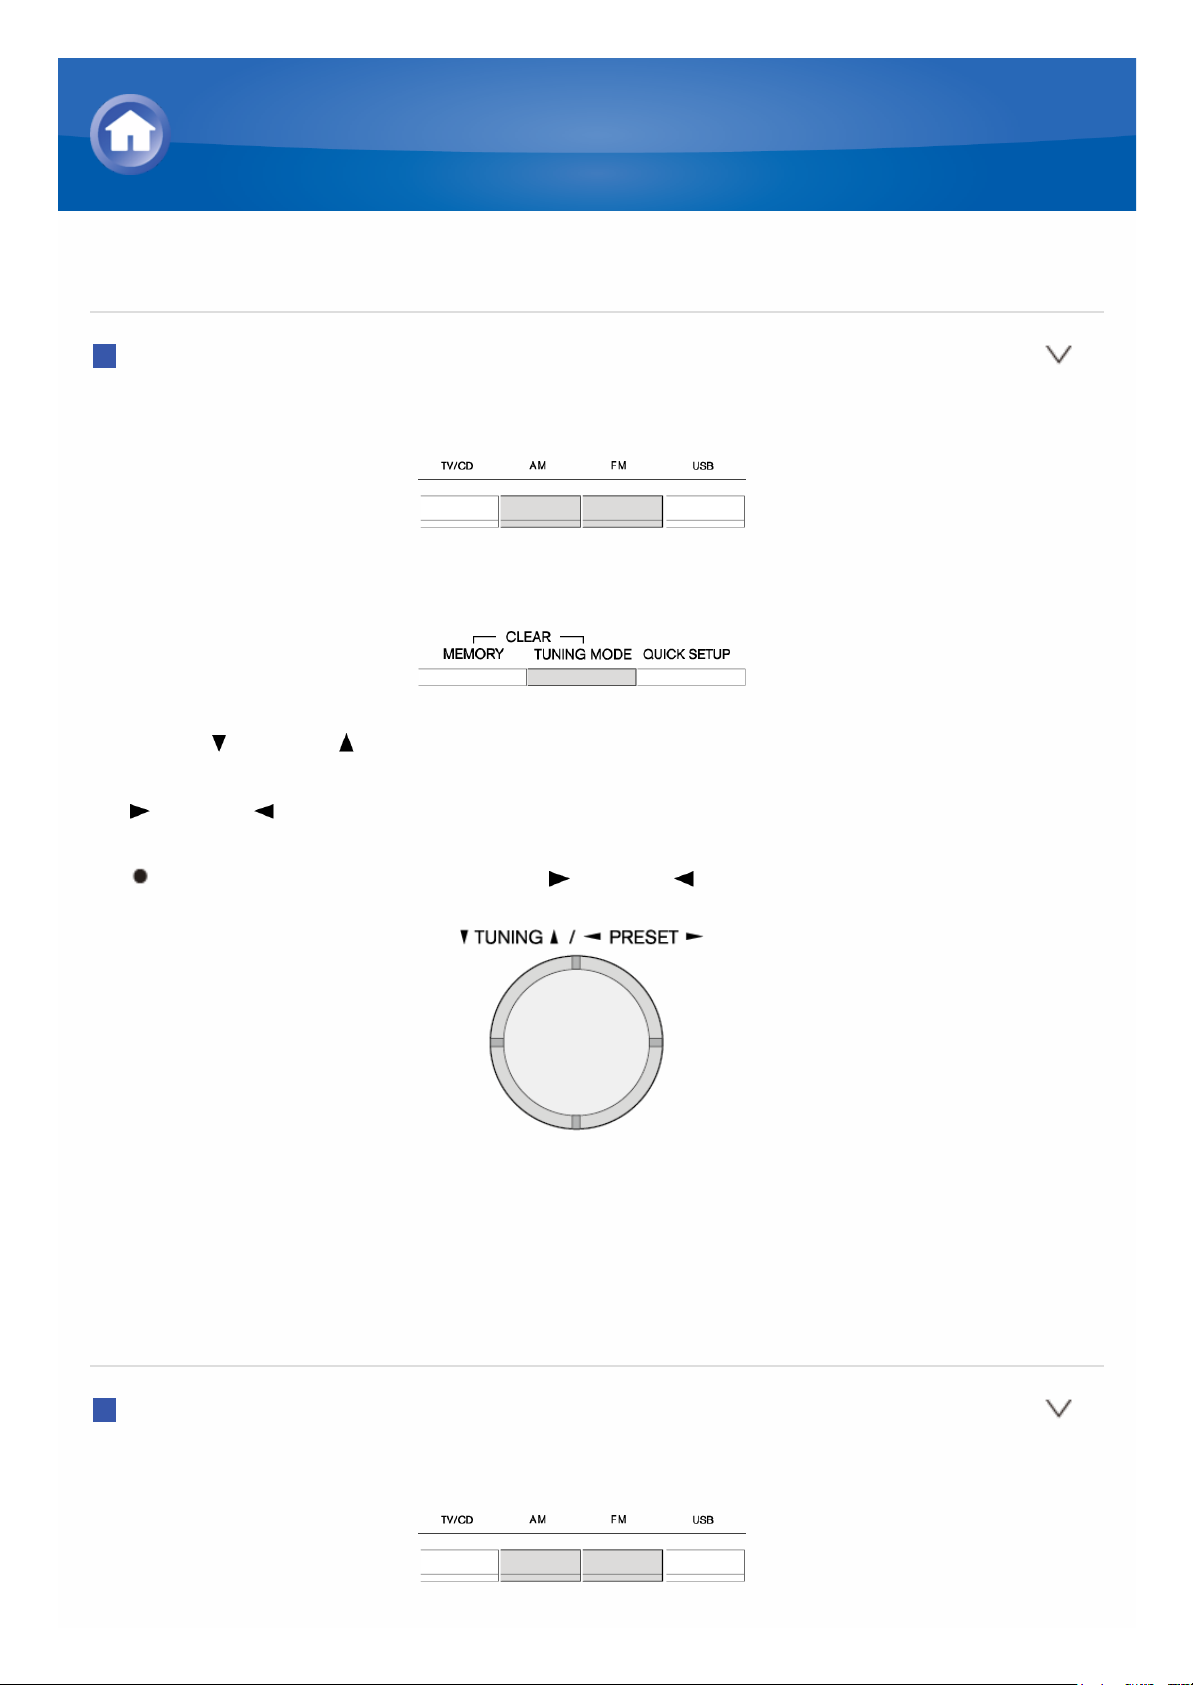
1. Press AM or FM on the unit to select either "AM" or "FM".
2. Press TUNING MODE, so that the "AUTO" indicator on the display lights.
3. Press TUNING . The automatic search for a radio station starts.
Searching stops when one is found. When tuned into a radio station, the "
TUNED " lights on the display lights. If FM stereo broadcasting is
tuned, the "FM STEREO" indicator lights.
No sound is output while the " TUNED " indicator is off.
When the signal from an FM radio station is weak: Depending on the
structure of the building and the surrounding environment, the radio wave
condition is different and it may be impossible to get good reception. In that
case, manually tune into the radio station of your choice by referring to the
next section.
Tuning into stations manually
1. Press AM or FM on the unit to select either "AM" or "FM".
AM/FM Radio Receiving Function
Page 2
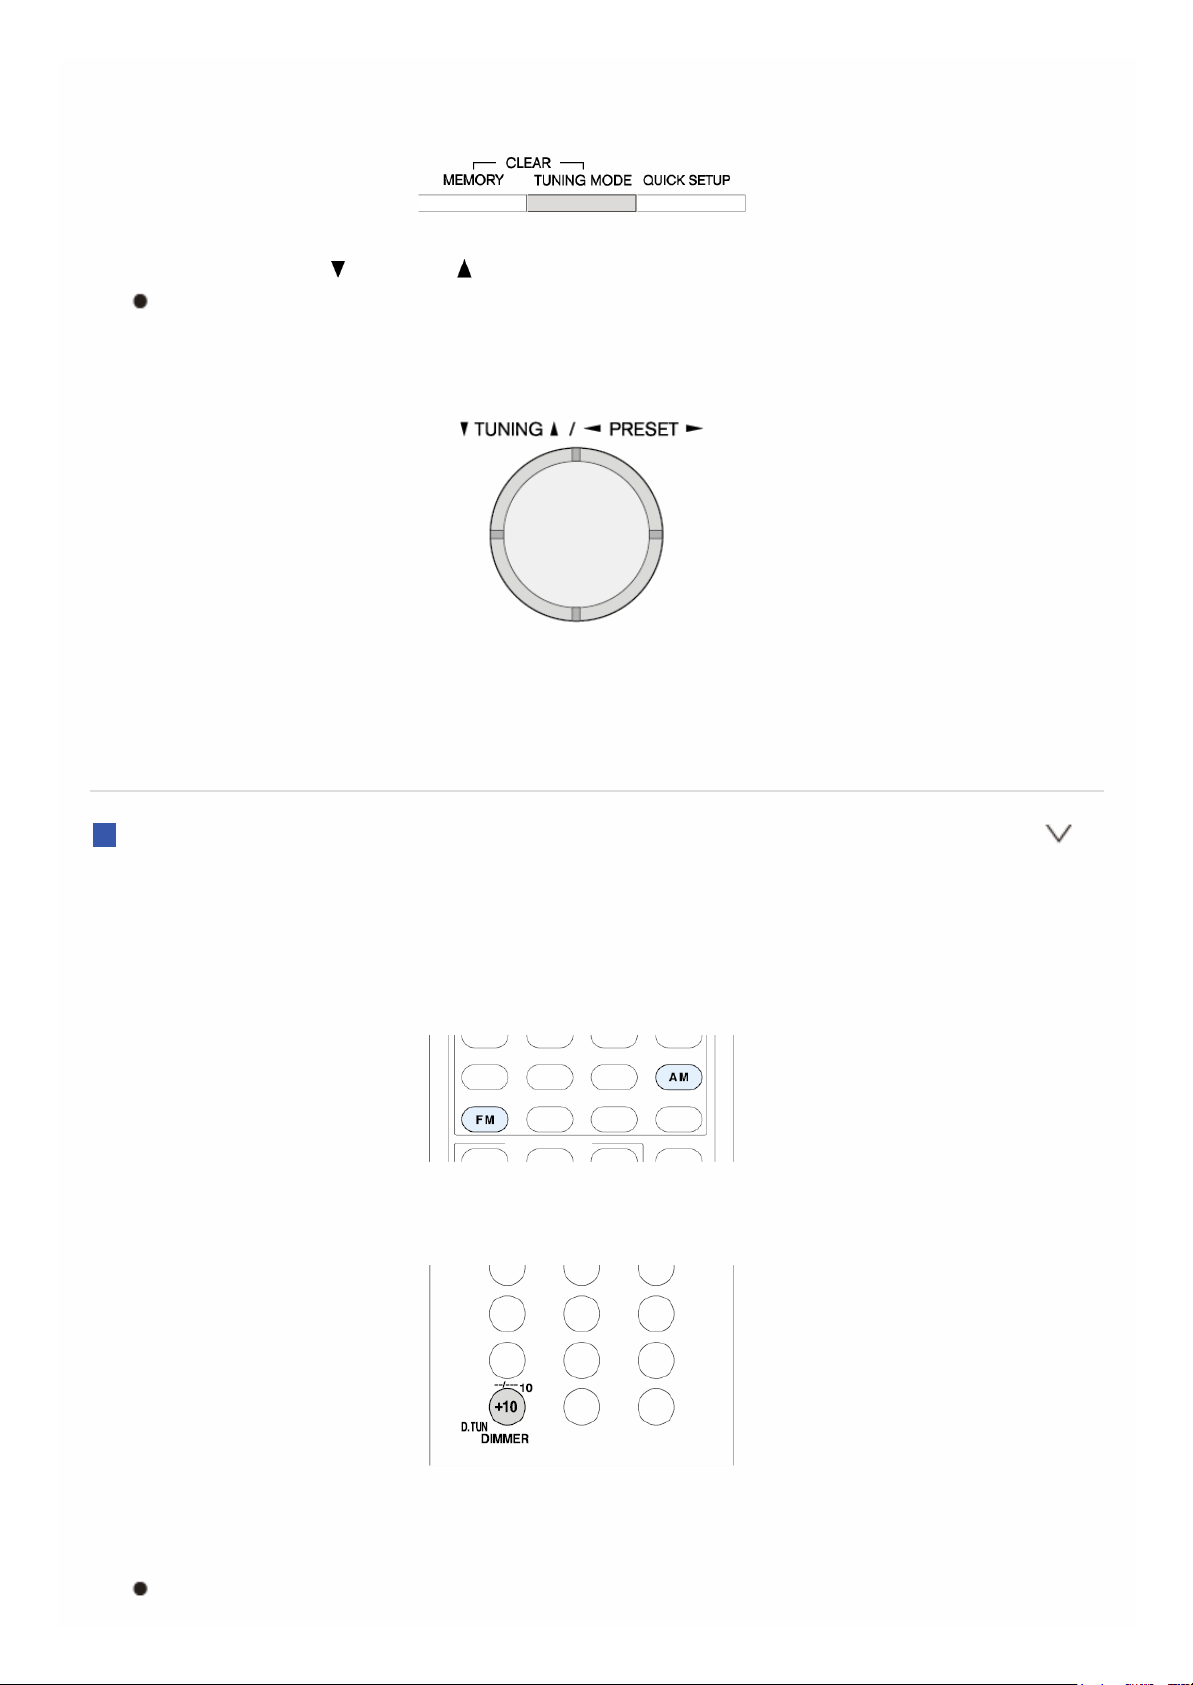
2. Press TUNING MODE, so that the "AUTO" indicator on the display goes
off.
3. Press and hold TUNING to select the desired radio station.
The frequency changes by 1 step each time you press the button. The
frequency changes continuously if the button is held down and stops
when released. Tune by looking at the display.
To return to the method for tuning into stations automatically: Press
TUNING MODE again on the main unit. FM stereo broadcasting is
automatically tuned. Normally, leave the indicator in "AUTO".
Tuning into stations by frequency
It allows you to directly enter the frequency of the radio station you want to
listen to.
1. Press AM or FM on the remote controller to select either "AM" or "FM".
2. Press D.TUN.
3. Using the number buttons, enter the frequency of the radio station within
8 seconds.
For example, to tune to 87.5 (FM), press 8, 7, 5 or 8, 7, 5, 0.
Page 3

Page 4
Registering Radio Station
It allows you to register up to 40 of your favorite AM/FM radio stations.
Registering radio stations in advance allows you to tune into your radio
station of choice directly.
Registration
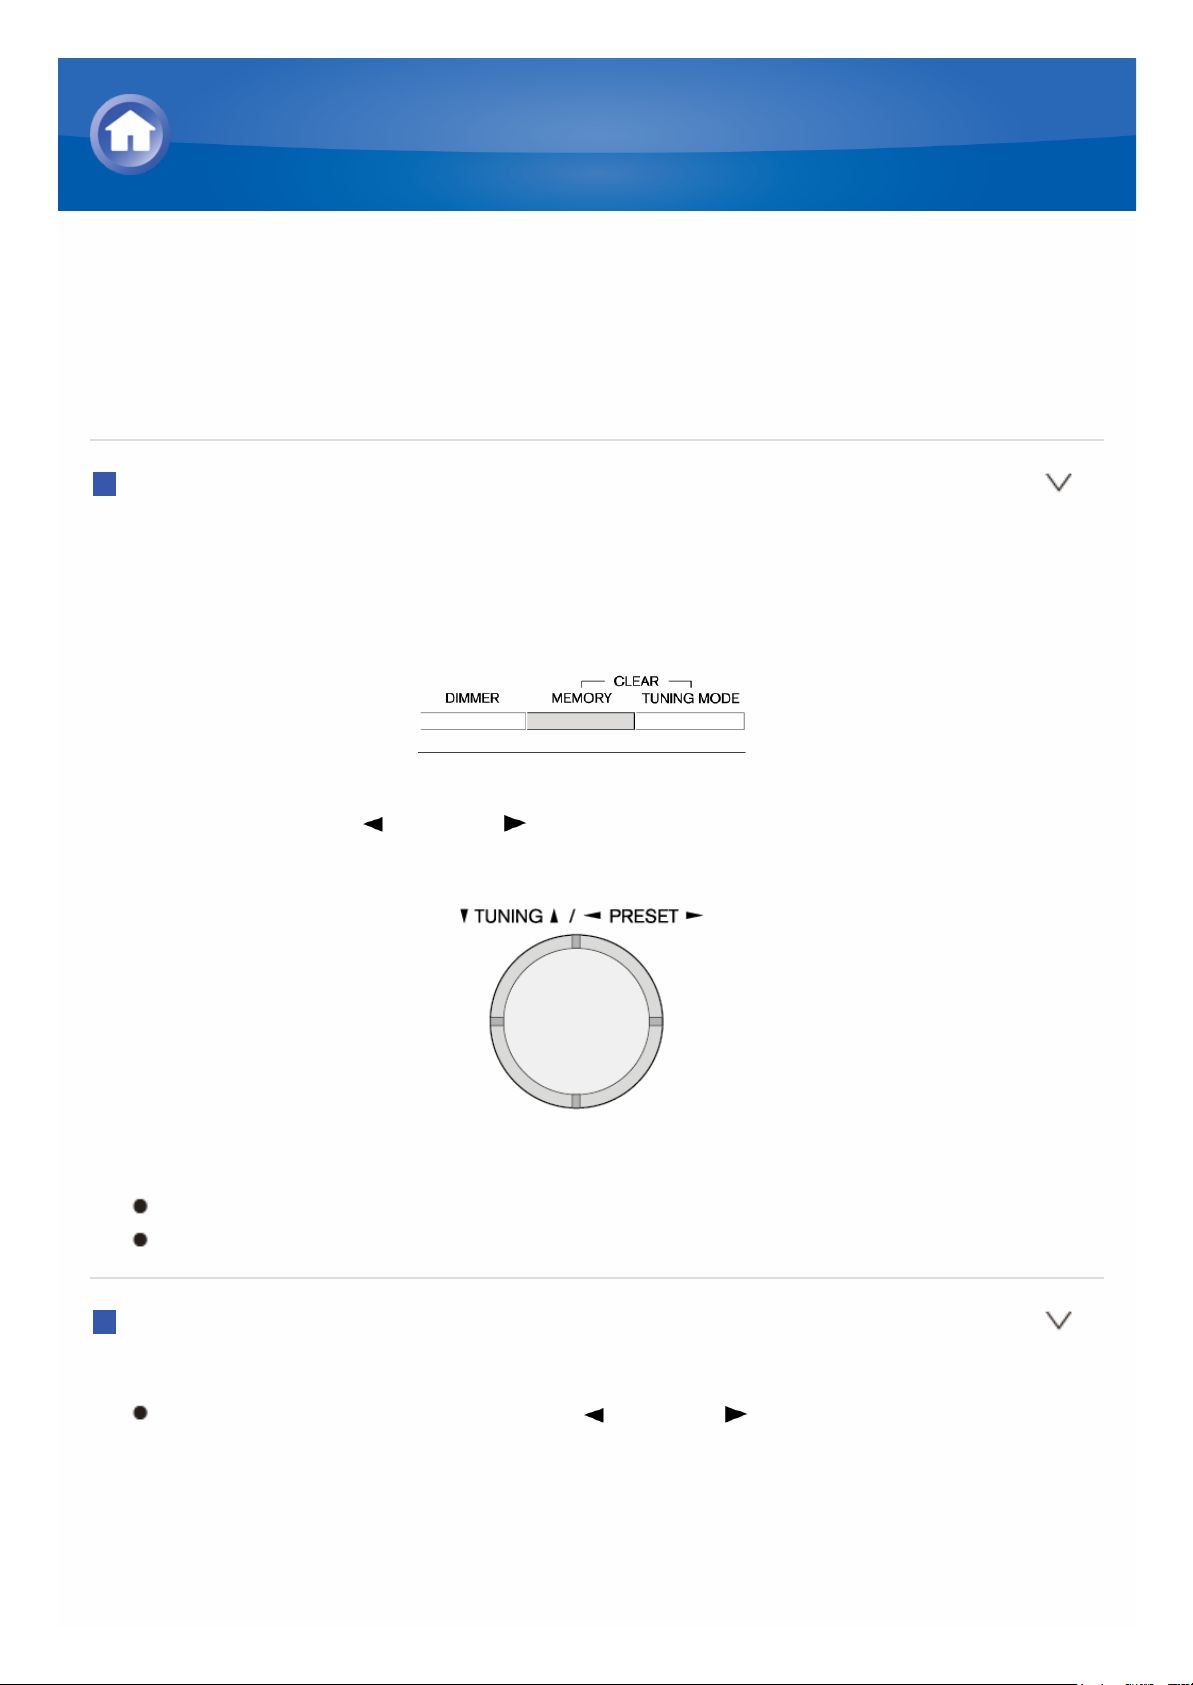
1. Tune into the AM/FM radio station you want to register.
2. Press MEMORY on the unit, so that the preset number flashes on the
display.
3. Repeatedly press PRESET to select a number between 1 and 40
while the preset number is flashing (about 8 seconds).
4. Press MEMORY again to register.
The preset number stops flashing.
Repeat this procedure for all of your favorite AM/FM radio stations.
Selecting a Preset Radio Station
1. Press CH +/- on the remote controller to select a preset number.
You can also select by pressing PRESET on the unit. It is also
possible to select by directly entering the preset number with the
number buttons on the remote controller.
AM/FM Radio Receiving Function
Page 5
Deleting a Preset Radio Station
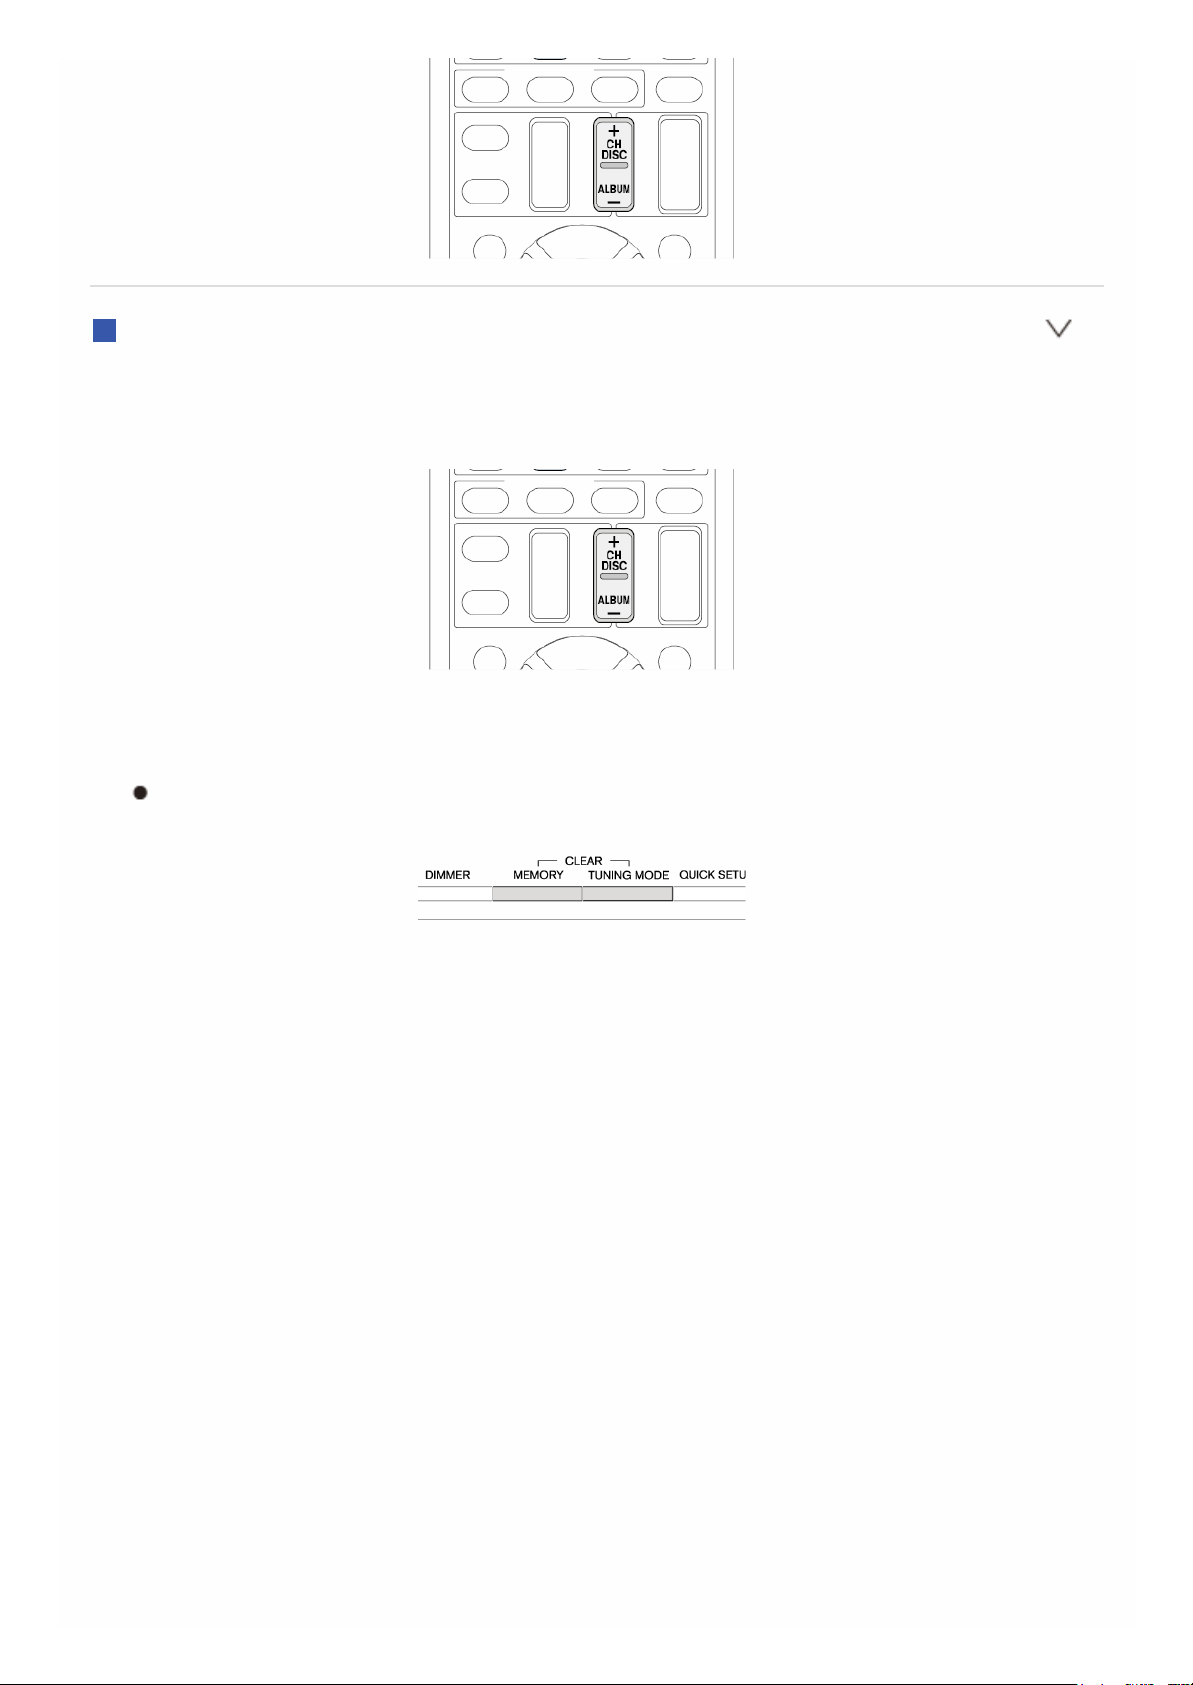
1. Press CH +/- on the remote controller to select the preset number to
delete.
2. While holding down MEMORY, press TUNING MODE on the unit to
delete the preset number.
The number on the display goes off.
Page 6
Using RDS (European and Asian models)
RDS stands for Radio Data System and is a method of transmitting data in
FM radio signals.
RDS works only in areas where RDS broadcasts are available.
In some cases, the text information appeared on the display is not
identical to the content transmitted by the RDS station. Furthermore,
unexpected characters may be displayed when the unit receives
unsupported characters. However, this is not a malfunction.
If the signal from an RDS station is weak, data may be displayed
intermittently or not at all.
PS (Program Service): Tuning into a radio station transmitting Program
Service information displays the radio station name. Pressing DISPLAY
displays the frequency for 3 seconds.
RT (Radio Text): Tuning into a radio station transmitting Radio Text
information displays text on the display of the unit.
PTY (Program Type): Allows you to search for RDS stations by program
type.
TP (Traffic Program): Allows you to search for radio stations transmitting
traffic information.
Displaying Radio Text (RT)
1. Press RT/PTY/TP on the unit once.
RT (Radio Text) is displayed scrolling across the unit's display. "No
Text Data" is displayed when the radio station is not transmitting text
information.
Searching by Type (PTY)
1. Press RT/PTY/TP on the unit twice.
The current program type appears on the display.
AM/FM Radio Receiving Function
Page 7

2. Press PRESET to select the type of program to search for.
The following RDS station types are displayed:
None
News (News reports)
Affairs (Current affairs)
Info (Information)
Sport
Educate (Education)
Drama
Culture
Science (Science and technology)
Varied
Pop M (Pop music)
Rock M (Rock music)
Easy M (Middle of the road music)
Light M (Light classics)
Classics (Serious classics)
Other M (Other music)
Weather
Finance
Children (Children’s programmes)
Social (Social affairs)
Religion
Phone In
Travel
Leisure
Jazz (Jazz music)
Country (Country music)
Nation M (National music)
Oldies (Oldies music)
Folk M (Folk music)
Document (Documentary)
3. Press ENTER to search for the selected type of radio station.
Page 8

4. When the desired radio station is found, the station name on the display
flashes. Then, press ENTER again.
"Not Found" is displayed if none is found.
Listening to Traffic Information (TP)
1. Press RT/PTY/TP on the unit thrice.
The traffic information "[TP]" transmitted by the radio station you are
tuned in is displayed. "TP" is displayed without square brackets when
the radio station is not transmitting traffic information.
2. Press ENTER to search for a radio station transmitting traffic information.
3. When such a radio station is found, searching stops and playing traffic
information starts.
"Not Found" is displayed if none is found.
Page 9
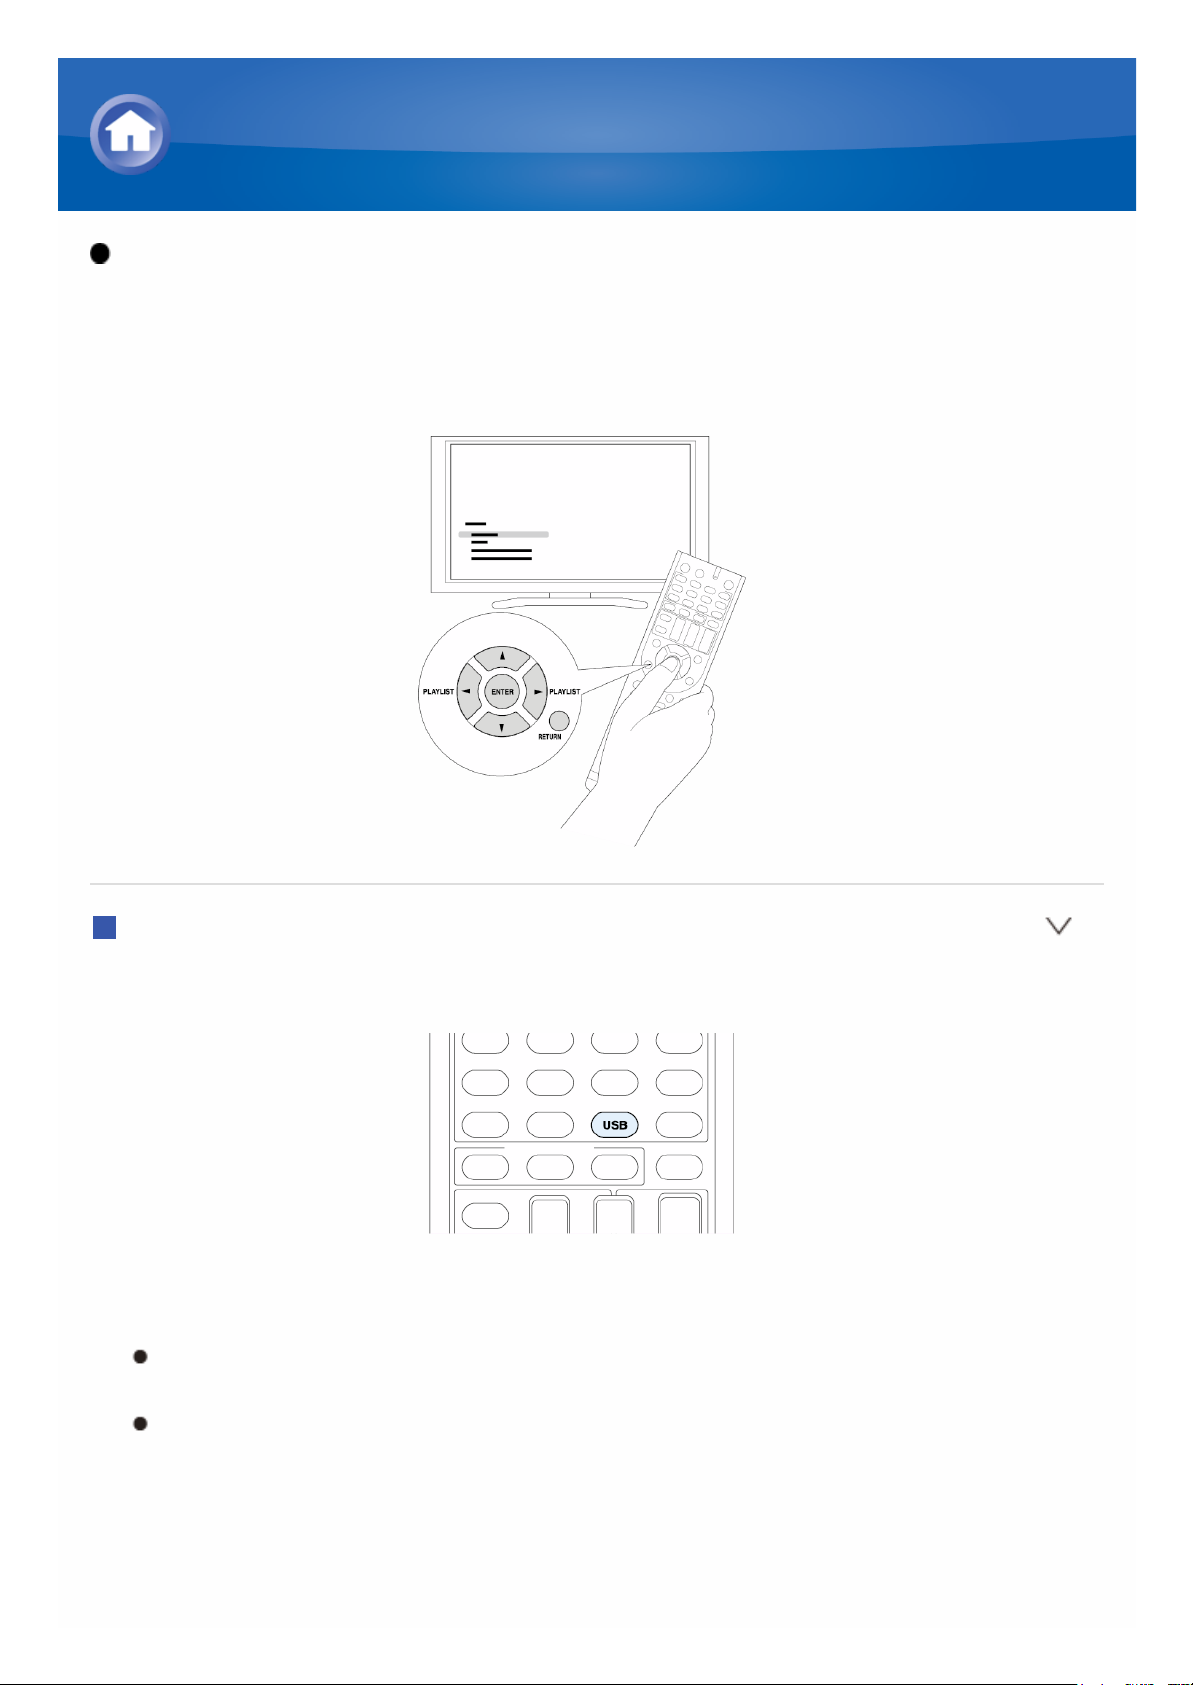
Operation: You can set up by viewing the guidance displayed on the TV
screen. To display the guidance, you need to make HDMI connection
between the unit and TV. Select the item with the cursor buttons of the
remote controller and press ENTER to confirm your selection. To return to
the previous screen, press RETURN.
Playback
1. Press USB on the remote controller to select "USB".
2. Plug your USB storage device with the music files into the USB port of the
unit, so that the "USB" lights on the display.
If the "USB" indicator flashes, check whether the USB storage device
is plugged in properly.
Do not unplug the USB storage device while "Connecting..." is
displayed on the display. This may cause data corruption or
malfunction.
Playing Content from a USB Storage Device
Page 10

3. Press ENTER.
The list of folders and music files on the USB storage device are
displayed. To open a folder, use cursor to select it, and then press
ENTER.
4. Select the folder and file to play using the cursor buttons, then press
ENTER or to start playing.
Page 11

Summary of Operation on Remote Controller
The remote controller of this unit allows you to operate and/or play music
files stored on USB storage devices, as well as on Bluetooth-enabled
devices.
Available buttons may vary depending on the device to play.
Some buttons cannot be used with Bluetooth-enabled devices.
Furthermore, the Bluetooth-enabled devices must support the AVRCP
profile. Some devices may not be operated, even when they support
AVRCP profile.
Using Remote Controller for Playing Music Files
Page 12
Functions of the Buttons of the Remote Controller
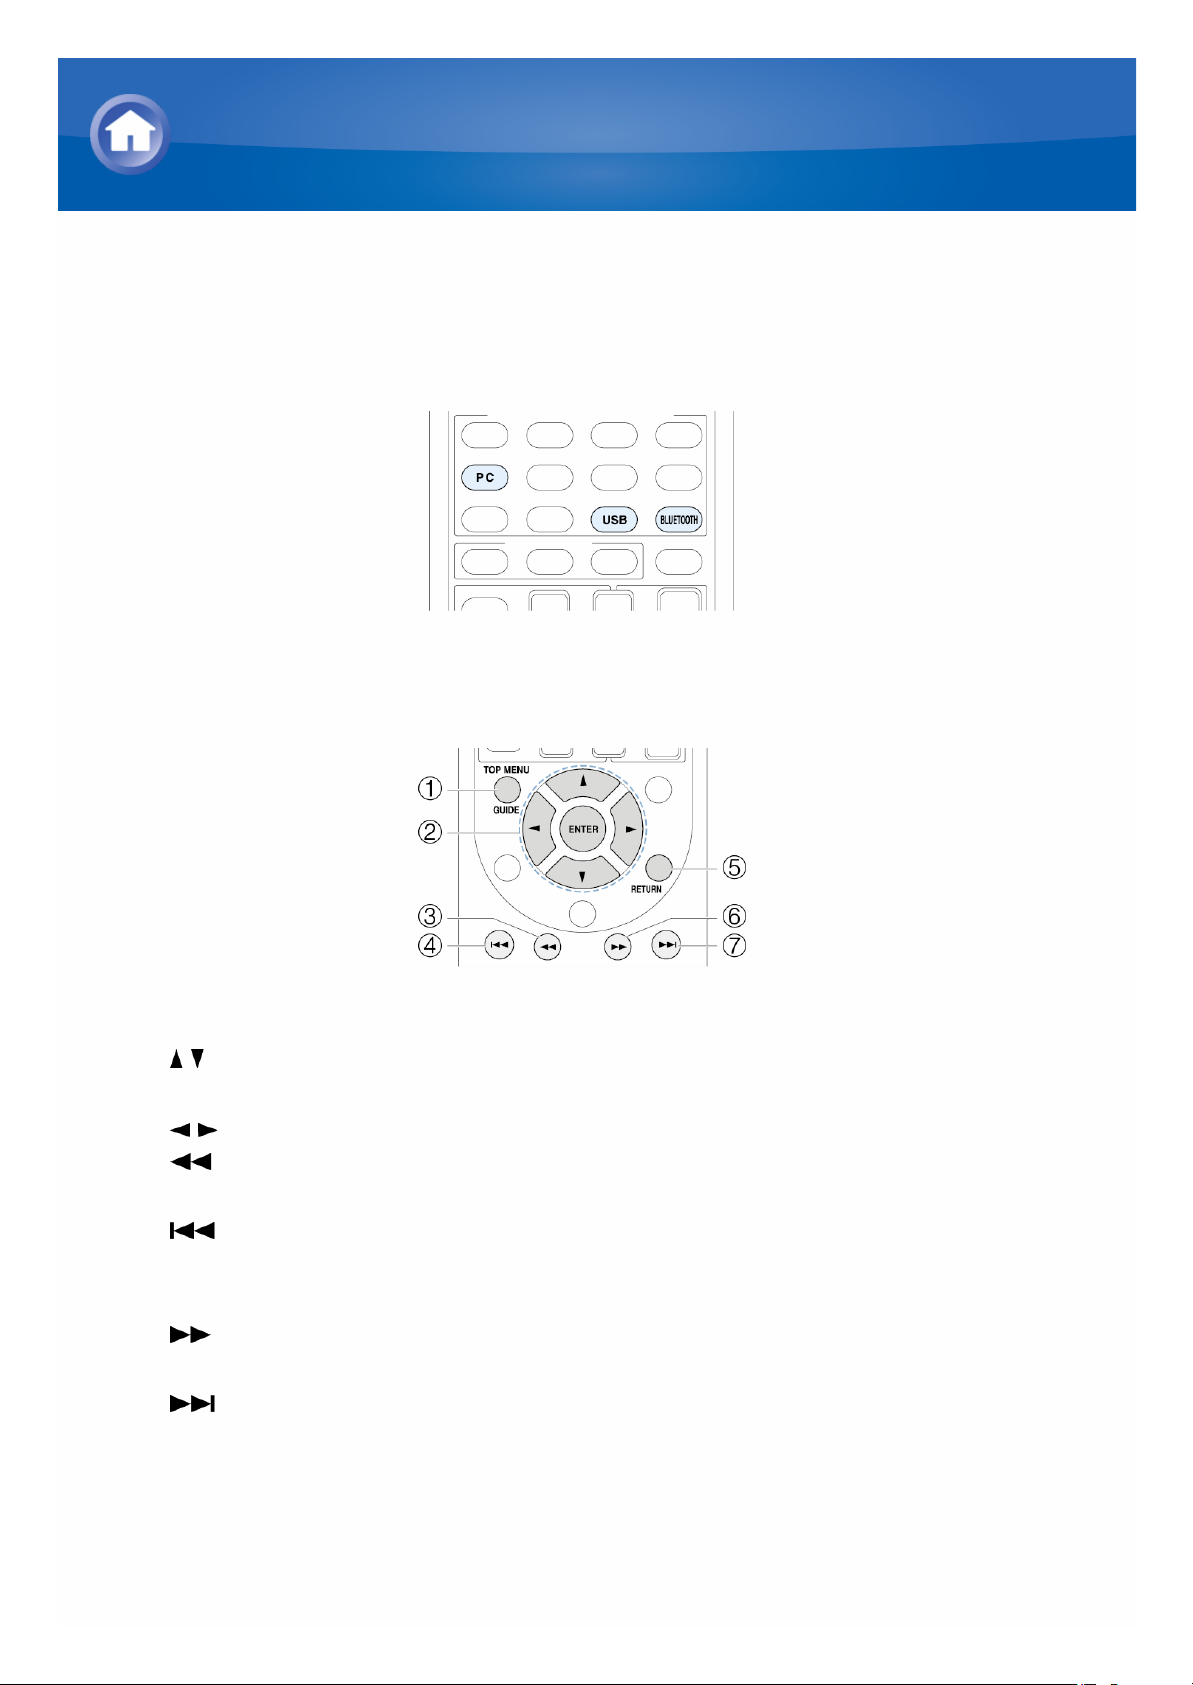
1. Press any of the INPUT SELECTOR button (PC, USB or BLUETOOTH)
accordingly to input source.
2. Operate the remote controller by referring to the name and function of
each of the buttons.
1 TOP MENU: This button displays the top menu for each media.
2 / , ENTER: These buttons navigate through items and activate the
selected item.
/ : These buttons cycle through pages.
3 : This button fast-reverses the current track. This button is not
operable from 10 seconds before the playback ends.
4 : This button plays the current track from the beginning. Pressing
this button twice plays the previous track.
5 RETURN: This button returns to the previous screen.
6 : This button fast-forwards the current track. This button is not
operable from 10 seconds before the playback ends.
7 : This button plays the next track.
Using Remote Controller for Playing Music Files
Page 13
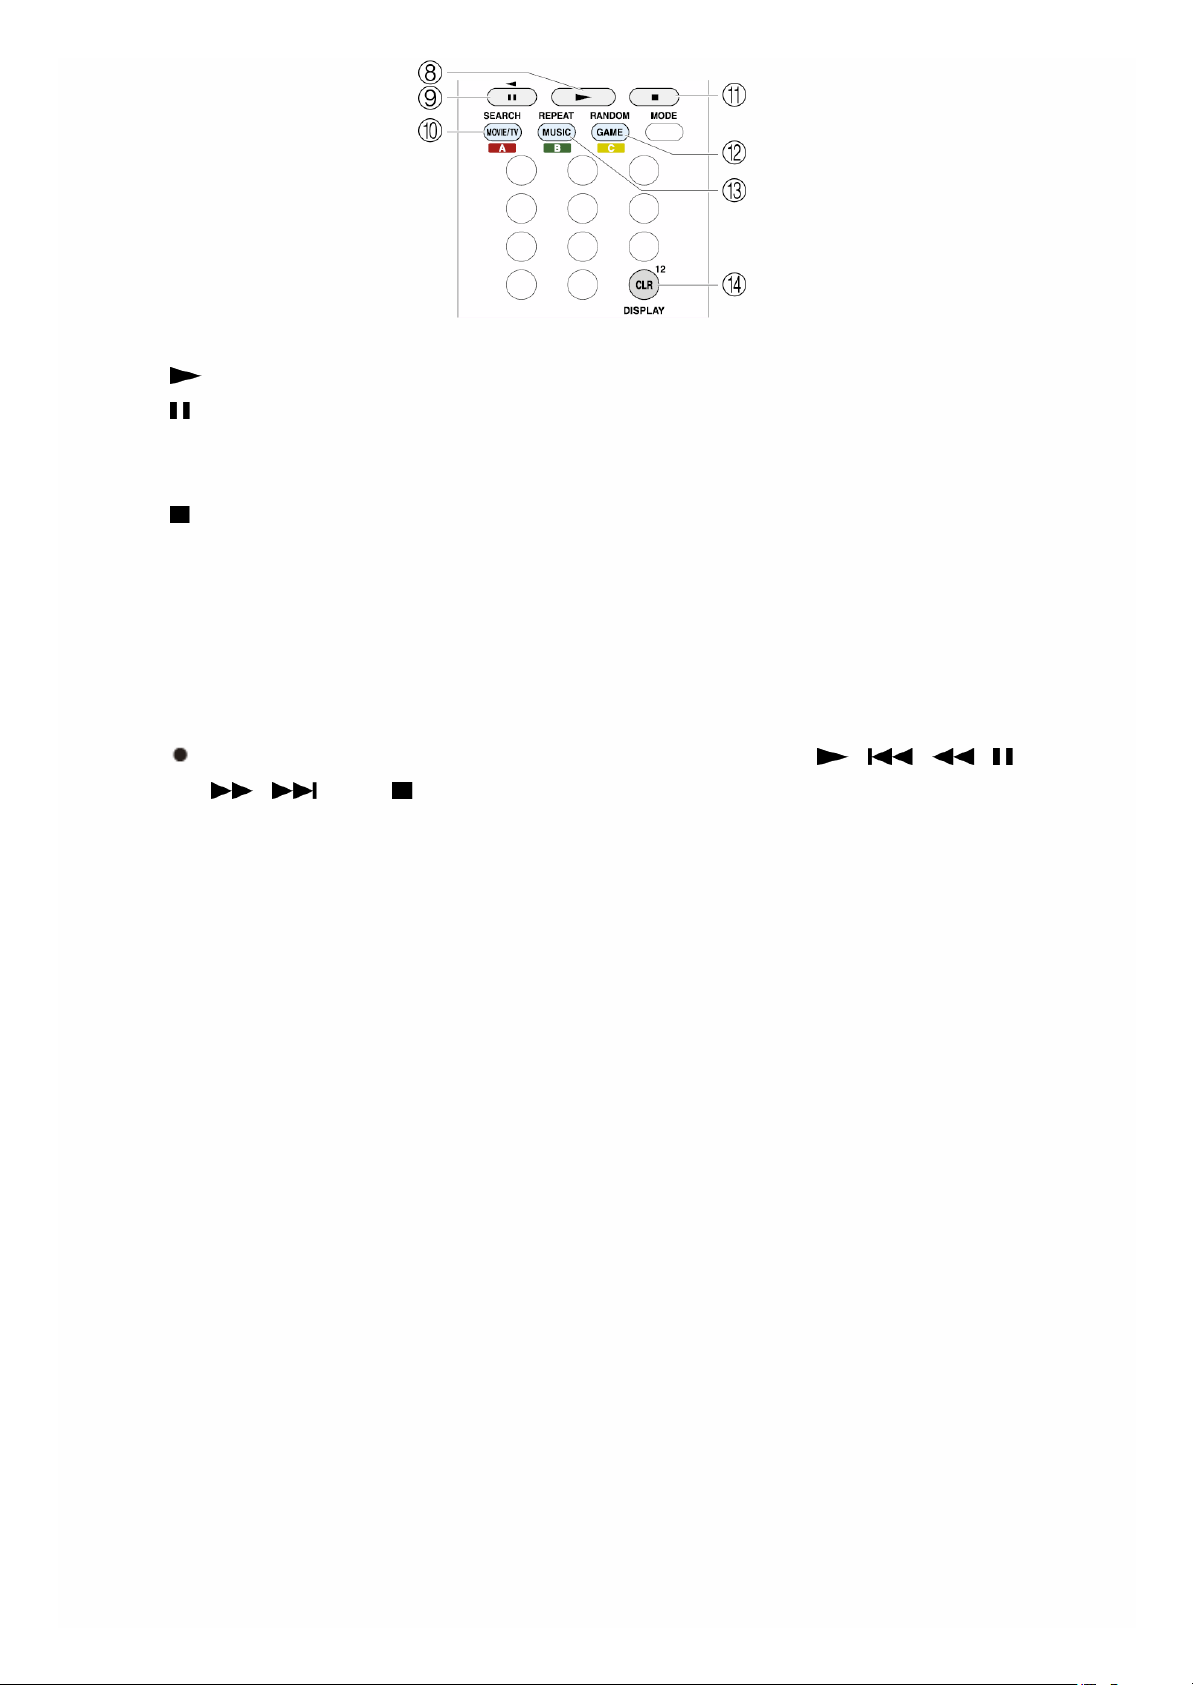
8 : This button starts the playback.
9 : This button pauses the playback.
F SEARCH: This button toggles between the playback screen and list
screen during playback.
G : This button stops the playback.
H RANDOM: This button performs random playback.
I REPEAT: This button replays the track (or tracks). Pressing this
button repeatedly cycles through the repeat modes.
J DISPLAY: This button changes the displayed track information during
playback. Pressing this button when the list screen is displayed
toggles the screen to playback.
Bluetooth-enabled devices: Usable buttons are , , , ,
, , and .
Page 14
Icons Displayed During Playback
Icons are displayed on the display during music file playback. The meaning
of each icon is as follows:
: Folder
: Track
: Play
: Pause
: Fast-forward
: Fast-reverse
: Artist
: Album
: Repeat One Track
: Repeat within a folder
: Repeat
: Shuffle
Using Remote Controller for Playing Music Files
Page 15
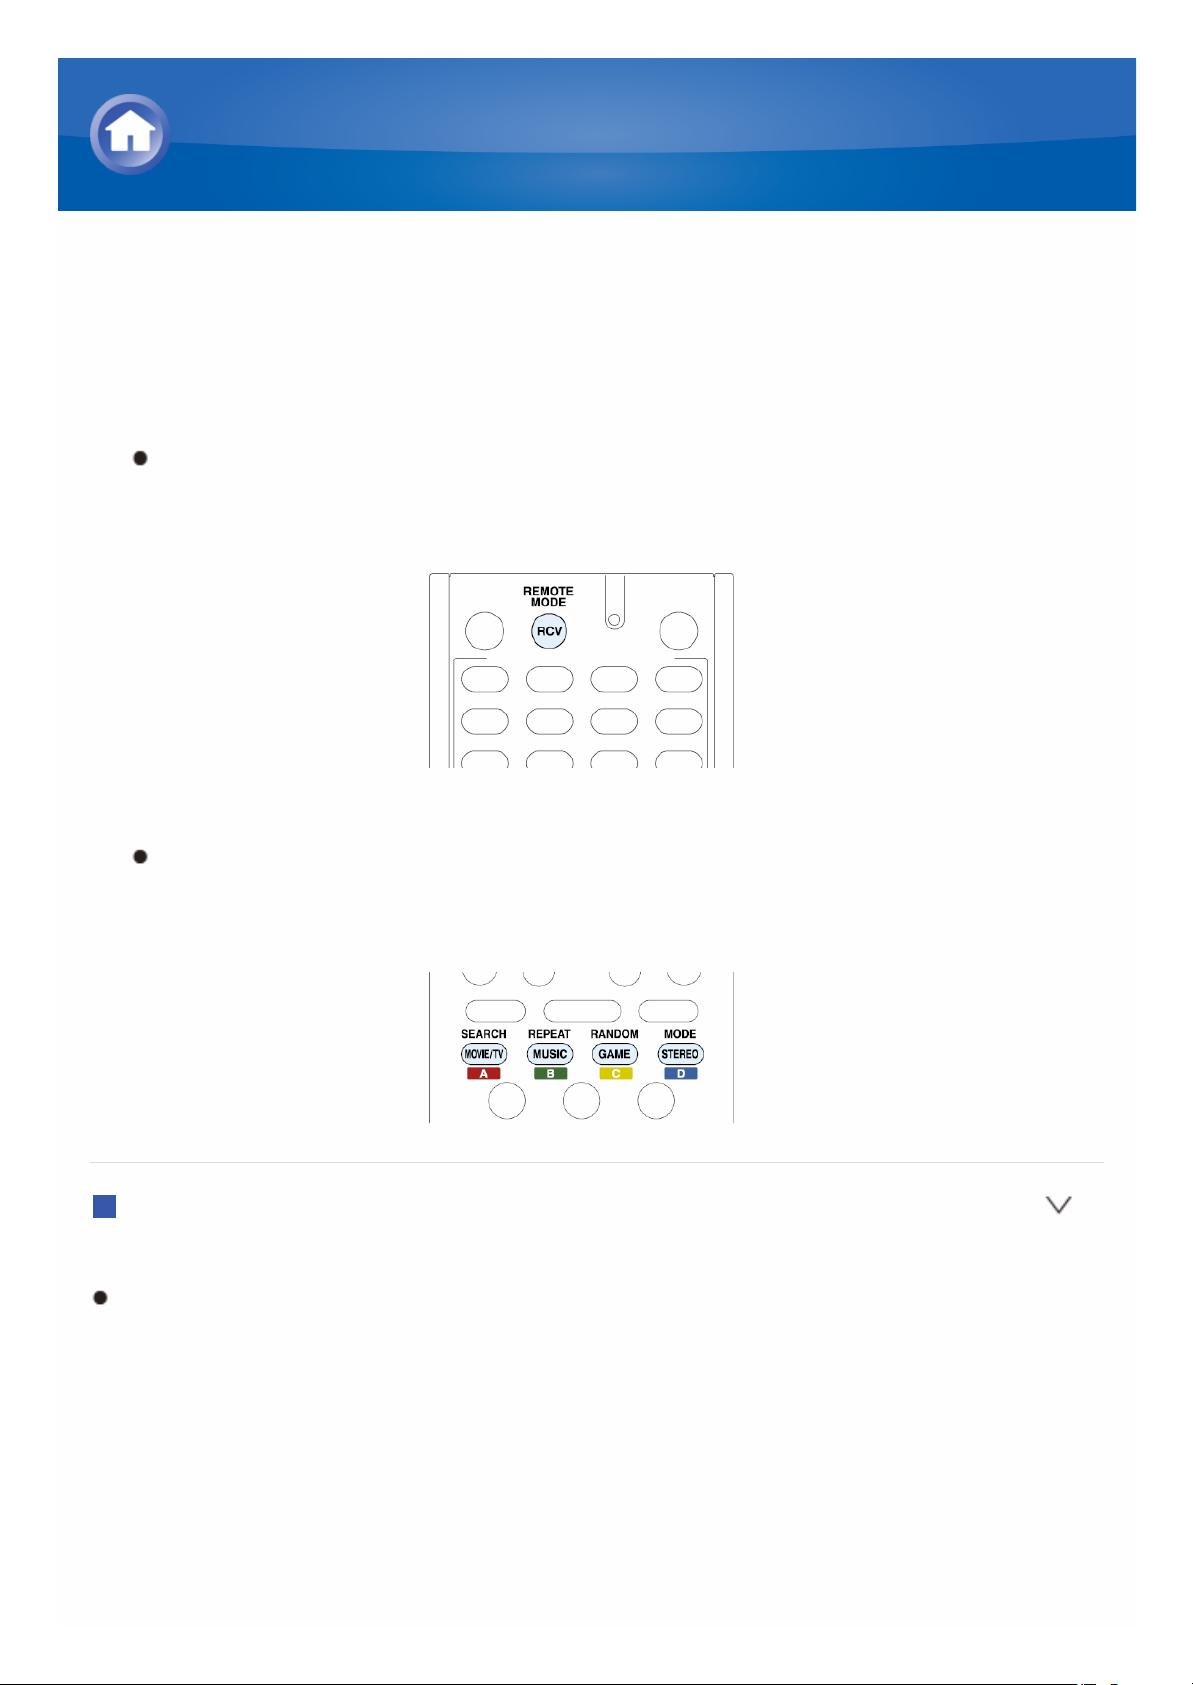
Selecting the Listening Mode
The listening modes allow you to select the best sound effect for your input
source.
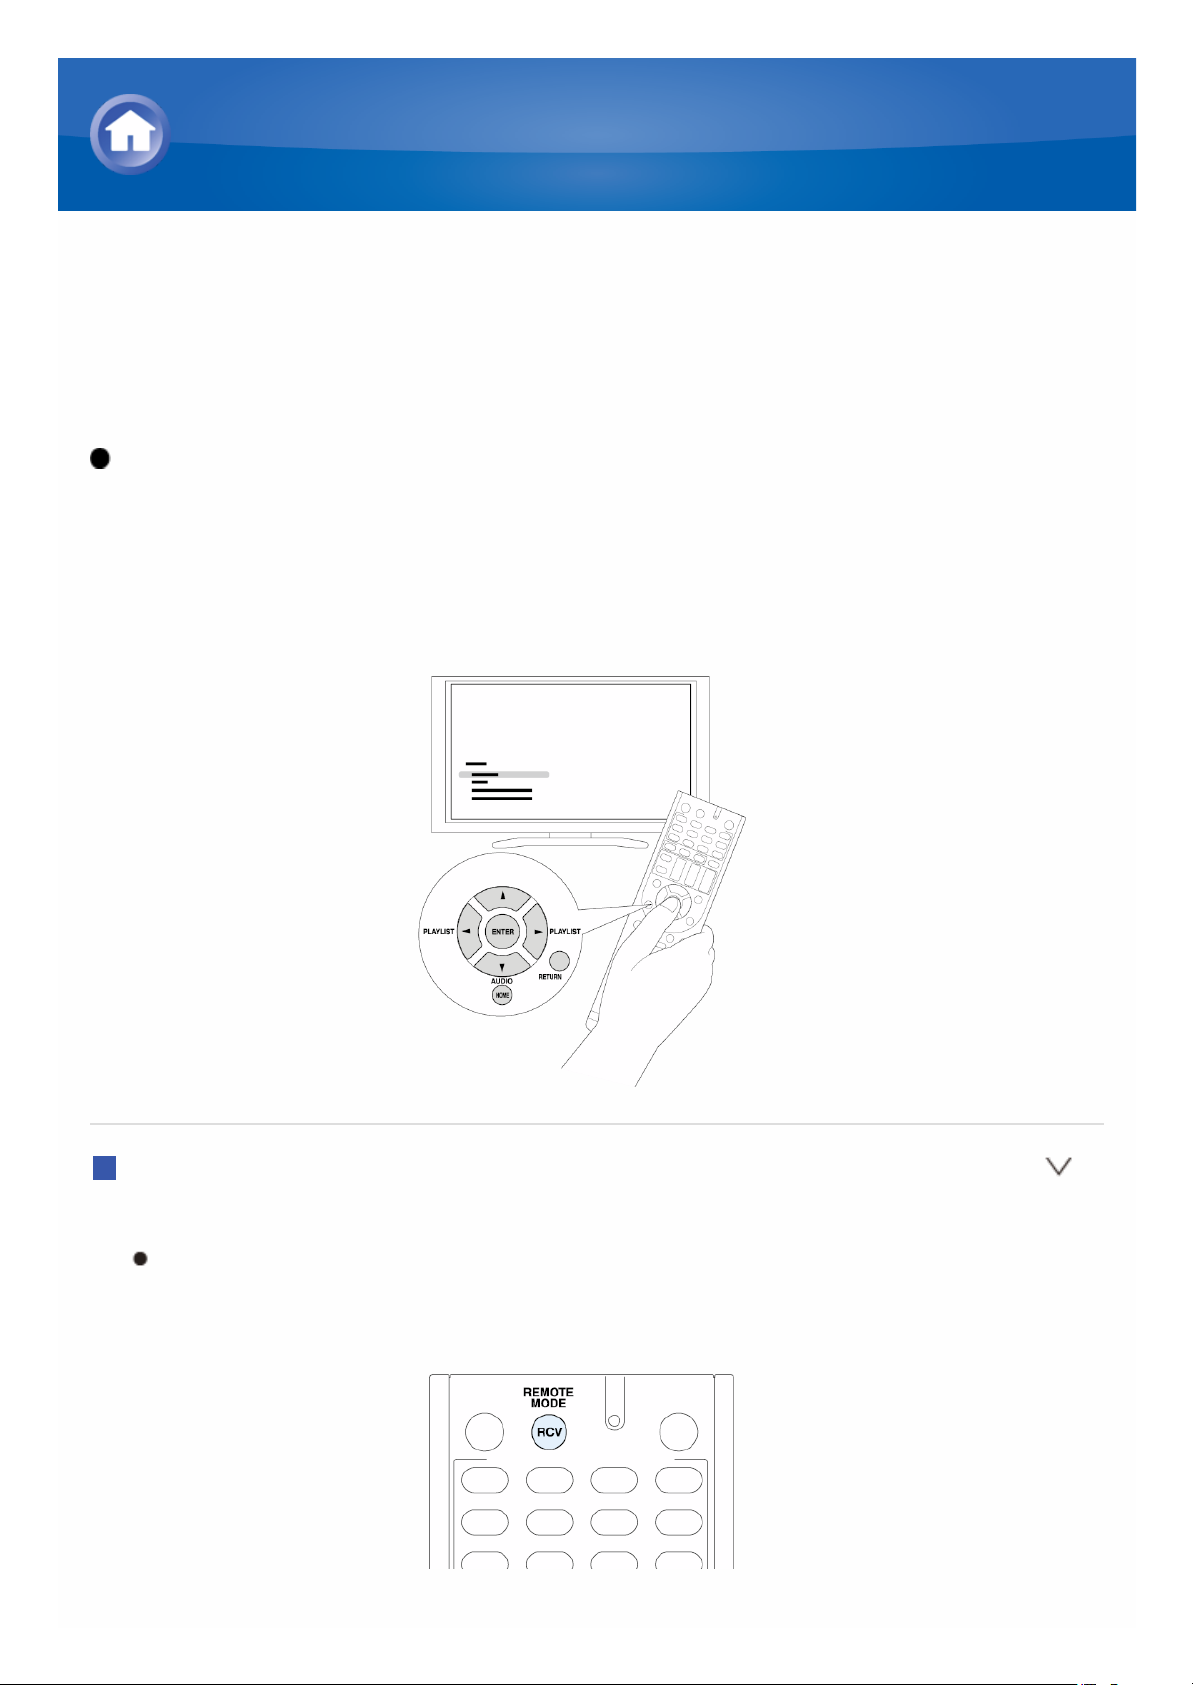
1. Press RCV on the remote controller.
Always press RCV first to change the remote controller to RECEIVER
mode (the mode to operate this unit) since its mode may be changed
to operate another components.
2. Select the desired listening mode.
The listening mode changes each time you press one of the buttons
below on the remote controller. Set the listening mode of your choice
by listening to the actual sound.
MOVIE/TV
You can select a listening mode suitable for movies and TV programs.
Selectable listening modes:
All Ch Stereo
Direct
Dolby D
Dolby D+
Dolby TrueHD
DSD
DTS
DTS 96/24
DTS Express
Using the Listening Modes
Page 16

DTS-HD HR
DTS-HD MSTR
Full Mono
Mono
Multichannel
Neo:6 Cinema
PLII Movie
T-D
TV Logic
MUSIC
You can select a listening mode suitable for music.
Selectable listening modes:
All Ch Stereo
Direct
Dolby D
Dolby D+
Dolby TrueHD
DSD
DTS
DTS 96/24
DTS Express
DTS-HD HR
DTS-HD MSTR
Full Mono
Multichannel
Neo:6 Music
Orchestra
PLII Music
Stereo
Studio-Mix
Unplugged
GAME
You can select a listening mode suitable for video games.
Selectable listening modes:
All Ch Stereo
Direct
Dolby D
Dolby D+
Dolby TrueHD
DSD
DTS
DTS 96/24
Page 17

DTS Express
DTS-HD HR
DTS-HD MSTR
Full Mono
Game-Action
Game-Rock
Game-RPG
Game-Sports
Multichannel
PLII Game
T-D
STEREO
You can select a listening mode for stereo and all channel stereo sources.
Selectable listening modes:
All Ch Stereo
Stereo
Page 18
Contents of the Listening Modes
Selectable listening modes will differ depending on the number of input
source channels and the actual speaker configuration. Listening modes
available when headphones are connected are: Mono, Direct, and Stereo.
Lists in alphabetic order (A-Z)
All Ch Stereo
Ideal for background music, this mode fills the entire listening area with
stereo sound from the front, surround, and surround back speakers.
Input source: Monaural, Stereo, 5.1 ch, 7.1 ch
Speaker configuration: 3.1 ch, 5.1 ch
Direct
In this mode, audio from the input source is output as-is. For example, if a 2
ch source from a music CD is input, the output will be stereo, or if Dolby
Digital signal is input, the sound field will be controlled corresponding to the
number of channels present.
Input source: Monaural, Stereo, 5.1 ch, 7.1 ch
Speaker configuration: 2.1 ch, 3.1 ch, 5.1 ch
Dolby D (Dolby Digital)
This mode is for use with Dolby Digital sources. The audio from the input
source is output as-is, without surround sound processing.
Input source: 5.1 ch
Speaker configuration: 3.1 ch, 5.1 ch
This listening mode can be selected only if your Blu-ray Disc/DVD player
is digitally connected to the unit or the player's output setting is bitstream.
Dolby D + (Dolby Digital Plus)
This mode is for use with Dolby Digital Plus sources. The audio from the
input source is output as-is, without surround sound processing.
Input source: 5.1 ch, 7.1 ch
Speaker configuration: 3.1 ch, 5.1 ch
This listening mode can be selected only if your Blu-ray Disc/DVD player
Using the Listening Modes
Page 19

is digitally connected to the unit or the player's output setting is bitstream.
When playing back 5.1 ch sources from Blu-ray Discs, Dolby Digital is
automatically applied.
Dolby Pro Logic II
This mode expands any 2 ch source for 5.1 ch multichannel surround
playback. It provides a very natural and seamless surround-sound
experience, keeping the sound clear. As well as music and movies, video
games can also benefit from the dramatic spatial effects and vivid imaging.
PLII Movie: Use this mode with any 2 ch movie.
PLII Music: Use this mode with any 2 ch music source.
PLII Game: Use this mode with any 2 ch game source.
Input source: Stereo
Speaker configuration: 3.1 ch, 5.1 ch
Dolby TrueHD
This mode is for use with Dolby TrueHD sources. The audio from the input
source is output as-is, without surround sound processing.
Input source: 5.1 ch, 7.1 ch
Speaker configuration: 3.1 ch, 5.1 ch
This listening mode can be selected only if your Blu-ray Disc/DVD player
is digitally connected to the unit or the player's output setting is bitstream.
DSD
This mode is for use with DSD sources. The audio from the input source is
output as-is, without surround sound processing.
Input source: 5.1 ch
Speaker configuration: 3.1 ch, 5.1 ch
This unit supports DSD signals input through HDMI IN. However,
depending on the connected player, better sound is possible when output
from the PCM output of the player. In that case, configure the player for
PCM output.
This listening mode can be selected only if your Blu-ray Disc/DVD
player's output setting is DSD.
DTS
This mode is for use with DTS sources. The audio from the input source is
output as-is, without surround sound processing.
Input source: 5.1 ch
Speaker configuration: 3.1 ch, 5.1 ch
This listening mode can be selected only if your Blu-ray Disc/DVD player
is digitally connected to the unit or the player's output setting is bitstream.
Page 20
DTS 96/24
This mode is for use with DTS 96/24 sources. The audio from the input
source is output as-is, without surround sound processing. With 96 kHz
sampling rate and 24-bit resolution, it provides superior fidelity.
Input source: 5.1 ch
Speaker configuration: 3.1 ch, 5.1 ch
Depending on the settings, this listening mode becomes DTS.
This listening mode can be selected only if your Blu-ray Disc/DVD player
is digitally connected to the unit or the player's output setting is bitstream.
DTS Express
This mode is for use with DTS Express sources. The audio from the input
source is output as-is, without surround sound processing.
Input source: 5.1 ch
Speaker configuration: 3.1 ch, 5.1 ch
This listening mode can be selected only if your Blu-ray Disc/DVD player
is digitally connected to the unit or the player's output setting is bitstream.
DTS-HD HR (DTS-HD High Resolution Audio)
This mode is for use with DTS-HD High Resolution Audio sources. The
audio from the input source is output as-is, without surround sound
processing.
Input source: 5.1 ch, 7.1 ch
Speaker configuration: 3.1 ch, 5.1 ch
This listening mode can be selected only if your Blu-ray Disc/DVD player
is digitally connected to the unit or the player's output setting is bitstream.
DTS-HD MSTR (DTS-HD Master Audio)
This mode is for use with DTS-HD Master Audio sources. The audio from the
input source is output as-is, without surround sound processing.
Input source: 5.1 ch, 7.1 ch
Speaker configuration: 3.1 ch, 5.1 ch
This listening mode can be selected only if your Blu-ray Disc/DVD player
is digitally connected to the unit or the player's output setting is bitstream.
DTS Neo:6
This mode expands any 2 ch source for 5.1 ch multichannel surround
playback. It offers full-bandwidth on all channels, with great independence
between the channels. There are two variants for this mode: one ideal for
movies and another ideal for music.
Page 21
Neo:6 Cinema: Use this mode with any 2 ch movie.
Neo:6 Music: Use this mode with any 2 ch music source.
Input source: Stereo
Speaker configuration: 3.1 ch, 5.1 ch
Full Mono
In this mode, all speakers output the same sound in mono, so the sound you
hear is the same regardless of where you are within the listening room.
Input source: Monaural, Stereo, 5.1 ch, 7.1 ch
Speaker configuration: 3.1 ch, 5.1 ch
Game-Action
In this mode, sound localization is distinct with emphasis on bass.
Input source: Monaural, Stereo, 5.1 ch, 7.1 ch
Speaker configuration: 5.1 ch
Game-Rock
In this mode, sound pressure is emphasized to heighten live feel.
Input source: Monaural, Stereo, 5.1 ch, 7.1 ch
Speaker configuration: 5.1 ch
Game-RPG
In this mode, the sound has a dramatic feel with a similar atmosphere to
Orchestra mode.
Input source: Monaural, Stereo, 5.1 ch, 7.1 ch
Speaker configuration: 5.1 ch
Game-Sports
Suitable for audio source with much reverberation.
Input source: Monaural, Stereo, 5.1 ch, 7.1 ch
Speaker configuration: 5.1 ch
Mono
Use this mode when watching an old movie with a mono soundtrack, or use it
to separately reproduce soundtracks in two different languages recorded in
the left and right channels of some movies. It is also suitable for DVDs or
other sources containing multiplexed audio.
Input source: Monaural, Stereo, 5.1 ch, 7.1 ch
Speaker configuration: 2.1 ch, 3.1 ch, 5.1 ch
Page 22
Multichannel
This mode is for use with PCM multichannel sources. The audio from the
input source is output as-is, without surround sound processing.
Input source: 5.1 ch, 7.1 ch
Speaker configuration: 3.1 ch, 5.1 ch
Orchestra
Suitable for classical or operatic music, This mode emphasizes the surround
channels in order to widen the stereo image, and simulates the natural
reverberation of a large hall.
Input source: Monaural, Stereo, 5.1 ch, 7.1 ch
Speaker configuration: 5.1 ch
Stereo
In this mode, sound is output from the front left and right speakers and
subwoofer.
Input source: Monaural, Stereo, 5.1 ch, 7.1 ch
Speaker configuration: 2.1 ch, 3.1 ch, 5.1 ch
Studio-Mix
Suitable for rock or pop music, Listening to music in this mode creates a
lively sound field with a powerful acoustic image, like being at a club or rock
concert.
Input source: Monaural, Stereo, 5.1 ch, 7.1 ch
Speaker configuration: 5.1 ch
T-D (Theater-Dimensional)
T-D (Theater-Dimensional): In this mode, you can enjoy a virtual playback of
multichannel surround sound even with only two or three speakers. This
works by controlling how sounds reach the listener’s left and right ears.
Input source: Monaural, Stereo, 5.1 ch, 7.1 ch
Speaker configuration: 2.1 ch, 3.1 ch, 5.1 ch
Good results may not be possible if there is too much reverb, so we
recommend that you use this mode in an environment with little or no
natural reverb.
TV Logic
Suitable for TV shows produced in a TV studio, This mode enhances the
surround effects to the entire sound to give clarity to voices and create a
Page 23

realistic acoustic image.
Input source: Monaural, Stereo, 5.1 ch, 7.1 ch
Speaker configuration: 5.1 ch
Unplugged
Suitable for acoustic instruments, vocals and jazz. This mode emphasizes the
front stereo image, giving the impression of being right in front of the stage.
Input source: Monaural, Stereo, 5.1 ch, 7.1 ch
Speaker configuration: 5.1 ch
Page 24
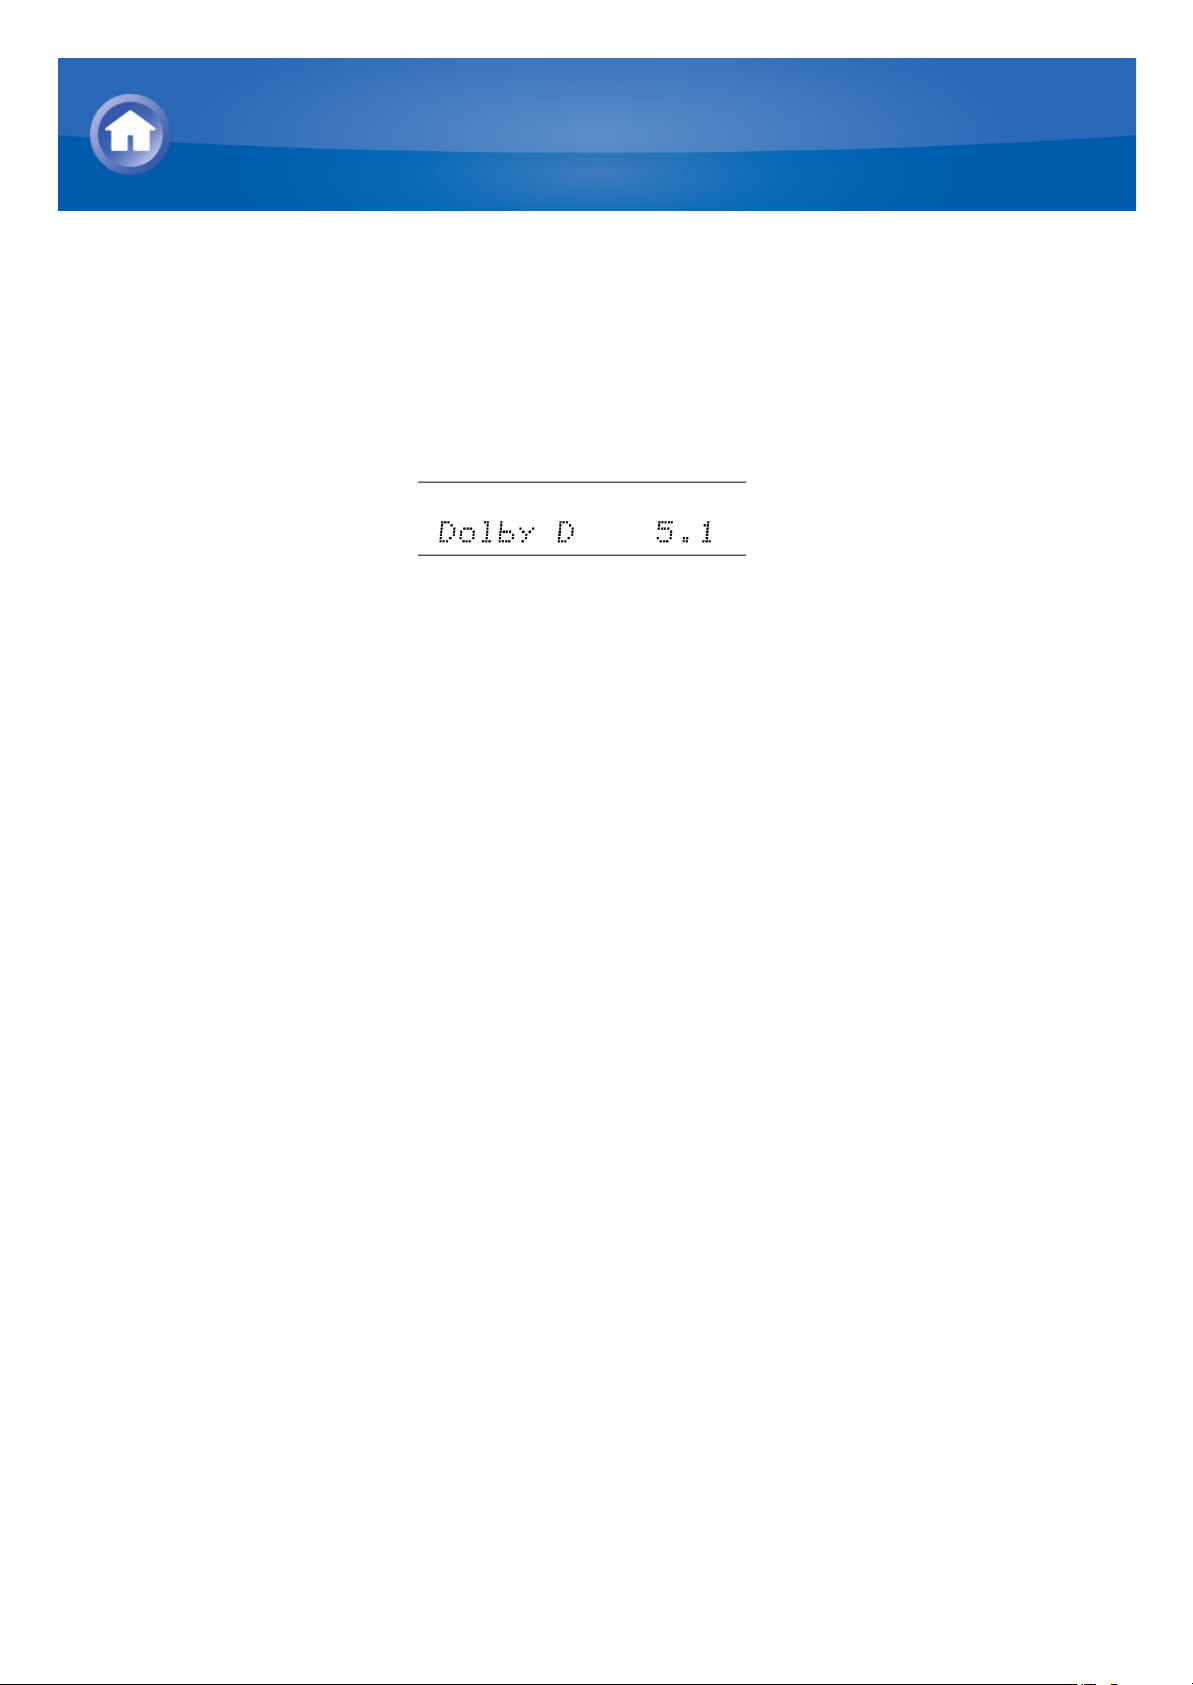
Checking the Input Source
You can check the audio format of the input signals. While audio from the
player is being input, press DISPLAY on the remote controller several times
to switch the information shown on the main unit display. If "Dolby D 5.1" is
displayed in Signal format, the Dolby Digital 5.1 ch signals are being input.
Using the Listening Modes
Page 25
Setup Procedure
This unit allows you to configure advanced settings, such as to reassign the
input jacks and input selector, or configure various speaker settings.
To configure advanced settings, select "Setup" in the Home menu.
Operation: You can set up by viewing the guidance displayed on the TV
screen. To display the guidance, you need to make HDMI connection
between the unit and TV. Select the item with the cursor buttons of the
remote controller and press ENTER to confirm your selection. To return to
the previous screen, press RETURN. To return to the Home menu, press
HOME.
Operation
1. Press RCV on the remote controller.
Always press RCV first to change the remote controller to RECEIVER
mode (the mode to operate this unit) since its mode may be changed
to operate another components.
Advanced Settings
Page 26
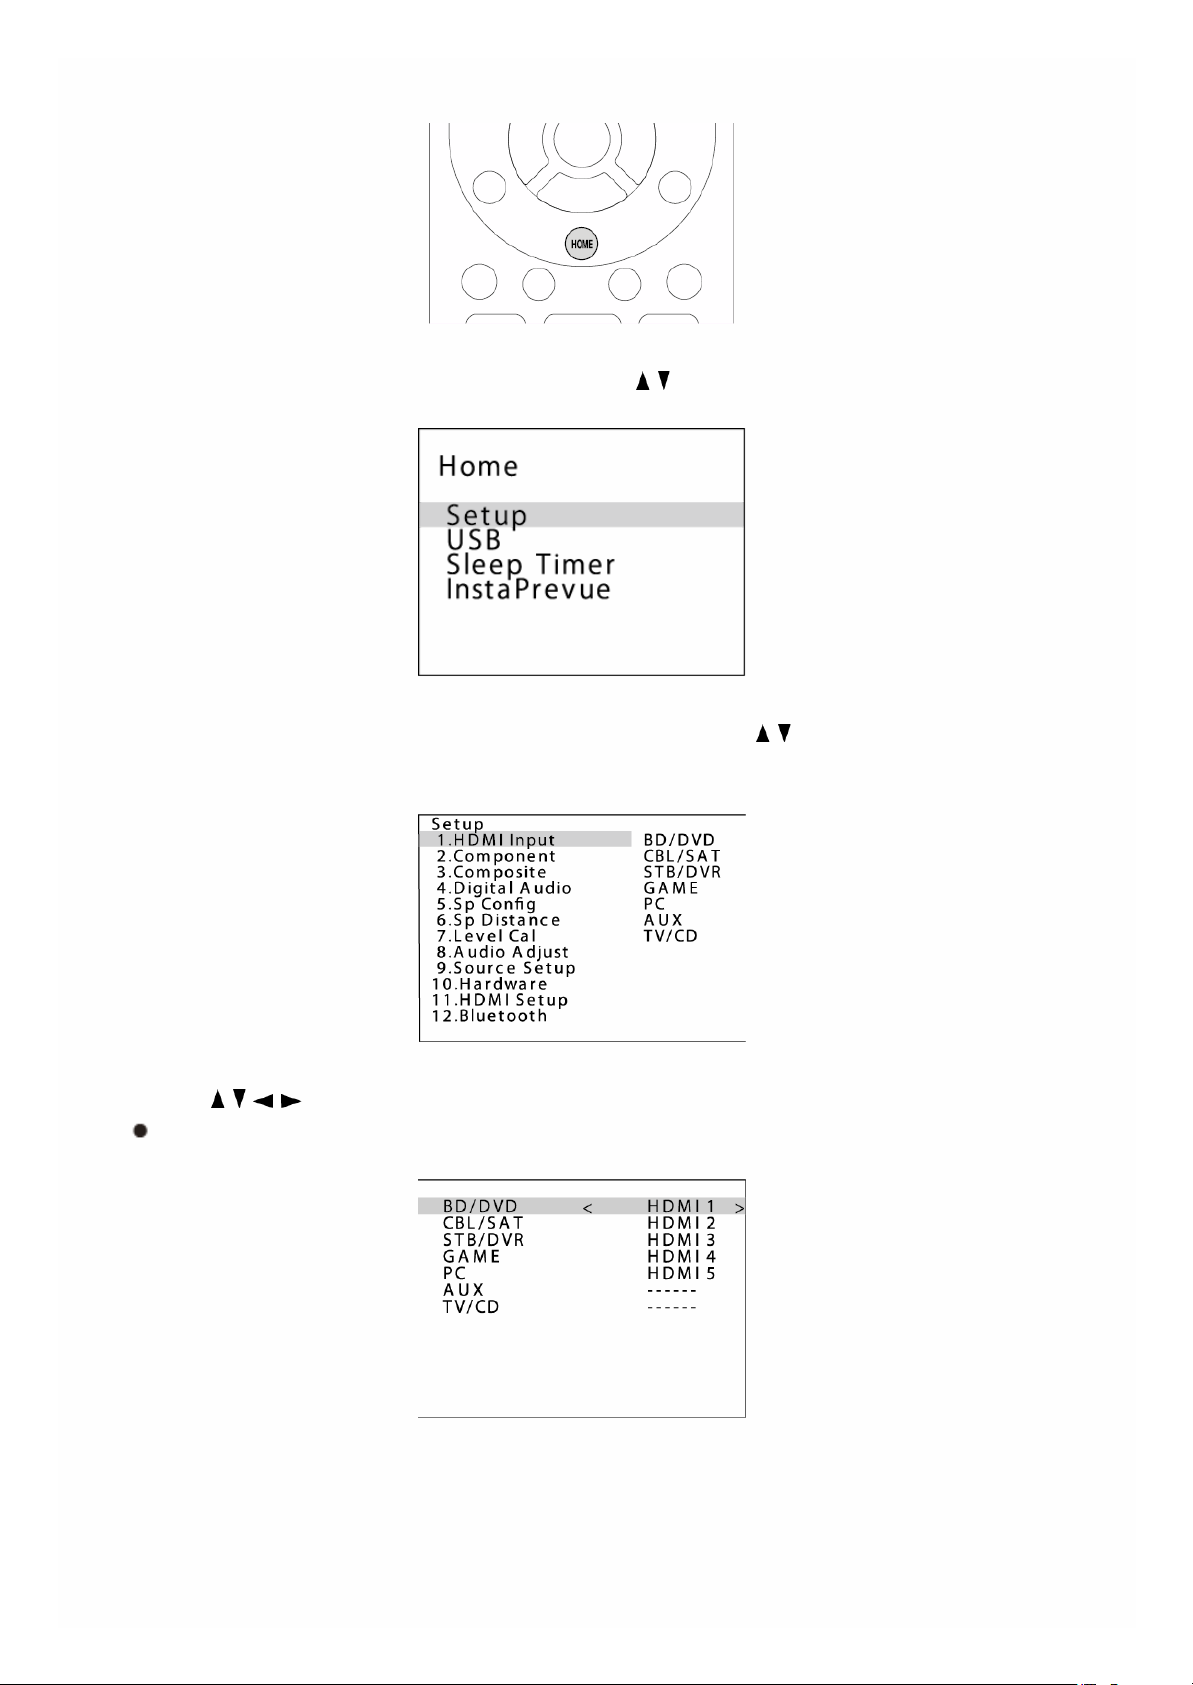
2. Press HOME. The Home menu is displayed on the TV screen.
3. Select "Setup" using the cursor buttons / and press ENTER.
4. Select the target menu using the cursors buttons / and then press
ENTER.
5. Press / / / to select the desired item to configure the settings.
When "ENTER" is displayed on the setting item, press ENTER.
To save changes and finish the setting: Press HOME to exit.
Page 27

1. HDMI Input
It is possible to change assignment of input selector buttons and the HDMI IN
jacks.
BD/DVD
Default Value: HDMI 1
"HDMI 1" to "HDMI 6": Desired HDMI IN jack can be assigned to
BD/DVD button. If you do not assign a jack, select "-----". To select an
HDMI IN jack already assigned to another input selector, change its
setting to "-----" first.
CBL/SAT
Default Value: HDMI 2
"HDMI 1" to "HDMI 6": Desired HDMI IN jack can be assigned to
CBL/SAT button. If you do not assign a jack, select "-----". To select an
HDMI IN jack already assigned to another input selector, change its
setting to "-----" first.
STB/DVR
Default Value: HDMI 3
"HDMI 1" to "HDMI 6": Desired HDMI IN jack can be assigned to
STB/DVR button. If you do not assign a jack, select "-----". To select an
HDMI IN jack already assigned to another input selector, change its
setting to "-----" first.
GAME
Default Value: HDMI 4
"HDMI 1" to "HDMI 6": Desired HDMI IN jack can be assigned to GAME
button. If you do not assign a jack, select "-----". To select an HDMI IN
jack already assigned to another input selector, change its setting to "---
--" first.
PC
Advanced Settings
Page 28

Default Value: HDMI 5
"HDMI 1" to "HDMI 6": Desired HDMI IN jack can be assigned to PC
button. If you do not assign a jack, select "-----". To select an HDMI IN
jack already assigned to another input selector, change its setting to "---
--" first.
AUX
Default Value: -----
"HDMI 1" to "HDMI 6": Desired HDMI IN jack can be assigned to AUX
button. If you do not assign a jack, select "-----". To select an HDMI IN
jack already assigned to another input selector, change its setting to "---
--" first.
TV/CD
Default Value: -----
"HDMI 1" to "HDMI 6": Desired HDMI IN jack can be assigned to TV/CD
button. If you do not assign a jack, select "-----". To select an HDMI IN
jack already assigned to another input selector, change its setting to "---
--" first.
Page 29

2. Component (Component Video Input)
GAME button is assigned to COMPONENT VIDEO IN jack as factory default
setting. This assignment can be changed if necessary. If you do not assign a
jack, select "-----".
BD/DVD
Default Value: -----
"COMPONENT": COMPONENT VIDEO IN jack is assigned to BD/DVD
button.
CBL/SAT
Default Value: -----
"COMPONENT": COMPONENT VIDEO IN jack is assigned to CBL/SAT
button.
STB/DVR
Default Value: -----
"COMPONENT": COMPONENT VIDEO IN jack is assigned to
STB/DVR button.
GAME
Default Value: COMPONENT
"COMPONENT": COMPONENT VIDEO IN jack is assigned to GAME
button.
PC
Default Value: -----
"COMPONENT": COMPONENT VIDEO IN jack is assigned to PC
button.
AUX
Advanced Settings
Page 30

Default Value: -----
"COMPONENT": COMPONENT VIDEO IN jack is assigned to AUX
button.
TV/CD
Default Value: -----
"COMPONENT": COMPONENT VIDEO IN jack is assigned to TV/CD
button.
Page 31

3. Composite (Composite Video Input)
It is possible to change assignment of input selector buttons and the
COMPOSITE VIDEO IN V1 to 3 jacks.
BD/DVD
Default Value: -----
"VIDEO 1" to "VIDEO 3": Desired COMPOSITE VIDEO IN jack can be
assigned to BD/DVD button. If you do not assign a jack, select "-----".
CBL/SAT
Default Value: VIDEO 1
"VIDEO 1" to "VIDEO 3": Desired COMPOSITE VIDEO IN jack can be
assigned to CBL/SAT button. If you do not assign a jack, select "-----".
STB/DVR
Default Value: VIDEO 2
"VIDEO 1" to "VIDEO 3": Desired COMPOSITE VIDEO IN jack can be
assigned to STB/DVR button. If you do not assign a jack, select "-----".
GAME
Default Value: VIDEO 3
"VIDEO 1" to "VIDEO 3": Desired COMPOSITE VIDEO IN jack can be
assigned to GAME button. If you do not assign a jack, select "-----".
PC
Default Value: -----
"VIDEO 1" to "VIDEO 3": Desired COMPOSITE VIDEO IN jack can be
assigned to PC button.
If you do not assign a jack, select "-----".
AUX
Advanced Settings
Page 32

Default Value: FRONT
You cannot change this setting.
TV/CD
Default Value: -----
"VIDEO 1" to "VIDEO 3": Desired COMPOSITE VIDEO IN jack can be
assigned to TV/CD button. If you do not assign a jack, select "-----".
Page 33

4. Digital Audio (Digital Audio Input)
It is possible to change assignment of input selector buttons and the DIGITAL
IN COAXIAL 1 to 2/OPTICAL jacks.
BD/DVD
Default Value: COAXIAL 1
"COAXIAL 1", "COAXIAL 2", "OPTICAL": Desired DIGITAL IN jack can be
assigned to BD/DVD button. If you do not assign a jack, select "-----".
CBL/SAT
Default Value: COAXIAL 2
"COAXIAL 1", "COAXIAL 2", "OPTICAL": Desired DIGITAL IN jack can be
assigned to CBL/SAT button. If you do not assign a jack, select "-----".
STB/DVR
Default Value: -----
"COAXIAL 1", "COAXIAL 2", "OPTICAL": Desired DIGITAL IN jack can be
assigned to STB/DVR button. If you do not assign a jack, select "-----".
GAME
Default Value: -----
"COAXIAL 1", "COAXIAL 2", "OPTICAL": Desired DIGITAL IN jack can be
assigned to GAME button. If you do not assign a jack, select "-----".
PC
Default Value: -----
"COAXIAL 1", "COAXIAL 2", "OPTICAL": Desired DIGITAL IN jack can be
assigned to PC button. If you do not assign a jack, select "-----".
AUX
Advanced Settings
Page 34

Default Value: -----
"COAXIAL 1", "COAXIAL 2", "OPTICAL": Desired DIGITAL IN jack can be
assigned to AUX button. If you do not assign a jack, select "-----".
TV/CD
Default Value: OPTICAL
"COAXIAL 1", "COAXIAL 2", "OPTICAL": Desired DIGITAL IN jack can be
assigned to TV/CD button. If you do not assign a jack, select "-----".
Supported sampling rates for PCM signals (stereo, mono) from a digital
input (optical and coaxial) are 32/44.1/48/88.2/96 kHz/16, 20, 24 bit.
Page 35

5. Sp Config (Speaker Configuration)
Allows you to change the speaker configuration such as existence of
subwoofer, crossover frequency, and so on.
Subwoofer
Default Value: Yes
Set whether a subwoofer is connected or not.
"Yes": When subwoofer is connected
"No": When subwoofer is not connected
Front
Default Value: Small
Allows you to specify the size of the front speakers. Specify the size
according to a cone diameter.
"Small": When the cone diameter is less than 6-1/2 inches (16 cm)
"Large": When the cone diameter is greater than 6-1/2 inches (16 cm)
The setting is fixed to "Large" if "Subwoofer" is set to "No".
Center
Default Value: Small
Allows you to specify the size of the center speaker. Specify the size in
accordance with the smallest cone diameter in the system.
"Small": When the cone diameter is less than 6-1/2 inches (16 cm)
"Large": When the cone diameter is greater than 6-1/2 inches (16 cm)
"None": When the corresponding speaker is not used.
The setting cannot be selected "Large" if "Front" is set to "Small".
Surround
Default Value: Small
Allows you to specify the size of the surround speakers. Specify the size
in accordance with the smallest cone diameter in the system.
"Small": When the cone diameter is less than 6-1/2 inches (16 cm)
"Large": When the cone diameter is greater than 6-1/2 inches (16 cm)
Advanced Settings
Page 36

"None": When the corresponding speaker is not used.
The setting cannot be selected "Large" if "Front" is set to "Small".
Crossover
Default Value: 120 Hz/150 Hz
Allows you to set the lowest frequency range for each speaker output,
and make the subwoofer output the lower frequency range than the set
value. Specify the size in accordance with the smallest cone diameter in
the system.
"40 Hz", "50 Hz", "60 Hz": For cone diameters greater than 8 inches (20
cm)
"70 Hz", "80 Hz" "90 Hz": For cone diameters 6-1/2 to 8 inches (16 to 20
cm)
"100 Hz": For cone diameters 5-1/4 to 6-1/2 inches (13 to 16 cm)
"120 Hz": For cone diameters 3-1/2 to 5-1/4 inches (9 to 13 cm)
"150 Hz", "200 Hz": For cone diameters less than 3-1/2 inches (9 cm)
Default values vary depending on the regions.
Double Bass
Default Value: Off
This function boosts bass output by feeding bass sounds from the front
left and right, and center speakers to the subwoofer.
"On": To boost the bass output
"Off": Not to boost the bass output
The setting is fixed to "Off" if "Subwoofer" is set to "No" and "Front" is
set to "Small".
In the following cases, the settings for "Sp Config" cannot be changed:
– Headphones are connected.
– "Audio TV Out" is set to "On".
– "HDMI CEC (RIHD)" is set to "On" and you’re listening through your TV
speakers.
Page 37

6. Sp Distance (Speaker Distance)
Allows you to set the distance from each speaker to the listening position.
Unit
Default Value: feet/meters
Specify the unit of distance for configuring settings.
"feet": When setting in feet (0.1 ft to 30.0 ft, in increments of 1.0 ft)
"meters": When setting in meters (0.03 m to 9.00 m, in increments of
0.03 m)
Front Left
Default Value: 12.0 ft/3.60 m
Specify the distance between each speaker and the listening position.
Center
Default Value: 12.0 ft/3.60 m
Specify the distance between each speaker and the listening position.
Front Right
Default Value: 12.0 ft/3.60 m
Specify the distance between each speaker and the listening position.
Surround Right
Default Value: 7.0 ft/2.10 m
Specify the distance between each speaker and the listening position.
Surround Left
Default Value: 7.0 ft/2.10 m
Specify the distance between each speaker and the listening position.
Advanced Settings
Page 38

Subwoofer
Default Value: 12.0 ft/3.60 m
Specify the distance between each speaker and the listening position.
In the following cases, the settings for "Sp Distance" cannot be changed:
– Headphones are connected.
– "Audio TV Out" is set to "On".
– Speakers for which "Sp Config" are set to "No" or "None".
– "HDMI CEC (RIHD)" is set to "On" and you’re listening through your TV
speakers.
Default values vary depending on the regions.
Page 39

7. Level Cal (Level Calibration)
Allows you to adjust the level of each speaker with the built-in test tone.
Front Left
Default Value: 0 dB
Select a value between "-12 dB" and "+12 dB". Select the desired
volume level accordingly to the test tone which is output as you change
the value.
Center
Default Value: 0 dB
Select a value between "-12 dB" and "+12 dB". Select the desired
volume level accordingly to the test tone which is output as you change
the value.
Front Right
Default Value: 0 dB
Select a value between "-12 dB" and "+12 dB". Select the desired
volume level accordingly to the test tone which is output as you change
the value.
Surround Right
Default Value: 0 dB
Select a value between "-12 dB" and "+12 dB". Select the desired
volume level accordingly to the test tone which is output as you change
the value.
Surround Left
Default Value: 0 dB
Select a value between "-12 dB" and "+12 dB". Select the desired
volume level accordingly to the test tone which is output as you change
Advanced Settings
Page 40

the value.
Subwoofer
Default Value: 0 dB/3 dB
Select a value between "-15 dB" and "+12 dB". Select the desired
volume level accordingly to the test tone which is output as you change
the value.
In the following cases, the settings for "Level Cal" cannot be changed:
– Headphones are connected.
– "Audio TV Out" is set to "On".
– Speakers for which "Sp Config" are set to "No" or "None".
– Mute (MUTING) is set.
– "HDMI CEC (RIHD)" is set to "On" and you’re listening through your TV
speakers.
Default values vary depending on the regions.
Page 41

8. Audio Adjust
Allows you to configure various settings related to sound, such as settings for
listening to multiplex audio or multilingual TV broadcasts and sound field
settings for listening modes.
Input Ch (Mux) (Multiplex Input Channel)
Default Value: Main
Set the audio channel or language to output when listening to multiplex
audio or multilingual TV broadcasts etc.
"Main": When playing primary audio channel.
"Sub": When playing secondary audio channel.
"Main/Sub": When playing both primary and secondary audio channel.
Input Ch (Mono) (Mono Input Channel)
Default Value: Left + Right
Allows you to set the input channel to use for playing any 2 ch digital
source such as Dolby Digital, or 2-ch analog/PCM source in the Mono
listening mode.
"Left": When playing left channel source only.
"Right": When playing right channel source only.
"Left + Right": When playing both left and right channel source only.
Panorama (PLII Panorama)
Default Value: Off
Configure the sound field settings for playing any 2 ch digital source
such as Dolby Digital, or 2-ch analog/PCM source in the Dolby Pro
Logic II Music listening mode. Allows you to configure the sound field
width of front stereo image.
"On": To broaden the width of the front stereo image
"Off": Default value.
Dimension (PLII Dimension)
Default Value: 0
Advanced Settings
Page 42

Configure the sound field settings for playing any 2 ch digital source
such as Dolby Digital, or 2-ch analog/PCM source in the Dolby Pro
Logic II Music listening mode. Allows you to configure the sound field
position forward or backward.
"-3" to "3": With "0" at the center, smaller the setting value is, more the
sound field moves forward, and larger the setting value is, more the
sound field moves backward.
Center Width (PLII Center Width)
Default Value: 3
Configure the settings to use for playing any 2 ch digital source such as
Dolby Digital, or 2-ch analog/PCM source in the Dolby Pro Logic II
Music listening mode. Allows you to configure the width of the sound
from the center speaker.
"0" to "7": Smaller the setting value is,the sound is gathered to the
center, and larger the setting value is, the sound is distributed to the
front left and right speakers.
Center Image (Neo:6 Center Image)
Default Value: 2
Allows you to configure the width of the front sound field when playing in
the DTS Neo:6 Music listening mode.
"0" to "5": Smaller the setting value is, the front sound field is gathered
to the center, and larger the setting value is, the front sound field is
distributed to the front left and right speakers.
Listening Angle
Default Value: Wide
Set the angle of the front left and right speakers relative to the listening
position when playing in the Theater-Dimensional listening mode.
"Narrow": Less than 30°
"Wide": Greater than 30°
Values recommended for "Listening Angle" are 20° when "Narrow" is
selected, and 40° when "Wide" is selected.
Page 43

9. Source Setup
The setting can be separately set to each input selector button. Select the
input selector to configure.
Name
Default Value: -
Allows you to rename the currently selected input selector for easy
identification.
Same name cannot be set for multiple input selectors. Moreover, a
name cannot be configured for the input selectors "AM", "FM",
"USB", and "BLUETOOTH".
Audio Selector
Default Value: -
Allows you to select prior input source.
"ARC": When giving priority to input signal from ARC compatible TV.
This setting can be selected when "Audio Return Channel" is set to
"Auto" and when "TV/CD" is selected.
"HDMI": When giving priority to input signal from HDMI jacks.
This setting can be selected only when the input selector to set is
assigned to the HDMI IN jack in the "HDMI Input" setting.
"COAXIAL" (Coaxial input): When giving priority to input signal from
DIGITAL IN COAXIAL jacks.
This setting can be selected only when the input selector to set is
assigned to the COAXIAL jack in the "Digital Audio (Digital Audio
Input)" setting.
"OPTICAL" (Optical input): When giving priority to input signal from
DIGITAL IN OPTICAL jack.
This setting can be selected only when the input selector to set is
assigned to the OPTICAL jack in the "Digital Audio (Digital Audio
Input)" setting.
"Analog": To always output analog audio independently of the input
signal.
Fixed Mode
Default Value: Off
Advanced Settings
Page 44

Specify an input signal when "HDMI", "COAXIAL", or "OPTICAL" is
selected for "Audio Selector". Set this item if noise is produced, or
truncation occurs at the beginning of a track that follows a gap when
playing PCM or DTS sources.
"Off": To play an analog signal when there is no digital signal.
"PCM": To fix the input source to PCM.
"DTS": To fix the input source to DTS (except for DTS-HD).
Changing "Audio Selector" setting changes "Fixed Mode" to "Off".
In the following cases, the settings for "Source Setup" cannot be
changed:
– When selecting the input selectors "AM", "FM", "USB",
"BLUETOOTH".
Page 45

10. Hardware (Hardware Setup)
Volume OSD
Default Value: On
This function displays the volume level on the TV screen during volume
level adjustment.
"On": The volume level is displayed on TV screen.
"Off": The volume level is not displayed on TV screen.
Remote ID
Default Value: 1
Select an ID for the remote controller to be used with the unit from "1",
"2", and "3", and set it to differentiate this unit's remote controller from
those used with other Onkyo components when multiple components
are used in the same room.
If you change the ID on the unit, set the remote controller ID to the same
value accordingly to the procedure below.
1. While holding down RCV, press Q SETUP for about 3 seconds until
the remote indicator lights.
2. Press either 1, 2, or 3 using the number buttons. The remote
indicator flashes twice.
AM/FM Freq Step (North American model)
Default Value: 10 kHz/
200 kHz
Select the frequency step according to your area.
Select from "10 kHz/200 kHz" or "9 kHz/50 kHz".
When the "AM/FM Frequency Step (AM Frequency Step)" setting is
changed, all radio presets are deleted.
AM Freq Step (European and Asian models)
Default Value: 9 kHz
Select the frequency step according to your area.
Select from "9 kHz" or "10 kHz".
Advanced Settings
Page 46

When the "AM/FM Frequency Step (AM Frequency Step)" setting is
changed, all radio presets are deleted.
Auto Standby
Default Value: On/Off
This function places the unit on standby automatically after 20 minutes
of inactivity without any video and/or audio input.
"On": To place the unit on standby automatically. ("ASb" flashes on the
display.)
"Off": Not to place the unit on standby automatically,
"Auto Standby" is appeared on the display and menu screen 30
seconds before the Auto Standby comes on.
"Auto Standby" does not work when Zone 2 is active.
Default values vary depending on the regions.
HDMI Through
Default Value: Off
Enables/Disables the "Auto Standby" setting when "HDMI Through"
setting is on.
"On": Enable this function
"Off": Disable this function
This setting is fixed to Off when setting "Auto Standby" to "Off".
Version
Default Value: -
The current firmware version is displayed.
Update via USB
Default Value: -
Press ENTER to select when you want to update the firmware via USB.
You will not be able to select "Update via USB" if a USB storage
device is not connected or there is nothing to update in the USB
storage device.
Page 47

11. HDMI Setup
HDMI CEC (RIHD)
Default Value: Off
Setting to "On" enables the input selection link and other link functions
with HDMI connected CEC compliant device.
"On": To enable this function.
"Off": When not using this function.
Depending on the TV set, a link may need to be configured on the
TV.
When this setting is set to "On", closing the on-screen menu displays
the name of the CEC-compatible devices and "RIHD On" on the
display.
When this setting is set to "On", power consumption in standby mode
may increase. (Depending on the TV status, the unit will enter the
normal standby mode.)
When this setting is set to "On" and you are listening to the audio
through the speakers of your TV, operating the MASTER VOLUME
control of the unit outputs audio from the speakers connected to the
unit. If you want to output audio from either of the unit or TV, change
the unit or TV settings, or reduce the volume of the unit.
If misbehavior occurs when this setting is set to "On", set this setting
to "Off".
When connecting a non-CEC compatible component, or when you
are not sure whether it is compatible, set the setting to "Off".
When making the change to this setting, turn off and then on again
the power of all connected components.
HDMI Through
Default Value: Off
Allows video signals from an AV component connected via HDMI to be
output to the TV independently of whether the AV receiver is on
standby. This setting is only valid for INPUT SELECTOR buttons
assigned to HDMI IN jack. You cannot set this setting to INPUT
SELECTOR button which is not assigned to any HDMI IN jack.
"Off": To disable this function. The input signal from any HDMI IN jacks
cannot be output to TV.
Advanced Settings
Page 48

"BD/DVD", "CBL/SAT", "STB/DVR", "GAME", "PC", "AUX", "TV/CD":
Input signal from components connected to the HDMI IN jack assigned
to each input selector is output to TV.
"Last": Input signal from the components connected to input selector
which was selected just before the unit enters the standby.
"Auto": Input signal from all components connected to HDMI IN jacks is
displayed on TV.
"Auto (Eco)": Input signal from all components connected to HDMI IN
jacks is displayed on TV. Selecting this setting when using CECcompatible TV, the power consumption on standby is reduced. You
cannot select this setting, when "HDMI CEC (RIHD)" is set to "Off".
When "HDMI Through" is set, the power consumption increases
even when the unit is on standby.
When making the change to this setting, turn off and then on again
the power of all connected components.
Audio TV Out
Default Value: Off
This function outputs the audio through the speakers of the TV
connected to HDMI with this unit turned on.
"On": When using this function
"Off": When not using this function.
When setting this function to "On", set "HDMI CEC (RIHD)" to "Off".
This function is fixed to "Auto", when setting "HDMI CEC (RIHD)" to
"On".
Listening mode cannot be changed while "Audio TV Out" is set to
"On" and audio is being output through the speakers of the TV.
Depending on your TV set or input signal of the component, audio
may not output through the speakers of the TV even if "Audio TV
Out" is set to "On". In such case, audio is output from the speakers
of the unit.
Operating the MASTER VOLUME control of the unit when "Audio TV
Out" or "HDMI CEC (RIHD)" is set to "On" and you are listening to
the audio through the speakers of your TV, outputs audio from the
unit. If you do not want to output audio from the unit, change the unit
or TV settings, or reduce the volume of the unit.
Audio Return Ch
Default Value: -
Connection to the ARC compatible TV using HDMI cable allows to listen
to the TV sound from the speakers connected to the unit. To use this
function, set "HDMI CEC (RIHD)" to "On" in advance.
"Auto": When using this function.
Page 49

"Off": When not using this funtion.
LipSync
Default Value: On
This function automatically corrects any desynchronization between the
video and audio signals based on data from the HDMI LipSync
compatible TV.
"On": When using this function.
"Off": When not using this function.
InstaPrevue
Default Value: -
This function is related to the preview thumbnails of the video input
through HDMI, which will be displayed using "InstaPrevue" in the Home
menu.
Depending on the video source, the preview thumbnails configured
in "InstaPrevue" may not be displayed properly.
Sub Window
Default Value: Multi
Allows you to set how to display preview thumbnails.
"Multi": Displays all the thumbnails of HDMI IN 1, 2, 3, 4 and 5 at
once.
"Single": Displays thumbnails of HDMI IN 1, 2, 3, 4 and 5 individually.
Position
Default Value: Bottom/LowerR
Allows you to set the display position of preview thumbnails.
When setting "Sub Window" to "Multi": Select from "Top", "Bottom",
"Left" and "Right".
When setting "Sub Window" to "Single": Select from "UpperL",
"UpperR", "LowerL" and "LowerR".
Page 50

12. Bluetooth (Bluetooth Setup)
Bluetooth
Default Value: On
Enables/Disables the unit to pair with Bluetooth-enabled device.
"On": Enables the Bluetooth function and allows the unit to pair with
Bluetooth-enabled device. Set this function to "On" when configuring the
settings related to Bluetooth.
"Off": When not using the Bluetooth function.
Direct Change
Default Value: On
Automatically changes the input selector to "BLUETOOTH" when a
Bluetooth-enabled device is connected.
"On": To enable this function.
"Off": To disable this function.
When the input selector is not selected automatically, set this
function to "Off" and change the input selector manually.
Auto Reconnect
Default Value: On
Automatically reconnects to the Bluetooth-enabled device connected
last when you change the input selector to "BLUETOOTH".
"On": To enable this function.
"Off": To disable this function.
This function may not work depending on your Bluetooth-enabled
device.
Pairing Info
Default Value: -
This function initializes the information of a previous pairing information
stored in the unit.
Pressing ENTER when "Clear" is displayed initializes the pairing
information stored in this unit.
Advanced Settings
Page 51

This function does not initialize the pairing information on the
Bluetooth-enabled device. When pairing the unit with the device
again, be sure to clear the pairing information on the Bluetooth-
enabled device in advance. For information on how to clear the
pairing information, refer to the Bluetooth-enabled device's
instruction manual.
Device
Default Value: -
Displays the name of the Bluetooth-enabled device connected to the
unit.
The name is not displayed when "Status" is "Ready" and "Pairing".
Status
Default Value: -
Displays the status of the Bluetooth-enabled device connected to the
unit.
"Ready": Not paired
"Pairing": Paired
"Connected": Connected successfully
When you cannot select "Bluetooth", wait until the Bluetooth function is
activated.
Page 52

Functions of Remote Mode Button
REMOTE MODE button on the remote controller has ability to control your
other AV components, including those made by other manufacturers, by
programming the specified remote control code. Program the desired
REMOTE MODE button with remote control code and then press the
programmed button. The remote controller's mode is changed to operate the
corresponding component.
* The RCV and ZONE2 buttons cannot be programmed.
Operating Other Components Using Remote Controller
Page 53

Programming Remote Control Codes
For information on the configuration and operation of Onkyo components
with RI jack, refer to "Connecting and Operating Onkyo RI Components".
Furthermore, the following REMOTE MODE buttons are preprogrammed with
remote control codes.
BD/DVD: Onkyo Blu-ray Disc/DVD player
TV/CD: Onkyo CD player
STB/DVR: Apple TV
Registration
1. Look up the Remote Control Code List for the corresponding remote
control code.
The codes in the Remote Control Code List are those known as of the
date of publication and may be changed.
Only TV remote control codes can be entered for TV.
Program a remote control code in accordance with the input since
each button also works as the input selector. (For example, when the
CD player is connected to the TV/CD jack, program the remote control
code for the CD player to TV/CD)
2. Press DISPLAY for 3 or more seconds while holding down the REMOTE
MODE button to which you want to register the remote control code.
The remote indicator will light.
Operating Other Components Using Remote Controller
Page 54

3. With the number buttons, enter the 5-digit remote control code within 30
seconds.
The registration is complete when the remote indicator flashes twice.
The remote indicator flashes once when registration fails. In that case,
try the registration again.
Remapping the Colored Buttons
The colored button assignment on the AV receiver's remote controller can be
remapped to match that on the remote controller of the component whose
remote control code you programmed to REMOTE MODE. However, you will
not be able to remap the colored buttons if Zone 2 is selected.
1. Hold down the REMOTE MODE button to map and A (Red)
simultaneously until the remote indicator lights (about 3 seconds).
Remapping is possible only for codes included in the categories of the
Remote Control Code List such as DVD player and TV.
2. Within 30 seconds, press the colored buttons from left to right, in the
order you want to remap.
For example, if the colored buttons on the remote controller of the
other component are yellow, green, blue, and red from left to right,
press the buttons on the AV receiver's remote controller in that order.
Programming is complete when the remote indicator flashes twice. The
remote indicator flashes once slowly when remapping fails. Try the
remapping again.
Pressing any other button than a colored button cancels the remap
operation.
Page 55

Resetting the REMOTE MODE Buttons
You can reset a REMOTE MODE button to its default remote control code.
Note that only one REMOTE MODE button can be reset in this procedure.
1. Press HOME for 3 or more seconds while holding down the REMOTE
MODE button to which you want to program the remote control code.
The remote indicator lights.
2. Within 30 seconds, press the REMOTE MODE button again.
Reset is complete when the remote indicator flashes twice.
To reset the remote controller to its factory defaults: While holding
down RCV, press and hold down HOME for about 3 seconds until the remote
indicator lights. Press RCV again within 30 seconds. Reset is complete if the
remote indicator flashes twice.
Page 56

TV operation
Press the REMOTE MODE button programmed with the remote control code
for the relevant AV component to switch the remote controller mode to that
for the AV component. Then, operate by using the corresponding buttons.
Available buttons vary depending on the product category of the component.
Note that some buttons may not work, or the remote controller may not work
at all with some components.
1 REMOTE MODE
2 , INPUT, VOL /
3 MUTING
4 CH +/–
5 GUIDE
6 / / / , ENTER
7 SETUP
8 PREV CH
9 RETURN
F AUDIO (*)
Operating Other Components Using Remote Controller
Page 57

G , , , , , , (*)
H A (Red), B (Green), C (Yellow), D (Blue)
I Number 1 to 9, 0, +10
J CLR, DISPLAY
* Not CEC-compatible.
Page 58

Blu-ray Disc player/DVD player/DVD recorder
operation
Press the REMOTE MODE button programmed with the remote control code
for the relevant AV component to switch the remote controller mode to that
for the AV component. Then, operate by using the corresponding buttons.
Available buttons vary depending on the product category of the component.
Note that some buttons may not work, or the remote controller may not work
at all with some components.
1 REMOTE MODE
2 SOURCE
3 MUTING
4 CH +/–, DISC +/–
5 TOP MENU
6 / / / , ENTER
7 SETUP
8 MENU
9 RETURN
F AUDIO (*)
Operating Other Components Using Remote Controller
Page 59

G , , , , , ,
H A (Red), B (Green), C (Yellow), D (Blue)
I Number 1 to 9, 0, +10 (*)
J CLR, DISPLAY
* Not CEC-compatible.
Page 60

VCR/PVR operation
Press the REMOTE MODE button programmed with the remote control code
for the relevant AV component to switch the remote controller mode to that
for the AV component. Then, operate by using the corresponding buttons.
Available buttons vary depending on the product category of the component.
Note that some buttons may not work, or the remote controller may not work
at all with some components.
1 REMOTE MODE
2 SOURCE
3 MUTING
4 CH +/–
5 GUIDE
6 / / / , ENTER
7 SETUP
8 PREV CH
9 RETURN
Operating Other Components Using Remote Controller
Page 61

F , , , , , ,
G Number 1 to 9, 0, +10
H CLR, DISPLAY
Page 62

Satellite receiver/Cable receiver operation
Press the REMOTE MODE button programmed with the remote control code
for the relevant AV component to switch the remote controller mode to that
for the AV component. Then, operate by using the corresponding buttons.
Available buttons vary depending on the product category of the component.
Note that some buttons may not work, or the remote controller may not work
at all with some components.
1 REMOTE MODE
2 SOURCE
3 MUTING
4 CH +/–
5 GUIDE
6 / / / , ENTER
7 SETUP
8 PREV CH
9 RETURN
F AUDIO
Operating Other Components Using Remote Controller
Page 63

G , , , , , ,
H A (Red), B (Green), C (Yellow), D (Blue)
I Number 1 to 9, 0, +10
J CLR, DISPLAY
Page 64

CD player operation
Press the REMOTE MODE button programmed with the remote control code
for the relevant AV component to switch the remote controller mode to that
for the AV component. Then, operate by using the corresponding buttons.
Available buttons vary depending on the product category of the component.
Note that some buttons may not work, or the remote controller may not work
at all with some components.
1 REMOTE MODE
2 SOURCE
3 MUTING
4 DISC +/–
5 / / / , ENTER
6 SETUP
Operating Other Components Using Remote Controller
Page 65

7 , , , , , ,
8 SEARCH, REPEAT, RANDOM, MODE
9 Number 1 to 9, 0, +10
F CLR, DISPLAY
Page 66

Cassette tape deck operation
Press the REMOTE MODE button programmed with the remote control code
for the relevant AV component to switch the remote controller mode to that
for the AV component. Then, operate by using the corresponding buttons.
Available buttons vary depending on the product category of the component.
Note that some buttons may not work, or the remote controller may not work
at all with some components.
1 REMOTE MODE
2 SOURCE
3 MUTING
4 , (Reverse Playback), , , , ,
Operating Other Components Using Remote Controller
Page 67

To operate CEC-compatible components
The TV and BD/DVD buttons on the remote controller are preprogrammed
with remote control codes for linked operation of some CEC (Consumer
Electronics Control)-compatible TV sets and Blu-ray Disk players. By
connecting to the unit via HDMI, you may operate them using the AV
receiver's remote controller.
If you cannot operate your CEC-compatible component, program one of
the following remote control codes to the TV or BD/DVD button.
TV button: 11807/13100/13500 (CEC-compatible TV)
BD/DVD button: 32910/33101/33501/31612 (CEC-compatible BD/DVD
player)
Operating Other Components Using Remote Controller
Page 68

Summary of RI function
Connecting an Onkyo component with RI jack such as the separately sold RI
Dock to the unit by using an RI cable and an analog audio (RCA) cable
enables the following RI functions:
System On/Auto Power On: Starting playback on a component connected
via RI when the unit is on standby mode, automatically turns on the unit to
select the relevant component as its input source.
Direct Change: When playback is started on a component connected via RI,
the unit selects that component as the input source.
Remote Controller Operation: Allows you to operate RI-compatible Onkyo
components using the AV receiver's remote controller. Point the remote
controller at remote control sensor of the unit. This operation is possible only
when the RI remote control code is programmed.
Some components may not support all RI functions.
These functions do not work when Zone 2 is turned on.
For information on the RI functions, also refer to each component's
instruction manual.
Connecting and Operating Onkyo RI Components
Page 69

RI connection and settings
Connect an Onkyo component with RI jack to the unit using an RI cable and
an analog audio (RCA) cable. For details, refer to the instruction manual of
the component with RI jack. The RI cable can be connected in any order.
When there are two RI jacks, you can connect to either one as both jacks
work in the same way.
To connect the RI Dock or cassette tape deck via RI, you must:
Renaming the Input Selector
To make the RI functions work, you must rename the input selectors. Press
RCV on the remote controller to switch its mode to RECEIVER mode and the
press HOME. Select "9. Source Setup" in "Setup" menu and rename the
input selector by setting "DOCK" or "TAPE".
Program the RI remote control code
Program the remote control code to desired REMOTE MODE button on the
remote controller. This will allow you to operate the component by pointing
the remote controller at the unit instead of the component.
1. Press DISPLAY for 3 or more seconds while holding down the REMOTE
MODE button to which you want to program the remote control code.
The remote indicator lights.
The RCV, ZONE2, and TV buttons cannot be programmed.
Connecting and Operating Onkyo RI Components
Page 70

2. With the number buttons, enter the following 5-digit remote control code
within 30 seconds.
RI Dock: 81993
Cassette tape deck with RI jack: 42157
Programming is complete when the remote indicator flashes twice. The
remote indicator flashes once slowly when programming the remote
control code fails. Try programming again.
Input selector on the RI Dock: Select "HDD" or "HDD/DOCK". For details,
refer to the RI Dock's instruction manual.
To operate Onkyo components directly or Onkyo components that are not
connected via RI, use the following remote control codes:
Onkyo DVD player: 30627
Onkyo CD player: 71817
RI Dock: 82990
With some models, operation may not be possible in part or not possible
at all.
Page 71

iPod/iPhone Operation
The RI Dock allows you to use the AV receiver's remote controller to operate
and play music on your iPod/iPhone. Moreover, it also allows you to view
videos on your iPod/iPhone on the screen of your TV, as well as perform RI
operations if connected via RI. This operation is possible only when the RI
remote control code is programmed.
Before Operation: Before performing any operation on your iPod/iPhone,
make sure to have it updated to the latest version via iTunes. Certain buttons
may not work for some iPod/iPhone models and generations, or RI Dock. For
details on the operation, refer to the RI Dock's instruction manual.
Switch the remote controller mode by pressing the REMOTE MODE button
programmed with the remote control code. Then, operate by using the
corresponding buttons. Point the remote controller at the unit.
1 REMOTE MODE
2 SOURCE
3 MUTING
4 VOL /
5 ALBUM +/-
6 TOP MENU
Connecting and Operating Onkyo RI Components
Page 72

7 / / / , ENTER, PLAYLIST /
8 MENU
9 , , , , , ,
F REPEAT, RANDOM
G MODE
H DISPLAY
Pressing DISPLAY turns on the backlight for a few seconds.
MODE allows you to use the Resume function. You can resume playing
from the song that was playing when you removed your iPod/iPhone from
the DS-A2 RI Dock.
Page 73

Summary of Firmware Update
There is method for updating the firmware: via USB.
Prepare a 64 MB or larger USB storage device.
For the latest information on updates, visit the Onkyo website.
During an update, do not
– Disconnect and reconnect any cable, USB storage device, speaker
setup microphone or headphones, or perform any operation on the
component such as turn off its power
– Access to this unit from a PC or smartphone using Android application
The update may take about 10 minutes to complete, via USB.
Furthermore, existing settings are saved regardless of the method used.
Disclaimer: The program and accompanying online documentation are
furnished to you for use at your own risk.
Onkyo will not be liable and you will have no remedy for damages for any
claim of any kind whatsoever concerning your use of the program or the
accompanying online documentation, regardless of legal theory, and whether
arising in tort or contract.
In no event will Onkyo be liable to you or any third party for any special,
indirect, incidental, or consequential damages of any kind, including, but not
limited to, compensation, reimbursement or damages on account of the loss
of present or prospective profits, loss of data, or for any other reason
whatsoever.
Firmware Update
Page 74

Updating the Firmware via USB
Before Start:
Media inserted in a USB card reader may not be used for this function.
USB storage devices with security function are not supported.
USB hubs and USB devices with hub function are not supported. Do not
connect these devices to the unit.
Delete any data stored on the USB storage device.
If Zone 2 is active, press OFF on the unit to turn it off.
If "HDMI CEC (RIHD)" is set to "On", set it to "Off" (default value).
– After pressing RCV, press HOME on the remote controller. Select
"Setup" with the cursors and press ENTER. Then, after selecting "11.
HDMI Setup" and pressing ENTER, select "HDMI CEC (RIHD)" to
select "Off".
* Some USB storage devices may take long to load, may not be loaded
correctly, or may not be correctly fed depending on the device or their
content.
* Onkyo will not be liable whatsoever for any loss or damage of data, or
storage failure arising from the use of the USB storage device with the
AV receiver. Thank you for your understanding.
* The description may differ from the on-screen display but that will not
change the way to operate or the function.
Update
1. Connect the USB storage device to your PC.
2. Download the firmware file from the Onkyo website to your PC and unzip.
Firmware files are named in the following way:
ONKAVR****_************.zip
Unzip the file on your PC. The number of unzipped files and folders varies
depending on the model.
3. Copy all unzipped files and folders to the root folder of the USB storage
device.
Make sure to copy the unzipped files.
4. Press USB on the remote controller to select "USB".
Firmware Update
Page 75

5. Connect the USB storage device to the USB port of the unit.
If you connect a USB hard disk drive to the USB port of the unit, we
recommend that you use its AC adapter to power it.
If the USB storage device has been partitioned, each section will be
treated as an independent device.
6. After pressing RCV, press HOME on the remote controller.
The Home menu is displayed on the TV screen.
7. Select "Setup" - "10. Hardware" - "Update via USB" in order using the
cursor buttons, and then press ENTER.
If "10. Hardware" is grayed out and cannot be selected, wait for a while
until it starts up.
Page 76

You will not be able to select "Update via USB" if there is nothing to
update.
8. Select "Update" and press ENTER to start updating.
During the update, the TV screen may go black depending on the
updated program. In that case, check the progress on the display of
the unit. The TV screen will remain black until the update is complete
and the power is turned on again.
During the update, do not turn off, or disconnect then reconnect the
USB storage device.
"Completed!" is displayed when the update is complete.
9. Disconnect the USB storage device from the unit.
10.Press ON/STANDBY on the unit to place the unit to standby. This is the
end of the firmware update and you now have the latest firmware
installed.
Do not use RECEIVER on the remote controller.
If an Error Message is Displayed
When an error occurs, "*-** Error!" is appeared on the display. ("*"
refers to the numbers displayed when error occurs.) Check the following:
Error Code
*-01, *-10:
USB storage device not found. Check whether the USB storage device or
USB cable is correctly inserted to the USB port of the unit.
Connect the USB storage device to an external power source if it has its
own power supply.
*-05, *-13, *-20, *-21:
The firmware file is not present in the root folder of the USB storage
device, or the firmware file is for another model. Retry from the download
of the firmware file.
Others:
Disconnect then reconnect the AC power cord, from the beginning.
Page 77

Read Before Start
Problem may be solved by turning on and off or reconnecting the power cord,
besides rechecking the connection, setting or operation procedure. Try that
on both the unit and components connected to the unit. Furthermore, in case
of no picture output, no sound or HDMI linked system does not work etc.,
may be solved if HDMI cable is reconnected. When reconnecting, note that
HDMI cable may not be connected properly if it is coiled. After reconnection,
turn off and then on again the power of all connected components.
Troubleshooting
Page 78

Resetting the unit
Problem may be solved by resetting the unit to initialize all the setting to
factory default. If you cannot resolve the issue from the procedure in trouble
shooting, try resetting the unit as explained below. If you reset the unit status,
your preferences will be reset to the defaults. Note them down before starting
reset.
Resetting method
1. While holding down CBL/SAT on the unit (Do not release this button until
step 2 is finished.)
2. Press ON/STANDBY on the unit. "Clear" is appeared on the display and
the unit will enter standby mode.
Resetting method of the remote controller
1. While holding down 1 RCV (Do not release this button until step 2 is
finished.).
2. Press and hold 2 HOME until the 3 remote indicator lights (about 3
seconds). Within 30 seconds, press 1 RCV again.
Troubleshooting
Page 79

Power
Can not turn on the unit
Make sure that the power cord is properly plugged into the wall outlet.
Unplug the power cord from the wall outlet, wait 5 seconds or more, then
plug it in again.
The unit turns off unexpectedly
The unit will automatically enter standby mode when Auto Standby has
been set and launches.
The unit turns off and after restoring the power, it turns off again
The protection circuit has been activated. Remove the power cord from
the wall outlet immediately. Make sure that all speaker cables and input
sources are properly connected, and leave the unit with its power cord
disconnected for 1 hour. After that, reconnect the power cord and turn the
power on. If the unit turns off again, avoid resetting it and unplug the
power cord. Then contact your Onkyo dealer.
Caution: If "CHECK SP WIRE" is appeared on the display, the speaker
cables may be shorting.
WARNING: If smoke, smell or abnormal noise is produced by the AV
receiver, unplug the power cord from the wall outlet immediately and contact
the dealer or Onkyo Support.
Troubleshooting
Page 80

Audio
There is no sound, or it is very quiet
Make sure that the proper input source is selected.
Make sure that connecting plugs are pushed in all the way.
Make sure that the inputs and outputs of all components are connected
properly.
Make sure that the polarity of the speaker cables is correct, and that no
bare wires are in contact with the metal part of speaker terminals.
Make sure that the input source is properly selected.
Make sure that the speaker cables are not shorting.
Check the volume. The volume level is adjustable between Min, 1 to 79,
Max (80) It is normal that the unit volume level is set up to 40 or around.
If the MUTING indicator on the display flashes, press MUTING on the
remote controller to unmute the unit.
While headphones are connected to the PHONES jack, no sound is
output from the speakers.
If there is no sound from a BD/DVD player connected to an HDMI IN,
check the BD/DVD player’s output settings, and be sure to select a
supported audio format.
Check the digital audio output setting on the connected component. On
some game consoles, such as those that support DVD, the default setting
is off.
With some DVD-Video discs, you need to select an audio output format
from a menu.
If your turntable uses an MC cartridge, you must connect an MC head
amp, or an MC transformer.
Make sure that none of the connecting cables are bent, twisted, or
damaged.
Not all listening modes use all speakers.
Specify the speaker distances and adjust the individual speaker levels.
If the input signal format is set to "PCM" or "DTS", set it to "Off".
Only the front speakers produce sound
When the Stereo or Mono listening mode is selected, only the front
speakers and subwoofer produce sound.
Make sure the speakers are configured correctly.
Only the center speaker produces sound
If you use the Dolby Pro Logic II listening mode with a mono source, such
as an AM radio station or mono TV program, the sound is concentrated in
Troubleshooting
Page 81

the center speaker.
Make sure the speakers are configured correctly.
The surround speakers produce no sound
When the T-D (Theater-Dimensional), Stereo or Mono listening mode is
selected, the surround speakers produce no sound.
Depending on the source and current listening mode, not much sound
may be produced by the surround speakers. Try selecting another
listening mode.
Make sure the speakers are configured correctly.
The center speaker produces no sound
When the Stereo or Mono listening mode is selected, the center speaker
produces no sound.
Make sure the speakers are configured correctly.
The subwoofer produces no sound
When you play source material that contains no information in the LFE
channel, the subwoofer produces no sound.
Make sure the speakers are configured correctly.
There is no sound with a certain signal format
When listening to Dolby Digital and/or DTS sound, digital connection is
necessary.
Check the digital input terminal setting. If the connection is different from
the default, re-setting is necessary.
Check the digital audio output setting on the connected component. On
some game consoles, such as those that support DVD, the default setting
is off.
Can not select a desired listening mode
Depending on the connecting status of the speaker, some listening
modes may not be selected. Check the details in "Using the Listening
Modes" section.
Can not play 5.1ch
Make sure the speakers are configured correctly.
Not all listening modes use all speakers.
The speaker volume cannot be set as required
Check to see if a maximum volume has been set.
Noise can be heard
Using cable ties to bundle analog audio (RCA) cables with power cords,
speaker cables, etc. may degrade the audio performance, so refrain from
doing it.
An analog audio (RCA) cable may be picking up interference. Try
repositioning your cables.
Page 82

The Late Night function does not work
Make sure the source material is Dolby Digital, Dolby Digital Plus, or
Dolby TrueHD.
About DTS signals
When DTS program material ends and the DTS bitstream stops, the unit
remains in DTS listening mode and the dts indicator remains on. This is to
prevent noise when you use the pause, fast forward, or fast reverse
function on your player. If you switch your player from DTS to PCM, you
may not hear any sound because the unit does not switch formats
immediately. In such case, you should stop your player for about 3
seconds and then resume playback.
With some CD and LD players, you will not be able to playback DTS
material properly even though your player is connected to a digital input
on the AV receiver. This is usually because the DTS bitstream has been
processed (e.g., output level, sampling rate, or frequency response
changed) and the AV receiver does not recognize it as a genuine DTS
signal. In such cases, you may hear noise.
Playing DTS program material, using the pause, fast forward, or fast
reverse function on your player may produce a short audible noise. This
is not a malfunction.
The beginning of audio received by an HDMI IN can not be heard
Since it takes longer to identify the format of an HDMI signal than it does
for other digital audio signals, audio output may not start immediately.
Page 83

Video
There is no picture
Make sure that all video connecting plugs are pushed in all the way.
Make sure that each video component is properly connected.
If the video source is connected to a component video input, you must
assign that input to an input selector, and your TV must be connected to
COMPONENT VIDEO OUT terminal.
If the video source is connected to a composite video input, your TV must
be connected to the MONITOR OUT V terminal.
If the video source is connected to an HDMI input, you must assign that
input to an input selector, and your TV must be connected to the HDMI
output(s).
Make sure the switching of input screens is proper at the monitor side
such as a TV.
Images of a component connected to the composite video input terminal
can not be output by converting on the monitor of a TV or other
components connected to COMPONENT VIDEO OUT terminal.
When the TV image is blurry or unclear, power code or connection cables
of the unit may have interfered. In that case, keep distance between TV
antenna cable and cables of the unit.
There is no picture from a source connected to an HDMI IN
Reliable operation with an HDMI-to-DVI adapter is not guaranteed. In
addition, video signals from a PC are not guaranteed.
The on-screen menus do not appear
On your TV, make sure that the video input to which this unit is connected
is selected.
When the AV receiver is not connected to a TV via HDMI OUT, on-screen
menus are not displayed.
Troubleshooting
Page 84

Tuner
Reception is noisy, FM stereo reception is noisy, or the "FM STEREO"
indicator does not light
Re-check the antenna connection.
Relocate your antenna.
Move the unit away from your TV or PC.
Passing cars and airplanes can cause interference.
Concrete walls weaken radio signals.
Listen to the station in mono.
When listening to an AM station, operating the remote controller may
cause noise.
If nothing improves the reception, install an outdoor antenna.
Troubleshooting
Page 85

Remote Controller
The remote controller does not work
Before operating this unit using remote controller, be sure to press RCV.
Make sure that the batteries are installed with the correct polarity.
Install new batteries. Do not mix different types of batteries, or old and
new batteries.
Make sure that the remote controller is not too far away from the unit, and
that there is no obstruction between the remote controller and the remote
control sensor of the unit.
Make sure that the unit is not subjected to direct sunshine or inverter-type
fluorescent lights. Relocate if necessary.
If the unit is installed in a rack or cabinet with colored-glass doors, the
remote controller may not work reliably when the doors are closed.
Make sure you have selected the correct remote controller mode.
When using the remote controller to control other manufacturers’ AV
components, some buttons may not work as expected.
Make sure you have entered the correct remote control code.
Make sure to set the same ID on both the unit and remote controller.
Operating other Onkyo component by using a RI remote control code is
not available
Make sure that the Onkyo component is properly connected with RI cable.
When RI cable is used for connection, make sure to connect analog audio
(RCA) cable as well. (Connecting only an RI cable is not enough.)
Make sure you have selected the correct remote controller mode.
Make sure that the input display is correctly set.
Input the RI remote control code again.
When the RI remote control code is input, point the remote controller at
remote control sensor of the unit.
Can not operate Onkyo components (ones without RI connection) and
components of other makers
Make sure that the connection with other components is correct.
Input a correct remote control code again. If there are several codes, try
each code.
Make sure that the remote controller mode is correctly selected.
Operate the remote controller by setting toward the light receiving section
of each component.
Some components may not start the operation.
Troubleshooting
Page 86

RI Dock for iPod/iPhone
There is no sound
Make sure your iPod/iPhone is actually playing.
Make sure your iPod/iPhone is properly inserted in the Dock.
Make sure the unit is turned on, the correct input source is selected, and
the volume is turned up.
Make sure the plugs are pushed in all the way.
Try resetting your iPod/iPhone.
There is no video
Make sure that your iPod/iPhone model’s TV OUT setting is set to On.
Make sure the correct input is selected on your TV or the unit.
Some versions of the iPod/iPhone do not output video.
The AV receiver’s remote controller does not control my iPod/iPhone
Make sure your iPod/iPhone is properly inserted in the Dock. If your
iPod/iPhone is in a case, it may not connect properly to the Dock. Always
remove your iPod/iPhone from the case before inserting it into the Dock.
The iPod/iPhone can not be operated while it is displaying the Apple logo.
Make sure you have selected the correct remote controller mode.
When you use the AV receiver’s remote controller, point it toward this unit.
Before operating with the remote controller, you may need to play on your
iPod/iPhone to make the input selector be recognized.
Try resetting your iPod/iPhone.
Depending on your iPod/iPhone model and generation, some buttons may
not work as expected.
The unit unexpectedly selects my iPod/iPhone as the input source
Always pause iPod/iPhone playback before selecting a different input
source. If playback is not paused, the Direct Change function may select
your iPod/iPhone as the input source by mistake during the transition
between tracks.
iPod/iPhone does not work properly
Try reconnecting your iPod/iPhone.
Troubleshooting
Page 87

Zone Function
There is no sound
Audio signal from input selector can be output for Zone function. Connect
audio components using the analog audio (RCA) cable as audio signal
from the components connected using HDMI or digital audio cable cannot
be output for one function. Note that connected components may have to
be setup to output analog audio signal.
Troubleshooting
Page 88

Bluetooth
Music playback is unavailable on the unit even after successful Bluetooth
connection
Depending on the characteristics or specifications of your Bluetooth-
enabled device, playback on the unit is not guaranteed.
When the audio volume of your Bluetooth-enabled device is set low, the
playback of audio may be unavailable. Volume up the Bluetooth-enabled
device.
Depending on the Bluetooth-enabled device, Send/Receive selector
switch may be provided. Select Send mode.
Even when a music file is playing on the Bluetooth-enabled device, the
sound can not be played if the connection is not established with the unit.
Make sure that the unit is connected (this unit is selected as the sound
output destination).
Sound is interrupted
Problem may be occurring at the Bluetooth-enabled device. Check the
information on a webpage.
The audio quality is poor after connection with a Bluetooth-enabled
device
The Bluetooth reception is poor. Move the Bluetooth-enabled device
closer to the unit or remove any obstacle between the Bluetooth-enabled
device and this unit.
Can not connect with this unit
Try plugging/unplugging the power of the unit and try turning on/off the
Bluetooth-enabled device. Re-startup of the Bluetooth-enabled device
may be effective.
The Bluetooth-enabled device does not support the profiles required for
this unit.
The Bluetooth function of the Bluetooth-enabled device is not enabled.
Refer to the user manual of the Bluetooth-enabled device for how to
enable the function.
Near devices such as microwave oven or cordless phone, which use the
radio wave in the 2.4 GHz range, a radio wave interference may occur,
which disables the use of the AV receiver.
Bluetooth connection can not be built
When building a Bluetooth connection between this unit and your
Troubleshooting
Page 89

Bluetooth-enabled device for the first time, if the connection fails, clear
"Pairing Info" in "12. Bluetooth", turn off and then on again your Bluetoothenabled device to clear the device name, and build the connection again.
If there is a metallic object near the unit, Bluetooth connection may not be
possible as the metal can effect on the radio wave.
The Bluetooth Auto Reconnect function does not work.
This function may not work depending on your Bluetooth-enabled device.
In this case, play on your Bluetooth-enabled device after pairing with this
unit.
Page 90

USB Function
USB storage device is not displayed
Make sure that USB storage device and USB cable are securely plugged
to the USB port of this AV receiver.
Remove the USB storage device from the AV receiver once, and then try
re-connecting.
Operability of a USB bus powered hard disk that receives power from the
unit via the USB port is not guaranteed.
Depending on the type of format, the playback may not be performed
normally. Check the type of the file formats that is supported.
USB storage device with security functions may not be played.
Troubleshooting
Page 91

Others
Power consumption in standby mode
In the following cases, the power consumption in standby mode may
reach up to a maximum of 55 W:
– When "HDMI CEC (RIHD)" is set to "On". (Depending on the TV
status, the AV receiver will enter normal standby mode.)
– When "HDMI Through" is set to other than "Off".
The sound changes when I connect my headphones
When a listening mode other than Direct, or Mono is selected, connecting
a headphone automatically selects Stereo.
How do I change the language of a multiplex source
Select "Main" or "Sub" for "Input Ch(Mux)" in "8. Audio Adjust".
The RI functions do not work
To use RI, you must make an RI connection and an analog audio (RCA)
cable between the component and AV receiver, even if they are
connected digitally.
While Zone 2 is selected, the RI functions do not work.
The functions System On/Auto Power On and Direct Change do not work
for components connected via RI
These functions do not work when Zone 2 is turned on.
The display is dark
Make sure that Dimmer function is not working. Press DIMMER button
and change the brightness level of the display.
The following settings can be made for the composite video inputs
While holding down the input selector button to configure, press HOME
once at a time until "Video ATT: On" is appeared on the display. To
resume the setup, repeat the above described step until "Video ATT: Off"
is appeared on the display.
This setting is possible for input selectors assigned with one of the video
inputs "VIDEO 1" to "VIDEO 3" in "3. Composite". If you have a game
console connected to the composite video input, and the picture is not
very clear, you can attenuate the gain.
Video ATT: Off: (default).
Video ATT: On: (Gain is reduced by 2 dB.)
Troubleshooting
Page 92

If the picture on your TV/monitor connected to the HDMI output(s) is
unstable, try turning the DeepColor function off.
To turn off the DeepColor function, press STB/DVR and ON/STANDBY
on the AV receiver simultaneously.
While holding down STB/DVR, press ON/STANDBY repeatedly until
"Deep Color:Off" is appeared on the display. To reactivate the DeepColor
function, repeat the above described step until "Deep Color:On" is
appeared on the display.
The AV receiver contains a microPC for signal processing and control
functions. In very rare situations, severe interference, noise from an external
source, or static electricity may cause it to lockup. In the unlikely event that
this happens, unplug the power cord from the wall outlet, wait at least 5
seconds, and then plug it back in.
Onkyo is not responsible for damages (such as CD rental fees) due to
unsuccessful recordings caused by the unit’s malfunction.
Before you record important data, make sure that the material will be
recorded correctly.
Before disconnecting the power cord from the wall outlet, set the AV receiver
to standby.
Page 93

Linked Operation with CEC-compatible Components
The AV receiver is compatible with the following components (as of January
2014).
TV (Random order):
Toshiba TV sets
Sharp TV sets
Players/Recorders (Random order):
Onkyo and Integra RIHD-compatible players
Toshiba players and recorders
Sharp players and recorders (only when used together with Sharp TV
sets)
Models other than those mentioned above may have some interoperability if
compatible with CEC, which is part of the HDMI Standard, but operation can
not be guaranteed.
Note: For RI functions to work properly, do not connect more RIHDcompatible components than the quantities specified below, to the HDMI
jack. RI functions are not guaranteed when more RIHD-compatible
components than the below mentioned quantities are connected.
Furthermore, do not connect the AV receiver to another AV receiver/AV
amplifier via HDMI.
Blu-ray Disc/DVD players: up to 3.
Blu-ray Disc/DVD recorders: up to 3.
Cable TV tuner, terrestrial digital tuner, and satellite broadcasting tuner:
up to 4 units.
Reference Information
Page 94

Checking whether the HDMI Linked Operation
Settings Are Enabled
1. Turn on the power of all connected components.
2. Turn off the power of the TV, and confirm that the power of the connected
components is turned off automatically with the link operation.
3. Turn on the power of the Blu-ray Disc/DVD player/recorder.
4. Start playback on the Blu-ray Disc/DVD player/recorder, and verify the
following:
The AV receiver automatically turns on, and selects the input to which
the Blu-ray Disc/DVD player/recorder is connected.
The TV automatically turns on, and selects the input to which the AV
receiver is connected.
5. Following the operating instructions of the TV, select "Use the TV
speakers" from the menu screen of the TV, and confirm that the audio is
output from the speakers of the TV, and not from the speakers connected
to the AV receiver.
6. Select "Use the speakers connected from the AV receiver" from the menu
screen of the TV, and confirm that the audio is output from the speakers
connected to the AV receiver, and not from the TV speakers.
Note:
Even if you set to output audio on the TV speakers, audio will be output
from the speakers connected to the AV receiver when you adjust the
volume or switch the input on the AV receiver. To output audio from the
TV speakers, redo the corresponding operations on the TV.
In case of an RIHD connection with RI and RI audio control compatible
components, do not connect the RI cable at the same time.
On the TV, when you select anything other than the HDMI jack to which
the AV receiver is connected, the input on the AV receiver will be switched
to "TV/CD".
The AV receiver will automatically power on in conjunction when it
determines it to be necessary. Even if the AV receiver is connected to an
RIHD compatible TV or player/recorder, it will not power on if it is not
necessary. It may not power on in conjunction when the TV is set to
output audio from the TV.
Linked system functions with the AV receiver may not work depending on
the component model connected. In such cases, operate the AV receiver
directly.
When the player/recorder cannot be operated with the remote controller
Reference Information
Page 95

of the AV receiver, the corresponding component may not be programmed
to support the remote controller operation of CEC. Program the remote
control code of the component maker to the remote controller for using.
Page 96

About HDMI
HDMI (High Definition Multimedia Interface) is a digital interface standard for
connecting TVs, projectors, Blu-ray Disc/DVD players, set-top boxes, and
other video components. Until now, several separate video and audio cables
have been required to connect AV components. With HDMI, a single cable
can carry control signals, digital video, and digital audio (2-channel PCM,
multichannel digital audio, and multichannel PCM).
The HDMI video stream (i.e., video signal) is compatible with DVI (Digital
Visual Interface) (*1), so TVs and displays with a DVI input can be
connected by using an HDMI-to-DVI adapter cable. (This may not work with
some TVs and displays, resulting in no picture.)
This unit supports HDCP (High-bandwidth Digital Content Protection) (*2),
so it can display picture only on HDCP-compatible components.
The HDMI on this unit supports the following functions:
Audio Return Channel, 3D, x.v.Color, DeepColor, Lip Sync, 4K
(Passthrough), DTS-HD Master Audio, DTS-HD High Resolution Audio,
Dolby TrueHD, Dolby Digital Plus, DSD and Multichannel PCM.
Supported Audio Formats of this Unit:
2-channel linear PCM (32–192 kHz, 16/20/24 bit)
Multichannel linear PCM (up to 7.1 ch, 32–192 kHz, 16/20/24 bit)
Bitstream (DSD, Dolby Digital, Dolby Digital Plus, Dolby TrueHD, DTS,
DTS-HD High Resolution Audio, DTS-HD Master Audio)
Your Blu-ray Disc/DVD player must also support HDMI output of the above
audio formats.
About Copyright Protection:
The AV receiver supports Revision 1.4 of the HDCP (High-bandwidth Digital
Content Protection) (*2), a copy-protection system for digital video signals.
Other components connected to the AV receiver via HDMI must also support
HDCP.
*1 DVI (Digital Visual Interface): The digital display interface standard
set by the DDWG (*3) in 1999.
*2 HDCP (High-bandwidth Digital Content Protection): The video
encryption technology developed by Intel for HDMI/DVI. It is designed
to protect video content and requires a HDCP-compatible HDMI/DVI
receiver to display the encrypted video.
*3 DDWG (Digital Display Working Group): Lead by Intel, Compaq,
Fujitsu, Hewlett-Packard, IBM, NEC, and Silicon Image, this open
industry group’s objective is to address the industry’s requirements
Reference Information
Page 97

for a digital connectivity specification for high-performance PC and
digital displays.
Note:
The HDMI video stream (i.e., video signal) is compatible with DVI (Digital
Visual Interface), so TVs and displays with a DVI input can be connected
by using an HDMI-to-DVI adapter cable. (Note that DVI connections only
carry video, so you will need to make a separate connection for audio.)
However, reliable operation with such an adapter is not guaranteed. In
addition, video signals from a PC are not supported.
The HDMI audio signal (sampling rate, bit length, etc.) may be restricted
by the connected source component. If the picture is poor or there is no
sound from a component connected via HDMI, check its setup. Refer to
the connected component’s instruction manual for details.
Page 98

USB Storage Device Requirements
USB mass storage device class (but not always guaranteed).
FAT16 or FAT32 file system format.
If the USB storage device has been partitioned, each section will be
treated as an independent device.
Up to 20,000 folders can be displayed, and folders may be nested up to
16 levels deep.
USB hubs and USB storage devices with hub functions are not
supported. Do not connect these devices to the unit.
Note:
If the media you connect is not supported, the message "No Storage" will
be displayed.
Sound files that are protected by copyright can not be played.
When the USB audio player and this unit are connected, the audio player
screen and the screen of the unit may be different. In addition, control
functions of the audio player (classifying and sorting music files and
adding information, etc.) are not available on this unit.
Do not connect a PC to the USB port of the unit. Inputting sound to the
USB port of the unit from a PC is not possible.
Media inserted to the USB card reader may not be available in this
function.
Some USB storage devices and its contents may require some time to be
read.
Depending on the USB storage device, proper reading of the contents
and proper supply of the power supply may not be possible.
Onkyo accepts no responsibility whatsoever for the loss or damage to
data stored on a USB storage device when that device is used with this
unit. We recommend that you back up your important music files
beforehand.
Performance of the hard disk that receive power from the USB port of the
unit is not guaranteed.
If you connect a USB hard disk drive to the USB port of the unit, we
recommend that you use its AC adapter to power it.
When an audio player that are operated with batteries is used, make sure
that the batteries have enough remaining power.
USB devices with security functions can not be played.
Reference Information
Page 99

Supported Audio Formats for USB Playback
For server playback and playback from a USB storage device, this unit
supports the following music file formats.
Variable bit-rate (VBR) files are supported. However, playback times may
not be displayed correctly.
This unit supports the gapless playback of the USB storage device in the
following conditions.
When WAV, FLAC and Apple Lossless files are continuously played back
with the same format, sampling frequency, channels and quantization bit
rate.
MP3 (.mp3 or .MP3)
Supported formats: MPEG-1/MPEG-2 Audio Layer 3
Supported sampling rates: 8 kHz, 11.025 kHz, 12 kHz, 16 kHz, 22.05 kHz,
24 kHz, 32 kHz, 44.1 kHz, 48 kHz
Supported bitrates: Between 8 kbps and 320 kbps and VBR.
WAV (.wav or .WAV)
WAV files contain uncompressed PCM digital audio.
Supported sampling rates: 8 kHz, 11.025 kHz, 16 kHz, 22.05 kHz, 32 kHz,
44.1 kHz, 48 kHz, 64 kHz, 88.2 kHz and 96 kHz
Quantization bit: 8 bit, 16 bit, 24 bit
FLAC (.flac or .FLAC)
FLAC is a file format for lossless audio data compression.
Supported sampling rates: 8 kHz, 11.025 kHz, 12 kHz, 16 kHz, 22.05 kHz,
24 kHz, 32 kHz, 44.1 kHz, 48 kHz, 64 kHz, 88.2 kHz, 96 kHz, 176.4 kHz
and 192 kHz
Quantization bit: 8 bit, 16 bit, 24 bit
Ogg Vorbis (.ogg or .OGG)
Supported sampling rates: 8 kHz, 11.025 kHz, 16 kHz, 22.05 kHz, 32 kHz,
44.1 kHz, 48 kHz
Supported bitrates: Between 32 kbps and 500 kbps and VBR.
Incompatible files can not be played.
Apple Lossless (.m4a/.mp4/.M4A/.MP4)
Supported sampling rates: 8 kHz, 11.025 kHz, 12 kHz, 16 kHz, 22.05 kHz,
24 kHz, 32 kHz, 44.1 kHz, 48 kHz, 64 kHz, 88.2 kHz, 96 kHz
Quantization bit: 16 bit, 24 bit
Reference Information
Page 100

DSD (.dsf or .DSF)
Supported sampling rates: 2.8224 MHz
 Loading...