

Page 1

OmniPage Pro
Version 6 for Windows
Reference Manual
1
Page 2
How to Use the Documentation
Use this online Reference manual to find specific information about any
OmniPage feature. It describes all the commands and settings, how to use
True Page, how to improve performance, and how to troubleshoot
common problems.
This information is also available in OmniPage’s online Help system.
Additionally, chapter 2 contains a variety of tutorial exercises to introduce
you to basic scanning and many features of OmniPage.
Use the toolbar buttons in Adobe® Acrobat® Reader to view the
Bookmarks or Thumbnails. Clicking on the Bookmarks or Thumbnails
navigates to the paragraphs or pages of the OmniPage Reference manual.
Assumptions and Symbols
We assume that you know how to work in the Microsoft Windows
environment. If you have questions about how to use dialog boxes, scroll
bars, edit boxes, and so on, please refer to the Windows User’s Guide.
This symbol means Note. It introduces a tip or an item of note.
This symbol means Warning. It introduces cautionary text.
2
Page 3

CAERE CORPORATION
100 Cooper Court
Los Gatos, California 95030-3321
European Offices:
CAERE GmbH
Innere Wiener Strasse 5
81667 Munich, Germany
OmniPage Pro Version 6
(PC Windows version)
Copyright© 1995, 1997 Caere Corporation
All rights reserved. CAERE®, OmniPage®, OmniPage Professional, Image Assistant®, AnyPage,
AnyFax, 3D OCR, and True Page are trademarks of Caere Corporation.
Many of the designations used by manufacturers and sellers to distinguish their products are claimed
as trademarks. Such designations appearing in this manual have been displayed in initial caps.
3
Page 4

Please read this section carefully! It includes:
• What’s in the Package
• System Requirements
• Saving a User Dictionary Before Installation
• Setting up a Windows Swap File
• Installing the Software
• Starting OmniPage Pro
What’s in the Package
Your OmniPage Pro 6.0 package includes:
• Omnipage Pro program
• OmniPage Pro online manual, which can be printed
• OmniPage Reference manual, if separately requested
Chapter 1
Installation
System Requirements
To install and run OmniPage, you need the following setup:
• Computer with an 80386 or higher processor.
• Microsoft Windows version 3.1 or higher.
• Windows-compatible mouse.
• Total system memory of at least 8MB RAM.
12MB RAM are recommended for Windows for Workgroups users.
• 8MB or larger permanent Windows swap file.
• Super-VGA color monitor with 512K memory on the adapter card.
Installation 4
Page 5

Saving a User Dictionary Before Installation
To view all 24 bits of color (millions of colors) in 24-bit color images,
you need a 24-bit video card.
• A compatible scanner if you plan to scan documents.
See the list of supported scanners in the Release Notes.
Install your scanner and test it according to the manufacturer’s
instructions before using it with OmniPage.
Saving a User Dictionary Before Installation
Read this section if you have a user dictionary from an older version of
OmniPage. OmniPage 6.0 overwrites the user dictionary (user.ud) if you
install the program in the omnipro directory.
If you are upgrading from OmniPage 5.x, move the 5.x user dictionary to
another directory before installation. This preserves your entries. Move
the 5.x user dictionary back to the omnipro directory after installation to
overwrite the newer user dictionary.
A user dictionary from OmniPage or OmniPage Professional 2.0 is
incompatible with later versions of the program. The following
instructions tell you how to save a user dictionary from version 2.0.
Save a Previous User Dictionary
1 Open your older version of OmniPage.
2 Choose
The Select File dialog box appears.
3Select
The Edit User Dictionary dialog box appears.
4 Click
The Export to Text File dialog box appears.
5 Save the dictionary as a text file in a different directory.
Import a Saved Dictionary
1 Install and open OmniPage Pro (see next section).
2 Choose
The Select File dialog box appears.
3Select
Edit User Dictionary...
and click
user.ud
Export...
user.ud
.
Edit User Dictionary...
and click
OK.
OK.
in the Settings menu.
in the Settings menu.
Installation 5
Page 6

Setting up a Windows Swap File
The Edit User Dictionary dialog box appears.
4 Click
5 Select the user dictionary you saved as a text file and click
Import...
The Import Text File dialog box appears.
The information in the old user dictionary is added to the new
user dictionary.
See “Edit User Dictionary” on page 149 for more information.
.
Setting up a Windows Swap File
Although 8MB is the minimum amount of memory required, OmniPage
can perform faster with more memory. 12–16MB RAM is recommended
for optimal performance. Set up a permanent Windows swap file with a
minimum of 8MB of free, contiguous disk space to improve disk speed.
A swap file acts as virtual memory. Free disk space set aside as a swap file
is used as if it were additional memory. This lets you run more programs
than you could with memory alone.
The disk space used for a swap file is different than the disk space needed
for temporary storage while you are working on a file. Be sure to allocate
enough free disk space for both a swap file and temporary storage.
Windows 3.1 automatically creates a swap file at setup. You can change its
size. You may need to
is in one empty block instead of fragmented into smaller portions.
defragment
OK.
the disk first to make sure free disk space
Use a program such as Norton Utilities to defragment a hard disk. You
could also exit Windows and type defrag at the DOS prompt if you have
version 6.0 or later of DOS. For more information about swap files, see the
Optimizing Windows chapter in your Windows User’s Guide.
To set up a Windows swap file (virtual memory):
1 Start Windows in Enhanced mode by typing win /3.
2 Double-click the Control Panel icon in the Main window of the
Program Manager.
3 Double-click the 386 Enhanced icon to open the 386 Enhanced
dialog.
4 Click the
dialog.
Virtual Memory
button to open the Virtual Memory
Installation 6
Page 7
Installing the Software
This dialog displays the location, size, and type of swap file. The
swap file should be at least 8192KB.
5 Click the
6 Select a new drive in the
file some place other than the default drive.
For example, you can store the swap file on a second hard disk
that is faster or larger than the default. If you cannot find a drive
with at least 8192KB of free space, try deleting some files and
optimizing the disk again.
Create your swap file in an uncompressed drive. If you use
DoubleSpace or another disk compression method, consult its
documentation regarding swap files.
7Select
8Type 8192 or greater in the
32-Bit Disk Access
9 Click OK in the Virtual Memory dialog box and click
changes to virtual memory.
10 Restart Windows.
Installing the Software
Change
Permanent
button to expand the dialog box.
list if you want to locate the swap
Drive
in the
if it is available.
Type
list.
New Size
edit box and select
Use
to verify
Ye s
Close all applications — including screen savers and mail applications —
to free up memory before installing OmniPage Pro.
1 Start Windows and open the Program Manager window.
2 Insert OmniPage Pro disk #1 in drive a: (or b:) of your
computer.
3 Choose
The Run dialog appears.
4Type a:\setup (or b:\setup) in the
click OK.
A dialog box prompts you to choose where to install OmniPage.
The default directory is c:\omnipro.
in the Program Manager File menu.
Run
Command Line
text box and
Installation 7
Page 8

Installing the Software
5 Click
6 Insert the other installation disks as prompted.
7 Do one of the following:
Continue
and then click
A dialog box warns that all executable files will be deleted from
your current omnipro directory if you have one.
• Click
• Click
A progress meter appears if you click
A dialog box prompts you to install a scanner driver when
installation of OmniPage is complete.
• Proceed to “Scan Manager Installation” on page 8 if you are
• Click
Continue
Back
using a scanner.
Exit
using a scanner.
An OmniPage Pro icon is added to the Caere Applications
program group. Restart Windows. You cannot use the Direct
Input feature until you restart Windows. See Chapter 5, Direct
Input, for information.
to start installation or type your desired location
Continue.
if you want to return to the previous dialog box.
to finish your OmniPage installation if you are not
Scan Manager Installation
You must install the Scan Manager if you plan to use a scanner with
OmniPage. Be sure your scanner is connected, compatible with your
system, and runs with the software provided by the manufacturer
you install the Scan Manager.
to continue.
Continue.
before
You are prompted to install the Scan Manager following OmniPage
installation. You will use the Scan Manager to install scanner drivers and
select a default scanner.
Follow instructions in “Installing the Software” on page 7 to install
OmniPage first if you have not done so.
1 Insert the disk labeled Scan Manager disk as prompted at the end
of OmniPage installation and click
A dialog box informs you that the program will create certain
directories. It lists the files that will be copied to these directories.
2 Click
3 Click
Continue.
The Scan Manager installs and a dialog box asks if you want to
install a scanner driver now.
to continue or No to exit.
Ye s
Continue
.
Installation 8
Page 9
Installing the Software
You can install a scanner driver anytime after Scan Manager
installation if you click
See the next section for instructions.
No.
The default scanner is used
when you scan in OmniPage.
4 Click
to install a scanner driver now.
Ye s
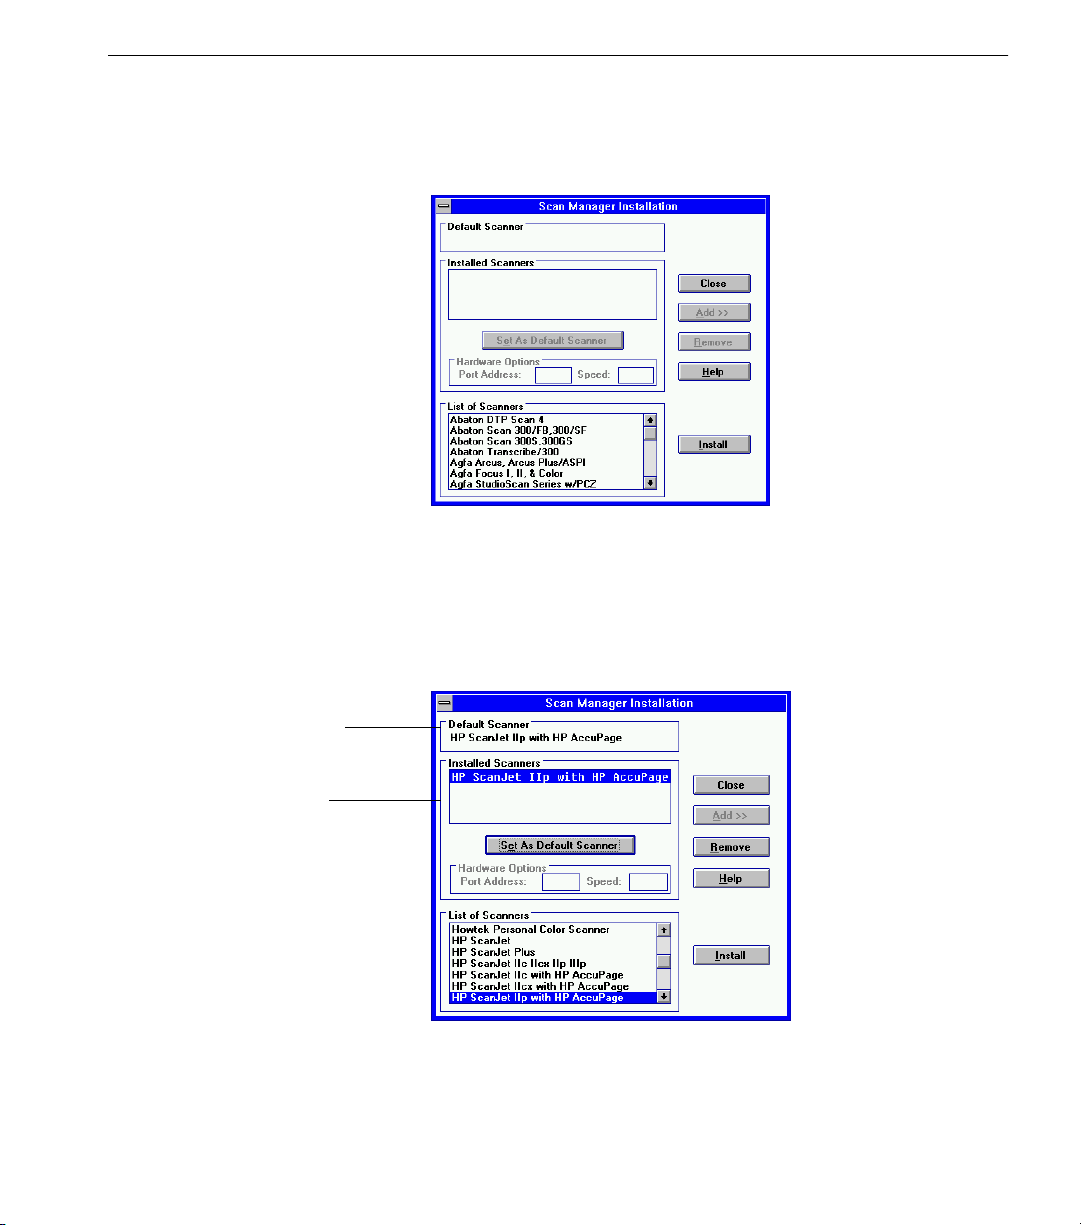
The Scan Manager Installation dialog box appears.
5 Locate and select your scanner in the
6 Click
7 Click
Install.
The scanner appears in the
Set As Default Scanner.
The scanner appears in the
Installed Scanners
Default Scanner
List of Scanners
list box.
list box.
list box.
Installed scanner drivers
appear here. You can install
more than one.
You can install more than one scanner driver but only one can be
the default scanner. Repeat steps 5 and 6 to install more drivers.
Installation 9
Page 10
Installing the Software
8 Click
when you are done.
Close
9 Restart Windows.
You cannot use the Direct Input feature until you restart
Windows. See Chapter 5, Direct Input, for information.
An OmniPage Pro and a Scan Manager icon are added to the
Caere Applications program group.
Selecting Your Scanner After Scan Manager Installation
You can install a scanner driver anytime after Scan Manager installation.
1 Exit OmniPage if it is running.
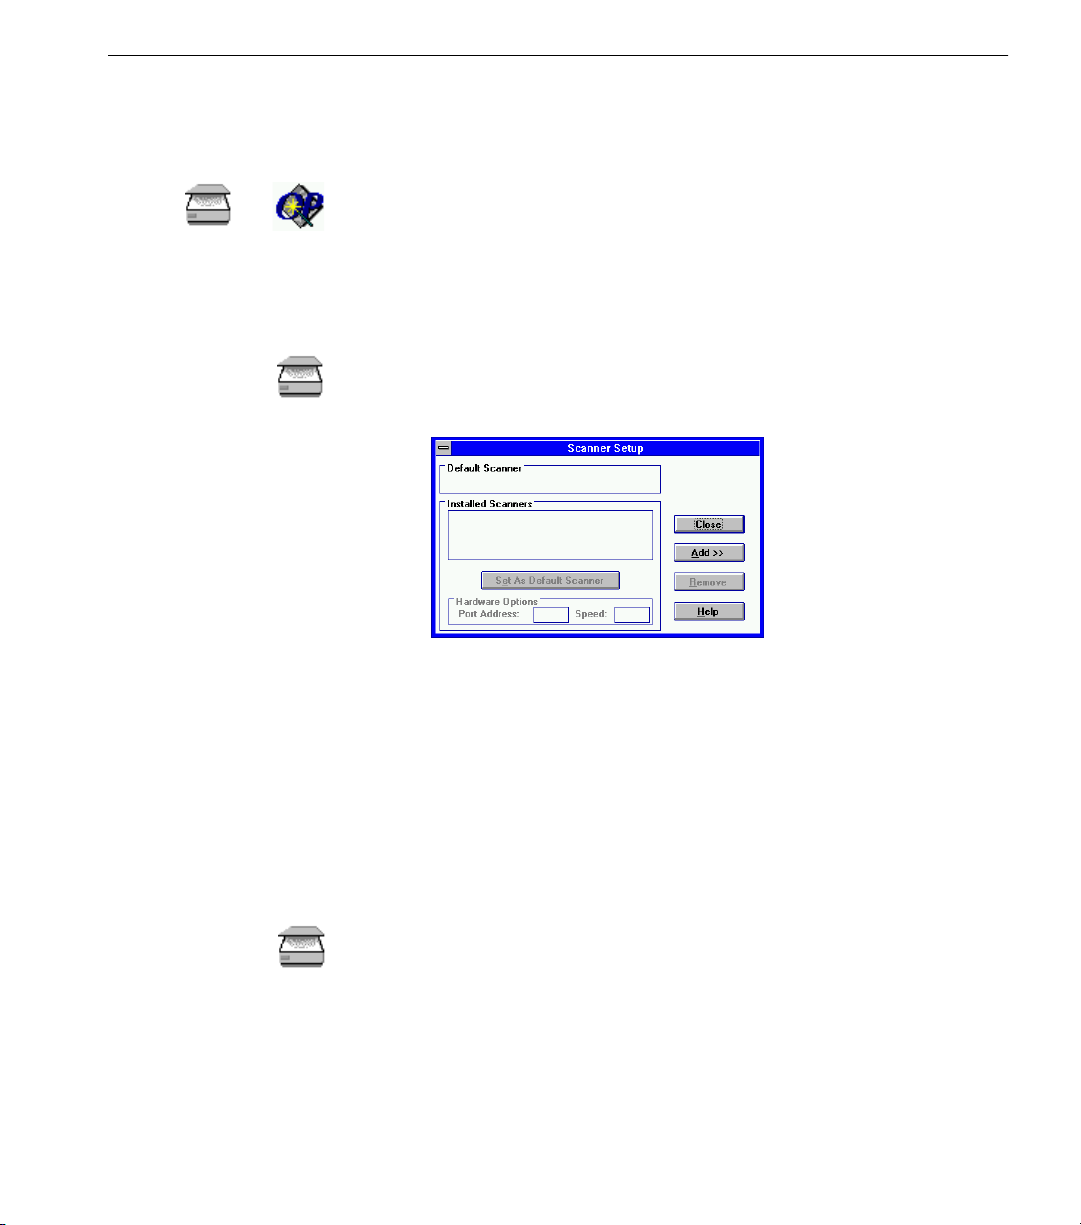
2 Double-click the Scan Manager icon in the Caere Applications
program group.
The Scanner Setup dialog box appears.
3 Click
Add>>
.
4 Insert the Scan Manager disk when prompted.
The dialog box expands to show a list of available scanner
drivers.
5 Follow steps 5 through 8 in the previous section.
Changing the Default Scanner Selection
You can change your default scanner selection anytime.
1 Exit OmniPage if it is running.
2 Double-click the Scan Manager icon in the Caere Applications
program group.
The Scanner Setup dialog box appears.
3 Skip to step 8 if you just want to change your default scanner and
do not need to install a new scanner driver. Proceed to step 4 to
add a new scanner to the
4 Click
Add>>
.
Installed Scanners
list box.
Installation 10
Page 11
Starting OmniPage Pro
5 Insert the Scan Manager disk when prompted.
The dialog box expands to show a list of available scanner
drivers.
6 Select a scanner in the
7 Click
The scanner appears in the
8 Select the scanner in the
to be the default scanner.
9 Click
The scanner appears in the
10 Click
Make sure the scanner you selected is already attached to your computer,
turned on, and working when you next launch OmniPage.
Starting OmniPage Pro
To start OmniPage:
1 Double-click the OmniPage Pro icon in the Caere Applications
program group.
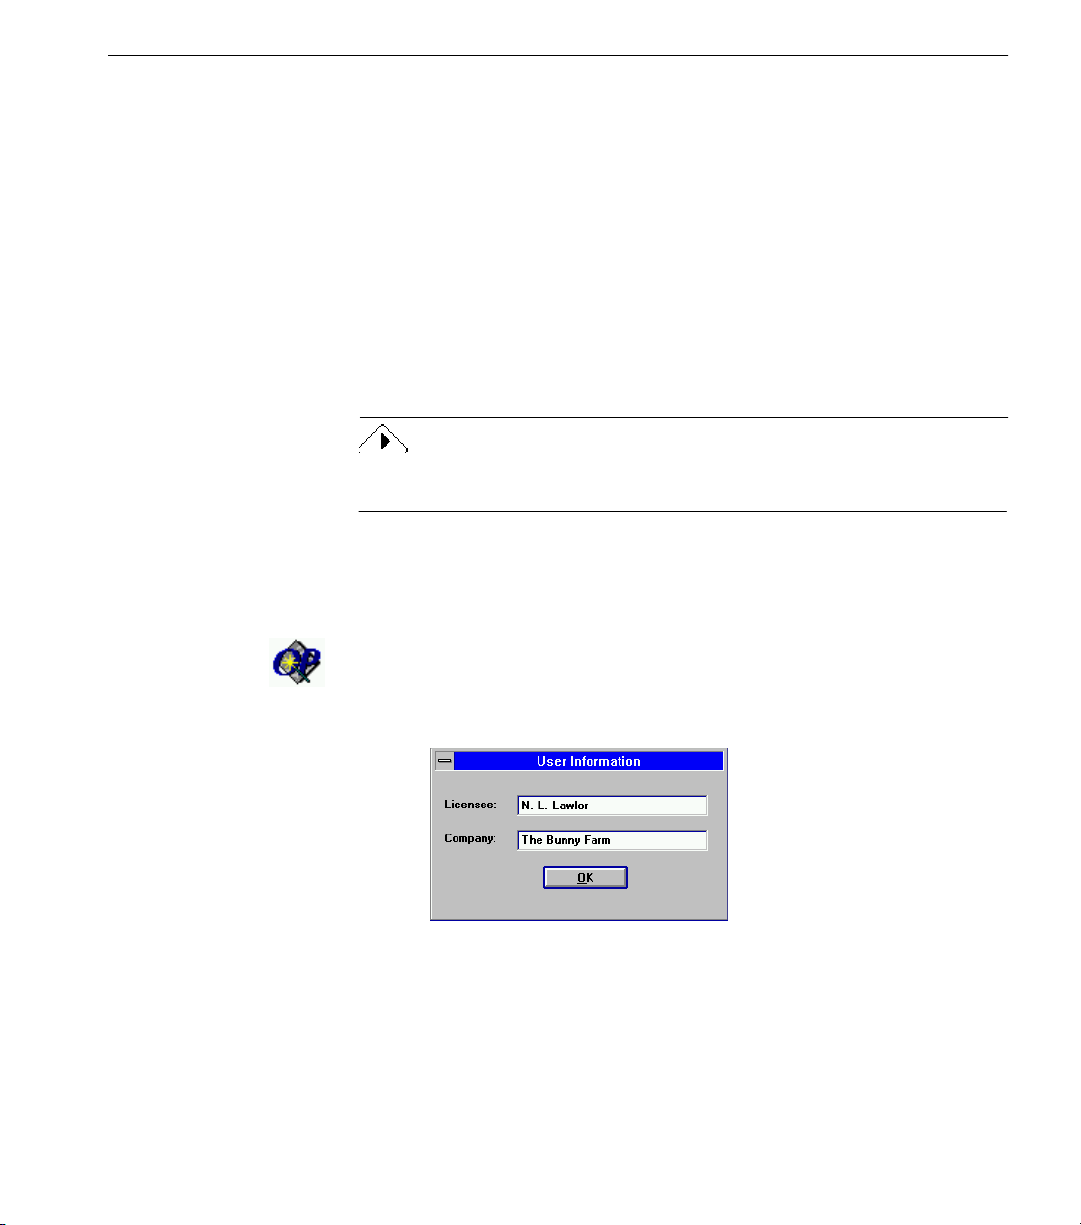
The first time you launch OmniPage, the User Information dialog
box appears.
List of Scanners
Install.
Installed Scanners
Set As Default Scanner.
.
Close
list box.
Installed Scanners
list box that you want
Default Scanner
list box.
list box.
2 Type your name in the
3 Type your company name in the
a company; otherwise, leave it blank.
4 Click
OK.
Licensee
text box.
Company
text box if you are with
Installation 11
Page 12
Starting OmniPage Pro
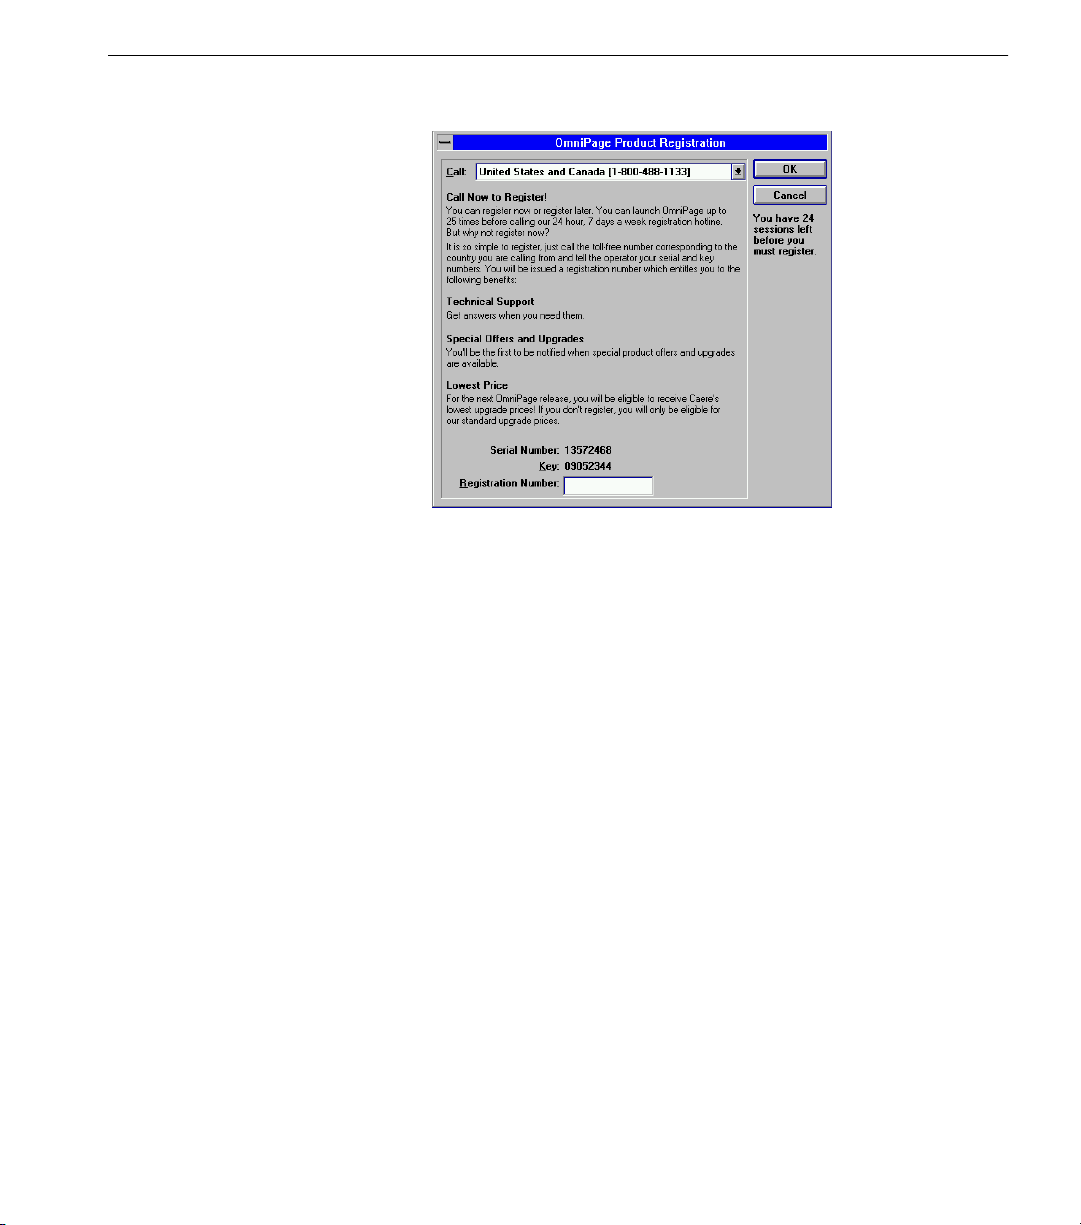
The Product Registration dialog appears the first time you launch
OmniPage.
5 See the next section for instructions on how to register OmniPage.
A scanner message may appear when you close this dialog. See
“Scanner Message on Launch” on page 227.
Registering OmniPage
You can use OmniPage for 25 sessions without registering it. A Register
menu appears in OmniPage until you register your copy. See “The
Register Menu” on page 151 for information. After 25 sessions, the
Registration dialog appears when you launch OmniPage, but the program
exits if you click
Registering your copy of OmniPage entitles you to technical support,
notification of special offers and upgrades, and the lowest price offered on
the next OmniPage upgrade.
1 Click the
from your country.
2 Call the number and ask for a registration number.
You will be asked to provide some information and you will be
assigned a registration number.
3 Enter the number in the
You are now a registered user of OmniPage.
Cancel
Call
.
drop-down list to find the number you should call
Registration Number
text box and click
Installation 12
OK.
Page 13
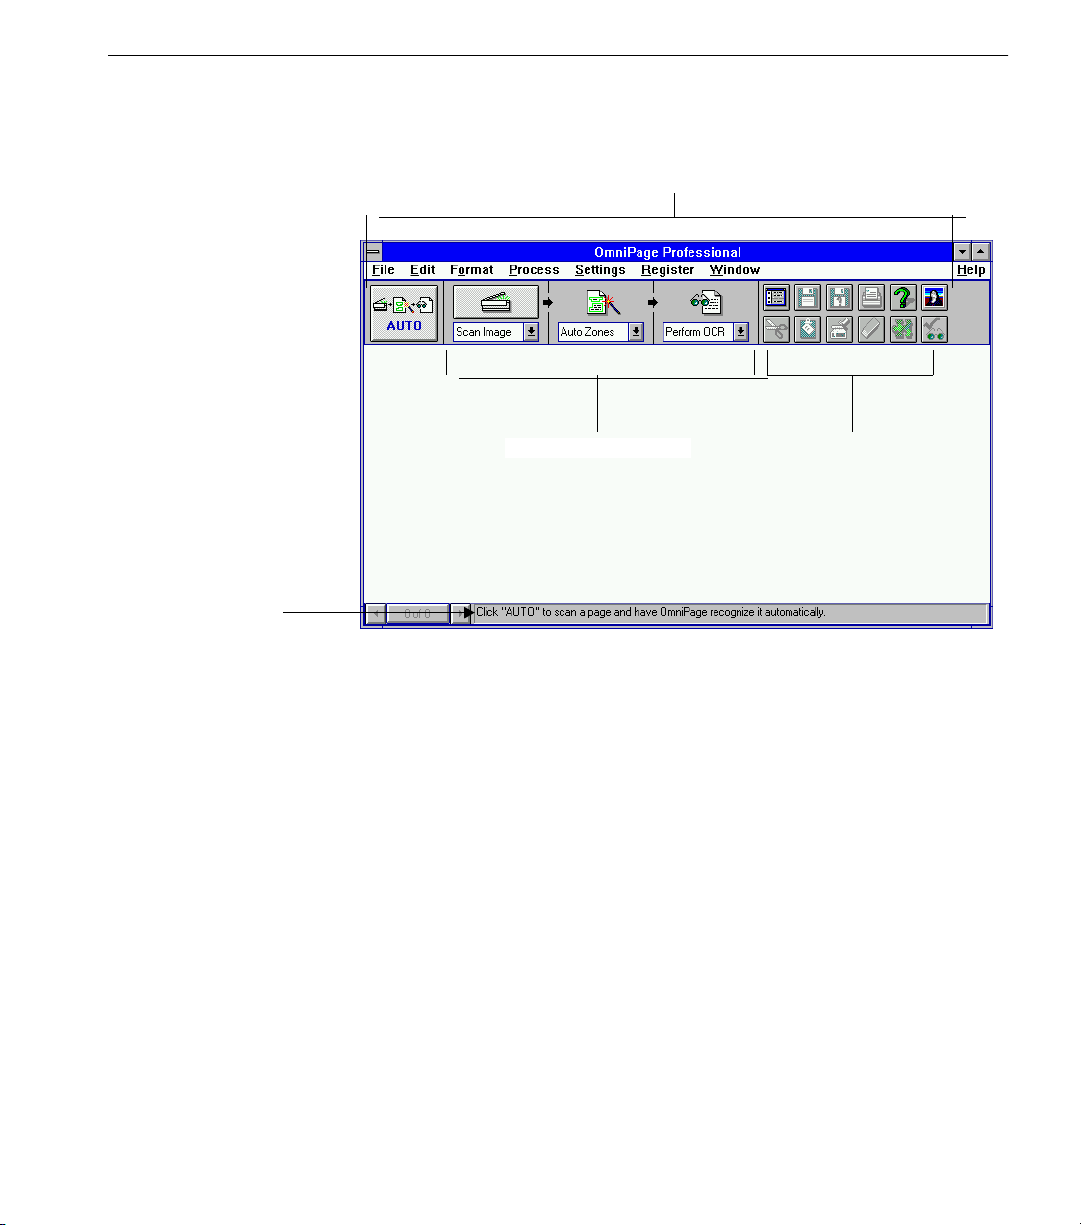
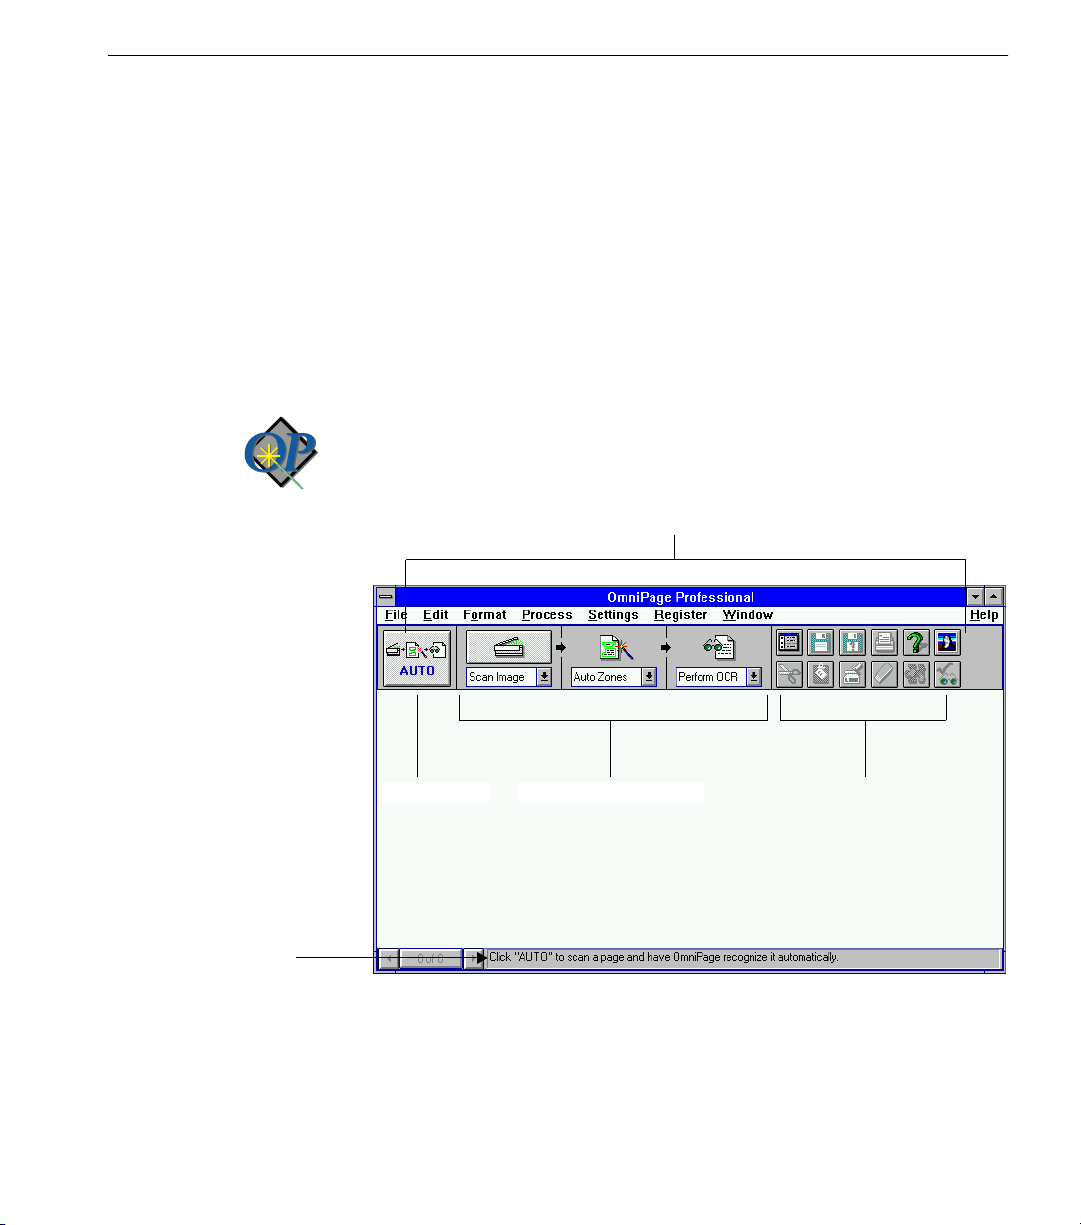
The OmniPage Window
The OmniPage window and AutoOCR™ toolbar appear after the
Registration dialog box closes.
Starting OmniPage Pro
Status text
The AutoOCR Toolbar
Process buttons
Shortcut command
buttons
Refer to Chapter 2, Tutorials, for an overview of OmniPage tools and
recognition techniques. The tutorials begin with basic scanning and an
overview of the OmniPage window and move on to more advanced
exercises.
Installation 13
Page 14
Chapter 2
Tutorials
This chapter contains eight tutorials. The tutorials take you through
practical exercises for everyday documents such as multi-column pages
and spreadsheets. They also cover more advanced concepts such as how
to use manual zoning and using deferred page recognition to maximize
efficiency.
The following tutorials are in this chapter:
• Tutorial 1 — Introduction to OmniPage
• Tutorial 2 — Basic Text Recognition
• Tutorial 3 — Working With Graphics
• Tutorial 4 — Evaluating a Page
• Tutorial 5 — Scanning a Single Column or Table
• Tutorial 6 — Train OCR
• Tutorial 7 — Deferring OCR
• Tutorial 8 — Using Direct Input
See the Table of Contents for a list of exercises within each tutorial.
Be sure your scanner is attached, turned on, and compatible with your
system. Test the scanner with the manufacturer’s software to ensure that
it works properly before using it with OmniPage.
Tutorials 14
Page 15
Tutorial 1 — Introduction to OmniPage
This tutorial gives you a brief introduction to OmniPage. It contains the
following sections:
• Launch OmniPage
• What is Optical Character Recognition (OCR)?
• The OCR Process
• Scan the Quick Scan Page Sample
• Settings Panel Overview
You will use the Quick Scan Page sample in this tutorial.
Launch OmniPage
Double-click the OmniPage icon in the Caere Applications program group
to launch OmniPage.
The OmniPage window opens.
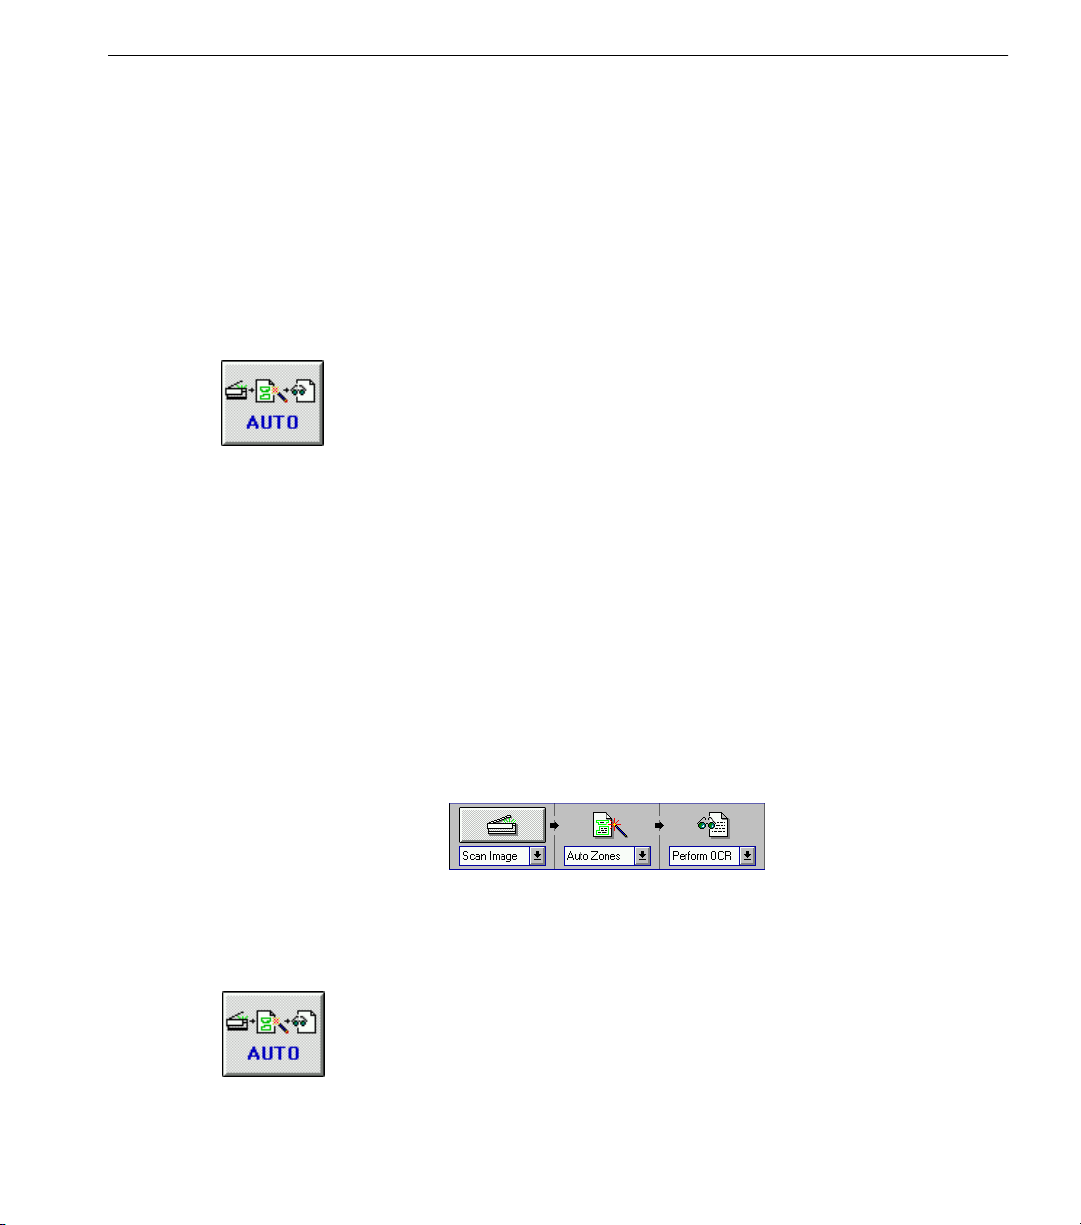
The OmniPage Toolbar
Launch OmniPage
Status text
AUTO
button
The toolbar contains an
Process buttons
button, three large process buttons, and the
AUTO
Shortcut command
buttons
smaller shortcut command buttons.
Status text appears at the bottom of the window. It tells you what you can
do next or what is taking place at the moment in the OCR process.
Tutorials 15
Page 16

What is Optical Character Recognition (OCR)?
What is Optical Character Recognition (OCR)?
Optical character recognition (OCR) is the process of converting an image
file to editable text or graphics. An image is an electronic picture of text
and/or graphics. You acquire an image in two ways:
• By scanning a hard-copy document
• By loading an image file such as a TIFF or PCX file (for example, a
received fax file can be saved to an image-file format and
recognized in OmniPage)
The image you scan or load is at first just a “picture” to your computer
even if it contains text. You can see the text but you cannot edit it. You need
to perform OCR to turn the image into individual characters.
During OCR, OmniPage looks for and defines characters on the image to
produce editable text. You can export the recognized text from OmniPage
to a variety of word-processing, page layout, and spreadsheet programs.
OCR is also referred to as
text or page recognition,
or just
The OCR Process
OCR is a three-step process: acquiring an image, zoning the image, and
recognizing the image. Use the process buttons in the toolbar (or
corresponding commands in the Process menu) to set up the OCR process.
recognition.
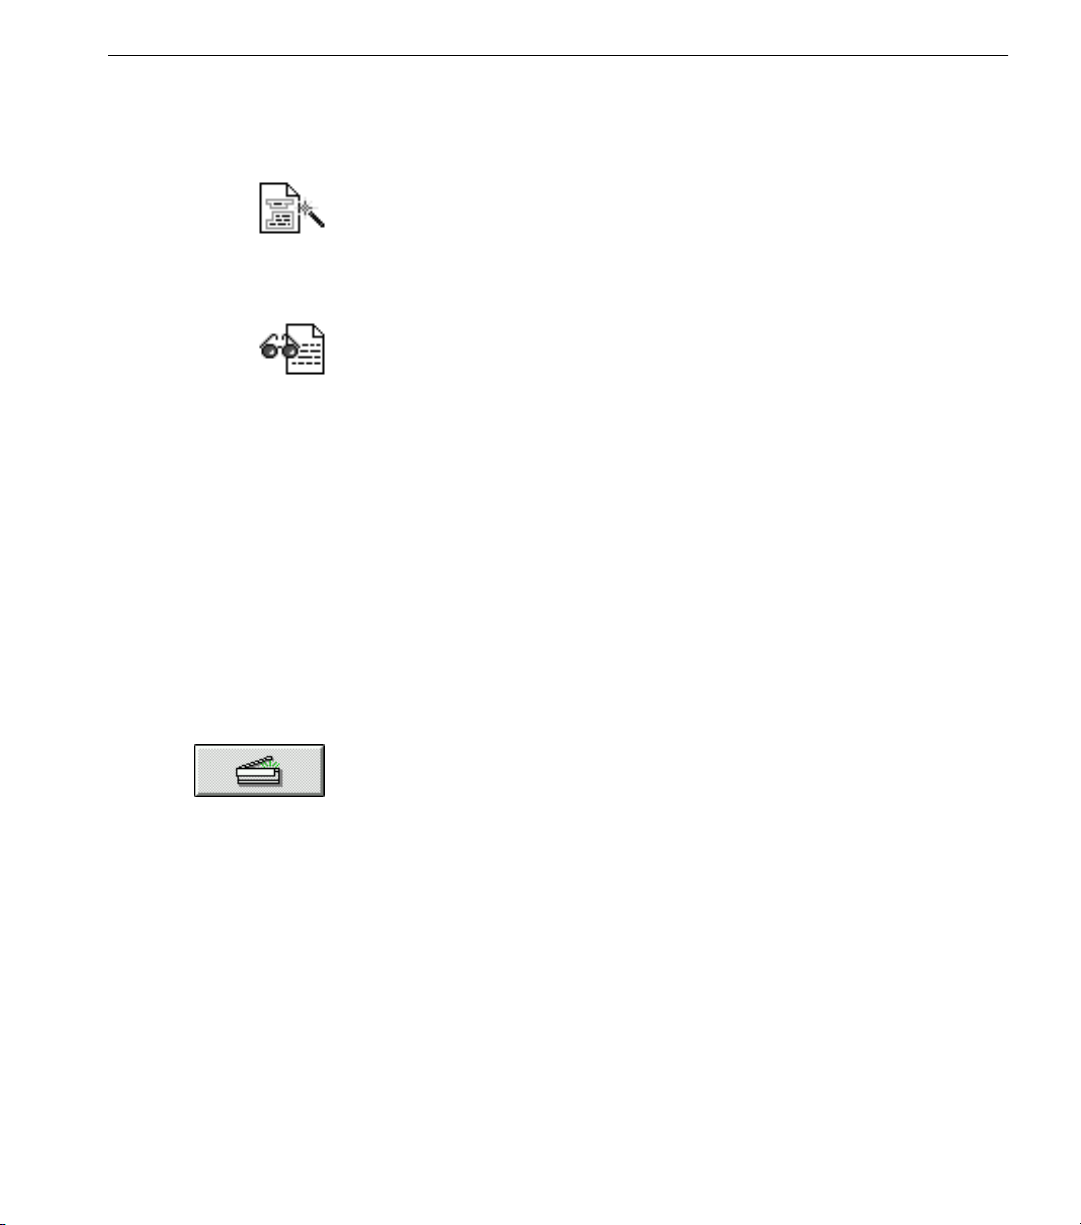
The Process Buttons
Each of the following three buttons represents one step in the optical
character recognition (OCR) process.
Image button Zone button OCR button
Using the Process Buttons
The OCR process offers choices at each step:
1 Loading an image into OmniPage
•Select
•Select
Scan Image
a hard-copy document with a scanner.
Load Image
PCX.
in the Image button’s drop-down list to scan in
to import a graphic-format file such as TIFF or
Tutorials 16
Page 17
2 Setting recognition zones
•Select
•Select
3 Performing OCR on the zoned page areas
•Select
•Select
•Select
You can either click each process button individually to activate its process
or click the
on what is selected in the drop-down lists.
In the following tutorial exercises, you will select a processing option for
each stage of OCR before you load an image or scan a document.
Auto Zones
OmniPage define the page areas to be recognized.
Manual Zones
Perform OCR
perform optical character recognition on a zoned page.
Defer OCR
Tra in OC R
characters before OCR.
button to activate the buttons automatically depending
AUTO
in the Zone button’s drop-down list to have
to draw the zones yourself.
in the OCR button’s drop-down list to
to perform OCR later.
to teach OmniPage to recognize special
Scan the Quick Scan Page Sample
You will scan the Quick Scan Page Sample in this exercise for a quick
introduction to the OCR process.
Scan the Quick Scan Page Sample
Select the Settings
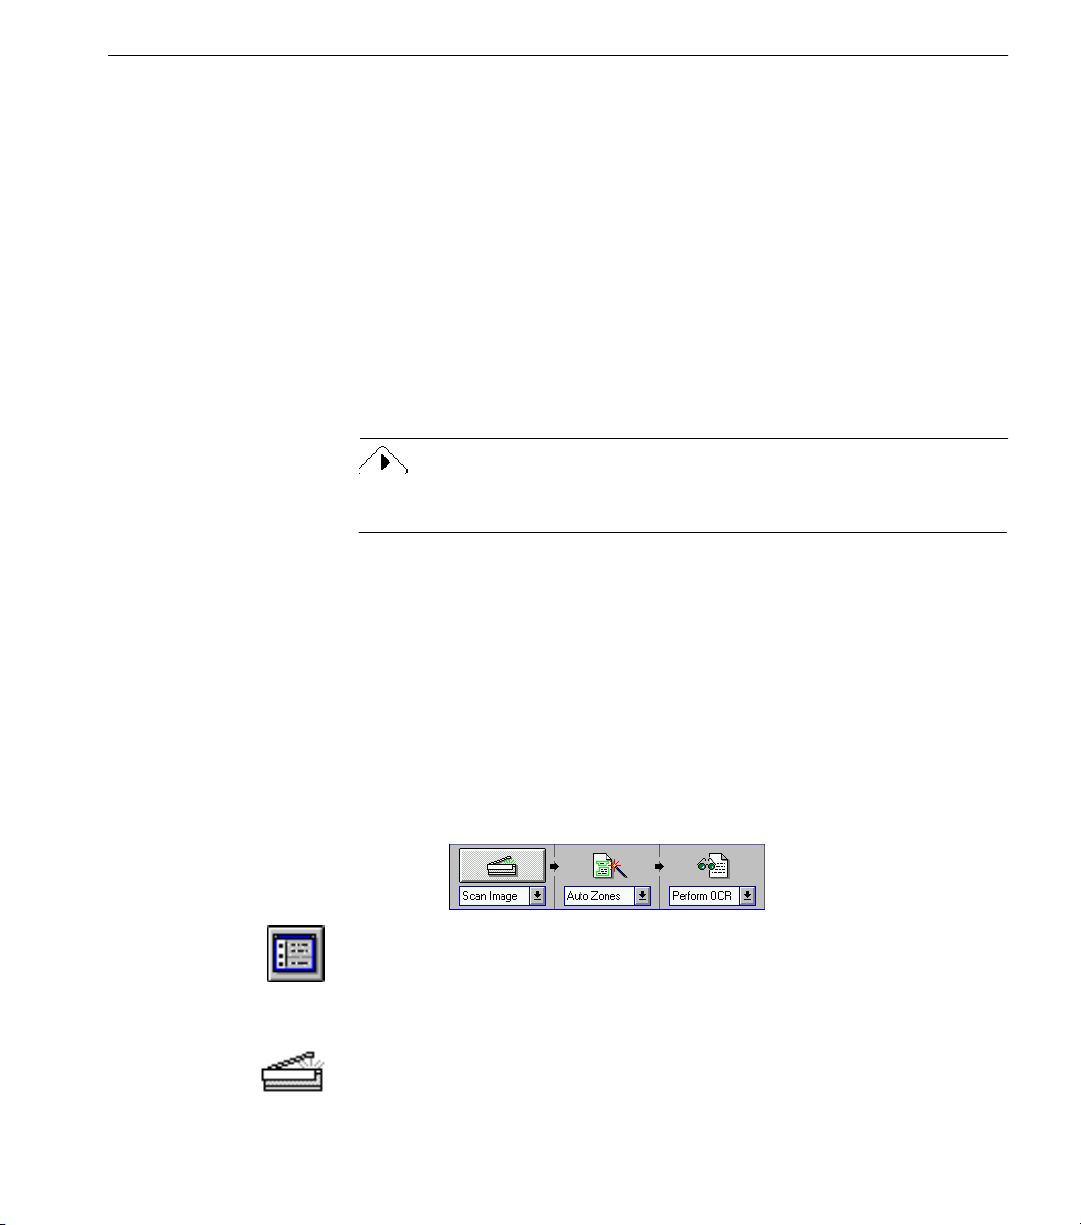
1 Click the drop-down list under each process button and select
these options:
•Scan Image
•Auto Zones
•
Perform OCR
Scan the Page
1 Place the Quick Scan Page Sample in your scanner making sure it
is aligned correctly.
2 Click the
• OmniPage scans the page and opens it in the zone window.
• Automatically drawn zones appear on the image to show how
text will be ordered.
button or choose
AUTO
in the Process menu.
Auto
Tutorials 17
Page 18
Scan the Quick Scan Page Sample
• OmniPage makes three recognition passes over the page: cyan,
light blue, and dark blue.
Each of these three stages is discussed in more detail in later
tutorials.
OmniPage opens the recognized page in a maximized text
window.
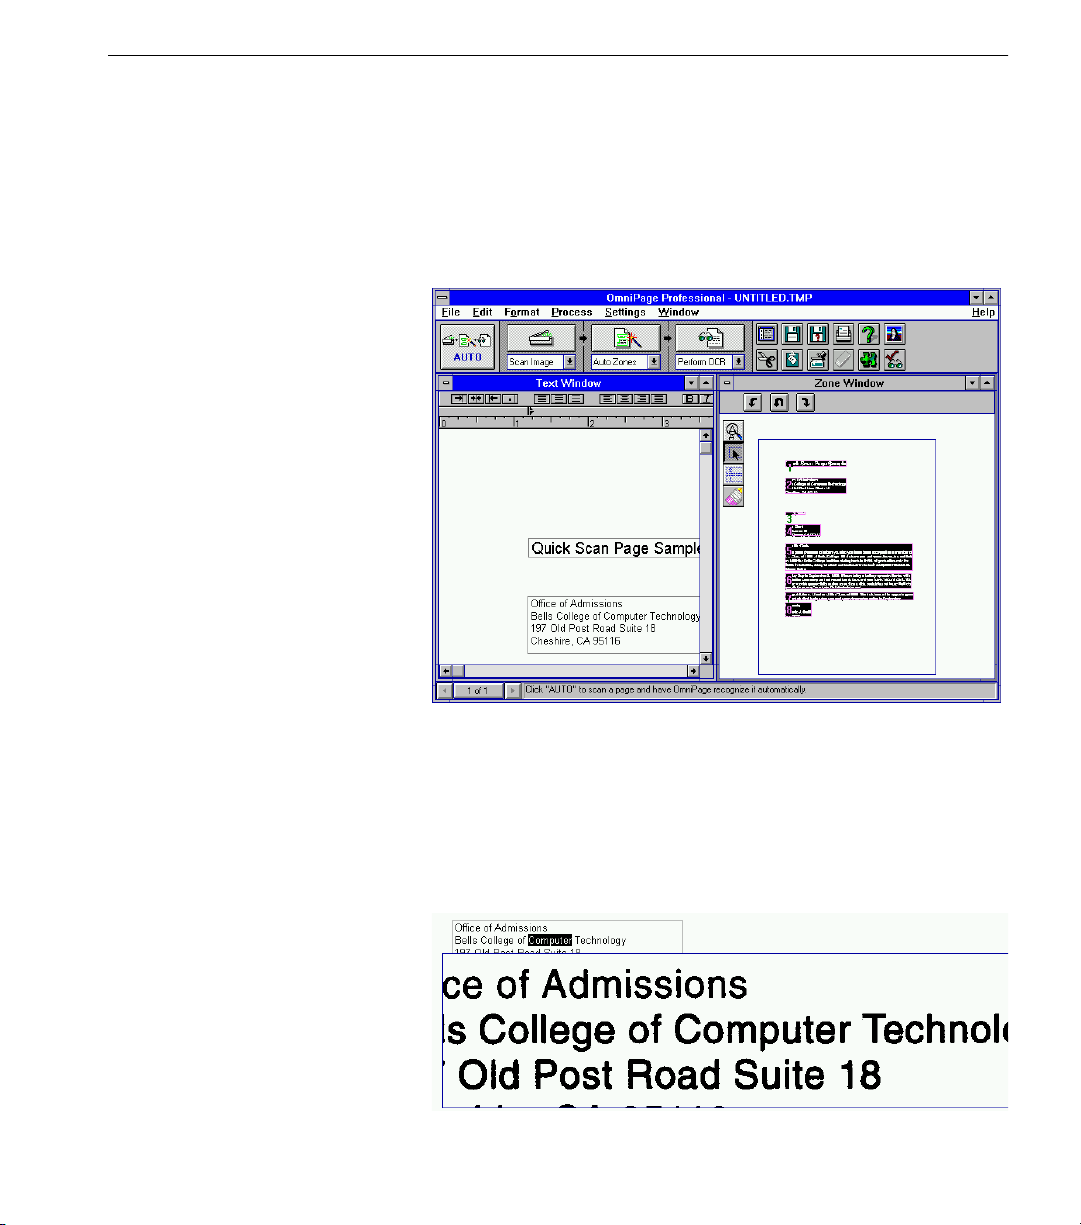
3 Choose
Tile Vertical
in the Windows menu so that you can see
both the zone and text windows.
The zone window shows the scanned image of the page. Note
that although you can see the text, you cannot select words or
letters, or edit the text in any way.
The text window shows the recognized, editable text.
4 Double-click the word
Computer
in the text window.
The Verification window opens to show the image of the word as
it was scanned originally.
Tutorials 18
Page 19
Settings Panel Overview
You can retype the highlighted word if necessary while the
Verification window is still open. This is a quick way to edit text
without using the spell checker.
5 Click anywhere in the text window to close the Verification
window.
6 Choose
Page sample.
7 Click No in the dialog box that asks if you want to save changes.
You will edit documents and save them in later tutorials.
Close Document...
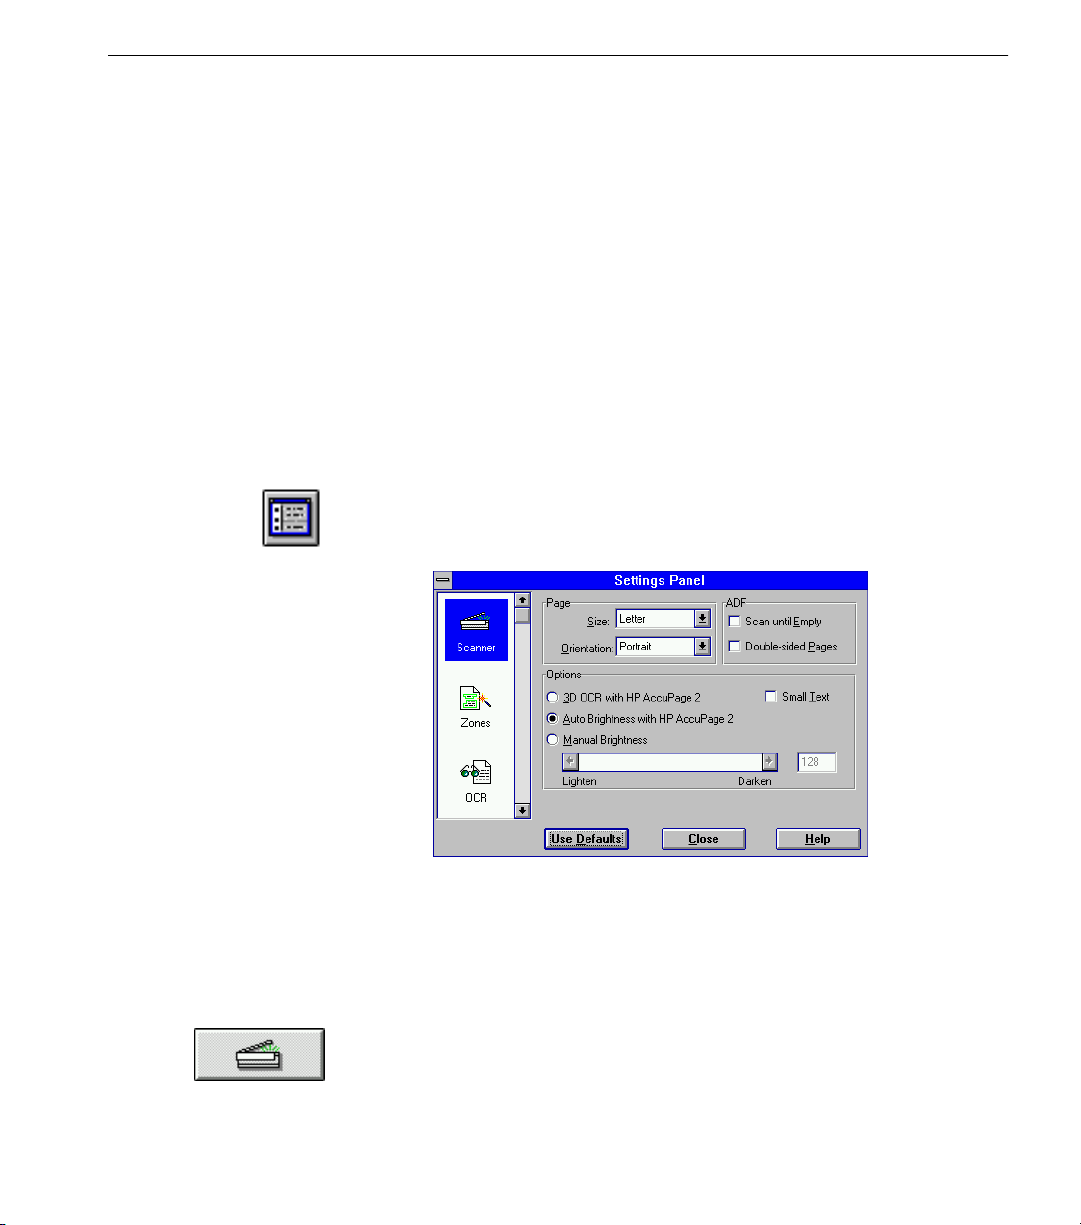
Settings Panel Overview
Use the Settings Panel to customize the OCR process for particular pages.
The page you just scanned had a simple page layout with crisp black text
on a clean white background. Most settings work well with this type of
page. You will customize the Settings Panel options in later tutorials.
1 Click the Settings Panel button in the toolbar or choose
Panel...
The Settings Panel appears.
in the Settings menu.
in the File menu to close the Quick Scan
Settings
There are seven panels in the Settings Panel dialog box: Scanner,
Zones, OCR, Fonts, Spelling, Direct Input, and Preferences
2 Click each icon in turn to view its options.
Use the scroll box to access and select icons below the OCR icon.
3 After you click the Preferences icon, click
4 Position the mouse pointer over the Image button in the toolbar
and click the
5 The Settings Panel opens to the Scanner options.
mouse button.
right
Close
.
.
Tutorials 19
Page 20
Settings Panel Overview
You can also click with the right mouse button on the Zone and OCR
process buttons when they are active to open the Settings Panel to the
corresponding settings. These two buttons are active after a document
has been loaded or scanned.
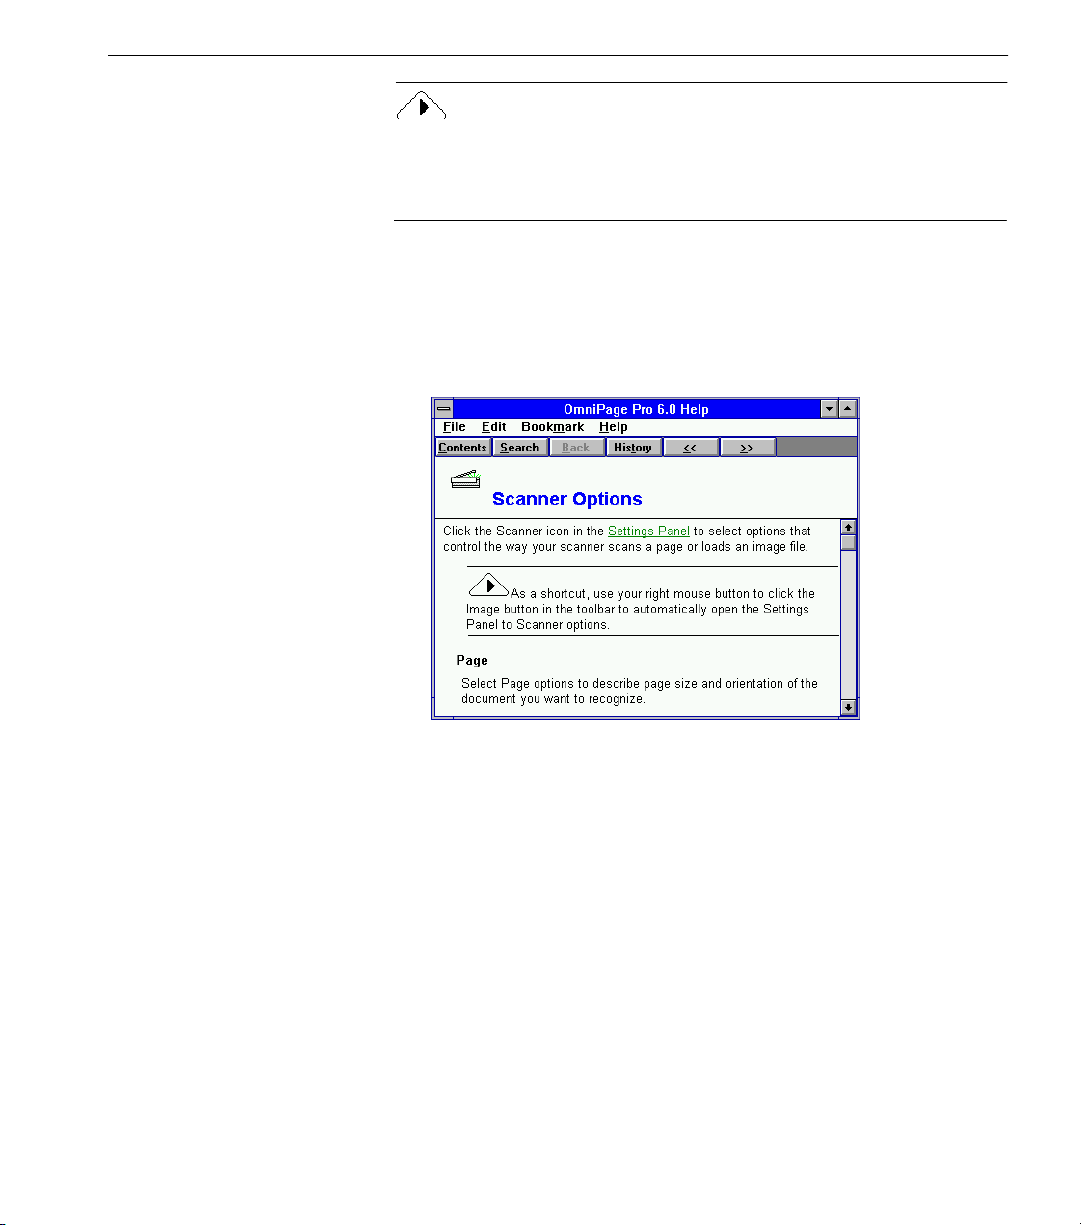
You would set Scanner options before scanning a page. Your
Scanner settings panel options may look different than those
pictured above, depending on your scanner.
6 Click
Help.
The online Help program opens to Scanner Options.
This section of the Help program gives information on all the
Scanner settings panel options. You can click the
Help
button in
each settings panel to open its corresponding Help section.
7 Choose
8 Click
in the File menu to close the online Help.
Exit
to close the Settings Panel.
Close
See Chapter 4, The Settings Panel, for detailed information on all settings.
The next tutorial introduces you to more scanning concepts.
Tutorials 20
Page 21
Tutorial 2 — Basic Text Recognition
This tutorial takes you through basic scanning, zoning, and OCR exercises
with OmniPage. It contains the following exercises:
• Scanning With the Default Settings
• Change a Document’s Fonts During OCR
• Ignore All Formatting
• True Page Recognition
• Deselect Retain Graphics
• Save a Settings File
• Load an Image File
You will use the True Page sample in these tutorials.
Save the files as directed during the exercises so you can use them in later
exercises.
Scanning With the Default Settings
You will select the default settings in this exercise, observe the OCR
process, use the
errors, and save the recognized document in two different file formats.
Check Recognition
command to correct any recognition
Scanning With the Default Settings
1 Click the drop-down list under each process button and select
these options:
•Scan Image
•Auto Zones
•
Perform OCR
2 Click the Settings Panel button or choose
Settings menu.
3 Click
4 Click OK in the dialog box that asks if you are sure.
5 Click the Scanner icon.
Use Defaults.
Settings Panel...
in the
Tutorials 21
Page 22
Scanning With the Default Settings
Auto Brightness with AnyPage/HP AccuPage 2
is the default. (HP
stands for Hewlett-Packard.)
This setting works well with most types of pages. The default is
Manual Brightness
if you have a black-and-white scanner.
6 Click the Zones icon.
The default setting is
Multiple Columns.
The True Page sample has multiple columns so this is the setting
you want. Use this option for pages such as newsletters, data
sheets, and magazines.
7 Click the OCR icon.
Retain Font and Paragraph Formatting
the section
Output Formatting Options.
is the default setting under
This setting preserves paragraph order and formatting (centered
or left-aligned), and font style (serif and sans serif) and
formatting (bold, point size, etc.) during OCR.
8 Click
Close.
You can leave the Settings Panel open if you have room on your
screen. This is useful if you need to change the settings
frequently.
Scan the Page
You will click the process buttons individually in this exercise to observe
each stage of the recognition process.
1 Place the True Page Sample in your scanner making sure the
page is aligned correctly.
2 Click the Image button.
Tutorials 22
Page 23
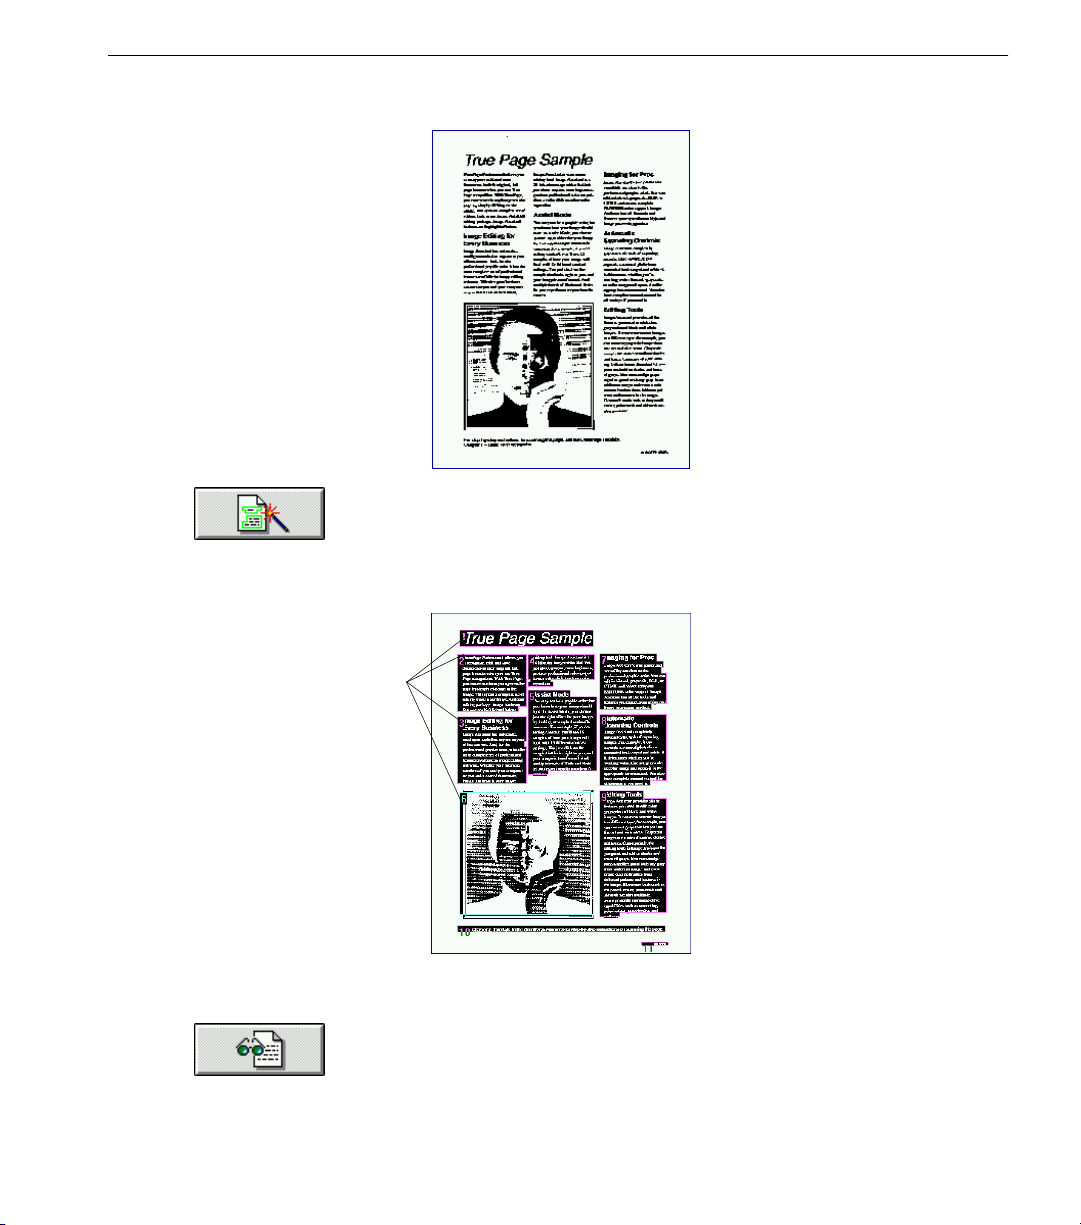
Scanning With the Default Settings
OmniPage scans the page and opens the image in the zone
window.
3 Click the Zone button.
OmniPage determines column flow and automatically draws
zones. This shows how text and graphics will be ordered during
OCR.
Numbered zones indicate
recognition order.
Your zones may be different depending on whether you are using
AnyPage, HP AccuPage, or Manual Brightness.
4 Click the OCR button.
Tutorials 23
Page 24
Scanning With the Default Settings
OmniPage performs three OCR passes over the document: a cyan
pass for initial recognition; a blue pass as text is analyzed and
corrected; and, a dark blue pass for final recognition.
The Character window displays characters as OCR takes place.
The Character
Window
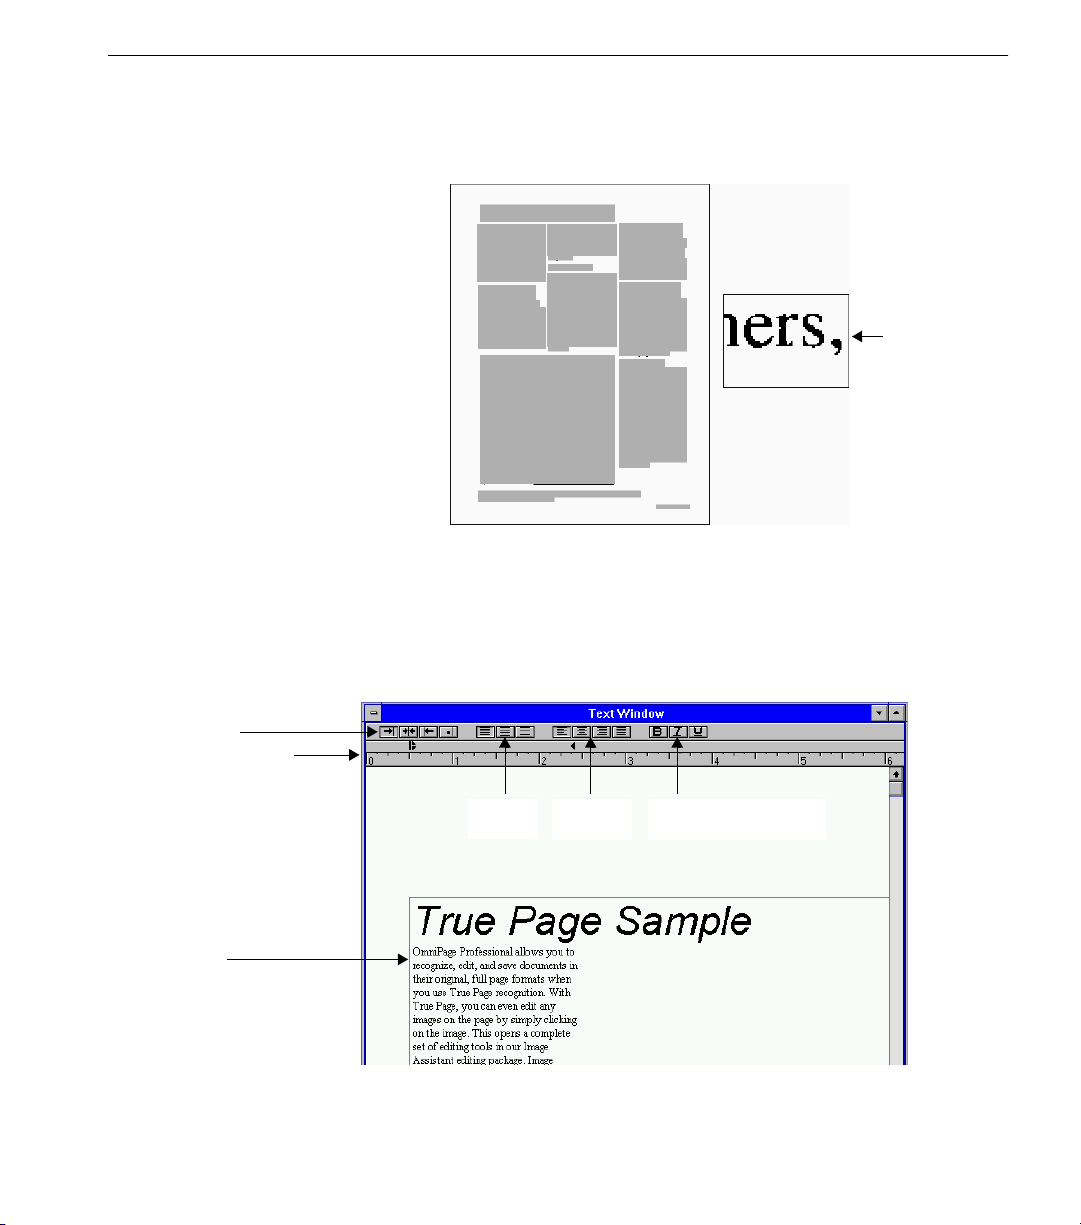
The recognized document opens in a new maximized text window. See the
next section for an overview of the text window and its editing tools.
The Text Window
Tab buttons
Ruler (set margins
and tabs)
Text f ra m e
The document’s font and paragraph formatting are retained but page
layout is not. Text is displayed in one column with the graphic at the end.
Spacing
buttons
Alignment
buttons
Formatting buttons
(bold, italic, underline)
Tutorials 24
Page 25
Scanning With the Default Settings
If the text is not ordered correctly, you may have misaligned the page in
your scanner. Realign the page and try scanning again.
1 Choose
Tile Vertical or Tile Horizontal
in the Windows menu.
The text and zone windows tile for easy viewing.
2 Compare the recognized document in the text window to the
scanned image in the zone window.
OmniPage highlights any words it had trouble recognizing.
• Green:
suspects,
words that may not have been recognized
correctly, are highlighted in green.
• Red tilde:
or unrecognizable characters, are marked with
rejects,
a red tilde (~).
3 Select a word in the text.
If you double-click the word, the Verification window opens. You
can still edit the word if this window is open. Click anywhere
outside the Verification window to close it.
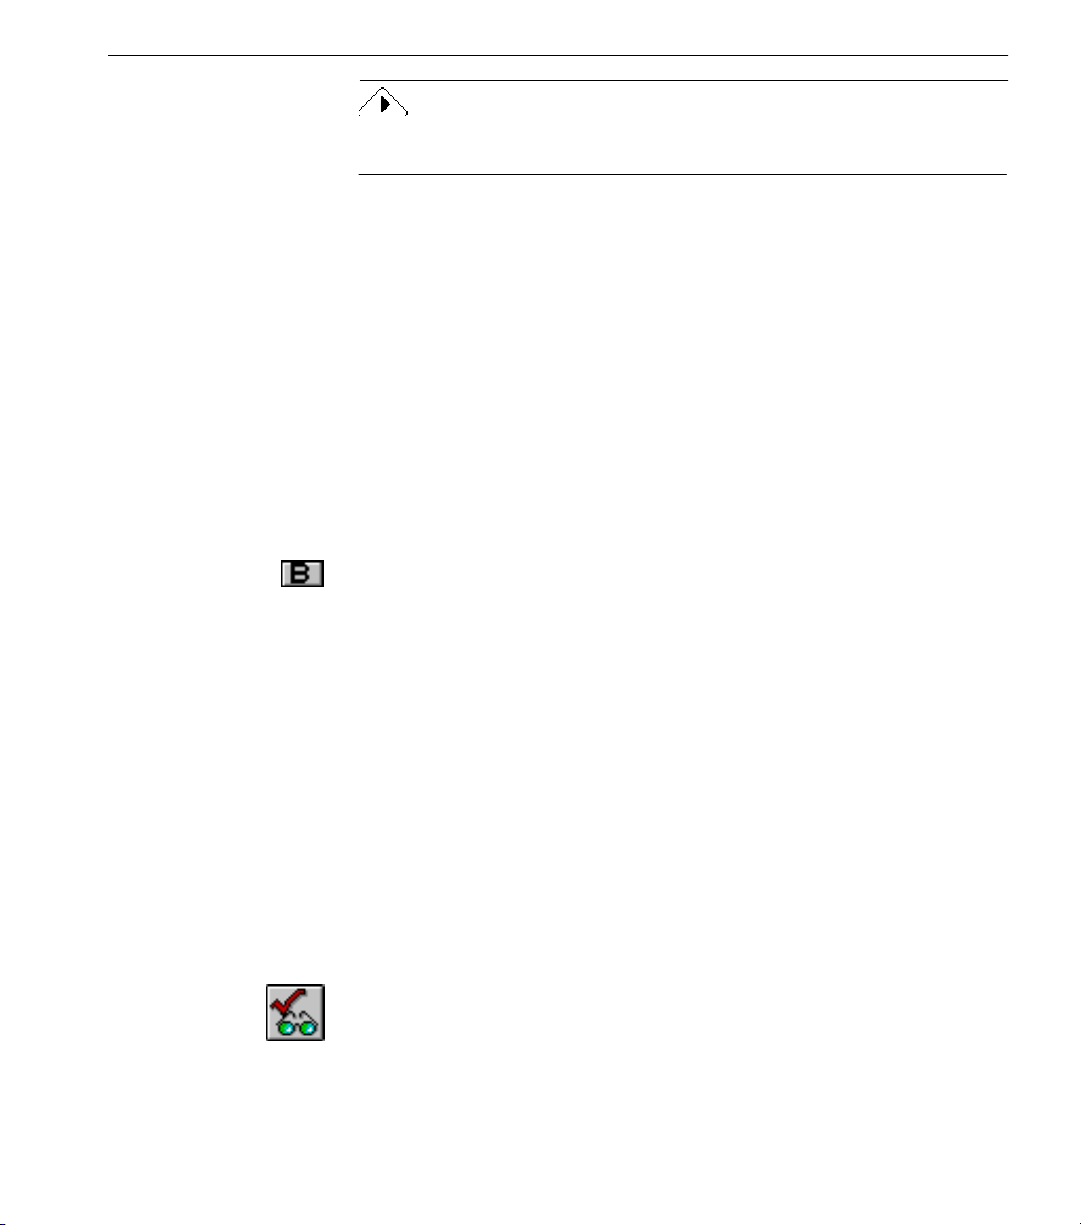
4 Click the Bold button in the text window.
The text becomes bold.
5 Experiment with the other tools in the text window to see how
they affect your text.
See “The Format Menu” on page 113 for detailed information on
formatting options.
The next section shows you how to correct any recognition errors and add
words to a user dictionary.
Check Recognition
The True Page Sample has black, crisp text on a clean white background
and so should have few, if any, recognition errors. Check Recognition,
however, also allows you to add words to your user dictionary as well as
correct recognition errors.
1 Click the text window to make it active if it is not already.
2 Click the Check Recognition button or choose
Check Recognition...
in the Edit menu.
Tutorials 25
Page 26
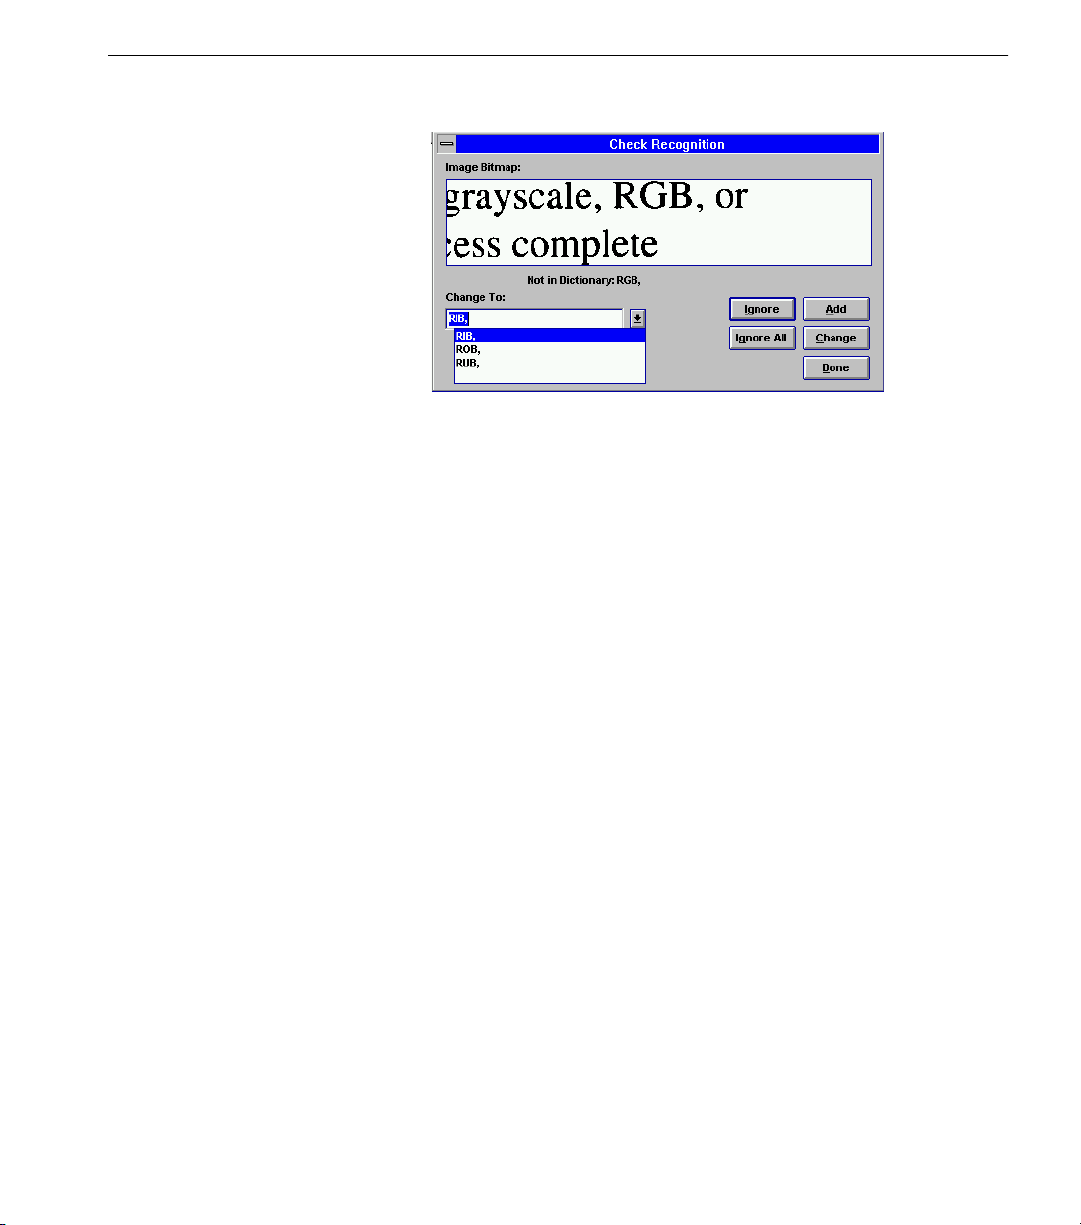
Scanning With the Default Settings
The Check Recognition window appears. It displays the image
and text of any questionable or unrecognizable word.
3 Correct any errors in the text.
If the word is misspelled:
• Correct the spelling in the
Change To
OmniPage may list one or more suggestions in the
edit box and click
Change To
drop-down list. The first word in the list is the word as
OmniPage recognized it. Select a word in the list and click
Change
proper word in the
to replace the word in the text. Alternatively, type the
Change To
edit box.
If the word is correct:
• Click
to add the word to the User Dictionary. The word will
Add
still be flagged if it is a suspect (green) word and it occurs again.
• Click
to ignore the currently flagged word. Other
Ignore
instances of the word in the document will be checked.
• Click
Ignore All
to ignore all instances of the currently flagged
word in the document.
OmniPage automatically moves to the next word after you click a
button.
Change
.
4 Click
if you want to end the spell check.
Done
Otherwise, a dialog box informs you when the end of the
document has been reached. Click OK in this dialog box.
Tutorials 26
Page 27
Scanning With the Default Settings
Save the Document
You will save the document as a Caere Document (a special OmniPage
format), reopen it, and save it as a word-processing file.
Save as a Caere Document
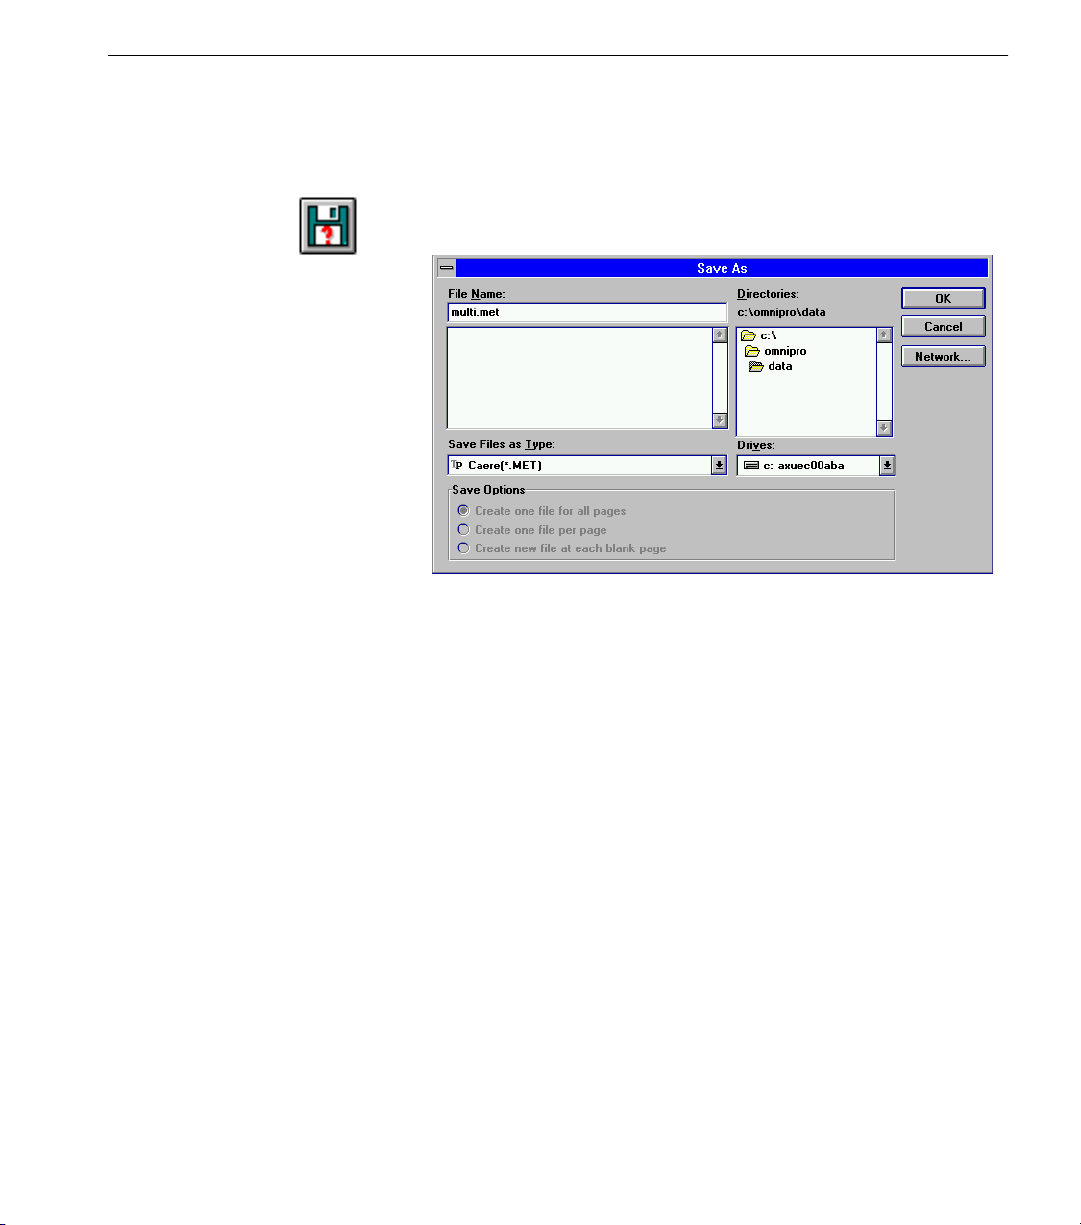
1 Click the Save As... button or choose
Save As...
in the File menu.
The Save As dialog box opens.
2Select
Caere[*.MET]
in the
Save File as Type
drop-down list.
The data directory is the default location, but you can choose
another location if you wish.
3Type
4 Click
5 Choose
multi.met
OK.
Close Document
in the
File Name
in the File menu.
edit box.
Tutorials 27
Page 28
Reopen the Document
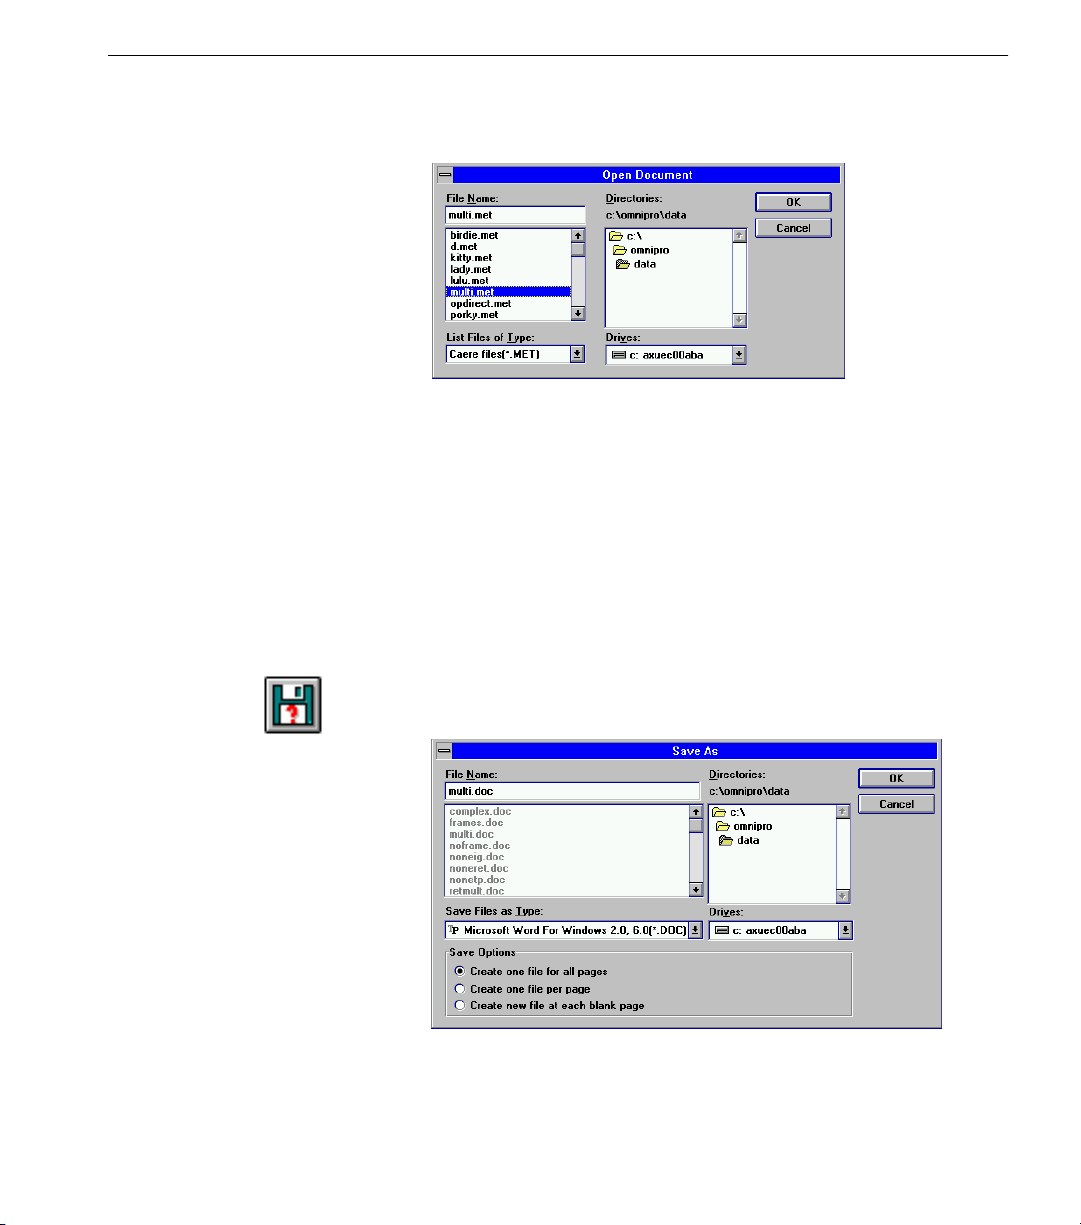
1 Choose
Open Document...
The Open dialog box appears.
Scanning With the Default Settings
in the File menu.
2Select Caere files[*.MET] in the
List Files of Type
drop-down
list if it is not selected already.
3 Locate and open the file multi.met.
The text window opens maximized.
OmniPage opens only Caere Documents and image files. A Caere
Document can contain both text and zone window information from a
recognized document. (An image file contains only an image.) You can
save a Caere Document to multiple file formats. You can also rezone or
re-recognize it to save the time of rescanning the original document.
Save as a Word-Processing File
1 Click the Save As... button or choose
Save As...
in the File menu.
The Save As dialog box appears.
2 Select a word-processing application file type in the
list box, such as Microsoft Word for Windows.
Ty pe
Save Files as
Tutorials 28
Page 29
Change a Document’s Fonts During OCR
Type a new name for the file in the
3 Click OK.
4 Leave the document open for the next exercise.
Change a Document’s Fonts During OCR
In the previous exercise, OmniPage retained font formatting but
the fonts to ones preselected in the Fonts settings panel. You can change
the fonts and point sizes assigned to your recognized document during
OCR. You may want to do this to save formatting time later, either in the
text window or in your target application.
You will see how font mapping works in this exercise.
Change the Font Settings
1 Choose
multi.met file if you did not leave it open after the previous
exercise.
See “Reopen the Document” on page 28 for information.
2 Click the Settings Panel button or choose
Settings menu.
3 Click
exercise.
Open...
Use Defaults
in the File menu to locate and open the
if you have changed the settings since the last
File Name
Settings Panel...
text box if you like.
mapped
in the
4 Click
Retain Font and Paragraph Formatting
you may recall from the last exercise.
This setting preserves paragraph order and formatting (such as
centered or left-aligned), and font style (serif and sans serif) and
formatting (bold, point size, etc.) during OCR.
It matches font types to the fonts selected in the
Formats
retain page layout.
in the dialog box that asks if you are sure.
Ye s
is the default OCR setting as
Retained Font
section of the Fonts settings panel. It does not try to
Tutorials 29
Page 30
Change a Document’s Fonts During OCR
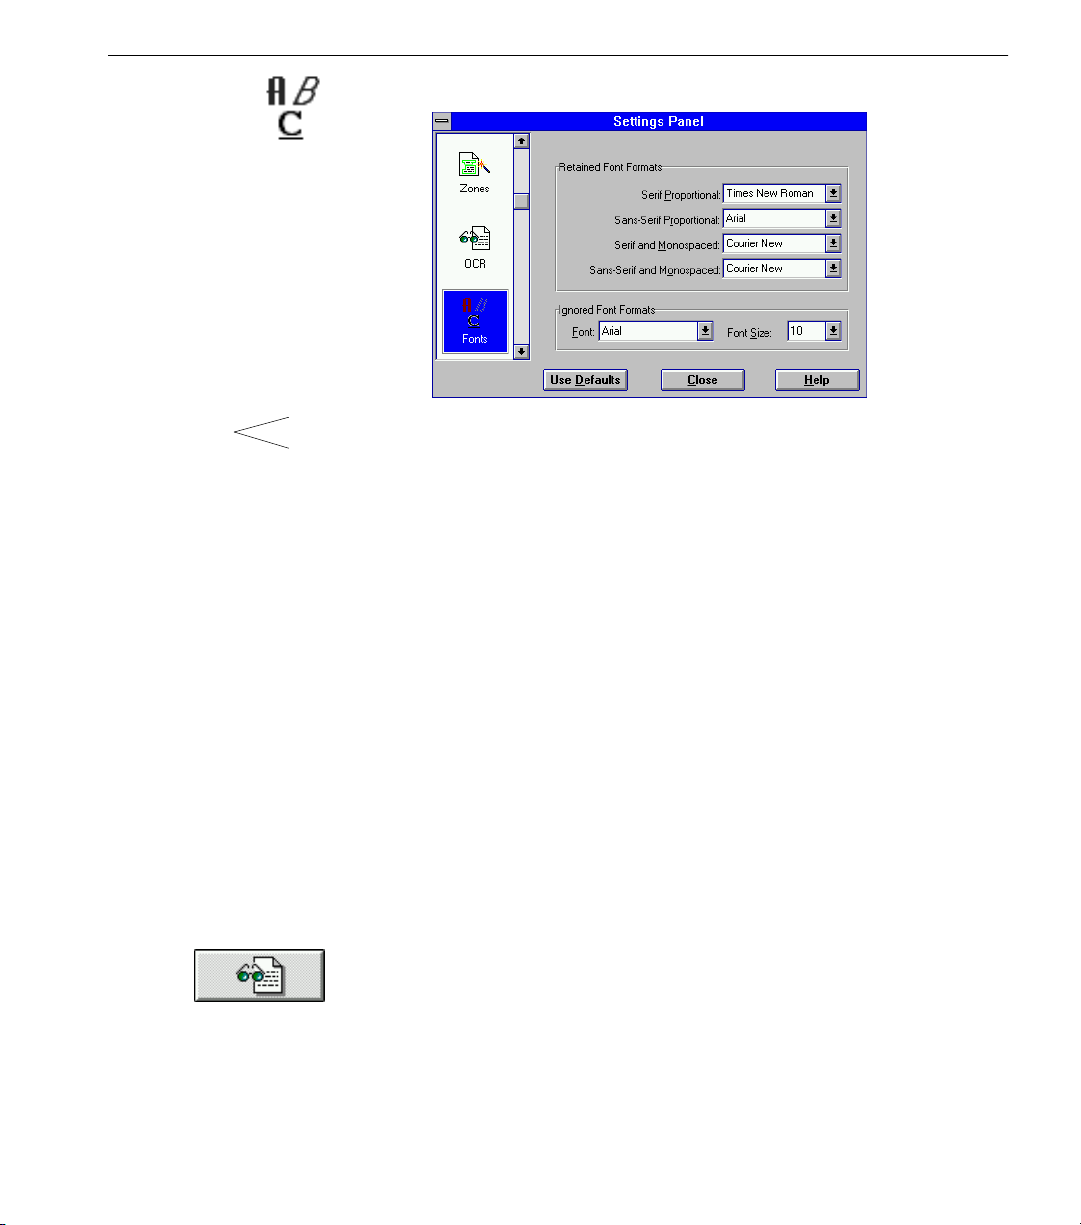
5 Click the Fonts icon and observe the settings.
Serifs
San Serif
K
K
Re-recognize the Page
• The default
seriffed
a letter.)
The body text in the True Page sample is already Times New
Roman and so would not change during OCR.
• The default
font has no serifs.)
The title and subtitles in the True Page sample are already Arial
and so would not change during OCR.
• There are no monospaced fonts in the True Page sample so
ignore these settings for now.
You can change the selection in any of the drop-down lists and
the fonts in your document will change accordingly during OCR.
6Select
Proportional
7Select
Proportional
8 Click
1 Click the OCR button.
2 Click
current text.
OmniPage re-recognizes the page and displays the recognized
text in the text window.
Serif Proportional
font has short lines, or
Sans Serif Proportional
Century Schoolbook
drop-down list.
Helvetica
Close.
Ye s
OR the font of your choice in the
drop-down list.
in the dialog box that asks if you want to replace the
setting is
serifs,
OR the font of your choice in the
Times New Roman
on the ends of the strokes of
settings is
Arial. (A sans seriffed
Sans Serif
. (A
Serif
Tutorials 30
Page 31

Arial becomes
Helvetica
Times New Roman becomes
Century Schoolbook
Change a Document’s Fonts During OCR
Font and paragraph formatting are retained but page layout is
not. Text is displayed in one column with the graphic at the end.
The fonts match the selections in the Fonts settings panel.
3 Click in the body of the text.
4 Choose
in the Format menu.
Font...
The Font dialog box appears.
5 Verify that the font display matches the font you selected in the
Serif Proportional
drop-down list in the Fonts settings panel.
6 Leave the document open for the next exercise.
See “Retain Font and Paragraph Formatting” on page 172 for detailed
information on the Fonts settings panel options.
Tutorials 31
Page 32

Ignore All Formatting
You may decide you do not need any formatting at all, just the recognized
text itself. You will use the
font and paragraph formatting during recognition and assign one font and
point size to the recognized text.
This option speeds the OCR process. It is useful if you want to export just
text that either needs no particular formatting or that you want to format
yourself in your target application.
Ignore All Formatting
Ignore All Formatting
OCR option to strip away
1 Choose
multi.met file if you did not leave it open after the previous
exercise.
See “Reopen the Document” on page 28 for information.
2 Click with your
the Settings Panel to the OCR settings.
3Select
OmniPage will maintain paragraph order but not formatting. It
will ignore font types (serif and sans serif) and any formatting
(bold, point size, etc.) when it recognizes the document. You can
choose a single font type and size for all the recognized text in the
Ignored Font Formats
4 Click the Fonts icon.
The Fonts options appear.
Open...
Ignore All Formatting
in the File menu to locate and open the
mouse button on the OCR button to open
right
.
section of the Fonts settings panel.
The default setting under
All recognized characters will be formatted as plain, Arial, 10point text. You can choose a different font and point size in the
drop-down lists if you like.
5 Click
Close.
Ignored Font Formats
is Arial 10-point.
Tutorials 32
Page 33

6 Click the OCR button.
True Page Recognition
All text is now 10-point Arial.
7 Click
in the dialog box that asks if you want to replace the
Ye s
text.
OmniPage re-recognizes the page and displays the recognized
text in the text window.
Formatting has been discarded and all text is Arial 10-point (or
whichever font and point size you chose). The text is displayed in
one column in order of recognition with the graphic at the end.
8 Leave the document open for the next exercise.
True Page Recognition
You may want to scan a document and retain not only font and paragraph
formatting, but also as much page layout as possible. You can retain page
layout by using the
You will re-recognize the True Sample with the True Page OCR option,
work with frames in the text window, and deselect the Retain Graphics
option to observe what effect this has on True Page recognition.
1 Choose
multi.met file if you did not leave it open after the previous
exercise.
See “Reopen the Document” on page 28 for information.
Open...
True Page - Retain All Page Formatting
in the File menu to locate and open the
OCR option.
Tutorials 33
Page 34

True Page Recognition
2 Click with your
mouse button on the OCR button to open
right
the Settings Panel to the OCR settings.
3Select
True Page - Retain All Page Formatting
.
Use this option when you want to duplicate page layout as
closely as possible.
4 Click
5 Click the OCR button
6 Click
.
Close
.
in the dialog box that asks if you want to replace the
Ye s
current text.
OmniPage re-recognizes the document and displays the
recognized text in the text window.
The result matches the original page layout as closely as possible.
Tutorials 34
Page 35

Working With Frames
True Page Recognition
Because
Multiple Columns
automatically creates
was the default zoning method, True Page
around recognized text and graphic zones to
frames
preserve a side-by-side column structure.
Frames
You can resize frames and move them around to modify your document’s
page layout. These frames are exported intact when you save your
document in an appropriate file format. You will work with True Page
frames in this exercise.
1 Click the text window to make it active if it is not already.
2 Choose
Select Recognized Zones
in the Edit menu.
You cannot select this command if the zone window is active.
All text and graphic zones in the text window are selected.
Handles appear around the text zones.
3 Hold your cursor over a frame handle in a text zone so that it
turns into a two-way arrow.
Resizing the frame
4 Hold down the mouse button and drag to resize the frame.
Tutorials 35
Page 36

Moving the frame
Deselect Retain Graphics
5 Place your cursor inside a text zone so that it turns into a four-
way arrow.
6 Hold down the mouse button and drag the zone to any location
on the page.
7 Choose
Select Recognized Zone
All frames are deselected. A check mark in front of the command
indicates that the command is active. The check mark disappears
when you reselect the command.
8 Place your cursor inside a frame.
9 Hold down the Alt key, and click the right mouse button.
This selects an individual frame.
10 Repeat the Alt-right-mouse-button click to deselect the frame.
11 Leave the document open for the next exercise.
Deselect Retain Graphics
You may want to retain page layout but not graphics during page
recognition. Not retaining graphics speeds recognition because OmniPage
can skip over those zones. You will re-recognize the document you
scanned in the previous exercise but not retain the graphic.
1 Choose
multi.met file if you did not leave it open after the previous
exercise.
See “Reopen the Document” on page 28 for information.
Open...
s in the Edit menu again.
in the File menu to locate and open the
Tutorials 36
Page 37

Save a Settings File
2 Click with your
mouse button on the OCR button to open
right
the Settings Panel to the OCR settings.
3 Deselect
4Select
True Page - Retain All Page Formatting
Retain Graphics
.
if it is not selected
already.
5 Click
Close.
6 Click the OCR button.
7 Click
in the dialog box that asks if you want to replace the
Ye s
text.
OmniPage re-recognizes the page.
The text appears in the same format as before, but has an empty
space where the graphic was originally.
Empty space where graphic was
Save a Settings File
8 Choose
Close Document
in the File menu.
9 Click No in the dialog box that asks if you want to save changes.
You may find that you use the same Settings Panel options often. You can
save these settings as a file and load the file before scanning or loading an
image file. This saves you the time of opening the Settings Panel and
resetting the options you need.
Tutorials 37
Page 38

Save the Settings
Save a Settings File
1 Click the Settings Panel button or choose
Settings Panel...
Settings menu.
2 Select the following options in each settings panel:
• Scanner:
•Zones:
•OCR:
Manual Brightness
One Zone
Ignore All Formatting
Note that none of these settings is a default setting.
3 Leave the Settings Panel open
4 Choose
Save Settings...
in the File menu.
.
The Save Settings dialog box appears.
• Caere Settings files[*.SET] is the only selection in the
Save Files of Type
list box.
•The data directory is the default location but you can choose
another if you like.
in the
5 Type the name test.set in the
6 Click OK.
Load the Settings
1 In the Settings Panel, click
2 Click
Ye s
3 Choose
File Name
Use Defaults
text box.
.
in the dialog box that asks if you are sure.
Load Settings...
in the File menu.
Tutorials 38
Page 39

Load an Image File
The Load Settings dialog box appears.
4 Locate and select the file test.set.
5 Click OK.
The Settings Panel settings change to match the settings file you
just loaded.
6 Click the Scanner, Zone, and OCR icons to verify that their
respective settings have changed.
7 Choose
8 Click No in the dialog box that asks if you want to save changes.
Load an Image File
OmniPage can load, zone, and recognize TIFF and PCX files in the same
way it does scanned documents. You will load an image file in this
exercise and experiment with font settings. See “Supported Input File
Formats” on page 239 for a complete list of supported file types you can
load.
Load a Single Image File
1 Click the drop-down lists under the process buttons and select:
• Load Image
•Auto Zones
•
Perform OCR
Close Document
in the File menu.
Tutorials 39
Page 40

Load an Image File
2 Click the
AUTO
button.
The Load Image dialog box appears.
3Select TIFF files[*.TIF] in the
List Files of Type
drop-down
list.
4 Locate and select the test.tif file.
The file was placed in the c:\omnipro\data directory during
installation.
5 Click
OK.
OmniPage loads the image file, creates automatic zones on it,
performs OCR, and then displays the recognized text in the text
window.
Load Multiple Image Files
You can load your own image files in this exercise if you have them.
Otherwise, skip to the next tutorial. See “Supported Input File Formats”
on page 239 for a list of file types you can import.
1 Click the drop-down lists under the process buttons and select:
• Load Image
•Auto Zones
•
Perform OCR
Tutorials 40
Page 41

Load an Image File
2 Click the
AUTO
button.
3 The Load Image dialog box appears.
4 Select a file format in the
List Files of Type
5 Select a file to load and click
The file appears in the
Selected Files
Add.
drop-down list.
list box.
6 Repeat for each file you want to load.
7 Click OK when you have selected all the files to load.
OmniPage loads, zones, and performs recognition on the files in
the order selected. The new document starts at page two if you
left the document from the previous exercise open.
Each subsequent document becomes a new page in the final
recognized document. Three one-page TIFF files, for example,
would be merged into a three-page recognized document.
8 Choose
Close Document
in the File menu.
9 Click No in the dialog box that asks if you want to save changes if
you do not want to save the document.
You will learn about the different save options available for
multiple-page documents in the “Deferring OCR” tutorial. Or,
see “Save Options” on page 92 if you want to save the document.
Tutorials 41
Page 42

Tutorial 3 — Working With Graphics
OmniPage can export a scanned page or pages as one or more graphicformat files. It can also find individual graphic zones on each page and
export them as graphic-format files. This tutorial contains a tutorial on
how to Export a Graphic
You will use the True Page Sample in this tutorial.
Export a Graphic
You will export the graphic on the True Page sample as an individual
graphic file in this exercise.
Select Settings
1 Click the drop-down list under each process button and select
these options:
•Scan Image
•Auto Zones
•
Perform OCR
Export a Graphic
2 Click the Settings Panel button in the toolbar or choose
Panel...
The Settings Panel appears.
3 Click
4 Click
in the Settings menu.
Use Defaults
in the dialog box that asks if you are sure.
Ye s
.
Settings
Tutorials 42
Page 43

Export a Graphic
5 Click
Close
.
Scan the Page
1 Place the True Page sample in your scanner making sure it is
aligned correctly.
2 Click the
AUTO
3 OmniPage scans, zones, and recognizes the document.
Export the Graphic Zone
1 Choose
Export Image...
The Export Image dialog box opens.
button.
in the File menu.
2Select
Save Current Page Only
under
Save Options
.
You only have one page, but if you had a multiple-page
document open, OmniPage would save the page being viewed.
3Select
Save Each Graphic Zone to a File
under
Image Options
There is one graphic zone on this page, the image of the woman.
OmniPage will export just this image and none of the text.
4 Select a file format in the
Save Files as Type
drop-down list.
5 Select a location for your file.
6 Type a name for your graphic file in the
File Name
edit box.
The name you choose can have up to seven characters. OmniPage
appends a letter to indicate the order of the graphic on the page.
If you had multiple graphics to export, A would indicate the first
graphic, B the second and so on. Up to 26 files can be created in
one directory with this method.
Tutorials 43
.
Page 44

7 Click OK.
The recognized graphic zone on the page is exported in the file
format you chose. You can open it in most image-editing
programs.
Tutorial 4 — Evaluating a Page
A complex page may require more attention on your part for accurate
OCR to take place. Tight or non-rectangular columns, text-filled or very
small graphics, shading behind text, or very stylized text may be difficult
for OmniPage to recognize with perfect accuracy on the first try.
Sometimes you need to reprocess a page with different settings.
This tutorial illustrates some difficulties a complex page or any kind of
page can present and how to correct those problems. It also gives a basic
introduction to manual zoning at the same time. It contains the following
exercises:
• Overcoming Recognition Difficulties
• When to Use Manual Zoning
• Manual Zones — Recognize Portions of a Page
• Manual Zones — Specify Zone Contents
• Manual Zoning — Reorder Text
• Scanning and the Brightness Setting
Overcoming Recognition Difficulties
You will use the Complex Page sample in this tutorial.
Overcoming Recognition Difficulties
This exercise uses a fictional newsletter to illustrate some challenges you
may encounter with your own scanned pages — graphics recognized as
text, background interfering with text recognition, unwanted text or
graphic elements on a page — and how to solve them.
Select Settings
1 Set these options in the toolbar:
•Scan Image
•Auto Zones
•
Perform OCR
Tutorials 44
Page 45

Overcoming Recognition Difficulties
2 Click the Settings Panel button in the toolbar.
3 Select the following settings:
• Scanner:
Auto Brightness with AnyPage/HP AccuPage2
This is a good setting for shaded backgrounds.
• If you have a black-and-white scanner, set
Manual Brightness
the center of the slider.
•Zones:
Multiple Columns
The page has multiple columns so this setting is appropriate.
•OCR:
Retain Graphics
• You will retain the Caere logo in this exercise.
•OCR:
True Page - Retain All Page Formatting
This setting retains page layout and will make it easier to find
various sections of the page in this exercise. You would choose
Retain Font and Paragraph Formatting
if you did not need to
preserve page layout.
to
4 Click
Scan the Page
1 Place the Complex Page Sample in your scanner making sure it is
aligned correctly.
2 Click
Close
AUTO
.
.
Tutorials 45
Page 46

Unwanted graphic element
Caere logo recognized as text
Your results may be different than those pictured above depending on
your scanner. The line above the newsletter title may be not recognized at
all, for example.
Overcoming Recognition Difficulties
OmniPage scans, zones, and recognizes the page. The recognized
page opens in the text window.
OmniPage assumed
the beginning of a word.
ca
The Problems to be Solved
You may find some or all of the following recognition difficulties.
1 Note that the Caere logo was not reproduced: OmniPage tried to
recognize it as text.
This is because it saw the CA at the beginning of the logo and
assumed it was the beginning of a word such as cat.
was
You may have different recognition results depending on the
quality of your scanner.
Tutorials 46
Page 47

Overcoming Recognition Difficulties
Dark shading recognized
as a graphic zone
Unwanted text element
2 Scroll down the page to the
A Little Background
article.
OmniPage had trouble with this section because the extremely
dark background could be interpreted as part of a graphic. The
lack of distinct contrast also interfered with the program’s ability
to distinguish characters.
Depending on your scanner, you may find recognition errors and
perhaps some small graphic zones here.
3 Note that OmniPage may have tried to recognize the tiny squares
at the bottom of the page because they are easily confused with
text. You might see tildes or other characters here.
You will not always need all the information on a page. You can
choose which portions to recognize. In this exercise, you will
recognize just the logo, the headlines, and the body text.
How to Solve the Problems
You will:
• Rezone the page to leave out the unwanted text and graphic
elements.
• Specify a graphics zone content for the Caere logo.
• Isolate the shaded portion of the page and rescan it with a different
brightness setting to compensate for the shading.
Tutorials 47
Page 48

When to Use Manual Zoning
These fixes require you to use
of the page,
manual zoning techniques in the course of this tutorial.
specify zone contents
manual zoning.
for the logo and text, and learn other
You will recognize portions
When to Use Manual Zoning
Use manual zoning in the following circumstances:
• to select a portion of a page for recognition
• to specify zone contents
• to order text for recognition
• to create a zone template for standardized pages
The next exercises cover the first three circumstances. Creating a zone
template is covered in the next tutorial.
Manual Zones — Recognize Portions of a Page
You can recognize portions of a page to retain just the information you
want to recognize and to leave out undesired elements.
1 Choose
zone windows side by side.
You can also close the maximized text window and it will tile
automatically with the zone window.
2Select
in the toolbar.
Tile Vertical
Manual Zones
in the Window menu to view the text and
in the drop-down list under the Zone button
3 Click
current zones.
in the dialog box that asks if you want to replace the
Ye s
Tutorials 48
Page 49

Manual Zones — Recognize Portions of a Page
The zones disappear and the automatic zone tools change to
manual zone tools.
Zoom tool: zoom your view
of the page in and out.
Draw Zones tool: draw
zones for recognition.
Order Zones tool: change
text recognition order.
Erase Zones tool: erase a
zone.
Use the arrow buttons
to rotate the image.
Select zone contents.
4 Click the Zoom tool.
Your cursor turns into a magnifying glass.
5 Click anywhere on the zone window to zoom into the image.
This is useful when you are drawing zones around areas that are
close together such as the three columns on the page.
6 Click the right mouse button to zoom out of the image.
7 Click the Draw Zones tool.
8 Place the cursor by the Caere logo, hold down the mouse button,
and drag the cursor to draw a rectangular zone around the title.
Leave out the volume number and other text below the logo.
OmniPage numbers this zone with a 1.
9 Draw a zone around the headline below the Caere logo.
OmniPage numbers this zone with a 2.
Tutorials 49
Page 50

Manual Zones — Specify Zone Contents
10 Draw zones around the three side-by-side columns, avoiding the
lines, as illustrated in the picture.
This is where zooming in your view of the page is especially of
help.
Do not draw a zone around the
will zone this separately in another exercise.
You should now have five zones as pictured below.
A Little Background
article. You
Manual Zones — Specify Zone Contents
1 Click in the zone around the Caere logo to make it active.
Handles appear on the zone when it is active.
2Select
3 Click the OCR button.
4 Click
Graphic
The zone is now identified as a graphics zone. OmniPage will not
try to recognize it as text.
Ye s
current text.
in the
Zone Contents
in the dialog box that asks if you want to replace the
drop-down list.
Tutorials 50
Page 51

Caere logo recognized as graphic
Manual Zoning — Reorder Text
OmniPage re-recognizes the document according to the zones
you drew. The logo now appears in the text window as a graphic.
5 Leave the document open for the next exercise.
Manual Zoning — Reorder Text
After you scan a document, you may decide to reorder the text before or
after recognition to save yourself time editing the document. In this
exercise, you will recognize just the columns in a different order.
Reorder the Zones
1 Click the Erase Zones tool.
2 Click the first two zones to erase them.
OmniPage will recognize just the three columns.
3 Click the Order Zones tool.
The cursor becomes the # symbol and numbers in the three
remaining zones around the columns disappear.
4 Click the right column that used to be labeled 5.
Now the zone is labeled 1. This zone will be recognized first and
placed at the beginning of the new document in the text window.
5 Click the middle column.
It is now labeled 2 and will be recognized second.
Tutorials 51
Page 52

6 Click the left column.
It is now labeled 3 and will be recognized third.
Manual Zoning — Reorder Text
OCR
1 Click with your
mouse button on the OCR button to open
right
the Settings Panel to the OCR options.
2Select
Retain Font and Paragraph Formatting
.
This setting allows you to see the reordered text in the text
window. Text would still be reordered with the True Page setting
but you would have to export the text first and view it in the
target application.
3 Click
Close.
4 Click the OCR button.
5 Click
in the dialog box that asks if you want to replace the
Ye s
text.
OmniPage makes three recognition passes over the zones.
Tutorials 52
Page 53

The text window opens to display the newly reordered text.
Scanning and the Brightness Setting
The scanner brightness setting you choose in the Scanner settings panel
can strongly affect page recognition. 3D
and
Auto Brightness with AnyPage/HP AccuPage 2
settings to choose for shaded areas.
Scanning and the Brightness Setting
OCR with HP AccuPage 2/AnyPage
are both good scanner
However, the shaded area in this case is too dark for the auto brightness
settings to help much. You may find adjusting brightness manually works
better. You will re-recognize just the
recognition and evaluate the article during processing.
Some scanners cannot scan a dark background well even with manual
brightness adjustment. Skip this exercise if recognition does not improve
after you have tried one or two different brightness settings.
1 Make sure the Complex Page sample is still in your scanner.
2Select
Manual Zones
already selected.
in the Zone button drop-down list if it is not
A Little Background
article to improve
Tutorials 53
Page 54

Scanning and the Brightness Setting
3 Click with your
mouse button on the Image button to open
right
the Settings Panel to the Scanner options.
4Select
Manual Brightness.
The number range that appears in the text box on the right
depends on what kind of scanner you have.
5 Drag the slider box to the left on the slider (toward
Lighten
You may have to experiment to find the optimum scanning
brightness. For now, try to position the slider box approximately
where it appears on the slider in the previous picture.
6 Note the number in the text box for future reference.
).
7 Click
Close.
8 Click the Image button.
OmniPage rescans the document. It opens in the zone window as
page two of your current document.
Tutorials 54
Page 55

9 Look at the image to see how the brightness setting affected
scanning.
Brightness setting too dark Brightness setting just rightBrightness setting too light
• Set the brightness to a lighter setting if your image still has
shading behind the article as does the left image, above, and
rescan.
• Set the brightness to a darker setting if your image looks faded
as does the middle image, above, and rescan.
• The right image, above, has the right brightness setting.
The text outside the
A Little Background
text inside the article (you can use the Zoom tool to enlarge the
image and see).
This would cause recognition problems if you recognized the
entire page. That is why you will zone and recognize just the
Little Background
article.
Scanning and the Brightness Setting
article is lighter than the
A
10 Choose
Delete Page
in the Edit menu to delete the page being
viewed if it did not scan well.
Tutorials 55
Page 56

Zone and Recognize the Article
1 Click the Draw Zones tool.
Scanning and the Brightness Setting
2 Draw a zone around just the
A Little Background
3 Click the OCR button.
4 Observe the Character window during OCR.
article.
Shaded background dots
would hinder recognition
Brightness
setting too dark
Brightness setting
too light
Brightness setting
just right
• The Character window on the left, above, still shows some of the
shaded background. Set the brightness to a lighter setting and
rescan after OCR.
• The Character window in the middle, above, shows thin, broken
characters. Set the brightness to a darker setting and rescan after
OCR.
• The Character window on the right, above, shows well formed
characters.
Tutorials 56
Page 57

Scanning and the Brightness Setting
OmniPage displays the text in the text window after OCR.
5 Scroll down the page to locate the article in the text window.
You should find few, if any, recognition errors once you have
scanned with the proper brightness setting. Continue to adjust
the scanner brightness setting in the Settings Panel and rescan the
page if there are numerous errors.
6 Choose
Delete Page
in the Edit menu to delete the page being
viewed if it did not scan or recognize well.
Cut and Paste the Text
If you deleted any pages that did not scan or recognize well, you should
now have two pages with portions of recognized text on each. You can cut
and paste the text in the
A Little Background Article
into the text from the
rest of the newsletter.
1 Select the text in the
2 Choose
in the Edit menu.
Copy
A Little Background
article.
3 Click the left arrow button by the page number at the bottom of
the window to go to page one.
This is the page that has the newsletter text from the three
columns.
4 Place your cursor at the end of the text in the column.
5 Choose
in the Edit menu.
Paste
The text is added to the text on the page.
6 Resize the column as necessary to view all the text.
See “Working With Frames” on page 35 for detailed information
on resizing and moving frames.
You could also export the whole document and cut and paste the text in
your target application instead.
Tutorials 57
Page 58

Recognize a Memo With a Table
Tutorial 5 — Scanning a Single Column or Table
So far in these tutorials, you have scanned two different multiple-column
documents with various settings. You may need to scan spreadsheets,
tables, or memos. Although these also have multiple columns, these
documents usually rely on tabs to maintain formatting. The
or Table
document.
zoning method is specifically designed to recognize this sort of
Single Column
You will use the
will also learn how to speed processing and increase recognition accuracy
by creating a zone contents file and a zone template.
There are three exercises:
• Recognize a Memo With a Table
• Create a Zone Contents File
• Create a Zone Template
You will use the Single Column or Table Page sample in this exercise.
Single Column or Table
Recognize a Memo With a Table
1 Place the Single Column Page sample in your scanner making
sure it is aligned correctly.
2 Click the drop-down lists under the process buttons and select:
•Scan Image
•Auto Zones
•
Perform OCR
3 Click the Settings Panel button in the toolbar.
The Settings Panel appears.
zoning method in this tutorial. You
4 Click the
5Select
Single Table or Column.
icon in the Settings Panel.
Zones
Tutorials 58
Page 59

Recognize a Memo With a Table
This option is best for preserving tabbing or columns of
characters such as are on the table on the sample page.
6 Click the OCR icon.
Tabs inserted by OmniPage
to maintain formatting
7Select
Retain Font and Paragraph Formatting
.
This option preserves the formatting of the page but not its
layout as True Page would. On the sample page, for example,
True Page would interpret the wide spacing between sections as
extra line returns. You may not want this extra formatting.
8 Click
9 Click
Close
AUTO
.
.
OmniPage scans, zones, and recognizes the document.
Tutorials 59
Page 60

Note that OmniPage preserves the table and other even spacing
with tabs.
The red tildes on the page mean OmniPage did not recognize
some of the specialized characters in the document. You can
double-click each tilde in the text window to open the
Verification window and see the original image. A later tutorial,
Train OCR, shows you how to teach OmniPage to recognize these
special characters and symbols.
10 Leave the document open for the next exercise.
Create a Zone Contents File
You can speed OCR and minimize potential recognition errors by creating
your own zone contents file. Depending on the font and image quality,
OmniPage may recognize a five (5) as an S or a zero (0) as an O. A zone
contents file prevents this by telling OmniPage exactly what to recognize
in a particular zone. You will create a zone contents file in this exercise.
Creating the File
Create a Zone Contents File
1 Choose
The Select File dialog box opens.
2 Click
The Edit Zone Content File dialog box opens with a string of
highlighted characters. This is the default Alphanumeric zone
contents set
Edit Zone Contents File...
.
New
in the Settings menu.
Tutorials 60
Page 61

Create a Zone Contents File
You need to enter all the numbers in the table. You must also
enter any characters. If you just entered numbers, OmniPage
would not be able to recognize the letters with this zone contents
file.
3 Type the characters 0123456789ABCDTL- (hyphen).
Zone contents files are case-sensitive, so make sure your letters are
uppercase as in the example.
The highlighted characters are replaced with the ones you enter.
4 Click
Save
.
The Save dialog box opens.
5Type finance in the
6 Click
OK.
Draw and Specify Zones
1 Follow steps 1–8 beginning on page 58 if you did not leave the
document open.
2 Choose
Tile Vertical
window.
3Select
4 Click
Manual Zones
in the dialog box that asks if you want to delete the
Ye s
current zones.
File Name
text box.
in the Window menu so you can see the zone
in the Zone button drop-down list.
Tutorials 61
Page 62

Alphanumeric
Alphanumeric
Alphanumeric
Finance
Alphanumeric
Create a Zone Contents File
5 Draw zones around the sections of the page as shown in this
picture:
6 Click in the zone around the table to make it active.
7Select
Finance
in the
Zone Contents
drop-down list.
8 Click the OCR button.
9 Click
in the dialog box that asks if you want to replace the
Ye s
current text.
OmniPage recognizes each of the zones according to the zone
contents you specified.
Because you selected the appropriate zone contents file, all
characters in the table are recognized correctly.
10 Leave the document open for the next exercise.
Tutorials 62
Page 63

Create a Zone Template
The Single Column or Table Page sample is a fictional example of a weekly
report — one that always has similar information in the same place on the
page. This is known as a
to use on standardized form instead of drawing the same zones each time.
Select Settings
1 Perform the previous exercise, “Draw and Specify Zones” if you
did not leave the document open.
standardized form.
Create a Zone Template
You can create a zone template
2 Choose
The Save Zone Template File dialog box appears.
3
Caere Zone (
drop-down list.
4 Type the name weekrpt.zon in the
The data directory is the default location for all zone template files.
This is where OmniPage looks for them. It cannot find the zone
template files in any other location.
5 Click OK.
Save Zone Template...
*.zon
is the only selection in the
)
in the File menu.
File Name
Save Files as Type
text box.
Load the Zone Template
1Select
weekrpt
in the Zone button drop-down list.
Tutorials 63
Page 64

Create a Zone Template
2 Click
in the dialog box that asks if you want to replace the
Ye s
current zones.
3 Click the Zone button.
OmniPage draws zones on the page image according to the zone
template you just saved.
4 Click each zone and observe the setting in the Zone Contents
drop-down list to verify that your zone template is correct.
You could use this template on any similar documents.
You can create zone templates for any page that has a standardized layout.
You could also load a saved settings file before OCR so that an OCR
training file could be used on the document. See “Save a Settings File” on
page 37.
The next tutorial, “Train OCR,” teaches you how to create a training file.
Tutorials 64
Page 65

Tutorial 6 — Train OCR
OmniPage automatically recognizes characters commonly found in most
documents. Other documents may contain characters OmniPage has not
yet learned to recognize such as copyright and trademark symbols, and
mathematical symbols such as pi (π). You can train OmniPage to recognize
special characters and create a training file to use on similar documents.
This tutorial contains the following sections:
• Scan a Document With Special Characters
• Train OCR to Recognize Special Characters
You will use the Single Column or Table Page sample in this exercise.
Scan a Document With Special Characters
1 Place the Single Column or Table Page sample in your scanner
making sure it is aligned correctly.
2 Click the drop-down lists under the process buttons and select:
•Scan Image
• week.rpt
This template was created in the last tutorial. Select
if you did not perform the last tutorial.
•
Perform OCR
Scan a Document With Special Characters
Auto Zones
3 Click the Settings Panel button in the toolbar.
The Settings Panel appears.
4 Click the
5Select
6 Click the OCR icon.
7Select
8 Click
Single Table or Column.
This option is best for preserving the tabbed spacing found on the
sample page.
Retain Font and Paragraph Formatting
You do not need to retain exact page layout in this exercise.
Close.
icon in the Settings Panel.
Zones
.
Tutorials 65
Page 66

Scan a Document With Special Characters
9 Click
AUTO.
OmniPage scans, zones, and recognizes the document. and then
displays the recognized text in the text window.
View the Recognized Text
1 Compare the text in the text window to the page you scanned.
OmniPage replaced unrecognizable characters with red tildes.
2 Double-click a red tilde if you have any, such as the one after the
word LUMINA in the example above.
The Verification window opens to show the original scanned
character, a registered trademark sign.
Tilde
Original image
of the character
You will train OCR to recognize this and other characters.
3 Click anywhere outside the Verification window to close it.
Leave the document open. You will create a training file in the
next exercise.
Tutorials 66
Page 67

Train OCR to Recognize Special Characters
Train OCR to Recognize Special Characters
You will train OmniPage to recognize several characters in this exercise.
See “Scan a Document With Special Characters” on page 65 if you did not
leave the document open.
Re-recognize the Document
The Train Characters Dialog Box
Suspect character
Attempted identification. A
tilde means OmniPage could
not identify the character.
1Select
Tra in OC R
in the OCR button drop-down list.
2 Click the OCR button.
3 OmniPage re-recognizes the document, and then opens the Train
Characters dialog box.
Characters OmniPage had trouble identifying are displayed at
the top of the dialog box.
Beneath each image, in smaller type, is OmniPage’s attempted
identification of that character. A tilde means that OmniPage
could not identify the character.
Depending on your scanner, the characters you see in this dialog box
may be different from those pictured above.
Specify Characters to Recognize
1 Locate the registered trademark (®) symbol in the dialog box.
2 Double-click the symbol, or select it and click
Specify
.
Tutorials 67
Page 68

Train OCR to Recognize Special Characters
The Specify Character dialog box appears.
It displays the symbol as it appeared in the scanned document.
Tilde replaced with registered
trademark symbol
3 Locate the registered trademark symbol in the
Extended ANSI
list
box on the left.
4 Double-click the symbol.
It appears in the
Character
edit box.
If a symbol or character does not appear in the list, you can type it in
the
Character
edit box, cut and paste it from another source, or use an
Alt-number key combination.
5 Click OK.
The specified character now appears under the suspect character
in the Train Characters dialog box.
The symbol turns gray to indicate that you specified a character
for it.
Tutorials 68
Page 69

6 Specify other characters in the same way such as the lowercase ü
5 recognized as the letter S. You ca n
create and use a zone contents file to
prevent this (see “Create a Zone Contents File” on page 60 for information).
Train OCR to Recognize Special Characters
and é, and the copyright (©) symbol.
Characters OmniPage believes it identified correctly are listed
alphabetically below the suspect characters. Check for common
errors, such as a 5 being recognized as the letter
S.
Generally, you will not want to train OmniPage to recognize
common letters unless they are in a very specialized font. One
way to prevent these common errors is to use a special zone
contents files during recognition, such as the numeric
finance
zone contents file created in the previous tutorial.
Even if a character is not recognized, OmniPage corrects most
common OCR errors by analyzing the structure of a word and
comparing it to entries in the dictionary.
Save the File and Recognize the Document
1 Click the
Save
button.
The Save dialog box appears.
2 Type a file name in the
File Name
edit box.
3 Click OK.
A dialog box asks if you want to recognize the image with the
training file you just created.
4 Click
Ye s
.
OmniPage recognizes the document and all specified symbols.
5 Check the text window to verify the training file improved OCR.
6 Close the document and click No in the dialog box that asks if you
want to save changes.
This file becomes the default training file in the OCR section of
the Settings Panel. You can save Settings Panel selections,
including this training file, as a settings file for use on similar
documents. See “Save a Settings File” on page 37. See “Train
OCR” on page 129 for more information on creating and editing
an OCR training file.
Tutorials 69
Page 70

Tutorial 7 — Deferring OCR
Compared to the time it takes to scan and zone a page, OCR can be timeconsuming. You might find it more efficient to scan a stack of pages
(especially if you have an ADF) or load multiple images all at once, zone
them, and then defer recognition to a later time.
You can choose to finish OCR at any time convenient to you or set it to take
place automatically at a specific time. In this tutorial, you will scan two
pages, defer OCR, and then finish OCR both on an open document and on
a saved document.
Use the Quick Scan Page sample and the True Page sample in this tutorial.
This tutorial contains the following exercise:
• Scan Multiple Pages and Defer OCR
• Finish Current Document
• Finish Deferred Documents
Scan Multiple Pages and Defer OCR
1 Click the drop-down list under each process button and select
these options:
•Scan Image
•Auto Zones
•
Defer OCR
Scan Multiple Pages and Defer OCR
2 Click the Settings Panel button or choose
Settings menu.
The Settings Panel appears.
3 Click
4 Click
5 Make the following selection if you are using an automatic
6 Click
7 Place both sample pages in your ADF.
Use Defaults.
in the dialog box that asks if you are sure.
Ye s
document feeder (ADF):
• Click the Scanner icon.
• Click
Scan until Empty.
Close.
Settings Panel...
in the
Tutorials 70
Page 71

Finish Current Document
If you do not have an ADF, place the Quick Scan Page sample in
your scanner.
8 Click the
The first page in the stack is scanned and zoned, and then the
next page.
If you do not have an ADF, place the True Page sample in your
scanner now and click
You now have a two-page document open in the zone window.
9 Leave the document open for the next exercise.
You have two choices at this point: finish recognizing the current open
document or save the document and perform recognition later. You will
finish the current open document in the next exercise.
AUTO
Finish Current Document
In the normal course of a day, you may decide to leave scanned or loaded
documents open in OmniPage and finish them later. OCR can be both
time- and memory-intensive.
You can even set OCR to begin and leave your computer while it is in
process.
1 Choose
The Finish Current Document dialog box appears.
Finish Current Document...
button.
AUTO.
in the Process menu.
You can perform recognition and save the document later, or
perform recognition and save the document automatically. You
will save the document automatically in this exercise.
2Select
3 Click
Save Automatically
This activates the other options in the dialog box.
Save As...
.
if it is not selected.
Tutorials 71
Page 72

The Save As dialog box appears.
Finish Current Document
4 Select a file type in the
Save Files as Type
drop-down list.
Microsoft Word for Windows is selected in the example above.
5 Select a location for your saved file.
6Select
Create one file per page.
This save option creates two separate files after OCR. See “Save
Options” on page 95 for information on the other two save
options.
7Type smple in the
File Name
text box.
You can type in a name of up to five characters, not including the
extension, with this save option.
8 Click OK to return to the Finish Current Document dialog box.
9 Click OK to begin OCR.
OmniPage recognizes each page and saves it as specified. The
Caere Document remains open in OmniPage with the recognized
text displayed in the text window.
10 Choose
Close Document
in the File menu, saving changes to the
Caere Document if you wish.
You now have two new files in the directory you selected. The Quick Scan
sample is named smple001.*. The True Page sample is named
smple002.*. OmniPage has appended the appropriate file extension if
you did not type it in. (In this example, the full file names are
smple001.doc and smple002.doc.)
See “Finish Current Document” on page 133 for detailed information on
this command.
Tutorials 72
Page 73

Finish Deferred Documents
You may decide to defer OCR, close the open documents or OmniPage,
and finish processing later. You must save the open documents in order to
reopen and recognize them.
Scan and Save the Pages
1 Follow the steps in the section “Scan Multiple Pages and Defer
OCR” on page 70 and then return to this section.
OmniPage scans and zones the pages. You now have a two-page
document open in the zone window.
Finish Deferred Documents
2 Choose
The Save As dialog box appears.
3 Locate the omnipro\input directory.
This is the default location in which OmniPage looks for deferred
files.
4Select
You can only select Caere Documents and image files when
finishing deferred OCR.
5Type new.met in the
Save As...
Caere[*.MET]
in the File menu.
in the
Save Files as Type
File Name
text box.
drop-down list.
6 Click
7 Choose
OK.
window.
Close Document
in the File menu to close the zone
Tutorials 73
Page 74

The Finish Deferred Documents Dialog Box
Finish Deferred Documents
1 Choose
Finish Deferred Documents...
in the Process menu.
The Finish Deferred Documents dialog box appears.
2 The file you saved to the input directory appears in the
list box.
Finish
This is where OmniPage looks by default for deferred files.
OmniPage assigns a a file format to your file based on the last-
selected file format. (In the previous example, Word for Windows
was the selected file format so it is selected in this example by
default.) It assigns a new file name based on that file format.
You can select a different location and file format for files if you
wish.
Files to
3 Click
Set Output Directory...
.
The Set Output Directory dialog box appears.
Tutorials 74
Page 75

Finish Deferred Documents
(A
Network
Windows For Workgroup with network enabled.)
• Locate and select the output directory as the location to save
the file if it is not already selected by default.
•Select
• Select a file format in the
want to change the current selection.
In this exercise, there is just one file selected for OCR. Note that if
you select multiple deferred documents, however, selections
made in the Set Output Directory dialog box would affect
4 Click OK to return to the Finish Deferred Documents dialog box.
Perform OCR
1 Deselect
selected.
2Select
3 Click
OmniPage opens and recognizes the new.met file, and then saves it as
specified. You now have three more new files in the output directory.
The Quick Scan sample is named new001.*. The True Page sample is
named new002.*. OmniPage has appended the appropriate file
extension if you did not type it in. (In this example, the full file names
would be new001.doc and new002.doc.)
OK.
button also appears in this dialog box if you use
Create one file per page
Delete Deferred File After OCR
under
Now
Perform OCR.
if it is not already selected.
Save Files as Type
drop-down list if you
under
Settings
if it is
all
files.
The new.met file also moves here after OCR. If you had selected
Deferred File After OCR
file permanently from the input directory instead.
See “Finish Deferred Documents” on page 135 for detailed information on
this command.
, OmniPage would have deleted the sample.met
Tutorial 8 — Using Direct Input
You will use OmniPage’s Direct Input mode in this tutorial to scan and
recognize text from within another application. Recognized text will be
pasted directly into the initiating application.
This tutorial consists of one exercise containing the following sections:
• Register an Application
• Launch Direct Input
• Direct Input Mode
Delete
Tutorials 75
Page 76

You will use the Quick Scan Page sample in this tutorial.
Register an Application
You must
Once an application is registered with Direct Input, the
command appears in its File menu above the
this command to initiate OCR processing from your application.
A variety of applications are compatible with Direct Input. You will
register a compatible application in this exercise if you have one.
register
1 Launch OmniPage if it is not already open.
an application before using it to initiate Direct Input.
Register an Application
Direct Input...
command. You choose
Exit
2 Choose
This command is enabled only when
the Direct Input settings panel.
The Register Applications dialog box appears.
The Windows programs Write and NotePad are pre-registered.
3 Select an application that is installed on your computer in the
Unregistered Applications
4 Click
Register Applications...
Add>>.
in the Settings menu.
Enable Direct Input
list box.
is selected in
Tutorials 76
Page 77

Launch Direct Input
The application moves into the
5 Select and move as many applications as you like.
6 Click OK when you are done.
OmniPage immediately places the
File menu of the registered application(s).
7 Choose
Launch Direct Input
1 Place the Quick Scan Page sample in your scanner making sure it
is aligned properly.
2 Open or switch to any registered application.
Microsoft Word is used in this example.
3 Use your program’s commands to create a new document if one
is not open.
in the File menu.
Exit
Registered Applications
Direct Input...
command in the
list box.
4 Place your cursor in this new document if it is not already there.
5 Choose
Direct Input...
in the program’s File menu.
Tutorials 77
Page 78

Direct Input Mode
Some applications, such as Word and Notepad, allow you to launch
multiple copies of the application. The
appears in the first copy of the application launched.
OmniPage launches in Direct Input mode and the Direct Input
window appears.
Direct Input...
command only
Direct Input Mode
Always select the appropriate settings before you begin the OCR process.
1 Click the drop-down list under each process button and select
these options:
•Scan Image
•Auto Zones
•Auto Paste
Perform OCR
2 Choose
Panel.
There are no shortcut command buttons in Direct Input mode as
there are in the regular OmniPage mode.
is the only selection under the OCR button.
Settings Panel...
in the Settings menu to open the Settings
Tutorials 78
Page 79

3 Click the Direct Input icon to observe the settings.
Direct Input Mode
4 Click
5 Click
Use Defaults.
if a dialog box appears to confirm your choice.
Ye s
The default output formatting option is
Formatting.
This setting retains font types and styles, and
Retain Font and Paragraph
paragraph order and formatting in recognized text.
6 Click
7 Click
Close.
AUTO
You can click
.
STOP
at any time to cancel processing but remain in
Direct Input mode.
OmniPage scans, zones, and recognizes the document in the
Direct Input window. Then the program exits, your initiating
application appears, and the text is pasted where you left the
cursor.
If you had for some reason closed your initiating application or had not
opened or created a document, OmniPage would paste the recognized text
to the Clipboard instead. Use your program’s commands to paste text
from the Clipboard into the application of your choice.
See Chapter 5, Direct Input, for detailed information on this feature.
Tutorials 79
Page 80

Direct Input Mode
Tutorials 80
Page 81

Chapter 3
Commands and
Settings
This chapter explains how to use the OmniPage commands and settings,
all of which are located within eight menus and a toolbar.
This chapter contains the following sections:
• The Toolbar
• The File Menu
• The Edit Menu
• The Format Menu
• The Process Menu
• The Settings Menu
• The Register Menu*
• The Window Menu
•The Help Menu
The menu command information is listed in the same order in this chapter
that the commands appear in the menu.
See Chapter 5, Direct Input, for an explanation of the different toolbar
options and menu commands available in Direct Input mode.
Many of the operations explained in this chapter are detailed further in the
form of tutorial exercises. Please refer to Chapter 2, Tutorials, for
information on basic and advanced document processing.
* The Register menu only appears if you did not register your copy of
OmniPage the first time you launched it after installation.
Commands and Settings 81
Page 82

The Toolbar
The Toolbar
The toolbar has four process buttons and several shortcut command
buttons.
Process buttons
Shortcut command
AUTO
button
Image
button
Zone
button
OCR
button
buttons
Use the toolbar to access the three basic steps of the optical character
recognition (OCR) process:
1 Acquiring a page image to recognize.
2 Creating zones on the image to choose what will be recognized.
3 Performing OCR on the information in the zones.
OCR is the process of converting an image file to editable text. An image
is an electronic picture of text and/or graphics. You acquire an image by
scanning a hard-copy document or loading a graphic-format file (such as
a TIFF or PCX file). The image you scan or load is just a picture to your
computer before OCR.
During OCR, OmniPage looks for and defines characters on the image to
produce editable text. You can export the recognized text from OmniPage
for use in a wide variety of applications.
The toolbar’s process buttons perform the same operations as the
Settings
commands in the Process menu. The shortcut command buttons
Process
provide shortcuts for performing other OmniPage commands.
Click the:
•
button to process your document automatically from start to
AUTO
finish according to the selected processing commands.
• Image button to acquire an image for recognition by scanning a
page or loading an existing image.
• Zone button to specify what will be recognized in an image by
creating zones manually, automatically, or with a template.
• OCR button to perform OCR, defer OCR, or train OCR.
• Shortcut command buttons to access various menu commands.
Commands and Settings 82
Page 83

The Toolbar
The toolbar is different in Direct Input mode. See Chapter 5, Direct Input,
for detailed information.
Each button is described next in the order it appears on the toolbar.
AUTO
Button
The
AUTO
operations as the
Click
or to finish processing the current page of an open document according to
the currently selected Process Settings commands. This is known as
automatic processing.
For example, if you select
processing button drop-down lists and click
scanner is scanned, automatically zoned, and recognized. You do not have
to click each process button individually.
You can also click
document. The resulting operation depends on the state of the page and
the selected Image, Zone, and OCR commands. If the page image is zoned
and you click
OCR according to the selected OCR button command.
The
AUTO
Click
Image Button
The Image button is the second button in the toolbar. This button contains
the same commands,
menu under the
button is the first button in the toolbar. It performs the same
command in the Process menu.
Auto
AUTO
STOP
to start and finish processing each page of a new document
Scan Image, Auto Zones
AUTO
AUTO,
button changes to
at any time if you want to discontinue processing.
Process Settings
to finish processing the current page of an open
for example, then OmniPage immediately begins
when automatic processing begins.
STOP
Scan Image
and
Load Image,
command in the Process menu.
, and
Perform OCR
, the first page in the
AUTO
that are in the cascading
in the
Click the Image button to acquire an image by scanning a page or loading
an existing image file. The two commands are described further in this
section.
OmniPage uses the selected Image button command when it performs
automatic processing.
Use your right mouse button to click the Image button and automatically
open the Settings Panel to Scanner options.
Commands and Settings 83
Page 84

Scan Image
The Toolbar
Select
appears in the drop-down list if you have installed the Scan Manager.
Select your default scanner in the Scan Manager before scanning (see
“Scan Manager Installation” on page 8). Select the appropriate Scanner
options in the Settings Panel as well.
A progress meter appears and the status bar reports progress during
scanning. The page image appears in the zone window when scanning is
complete.
Click the
Load Image
Select
or to add it as a new page to an open document.
An image file is a picture of text and/or graphics that is saved in an image
file format such as TIFF or PCX. When you load an image file in
OmniPage, it appears in the zone window. See “Supported Input File
Formats” on page 239 for a list of files OmniPage can load.
Click the
“Load Image” on page 119 for detailed information on this command.
Zone Button
The Zone button is the third button in the toolbar. This button contains the
two commands,
menu under the
button drop-down list contains the names of available zone templates
rather than the Process menu command
Scan Image
STOP
Load Image
STOP
to scan a page in your scanner. This command only
button in the toolbar to cancel scanning at any time.
to load a previously saved image file as a new document
button in the toolbar to cancel processing at any time. See
Auto Zones
Process Settings
and
Manual Zones,
command in the Process menu. (The Zone
that are in the cascading
Use Template...
.)
Click the Zone button to create zones that determine what will be
recognized in the page image. The available commands are described
further in this section.
OmniPage uses the selected Zone button command when it performs
automatic processing.
Use your right mouse button to click the Zone button when it is active and
automatically open the Settings Panel to Zones options.
Commands and Settings 84
Page 85

Auto Zones
The Toolbar
Select
Auto Zones
in the drop-down list to have OmniPage automatically
draw and order zones for text recognition on the current page image.
OmniPage uses the selected Zones option in the Settings Panel:
Columns, Single Column or Table
, or
One Zone
. For more information about
each of these options, see “Zones Options” on page 163.
If the current page already has zones when you select this command, you
are prompted to delete the current zones before auto zoning occurs. Click
to have OmniPage delete old zones and draw new zones.
Yes
Manual Zones
Select
Manual Zones
to draw and order your own zones for text recognition
on the current page image.
OmniPage uses the selected Zones option in the Settings Panel on the
zones you draw:
Multiple Columns, Single Column or Table
, or
One Zone
more information about each of these options, see “Zones Options” on
page 163.
If the current page already has zones when you select this command, you
are prompted to delete the current zones. Click
to have OmniPage
Yes
delete old zones so that you can draw new zones.
For more information on creating manual zones, see “Tutorial 4 —
Evaluating a Page” on page 44.
Zone Templates
Select a previously created zone template file to automatically zone the
current page image. Zone template files appear in the Zone button dropdown list after they are saved. A template contains zones that you created
manually for a page and then saved as a file along with the zones’ order,
position, and contents.
Multiple
. For
Using a zone template is a quick and efficient means of processing
documents that have the same zoning requirements. See “Save Zone
Template” on page 100 for detailed information on creating zone
templates.
If the current page already has zones when you select a template, you are
prompted to delete the current zones. Click
to have OmniPage delete
Yes
old zones and apply the selected zone template.
Commands and Settings 85
Page 86

OCR Button
The OCR button is the fourth button in the toolbar. This button contains
the same commands,
the cascading menu under the
menu.
Click the OCR button to perform the selected OCR command on the page
image. The available commands are described further in this section.
OmniPage uses the selected OCR button command when it performs
automatic processing. Zones are created automatically if you click the
OCR button before clicking the Zone button or before drawing manual
zones.
Use your right mouse button to click the OCR button when it is active and
automatically open the Settings Panel to OCR options.
Perform OCR
Perform OCR, Defer OCR,
Process Settings
The Toolbar
and
Tra in O CR,
command in the Process
that are in
Select
Perform OCR
Before performing OCR, make sure the appropriate OCR options are
selected in the Settings Panel.
If there are no zones on the page when you select
the OCR button, OmniPage automatically creates zones according to the
selected Zone command. If
ignores this and draws zones automatically.
Defer OCR
Select
Defer OCR
document. OCR can be a time- and memory-intensive process so you may
want it to take place while you are away from your computer.
You might, for example, choose
the processing commands. OmniPage will scan and zone the document
and stop processing it further. Save deferred documents as Caere
Documents (*.met).
Choose
Process menu when you want to perform page recognition on the deferred
document(s).
See “Finish Current Document” on page 133 and “Finish Deferred
Documents” on page 135 for detailed information.
Finish Current Document
to recognize text on the current page.
Perform OCR
Manual Zones
to delay text recognition of one or more pages of your
Scan Page, Auto Zones,
or
is currently selected, OmniPage
and
Finish Deferred Documents
and click
Defer OCR
in the
as
Commands and Settings 86
Page 87

Train OCR
The Toolbar
Select
Tra in O CR
to create a character training file (*.trn) that assists
OmniPage during text recognition and allows better recognition of special
characters.
A character training file is a set of pre-recognized text characters that
OmniPage compares with the characters in the page image during
recognition. Before recognizing an image, you can create a new training
file or choose an existing one in the OCR settings panel.
For more information on creating a training file, see “Train OCR” on page
129.
Shortcut Command Buttons
The shortcut command buttons perform the same functions as the
commands of the same name in the File, Edit, Settings, and Help menus.
Settings
Panel
Save
Help Save As... Print
Cut
Copy
Paste Clear All
Zones
Find/
Replace
Check
Recognition
For example, you can click the Settings Panel button in the toolbar to open
the Settings Panel or you can choose
Settings Panel...
in the Settings menu.
See each button’s respective menu entry further in this chapter for
information.
Some buttons are only active when the particular command it represents
can be applied to the active text or zone window. The Check Recognition
button, for example, is only active when the text window is active. There
are no Shortcut command buttons in Direct Input mode. See Chapter 5,
Direct Input, for detailed information.
Commands and Settings 87
Page 88

The File Menu
The File Menu
The File menu lets you manage OmniPage file operations. File menu
commands include:
• Open Document
• Close Document
• Mail (MAPI mail systems only)
•Save
•Save As
• Export Image
• Revert to Saved
• Get Accuracy Info
• Save Settings
• Load Settings
• Save Zone Template
•Print
• Publish to Envoy
•Exit
Open Document
Choose
file. A Caere Document is created the first time you scan a page or load an
image file. This is a proprietary OmniPage file format. See “Caere
Document (*.met)” on page 92 for more information.
Image file
An image file is a “picture” of text and/or graphics that is saved in an
image file format such as TIFF or PCX. Received fax files, for example, can
usually be saved in an image format OmniPage recognizes. Image files do
not have OCR or zone information. When you open an image file in
OmniPage, it appears in the zone window.
Open Document...
to open a Caere Document (*.met) or an image
Commands and Settings 88
Page 89

Opening a Caere Document or Image File
The File Menu
1 Choose
Open Document...
in the File menu.
The Open Document dialog box appears.
2 Select the type of file to open in the
List Files of Type
drop-down
list.
Files of that type appear in the
File Name
3 Double-click a file or select it and click
list box.
OK.
The image file opens in the zone window. A Caere Document
opens with recognized text in the text window (if it was
recognized) and its original image in the zone window. In either
case, the first page of your file is displayed.
Click
to exit without opening a file.
Cancel
An image file becomes a Caere Document once it is opened with the
command. You can only open one Caere Document at a time.
Open...
OmniPage closes the current document if you open another one. It
prompts you to save the current document if you have made changes to it.
Add page images to your open document by choosing
in the Process menu or in the Image button drop-down list. See
Image
Load Image
or
Scan
“Adding a Page to a Scanned Image” on page 119 and “Adding a Page to
a Loaded Image” on page 121 for detailed information.
Commands and Settings 89
Page 90

Close Document
Choose
OmniPage running.
If the current document has not been saved or has changed since the last
save, a prompt appears asking if you want to save the document before
closing. See “Save As” on page 90 for information.
Close Document
The File Menu
to stop working on a document but leave
Save
Save As
Click
Choose
recognized text from your currently open document. This command only
appears if you have a MAPI-compliant mail system such as Microsoft
Mail.
Choose
disk. This command is also available as a button in the toolbar.
The Save As dialog box appears when you save a file for the first time.
After saving, you can continue working on your document.
Choose
command is also available as a button in the toolbar.
Use this command to save Caere Documents and recognized documents
to other file formats.
to return to the open document.
Cancel
to access your mail system and send each page of
Mail...
to write the contents of your current working document to
Save
Save As...
to choose a file format and save a document to disk. This
Commands and Settings 90
Page 91

Saving a File
The File Menu
1 Choose
Save As...
in the File menu.
The Save As dialog box appears.
2 Select a file type in the
Save Files as Type
drop-down list.
See “Supported Output File Formats” on page 238 for a list of
supported file formats.
Remember, if you save your image as a Caere Document first,
you can reopen and re-edit it, and save it in other file formats as
well.
You must perform OCR on any document before you can save it to a
text format.
3 Type a name for your file in the
File Name
text box.
See the next section for information on how the save option you
choose affects the length of the file name.
4 Select a location for your file.
The default location is omnipro\data.
5 Select the appropriate option under
Save Options
as described in
“Save Options” on page 92.
6 Click OK.
OmniPage automatically adds the appropriate file extension to
the file name and the current working file returns to the screen.
Click
at any time to exit without saving.
Cancel
Commands and Settings 91
Page 92

The File Menu
Caere Document (*.met)
OmniPage creates a Caere Document the first time you scan a document
or open an image. A Caere Document can have up to 256 pages. Each page
includes the original image and can vary to include zones and recognized
text. When you close the scanned or loaded image, OmniPage prompts
you to save the Caere Document. There are advantages to doing this. You
can:
• Continue to reopen a Caere Document in OmniPage, make edits,
and save it in any other supported file format you wish.
• Use the Verification window to compare recognized text with the
original page image.
• Defer recognition.
• Rezone and re-recognize pages at any time.
• Save the time needed to rescan or reload the same page.
You must rescan or reload a document to use it again in OmniPage if you
do not save it as a Caere Document.
Saving one or more images as a Caere Document, however, requires more
room on the hard drive. The amount depends on the size of the image(s).
Save Options
When you save your document to a file format other than a Caere
Document you can select one of three
Save Options.
Create one file for all pages
Select this to save all the pages in your document as one file. (Blank pages
are not saved.) Save the file with a standard file name of eight characters
or less.
Create one file per page
Select this to create a separate file for each page in your document and
automatically increment file names. (Blank pages are not saved.) Save the
file with a file name of five characters or less. OmniPage appends numbers
starting with 001.
For example, if you use form as a file name, the first file is named
form001, the second file form002, and so on. The file extension added
depends on your choice of file formats: a Word for Windows file would be
named form001.doc.
Create new file at each blank page
Select this to create a new file after each blank page in your document.
(Blank pages are not saved.)
Commands and Settings 92
Page 93

The File Menu
For example, if you want to scan several stacks of pages at once, insert
blank pages to separate each batch. OmniPage saves the first stack as one
file, detects a blank page, saves the next stack as one file, detects a blank
page, and so on.
Save the file with a file name of five characters or less. OmniPage appends
numbers starting with 001.
For example, if you use form as a file name, the first file is named
form001, the second file form002, and so on. The file extension added
depends on your choice of file formats: a Word for Windows file would be
named form001.doc.
How Saved Text Appears
The way text appears when you open your recognized document in your
target application depends on that application.
For example, if you save a page with text and graphics in ASCII format,
only the text will be displayed because ASCII format does not retain
graphics. Graphics are only displayed in applications that support
graphics.
Normal differences in typeface sizes between applications can result in
differences in the page formatting and display of the text. The settings
within the application, such as margins, also affect the page layout.
If you use the True Page option (chosen in the OCR settings panel),
OmniPage exports text in frames. If your application doesn’t accept
frames, the text frames are not maintained in their original positions and
the text within the frames is displayed in one vertical column.
Applications that support frame-based output have the letters TP in front
of their names in the
box. See Chapter 6, Using True Page, for more information.
Export Image
Choose
as TIFF or PCX. This exports just the original scanned image of a
document, not zone or OCR information.
An image file is a “picture” of text and/or graphics. When you open an
image file in OmniPage, it appears in the zone window.
Export Image...
List Files of Type
to save an image to disk in an image file format such
drop-down list in the Save As dialog
Commands and Settings 93
Page 94

The File Menu
Exporting an Image File
You can export an image file after a document has been scanned or loaded.
1 Choose
Export Image...
in the File menu.
The Export Image dialog box appears.
2 Select a file type in the
Save Files as Type
drop-down list.
See “Supported Output File Formats” on page 238 for a list of
supported file formats.
3 Type a name for your file in the
File Name
text box.
See “Graphic File Name” on page 96 for information on how the
options you choose affect the length of the file name.
4 Select a location for your file.
5 The default location is omnipro\data.
6Select
Save
and
options as described in the following
Image
sections.
7 Click OK.
OmniPage automatically adds the appropriate file extension to
the file name. The Export Image dialog box closes and the current
working file returns to the screen.
Click
at any time to exit without saving.
Cancel
Commands and Settings 94
Page 95

Save Options
The File Menu
You can select one of two
•Select
Save Current Page Only
Save Options.
if you want OmniPage to save only
the current page image as a file.
•Select
Save All Pages
if you want OmniPage to create a separate file
for each page in your document and automatically increment file
names starting with 001.
You must have
Save Page Images in Caere Document
selected in the
Preferences settings panel to save an a page to an image file.
Image Options
You can select one of two
•Select
Save Each Graphic Zone to a File
only the graphics within your page image. You must create graphic
zones on the page image and perform OCR before you can choose
this option.
•Select
Save Entire Page to a File
entire page image. You do not need to create zones or perform OCR
unless you have graphic zones.
You must either choose the
Zones settings panel or draw manual zones and identify the graphics
as graphic zones to separate graphics from text and export them.
Image Options.
if you want OmniPage to save the
Multiple Columns
if you want OmniPage to save
zoning option in the
Commands and Settings 95
Page 96

Graphic File Name
The File Menu
The way you match the
of the file name. The file name form is used as an example of how a file
would be named in the following combinations of save and image options.
•
Save Current Page Only
can have up to eight characters. This creates a one-page image file.
A PCX file named form would be saved as form.pcx.
•
Save All Pages
up to five characters. 00n is appended, where n represents the page
number (001, 002, etc.). This creates multiple one-page image files.
A multiple-page PCX file named form would be saved as
form001.pcx, form002.pcx, and so forth.
•
Save Current Page Only
name can have up to seven characters. OmniPage appends a letter
to indicate the order of the graphic on the page.
A PCX file with multiple graphic zones named form would be
saved as forma.pcx, formb.pcx, and so forth.
This creates one file for each graphic on the current page. Up to 26
files can be created in one directory with this method.
•
Save All Pages
have up to four characters. OmniPage appends both a number and
a letter as an extension.
A multiple-page PCX file with multiple graphics named form
would be saved as form001a.pcx, form001b.pcx, and so
forth. This creates one file for each graphic on every page.
The number (00n) indicates the page number and the letter
indicates the order of the graphic on the page. Thus the second
graphic on the second page would be named form002B.pcx.
Save Options
and
and
Save Entire Page to a File:
and
and
Save Each Graphic Zone to a File:
and
Image Options
Save Entire Page to a File:
Save Each Graphic Zone to a File:
affects the length
the file name
the file name can have
the file name can
the file
Revert to Saved
Choose
saved version of the file.
If you accidentally deleted important information in the text window, for
example, choose
you last saved it.
Revert to Saved
to undo edits made to a file and return to the last-
Revert to Saved
and the file will reappear as it was when
Commands and Settings 96
Page 97

Get Accuracy Info
Choose
Accuracy information is valuable for comparing the effect of different
settings on recognition accuracy. For example, if you are not sure about
which Scanner settings panel options to choose, you can compare the
recognition accuracy percentages of different options.
You can also quickly tell if a poor-quality document is worth editing. If the
recognition accuracy rate is less than 97%, it might be quicker to rescan a
better copy of the page or to enter the text manually.
The Get Accuracy Info dialog box provides a statistical report for the most
recently recognized page.
Get Accuracy Info
The File Menu
... for a statistical report on recognition accuracy.
Number of Characters
This is the number of characters and spaces recognized on the page.
Number of Words
This is the number of words recognized on the page.
Number of Rejects
This is the number of unrecognizable characters. This does not count
improper substitutions or incorrectly recognized formatting commands.
Reject characters appear in red in the recognized document. By default,
rejects are represented by the tilde (~) character.
Number of Suspects
This is the number of questionable characters that OmniPage made an
attempt to recognize. These words are green in the recognized document.
Commands and Settings 97
Page 98

The File Menu
Number of Spelling Replacements
This is the number of words that were corrected automatically by the
Language Analyst. These words are blue in the recognized document.
Recognition Time
This is the time it took to break the page down into text and graphics and
perform recognition. This does not count scanning time, the time it takes
to create zones, or the time spent writing data to disk.
Words per Minute
This is the number of words per minute (wpm) that OmniPage
recognized. Assuming that the average word is five characters long, the
formula is
[characters per second
Recognition Rate
This rate is expressed in characters per second (cps). The formula is
total number of characters
Accuracy Rate
This is the character recognition accuracy given as a percentage. The
formula for Accuracy Rate is
[number of characters - number of rejects]
of characters = recognition accuracy
If the accuracy rate is less than 97%, it might be quicker to rescan a better
copy of the page or to enter the text manually.
Save Settings
Choose
and language selection(s) (from the Select Languages dialog box) to a
settings file (*.set) for later use.
Saving settings files is especially useful if you use the same settings often.
Saving Settings
1 Select the Settings Panel options you want to save if they are not
Save Settings...
set already.
5] x 60 = wpm
÷
recognition time = cps
÷
number
÷
to save the currently selected Settings Panel options
2 Choose
Select the language(s) appropriate to your document and click OK.
Select Languages...
in the Settings menu.
Commands and Settings 98
Page 99

The File Menu
3 Choose
4 Type a name for your file in the
5 Select a location for your file.
6 The default location is omnipro\data.
7 Click OK.
Choose
Load Settings
Choose
Save Settings...
The Save Settings dialog box appears.
Caere Settings (*.set)
drop-down list.
Load Settings...
Load Settings...
in the File menu to load the file. See the next section.
to load a previously saved settings file (*.set).
in the File menu.
is the only selection in the
File Name
Save Files of Type
edit box.
A loaded settings file automatically configures the Settings Panel and
language selection(s) to preselected values. This is useful for quickly
restoring OmniPage to settings required for particular documents.
Loading a Settings File
1 Choose
The Load Settings dialog box appears.
Load Settings...
in the File menu.
Commands and Settings 99
Page 100

The File Menu
Caere Settings (*.set)
drop-down list.
2 Locate and select the settings file to open.
3 Click
To save a settings file, choose
“Deleting *.set, *.trn, *.ud, *.zcn, and *.zon Files” on page 236 for
information on how to delete a settings file.
OK.
The settings are loaded immediately into the Settings Panel.
Save Zone Template
Choose
image as a template.
A zone template file (*.zon) is comprised of various zone attributes such
as position, order, and zone contents. If you frequently process documents
with layouts and content that require the same type of zoning, you can
create and save a zone template. Save time by applying it to all documents
of the same layout, especially when processing multiple documents.
Automatically drawn zones cannot be saved as a zone template.
Saving a Zone Template
Save Zone Template...
1 Create manual zones on a page image.
is the only selection in the
Save Settings...
to save manually created zones on a page
in the File menu. See
Save Files of Type
2 See “Manual Zones — Recognize Portions of a Page” on page 48
for an overview of manual zoning.
3 Choose
The Save Zone Template File dialog box appears.
4
Caere Zone (
drop-down list.
5 Type a name for your file in the
Save Zone Template
*.zon
is the only selection in the
)
... in the File menu.
File Name
text box.
Commands and Settings 100
Save Files as Type
 Loading...