

Page 1
Page 2

LEGAL NOTICES
Copyright © 2003 ScanSoft, Inc. All rights reserved. No part of this publication may be
transmitted, transcribed, reproduced, stored in any retrieval system or translated into any
language or computer language in any form or by any means, mechanical, electronic,
magnetic, optical, chemical, manual, or otherwise, without prior written consent from
ScanSoft, Inc., 9 Centennial Drive, Peabody, Massachusetts 01960. Printed in the United
States of America and in Ireland.
The software described in this book is furnished under license and may be used or copied only
in accordance with the terms of such license.
MPORTANT NOTICE
I
ScanSoft, Inc. provides this publication "as is" without warranty of any kind, either express or
implied, including but not limited to the implied warranties of merchantability or fitness for a
particular purpose. Some states or jurisdictions do not allow disclaimer of express or implied
warranties in certain transactions; therefore, this statement may not apply to you. ScanSoft
reserves the right to revise this publication and to make changes from time to time in the
content hereof without obligation of ScanSoft to notify any person of such revision or
changes.
RADEMARKS AND CREDITS
T
ScanSoft, OmniPage, OmniPage Pro, PaperPort, Pagis, True Page, Direct OCR, RealSpeak and
ASR-1600 are registered trademarks or trademarks of ScanSoft, Inc., in the United States
and/or other countries. All other company names or product names referenced herein may be
the trademarks of their respective holders.
THIRD PARTY LICENSES/NOTICES
Please see acknowledgements/notices at the end of this guide.
ScanSoft, Inc.
9 Centennial Drive
Peabody, MA 01960
U.S.A.
ScanSoft Belgium BVBA
Guldensporenpark 32
BE-9820 Merelbeke
Belgium
Part Number 50-281A-10119
Page 3

C ONTENTS
WELCOME 7
Using this Guide 8
Getting online Help 9
Online HTML Help 9
Context-Sensitive Help 9
Tech Notes 10
Glossary 10
When to go online 10
1INSTALLATION AND SETUP 11
System requirements 12
Installing OmniPage Pro 13
Setting up your scanner with OmniPage Pro 14
How to start the program 16
Registering your software 17
New features in OmniPage Pro 14 17
2INTRODUCTION 19
What is optical character recognition 20
OmniPage Pro’s OCR capabilities 20
Documents in OmniPage Pro 21
Basic processing steps 21
The OmniPage Desktop 22
The Menu bar 23
The Toolbars 23
The Image Panel 24
The Text Editor 24
The OmniPage Toolbox 25
OmniPage Pro User’s Guide iii
Page 4

Managing documents 26
Thumbnails 26
Document Manager 27
Customizing Document Manager columns 28
Deleting pages from a document 28
Printing a document 29
Closing a document 29
OmniPage Documents 29
Why save to OPD 30
How to save to OPD 30
How to load an OPD 31
Settings 31
3PROCESSING DOCUMENTS 33
Quick Start Guide 34
Loading and recognizing sample image files 34
Scanning and recognizing a single page 34
Processing overview 36
Automatic processing 38
Stopping and restarting automatic processing 39
Manual processing 40
Combined processing 41
Processing with workflows 43
Processing from other applications 44
How to set up Direct OCR 44
How to use Direct OCR 45
How to use OmniPage Pro with PaperPort 46
Processing with the Batch Manager 47
Defining the source of page images 48
Input from image files 48
Input from scanner 49
Scanning with an ADF 50
Scanning without an ADF 51
Describing the layout of the document 51
Zones and backgrounds 53
Automatic zoning 53
iv Contents
Page 5

Manual zoning 54
Zone types and properties 55
Working with zones 57
Speed zoning 59
Table grids in the image 59
Using zone templates 61
4PROOFING AND EDITING 63
The editor display and views 64
Proofreading OCR results 65
Verifying text 67
User dictionaries 68
Languages 69
Training 69
Manual training 70
IntelliTrain 70
Training files 71
Text and image editing 73
On-the-fly editing 75
Reading text aloud 76
5SAVING AND EXPORTING 79
Saving OmniPage Documents 80
Export Results button 80
Saving original images 81
Saving recognition results 82
Selecting a formatting level 83
Selecting converter options 85
Using multiple converters 86
Saving to PDF 88
Converting from PDF 89
Copying pages to Clipboard 89
Sending pages by mail 90
Other export targets 92
OmniPage Pro User’s Guide v
Page 6

6WORKFLOWS 93
Workflows 94
Sample workflows 94
Running workflows 96
Workflow Assistant 98
Creating workflows 98
Modifying workflows 101
Batch Manager 101
Creating new jobs 102
Modifying jobs 103
Managing and running jobs 103
Watched folders 104
Barcode driven workflows 106
Voice recognition 107
7TECHNICAL INFORMATION 109
Troubleshooting 110
Solutions to try first 110
Testing OmniPage Pro 111
Increasing memory resources 112
Increasing disk space 112
Text does not get recognized properly 113
Problems with fax recognition 114
System or performance problems during OCR 114
Supported file types 115
File types for opening and saving images 115
File types for saving recognition results 116
Uninstalling the software 118
vi Contents
Page 7
Welcome
Welcome to this OmniPage Pro® text recognition program, and thank
you for choosing our software! The following documentation has been
provided to help you get started and give you an overview of the
program.
This User’s Guide
This guide introduces you to using OmniPage Pro 14. It includes
installation and setup instructions, a description of the program’s
commands and working areas, task-oriented instructions, ways to
customize and control processing, and technical information. The guide
is presented in PDF format, allowing you to use hyperlink jumps on
cross-references and other navigation tools in your PDF viewer.
Online Help
OmniPage Pro’s online Help contains information on features, settings,
and procedures. The online Help is provided as HTML help, and has
been designed for quick and easy information retrieval. Comprehensive
context-sensitive help aims to provide just enough assistance to let you
keep working without delay. See “Getting online Help” on page 9.
Readme File
The Readme file contains last-minute information about the software.
Please read it before using OmniPage Pro. To open this HTML file,
choose Readme in the OmniPage Pro Installer or afterwards in the Help
menu.
Scanning and other information
ScanSoft’s web site at www.scansoft.com provides timely information on
the program. The Scanner Guide contains up-dated information about
supported scanners and related issues; ScanSoft tests the 25 most widely
OmniPage Pro User’s Guide 7
Page 8
used scanner models. Access ScanSoft’s web site from the OmniPage Pro
Installer or afterwards from the Help menu.
Using this Guide
This guide is written with the assumption that you know how to work in
the Microsoft Windows environment. Please refer to your Windows
documentation if you have questions about how to use dialog boxes,
menu commands, scroll bars, drag and drop functionality, shortcut
menus, and so on.
We also assume you are familiar with your scanner and its supporting
software, and that the scanner is installed and working correctly before it
is setup with OmniPage Pro 14. Please refer to the scanner’s own
documentation as necessary.
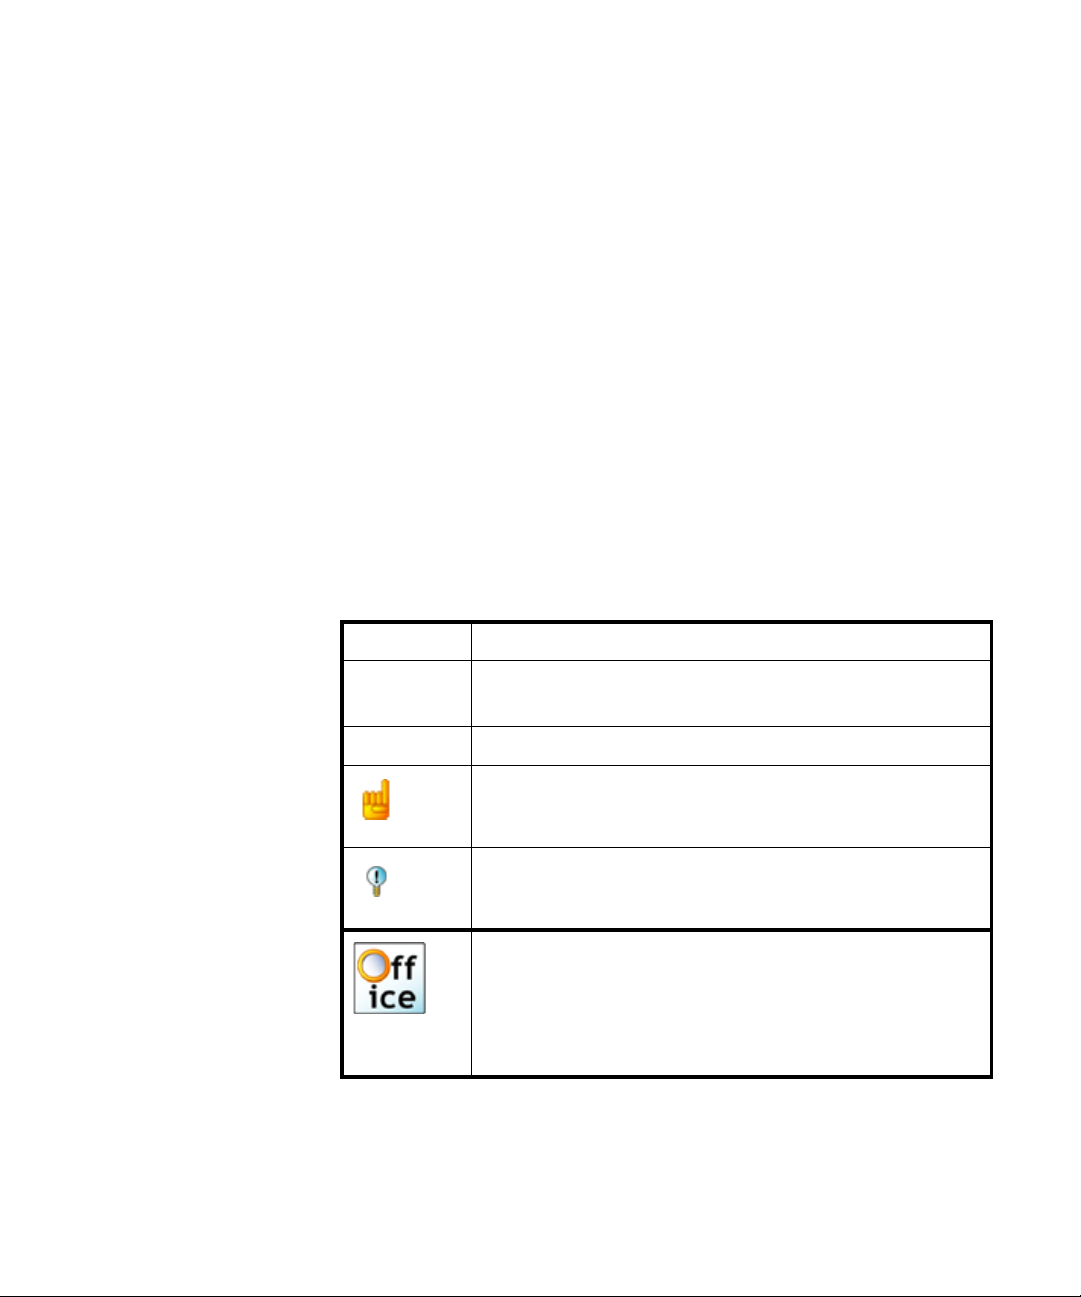
The following conventions are used in this guide:
Bold Introduces new terms and presents sub-headings.
Italic Names topics in the online Help system.
Presents longer option texts in dialog boxes.
8 Welcome
Non-serif
Presents file names: sample.tif
A note presents an item of additional information.
A tip presents ideas for using program features to
accomplish specific tasks.
OmniPage Pro 14 Office is a version of the product
designed for more intensive use and is tailored to office
environments. Its added features are denoted through
the guide by this symbol. For a concise listing, see “New
features in OmniPage Pro 14” on page 17.
Page 9
Getting online Help
In addition to using this guide, you can use OmniPage Pro’s online Help
to learn about features, settings, and procedures. Online Help is available
after you install OmniPage Pro.
Online HTML Help
Open OmniPage Pro’s online Help at its top level by choosing Help
Topics at the top of the Help menu. This allows you to see topics
arranged in a Table of Contents, search an alphabetical list of keywords or
make full-text searches through the topics. Other items in the Help menu
provide access to useful topics or web pages.
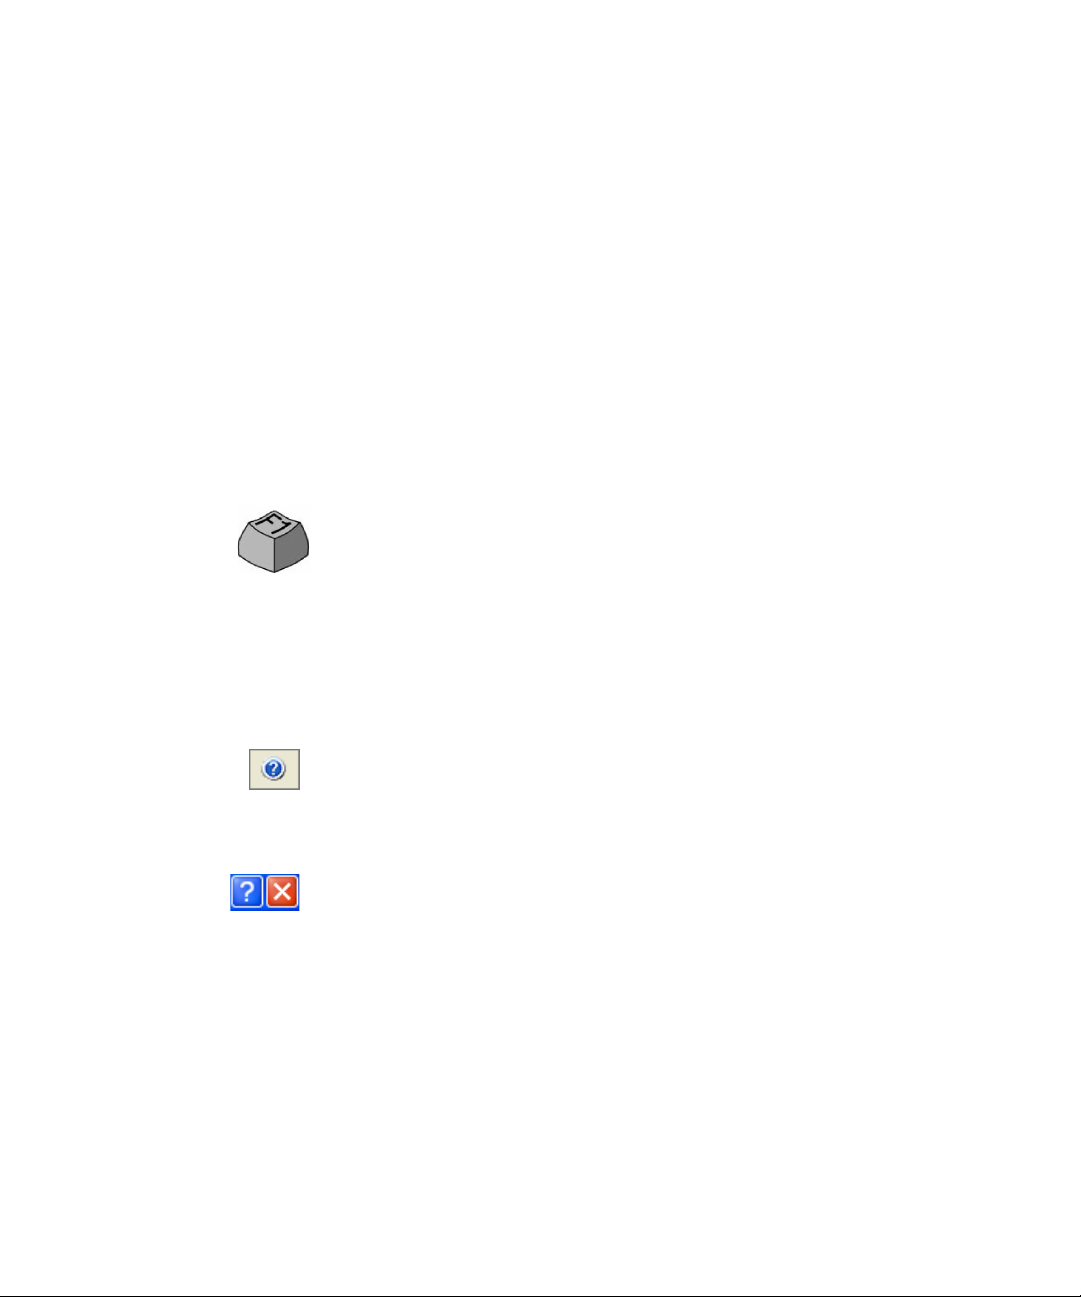
Press F1 as you are working with the program to see an online help topic
relating to the current screen area, dialog box or warning message.
Context-Sensitive Help
You can get concise on-the-spot information in a popup window about a
particular OmniPage Pro menu item, toolbar button, screen area or
dialog box, in the following ways:
Click the Help tool in the Standard toolbar to get the help icon. Click
this on any item on the desktop outside a dialog box or warning message.
Press Shift + F1 to get the same help icon. Use Shift + F1 to get contextsensitive help for shortcut menu items.
Click the question mark button in the upper right corner of a dialog box
and then click an item in the dialog box to see the popup window.
Some dialog boxes or warning messages have their own Help button, or a
help text. Click the button or the text to get information on the dialog or
message box.
Click anywhere to remove a context-sensitive popup Help window.
OmniPage Pro User’s Guide 9
Page 10

Tech Notes
ScanSoft’s web site at www.scansoft.com contains Tech Notes on
commonly reported issues using OmniPage Pro 14. Web pages may also
offer assistance on the installation process and troubleshooting.
Glossary
This guide does not include a glossary. The online Help has a
comprehensive glossary, with its own alphabetical index and a table of
contents. Please consult it if you want to find the meaning of a term used
in this guide or in the program.
When to go online
This guide concentrates on providing background understanding of
program features, suggesting also what they can be useful for. The online
Help provides mainly numbered procedures. Turn to online Help for the
following items or for grater detail on the following topics:
◆ Keyboard guide
10 Welcome
◆ Settings guidelines
◆ Manual training
◆ Export Converter options
◆ Using the Text Editor
◆ On-the-fly zoning and editing
Page 11
Chapter 1
Installation and setup
This chapter provides information on installing and starting OmniPage
Pro 14. It presents the following topics:
◆ System requirements
◆ Installing OmniPage Pro
◆ Setting up your scanner with OmniPage Pro
◆ How to start the program
◆ Registering your software
◆ New features in OmniPage Pro 14
OmniPage Pro User’s Guide 11
Page 12

System requirements
The minimum requirements to install and run OmniPage Pro 14 are:
◆ A computer with an Intel
◆ Microsoft
Windows NT
®
Windows® 98 (from second edition), Windows Me,
®
4.0 (from Service Pack 6), Windows 2000 (from
®
Pentium® III processor or equivalent
Service Pack 2), Windows XP or Windows Server 2003
◆ Microsoft Internet Explorer 5.01 with at least Service Pack 2
◆ 128MB of memory (RAM), 256MB recommended
◆ 135MB of free hard disk space for application and sample files
plus 40-45MB working space during installation. Additionally:
◆ 20-67 MB per RealSpeak
◆ 2 MB per ASR speech recognition language (15MB for 7 languages) *
◆ 18 MB for ScanSoft PDF Converter *
◆ 3.4 MB for ScanSoft PDF Printer Driver *
◆ 5MB for Microsoft Installer (MSI) if not present (it is included
TM
module (343 MB for 9 languages)
in most Windows operating systems)
◆ Up to 5MB for system updates
◆ An SVGA monitor with 256 colors, but preferably 16-bit color
(called High Color in Windows 2000 and Medium Color in XP)
and a resolution of at least 800 x 600 pixels
◆ A CD-ROM drive for installation
12 Installation and setup
◆ A Windows compatible pointing device
◆ A compatible scanner with its own scanner driver software, if you
plan to scan documents. See the Scanner Guide at ScanSoft’s web
site (www.scansoft.com) for a list of supported scanners
◆ Web access is needed for product registration, Scanner Wizard
database updating and obtaining live updates for the program.
* Supplied with OmniPage Pro 14 Office only.
Performance and speed will be enhanced if your computer’s processor, memory,
and available disk space exceed minimum requirements.
Page 13

Installing OmniPage Pro
OmniPage Pro 14’s installation program takes you through installation
with instructions on every screen.
Before installing OmniPage Pro:
◆ Close all other applications, especially anti-virus programs.
◆ Log into your computer with administrator privileges if you are
installing on Windows NT, 2000, XP or Server 2003.
◆ If you own a previous version of OmniPage Pro, or if you are
upgrading from demonstration software or an OmniPage Special
Edition, the installer asks your consent to uninstall that product.
! To i n stal l Omni Pa g e Pro:
1. Insert OmniPage Pro’s CD-ROM in the CD-ROM drive. The
installation program should start automatically. If it does not start,
locate your CD-ROM drive in Windows Explorer and double-click
the
Autorun.exe program at the top-level of the CD-ROM.
Chapter 1
2. Choose a language to use during installation. Accept the End-User
License Agreement and enter the serial number shown on the CD
envelope.
3. Choose a complete or a custom installation. A complete installation
installs all RealSpeak
TM
Text-to-Speech language modules (currently
9). In OmniPage Pro 14 Office, up to 7 ASR-1600™ Speech
Recognition modules are installed. Custom installation lets you
exclude or add modules. To exclude a module, click its down arrow
and select ‘This feature will be installed when required’.
4. Follow the instructions on each screen to install the software. All files
needed for scanning are copied automatically during installation.
Sometimes uninstalling and then reinstalling OmniPage Pro will solve a problem.
See “Uninstalling the software” on page 118.
You can use the Control Panel’s Add/Remove Programs facility to add or remove
RealSpeak or ASR modules later. You will need your installation CD for this.
Installing OmniPage Pro 13
Page 14

Setting up your scanner with OmniPage Pro
All files needed for scanner setup and support are copied automatically
during the program’s installation, but no scanner setup occurs at
installation time. Before using OmniPage Pro 14 for scanning, your
scanner should be installed with its own scanner driver software and
tested for correct functionality. Scanner driver software is not included
with OmniPage Pro.
Scanner setup is done through the Scanner Setup Wizard. You can start
this yourself, as described below. Otherwise, it appears when you first
attempt to perform scanning. Proceed as follows:
◆ Choose Start!All Programs!ScanSoft OmniPage Pro 14.0!
Scanner Wizard
or click the Setup button in the Scanner panel of the Options
dialog box.
or choose Scan in the Get Page drop-down list in the OmniPage
Toolbox and click the Get Page button.
◆ The Scanner Setup Wizard starts. If you have a web connection,
the first panel invites you to update the scanner database supplied
with the wizard. Choose Yes or No and click on Next.
14 Installation and setup
◆ Choose ‘Select and test scanner or digital camera’, then click
Next. If you have a single installed scanner, it appears, along with
any scanners previously set up with OmniPage Pro. If the
required scanner is not listed, click Add Scanner... .
◆ You see a list of all detected scanner drivers in the checkmarked
categories. This can include network devices. Select one and click
OK. To install a second device, you must run the Scanner Wizard
again.
◆ The wizard reports whether the chosen scanner model already
has settings in the scanner database. If it does, you do not need to
test it. If it does not, you should test it. Click on Next.
◆ If you chose not to test, click Finish. If you chose testing, click
Next to have the scanner connection tested. If the connection is
in order, you see a menu of further tests. Choose which testing
steps you want to run. The Basic test scan is recommended.
Page 15

Chapter 1
◆ By default OmniPage Pro uses its own scanning interface, located
in the Scanner panel of the Options dialog box. If you want to
use your scanner’s own interface instead, choose Advanced
settings and select this. Choose Modify hints only if you are
experienced in configuring scanners or have been advised by
Technical Support to do so.
◆ Click Next to start the tests. For the Basic scan test, insert a test
page into your scanner. The wizard will scan using your scanner
manufacturer’s software. Click on Next. Your scanner’s native
user-interface will appear.
◆ Click on Scan to begin the sample scan.
◆ If necessary, click on Missing Image… or Improper
Orientation... and make the appropriate selections.
◆ Once the image appears correctly in the window, click on Next.
◆ Move through the remaining requested tests, following the
instructions on the screen.
◆ When all the requested tests have been completed successfully,
the Scanner Wizard reports and invites you to click on Finish.
◆ You have successfully configured your scanner to work with
OmniPage Pro 14!
To change the scanner settings at a later time, or to setup or remove a
scanner, reopen the Scanner Setup Wizard from the Windows Start menu
or from the Scanner panel of the Options dialog box.
To test and repair an improperly functioning scanner, open the wizard
and select ‘Test the current scanner or digital camera’ in the second panel,
then work through the procedure described above, maybe using advice
received from Technical Support.
To specify a different default scanner, open the wizard to reach the list of
setup scanners. Move the highlight to the desired scanner and be sure to
close the wizard with Finish.
To get updated settings for your current scanner, open the wizard, request
a fresh database download in the first screen, then choose ‘Use current
settings with current device’, click Next and then Finish.
Setting up your scanner with OmniPage Pro 15
Page 16

How to start the program
To start OmniPage Pro 14 do one of the following:
◆ Click Start in the Windows taskbar and choose All Programs!
ScanSoft OmniPage Pro 14.0!OmniPage Pro 14.0.
◆ Double-click the OmniPage Pro icon in the program’s
installation folder or on the Windows desktop if placed there.
◆ Double-click an OmniPage Document (OPD) icon or file name;
the clicked document is loaded into the program. See
“OmniPage Documents” on page 29.
◆ Right click one or more image file icons or file names for a
shortcut menu. Select Open With... OmniPage Pro application.
The images are loaded into the program.
On opening, OmniPage Pro’s title screen is displayed and then its
desktop. See “The OmniPage Desktop” on page 22. It provides an
introduction to the program’s main working areas.
There are several ways of running the program with a limited interface:
◆ Use the Batch Manager program. Click Start in the Windows
taskbar and choose All Programs!ScanSoft OmniPage Pro
14.0! OmniPage Batch Manager. See page 47.
16 Installation and setup
◆ Click Acquire Text from the File menu of an application
registered with the Direct OCR™ facility. See “How to set up
Direct OCR” on page 44.
◆ Right-click on one or more image file icons or file names for a
shortcut menu. Select OmniPage Pro 14 and choose a target
format or a workflow from its sub-menu. The files will be
processed according to the workflow instructions. See page 96.
◆ Click the OmniPage icon on the taskbar. Choose a workflow to
start the program and run the workflow. In OmniPage Pro 14
Office, voice selection of workflow is possible.
◆ Use OmniPage Pro 14 with ScanSoft’s PaperPort
®
or Pagis®
document management products, to add OCR services. See
“How to use OmniPage Pro with PaperPort” on page 46.
Page 17

Chapter 1
Registering your software
ScanSoft’s online registration runs at the end of installation. Please ensure
web access is available. We provide an easy electronic form that can be
completed in less than five minutes. When the form is filled, click
Submit. If you did not register the software during installation, you will
be periodically invited to register later. You can go to www.scansoft.com
to register online. Click on Support and from the main support screen
choose Register in the left-hand column. For a statement on the use of
your registration data, please see ScanSoft’s Privacy Policy.
New features in OmniPage Pro 14
The OmniPage® product family is augmented by OmniPage Pro 14. If
you are upgrading, you may not need to consult this guide very much.
Here are some main areas of innovation compared to OmniPage Pro 12.
Features unique to OmniPage Pro 14 Office have the Office icon:
Feature Description See
Higher accuracy
Improved layout retention
Workflows and instant access
Drag-and-drop recognition
Adjustable recognition speed
Speed zoning
Financial dictionary
Character validation
Bullets and numbering
More portable OPDs
A new recognition and parsing engine, four years in development, delivers
even better OCR accuracy.
This engine also delivers superior page layout retention with True Page and
Flowing Page formatting levels. Text flows better round irregular pictures.
Save workflows to perform recurring tasks without having to take care of individual settings each time. Run workflows instantly from your taskbar.
Select a zone and drag it into the working area of a target application. Graphics
are pasted as image, text is recognized and pasted.
Recognition performance can be optimized for greater speed or greater accuracy. On good quality documents even faster processing gives good results.
Do manual zoning quickly. See auto-detected zones and double-click on any of
them to turn them into real zones.
An English financial dictionary is added to the existing legal and medical professional dictionaries, available for several languages.
Validate individual accented letters for recognition, in addition to those enabled
by the language choice.
Bulleted and numbered paragraphs can be detected. Bullets and numbering
can be inserted, removed and edited in the Text Editor.
Save to OmniPage Document (Extended) to have training files, user dictionaries or zone templates embedded in the OPD.
page 31
page 83
page 93
page 89
page 31
page 59
page 31
page 31
page 73
page 29
Registering your software 17
Page 18
Feature Description See Office
Colored backgrounds
Resolution control
Improved proofing system
Concurrent saving
Audio book publishing
Voice read-back
Batch Manager
Smart Folders
Get better recognition of text printed on color or shaded backgrounds. There is also improved noise removal.
Choose the resolution for saved page images and for images
embedded in recognized pages.
The two parts of words hyphenated at line ends are now joined.
The image viewer and the verifier display both image parts.
Create multiple converters to save to more than one file type in
one step: for example save page images and recognized pages.
Save recognized texts as WAV audio files. Transfer these to CD to
have scanned documents read aloud anytime - even on the move.
ScanSoft RealSpeak as the Text-to-Speech solution provides better quality voices in more languages for having text read aloud.
Redesign of the previous Schedule OCR facility gives more control
and better overview for unattended processing of pre-defined jobs.
Jobs can take input from watched folders, with better handling of
multiple folders. Background processing runs whenever image
files are sent to these folders. Recurring jobs are supported.
page 49
page 85
page 65
page 86
page 116
page 76
page 101
page 104
Barcode cover pages
Greater PDF support
Open PDF files in MS Word
Export to Office 2003
Voice control
SharePoint, DMS and FTP
Print to PDF functionality
Start a workflow by placing a barcode cover page in a scanner on
top of your document. Cover page image files can start image file
workflows.
Generate tagged, signed and encrypted Portable Document Files.
Allow reading of tags when PDF files are opened to improve layout
retention.
ScanSoft enables PDF files to be converted to Word documents
when working in Microsoft Word, without using OmniPage Pro.
Support for Microsoft Word 2003 (Word ML). In OmniPage Pro 14
Office support is added for Microsoft Reader (.LIT) and maintained
for the XML and eBook file types.
Start workflows and control proofing corrections by voice commands in a number of languages, using the included ScanSoft
ASR-1600 voice recognition modules.
Take image files from Microsoft SharePoint, any ODMA-compliant
Document Management System (DMS) or an FTP site and export
files to these locations for storage or group use.
Create searchable, editable PDF files from text files, such as Word
documents. OmniPage Pro installs a PDF printer driver that
becomes available in all your print-capable applications.
page 106
page 88
page 89
page 116
page 107
page 92
page 88
A more complete list of features and differences appears in online Help.
18 Installation and setup
Page 19

Chapter 2
Introduction
You probably use your computer for business correspondence, preparing
reports, handling data and an ever-increasing number of other uses. The
challenge is that, in spite of the digital revolution, certain sources of
information still circulate in printed, paper form and cannot be used
immediately in a computer.
For example, if you want to incorporate information from a magazine
article in a report you are preparing, you somehow have to get the text
from the article into your computer. Painstakingly retyping the article is
not an appealing solution.
This chapter introduces you to the solution: optical character recognition
(OCR). It describes how OmniPage Pro 14 uses OCR technology to
transform text from scanned pages or image files into editable text for use
in your favorite computer applications.
We present the following topics:
◆ What is optical character recognition
• Documents in OmniPage Pro
• Basic processing steps
◆ The OmniPage Desktop
◆ Managing documents
◆ OmniPage Documents
◆ Settings
OmniPage Pro User’s Guide 19
Page 20

What is optical character recognition
Optical character recognition is the process of extracting text from an
image. This image can result from scanning a paper document or
opening an electronic image file. Images do not have editable text
characters; they have many tiny dots (pixels) that together form character
shapes. These present a picture of the text on a page.
During OCR, OmniPage Pro analyzes the character shapes in an image
and defines solutions to produce editable text. After OCR, you can save
the resulting text to a variety of word-processing, desktop publishing or
spreadsheet applications.
OmniPage Pro’s OCR capabilities
In addition to text recognition, OmniPage Pro can retain the following
elements of a document through the OCR process.
Graphics
Photos, logos, and drawings are examples of graphics.
Tex t form a ttin g
Font types, sizes and styles (such as bold, italic and underlines
examples of character formatting. Indents, tabs, margins and line spacing
are examples of paragraph formatting.
) are
20 Introduction
Page formatting
Column structure, table formats, and placement of graphics and headings
are examples of page formatting.
The graphics, text and page formatting elements that OmniPage Pro
retains are determined by the settings you select. Refer to the Settings
Guidelines in the online Help for more information about selecting
settings.
OmniPage Pro only recognizes machine-generated characters such as offset or laserprinted or typewritten text. However, it can retain handwritten text, such as a
signature, as a graphic.
Page 21

Chapter 2
Documents in OmniPage Pro
OmniPage Pro 14 handles documents one at a time. When you acquire
your first image (from scanner or from file) a new document is started.
Further acquired images are added to the same document, until you save
and close it.
A document in OmniPage Pro consists of one image for each document
page. After you perform OCR, the document will also contain recognized
text, displayed in the Text Editor, possibly along with graphics and tables.
See “The OmniPage Desktop” on page 22.
Basic processing steps
There are three ways of handling documents: with automatic, manual or
workflow processing. See “Automatic processing” on page 38, “Manual
processing” on page 40 and “Workflows” on page 94. The basic steps for
all processing methods are broadly the same:
1. Bring a set of images into OmniPage Pro.
You can scan a paper document with or without an Automatic
Document Feeder (ADF) or load one or more image files. The
resulting images can appear as thumbnails in the Image Panel along
with the image of the first page entered. The document pages are
summarized in the Document Manager. See “Defining the source of
page images” on page 48.
2. Perform OCR to generate editable text.
During OCR, OmniPage Pro creates zones around elements on the
page that will be processed, and then interprets text characters or
graphics in each zone. Manual and template zoning are also possible.
After OCR, you can check and correct errors in the document using
the OCR Proofreader and edit the document in the Text Editor.
3. Export the document to the desired location.
You can save your document to a specified file name and type, place
it on the Clipboard, send it as a mail attachment or publish it. You
can save it as an OmniPage Document (OPD) as described later. You
can save the same document repeatedly to different destinations,
different file types, with different settings and levels of formatting.
See “Saving and exporting” on page 79.
What is optical character recognition 21
Page 22
Standard toolbar
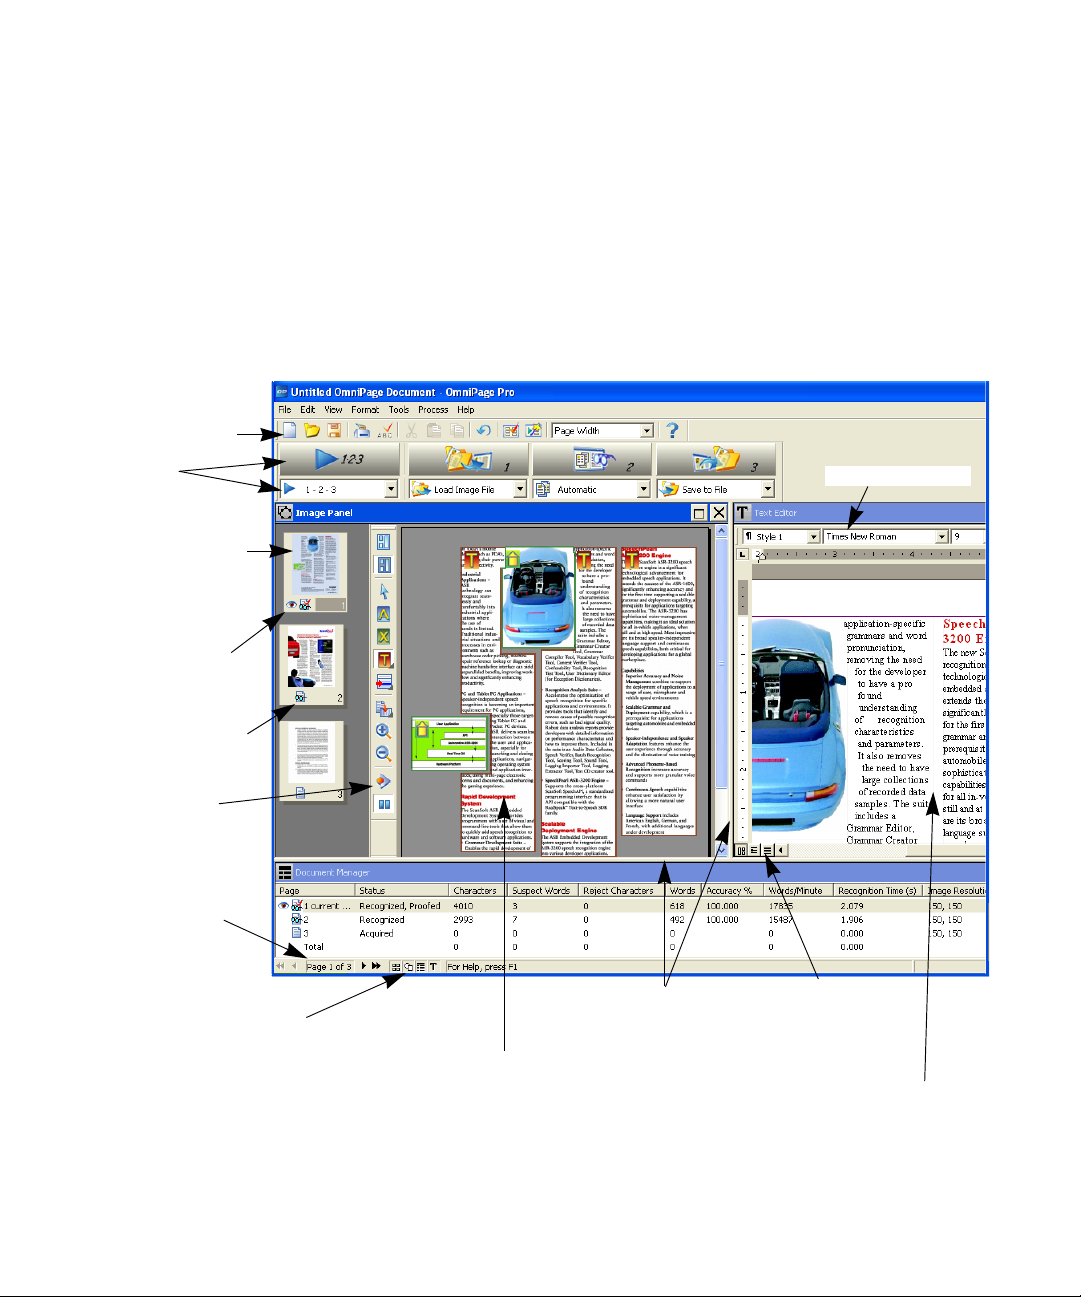
The OmniPage Desktop
The OmniPage Desktop has a title bar and a menu bar along the top and
a status bar along the bottom. It has three main working areas, separated
by splitters: the Document Manager, the Image Panel and the Text
Editor. Each has close, maximize and restore buttons top right. The
Image Panel has an Image toolbar and the Text Editor has a Formatting
toolbar.
OmniPage
Toolbox
Thumbnails show a
picture of each page
in the document.
The current page
has an “eye” icon.
This page has been
recognized.
Image toolbar
Page navigation
buttons
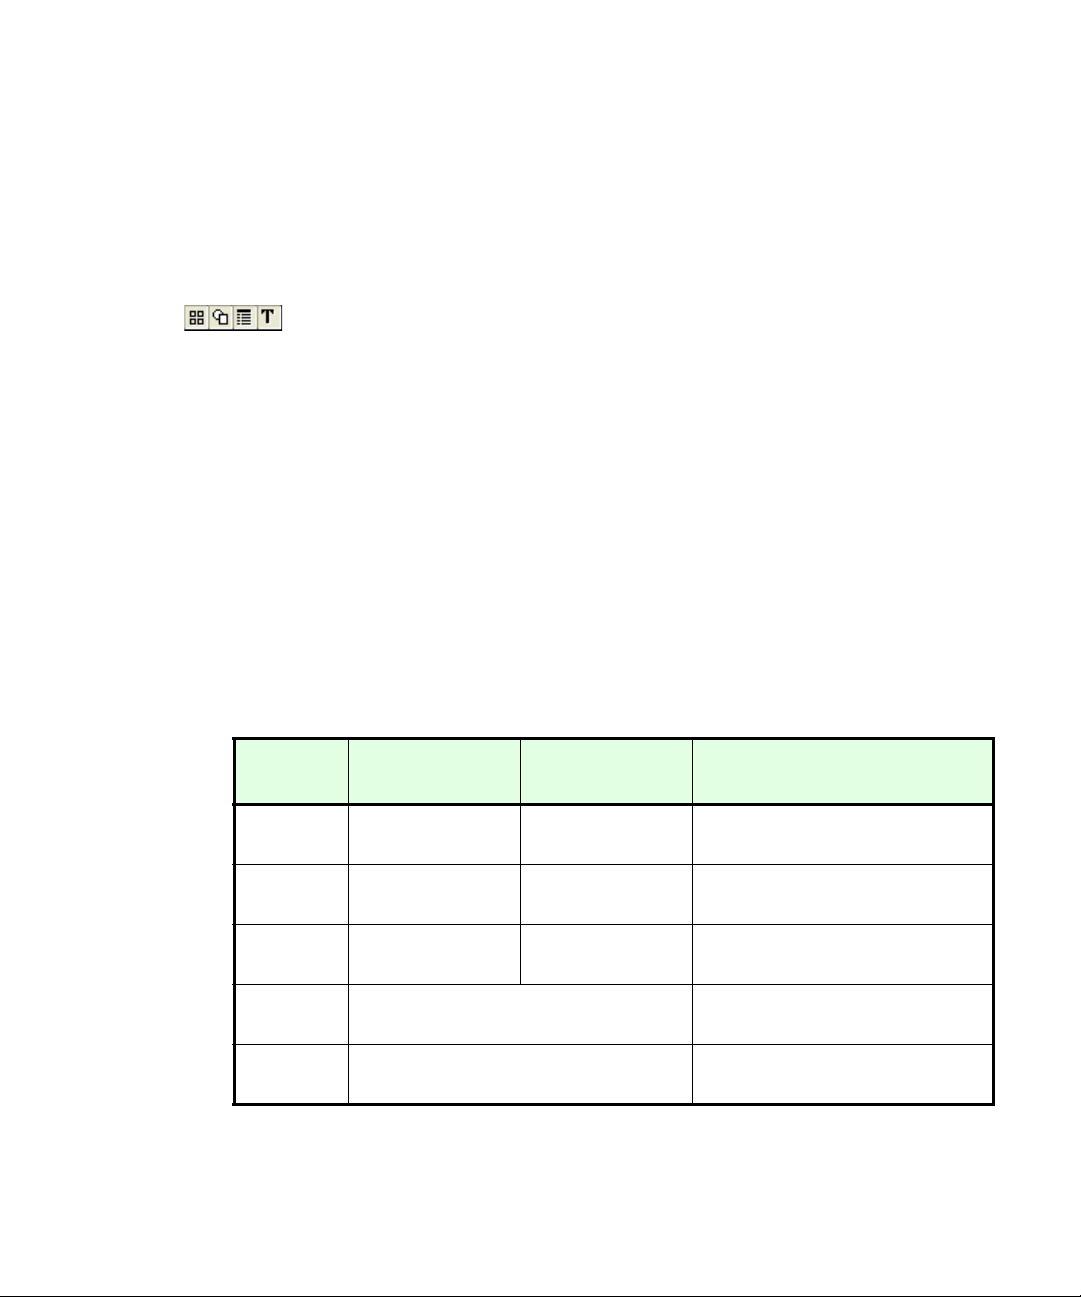
Buttons to show or hide the
Document Manager, Text
Editor and the Image
Panel’s thumbnails and
current page display. This
can also be done from the
View menu.
Drag these splitters to
resize the working areas.
Image Panel:
This is displaying the image of the current
page, together with its zones. The image
panel can display the current page,
thumbnails, or both.
Formatting toolbar
The Text Editor view
buttons offer three
formatting levels.
Text Editor:
This is displaying the
recognition results from the
current page in True Page
view.
22 Introduction
Page 23
Chapter 2
We show the program with a three-page document. Page one is the
current page, which has been recognized and proofed. Page two has been
recognized but not proofed yet. Page three has been acquired and
manually zoned, but not recognized yet. The icons at the bottom of the
thumbnail images show page status.
Status bar buttons let you show or hide the main screen areas and move
to other pages in the document. A right mouse click in any screen area
brings up a shortcut menu with the most useful commands for that area.
The Menu bar
For concise information on any menu item, click the context-sensitive
help button and then click a menu item. A popup text explains the
purpose of the menu item. Click anywhere to close the popup.
The Toolbars
The program has three main toolbars; all can be floated. Use the View
menu to show, hide or customize them. Context-sensitive help explains
the purpose of all tools. Two further toolbars govern specific tasks.
Toolbar
Standard
Image
Formatting
Verifi er
Reorder
Default
location
Horizontal under
Menu bar
Vertically to left of
current page image
Horizontal at top of
Text E d i tor
Hover the cursor over the verifier window
to see this floating toolbar.
Click the Change reading order tool. This
toolbar replaces the Formatting toolbar.
Other docking
locations
Any edge of the
OmniPage Desktop
Vertically to right of
current page image
None
Purpose
Performing basic program functions.
See page 29 and page 65.
Image, zoning and table operations.
See page 53 and page 59.
Formatting recognized text in the
Text Editor. See page 73.
Controlling the location and appearance of the verifier. See page 67.
Modifying the order of elements in
recognized pages. See page 73.
The OmniPage Desktop 23
Page 24
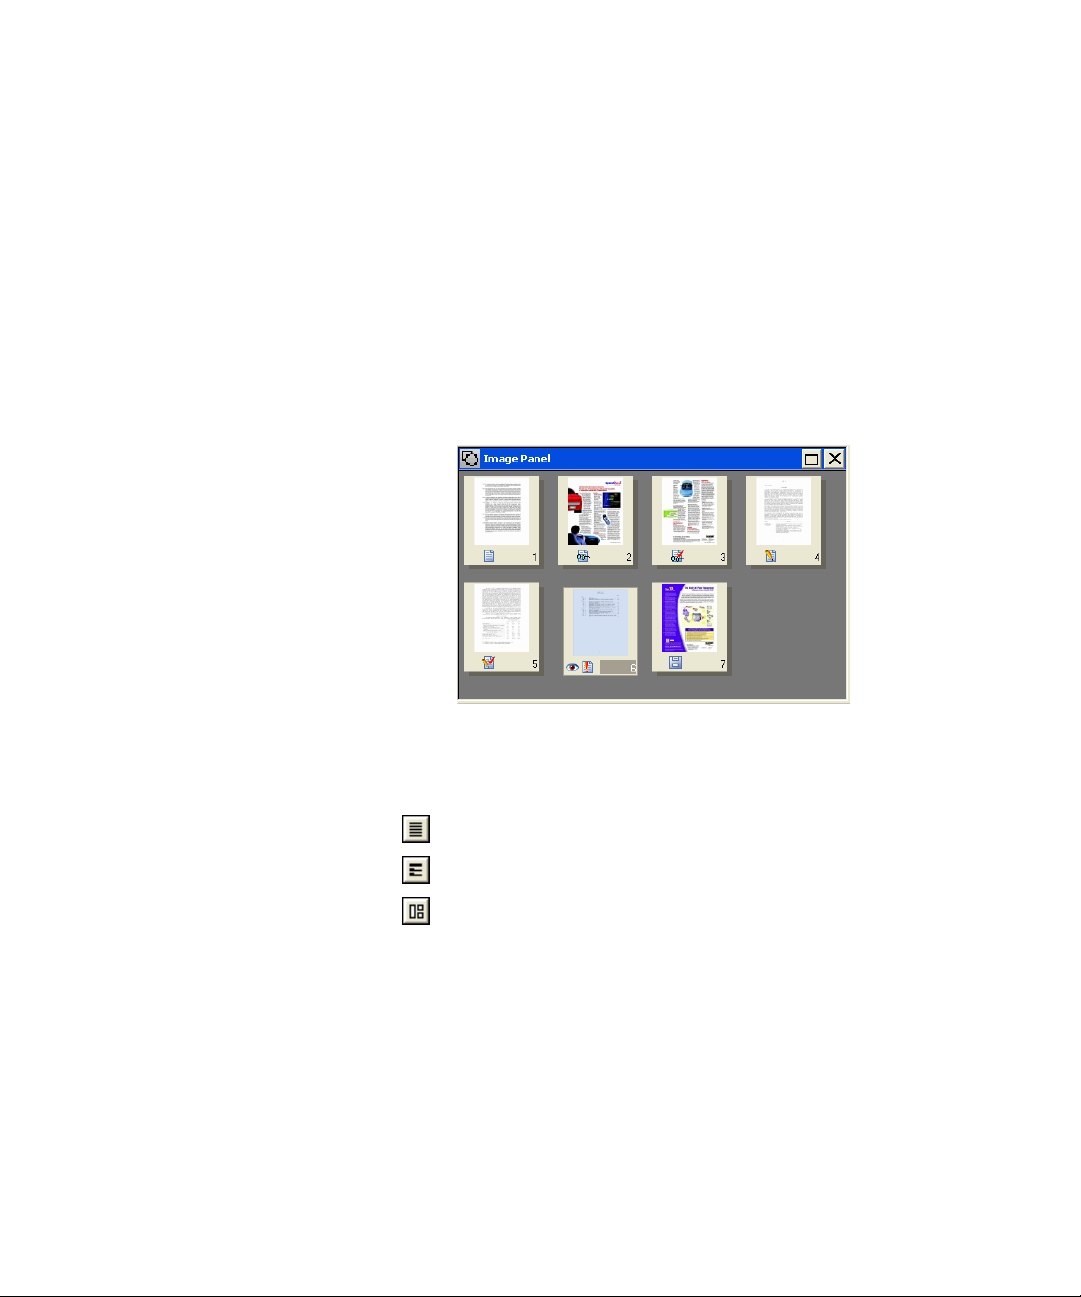
The Image Panel
When this displays the current page image, the Image toolbar is available.
All page images have a background value: process or ignore. Zones can be
manually drawn on page images, or can be placed automatically after
recognition. There are five zone types: Process, Ignore, Text, Table,
Graphics. Areas inside process zones and on a process background outside
other zones have zones automatically drawn and their zone types
determined during processing. See “Zones and backgrounds” on page 53.
If the current page image is hidden, the thumbnails appear in rows to
make the best use of the available space.
24 Introduction
The Text Editor
This displays recognition results in any of three formatting levels:
No Formatting view (NF)
Retain Fonts and Paragraphs view (RFP)
True Page (TP)
®
The True Page
formatting level retains page layout using text, table and
picture boxes, and frames. It can display multicolumn areas, to show text
blocks that can be treated as flowing columns at export time. Tru e Page is
also an export formatting level, along with Flowing Page that retains page
layout without boxes and frames. See page 64.
In both the Image Panel and Text Editor, the shortcut menu (right mouse
click) allows you to zoom in our out on the display. The standard toolbar
also provides a zoom control.
Page 25
Chapter 2
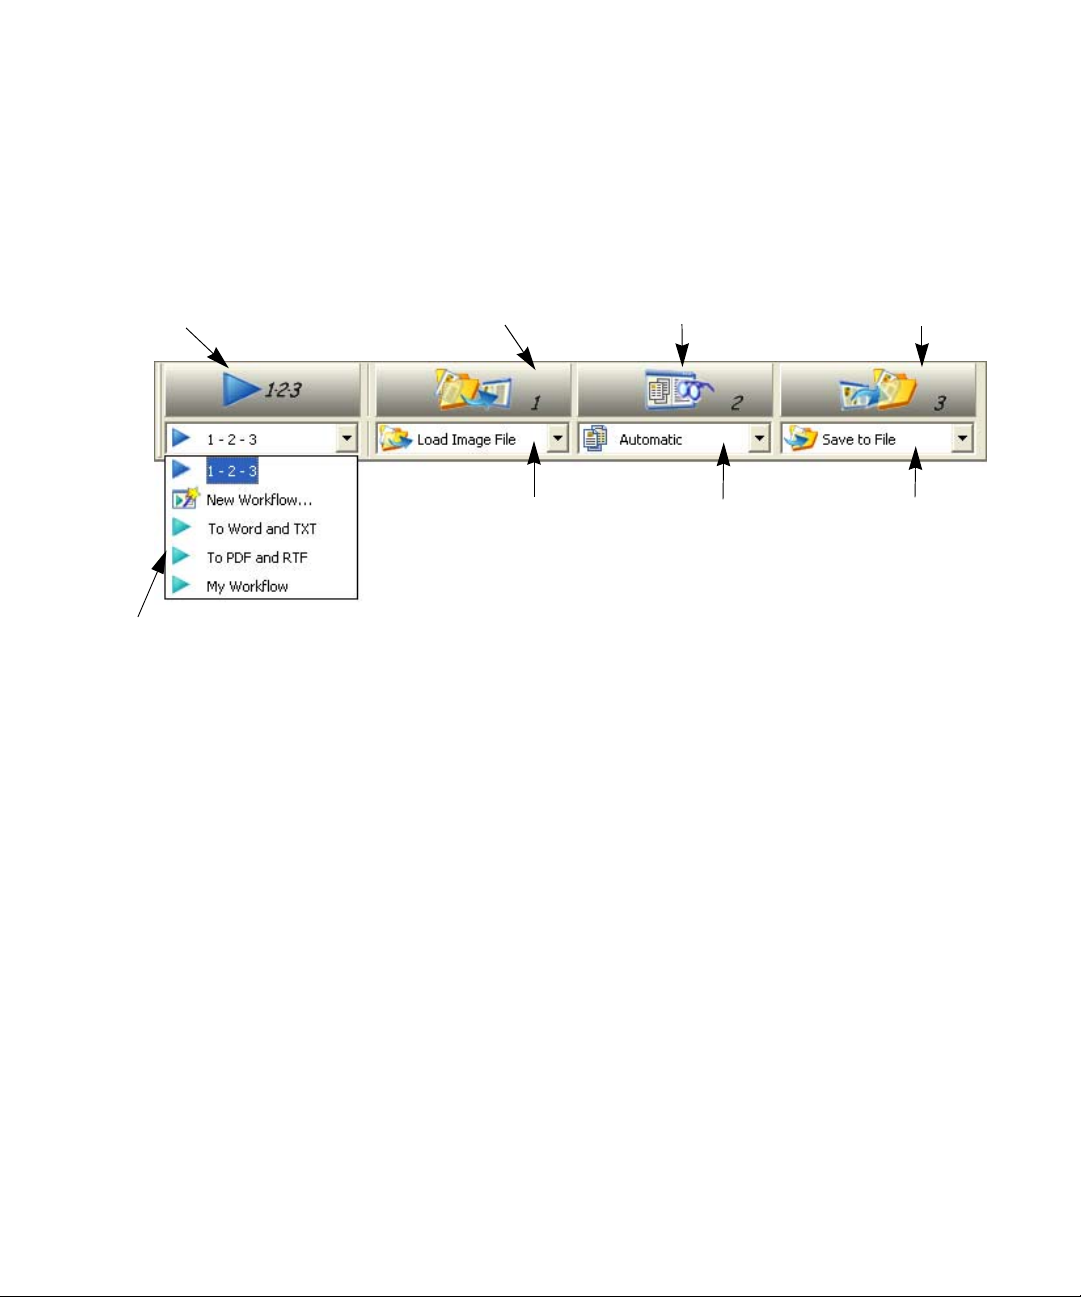
The OmniPage Toolbox
This Toolbox lets you drive the processing. By default it is located along
the top of the OmniPage Desktop, just above the working areas. It can be
floated and also be docked along the bottom of the desktop.
Start/Stop button Get Page button
Workflow dropdown list with two
sample workflows
and a user-defined
one.
Automatic processing is started, and can be stopped and re-started with
the Start button when “1-2-3” is selected in the Workflow drop-down
list. See “Automatic processing” on page 38.
Manual processing allows you to process documents page-by-page and
step-by-step. Start each step (again with “1-2-3” selected) with the three
large buttons: the Get Page button (1), the Perform OCR button (2) and
the Export Results button (3). See “Manual processing” on page 40.
You can switch between automatic and manual processing any time the
program is not busy with processing. That means you can switch between
them while you are working within a document. You can automatically
process some pages, then add more pages with manual processing. After
processing a stack of pages automatically, you can inspect the results and
then go back to reprocess certain pages manually. This procedure is
described in chapter 3. See “Combined processing” on page 41.
Get Pages
drop-down list
Perform OCR button Export Results button
Layout Description
drop-down list
Export Results
drop-down list
Workflow pro c e s s ing is designed for performing repeated tasks
efficiently. Select New Workflow... in the Workflow drop-down list and
click Start. The Workflow Assistant helps you define a workflow that can
be saved for repeated use. See “Workflow Assistant” on page 98.
The OmniPage Desktop 25
Page 26

Managing documents
Document management can be done by thumbnails in the Image Panel
or by the Document Manager, situated along the bottom of the
OmniPage Desktop. Both summarize the pages in the document and are
synchronized. Our pictures show these with the same seven-page
document. Pages 1 and 2 are selected and page 4 is the current page, that
is, the one shown in the Image Panel. Page status is shown as follows:
Page Status Icon Page image has been...
1 Acquired acquired but has not yet been recognized.
2 Recognized
3
4 Modified
5
6 Pending
7 Saved recognized and saved at least once.
Recognized,
Proofed
Modified,
proofed
recognized, but not proofread, or proofing
was interrupted on the page.
recognized, and proofing has reached the
end of the page.
recognized with at least one editing or formatting change made in the Text Editor.
recognized, edited in the Text Editor, and
proofing has reached the end of the page.
acquired, maybe recognized; some zone
changes are stored but not yet processed.
Thumbnails
These present a set of numbered thumbnail images, one for each page in the
document. Scroll to see pages as necessary. The current page has an ‘eye’
icon. You can select multiple pages in the document; these have a distinctive
appearance. Use thumbnails for page operations, as follows:
Jump to a page: Click the thumbnail of the desired page.
Reorder a page: Click the thumbnail of the page you want to move and
drag it above the desired page number. Pages are renumbered
automatically.
26 Introduction
Delete a page: Select the thumbnail of the page you want to delete and
press the Delete key.
Select multiple pages: Hold down the Shift key and click two
thumbnails to select all pages between and including them. Hold down
Page 27
Chapter 2
the Ctrl key as you click thumbnails to add pages to a selection one by
one. Then you can move or delete the selected pages as a group, or send
them to (re)recognition. You can also export selected pages.
Get information on an image by hovering the cursor over it with Image Info
enabled in the image panel shortcut menu. A popup text displays the image size in
pixels and the program’s unit of measurement. Image resolution is also shown.
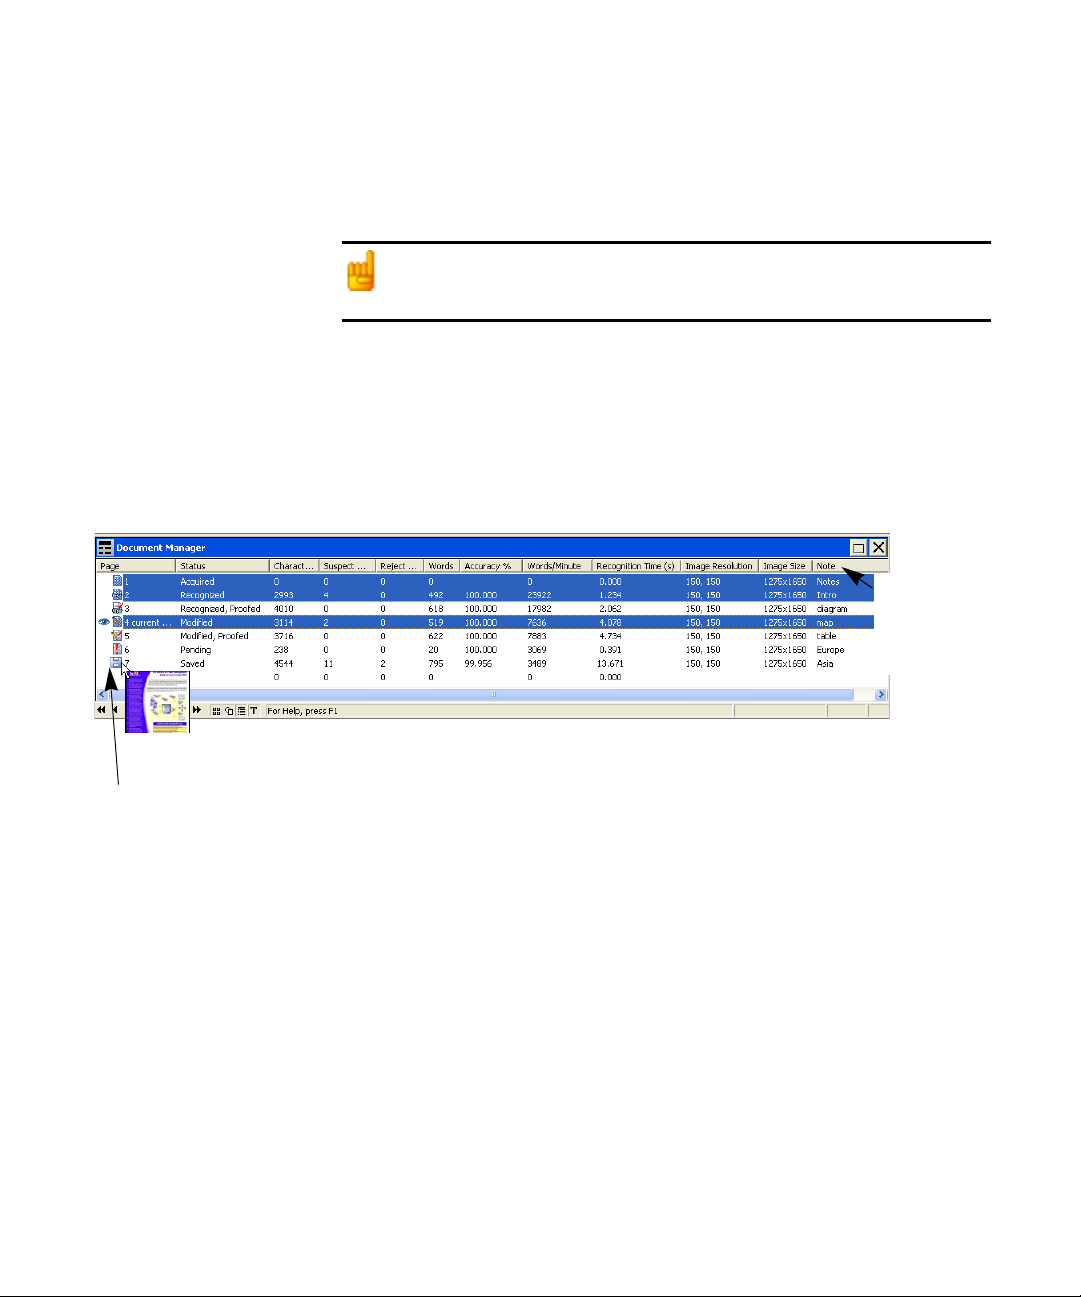
Document Manager
This provides an overview of your document with a table. Each row
represents one page. Columns present statistical or status information for
each page, and (where appropriate) document totals. The picture shows
columns that a user has specified.
Enter
comments or
searchable
keywords
here.
Move the
cursor onto the
page’s status
icon to see a
thumbnail of
the page.
The current page is shown with an ‘eye’ icon. You can use the Document
Manager for page operations, as follows:
Jump to a page: Click the leftmost part of the page row or double click
anywhere in its row.
Reorder a page: Click the row of the page you want to move and drag it
to the desired location. An indicator on the left shows where the page will
be inserted. Pages are renumbered automatically.
Delete a page: Select the row of the page you want to delete and press the
Delete key.
Select multiple pages: Hold down the Shift key and click two page rows
to select all pages between and including them. Hold down the Ctrl key
as you click rows to add pages to a selection one by one. Then you can
move or delete the selected pages as a group, or send them to
(re)recognition. You can also export selected pages.
Managing documents 27
Page 28
When multiple pages are being selected, the page set as current does not
change. All selected pages are highlighted.
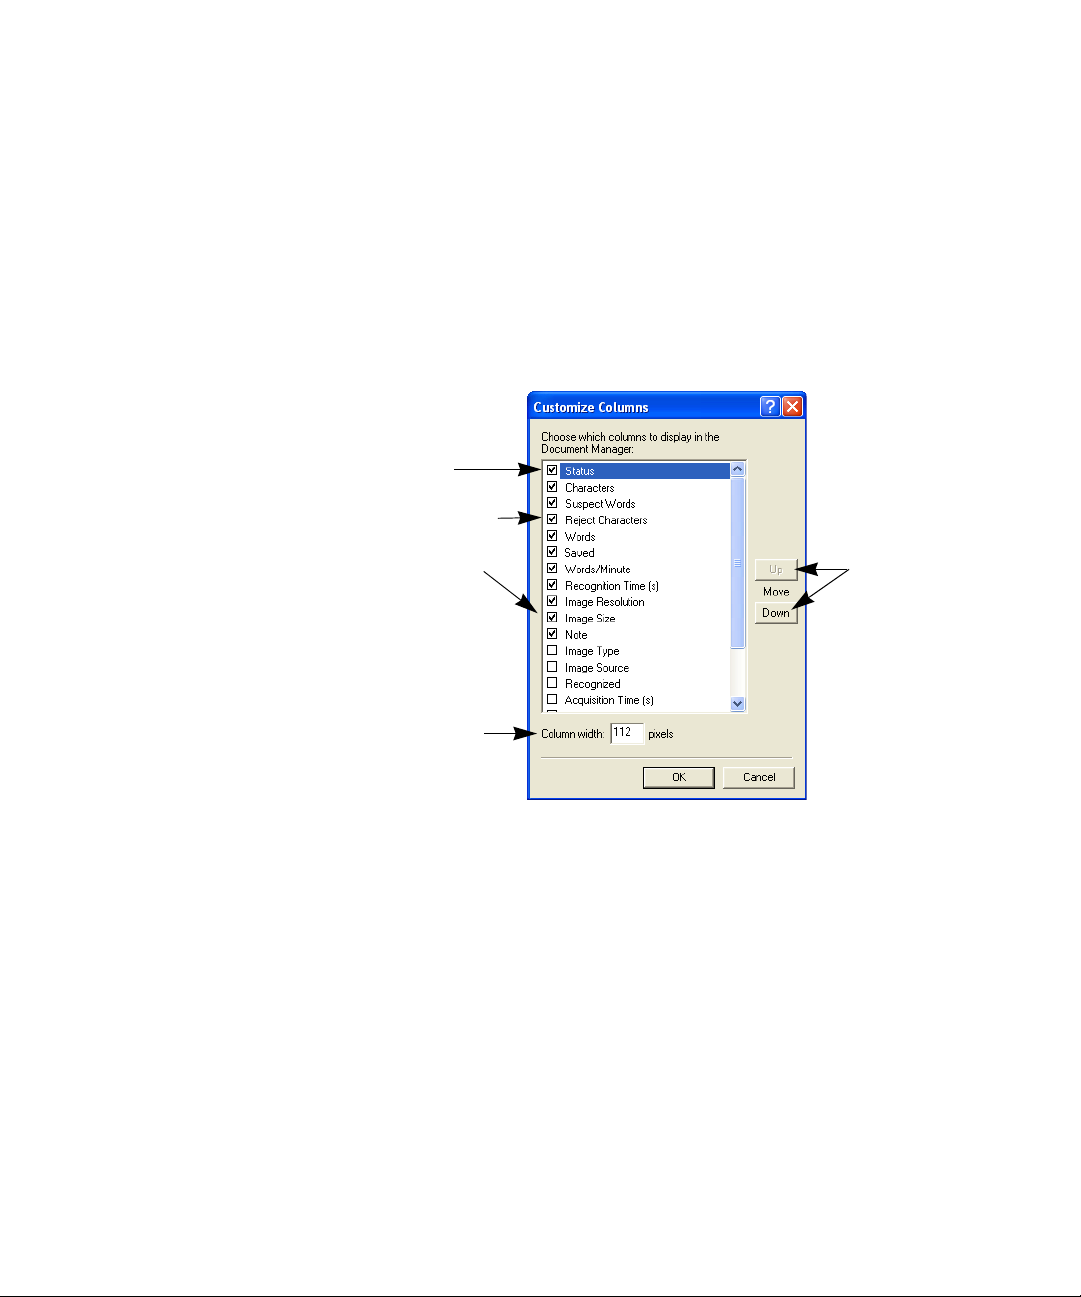
Customizing Document Manager columns
You can specify which columns of information you want to see in the
Document Manager. Click Customize Columns... in the View menu for
the following dialog box:
This item is
highlighted.
Click a checkbox
to select the item.
Image sizes are
expressed in
pixels.
Define a width for
the highlighted
item.
Highlight an
item and use
these arrows to
change the
order of
columns.
Define which columns should appear, their widths, and column order.
The topic Customizing Document Manager columns in online Help
clarifies what is presented in each column. You can change column
widths easily in the Document Manager; just drag the column dividers in
the title bar.
Deleting pages from a document
Page deletions must be confirmed and can be undone. Delete the current
page only with the item Delete Current Page in the Edit menu. Delete all
selected pages in the Document Manager or from the thumbnails by
pressing the Delete key or using the shortcut menu command Clear.
28 Introduction
Page 29

Chapter 2
Printing a document
You can print the document with the Print item in the File menu.
Choose whether to print images or text (that is, recognition results as
they appear in the Text Editor). You can print all pages or a range of
pages. The Print tool in the Standard toolbar prints images or text,
depending whether the Image Panel or the Text Editor is active.
Closing a document
Choose Close in the File menu to close a document. You are prompted to
save your document if you have not saved it or you have modified it since
the last save. See the next section on saving the document as an
OmniPage Document (*.opd). You will also be prompted to save unsaved
training data if you selected ‘Prompt to save training data when closing
document’ in the Proofing panel of the Options dialog box.
OmniPage Documents
The OmniPage Document is the program’s proprietary file type; it has
the extension .opd. You save the document to the OPD file type if you
want to work with it again in OmniPage Pro during a future session. You
can then process unfinished pages, add more pages and proof or edit
recognition results.
An OmniPage Document contains the original page images (deskewed
and pre-processed) with any zones placed on them. After recognition, the
OPD also contains the recognition results. Recognized characters are
stored along with their coordinate and confidence data. This preserves
the links between image and text, so that verification and proofing
remain available when the OPD is reopened in future sessions.
When you save an OmniPage Document, the current settings (and
unsaved training) are also saved. When you open an OmniPage
Document, its settings are applied, replacing those existing in the
program.
OmniPage Documents 29
Page 30

Why save to OPD
You do not have to save your documents to the OPD file type. You would
typically do this for the following reasons:
◆ You cannot finish working with the document in the current
session.
◆ You want to pass the document to other users who have
OmniPage Pro. For example, you can pass an OPD file to a
specialist for proofing. In an office network, you may have one
scanner generating images for recognition and proofing at several
workstations.
◆ You want to build up an archive of recognized documents whose
original images remain accessible. The recognized texts allow
searching by keywords and other document retrieval techniques.
Recognition results should be saved from OPD files before installing any
OmniPage Pro upgrade. These files may not be upwards compatible to newer
OPD file formats, or possibly only the images will be retained when the files are
upgraded. When you open an OPD created by OmniPage Pro 10, only images are
loaded. When you open an OPD created by OmniPage Pro 11, images and
recognized pages are loaded, but no zones are retained. All three are retained in
OPD files originating from OmniPage Pro 12.
30 Introduction
How to save to OPD
Saving to OPD is done from the File menu, or by using the Save button
in the Standard toolbar. The title bar shows the OmniPage Document file
name. If you intend to create an OPD, you can save it to this file type at
an early stage, for protection. Then use the Save button to save it
periodically as you work. Save it again at the end of your session.
When you close the document or exit the program, you will be prompted
to save the document as an OPD. You can include one or more saves to
the OPD file type in a workflow, along with steps to save images or
recognition results to other file types, see “Creating workflows” on
page 98.
Page 31

Chapter 2
When saving, you have two file type choices: OmniPage Document or
OmniPage Document (Extended). The latter allows you to embed a user
dictionary, training file or zone template file in the OPD. This can
increase file size considerably but makes the OPD more portable. To
embed any of these items, load them before the save to the OmniPage
Document (Extended) file type.
How to load an OPD
Select Open OPD... from the File menu. The file type OmniPage
Document includes both normal and extended OPDs. Choose the
required file. An embedded user dictionary, training file or zone template
can be resaved to a named file. Opening an OmniPage Document is also
available as a workflow step.
Settings
The Options dialog box is the central location for OmniPage Pro
settings. Access it from the Standard toolbar or the Tools menu. Contextsensitive help provides information on each setting. In overview, the
settings panels are:
OCR
Use this to specify recognition languages, additional characters and a user
or professional dictionary. Click the checkbox before a language to select
or deselect it. Multiple selection is possible; select only languages
appearing in the document to be recognized. The top items are the
recently selected languages. Key in the first letters of a language to jump
to it. You can also choose to optimize processing for speed or accuracy,
define a reject character, handle font matching and provide a custom
layout description. See page 51.
Scanner
Use this to define page size and orientation for scanning. You can also
make brightness and contrast settings and define options for scanning
multi-page documents, with or without an Automatic Document Feeder
(ADF). You can change scanner setup settings or install a new scanner or
change the default scanner. See “Input from scanner” on page 49. This
Settings 31
Page 32

panel is not available if you requested display of your scanner’s native
TWAIN interface when you set up your scanner. See “Setting up your
scanner with OmniPage Pro” on page 14.
Direct OCR
This feature provides OCR services directly from your favorite word
processor or similar application. Use this panel to register and unregister
applications for Direct OCR and to enable or disable this service. You can
also specify automatic or manual zoning and whether proofreading is
desired or not. See “How to set up Direct OCR” on page 44.
Process
Use this to define where new images should be placed in the document,
to request prompting for more pages when scanning, to specify two-page
scanning for handling books, and other settings.
Proofing
Use this to define whether proofreading should begin automatically after
recognition. Define also whether IntelliTrain should run, and use it to
load or work with a training file. See “Proofreading OCR results” on
page 65.
General
Change the interface language here. Enable an OmniPage icon on your
taskbar that will list your workflows for quick start processing. Enable
automatic detection of online updates and other settings.
32 Introduction
Tex t Edit o r
Use this to show or hide some features in the Text Editor, to define the
unit of measurement to be used and to turn word wrapping on or off. See
“Text and image editing” on page 73.
Some settings have an effect only on future recognition. Examples are the
recognition languages, a training file or scanner brightness. These settings should
be correctly adjusted before you start processing. To have changes in these settings
applied to already recognized pages, you will have to re-recognize them. Other
settings are implemented immediately in all existing pages. Examples are Text
Editor settings like word wrap or measurement units.
Page 33

Chapter 3
Processing documents
This tutorial chapter describes different ways you can process a document
and also provides information on key parts of this processing.
◆ Quick Start Guide
◆ Processing overview
◆ Automatic processing
◆ Manual processing
◆ Combined processing
◆ Processing with workflows
◆ Processing from other applications (Direct OCR, PaperPort)
◆ Processing with the Batch Manager
The detailed topics are:
◆ Defining the source of page images
◆ Describing the layout of the document
◆ Zones and backgrounds
• Automatic zoning
• Manual zoning
• Zone types and properties
• Working with zones
• Speed zoning
◆ Table grids in the image
◆ Using zone templates
OmniPage Pro User’s Guide 33
Page 34

Quick Start Guide
This topic takes you step-by-step through the basic OCR process.
Loading and recognizing sample image files
You will find sample image files in the program folder, both single-page
and multi-page files. First try reading these files using the procedure
presented below, except for the references to a scanner. See “Input from
image files” on page 48. The results provide you with a benchmark of the
recognition quality you should expect from your own files of comparable
quality.
Next, try scanning a page from your scanner.
34 Processing documents
Scanning and recognizing a single page
Turn your scanner on and be sure it is working correctly. Choose a page
with good-quality clear text for this test.
We assume OmniPage Pro’s default settings are set and that your
document is in the language you specified for interface language during
installation. Open the Options dialog box from the Tools menu and
choose Use Defaults if you are not using the program for the first time.
You will process the document automatically and save the recognition
results to a file. You will proof the document but will not edit it inside the
Tex t Edit o r.
Page 35

What you do: What happens:
Chapter 3
1. Set up your scanner using the Scanner
Wizard, if this is not already done.
2. Select Start!All Programs!ScanSoft
OmniPage Pro 14.0!OmniPage Pro 14.0
3. Place the document correctly in your
scanner.
4. From the Get Page drop-down list, select a
scan option for your document:
black-and-white, grayscale or color.
5. From the Layout Description drop-down list,
check Automatic is selected. For a wide
range of documents, this is the best choice.
6. From the Export Results drop-down list,
check that Save to File is selected.
7.
Make sure 1-2-3 is selected in the Workflow
drop-down list. Click the Start button.
8.
Use the OCR Proofreader to modify words
that the program suspects have not been
recognized correctly.
9. Click in the Text Editor. Select Text Editor
views one after another, to see how the
page appears in each view.
10. Click Resume to restart proofing. When the
message OCR Proofreading is complete
appears, click on OK.
11.
Choose a file name, file type, path and a
formatting level to save your recognized
document. Click on OK.
12.
Inspect the document in your word process-
ing program.
Configures OmniPage Pro to work with your scanner.
Opens OmniPage Pro on your computer.
Allows you to determine how pictures or colored texts
and backgrounds will look in the exported document.
Color scanning needs a color scanner.
Configures the program how to place zones on the
page and decide their properties automatically.
This means you will be able to name your export file
after you have proofed the document.
OmniPage Pro will start to scan in your document. A
thumbnail appears with a progress indicator. The
OCR Proofreader appears.
The OCR Proofreader operates like a spell checker in
a word processing program, but with added
OCR-specific features. It removes markings from
words you proof.
Each Text Editor view defines a formatting level. This
guides you which level to choose at saving time.
This ends the OCR Proofreader process. The Save to
File dialog box will appear.
By default, Save and Launch is enabled, so your
document will be automatically opened in the word
processing program associated with the file type that
you selected.
You have successfully used OmniPage Pro 14 to
recognize your document and open it in your target
application!
If you succeeded in getting good results from the sample image files, but
not from the scanned page, check your scanner installation and settings:
in particular brightness and image resolution. See “Input from scanner”
on page 49. This provides a model of optimum brightness. See also the
online Help topics Setting up your scanner and Scanner troubleshooting.
Quick Start Guide 35
Page 36

Processing overview
The following flow diagram summarizes the processing steps:
Get Pages
from file
page 48
from
scanner
page 49
other
page 48
Describe
page
layout
page 51
Apply a
template
page 61
Auto-
zoning
page 53
Manual
zoning
page 54
Perform
OCR
with
current
settings
page 31
Verify and
edit
page 67
Proofread
page 65
Export pages
to file
page 82
to Clipboard
page 89
via Mail
page 90
other
page 92
Here is an overview of the processing methods you can use. You will find
step-by-step guidance for each of them in the following pages.
Automatic
A fast and easy way to process documents is to let OmniPage Pro do it
automatically for you. Select settings in the Options dialog box and in the
OmniPage Toolbox drop-down lists and then click Start. It will take each
page through the whole process from beginning to end, when possible
running in parallel. It will typically auto-zone the pages.
36 Processing documents
Manual
Manual processing gives you more precise control over the way your
pages are handled. You can process the document page-by-page with
different settings for each page. The program also stops between each
step: acquiring images, performing recognition, exporting. This lets you,
for instance, draw zones manually or change recognition language(s). You
start each step by clicking the three buttons on the OmniPage Toolbox.
Combined
You can process a document automatically and view results in the Text
Editor. If most pages are in order, but a few have not turned out as
expected, you can switch to manual processing to adjust settings and re-
Page 37

Chapter 3
recognize just those problem pages. Alternatively, you can acquire images
with manual processing, draw zones on some or all of them, and then
send all pages to automatic processing.
Workflow
A workflow consists of a series of steps and their settings. Typically it will
include a recognition step, but it does not have to. Workflows are listed in
the Workflow drop-down list – sample workflows plus any you create. You
can choose to place an OmniPage icon on your taskbar. Its shortcut menu
lists your workflows. Click a workflow to launch OmniPage Pro and have it
run.
Let the Workflow Assistant guide you in creating new workflows. It
provides a choice of steps and the settings they need. After each step icon is
selected and its settings (if any) defined, you get a new set of step icons to
choose from. When ready, you can save the workflow for future use, but
this is not compulsory. You can use the Assistant just to get more guidance
when doing automatic processing. See “Workflow Assistant” on page 98.
In other applications
You can use the Direct OCR feature to call on the recognition services of
OmniPage Pro while working in your usual word-processor or similar
application. OmniPage Pro also automatically links itself to ScanSoft’s
PaperPort and Pagis document management programs.
At a later time
You can schedule OCR jobs or other processing jobs to be performed
automatically at a later time, when you may not even be present at your
computer. This is done through the Batch Manager. When you choose
New Job, the Workflow Assistant appears, with a slightly modified set of
choices and settings. The main difference is its closing panel that allows
you to specify a starting time, a recurring job or watched folder
instructions.
A Batch Manager job is basically a workflow with timing instructions
added. See “Batch Manager” on page 101.
Processing overview 37
Page 38

Automatic processing
Automatic processing provides an efficient way of handling documents,
especially larger ones. First you select all settings needed, then you can use
the Start button in the OmniPage Toolbox to process a new document
from start to finish or to restart and finish processing on an open
document.
Start button
Workf lo w
drop-down list
Get Page button Perform OCR button Export Results button
Export
Results
drop-down
list
Get Pages
drop-down list
Some items appear
only in OmniPage
Pro 14 Office, others only if
the source is available.
Layout
Description
drop-down
list
1. Make sure 1-2-3 is selected in the Workflow drop-down list.
2. Select the desired Get Page setting in the drop-down list. You define
the document source, which can be from image files or from a
scanner. See “Defining the source of page images” on page 48.
38 Processing documents
3. Select a setting from the Layout Description drop-down list, as
shown above. This guides the program in auto-zoning the pages. You
describe the incoming pages or specify a zone template file. See
“Describing the layout of the document” on page 51.
4. Select a setting from the Export Results drop-down list. You can save
pages (current, selected, all) to file, copy them to Clipboard, send
Page 39

Chapter 3
them as mail attachments or direct them to other targets.
Save the
document as an OmniPage Document file from the File menu or
Standard toolbar.
See “Saving and exporting” on page 79.
5. Choose in the Standard toolbar or Options in the Tools menu
and check that settings are appropriate for your document. You can,
for instance, specify recognition languages and whether you want to
proofread the document or not. See “Settings” on page 31.
6. Click the Start button or choose Workflows in the Process menu and
click Start with 1-2-3 still selected. Each page of the document is
processed and finished one after the other. The program may perform
tasks simultaneously, for instance it may start loading and
recognizing a new page as you proofread the previous page.
Stopping and restarting automatic processing
Stop: When automatic processing is in progress, the Start button
becomes Stop. Click it to interrupt automatic processing. You may do
this if you find that some settings need to be changed.
Restart: When automatic processing is stopped, the Start button is
restored. Click it to restart processing. The Automatic Processing dialog
box lets you specify what you want to do:
◆ Finish processing unrecognized and unproofed pages and then
export the results.
◆ Add more pages from the same source or a different source,
with changed or unchanged settings.
◆ Re-process all pages to discard all recognition results and re-
recognize all pages in the document with different settings.
You can specify auto-zoning or a template file. You may want
to do this if an unsuitable setting caused poor results on all
pages. An example is incorrect language choice, resulting in
almost all words marked suspect during proofing. This
option lets you perform re-recognition without having to
scan or load or rezone all the images again.
Automatic processing 39
Page 40

Manual processing
Manual processing gives you more precise control over the way your
pages are handled. You can process the document page-by-page with
different settings for each page. The program also stops between each
step: acquiring images, performing recognition, exporting. This lets you,
for instance, change the page background and draw zones manually on
each page. You start each step in the process by clicking the three
numbered buttons on the OmniPage Toolbox.
1. Select 1-2-3 in the Workflow drop-down list. Click in the
Standard toolbar or Options in the Tools menu to check or make
settings in the Options dialog box. See “Settings” on page 31.
2. Select the desired value for the Get Page button from the drop-down
list. You define the document source, which can be from image files
or from a scanner. When scanning with the OmniPage interface,
select a scanning mode and use the Scanner and Process panels of the
Options dialog box to select settings. See “Defining the source of
page images” on page 48.
40 Processing documents
3. Click the Get Page button. This either brings up a dialog box
allowing you to name images files, or initiates scanning. Thumbnail
images of each page can appear in the Image Panel, along with the
current page image. Use status bar buttons to show or hide either of
these. Acquired pages are summarized in the Document Manager.
4.
All page images enter the program with a process background.
Provided you draw no zones on these pages, they will be auto-zoned
when recognition is requested.
5.
You can manually draw and modify zones on one or more images and
assign zone properties. Status bar buttons let you move to other pages.
As soon as you draw a zone on a page, it takes on an ignore
background. You can specify auto-zoning on parts of a page by
drawing process zones. See “Zones and backgrounds” on page 53.
Page 41

Chapter 3
6. Select a value for the Perform OCR button. You describe the layout
of the incoming pages. This value has an influence if auto-zoning
runs on any pages. See “Describing the layout of the document” on
page 51. You can also select a template to have its zones placed on the
current page. See “Using zone templates” on page 61.
7. Click the Perform OCR button to have the current page recognized.
To have selected pages recognized, make a multiple selection with the
thumbnails or in the Document Manager (See “Managing
documents” on page 26) and then click the Perform OCR button.
Recognized pages appear in the Text Editor.
8. If you requested proofing, the OCR Proofreader dialog box displays
suspect words one after the other from the recognized page(s). You
can proof and edit the recognized text. See “Proofreading OCR
results” on page 65.
9. Continue loading pages, performing OCR, editing, proofing and
verifying as desired. You can change the reading order of page
elements in the Text Editor. See “Text and image editing” on
page 73.
10.
Select a value for the Export Results button. You can save pages
(current, selected or all) to file, copy them to Clipboard, send them as
mail attachments or send them to other targets. Some targets are
available only in OmniPage Pro 14 Office; others appear only if the
target is detected on your system. Click the Export Results button. See
“Saving and exporting” on page 79. Save the document as an
OmniPage Document file from the File menu or Standard toolbar.
Combined processing
Automatic processing provides speed and efficiency. Manual processing
demands more attention, but gives greater control over results. It is
possible to tap into both benefits while processing a single document.
Combined processing 41
Page 42

Start automatically and finish manually:
When you have a large document with only a few pages needing special
attention, you do not have to manually process the whole document. You
can process it automatically and view results in the Text Editor. You can
determine which pages are in order, and which need different settings or
some manual zoning. After adjusting settings and/or modifying zones,
use manual processing to re-recognize just those pages.
1. Prepare the document and perform automatic processing, as already
described.
2. If you close or finish proofing you will be invited to save the
document. This is recommended, even if it is not in its final form.
3. Select a page needing rezoning and delete or modify the existing
zones in the Image Panel. You can also load a template to let its zones
replace existing ones. Draw new zones as desired. See “Zones and
backgrounds” on page 53.
4. Change other settings as required for the current page. See “Settings”
on page 31.
5. Click the Perform OCR button to re-recognize the current page.
Confirm that the previous recognition results should be overwritten.
Alternatively, you can use on-the-fly processing to handle zoning
changes without re-recognizing the whole page. See “On-the-fly
editing” on page 75.
42 Processing documents
6. To re-recognize more than one page, select the required pages in the
thumbnails or Document Manager before clicking the Perform OCR
button.
7. When all pages have been re-recognized with acceptable results, save
the document again.
Start manually and finish automatically:
1. Prepare settings and acquire images for the document by clicking the
Get Page button.
2. Examine the pages for suitable brightness, orientation and content.
Rescan or rotate unsuitable images. Reorder pages as desired.
3. Manually zone pages where you want to process only part of the page
or if you want to give precise zoning instructions. Use ignore
Page 43

Chapter 3
backgrounds or zones to exclude areas from processing. Use process
backgrounds or zones to specify areas to be auto-zoned.
4. Click the Start button, then choose Finish Processing Existing Pages in
the Automatic Processing dialog box.
5. After proofing (if requested) you can save or export the document.
Processing with workflows
A workflow consists of a series of steps and their settings. It does not have
to conform to the 1-2-3 pattern of traditional processing. Workflows
allow you to handle recurring tasks more efficiently, because all the steps
and their settings are pre-defined.
To run a workflow with OmniPage Pro closed
Click on the OmniPage icon in your taskbar. Select a workflow from its
shortcut menu. OmniPage Pro will start and immediately run the
workflow. If you do not see the icon, enable it in the General panel of the
Options dialog box.
To run a workflow with OmniPage Pro open
You can use the taskbar icon as described above, or you can select the
workflow in the Workflow drop-down list and click Start. When a
workflow is running, program settings are not accessible.
To modify a workflow
Select the workflow in the Workflow drop-down list and press the
Workflow Assistant button on the Standard toolbar, or choose
Workflows... in the Tools menu, select the workflow and click Modify.
To make a new workflow
There are sample workflows supplied with the program. You can modify
these, or use them as the source for new workflows. New workflows are
made with the Workflow Assistant. See page 98 in Chapter 6.
Processing with workflows 43
Page 44

Processing from other applications
You can use the Direct OCR™ feature to call on the recognition services
of OmniPage Pro while you work in your usual word-processor or other
application. First you must establish the direct connection with the
application. Then, two items in its File Menu open the door to OCR
facilities.
How to set up Direct OCR
1. Start the application you want connected to OmniPage Pro. Start
OmniPage Pro, open the Options dialog box at the Direct OCR
panel and select Enable Direct OCR.
2. Select process options for proofing and zoning. These function for
future Direct OCR work until you change them again; they are not
applied when OmniPage Pro is used on its own.
3. The Unregistered panel displays running or previously registered
applications. Select the desired one(s) and click Add. You can browse
for an unlisted application.
This must be
selected for Direct
OCR to function.
Use these to specify
interactive steps:
manual zoning or
proofing.
These applications
are set to support
Direct OCR.
44 Processing documents
Page 45

Chapter 3
How to use Direct OCR
1. Open your registered application and work in a document. To
acquire recognition results from scanned pages, place them correctly
in the scanner.
2. Use the target application’s File Menu item Acquire Text Settings... to
specify settings to be used during recognition. Any settings not
offered take their values from those last used in OmniPage Pro.
Settings changed for Direct OCR are also changed in OmniPage Pro.
3. Use the File Menu item Acquire Text to acquire images from scanner
or file.
4. If you selected Draw zones automatically in the Direct OCR panel of
the Options dialog box, or under Acquire Text Settings...,
recognition proceeds immediately.
5. If Draw zones automatically is not selected, each page image will be
presented to you, allowing you to draw zones manually. Click the
Perform OCR button to continue with recognition.
6. If proofing was specified, this follows recognition. Then the
recognized text is placed at the cursor position in your application,
with the formatting level specified by Acquire Text Settings... .
If OmniPage Pro is running when Direct OCR is called from a target application, a
second instance of OmniPage Pro is launched.
See the Direct OCR topics in online Help for more information. These include a
topic Direct OCR Questions and Answers. The Readme file and the ScanSoft web
site may present more recent information relating to specific target applications.
Processing from other applications 45
Page 46

How to use OmniPage Pro with PaperPort
The PaperPort® program is a paper management software product
from ScanSoft. It lets you link pages with suitable applications. Pages
can contain pictures, text or both. If PaperPort exists on a computer
with OmniPage Pro, its OCR services become available and amplify
the power of PaperPort. You can choose an OCR program by right
clicking on a text application’s PaperPort link, selecting Preferences
and then selecting OmniPage Pro 14 as the OCR package. OCR
settings can be specified, as with Direct OCR.
:
46 Processing documents
Here OmniPage Pro 14 has been selected as the OCR package for
MS Word 2000. Then you can drag page images from the PaperPort
desktop onto the MS Word link on a PaperPort toolbar. While the
text is being recognized, only a progress monitor is displayed.
OmniPage Pro’s manual zoning window or proofing facility will
appear if requested. The recognition results are placed in a new
unnamed document in the target application.
Page 47

Chapter 3
Processing with the Batch Manager
You can schedule processing jobs to be performed automatically at a
specified time in the future. The job pages can come from a scanner with an
ADF or from image files. You do not have to be present at your computer at
job start time, nor does OmniPage Pro have to be running. It does not
matter if your computer is turned off after the job is set up, so long as it is
running at job start time. If you are scanning pages, your scanner must be
functioning at job start time, with the pages loaded in the ADF. Here is how
to set up your first job:
1. Click Batch Manager... in the Process menu or in the Windows Start
menu: select All Programs!ScanSoft OmniPage Pro
14.0!OmniPage Batch Manager. The Batch Manager window
appears. Because there are no existing jobs, the Workflow Assistant
appears immediately.
2. Define a starting point for the new job. This can be a fresh start, an
existing workflow or (later on) an existing job. Click Next to finish
each step.
3. The following panels allow you to build the workflow for the job, as
described in Chapter 6.
4. The final panel lets you name the job and specify timing instructions.
In OmniPage Pro 14 Office you can request e-mail notification of
job completion, create recurring jobs and specify a stopping time for
watched folder jobs.
5.
Click Finish to confirm job creation.
The Batch Manager window lists all jobs, with status Not Scheduled, Waiting,
Running, Watching, Paused or Completed. Use Modify... in the Edit menu to
change settings for jobs with status Not Scheduled or Completed. You can view,
modify and reuse completed jobs to process new jobs needing similar settings. You
can delete completed jobs when they are no longer needed.
For more information, please see Batch Manager in the online Help and
“Batch Manager” on page 101.
Processing with the Batch Manager 47
Page 48

Defining the source of page images
There are two possible image sources: from image files and from a
scanner. There are two main types of scanners: flatbed or sheetfed. A
scanner may have a built-in or added Automatic Document Feeder
(ADF), which makes it easier to scan multi-page documents. The images
from scanned documents can be input directly into OmniPage Pro or
may be saved with the scanner’s own software to an image file, which
OmniPage Pro can later open.
Input from image files
You can create image files from your own scanner, or receive them by
e-mail or as fax files. OmniPage Pro can open a wide range of image file
types. See “File types for opening and saving images” on page 115. Select
Load Image File in the Get Pages drop-down list. Files are specified in the
Load Image File dialog box. This appears when you start automatic
processing. In manual processing, click the Get Page button or use the
Process menu. The lower part of the dialog box provides advanced
settings, and can be shown or hidden. Here, it is displayed.
This is the
current folder.
Use Shift+ clicks or
Ctrl+clicks to place
more than one file
in the File name text
box.
Specify the file
type(s) you want
listed.
This can be used for
multipage TIFF, DCX,
MAX and PDF files.
This is a blank
image file for the
saving option:
"New file for each
blank page".
48 Processing documents
Select this to see
a thumbnail of
the selected file.
Not available
when multiple
files are selected.
Click Advanced to
open the lower panel
and Basic to close it.
Use this to add files
from different folders
and to control file
order precisely.
Use these arrows to change the file order.
Page 49

Chapter 3
Normally the Add button places each file at the bottom of the file list. To
place a file at a different location, highlight a file in the list. The new file
will be added immediately below the lowest highlighted file.
In OmniPage Pro Office, files can also be imported from FTP locations,
Microsoft SharePoint or ODMA sources.
The minimum width or height for an image file is 50 pixels; the
maximum is 71cm. (28 inches). See online Help for pixel limits.
Input from scanner
You must have a functioning, supported scanner correctly installed with
OmniPage Pro. See “Setting up your scanner with OmniPage Pro” on
page 14. You have a choice of scanning modes. In making your choice,
there are two main considerations:
◆ Which type of output do you want in your export document?
◆ Which mode will yield best OCR accuracy?
Scan black and white
Select this to scan in black-and-white. This is not suitable if you want
color in your output document, nor if you want pictures to look like
so-called ‘black-and-white’ photographs: they need grayscale scanning.
For best OCR accuracy, use this for crisp black texts on a white or light
background. Black-and-white images can be scanned and handled
quicker than others and occupy less disk space.
Scan grayscale
Select this to use grayscale scanning. Choose this to keep ‘black-andwhite’ photographs in the output document. For best OCR accuracy, use
this for pages with varying or low contrast (not much difference between
light and dark) and with text on colored or shaded backgrounds.
Scan color
Select this to scan in color. This will function only with color scanners.
Choose this if you want colored graphics, texts or backgrounds in the
output document. For OCR accuracy, it offers no more benefit than
grayscale scanning (for a given resolution), but will require much more
time, memory resources and disk space.
Defining the source of page images 49
Page 50

Brightness and contrast
Good brightness and contrast settings play an important role in OCR
accuracy. Set these in the Scanner panel of the Options dialog box or in
your scanner’s interface. The diagram illustrates an optimum brightness
setting. After loading an image, check its appearance. If characters are
thick and touching, lighten the brightness. If characters are thin and
broken, darken it. Then rescan the page.
Unsuitable
Toler ab le
Good
Best
Good
Toler ab le
50 Processing documents
Unsuitable
Scanning with an ADF
The best way to scan multi-page documents is with an Automatic
Document Feeder (ADF). Simply load pages in the correct order into the
ADF. Place blank pages if you want to save your document to multiple
output files using the Create a new file at each blank page option. See
“Saving recognition results” on page 82.
If you have a document longer than the capacity of your ADF, select
Automatically prompt for more pages in the Process panel of the Options
dialog box. Then a dialog box lets you add further page batches and
signal when all pages are scanned.
Page 51

Chapter 3
You can scan double-sided documents with an ADF. A duplex scanner
will manage this automatically. For non-duplex scanners, select Scan
double-sided pages in the Scanner panel of the Options dialog box. Then
you can scan the document in just a few passes, with even pages grouped
together and odd pages also grouped. OmniPage Pro will merge the pages
for you.
Scanning without an ADF
Using OmniPage’s scanner interface, you can scan multi-page documents
efficiently from a flatbed scanner, even without an ADF. Select
Automatically scan pages in the Scanner panel of the Options dialog box,
and define a pause value in seconds. Then the scanner will make scanning
passes automatically, pausing between each scan by the defined number
of seconds, giving you time to place the next page. A dialog box allows
you finish the pause early or request a longer pause and to specify when
the last page is scanned.
To scan books two pages at a time, select Look for facing pages in the
Process panel of the Options dialog box. The program will split the
incoming images into two pages and deskew them independently.
Describing the layout of the document
Before starting recognition you are requested to describe the layout of the
incoming pages to assist the auto-zoning process. When you do
automatic processing, auto-zoning always runs unless you specify a
template that does not contain a process zone or background. When you
do manual processing, auto-zoning sometimes runs. See online Help:
When does auto-zoning run? Here are your input description choices:
Automatic
Choose this to let the program make all auto-zoning decisions. It decides
whether text is in columns or not, whether an item is a graphic or text to
be recognized and whether to place tables or not. Choose Automatic if
your document contains pages with different or unknown layouts.
Choose it for a page with multiple columns and a table, and for any pages
with more than one table.
Describing the layout of the document 51
Page 52

Single column, no table
Choose this setting if your pages contain only one column of text and no
table. Business letters or pages from a book are normally like this. Choose
it also for a page with words or numbers arranged in columns if you do
not want these placed in a table or decolumnized or treated as separate
columns. Graphics may be detected.
Multiple columns, no table
Choose this if some of your pages contain text in columns and you want
this decolumnized or kept in separate columns, similar to the original
layout. Columns can be retained in the output document, either with
frames (if True Page is selected at export time) or without frames (if
Flowing Page is selected). If tabular data is encountered, it is likely to be
treated as flowing text. Graphics may be detected.
Single column with table
Choose this if your page contains only one column of text and a table.
Auto-zoning will not look for columns but will try to find a table and
place it in a grid in the Text Editor. You can later specify whether to
export it in a grid or as tab separated text columns. Graphics may be
detected.
Spreadsheet
Choose this if your whole page consists of a table which you want to
export to a spreadsheet program, or have treated as single table. No
flowing text or graphics zones will be detected.
52 Processing documents
Custom
Choose this for maximum control over auto-zoning. You can prevent or
encourage the detection of columns, graphics and tables. Make your
settings in the OCR panel of the Options dialog box.
Te m p la t e
Choose a zone template file if you wish to have its background value,
zones and properties applied to all acquired pages from now on. The
template zones are also applied to the current page, replacing any existing
zones. They will also be applied to pre-existing pages without zones when
they are (re-)recognized. See “Using zone templates” on page 61.
If auto-zoning yielded unexpected recognition results, use manual
processing to rezone individual pages and re-recognize them.
Page 53

Chapter 3
Zones and backgrounds
Zones define areas on the page to be processed or ignored. Zones are
rectangular or irregular, with vertical and horizontal sides. Page images in
a document have a background value: process or ignore (the latter is more
typical). Background values can be changed with the tools shown. Zones
can be drawn on page backgrounds with the tools shown:
Backgrounds
Zones
Process
Process Ignore Text Table Graphic
Process areas (in process zones or backgrounds) are auto-zoned when
they are sent to recognition.
Ignore areas (in ignore zones or backgrounds) are dropped from
processing. No text is recognized and no image is transferred.
Ignore
Automatic zoning
Automatic zoning allows the program to detect blocks of text, headings,
pictures and other elements on a page and draw zones to enclose them. It
assigns zone types and properties to those zones. Auto-zoning runs on
whole pages when you do automatic processing, unless you have a
template loaded. A workflow can contain auto-zoning. You can also
specify auto-zoning when doing manual processing, as follows:
Auto-zone a whole page
Acquire a page. It appears with a process background. Draw no zones on
it and check in the Layout Description drop-down list that a zone
template is not loaded. Click the Perform OCR button. You can select
several zone-less pages to have them auto-zoned and recognized together.
Auto-zone a part of a page
Acquire a page. It appears with a process background. Draw a zone. The
background changes to ignore. Draw text, table or graphic zones to
enclose areas you want manually zoned. Draw process zones to enclose
areas you want auto-zoned. After recognition the process zones will be
replaced with one or more text, table or graphic zones.
Zones and backgrounds 53
Page 54

Auto-zone a page background
Acquire a page. It appears with a process background. Draw a zone. The
background changes to ignore. Draw text, table or graphic zones to
enclose areas you want manually zoned. Click the Process background
tool (shown) to set a process background. Draw ignore zones over parts of
the page you do not need. After recognition the page will return with an
ignore background and new zones round all elements found on the
background.
Manual zoning
First we present two examples on zones and backgrounds. Then we detail
the zone types. Lastly we explain how to draw and work with zones. In
these examples the numbers refer to the table on the following page.
Drawing zones on an ignore background:
Before
recognition:
Before
recognition:
After
recognition:
Background
remains as
ignore.
Drawing zones on a process background:
After
recognition:
Background
is changed
to ignore.
Zone 4 returns as a
set of zones, in this
case to handle
three columns of
text and a photo.
Zone 6 is absorbed
into the background.
All zones on the left
side of the page
were automatically
created.
54 Processing documents
Page 55

Chapter 3
No. Typ e What happens:
1 Text zone OCR runs and generates text.
2 Table zone OCR runs, text is placed in a table grid.
3 Graphic zone Image is embedded in recognized page.
4 Process zone Auto-zoning creates one or more zones,
5 Process background
6 Ignore zone
7 Ignore background
decides their types and processes their
contents.
Nothing
Automatically drawn zones and template zones have solid borders:
Manually drawn or modified zones have dotted borders:
Zones do not have a reading order. Reordering of recognized elements
can be done in the Text Editor. See “Text and image editing” on page 73.
On-the-fly zoning is described in chapter 4. See “On-the-fly editing” on
page 75.
Zone types and properties
Each zone has a zone type. Zones containing text can also have a zone
contents setting: alphanumeric or numeric. The zone type and zone
contents together constitute the zone properties. Right-click in a zone for
a shortcut menu allowing you to change the zone’s properties. Select
multiple zones with Shift+clicks to change their properties in one move.
The Image toolbar provides five zone drawing tools, one for each type. A
zone’s type is shown by an icon in its top left corner, and by the icon and
zone border color. Here are the tools and the colors:
Process zone (blue)
Use this to draw a process zone, to define a page area where auto-zoning
will run. After recognition, this zone will be replaced by one or more
zones with automatically determined zone types. You normally draw
Zones and backgrounds 55
Page 56

process zones on an ignore background. Draw a process zone to enclose
columns of text to have them handled automatically. They will be
decolumnized in the Text Editor’s NF view and RFP view, but kept in
columns in True Page view.
Ignore zone (olive)
Use this to draw an ignore zone, to define a page area you do not want
transferred to the Text Editor. Auto-zoning will not place zones here. To
exclude a given page area from many pages (for example a header or page
numbers), place an ignore zone in a template. You normally draw ignore
zones on a process background.
Tex t zone ( brown )
Use this to draw a text zone. Draw it over a single block of text. Zone
contents will be treated as flowing text, without columns being found. If
you want columns of text to be handled automatically, enclose them in a
process zone.
Table zone (blue)
Use this to have the zone contents treated as a table. Table grids can be
automatically detected, or placed manually as described in the next
section. Table zones must be rectangular. The Text Editor displays the
table in an editable grid. For many output file types, you can choose
whether to export tables in grids or in columns separated by tabs.
56 Processing documents
Graphic zone (green)
Use this to enclose a picture, diagram, drawing, signature or anything you
want transferred to the Text Editor as an embedded image, and not as
recognized text. Embedded images can be exported with the document to
target applications supporting graphics.
Text and table zones have a zone content setting. Alphanumeric contents validates
all characters needed for your language choice. Recognition results from a numeric
zone will contain only numbers and number-related punctuation. No letters will
be placed. Use the zone’s shortcut menu to change this setting.
Right-click outside a zone for a shortcut menu tailored for the whole image. It
allows you to zoom in or out or rotate the image. When an image is rotated, all
zones on it are deleted.
Page 57

Chapter 3
Working with zones
The Image toolbar provides zone editing tools. One is always selected.
When you no longer want the service of a tool, click a different tool.
Some tools on this toolbar are grouped. Only the last selected tool from
the group is visible. To select a visible tool, click it. To select a hidden
tool, hold down the mouse button on the triangle at the bottom right of
the visible tool until the additional tools appear, then click the tool you
want.
Draw a single zone
Select the zone drawing tool of the desired
type, then click and drag the cursor.
In these examples, this is shown by the
arrow going from A to B. Dragging from
top left to bottom right is also possible.
Only rectangular zones can be drawn; zones (except table zones) can be
made irregular after they are drawn.
To resize a zone, select it by clicking in it, move the cursor to a side or
corner, catch a handle and move it to the desired location. It cannot
overlap another zone.
Make an irregular zone by addition
Draw a partially overlapping zone of the same type:
existing zone
new zone
resulting zone
Zones and backgrounds 57
Page 58

Join two zones of the same type
Draw an overlapping zone of the same type.
existing
zones
new
zone
resulting
zone
Make an irregular zone by subtraction
Draw an overlapping zone of the same type as the background (in this
example, on an ignore background).
existing
zone on an
ignore
background
new
ignore
zone
resulting
zone
Split a zone
Draw a splitting zone of the same type as the background (in this
example, on a process background).
58 Processing documents
existing text
zone on a
process
background
new
process
zone
resulting
zones
Page 59

The following zone shapes are prohibited:
Chapter 3
Indented
along the
bottom
Indented
along the
top
Hole in the
middle
To expand a zone more quickly than using its resizing handles, draw a
zone of the same type to completely enclose it. The smaller zone is
replaced by the larger one. To replace a set of zones of whatever type with
a single zone, draw a larger zone of the desired type to completely enclose
them. All the smaller zones are replaced by the larger one.
When you draw a new zone that partly overlaps an existing zone of a
different type, it does not really overlap it; the new zone replaces the
overlapped part of the existing zone. Diagrams in the online Help topic
Drawing zones manually clarify these two topics.
Speed zoning
This lets you do manual zoning quickly. Activate the zone selection
cursor, then move the cursor over the page image. Shaded areas will
appear showing the auto-detected zones. Double-click to transform a
shaded area into a zone. Speed zoning is useful when you want to process
only parts of a page. For example, with classified advertisements, just
double-click on those that interest you – everything else on the page will
be ignored.
Table grids in the image
After automatic processing you may see table zones placed on a page.
They are denoted with a table zone icon in the top left corner of the zone.
To change a rectangular zone to or from a table zone, use its shortcut
menu. You can also draw table type zones, but they must remain
rectangular.
You draw or move table dividers to determine where gridlines will appear
when the table is placed in the Text Editor. You can draw or resize a table
Table grids in the image 59
Page 60

zone (provided it stays rectangular) to discard unneeded columns or rows
from the outer edges of a table.
The five grouped table handling tools on the Imaging toolbar can be used
if the current page contains a table type zone. If the tool you need is not
visible, click the triangle on the bottom right of the visible tool to display
all the tools, then click the desired one.
Use the table tools and their cursors as follows:
Insert row dividers
Click the tool then click at the location in a table zone where you want to
place a row divider. Avoid placing a divider so it cuts through text.
Insert column dividers
Click the tool then click at the location in a table zone where you want to
place a column divider.
Move dividers
Click the tool and move the cursor to the row or column divider to be
moved. It displays a double-headed arrow. Drag the divider as desired.
You cannot drag it beyond its neighbor. Avoid placing dividers so they
cut through text.
60 Processing documents
Remove dividers
Click the tool then click on a single row or column divider you want to
delete. Do this if a divider is wrongly located, or if you want to change
the appearance of the table in the final document. For example, you can
place two columns of data in a single column by deleting the divider
between the columns.
Place/Remove all dividers
Click this tool and click its cursor icon inside a table zone without
dividers. Dividers will be auto-detected and placed. Click it in a table
with dividers to make them all disappear.
Press the Ctrl key as you click if you want to place, move or delete a
divider in the current cell only.
You can specify line formatting for table borders and grids from a
shortcut menu. You will have greater choice for editing borders and
shading in the Text Editor after recognition.
Page 61

Chapter 3
Using zone templates
A template contains a page background value and a set of zones and their
properties, stored in a file. A zone template file can be loaded to have
template zones used during recognition. Load a template file in the
Layout Description drop-down list or from the Tools menu. You can
browse to network locations to load templates created by others.
When you load a template, its background and zones are placed:
◆ on the current page, replacing any zones already there
◆ on all further acquired pages
◆ on pre-existing pages sent to (re-)recognition without any zones.
With manual processing the template zones in the first two cases can be
viewed and modified before recognition.
With automatic processing the template zones can be viewed and
modified only after recognition.
With workflow processing, a load template step can be followed by a
manual zoning step, so you can see the template zones and modify or
supplement them before recognition.
Templates accept ignore and process zones and backgrounds. They can
therefore be useful to define which parts of the pages to process with
auto-zoning, and which parts to ignore. Process zones or process
background areas from a template may be replaced during recognition by
a set of smaller zones; specific zone types will be assigned to these zones.
How to save a zone template
Select a background value and prepare zones on a page. Check their
locations and properties. Click Zone Template... in the Tools menu. In
the dialog box, select
[zones on page] and click Save, then assign a name
and optionally a different path. Choose a network location to share the
template file. Click OK. The new zone template remains loaded.
How to modify a zone template
Load the template and acquire a suitable image with manual processing.
The template zones appear. Modify the zones and/or properties as
Using zone templates 61
Page 62

desired. Open the Zone Template Files dialog box. The current template
is selected. Click Save and then Close.
How to unload a template
Select a non-template setting in the Layout Description drop-down list.
The template zones are not removed from the current or existing pages,
but template zones will no longer be used for future processing. You can
also open the Zone Template Files dialog box, select
[none] and click the
Set As Current button. In this case, the layout description setting returns
to Automatic.
How to replace one template with another
Select a different template in the Layout Description drop-down list, or
open the Zone Template Files dialog box, select the desired template and
click the Set As Current button. Zones from the new template are applied
to the current page, replacing any existing zones. They are also applied as
explained above.
How to remove a template file
Open the Zone Template Files dialog box. Select a template and click the
Remove button. Zones already placed by this template are not removed.
Template files can be deleted only from the operating system.
How to include a template file in an OPD
Load the template, then click the Save button in the Standard toolbar
and choose the file type OmniPage Document (Extended). That means
the template will travel with the OPD if it is sent to a new location.
When the extended OPD file is opened later, the included zone template
will be shown in the Zone Template dialog box as
[embedded] and can be
saved to a new named template file at the new location.
62 Processing documents
Templates are available in Direct OCR, in the Workflow Assistant and also for use
in Batch Manager jobs.
Page 63

Chapter 4
Proofing and editing
Recognition results are placed in the Text Editor. These can be
recognized texts, tables and embedded graphics. This WYSIWYG (What
You See Is What You Get) editor offers the following features, detailed in
this chapter:
◆ The editor display and views
◆ Proofreading OCR results
◆ Verifying text
◆ User dictionaries
◆ Languages
◆ Tr a i n i n g
◆ Text and image editing
◆ On-the-fly editing
◆ Reading text aloud
OmniPage Pro User’s Guide 63
Page 64

The editor display and views
The Text Editor displays recognized texts and can mark words that were
suspected during recognition with wavy underlines:
◆ Green – Non-dictionary words: These were recognized
confidently, but are not found in any active dictionary: standard,
user or professional.
◆ Blue – Words with suspect characters: These contain
unrecognized characters or are dictionary-approved words
containing characters recognized with lower confidence.
◆ Red – Suspect words: These are likely to be non-dictionary
words with one or more suspect characters, but may also be
suspect for other reasons.
Choose to have non-dictionary words marked or not in the Proofing
panel of the Options dialog box. All markers can be shown or hidden as
selected in the Text Editor panel of the Options dialog box. You can also
show or hide non-printing characters and header/footer indicators. The
Text Editor panel also lets you define a unit of measurement for the
program and a word wrap setting for use in all Text Editor views except
No Formatting view.
64 Proofing and editing
OmniPage Pro 14 can display pages with three levels of formatting. You
can switch freely between them with the three buttons at the bottom left
of the Text Editor or from the View menu. Graphics and tables can
appear in all views. Here are the main differences between the views:
No Formatting view
This displays plain decolumnized left-aligned text in a single font and font
size, with the same line breaks as in the original document. Most
formatting buttons and dialog boxes are disabled. Rulers are not displayed.
You may find this view convenient for verifying and editing the text.
Retain Fonts and Paragraphs view
This displays decolumnized text with font and paragraph styling. The
horizontal ruler is displayed. You may find this view convenient for
verifying, editing and modifying the text together with its styling.
Page 65

Chapter 4
True Page view
®
Tru e Pag e
view tries to conserve as much of the formatting of the
original document as possible. Character and paragraph styling is
retained. All page elements, including columns, are placed in boxes and
frames. Reading order can be displayed by arrows. See from page 73.
The formatting level for export is chosen separately at export time.
Proofreading OCR results
After a page is recognized, the recognition results appear in the Text
Editor. Proofreading starts automatically if that was requested in the
Proofing panel of the Options dialog box. You can start proofing
manually any time. Work as follows:
1. Click the Proofread OCR tool in the Standard toolbar, or choose
Proofread OCR... in the Tools menu.
This tells why the
word is marked.
Edit panel: The
marked word is shown
in its marker color:
red, blue or green.
This window shows
the relevant part of the
original image. Click
inside it to enlarge or
reduce the display.
2. Proofing starts from the current page, but skips text already proofed.
If a suspected error is detected, the OCR Proofreader dialog box
colors the suspect word in its context, and provides a picture of how
it originally looked in the image.
The image of the
suspect word is
highlighted.
Both parts of a word
split by hyphenation
will be shown.
Drag a corner
or the bottom of
the dialog box
to resize it.
Proofreading OCR results 65
Page 66

3. If the recognized word is correct, click Ignore or Ignore All to move
to the next suspect word. Click Add to add it to the current user
dictionary and move to the next suspect word.
4. If the recognized word is not correct, modify the word in the Edit
panel or select a dictionary suggestion. Click Change or Change All
to implement the change and move to the next suspect word. Click
Add to add the changed word to the current user dictionary and
move to the next suspect word.
5. Color markers are removed from words in the Text Editor as they are
proofread. You can switch to the Text Editor during proofing to
make corrections there. Use the Resume button to restart proofing.
Click Page Ready to skip to the next page and Document Ready or
Close to stop proofreading before the end of the document is
reached.
Voice-driven proofing is available in OmniPage Pro 14 Office. See
“Voice recognition” on page 107. The proofreader’s suggestions are
numbered. Speak the number of the suggestion you want to accept.
66 Proofing and editing
A page is marked with the proofed icon on its thumbnail and in the
Document Manager if proofing ran to the end of the page.
If markers were hidden in the Text Editor when proofing is started or Find Next
Suspect is chosen, the markers become shown and remain shown after proofing.
If Mark non-dictionary words is turned off in the Proofing panel of the Options
dialog box, proofing will stop only on words marked red or blue, and not on nondictionary words. This is useful when checking pages with many non-dictionary
words, such as product catalogues containing codes and bibliographies containing
many proper names.
Use Recheck Current Page in the Tools menu to run a new spelling check on a page
that has already been proofed. Do this to check words typed or pasted in the Text
Editor after proofing was done. This works even if Mark non-dictionary words is
turned off in the Proofing panel.
Page 67

Chapter 4
f
Verifying text
After performing OCR, you can compare any part of the recognized text
against the corresponding part of the original image, to verify that the
text was recognized correctly. Work as follows:
To do this: Use this:
Turn verifier on F9 or verifier tool
Turn verifier off Esc or F9 or verifier tool
Turn verifier on/off temporarily F8: press and hold down
Show verifier until next keystroke Double-click on word
Zoom display in Alt + Num + or click in verifier
Zoom display out Alt + Num – or click in verifier
Make verifier dynamic or docked/floating Alt + Num /
Dynamic context (scroll through 3 values) Alt + Num *
The verifier tool is in the Formatting toolbar. The verifier can also be
controlled from the Tools menu. Hover the cursor over a verifier display
to obtain the verifier toolbar. Use it as follows:
Drag
between
float and
docked
Text Editor
Verifier
Toolbar:
zoom in/out
to float or dock (returns to last state)
to dynamic
veri
ier tool (on/off)
How much context for dynamic verifier?
• one word
• three words (current + neighbors)
• whole image line
Verifying text 67
Page 68

You should proofread and verify texts before doing large-scale editing. If you cut
and paste large blocks of text, the links between text and image may be disturbed.
You can use OmniPage Pro’s Text-to-Speech facility to have the recognized text
read aloud as another way of verifying text. You can hear the text letter-by-letter,
word-by-word, line-by-line, sentence-by-sentence or in whole pages. See the
section “Reading text aloud” on page 76.
User dictionaries
The program has built-in dictionaries for many languages. These assist
during recognition and may offer suggestions during proofing. They can
be supplemented by user dictionaries. You can save any number of user
dictionaries, but only one can be loaded at a time. A dictionary called
Custom is the default user dictionary for Microsoft Word.
Starting a user dictionary
Click Add in the OCR Proofreader dialog box with no user dictionary
loaded or open the User Dictionary Files dialog box from the Tools menu
and click New. You will be asked to name the dictionary immediately.
Loading or unloading a user dictionary
Do this from the OCR panel of the Options dialog box or from the User
Dictionary Files dialog box. Select a dictionary file to load it or
unload a user dictionary. You can browse for a file.
[none] to
68 Proofing and editing
Editing or removing a user dictionary
Add words by loading a user dictionary and then clicking Add in the
OCR Proofreader dialog box. You can add and delete words by clicking
Edit in the User Dictionary Files dialog box. While editing a user
dictionary, you can import a word list from a plain text file to add words
to the dictionary quickly. Each word must be on a separate line with no
punctuation at the start or end of the word. The Remove button lets you
remove the selected user dictionary from the list.
To embed a user dictionary in an OmniPage Document, load it and save
to the file type OmniPage Document (Extended). When you load an
OPD with an embedded user dictionary, it appears in the list of user
dictionaries as
[embedded]. You can edit it and save it to a new name.
Page 69
Chapter 4
Languages
The program can read over 110 languages with three alphabets: Latin,
Greek and Cyrillic. See the list in the OCR panel of the Options dialog
box. It shows which languages have dictionary support. A listing is also
provided on the ScanSoft web site.
In addition to user dictionaries, specialized dictionaries are available for
certain professions (currently medical, legal and financial) for some
languages. See the list and make selections in the OCR panel of the
Options dialog box.
The program identifies the language of recognized texts and displays it in the status
bar. This language marking is exported with the document. Use Set Language... in
the Tools menu to change the language marking for selected text. This does not
change the recognition language(s).
Training
Training is the process of changing the OCR solutions assigned to
character shapes in the image. It is useful for uniformly degraded
documents or when an unusual typeface is used throughout a document.
Training will be less useful for texts with random distortions. Here is an
example, based on the letter “g”, which can be printed in different ways:
The first two examples do not need training, because both shapes are
normal for the letter “g” and the program can handle them. The third
example could benefit from training because the shape of “g” is unusual,
and all instances of “g” in the text are likely to look like this. The fourth
example is not good for training, because the first “g” is poorly printed,
and this shape is unlikely to appear again in the document.
Languages 69
Page 70

You can use training to improve recognition of special symbols such as @,
® and © or to recognize supported accented letters more reliably. The
purpose of training is not to teach the program to read characters from
non-supported languages or alphabets.
OmniPage Pro 14 offers two types of training: manual training and
automatic training (IntelliTrain). Data coming from both types of
training are combined and available for saving to a training file.
When you leave a page on which training data was generated, you will be
asked how to apply it to other existing pages in the document.
Manual training
To do manual training, place the insertion point in front of the character
you want to train, or select a group of characters (up to one word) and
choose Train Character... from the Tools menu or the shortcut menu.
You will see an enlarged view of the character(s) to be trained, along with
the current OCR solution. Change this to the desired solution and click
OK. The program takes this training and examines the rest of the page. If
it finds candidate words to change, the Check Training dialog box lists
these. Incorrect words should be re-trained before the list is approved.
70 Proofing and editing
For guidance on using the Train Character and Check Training dialog
boxes, please consult their context-sensitive help or the online help topic
Manual training and its related topics.
IntelliTrain
IntelliTrain is an automated form of training. It takes input from the
corrections you make during proofing. When you make a change, it
remembers the character shape involved, and your proofing change. It
searches other similar character shapes in the document, especially in
suspect words. It assesses whether to apply the user correction or not.
You can turn IntelliTrain on or off in the OCR panel of the Options
dialog box.
The following shows how IntelliTrain works, using the original image.
Our example involves the letters c and e. With some typefaces and
Page 71

OmniPage Pro read this as
bcnefit.
You changed it during
proofing to benefit.
Chapter 4
scanning settings, the horizontal line in e can become very thin, leading
to OCR errors that IntelliTrain can repair.
IntelliTrain
remembers this
shape and the rule:
This is not c.
e
This is e.
IntelliTrain changes:
thcrc to there
likc to like
Whcncvcr to Whenever
etc.
IntelliTrain remembers the training data it collects, and adds it to any
manual training you have done. This training can be saved to a training
file for future use with similar documents.
Training files
If you want to be prompted to save your unsaved training data when you
close the document, select that option in the Proofing panel of the
Options dialog box. Unsaved training data is stored in an OmniPage
Document. If you do not save the document as an OPD, unsaved
training is discarded when the document is closed. To save a training file
into an OPD, load it and save to the file type OmniPage Document
(Extended).
Saving training to file, loading, editing and unloading training files are all
done in the Training Files dialog box. Open this from the Proofing panel
of the Options dialog box or the Tools menu. The program offers a
Training 71
Page 72

This appears if you load an
OPD with an embedded
training file. You can edit it
and also save it to a new
named training file.
Select this, click Save
and type in a name to
save a new training file.
Select this to unload a
training file.
default location, but you can specify a different path, for instance on a
local network, to share training files with other users.
Click this to edit the
selected training file
in the Edit Training
dialog box.
Use this also to save
new training into a
loaded training file.
It is listed as:
<File name>
[modified]
Unsaved training can be edited in the Edit Training dialog box, an
asterisk is displayed in the title bar in place of a training file name. It
remains unsaved when you close the Edit Training dialog box. Save it in
the Training Files dialog box.
A training file can be also edited; its name appears in the title bar. If it has
unsaved training added to it, an asterisk appears after its name. Both the
unsaved and the modified training are saved when you close the dialog
box.
You are editing
your unsaved
training.
This frame is grayed.
It has been deleted.
To undelete it, select
it again and press the
Delete key.
Characters marked
as deleted are really
deleted when you
close the dialog box.
72 Proofing and editing
The Edit Training dialog box displays frames containing a character
shape and an OCR solution assigned to that shape. Click a frame to select
it. Then you can delete it with the Delete key, or change the assignation.
Use arrow keys to move to the next or previous frame.
Double-click a frame
or press Enter to
change its OCR
solution. Enter the
new solution in the
text box that appears
and press Enter.
Changed assignations
appear in red.
This frame is selected. The top part shows the
shape from the image. The bottom part shows
the assigned OCR solution.
Page 73

Chapter 4
Text and image editing
OmniPage Pro has a WYSIWYG Text Editor, providing many editing
facilities. These work very similarly to those in leading word processors.
Editing character attributes
In all views except No Formatting view, you can change the font type,
size and attributes (bold, italic, underlined) for selected text. Use the
Formatting toolbar or the Font dialog box from the Format menu. The
latter also offers subscripts, superscripts and colored text or backgrounds.
In No Formatting view, use the Formatting toolbar to specify one font
type and size to be applied to the whole document. This is not used for
export, nor transferred to other views; their previous settings are restored.
Open the Font Matching dialog box from the OCR panel of the Options
dialog box before OCR, to specify which fonts to use for texts entering
the Text Editor.
Editing paragraph attributes
In all views except No Formatting view, you can change the alignment of
selected paragraphs and apply bulleting to paragraphs. Use the
Formatting toolbar or the Paragraph dialog box from the Format menu.
The latter allows you to modify indents, line spacing and spacing
between paragraphs. The Text Editor’s horizontal ruler lets you define
indent and tab positions easily. Advanced tab settings are done in the
Tabs dialog box from the Format menu. Numbered and bulleted
paragraphs can be detected and edited.
Paragraph styles
Paragraph styles are auto-detected during recognition. A list of styles is
built up and presented in a selection box on the left of the Formatting
toolbar. Use this to assign a style to selected paragraphs. Use the Style
dialog box from the Format menu to rename or modify a style and to
define a new style. When you save a document to file, you can choose
whether to export the paragraph styles with the document or not. This is
valid only if the target application supports paragraph styles.
Graphics
You can edit the contents of a selected graphic if you have an image editor
in your computer. Click Edit Picture in the Tools menu. This will
Text and image editing 73
Page 74

activate the image editor associated with BMP files in your Windows
system, and load the graphic. Edit the graphic, then close the editor to
have it re-embedded in the Text Editor. Do not change the graphic’s size,
resolution or type, because this will prevent the re-embedding.
Tables
Tables are displayed in the Text Editor in grids. Move the cursor into a
table area. It changes appearance, allowing you to move gridlines. You
can also use the Text Editor’s rulers to modify a table. Modify the
placement of text in table cells with the alignment buttons in the
Formatting toolbar and the tab controls in the ruler. When saving the
document to some file types, you can choose whether to have the tables
exported in grids or as tab separated or space separated columns.
Hyperlinks
Web page and e-mail addresses can be detected and placed as links in
recognized text. Choose Hyperlink... in the Format menu to edit an
existing link or create a new one. A new link can be to a web page or a
file. Use a shortcut menu to delete a link. Turn hyperlink detection on or
off in the Process panel of the Options dialog box.
Editing in True Page
Page elements are contained in text boxes, table boxes and picture boxes.
These usually correspond to text, table and graphic zones in the image.
Click inside an element to see the box border; they have the same
coloring as the corresponding zones. The online Help topic True Page
provides details on the operations summarized here.
74 Proofing and editing
Frames have gray borders and enclose one or more boxes. They are
placed when a visible border is detected in an image. Format frame and
table borders and shading with a shortcut menu or by choosing Table...
in the Format menu. Text box shading can be specified from its shortcut
menu. To call up a shortcut menu, right-click inside an element away
from a marked word.
Multicolumn areas have pink borders and enclose one or more boxes.
They are auto-detected and show which text will be treated as flowing
columns when exported with the Flowing Page formatting level. Use
shortcut menus to ungroup multicolumn areas and frames, allowing their
Page 75

Chapter 4
elements to be modified. You can also group elements into frames or
multicolumn areas.
Reading order can be displayed and changed. Click the Show reading
order tool in the Formatting toolbar to have the order shown by arrows.
Click again to remove the arrows.
Click the Change reading order tool for a set of reordering buttons in
place of the Formatting toolbar. Context-sensitive help explains their use,
as does Reading order in online Help. A changed order is applied in NF
and RFP views. It modifies the way the cursor moves through a page
when it is exported as True Page.
On-the-fly editing
This allows you to modify a recognized page through re-zoning, without
having to re-process the whole page. When on-the-fly editing is enabled,
zone changes (deleting, drawing, resizing, changing type) immediately
make changes in the recognized page. Conversely, when you modify
elements in the Text Editor’s True Page view, this changes the zones on
that page. On-the-fly zoning can also be used with unrecognized pages.
Two linked tools on the Image toolbar control on-the-fly zoning. One of
these tools is always active whenever no recognition is in progress.
Click this to activate on-the-fly editing. The red signal shows there are
no stored zoning changes.
Click this to turn on-the-fly editing off. Your zoning changes are stored;
the on-the-fly tool displays a green signal to show there are stored
changes. To activate these changes, do one of the following:
Click the on-the-fly tool with a green signal. The
zoning changes will cause changes in the Text Editor.
Click the Perform OCR button to have the whole
page (re)recognized, including your zone changes.
For details on how changes are handled in on-the-fly zoning and their
effects in the Text Editor views, see On-the-fly processing in online Help.
On-the-fly editing 75
Page 76

Reading text aloud
The ScanSoft RealSpeakTM speech facility is provided for the visually
impaired, but it can also be useful to anyone during text checking and
verification. The speaking is controlled by movements of the insertion
point in the Text Editor which can be mouse or keyboard driven.
To hear text: Use these keys:
One character at a time, forward or back
Current word Ctrl + Numpad 1
One word to the right Ctrl + right arrow
One word to the left Ctrl + left arrow
A single line Place the insertion point in the line
Next line Down arrow
Previous line Up arrow
Current sentence Ctrl + Numpad 2
From insertion point to end of sentence Ctrl + Numpad 6
From start of sentence to insertion point Ctrl + Numpad 4
Current page Ctrl + Numpad 3
From top of current page to insertion point Ctrl + Home
From insertion point to end of current page Ctrl + End
Previous, next or any page Ctrl + PgUp, PgDown or navigation buttons
Typed characters
Right or left arrow. Letter, number or
punctuation names are spoken.
Each typed character is pronounced, one by
one, including punctuation.
The Text-to-Speech facility is enabled or disabled with the Tools menu
item Speech Mode or with the F5 key. A second menu item Speech
Settings... allows you to select a voice (for example, male or female for a
given language), a reading speed and the volume. You must ensure the
language selection is appropriate for the text you want to hear.
76 Proofing and editing
Page 77

Chapter 4
The three basic speech keys are grouped together on the numeric keypad.
+
1 2 3
Speak
current
word
Speak
current
sentence
Speak
current
page
You also have the following keyboard controls:
To do this: Use this:
Pause/Resume Ctrl + Numpad 5
Set speed higher Ctrl + Numpad +
Set speed lower Ctrl + Numpad –
Restore speed Ctrl + Numpad *
It is planned to provide RealSpeak programs for the following languages:
English (UK and US), Dutch, French, German, Italian, Portuguese
(Brazilian), Spanish and Swedish. Please consult the Readme file for the
latest information. All speech systems will be installed with OmniPage
Pro if you choose a complete installation. If you perform a custom
installation, you can choose the languages you need. If you later try to
read text aloud in a language you did not install, you will be invited to
install the required module without interrupting your OmniPage session,
provided you have the program CD on hand. Or, you can use the
Add/Remove Programs facility in your system’s Control Panel.
The RealSpeak modules are also used when saving the text from a
document into a wave audio file. This is done by choosing Save to File in
the Export drop-down list and choosing Wave Audio Converter as file
type. Click Converter options to specify the voice/language and a reading
speed.
Reading text aloud 77
Page 78

78 Proofing and editing
Page 79

Chapter 5
Saving and exporting
Once you have acquired at least one image for a document, you can
export the image(s) to file. Once you have recognized at least one page,
you can export recognition results – a single page, selected pages or the
whole document – to a target application by saving to file, copying to
Clipboard or sending to a mailing application. Saving as an OmniPage
Document is always possible.
This chapter presents the following topics:
◆ Saving OmniPage Documents
◆ Export Results button
◆ Saving original images
◆ Saving recognition results
• Selecting a formatting level
• Selecting converter options
• Using multiple converters
•Saving to PDF
• Converting from PDF
◆ Copying pages to Clipboard
◆ Sending pages by mail
◆ Other export targets
OmniPage Pro User’s Guide 79
Page 80

A document remains in OmniPage Pro after export. This allows you to
save, copy or send its pages repeatedly, for example with different
formatting levels, using different file types, names or locations. You can
also add or re-recognize pages or modify the recognized text.
With automatic processing and in Batch Manager jobs, you specify the
first saving destination before processing starts. When the last available
page is recognized (or proofread, if that was requested), an exporting
dialog box appears.
You can specify export any time the program is not busy. If you ask to
export a document with unrecognized pages, you will be asked whether
they should be recognized first. If you answer No, only results from
recognized pages will be exported. If zones have been modified on
recognized pages, you will be invited to re-recognize those pages before
exporting.
A workflow may contain one or more saving steps, even to different
targets (for instance, to file and to mail). A Batch Manager job must
contain at least one saving step. See chapter 6, “Workflows”.
Saving OmniPage Documents
80 Saving and exporting
If you want to work with your document again in OmniPage Pro in a
later session, save it as an OmniPage Document. This is a special output
file type. It saves the original images together with the recognition results,
settings and training. See “OmniPage Documents” on page 29.
Export Results button
Exporting is done through button 3 on the OmniPage Toolbox. It lists
available export targets. The picture on the left shows all possible targets.
The last three appear only in OmniPage Pro 14 Office. Some appear only
if access to the target is detected on your computer. Select the desired
target then click the Export Results button to begin export. You can also
perform exporting through the Process menu.
Page 81

Chapter 5
Saving original images
You can save original images to disk in a wide variety of file types. See
“File types for opening and saving images” on page 115.
1. Choose Save to File in the Export Results drop-down list. In the
dialog box that appears, select Image under Save as.
2. Choose a folder location and a file type. Type in a file name.
3. Select to save the selected zone image(s) only, the current page image,
selected page images or all images in the document. For multiple
zones or multiple pages, you can have all images in a single multipage image file, providing you set TIFF, MAX, DCX or Image-only
PDF as file type. Otherwise each image is placed in a separate file.
OmniPage Pro adds numerical suffixes to the file name you provide,
to generate unique file names.
4. Click Converter Options... if you want to specify a saving mode
(black-and-white, grayscale, color or ‘As is’), a maximum resolution
and other settings. For TIFF files, you specify the compression
method here.
5. Click OK to save the image(s) as specified. Zones and recognized text
are not saved with the file.
To see the size and resolution of a page image, hover the cursor over it or its
thumbnail in the Image Panel. Show or hide this display in its shortcut menu.
You can save your document to five variants of PDF. Two of these save the original
images, the others save recognition results. See the following sections.
You can save images to two or more file types, or save images together with
recognized pages in one saving step. See “Using multiple converters” on page 86.
Saving original images 81
Page 82

Select this first.
It determines
which other
options are
available.
Saving recognition results
You can save recognized pages to disk in a wide variety of file types. See
“File types for saving recognition results” on page 116.
1. Choose Export Results... in the File menu, or click the Export
Results button in the OmniPage Toolbox with Save to File selected
in the drop-down list.
2. The Save to File dialog box appears. Select Text under Save as.
Select this to
automatically open
the saved file in its
target application.
Possible choices:
All pages
Current page
Selected pages
Select pages with the
thumbnails or in the
Document Manager.
82 Saving and exporting
Click this to
view and
change output
options for the
current file
type.
Possible choices:
Create one file for all pages
Create one file per page
Create a new file at each blank page
Create a new file for each image file.
3. Select a folder location and a file type for your document. Select a
page range, file options and a formatting level for the document. See
“Selecting a formatting level” on page 83.
4. Type in a file name. Click Converter Options... if you want to
specify precise settings for the export. See “Selecting converter
options” on page 85.
Page 83

Chapter 5
5. Click OK. The document is saved to disk as specified. If Save and
Launch is selected, the exported file will appear in its target
application; that is the one associated with the selected file type in
your Windows system or in the advanced saving options for your
selected file type converter.
Graphics, table grids and other properties are saved in the document only if the
selected file type supports them, and if these are specified for retention in the
converter options for the current file type.
If more than one export file is created, OmniPage Pro will append numerical
suffixes to your file name to create unique file names.
If you select Create a new file at each blank page with input from image files, you
can place blank image files in the document. See “Input from image files” on
page 48.
If you select Create a new file for each image file, no file name is required. Each
output file will take its name from the input file that generated it, with just the
extension changed.
Selecting a formatting level
The formatting level for export is defined at export time, in the saving
dialog box (Save to File, Copy to Clipboard, Send in Mail or other dialog
box). Three of the levels correspond to the format views of the same
name in the Text Editor. However, the level to be applied for saving is
independent of the formatting view displayed in the Text Editor. When
exporting to file or mail, first specify a file type. This determines which
formatting levels are available. A table in chapter 7 summarizes this. See
“File types for saving recognition results” on page 116.
The formatting levels are:
No Formatting (NF)
This exports plain decolumnized left-aligned text in a single font and font
size. When exporting to Text or Unicode file types, graphics and tables
are not supported. You can export plain text to nearly all file types and
target applications; in these cases graphics, tables and bullets can be
retained.
Saving recognition results 83
Page 84

Retain Fonts and Paragraphs (RFP)
This exports decolumnized text with font and paragraph styling, along
with graphics and tables. This is available for nearly all file types.
Flowing Page (FP)
This keeps the original layout of the pages, including columns. This is
done wherever possible with column and indent settings, not with text
boxes or frames. Text will then flow from one column to the other, which
does not happen when text boxes are used.
True Page (TP)
This keeps the original layout of the pages, including columns. This is
done with text, picture and table boxes and frames. This is offered only
for target applications capable of handling these. True Page formatting is
the only choice for XML export and for all PDF export, except to the file
type ‘PDF Edited’.
Spreadsheet
This exports recognition results in tabular form, suitable for use in
spreadsheet applications.
Decolumnization for NF and RFP export is performed from left-to-right
and top-to-bottom:
84 Saving and exporting
Original
page
Decolumnized
result
Before export, check in NF or RFP view that the decolumnized order of
elements is correct. If not, switch to True Page view and click the Show
reading order tool to have the order shown by arrows. Use the Change
reading order tool to specify a different order. Multicolumn areas show
which columns are linked. If this linking is unsuitable, ungroup the area
and change the order of the elements it enclosed.
Page 85

Chapter 5
Selecting converter options
Click the Converter Options... button in a saving dialog box to have
precise control over the export. This brings up a dialog box with the
name of the current file type. It presents a series of options tailored to this
file type. First, confirm or change the formatting level, because this
influences which other options are presented. Select options as desired.
Online Help details how to do this.
Click Apply to have the changed settings applied to the current save only.
Click Defaults to have all settings returned to the default values for the
current file type.
Click Save to have the changed settings applied to the current save and
also stored as the settings to be applied in future whenever this file type is
selected again for saving.
The program currently associated with the chosen file type for the Save
and Launch feature is displayed at the bottom of the dialog box. Click the
three dots button to specify a different program.
To make your own customized converter, prepare your settings, click
New Converter..., provide a name, then click OK. Alternatively, name
the converter first, change settings next and then click Save.
Saving recognition results 85
Page 86

Custom converters are useful for repeated tasks, such as publishing a
weekly magazine. Then all recognized pages can be exported with their
formatting tailored to their intended use. You can also create a set of
customized converters for a given file type defining saving options for
each output formatting level, for example: RTF No Formatting, RTF
Retain Fonts and Paragraphs, RTF Flowing Page and RTF True Page.
You can change converter options without saving anything to file. Call
the Export Converters dialog box from the Tools menu. Three groups
appear: Text converters, Image converters and Multiple converters. Select
the desired converter and click the Options button. In this case, the
Apply button is not available.
Using multiple converters
Multiple converters allow you to export to two or more file types in one
export step. Choose Multiple in the saving dialog box:
86 Saving and exporting
The program has four sample multiple converters: Image PDF and TIFF,
Word and TIFF, Word and TXT, PDF and Word. When you choose
one, your pages will be saved to both file types using the file name you
provide. The extension differentiates the files. To save the files to
different folders, click Converter Options... and specify sub-folders. All
other settings are taken from the current converter options for each file
type in the multiple converter.
To make your own multiple converter, open the Export Converters
dialog box from the Tools menu. Choose the heading Multiple
converters and click New... to receive a list of all text converters, followed
by all image converters. Checkmark the desired ones. Optionally specify
sub-folder paths for each file type. Click New Converter..., specify a
name and click OK.
The sample converters and those you create are dependent converters.
Suppose you make a multiple converter to save to HTML and WordPad.
Page 87

Chapter 5
If you later change the saving options for the simple HTML converter,
these changes will also be applied in the multiple converter.
To m a ke an independent multiple converter, using the same example,
select the simple HTML converter and make a new simple converter
from it, naming it for instance ‘HTML for multiple’. Similarly, make a
converter ‘WordPad for multiple’. Then make a new multiple converter
from the two user-defined simple converters. In this way, the settings for
simple saving to HTML will be independent from those in the multiple
converter.
You can save pages with different formatting levels or file options to the
different file types, as defined in their simple converters. A few saving
operations cannot be done with multiple converters. These are:
Saving OmniPage Documents
Use a workflow with two saving steps, or perform two separate saves.
Saving to two targets
For instance, you cannot use a multiple converter to save a document to
file and also send it in mail. Use a workflow with two saving steps, or
perform two separate saves.
Saving different page ranges
You cannot save different page ranges to different file types, because only
one set of selected pages can exist at saving time. For the same reason, a
single workflow cannot be used either. Perform two separate saves or use
two workflows.
OmniPage Pro offers a new export option. Turn recognized text into an audio
wave file for later listening, using ScanSoft RealSpeak. A multiple converter is
useful for this, allowing you to save the document to file and generate a wave file in
one saving step. You must specify the reading language in the converter options for
the wave file type.
Saving recognition results 87
Page 88

Saving to PDF
You have five choices when saving to Portable Document Format (PDF)
files. The first four are presented as Text converters, the last one is listed
among the Image converters.
PDF (Normal):
Pages are exported as they appeared in the Text Editor in True Page view.
The PDF file can be viewed and searched in a PDF viewer and edited in a
PDF editor.
PDF Edited:
Use this if you have made significant editing changes in the recognition
results. You have three formatting level choices, including True Page.
The PDF file can be viewed, searched and edited.
PDF with image on text:
The PDF file is viewable only and cannot be modified in a PDF editor.
The original images are exported, but there is a linked text file behind
each image, so the text can be searched. A found word is highlighted in
the image.
PDF with image substitutes:
As for PDF (Normal), but words containing reject and suspect characters
have image overlays, so these uncertain words display as they were in the
original document. The PDF file can be viewed, searched and edited.
88 Saving and exporting
PDF, image only:
The original images are exported. The PDF file is viewable only and
cannot be modified in a PDF editor and text cannot be searched.
OmniPage Pro 14 Office allows you to create signed, tagged or encrypted
PDF files. To do this, select a PDF file type, click Converter Options...
and make the necessary choices.
OmniPage Pro 14 Office is supplied with a PDF printer facility. This
allows documents inside any print-capable application to be converted to
the PDF (Normal) format. Once OmniPage is installed, a new printer,
called “ScanSoft PDF Printer” will appear in your Print dialog boxes.
Click Properties... to set PDF creation norms. When you click OK you
are invited to specify a path and name for the PDF file.
Page 89

Chapter 5
Converting from PDF
OmniPage Pro 14 Office is supplied with a separate program from
ScanSoft: the PDF Converter for Microsoft Word. This allows you to
convert PDF files into Word documents quickly and easily. Once
OmniPage Pro is installed, PDF becomes available as a file type in the
Microsoft Word File Open dialog box. In most cases the conversion can
be done without invoking OmniPage Pro. It also places a PDF to Word
button in the Microsoft Outlook toolbar to perform conversion of PDF
files attached to mail messages.
The PDF Converter has its own help system, to be found in the Help
menu in Microsoft Word.
Copying pages to Clipboard
You can copy the recognition results from the current page, selected
pages or all document pages to the Clipboard. The copying is reported by
a progress monitor. You can then paste the Clipboard contents into
another application.
Text formatting, such as bold and italics, is retained when you paste into
an application that supports RTF 6.0/95 information. Otherwise, only
plain or Unicode text will be pasted. Graphics are retained if the
application supports insertion of images. If the target application has a
command Paste Special..., use it to specify which variant to paste.
! To copy pages to the Clipboard:
◆ With automatic processing, select Copy to Clipboard as the
setting in the Export Results drop-down list on the OmniPage
Toolbox. The Copy to Clipboard dialog box appears as soon as
the last available page is recognized or proofed.
◆ With manual processing, select the Copy to Clipboard setting in
the Export Results drop-down list and then click its button. The
Copy to Clipboard dialog box appears immediately.
◆ Specify a page range and formatting level to be used, then click
OK to start the copying.
Copying pages to Clipboard 89
Page 90

Copying to Clipboard is not available in workflows or jobs.
You can perform a copy and paste operation for the current zone by drag-anddrop. Use the Select zone tool to select a zone. Then drag the cursor from the
Image Panel to a target application with an open document. The zone contents
will be pasted at the cursor position. OCR runs if necessary.
Sending pages by mail
You can send page images or recognized pages as one or more files
attached to a mail message if you have installed a MAPI-compliant mail
application, such as Microsoft Outlook.
! To send pages by e-mail:
◆ With automatic processing, select Send in Mail as the setting in
the Export Results drop-down list on the OmniPage Toolbox.
The Export Options dialog box appears as soon as the last
available page in the document is recognized or proofed.
◆ With manual processing, select Send in Mail as the setting in the
Export Results drop-down list and then click its button. The
dialog box appears immediately.
◆ Workflows and jobs accept a Send in Mail export step.
90 Saving and exporting
At any time the program is not busy, choose Export Results/Send in Mail
from the File menu to call up this dialog box.
Page 91

Chapter 5
1. Choose what you want to send: Text, Image or Multiple. Text is for
recognized pages, Image for page images, Multiple to save to two or
more file types at once. See “Using multiple converters” on page 86.
2. Specify a file type, a page range, a formatting level and attachment
options: one attachment for all pages, one attachment per page, new
attachment at each blank page or one attachment for each input file.
Set all options and click OK.
3. The eMail Properties dialog box appears. Choose to auto-send the
message or not.
4. If you choose auto-sending, supply at least one e-mail address and if
desired a subject and an attachment name. Click OK to have the mail
sent. For auto-sending you must have a functioning connection to
your mailing system.
5. If you do not choose auto-sending, supply an attachment name and
click OK. Log into your mail application if you are prompted to do
so. Your mail application appears with the attachment(s) in a new
empty message. The suitable file extension is added to your
attachment name, with numerical suffixes for multiple attachments.
6. Address your mail message, add message text as desired and your mail
is ready to be sent.
The main purpose of auto-sending is for Batch Manager jobs, which may
run unattended. Just ensure your e-mail connection is available at job
completion time and job results (page images and/or recognized pages)
can be directed to pre-defined mail recipients — and also saved to file.
In OmniPage Pro 14 Office you can also request e-mail notification of
job or workflow completion. See the next chapter.
The program can detect e-mail addresses as it recognizes pages and transmits these
to the Text Editor. If you click an address, your mailing application appears with a
new empty message containing only the e-mail address.
Sending pages by mail 91
Page 92

Other export targets
In OmniPage Pro 14 Office you can export files to other targets. You can
save files to a central server (an FTP site) or to Microsoft SharePoint.
Exporting choices are made in the Export Options dialog box as shown
on the previous page. When you click OK you are directed to FTP or
SharePoint log-in and invited to specify the required path.
If an ODMA-compliant Document Management System (DMS) is
detected in your computing environment, it will be offered. If you have
access to more than one DMS, the system default will apply. The
ODMA server must be pre-configured to accept the file types to be
exported from OmniPage Pro, as defined by their extensions. Because
only one file can be saved at a time to ODMA, there are no File options
choices and multiple converters are not available. Otherwise, exporting
choices are as for other targets.
OmniPage Documents cannot be saved to these targets (nor sent to mail)
from inside OmniPage Pro. Please save OPDs to file and transfer them to
these targets outside the program.
92 Saving and exporting
Page 93
Chapter 6
Workflows
Workflows contain a series of processing steps along with their settings
that can be saved for future use. This makes them useful for handling
recurring tasks efficiently. They process whole documents using the page
order supplied as input. They often perform tasks in parallel, for instance
recognizing a page while the following page is being loaded.
Batch Manager jobs are closely related to workflows. Both are created and
modified with the Workflow Assistant. The main difference is that jobs
have added timing instructions and it is more usual for them to be run
without user attention.
This chapter presents the following topics:
◆ Work flows
•Sample workflows
•Running workflows
◆ Workflow Assistant
•Creating workflows
•Modifying workflows
◆ Batch Manager
•Creating new jobs
•Modifying jobs
• Managing and running jobs
◆ Watched folders
◆ Barcode driven workflows
◆ Voice recognition
OmniPage Pro User’s Guide 93
Page 94

Workflows
A workflow contains a series of processing steps and their settings. It can
be saved for repeated use whenever you have a task needing the same
processing. Workflows must begin with one and only one input step. But
after that, they do not have to conform to the traditional 1-2-3
processing pattern. Usually a workflow will include a recognition step,
but this is not compulsory. For instance, page images can be saved to
image files in a different file type or to an OmniPage Document. With or
without OCR, any number of saving steps are possible, even to different
targets, each with their own export settings.
Workflows are designed for efficient whole-document processing. They
cannot handle recognizing or saving single or selected pages from a
document. You should use manual processing for such cases.
Some workflows run without user interaction. Workflows needing
interaction are those with a manual zoning step, a proofing/editing step
or when run-time prompting is requested for input or output file names
and paths.
Sample workflows
94 Workflows
Here is a description of the four sample workflows provided with the
program. Their workflow diagrams are also shown.
1. To Word and TXT
◆ Input is taken from file with run-time prompting for file names,
keeping original resolutions.
◆ Auto-zoning will run on the pages. (No step necessary for this)
◆ Recognition in English with no professional or user dictionary,
optimized for speed rather than accuracy.
◆ No proofing or editing is requested. (No step necessary for this)
◆ Save to file with pre-defined multiple converter “Word and
TXT”. Prompt at run-time for saving path and name. Settings
and formatting levels will be those currently set for the two file
converters contributing to this multiple converter.
Page 95

2. To PDF and RTF
◆ Input is taken from file with run-time prompting for file names.
Original resolutions not to be kept for color and grayscale pages.
◆ Stop for manual zoning. (When running the workflow, use the
Document Ready button in the Toolbox to continue.)
◆ Recognition in English optimized for accuracy rather than speed.
◆ Stop for editing and proofing. (When running the workflow, use
the Document Ready button in the Toolbox to continue.)
◆ Save to PDF (Normal) with one file for all pages. True Page
formatting level is compulsory for PDF saving. Prompt for
saving path and name at run-time.
◆ Send RTF file with RFP formatting in a mail message. One
attached file for each input image file. Auto-sending turned off;
attachment name is ‘From Workflow’.
Workflows 1 and 2 are complete. The following workflows 3 and 4
are incomplete but complementary. If you run workflow 3 to save an
OmniPage Document (OPD), then later run workflow 4 to load
that OPD and finish processing it, you have a complete workflow,
separated into two parts. This allows proofing to be done
independently from recognition, for instance at a remote location.
Chapter 6
3. From images to OPD
◆ Input is taken from file with run-time prompting for file names
with ‘Keep original resolution’ turned off.
◆ Auto-zoning will run on the pages. (No step necessary for this)
◆ Recognition in English with maximum accuracy. No user or
professional dictionaries, but additional accented characters
e-acute and a-circumflex.
◆ Save results to OmniPage Document to a name and folder to be
defined when the workflow is run.
◆ Save unproofed recognized pages to WordPad with no
formatting and one file for all pages. This allows quick access to
the text while it awaits proofing in workflow 4.
Workflows 95
Page 96

4. From OPD to Word and TIFF
◆ Input is from OPD with run-time prompting for name and
path. The idea is to open the OPD generated by workflow 3.
◆ The OPD is presented for proofing and editing. (At run-time,
the Document Ready button signals that proofing is finished).
◆ Save as OmniPage Document back to its original location and
name to overwrite the previous unproofed version.
◆ Save recognized pages to Word 2000 and page images to TIFF
with the pre-defined multiple converter “Word and TIFF”.
Settings and formatting levels will be those currently set for the
two file converters contributing to this multiple converter.
If you need other export settings, or you want fixed settings when using
this workflow, you should use two separate saving steps. You can also use
an independent multiple converter you have defined yourself. See “Using
multiple converters” on page 86.
When using two incomplete workflows, recognition does not have to be
in the first workflow, as in the example above. You can use the first
workflow just to scan or import images. The second workflow can
contain the recognition, proofing and saving. This is useful when
scanning is performed at a different location.
96 Workflows
You can use these sample workflows as they are. You can modify their
settings, for instance to take input from pre-specified files and with
different recognition languages. See “Modifying workflows” on page 101.
You can choose a sample workflow as the starting point for a new userdefined workflow. See “Creating workflows” on page 98.
Running workflows
Here is how to run a sample workflow or one you have created:
1. If your workflow takes input from scanner, place your document in
its ADF or its first page on the scanner bed.
2. Select the desired workflow from the Workflow drop-down list.
3. Press the Start button. The OmniPage Toolbox displays the steps in
the workflow and acts as a progress monitor. You do not have access
Page 97

Chapter 6
to most program functions while the workflow is running. To stop
the workflow before it completes, press the Stop button.
4. If run-time input selection is specified, the Load Images dialog box
awaits your choice of files.
5. If you requested a step requiring interaction (manual zoning or
proofing) the program presents pages for attention.
6. When a page is zoned or proofed, click the Page Ready button in the
Toolbox to move to the next page.
7. When the last page is zoned or proofed, or when you no longer want
to do zoning or proofing, press the appropriate Document Ready
button on the Toolbox. Any pages without zones will be auto-zoned.
8. The document will remain displayed in OmniPage Pro if you
requested that when the workflow was created. Documents created
by the sample workflows will remain displayed. If your workflow
contains no saving step, you will be invited to save it to an OmniPage
Document on workflow completion.
9. A progress monitor tells you when the workflow is complete and
where to find the output file(s). In OmniPage Pro 14 Office, you can
have automatic notification sent to an e-mail address.
You can also run workflows from an OmniPage Workflow Starter icon on
the Windows taskbar. Click it for a shortcut menu listing your
workflows. Select one to run it. OmniPage Pro will be launched if
necessary. If it is running with a document loaded, you will be invited to
close it first, unless the workflow input is ‘Use current document’.
If you do not see the OmniPage icon, enable it in the General panel of
the Options dialog box or choose Start!All Programs!ScanSoft
OmniPage Pro 14.0! OmniPage Workflow Starter.
When the Workflow Starter is running in OmniPage Pro 14 Office with
the ASR-1600 voice recognition system in operation, you can launch
workflows by voice commands. See “Voice recognition” on page 107.
You can launch some workflows from your desktop. Right click on an
image file icon or file name for a shortcut menu. Multiple file selection is
possible. Choose OmniPage Pro 14.0 and a workflow name from the
sub-menu. This sub-menu also provides quick access to five target
Workflows 97
Page 98

formats using default settings: Word, Excel, PDF, TXT and
WordPerfec t. Only workflows with run-time prompting for input files
are listed here.
Pressing Stop while a workflow is running pauses it. Click Start to
resume processing. If you pause a workflow, maybe do some manual
processing, and then save the document as an OmniPage Document,
when you later open that OmniPage Document, the interrupted
workflow will use the OPD as input and finish the processing.
Workflow Assistant
This allows you to create and modify workflows. It is also used to create
and modify Batch Manager jobs; see the next section. The Assistant offers
a selection of steps, each represented by an icon. When you choose a step
with settings, clicking Next brings up a dialog box allowing you to check
and change them. You click Next again to receive a new set of step icons.
At any moment in the process, the Assistant offers icons for all steps that
are logically possible at that point.
98 Workflows
Creating workflows
Select New Workflow... in the Workflow drop-down list, or from the
Process menu. Or click the Workflow Assistant button in the Standard
toolbar when no workflow is selected.
The opening Assistant panel offers three starting points.
Choose Fresh Start to begin with no steps in the workflow diagram on
the right. Then click Next to choose your first step.
Choose OmniPage Workflows to see a list of existing workflows. These
are the four sample workflows plus any you have created. Select one as
source. Its steps will appear in the workflow diagram on the right. This is
illustrated in the following diagram.
Choose Batch Manager jobs and then select one. Its steps appear in the
workflow diagram, but all its timing instructions are ignored.
Page 99

Chapter 6
The starting point for
your workflow will
be an existing one.
This lists your
workflows. Select
one to see its steps
in the panel on the
right.
Workflow
diagram:
The series of steps
in your chosen
workflow appear
here.
When you are
satisfied with
your choice,
click Next.
If you selected a workflow or job as source, you proceed by modifying its
steps and settings. See the next section. If you save the workflow to a new
name, the changed settings apply to the new workflow only and are not
written back to the workflow or job used as the source. Similarly, when
you make a new workflow with Fresh Start as source, its panels present
settings as they were last set in OmniPage Pro. Any changed settings
enter the new workflow, but do not affect the settings in the program.
We now describe the creation of a workflow from a fresh start. Click
Next to proceed to the panel where the input is defined:
Choose one input step:
Load Image Files: Choose this and click Next to
define file names or request run-time prompting
and input settings.
Scan Images: Choose this and click Next to
define scanner settings for the workflow.
Open OmniPage Document: Choose this to
open a partially processed OPD file that your new
workflow should handle. Click Next to name the
file.
Use Current Document: Choose this to use a
document in OmniPage Pro as input. Be sure
OmniPage Pro is running with a suitable document
when you start a workflow with this step.
Other input: Depending on your OmniPage Pro
version and computing environment, other input
sources may be available.
Workflow Assistant 99
Page 100

After defining the input settings, click Next to choose your second step.
The screen looks like this:
Choose your next step:
Recognize Images: Send document pages to
OCR with auto-zoning.
Zone Images Manually: Choose this to see
document pages before recognition and draw
zones on them. Click Next. The recognition step
will be offered again.
Apply Zone Template: Click Next to specify
the template name. Both manual zoning (in
addition to template zones) and recognition will
be offered again.
Saving: If you choose a saving step without
recognition, you can save only page images.
Finish Workflow: If you choose this now, you
will be invited to save images to an OmniPage
Document at run-time.
Use Next to move to further steps. Select steps and settings as requested,
always using Next to confirm settings and proceed. Use Back to return to
earlier steps and modify their settings. If you select a different step, all the
steps following it will be deleted. To place multiple saving steps, always
use Next. After each saving step is chosen and its settings specified, you
still have a full choice of saving icons.
100 Workflows
Finally, select Finish Workflow and click Next. Name the workflow. If
you click Finish without providing a name, the workflow is run and the
document remains in OmniPage Pro with the name [untitled]. You can
consider this a different way of doing automatic processing. If you name
the workflow, choose whether the document should remain open or not.
In OmniPage Pro 14 Office you can request e-mail notification of
workflow completion to specified recipients. You can also request a
barcode cover page for the workflow to be printed or saved to an image
file. See “Watched folders” on page 104.
 Loading...