

NorthStar Navigation 8000I User Manual
Northstar 8000i
Quickstart Guide
www.northstarnav.com
Important Safety Information
IMPORTANT SAFETY INFORMATION
Please read carefully before use
It is your sole responsibility to use the Northstar 8000i in a manner that will not cause
accidents, personal injury or property damage. Always observe safe boating practices.
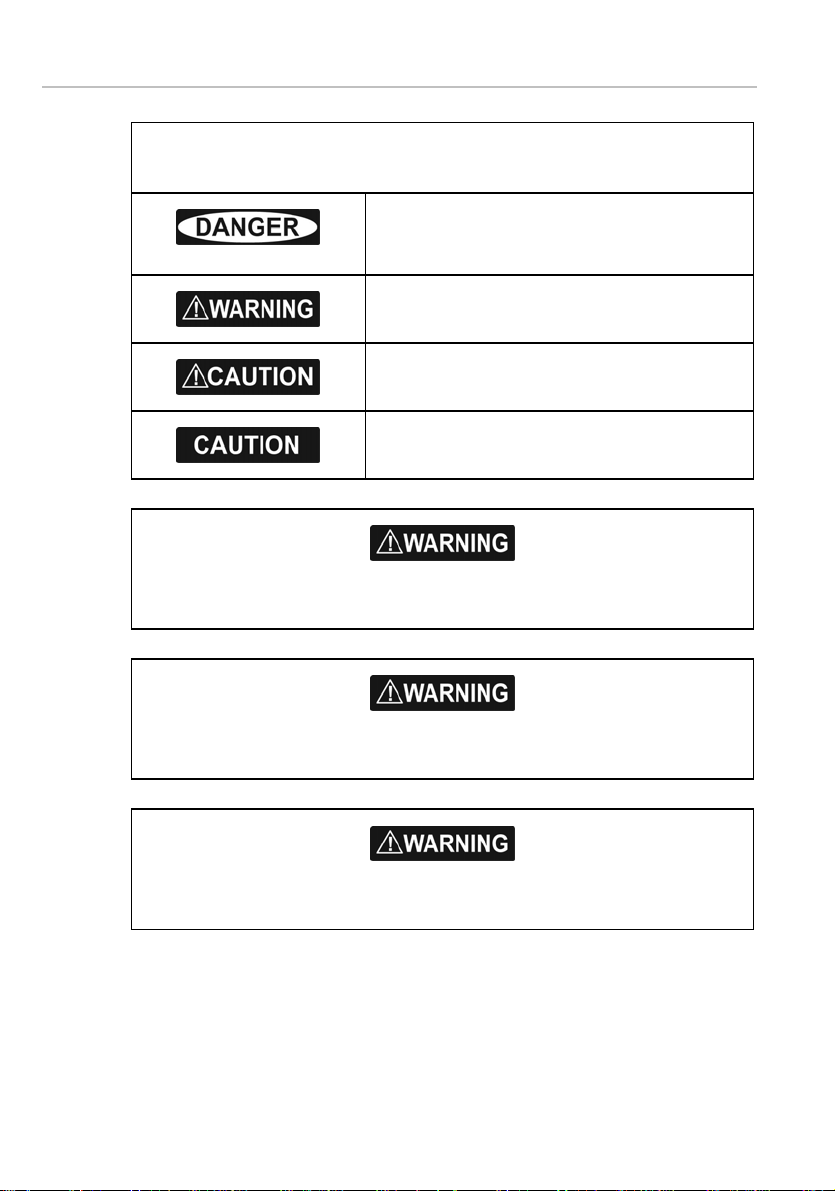
This is the safety alert symbol. It is used to alert you to
potential personal injury hazards. Obey all safety
measures that follow this symbol to avoid possible
injury or death.
WARNING indicates a potentially hazardous situation
which, if not avoided, could result in death or serious
injury.
CAUTION indicates a potentially hazardous situation
which, if not avoided, may result in minor or moderate
injury.
CAUTION used without the safety alert symbol indicates
a potentially hazardous situation which, if not avoided,
may result in property damage.
When navigating the vessel, use the Northstar 8000i only as a navigational aid. Proper
navigation of the vessel is the sole responsibility of the vessel operator.
Depth soundings should be used only for navigation. Never use a depth sounding to gauge
depth, range or other conditions for swimming or diving.
2
Northstar 8000i Quickstart Guide
The Global Positioning System (GPS) is operated by the US Government which is solely
responsible for its operation, accuracy, and maintenance. The GPS system is subject to
changes which could affect the accuracy and performance of all GPS equipment
anywhere in the world.
The electronic chart used by the Northstar 8000i is an aid to navigation designed to
supplement, not replace, official government charts. Only official government charts
supplemented by notices to mariners contain the information required for safe and
prudent navigation. Always supplement the electronic information provided by the
Northstar 8000i with other plotting sources such as observations, depth soundings,
radar and hand compass bearings. Should the information not agree, the discrepancy
must be resolved before proceeding any further.
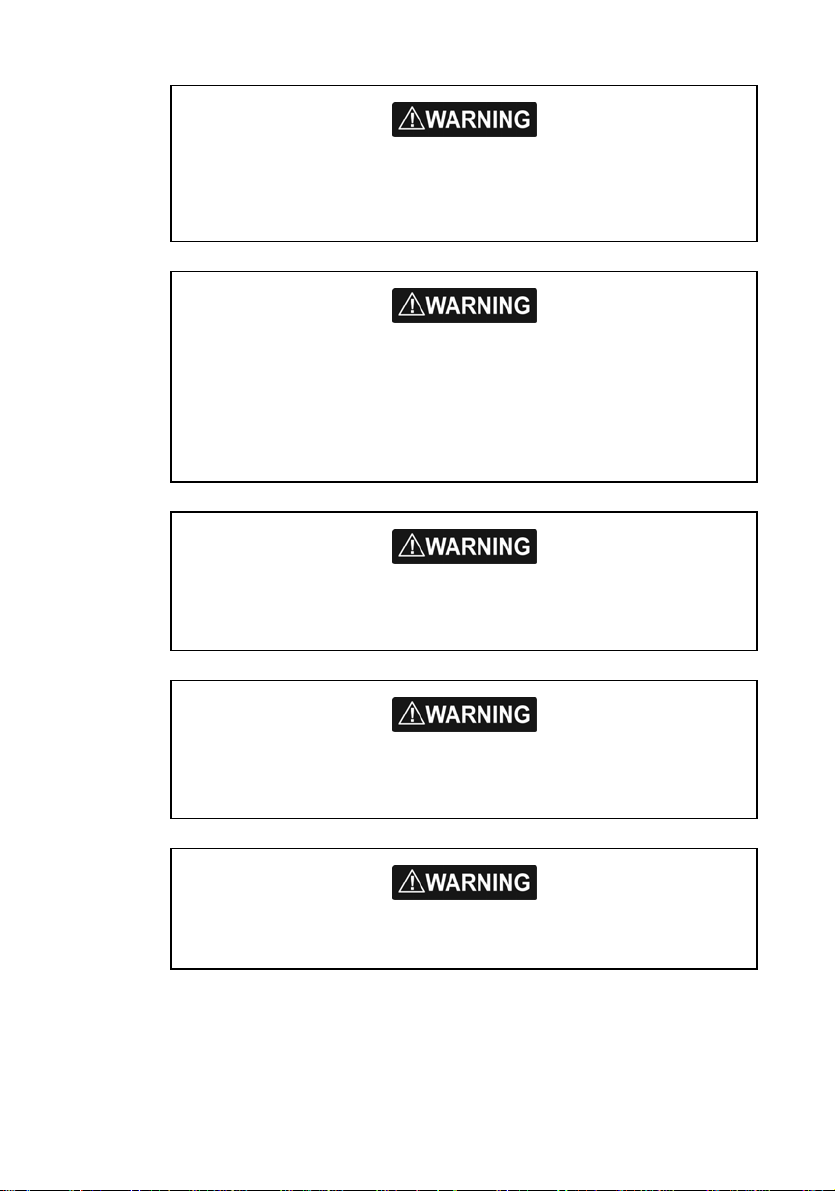
Never operate the 8000i in Simulate Mode while you're underway.
It is the user's responsibility to ensure that Simulate Mode is used only in safe
situations such as when you are moored in a marina.
The accuracy of the sonar depth display can be limited by many factors, including the
type of transducer, the location of the transducer, and water conditions. Ensure that
the transducer is installed and used correctly.
The radar must be set up before it is used for the first time.
See "Set up the radar before using it" in the Radar Installation manual.
Northstar 8000i Quickstart Guide
3
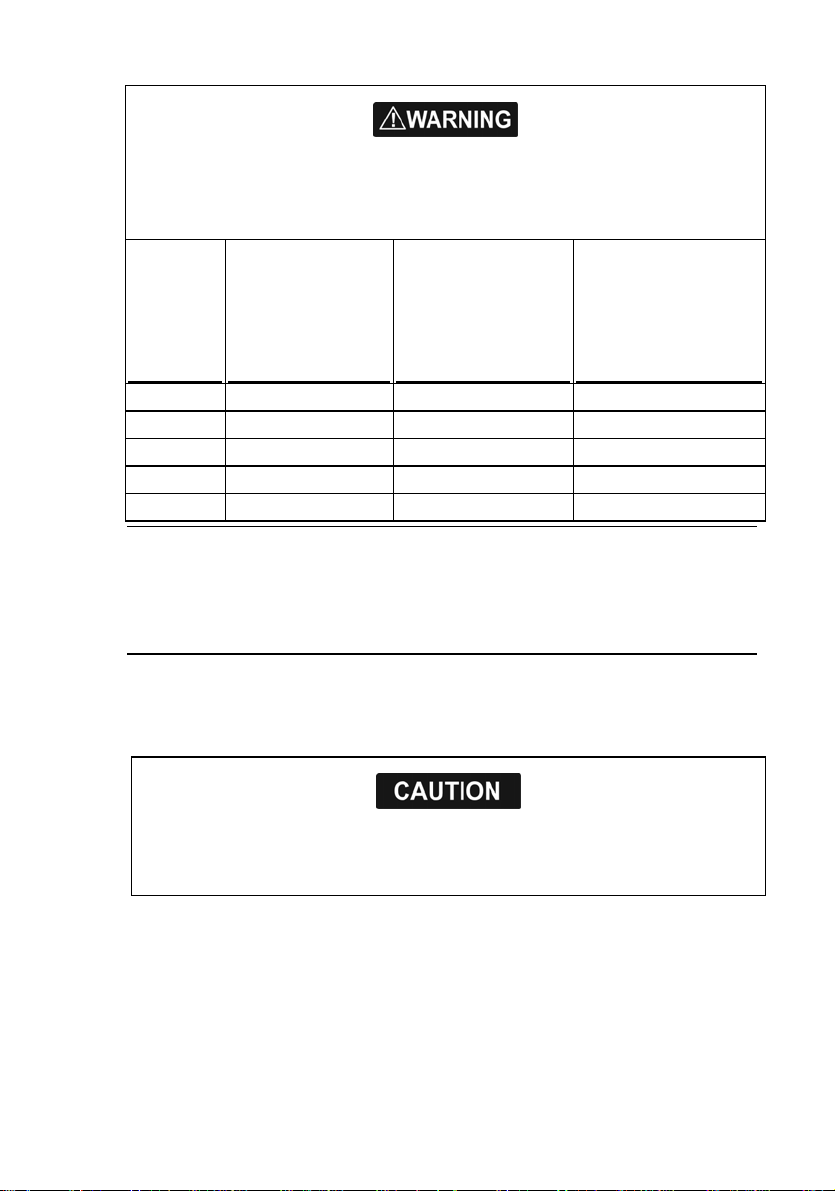
Never look directly into the scanner at close range while the radar is operating.
Radar scanners emit electromagnetic energy at a frequency that can be harmful at close
range. Always keep the recommended safe distance from the scanner as follows:
Minimum safe
distance
Scanner
Model
2 kW 30 1.6 ft (0.5 m) 4.6 ft (1.4 m)
4 kW 25 3 ft (0.9 m) 9.3 ft (2.8 m)
6 kW 20 3.6 ft (1.1 m) 11.5 ft (3.5 m)
10 kW 20 9.5 ft (2.9 m) 30 ft (9.0 m)
25 kW 20 18 ft (5.5 m) 57 ft (17.4 m)
Vertical beam
angle of scanner
(degrees)
(100 Watts per m²
average power
density) Note 1
Minimum safe
distance
(10 Watts per m²
average power
density) Note 2
NOTES: Limits apply to exposure within the vertical beam angle.
Note 1: Peak occupational exposure limit pursuant to IEC 60936 Clause 3.27 and IEC
62252 Clause 4.32
Note 2: General public exposure limit pursuant to IEC 60936 Clause 3.27 and IEC
62252 Clause 4.32
Failure to adhere to these warnings may lead to death, serious injury or property
damage. Northstar disclaims all liability for installation or use of this product that
causes or contributes to death, injury or property damage or that violates any law.
You are strongly recommended to scan all removable media (such as USB memory sticks or
CDs) for viruses or corrupt data on a separate device BEFORE connecting or using the
removable media with the 8000i.
4
Northstar 8000i Quickstart Guide

Disclaimer
As Northstar is continuously improving this product we retain the right to make
changes to the product at any time which may not be reflected in this version of
the manual. Please contact your nearest Northstar distributor if you require any
further assistance.
It is the owner’s sole responsibility to install and use the instrument and
transducers in a manner that will not cause accidents, personal injury or property
damage. The user of this product is solely responsible for observing safe boating
practices.
BRUNSWICK NEW TECHNOLOGIES INC. AND ITS SUBSIDIARIES AND AFFILIATES
DISCLAIM ALL LIABILITY FOR ANY USE OF THIS PRODUCT IN A WAY THAT MAY
CAUSE ACCIDENTS, DAMAGE OR THAT MAY VIOLATE THE LAW.
Governing Language: This statement, any instruction manuals, user guides and
other information relating to the product (Documentation) may be translated to,
or has been translated from, another language (Translation). In the event of any
conflict between any Translation of the Documentation, the English language
version of the Documentation will be the official version of the Documentation.
This manual represents the product as at the time of printing. Brunswick New
Technologies Inc. and its subsidiaries and affiliates reserve the right to make
changes to specifications without notice.
Copyright © 2006 Brunswick New Technologies Inc. Northstar™ is a registered
trademark of Brunswick New Technologies Inc.
Warranty
The Northstar Warranty Statement is supplied as a separate document.
It is shipped with the Product Registration Card.
In case of any queries, refer to www.northstarnav.com.
Northstar 8000i Quickstart Guide
5

Contents
Important Safety Information.............................................................................................................................2
Disclaimer..................................................................................................................................................................5
Warranty.....................................................................................................................................................................5
1 Welcome to the Northstar 8000i 8
1.1 Networking the 8000i ..............................................................................................................................8
1.2 How to use this manual...........................................................................................................................9
1.3 Conventions................................................................................................................................................9
2 Introduction to the Northstar 8000i 11
2.1 Turn on the 8000i ...................................................................................................................................11
2.2 Turn off the 8000i...................................................................................................................................12
2.3 The keys on the 15 inch Monitor....................................................................................................... 12
2.4 The keys on the remote keypad........................................................................................................ 13
2.5 The keys on the 12 inch Display Processor.................................................................................... 15
2.6 The buttons .............................................................................................................................................. 16
2.7 How to select an item ...........................................................................................................................16
2.8 Single pane options............................................................................................................................... 16
2.9 What is the active pane? ......................................................................................................................17
2.10 What are pages? .....................................................................................................................................17
2.11 Expand a small pane.............................................................................................................................. 18
2.12 Cycle through the panes on a page.................................................................................................19
2.13 Select a page............................................................................................................................................ 19
2.14 Adjust the brightness on a 12 inch Display Processor............................................................... 19
2.15 Adjust the brightness on the 15 inch Monitor .............................................................................20
2.16 Adjust the volume.................................................................................................................................. 20
2.17 Select a palette........................................................................................................................................ 20
3 Get started with Northstar 8000i 21
3.1 Display the chart screen....................................................................................................................... 21
3.2 What does the chart screen show?................................................................................................... 21
3.3 Display your current position in real time......................................................................................22
3.4 Pan the chart............................................................................................................................................ 22
3.5 Zoom in or out on a chart screen...................................................................................................... 22
3.6 Zoom in or out on part of a chart screen........................................................................................23
3.7 Instant GoTo............................................................................................................................................. 23
3.8 Show range and bearing from your vessel.................................................................................... 24
3.9 Overlay the radar.................................................................................................................................... 24
3.10 Create a waypoint ..................................................................................................................................25
3.11 Create an event mark............................................................................................................................25
3.12 Navigate to a waypoint ........................................................................................................................26
3.13 Stop navigating to a waypoint ..........................................................................................................26
3.14 Create a new route................................................................................................................................. 26
3.15 Move a waypoint in a route ................................................................................................................27
3.16 Add a new waypoint into a route .....................................................................................................28

3.17 Add a waypoint to the start or end of the route ..........................................................................29
3.18 Select and follow a route with GoTo................................................................................................ 29
3.19 Stop following a route ..........................................................................................................................30
3.20 Introduction to 3D Chart...................................................................................................................... 30
3.21 Display the 3D Chart screen................................................................................................................ 30
3.22 Reposition the 3D Chart screen to show your vessel .................................................................31
3.23 3D Steer......................................................................................................................................................31
3.24 Display the 3D Steer screen ................................................................................................................31
3.25 The sounder..............................................................................................................................................31
3.26 Change the sounder operating mode.............................................................................................32
3.27 Change the range................................................................................................................................... 32
3.28 Radar...........................................................................................................................................................33
3.29 What are the radar modes? .................................................................................................................33
3.30 Display the radar screen....................................................................................................................... 34
3.31 Start the radar transmitting ................................................................................................................34
3.32 Stop the radar transmitting ................................................................................................................34
3.33 What does the radar screen show?...................................................................................................34
3.34 Change the range of the radar........................................................................................................... 35
3.35 Optimize the quality of the radar display.......................................................................................36
3.36 Change the radar gain mode..............................................................................................................36
3.37 Change the radar gain setting ...........................................................................................................37
3.38 What is sea clutter? ................................................................................................................................37
3.39 Change the sea clutter mode .............................................................................................................37
3.40 Change the sea clutter setting...........................................................................................................38
3.41 Entertainment.......................................................................................................................................... 39
3.42 Turn the volume up or down..............................................................................................................40
3.43 Select and play music from the jukebox.........................................................................................40
3.44 Play a music CD .......................................................................................................................................41
3.45 Select and play a video.........................................................................................................................41
3.46 Play a DVD................................................................................................................................................. 42
3.47 Select and play the Video Aux In source.........................................................................................42
4 Man Overboard 43
Northstar 8000i Quickstart Guide
7

1 Welcome to the Northstar 8000i
Congratulations on your purchase of the Northstar 8000i, the revolutionary new
integrated marine electronics system. The 8000i is designed for ease of use in the
marine environment, with Touch Screen technology and Online Help.
The 8000i can integrate navigation, fishfinding, instrumentation, multimedia
entertainment, and an onboard camera. Whatever type of boat you have and
however you use it, you can customize the 8000i to meet your needs.
Flexible, modular, and innovative, the 8000i delivers awesome performance.
Please take a few minutes to read through this Northstar 8000i Quickstart Guide and
learn how to get started with your 8000i.
NOTE: The 8000i has several requirements that must be met to ensure safe and
proper operation. Installation and interfacing of the 8000i should be handled by a
marine technician using the guidelines found in the various Northstar 8000i
1.1 Networking the 8000i
8
installation manuals.
The 8000i can be connected to a wide variety of compatible marine devices,
including Northstar's sounder and radar. A qualified marine electronics technician
should perform these installations.
The 8000i integrated networking technology lets you connect two or more display
units in order to share navigation, sounder, radar, entertainment, and
instrumentation data. Any changes that you make to any of these functions, such
as creating a new waypoint or saving a new video in the video jukebox, are
instantly available to everyone using the 8000i.
If more than one display unit is used in the 8000i system, one of them must be
specified as the network master unit. The master unit MUST:
• have all the data wiring (such as NMEA) run to it. Incoming navigation date,
such as GPS and NMEA, is received by the master unit and then distributed over
the network to other display units.
• have the GPS antenna is connected to it.
• have the chart license key connected to it. When the chart license key is
connected and the charts unlocked, other display units can share the one
license and display the charts.
• have the autopilot (if fitted) connected to it.
The master unit MUST be operating in order for the other display units to function
with navigational information. The other display units are sometimes referred to as
client units.
If the master unit is NOT operating, all the other display units will show a grey
screen with the message "Master “name” unavailable". This will be the case for
Chart, Radar, Sounder, and 3D Chart.
Northstar 8000i Quickstart Guide

1.2 How to use this manual
The Northstar 8000i Quickstart Guide has all the basic information you need to start
operating the 8000i after it has been installed and set up. Be sure to read this when
you start using the 8000i so you can try out the various functions and see the
results.
The Northstar 8000i System Operation Manual has more detailed information about
all the different functions to help you get the most from your 8000i.
Detailed information on how to use all the 8000i functions is also available as
online help - just select Display, then Help.
1.3 Conventions
This manual uses certain conventions to provide a consistent mean of recognizing
specific information, as follows:
PLEASE READ CAREFULLY BEFORE USE
WARNING indicates a potentially hazardous
situation which, if not avoided, could result in death
or serious injury.
CAUTION indicates a potentially hazardous situation
which, if not avoided, may result in minor or
moderate injury.
CAUTION used without the safety alert symbol
indicates a potentially hazardous situation which, if
not avoided, may result in property damage.
Text written like Radar refers to a function that's included in your 8000i, such as the
radar or the camera.
A "pane" is the part of the screen that shows an 8000i function, such as the
sounder.
A "page" is a multi-pane screen. You can have a maximum of four panes on the
screen at any one time.
The "active pane" contains the 8000i function that you're currently using; it's
identified by an orange border.
The "cursor" is the cross hair or arrow that may be shown on the screen.
"keys" are physical keys that you can depress; these may be on the surround of your
display unit or located on a remote keypad.
"buttons" are displayed graphically on the screen.
"Select ...." means touch an item on the screen, or, if you are using a remote keypad,
use the four directional arrows or the cursor control pad to move to the item then
press the confirm bar.
Northstar 8000i Quickstart Guide
9

The "control panel" refers to the onscreen buttons that are displayed in the right
hand side of the screen. They show the options available for the selected function.
Text written like Chart refers to the names of keys and buttons.
Text written like this identifies a task, and is followed by numbered steps that
explain how to do the task.
10
Northstar 8000i Quickstart Guide

2 Introduction to the Northstar 8000i
This section introduces the 8000i and shows you how to use the basic functionality.
It's best to work through this section with the 8000i set up and running so you can
2.1 Turn on the 8000i
try out the various functions and see the results.
To turn on the 8000i using a 12" Display Processor:
1. Just press the Power key to turn on the 8000i.
2. The Northstar 8000i screen appears briefly, followed by an information
screen. (This appears each time that you start the 8000i.) If you agree to
the conditions of use, select Accept Conditions of Use.
3. The Chart screen appears in a single pane. The 8000i is ready to use.
To turn on the 8000i using a 15" Monitor (preferred method):
Use this method when the Black Box Processor and the 15" Monitor are both wired
together as recommended in the 15” Installation Manual.
1. Press the Power key on the 15" Monitor.
2. The Northstar Marine Monitor screen may appear briefly, followed by
the Northstar 8000i screen.
3. An information screen appears. (This appears each time that you start
the 8000i.) If you agree to the conditions of use, select Accept
Conditions of Use.
4. The Chart screen appears in a single pane. The 8000i is ready to use.
To turn on the 8000i using a 15" Monitor (alternative method):
Use this method when the Black Box Processor and the 15" Monitor are wired
independently.
1. If the Black Box Processor is turned off, press the Power (ON/OFF) key at
the rear.
2. The Power LED at the rear will glow red when the Black Box Processor is
on.
3. Press the Power key on the 15" Monitor.
4. The Northstar Marine Monitor screen may appear briefly, followed by
the Northstar 8000i screen.
5. An information screen appears. (This appears each time that you start
the 8000i.) If you agree to the conditions of use, select Accept
Conditions of Use.
6. The Chart screen appears in a single pane. The 8000i is ready to use.
Northstar 8000i Quickstart Guide
11
2.2 Turn off the 8000i
To turn off the 8000i using a 12" Display Processor:
1. Hold down the Power key. The Northstar 8000i countdown screen
appears, then the 12" Display Processor turns off automatically. (If you
want to cancel shutdown, just release the button.)
To turn off the 8000i using a 15" Monitor (preferred method):
Use this method when the Black Box Processor and the 15" Monitor are both wired
together as recommended in the 15” Installation Manual.
1. Hold down the Power key on the 15" Monitor for about three seconds
to turn off the 8000i.
To turn off the 8000i using a 15" Monitor (alternative method):
Use this method when the Black Box Processor and the 15" Monitor are wired
independently.
1. Hold down the Power key on the 15" Monitor for about three seconds
to turn off the 15" Monitor.
2. Hold down the Power (ON/OFF) key at the back of the Black Box
Processor until the red Power LED goes out.
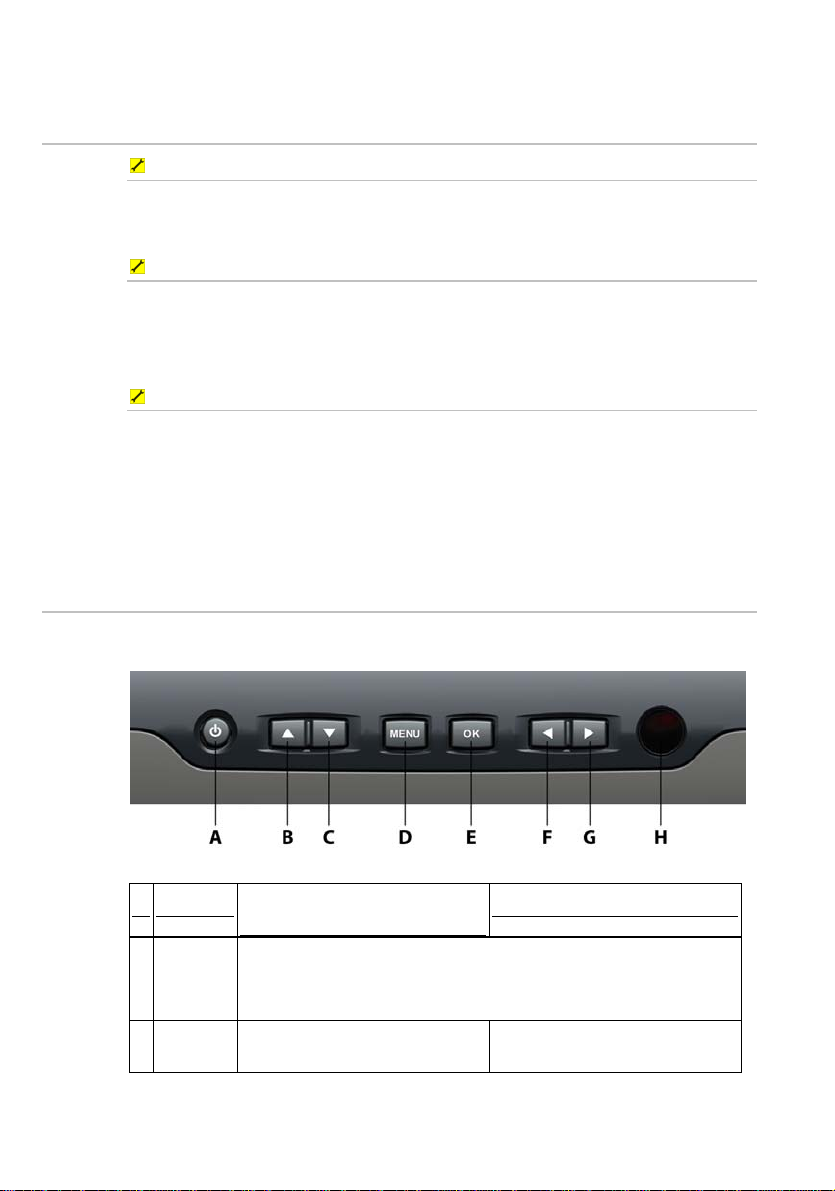
2.3 The keys on the 15 inch Monitor
The "keys" are physical keys that you can depress. The following keys are shown on
your 15" Monitor:
12
Key
A Power Press once to turn on. Hold down for three seconds to t urn off.
B Up Arrow Press to step up through the
Function when NOT in
OSD mode
If correctly wired using the Remote Power On feature this key also
controls the power status of the Northstar 8000i Black Box Processor
other video input source options.
Northstar 8000i Quickstart Guide
Function in OSD mode
Press once to step up through
the OSD options.
C Down
Arrow
D MENU Press once to show the OSD
E OK Press to show the current video
F Left
Arrow
G Right
Arrow
H Infrared
Receiver
I Screen 1024 x 768 resolution touch screen (XGA)
Press to show the current video
input source in the top left corner
of the screen.
Press again to step down through
the other video input source
options.
options.
input source in the top left corner
of the screen.
Press once to decrease the
brightness one step or hold down
to change it rapidly.
Press once to increase the
brightness one step or hold down
to change it rapidly.
Not yet implemented
Press once to step down through
the OSD options.
Press to exit the OSD options.
Press to select or accept changes
to the OSD options and exit the
OSD options.
Press once to change an OSD
setting (such as contrast) one
step or hold down to change the
setting rapidly.
Press once to change an OSD
setting (such as contrast) one
step or hold down to change the
setting rapidly.
J Finger
Guides
K Mounting
Bezel
To guide fingers to the onscreen controls when using the 8000i
software.
Clip-on bezel.
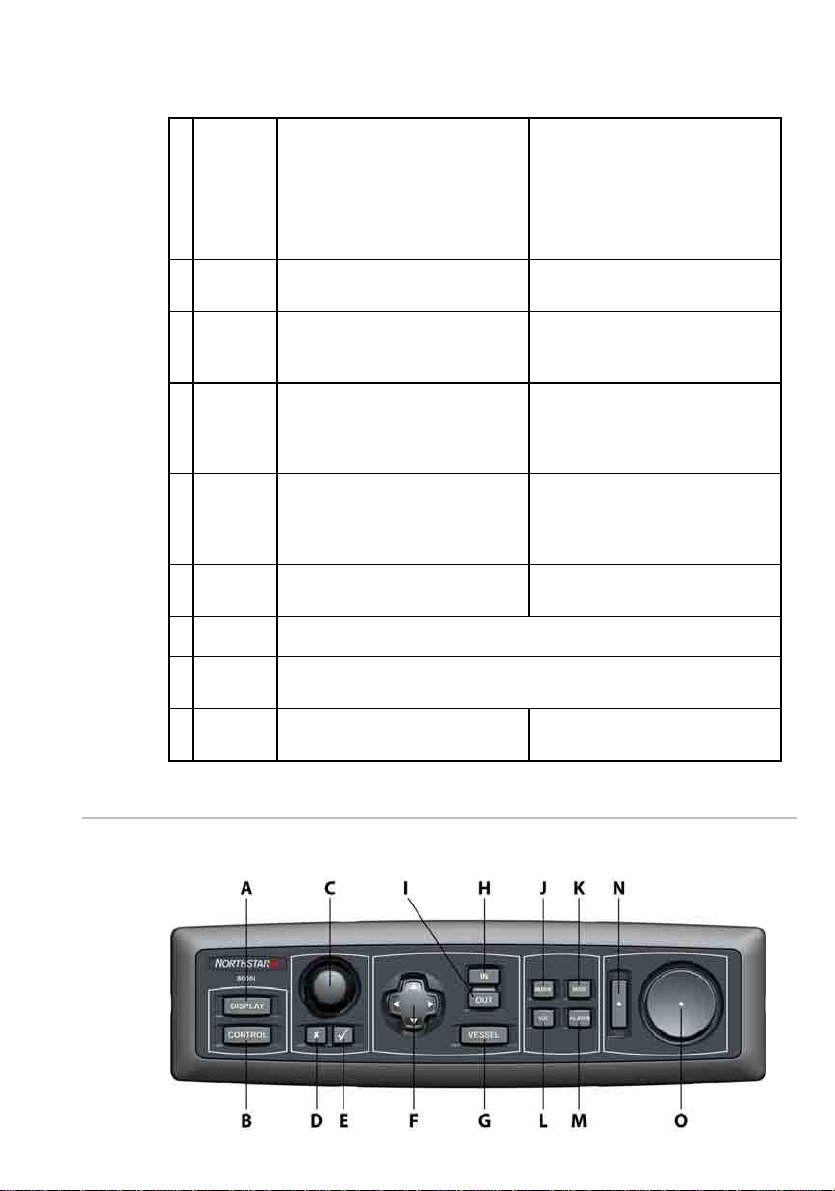
2.4 The keys on the remote keypad
The "keys" are physical keys that you can depress. The following keys are shown on
your remote keypad:
Northstar 8000i Quickstart Guide
13

A DISPLAY Press once to show the single pane options; press again to show
B CONTROL If the control panel is hidden, press once to show it.
C Rotary knob Turn left (counter-clockwise) to scroll down or decrease a value or
D Cancel Press to cancel or exit.
E Confirm Press to select or confirm.
F 4 directional
arrows
G VESSEL Press to return to the selected vessel offset position on your Chart
H IN Press once to zoom in one step.
I OUT Press once to zoom out one step.
J MARK Press to mark the current position with a default event mark icon.
K MOB Press to activate the Man Overboard waypoint.
L VOL Press to adjust the volume of the audio that you're playing.
M ALARM Press to show the alarm log and to set up the alarms.
N Confirm bar Press to select the chosen item on the screen.
O Cursor control
pad
the page options.
On a multi-pane screen, press once to make the next pane the
active pane. Repeat if necessary.
On a multi-pane screen, where you have expanded the active
pane to full size, press to show the next pane at full size. Repeat if
necessary.
setting.
Turn right (clockwise) to scroll up or increase a value or setting.
Press or hold down an arrow to move in that direction, or to move
the selection highlight.
These work only for some functions, such as Chart.
screen (Look Ahead or Center) or to remove any offset on your
Radar screen.
Press an edge to move the cursor in that direction on the screen.
14
Northstar 8000i Quickstart Guide
 Loading...