

Nikon COOLPIX S7C Quick Start Guide
DIGITAL CAMERA
Quick Start Guide
Package Contents
First Steps
Taking Pictures
Installing PictureProject
Viewing Pictures on a
Computer
En
pg. 2
pg. 3
pg. 10
pg. 15
pg. 31
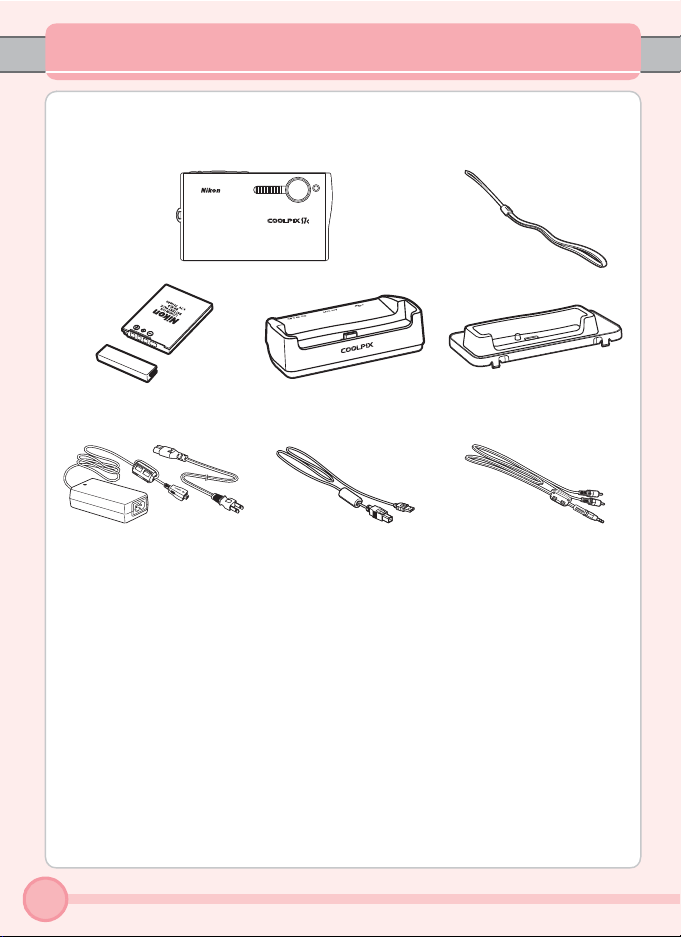
Package Contents
Remove the camera and accessories from the box and confirm that you have
all the items listed below.
COOLPIX S7c
digital camera
Camera strap
EN-EL8 rechargeable battery (with terminal cover)
EH-64 AC adapter
(with power cable)
• Quick Start Guide (this guide)
• Guide to Digital Photography
• Warranty
• Customer registration card
MV-15 COOL-STATION PV-11 dock insert
UC-E10 USB cable EG-E5000
• Wireless Camera Setup Utility/
PictureProject Installer CD (yellow)
• PictureProject Reference Manual CD
(silver)
* A Secure Digital (SD) memory card is not included.
2
audio/video cable
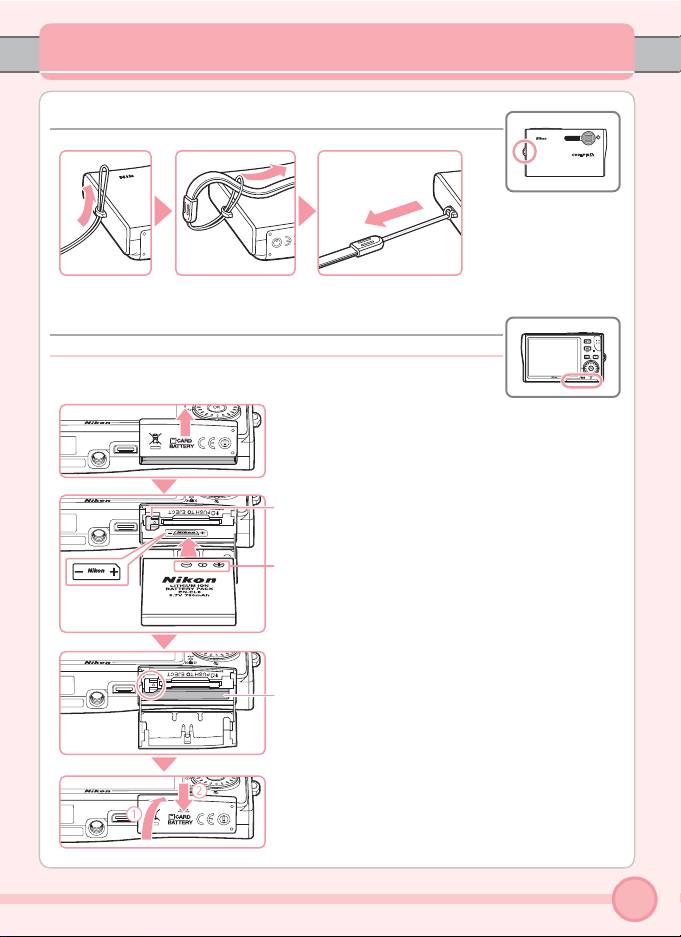
First Steps
Step 1 Attach the Camera Strap
Step 2 Charge the Battery
1 Insert the battery.
The battery latch is pushed aside as the battery is inserted.
Inserting the battery upside down or backwards
could damage the camera. Check to be sure the
battery is in the correct orientation.
The battery is fully inserted when the latch
clicks back into place.
3
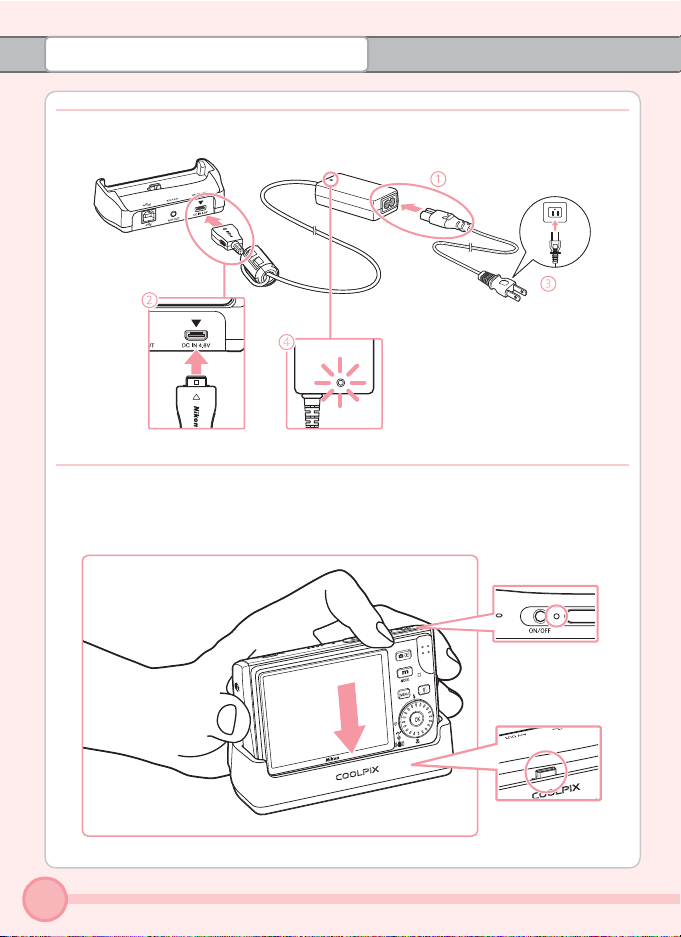
First Steps
2 Connect the COOL-STATION and AC adapter.
When the adapter is connected correctly, the power on lamp will light.
3 Place the camera in the COOL-STATION.
After making sure that the camera is turned off, fully insert into the COOL-STATION.
4
First Steps
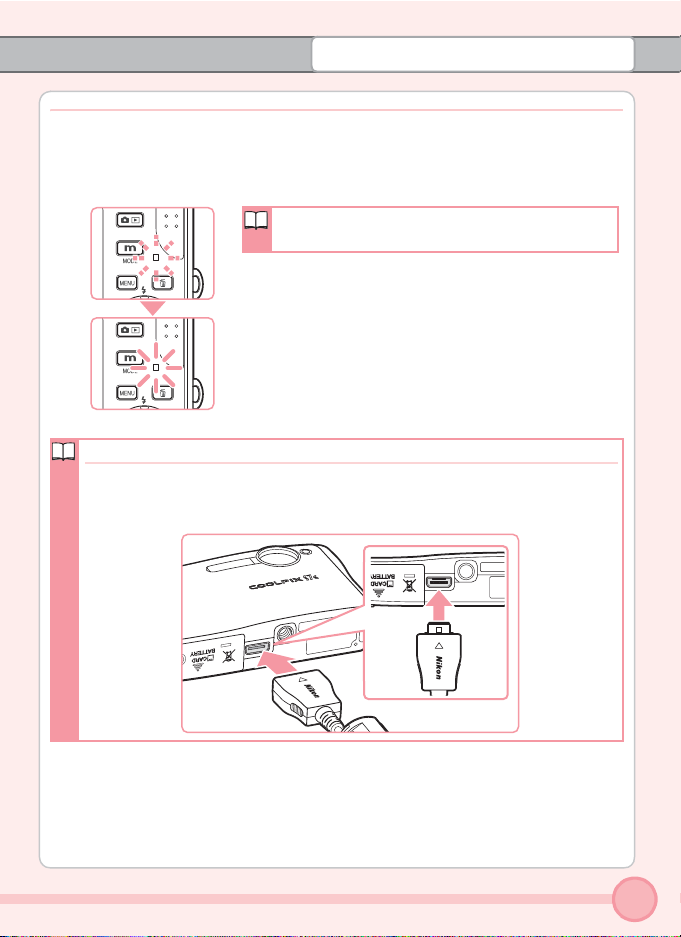
4 Charge the battery.
The indicator lamp next to the camera monitor will blink green as the battery
charges.
A fully exhausted battery will recharge in about
two hours.
The indicator lamp stops blinking when charging is
complete.
Remove the camera and unplug the power cable from
the power outlet.
Charging the Camera Without Using the COOL-STATION
Charging the battery is possible without using the COOL-STATION. Insert the
battery into the camera, make sure that the camera is turned off, and connect the AC adapter to the multi connector of the camera directly.
5
First Steps
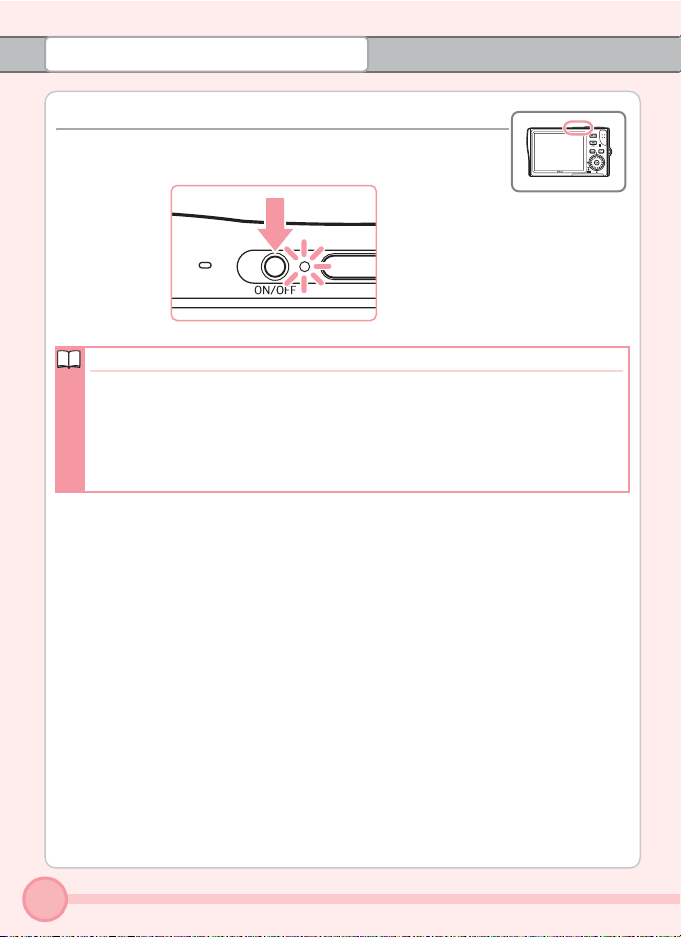
Step 3 Turn On the Camera
Press the power switch to turn on the camera.
Power Saving Function
• In shooting mode, the monitor will dim to reduce the drain on the battery
if no operations are performed for about five seconds. The monitor will
brighten when camera controls are used.
• The monitor will turn off altogether if no operations are performed for
about a minute. The camera will turn off automatically (Auto Off) if no
operations are performed for another three minutes.
The procedures described in this Quick Start Guide are for basic, initial settings.
6

First Steps
Step 4 Choose a Language and Set the Camera Clock
A language-selection dialog is displayed the first time the camera is turned
on. Follow the steps below to choose a language and set the time and date.
Use the rotary multi selector to make the settings.
Rotary multi
selector
Rotate in either direction to choose items
Press d to apply selection
In the descriptions that follow, how to use the rotary multi selector to
perform a task are shown in pink.
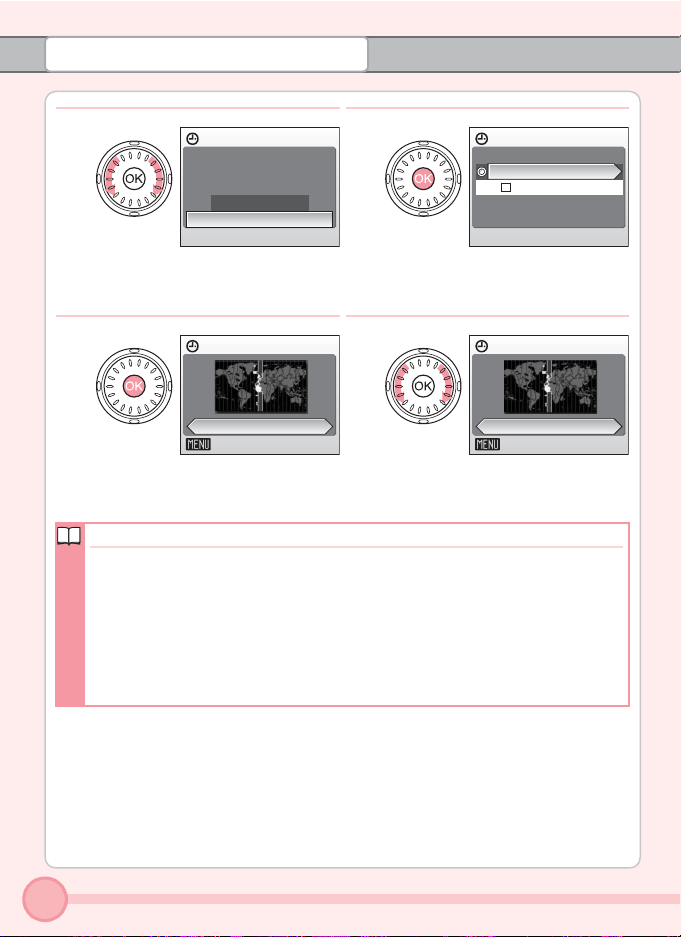
1
Choose the desired language.
Rotate
2
The date menu is displayed.
Press d
Date
Set time and date?
No
Yes
7
First Steps
3
Choose [Yes].
5
The home time zone menu is displayed.
Daylight Saving Time
When daylight saving time is in effect, follow the steps below in the time
zone menu (step 4 above):
1 Rotate the rotary multi selector to choose [DaylightSaving].
2 Press d to enable daylight saving time y.
3 Rotate the multi selector to return to the time zone menu with the zone
selected (“London, Casablanca” in step 4 above).
Then, proceed to step 5. Daylight saving time is enabled and the camera clock
automatically advances one hour.
Date
Set time and date?
No
Yes
Home time zone
London,Casablanca
X
Back
4
The time zone menu is displayed.
If daylight saving time is in effect,
see “Daylight Saving Time” below.
6
Select your home time zone.
Time zone
London,Casablanca
X
DaylightSaving
Home time zone
London,Casablanca
X
Back
8
First Steps
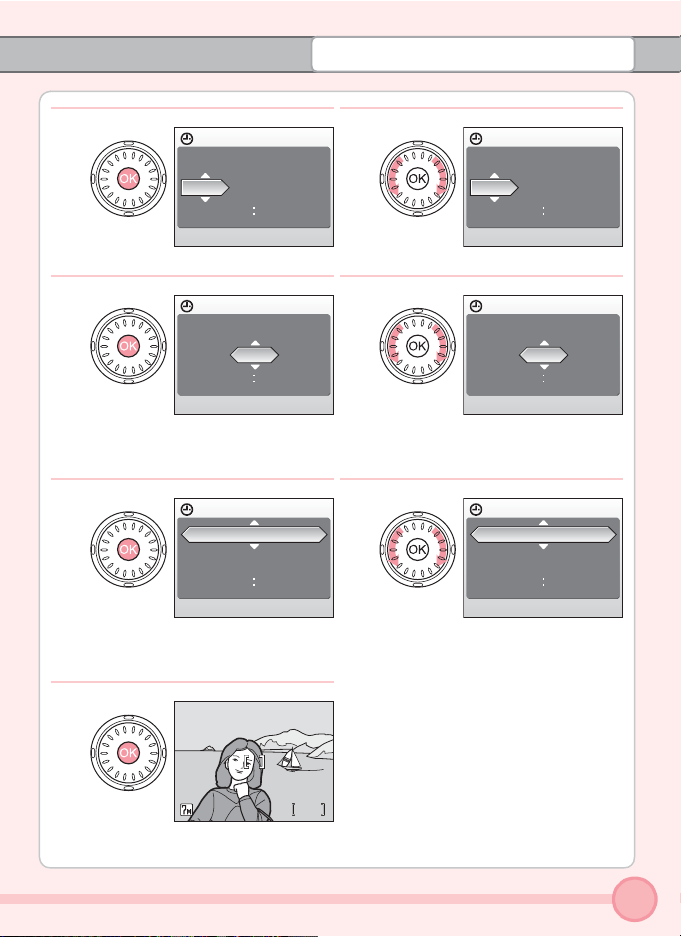
7
The date menu is displayed.
9
Press d.
11
Press d.
• The row for setting the order in
which the date is displayed will blink.
13
Date
DMY
01
Date
DMY
15
Date
DMY
15
M
8
200609
0000
Edit the day.
10
200609
0000
Edit the month.
Perform steps 9 and 10 to edit the
•
year and time in the same manner.
12
200610
1010
Choose the order in which the day,
month, and year are displayed.
MM
Date
DMY
01
Date
DMY
15
Date
DMY
15
200609
0000
200610
0000
200610
1010
The settings are applied.
88
9
Taking Pictures
88
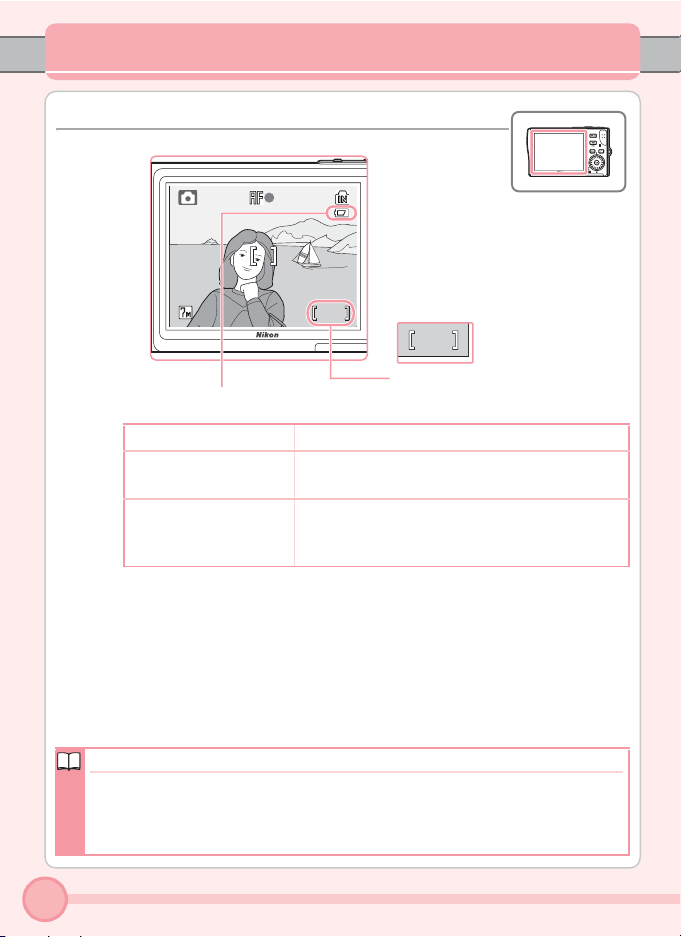
Step 1 Check Monitor Indicators
888
Number of exposures
Battery level indicator
NO INDICATOR Battery fully charged.
w
(blinks)
Warning!
Battery exhausted
w
Battery low; replace or charge the battery.
Battery exhausted. Recharge or replace with a
fully charged battery.
Information such as the battery level and number of exposures remaining
will disappear after five seconds; only M and the focus area will remain displayed in the monitor.
remaining
Where Are My Pictures Stored?
The camera stores pictures in internal memory (14 MB) or on removable
Secure Digital (SD) memory cards (available separately). Descriptions shown in
this manual are for when the internal memory is used. When using a memory
card, see page 22 of the Guide to Digital Photography.
10
Taking Pictures
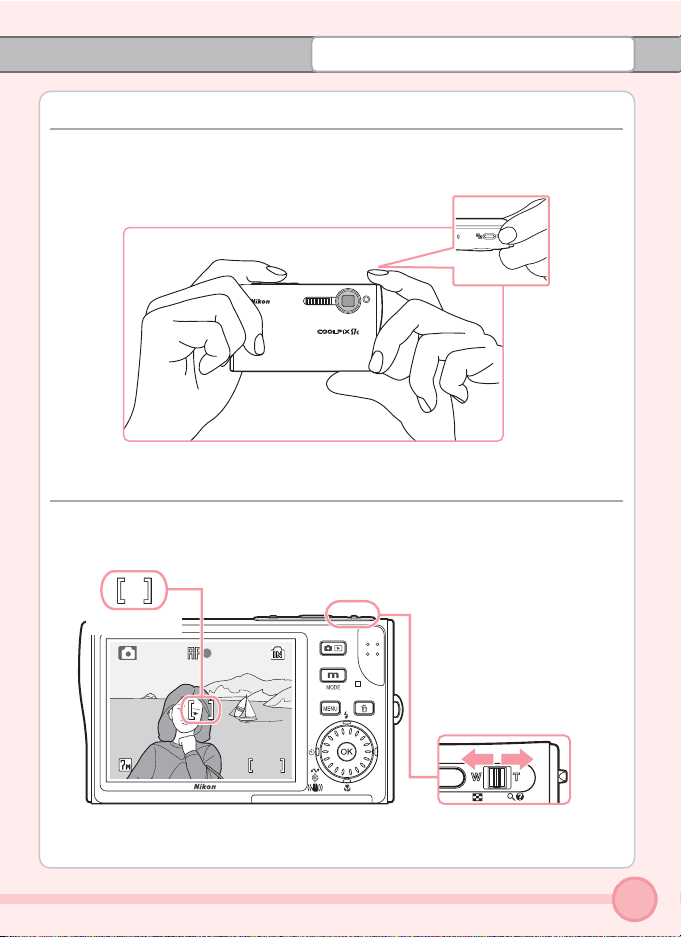
Step 2 Ready the Camera
• Hold the camera steady in both hands, keeping your fingers and other objects away from the lens, flash, and self-timer lamp.
Step 3 Frame a Picture
• Frame the subject near the AF area near the center of the monitor.
• Use the zoom control to adjust the size of the framed subject.
Focus area
The zoom control
Press the zoom control to
to zoom in on the subject so
that it fills a larger area of the
frame. Press the zoom control
t
to zoom out, increasing
to
the area visible in the frame.
88
v
11
 Loading...