

Page 1

Nero Sipps Manual
Nero AG
Page 2

Copyright and Trademark Information
The Nero Sipps manual and all its contents are protected by copyright and are the property
of Nero AG. All rights reserved. This manual contains material that is protected by internationally valid copyright. No part of this manual may be reproduced, transmitted or transcribed
without the express written permission of Nero AG.
All trade names and trademarks are the property of their respective owners.
Nero AG rejects any claims that transcend the clauses of the guarantee rights. Nero AG
does not undertake any liability for the correctness of the content of the Nero Sipps manual.
The contents of the software supplied, as well as of the Nero Sipps manual, may be changed
without prior warning.
The trademarks mentioned here are listed only for information purposes.
Copyright © 2006 by Nero AG
REV 1.0 - 2.1.6.27
Page 3

Contents
Contents
1 Introduction 7
1.1 Purpose of the Nero Sipps manual 7
1.2 About Nero Sipps 7
2 System requirements 8
2.1.1 Operating systems supported 8
2.1.2 Minimum requirements 8
2.1.3 Recommended requirements 8
2.1.4 Firewall and router settings 8
2.2 Conventions followed in the manual 9
3 Basic information on making phone calls over the Internet 10
3.1 What is voice over IP? 10
3.2 How does voice over IP work? 10
4 Installation and configuration 11
4.1 Installing Nero Sipps 11
4.2 Registering with My Nero 13
4.2.1 Creating a My Nero identity 14
4.2.2 Registering with an existing My Nero identity 15
4.3 Setting up an Internet connection 16
5 User interface 17
5.1 Main screen 17
5.1.1 Menu 17
5.1.2 Areas 18
5.1.3 Buttons 19
5.1.4 Context menu 19
5.2 Contacts tab 20
5.2.1 Buttons 20
5.2.2 Context menu 20
5.3 Telephone tab 20
5.3.1 Buttons 21
5.3.2 Context menu 21
5.4 List of calls tab 21
5.4.1 Buttons 22
5.4.2 Context menu 22
Page 3
Page 4

Contents
6 Outgoing calls 23
6.1 Calling someone on My Nero 23
6.2 Calling someone in the public telephone network 23
6.3 Calling someone as a contact 24
6.4 Calling someone with video transmission 24
7 Incoming calls 25
7.1 Accepting a call 25
7.2 Rejecting a call 25
8 Current call 26
8.1 Ending a call 26
8.2 Holding and resuming a call 26
8.3 Forwarding a call 26
8.4 Recording a call 27
8.5 Muting the microphone 28
8.6 Restoring the microphone volume 28
8.7 Regulating the microphone volume 28
8.8 Regulating the speaker volume 29
9 Conference call 30
9.1 Inviting someone to join a call in progress 30
9.2 Ending a conference call 31
9.3 Disconnecting individual call partners from a conference call 31
10 List of calls 32
10.1 Deleting a call from the list of calls 32
10.2 Deleting all calls from the list of calls 32
10.3 Listening to a recorded call 32
10.4 Deleting a recorded call 32
11 Chat 34
11.1 Changing your online status 34
11.2 Sending a chat message 34
11.3 Inviting someone to join a chat in progress 35
11.4 Setting up a further chat identity 36
12 Contact management 37
12.1 Adding a contact to the contact list 37
12.2 Creating a contact manually 37
12.3 Editing a contact 39
12.4 Deleting a contact 39
Page 4
Page 5

Contents
12.5 Authorizing a contact 40
12.6 Editing your own profile 40
12.7 Adding an avatar to a contact 41
13 Ring tones 43
13.1 Setting up custom ring tones 43
13.2 Assigning a custom ring tone to a contact 44
13.3 Assigning a custom ring tone to a contact for chat messages 45
14 Advanced functions 47
14.1 Working with Microsoft® Outlook® 47
14.1.1 Making calls from Microsoft® Outlook® 47
14.1.2 Synchronizing contacts with Microsoft® Outlook® 48
15 Configuration 50
15.1 Calling up the configuration 50
15.2 Basic settings menu icon 50
15.2.1 Basic Condition and Language tab 50
15.2.2 Internet Connection tab 51
15.2.3 Audio devices tab 52
15.2.4 Video tab 53
15.2.5 Telephone Options tab 54
15.3 Signal and ring tones menu icon 55
15.3.1 Available audio files tab 55
15.3.2 General Signals tab 56
15.3.3 Individual ring tones tab 57
15.3.4 Individual IM-Signals tab 58
15.4 Instant Messaging menu icon 59
15.4.1 My User Accounts tab 59
15.4.2 Display tab 60
15.5 Address Book menu icon 61
15.5.1 Synchronization tab 61
15.5.2 Contact behavior tab 62
15.6 Service Management menu icon 63
15.6.1 Registration tab 63
16 Context menu 65
16.1 System tray in the taskbar 65
17 Uninstallation 66
17.1 Uninstalling Nero Sipps 66
18 Troubleshooting 68
18.1 Troubleshooting 68
Page 5
Page 6

Contents
19 Technical data 70
19.1 SIP conformity 70
19.2 Codecs supported 70
19.2.1 Audio 70
19.2.2 Video 70
19.3 Encryption 70
19.4 Automatic update 70
19.5 Other functions 71
19.6 Plug-ins 71
20 List of figures 72
21 Glossary 74
22 Contact 76
22.1 Contact details 76
22.2 Web 76
Page 6
Page 7

Introduction
1 Introduction
1.1 Purpose of the Nero Sipps manual
This manual tells you how to use and configure Nero Sipps.
It is intended for all users who want to find out how to use Nero Sipps.
1.2 About Nero Sipps
Nero Sipps is a powerful Nero 7 application which provides the functions for making calls on
the Internet on any standard PC. Nero Sipps helps you reduce your phone bill by placing
calls from PC to PC over the Internet - you pay only your normal online charges. You can
also use the Nero calling card to make low-cost calls to fixed network and mobile numbers
anywhere in the world.
Not only does Nero Sipps enable you to make calls over the Internet, the application also offers functions such as call recording, call forwarding, and chat messaging.
Nero Sipps is also closely integrated with the My Nero communication network, whose
members can swap information and ideas at no charge. The My Nero community puts you in
touch with friends, relatives, and other like-minded people online.
This is done using SIP voice over IP technology. SIP (Session Initiation Protocol) represents
a new form of voice transmission via the Internet or IP network. SIP supports the transmission of data, voice, and video over the Internet. The speech is digitized, compressed, and
then packed into language packets before being sent to the IP network.
For more information, go to
http://my.nero.com
http://www.sippstar.com
http://www.nero.com
Page 7
Page 8

System requirements
2 System requirements
2.1.1 Operating systems supported
Nero Sipps runs on the following operating systems:
Microsoft® Windows® 2000
Microsoft® Windows® XP
Microsoft® Windows Server® 2003
Microsoft
download the latest version of DirectX
2.1.2 Minimum requirements
Operating system: Microsoft® Windows® 2000
Processor: 400 MHz
Main memory: 128 MB
Hard drive space: 40 MB
Graphics card: AGP 64 MB
Internet access: 56 kb modem
DirectX: DirectX
Webcam: USB 1.1 webcam (for video telephony)
®
DirectX® 9.0 (or higher) must also be installed on your computer. You can
®
®
from http://www.microsoft.com/windows/directx.
9.0
Plus: Sound card, microphone, headphones or speakers
2.1.3 Recommended requirements
Operating system: Microsoft® Windows® XP
Processor: 1.8 GHz
Main memory: 256 MB
Hard drive space: 40 MB
Graphics card: AGP 128 MB
Internet access: DSL
DirectX: DirectX
Webcam: USB 2.0 webcam (for video telephony)
Plus: Sound card, headset
You will get the best call quality using the headset.
2.1.4 Firewall and router settings
To be able to make calls using Nero Sipps, you must have the following ports in your firewall
open and forwarded to your router.
®
9.0 or higher
UDP: Ports 5070 / 30000-30009
UDP: Ports 3478 / 3479 (for NAT / STUN)
Page 8
Page 9
System requirements
Instructions for configuring your firewall can be found in the document entitled "Firewall Configuration" in the support area of
Please consult your router manual for instructions on how to configure your router.
http://www.sippstar.com.
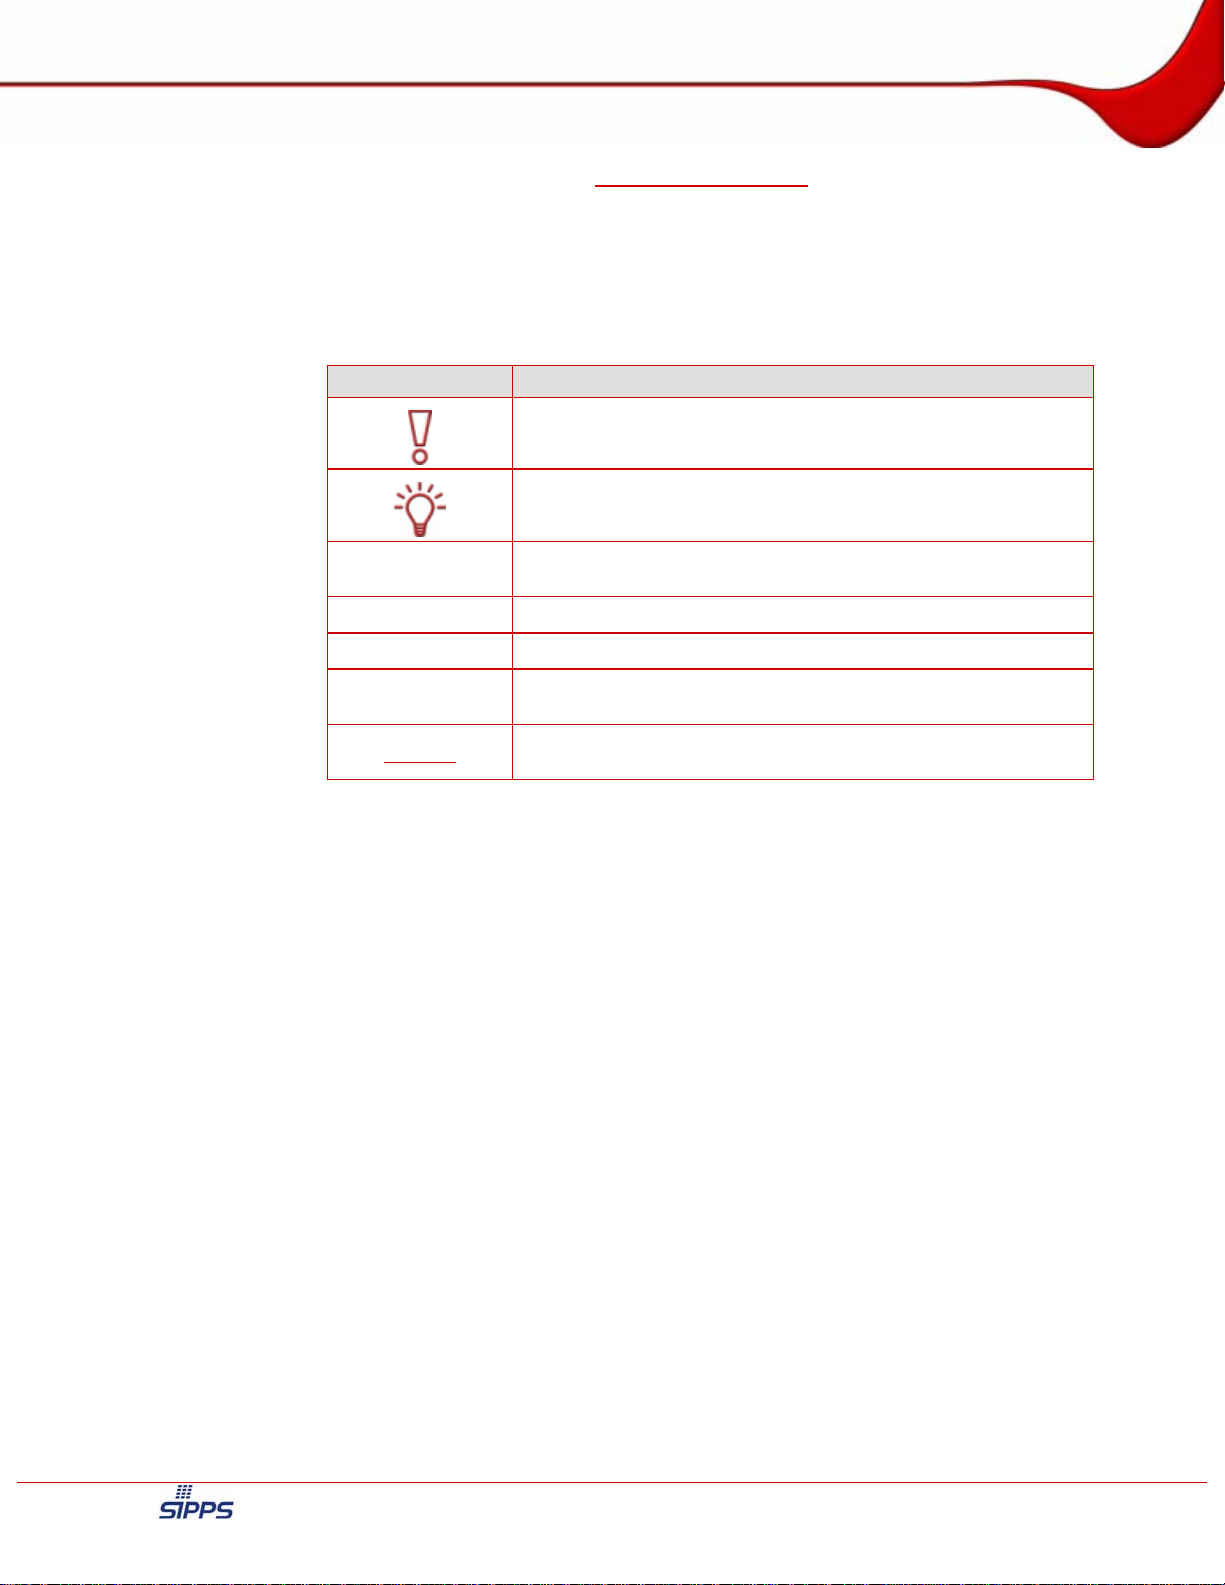
2.2 Conventions followed in the manual
In order to make best use of this manual, please note the following conventions:
Symbol Meaning
Indicates warnings or instructions that have to be followed
1. Start…
Æ
Î
OK
Chapter
strictly.
Indicates additional information or advice.
A number at the beginning of a line indicates a request for action. Carry out these actions in the order specified.
Indicates an intermediate result.
Indicates a result.
Indicates text passages or buttons that appear in the program
interface of Nero Sipps. They are shown in bold face.
Indicates references to other chapters. They are executed as
links and are shown in red and underlined.
Page 9
Page 10

Basic information on making phone calls over the Internet
3 Basic information on making phone calls over the Internet
3.1 What is voice over IP?
Voice over IP (VoIP), also known as Internet telephony, is the designation for making phone
calls via a computer network using an Internet protocol.
The essential difference between this and standard telephony is that the voice information is
not transmitted via a line in a telephone network but is divided up into IP packets which are
reassembled at the receiver's end. The big advantage over traditional telephony is that voice
over IP uses the existing network infrastructure, so all you need is one network.
At the moment there is a great deal of hype about voice over IP, but the underlying concept
for this technology is by no means new. Back in the late 1990s various companies were already working on Internet telephony but were hampered by the enormous demands which
the network could not meet at the time.
By the beginning of the 21st century the facilities were available to enable this technology
with massive potential to be implemented. Networks had become more powerful, and broadband connections were becoming ever more widespread, so the world was ready for voice
over IP.
To ensure that the technology could be used by different companies and in different countries, various protocols were defined which control voice and data transfer. The main protocol is SIP (Session Initiation Protocol).
3.2 How does voice over IP work?
Human speech starts out as an analog signal. In order to transport it, it is digitized and reduced using various compression processes so that it can be sent across the Internet.
Whereas a standard telephone call requires a connection to be set up between the participants and reserved for the duration of the call, Nero Sipps uses existing Internet connection s
which transmit the call much more economically.
The compressed data is divided up into packets and transported to the destination. When
they arrive there, for example at another Nero Sipps client or any other SIP compliant client,
the data packets are reassembled and converted into voice signals.
Using interfaces like the My Nero gateway you can also make calls to the fixed network or
mobile network using Nero Sipps, as this gateway not only forwards calls to the Internet but
also to the public fixed and mobile networks.
Page 10
Page 11
Installation and configuration
4 Installation and configuration
4.1 Installing Nero Sipps
The following prerequisite must be met:
You have administrator rights.
To install Nero Sipps, proceed as follows:
1. Double-click on the installation file.
Æ The Nero Sipps window opens.
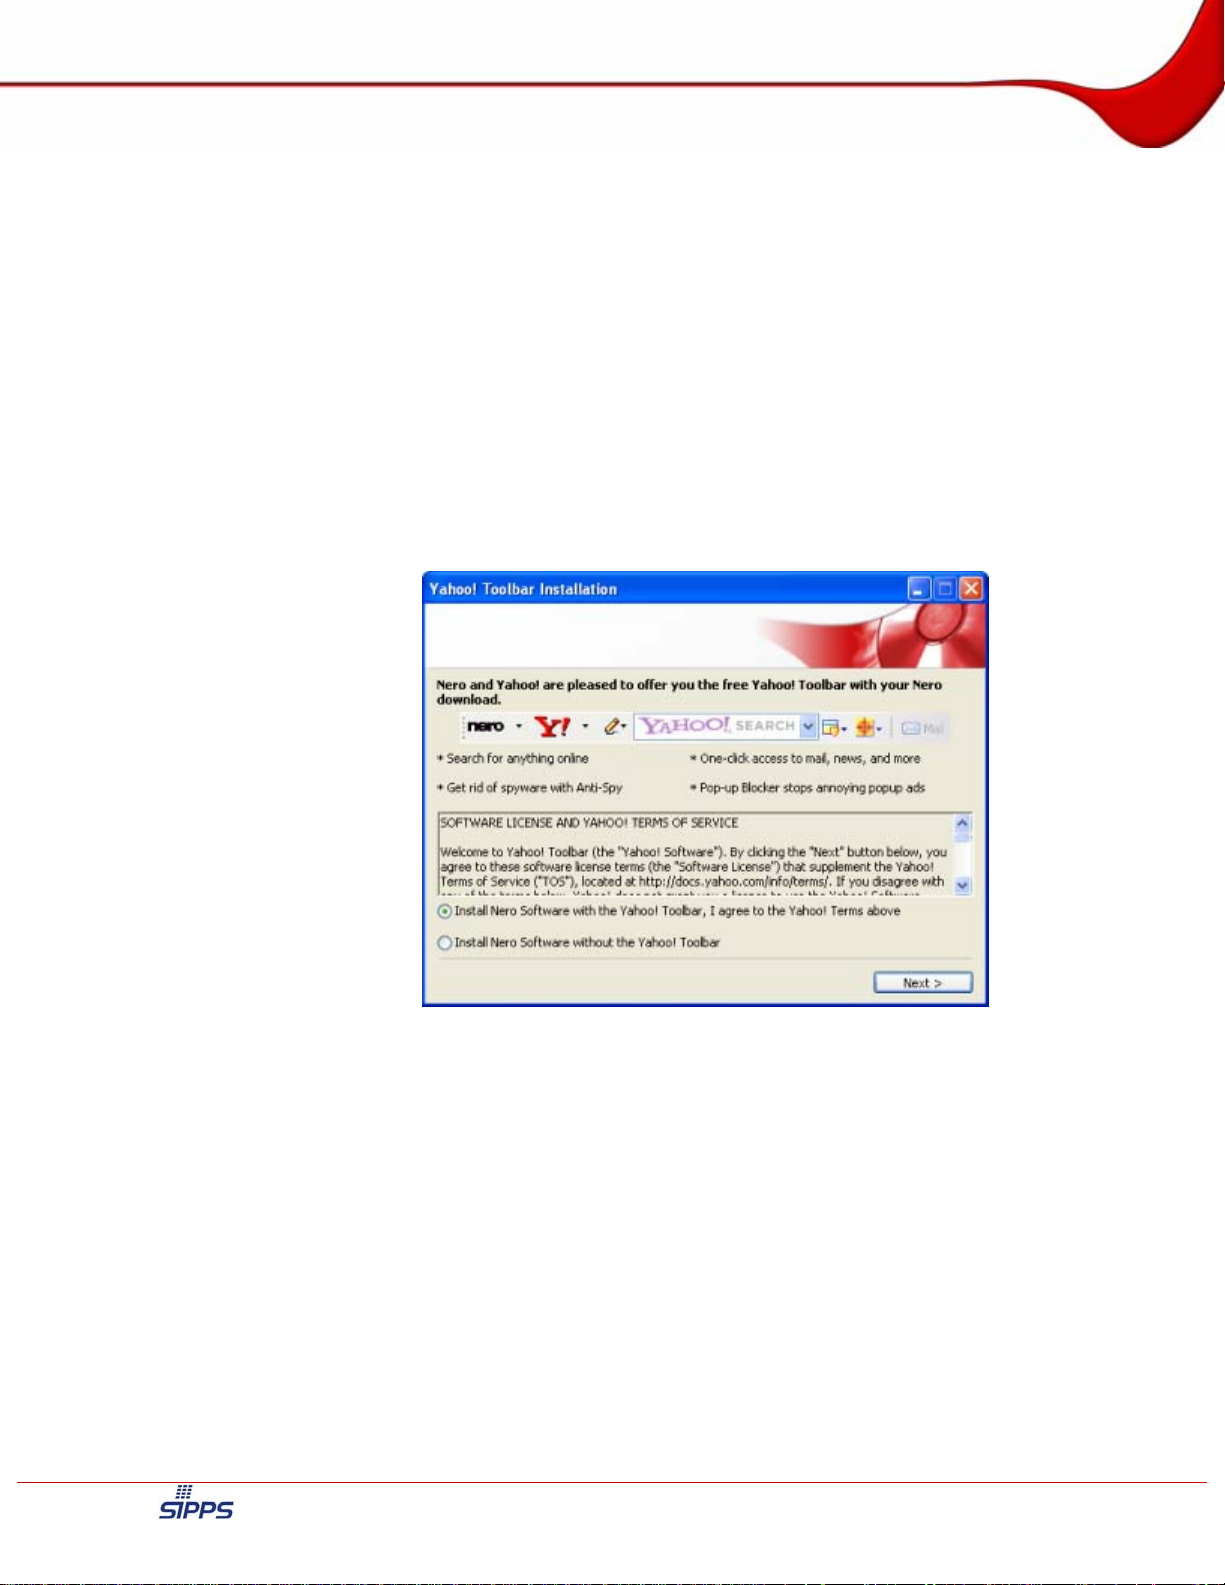
Æ The Install Yahoo! Toolbar window opens.
2. If you want to install Nero Sipps with the Yahoo!
the Yahoo! Toolbar - I accept the above mentioned conditions from Yahoo.
If you want to install Nero Sipps without the Yahoo!
without the Yahoo! Toolbar.
®
toolbar, select Install Nero software with
®
toolbar, select Install Nero Software
3. Click on the Next button.
Æ If you have decided to install Nero Sipps with the Yahoo!
the background.
Æ The Nero Sipps Installation Wizard opens.
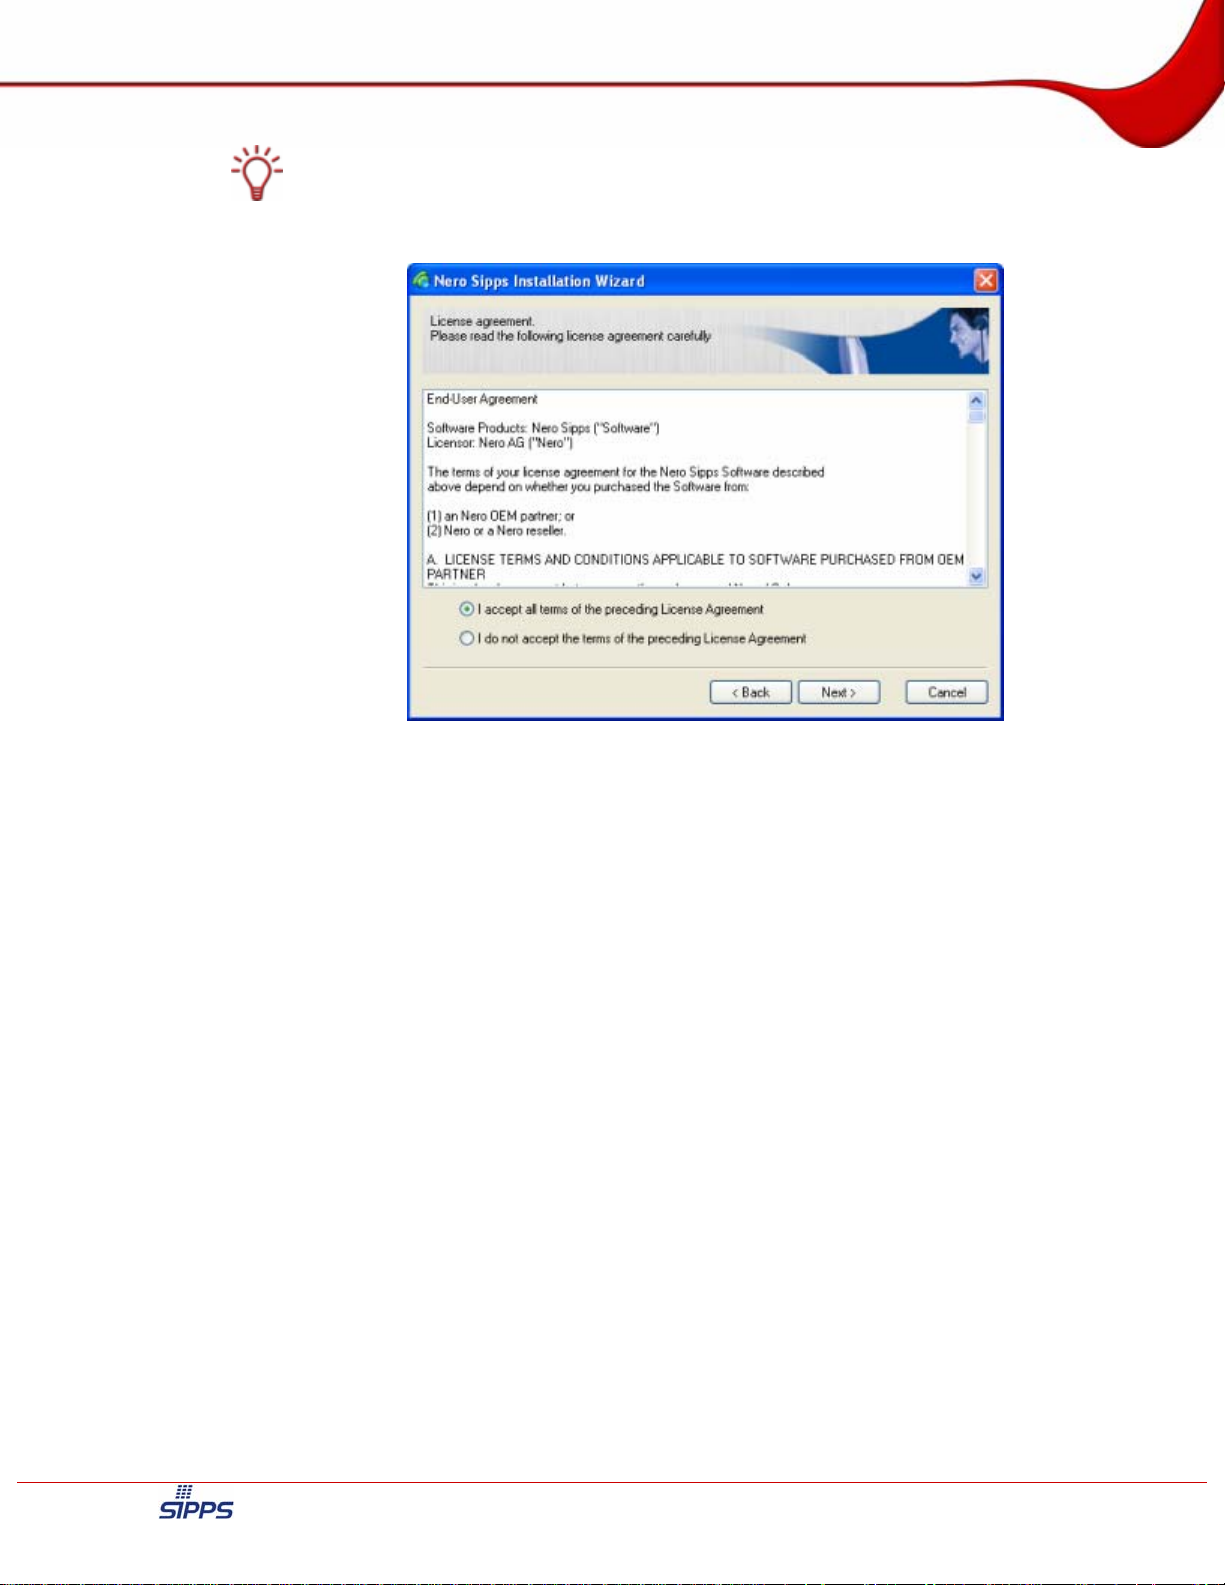
4. Click on the Next button.
5. Read the licence agreement carefully.
6. Select I accept all terms of the preceding License Agreement.
Fig. 1: Install Yahoo! Toolbar window
®
toolbar, it will be installed in
Page 11
Page 12
Installation and configuration
You can only continue installing Nero Sipps if you agree with the licence agreement.
Fig. 2: Nero Sipps Installation Wizard – License agreement window
7. Click on the Next button.
8. If you want to install Nero Sipps in a different directory than the one suggested in the Install
to... field:
1. Click on the Browse button.
Æ The Nero Sipps Installer dialog box opens.
2. In the directory tree, click on the folder in which you want to install the software.
3. Click on the OK button.
9. Click on the Install button.
Æ Nero Sipps will now be installed. When it is successfully installed, a dialog box will open.
Page 12
Page 13
Installation and configuration
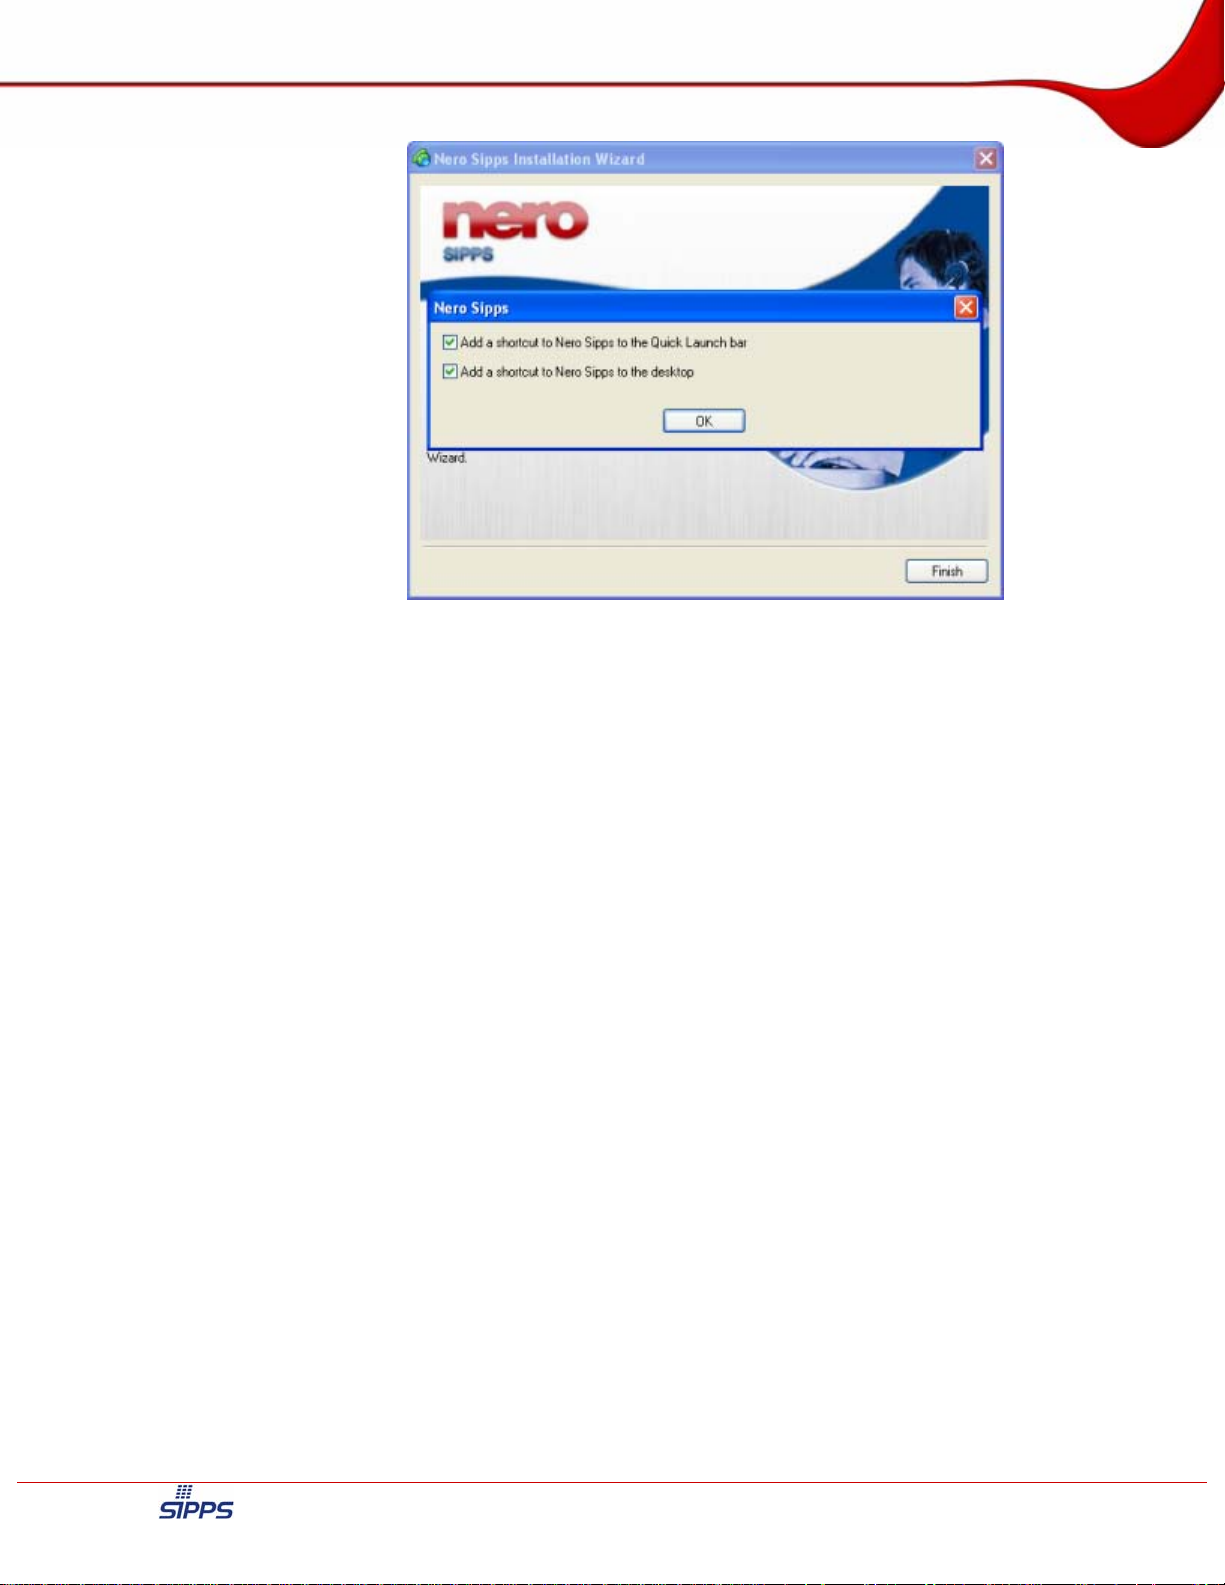
Abb. 3: Nero Sipps Installation Wizard – Shortcuts window
10. If you do not want to create a shortcut to Nero Sipps in the Quick Launch bar, uncheck the
Add a shortcut to Nero Sipps in the Quick Launch bar box.
11. If you do not want to create a shortcut to Nero Sipps on your desktop, uncheck the Add a
shortcut to Nero Sipps on the desktop box.
12. Click on the OK button.
13. Click on the Finish button.
Î You have now installed Nero Sipps.
4.2 Registering with My Nero
The following prerequisite must be met:
The Nero Sipps - My Nero Registration window is open.
To register with My Nero, proceed as follows:
1. If your software firewall asks you whether you want to continue blocking Nero Sipps, click on
the Do not block button.
Page 13
Page 14

Installation and configuration
2. If you do not yet have a My Nero identity, read Creating a My Nero identity.
3. If you already have a My Nero identity, read Registering with an existing My Nero identity.
Fig. 4: Windows security warning dialog box
4.2.1 Creating a My Nero identity
The following prerequisite must be met:
You are connected to the Internet.
To create a new My Nero identity, proceed as follows:
1. Read the license conditions carefully.
2. Check the I agree to these license terms box.
3. Click on the Next button.
Æ The Create your own account window will open.
Your nickname must not contain any periods, underscores or other special characters, and
must be between 5 and 20 characters long.
4. Enter a name you want your friends to use to find you in the Nickname input field.
5. Enter your first name in the First name input field.
6. Enter your last name in the Last name input field.
7. In the Country drop-down menu, select the country you are in at the moment.
You can only register with My Nero once with the same email address.
Page 14
Page 15

Installation and configuration
8. Enter your email address in the Email and Email (retype) input fields.
If you cannot read the character combination in the Security code field, click in the field
again and a new combination will be displayed.
9. Enter the combination of letters and numbers you can see in the Security code display field
in the Security code input field.
Choosing a safe password
Make sure your password consists of numbers, letters, and special characters. This will
minimize the risk of your data being misused by unauthorized persons.
10. Enter a password with at least 6 characters in the Password input field.
11. Enter the password again in the Password (retype) input field.
12. Click on the Register button.
Æ The My Nero Login screen will appear.
You will receive an activation email from My Nero.
13. Follow the instructions in the activation email.
14. When you have activated your account, click on the Login button.
Î You are now registered with My Nero with a new identity.
The Your Internet connection screen will now be displayed. For instructions on how
to configure this, see
Setting up an Internet connection.
4.2.2 Registering with an existing My Nero identity
The following prerequisite must be met:
You are connected to the Internet.
To register with an existing My Nero identity, proceed as follows:
1. Select the I already have an account at My Nero radio button.
Æ The My Nero Login screen will appear.
2. Enter your nickname in the Nickname input field.
3. Enter your password in the Password input field.
If you have forgotten your password, click on the Forgot your password? link and you will
be taken to a My Nero web page where you can have a new password sent to you by
email.
4. Click on the Login button.
Page 15
Page 16

Installation and configuration
Î You are now registered with My Nero with an existing identity. The Your Internet
connection window will now be displayed. For instructions on how to configure this,
Setting up an Internet connection.
see
4.3 Setting up an Internet connection
To set up your Internet connection, proceed as follows:
1. Select the radio button for the type of connection your computer uses to connect to the Inter-
net.
The type of connection affects the audio and video quality.
Choose the most suitable connection type and bandwidth for your Internet connection. If
the bandwidth you set is higher than the bandwidth actually available, this may cause a deterioration in audio and video quality.
2. If you selected Broadband and DSL, select the bandwidth of your Internet connection in the
drop-down menu.
3. Click on the Next button.
Æ The Select your Video Device screen will open.
4. If you have a webcam connected to your computer:
1. Check the Activate video functionality box.
2. Select your webcam in the Capture Device (Webcam) drop-down menu.
5. Click on the Next button.
Æ If there is more than one audio device installed on your computer, the Select your
Sound Device screen will open.
1. Select the playback device you require in the Device for Playback drop-down menu.
2. Select the recording device you require in the Device for Recording drop-down menu.
3. Select the audio device you require in the Audio device for ring tone and hands-free
talking drop-down menu.
6. Click on the Finish button.
Î You have now set up the Internet connection.
The first time you open Nero Sipps, the Nero Sipps Callto dialog box will open.
If you do not want Nero Sipps to check whether it is the default application for Internet calls,
check the Do not bother me again box. Nero Sipps will now be the default telephone for
all callto links.
Page 16
Page 17
User interface
5 User interface
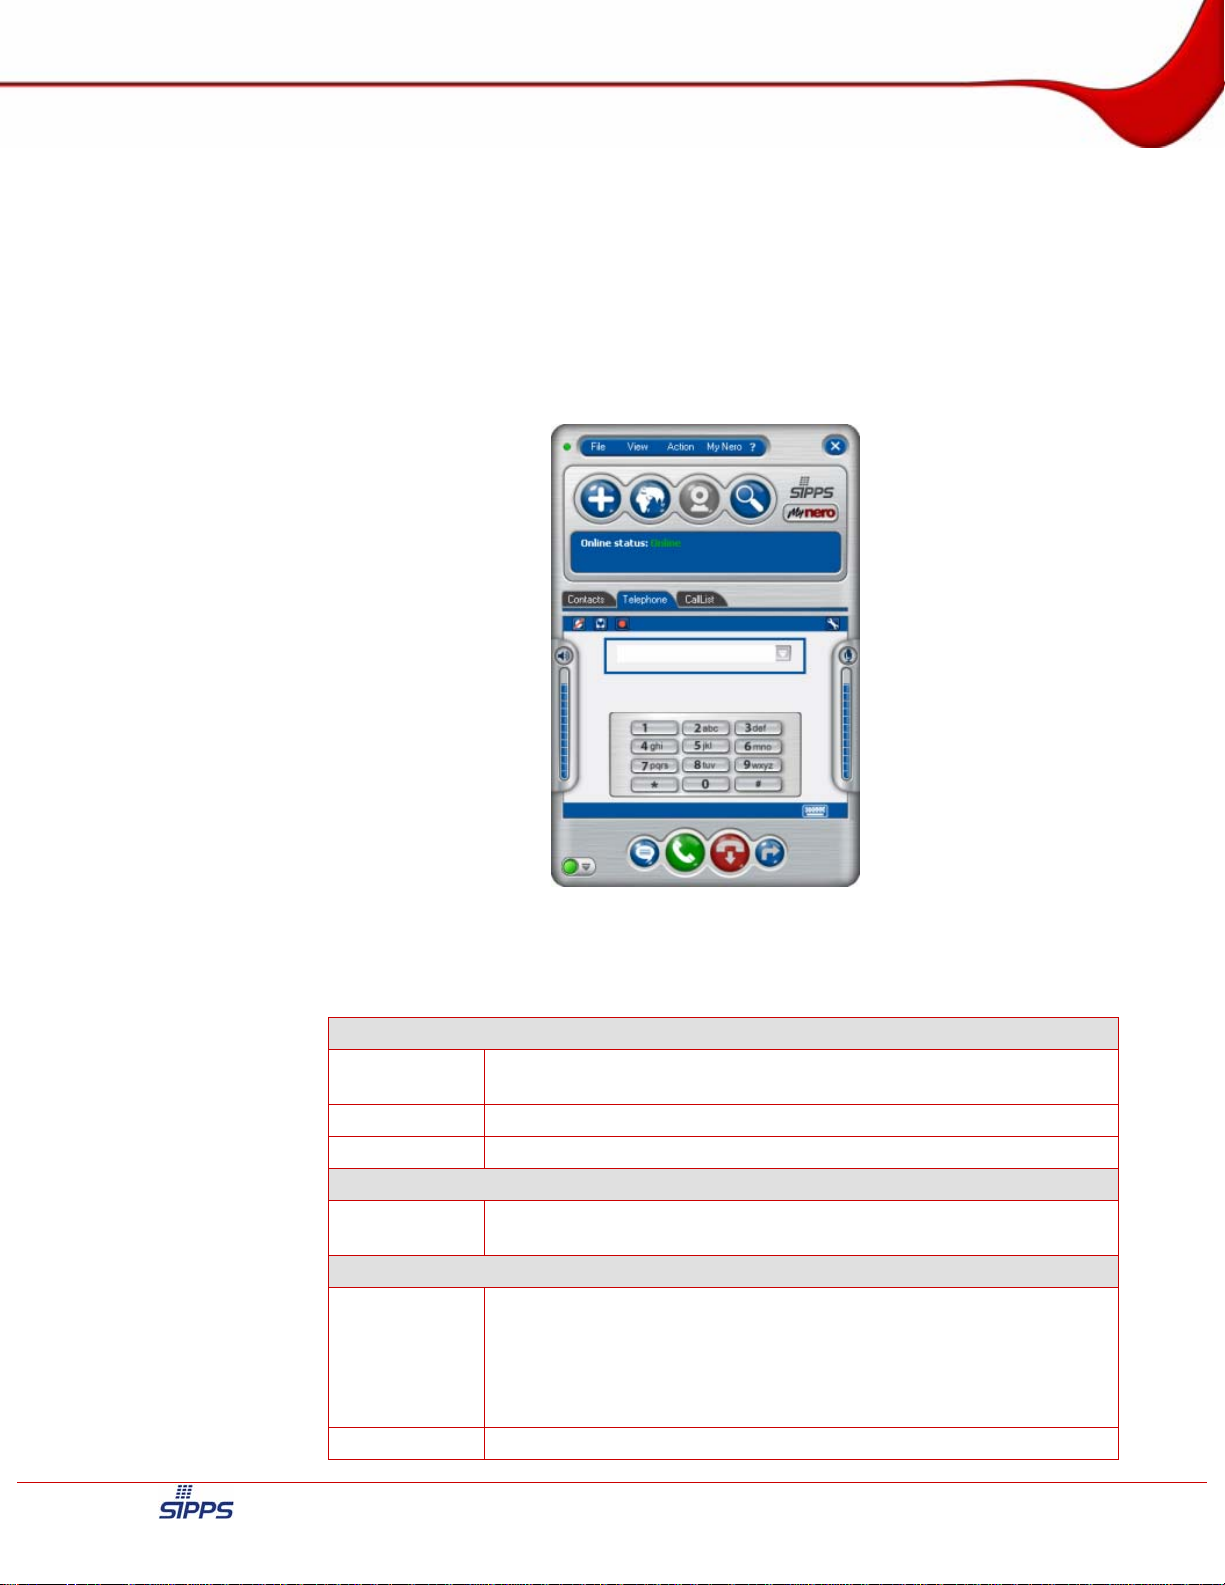
5.1 Main screen
The Nero Sipps main screen offers you fast access to all functions via the menu and buttons.
The message field lets you see the most important messages at a glance.
The tabs allow you to access your contacts, the telephone, and the call list as well as to call
up the functions you require.
5.1.1 Menu
File menu
My Status
Configuration
Exit
View menu
Silver
Action menu
Call handling
Video call
Fig. 5: Main screen
Displays a drop-down list from which you can select your online
status.
Opens the Nero Sipps configuration.
Exits Nero Sipps.
Selects the Silver skin for the user interface. This box is checked by
default.
New call: Dials the number shown in the dialing field.
Conference call: Starts a conference call to the number shown in the
second dialing field.
Start recording: Records a call in progress. This item is only avail-
able if there is a call underway.
Starts video transmission. The Preview window is opened.
Page 17
Page 18
User interface
Contact man-
agement
Search for
Contacts
File transfer
Online shop
My Nero menu
My profile
Info services
My Nero
account
Help menu
Quick start
Help
Tutorial
About
Add contact / Find friends on My Nero: Finds your friends on My
Nero. A browser window containing the Search contact page is
opened.
Add contact / Add a contact manually: Adds a new contact to the
contact list manually. The New contact window is opened.
Contact details: Shows the details for the highlighted contact. The
Edit contact window is opened.
Invite friends: Invites your friends into My Nero.
Contact synchronization: Synchronizes your contacts with other ap-
plications. The Configuration window is opened with the Contact
Synchronization tab.
Find friends on My Nero: Finds your friends on My Nero. A browser
window containing the Search contact page is opened.
Search after contact local: Searches the local contact list. The Begin Search dialog window is opened.
Starts a file transfer between you and another My Nero member.
Opens the Nero Sipps online shop in which you can purchase further
Nero products and call credit.
Edits your profile. A browser window containing the My profile page
is opened.
Opens a drop-down list containing information services to which you
can subscribe. Information on the services to which you have subscribed is displayed in the message field.
Edits your My Nero account. A browser window containing the pa ge
for your user account is opened.
Opens the QuickStart guide.
Opens the online help.
Opens a tutorial on Nero Sipps in pdf format.
Opens a window containing information about Nero Sipps.
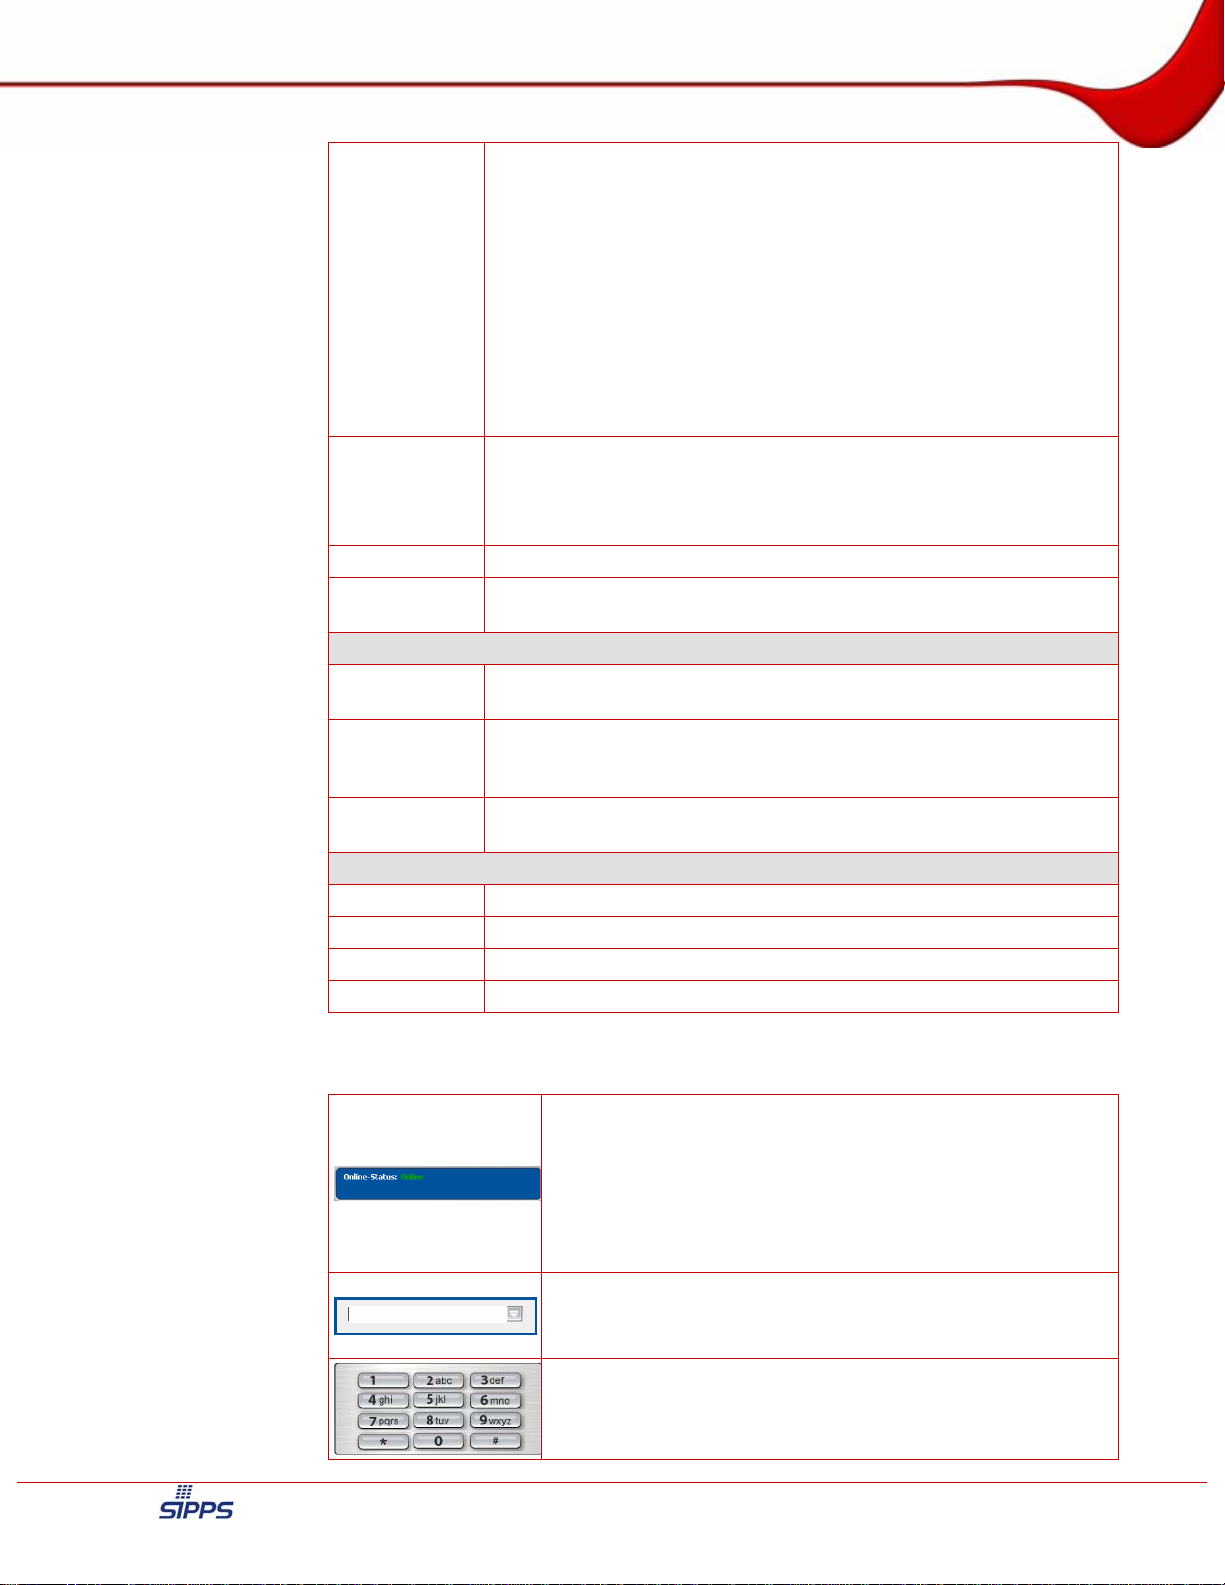
5.1.2 Areas
Message field
Shows your online status, messages relating to subscription
information services, and any changes to the status of your
contacts. Clicking on the message for an information service
opens a window containing further information. Clicking on the
message about a change in status opens a chat window with
the contact in question.
Dialing field
Lets you enter digits using the keyboard and shows the number
to be called.
Keypad
Lets you enter digits using the mouse.
Page 18
Page 19
User interface
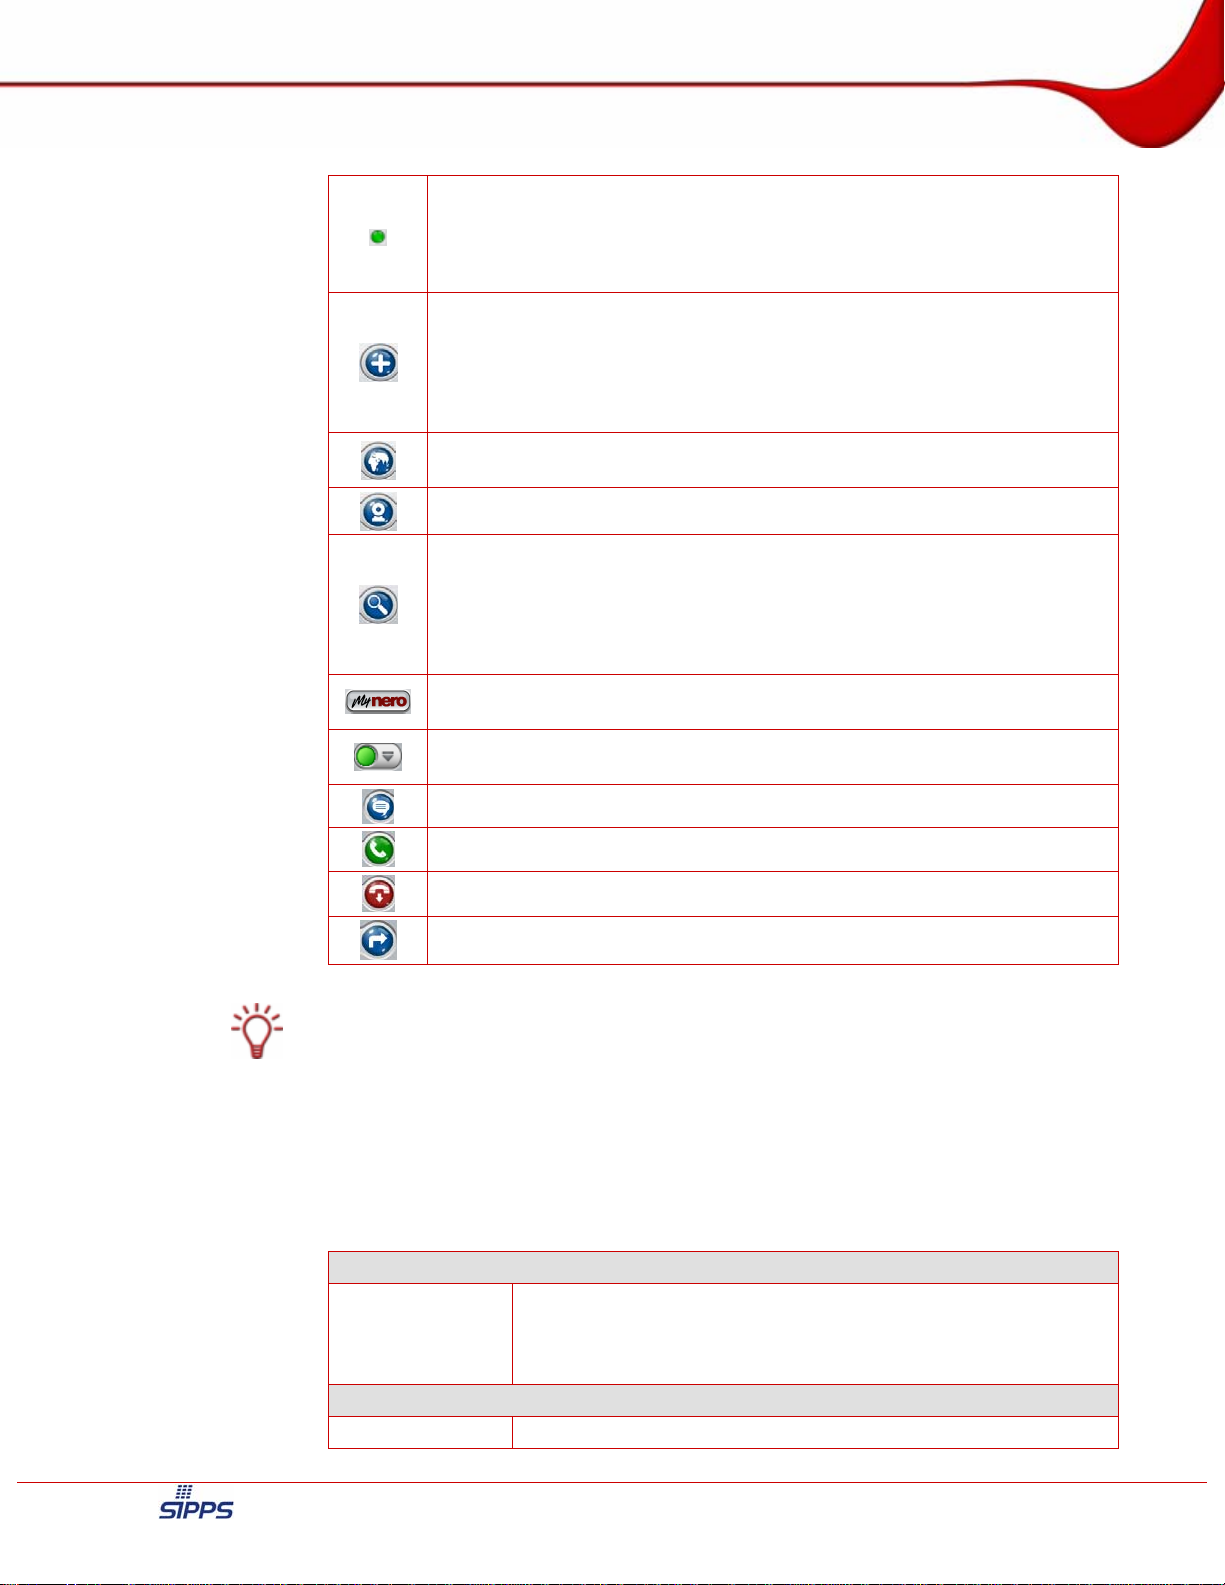
5.1.3 Buttons
Status indicator
Indicates whether you are logged into the My Nero network.
If the status indicator is red, you are either not connected to the Internet or
your connection with My Nero has been interrupted.
Opens a drop-down menu.
Find friends on My Nero: Finds your friends on My Nero. A browser win-
dow containing the Search contact page is opened.
Add a contact manually: Adds a new contact to the contact list manually.
The New contact window is opened.
Connects you to My Nero. A browser window containing the My Nero start
page is opened.
Opens the Video preview window.
Opens a drop-down menu.
Find friends on My Nero: Finds your friends on My Nero. A browser window containing the Search contact page is opened.
Search after contact local: Searches the local contact list. The Begin
Search dialog window is opened.
Connects you to My Nero. A browser window containing the My Nero start
page is opened.
Selects the online status. A drop-down menu containing the various online
states is opened.
If the status indicator is red, you are either not connected to the Internet or your connection
with My Nero has been interrupted. Check your Internet connection and restart Nero Sipps
if necessary.
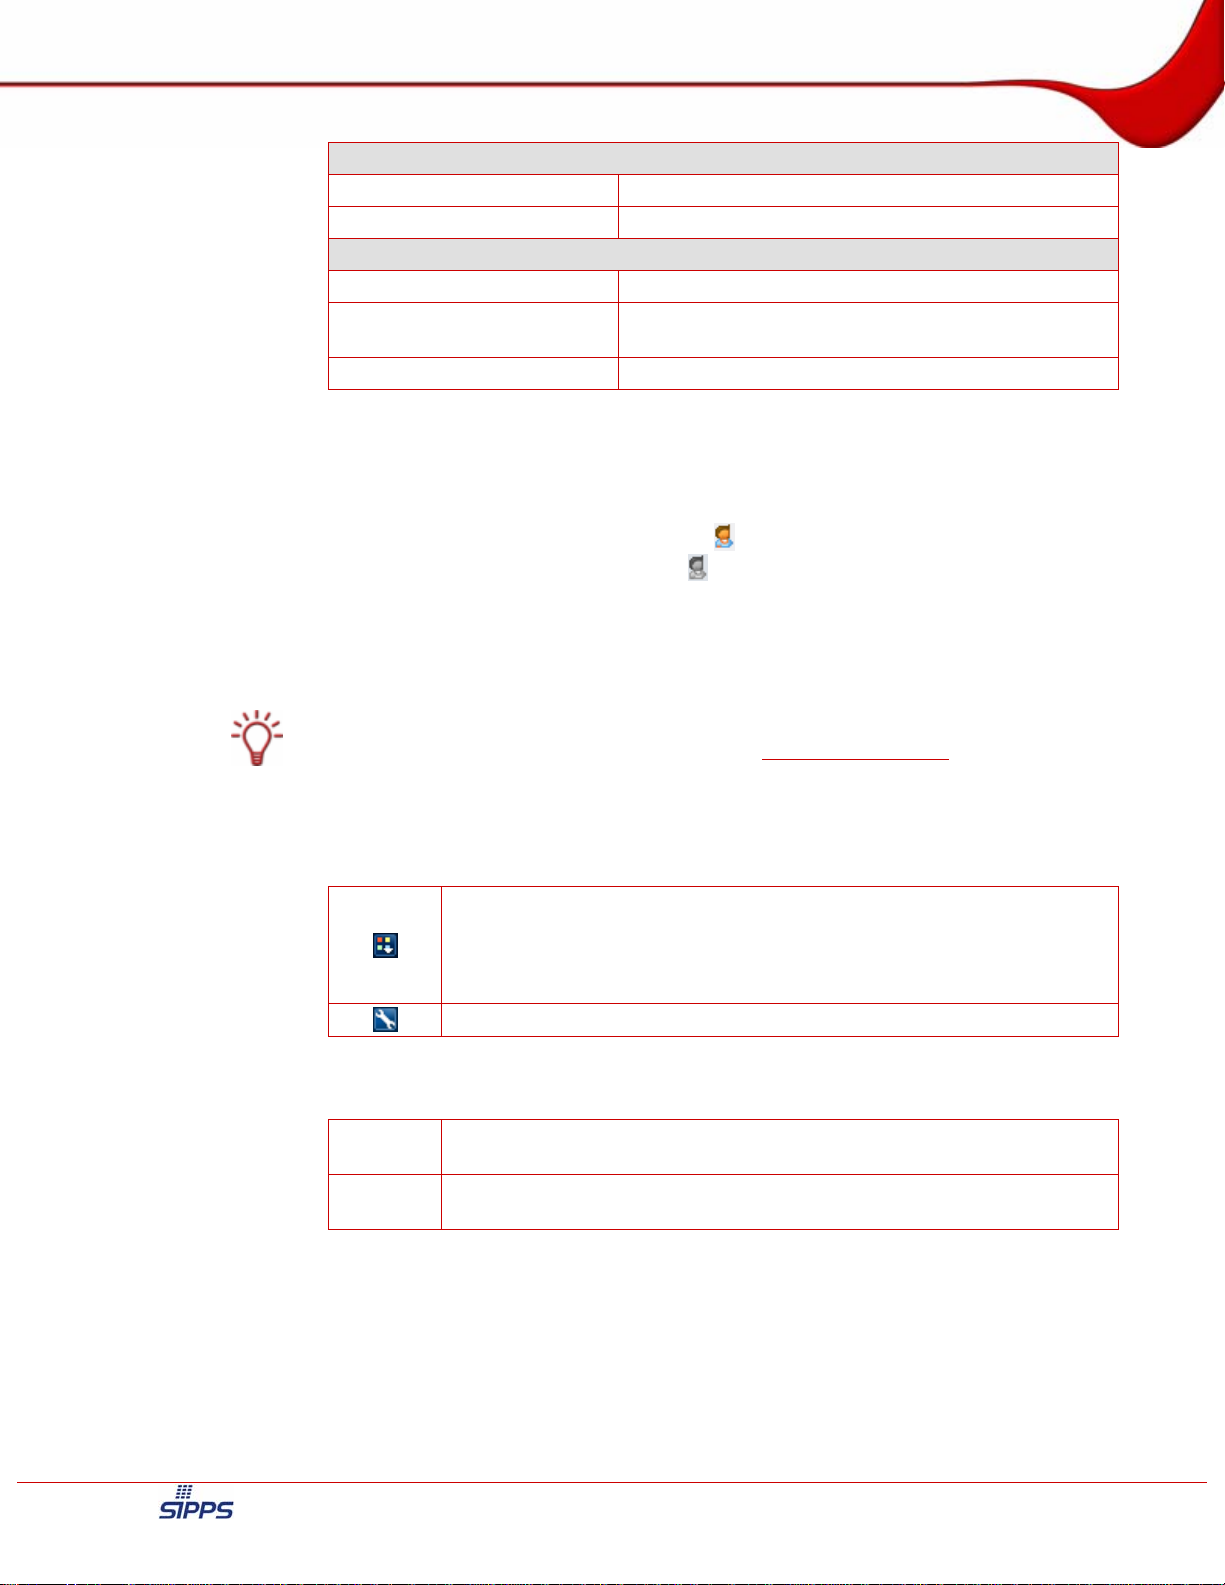
5.1.4 Context menu
Right-clicking on a free area opens a context menu.
Connections area
IP Address
Extended area
Session logfile
Sends the selected contact a chat message. The chat window is opened.
Calls the highlighted contact or dials the number in the dialing field.
Ends a call in progress. This button is only active if there is a call underway.
Forwards a call in progress. The Call Forward dialog is opened.
Selects the network adapter via which Nero Sipps receives and
transmits voice packages using its IP address. This item is only
displayed if there is more than one network adapter installed in the
computer.
Opens the Logfile Viewer window.
Page 19
Page 20
User interface
Nero Sipps configuration area
Configuration
About Nero Sipps
5.2 Contacts tab
This tab shows your contacts and their current online status. You can edit and delete your
contacts.
Wizard
Help
Exit
Opens the Nero Sipps configuration.
Opens the Nero Sipps configuration wizard.
Opens the online help.
Opens a window containing information about Nero
Sipps.
Exits Nero Sipps.
Contacts that are online have a colored avatar
Contacts that are offline have a gray avatar
Highlighting a contact opens a detailed view. This includes a larger version of the avatar together with a small icon on the bottom right showing the contact's online status. Next to this
you will see the contact's IM account and telephone number.
You can only view the online status of your contacts if they have authorized you to do so.
To find out how to authorize a contact yourself, see
5.2.1 Buttons
5.2.2 Context menu
.
.
Authorizing a contact.
Sorts the contacts.
Show all: Shows all contacts.
Online: Shows only contacts who are online in My Nero and whose online
status is online, away or busy.
Opens the Nero Sipps configuration.
Edit
contact
Delete
contact
5.3 Telephone tab
This tab lets you call people using their number or nickname on My Nero. You can do this
using the keyboard of your computer or the keypad in Nero Sipps. You can also carry out all
actions relating to calls here.
Edits the highlighted contact. The Edit contact window is opened.
Deletes the highlighted contact.
Page 20
Page 21
User interface
5.3.1 Buttons
Legal information
Please note that unauthorized recording of calls is illegal in many countries and is a prosecutable offence. If you live in such a country, you are obliged to tell the other party that the
call is being recorded. Please inform yourself therefore of the statutory regulations for your
country before recording your telephone call. If you are unsure about the legal position in
your country, we recommend that you consult your legal advisor. Nero AG accepts no liability in the event of misuse of this program function and the resultant violation of the respective national law.
In Germany, this problem is addressed in the penal code, § 203.
More detailed information can be found under:
Holds the call in progress. This button is only active if there is a call underway.
Starts a conference call.
If a call is not yet underway, the number in the first dialing field will be
called directly.
If a call is already underway, the next number will be called.
Records the call in progress.
http://bundesrecht.juris.de/stgb/
5.3.2 Context menu
The context menu for the Telephone tab corresponds to the context menu for the main
screen.
5.4 List of calls tab
Opens the Nero Sipps configuration.
Regulates the microphone volume.
The changes will only take effect if the Automatic Gain Control (AGC)
box on the Audio Devices tab under the Basic settings menu icon in the
configuration is unchecked.
The top button mutes and restores the microphone volume.
Regulates the speaker volume.
The top button mutes and restores the speaker volume.
Shows and hides the keypad.
The list of calls provides information on successful and unsuccessful calls, their date and
time, the person called, and the duration.
Successful calls are indicated by a green telephone symbol
Unsuccessful calls are indicated by a red telephone symbol
.
.
Reasons for an unsuccessful call include the caller hanging up too early or you rejecting the
call.
Page 21
Page 22
User interface
5.4.1 Buttons
5.4.2 Context menu
Opens the Nero Sipps configuration.
Plays a recorded call. This button is only displayed if the call was recorded.
Deletes the call.
Deletes all calls in the list of calls. A dialog window to confirm this action is
opened.
Delete call
contact to
address
Call
Add
book
Calls the originator of the highlighted call.
Deletes the call.
Adds the originator of the highlighted call to the contacts. The New con-
tact window is opened.
Page 22
Page 23
Outgoing calls
6 Outgoing calls
6.1 Calling someone on My Nero
Calls to others logged into My Nero are free.
To call someone on My Nero, proceed as follows:
1. Click on the Telephone tab.
2. Click in the dialing field.
Fig. 6: Dialing field
3. Enter the Nero nickname of the person you want to call in the dialing field.
4. Click on the button.
Î The call is made.
6.2 Calling someone in the public telephone network
DTMF dialing is only available if you are using the Nero Sipps keypad.
Composition of the telephone numbers
The composition of the telephone numbers change when calling the public telephone network via Internet telephony.
Enter the numbers in the following format:
Country code – area code (without 0) – telephone number
Example: 49891234567
The following prerequisite must be met:
Your Nero calling card is in credit.
To call someone in the public telephone network, proceed as follows:
1. Click on the Telephone tab.
2. Click in the dialing field.
3. Enter the number of the person you want to call in the dialing field.
Page 23
Page 24

Outgoing calls
4. Click on the button.
Î The call is made.
6.3 Calling someone as a contact
The following prerequisite must be met:
A contact has been created.
To call someone as a contact, proceed as follows:
1. Click on the Contacts tab.
2. Select the contact you want to call in the drop-down list.
3. Click on the button.
Î The call is made.
6.4 Calling someone with video transmission
Video calls are not possible to the public telephone network
Note that video calls to the public telephone network are not possible at present.
The following prerequisites must be met:
There is a webcam connected to your PC and you have installed and set up the software.
The telephone of the person you are calling supports SIP-based video telephony.
To call someone with video transmission, proceed as follows:
1. Click on the button.
Æ The Preview window is opened.
2. Click on the Telephone tab.
3. Click in the dialing field.
4. Enter the number of the person you want to call in the dialing field.
5. Click on the button.
Î The call with video transmission is made.
Page 24
Page 25

Incoming calls
7 Incoming calls
7.1 Accepting a call
The following prerequisite must be met:
There is a call coming in.
To accept a call, proceed as follows:
1. Click on the button.
Î You have accepted a call.
7.2 Rejecting a call
The following prerequisite must be met:
There is a call coming in.
To reject a call, proceed as follows:
1. Click on the button.
Î You have rejected a call.
Page 25
Page 26

Current call
8 Current call
8.1 Ending a call
The following prerequisite must be met:
There is already a call underway.
To end a call, proceed as follows:
1. Click on the button.
Æ You have ended the call.
8.2 Holding and resuming a call
The following prerequisite must be met:
There is already a call underway.
To hold and resume a call, proceed as follows:
1. Click on the button.
Æ The call is put on hold.
Æ The affix Hold appears in the connection on hold in the dialing field.
2. Click on the button.
Æ The call is resumed.
3. Continue with your call.
Î You have held and resumed a call.
8.3 Forwarding a call
The following prerequisite must be met:
Fig. 7: Dialing field – Hold
There is already a call underway.
To forward a call, proceed as follows:
1. Click on the button.
Æ The Call Forward dialog is opened.
Page 26
Page 27

Current call
Fig. 8: Call Forward dialog
2. Select the number to which you want to forward the call in the drop-down menu or enter it in
the field.
3. If you want to ask before forwarding the call:
1. Check the Ask before call forwarding box.
2. Click on the OK button.
Æ The call is made to the person to whom forwarding is to take place. Inform the caller of
the planned forwarding.
3. Click on the
Æ The call is forwarded.
If you do not want to ask before forwarding the call:
4. Uncheck the Ask before call forwarding box.
5. Click on the OK button.
Æ The call is forwarded.
Î You have forwarded a call.
8.4 Recording a call
Legal information
Please note that unauthorized recording of calls is illegal in many countries and is a prosecutable offence. If you live in such a country, you are obliged to tell the other party that the
call is being recorded. Please inform yourself therefore of the statutory regulations for your
country before recording your telephone call. If you are unsure about the legal position in
your country, we recommend that you consult your legal advisor. Nero AG accepts no liability in the event of misuse of this program function and the resultant violation of the respective national law.
In Germany, this problem is addressed in the penal code, § 203.
More detailed information can be found under:
button.
http://bundesrecht.juris.de/stgb/
Note that for legal reasons, the person you are calling will be made aware that the call is
being recorded by means of a beep at the start and end of recording.
The following prerequisite must be met:
The person you are calling has been informed that the call is being recorded and has
agreed to this.
To record a call, proceed as follows:
Page 27
Page 28

Current call
1. Click on the button.
Æ There is a beep. A red symbol appears in the message area.
Æ The call is recorded.
2. Click on the button.
Æ Recording is terminated.
Î You have recorded a call.
Recorded calls are stored as WAV files in the folder
C:\Documents and Settings\<Identity>\Local Settings\User Data\.SIPPS\<Identity>
where <Identity> stands for the identity under which you logged onto Windows
®
If you cannot see this folder, click in Windows
tions, then on the View tab and select the Show hidden files and folders radio button in
the Advanced settings area. Click on the OK button.
Explorer on the Tools menu > Folder Op-
®
.
8.5 Muting the microphone
To mute the microphone, proceed as follows:
1. Click on the button.
Î You have muted the microphone.
8.6 Restoring the microphone volume
The following prerequisite must be met:
The microphone has been muted.
To restore the microphone volume, proceed as follows:
1. Click on the button.
Î You have restored the microphone volume.
8.7 Regulating the microphone volume
The following prerequisite must be met:
The Automatic Gain Control (AGC) box on the Audio Devices tab under the Basic set-
tings menu icon in the configuration is unchecked.
Page 28
Page 29

Current call
Fig. 9: Microphone volume slider
To regulate the microphone volume, proceed as follows:
1. To reduce the volume:
1. Click on the microphone volume slider.
2. Drag the slider downwards while keeping the left mouse button pressed.
2. To increase the volume:
1. Click on the microphone volume slider.
2. Drag the slider upwards while keeping the left mouse button pressed.
Î You have regulated the microphone volume.
8.8 Regulating the speaker volume
To regulate the speaker volume, proceed as follows:
1. To reduce the volume:
1. Click on the speaker volume slider.
2. Drag the slider downwards while keeping the left mouse button pressed.
Fig. 10: Speaker volume slider
2. To increase the volume:
1. Click on the appropriate volume slider.
2. Drag the slider upwards while keeping the left mouse button pressed.
Î You have regulated the speaker volume.
Page 29
Page 30

Conference call
9 Conference call
9.1 Inviting someone to join a call in progress
In this section you will learn how to hold a conference call with three participants by inviting
someone to join a call already in progress.
The following prerequisite must be met:
There is already a call underway.
To invite someone to join a call in progress, proceed as follows:
1. Click in the second dialing field.
Æ The dialing field is framed in blue.
Fig. 11: Conference call
2. Enter the number of the person you want to invite to join the conference call in the dialing
field.
3. Click on the button.
Æ The second person is called.
The first person will be put on hold until the second person has answered the call.
Fig. 12: Conference call established
Î You have invited someone to join a call in progress.
Page 30
Page 31

Conference call
9.2 Ending a conference call
The following prerequisite must be met:
There is a conference call underway.
To end a conference call, proceed as follows:
1. Click on the button.
Î You have ended a conference call.
9.3 Disconnecting individual call partners from a conference call
The following prerequisite must be met:
There is a conference call underway.
To disconnect an individual call partner from the conference call, proceed as follows:
1. Click in the dialing field of the connection with the call partner you want to disconnect.
Æ The dialing field is framed in blue.
2. Click on the button.
Î You have disconnected an individual call partner from the conference call.
Fig. 13: Dialing field framed
Page 31
Page 32

List of calls
10 List of calls
10.1 Deleting a call from the list of calls
To delete a call from the list of calls, proceed as follows:
1. Click on the List of calls tab.
2. Select a call you have recorded in the drop-down list.
3. Click on the button.
Î You have deleted a call from the list of calls.
10.2 Deleting all calls from the list of calls
To delete all calls from the list of calls, proceed as follows:
1. Click on the List of calls tab.
2. Click on the button.
Æ The Delete all entries in last call list dialog window is opened.
3. Click on the Yes button.
Î You have deleted all calls from the list of calls.
10.3 Listening to a recorded call
The following prerequisite must be met:
You have recorded a call.
To listen to the recording of a call, proceed as follows:
1. Click on the List of calls tab.
2. Select a call you have recorded in the drop-down list.
3. Click on the button.
Æ The recorded call is played back.
Î You have listened to a recorded call.
10.4 Deleting a recorded call
The following prerequisite must be met:
You have recorded a call.
To delete a recorded call, proceed as follows:
1. Click on the List of calls tab.
Page 32
Page 33

List of calls
2. Select a call you have recorded in the drop-down list.
3. Click on the button.
Æ A dialog window is opened.
4. Click on the Yes button.
Î You have deleted a recorded call.
Page 33
Page 34

Chat
11 Chat
11.1 Changing your online status
Your online status shows your contacts whether you are available for a call or chat.
To change your online status, proceed as follows:
1. Click on the button.
2. Select the online status you want in the drop-down menu.
Online
Away
Busy
Offline
Shows you as being online and available for calling and chatting.
Shows you as being presently unavailable for chatting.
If you do not use the mouse and keyboard for a defined time, Nero Sipps
will automatically select this online status (so-called auto-away) and revert to the original online status upon your return.
You will still be shown any chat messages sent to you.
Shows you as being busy.
You will still be shown any chat messages sent to you.
Shows you as being offline.
Any chat messages sent to you will be buffered on the server and shown
to you as soon as you change your online status.
You will continue to be made aware of calls to you in this online status.
Î You have changed your online status.
11.2 Sending a chat message
Nero Sipps only supports offline messages for the instant messaging services of My Nero,
ICQ, and AOL.
An offline message is a message that you send to a contact while they are offline. The
message is buffered on the chat server and shown to the contact as soon as they go
online.
To send a chat message to a contact, proceed as follows:
1. Click on the Contacts tab.
2. Select the contact you want to chat with in the drop-down list.
3. Click on the button.
Æ The Choose IM Account dialog window is opened if there are a number of IM accounts
assigned to a contact.
1. Select the IM account to which you want to send the message in the drop-down list.
2. Click on the OK button.
Æ The Chat window is opened.
Page 34
Page 35

Chat
Fig. 14: Chat window
4. Enter your message in the input area.
5. Press the Enter key.
Î You have sent the contact a chat message.
11.3 Inviting someone to join a chat in progress
The following prerequisite must be met:
You are already chatting with a contact.
To invite someone to join a chat in progress, proceed as follows:
1. Click on the button in the Chat window.
Æ The Invite contact dialog window is opened.
2. Select the IM account of the contact you want to invite to join the chat in the drop-down list.
Fig. 15: Invite contact dialog window
3. Click on the Invite button.
4. The message "The user x has joined the chat" is shown in the display area.
Î You have invited a contact to join a chat in progress.
Page 35
Page 36

Chat
11.4 Setting up a further chat identity
My Nero supports the following instant messaging protocols:
http://www.icq.de/)
ICQ (
http://www.msn.de/)
MSN (
http://www.aol.de/)
AOL (
This manual does not describe how to create an identity within the individual instant mes-
saging services. Please refer to the individual providers for more information.
To set up a further chat identity, proceed as follows:
1. Click on the File menu > Configuration.
Æ The Configuration window is opened.
2. Click on the Instant Messaging menu icon.
3. Enter your ID or UIN in the appropriate input field in the Identity area.
ID stands for IDentification and UIN for Unique Identification Number. They are the user
IDs within the respective instant messaging services.
4. Enter the password for your identity in the Password input field.
5. Check the Active box.
6. Click on the OK button.
Î You have set up a further chat identity.
Chat messages in My Nero are transmitted using the Jabber instant messaging protocol.
This is why you can set up a further Jabber identity in Nero Sipps.
Page 36
Page 37

Contact management
12 Contact management
12.1 Adding a contact to the contact list
To add a contact to your contact list, proceed as follows:
1. Click on the button > Find Friends on My Nero.
Æ The browser opens with the Search contact page.
2. Enter the first name, last name or nickname of the person you want to add to your contact
list in the input field.
3. Click on the Search button.
Æ The search results are displayed.
4. Click on the link containing the contact's nickname.
Æ The contact's profile is displayed.
5. Click on the Add to contact list link.
Î You have added a contact to your contact list.
12.2 Creating a contact manually
To create a contact manually, proceed as follows:
1. Click on the button > Add a contact manually.
Æ The Nero Sipps - New contact window is opened.
Fig. 16: New contact window
Page 37
Page 38

Contact management
2. Enter the contact's last name in the Last name input field.
3. Enter the contact's first name in the First name input field.
4. Enter the contact's nickname in the Nickname input field.
5. Enter the contact's home number in the Home input field.
Enter all numbers with country code as in the following example: +49 89 1234567
6. Enter the contact's work number in the Business input field.
7. Enter the contact's mobile phone number in the Mobile phone input field.
8. Enter the SIP number in the SIP input field.
The SIP number in My Nero has the following format: sip:nickname@sip.my.nero.com.
9. Select the radio button for the preferred number to be dialed by Nero Sipps when the contact
is double-clicked in the Telephone number area.
10. Enter your contact's IM accounts in the input fields in the IM accounts area.
An IM account can only ever be allocated to one contact. In other words you cannot create
two contacts with the same IM account allocated to them.
The My Nero IM account must end with @jabber.my.nero.com.
11. Enter your contact's e-mail addresses in the input field in the E-mail address area.
12. Select the radio button for the preferred e-mail address in the E-mail address area.
Fig. 17: New contact window
13. Click on the OK button.
Î You have created an account manually.
Page 38
Page 39

Contact management
12.3 Editing a contact
To edit a contact, proceed as follows:
1. Click on the Contacts tab.
2. Right-click on the contact that you want to edit and select Edit contact in the context menu
that is displayed.
Æ The Edit contact window is opened.
3. Make the necessary changes.
4. Click on the OK button.
Î You have edited a contact.
12.4 Deleting a contact
To delete a contact, proceed as follows:
1. Click on the Contacts tab.
2. Right-click on the contact that you want to edit and select Delete contact in the context
menu that is displayed.
Æ The Confirmation dialog window is opened.
3. Click on the Yes button.
Î You have deleted a contact.
Fig. 18: Edit contact window
Page 39
Page 40

Contact management
12.5 Authorizing a contact
The following prerequisites must be met:
The contact has added you to their contact list.
The Buddy authorization request dialog window is open.
To authorize a contact, proceed as follows:
1. Check the I want to also be added to his/her contact list box.
Fig. 19: Buddy authorization request dialog window
2. Click on the Allow button.
Æ The contact is automatically added to your contact list.
Î You have authorized a contact.
12.6 Editing your own profile
To edit your profile, proceed as follows:
1. Click on the My Nero menu > My profile.
Æ The browser opens with the My profile page.
Fig. 20: My Nero – My profile browser window
Page 40
Page 41

Contact management
2. Click on the General link.
3. Click on the Edit button.
4. Make the necessary changes to your profile.
5. Click on the Save button.
6. Click on the Personal link.
Æ The Personal information page is displayed.
7. Click on the Edit button.
8. Make the necessary changes to your profile.
9. Click on the Save button.
Î You have edited your personal profile.
12.7 Adding an avatar to a contact
The following prerequisites must be met:
You have opened the New contact or Edit contact window.
The avatar exists as a JPG, BMP or PNG graphic.
To add an avatar (i.e. a graphical representation of a user) to a contact, proceed as follows:
1. Click on the Change button in the Avatar area.
Æ The Select image dialog window is opened.
2. Select the image you want in the drop-down list.
Fig. 21: My Nero – My profile – Personal browser window
Page 41
Page 42

Contact management
3. Click on the Open button.
4. Click on the OK button.
Î You have added an avatar to a contact.
Page 42
Page 43

Ring tones
13 Ring tones
13.1 Setting up custom ring tones
The following prerequisite must be met:
The ring tone exists as a WAV audio file.
To set up a custom ring tone, proceed as follows:
1. Click on the File menu > Configuration.
2. Click on the Signal and ring tones menu icon.
3. Click on the General signals tab.
4. Select the event to which you want to assign a new ring tone in the Events drop-down li st.
5. Click on the button.
Æ The Search for audio files window is opened.
6. Highlight the audio file containing the ring tone you want.
The quality of the audio file is automatically reduced to 128 kbps, 16 bit, mono.
7. Click on the Open button.
8. If you want to listen to the ring tone, click on the button.
Æ The ring tone is played.
9. Click on the OK button.
Î You have set up a custom ring tone.
Fig. 22: Search for audio files dialog window
Page 43
Page 44

Ring tones
13.2 Assigning a custom ring tone to a contact
The following prerequisite must be met:
The ring tone exists as a WAV audio file.
To assign a custom ring tone to a contact, proceed as follows:
1. Click on the File menu > Configuration.
Æ The Configuration window is opened.
2. Click on the Signal and ring tones menu icon.
3. Click on the Available audio files tab.
4. Click on the Import local ring tones button.
Æ A dialog window is opened.
5. Highlight the audio file containing the ring tone you want.
The quality of the audio file is automatically reduced to 128 kbps, 16 bit, mono.
6. Click on the Open button.
7. Click on the Individual ring tones tab.
8. Click on the New button.
Æ The Select contact dialog window is opened.
Fig. 23: Dialog window for importing local ring tones
Page 44
Page 45

Ring tones
Fig. 24: Select contact dialog window
9. Select the required contact in the drop-down list.
10. Click on the Select button.
Æ A drop-down menu is opened beside the contact.
11. Select the ring tone you want in the drop-down menu.
12. If you want to listen to the custom ring tone:
1. Select the contact once more in the Contact/Group drop-down list.
2. Click on the
button.
Æ The ring tone is played.
13. Click on the OK button.
Î You have assigned a custom ring tone to a contact.
13.3 Assigning a custom ring tone to a contact for chat messages
In this section you will find out how to configure a custom ring tone for a contact that will
sound each time your contact sends you a chat message.
The following prerequisite must be met:
The ring tone exists as a WAV audio file.
To assign a custom ring tone to a contact for chat messages, proceed as follows:
1. Click on the File menu > Configuration.
Æ The Configuration window is opened.
2. Click on the Signal and ring tones menu icon.
3. Click on the Available audio files tab.
Page 45
Page 46

Ring tones
4. Click on the Import local ring tones button.
Æ A dialog window is opened.
5. Highlight the audio file containing the ring tone you want.
You can only use WAV audio files as ring tones.
The quality of the audio file is automatically reduced to 128 kbps, 16 bit, mono.
6. Click on the Open button.
7. Click on the Individual IM signals tab.
8. Click on the New button.
Æ The Select contact dialog window is opened.
9. Select the required contact in the drop-down list.
10. Click on the Select button.
Æ A drop-down menu is opened beside the contact.
11. Select the ring tone you want in the drop-down menu.
12. If you want to listen to the custom ring tone:
1. Select the contact once more in the Contact/Group drop-down list.
2. Click on the
button.
Æ The ring tone is played.
13. Click on the OK button.
Î You have assigned a custom ring tone to a contact for chat messages.
Page 46
Page 47

Advanced functions
14 Advanced functions
14.1 Working with Microsoft® Outlook®
14.1.1 Making calls from Microsoft® Outlook®
In this section you will learn how to make calls via Nero Sipps from any TAPI-compatible application at the touch of a button using the TAPI functionality of Nero Sipps. TAPI is a programming interface developed by Microsoft
mainly used with Microsoft
The following prerequisites must be met:
You are using Microsoft® Outlook® 2000 or higher.
Nero Sipps is running.
To call someone directly from Microsoft
1. Launch Microsoft
®
Outlook®.
®
Outlook®, the procedure will be described using this program.
®
Outlook®, proceed as follows:
®
for telephony applications. As this function is
2. Click on Contacts in the navigation area.
3. Right-click on the contact that you want to call and select Call contact in the context menu
that is displayed.
Æ The New telephone call window is opened.
Fig. 25: Outlook – New telephone call dialog window
4. Click on the Dialing options button.
Æ The Dialing options dialog window is opened.
5. Select the SIPPS Line entry in the drop-down menu in the Connect using this line area.
Page 47
Page 48

Advanced functions
6. Click on the OK button.
Fig. 26: Outlook – Dialing options dialog window
7. Click on the Start call button.
Æ Nero Sipps is brought to the foreground and dials the required number.
Î You have called someone directly from Microsoft
If you are using another TAPI-capable application, you can also select Nero Sipps as a telephony device. Refer to the manual for the respective application to find out exactly how to
do this.
14.1.2 Synchronizing contacts with Microsoft® Outlook®
To synchronize contacts with Microsoft® Outlook®, proceed as follows:
1. Click on the File menu > Configuration.
Æ The Configuration window is opened.
2. Click on the Address book menu icon.
3. Select the entry Synchronize with Microsoft Outlook in the drop-down menu in the Syn-
chronization settings area.
®
Outlook®.
4. Click on the Edit button.
Æ The Choose Outlook folder dialog window is opened.
Page 48
Page 49

Advanced functions
5. Select the required contacts folder in the drop-down list.
6. Click on the OK button.
Fig. 27: Choose Outlook folder dialog window
7. Click on the OK button in the Configuration window.
Î You have synchronized the contacts with Microsoft
®
Outlook®.
Page 49
Page 50

Configuration
15 Configuration
15.1 Calling up the configuration
To call up the Nero Sipps configuration, proceed as follows:
1. Click on the File menu > Configuration.
Æ The Configuration window is opened.
Î You have called up the Nero Sipps configuration.
15.2 Basic settings menu icon
15.2.1 Basic Condition and Language tab
Fig. 28: Configuration – Basic settings menu icon – Basic Condition and Language tab
Startup Condition area
Start Nero Sipps together
with Windows check box
Perform check that Nero
Sipps is selected as the
standard telephone applica-
tion check box
Language Selection area
Drop-down menu
Loads Nero Sipps automatically each time Windows
starts. This box is unchecked by default.
Checks whether Nero Sipps is entered as the standard
telephone application for Internet calls each time Windows starts. As the standard telephone, Nero Sipps is
activated for all callto links. This box is checked by default.
Selects the language for the Nero Sipps user interface.
Nero Sipps must be restarted in order for the change
to the language to take effect.
Page 50
Page 51

Configuration
Interrupted Internet Connection area
Show message box when
you are disconnected from
the Internet check box
15.2.2 Internet Connection tab
Displays a dialog window if you are not connected to
the Internet and therefore cannot be reached. This box
is checked by default.
Fig. 29: Configuration – Basic settings menu icon – Internet Connection tab
Select Internet Connection area
Broadband and DSL
radio button
Local Network (LAN)
radio button
Used IP-Address
display field
Indicates that dial-up is to take place via a DSL or other broadband connection. You can select the exact type of broadband
connection in the drop-down menu under Broadband.
Indicates that the Internet connection is to be established via a
local network.
Displays the IP address via which Nero Sipps can be reached
from the Internet.
Page 51
Page 52

Configuration
15.2.3 Audio devices tab
Fig. 30: Configuration – Basic settings menu icon – Audio devices tab
Device Settings area
Device for Playback
drop-down menu
Device for Recording
drop-down menu
Audio device for ring tone
and hands-free talking
drop-down menu
Selects an audio device for playback.
Selects an audio device for recording.
Selects an audio device for ring tones and hands-free
talking.
Internal computer speaker area
Use internal computer
speaker for ring tone
check box
The ring tone for incoming calls is output using the
speaker built into the computer.
Playing of ring tone area
Use 2nd audio device to
play the ring tone
check box
A second audio device is used to play the ring tone. This
box is unchecked by default.
Microphone area
Activates the microphone's automatic volume adjustment
facility. The microphone sensitivity is automatically set to
Automatic Gain Control
(AGC) check box
a comfortable level for the other party; this avoids overloading and compensates any shifts in distance between
the talker and microphone. This box is unchecked by default.
Page 52
Page 53

Configuration
15.2.4 Video tab
All control elements on this tab will be grayed out if there is no webcam installed, configured, and connected to the computer.
Video options area
Activate video functionality
check box
Capture Device (Webcam)
drop-down menu
Camera settings button
Fig. 31: Configuration – Basic settings menu icon – Video tab
Activates the Nero Sipps video transmission functionality.
Selects the webcam for video transmission.
Allows you to make webcam-specific settings. Web-
cam-specific setting windows are opened.
Page 53
Page 54

Configuration
15.2.5 Telephone Options tab
When in a call area
Signalize call waiting
radio button
Give busy signal
radio button
When away area
Accept
radio button
Give busy signal
radio button
Fig. 32: Configuration – Basic settings menu icon – Telephone Options tab
If a new call comes in while another call is underway, a ring
tone will sound. This radio button is selected by default.
If a new call comes in while another call is underway, the
caller will hear a busy signal.
If a call comes in while you are away, a ring tone will still
sound. This radio button is selected by default.
If a call comes in while you are away, the caller will hear a
busy signal.
Page 54
Page 55

Configuration
15.3 Signal and ring tones menu icon
15.3.1 Available audio files tab
Fig. 33: Configuration – Signal and ring tones menu icon – Available audio files tab
Overview and Import area
Display area Displays the available audio files.
Show standard
audio files check box
Import local ring
tones button
button
button
Shows the audio files supplied with Nero Sipps. This box is unchecked by default.
Imports local ring tones so they can be used as custom ring
tones. A window is opened in which you can highlight a single
file.
Plays the highlighted audio file.
Stops playback of an audio file.
Page 55
Page 56

Configuration
15.3.2 General Signals tab
Sound Events area
Events
drop-down list
Sound File
drop-down menu
Fig. 34: Configuration – Signal and ring tones menu icon – General Signals tab
Selects the event to which the audio file is to be assigned.
Selects the audio file for the highlighted event.
Opens the Search for audio files window in which you can high-
light a single file.
Plays the audio file for the highlighted event.
Stops playback of an audio file.
Page 56
Page 57

Configuration
15.3.3 Individual ring tones tab
Fig. 35: Configuration – Signal and ring tones menu icon – Individual ring tones tab
Assign Ring Tones to Contacts area
Contact/Group
drop-down list
Audio File drop-
down list
New button
Delete button
button
button
Selects the contact or group to be assigned a custom ring tone.
Selects a custom ring tone for a contact or group. The audio file
must previously have been imported under the Available audio
files tab.
Creates a new assignment of a custom ring tone to a contact or
group. The Select contact dialog window is opened.
Deletes the highlighted assignment of a custom ring tone to a contact or group.
Plays the audio file for the highlighted contact/group.
Stops playback of an audio file.
Page 57
Page 58

Configuration
15.3.4 Individual IM-Signals tab
Fig. 36: Configuration – Signal and ring tones menu icon – Individual IM-Signals tab
Assign IM Signals to Contacts area
Contact/Group drop-down list
Selects the contact or group to be assigned a custom
ring tone for chat messages.
Selects a custom IM signal for a contact or group. The
Audio File drop-down list
audio file must previously have been imported under
the Available audio files tab.
Creates a new assignment of an IM signal to a contact
New button
or group. The Select contact dialog window is
opened.
Delete button
button
button
Deletes the highlighted assignment of a custom IM
signal to a contact or group.
Plays the audio file for the highlighted contact/group.
Stops playback of an audio file.
Page 58
Page 59

Configuration
15.4 Instant Messaging menu icon
15.4.1 My User Accounts tab
Fig. 37: Configuration – Instant Messaging menu icon – My User Accounts tab
My Nero identity area
Active check box Activates the My Nero identity. This box cannot be unchecked.
My Nero ID
display field
Password
display field
Displays the identity used by Nero Sipps to log into My Nero. The
identity cannot be changed here.
Specifies the password used by Nero Sipps to log into My Nero.
The password cannot be changed here.
MSN ID area
Active check box Activates the MSN identity.
MSN ID input field Specifies the MSN ID used by Nero Sipps to log into MSN.
Password
input field
Specifies the password used by Nero Sipps to log into MSN.
ICQ identity area
Active check box Activates the ICQ identity.
ICQ UIN input field Specifies the ICQ UIN used by Nero Sipps to log into ICQ.
Password
input field
Specifies the password used by Nero Sipps to log into ICQ.
AOL identity area
Active check box Activates the AOL identity.
AOL ID input field Specifies the AOL ID used by Nero Sipps to log into AOL.
Password
input field
Specifies the password used by Nero Sipps to log into AOL.
Page 59
Page 60

Configuration
15.4.2 Display tab
Fig. 38: Configuration – Instant Messaging menu icon – Display tab
Sent lines area
Font
display field
Change font
check box
Change color
check box
Displays the current font format. Sent lines of text are displayed in the
specified format.
Changes the format. The Select Font window is opened.
Changes the font color. The Select color window is opened.
Received lines area
Font
display field
Change font
check box
Change color
check box
Displays the current font format. Received lines of text are displayed
in the specified format.
Changes the format. The Select Font window is opened.
Changes the font color. The Select color window is opened.
Special lines area
Font
display field
Change font
check box
Change color
check box
Displays the current font format. Special lines of text are displayed in
the specified format.
Changes the format. The Select Font window is opened.
Changes the font color. The Select color window is opened.
Preview area
Display area
Displays the current font format. The current lines of text are displayed in the specified format.
Page 60
Page 61

Configuration
15.5 Address Book menu icon
15.5.1 Synchronization tab
Fig. 39: Configuration – Address Book menu icon – Synchronization tab
Changes to synchronized contacts are global!
Note that changes to synchronized contacts in Nero Sipps will also be reflected in the contacts in Microsoft
®
Outlook® / Outlook® Express. Local changes to contacts are only possi-
ble if synchronization is disabled.
Synchronization settings area
Do not synchronize: Nero Sipps will not be synchronized with another ad-
dress book. Contacts can only be used within Nero Sipps.
Drop-
down
menu
Synchronize with Microsoft Outlook Express: Synchronizes th e Nero
Sipps contacts with Microsoft
®
Outlook® Express. Changes made in one
program will be automatically reflected in the other program.
Synchronize with Microsoft Outlook: Synchronizes the Nero Sipps con-
tacts with Microsoft
®
Outlook®. Changes made in one program will be auto-
matically reflected in the other program.
Page 61
Page 62

Configuration
15.5.2 Contact behavior tab
Fig. 40: Configuration – Address Book menu icon – Contact behavior tab
Moving a contact to different contact group area
Always ask radio button
Always reset radio button
Always keep radio button
Always ask whether custom settings for a contact are
to be deleted if this contact is moved to another group.
Deletes custom settings for a contact if it is moved to
another group.
Keeps custom settings for a contact if it is moved to
another group.
When double clicking on a contact should area
Start a call radio button
Show the details of the con-
tact radio button
Open an Instant Message
dialog box radio button
Defines that double-clicking on a contact calls that
contact.
Defines that double-clicking on a contact displays that
contact's details.
Defines that double-clicking on a contact opens a chat
window.
Page 62
Page 63

Configuration
15.6 Service Management menu icon
15.6.1 Registration tab
Fig. 41: Configuration – Service Management menu icon – Registration tab
Changes should only be made by advanced users!
Make sure that you do not make changes to the settings on this tab without knowing what
effect they will have.
Communication Services area
Modify
button
Apply
button
Edits the Nero Sipps communication service. The Modify Nero
Sipps user window is opened.
Applies the modification to the identity. Nero Sipps will initially
log off from the server, but will then log back in.
Ports area
Media Port Range
input field
Standard SIP Port
input field
STUN Server
input field
Set default values
button
Specifies the port range in which the voice and video packages
are transmitted.
Specifies the port via which the SIP packages are transferred.
Specifies the STUN server.
A STUN server permits the traversal of firewalls and NAT
routers for the purpose of data transmission.
Resets the input fields to the default settings.
Page 63
Page 64

Configuration
Global Network Mode area
Universal Plug and
Play (UPnP) check
box
This box is checked if Universal Plug and Play has detected the
router and automatically made all the necessary settings on it.
NAT Traversal or
manually configured
port/Transfer (using
STUN service) radio
Defines that the computer on which Nero Sipps is installed
should use the STUN server to traverse firewalls and NAT
routers for the purpose of data transmission.
button
Direct Internet con-
nection/or available
SIP proxy radio but-
ton
Defines that the computer on which Nero Sipps is installed is
directly connected with the Internet or that an SIP proxy is
available.
Page 64
Page 65

Context menu
16 Context menu
16.1 System tray in the taskbar
If Nero Sipps has been started and is not active in the foreground, the system tray in the
taskbar will contain the
open the context menu by clicking with the right mouse button.
Display Nero Sipps
Hide Nero Sipps
Nero Sipps configuration
About Nero Sipps
Help
Exit
icon. You open Nero Sipps by double-clicking on this icon. You
Opens the Nero Sipps window.
Hides the Nero Sipps window.
Opens the Nero Sipps configuration.
Opens a window containing information about Nero
Sipps.
Opens the online help.
Exits Nero Sipps.
Page 65
Page 66

Uninstallation
17 Uninstallation
17.1 Uninstalling Nero Sipps
The following prerequisites must be met:
You have administrator rights.
Nero Sipps is not running.
To uninstall Nero Sipps, proceed as follows:
1. If you are using the Windows XP start menu, click on Start > Control Panel.
If you are using the classic start menu, click on Start > Settings > Control Panel.
Æ The Control Panel window is opened.
2. Click on the Add or Remove Programs icon.
Æ The Add or Remove Programs window is opened.
3. Click on the Nero Sipps menu icon.
Fig. 42: Control Panel – Add or Remove Programs – Change or Remove Programs
4. Click on the Change or Remove Programs button.
Æ The Nero Sipps Uninstallation Wizard window is opened.
5. Click on the Next button.
Æ A dialog window is opened.
6. If you want to retain your personal settings and your contact list on your computer, click on
the Yes button.
Æ Nero Sipps is uninstalled.
Page 66
Page 67

Uninstallation
7. Click on the Exit button.
Î You have uninstalled Nero Sipps.
The Nero Sipps uninstallation wizard will not automatically uninstall the Yahoo!
you want to uninstall the Yahoo!
icon.
®
toolbar, repeat these steps for the Yahoo! Toolbar menu
®
toolbar. If
Page 67
Page 68

Troubleshooting
18 Troubleshooting
18.1 Troubleshooting
I don't hear a ring tone/I can't hear the other person when I make a call.
Check the following possible causes:
A) The microphone and speaker volume is set very low.
B) There are a number of audio devices installed in your computer.
Solution for A):
1. Increase the microphone and speaker volume in Nero Sipps as described in Regulating the
microphone volume
2. Click on Start > Programs > Accessories > Entertainment > Volume Control in Win-
dows®.
.
Æ The Volume Control window is opened.
3. Move the volume slider in the Volume Control area upwards.
4. Move the volume slider in the Wave area upwards.
Solution for B):
1. Click on the File menu > Configuration.
2. Click on the Audio devices tab.
3. Select the respective audio devices in the drop-down menus in the Device Settings area.
4. Click on the OK button.
The voice of the person calling is clipped.
Check the following possible causes:
A) Your sound driver is outdated.
B) You have other programs open that need bandwidth.
C) Your Internet connection is slower than you indicated in the configuration wizard.
Solution for A):
1. Launch your browser.
2. Enter the URL for the manufacturer of your sound card.
3. Download the latest driver for your sound card.
4. Install the new driver. Refer to the instructions of the sound card manufacturer for more in-
formation.
Page 68
Page 69

Troubleshooting
5. Restart your computer.
1. Click on the File menu > Configuration.
2. Click on the Internet Connection tab.
3. Select the appropriate radio button for your Internet connection.
4. If you have selected the Broadband and DSL radio button, select the exact connection type
5. Click on the OK button.
Solution for B):
Close all other programs that need additional bandwidth.
Transmission of the telephony data can be hindered by other programs that need bandwidth
from your Internet connection. Make sure therefore that there are no e-mail, file sharing or
download programs active during a telephone call.
Solution for C):
in the drop-down menu.
Page 69
Page 70

Technical data
19 Technical data
19.1 SIP conformity
Nero Sipps conforms to the SIP standard (Session Initiation Protocol), an RFC (Request for
Comments) of the IETF (Internet Engineering Task Force).
SIP is an open standard, i.e. Nero Sipps can communicate with any device as long as it is
based on SIP (telephones, gateways, etc.).
19.2 Codecs supported
19.2.1 Audio
PCMA
PCMU
GSM
G726-24
G726-32
ILBC
19.2.2 Video
H.263
19.3 Encryption
Calls between two call partners, both of whom use Nero Sipps, will be automatically encrypted. This encryption does not have to be specially enabled.
Not all calls are encrypted!
Encrypted calls are only possible between call partners usi ng Nero Sipps. The protocol
used does not provide for standardized encryption so Nero Sipps uses its own encryption
system which is not supported by other products in the IP telephony sector.
19.4 Automatic update
Nero Sipps automatically checks whether there is a newer version available on the download
server each time it starts.
If there is a new version of Nero Sipps available, the Update Information dialog window
from which you can call up the download page directly is opened.
Page 70
Page 71

Technical data
19.5 Other functions
Echo suppression (automatically enabled)
NAT traversal via STUN server (automatically enabled)
19.6 Plug-ins
Nero Sipps can be enhanced with plug-ins that unlock additional functions.
The individual plug-ins can be downloaded in the Nero online shop under
http://www.nero.com.
Page 71
Page 72

List of figures
20 List of figures
Fig. 1: Install Yahoo! Toolbar window............................................................................................................11
Fig. 2: Nero Sipps Installation Wizard – License agreement window............................................................12
Abb. 3: Nero Sipps Installation Wizard – Shortcuts window..........................................................................13
Fig. 4: Windows security warning dialog box................................................................................................14
Fig. 5: Main screen...........................................................................................................................................17
Fig. 6: Dialing field............................................................................................................................................23
Fig. 7: Dialing field – Hold.................................................................................................................................26
Fig. 8: Call Forward dialog..............................................................................................................................27
Fig. 9: Microphone volume slider .....................................................................................................................29
Fig. 10: Speaker volume slider.........................................................................................................................29
Fig. 11: Conference call....................................................................................................................................30
Fig. 12: Conference call established ................................................................................................................30
Fig. 13: Dialing field framed..............................................................................................................................31
Fig. 14: Chat window........................................................................................................................................35
Fig. 15: Invite contact dialog window..............................................................................................................35
Fig. 16: New contact window ..........................................................................................................................37
Fig. 17: New contact window ..........................................................................................................................38
Fig. 18: Edit contact window...........................................................................................................................39
Fig. 19: Buddy authorization request dialog window....................................................................................40
Fig. 20: My Nero – My profile browser window ..............................................................................................40
Fig. 21: My Nero – My profile – Personal browser window...........................................................................41
Fig. 22: Search for audio files dialog window................................................................................................43
Fig. 23: Dialog window for importing local ring tones.......................................................................................44
Fig. 24: Select contact dialog window ............................................................................................................45
Fig. 25: Outlook – New telephone call dialog window....................................................................................47
Fig. 26: Outlook – Dialing options dialog window..........................................................................................48
Fig. 27: Choose Outlook folder dialog window..............................................................................................49
Fig. 28: Configuration – Basic settings menu icon – Basic Condition and Language tab..........................50
Fig. 29: Configuration – Basic settings menu icon – Internet Connection tab.............................................51
Fig. 30: Configuration – Basic settings menu icon – Audio devices tab......................................................52
Fig. 31: Configuration – Basic settings menu icon – Video tab.....................................................................53
Fig. 32: Configuration – Basic settings menu icon – Telephone Options tab..............................................54
Fig. 33: Configuration – Signal and ring tones menu icon – Available audio files tab................................55
Fig. 34: Configuration – Signal and ring tones menu icon – General Signals tab.......................................56
Fig. 35: Configuration – Signal and ring tones menu icon – Individual ring tones tab...............................57
Fig. 36: Configuration – Signal and ring tones menu icon – Individual IM-Signals tab...............................58
Page 72
Page 73

List of figures
Fig. 37: Configuration – Instant Messaging menu icon – My User Accounts tab........................................59
Fig. 38: Configuration – Instant Messaging menu icon – Display tab...........................................................60
Fig. 39: Configuration – Address Book menu icon – Synchronization tab...................................................61
Fig. 40: Configuration – Address Book menu icon – Contact behavior tab.................................................62
Fig. 41: Configuration – Service Management menu icon – Registration tab..............................................63
Fig. 42: Control Panel – Add or Remove Programs – Change or Remove Programs.....................................66
Page 73
Page 74

Glossary
21 Glossary
Automatic Gain Control
The Automatic Gain Control (AGC) automatically levels out the volume of the microphone
recording so that recordings with varying volume levels do not produce cracks and the like.
Automatic Codec Adaption
Automatic Codec Adaption checks the bandwidth available for the Internet connection an d
selects the compression codec to be used based on this.
Firewall
A firewall is a piece of protective software or hardware that guards a secure internal network
that is linked to a public network (such as the Internet) against viruses, hackers, and other
dangerous data.
Gateway
A gateway is an interface for the exchange of data between two different networks. For example, the Sippstar IP-PBX gateway function translates the SIP protocol into the ISDN protocol and so represents the interface between voice over IP and conventional telephony,
which means that others without a VOIP telephone can also be called.
NAT
Network Address Translation (NAT) is a procedure for increasing the number of IP addresses within company networks. The NAT procedure registers the IP addresses of a private network and assigns them publicly registered IP addresses. The advantage of this procedure is that computers which only communicate with one another within the company network do not require any public IP addresses. The computers that establish communication to
other external computers are given a table entry when routing.
Port
The term port is used for the logical representation when addressing interfaces in computer
networks. Ports can be open or closed. For example, certain ports on a router must be open
and forwarded to target computers (port forwarding) in order for a virtual private network
(VPN), file transfer (FTP server) or online games to work.
You will find a detailed overview of ports and what they do at the Internet address
http://portforward.com/
Router
A router is a switching computer in a network that ensures that the protocol data arriving at it
is forwarded to the designated target.
Routing
Routing refers to the switching of data packets between a number of subnetworks.
SIP
The Session Initiation Protocol (SIP) is a standard protocol (RFC 3261) for Internet multimedia conferences, for example when making calls via the Internet.
Page 74
Page 75

Glossary
STUN
STUN stands for 'Simple Traversal of UDP over NATs' and is a simple network protocol that
detects the presence of firewalls and NAT routers and permits their traversal.
TAPI
The Telephony Application Programming Interface (TAPI) is a programming interface developed by Microsoft® for telephony applications. It lets you make telephone calls directly from
the software and informs you of incoming calls.
UDP
User Datagram Protocol (UDP) is a network protocol that governs wireless data exchange
between computers.
UPnP
Universal Plug and Play (UPnP) is based on a series of standardized network protocols and
data formats. It is used for manufacturer-neutral actuation of devices (stereo systems,
routers, printers, house controllers) via an IP-based network.
Page 75
Page 76

Contact
22 Contact
22.1 Contact details
Nero AG
Im Stoeckmaedle 18
76307 Karlsbad
Germany
Tel.: +49 724 892 80
Fax: +49 724 892 8499
22.2 Web
You will find the manufacturer's homepage at the following Internet addresses:
http://www.nero.com
http://my.nero.com
http://www.sippstar.com
Page 76
 Loading...