


PhotoSnap
Table of contents
 Loading...
Nero PhotoSnap Manual
Nero AG

Copyright and Trademark Information
The Nero PhotoSnap and all its contents are protected by copyright and property of Nero
AG. All rights reserved. This manual contains material that is protected by internationally
valid copyright. No part of this manual may be reproduced, transmitted or transcribed without
the express written permission of Nero AG.
Nero rejects any claims that transcend the clauses of the guarantee rights. Nero AG does
not undertake any liability for the correctness of the Nero PhotoSnap manual. The contents
of the software supplied, as well as the Nero PhotoSnap manual, may be changed without
prior warning.
All trade names and trademarks are the property of their respective owners.
The trademarks mentioned here are listed only for information purposes.
Copyright © 2007 Nero AG and its licensors. All rights reserved.
REV 1.0, SW 1.2.0.19

Contents
Page 3
Contents
1 General Information 5
1.1 About the Manual 5
1.2 About Nero PhotoSnap and Nero PhotoSnap Viewer 5
1.3 Versions of Nero PhotoSnap 6
2 Technical Information 7
2.1 System Requirements 7
2.2 Supported Formats 7
3 Launching the Program 8
3.1 Starting Nero PhotoSnap via Nero StartSmart 8
3.2 Starting Nero PhotoSnap On-the-Fly 8
4 Program Interface 9
5 Image Effects 11
5.1 Effect Area 17
5.2 Exposure Area 17
5.2.1 Correct Brightness Range 18
5.2.2 Correct Gradation Curve 19
5.3 Color Balance 20
5.3.1 Color Balance 21
5.4 Resolution Area 22
5.5 Noise Area 23
5.6 Sharpen Area 24
5.7 Red Eye Removal 25
5.8 Rotate Area 26
5.8.1 Rotate Image 27
5.9 Aging Area 28
6 Edit Image 29
7 Save Image 30
7.1 Image Format Settings Window 31

Contents
Page 4
8 File Information Window 33
9 Configuration 34
10 Nero PhotoSnap Viewer 35
10.1 Program Interface 35
10.2 Full Screen View 36
10.3 View Image 36
10.4 Configuration 37
10.5 Key Combinations 37
11 List of Figures 39
12 Glossary 40
13 Index 42
14 Contact 45
General Information
Page 5
1 General Information
1.1 About the Manual
This manual is intended for all users who want to find out how to use Nero PhotoSnap. It is
process-based and explains how to reach a particular objective on a step-by-step basis.
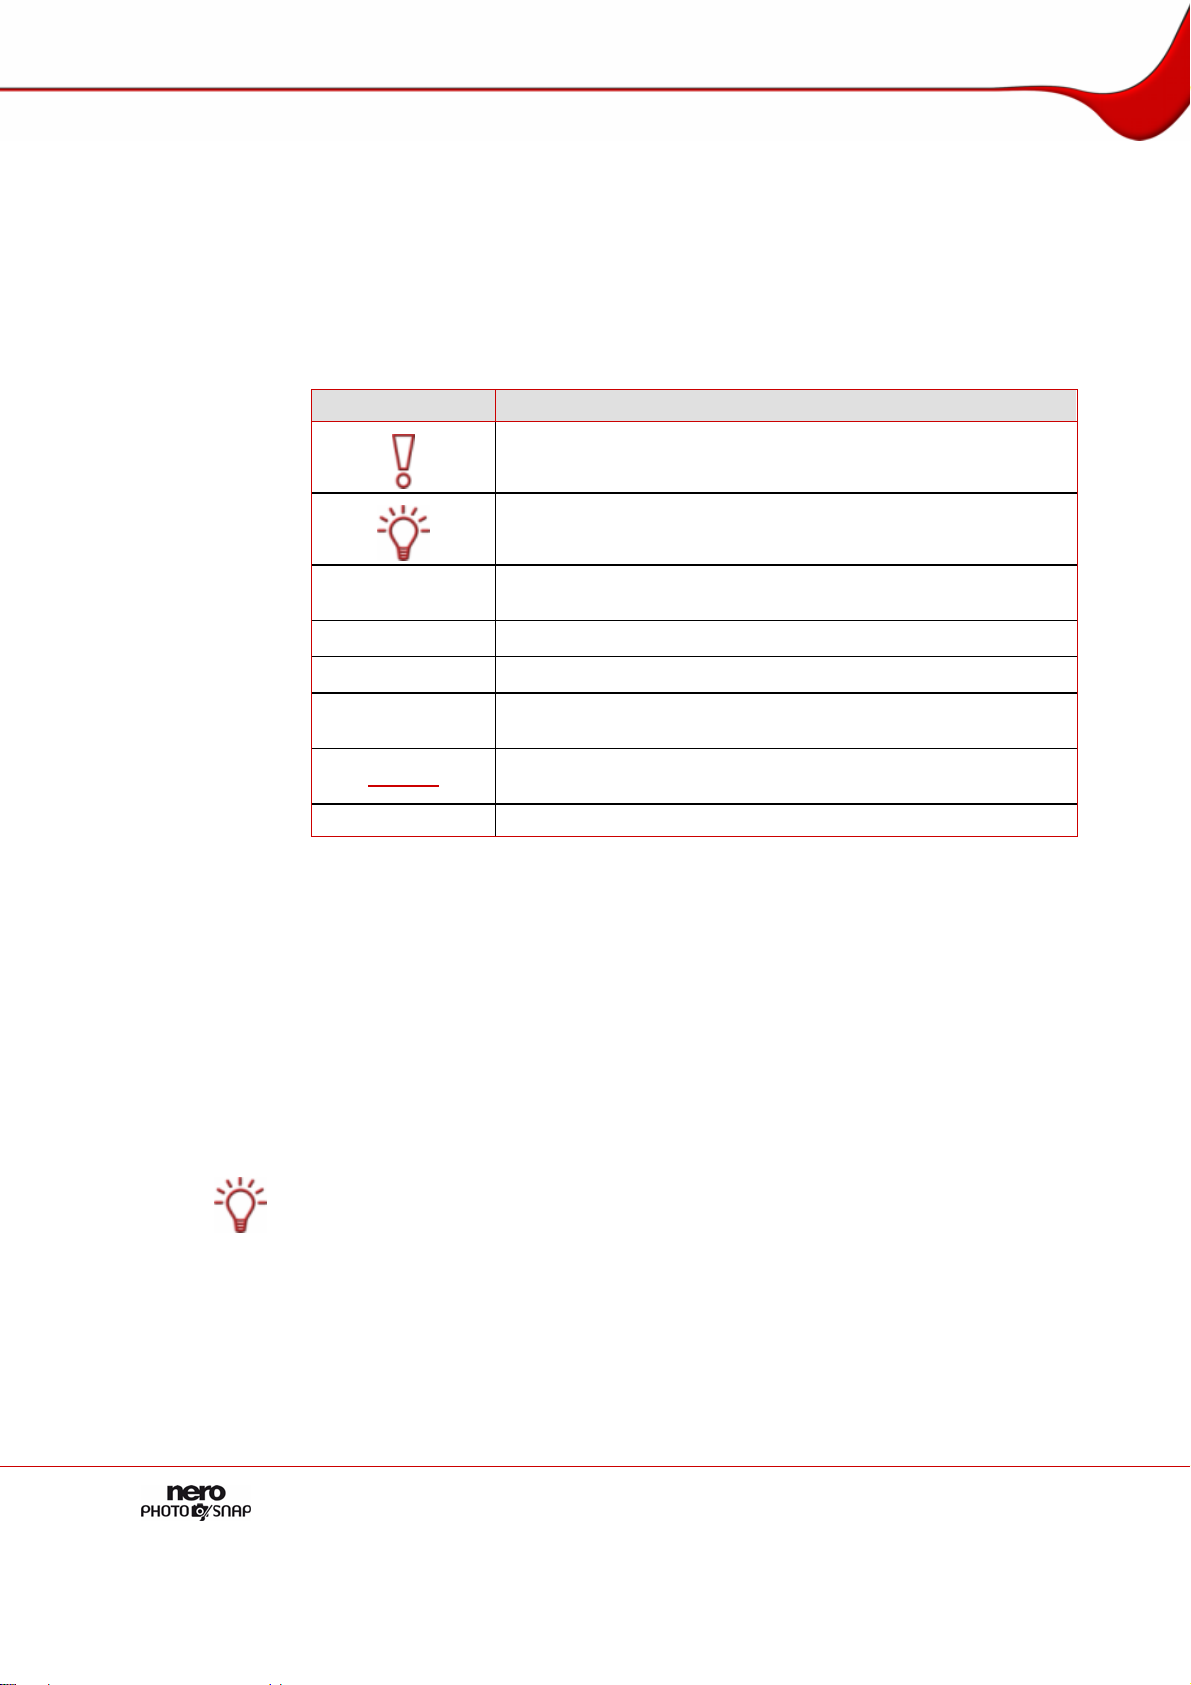
In order to make best use of this manual, please note the following conventions:
Symbol Meaning
Indicates warnings, preconditions or instructions that have to be
followed strictly.
Indicates additional information or notice messages.
1. Start…
A number at the beginning of a line indicates a request for
action. Carry out these actions in the order specified.
Æ
Indicates an intermediate result.
Î
Indicates a result.
OK
Indicates text passages or buttons that appear in the program
interface. They are shown in bold print.
Chapter
Indicates references to other chapters. They are executed as
links and are shown in red and underlined.
[…] Indicates keyboard shortcuts for entering commands.
1.2 About Nero PhotoSnap and Nero PhotoSnap Viewer
Nero PhotoSnap lets you edit your digital photographs. You can choose from a large
selection of tools to improve the image quality or to create special picture effects.
Nero PhotoSnap also includes image viewing software Nero PhotoSnap Viewer. Nero
PhotoSnap Viewer lets you view your digital photos and image files.
Nero Scout is integrated in both applications in the window Select an image file to open.
You have various search options with Nero Search.
Nero Scout and the search wizard Nero Search are applications in the Nero 7 Suite and
are automatically installed when Nero 7 is installed. You will find more information in the
Nero Scout manual.
General Information
Page 6
1.3 Versions of Nero PhotoSnap
Nero PhotoSnap is available in three different versions:
Nero PhotoSnap
Nero PhotoSnap Essentials
Nero PhotoSnap Essentials SE
Nero PhotoSnap and Nero PhotoSnap Essentials offer the full range of functions. Nero
PhotoSnap Essentials SE does not offer the following filters and tools:
Autofix Image
Auto-remove color cast
Noise
Red Eye Removal
Aging
Glow
JPEG artefact remover
Kaleidoscope
Canvas
Posterize
Solarize
Water
Duotone

Technical Information
Page 7
2 Technical Information
2.1 System Requirements
Nero PhotoSnap is installed together with the full version of Nero; the same system
requirements apply. You can find more detailed information about the system requirements
in the Nero QuickStart Guide.
2.2 Supported Formats
Nero PhotoSnap supports all common image formats.
Formats that can be
read
Formats supported
when writing
BMP
GIF
IFF
JPG
PCD
PCX
PNG
RAS
TGA
TIF
XBM
BMP
GIF
JP2
JPG
PCX
PNG
TGA
TIF
Launching the Program
Page 8
3 Launching the Program
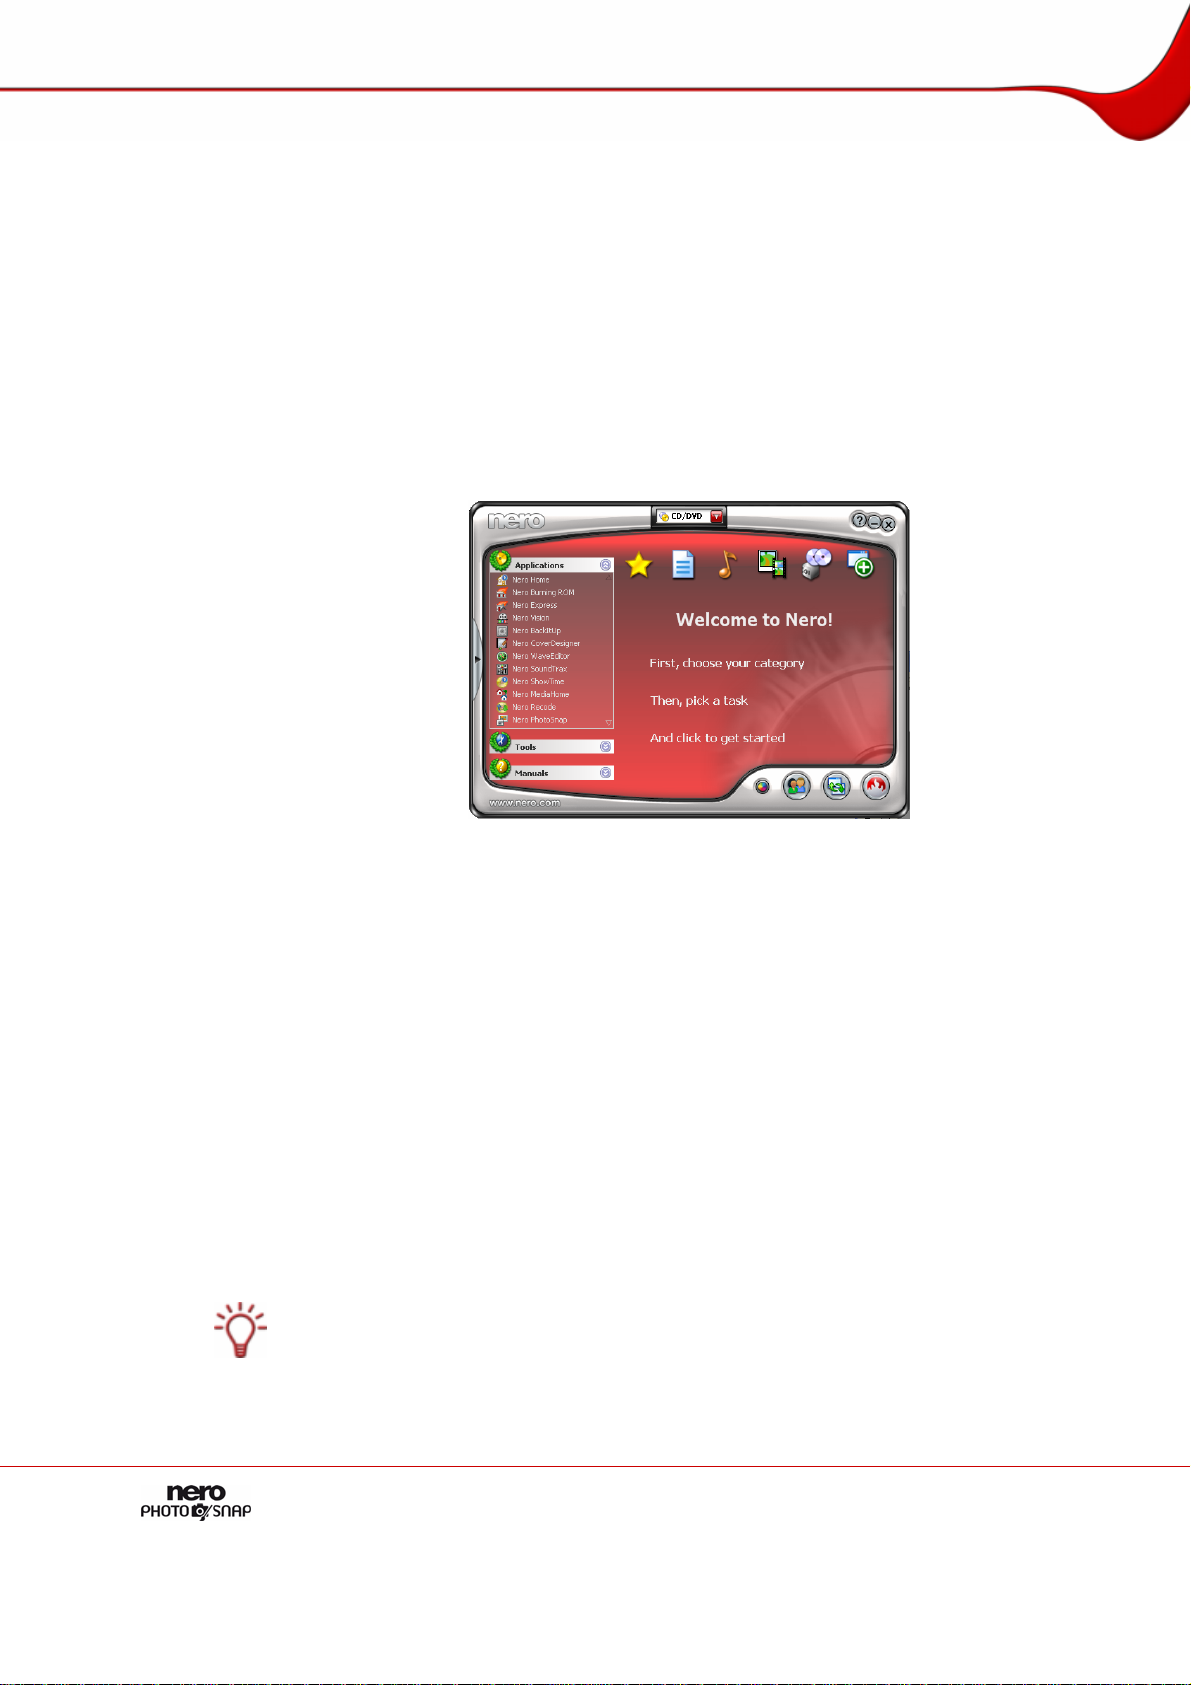
3.1 Starting Nero PhotoSnap via Nero StartSmart
To start Nero PhotoSnap via Nero StartSmart, proceed as follows:
1. Click on the "Nero StartSmart" icon.
Æ The Nero StartSmart window is opened.
2. Click the arrow button on the left in the window.
Æ The extended dialog box opens.
Fig. 1: Nero StartSmart
3. Select the Nero PhotoSnap entry from the Applications selection list.
Æ The Nero PhotoSnap window is opened.
Î You have started Nero PhotoSnap via Nero StartSmart.
3.2 Starting Nero PhotoSnap On-the-Fly
To start Nero PhotoSnap on-the-fly, proceed as follows:
1. Select Start (the start icon) > (All) Programs > Nero 7 (Premium) > Photo and Video >
Nero PhotoSnap.
Æ The Nero PhotoSnap window is opened.
Î You have started Nero PhotoSnap.
You launch Nero PhotoSnap Viewer the same way as you do Nero PhotoSnap. You can
also start Nero PhotoSnap Viewer by double-clicking an image.
You can also start Nero PhotoSnap via Nero PhotoSnap Viewer by clicking the Edit button.
Program Interface
Page 9
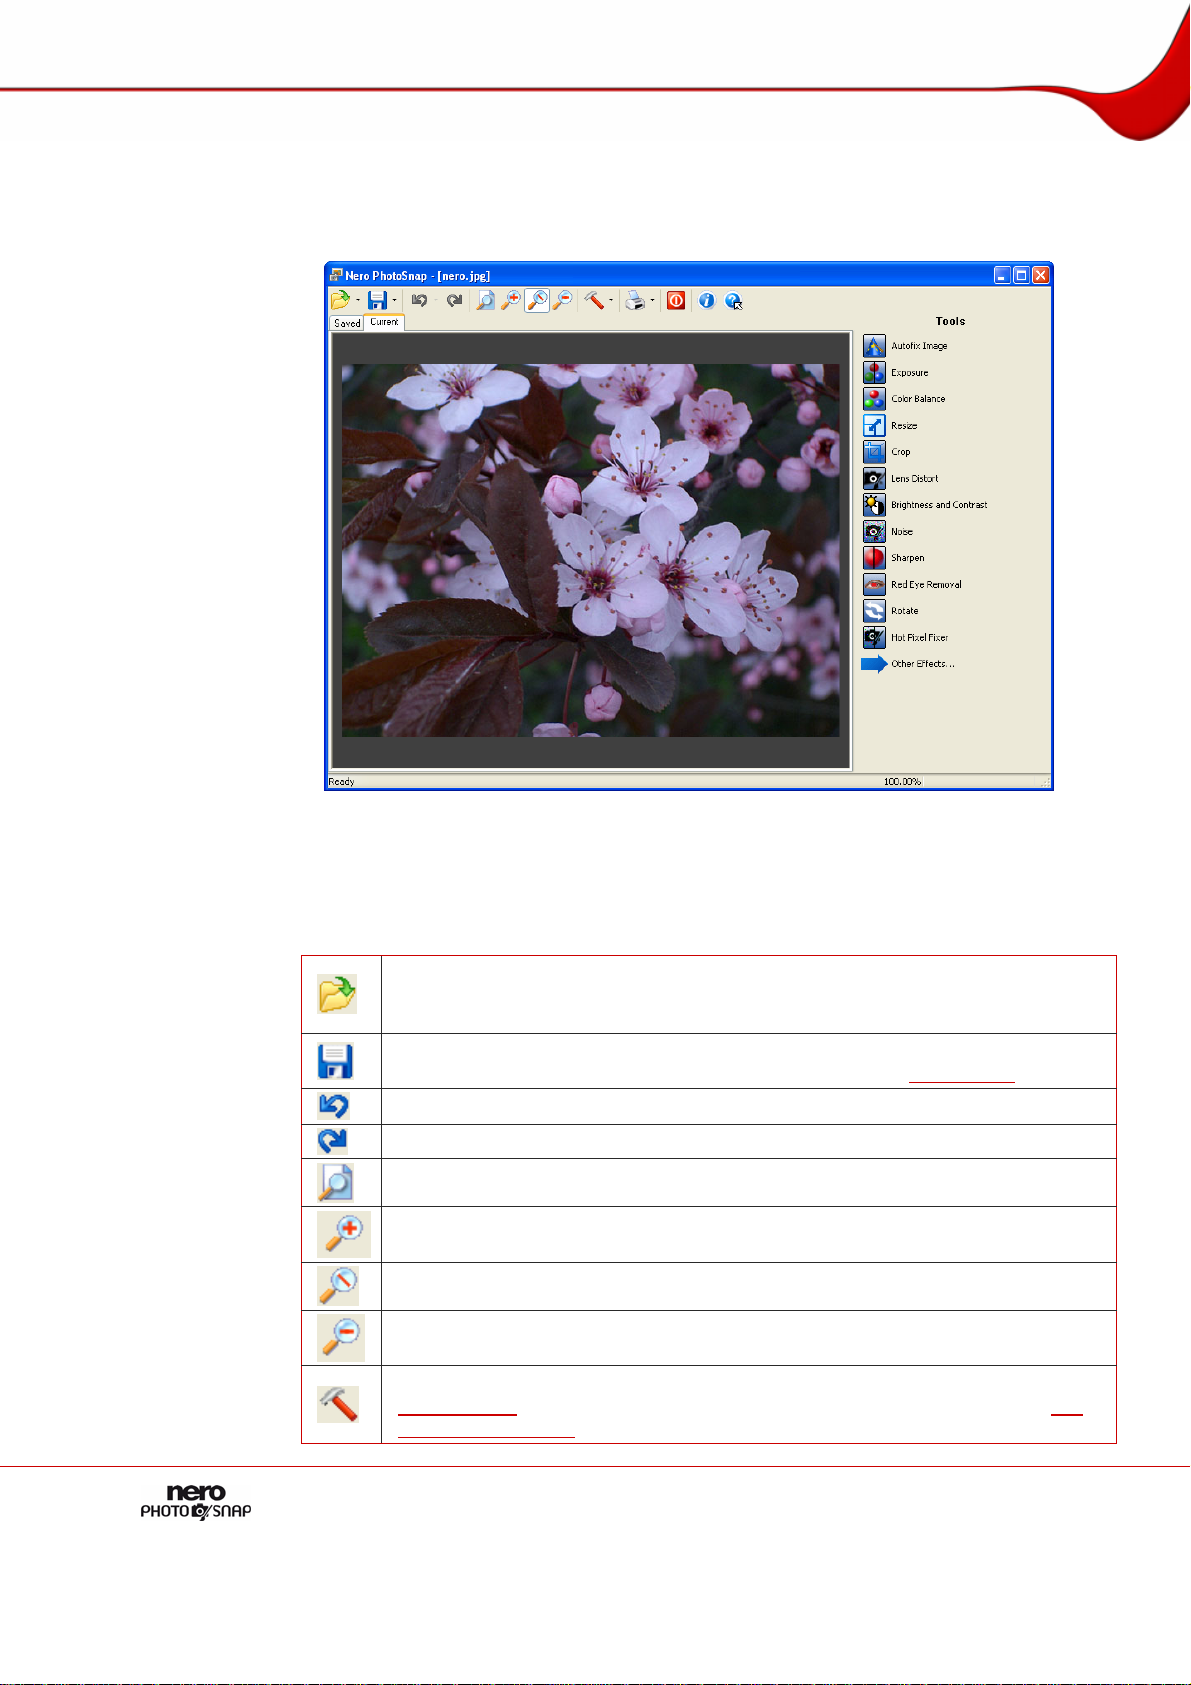
4 Program Interface
The program interface of Nero PhotoSnap is where you begin to edit photos and images.
Fig. 2: Nero PhotoSnap program interface, with opened image
In one task bar Nero PhotoSnap offers file, display and configuration options, and in the
Tools area it offers filters and effects for image editing. The opened image is displayed in
the editing area.
The following buttons are available in the toolbar:
Opens the Select an image file to open window where you can select an
image to open. In the combo box you can select one of the most recently
opened image files.
Saves the image. In the combo box you can save the image under a different
name and set the options for compression if needed (see
Save Image).
Undoes the last editing step.
Redo the editing step.
Fits the image to the editing area.
Increases the view of the image.
Displays the image in its original size (100% zoom).
Decreases the view of the image.
Opens the Options window where you can configure the program (see
Configuration). In the combo box you can display the file information (see File
Information Window
) or register plug-ins (no plug-ins are currently available).
Program Interface
Page 10
Prints the image. You can configure the printer settings in the combo box.
Closes Nero PhotoSnap.
Opens the About Nero PhotoSnap window to display information such as the
version number.
Opens the Help window to display Online Help (provided you installed the
corresponding manual during installation).
The following options are available in the editing area:
Saved
tab
Displays the original image as it is saved.
Current
tab
Displays the current editing state of the image (not saved).
Preview
tab
Shows what the image would look like with the current filter.
This tab is available only if a filter is selected.
Split
view
tab
Shows the current image in the left pane and in the right pane how the
image would look if the current filter were applied.
This tab is available only if a filter is selected.
button
Synchronizes the view of the left and right images, i.e. if the left image is
enlarged, the right image is also enlarged and vice versa.
If the button is deactivated, the views are not synchronized.
This button is available when the Split preview tab is displayed.
In the Tools area, effects are available that you can apply to images (see
Image Effects).
The following buttons are also available:
Other effects
Shows additional effects.
Back to main
effects
Shows the main effects.
The main effects are particularly useful for correcting imperfections in the digital image
caused by, for example, a faulty shot or a faulty scan. The other effects are used for artistic
editing and creative image manipulation.
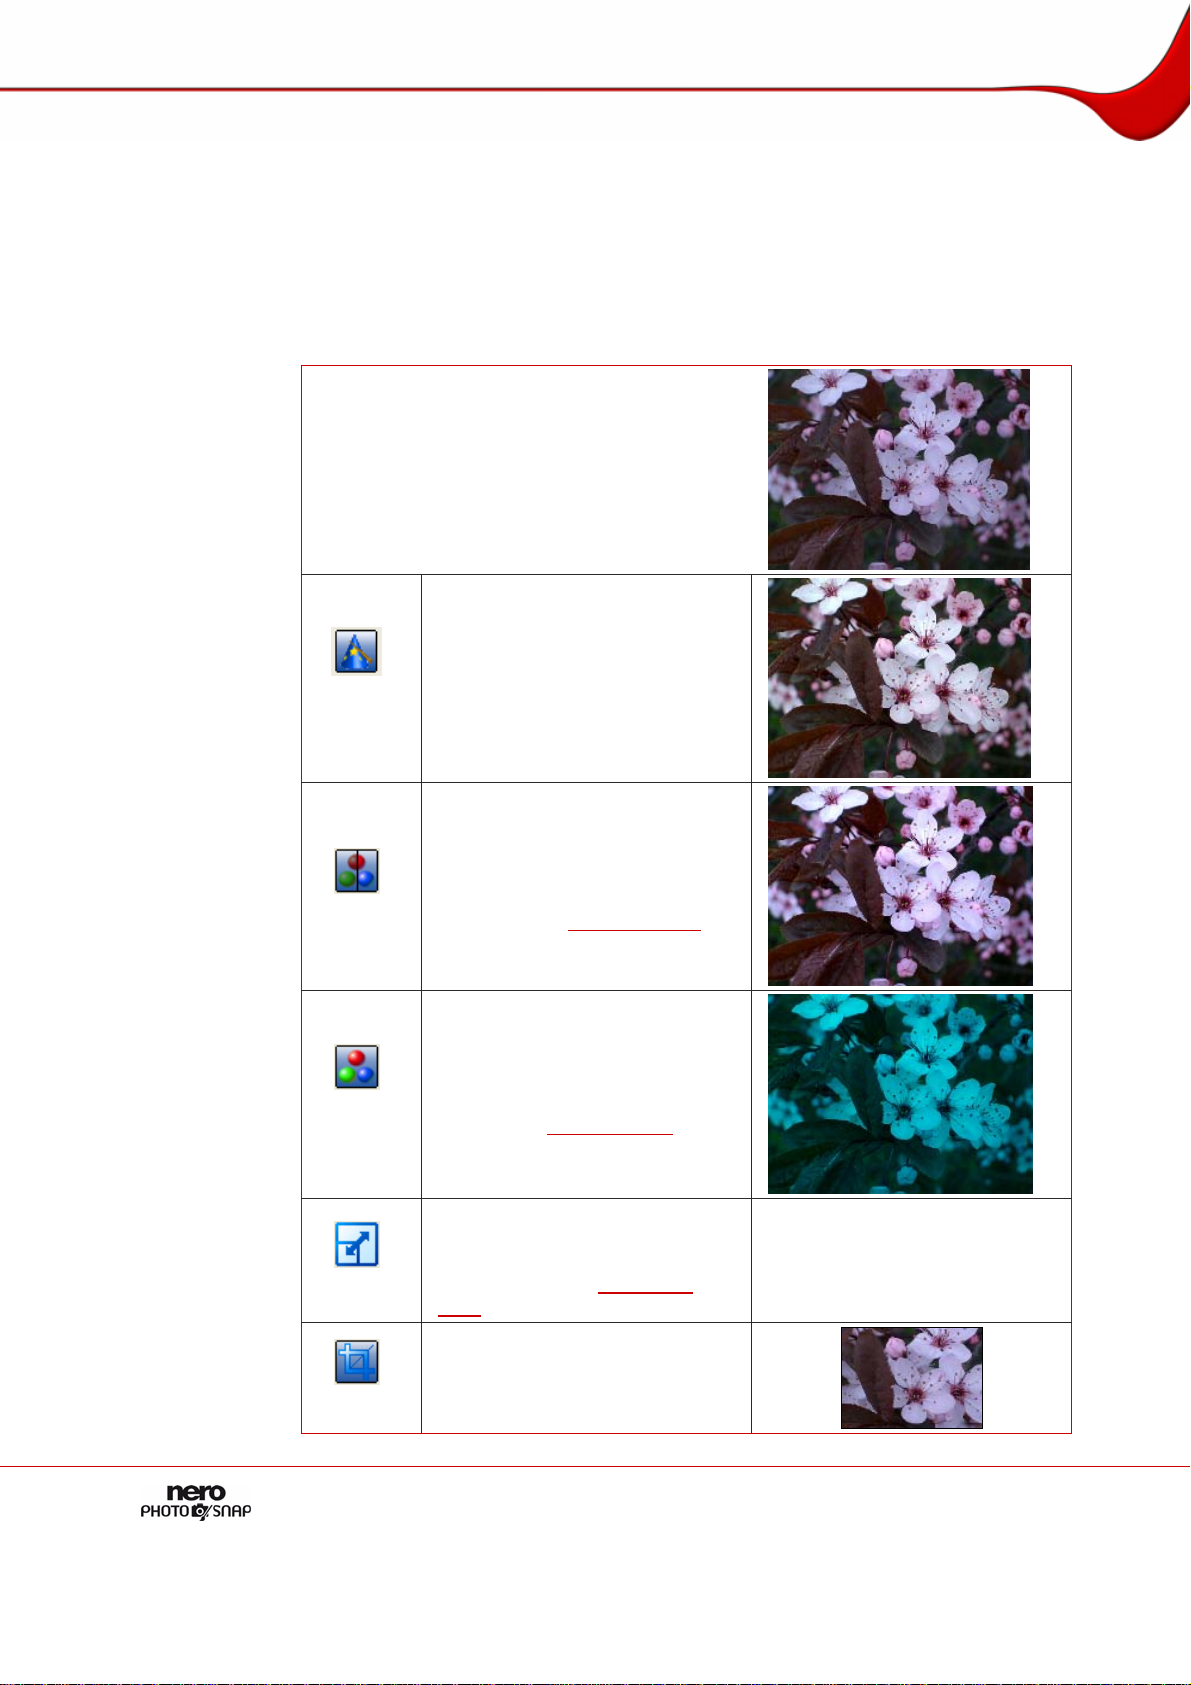
Image Effects
Page 11
5 Image Effects
When an image is open, you can switch between main effects and other effects in the Tools
area with the Other effects and Return to main effects buttons. The main effects are
particularly useful for correcting imperfections in the digital image caused by, for example, a
faulty shot or a faulty scan. The other effects are used for artistic editing and creative image
manipulation.
The following main effects are available:
Original image
Automatic
correction
Shows the Automatic
correction area where you can
automatically perform
corrections. Depending on what
you want to do, you can remove
color cast, poor exposure, tilting
and/or image noise.
Exposure
Shows the Color/Exposure area
where you can correct the
exposure automatically or
manually (see
Exposure Area).
Color
balance
Shows Color/Color balance
area where you can increase or
decrease the individual color
values and in this way correct
color cast or create special
effects (see Color Balance
).
Example: in the sample image
the amount of red is reduced.
Resolution
Shows the Resolution area
where you can change the pixel
size, resolution and/or print size
of the image (see
Resolution
Area
).
Crop
Shows the Crop area where you
can extract (crop) part of the
image.
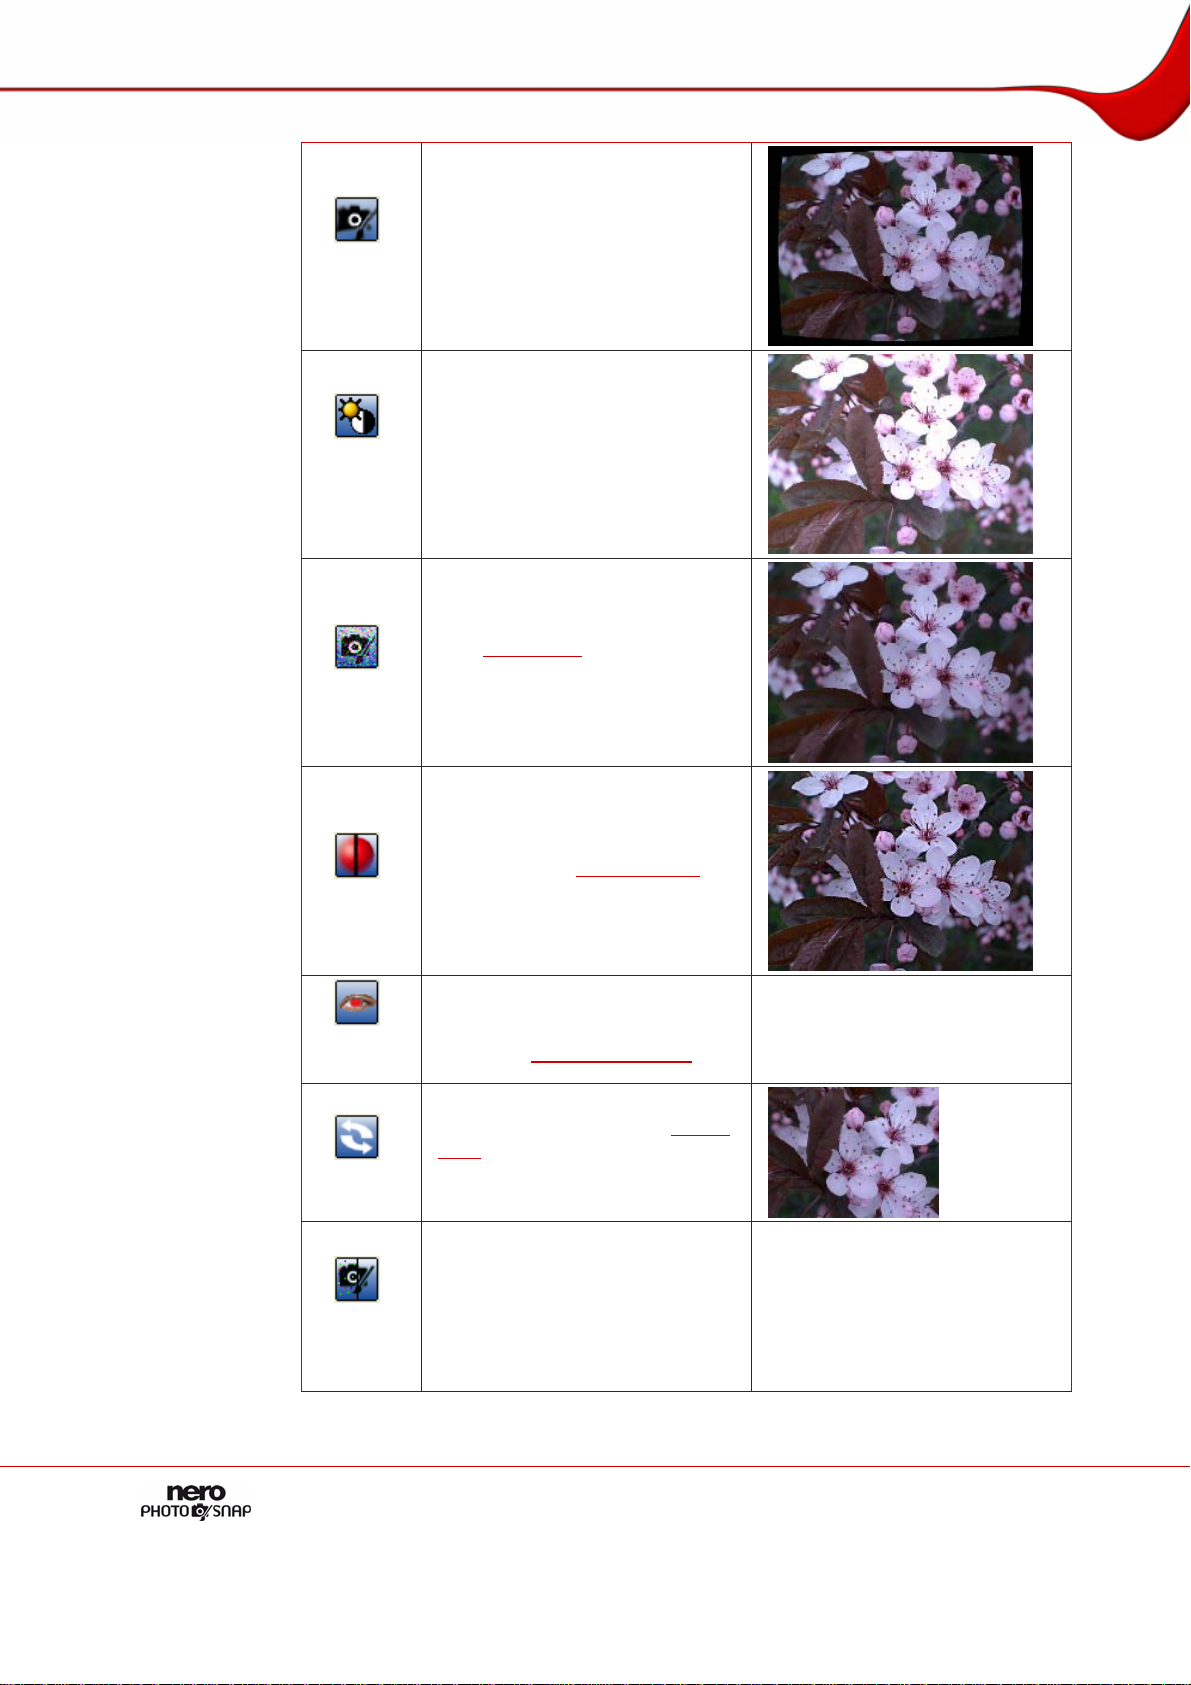
Image Effects
Page 12
Lens
distortion
Shows the Lens distortion area
where you can offset pincushion
or barrel lens distortion.
Example: the sample image has
barrel distortion.
Brightness
and
contrast
Shows the Brightness and
contrast area where you can
adjust the brightness and
contrast.
Example: the sample image has
been made brighter.
Noise
Shows the Noise area where you
can reduce or add image noise
(see
Noise Area).
Example: in the sample image
the image noise has been
reduced.
Sharpen
Shows the Sharpen area where
you can sharpen or unsharpen
the image (see
Sharpen Area).
Example: the sample image has
been sharpened.
Remove
red eye
Shows the Red eye removal
area where you can correct red
eyes (see
Red Eye Removal).
Rotate
Shows the Rotate area where
you rotate the image (see
Rotate
Area
).
Example: The sample image has
been rotated 330 degrees.
Hot pixel
fixer
Shows the Hot pixel fixer area
where you can remove so-called
hot pixels. Hot pixels are single
bright pixels in white, green, red
and blue that can occur in digital
cameras due to excess charge in
the CCD chip.
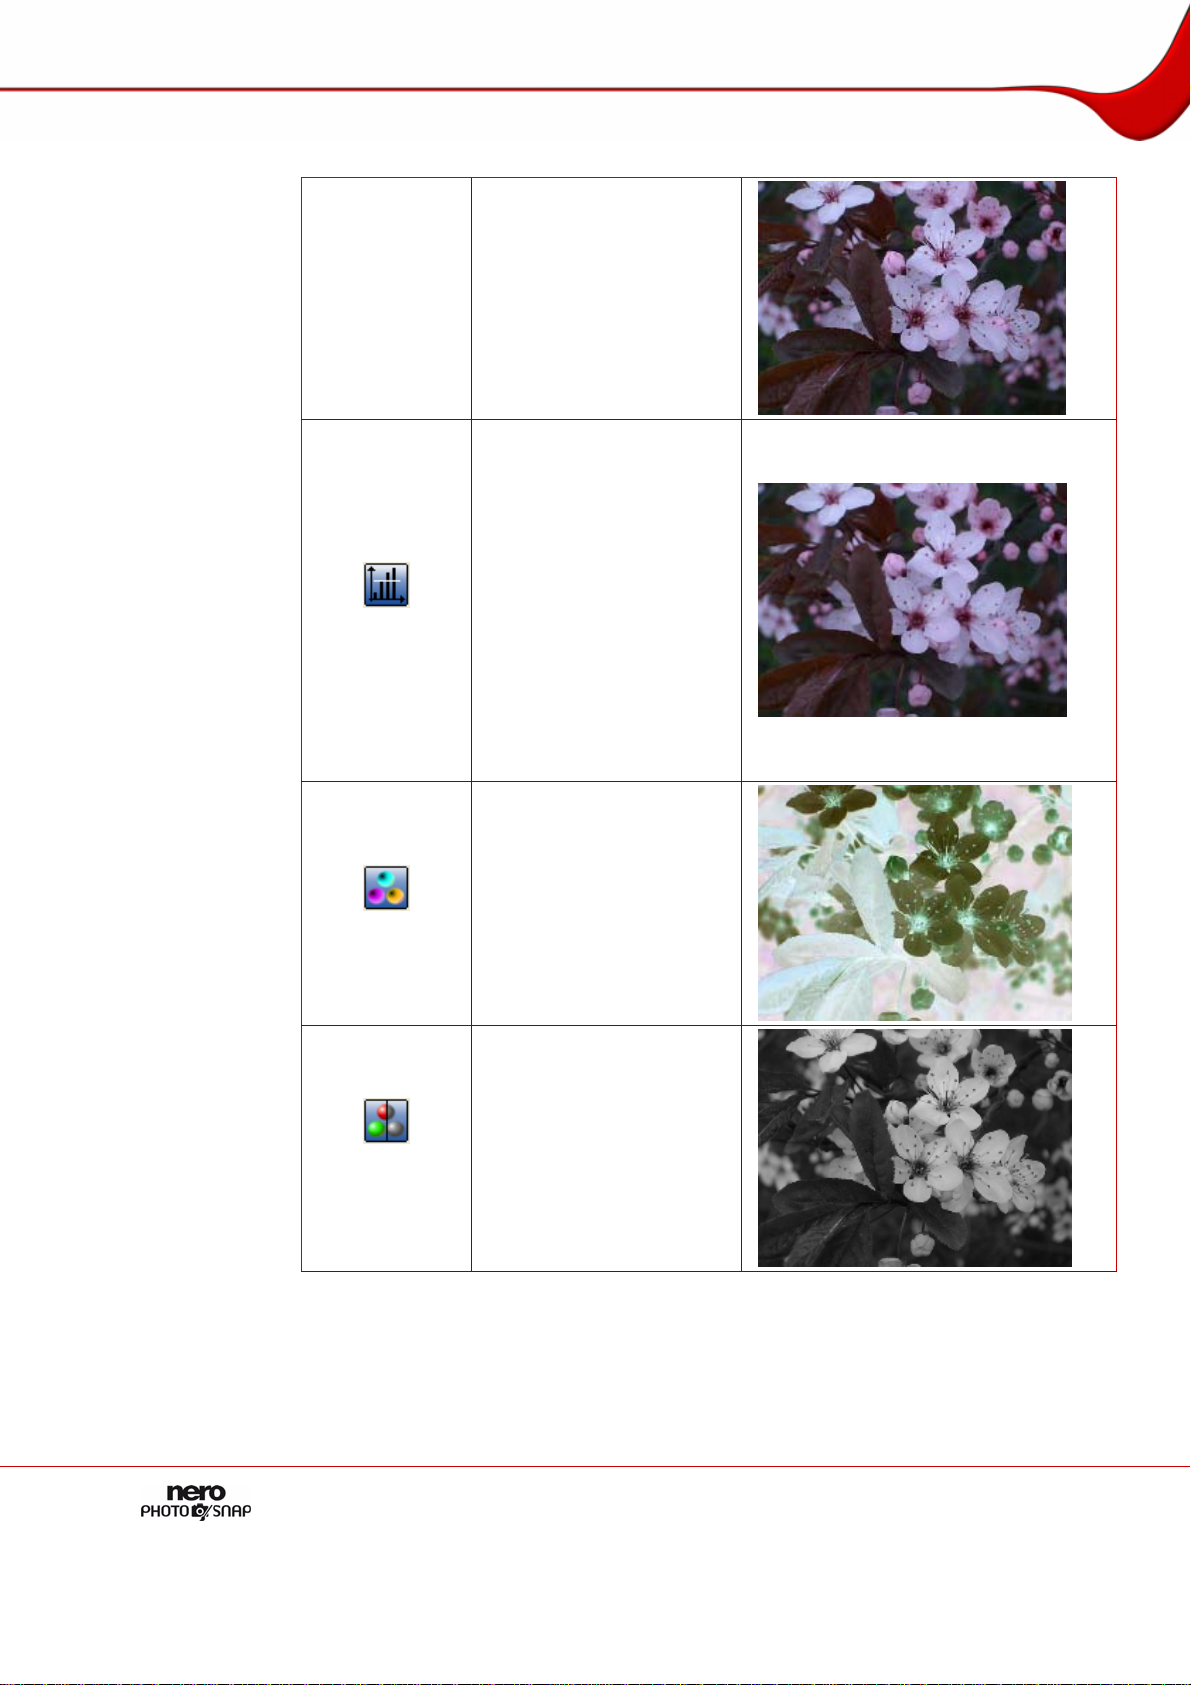
Image Effects
Page 13
The following additional effects are available:
Original image
Median
Shows the Median area
where you can use a
water color effect. This
effect reduces image
noise, diffuses the image
and makes it somewhat
blurred. The filter is useful
for removing outlier and
artifact pixels.
The filter calculates the
median brightness value
within a defined
environment and replaces
the central pixels with the
calculated value.
Inverting
Shows the
Color/Inverting area
where you can invert the
colors of an image and
create a negative of the
image. When you do this,
you can choose to exclude
the red, green or blue
channel from the color
inversion.
Convert to
gray scale
Converts a color image to
a black & white image.
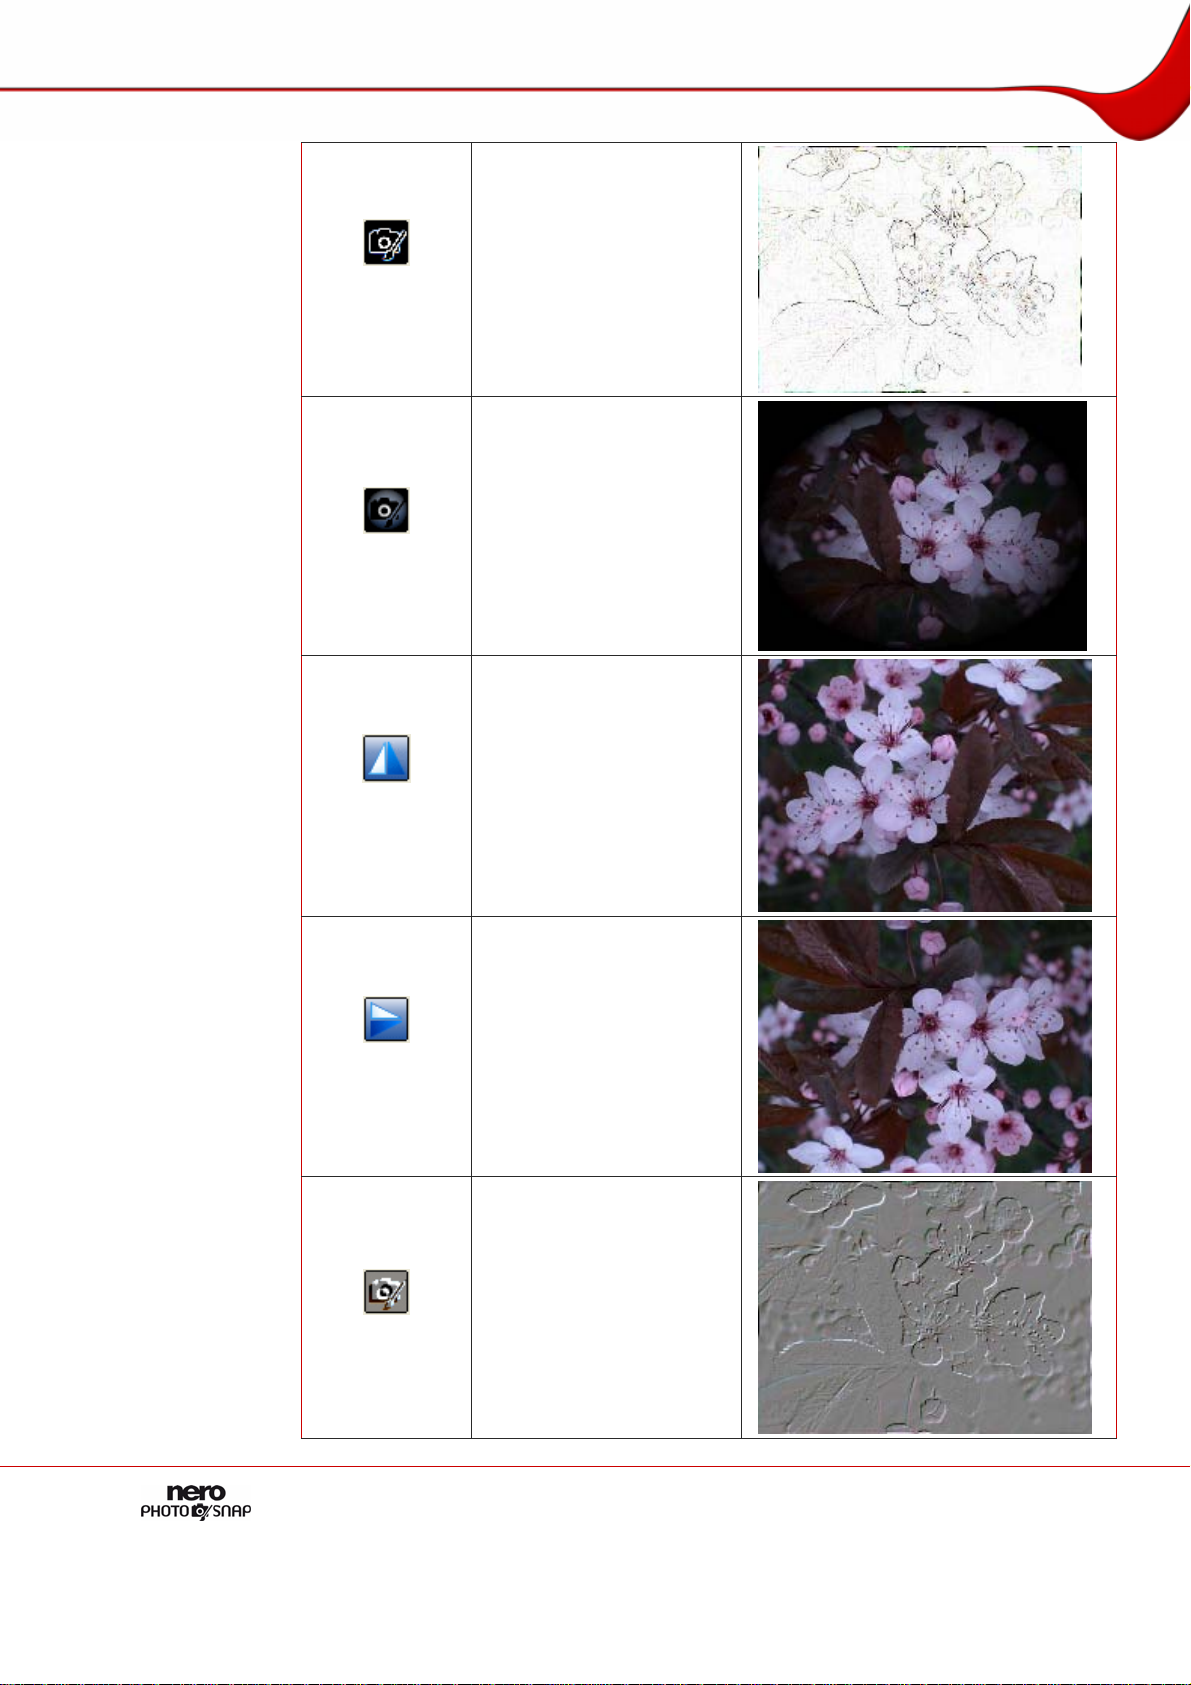
Image Effects
Page 14
Edge
detection
Reduce the image to its
edges, i.e. to the
transitions between color
areas.
Vignetting
Applies the vignetting
filter. The image is
elliptically shadowed
toward the corners.
Mirror
horizontally
Mirrors the image
horizontally.
Mirror
vertically
Mirrors the image
vertically.
Embossing
Applies the embossing
effect.
Loading...