

Page 1

User Manual
Nero Recode
www.nero.com
Page 2

Copyright and Trademark Information
The
Nero Recode 2 User Manual and the Nero Recode 2 Software are
copyrighted and the property of Ahead Software AG, Im Stoeckmaedle 18, 76307
Karlsbad, Germany. All rights are reserved.
This User Manual contains materials protected under International Copyright
Laws. It is expressly forbidden to copy, reproduce, duplicate or transmit all or any
part of the Guide or the software without the prior written consent of Ahead
Software AG. All brand names and trademarks are properties of their respective
owners.
THIS MANUAL IS PROVIDED 'AS IS,' AND AHEAD SOFTWARE AG MAKES
NO REPRESENTATIONS OR WARRANTIES, EXPRESS OR IMPLIED,
INCLUDING, BUT NOT LIMITED TO, WARRANTIES OF MERCHANTABILITY,
FITNESS FOR A PARTICULAR PURPOSE, NON-INFRINGEMENT, OR TITLE;
THAT THE CONTENTS OF THE MANUAL ARE SUITABLE FOR ANY
PURPOSE; NOR THAT THE IMPLEMENTATION OF SUCH CONTENTS WILL
NOT INFRINGE ANY THIRD PARTY PATENTS, COPYRIGHTS, TRADEMARKS
OR OTHER RIGHTS.
AHEAD SOFTWARE AG WILL NOT BE LIABLE FOR ANY DIRECT, INDIRECT,
SPECIAL OR CONSEQUENTIAL DAMAGES ARISING OUT OF ANY USE OF
THE MANUAL OR THE PERFORMANCE OR IMPLEMENTATION OF THE
CONTENTS THEREOF.
The name and trademarks of Ahead Software AG may NOT be used in
advertising or publicity pertaining to this manual or its contents without specific
written prior permission. Title to copyright in this manual will at all times remain
with Ahead Software AG.
Ahead Software AG accepts no claims for the correctness of the contents of the
manual. The contents of the enclosed software and the manual are subject to
change.
If you are neither in possession of the copyright nor have authorization
from the owner of the copyright, unauthorized copying of CDs or DVDs
violates national and international legislation and can result in severe
penalties.
Copyright © 2003 by Ahead Software AG
REV 1.0
Page 3

Table of contents
1 About Nero Recode 2........................................................................6
1.1 What is Nero Recode 2?................................................................ 6
1.1.1 Nero Recode 2 as a copying program ............................................. 6
1.1.2 Nero Recode 2 as a compilation program........................................ 6
1.1.3 Nero Recode 2 as a conversion program ........................................ 6
1.2 System requirements..................................................................... 6
1.3 Installation ......................................................................................7
1.4 Launching Nero Recode 2.............................................................7
1.4.1 Opening Nero Recode 2 with Nero StartSmart................................ 7
1.4.2 Launching Nero Recode 2 separately..............................................7
2 The Nero Recode 2 interface............................................................8
2.1 Introduction ....................................................................................8
2.2 Copying an entire DVD ..................................................................9
2.2.1 DVD-Video .......................................................................................9
2.2.2 DVD data........................................................................................ 12
2.3 Creating your own DVD............................................................... 14
2.3.1 DVD-Video .....................................................................................14
2.3.2 DVD data........................................................................................ 16
2.4 Create a Nero Digital disc............................................................ 17
2.4.1 DVD-Video .....................................................................................17
2.5 Advanced display......................................................................... 19
2.5.1 Selecting an import profile.............................................................. 19
2.5.2 Selecting a Nero Digital profile.......................................................19
2.5.3 Shutting down the computer once burning has been completed ...20
2.5.4 Setting the burning priority.............................................................20
2.5.5 Configuring Nero Recode 2............................................................ 21
2.5.6 Erasing the contents of a disc........................................................24
2.5.7 Obtaining information on the inserted disc.....................................25
2.5.8 Nero Cover Designer ..................................................................... 26
3 Import profiles.................................................................................27
3.1 Creating an import profile ...........................................................27
3.2 Editing an existing import profile............................................... 34
3.3 Deleting an import profile............................................................ 35
Nero Recode Table of contents • 3
Page 4

4 Copying a DVD ................................................................................37
4.1 General information..................................................................... 37
4.2 Copying without changing the DVD structure........................... 37
4.3 Copying (and changing the DVD structure)............................... 38
4.3.1 Importing a DVD............................................................................. 38
4.3.2 Changing the structure of a DVD...................................................41
5 Creating a new DVD ........................................................................48
5.1 Creating a new DVD..................................................................... 48
5.2 Further options............................................................................. 51
5.2.1 Shortening videos .......................................................................... 51
5.2.2 Merging individual titles..................................................................52
5.2.3 Separating merged titles................................................................53
6 Converting DVD-Videos to MPEG-4 files with Nero Digital..........54
6.1 Converting DVD-Video titles into MPEG-4 format.....................54
6.2 Additional conversion options....................................................56
6.2.1 Selecting an audio track.................................................................56
6.2.2 Selecting the subtitle......................................................................57
6.2.3 Information on the DVD-Video title................................................. 57
6.3 Specifying the Nero Digital encoder settings............................ 58
6.3.1 Specifying the video settings.......................................................... 58
6.3.2 Specifying the audio settings ......................................................... 61
7 Burning a disc .................................................................................62
7.1 Burning a disc ..............................................................................62
7.2 Burn options.................................................................................62
7.3 Nero Digital settings ....................................................................67
7.3.1 Nero Digital settings.......................................................................67
7.3.2 Normal mode.................................................................................. 68
7.3.3 Expert mode...................................................................................69
8 Keyboard shortcuts.........................................................................73
8.1 Keyboard shortcuts .....................................................................73
Nero Recode Table of contents • 4
Page 5

9 Service..............................................................................................74
9.1 FAQs.............................................................................................. 74
9.1.1 The copied DVD does not contain the audio tracks I selected. What
did I do wrong?............................................................................... 74
9.1.2 The copied DVD does not contain the subtitles I selected. What did
I do wrong? .................................................................................... 74
9.1.3 The DVD I made does have a DTS soundtrack but I cannot hear
any sound. What went wrong during recording?............................74
9.1.4 It takes different lengths of time to recode DVDs, depending on the
DVD involved. Why is that?............................................................ 74
9.1.5 I have inserted a DVD and want to copy it but Nero Recode 2 does
not recognize it. What am I doing wrong?......................................74
9.1.6 I created an MPEG-4 file but I only have one soundtrack. What went
wrong? ........................................................................................... 75
9.1.7 I would like to obtain a newer version of Nero Recode 2. Where can
I find out if an update is available and download it?....................... 75
9.1.8 Where can I get help with technical problems?.............................. 75
9.2 Contact..........................................................................................76
10 Index.................................................................................................77
Nero Recode Table of contents • 5
Page 6

1 About Nero Recode 2
1.1 What is Nero Recode 2?
Nero Recode 2 is a program that performs three different tasks in connection
with DVD-Video titles that are not copy-protected.
1.1.1 Nero Recode 2 as a copying program
Nero Recode 2 is a program for copying and archiving DVD-Video titles that are
not copy-protected onto a 4.7 GB DVD+R/RW, DVD-R/RW or DVD-RAM disc.
If the source DVD is larger than 4.7 GB, Nero Recode 2 can compress its
contents so that it fits on an empty DVD disc – normally without any noticeable
loss of quality. In addition, you can remove soundtracks and subtitles with Nero
Recode 2 in order to achieve maximum image quality, for example. What is
special is that even the DVD menu of the source DVD remains complete if
individual titles have been removed. The target DVD can alternatively be written
on the hard disk in the form of a DVD-Video directory - or as a so-called disk
image on the hard drive.
1.1.2 Nero Recode 2 as a compilation program
Nero Recode 2 is a program for compiling DVD-Video titles (that are not copyprotected) onto other
If you have DVD-Video titles on different DVDs and would like to compile your
favorite titles onto one DVD, you can use Nero Recode 2 to have the desired
DVD-Video titles in a new compilation which you can then 'burn'. It does not
matter whether you burn the compilation on a DVD or a CD.
media (CD and DVD).
1.1.3 Nero Recode 2 as a conversion program
Nero Recode 2 is a program you can use to convert DVD-Video titles that are
not copy-protected into the Nero Digital Format (MPEG-4) and to burn them
onto discs.
1.2 System requirements
Nero Recode 2 is installed together with NeroVision Express 2 and its
system requirements are the same. You can find more detailed information on
the system requirements in the NeroVision Express 2 manual.
In addition, you will need to have a computer with a built-in DVD-ROM or DVD
recorder, as otherwise you will be unable to read or burn DVDs.
Nero Recode About Nero Recode 2 • 6
Page 7
1.3 Installation
Nero Recode 2 is not installed separately but together with NeroVision Express
2. In other words, after installing NeroVision Express 2 you will also
automatically possess Nero Recode 2.
1.4 Launching Nero Recode 2
You can start Nero Recode 2 in two different ways – either via Nero StartSmart,
the 'command centre' of the Nero family of products, or directly.
1.4.1 Opening Nero Recode 2 with Nero StartSmart
Open Nero StartSmart, select 'DVD' as recorder format and click the field with
the 'Recode DVD' text.
1.4.2 Launching Nero Recode 2 separately
Proceed as follows to launch Nero Recode 2:
Click on START
Nero Recode.
Nero Recode About Nero Recode 2 • 7
> ALL PROGRAMS > NERO > NeroVision Express 2 >
Page 8
2 The Nero Recode 2 interface
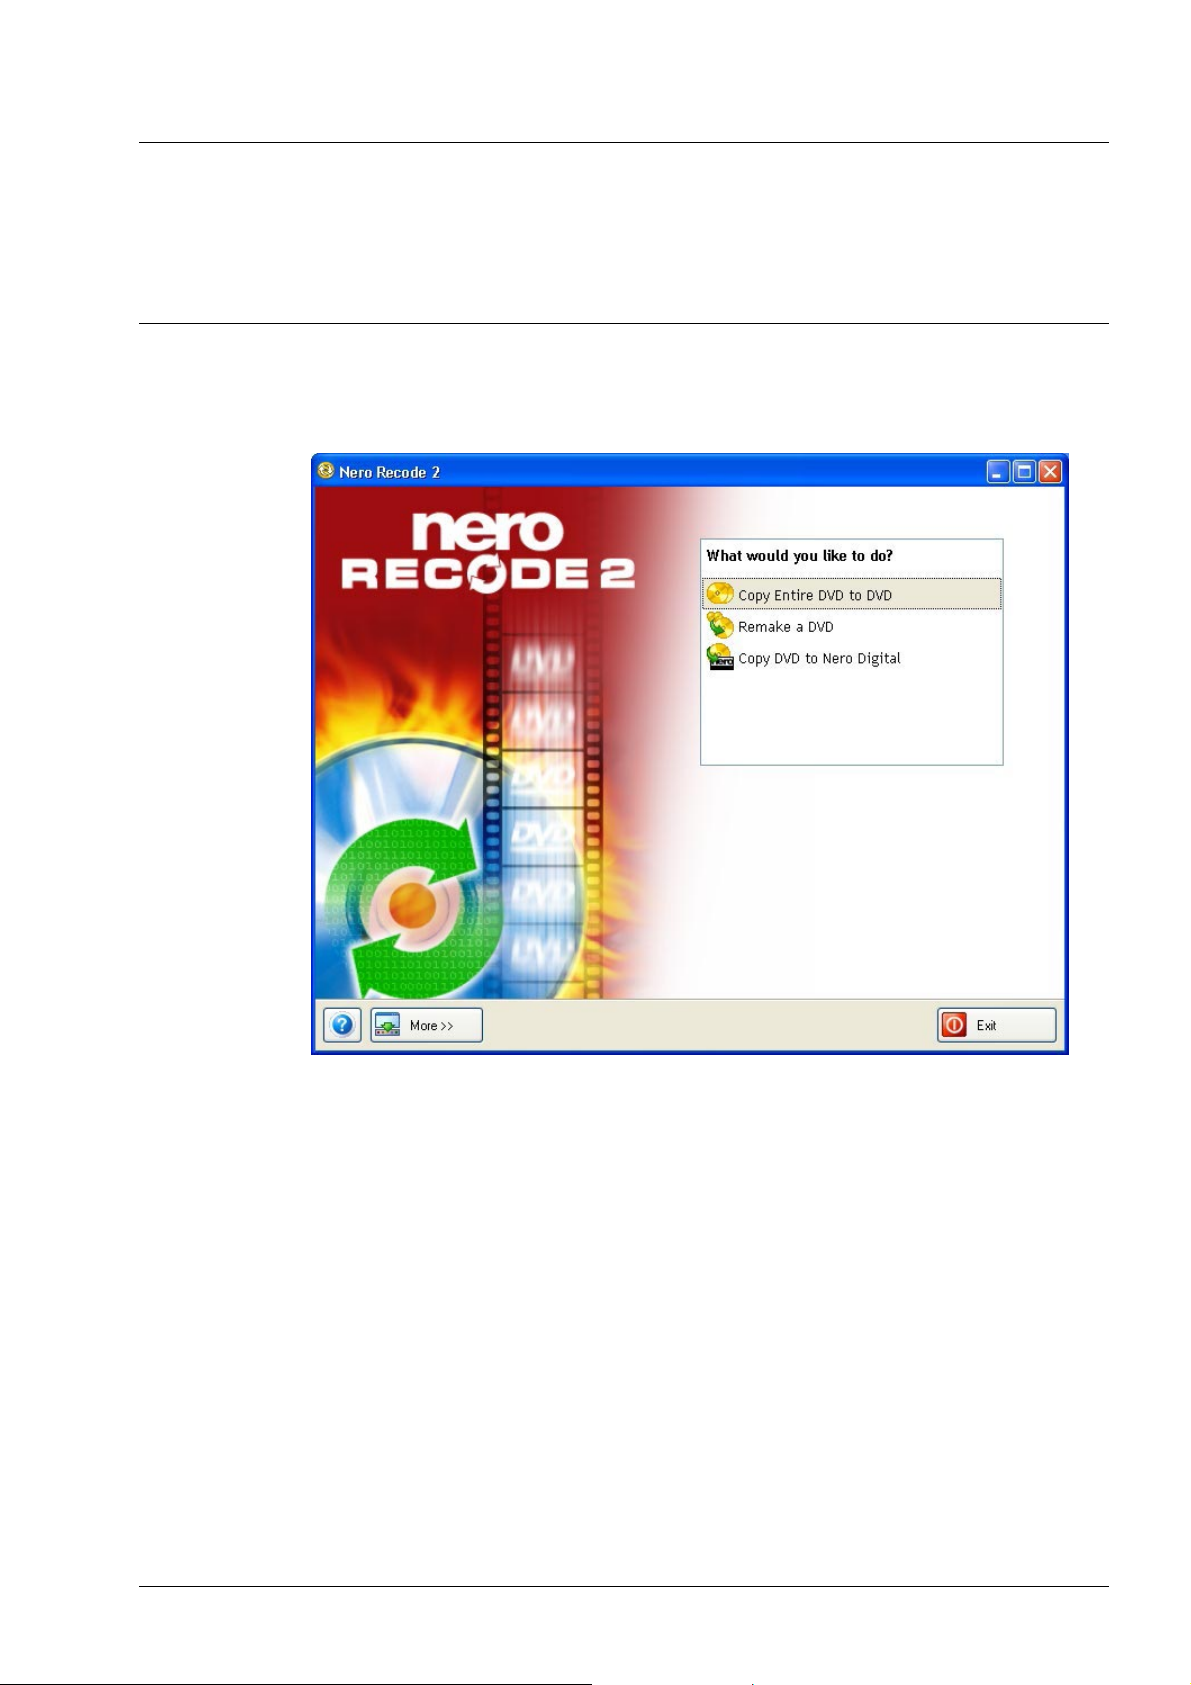
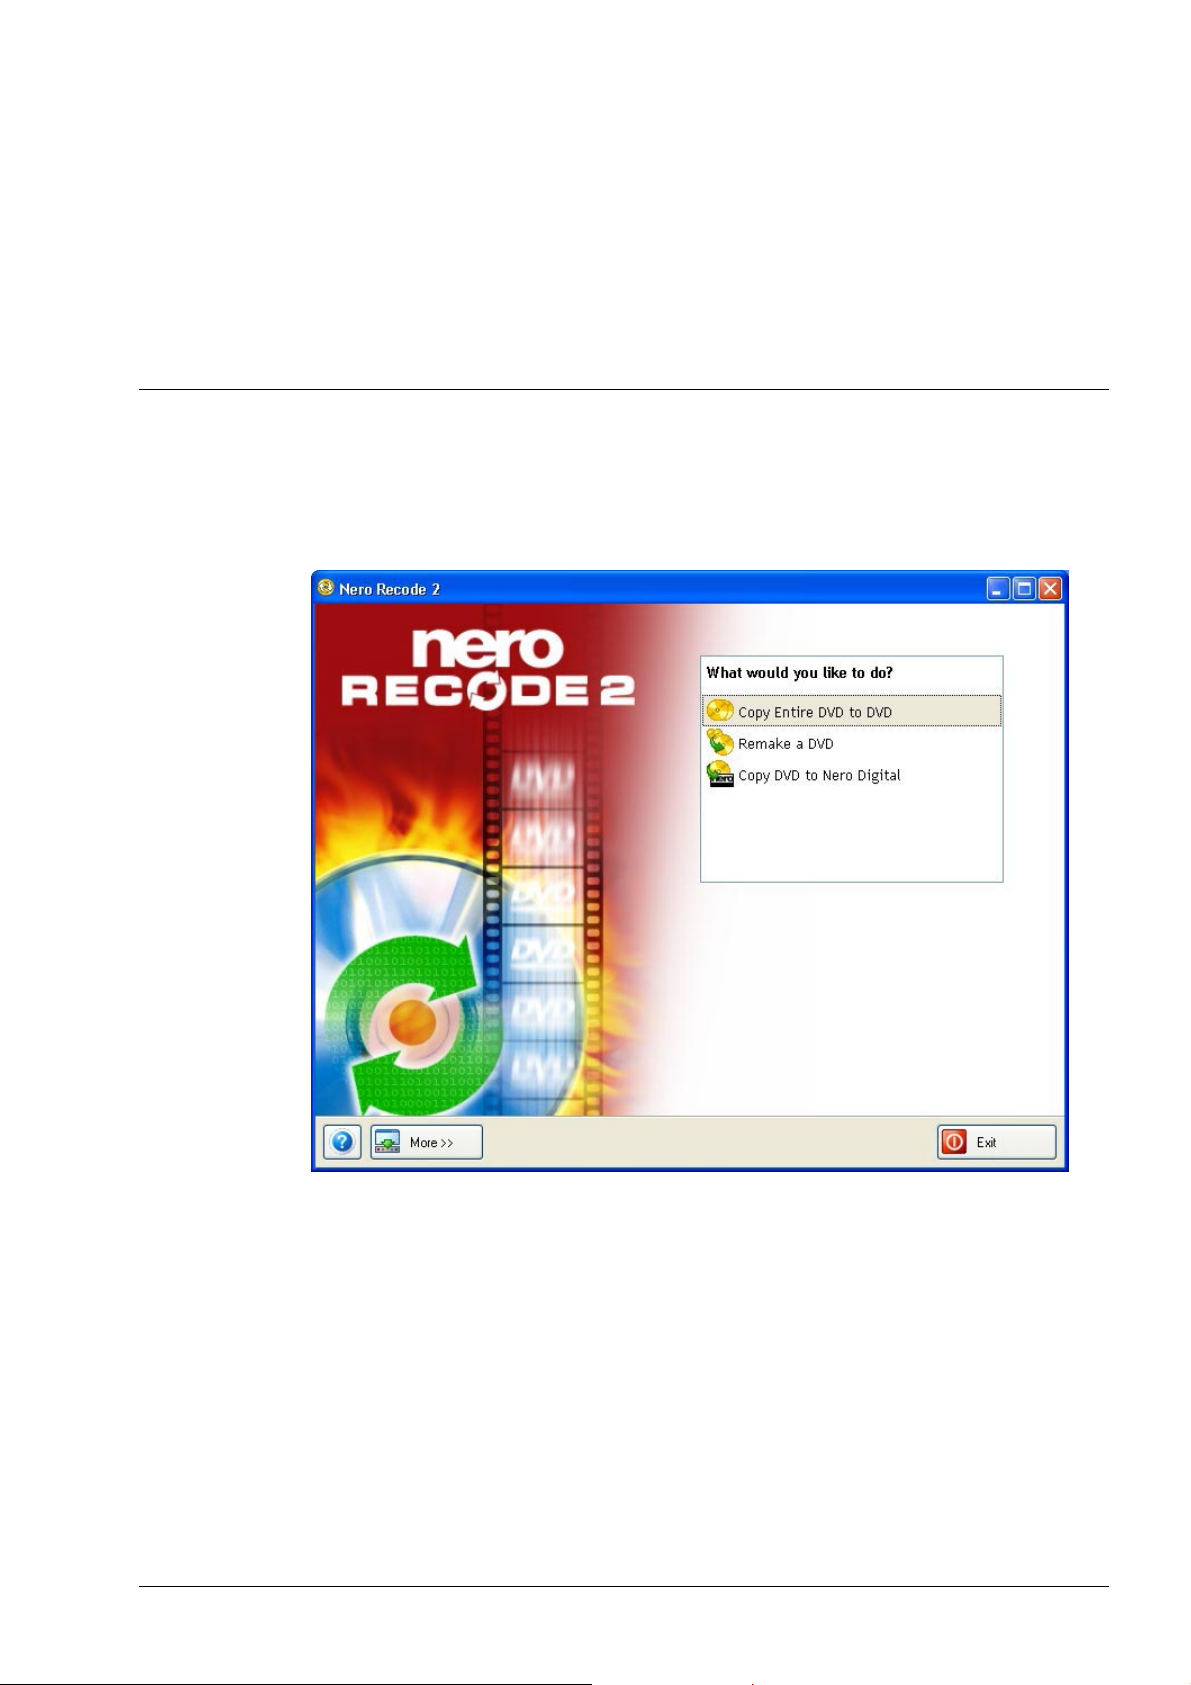
2.1 Introduction
The Nero Recode 2 interface is independent of the chosen task. This means that
there are different commands present on the different interfaces. The individual
interfaces are described in the order they appear in the selection area of the start
window.
Nero Recode The Nero Recode 2 interface • 8
Page 9
2.2 Copying an entire DVD
A DVD may not only contain video files that can be played on a DVD player but
also other kinds of data. This data cannot be played on a normal commercially
available DVD player but only on a DVD-ROM/DVD burner drive in a computer.
When copying a DVD, Nero Recode 2 is capable of copying both the video as
well as the data contents. Of course, you can just copy the video element if you
wish.
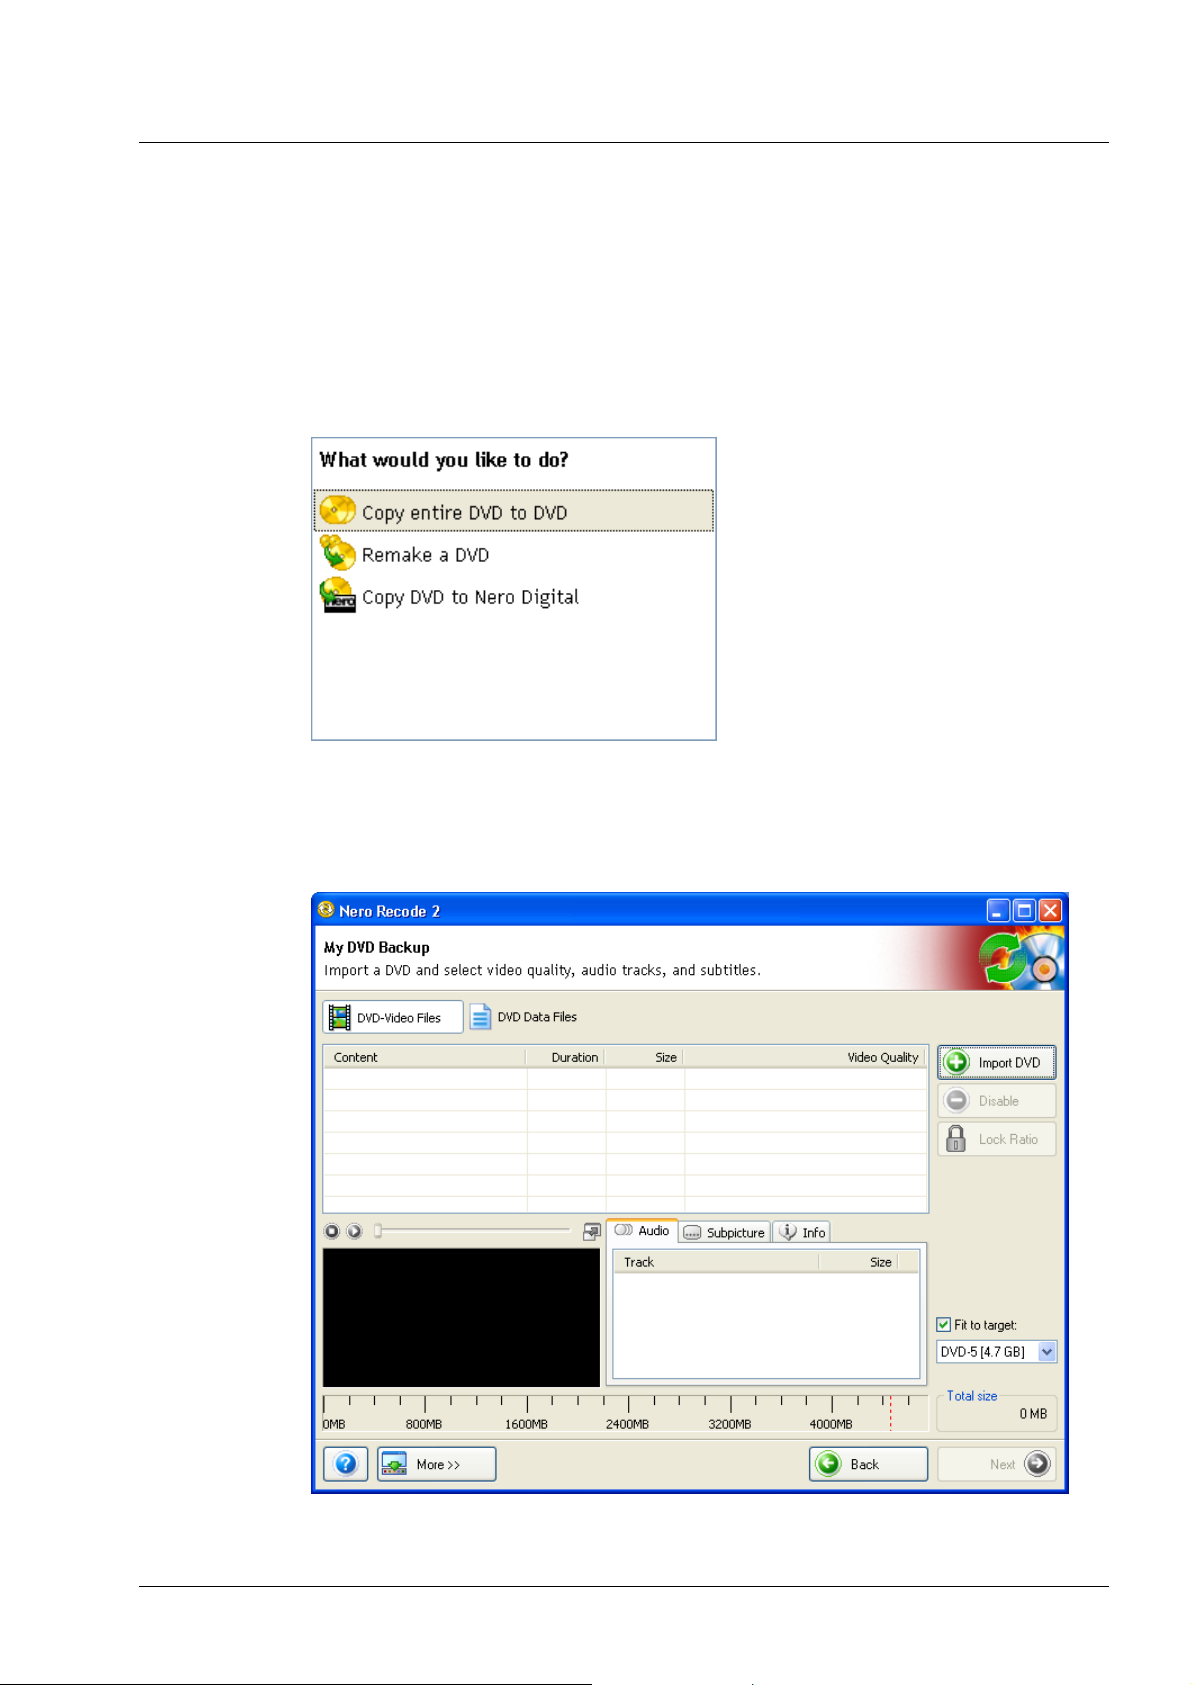
You will reach the area for copying an entire DVD by clicking on 'Copy entire
DVD to DVD' in the start window.
2.2.1 DVD-Video
After clicking on the 'Copy entire DVD to DVD' field in the start window, the DVDVideo area of the backup window for your DVDs will open.
Nero Recode The Nero Recode 2 interface • 9
Page 10
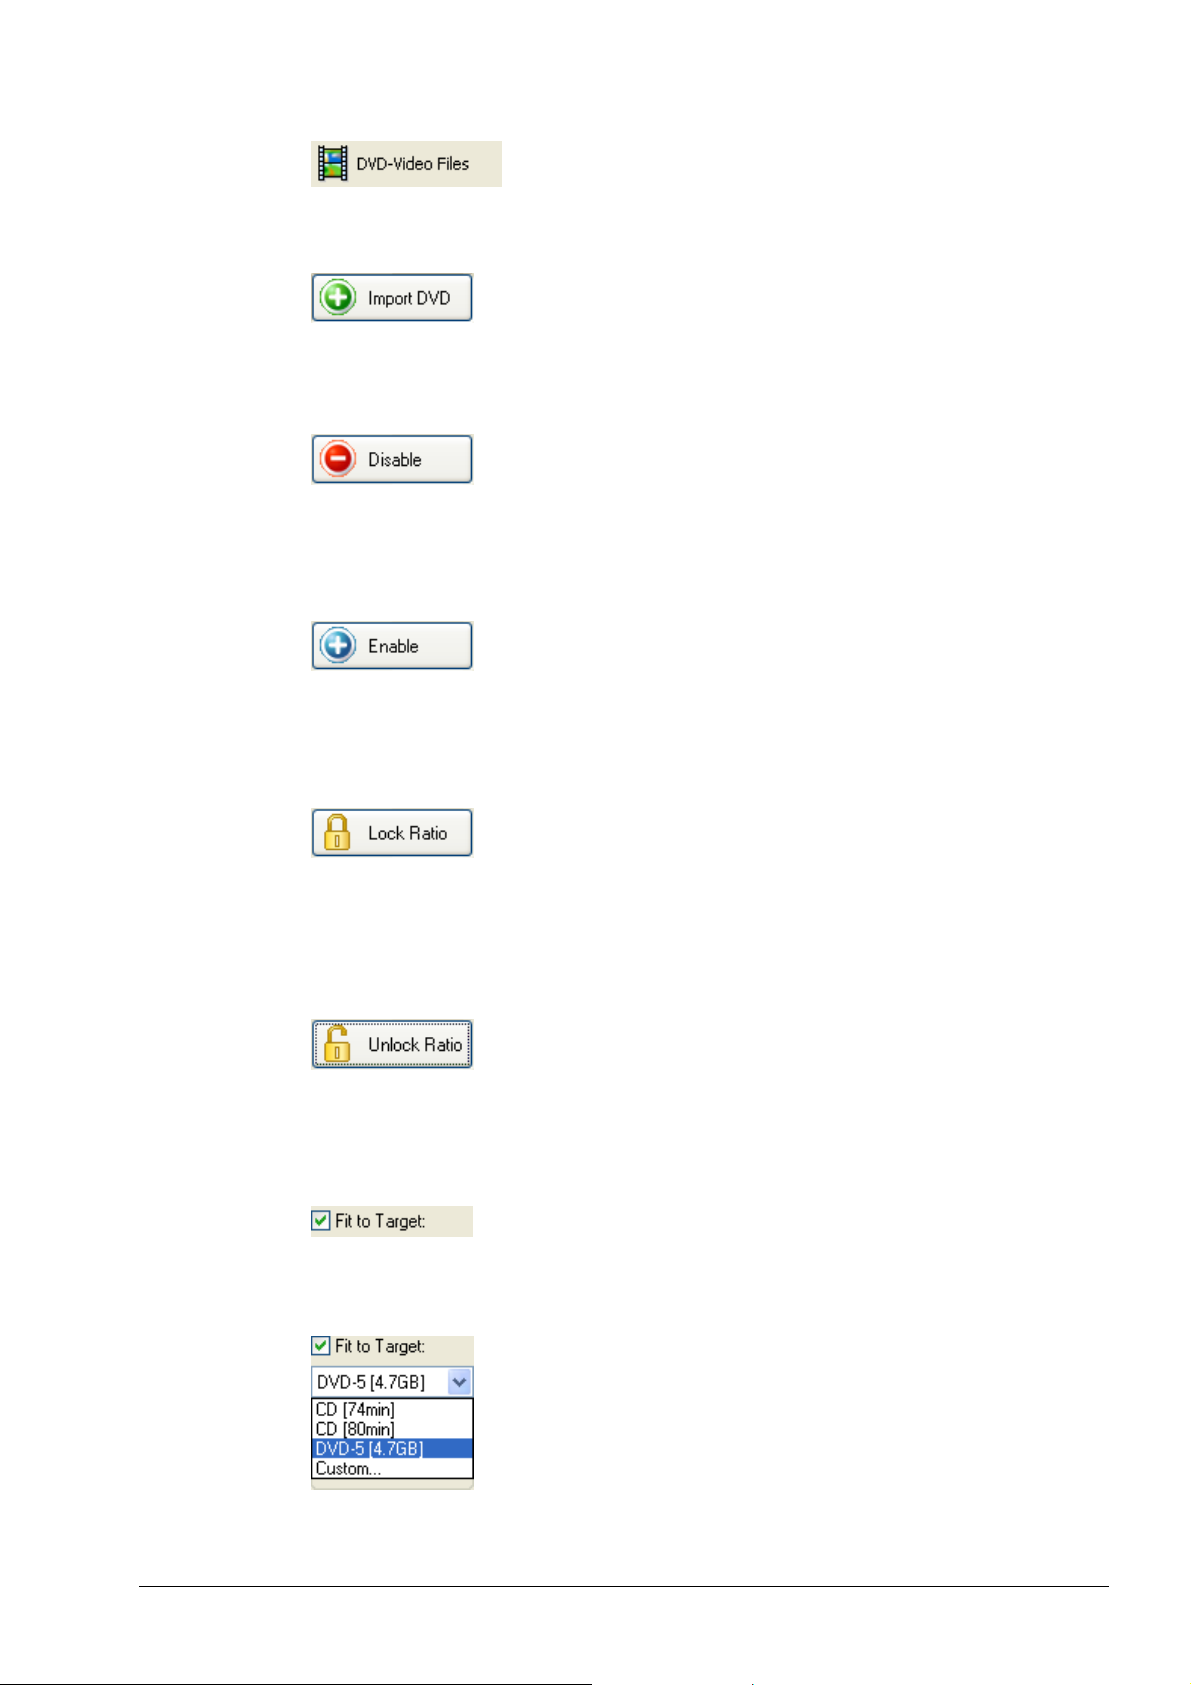
By clicking on 'DVD-Video Files' you will move to the Nero Recode 2 video area.
By clicking on the 'Import DVD' button you will open a dialog to import the
selected DVD.
This button is only enabled if a DVD-Video title has been imported. Clicking on
the 'Disable' button will remove titles that were originally present so that they will
not be included when you burn your copy.
This button is only enabled if an imported DVD-Video title has been deactivated.
Clicking on the 'Enable' button will activate titles that were originally disabled so
that they will be included when you burn your copy.
This button is only enabled if a DVD-Video title has been imported. Clicking on
the 'Lock Ratio' button will stop the recorder quality of a DVD-Video title being
changed automatically. However, it is still possible to change the quality setting
manually by moving the slider.
This button is only enabled if a DVD-Video title has been imported and automatic
modification has been prevented. Click on the 'Unlock Ratio' button to unblock
the automatic modification of the recode a title's quality.
The 'Fit to Target' check box is ticked as a default. This means that the disc
inserted will later be automatically recoded to fit the size of the blank disk inserted
(where technically possible).
Nero Recode The Nero Recode 2 interface • 10
Page 11
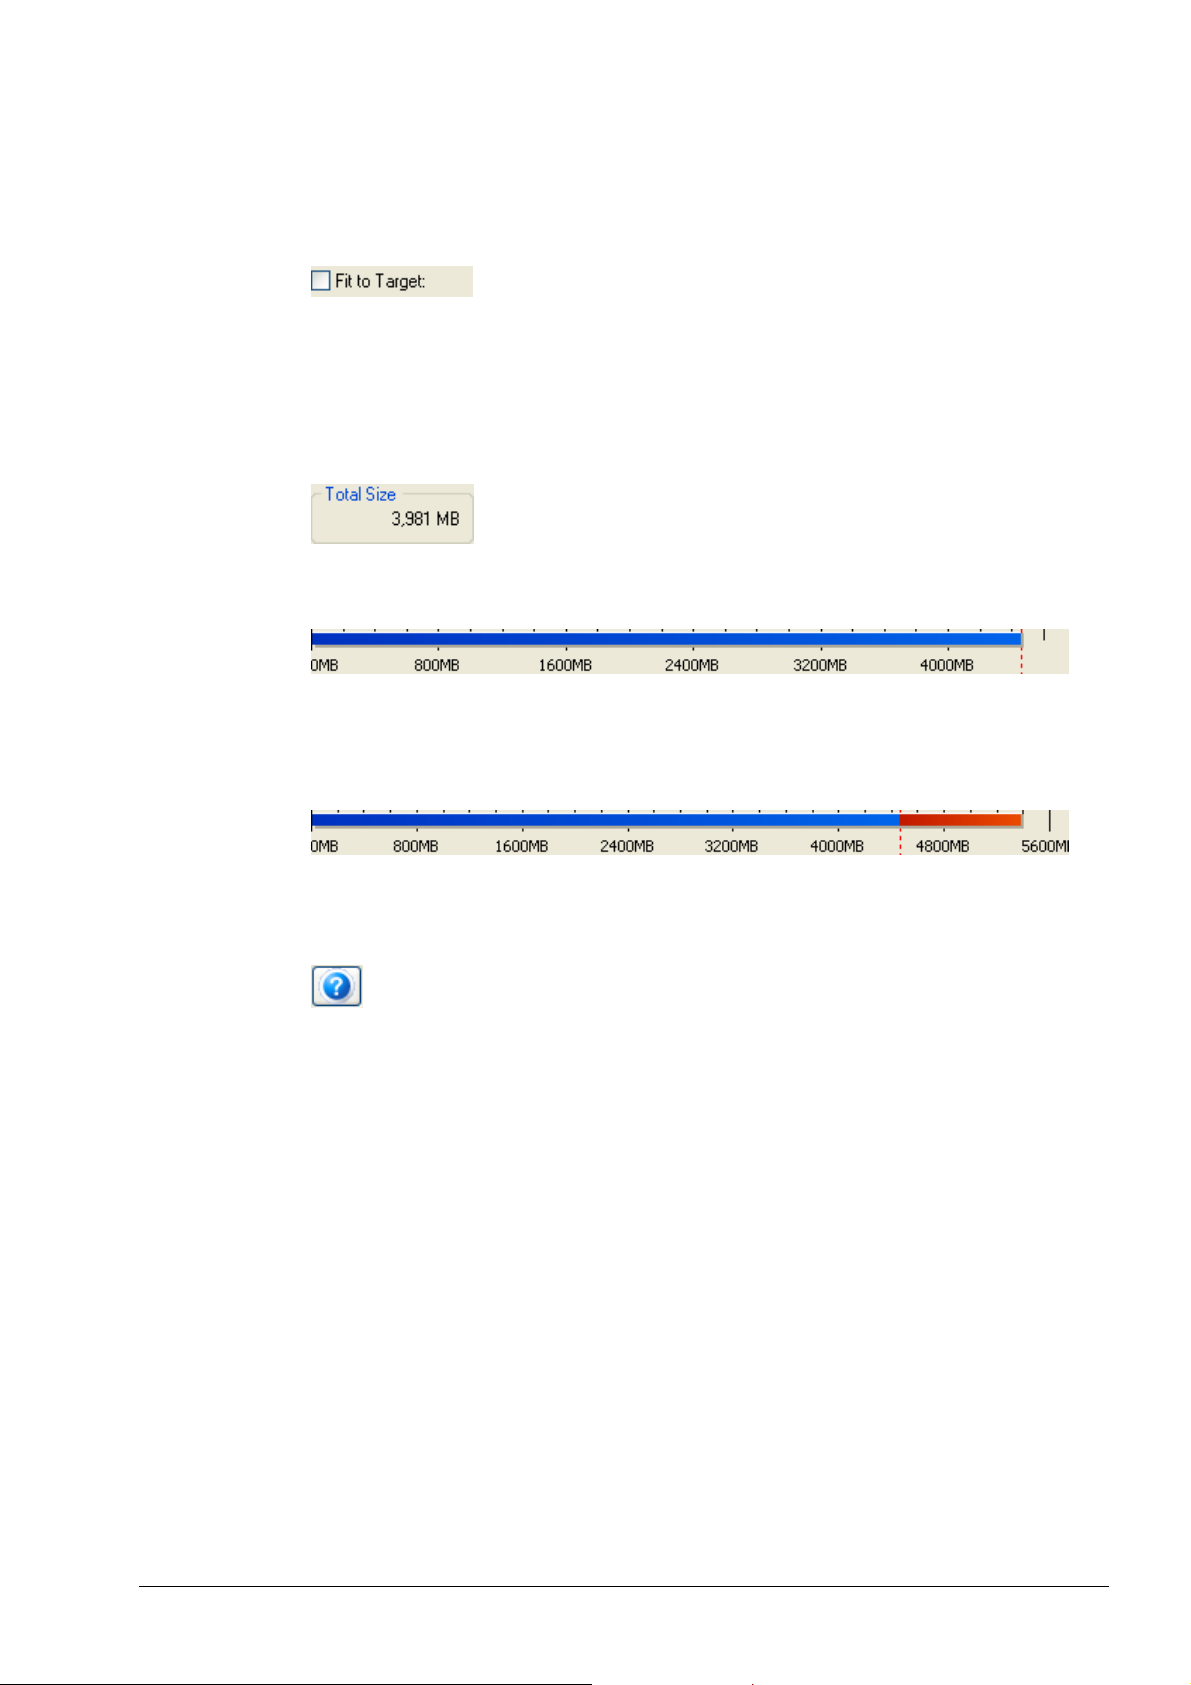
If the 'Fit to Target' check box has been ticked, you can select the target by
clicking on the dropdown button. The level indicator will be adjusted depending
on the target.
If the 'Fit to Target' check box has been disabled, the size of a copy can be
specified independently of the disc's size limitations. It may be that it is not
possible to burn the DVD structure thus created on a normal, commercially
available blank disc. However, this method is suitable for playing a DVD-Video
from the hard drive.
This information field indicates how much space is currently available on the disc.
The Nero Recode 2 level indicator shows how much space on the disc is
occupied. As long as the bar of the level indicator is blue, the entire contents will
fit onto the disc.
If a red bar appears in the indicator, the amount of data is larger than the capacity
of the disc.
Clicking on the '?' button will tell you more about Nero Recode 2.
Nero Recode The Nero Recode 2 interface • 11
Page 12
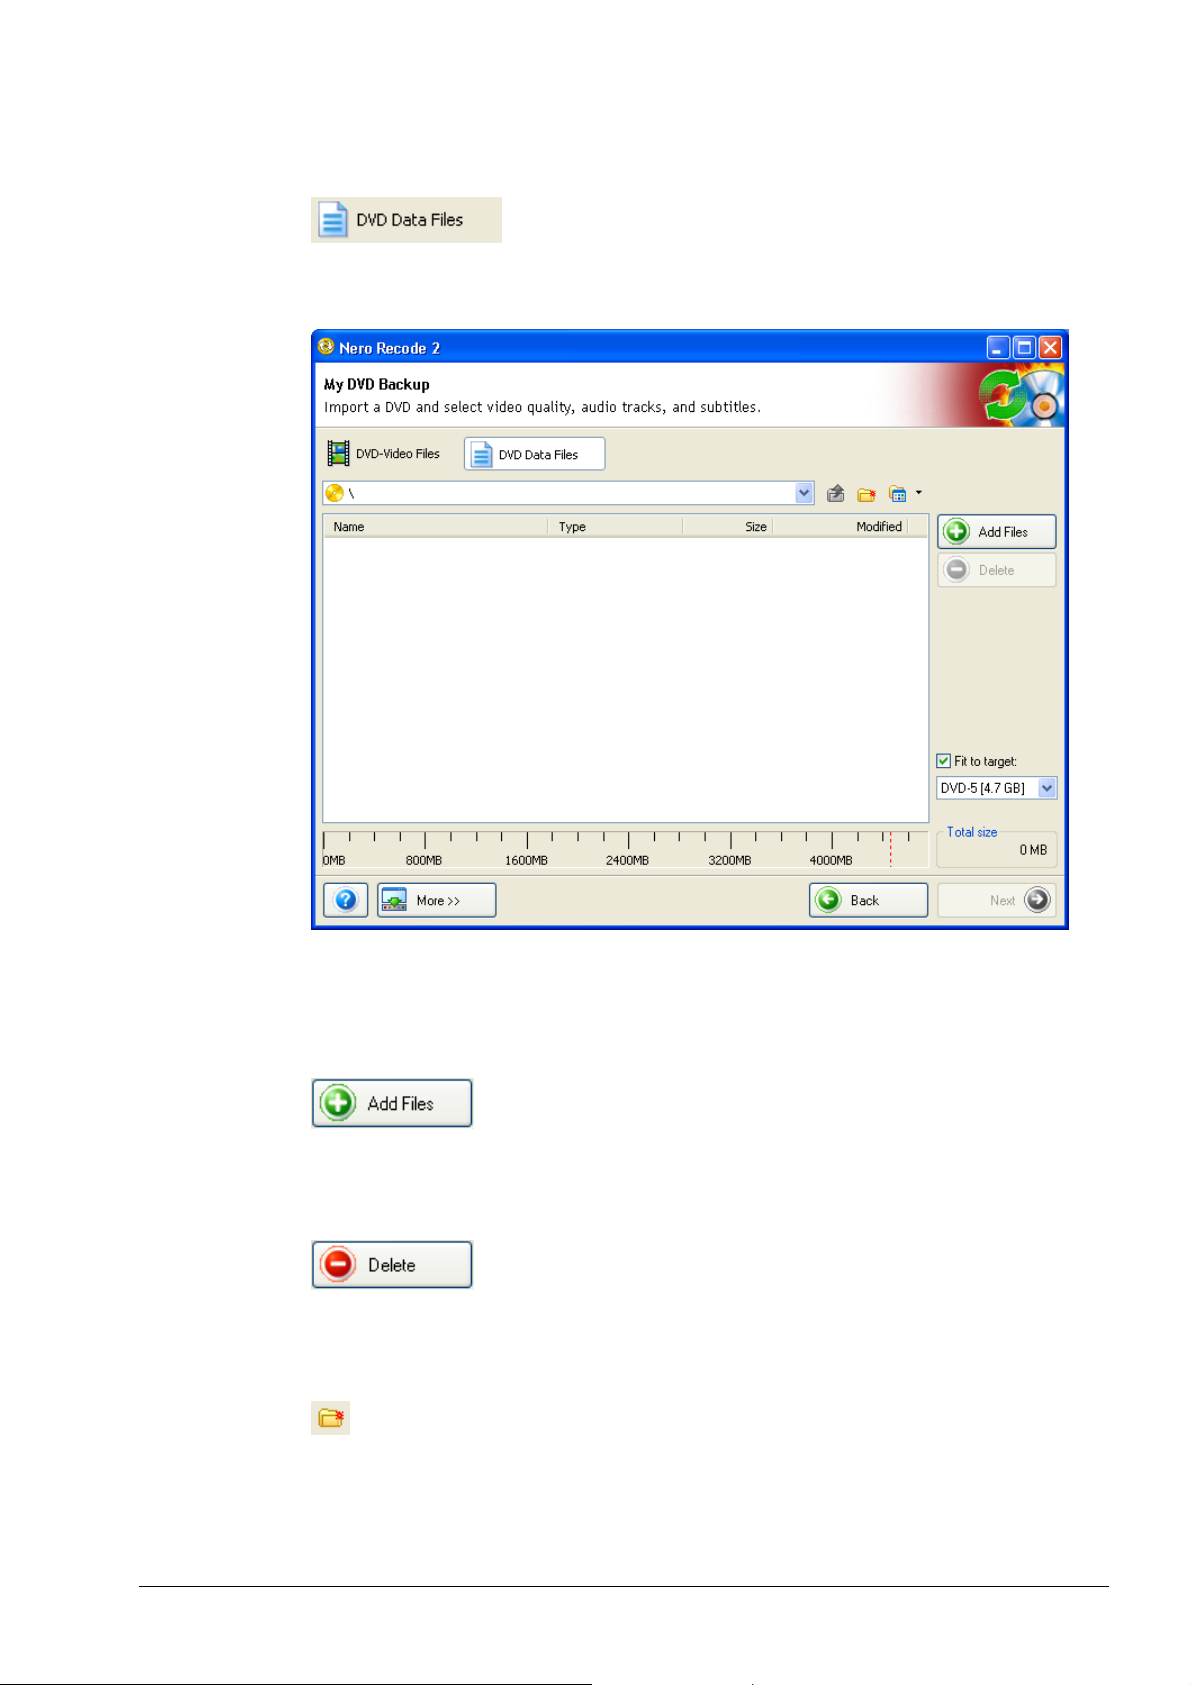
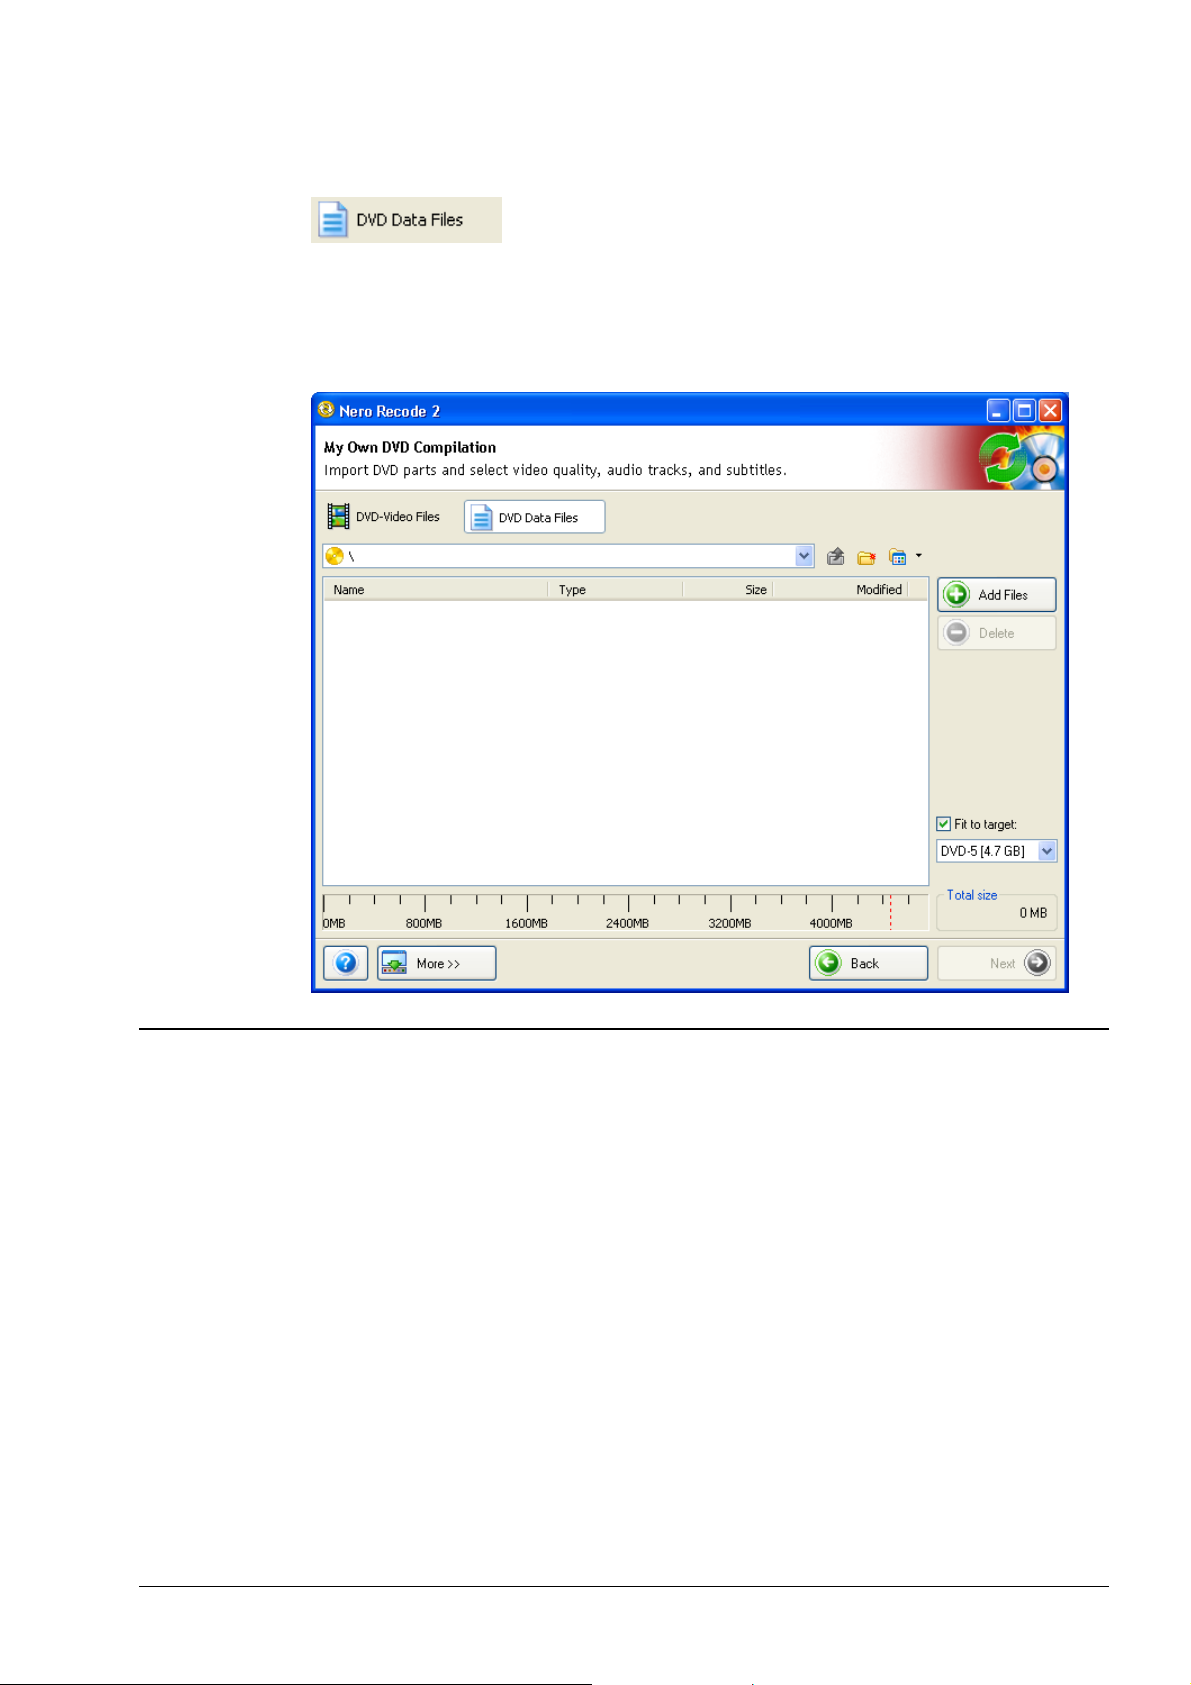
2.2.2 DVD data
By clicking on 'DVD Data Files' you will move to the Nero Recode 2 data area.
In contrast to the video area, the following elements are present in the 'DVD Data
Files' area.
You can open a dialog to import the selected data files by clicking on the 'Add
Files' button.
This button is only enabled if a data file is present. Clicking on the 'Delete' button
will remove any data files that have been added.
Clicking on this icon will start a dialog to let you name a folder to be created in the
data section of the disc.
Nero Recode The Nero Recode 2 interface • 12
Page 13

This icon is only enabled in a subordinate folder. If you click on this icon, the
contents of the parent folder will be displayed.
Clicking on this dropdown button will open a menu and let you choose how the
available files will be displayed in the folders.
Nero Recode The Nero Recode 2 interface • 13
Page 14
2.3 Creating your own DVD
With Nero Recode 2 you can quickly and easily create a new DVD from DVD-
Video titles (provided they are not copy-protected). This allows you to burn a
'Best of' DVD from existing DVD-Video titles and data files. Naturally enough, you
can remove any subtitles and audio tracks that you do not want, just like when
copying a DVD.
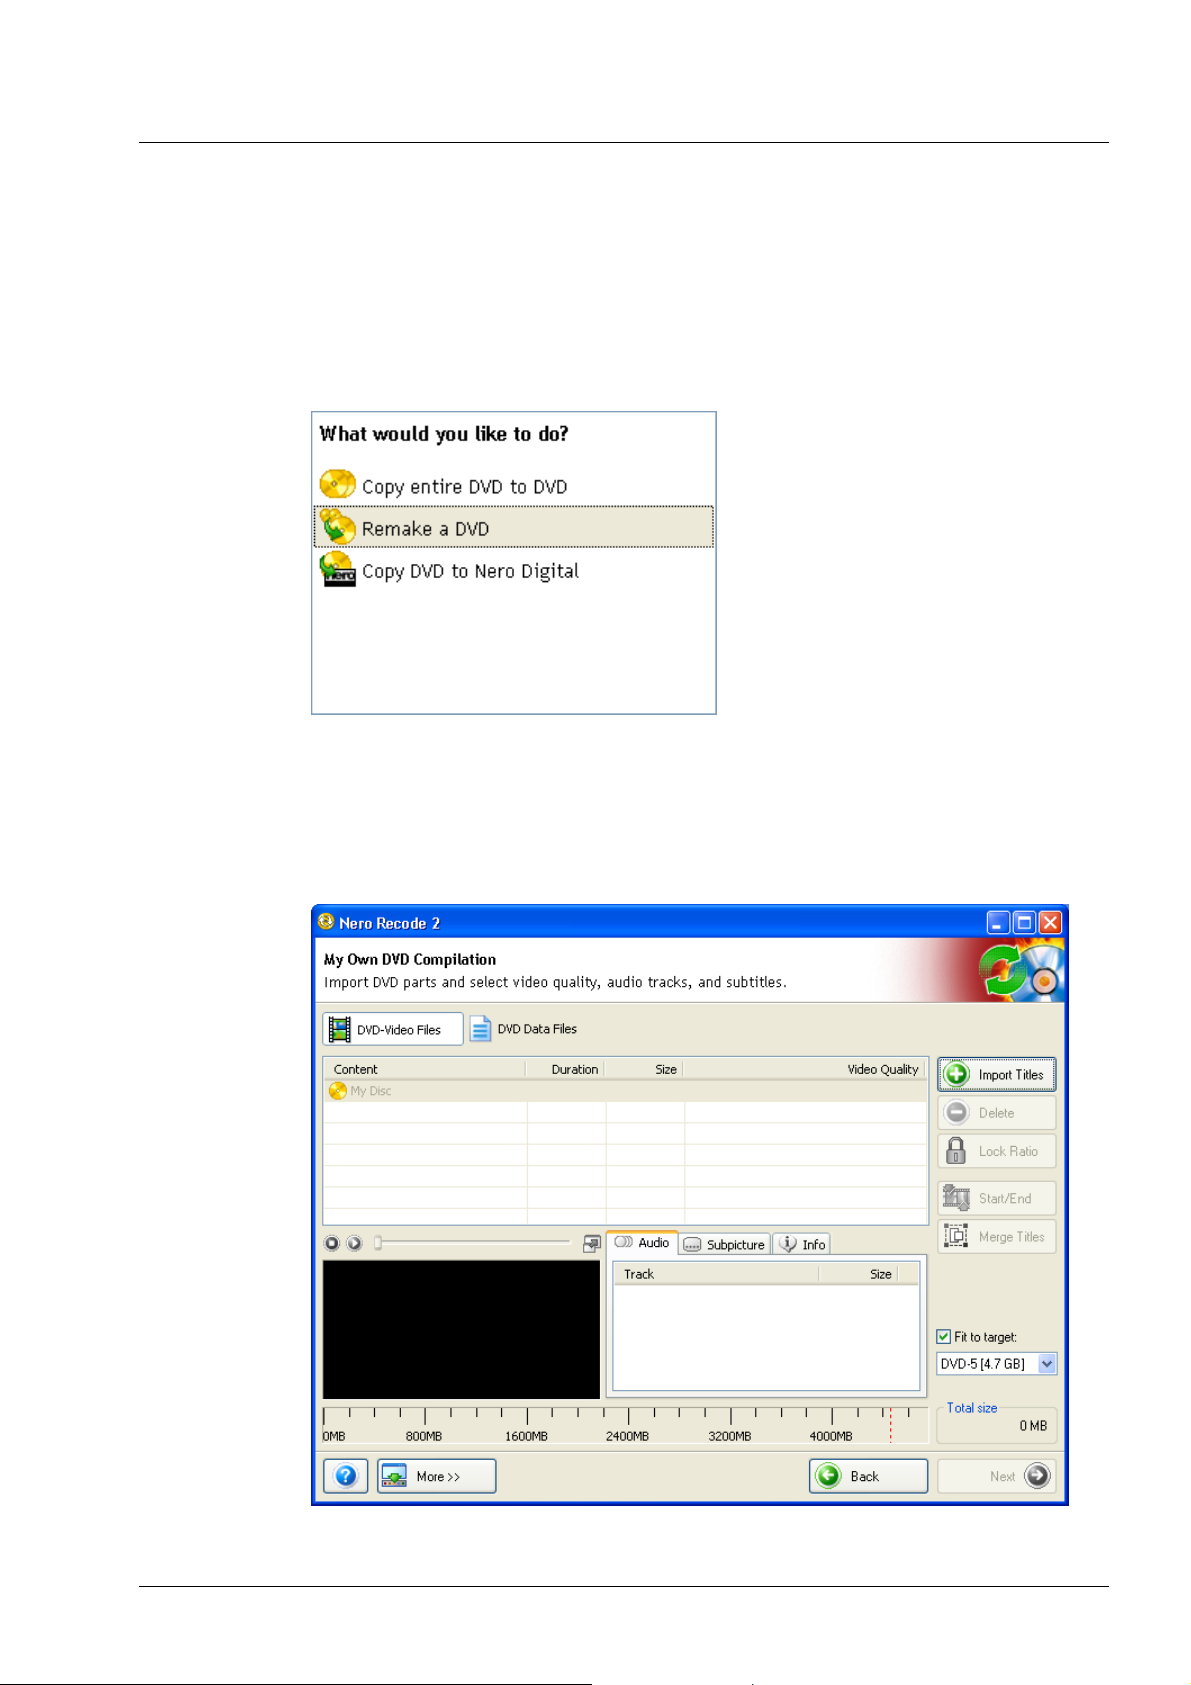
You will reach the area for creating your own DVDs by clicking on 'Remake a
DVD' in the start window.
2.3.1 DVD-Video
After clicking on the 'Remake a DVD' field in the start window, the DVD-Video
area of the compilation window for your own DVDs will open.
Nero Recode The Nero Recode 2 interface • 14
Page 15
In contrast to the copy window for a DVD, the following new buttons are present
in this compilation window.
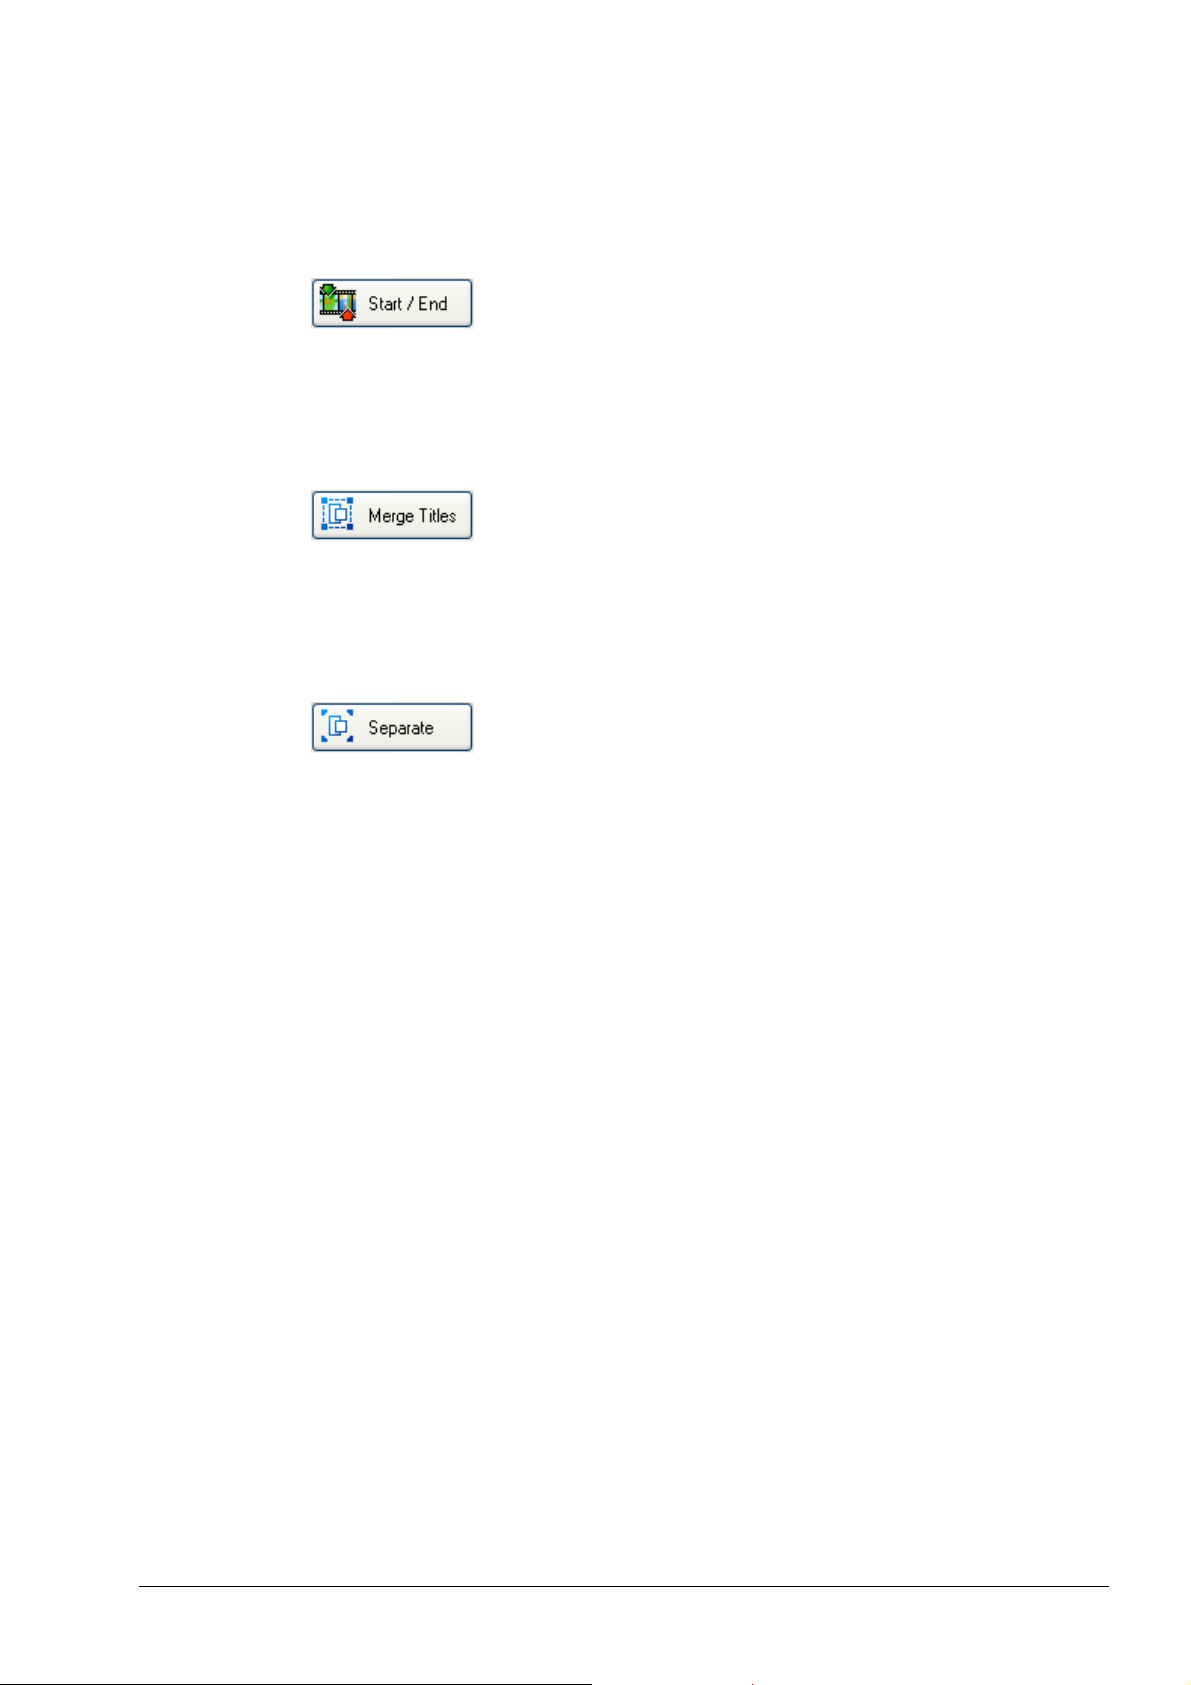
This button is only enabled if a DVD-Video title has been imported. Clicking on
the 'Start / End' button will open a window in which the titles can be shortened –
you must specify the first and last frame. You can find more detailed information
on shortening DVD-Videos in the 'Shortening videos' section.
This button is only enabled if a DVD-Video title has been imported and at least
two titles have been highlighted. Clicking on the 'Merge Titles' button will merge
the two titles to one. You can find more detailed information on mixing DVDVideos in the 'Merging individual titles' section.
This button is only enabled if a DVD-Video title has been imported and two titles
have been merged to form one single one. Clicking on the 'Separate' button will
separate the merged titles so that the original titles are available again in their
original form. You can find more detailed information on separating DVD-Videos
in the 'Separating merged titles' section.
Nero Recode The Nero Recode 2 interface • 15
Page 16
2.3.2 DVD data
By clicking on 'DVD Data Files' you will move to the Nero Recode 2 data area.
In contrast to the data window in the copy area, this window does not contain any
new areas and buttons. Therefore we will not describe it in further detail here.
2.4
Nero Recode The Nero Recode 2 interface • 16
Page 17
Create a Nero Digital disc
You can use Nero Recode 2 to convert DVD-Video titles (not copy-protected)
with Nero Digital quickly and easily into MPEG-4 files. Like when making your
own DVD compilation, you can shorten existing titles if you only want to use
certain parts of a DVD title. Unlike a DVD, an MPEG-4 file created with Nero
Digital can only have a soundtrack and subtitles in one language.
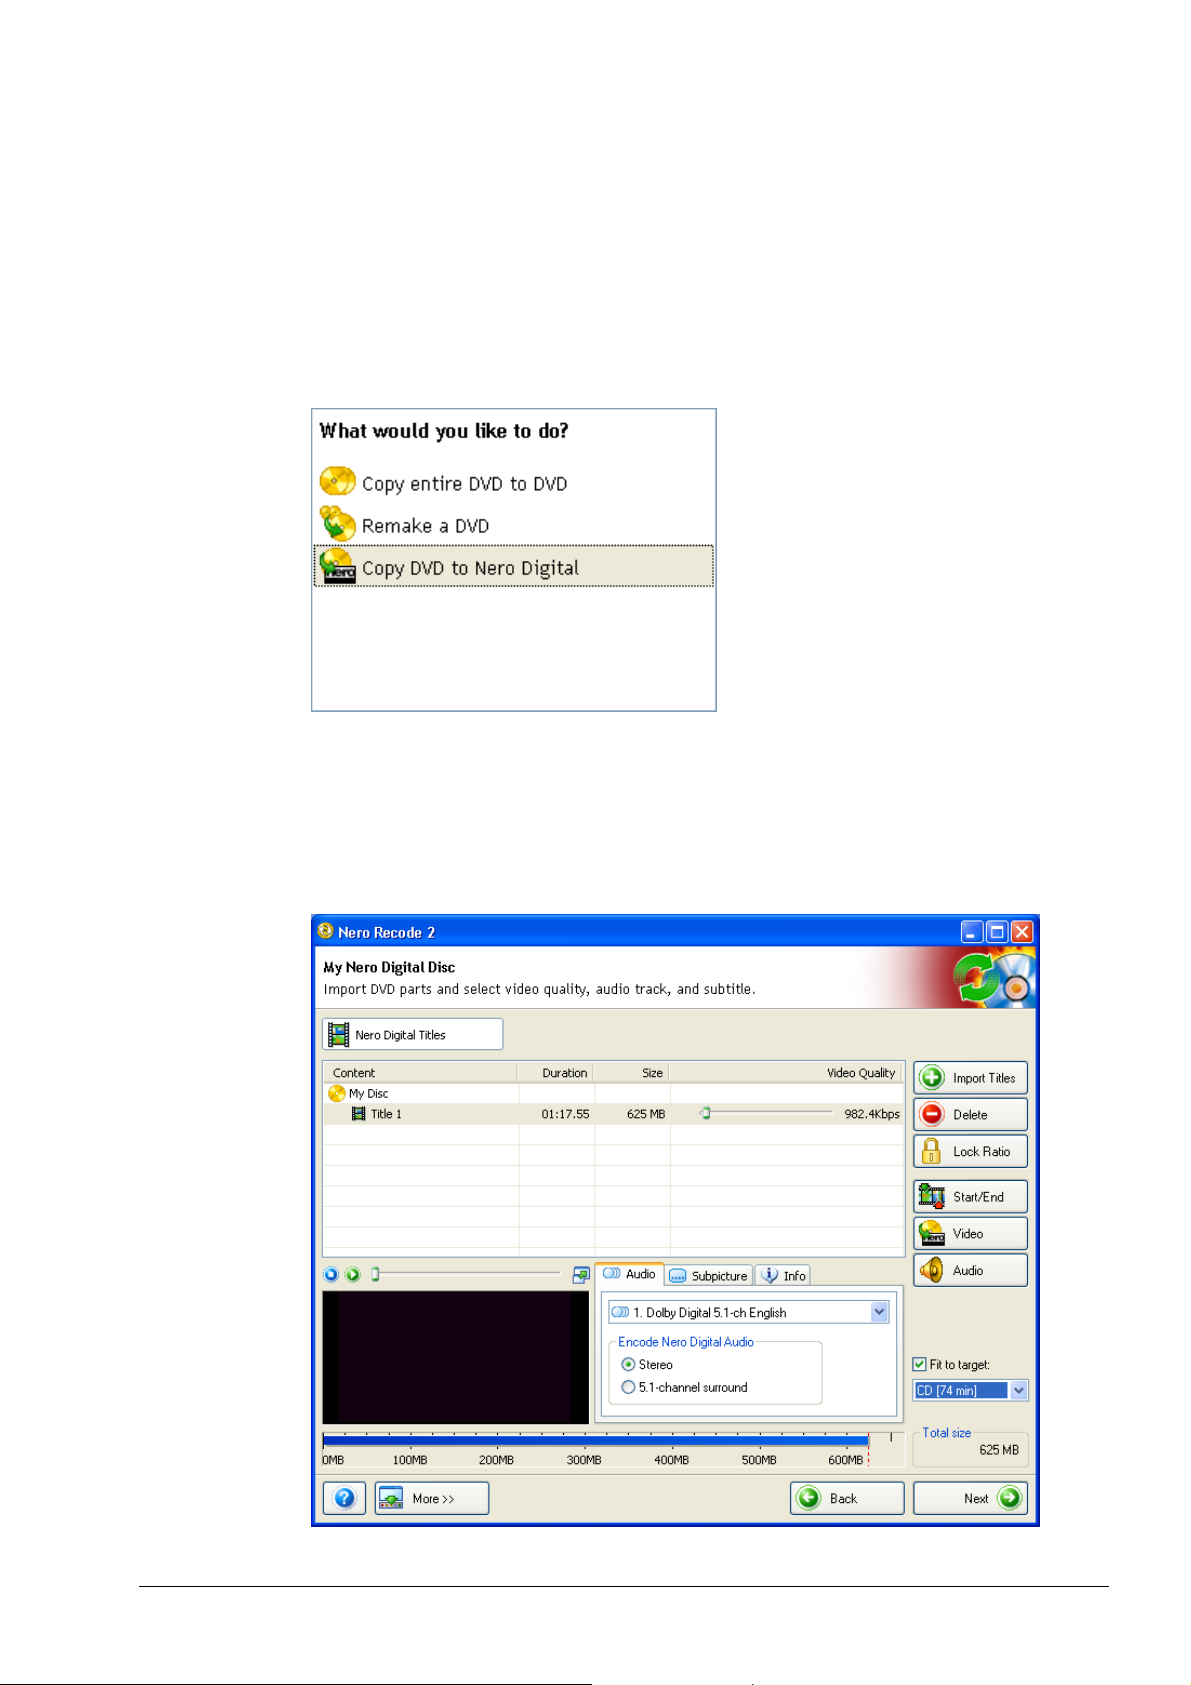
You reach the field for creating a Nero Digital disc by clicking on 'Copy DVD to
Nero Digital' in the start window.
2.4.1 DVD-Video
After clicking on 'Copy DVD to Nero Digital' in the start window, the DVD-Video
area of the compilation window for converting DVD-Vides into MPEG-4 files will
open. The Nero Digital Disc import area only has one window for importing DVDVideos as data files cannot be converted to MPEG-4 files.
Nero Recode The Nero Recode 2 interface • 17
Page 18
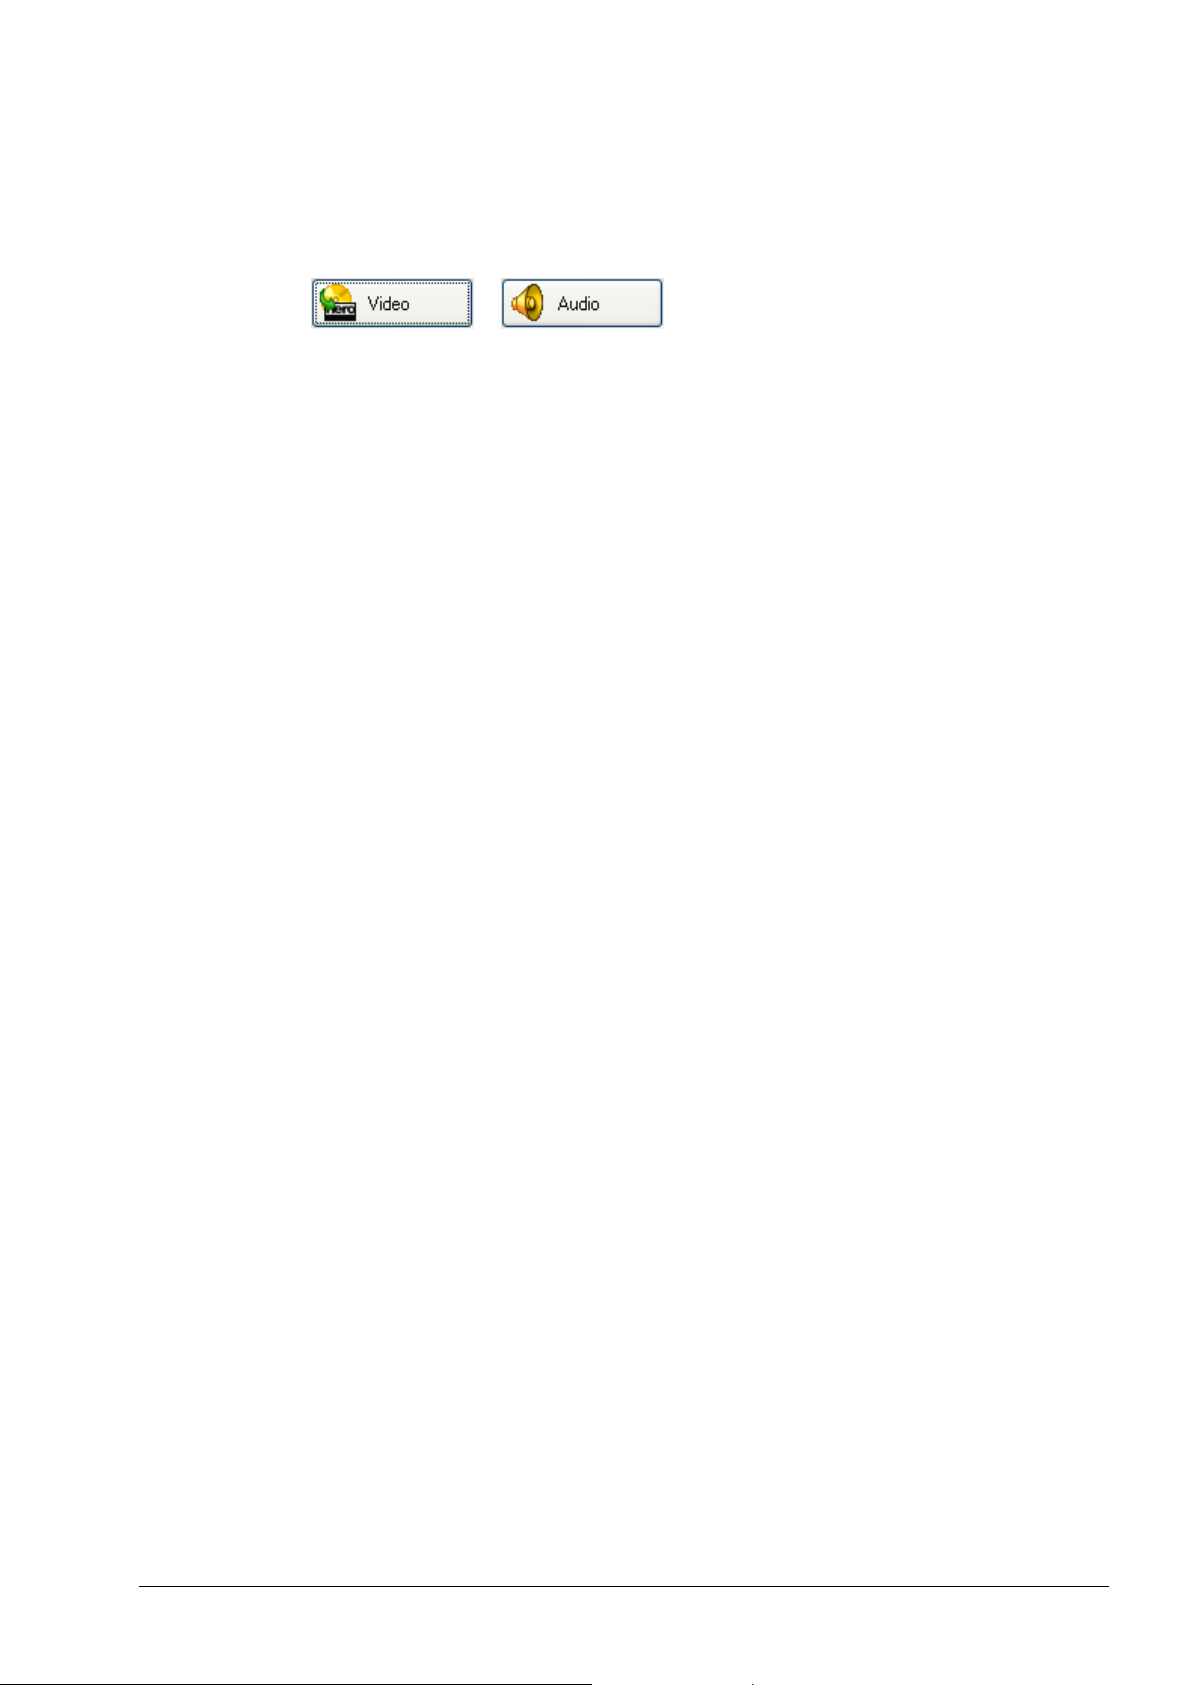
Two new buttons are now present that are not to be found in the DVD copy and
compilation windows.
The two buttons are only enabled if a DVD-Video title has been imported.
Clicking on the appropriate button will open a window in which you can determine
the video and audio settings to be used when converting. You can find more
detailed information on Nero Digital settings in sections on 'Specifying the video
settings' and 'Specifying the audio settings'.
Nero Recode The Nero Recode 2 interface • 18
Page 19
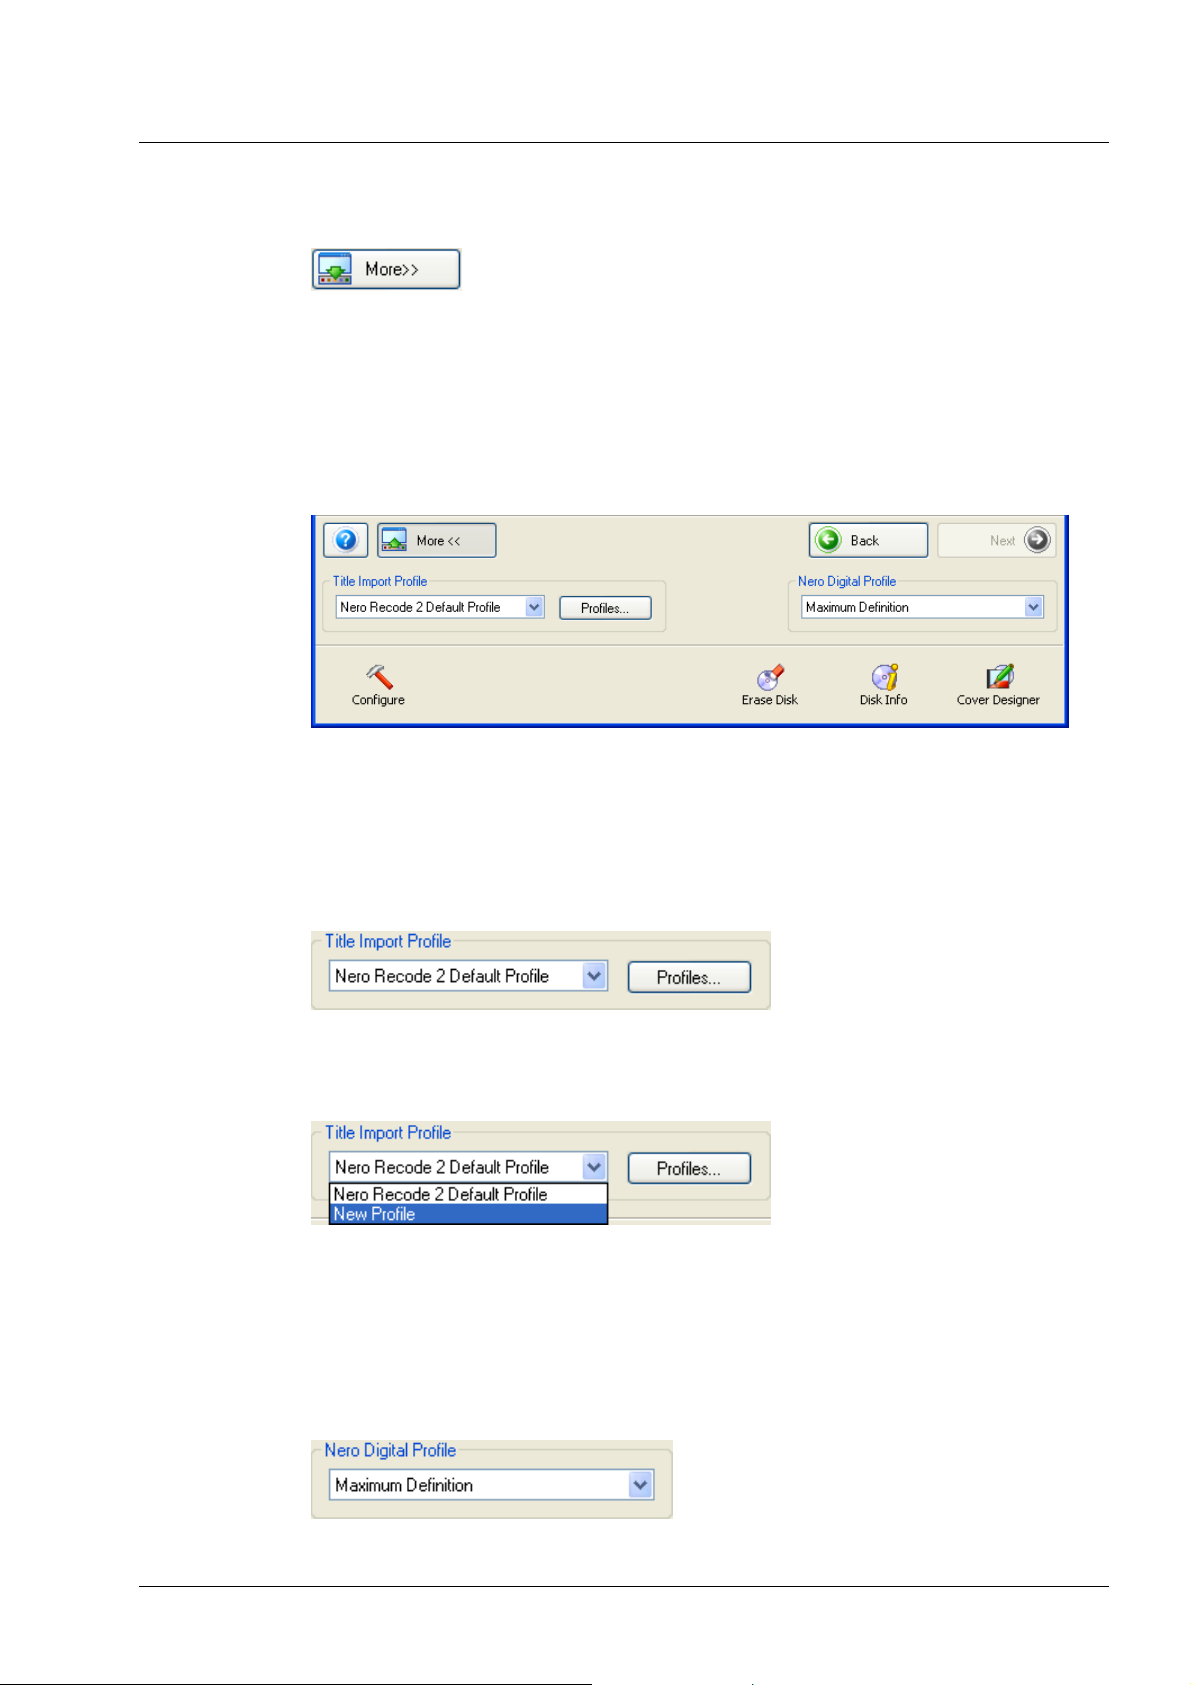
2.5 Advanced display
Clicking on the 'More' button will extend the Nero Recode 2 user interface.
Additional options are available in the Nero Recode 2 advanced display mode.
You can use it to adapt the program to your personal needs and to start other
functions related to DVDs.
The content of this area depends on the element of Nero Recode 2 where you
clicked on the 'More' button. The following diagram shows the field where all the
profiles and commands are displayed.
2.5.1 Selecting an import profile
This area allows you to select the profile you want, the settings of which will
determine the result of the finished DVD. A special explanation is provided of how
to specify a profile. Please read the following section on 'Creating an import
profile'.
You can change the profile by clicking on the dropdown button and selecting the
chosen import profile.
2.5.2 Selecting a Nero Digital profile
This profile is only available when the 'Copy DVD to Nero Digital' task has been
chosen.
This area allows you to select the desired conversion profile. Depending on the
purpose of the converted DVD title, the size of the final result can vary.
Nero Recode The Nero Recode 2 interface • 19
Page 20
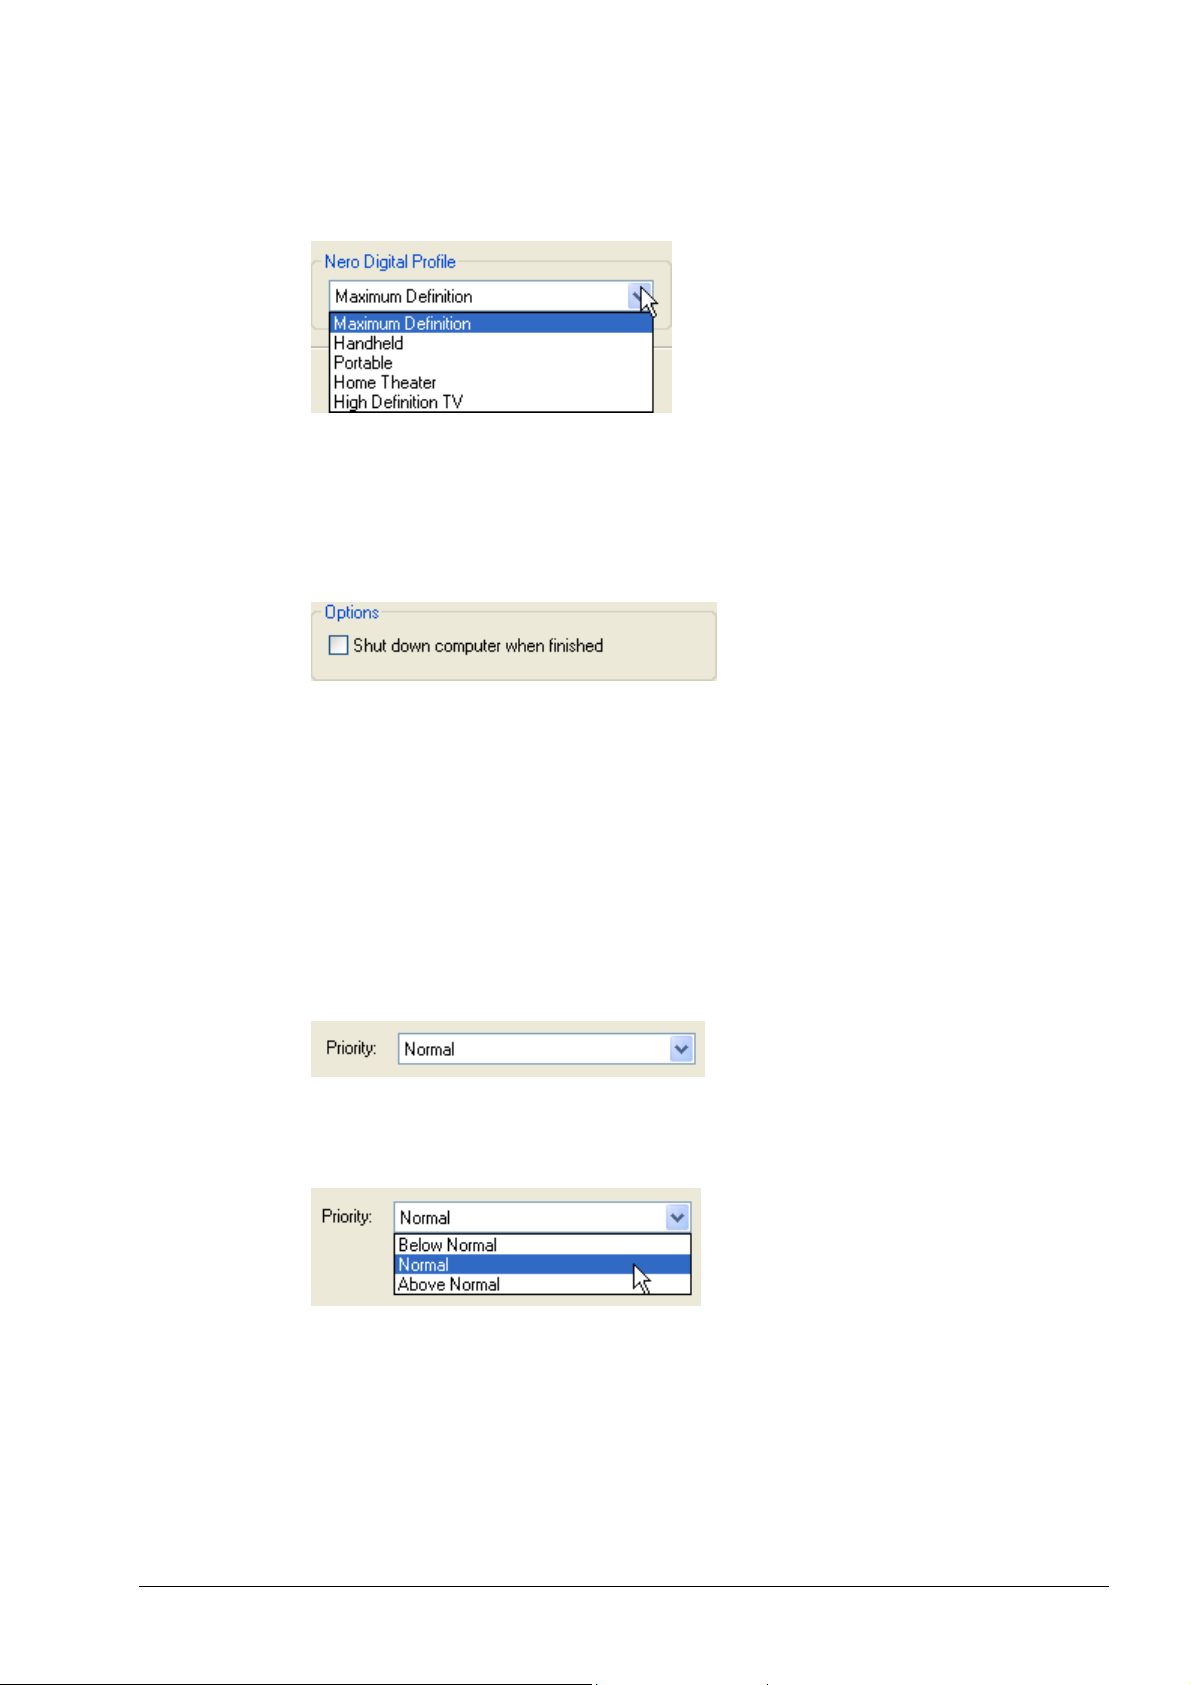
You can change the profile by clicking on the dropdown button and selecting the
desired profile.
2.5.3 Shutting down the computer once burning has been completed
In the Nero Recode 2 burning dialog, the user can decide whether the computer
is to be shut down once the burning procedure is finished.
This check box determines whether or not the computer will be shut down
once the burning procedure has been completed. In the default setting, this
check box is disabled. In other words, the computer will not be shut down after
burning but remains switched on.
2.5.4 Setting the burning priority
In the Nero Recode 2 burning dialog, the user can decide how the computer's
resources should be employed when burning the disc.
This area allows you to select the desired priority.
You can change the profile by clicking on the dropdown button and selecting the
desired priority.
Nero Recode The Nero Recode 2 interface • 20
Page 21

2.5.5 Configuring Nero Recode 2
Clicking on the 'Configure' area will open the configuration menu of Nero Recode
2 showing various tabs which determine the behavior of the program. Clicking on
the 'OK' button will save the changes and close the window.
DVD
Import DVD
This check box determines whether (when importing a DVD with data content)
the contents will also be taken over. In the default setting, this check box is
disabled. In other words, the data content of a DVD will not be automatically
copied as well.
Output DVD
This check box specifies whether (when copying a DVD with elements that are
blocked for user input) these areas should be made accessible to the user.
This is also the standard (default) setting. If, for example, the original DVD
contains a section that cannot be jumped over (so that the contents of this
section are always shown when playing) Nero Recode 2 can unblock it and
the user can skip the section - or view it at fast forward. In the default setting,
this check box is enabled, in other words the section is 'unlocked' and the user
has access to these areas.
Nero Recode The Nero Recode 2 interface • 21
Page 22
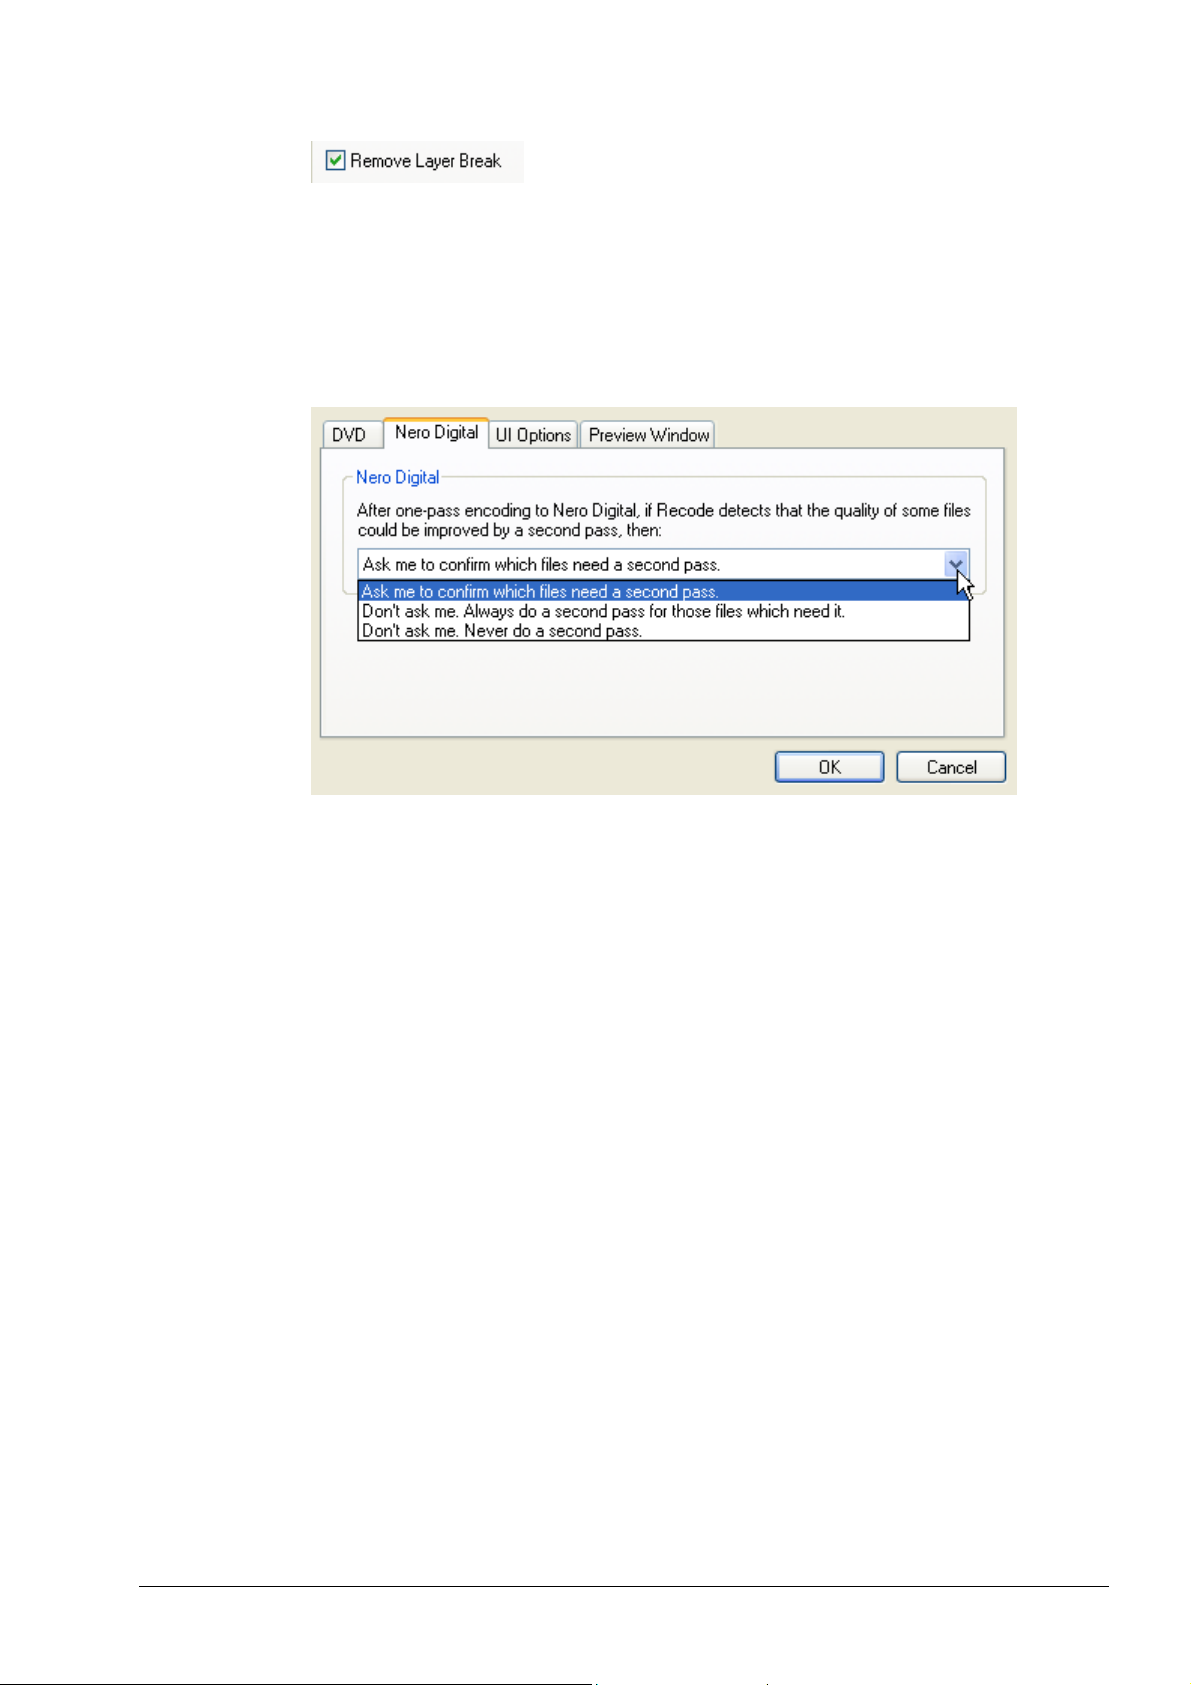
A
If the original DVD consists of two layers, there is a command on the DVD
which will stop the picture for a short time so that the laser can jump from the
first to the second layer. When copying with Nero Recode 2 onto a DVD with
only one layer, this command is unnecessary and can be removed. The
checkbox is enabled in the default setting.
Nero Digital
After creating an MPEG-4 file with Nero Recode 2, the program can determine,
after the first pass, that the quality of the resulting video would be improved if the
file is passed a second time.
In this case you can stipulate on this tab how Nero Recode 2 should proceed.
You can change the setting by clicking on the dropdown button and selecting the
desired option.
Ask me to confirm If a second pass is meant to improve the quality, then a
dialog always appears before the second pass in which you
can choose if the second pass should be done or not.
Don’t ask me. Always
do a second pass
Don’t ask me. Never
do a second pass
If a second pass is meant to improve the quality, then this
will be done automatically without consulting you.
second pass will never be done, even if the quality of the
resulting MPEG-4 file would improve.
Nero Recode The Nero Recode 2 interface • 22
Page 23
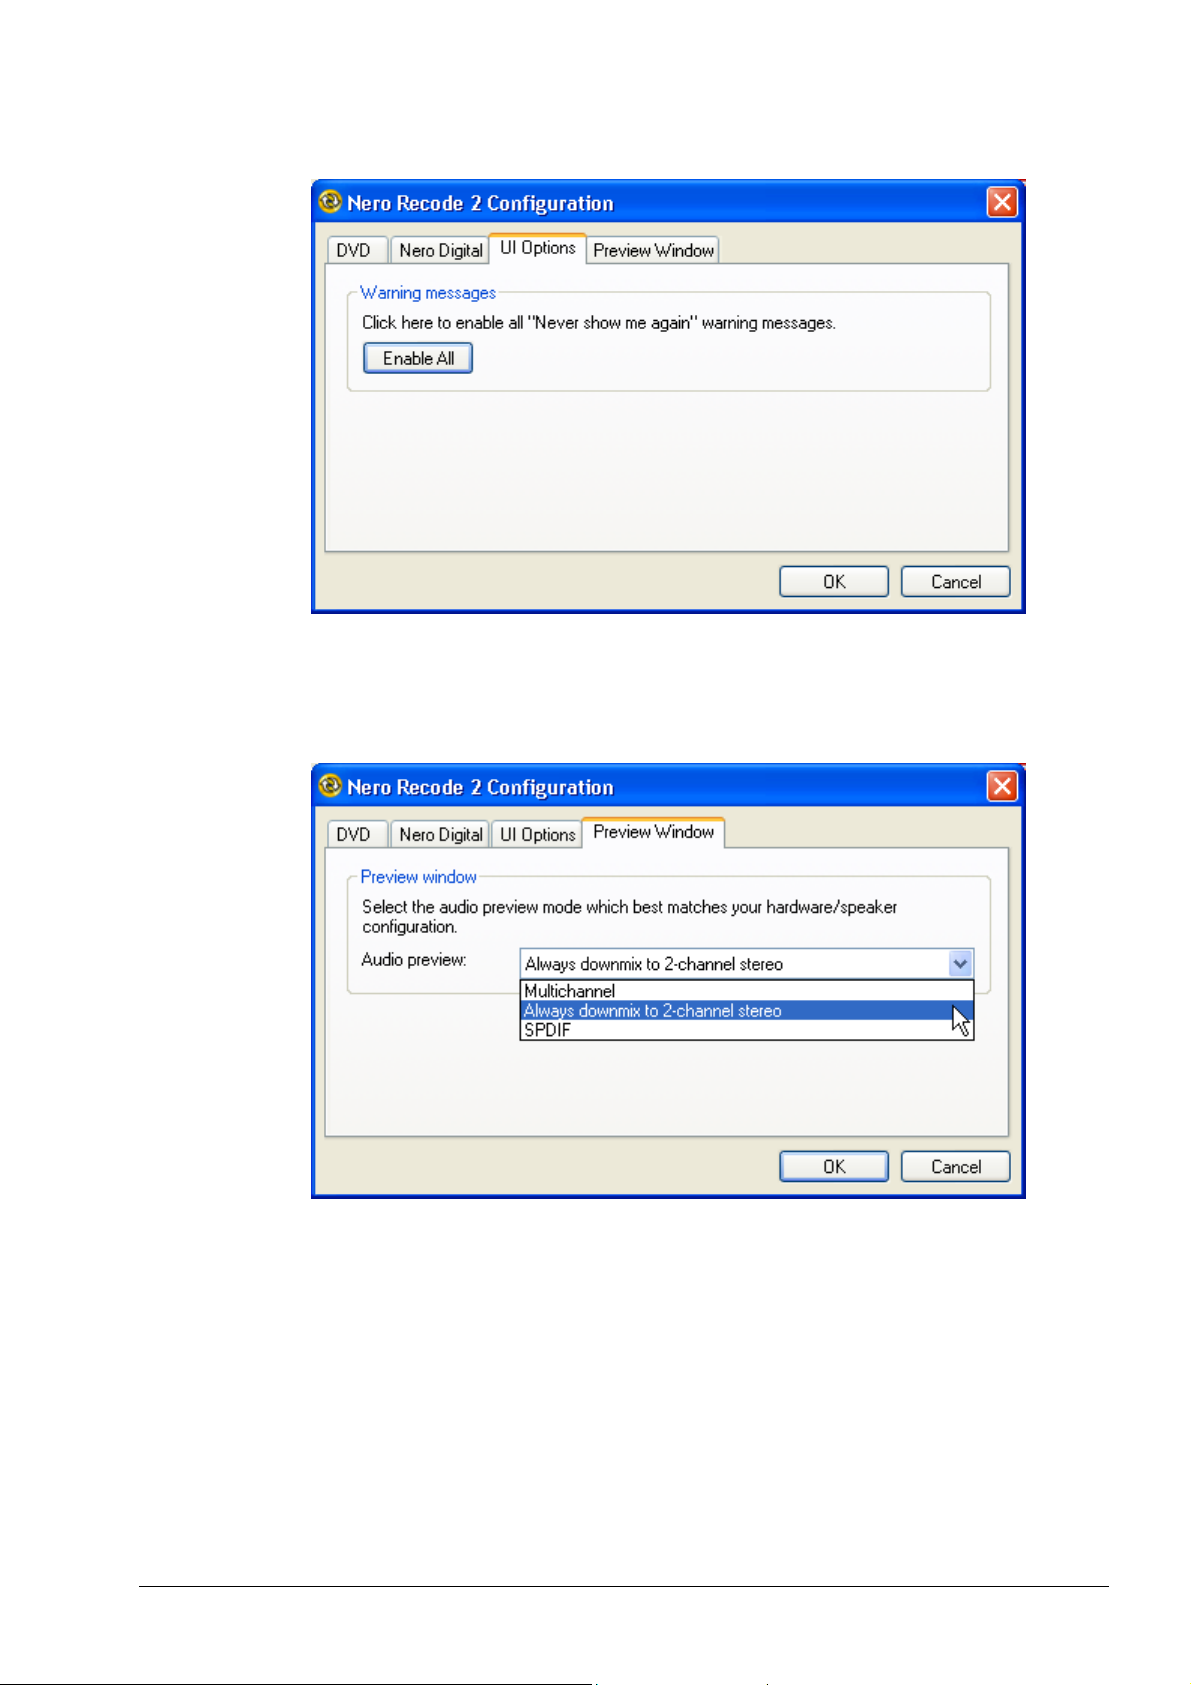
User Interface Options
Clicking on the 'Enable All' button will enable all the warning messages again if
they have previously been manually disabled.
Preview Window
This area determines the quality of the audio output when the DVD title is being
seen in the preview window.
You can change the setting by clicking on the dropdown button and selecting the
desired option.
Multichannel The audio output is over a number of channels.
Always Downmix The audio output is in two-channel stereo (default).
SPDIF If the computer has a sound card with digital output, the sound
will be heard from the digital audio device connected.
Nero Recode The Nero Recode 2 interface • 23
Page 24

2.5.6 Erasing the contents of a disc
The owner of a recorder that can erase rewritable discs can erase the contents if
such a disc is inserted in the drive.
Clicking on 'Erase disc contents' will open the corresponding window.
Nero Recode The Nero Recode 2 interface • 24
Page 25

Choose Recorder
If a number of recorders that can all erase disc contents have been installed,
you can select from the recorders available. You can change the recorder by
clicking on the dropdown button and selecting another. This area will be
disabled if only one recorder has been installed.
Select the erase method to be used
There are two different methods of erasure. You can choose a different
method by clicking on the dropdown button and selecting another one.
Quick erasure: The data on the disc is not deleted, only the information on
the data on the disc is erased. The disc looks as if it has not been written on
even though it is has been. As the data can be restored by experts, this
method of erasure is not suitable if there is confidential data on the disc. The
advantage of this method is the speed at which the disc is processed. Erasure
is complete after about two minutes and the disc can then be burned again.
Full erasure: The data on the disc is completely deleted and the DVD is
blank. The disadvantage here is the time needed until the data has been
completely removed. Depending on recorder and medium, it can take up to
about 30 minutes.
2.5.7 Obtaining information on the inserted disc
This field allows information to be obtained on the disc that has been inserted. It
does not matter whether the disc is located in a CD or a DVD drive.
Clicking on 'Disc Info' will open the corresponding window.
Nero Recode The Nero Recode 2 interface • 25
Page 26

The upper gray area tells you about the type of disc, the amount of data
present, its total capacity, and the number of sessions and tracks.
The central white area tells you about the structure of the disc and shows the
size of the individual sessions and tracks, for instance.
The dropdown button in the lower gray area allows you to choose the drive.
Clicking on the 'Eject' button opens the tray of the drive selected.
Clicking on the 'Refresh' button reads the inserted disc again. This information
will then appear in the upper and central areas of the window.
Click on 'OK' to close the window.
2.5.8 Nero Cover Designer
This field opens Nero Cover Designer – a versatile and comfortable program
that you can use to create covers and labels for the DVDs you have created.
Refer to the Nero Cover Designer manual and online-help for detailed
information on using the program.
Nero Recode The Nero Recode 2 interface • 26
Page 27

3 Import profiles
r
3.1 Creating an import profile
With Nero Recode 2, an import profile can be selected that specifies which audio
tracks and subtitles are chosen when you import DVD-Videos. This information is
stored in the profile and can therefore be quickly called up again. Depending on
the way the DVD-Video is copied, a number of profiles can be created. Before
burning you only need to select the profile you want and then start the copying
procedure.
However, you can change the settings at any time before burning. If English and
German audio tracks and subtitles have been selected for example, othe
languages (if available) can also be chosen at a later stage or else those that
have already been marked can be disabled.
1. Click on 'More' to display Nero Recode's additional functions.
The field with the additional functions includes the profile field, which
determines the profile to be used.
2. Click on the 'Profile' button and the profile window will appear.
Nero Recode Import profiles • 27
Page 28

The tab ('index card') will show you the possible settings for the corresponding
features.
3. Click on the 'New' button to create a new profile.
4. As the first step give the new profile a name and specify the source from which
the settings should be copied.
In the 'Profile name' field enter the name of the new profile.
Specify the source from which the settings are to be copied by clicking on
the dropdown button and selecting the profile required from the list of those
available.
Nero Recode Import profiles • 28
Page 29

5. In a second step you can specify the quality of the video by selecting the
desired option field.
You have three options open to you that affect the relationship between the
'Main Movie' and the 'Extras'. Depending on your selection, the main movie
will be granted more, the same or less priority - in other words, the quality
of the main movie in comparison the extras will be better, the same, or
worse. In the standard setting (default) the main movie will have a better
quality than the extras.
Specify whether the menus should be kept in the original quality – in this
case they will simply be copied and not recoded (this is also the standard
setting). If you disable the check box you will be able to recode the files
contained in the menus.
Nero Recode Import profiles • 29
Page 30

6. In the third step you can specify the audio tracks that you would like to have
after recoding. Click on the 'Audio' tab, to specify the audio characteristics of
the DVD-Video title.
By enabling (standard setting) or disabling the check box, you can specify
whether only certain languages should be present on the copied DVD or
whether they should all be available.
If the check box has been disabled, it will not be possible to select the language!
If you want to specify which audio tracks should be used for DVD-Video
titles, click on the 'Add' button to open the window for the desired audio
files.
Nero Recode Import profiles • 30
Page 31

Mark the chosen languages and click on the 'OK' button to save the
settings and close the window.
Note that only those tracks that are also present in the original can be copied. By
clicking on the 'Select All' button you will select all languages, in other words, all
the audio tracks on the DVD will be copied.
If none of the tracks you have selected are present on the original DVD-
Video, the copied video will not have any soundtrack. To prevent this, you
can tick the check box. This means that all the available audio tracks will be
copied. In the default setting, this option is enabled.
7. In the fourth step you can specify the subtitle tracks that you want to have
after recoding. Click on the 'subtitle' tab to set the subtitles.
By ticking (standard setting) or disabling the check box, you specify
whether only certain subtitles are to be present on the copied DVD or
whether they should be available in all languages.
If this check box has been disabled, it will not be possible to select a subtitle
language!
Nero Recode Import profiles • 31
Page 32

If you want to specify which subtitle should be used for DVD-Videos, click
on the 'Add' button to open the window for the audio files concerned.
Mark the desired languages and click on the 'OK' button to save the
settings and to close the window.
Note that only those tracks that are also present in the original can be copied. By
clicking on the 'Select All' button you will select all the languages, in other words,
all the audio tracks on the DVD will be copied.
If none of the tracks you have selected are present on the original DVD-
Video, the video copied will not have any subtitles. To prevent this, you can
tick the check box. This means that all the available subtitle tracks will be
copied. In the default setting, this option is enabled.
Nero Recode Import profiles • 32
Page 33

8. Click on the 'OK' button to save the changes and to close the window with the
tabs.
Nero Recode Import profiles • 33
Page 34

3.2 Editing an existing import profile
You can modify an existing profile quickly and easily by calling it up and making
the changes.
1. Click on the 'More' button to view Nero Recode's additional functions.
2. Click in the 'Title Import Profile' field on the dropdown button and highlight the
profile you would like to edit.
3. Click on the 'Profiles' button to open the profile window.
4. Make the changes you want and click on 'OK' to save them. You can find more
detailed information on the settings possible on the Nero Recode 2 tabs in the
'Creating an import profile' section.
Nero Recode Import profiles • 34
Page 35

3.3 Deleting an import profile
If a profile is no longer needed, it can be easily deleted.
The standard profile can only be deleted if at least one other profile is present.
1. Click on the 'More' button to view Nero Recode's additional functions.
2. Click in the 'Title Import Profile' field on the dropdown button and highlight the
profile you would like to delete.
3. Click on the 'Profiles' button to open the profile window.
4. Click on the 'Delete' button to delete the profile.
Nero Recode Import profiles • 35
Page 36

5. Click on 'OK' to save the changes and to close the window.
Nero Recode Import profiles • 36
Page 37

4 Copying a DVD
f
4.1 General information
This section explains how you can copy a DVD. It does not matter whether the
DVD is present as a disc or on the hard drive.
Nero Recode 2 is a versatile DVD copying program that can do more than simply
make 1:1 copies. You can also change the DVD in such a way that you can
recode the menu, the soundtrack, any extras that may be present and the video
files, too. So thanks to Nero Recode 2 you can edit DVD-Videos in such a way
that they can be copied onto commercially available DVD blanks – not only in an
excellent quality that can hardly be differentiated from the original but also at a
very high speed.
Unless you possess the copyright yourself, or at least have the permission of the
copyright holder, the unauthorized reproduction of discs may be a breach o
national or international law and may lead to severe penalties!
4.2 Copying without changing the DVD structure
If you want to copy a DVD without changing its structure (in other words you
would like to make a 1:1 copy of the original) it is better to burn the DVD with
Nero Express or Nero Burning ROM. This is only possible if there is as much
memory available on the blank as on the original DVD.
Read the Nero Express or Nero Burning ROM manual or the help-file to find out
how to copy a disc, and then proceed as instructed.
Nero Recode Copying a DVD • 37
Page 38

4.3 Copying (and changing the DVD structure)
This section explains how you can quickly change the structure of a DVD with
Nero Recode 2, so that its contents will fit on a commercially available blank disc
after recoding and subsequent burning. This procedure is particularly important if
the original DVD has more data than will fit on a conventional 4.7 GB blank. A
separate section will tell you how to burn the copy. Please read the 'Burning a
disc' section.
4.3.1 Importing a DVD
1. Start Nero Recode 2 and select 'Copy entire DVD to DVD'.
Nero Recode Copying a DVD • 38
Page 39

2. Click on the 'Import DVD' button to select the DVD source.
3. Select the source where the original DVD is located and click on 'OK' to
confirm your selection and to close the window. The source can be either a
drive or a folder on your hard drive. If the source is on your computer you must
specify the folder that contains the files.
After reading the DVD, the Nero Recode window will indicate how much
memory the various elements of the DVD (Menu, Main Movie and Extras) will
need. If the source DVD is larger than the blank that has been inserted, the
Nero Recode Copying a DVD • 39
Page 40

window will show how much the DVD will need to be recoded in accordance
with the selected profile.
The desired recode settings will be taken over from the profile settings. Click
on the 'Next' button to open the burn window, where the recoding and the
subsequent burning process will be started. You will find out in the next
section (which tells you how to change the structure of a DVD) that Nero
Recode 2 can do much more than this.
Nero Recode Copying a DVD • 40
Page 41

4.3.2 Changing the structure of a DVD
If you have imported a DVD with Nero Recode 2 and have inserted it, details of
the DVD structure will appear in the upper part of the window. You can then view
the DVD elements to be copied and make any other changes.
Content The structure of the DVD
Duration Length of the respective segment
Size Size of the respective segment
Video Quality Quality details – the higher the number, the better the
quality of the file recoded with Nero Recode 2.
Clicking on the '
The soundtracks and subtitles for the highlighted titles to be copied will be shown
in the audio track and subtitle area.
' icon opens the folder and displays the structure of the DVD.
Nero Recode Copying a DVD • 41
Page 42

4.3.2.1 Preview area
r
f
This field shows the content of a highlighted title. You can then decide for
yourself whether this title should be copied onto your DVD.
Ends playback
Starts playback
Slider to let you move directly to individual positions
Enlarges the preview area
Click on the preview window with the right-hand mouse button to open a pop-up
menu – this will let you select further options.
Audio If the imported DVD-Video has a number of audio tracks, the
desired audio track can be selected during the preview.
Clicking on 'Audio' will show the available tracks – the track
currently being used will be ticked. If you click on anothe
track, this will then be marked.
Subpicture If the imported DVD-Video has a number of subtitles, you
can choose the one you want during the preview. Clicking on
'Subpicture' will show the available subtitles – the ones
currently being used will be ticked. If you click on another set
of subtitles, these will also be marked.
Play Starts play
Stop Ends play
Maximize Window Expands the preview area in the Nero Recode 2 window
Full Screen Expands the preview area so that it takes up the whole o
the screen
Nero Recode Copying a DVD • 42
Page 43

4.3.2.2 Selecting the audio tracks
This field shows the soundtracks on the original DVD (for the highlighted section).
The audio tracks have been automatically selected by Nero Recode 2 in
accordance with the specified profile, in other words they are highlighted.
In the example shown here, there are three soundtracks on the original DVD:
One German track and two English ones. The German track is in 'Dolby Digital
5.1' format, while the English tracks are in 'Dolby Digital 5.1' and 'Dolby Digital 2
(stereo)' formats.
This means that the best sound quality is provided by tracks in 'Dolby Digital 5.1'
format and the poorest quality with the English 'Dolby Digital 2 (stereo)' format.
As a rule, the following applies: the more memory that is required, the better the
sound quality.
1. Start Nero Recode 2, import a DVD and highlight the video title you want.
2. If necessary, highlight the soundtracks to be copied by ticking the
corresponding check box.
3. If necessary, de-highlight the soundtracks to be copied, by clearing the
corresponding check box.
4.3.2.3 Selecting the subtitles
This field shows the subtitles on the highlighted section of the original DVD. The
subtitles will be automatically selected by Nero Recode 2 in accordance with
your chosen profile.
In this example there are four different subtitles on the original DVD; three
German and one English. As a rule the more memory that is available, the more
detailed the subtitles will be.
1. Start Nero Recode 2, import a DVD and highlight the title you want.
Nero Recode Copying a DVD • 43
Page 44

2. If necessary, highlight the soundtracks to be copied by ticking the
corresponding check box.
3. If necessary, de-highlight the subtitle to be copied by clearing the
corresponding check box.
4.3.2.4 Deleting titles
If there are some titles on the original DVD you do not want to copy, you can
delete them with Nero Recode 2.
1. Start Nero Recode 2 , import a DVD and highlight the title(s) you do not want
to copy.
2. Click on the 'Delete' button to start the dialog to decide what should appear on
the recoded DVD instead of the deleted title(s).
3. In order to maintain the menu structure of the recoded DVD and for the DVD
to remain compatible, something else must appear instead of the title that has
been deleted. Click on the dropdown button, select the desired method and
click on 'OK' to save your settings and to close the window.
Nero Recode Copying a DVD • 44
Page 45

Custom Picture: Instead of the title, a picture that you have chosen will be
displayed. You can select the picture you want by clicking on the 'Browse'
button. The picture will then appear in the preview area of this window. This
is also the standard setting.
Slide Show: Individual pictures from the deleted title will be shown instead
of the title itself. This means that the viewer will have an impression of the
content, despite the erasure. You can follow this 'slide show' in the preview
area.
Custom Color: A specified color will be shown instead of the title. Clicking
on the 'Select Color' button lets you choose the color to use. This will then
appear in the preview area of this window.
4. The deleted titles will be shown (they will be grayed). Repeat steps 2 and 3 for
all those titles that you would like to have removed.
If you would still like to copy a title that you have deleted then highlight it and
click on the 'Enable' button.
4.3.2.5 Additional settings
The chosen import profile will specify how the space available on the DVD is to
be used. However, you have some other opportunities at your disposal with Nero
Recode 2. The following example shows you how to modify the quality of the
individual sections of the DVD at a later stage.
1. Start Nero Recode 2 and import a DVD. In the following example, the space
available on the DVD is distributed as follows.
Menus: 220 MB - corresponding to 52.3 % of the original size
Main Movie: 2104 MB - corresponding to 59.8 % of the original size
Extras: 2104 MB - corresponding to 63.5 % of the original size
Nero Recode Copying a DVD • 45
Page 46

2. To improve the quality for a section move the appropriate slider until the
desired quality is reached. In the following example, the quality of the menus
is not to be changed during recoding - so the slider is set at 100 %.
Correspondingly, the quality of the 'Main Movie' and 'Extra' sections will be
slightly poorer if the 'Fit to Target' check box has been ticked.
3. If you would now like to improve the quality of the 'Main Movie' field even
more, but at the same time leave the quality of the 'Menus' field unchanged,
you can 'block' the section. Highlight the section you would like to leave
unchanged and click on the 'Lock Ratio' button.
A lock symbol represents the locked area.
4. Move the slider for the section whose quality is to be improved until the
desired quality is reached. The following diagram shows how the quality of the
'Main Movie' section is improved. This means that the quality of the 'Extras'
section will be reduced while the 'Menus' section remains unchanged due to
the lock.
Nero Recode Copying a DVD • 46
Page 47

4.3.2.6 Making copies that are larger than 4.7 GB
Normally, the data to be copied are recoded in such a way that they fit on
commercially available blanks. This is ensured by the fact that the 'Fit to Target'
check box is ticked (this is the standard setting). If you want to make larger
copies, you must first disable the 'Fit to Target' check box.
1. Start Nero Recode 2 and import a DVD. In the following example, the space
available on the DVD is distributed as follows.
Menus: 220 MB - corresponding to 52.3 % of the original size
Main Movie: 2104 MB - corresponding to 59.8 % of the original size
Extras: 2104 MB - corresponding to 63.5 % of the original size
2. Disable (clear) the 'Fit to Target' check box.
3. Move the slider until the desired quality has been reached. In the following
example, neither the Menus, Main Movie nor the Extras are to be compressed.
The total size of the copy is over 6.5 GB so this large amount of data can only
be stored on the hard drive.
Nero Recode Copying a DVD • 47
Page 48

5 Creating a new DVD
5.1 Creating a new DVD
You can create your own DVD from DVD-Video titles that are not copy-protected
as well as from data files. If your favorite films are on different DVDs, for instance,
you will be able to copy these titles onto a single DVD. In contrast to a 'normal'
DVD-Video disc containing 'Menus', 'Main Movie' and 'Extras', home-made DVDs
do not have this content. A separate section will tell you how to burn the newly
compiled DVD. Please read the 'Burning a disc' section.
This section does not describe in detail how to import a DVD and change the
structure of a DVD, as this process has already been described in 'Importing a
DVD'.
For reasons of clarity, this section only explains how you can create a new DVD
from existing titles. Additional options, such as shortening videos and merging
video titles are not explained here (see the following section for details).
Additional options such as shortening videos and merging video titles are not
explained here (see the following section for details).
1. Start Nero Recode 2 and click on 'Remake a DVD'.
Nero Recode Creating a new DVD • 48
Page 49

2. Insert the DVD containing the desired title(s).
3. Click on the 'Import Titles' button and import the chosen video title(s).
4. Repeat steps 2 and 3 until the compilation includes all the titles chosen for
your DVD.
Nero Recode Creating a new DVD • 49
Page 50

Please make sure that the level indicator is not in the red zone. If that is the case,
the compilation will not fit on the selected disc. In this event, tick the 'Fit to disc'
check box and/or reduce the number of titles until the compilation fits on the disc.
5. If you would like to rename the disc and/or title, click on 'My Disk' or 'Title' and
enter the name you would like to use.
6. For each title, specify the audio track or subtitle you would like to use.
7. Click on the 'Next' button as soon as you are satisfied with your compilation.
8. Place a disc in the DVD recorder, select the drive, recording speed and the
number of copies you want and then click on the 'Burn' button once you are
happy with the settings.
You can find more details on burning discs in 'Burning a disc'.
Nero Recode Creating a new DVD • 50
Page 51

5.2 Further options
The last section described how you can make and burn your own compilation.
For reasons of clarity, additional options such as shortening videos and merging
videos were not dealt with. These options are explained in the next two chapters.
5.2.1 Shortening videos
If you do not want to use the entire DVD-Video in your compilation, you can just
use a special passage from it by shortening it.
1. Start Nero Recode 2, select 'Remake a DVD' in the start window and then
import the desired DVD-Video titles.
2. Highlight the title that you would like to shorten and then click on the
'Start/End' button.
The window that opens will show the first and last frame of the imported DVD
title.
3. Specify which part of the DVD by defining the first and last frame.
Nero Recode Creating a new DVD • 51
Slider to mark the chosen frame manually
Button to jump back six seconds within the DVD
Button to jump back a few frames within the DVD
Button to jump forward a few frames within the DVD
Button to jump forward six seconds within the DVD
Page 52

If the DVD-Video is divided into sections, you can jump
directly to this frame by clicking on the dropdown button
and highlighting the chosen frame.
There are three information fields next to these 'active' fields.
This field shows you the frame with which the DVD-Video title begins.
This field shows you the frame with which the DVD-Video title ends.
This field shows you the overall length of the selected frame and its size.
4. Click on the 'OK' button to save the
now be back in the compilation window for your own DVDs.
5. Now you can continue to edit your own compilation.
5.2.2 Merging individual titles
If a self-made DVD compilation contains a number of titles, you can combine
these to one single title so they are seamlessly joined.
1. Start Nero Recode 2, select 'Remake a DVD' in the start window and then
import the desired DVD-Video titles.
2. Highlight the titles that you would like to merge and then click on the 'Merge
Titles' button.
The highlighted titles will now be put in a new folder called 'Merged Titles'.
entries and to close the window. You will
Nero Recode Creating a new DVD • 52
Page 53

3. You can change the name of the folder with the merged titles to avoid
confusion when there are a large number of titles. Highlight the chosen folder,
click in the 'Merged Titles' field and enter the chosen name.
4. Now you can continue to edit your own compilation.
5.2.3 Separating merged titles
If you have merged a number of titles on a single DVD compilation, you can
separate them before you start burning, should you wish to do so.
1. Highlight the folder with the merged titles and click on 'Separate'.
The merged titles will appear as individual ones again.
2. Now you can continue compiling your own DVD.
Nero Recode Creating a new DVD • 53
Page 54

6 Converting DVD-Videos to MPEG-4
files with Nero Digital
6.1 Converting DVD-Video titles into MPEG-4 format
You can use Nero Digital to convert an existing DVD-Video (one that is not copyprotected) into the MPEG-4 format. The files made by these means can be
played with Nero ShowTime and many other common programs. The special
feature of Nero Digital is that it is an audio and video Codec, conforming to the
MPEG-4 standard and making use of the new MP4 file format. A separate section
will tell you how to burn MPEG-4 files. Please read the 'Burning a disc' section.
For reasons of clarity, this section only explains how DVD-Videos are converted
into the MPEG-4 format. An extra section deals with additional options.
1. Start Nero Recode 2 and click on 'Copy DVD to Nero Digital'.
2. Insert the DVD that contains the desired title(s).
Nero Recode Converting DVD-Videos to MPEG-4 files with Nero Digital • 54
Page 55

3. Click on the 'Import Titles' button and import the chosen video title(s).
4. To ensure that the MPEG-4 file(s) can fit on the target disc, tick the 'Fit to
Target' check box, then click on the dropdown button and select the size of
disc you want to use.
5. Repeat steps 2 and 3 until all the titles that you would like converted to an
MPEG-4 file are included in your compilation.
6. If you would like to give the disc and/or video a new name, click on 'My Disk'
or 'Title' and enter the name you would like to use.
7. For each title, specify the audio track and subtitle you would like to have.
8. Click on the 'Next' button when you are satisfied with your compilation.
9. Place a disc in the recorder, select the drive, recording speed and the number
of copies that you want and then click on the 'Burn' button once you are happy
with the settings.
Nero Recode Converting DVD-Videos to MPEG-4 files with Nero Digital • 55
Page 56

You can find more detailed information on burning in the 'Burning a disc' section.
6.2 Additional conversion options
The last section described how DVD-Video titles can be converted and burned.
For reasons of clarity, additional options such as shortening videos and
configuring Nero Digital settings were not dealt with.
6.2.1 Selecting an audio track
In contrast to a DVD, an MPEG-4 file only has one soundtrack. This means that
before conversion, you must select one of the existing audio tracks and specify
the encoding format.
1. Click on the on the dropdown button on the 'Audio' tab and highlight the audio
track you would like.
2. You can enter something in this field if the selected audio track is of a quality
that permits different qualities of encoding. Specify the Nero Digital audio
format by clicking on the chosen option button.
Stereo: The audio track is encoded as two-channel stereo.
5.1 Channel Surround: The audio track is encoded as 5.1 Channel
Sound).
(Surround
Nero Recode Converting DVD-Videos to MPEG-4 files with Nero Digital • 56
Page 57

6.2.2 Selecting the subtitle
In contrast to a DVD, an MPEG-4 file created with Nero Recode 2 can only have
one subtitle. In other words, before conversion you must choose one of the
available subtitles – or do without subtitles altogether.
1. Click on the dropdown button on the 'Subpicture' tab and highlight the subtitle
you would like to have (or specify that no subtitles should be used following
conversion).
6.2.3 Information on the DVD-Video title
If you click on the 'Info' tab, you will be shown information on an imported DVDVideo title.
Nero Recode Converting DVD-Videos to MPEG-4 files with Nero Digital • 57
Page 58

6.3 Specifying the Nero Digital encoder settings
The Nero Digital encoder settings determine how the video and audio source is
converted. Clicking on the 'OK' button will save the changes and close the
window.
6.3.1 Specifying the video settings
Click on the 'Video' button to open the dialog window with the corresponding
tabs.
Nero Recode Converting DVD-Videos to MPEG-4 files with Nero Digital • 58
Page 59

Deinterlace
Nero Recode 2 recognizes automatically whether it is necessary to de-interlace
the DVD-Video title, and automatically enables the chosen option.
Enable De-Interlacing is used during conversion
Disable De-Interlacing is disabled
Crop
Nero Recode Converting DVD-Videos to MPEG-4 files with Nero Digital • 59
Page 60

If the DVD-Video has black edges at the side, these can be cut off (cropped)
r
r
automatically. This reduces the size of the video and improves its quality. Nero
Recode 2 recognizes these edges automatically and crops them (this is the
standard setting).
Automatic The black edges are automatically recognized and
cropped (standard setting).
Disabled The video is converted without cropping the edges.
Custom Crop Selecting this option will enable the four input boxes fo
cropping (upper, lower, right and left) as well as the
'Custom Crop Interface' button.
Custom Crop Interface The 'Custom Crop Interface' button is only enabled if the
'Custom Crop' option has been selected. After you have
clicked on the button, a window will open and show an
image from the video. You can specify the four cropping
possibilities (upper, lower, right and left) manually using
the mouse. Clicking on the 'OK' button will save the
changes and close the window.
Resize
Selecting a Nero Digital profile for converting the DVD-Video into the MPEG-4
format (see the 'Selecting a Nero Digital profile') will define the size of the image
to be created.
Automatic The image size is automatically fitted to the Nero Digital
profile so that the image size created fits the output medium
(standard setting).
Disabled The image size is not changed, but left as it is in the original.
Custom Resize Selecting this option will enable the two input boxes fo
resizing the width and height. The values to be entered must
be divisible by 16 and lie between 16 and 720 pixels (width)
and between 16 und 576 pixels (height).
Nero Recode Converting DVD-Videos to MPEG-4 files with Nero Digital • 60
Page 61

6.3.2 Specifying the audio settings
Clicking on the 'Audio' button opens a dialog window.
Audio Channels
Clicking on the dropdown button will show the audio channels possible in the
selected Nero Digital profile for the conversion of DVD-Videos into the MPEG-4
format (see the section on 'Selecting a Nero Digital profile'). With a 'High
Definition TV' profile, you can choose between 'Stereo' and '5.1 Channel
Surround Sound) while only 'Stereo' can be selected with a 'Portable' profile.
Nero Digital Audio Profile
Depending on the Nero Digital profile chosen, 'audio profile' defines the audio
profile used during data conversion.
Automatic settings The audio profile is automatically adjusted to the Nero
Digital profile so that the audio track is suited as well as
possible to the output medium (standard setting).
Custom profile Selecting this option enable you to select from the available
audio profiles. Clicking on the dropdown button will show the
audio profiles available with the chosen Nero Digital profile;
to select, highlight the desired profile. In addition, you can
also modify the quality of the audio tracks by changing the
bit rate. Select it by clicking on the dropdown button and
marking the desired bit rate.
Nero Recode Converting DVD-Videos to MPEG-4 files with Nero Digital • 61
Page 62

7 Burning a disc
7.1 Burning a disc
Depending on what you are using Nero Recode 2 for, the aim is always the
same – burning – either to disc or onto the hard drive.
The burn dialog will vary slightly, depending on the task. If you are converting
DVD-Video titles with Nero Digital to create an MPEG-4 file, Nero Digital settings
are available in addition to the burn options.
Depending on the performance of the computer, it may even be possible to view
the film in real time while burning the disc. If you are burning a DVD-Video title
this may be even possible to do with sound as well (though not when you are
burning an MPEG-4 file).
7.2 Burn options
You can make the final settings before you burn the disc.
Nero Recode Burning a disc • 62
Page 63

1. Specify the target for your compilation. You can either burn with a CD/DVD
recorder, save your compilation on the hard drive or create an image file.
2. Specify the directory where you wish to store the temporary files that may be
created before burning by clicking on the 'Browse' button. In the window that
now opens look for the chosen folder or create a new one. Click on the 'OK'
button to save the
selection and to close the window.
The temporary files will be automatically deleted after the burning has been
completed. If you have specified at first that the compilation is to be stored on
the hard drive, the files created will also be stored in the directory stated and
(understandably enough) not automatically deleted.
3. Select the writing speed by clicking on the dropdown button and highlighting
the desired speed. You can only select the writing speed if the target is a
CD/DVD recorder.
4. Specify the number of copies to be burned by entering the value you want.
You can only select the number of copies if the target is a CD/DVD recorder.
Nero Recode Burning a disc • 63
Page 64

5. If you are copying a DVD or creating your own DVD, specify whether the DVD
f
structure should first be copied onto the hard drive before starting burning.
Enable or disable (standard setting) the appropriate check box. If the check
box has been disabled (cleared) it will take longer to burn a copy than when
enabled (ticked) as the DVD structure first has to be created. This method is
quicker if a number of copies are to be made because the file itself is only
recoded once.
Clicking on the 'More' button will display the additional option.
Tick the appropriate check box if you want the computer to be switched of
automatically once burning has been completed.
If you would like to change the priority that Nero Recode 2 has (in comparison
to other programs that are running at the same time) then click on the
dropdown button and select another option.
6. Once you have made all the settings there is nothing more to stop you burning
a disc with Nero Recode 2. Click on the 'Burn' button to start the process.
Nero Recode Burning a disc • 64
Page 65

7. You can trace the progress of the copying procedure in the Nero Recode 2
information field. Once the DVD has been burned, it will be ejected and a
window will appear to indicate that the burning process is complete. If you
want, you can also store a report about the burning process. Click on the
selected button to close the window.
8. Click on 'Next', to finish the process.
Nero Recode Burning a disc • 65
Page 66

9. Decide what you want to do next by clicking on the appropriate section of the
window.
Burn the same project again.
Start a new project.
Open Nero Cover Designer to create a cover and/or label for the new
Disc.
Exit Nero Recode 2.
Nero Recode Burning a disc • 66
Page 67

7.3 Nero Digital settings
7.3.1 Nero Digital settings
Before burning MPEG-4 files, you can specify the settings to be used by Nero
Digital during data conversion. There is also an 'Expert mode' for those users
who have a lot of experience in converting video and audio files. This permits
more settings. The settings for this advance mode are described in the next
section.
In the example shown, the 'High Definition TV' profile is used. The profile
displayed is identical with the Nero Digital profile selected, which determines the
target for which the MPEG-4 file is created.
Nero Recode Burning a disc • 67
Page 68

7.3.2 Normal mode
1. Select one of the available profiles by clicking on a dropdown button and
highlighting the desired profile.
As a default, only one profile is available. You can create a new profile by
clicking on 'New'. In the window that opens, assign a name to the new profile
and click on the 'OK' button to save the changes and close the window.
Please note that the new profile will be based on one that already exists and
that there are a number of preset basic variables so that no MPEG-4 file will
be produced that is unsuitable for the target.
2. Select the method to be used to encode the MPEG-4 file, clicking on the
dropdown button and highlighting the desired option.
3. Once you are satisfied, click on 'Burn Options' to specify the burn settings.
Nero Recode Burning a disc • 68
Page 69

7.3.3 Expert mode
Nero Digital's advanced settings provide a number of additional options for
experienced users.
Please only alter the settings if you are experienced in encoding.
1. Select one of the available profiles by clicking on a dropdown button and
highlighting the desired profile.
Nero Recode Burning a disc • 69
Page 70

2. Click on 'Profile' if you want to change the name of the profile or its
description.
3. Click on 'Codec' if you want to change the priority of the Nero Digital encoder
(by clicking on the dropdown button and highlighting the desired option).
Nero Recode Burning a disc • 70
Page 71

4. Click on 'Quality / Speed' if you want to alter the encoding quality. In this field,
please only make changes in 'Performance / Quality' by clicking on the
dropdown button and highlighting the desired option. In general, if you want to
modify the performance: the higher the quality you require, the more time the
conversion process will need.
5. Please do not make any changes in this section.
Nero Recode Burning a disc • 71
Page 72

6. Click on 'Keyframes' if you want to alter the keyframe interval and enter the
desired minimum and maximum values.
7. Please do not make any changes in this section.
8. Once you are satisfied with the settings, click on 'Burn Options' to specify the
burn settings.
Nero Recode Burning a disc • 72
Page 73

8 Keyboard shortcuts
8.1 Keyboard shortcuts
As well as operating Nero Recode 2 with a mouse, you can also naturally
enough use hotkeys.
As is usual with Windows programs, you can navigate forwards within the
elements using the 'Tab' key and navigate back with the 'Shift' + 'Tab'
combination. Below you can see a range of hotkey combinations specifically for
Nero Recode 2.
The 'More' section
In the 'More' section, the following commands can be called up by hotkeys.
Erase disc: Control + Shift + e
Disc info Control + Shift + i
Nero Cover Designer Control + Shift + c
Configure Control + Shift + p
DVD-Video files / DVD Data files
The input fields for DVD-Video files and DVD-Data files are called up by the
following key combinations.
DVD-Video files Control + Shift + v
DVD Ddata files Control + Shift + d
DVD contents
Within the contents section of a DVD, the 'Tab' key jumps to the video quality
slider.
Specify first / last frame
If you click on the 'Start/End' button a window will opened in which the video can
be shortened, by specifying
buttons for controlling action within the frame, clicking on the space bar will
continue winding or rewinding as long as this key is kept pressed.
the first and last frame. After clicking on the four
Nero Recode Keyboard shortcuts • 73
Page 74

9 Service
9.1 FAQs
9.1.1 The copied DVD does not contain the audio tracks I selected.
What did I do wrong?
Nero Recode 2 can only copy audio tracks that are present on the original DVD.
If the soundtracks you selected in your import profile are not present on the DVD,
they will not have been available on the original, either. Please check the 'Audio'
tab to see which soundtracks exist.
9.1.2 The copied DVD does not contain the subtitles I selected. What
did I do wrong?
Nero Recode 2 can only copy those subtitles that are present on the original
DVD. If the subtitles that you selected in your import profile are not present on the
DVD, they will not have been present on the original, either. Please check the
'Subpicture' tab to see which subtitles exist.
9.1.3 The DVD I made does have a DTS soundtrack but I cannot hear
any sound. What went wrong during recording?
In order to hear DVDs that have a DTS soundtrack you will need a suitable
decoder that can convert the sounds. This decoder may either be integrated in a
DVD player or in a receiver. If you cannot hear the DTS soundtrack it is likely that
the devices you are using do not support this format.
9.1.4 It takes different lengths of time to recode DVDs, depending on
the DVD involved. Why is that?
The more a DVD is recoded before burning, the longer Nero Recode 2 needs to
carry out the process.
9.1.5 I have inserted a DVD and want to copy it but Nero Recode 2
does not recognize it. What am I doing wrong?
Nero Recode 2 only copies and recodes DVDs that are not copy-protected.
Copy-protected DVDs will not be read by Nero Recode 2. You probably inserted
a DVD that was copy-protected.
Nero Recode Service • 74
Page 75

9.1.6 I created an MPEG-4 file but I only have one soundtrack. What
went wrong?
Unlike DVD-Video titles, which may have a number of soundtracks (and subtitles)
MPEG-4 files made with Nero Recode 2 only have one soundtrack (and one set
of subtitles).
9.1.7 I would like to obtain a newer version of Nero Recode 2. Where
can I find out if an update is available and download it?
You can find all the updates and test versions of other Ahead products at
http://www.nero.com. Nero Recode 2 forms part of NeroVision Express 2 and
updates are only possible for the entire product package – in other words, an
individual update is not possible.
9.1.8 Where can I get help with technical problems?
In the event of any technical problem we recommend contacting our support
system at
problem there, you can contact our support service by fax (+49 7248 911 888), email (techsupport@nero.com) or via our hotline (0190 871086; charge: € 1.86 per
minute can be reached from within Germany only).
http://englishsupport.nero.com/. If you do not find an answer to your
Nero Recode Service • 75
Page 76

9.2 Contact
Nero Recode 2 is an Ahead Software AG product
Ahead Software AG
Im Stoeckmaedle 18
76307 Karlsbad
Germany
Web:
Help: http://englishsupport.nero.com/
Mail: techsupport@nero.com
Hotline: 0190 871086 (1,86€/min – from Germany)
Fax: +49 7248 911 888
Copyright © 2003 Ahead Software AG. All rights reserved.
http://www.nero.com
Nero Recode Service • 76
Page 77

F
10 Index
A
Adding data 12
Advanced display 19
B
Burning a disc 62, 64
Burn options 62
C
Changing the structure of a DVD 41
Computer shut down 64
Configuring Nero Recode 2 21
Contact information 76
Copying a DVD 37
FAQs 74
Fit to Target 10, 47, 55
H
Hotline 75
I
Import DVD 10
Import profile
Audio 30
Menu quality 29
Profile name 28
Subtitles 31
Video 29
Video quality 29
Importing a DVD 38
Importing titles 49, 55
Installation 7
K
Without changing the DVD structure 37
Copying a DVD (and changing the DVD
structure) 38
Creating a new DVD 48
Creating an import profile 19, 27
D
Deleting an import profile 35
Deleting titles 44
E
Editing an import profile 34
Erasing the contents of a disc 24
Full erasure 25
Quick erasure 25
Keyboard shortcuts 73
L
Level indicator 11
M
Making copies that are larger than 4.7 GB 47
Merging individual video titles 52
N
Nero Cover Designer 26, 66
Nero Digital encoder 58
Audio settings 61
Video settings 58
Nero Digital Expert mode 69
Nero Digital normal mode 68
Nero Digital settings 67
Nero Recode Index • 77
Page 78

O
Obtaining information on the disc 25
P
Preview 42
Program start 7
Q
Quality of the menus 29
Quality of the video 29
S
Selecting audio tracks 43
Selecting the Nero Digital profile 19
Selecting the source 39
Selecting the subtitles 43
Separating merged titles 53
Setting the burning priority 20
Shortening videos 51
Shutting down the computer once burning
has been completed 20
System requirements 6
Nero Recode Index • 78
 Loading...