

Page 1
Quickstart
NeroROBO
Ahead Software AG
Page 2

Information concerning copyright and brand names
NeroROBO Quickstart and all its contents are protected by copyright and remain
the property of Ahead Software AG. All rights reserved. This Users' Handbook
contains matter that is protected by international copyright laws. No part of this
handbook may be reproduced or transmitted in any shape or form, without the
express written permission of Ahead Software AG.
All brand names and brands are the property of their respective owners.
Ahead Software AG does not accept any liability exceeding the warranty laws.
Ahead Software AG does not bear responsibility for the accuracy of the content
of NeroROBO Quickstart. The content of NeroROBO Quickstart and its
accompanying software may be altered without notice.
All brands are for information purposes only.
Copyright © 2003 Ahead Software AG
REV 1.01
Page 3

Table of contents
1 Desktop duplication system and Nero .......................................... 4
2 Installing and configuring the desktop duplication system ........ 5
2.1 System requirements..................................................................... 5
2.2 Installation ...................................................................................... 6
2.3 Configuration.................................................................................. 7
3 Erasing multiple CD-RW media simultaneously......................... 12
4 Burning multiple media simultaneously...................................... 15
5 Expert settings .............................................................................. 19
5.1 Written and finalized media......................................................... 19
5.2 Non-finalized media ..................................................................... 19
5.3 Custom text fields ........................................................................ 19
5.4 Aborting robot activity................................................................. 22
5.5 Errors in robot movements ......................................................... 22
6 Centering CD labels ...................................................................... 23
NeroROBO Table of contents • 3
Page 4
1 Desktop duplication system and Nero
Nero's capabilities can be extended by means of an additional NeroROBO.dll
driver, making it possible to burn and print labels for several CDs simultaneously
using a desktop duplication system (presuming a printer is connected). This
type of system is usually equipped with a robot arm and up to 4 recorders and is
capable of dealing independently with orders to copy up to 100 CDs in one run.
The latest version of NeroROBO currently supports systems with up to 2
recorders. NeroROBO is the optimum solution for many companies whose PCs
are connected to a network, especially when working together with NeroNET, the
server/client version of Nero.
NeroROBO is not a stand-alone program capable of burning or guiding robots. It
can only work in conjunction with Nero or NeroNET and a connected desktop
duplication system.
The following is a step by step description of the settings necessary to configure
a desktop duplication system to burn multiple CDs and, if necessary, to print
labels for them. In the course of this description, the expression robot is
sometimes used as a synonym for desktop duplication system.
NeroROBO Desktop duplication system and Nero • 4
Page 5

2 Installing and configuring the desktop
duplication system
2.1 System requirements
NeroROBO can only work in conjunction with a functioning version of Nero or
NeroNET, which means that the system requirements for NeroROBO are
identical with those for the other Nero programs.
Operating system
Windows 95
Windows 98/SE
Windows ME
Windows NT 4.0 (Service Pack 6)
Windows 2000 (Service Pack 2 or higher)
Windows XP
Hardware
Your PC should be equipped with a processor with a minimum speed of 500
MHz. Information concerning the system configuration can be found in the
handbook delivered with your PC.
Your system should also be equipped with a minimum of 64 MB RAM and
generally speaking, the more RAM there is available the better.
The access time to the hard disk should be less than 19 milliseconds.
A graphic card with 8 MB or more (for video) is necessary.
For best results we recommend a monitor resolution of 1024x768 or higher.
A minimum of 700 MB free hard disk space is recommended in order to save
drive images, but generally speaking, the more free hard disk space available
the better.
NeroROBO Installing and configuring the desktop duplication system • 5
Page 6
2.2 Installation
Installing NeroROBO is very simple and done by means of an executable file
named 'NeroRobo.exe'.
1. Please make sure your Nero program is closed before continuing.
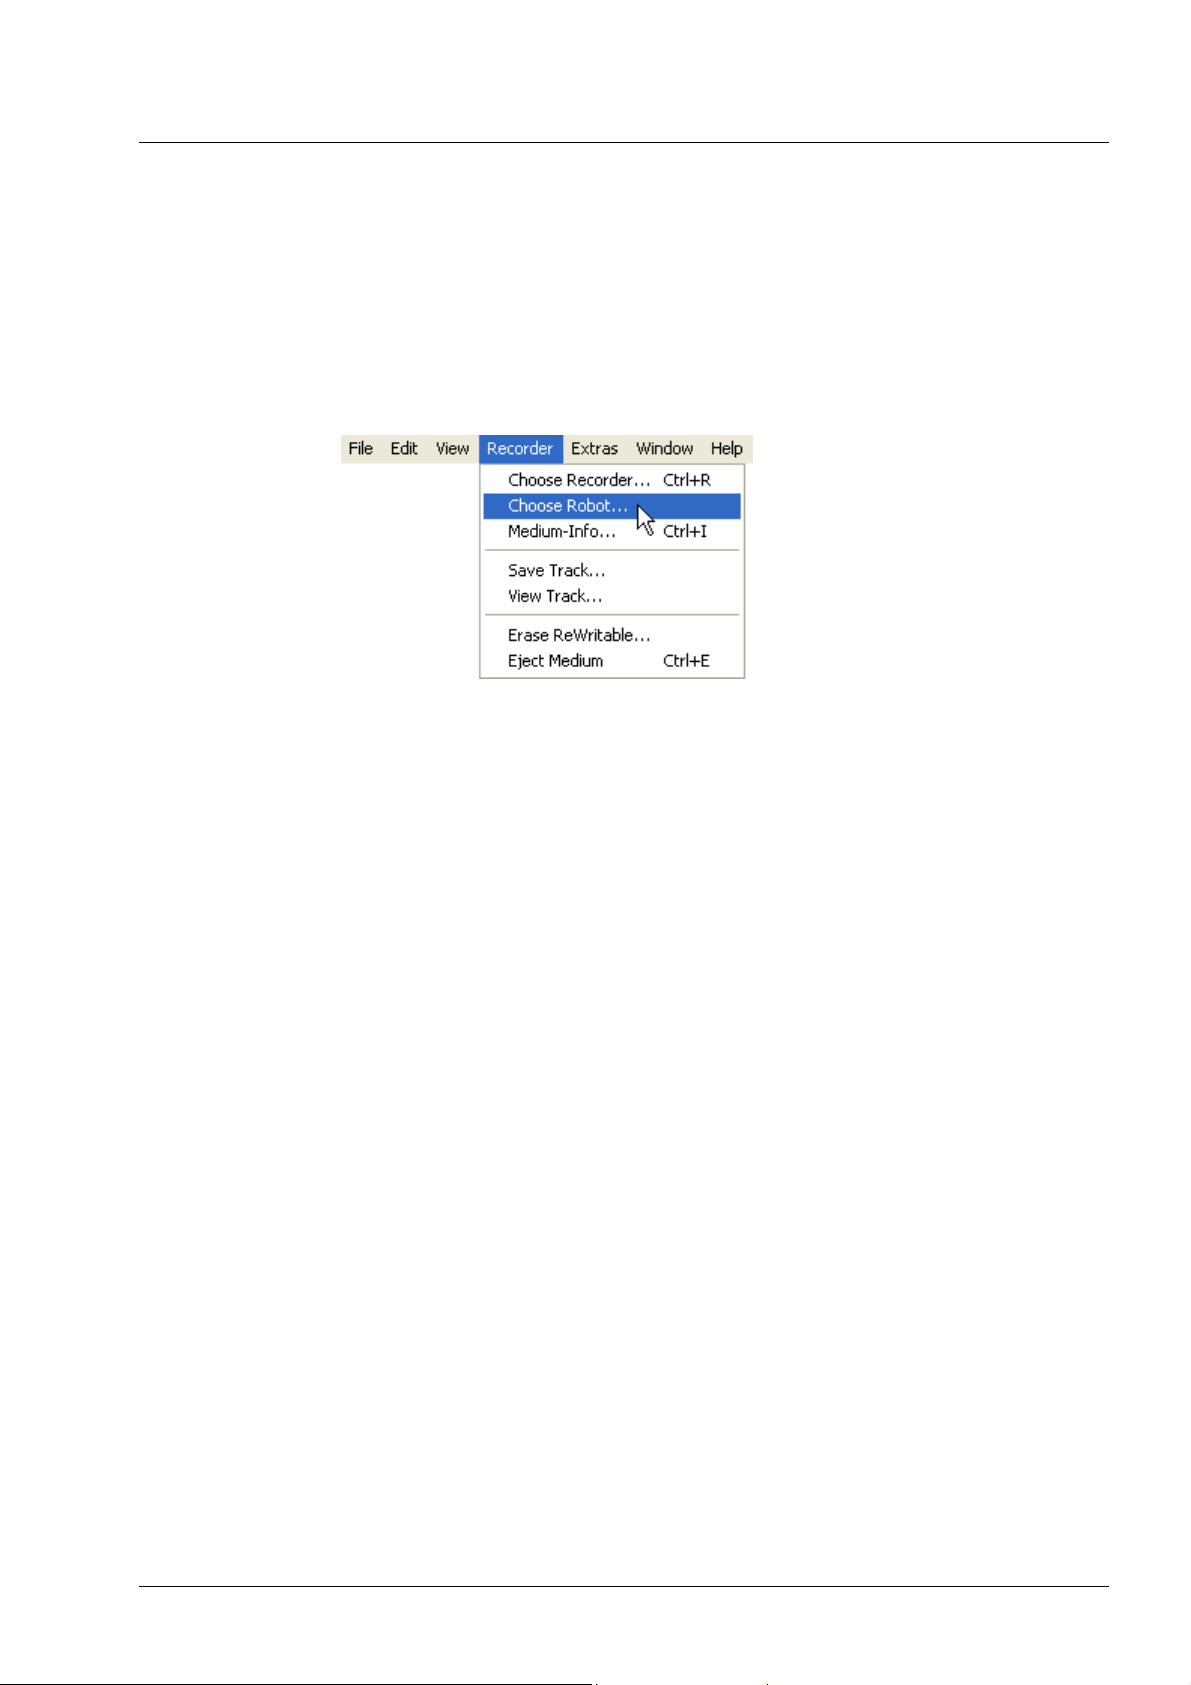
2. Now double click on the 'NeroRobo.exe' file. The NeroROBO drivers will then
be installed and after starting Nero, NeroROBO will now be available. In the
'Recorder' menu you will now find the 'Choose Robot' command.
NeroROBO Installing and configuring the desktop duplication system • 6
Page 7
2.3 Configuration
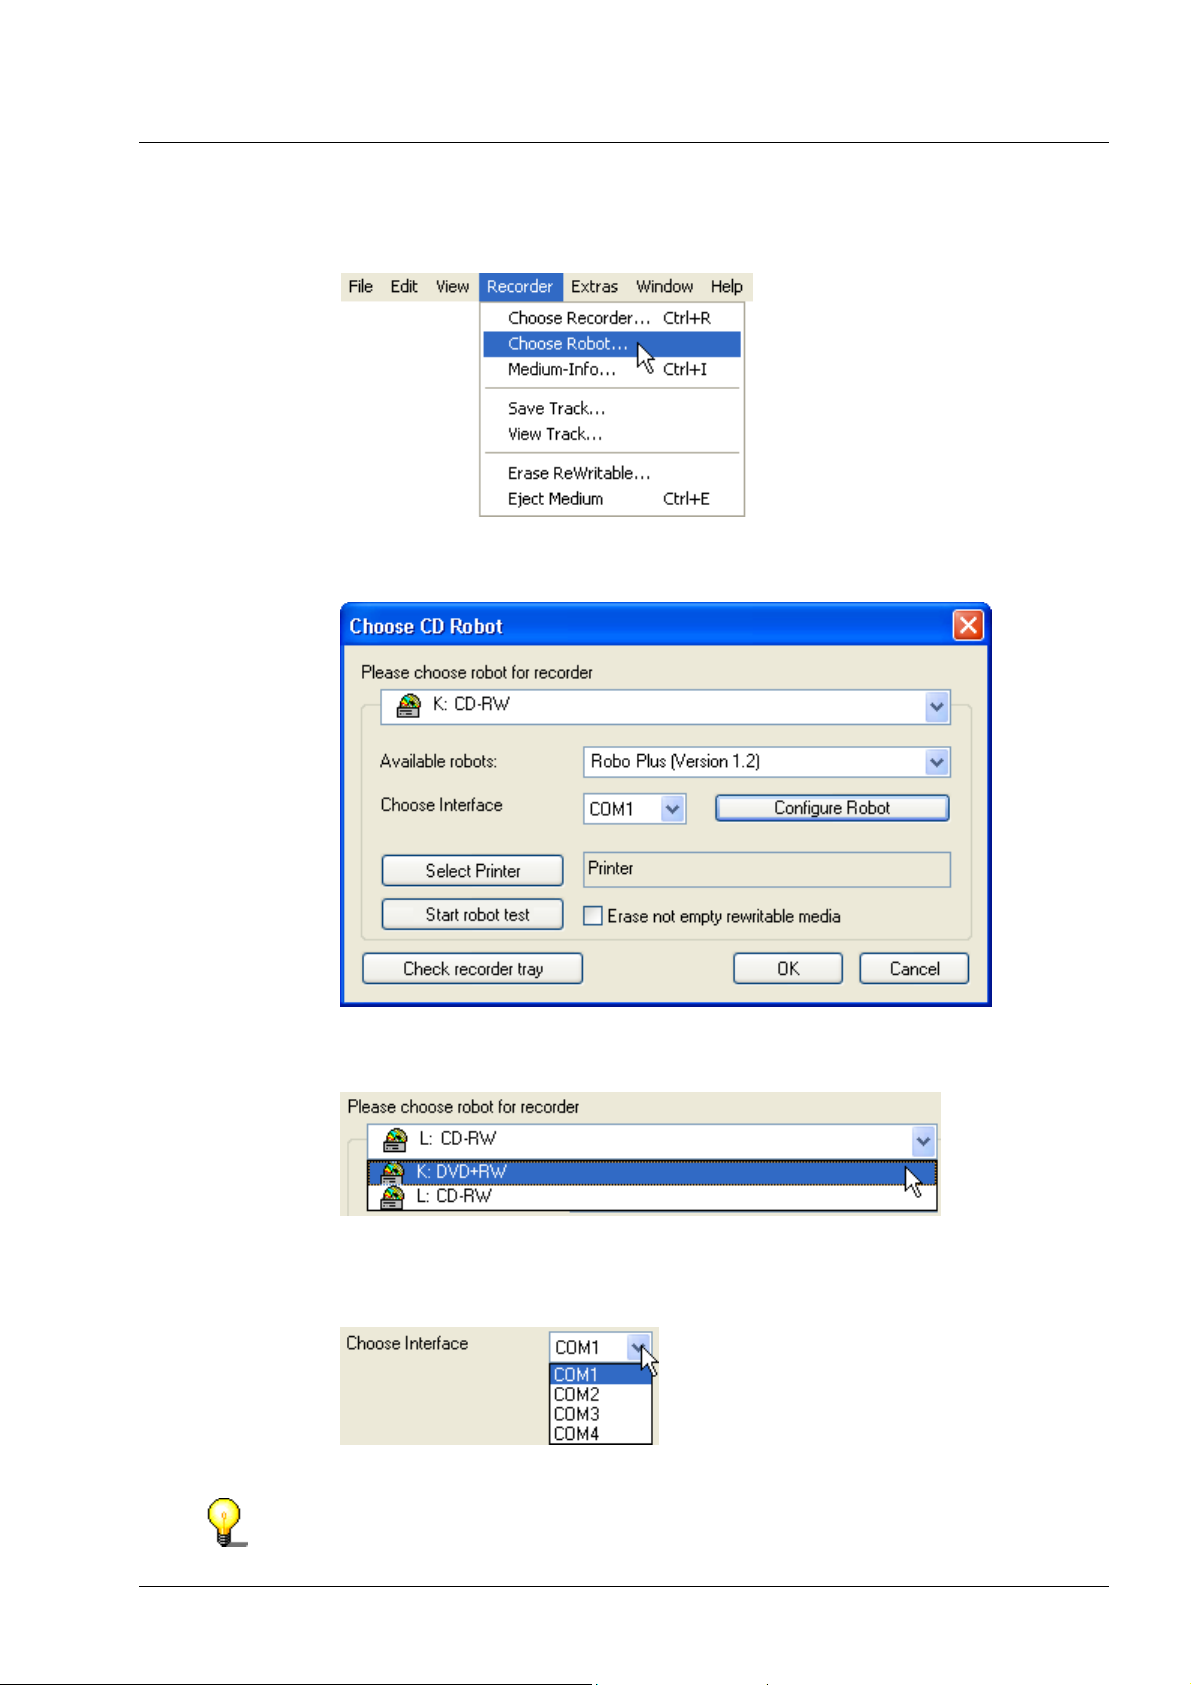
1. Select 'Recorder' from the menu bar and then 'Choose Robot' from the drop-
down menu.
The 'Choose CD Robot' window will now open and the configuration can
begin.
2. Now click on 'Please choose robot for recorder' with the drop-down button
and mark the recorder that is installed in your desktop duplication system.
3. Then go to 'Choose Interface' and select the computer interface to which the
robot is connected. The program will then proceed to test the interface and the
respective driver and the connected robot printer will then be selected.
If you wish to change these settings or if the robot has not been recognized,
please proceed as described in points 4 and 6.
NeroROBO Installing and configuring the desktop duplication system • 7
Page 8
f
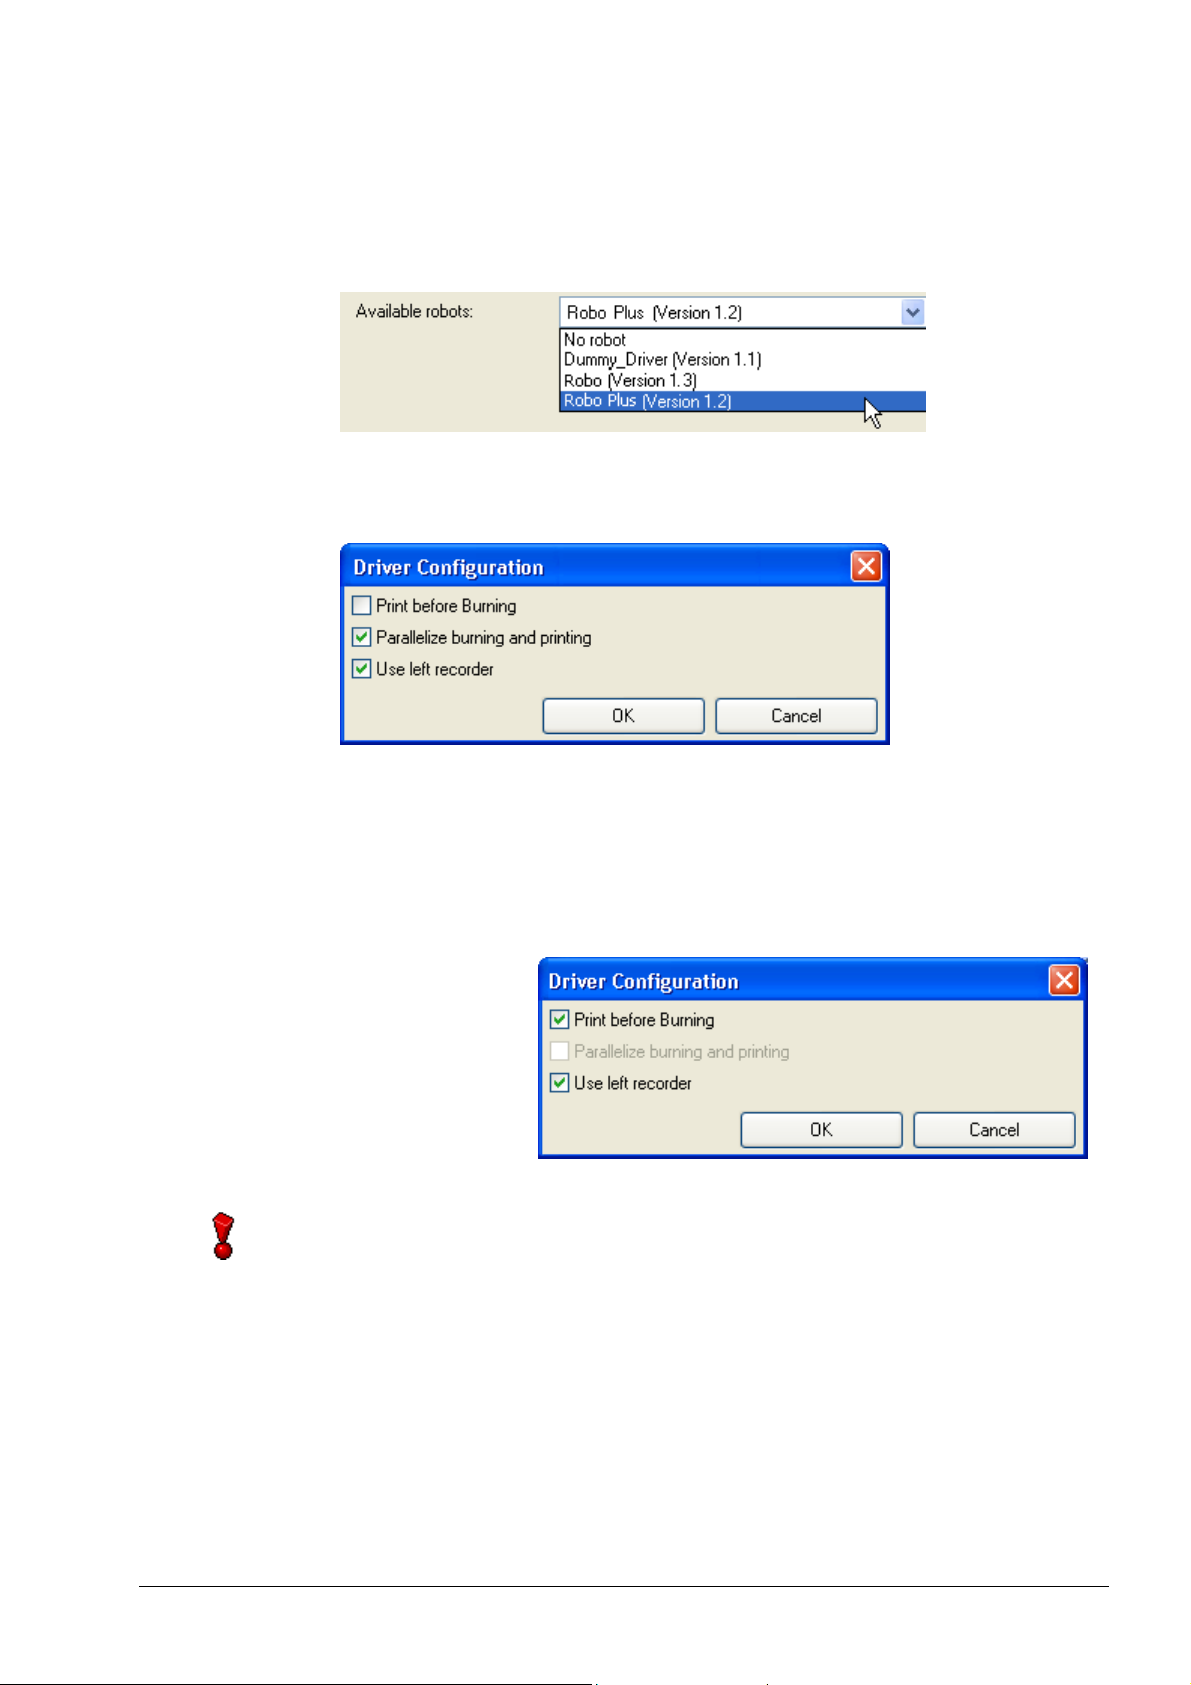
4. If NeroROBO did not recognize the robot or if you wish to select a robot other
than the one found, please click on the drop-down button in the 'Available
robots' section and mark your desired robot driver from the list of those
available to Nero.
5. If the selected robot is configurable, you may then select additional settings.
Click on the 'Configure Robot' button and a dialog window containing three
checkboxes will appear.
Print before
burning:
If this option has been selected, the blank CDs will be
printed prior to burning. Simultaneous burning and
printing is not possible in this case because all of the
blank CDs must be printed first before they can be written
simultaneously. For this reason, the 'Parallelize burning
and printing' box is grayed out and therefore not
available as an option.
If the robot has to serve several recorders simultaneously, the print option (or the
option to allow printing and recording at the same time) must be activated for all
recorders configured in order to realize these options. If this is not the case, i.e. i
this option has not been selected for any one of the configured recorders, this
setting will be used for all other recorders.
Parallelize burning
and printing
If this option has been selected, the blank CDs will be
printed and written simultaneously. This means that
orders can be carried out more quickly.
NeroROBO Installing and configuring the desktop duplication system • 8
Page 9

Use left recorder
This checkbox should only be used when the robot is
equipped with two recorders.
First, select the position of the desired recorder. To select
the left recorder, check the 'Use left recorder' box.
To select the right-hand recorder, simply leave the box
unchecked. To verify the recorder position, click on the
'Check recorder tray' button. The drawer of the selected
recorder will now open for a short time and then close
again.
If the robot is controlling recorders with various names,
the positions of each of the recorders will also be stored.
If these positions are changed at any time, a warning will
appear that you will have to acknowledge before the new
configuration data can be stored.
If recorders of the same name are connected to the same FireWire (IEEE 1394)
interface, they may have to be reconfigured after Windows has been restarted
because Windows does not always allocate the recorders the same port ID.
NeroROBO Installing and configuring the desktop duplication system • 9
Page 10

6. If you wish to burn and also print a label for the blank CD, you need to select
the required printer first. To do this, click on the 'Select Printer' button to start
the selection dialog.
The self-opening dialog window will now display the standard printer settings
for your computer. Now click on the drop-down button next to 'Name' and
select from the list of printers connected to your computer the one that is
connected to the robot.
7. Now click on the 'Start robot test' button to verify the robot settings. The robot
will now select a medium from the 'In' pile and, depending on the current
settings, pass each of the stations (recorder, printer) and place it in the 'Out'
pile.
8. If you now wish to burn several rewritable but not empty CDs, the robot can
now completely erase the contents of these media before rewriting them with
new data. If this is the case, then simply check the 'Erase not empty
rewritable media' box.
Even if several recorders are installed, you can also command the robot to erase
the contents of multiples of CD-RW media simultaneously. To find out how this
works, go to the 'Erasing multiple CD-RW media simultaneously' section.
NeroROBO Installing and configuring the desktop duplication system • 10
Page 11

9. To check the recorder, simply click on the 'Check recorder tray' button. The
drawer of the selected recorder will now open for a short time and then close
again.
This check not only serves to ascertain whether a blank CD is in the drive or not,
but also tests the recorder's correct connection and response.
10. Repeat the configuration steps 2 to 8 for all recorders you wish to use and
then click on 'OK' to accept the settings and close the dialog window.
NeroROBO Installing and configuring the desktop duplication system • 11
Page 12

3 Erasing multiple CD-RW media
simultaneously
A desktop duplication system allows you to erase several CD-RW media
simultaneously. Simply take the following steps:
1. Select 'Recorder' from the menu bar and then the 'Erase ReWritable'
command.
The Erase CD-RW window will then open.
2. Then click on the drop-down button and select the desired erasing method.
NeroROBO Erasing multiple CD-RW media simultaneously • 12
Page 13
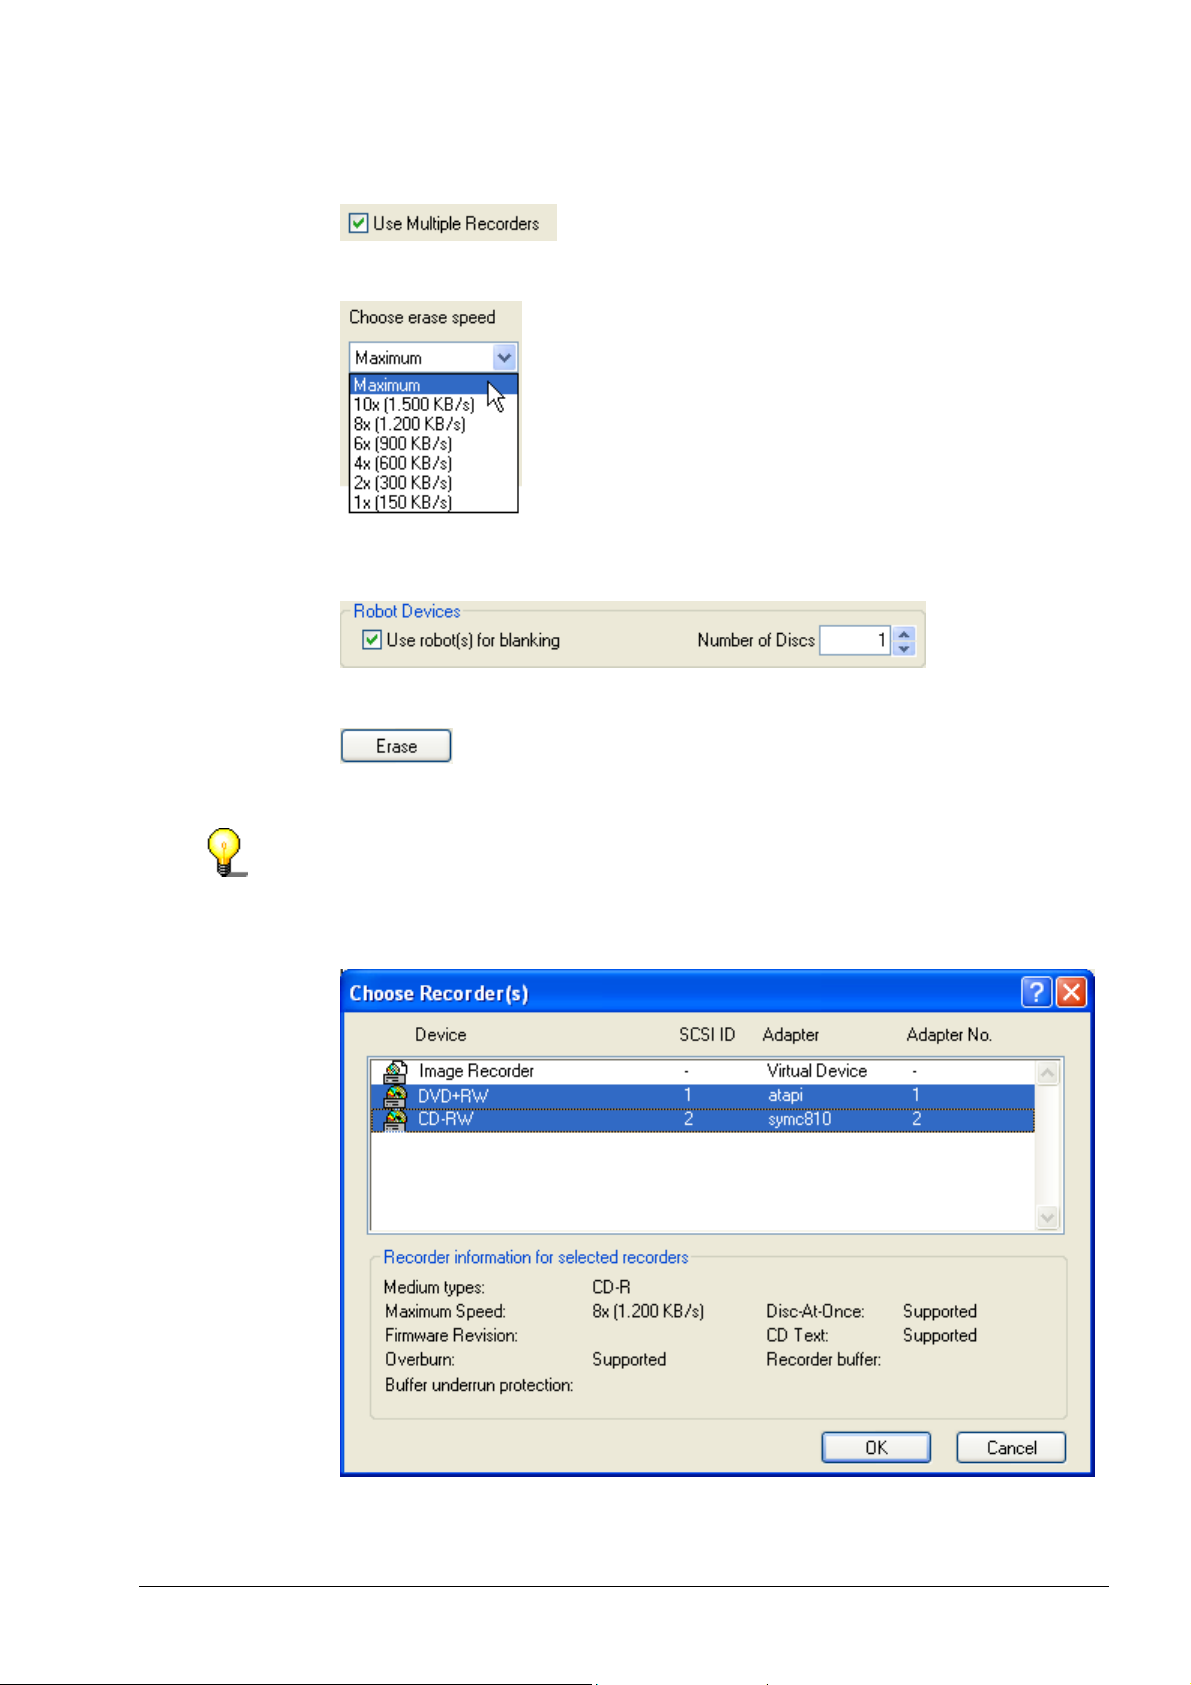
3. If the robot is controlling several recorders that you wish to use, then check
the 'Use Multiple Recorders' box.
4. Now click on the drop-down button and mark the desired erasing speed.
5. Now go to 'Robot Devices', check the 'Use robot(s) for blanking' box and
enter the desired number of CDs to be erased in the 'Number of Discs' field.
6. Now click on the 'Erase' button to begin erasing.
If you have selected the 'Use Multiple Recorders' option, you can now select
the respective recorders in the self-opening dialog window. Now click on the OK
button to begin erasing.
NeroROBO Erasing multiple CD-RW media simultaneously • 13
Page 14

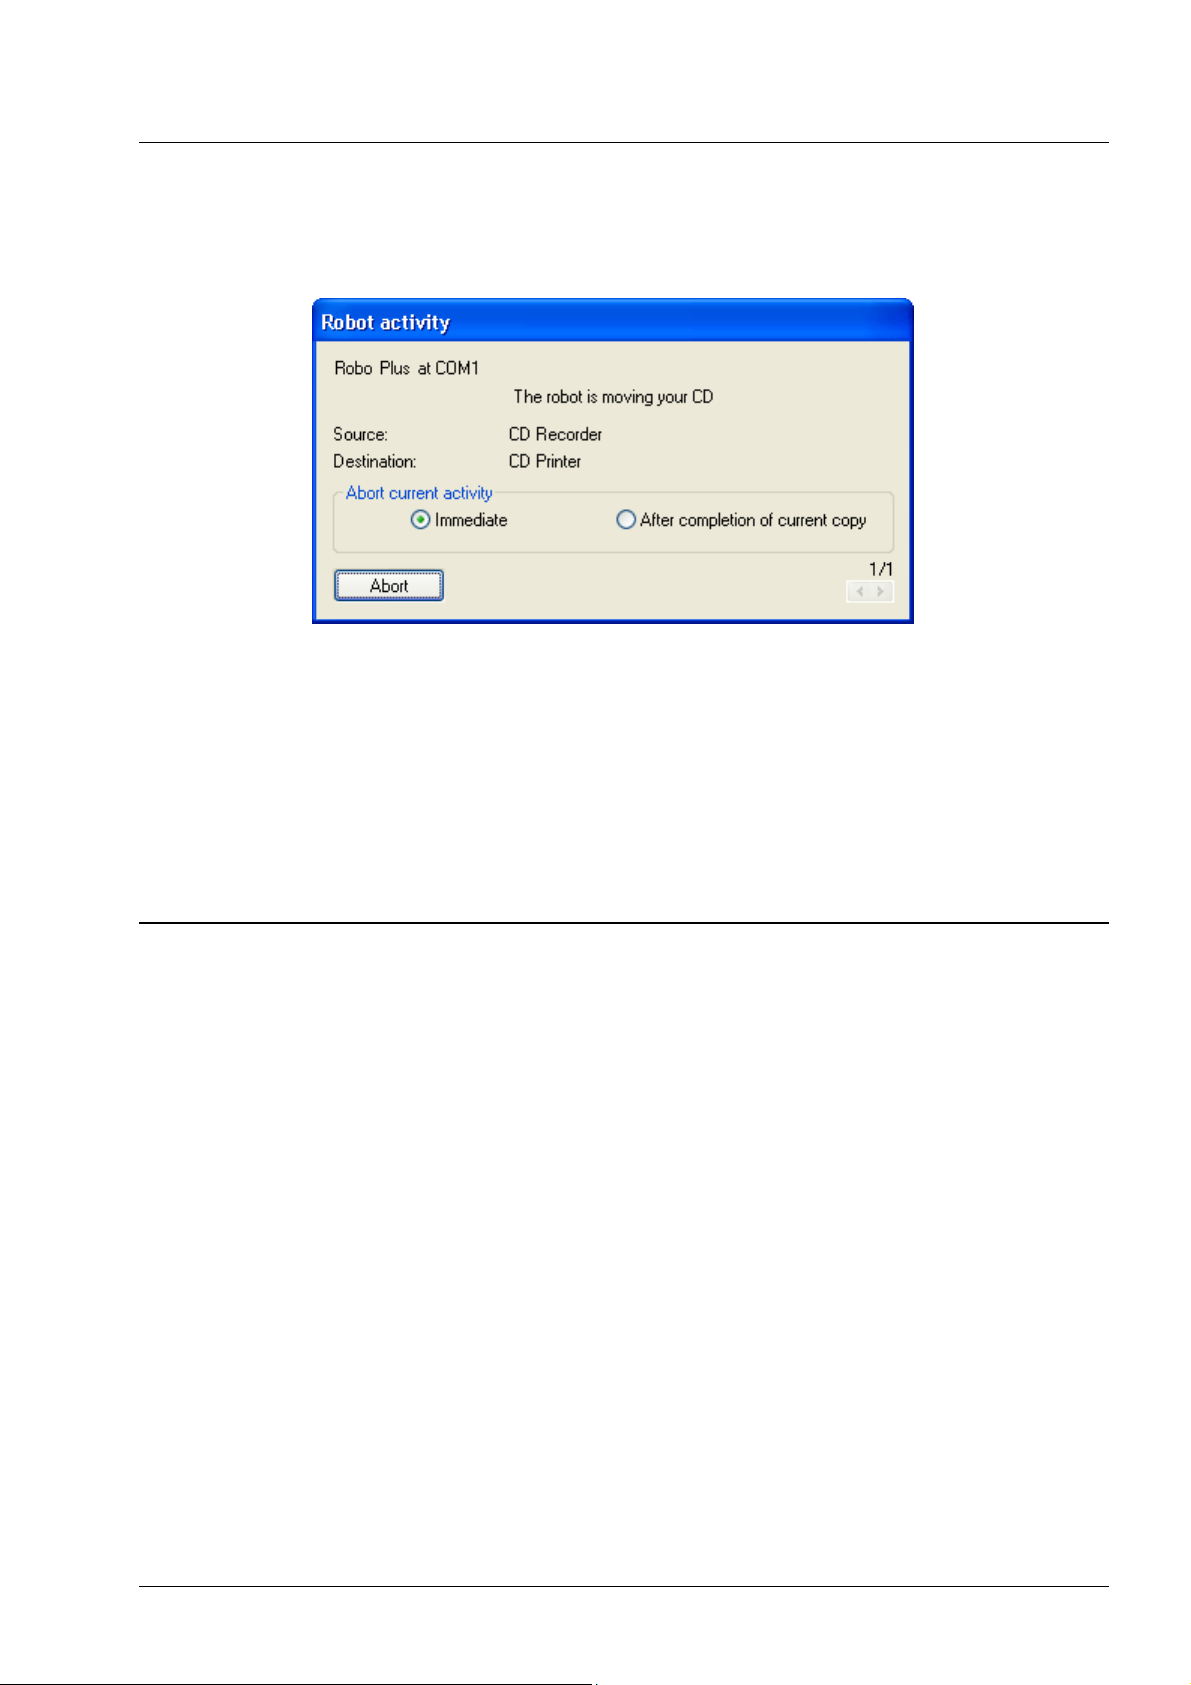
7. The robot will now start moving and the 'Robot activity' window will appear.
This window makes it possible for you to monitor current robot activity and to
abort it if necessary. For performing normal tasks no further steps are
necessary and NeroROBO will complete the remaining work on its own.
There are two 'Abort' options available:
Immediate
After completion
of current copy
Both the task being performed and the complete order will
be aborted immediately and any transported medium will
be thrown into the trash.
The copy currently being written will be completed and
then the order will be aborted.
NeroROBO Erasing multiple CD-RW media simultaneously • 14
Page 15

4 Burning multiple media simultaneously
Once all the necessary robot settings have been carried out and the compilation
has been completed, you may now start your project.
1. Either click on the 'Write' button
'Write CD' command. The 'Write CD' dialog window will now open. As a Nero
user you will probably be familiar with this dialog window, but when using the
desktop duplication system you will need to perform a number of additional
settings.
or go to the 'File' menu and select the
2. If you have already created a label, e.g. with Nero Cover Designer, you can
simply skip this step. The same thing applies if the burned CD does not
require a label. If however, you do wish to label the CD and would also like to
have it automatically printed by the robot, you can use the Cover Editor
integrated in Nero to create the new label. If you have already created a label
with the Nero Cover Designer, you may of course use this. Just click on the
Misc register tab to mark the option to print the label.
NeroROBO Burning multiple media simultaneously • 15
Page 16

3. Check the 'Print label' box and then click on the 'Create' button to start the
Cover Editor.
4. Create the label of your choice or load a previously created label into the
Cover Editor. Then click on 'Open', select the desired label in the self-opening
window and transfer it to the Cover Editor by clicking on the 'Open' button.
Once the label has been created or transferred, click on 'OK' to quit the Cover
Editor and to return to the Write CD dialog window.
NeroROBO Burning multiple media simultaneously • 16
Page 17

5. Now click on the 'Burn' register tab and enter the number of copies you wish
to create in the 'Number of Copies' field. Now check the 'Use robot(s) for
burning' box, otherwise the robot will not be used. If there are several
recorders installed in the desktop duplication system, they will only be used if
the 'Use Multiple Recorders' option has been checked.
6. Now click on the 'Write' button.
7. If you have selected the 'Use Multiple Recorders' option, the 'Choose
Recorder(s)' dialog window will appear. Now mark all of the recorders you
wish to use - especially, of course, that of the robot. You may select several
recorders by using the usual procedure in Windows and holding the 'Ctrl' key
depressed to mark the desired positions with the mouse. Now click on the 'OK'
button to quit the recorder selection and close the window.
NeroROBO Burning multiple media simultaneously • 17
Page 18

8. In the following dialog window you can select a label to match your CD. If you
r
have already created a label for this compilation with Cover Editor, the 'Use
cover from compilation' box will already be checked so that your label will be
used. Just click on the 'OK' button to select the cover and start the writing
process.
You may, of course, also use other stored labels by deactivating the 'Use
cover from compilation' box, clicking on the 'Search File' button and
selecting the label from the self-opening window. Then click on the 'OK' button
to start the writing process.
If you wish to create a label with the Nero Cover Designer, just click on the
'Run Cover Designer' button to create a cover. When you are finished, simply
click on the 'OK' button to start the writing process.
If you have created a cover with Nero Cover Designer that contains at least one
custom text field, it will be shown in a special area. You will find furthe
information concerning the use of the custom text fields in the chapter 'Custom
text fields'.
If you have decided not to print a label, just click on the 'No Label' button. The
window will then close and the burning will begin.
NeroROBO Burning multiple media simultaneously • 18
Page 19

5 Expert settings
The following is a description of the special points to observe when burning with
NeroROBO, how to abort the writing process and how to remedy any robot errors
that may occur.
5.1 Written and finalized media
If a finalized medium is in the drive (CD-R or CD-RW) and the 'Erase not empty
rewritable media' option has not been selected, the finalized medium will be
removed from the recorder and thrown into the trash.
5.2 Non-finalized media
Media (CD-R and CD-RW) that have not been finalized can be written in further
sessions until they are either full or become finalized. In this way, the available
storage space on each medium can be used to its full extent.
Systems using several recorders are not able to burn media simultaneously if
they contain differing data. This causes them to be thrown into the trash and an
error warning will appear in the write status dialog window. After that, the next
two media will be taken and placed in the recorder. This procedure is then
repeated up to a maximum of three times and if the third attempt is unsuccessful
a dialog window will appear in which the user can decide whether to continue the
writing process or to abort.
5.3 Custom text fields
If a cover has been created with Nero Cover Designer or if a cover has been
selected that contains at least one custom text field, this free field can be used as
a dynamic element and inserted in the cover.
The dialog window prior to starting the writing process shows the custom text
fields that have been created with Nero Cover Designer.
NeroROBO Expert settings • 19
Page 20

1. Mark the desired field and click on the 'Edit' button.
NeroROBO Expert settings • 20
Page 21

2. Mark the desired dynamic content that is going to replace the marked cover
element. Dynamic, in this case, means that the text on the cover of each
burned CD may differ from that of the last, although it is optional.
In the above example, all four cover elements have been used. In the
'Number' element, the counter begins with '1' and ascends by one with each
copy, so that a '2' appears on the second cover.
If you want to change or reset the cover element, click on the 'Reset' button.
NeroROBO Expert settings • 21
Page 22
5.4 Aborting robot activity
All robot activity is shown in a dialog window. This window makes it possible to
monitor current robot activity and, if necessary, to abort it. Two options are
available to abort activity.
Immediate
After completion
of current copy
Mark the desired option and click on the 'Abort' button to abort the process.
Both the task being performed and the complete order will be
aborted immediately and any transported medium will be
thrown into the trash.
The copy currently being written will be completed and then
the order will be aborted.
5.5 Errors in robot movements
If an error should occur during the performance of a robot movement, this will be
shown and, if possible, suggested diagnoses will be offered. In addition to that,
each error causes an entry to be made in the 'NeroHistory.log' file. This file can
be found in the Nero installation directory.
NeroROBO Expert settings • 22
Page 23

6 Centering CD labels
If the labels on the CDs do not appear properly centered, the cause of this could
be either wrong settings in the device driver or wrong values in the 'Paper
profile' that have been entered for this label.
The paper profiles can be found in Nero Cover Designer and new profiles can
also be added.
If the stock is going to be printed from Nero Cover Designer, it is advisable to
create a stock first.
1. Select 'File' from the menu bar and then 'Paper stocks' to open the dialog
window.
2. Now go to the list on the left, mark 'User-defined stocks' and click on the 'Add
Stock' button.
NeroROBO Centering CD labels • 23
Page 24

3. Mark the new stock in the stock list on the left. Now name the stock in the
r
'Name' field in the center column.
4. Select 120 mm for both the width and the length of the paper profile.
As the printer driver and its settings play major roles when centering labels, it is
very difficult to state an ideal size. However, it has been shown that the width
and height dimensions must roughly correspond to twice the size of the oute
radius.
5. Click on the 'Add Item' button and mark 'Label'. This label will then appear in
the list of profiles as a part of your new profile.
NeroROBO Centering CD labels • 24
Page 25

6. Adjust the correct position of the label by altering the values in the 'Position
(X/Y)' area. The values do not usually differ much from 0 unless the size of the
outer radius is altered, meaning that instead of the position of the center of the
label being entered, the distances from the upper and the left-hand edges of
the paper are entered instead. Click on the 'OK' button to close the window
and save the changes.
NeroROBO Centering CD labels • 25
 Loading...