

Page 1
®
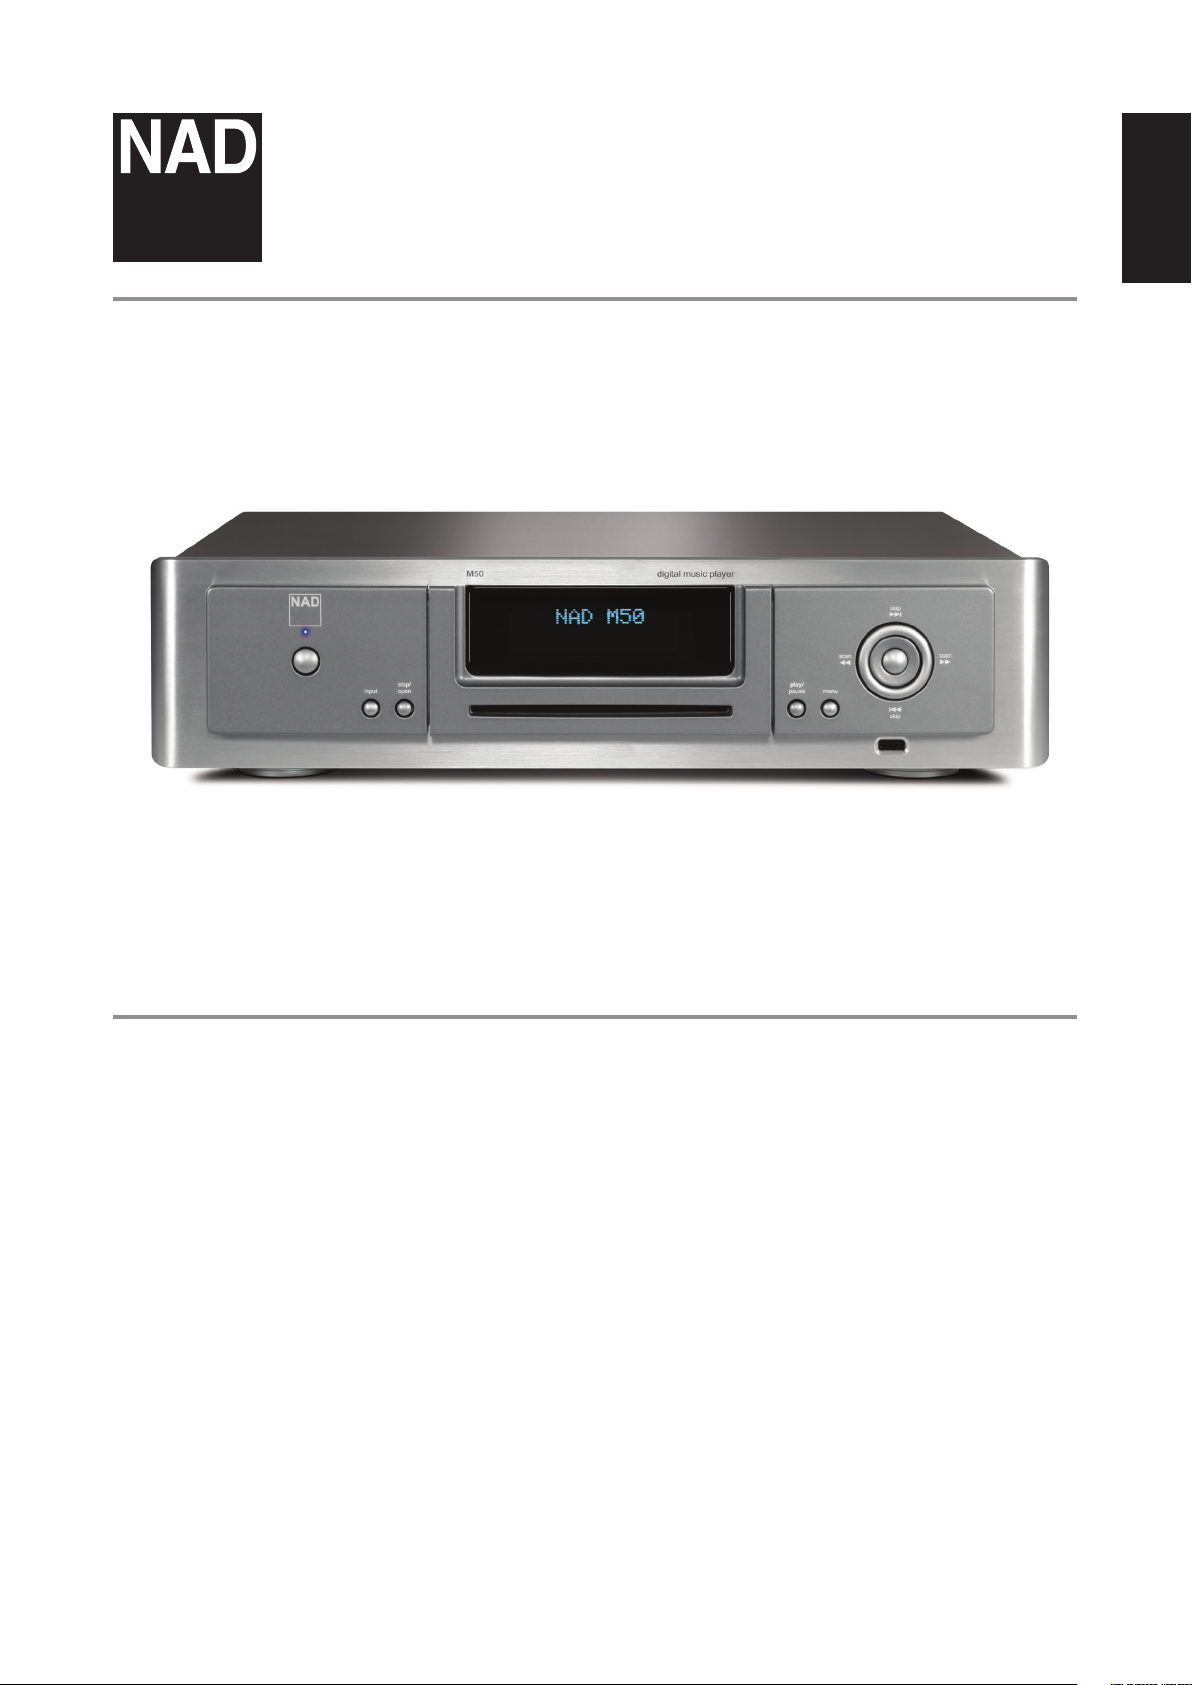
M50
Digital Music Player
ENGLISHFRANÇAISESPAÑOLITALIANODEUTSCHNEDERLANDSSVENSKAРУССКИЙ
Owner’s Manual
Page 2
ENGLISH FRANÇAIS ESPAÑOL ITALIANO DEUTSCH NEDERLANDS SVENSKA РУССКИЙ
IMPORTANT SAFETY INSTRUCTIONS
SAVE THESE INSTRUCTIONS FOR LATER USE.
FOLLOW ALL WARNINGS AND INSTRUCTIONS MARKED ON THE AUDIO
EQUIPMENT.
1 Read instructions - All the safety and operating instructions should be read
before the product is operated.
2 Retain instructions - The safety and operating instructions should be retained
for future reference.
3 Heed Warnings - All warnings on the product and in the operating instructions
should be adhered to.
4 Follow Instructions - All operating and use instructions should be followed.
5 Cleaning - Unplug this product from the wall outlet before cleaning. Do not use
liquid cleaners or aerosol cleaners. Use a damp cloth for cleaning.
6 Attachments - Do not use attachments not recommended by the product
manufacturer as they may cause hazards.
7 Water and Moisture - Do not use this product near water-for example, near a
bath tub, wash bowl, kitchen sink, or laundry tub; in a wet basement; or near a
swimming pool; and the like.
8 Accessories - Do not place this product on an unstable cart, stand, tripod,
bracket, or table. The product may fall, causing serious injury to a child or adult,
and serious damage to the product. Use only with a cart, stand, tripod, bracket, or
table recommended by the manufacturer, or sold with the product. Any mounting
of the product should follow the manufacturer’s instructions, and should use a
mounting accessory recommended by the manufacturer.
9 A product and cart combination should be moved with care. Quick
stops, excessive force, and uneven surfaces may cause the product and
cart combination to overturn.
10 Ventilation - Slots and openings in the cabinet are provided for ventilation and
to ensure reliable operation of the product and to protect it from overheating, and
these openings must not be blocked or covered. The openings should never be
blocked by placing the product on a bed, sofa, rug, or other similar surface. This
product should not be placed in a built-in installation such as a bookcase or rack
unless proper ventilation is provided or the manufacturer’s instructions have been
adhered to.
11 Power Sources - This product should be operated only from the type of power
source indicated on the marking label. If you are not sure of the type of power
supply to your home, consult your product dealer or local power company.
The primary method of isolating the amplier from the mains supply is to
disconnect the mains plug. Ensure that the mains plug remains accessible at all
times. Unplug the AC power cord from the AC outlet if the unit will not be used
for several months or more.
12 Grounding or Polarization - This product may be equipped with a polarized
alternating-current line plug (a plug having one blade wider than the other). This
plug will t into the power outlet only one way. This is a safety feature. If you are
unable to insert the plug fully into the outlet, try reversing the plug. If the plug
should still fail to t, contact your electrician to replace your obsolete outlet. Do
not defeat the safety purpose of the polarized plug.
13 Power Cord Protection - Power-supply cords should be routed so that they
are not likely to be walked on or pinched by items placed upon or against them,
paying particular attention to cords at plugs, convenience receptacles, and the
point where they exit from the product.
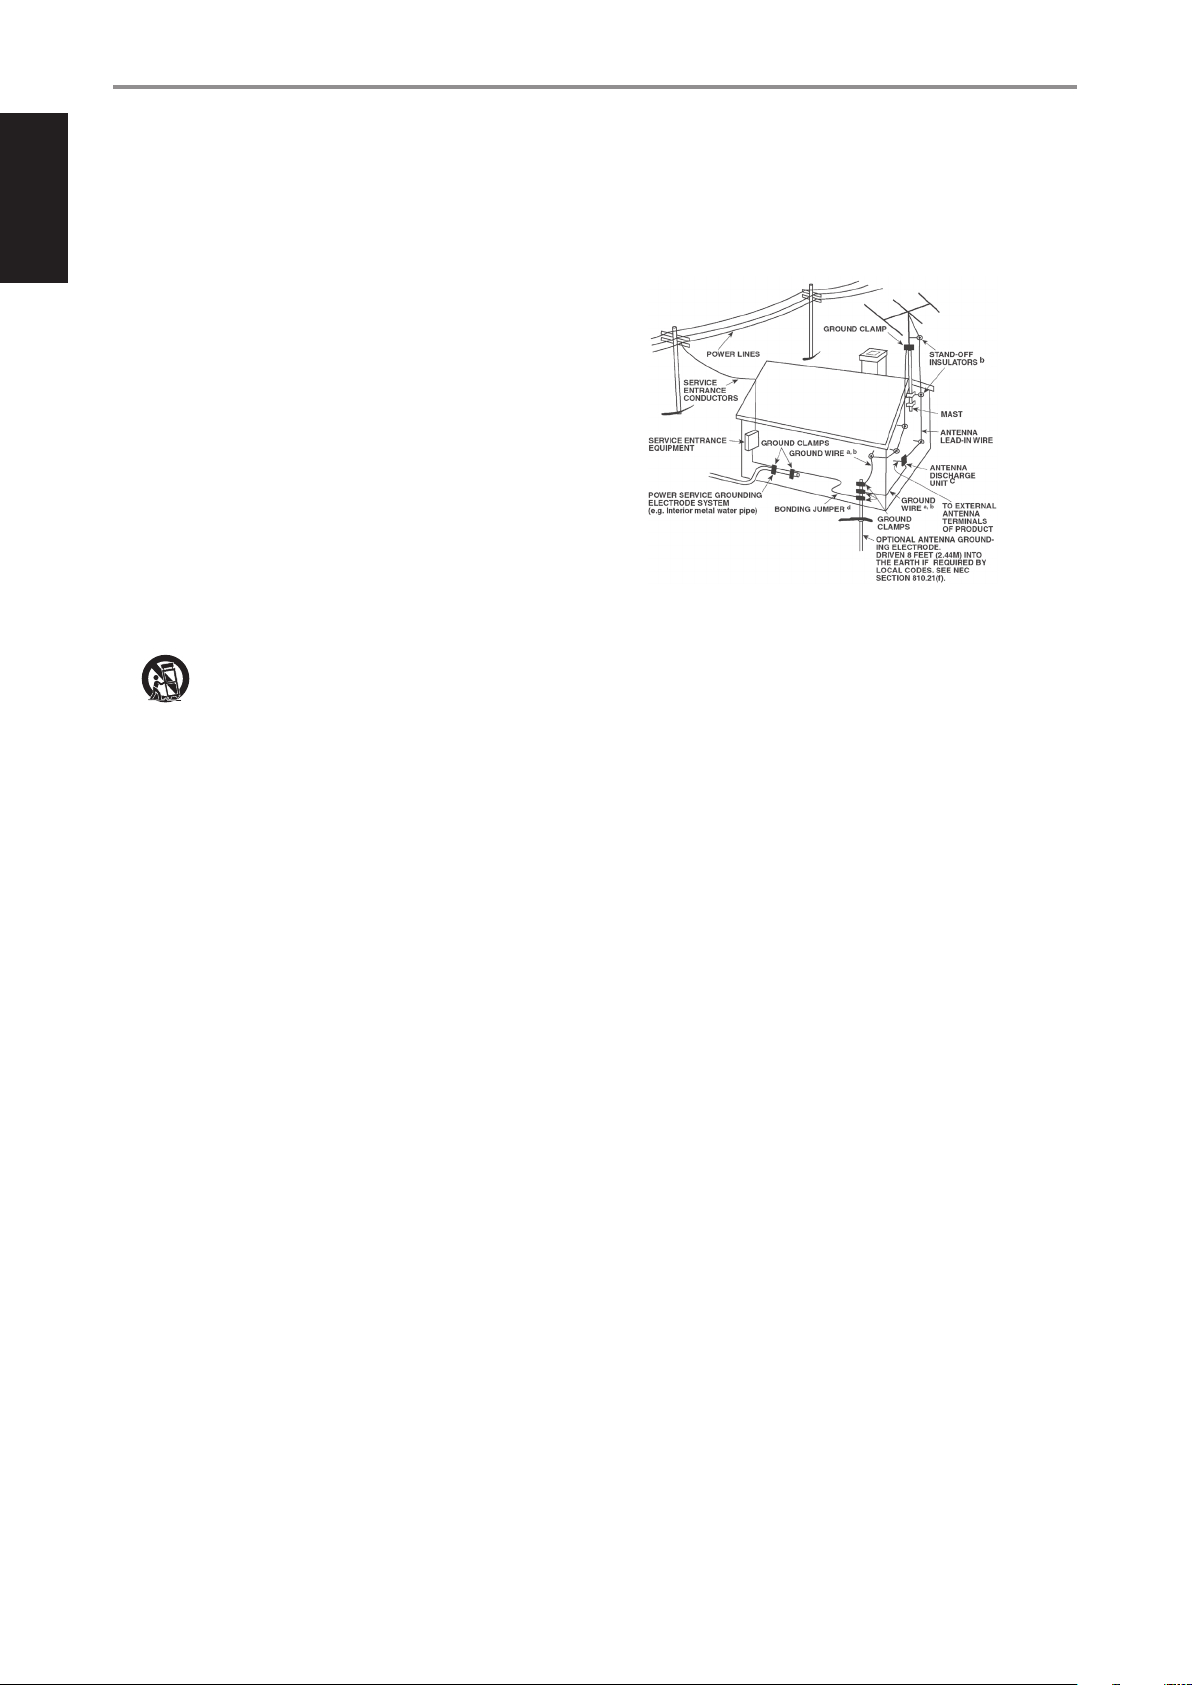
14 Outdoor Antenna Grounding - If an outside antenna or cable system is
connected to the product, be sure the antenna or cable system is grounded so
as to provide some protection against voltage surges and built-up static charges.
Article 810 of the National Electrical Code, ANSI/NFPA 70, provides information
with regard to proper grounding of the mast and supporting structure, grounding
of the lead-in wire to an antenna discharge unit, size of grounding conductors,
location of antenna discharge unit, connection to grounding electrodes, and
requirements for the grounding electrode.
NOTE TO CATV SYSTEM INSTALLER
This reminder is provided to call the CATV system installer’s attention to Section 820-40 of
the NEC which provides guidelines for proper grounding and, in particular, species that
the cable ground shall be connected to the grounding system of the building, as close to
the point of cable entry as practical.
15 Lightning - For added protection for this product during a lightning storm, or
when it is left unattended and unused for long periods of time, unplug it from the
wall outlet and disconnect the antenna or cable system. This will prevent damage
to the product due to lightning and power line surges.
16 Power Lines - An outside antenna system should not be located in the vicinity
of overhead power lines or other electric light or power circuits, or where it can
fall into such power lines or circuits. When installing an outside antenna system,
extreme care should be taken to keep from touching such power lines or circuits
as contact with them might be fatal.
17 Overloading - Do not overload wall outlets, extension cords, or integral
convenience receptacles as this can result in a risk of re or electric shock.
18 Object and Liquid Entry - Never push objects of any kind into this product
through openings as they may touch dangerous voltage points or short out parts
that could result in a re or electric shock. Never spill liquid of any kind on the
product.
WARNING: THE APPARATUS SHOULD NOT BE EXPOSED TO DRIPPING
OR SPLASHING, AND OBJECTS FILLED WITH LIQUIDS, SUCH AS VASES,
SHOULD NOT BE PLACED ON THE APPARATUS. AS WITH ANY ELECTRONIC
PRODUCTS, USE CARE NOT TO SPILL LIQUIDS INTO ANY PART OF THE
SYSTEM. LIQUIDS CAN CAUSE A FAILURE AND/OR A FIRE HAZARD.
19 Damage Requiring Service - Unplug this product from the wall outlet and refer
servicing to qualied service personnel under the following conditions:
a) When the power supply cord or plug is damaged.
b) If liquid has been spilled, or objects have fallen into the product.
c) If the product has been exposed to rain or water.
d) If the product does not operate normally by following the operating
instructions. Adjust only those controls that are covered by the operating
instructions as an improper adjustment of other controls may result in
damage and will often require extensive work by a qualied technician to
restore the product to its normal operation.
e) If the product has been dropped or damaged in any way.
f) when the product exhibits a distinct change in performance-this indicates a
need for service.
20 Replacement Parts - When replacement parts are required, be sure the
service technician has used replacement parts specified by the manufacturer
or have the same characteristics as the original part. Unauthorized
substitutions may result in fire, electric shock, or other hazards.
21 Safety Check - Upon completion of any service or repairs to this product, ask the
service technician to perform safety checks to determine that the product is in
proper operating condition.
22 Heat - The product should be situated away from heat sources such as radiators,
heat registers, stoves or other products (including ampliers) that produce heat.
2
Page 3
IMPORTANT SAFETY INSTRUCTIONS
Battery must not be exposed to excessive heat such as sunshine, re or the
like.
WARNING
TO REDUCE THE RISK OF FIRE OR ELECTRIC SHOCK, DO NOT EXPOSE THIS PRODUCT TO
RAIN OR MOISTURE.
CAUTION
TO PREVENT ELECTRIC SHOCK, MATCH WIDE BLADE OF PLUG TO WIDE SLOT, FULLY
INSERT.
FCC WARNING USA NOTICE
This equipment may generate or use radio frequency energy. Changes or
modications to this equipment may cause harmful interference unless the
modications are expressedly approved in the manual. The user could lose the
authority to operate this equipment if an unathorized change or modication is made.
LABELING INFORMATION
This device complies with Part 15 of the FCC rules. Operation is subject to the following
two conditions:
(1) This device may not cause harmful interference, and
(2) This device must accept any interference received, including interference that may
cause undesired operation.
RF EXPOSURE STATEMENT
The antenna(s) used for this transmitter must be installed to provide a separation
distance of at least 20 cm from all persons and must not be located or operated in
conjunction with any antenna or transmitter other than those contained in this device.
CANADA NOTICE
“This Class B digital apparatus complies with Canadian ICES-003.”
This device complies with Industry Canada license-exempt RSS-210. Operation is
subject to the following two conditions: (1) this device may not cause Interference,
and (2) this device must accept any interference, including interference that may
cause undesired operation of the device.
• no naked ame sources such as lighted candles should be placed on the
apparatus;
• the use of apparatus in tropical climate
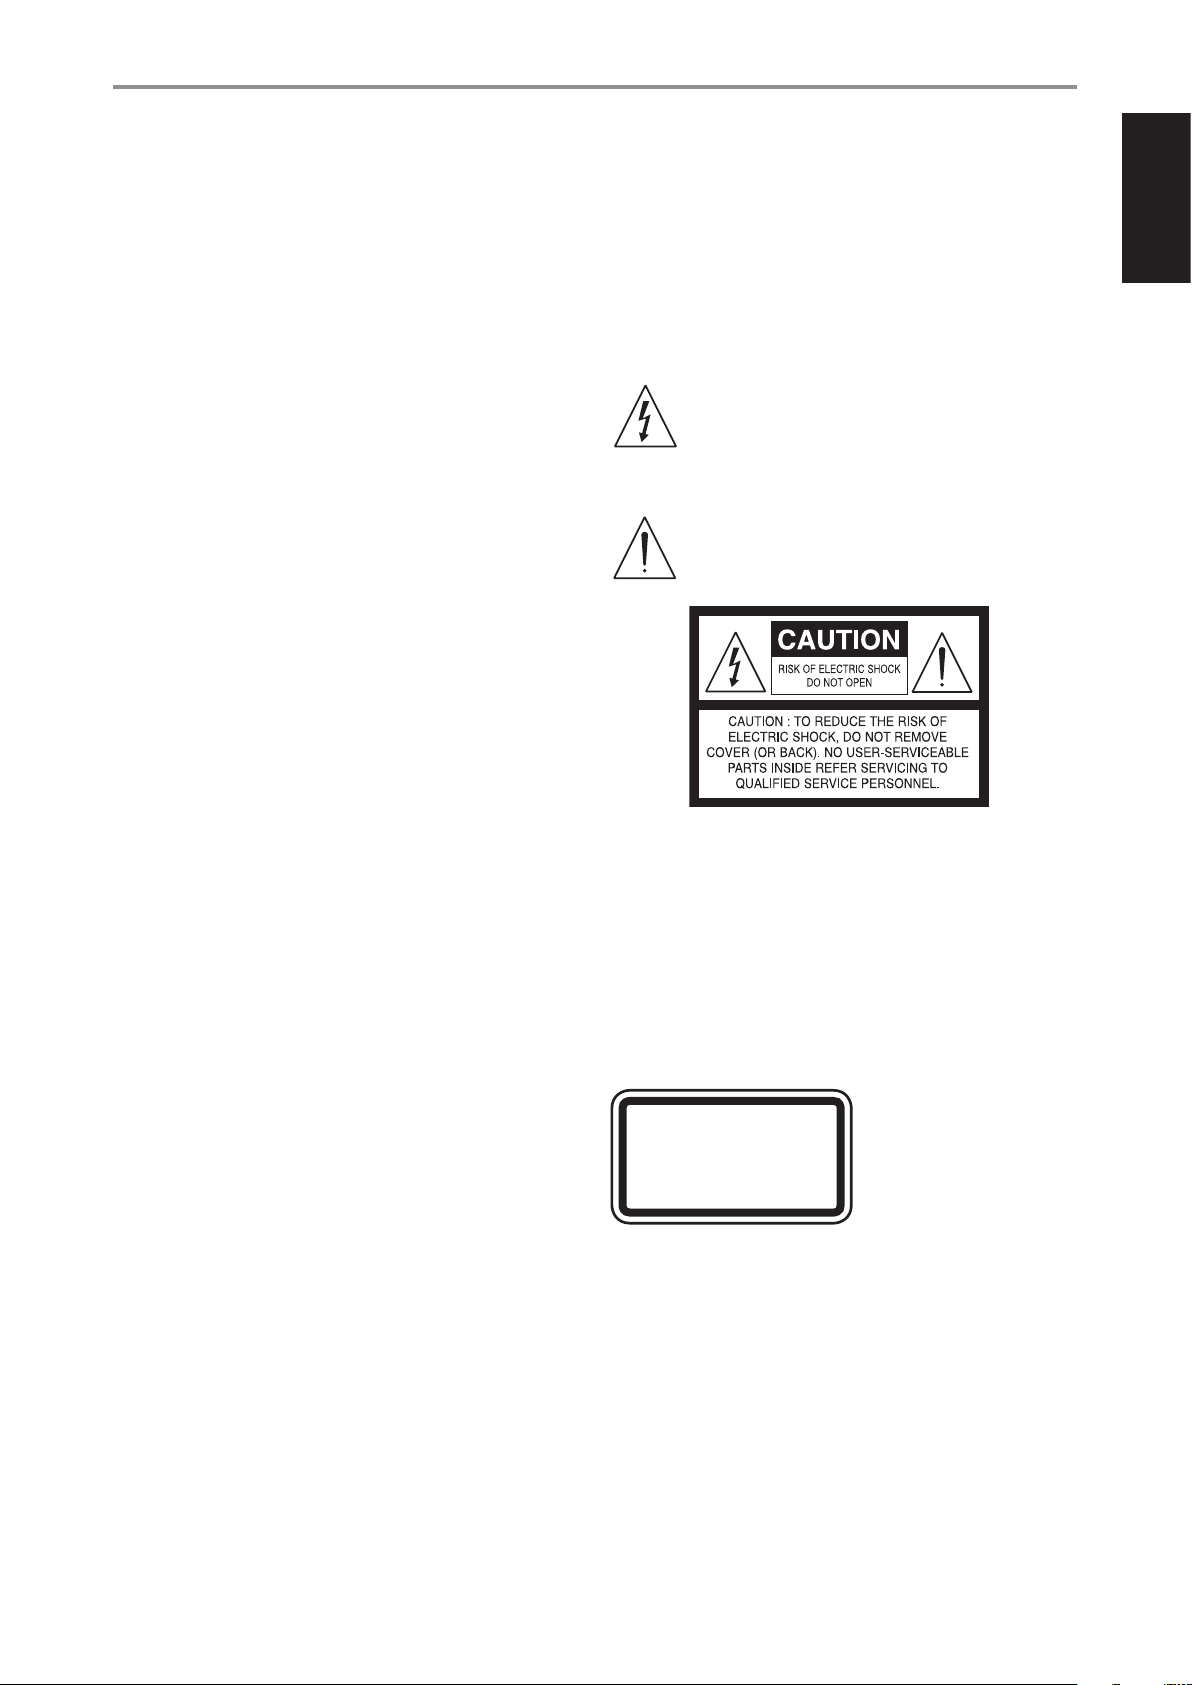
THE LIGHTNING FLASH WITH ARROWHEAD SYMBOL, WITHIN AN
EQUILATERAL TRIANGLE, IS INTENDED TO ALERT THE USER TO THE
PRESENCE OF UNINSULATED “DANGEROUS VOLTAGE” WITHIN THE
PRODUCT’S ENCLOSURE THAT MAYBE OF SUFFICIENT MAGNITUDE TO
CONSTITUTE A RISK OF ELECTRIC SHOCK TO PERSONS.
THE EXCLAMATION POINT WITHIN AN EQUILATERAL TRIANGLE IS INTENDED
TO ALERT THE USER TO THE PRESENCE OF IMPORTANT OPERATING
AND MAINTENANCE (SERVICING) INSTRUCTIONS IN THE LITERATURE
ACCOMPANYING THE APPLIANCE.
ENGLISHFRANÇAISESPAÑOLITALIANODEUTSCHNEDERLANDSSVENSKAРУССКИЙ
RESPONSIBLE PARTY
LENBROOK AMERICA
6 Merchant Street
Sharon, MA 02067
USA
Telephone: 800 263 4641; 781 784-8586
Facsimile: 781 784-8386
This device complies with Part 15 of the FCC Rules. Operation is subject to the
following two conditions: (1) this device may not cause harmful interference, and (2)
this device must accept any interference received, including interference that may
cause undesired operation.
WARNING
Changes or modications to this unit not expressly approved by the party responsible
for compliance could void the user's authority to operate the equipment.
NOTE
This equipment has been tested and found to comply with the limits for a Class
B digital device, pursuant to Part 15 of the FCC Rules. These limits are designed to
provide reasonable protection against harmful interference in a residential installation.
This equipment generates, uses and can radiate radio frequency energy and, if not
installed and used in accordance with the instructions, may cause harmful interference
to radio communications. However, there is no guarantee that interference will not
occur in a particular installation. If this equipment does cause harmful interference to
radio or television reception, which can be determined by turning the equipment o
and on, the user is encouraged to try to correct the interference by one or more of the
following measures:
• Reorient or relocate the receiving antenna.
• Increase the separation between the equipment and receiver.
• Connect the equipment into an outlet on a circuit dierent from that to which the
receiver is connected.
• Consult the dealer or an experienced radio/ TV technician for help.
CAUTION
This equipment employs a Laser System. To ensure proper use of this product, please
read the complete owner’s manual, available online at www.nadelectronics.com/
support, and retain for future reference. Should the unit require maintenance, contact
an authorized service location. Use of controls, adjustments or the performance of
procedures other than those specied may result in exposure to laser radiation. To
prevent direct exposure to laser beam, do not try to open the enclosure. Visible laser
radiation when the enclosure is opened.
DO NOT STARE INTO BEAM
CLASS 1 LASER PRODUCT
KLASSE 1 LASER PRODUKT
LUOKAN 1 LASER LAITE
KLASS 1 LASER APPARAT
CLASSE 1 PRODUIT LASER
CAUTION REGARDING PLACEMENT
To maintain proper ventilation, be sure to leave a space around the unit (from the
largest outer dimensions including projections) that is equal to or greater than shown
below.
Left and Right Panels: 10 cm
Rear Panel: 10 cm
Top Panel: 10 cm
WARNING
If this product is used at 240VAC, a suitable attachment plug should be used.
3
Page 4
IMPORTANT
DO NOT make any connection to the larger terminal which is marked
with the letter ‘E’ or by the safety earth symbol or colored GREEN or GREEN
AND YELLOW. The wires in the mains lead on this product are colored in
accordance with the following code:
BLUE - NEUTRAL
BROWN - LIVE
As these colors may not correspond with the colored markings identifying
the terminals in your plug, proceed as follows:
• The BLUE wire must be connected to the terminal marked with the
letter ‘N’ or colored BLACK.
• The BROWN wire must be connected to the terminal marked with the
letter ‘L’ or colored RED
• When replacing the fuse, only a correctly rated and approved type
should be used, and be sure to re-t the fuse cover.
IF IN DOUBT CONSULT A COMPETENT ELECTRICIAN.
This product is manufactured to comply with the radio
interference requirements of EEC DIRECTIVE 2004/108/EC.
ENGLISHFRANÇAISESPAÑOLITALIANODEUTSCHNEDERLANDSSVENSKAРУССКИЙ
ENGLISH FRANÇAIS ESPAÑOL ITALIANO DEUTSCH NEDERLANDS SVENSKA РУССКИЙ
IMPORTANT SAFETY INSTRUCTIONS
EUROPEAN UNION NOTICE FOR WIRELESS PRODUCT
Products bearing the CE marking comply
0979
Directive (2006/95/EC) issued by the Commission of the European Community. Indoor
use only.
NOTES ON ENVIRONMENTAL PROTECTION
At the end of its useful life, this product must not be disposed of with
regular household waste but must be returned to a collection point for
the recycling of electrical and electronic equipment. The symbol on the
product, user’s manual and packaging, point this out.
The materials can be reused in accordance with their markings. Through re-use,
recycling of raw materials or other forms of recycling of old products, you are
making an important contribution to the protection of our environment. Your local
administrative oce can advise you of the responsible waste disposal point.
with the R&TTE Directive (1999/5/EC),
EMC Directive (2004/108/EC) and the Low
INFORMATION ABOUT COLLECTION AND DISPOSAL OF WASTE BATTERIES
DIRECTIVE 2006/66/EC OF THE EUROPEAN PARLIAMENT AND THE COUNCIL
OF EUROPEAN UNION FOR EUROPEAN CUSTOMERS ONLY
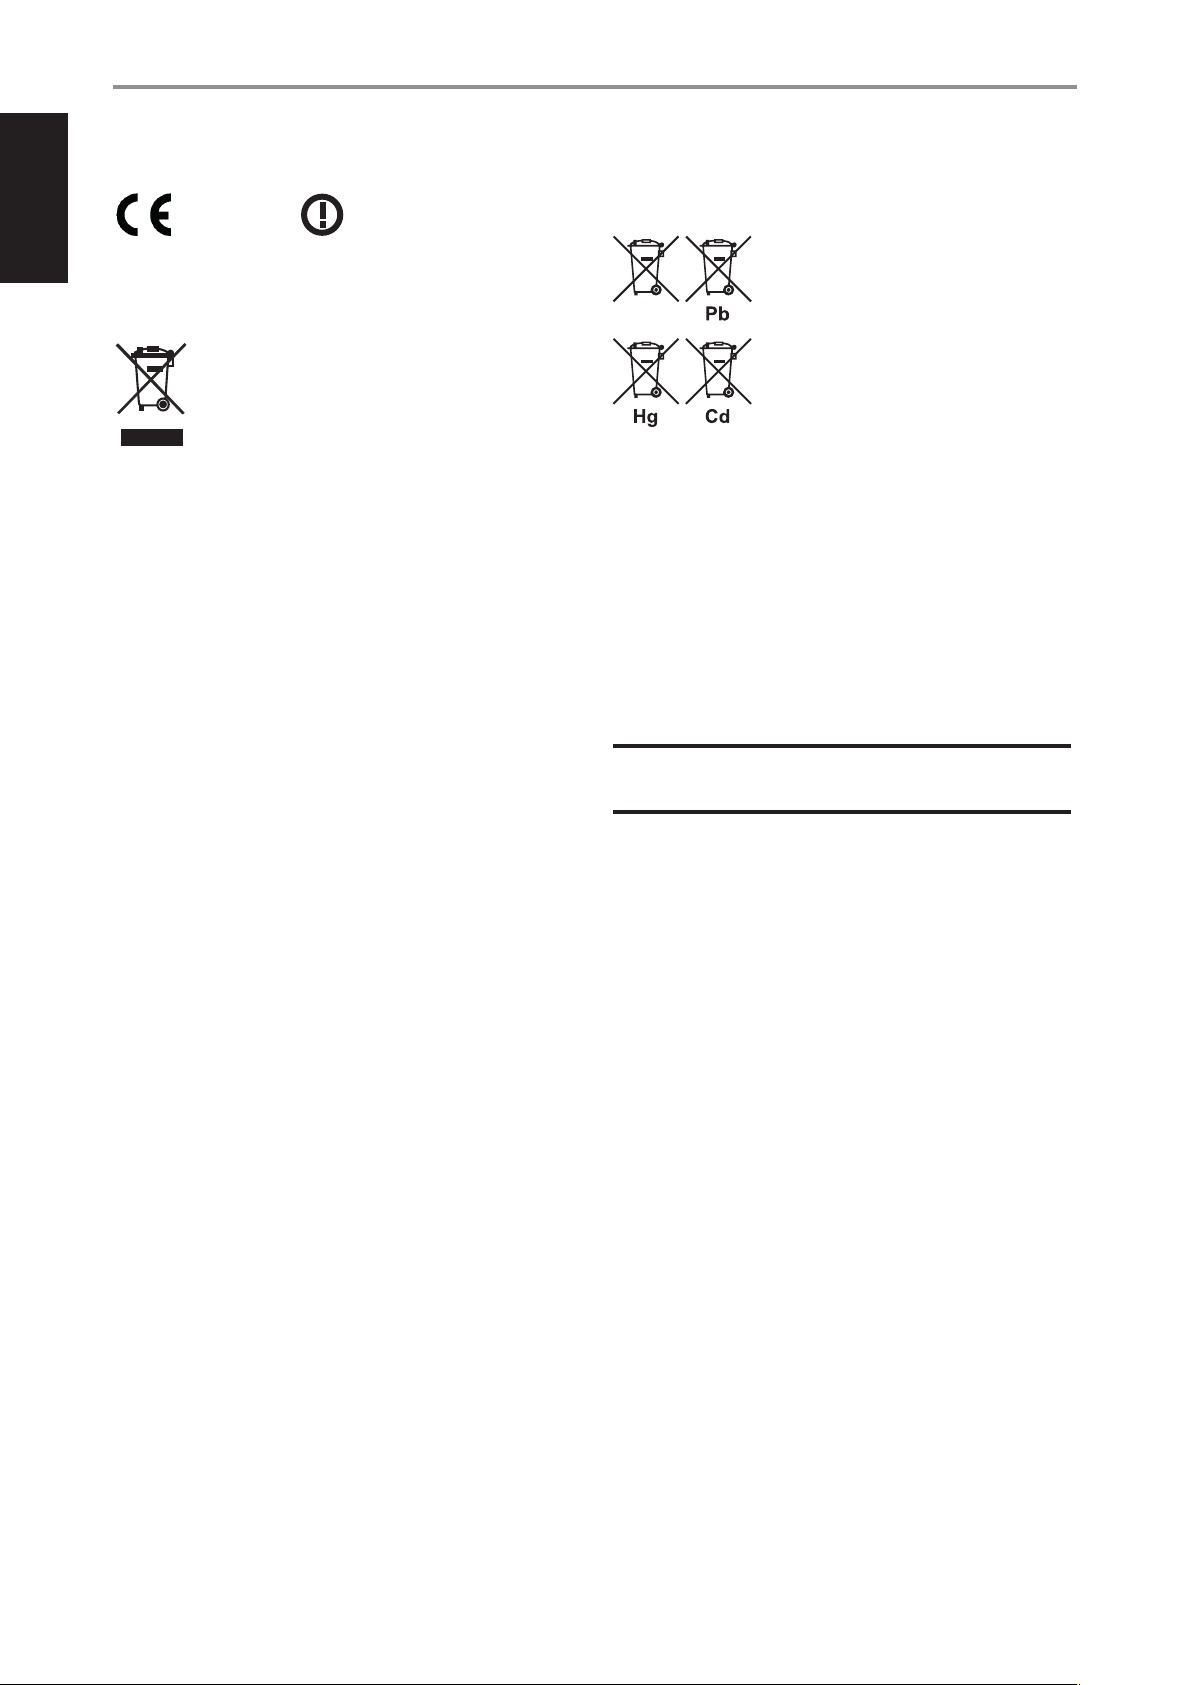
Batteries bearing any of these symbols indicate that
they should be treated as “separate collection” and not
as municipal waste. It is encouraged that necessary
measures are implemented to maximize the separate
collection of waste batteries and to minimize the disposal
of batteries as mixed municipal waste.
End-users are exhorted not to dispose waste batteries
as unsorted municipal waste. In order to achieve a high
level of recycling waste batteries, discard waste batteries
separately and properly through an accessible collection point in your vicinity. For
more information about collection and recycling of waste batteries, please contact
your local municipality, your waste disposal service or the point of sale where you
purchased the items.
By ensuring compliance and conformance to proper disposal of waste batteries,
potential hazardous eects on human health is prevented and the negative impact of
batteries and waste batteries on the environment is minimized, thus contributing to
the protection, preservation and quality improvement of the environment.
RECORD YOUR MODEL NUMBER NOW, WHILE YOU CAN SEE IT
The model and serial number of your new M50 are located on the back of the cabinet.
For your future convenience, we suggest that you record these numbers here:
Model no: ......................................
Serial no.: . . . . . . . . . . . . . . . . . . . . . . . . . . . . . . . . . . . . . .
NAD is a trademark of NAD Electronics International, a division of Lenbrook Industries Limited
4
Copyright 2013, NAD Electronics International, a division of Lenbrook Industries Limited
Page 5

IMPORTANT SAFETY INSTRUCTIONS .........................2
GETTING STARTED
WHAT’S IN THE BOX ..................................................6
QUICK SETUP GUIDE .................................................6
IDENTIFICATION OF CONTROLS
FRONT PANEL ........................................................8
REAR PANEL ........................................................ 10
REMOTE CONTROL .................................................12
OPERATION
USING YOUR iPad AS CONTROLLER ................................. 13
NAVIGATION CONTROLS AND ICONS ............................... 13
CONTROL PANEL ................................................... 13
HOW TO SWITCH BETWEEN SCREEN SECTIONS .................... 14
MENU SCREEN ..................................................... 15
LOCAL SOURCES ................................................... 15
LIBRARY ............................................................ 15
STREAMING SERVICES .............................................. 16
TUNEIN ............................................................. 16
FAVOURITES ........................................................ 17
DISPLAY OF CURRENT BROADCAST ................................ 17
WiMP ............................................................... 18
OTHER MUSIC SERVICE PROVIDERS. . . . . . . . . . . . . . . . . . . . . . . . . . . . . . . . . 18
CREATING A PLAYLIST ..............................................18
MANAGING YOUR PLAYLIST ........................................ 19
PLAYBACK DISPLAY OF CURRENT SONG ............................ 20
NOW PLAYING. . . . . . . . . . . . . . . . . . . . . . . . . . . . . . . . . . . . . . . . . . . . . . . . . . . . . . 21
PLAYER CONTROL .................................................. 21
CONFIGURE PLAYER ................................................ 21
RIP/ENCODE CONTROL PANEL ..................................... 22
CONFIGURE NETWORK SHARES .................................... 24
SETTINGS ........................................................... 26
HELP ............................................................... 26
PLAYER NOTIFICATION ............................................. 26
TABLE OF CONTENTS
ENGLISHFRANÇAISESPAÑOLITALIANODEUTSCHNEDERLANDSSVENSKAРУССКИЙ
SPECIFICATIONS .......................................... 28
5
Page 6

ENGLISH FRANÇAIS ESPAÑOL ITALIANO DEUTSCH NEDERLANDS SVENSKA РУССКИЙ
GETTING STARTED
WHAT’S IN THE BOX
Packed with your NAD M50 you will nd
Accessories box containing the following
• 120V AC Power cord
• 230V AC Power cord
• M50 remote control with 2 AA batteries
• Wireless antenna
• Quick Setup Guide
IMPORTANT NOTES
• This manual uses iPad as the device controller with respect to NAD M50
App operation.
• iPad is not supplied with the M50.
• The iPad controller can be viewed in either landscape or portrait
orientation.
• M52 and USB mass storage device mentioned in this manual are for
reference only and not supplied with the M50.
QUICK SETUP GUIDE
This simple guide will help you get started with your M50.
CONNECT FOR SOUND
• Using corresponding cable connectors (not supplied), connect M50’s
DIGITAL AUDIO ports to corresponding digital audio input of receivers,
home theater systems or digital processors.
CONNECT TO NETWORK
• Using an Ethernet cable (not supplied), connect one end to M50’s LAN
port and the other end directly to your Wired home network or router.
Alternatively, the M50 can also be connected by Wireless connection. See
succeeding section about “CONNECT TO WiFi”.
CONNECT TO POWER
The M50 comes supplied with two separate AC power cords. Select the AC
power cord appropriate for your region.
1 Before connecting the AC power cord’s plug to the wall outlet, connect
rmly rst the other end of the AC power cord to M50’s AC Mains input
socket.
2 Set the POWER switch at the rear panel to ON and then press the front
panel Standby button.
3 Out of the box and the M50 powered up for the rst time, the M50 will
have its initial reboot process that will end with the VFD showing
With Wired connection
NOTES
• Never force the plug into a wall outlet. An adaptor may be necessary in
certain regions.
• Always disconnect rst from the wall outlet the AC power cord’s plug,
before disconnecting the other end of the AC power cord from the M50’s
AC Mains input socket.
CONNECT TO WIFI
1 Connect the supplied wireless antenna to M50’s WiFi antenna terminal
at the rear panel. Set the rear panel POWER switch to ON.
IMPORTANT!
For wireless connection to be established, ensure that the supplied
wireless antenna is installed and Wireless (WiFi) broadband router with
broadband internet connection is setup and available.
2 Use your iPad (not provided) to search for the WiFi network matching
your M50’s unique network ID and join it.
For example: “M50-0064” where “0064” are the last four numbers of the
unique Internet MAC identier of your M50. You can check your M50’s
unique Internet MAC identier by undertaking the following steps
a Press front panel’s MENU button.
b VFD will show
}Info
Mass Storage Usage
Test Mass Storage
WiFi Hot Spot Mode
c Select “Info”. Press remote control’s [S] or front panel’s [8] and the
VFD will show
Ver: 1.4.0
192.168.1.16
96:55:88:00:00:64
“00:64” is the same last four numbers in the “M50-0064” example above.
3 By selecting “M50-0064” from the “Choose a Network… “ list in the
“Wi-Fi” tab of Settings menu of your iPad, the “Congure Player” menu
window should automatically open. If not, open a web browser on your
device and visit http://10.1.2.3/
Ready
With Wireless connection
Ready
Hotspot Mode
6
Page 7

4 Select “Congure WiFi”.
5 Select your home network or applicable wireless network name (SSID)
from the “Congure wireless” drop down menu.
8 Select “Update” and wait for the VFD to show
ENGLISHFRANÇAISESPAÑOLITALIANODEUTSCHNEDERLANDSSVENSKAРУССКИЙ
Ready
Your M50 is now connected to your home network and ready to be
used with the NAD M50 controller App.
DOWNLOAD THE APP
Upon successful setup connection, you will be directed to the “Congratulations”
page where you can select the highlighted “iOS App from the Apple App Store”
to download and install the “M50 Remote” App to your iPad.
After successfully downloading the M50 Remote App, select from your
iPad screen to open the NAD M50 Control Panel.
6
8
6 Enter your home network’s Wireless Password (Passphrase, WEP/WAP
key as applicable) in the eld “Enter password or key (if protected)”.
The Password (Passphrase, WEP/WAP key as applicable) is the same
Password that was setup or generated during the conguration of
your home router or gateway. An incorrect password entered in the
“Congure wireless” menu screen will simply cause the unit to timeout
and return to Hotspot Mode.
Trying multiple passwords will not damage the device in any way. If
you are not sure what is your Password, login to your router and locate
the Password in the applicable setup screen for Wireless Conguration
section. Refer to your router’s documentation for further information.
7 Select a “Player name” from the drop down list or use the on-screen
keyboard to create a customized room name in the eld “Custom
name”.
CONNECT TO MUSIC
5
7
You’re now ready to stream music by
selecting any source from the Local
Sources or Streaming Services.
Follow the screen prompts, and open
your whole home to the pleasure of
streaming HiFi music.
7
Page 8
ENGLISH FRANÇAIS ESPAÑOL ITALIANO DEUTSCH NEDERLANDS SVENSKA РУССКИЙ
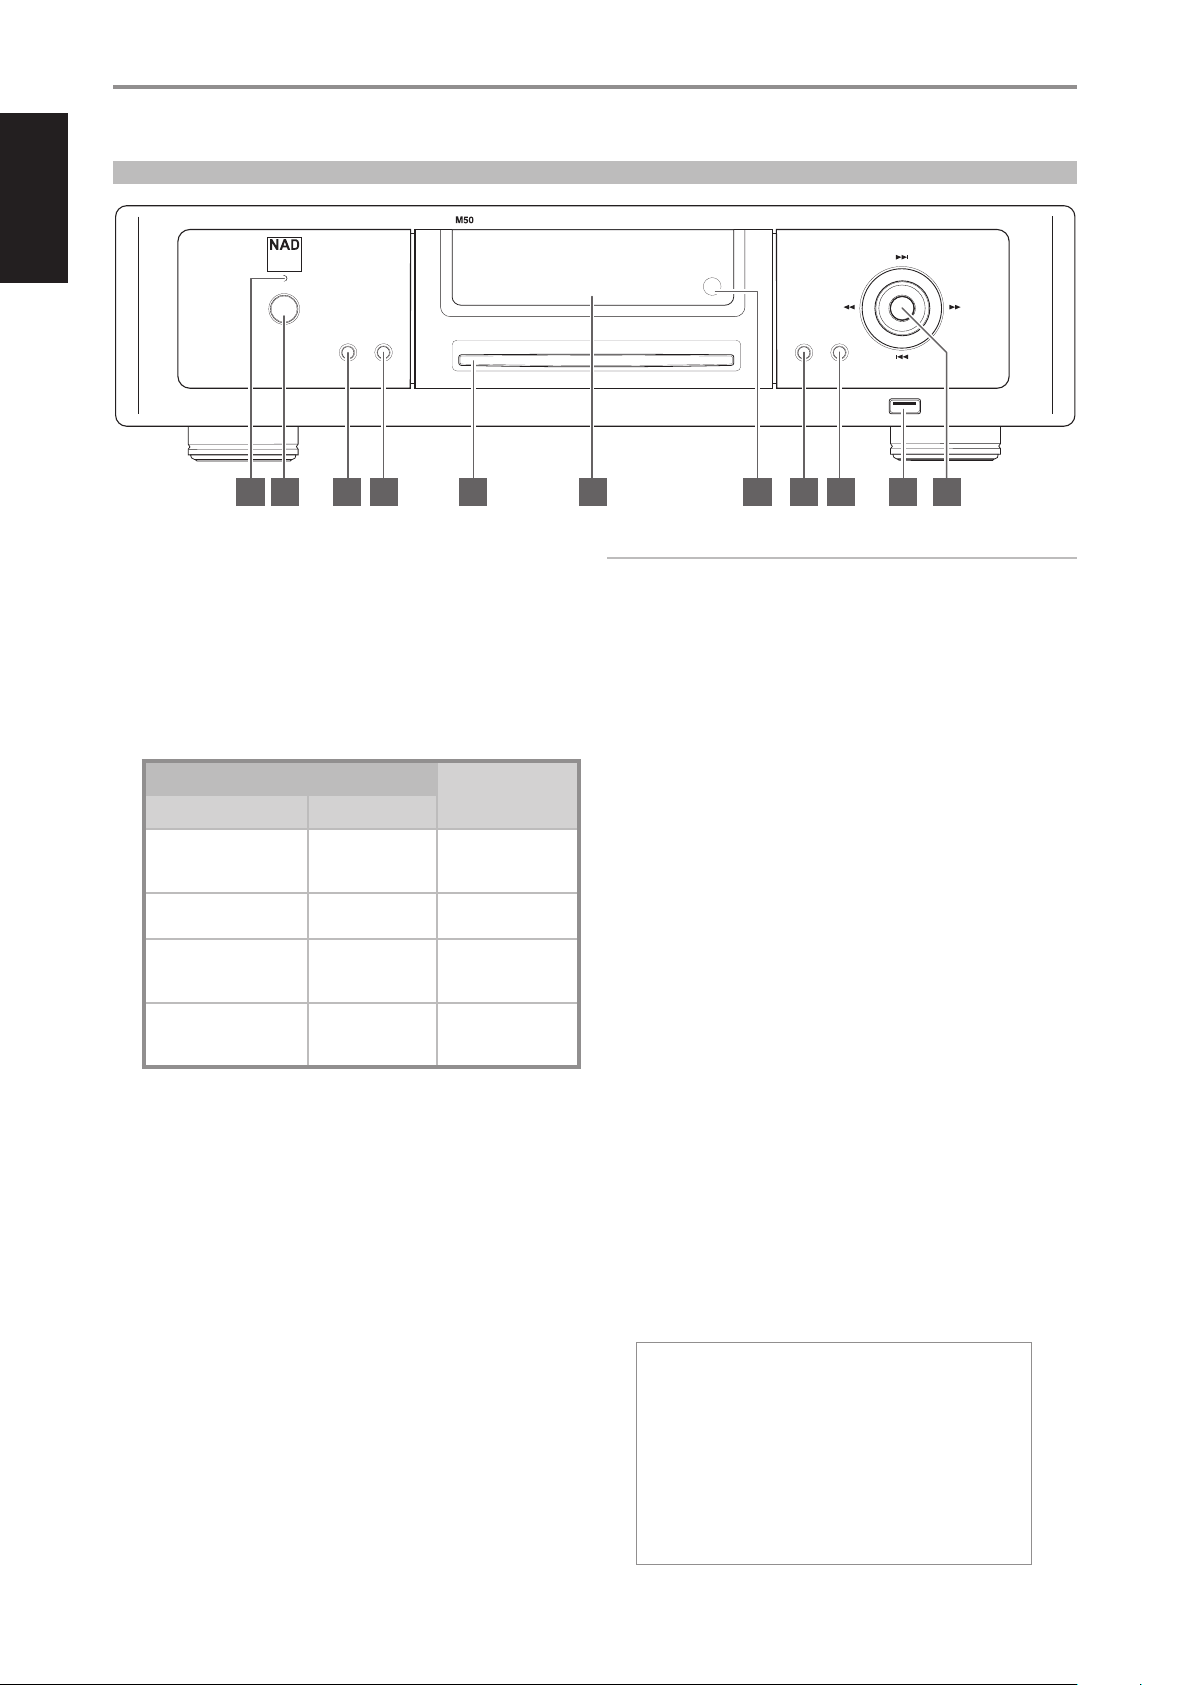
IDENTIFICATION OF CONTROLS
FRONT PANEL
stop/
input
open
4 5 6 7 8 9 10 111 2 3
digital music player
scan scan
play/
menu
pause
skip
skip
© NAD M50
1 STANDBY LED
• This indicator will light up amber upon switching ON the rear panel
POWER switch.
• When the front panel Standby button is pressed to power up the
M50 from standby mode, this indicator will illuminate blue.
2 STANDBY BUTTON
The rear panel POWER switch must be at ON position for the Standby
button to activate. Pressing the Standby button will result to varying
actions or responses and is best illustrated by the table below.
ACTION/RESPONSE
STANDBY BUTTON STANDBY LED
After switching ON the rear
panel POWER button, press
from standby mode.
With M50 already powered
ON, toggle button.
Press and hold… until
Standby LED turns to solid
amber.
With the M50 at standby
mode, press Standby button
or any front panel button.
3 INPUT
Switch input Sources when available. Toggle INPUT button to select
through the following Sources
• USB - Playback music les from the USB mass storage device
connected to Front USB.
• Library - Makes available songs from shared computer, NAS,
connected USB mass storage device or M52.
• Audio/Data disc - Playback loaded audio or data disc.
4 STOP/OPEN
Pressing STOP/OPEN during disc playback will cause the M50 to stop
playback and then eject the loaded disc.
5 DISC SLOT
• Insert CD or audio disc face down into this slot and playback will
automatically start provided the M50 is not connected to an active
M52 or USB mass storage device.
• CD will not playback automatically if a playlist is already available or
active at the time of CD loading. Select Audio Disc source to browse
and playback CD content.
• Refer also to “RIP/ENCODE CONTROL PANEL” section below for Rip/
Play options when an audio CD is inserted.
Turns from amber
to blue.
Remains illuminated
in blue.
Flashing amber and
then turns to solid
amber.
Turns from amber
to blue.
RESULT
M50 is powered up.
VFD is illuminated.
M50 remains ON.
VFD is turned on or o.
M50 switches to
standby mode.
VFD is turned o.
M50 is powered up.
VFD is illuminated.
IMPORTANT NOTES
• The M50 must stand-alone, i.e. not connected to an active M52 or USB
mass storage device, for a loaded CD to be automatically played back.
• Only Audio CD can be played back by a stand-alone M50. If a data disc
(CD-R/RW with data les) is inserted into the disc slot, select “Data Disc”
source to browse and playback music le contents.
6 VACUUM FLUORESCENT DISPLAY (VFD)
Display visual information about the current Source. Information
supplied is generated by the Source.
7 REMOTE SENSOR
• Point the remote control at the remote sensor and press the
buttons.
• Do not expose the remote sensor of the M50 to a strong light
source such as direct sunlight or illumination. If you do so, you may
not be able to operate the M50 with the remote control.
Distance: About 23ft (7m) from the front of the remote sensor.
Angle: About 30° in each direction of the front of the remote sensor.
8 PLAY/PAUSE
• Toggle to start, pause or resume playback of current source.
9 MENU
• Display main menu options. Use the remote control’s D/F buttons
to move up or down the menu selections. Press S to select a menu
item (use A to return to the main menu or previous display). Having
selected a menu item, use D/F buttons to select an option and
then press ENTER to conrm selection. Upon pressing ENTER, the
display will revert back to the main menu window.
• The front panel 7/8/ 9/0 and ENTER buttons perform
respectively the same functions of the remote control A/S /F/D
and ENTER buttons. Use these buttons to navigate through the
MENU options.
}Info
Mass Storage Usage
Test Storage Usage
WiFi Hot Spot Mode
IR Channel
Reboot
Factory Reset
8
Page 9

IDENTIFICATION OF CONTROLS
Info
Display information about the current software version, IP address and
unique Internet MAC identier.
Mass Storage Usage
Information is shown about the status of the M52 hard drives or USB
mass storage device like total, used and remaining disk space. “No Disk”
is displayed if there’s nothing connected at the rear panel’s USB 2 port.
Test Mass Storage
The connected M52 or USB mass storage device will be tested and
the result will be shown in the display. “No Mass Storage” is displayed if
there’s nothing connected at the rear panel’s USB 2 port.
WiFi Hot Spot Mode
• Enabled: Upon powering up, M50 goes to normal procedure of
connecting to network and then to Hot Spot mode.
• Disabled: M50 bypasses connecting to a network and goes directly
to “Ready” mode. It does not go to Hot Spot mode.
IR Channel
The M50 has the capability to operate via alternate IR channel. This is
practically useful if you have two NAD products that can be operated
by similar remote control commands. With alternate IR Channel, two
dierent NAD products can be controlled independently in the same
zone by setting each one to a dierent IR channel.
• Channel 0: Default IR channel setting of M50 to Channel 0. The
IR Channel for both the M50 and remote control must be set to IR
Channel 0 for full interface.
• Channel 1: Default IR channel setting of M50 to Channel 1. The
IR Channel for both the M50 and remote control must be set to IR
Channel 1 for full interface.
b Continue press and hold of Standby button(for more than 30
seconds)until VFD will show
ENGLISHFRANÇAISESPAÑOLITALIANODEUTSCHNEDERLANDSSVENSKAРУССКИЙ
NAD M50
Factory Reset…
c Release hold of the Standby button.
d With the blue Standby LED continuously ashing, the M50 will
eventually restart and undergo normal start up procedure.
e The VFD will end up showing
Ready
Hotspot Mode
(If connected via Wireless connection)
Ready
IMPORTANT NOTES
• The IR Channel feature is compatible only with programmable NAD
remote controls like the AVR 4 and HTR-series remote controls.
• The M50 remote control is defaulted to IR Channel 0. The M50 remote
control has no feature that will allow it to switch IR channels so
ensure that the corresponding IR Channel setting of your M50 is set to
Channel0.
Reboot
Yes: Restart your M50 again.
No: Reboot is not initiated.
Factory Reset
Yes: Restore your M50 to its factory default settings.
No: Do not initiate factory reset.
Another way to restore your M50 to its factory default settings is by
undertaking the following steps.
HOW TO MANUALLY RESET M50
a While keeping hold of front panel Standby button (press and hold),
set the POWER switch at the rear panel to ON. The blue Standby LED
will continuously ash and the VFD will show
NAD M50
Upgrade Mode
(If connected via Wired connection)
You are now ready to use or congure your M50.
10 FRONT USB
• Connect to this input a USB mass storage device with music les.
Typical USB mass storage devices compatible with M50 include
portable ash memory devices and external hard drives (FAT32
formatted).
11 9/0/7/8, ENTER
• Press 0 to skip forward or 9 to skip backward a track or song.
• Press 7/8 to scan fast-forward or fast-reverse during playback.
• The front panel 7/8/ 9/0 and ENTER buttons perform
respectively the same functions of the remote control A/S /F/D
and ENTER buttons. Use these buttons to navigate through the
MENU options.
9
Page 10

ENGLISH FRANÇAIS ESPAÑOL ITALIANO DEUTSCH NEDERLANDS SVENSKA РУССКИЙ
IDENTIFICATION OF CONTROLS
REAR PANEL
WIFI
AES/EBU OUT
AL
DIGIT AUDIO
COAXIAL
HDMI
USB 1 USB 2
OPTICAL
OUT
OUT
OUT
ETHERNET
4 5 6 7 8 9 10 11 12 131 2 3
1 AES/EBU OUT
Connect AES/EBU OUT to corresponding AES/EBU IN of compatible
devices (like the NAD M2 or NAD M51) to stream digital audio content.
For high-end sources with higher sampling rates like 176kHz and
192kHz, it is highly recommended that this AES/EBU OUT be interfaced
with the AES/EBU IN connector. Such interface is well suited to handle
such sources with high sampling rate.
2 COAXIAL OUT, OPTICAL OUT
Connect COAXIAL OUT or OPTICAL OUT to corresponding digital audio
input of compatible devices such receivers, computer soundcard or
other digital processors.
3 USB 1 (TYPE B)
Use for servicing purposes only. Not for consumer use. Only authorized
NAD service personnel can access this USB port.
4 HDMI OUT
Connect HDMI OUT to compatible devices with HDMI input. This is not
video output. It output audio component only and supports 24/192 HD
Audio in PCM’s native I2S format.
5 USB 2 (TYPE A)
• USB 2 is the corresponding USB input for M52 Digital Music Vault
connection.
• A USB mass storage device with music les can also be connected
to USB 2. Typical USB mass storage devices compatible with M50
include portable ash memory devices and external hard drives
(FAT32 formatted).
• When a USB mass storage device is connected to this port, a “Music”
folder will be automatically created on the USB device. Put all your
music les in this “Music” folder, connect it to M50’s USB 2 and then
re-index – this “Music” folder is now your “Library” where all songs
are stored or ripped.
RS232
+12V TRIGGERIR
OUTOUT
IN
IN
POWER
100-240V 50/60Hz
ON
© NAD M50
7 RS232
Use a RS232 serial cable (not supplied) with RS232 adapter (if necessary)
to interface this port to the corresponding RS232 connector of the
optional M2, M51, C390DD or any compatible NAD models. Through
this RS232 connection, the VOLUME slider in the App can be adjusted to
increase or decrease the audio output level of the M50.
NOTE
Use a NULL modem cable or cross serial RS232 gender changer adapter
to interface the M50 with the compatible NAD model.
8 IR IN, IR OUT
These mini-jacks accept and output remote-controlled codes in
electrical format, using industry-standard protocols, for use with “IRrepeater” and multi-room systems and related technologies.
• All NAD products with IR IN/IR OUT features are fully compatible
with M50. For non-NAD models, please check with your other
product’s service specialists as to their compatibility to the M50’s IR
features.
IR IN
This input is connected to the output of an IR (infrared) repeater
(Xantech or similar) or the IR output of another compatible device to
allow control of the M50 from a remote location.
IR OUT
Connect IR OUT to the IR IN jack of a compatible device. Command
and control the linked compatible device by directing its own remote
control to M50’s infrared receiver.
6 ETHERNET/LAN
LAN connection must be setup for wired connection to be established.
Set up a Wired Ethernet broadband router with broadband internet
connection. Your router or home network should have a built-in DHCP
server to consummate the connection.
• Using a standard straight-through Ethernet cable (not supplied),
connect one end of the Ethernet cable to the LAN port of your
wired Ethernet broadband router and the other end to M50’s LAN
port.
10
Page 11

9 +12V TRIGGER IN
With this input triggered by a 12V DC supply, the M50 can be switched
ON remotely from standby mode by compatible devices such as
ampliers, preampliers, receivers, etc. If the 12V DC supply is cut o,
the M50 will return to standby mode.
• Connect this +12V trigger input to the remote device’s
corresponding +12V DC output jack using a mono cable with
3.5mm male plug.
• The controlling device must be equipped with a +12V trigger
output to use this feature.
+12V TRIGGER OUT
• The +12V TRIGGER OUT is used for controlling external device that is
equipped with a +12V trigger input.
• Use a 3.5mm mini-jack connector to pass +12V to a compatible
device equipped with +12V TRIGGER IN.
• This output will be 12V when the M50 is ON and 0V when the unit is
either OFF or in standby mode.
10 WIRELESS (WIFI) ANTENNA TERMINAL
• Install the supplied wireless antenna into this wireless antenna
terminal (WiFi).
• For wireless connection to be established, ensure that the supplied
wireless antenna is installed and Wireless (WiFi) broadband router
with broadband internet connection is setup and available.
IDENTIFICATION OF CONTROLS
ENGLISHFRANÇAISESPAÑOLITALIANODEUTSCHNEDERLANDSSVENSKAРУССКИЙ
11 POWER
• Supply AC mains power to the M50.
• When the POWER switch is set to ON position, the M50 goes to
standby mode as shown by the amber status condition of the
Standby LED. Press the front panel Standby button or remote
control’s [ON] button to switch ON the M50 from standby mode.
• If you intend not to use the M50 for long periods of time (such as
when on vacation), switch o the POWER switch.
• With POWER switched o, neither the front panel Standby button
nor remote control’s [ON] button can activate the M50.
12 FUSE HOLDER
Only NAD service personnel can access the fuse holder in the unlikely
event a fuse may need to be replaced. Refer all servicing to authorized
NAD service centers.
13 AC MAINS INPUT
The M50 comes supplied with two separate AC power cords. Select the
AC power cord appropriate for your region.
• Before connecting the AC power cord’s plug to the wall outlet,
connect rmly rst the other end of the AC power cord to M50’s AC
Mains input socket.
• Always disconnect the AC power cord’s plug from the wall outlet
rst, before disconnecting the cable from the M50’s AC Mains input
socket.
11
Page 12

ENGLISH FRANÇAIS ESPAÑOL ITALIANO DEUTSCH NEDERLANDS SVENSKA РУССКИЙ
IDENTIFICATION OF CONTROLS
REMOTE CONTROL
1 ON: Switch M50 from Standby mode to operating mode.
1
OFF: Switch M50 to standby mode.
HDM I
AES/
EBU
USB
SETUP
2
DIM
CD
HDM I
EQ
DISP
COAX
1
OPT
2
POL AR.
MENU: Display main menu.
3 D/F/A/S: Navigate or select through menu items or options.
ENTER: Conrm selected option. Go to next option.
CD: Select CD mode.
MENU
NET W
USB 1: Select Front USB source.
4 RPT: Repeat playback of current track or le. Repeat playback of whole disc or playlist.
RAND: Play tracks/les in random order.
2 DISP: Display information about current track, le or song.
3
4
ENTER
5 [k]: Eject loaded disc.
USB
1
VO LUME
RPT
MUTE
RAND
USB
2
[;]: Pause playback temporarily.
[0]: Go to next track or le.
[9]: Go to the beginning of current track or le.
[4]: Start playback.
Only above buttons are compatible with M50. Other available buttons are not applicable for M50 or
are non-functional.
5
IMPORTANT NOTICE ABOUT M50 REMOTE CONTROL
The M50 remote control can be used for either M51 Direct Digital DAC or M50 Digital Music
Player.By undertaking the following steps, the M50 remote control can be defaulted for use by
either M51 or M50.
3
2
1
5
4
6
For M50: Press and hold “5” and “0” at the same time until the remote control’s blue transmit LED
ashes twice.
8
7 9
0
For M51: Press and hold “5” and “1” at the same time until the remote control’s blue transmit LED
ashes twice.
Release the corresponding buttons above as soon as the blue transmit LED ashed twice.
12
Page 13

OPERATION
USING YOUR iPad AS CONTROLLER
This version of the manual employs the iPad as the device controller of the
NAD M50. iPad is not supplied with your NAD M50.
Use your iPad to download and install the free NAD M50 Remote App from
the iTunes App Store.
Select from your iPad screen to open the NAD M50 Control Panel.
The NAD M50 Control panel is compatible with iPad’s method of navigating
through its features and functions. Use your ngers to pinch, swipe, tap and
double-tap an item you want to command, control or manipulate. Refer to
your iPad’s user guide for further information on how to use multi-tasking
gestures to go about the task you want to perform.
NAVIGATION CONTROLS AND ICONS
The following are other navigation controls and icons that you will
encounter as you use your iPad to open the NAD M50 App and navigate
through its features.
Launch NAD M50 app.
Return to Source mode. Display available sources.
Show all active NAD devices available within the same
network.
CONTROL PANEL
The NAD M50 Control Panel is divided into three main screen sections
1 Center Screen
Reect all playback controls and other information depending upon the
source selected.
2 Menu Screen
Show all congurable menu settings.
ENGLISHFRANÇAISESPAÑOLITALIANODEUTSCHNEDERLANDSSVENSKAРУССКИЙ
Slide to increase or decrease volume or audio output
NOTE
Audio output level is adjustable via the Volume slider in the NAD App
only if the respective RS232 ports of M50 and the optional M2, M51,
C390DD or any compatible NAD models are interfaced and connected
together. The Volume slider in the NAD App is disabled and not
functional in the absence of such interconnection.
Return to Home mode – display device’s control panel.
Return to previous display or menu window.
Exit current menu window or page display.
level.
Skip forward or backward a song from your current
playback list. At TuneIn or WiMP Source mode, tapping
either control will revert the source to “Library” mode.
Start playback of song or broadcast.
Pause playback of song or broadcast.
Songs in the current playback list are played in random
order.
Repeat playback of current song.
Repeat all songs in the playlist.
3 Player Screen
Display all available players in the same network.
13
Page 14

ENGLISH FRANÇAIS ESPAÑOL ITALIANO DEUTSCH NEDERLANDS SVENSKA РУССКИЙ
OPERATION
HOW TO SWITCH BETWEEN SCREEN SECTIONS
CENTER SCREEN TO MENU SCREEN
CENTER SCREEN TO PLAYER SCREEN
MENU SCREEN TO CENTER SCREEN
1
1
2
1 Tap to show Menu Screen along with a portion of the Center
Screen display.
2 Swipe from left to right to show Menu Screen along with a portion of
the Center Screen display.
3
2
4
1 Tap or anywhere within the Center Screen display portion to return
full Center Screen display.
2 Swipe from right to left within the Center Screen display portion to
return full Center Screen display.
PLAYER SCREEN TO CENTER SCREEN
3 Tap to show Player Screen along with a portion of the Center
Screen display.
4 Swipe from right to left to show Player Screen along with a portion of
the Center Screen display.
1
2
1 Tap or anywhere within the Center Screen display portion to return
full Center Screen display.
2 Swipe from left to right within the Center Screen display portion to
return full Center Screen display.
14
Page 15

OPERATION
MENU SCREEN
The Menu Screen consists of several sections as follows
• Local Sources
• Streaming Services
• Now Playing
• Player Control
• Settings
• Help
LOCAL SOURCES
Show current sources. When available, these sources could be
LIBRARY
Selecting “Library” allows you to listen to your personal music collection
stored on your network (PC, MAC, NAS), ripped to your M52 Digital Music
Vault or contained in a USB mass storage device connected to the USB 2
(Type A) input of the M50.
Upon selection of “Library”, your music catalogue will appear on-screen.
The category buttons (located at the bottom portion) allows your music to
be sorted in several ways as follows
• Artist
• Album
• Song
ENGLISHFRANÇAISESPAÑOLITALIANODEUTSCHNEDERLANDSSVENSKAРУССКИЙ
Library
Collection of personal music you have backed up, stored or ripped in
• A M52 Digital Music Vault or USB mass storage device connected to the
USB 2 (Type A) input of your M50
• Shared network (PC, MAC, NAS)
Audio Disc/Data Disc
Tracks or les playable from the audio or data disc loaded at the disc slot.
USB
Stored music les accessible from the USB device connected to the Front
USB.
Select an alphabet letter on the right side for quick redirection to the
corresponding list of artists, albums or songs that starts with the selected letter.
• New: List albums in the order they were encoded with the latest
item at the top of the list. This is an easy way to locate ripped CD’s or
purchases that were recently downloaded.
• Playlist: Show favourite songs that were grouped together and saved
for easy access. Several playlists can be created like your Favourite
playlist, Contemporary playlist, Oldies playlists, etc.
• Info: Open on Last.fm a small browser showing related information
(like biography, albums) about the current artist being played back.
If no information about the artist is available, the browser will display
“[unknown]”.
15
Page 16

ENGLISH FRANÇAIS ESPAÑOL ITALIANO DEUTSCH NEDERLANDS SVENSKA РУССКИЙ
OPERATION
SEARCH …
You can search a song by directly entering its name at the “Search…” box.
Select the “Search…” box and the on-screen keyboard appears.
Enter the song’s name (even just a part of it) and several relevant songs,
albums or artists pop up as you type.
If available, select from the suggested list the song you were looking for.
Otherwise, try searching again.
NOTE
Above category buttons and features apply also to Audio/Data disc and
USB source modes.
STREAMING SERVICES
Show streaming services supported by NAD M50. Enter your account log-in
details or credentials for the applicable streaming service you subscribe.
TUNEIN
TuneIn Radio is a music service provider supported by NAD M50. TuneIn
Radio allows listeners to experience the whole world of radio within a
single application. It is a global service where one can listen to music,
sports or news from every corner of the earth. Users in Vancouver can enjoy
broadcasts from London, Sydney, New York, Tokyo or any other location in
the world.
TuneIn allows listeners to quickly and easily nd their favourite radio
stations and personalities plus discover new ones. Radio stations are
classied according to the following preferences.
TuneIn
Tune to radio stations streamed across the Internet via TuneIn.
WiMP
Rdio
Listen to music streaming service providers supported by NAD M50.
• Local Radio: Tune in to radio stations in your local area.
• Music: Select radio stations by categories or genres like Adult
Contemporary, Classical, Country, Reggae, etc.
• Talk: Oer a variety of topics like Business, Comedy, News, Religious, etc.
• Sports: List popular sports news or content providers that you can
listen in.
• By location: Listen to radio stations by countries. Radio stations are
grouped by continents and then by countries.
• By language: Radio stations are grouped according to the language
they are broadcast like Arabic, Chinese, Spanish, Tagalog, etc.
• Podcasts: Listen to Talk, Music, Sports or other available audio
podcasts.
SEARCH STATIONS, SHOWS, SONG…
Search a radio station, show, song or any type of broadcast by directly
entering the name at the “Search stations, shows, songs…” box.
1 Select the “Search stations, shows, songs…” box and the on-screen
keyboard appears.
2 Enter the name of station, show, song or broadcast you are searching
and then select “Search” from the on-screen keyboard. Several
suggested stations, shows, songs or broadcasts corresponding to your
search will be shown.
3 Select from the suggested list the station, show, song or broadcast you
were looking for. Otherwise, try searching again.
16
Page 17

OPERATION
FAVOURITES
Create, save and easily access your favourite radio stations.
TO ADD FAVOURITE
Go to desired station page and select the TuneIn icon in the thumbnail of
the selected station. A menu window will pop-up. Select “Add Favourite”
and the selected radio station will be added in your “Favourites” list.
TO DELETE FAVOURITE
From the same menu window, select “Delete Favourite” to remove the
selected station from the “Favourites” list.
OTHER OPTIONS
The menu window that pops-up may include other options like the
playable audio format and the reliability of the signal, i.e. “Play I 48 kbps
MP3 – 75% reliable”. These options are dependent upon the capability or
information supplied by the selected radio station.
NOTE
The added or deleted favourite may not be reected immediately in
the “Favourites” menu window. Refresh the display by selecting “Local
Radio” or any other options and then return to “Favourites” – the
Favourite would be by now included or deleted in the Favourites list.
DISPLAY OF CURRENT BROADCAST
When a particular radio station is being broadcast, a thumbnail of the radio
station logo is shown at the lower left corner of the screen display.
Upon selection, the thumbnail image will be maximized into a full
screen display. In this full screen view, the following features, functions or
information are available.
3 42
1
1 Return to previous display or menu window.
2 Slide to the right to increase volume level
Slide to the left to decrease volume level
3 Play or pause current broadcast.
Skip backward and skip forward are not applicable for TuneIn.
4 Elapsed time listening in to current broadcast.
5 Show all devices in the network
6 Show clickable TuneIn menu options like Add Favourite, Delete
Favourite, Report a Problem and other available options.
7 Display related information as supplied by the radio station
ENGLISHFRANÇAISESPAÑOLITALIANODEUTSCHNEDERLANDSSVENSKAРУССКИЙ
5
6
7
Select the thumbnail.
When TuneIn icon is selected, among the options that appear is the “Report
a problem”. Follow all prompt commands to complete the report.
17
Page 18

ENGLISH FRANÇAIS ESPAÑOL ITALIANO DEUTSCH NEDERLANDS SVENSKA РУССКИЙ
OPERATION
WiMP
WiMP (Wireless Music Player) is a streaming music service currently
available in Sweden, Denmark, Norway and Germany. WiMP on NAD M50
allows you to gain access to millions of songs.
LOGIN TO YOUR WiMP ACCOUNT
1 Select “Congure Music Services” from the “Congure Player” menu.
2 Log-in to your WiMP account by entering applicable details like User
name, Password and Country.
3 Select “Update” to register and store your corresponding WiMP account
details.
OTHER WiMP FEATURES
(Applies to Songs and Albums)
• New - Latest songs or albums
• Recommended - Acclaimed recordings
• Popular - Most sought-after songs or in demand albums
PLAYLIST
• My Playlists - Include selections from WiMP and Library.
• My WiMP Playlist - Consist of selections only from WiMP.
Upon successful log-in, select “WiMP” from the available list of music
services and you will be ushered in to all kinds of music: pop, rock, metal,
hip hop, r & b, jazz, classical and more - both old, classics and the latest
nds.
MANAGING YOUR WiMP PLAYLIST
When at WiMP source mode, features like Edit, Shue, Clear, Save, Artist,
Album, Song and sections like “Creating Playlist” and “Deleting Playlist” are
managed in the same manner as they are handled at Library source mode.
OTHER MUSIC SERVICE PROVIDERS
For other music service providers supported by NAD, follow similar
procedure above for WiMP in activating and conguring their services.
More music service providers or streaming services will be supported by
NAD going forward. These music service providers may be added up when
your player receives notication for software upgrade. Watch out then for
your favourite music service providers as NAD gets to support their services!
CREATING A PLAYLIST
1
2
Refer these features and sections to their corresponding descriptions at the
LIBRARY section above.
18
The playlist, reected in the left side of the screen display, is a register of
songs you have individually or collectively selected from your library and
music service provider. The listed songs can be played back in sequential or
shued order.
Page 19

OPERATION
A playlist can be created by the following easy steps.
1 Select desired songs by picking through the Album, Song or Artist list
of your music Library or your music service provider. Select on the
upper right corner to close out the album.
2 Each selected song will be reected in the current playlist.
3 After completing your playlist, press “Save” and the on-screen keyboard
and playlist naming window will appear.
4 Type desired Playlist name. When done, press “Save” on the upper right
corner to complete the naming process.
4 Once you complete all the songs you want deleted, select “Done” to exit
edit mode.
While at Edit mode, the order of the songs can be rearranged according
to your preference. Press and hold the on the right side of the desired
song you like to relocate. Then drag and drop said song to the desired
location in the playlist.
SHUFFLE
Playback in random order the songs in the current playback list only.
CLEAR
Songs in the current playlist are all cleared out. From the “Clear playlist”
window that will pop-up, select “Yes” to clear the current playlist or “No” to
retain the current playlist
SAVE
Group current list of songs into one Playlist and create a name for the
collection.
1 Press “Save” during playback and the on-screen keyboard and playlist
naming window will appear.
2 Type desired Playlist name.
3 When done, press “Save” on the upper right corner to complete the
naming process.
DELETING A PLAYLIST
A Playlist can be deleted from the Playlist register by the following steps.
1 Select “Playlist” and the Playlist register appears. Press “Edit” and will
precede each Playlist.
ENGLISHFRANÇAISESPAÑOLITALIANODEUTSCHNEDERLANDSSVENSKAРУССКИЙ
This newly named Playlist will be included in the Playlist register. It will be
recalled along with other saved Playlists when “Playlist” tab is selected.
MANAGING YOUR PLAYLIST
A current Playlist can be managed by selecting any of the following options
EDIT
Delete songs from the current playlist.
1 Press “Edit” and will precede each song.
2 Select desired song to be deleted. and a “Delete” box will appear
on the same row as the selected song.
3 Select “Delete” to conrm removal of the song from the list. Repeat the
same for other desired songs to be deleted.
19
Page 20

ENGLISH FRANÇAIS ESPAÑOL ITALIANO DEUTSCH NEDERLANDS SVENSKA РУССКИЙ
OPERATION
2 Select desired Playlist to be deleted. and a “Delete” box will appear
on the same row as the selected Playlist.
Upon selection, the thumbnail will be maximized into a full screen display.
In this full screen view, the following features, functions or information are
available.
42 3
5
3 Select “Delete” to conrm removal of the desired Playlist. Repeat the
same for other Playlists to be deleted.
4 Once you complete all the Playlists you want deleted, select “Done” to
exit edit mode.
PLAYBACK DISPLAY OF CURRENT SONG
When a particular song from either your library or music provider is being
played back, a thumbnail of the album is shown on the lower left corner of
the screen display
Select the thumbnail.
1
1 Return to previous display or menu window.
2 Slide to the right to increase volume level
Slide to the left to decrease volume level
6
7
8
3 Play or pause current song
Skip backward to previous song
Skip forward to next song
4 Slide to the left to scan backward
Slide to the right to scan forward
Song elapsed time
Total playback time of current song
5 Show all devices in the network
6 Repeat playback of current song
Repeat all songs in the playlist
Repeat o
7 Random playback
8 Scroll through thumbnail images of the playlist.
Select thumbnail image of desired song for immediate playback.
20
Page 21

OPERATION
NOW PLAYING
COVER VIEW
Display in full screen view the current source being played or broadcast.
Select “Cover View” and the current thumbnail of the song or station will be
maximized in full screen view along with other related information.
PLAYER CONTROL
Access “Congure Player” to launch the Control Panel of your M50.
RIP/ENCODE CONTROL PANEL
Refer below under the same heading.
IMPORTANT!
“Rip/Encode Control Panel” will manifest in the “Congure Player” menu
window only if there is a USB mass storage device or M52 connected to
M50’s rear panel USB 2 input. In the absence of such interconnection, the
“Rip/Encode Control Panel” option will not be available in the “Congure
Player” menu.
CONFIGURE WIFI
Refer to section above about “CONNECT TO WiFi” under GETTING STARTED.
AUDIO SETTINGS
Congure the audio settings of the M50 with respect to volume limits, gain
and output mode.
Top volume limit/Bottom volume limit
Manually set desired maximum and minimum volume level settings of the
volume slider using the on-screen keyboard.
ENGLISHFRANÇAISESPAÑOLITALIANODEUTSCHNEDERLANDSSVENSKAРУССКИЙ
CONFIGURE PLAYER
Launch the Control Panel of your M50. Use this Control Panel to initiate, set
or congure the following options.
IMPORTANT!
• “Top volume limit” and “Bottom volume limit” will manifest in the
“Congure Audio Settings” menu window only if the respective RS232
ports of M50 and the optional M2, M51, C390DD or any compatible NAD
models are interfaced and connected together.
• Audio output level is adjustable via the Volume slider in the NAD App
only if the respective RS232 ports of M50 and the optional M2, M51,
C390DD or any compatible NAD models are interfaced and connected
together. The Volume slider in the NAD App is disabled and not
functional in the absence of such interconnection.
• Use a NULL modem cable or cross serial RS232 gender changer adapter
to interface the M50 with the compatible NAD model.
CONFIGURE NETWORK SHARES
Refer below under the same heading.
CONFIGURE MUSIC SERVICES
Log-in to your music service provider account (like WiMP) by entering
applicable details like User name, Password and Country. Select “Update”
to register and store your corresponding account details. Refer also to the
WIMP section above.
SET PLAYER ROOM NAME
Update the current player name using the on-screen keyboard.
21
Page 22

ENGLISH FRANÇAIS ESPAÑOL ITALIANO DEUTSCH NEDERLANDS SVENSKA РУССКИЙ
OPERATION
DOWNLOAD FROM HIGHRESAUDIO
HIGHRESAUDIO (HRA) is a commercial music download service for
audiophiles worldwide oering only high-resolution 24-bit albums and
songs at sampling rates from 88.2 kHz up to 384 kHz. It is a high-resolution
music download service oering a diverse catalog of music in Studio
Master-Quality. HIGHRESAUDIO provides double and above the sampling
rate to CD resolution in stereo and 5.1 studio master albums and songs in
FLAC, ALAC, DSD, DXD-FLAC format as instant download.
CHECK FOR UPGRADE
Automatically search for latest upgrade software available for your M50.
Install upgrade software when available.
DIAGNOSTICS
Display signal strength of current connection, IP address and applicable
details for your M50. Select “Advanced diagnostics” to show a log report of
your M50 and record of current connectivity and indexing status.
SEND SUPPORT REQUEST
Make a service request by sending your name, phone number, email
address and the subject of your request. A NAD customer service agent will
contact you either by email or phone call.
IMPORTANT!
“Send support request” is the best tool for any service request, customer
query or troubleshooting tips. Use this option to get direct assistance
from a NAD customer service agent.
Enter your HRA user name and password. Congure your M50 HRA settings
and monitor any downloads. The download list is obtained from HRA. It
contains all the tracks available for download.
The HRA download is per track, not per album. Some HRA tracks have
embedded artwork. If the corresponding artwork exceeds 600KB, it will not
be displayed in the App.
The “Update” option will constantly refresh the screen to monitor the tracks
being downloaded.
IMPORTANT!
“Download from HIGHRESAUDIO” will manifest in the “Congure
Player” menu window only if there is a USB mass storage device or
M52 connected to M50’s rear panel USB 2 input. In the absence of such
interconnection, the “Download from HIGHRESAUDIO” option will not
be available in the “Congure Player” menu.
PLAY INTERNET URL
Play specic Internet URLs. Type or copy the URL into the section provided
and select “Play”. The URL will automatically start playing.
SHOW YOUR OTHER PLAYERS
Other devices within your network are shown. Select a displayed device
and you will be redirected to its corresponding Control Panel.
BACKUP PLAYLISTS
Save a backup copy of the current playlists to the USB mass storage device
connected to the front panel’s USB input.
FORCE HOTSPOT MODE
Disconnect your M50 from your wireless network connection and reset it
to the factory Hotspot settings. This is normally initiated if you are changing
your network connection settings or connecting your M50 to a new
network.
REBOOT
Initiate reboot of your M50 to restore normal operations when experiencing
any inadvertent malfunctions.
RIP/ENCODE CONTROL PANEL
The M50 transport can rip directly a loaded CD to a connected M52
Digital Music Vault or USB mass storage device. Using NAD’s own music
management software, ripping is completely automatic. With a network
connection to the Internet, this music management software fetches
metadata and cover art, without the need for a computer! Everything is
organized and instantly available for playback. You can browse your music
collection using album art or category listing and easily create playlists on
the y.
IMPORTANT!
“Rip/Encode Control Panel” will manifest in the “Congure Player” menu
window only if there is a USB mass storage device or a M52 connected to
M50’s rear panel USB 2 input. In the absence of such interconnection, the
“Rip/Encode Control Panel” option will not be available in the “Congure
Player” menu.
The following Rip/Encode Control Panel options allow you to setup and
monitor the music CDs being backed up.
RESTORE PLAYLISTS
Reinstate the playlists that were backed up at the USB mass storage device
connected to the front panel’s USB input.
IMPORTANT!
“Backup Playlists” and “Restore Playlists” will manifest in the “Congure
Player” menu window only if there is a USB mass storage device
connected to M50’s front panel USB input. In the absence of such
interconnection, “Backup Playlists” and “Restore Playlists” options will
not be available in the “Congure Player” menu.
DELETE INDEX
Clear current indexed collection and refresh anew with re-indexing
automatically initiated. “Delete Index” is applicable when instability occurs
in accessing songs.
22
Page 23

OPERATION
ENCODER SETTING
Set up the default le format when ripping your music CDs.
ENCODER
Set the audio format the ripped audio le will be encoded.
FLAC (default format): High quality compression designed specically
for CD backup purposes. Files are ripped at FLAC level 5 balancing
compression and rip speed at full CD lossless levels of 44.1 kHz/16bits.
MP3: Standard audio compression designed to keep bandwidth low
with little degradation. Files are ripped at 320kbps, the highest level of
sound quality available to MP3 format.
WAV: Audio le type generally used for applications that require high
quality audio such as CDs. Files are uncompressed, and therefore take
up some disk space. Because WAV les are uncompressed, they contain
more data and produce better, more subtle and more detailed sounds.
MP3+FLAC: Audio le is encoded in both MP3 and FLAC format.
MP3+WAV: Audio le is encoded in both MP3 and WAV format.
RIP/PLAY OPTIONS
Set default setting when an audio disc is inserted.
ENGLISHFRANÇAISESPAÑOLITALIANODEUTSCHNEDERLANDSSVENSKAРУССКИЙ
Always Rip: Loaded audio disc will be directly ripped to the connected
M52 or USB mass storage device.
Always Play CD: Playback loaded audio CD. If loaded disc contains
music les, select “Audio Disc” or “Data Disc” from the “Local Sources”
menu to browse content of loaded disc. Select le to playback.
Prompt for Rip or Play: A Player notication will pop-up giving the
user two choices - Rip or Play the loaded disc.
DISK USAGE
Display current information of the connected M52 or USB mass storage
device’s total disk space, used space and total remaining disk space.
MP3 ENCODER
“MP3 encoder” section will be included in the “Encoder” menu window if
the selected encoder format option is MP3, MP3+FLAC or MP3+WAV.
Good quality, fast, 320kb/s or Moderate quality, fast, 128 kb/s: The
choice for MP3 encoder setting is a matter of preference. As a guideline,
greater bit rates generally mean better sound quality and a closer
representation of the original sound.
Best quality, slow, VBR (lame): VBR stands for “Variable Bit Rate” while LAME
is acronym for”LAMEAin’t anMP3Encoder”. With VBR MP3, the encoder
automatically detects which bit rate is most appropriate for the sound being
encoded. This means that when there is little sound to be heard, the encoder
employs a lower bit rate. On the other hand, if there is very complex sound
to be heard, the encoder uses a much higher bit rate to attain better sound
reproduction. LAME’s default VBR method tests theactualoutput quality to
ensure the desired quality level is always achieved.
Select “Update” to save your selected encoder setting.
RIP/ENCODE STATUS
Display progress of les being copied o the loaded CD. The current
encoder status is also shown. Select “Update” to refresh information
shown. The ripping process will be completed automatically and a Player
Notication will be briey shown indicating that the Rip/Encode process is
completed already.
IMPORTANT NOTES ABOUT CD RIPPING
• For ripping of multiple CDs, insert the next disc as soon as the current
disc is ejected. It is not necessary to wait for the encoding to be
completed before the next disc is inserted.
• Only Audio CDs can be ripped into the M52. It will not rip Blu-ray, DVD,
DVD-Audio, HD-DVD or other types of Optical Disc format.
• CD ripping can be stopped at any time by selecting “Eject CD”.
EJECT CD
Manually eject loaded disc if there are issues like the CD won’t eject or
cannot be encoded.
23
Page 24

ENGLISH FRANÇAIS ESPAÑOL ITALIANO DEUTSCH NEDERLANDS SVENSKA РУССКИЙ
OPERATION
CONFIGURE NETWORK SHARES
Connect your digital music les stored in your PC, MAC or NAS and stream
them through your M50 for easy access and listening.
Find, add or enter share name manually. Current music shares can also be
removed by clearing (unchecking) the check box of the desired network
share name.
When entering a share name manually, specify the Universal Naming
Convention (UNC) path where the shared folder is located. Computer name
and password will be required if applicable.
Below is a sample illustration of le sharing using Windows 7. Select
the items indicated and follow the steps in the order they are arranged
or numbered. The method shown below is about the same for other
operating systems except for the method of le sharing. Check the
procedure on How to Share File for your specic operating system.
WINDOWS 7 FILE SHARING
2
6
7
8
1
9
3
4
11
5
10
24
Page 25

OPERATION
Network conguration is now complete. Close Control Panel.
Now, start sharing your Music library.
13
12
14
Your Music library is now successfully shared with your network.
With your network already congured and music library shared, set up your
M50 to connect with your network shares. Use the NAD App to congure
the following:
18
19
ENGLISHFRANÇAISESPAÑOLITALIANODEUTSCHNEDERLANDSSVENSKAРУССКИЙ
16
20
15
21
22
17
23
Given that all entries are correct, a message will be shown afterward
indicating that the Share is successfully completed. Indexing will
automatically start with the shared les being incorporated to your library.
25
Page 26

ENGLISH FRANÇAIS ESPAÑOL ITALIANO DEUTSCH NEDERLANDS SVENSKA РУССКИЙ
OPERATION
SETTINGS
PLAYER NOTIFICATION
Your M50 is automatically notied if a new software upgrade is released. A
“Player notication” window willpop-up prompting you to select either “I
want it now” or “Delay 24 hours”.
The “Settings” section of the M50 allows you to customize its default
settings. The following are the parameters you can setup or initiate.
PLAY
Set the location of the song to be added in a playlist.
Last: Place song to be added at the end of the current playlist.
Next: Insert added song right after the current song being played back.
Now: Insert added song right after the current song being played back,
stops the current song and immediately playback the added song.
REINDEX MUSIC COLLECTION
Whenever songs are added to your library, reindex your NAD device so that
it can properly locate and identify these new songs.
How long will it take to reindex your Music Library? It will depend upon its
size and network connection (wired or wireless). For wireless connection, it
is 500 songs per minute; for wired connection, 1000 songs per minute.
During the indexing, “Indexing phase x – xxx tracks processed” is displayed.
“Reindex music collection” will re-appear once the indexing is completed.
RELOAD ARTWORK
Activate “Reload Artwork” if some of your Albums’ artwork went missing
after re-indexing.
ALL SONGS RANDOM
Re-arrange in random order all songs in your Library and then start or
continue playback. Select again “All Songs Random” to randomly re-arrange
once more your songs.
At random mode, “Shue” in the playlist is highlighted. Select “Shue” to
exit random play and resume normal playback.
• I want it now: Initiate installation of the latest upgrade software.
Installation of software update will proceed automatically.
• Delay 24 hours: Opt not to install latest software update and allow
receipt of the same notication again after 24 hours.
CONFIGURING YOUR SYSTEM
If you have multiple NAD digital music players like the M50 in the same
network, you can control them separately. Each player on your network is
an independent device working in conjunction with your system.
As a complete music system, they for the most part work together. Rarely
does each device need to be congured individually as playlists, music
sources and music subscription services are replicated to each device when
congured. Playback however is controlled individually or in groups.
From a multiple device setup, select the player (device) to playback using
the following step.
1 Select and available players in your network are displayed.
2 Select the player you wish to control and all the App controls will switch
to the selected player.
ORGANIZING YOUR PLAYERS
Multiple devices in dierent locations are like putting players in dierent
Rooms. You can organize these players into one group or conversely
remove a player in a group by initiating the following steps.
1 Select from the Player Screen the player (“Music Center” in this example)
you wish to control.
2 The selected player will be highlighted and a “Group” button is shown
beside it. This makes the “Music Center” the “Master” or main host player
of the group.
HELP
i0S APP: X.X.X BluOS: X.X.X
List the iOS App version and the operating software release version of your
M50.
26
3 Select the “Group” button and the button changes to “Done”. At the
same time, a button is shown beside each available player.
Page 27

4 Select the symbol of the player (“Oce” and “Master Bedroom”
in this example) you would like to group with “Music Center”. “Oce”,
“Master Bedroom” and “Music Center” will all be highlighted together.
5 Select “Done” button and the same button will change to “Group”
button - “Music Center”, “Oce” and “Master Bedroom” are now grouped
together. Note also the group name - “Music Center + Oce + Master
Bedroom”.
OPERATION
ENGLISHFRANÇAISESPAÑOLITALIANODEUTSCHNEDERLANDSSVENSKAРУССКИЙ
REMOVING A PLAYER FROM THE GROUP
1 Select “Group” button and the same button will change to “Done”
button with beside the players in the group.
2 Select the beside the player you want to remove from the group
(“Oce” in this example) and the selected player will be removed from
the group.
3 Select “Done” to complete removal process. The new group name is
now “Music Center + Master Bedroom”.
27
Page 28

ENGLISH FRANÇAIS ESPAÑOL ITALIANO DEUTSCH NEDERLANDS SVENSKA РУССКИЙ
SPECIFICATIONS
AUDIO
Supported File Formats MP3, AAC, WMA, OGG, WMA-L, FLAC, ALAC, WAV, AIFF
CD Slot-loading mechanism
Native Sampling Rates 32, 44.1, 48, 88.2, 96, 176.4, 192 kHz
Bit Depths 16, 24
Album Art JPG
Supported Operating
Systems
CONNECTIVITY
Network Ethernet RJ45, 802.11n WiFi
USB Host Type-A port for connection to USB memory sticks and
USB Device Type-B mini port for product servicing
Audio Analog RCA stereo jack, SPDIF digital connector
Power Universal three-pin AC cord input (100V – 240V)
Plays music from network shares on the following
desktop operating systems:
Windows : XP, 2000, Vista, 7
OS X : Snow Leopard 10.6 or later
iPad : iOS 5 or later
supported peripherals. Supply power up to 500 mA
USER-INTERFACE
Android Free App Available Online at Google Play website
Apple Free App Available Online at Apple App Store
Control buttons Front panel control buttons
GENERAL
Free Internet Radio TuneIn Radio
Supported Cloud Services WiMP
Unit weight 8.1 kg (17.8 lbs)
Shipping weight 11.5 kg (25.4 lbs)
Gross unit dimensions
(W x D x H)
Power consumption 22 W
Standby power ≤0.5W
Specifications are subject to change without notice. For updated documentation and features, check
out www.NADelectronics.com for the latest information about M50.
All artwork and imagery is used for illustration purposes only and remains the property of the respective
copyright holders. Music not included with M50 or NAD app.Chapter
435 x 327 x 115 mm
17 ¹/₈ x 12 ⁷/₈ x 4 ¹⁷/₃₂ inches
28
Page 29

ENGLISHFRANÇAISESPAÑOLITALIANODEUTSCHNEDERLANDSSVENSKAРУССКИЙ
29
Page 30

www.NADelectronics.com
©2013 NAD ELECTRONICS INTERNATIONAL
A DIVISION OF LENBROOK INDUSTRIES LIMITED
All rights reserved. NAD and the NAD logo are trademarks of NAD Electronics International, a division of Lenbrook Industries Limited.
No part of this publication may be reproduced, stored or transmitted in any form without the written permission of NAD Electronics International.
While every effort has been made to ensure the contents are accurate at the time of publication, features and specifications may be subject to change without prior notice.
M50_ENG_OM_V17 OCT 2013
 Loading...