


Digital Video
User Guide
Table of Contents |
|
Getting Started |
|
Getting to Know Your Digital Video............................................... |
3 |
Using the Panel............................................................. .......... |
5 |
Power................................................................................... |
6 |
Modes................................................................................... |
7 |
DV Mode |
|
Taking Movies........................................................................ |
11 |
Video Out............................................................................ |
12 |
DSC Mode |
|
Taking Pictures...................................................................... |
13 |
DVR Mode |
|
Recording Voice Messages........................................................ |
15 |
MP3 Mode |
|
Listening To MP3 Music............................................................ |
17 |
PLAYBACK Mode |
|
Basic Playback....................................................................... |
19 |
Advanced Playback................................................................. |
21 |
Main Functions |
|
Changing the Quality Setting..................................................... |
23 |
Using Self-timer...................................................................... |
25 |
Using Guide Line/The LCD Display............................................... |
26 |
Using Hold............................................................................ |
27 |
Volume Adjust........................................................................ |
27 |
Advanced Functions |
|
Attention Icon...................................................................... |
28 |
Menu.................................................................................. |
29 |
En 2
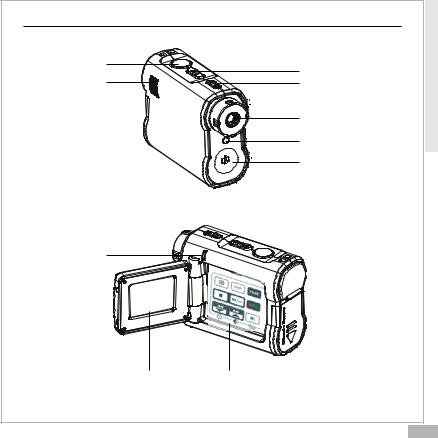
Getting to Know Your Digital Video
Front View
|
T |
Shutter |
E |
S |
|
|
Zoom |
Speaker |
Power Button |
|
Lens |
|
Front LED |
|
Microphone |
Back View
Status LED |
SET |
(Power On/USB) |
|
LCD Viewfinder |
Panel |
Started Getting
En 3
Getting |
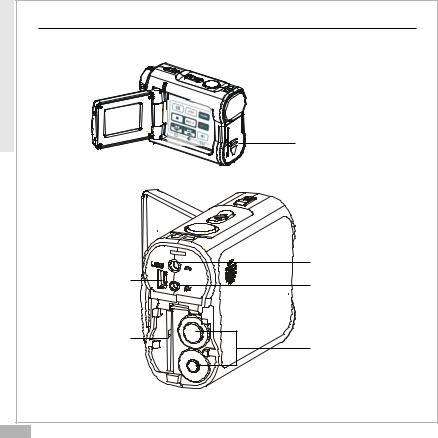
Getting to Know Your Digital Video-continued |
|
Side View |
|
|
Started |
|
|
|
|
|
|
SET |
|
|
|
Battery/SD/MMC Cover |
|
S |
|
|
E |
|
|
T |
|
|
|
Earphone jack |
|
USB port |
AV out |
|
|
|
|
SD/MMC card Slot |
Battery Slot |
|
|
|
En 4 |
|
|

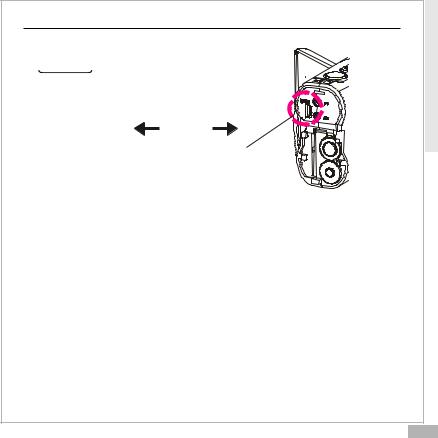
Using the Panel |
|
Getting |
|
|
|
|
Display |
Started |
Menu |
DV/DSC/DVR/MP3 Mode Switch |
|
|
Record/ |
|
Exit/ |
Playback |
|
Mode Switch |
|
|
Stop |
|
|
|
|
|
|
Play/Pause/ |
|
|
Enter |
|
Back/Down/Self-timer |
Volume/Hold(Press 2 Sec.) |
|
Next/Up/Resolution |
|
|
|
|
En 5 |

Getting |
Power |
|
|
|
|
Started |
Power On/Off |
|
|
Nudge the Power slider to activate your |
|
|
|
Digital Video. When Power is on, the Power |
|
SET |
indicator lights in green. Nudge it again to |
|
|
turn this Digital Video off. |
Power Low
If your battery is low, you will see a battery icon ( )shown on the top center of the LCD.
If your battery is about to run out, you will see a blinking battery icon ( ) shown on the top center of the LCD. Your Digital Video will turn off itself in several seconds.
En 6

Modes |
|
Getting |
|
|
|
Power On |
DV Record Mode |
Started |
|
||
|
|
|
|
DSC Record Mode |
|
|
DVR Record Mode |
|
|
MP3 Mode |
|
USB connected |
|
|
|
PLAYBACK Mode |
|
Mass Storage Mode |
PC Camera Mode |
|
|
|
En 7 |

Started Getting
Modes-continued
DV Mode/DSC Mode/DVR Mode/MP3 Mode/PLAYBACK Mode
There are four main modes and PLAYBACK mode in this Digital Video. The four main modes are DV Mode, DSC Mode, DVR Mode and MP3 Mode. 1.DV Mode: take videos with sound
2.DSC Mode: take pictures
3.DVR Mode: record voice messages. 4.MP3 Mode: listen to MP3 music.
You can switch among these four modes by pressing  . By pressing
 , you can switch to PLAYBACK mode to review your videos, pictures
and voice messages. DV Mode/DSC Mode/DVR mode shares the same PLAYBACK mode. You can switch back to the previous mode by pressing
 again.
En 8
Modes-continued
Connected to PC(Mass Storage Mode/PC Camera Mode)
ES
T
USB Cable
USB port
Using Console (Not Available for MAC)
By connecting your Digital Video to a computer, the Console opens. Meanwhile your Digital Video switches to Mass Storage, too. You may choose either to transfer the camera data through Console program or through Mass Storage Mode.
Started Getting
En 9
Started Getting
Modes-continued
Mass Storage Mode
Connect your Digital Video to a computer, it will turn to Mass Storage Mode. In Mass Storage Mode, your Digital Video acts exactly like a hard disk. That means you can access it via the Windows user interface. You can copy, move or delete files (pictures, movies, voice messages or MP3 music) exactly the way you manipulate files under Windows user interface.
Note:
1.Please do not copy any files into the DCIM folder of your Digital Video. Otherwise it may cause Digital Video unstable or crash.
2.Remember to copy the MP3 files into the MP3 folder of your Digital Video.
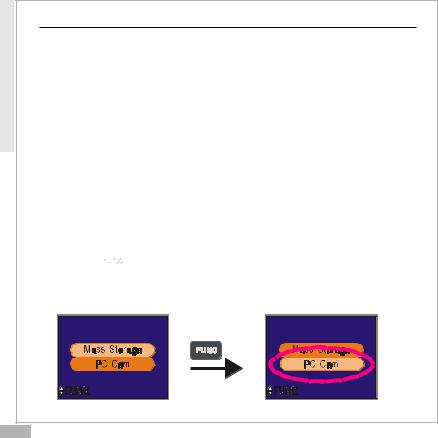
PC Camera Mode
You can connect this Digital Video to a computer with its supplied USB cable and use it as a PC camera.
After USB connecting, the screen will show as below.
By pressing  , it will turn to PC Camera Mode. With a compatible video capture program, you can capture movies.
En 10

Taking Movies |
|
DV |
|
|
Mode |
||
Taking Your First Movie |
|
||
|
|
||
1 |
Press Power |
2 |
Switch to DV Mode |
|
SET |
|
|
2 |
Slide Zoom-in or Zoom-out to frame your picture |
||
|
|
|
Zoom in or Zoom out |
3 |
Press Shutter to start recording |
|
|
|
|
|
SET |
4 |
Press Shutter again to stop |
|
|
En 11
 Loading...