

Page 1

Table of Contents
Introduction ...............................................................................1
Welcome to Nextel® .......................................................................... 1
Customer Care................................................................................... 3
Ordering Information.......................................................................... 4
Driving Safety Tips............................................................................. 4
Getting Started ..........................................................................7
i
550
plus
Phone Features................................................................... 8
Batteries............................................................................................. 8
i
550
plus
Turning Your
Enabling Security............................................................................. 11
Receiving Over-the-Air Programming .............................................. 12
Activating Your
Your Nextel Phone Status................................................................ 13
Keypad Lock .................................................................................... 14
Display Icons.................................................................................... 17
Modes and Menus ........................................................................... 19
Quick Guide to
Creating, Editing and
Using Stored Lists ..................................................................25
Phone Programming........................................................................ 26
Storing Names and Numbers ....................................................26
Pause Digit Entry .......................................................................27
Editing Stored List Entries .........................................................28
Address Book................................................................................... 30
iDEN Organizer ............................................................................... 30
Phone On/Off............................................... 11
i
550
plus
Phone....................................................... 12
i
550
plus
Phone Functions....................................... 20
i
Page 2

Phone Mode ...........................................................................31
Digital Cellular.................................................................................. 31
Making Phone Calls ...................................................................31
Placing International Phone Calls ..............................................34
Receiving a Phone Call .............................................................36
Last 10 Numbers Received/Sent Calls List ...............................37
Ending a Phone Call ..................................................................38
Standard Features .....................................................................39
Additional Phone Services .........................................................43
Nextel Voice Mail Service................................................................ 47
Setting Up Your Voice Mail Box .................................................47
Receiving Voice Mail Messages ................................................48
Using Voice Mail ........................................................................49
Advanced Voice Mail Features ..................................................54
Voice Mail Tree ..........................................................................64
Messaging Services......................................................................... 65
Nextel Two-Way Messaging ...................................................... 65
Text and Numeric Messaging .................................................... 66
Using Your Phone as a Modem....................................................... 70
Private/Group Mode ...............................................................71
Nextel Direct Connect® ................................................................... 71
Displaying Your Private ID............................................................... 72
Using the Private/GroupSpeaker .................................................... 72
Placing Private Calls........................................................................ 73
Receiving Private Calls.................................................................... 73
Quickstore of Private IDs ................................................................. 74
Sending a Call Alert......................................................................... 74
Receiving/Responding to a Call Alert............................................... 75
Call Alert Queuing............................................................................ 75
Group Call........................................................................................ 76
Group-Silent Programming.............................................................. 78
ii
nextel.com
Page 3

Table of Contents
Net Mode .................................................................................79
Wireless Web Navigation Keys........................................................ 80
Starting the Microbrowser................................................................ 80
Customizing thei550
Changing the Display Language...................................................... 83
Setting the Time and Date Format................................................... 84
Backlight Timer................................................................................ 85
Keypad Silence................................................................................ 86
Setting the Ringer Volume .............................................................. 86
Selecting a Ring Style ..................................................................... 87
Selecting a Call Alert Style............................................................... 87
Programming Menu.......................................................................... 88
plus
Phone ..........................................83
Accessories ............................................................................95
Batteries........................................................................................... 95
Travel Chargers............................................................................... 96
Other Important Information ..................................................99
Nextel Customer Care...................................................................... 99
Understanding Status Messages................................................... 100
Nextel Terms and Conditions of Ser vice . ....................................... 102
Safety and General Information..................................................... 109
Warranty Information...................................................................... 118
Patent and Trademark Information................................................ 126
Index ......................................................................................127
iii
Page 4

iv
nextel.com
Page 5

Introduction
Welcome to N ext el
®
Thank you for choosing Nextel as your wireless communications
provider. Your i550plus phone enables you to enjoy c lear c onnections
through Nextel’s All Digital NationalNetwork. In addition, with Nextel
Worldwide
internationally in select cities using other iDEN
SM
Service you can use your i550plus phone to roam
®
networks.
This guide contains all the information you need to take full advantage
of your Nextel service and i550plus phone, including:
Quick Guide to i550plus Phone Functions—
Page 20
Enables experienced digital cellular phone and twoway radio users to get started right away!
Digital Cellular Calling—Digital Cellular Calling
Page 31
includes features such as Call Hold, Call
Forwarding, and Call Waiting.Find out more about
placing calls in this section.
International Roaming—Enables you to make
Page 34
phone calls, check Voice Mail, and more while
traveling in select cities internationally.
Additional Phone Services—IncludesCall
Page 43
Restrictions, Caller ID, and Nextel 411. Find out
more in this section.
Voice Mail—Takes messages 24 hours a day and
includes Message Forwarding, Automatic
Playback,and more. Read more about Voice Mailin
this section.
Page 47
1
Page 6
Text and Numeric M essaging—Lets you receive
numeric messages and important, short m essages
right over the phone. Learn more about Messaging
in this section.
Page 66
Dial-Up Service—Dial-Up capability without
Page 70
landline access. Also see the NextelOnline Dial-Up
Service User’s Guide.
NextelDirect Connect®—An innovativefeaturefor
Page 71
communicating instantly with one or m ore coworkersat a fraction of the cost of cellular. Read
more about Nextel Direct Connect in this section.
Nextel Wireless Web—Stay connected to the
Page 79
critical information you need to make business
decisionsand get businessdone. Also see the Nextel
Wireless Web Us er’s Guide.
Programming—You can customize your i550plus
Page 83
phone and make it behave the way you want it to.
Learn how in this section.
Other Nextel Ad vantages—In a ddition to all of the previously
mentioned benefits,there’s more... Nextel features also include the
following:
• The guaranteed All-Digital Nextel National Network
• No roaming fees while traveling throughout the U.S.
• One-second call rounding after the first minute
• Flat-rate long distance pricing to anywhere in the continental
U.S.
• No landline connection charges
2
nextel.com
Page 7

Customer Care
NOTE: Are you an experienced digit al cellular phone and two-way
radio user? Turn to the Getting Started section beginning on
page 7. This section might be all you need to get started.
Customer Care
For domestic customer care issues including billing issues, general
service needs, or to order additional services, contact Nextel Customer
Care.
Visit nextel.com foravarietyofCustomerCareservices:
• Browsefor information on phones, coverage, rates and other
Nextel services. View and download user’s guides, try out our
interactive virtual product and service demos, find answers to
frequently a sked questions, order accessories, locate service and
repair centers, upgrade phone software, send a message, and more.
• For self-service on your Nextel account, click on My Account to
view your account, pay your bill, add phones to your account, reset
your Voice Mail password, add Wireless Web services, and more.
• For online assistance, click on Contact Us to send us an e-mail
request. Our representatives are committed t o assisting you. Every
effortwill be made to address your questions or concerns within 24
hours. Contact us to add Wireless Web and other services, change
rate plans, inquire on your bill and more.
Or, call us at 1-800-639-6111 or dial 611 from your Nextel phone.
To complement the i550plus phone and Nextel Worldwide Service,
Nextel has also launched International Roaming Customer Care
support. When traveling outside of the U.S. a nd Canada, call
+1 (201) 531-5202 for your Customer Care Service needs. This
Customer Care number will be toll-free from your Nextel handset both
domestically and internationally.
International and domestic coverage,rates and other information are
also available at nextel.com.
3
Page 8

Ordering Information
Nextel Business NetworksSMallow you to communicate with
individualsoutside as well as inside your company. These Networks
link Nextel customers in similar industries or geographies. So, if you
need to reach a client, vendor, or contractor instantly, work smarter by
joining the Nextel Business Networks. Call 1-888-NEXTEL2 (1-888-
639-8352).
Various accessories are available for use with your i550plus phone,
including a Hands-Free Car Kit, Swivel Belt Clip, a nd CigaretteLighter
Adapter. To order accessories, or for a brochure of additional
accessories, call Nextel Nextday
SM
Accessories at 1-800-914-3240 or
contact your Nextel Authorized Representative.
Contact Nextel Customer Care to order any of the services discussed
in this guide, including Nextel Wireless Web, Direct Connect,
AdditionalPhone Services, Voice Mail, Nextel Mobile Messaging and
much more!
SM
For information on Direct Protect
Insurance protection for your
Nextel phone and more, c all 1-888-352-9182 or contact your Nextel
Authorized Representative.
Visitus atnextel.comto learnmoreaboutNextel productsandservices!
Driving Safety Tips
Safety is the most important call you will ever make.
NOTE: For safety and legal reasons (in many countries), do not use
your phone while driving.
Check and follow the local laws regarding the use of mobile
phones while driving.
1. Get to know your wireless phone and its features such as speed dial
and redial. Carefully read your instruction manu al and learn to take
advantage of val uable features most phones offer, including automatic
nextel.com
4
Page 9

Driving Safety Tips
redial and memory.Also, work to memorize the ph one keypad so you can
use the speed dial fun ction without t aking your attention off the road.
2. When available, use a hands free device. A num ber of hands free
wireless phone accessories are readily available today. Whether you
choose an installed mounted device for your wireless phone or a speaker
phone accessory, take advantage of these devices if available to you.
3. Position your wireless phone within easy reach. M ake sure you place
your wireless phone within easy reach and where you can grab it w ithout
taking your eyes from the road. If you get an incom in g call at an
inconvenient time, if possible, let your voice mail answ er it for you.
4. Suspend conversat ions during hazardous driving conditions or
situations. Let the person you are speaking with know you are driving; if
necessary, suspend the call in heavy traffic or hazardous w eather
conditions. Rain, sleet, snow and ice can be hazardous, but so is heavy
traffic. A s a driver, your first responsibility is t o pay attention to the road.
5. Do not take notes or look up phone numbers while driving . If you are
reading an address book or business card, or writing a “to do” list while
driving a car, you are n ot watching w here you are going. It's common
sense. Don't g et caught in a dangerous situation because yo u are reading
or writing and not paying attention to the road or nearby vehicles.
6. Dial sensibly andassess the traffic. If possible, placecalls when you are
not moving or before pulling into traffic. Try to plan your calls before
you begin your trip or attempt to coincide your calls with times you may
be stopped at a stop sign, red light or otherwise stationary. But if you
need to dial while driving, follow this simple tip — dial only a few
numbers, check the road and your mirrors, then cont inue.
7. Do not engage in stressful or em otional conversations that may be
distracting. Stressful or emotional conversations and driving do not mix
— they are distracting and even d angerous when you are behind the
wheel of a car. Make people you are t alking with aware you are driving
and if necessary, suspend conversations which have the p otential to divert
your attention from the road .
8. Use your wireless phone to call for help. Your wireless phone is one of
the greatest tools you can own to protect you rself and your family in
dangerous situations — with your phone at your side, help is only three
numbers away. Dial 9-1-1 or other local emergency number in the case of
fire, traffic accident, road hazard or m edical emergency. Remember, it is
a free call on your wireless phone.
5
Page 10

9. Use your wireless phone to help others in emergencies. Your wireless
phone provides you a perfect opportunity to be a “Good Samaritan ” in
your community. If you see an auto accident, crime in progress or other
serious emergency where lives are in danger, call 9-1-1 or other local
emergency number, as you would want others to do f or you.
10. Callroadsideassistanceor a special wireless non-emergencyassistance
number when necessary.Certain situations you encounter while driving
may require attention but are not urgentenough to merit a call for
emergency services. But you still can use your wirelessphone to lend a
hand. If you see a broken-down vehicle posing no serious hazard, a broken
traffic signal, a minor traffic accident where no one appears injured or a
vehicleyou know to be stolen, call roadside assistance or other specialnonemergency wireless numbers.
11. Use your phone's Internetcapabilities before you
drive.Wireless Internet services are not designedto be
used while driving.
6
nextel.com
Page 11

Getting Started
In this section you will learn everything you need to begin using your
i550plus phone. This section also includes a Quick Guide portion so
experienced digital cellular phone and t wo-way radio users c an get
started right away.
About This Section
This section includes instructions for the following tasks:
i550plusPhone Features Page 8
Batteries:Attaching, Detaching, and Cha rging Page 9
Turning Your i550plus Phone On/Off Page 11
Enabling Security Page 11
Receiving Over-the-Air Programming Page 12
Activating Your i550plus Phone
NOTE: Your phone must be activated beforeyou
can use it.
Your Nextel Phone Status Page 13
Keypad Lock Page 14
Display Icons Page 17
Modes and Menus Page 19
Quick Guide to Using i550plus Phone Functions Page 20
Page 12
7
Page 12
i
550
plus
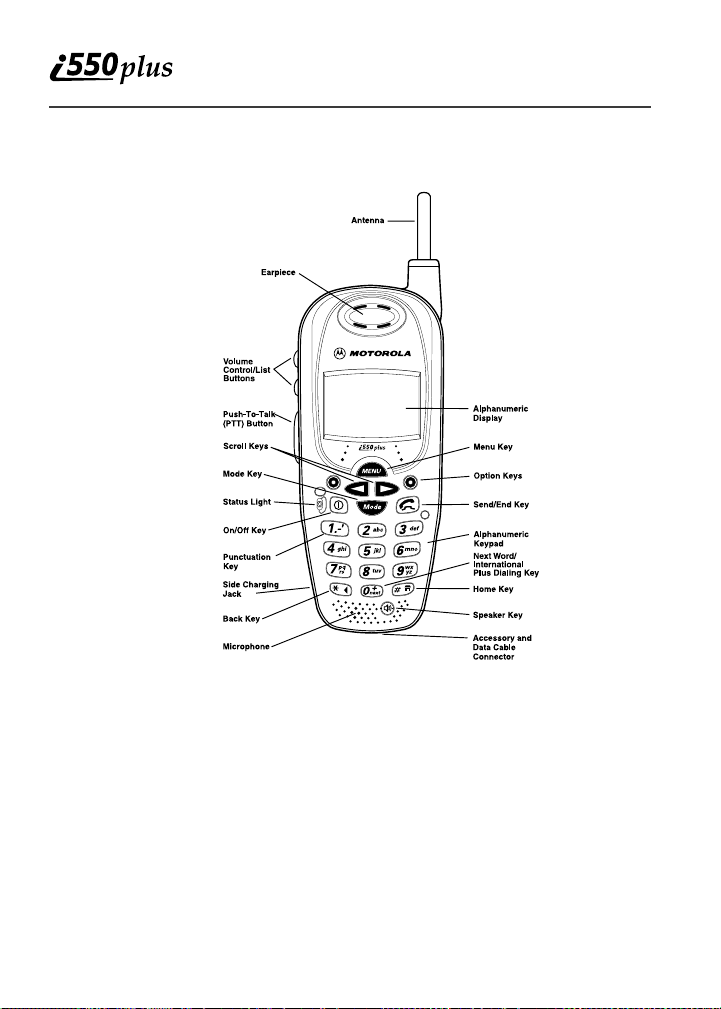
Phone Features
Nextel Direct
®
Connect
NOTE: The display backlight is activated by pressing any key or
button.
Batteries
Your i550plus phone comes with a NiMH-AA battery and charger.
After attaching the battery, you must charge it before you use it for the
first time. See “Charging the Battery” on page 95 to learn the
appropriate charging times for your phone’s battery. After the initial
charging, the battery can be charged more quickly.
8
nextel.com
Page 13
Batteries
Remove the battery from the protective case provided in the original
packaging. When the batteryis not attached to the phone, store it in this
case.
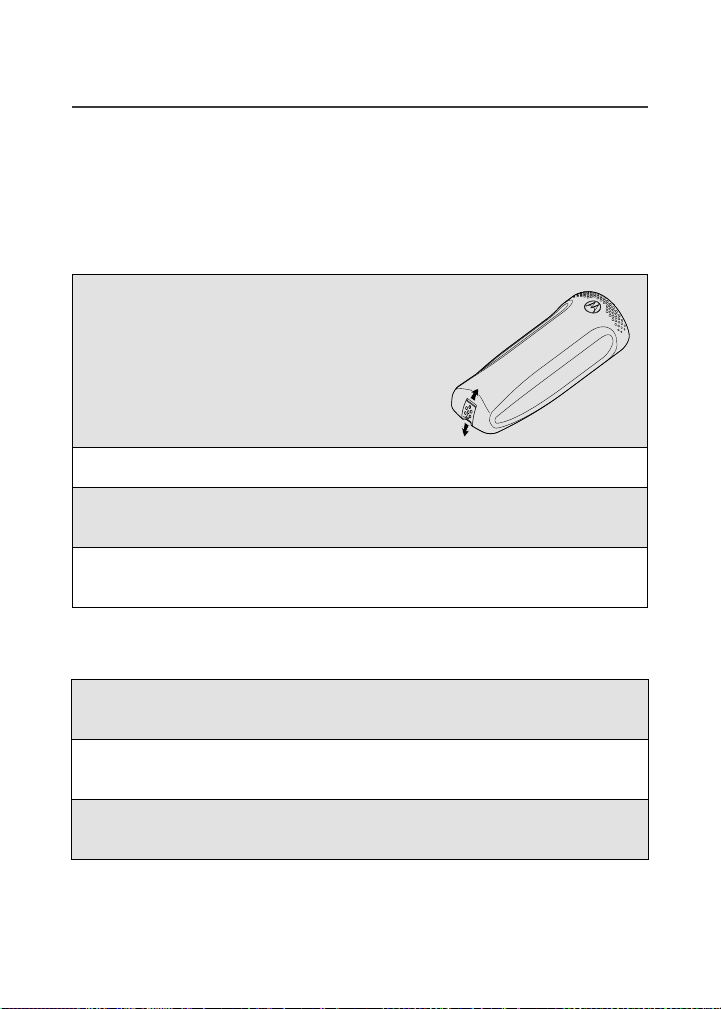
Attaching the Battery
1
Remove the battery cover located on
the back of the phone. Todo so, release
the lock at the bottom of the ba ttery
coverbypressinguponthelatch.
2
Remove the cover by sliding it away from the antenna.
3
Insert the battery with the “+” and “-” at the top. Install the battery bottom first, then press down on the battery to secure it.
4
Replace the battery cover and lock by pressing down on the
latch.
Detaching the Battery
1
If the phone is turned on, press f until the message Powering
Off displays.
2
Release the battery cover by pressing the battery cover latch
upward.
3
Remove the cover by sliding it away from the antenna and lift
the battery out of the phone.
9
Page 14
Charging the Battery
NOTE: Before you use the battery for the first time, charge it for at
NOTE: The battery can be charged with the phone either turned on or
1
least ten hours. After the initial charging, the battery can be
charged more quickly.
off. For best results, charge it with the phone turned off.
Attach the charger to your phone’s Side Charging Jack.
See “i550plus Phone Features” on page 8 for jack location.
2
Plug the charger into an electrical outlet.
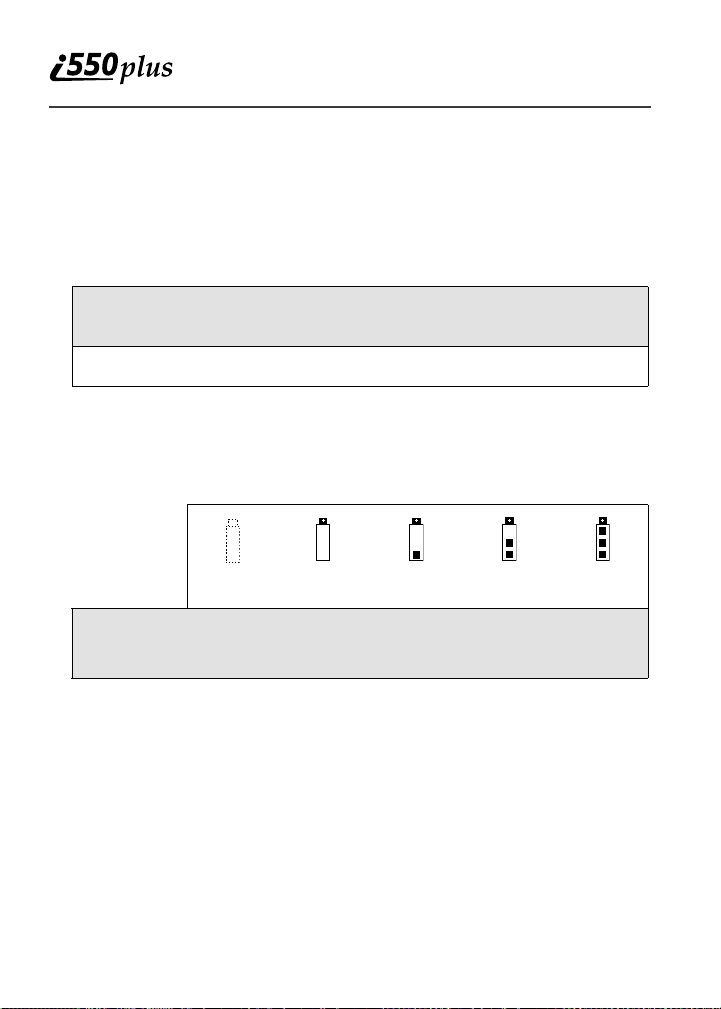
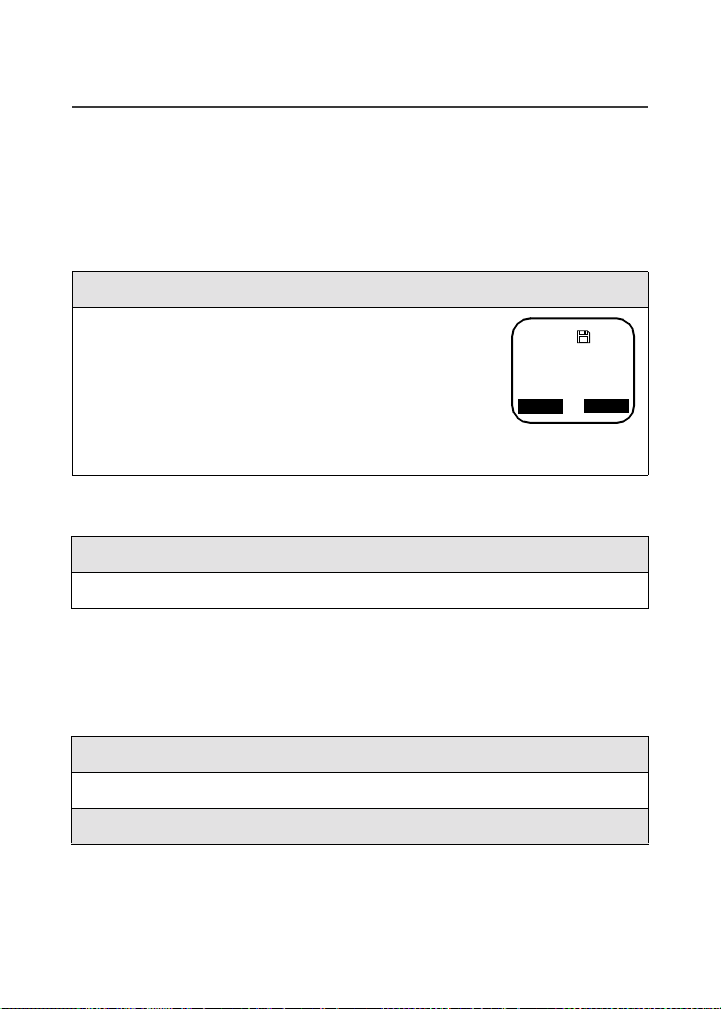
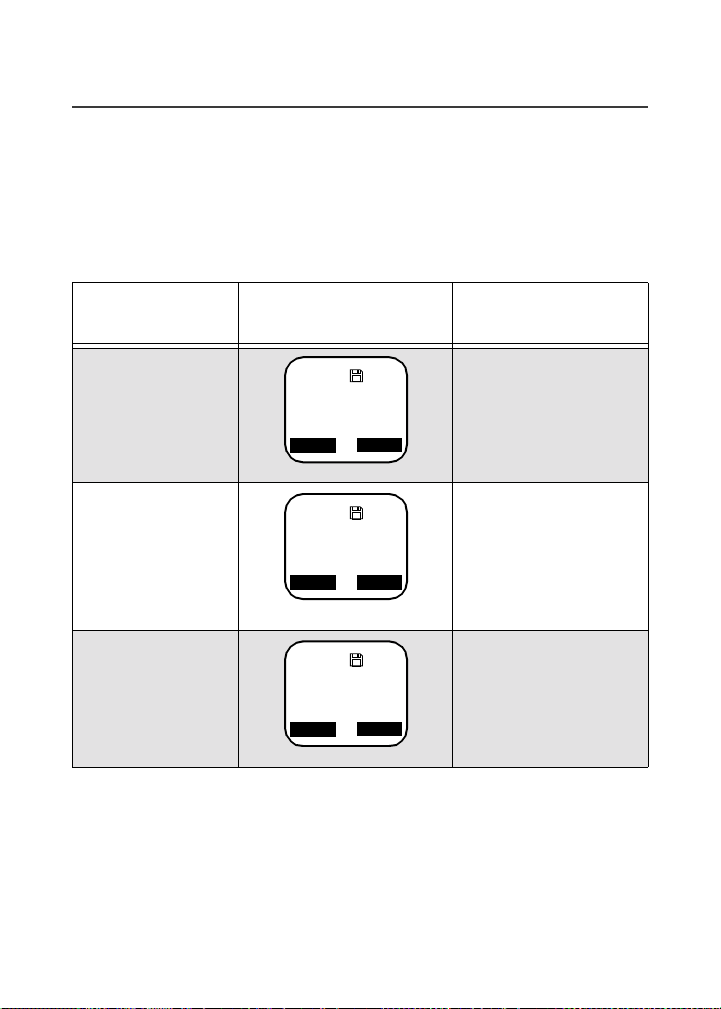
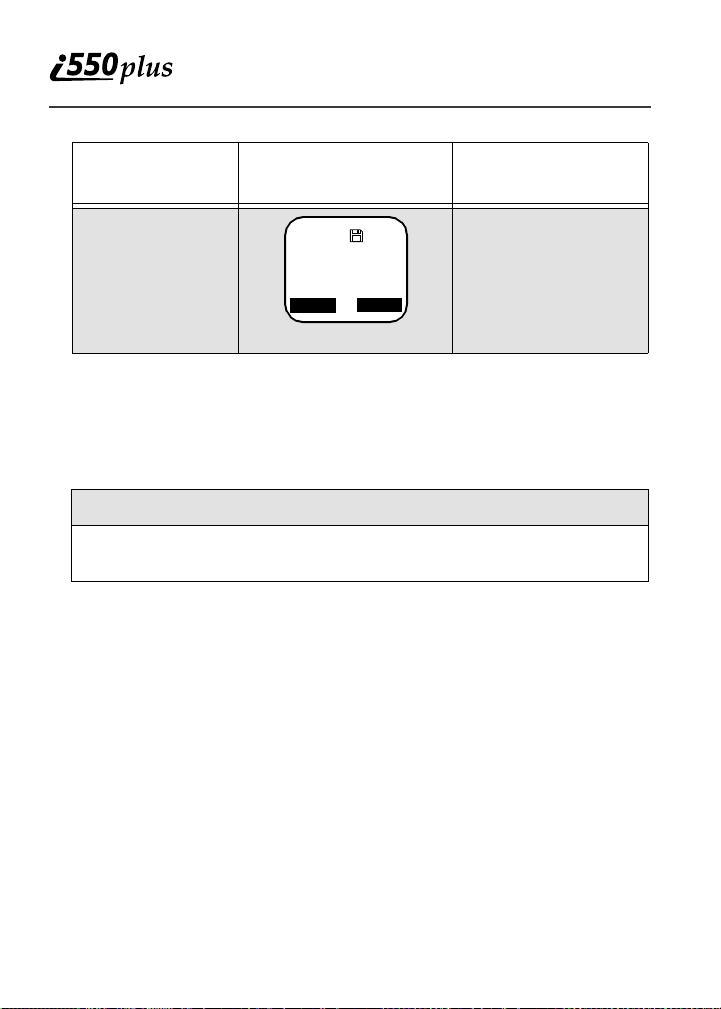
Battery Charging Status
The battery strength indicator icon, found on your phone’s display
screen, shows the charge amount remaining in the battery.
Charge
Strength
Icon
Flashes
Low
Battery
Icon
Displays
0-30% 31-60% 61-90% 91-100%
Icon
Displays
Icon
Displays
Icon
Displays
Fully
Charged
A short, chirp-like sound indicates a low battery. The icon flashes when
you have 5 minutes of talk time remaining.
10
nextel.com
Page 15
Turning Your i550plus Phone On/Off
Turning Youri550
NOTE: Toregister for the first time on the Nextel National Network, you
must turn on your
plus
Phone On/Off
i
550
plus
phone in your local calling area.
Phone On
1
For optimal signal strength, extend the antenna.
2
Press and hold f.
As your phone connects to the Nextel National
Network, you will see a Welcome to Nextel
message and a connecting message. When
ab
Phone Ready
Nextel
10:25a 03/12
Name Mail
Phone Ready appears on the display, you are
ready to use your i550plus phone!
Phone Off
1
Press and hold f until you see the message Powering Off.
2
Push in the antenna.
Enabling Security
The first time you power on your phone (or within 20 days of first
activation of your phone), you must enable security.
1
Turn your phone on.
2
Press m until you see Net Ready.
3
Pressounder “Ok.” A series of screens displays.
11
Page 16
4
You will be prompted to enable s ecurity. Pressounder “Yes.” If
you subscribeto a Nextel Online
SM
ServicePlan, your home page
will display.
5
Press m to return to Phone, Private,orGroup mode.
Receiving Over-the- A ir Programm ing
If you have been set up to receive over-the-air programming (OARSS),
you will receive your Private ID and Talkgroup lists for Direct Connect
use, your Personal Telephone Number and t he Nextel Customer Care
number via a Net Mail message.
In order to receive your programming, you must have enabled security
(see “E nabling Security” on page 11). Within 24 hours of enabling
security,you will receive a Net Mail message containing your lists.
Follow the instructions to a ccept your phone programming:
1
You will receive a Net M ail alert with the message New Net
Mail – Receive Programming.
2
Pressounder “Now” or “View.”
3
You will be prompted to accept changes to your phone’slists.
Pressounder “OK.”
4
A confirmation screen displays. Pressounder “OK.”
5
Press m to return to Phone, Private,orGroup mode.
Activating Your i550plus Phone
Before using your i550plusphone, it must be activated.
• Before contacting Nextel Customer Care, read “Nextel Terms and
Conditions of Service” on page 102.
12
nextel.com
Page 17

Your Nextel Phone Status
• If you purchased your phone through a Nextel Direct Sales
Representative, a local Authorized Representative,or a N ational
Authorized Representative, your phone should already be active.
If your display reads No Service or doesn’t change to the Phone Ready
screen when you turn on your phone, and you know you are in a Nextel
coverage area, contact Nextel Customer Care. For details on Nextel
coverage areas, visit nextel.com.
Your Nextel Phone Status
Your i550plus phone has a Status Light indicator. The Status Light
shows you, at a glance, the status of your connection (see “i550plus
Phone Features” on page 8).
Status Light
Indicator
Nextel Phone Status
Flashing Red Signing on to the network—Please Wait.
Solid R ed No service or out of coverage area. If you are in
a coverage area, keep your phone on and it will
attempt to connect e very two minutes. If you
cannot connect after 15 minutes or more,
contactNextel Customer Care.
Flashing
Green
In service/Ready to use.
NOTE: Nextel Direct Connect calls are not
availableoutside of your homemarket
area.
Solid Green In use.
13
Page 18
Keypad Lock
The i550plus phone includes a Keypad Lock fe ature that enables you to
quickly lock the phone’skeypad to avoid inadvertentlypressing keys or
placing calls. It is highly recommended that you activate your Keypad
Lock while your phone is on but not in use to avoid inadvertent 911
emergency calls. Once Keypad Lock is activated, you can only perform
the following tasks:
NOTE: Emergency calls cannotbe placed while Keypad Lock is
• Turn your phone On/Off
• Unlock the keypad
• Receive incoming calls, messages and alerts.
NOTE: Before lockingyour phone’s keypad, you may want to read
Activating Keypad L ock
activated.
this entire section to learn how to respond to incoming calls,
messages, and alerts.
From the Phone Ready screen,
simultaneously press *and #.The
message Keypad Locked displays on your
ab
phone.
Keypad
Locked
NOTE: Whenever a key is pressed while in Keypad Lock mode, the
Keypad L ocked messagedisplays as a reminder.
nextel.com
14
Page 19

Keypad Lock
Receiving Incoming Calls
When you receive an incoming phone call (see“Phone Mode” on
page 31), Keypad Lock will be temporarily disabled. You may perform
the following:
Press e to answer the call.
Or, pressounder “End” to send the call to Voice Mail.
When finished, Keypad Lock will automatically reactivate.
Receiving New Voice Mail
When you receive a new Voice Mail (see“New Message Indicators” on
page 49), Keypad Lock will be temporarily disabled. You may perform
the following:
When New Voice Mail Waitingdisplays,pressounder “Exit”
to return to Phone Ready.
Or, pressounder “Dial” to access Voice Ma il. Once you have
finished listening to your messages, press #to exit Voice Mail
andreturntoPhone Ready.
When finished, Keypad Lock will automatically reactivate.
NOTE: If you have disabled Voice Mail Notification, only g will
display. Youwill not receive the New Voice Mail Waiting
message.
15
Page 20
Receiving New Mess age Mail
When you receive new Message Mail (see“Notification of New
Messages” on page 67), Keypad Lock will be temporarily disabled.
You may perform the following:
Pressounder “Later” to re turn to Phone Ready.
Or, pressounder “Now.” Pressounder “Read.”
Pressounder “Save” or “Erase.” Once you have finished,
pressounder “Exit” to return to Phone Ready.
When finished, Keypad Lock will automatically reactivate.
NOTE: If you have disabled Message Mail Notification, only
c will display. Youwill not receive theRead Now/Later
options.
Receiving New Net Mail
When you receive new Net Mail (see “Two-Way Messaging” in the
Nextel Wireless Web User’s Guide), Keypad Lock will be temporarily
disabled. You may perform the following:
Pressounder “Later” to re turn to Phone Ready.
Or, pressounder “Now.” Pressounder “View.”
Pressounder “OK” or “Reply.” Once you have finished,press
m to return to Phone Ready.
When finished, Keypad Lock will automatically reactivate.
16
nextel.com
Page 21
Receiving Nextel Direct®Connect Calls
Display Icons
When you receive an incoming Direct Connect call (see“Nextel Direct
Connect
applicable mode (Group or Private). Once the call is terminated, the
phone will return to Phone ReadyandKeypadLockwillautomatically
reactivate.
Deactivating Keypad Lock
®
” on page 71), the phone will automatically activatethe
Simultaneously press * and #.
Or, press * followed by #.
The message Keypad Unlocked displays.
ab
Keypad
Unlocked
Display Icons
After you turn on your phone, the following icons may appear on the
display:
Signal Strength Indicator: Shows the signal
a
b
strength. Six bars indicate the strongest signal. Calls
and messages cannot be sent or received when there
is no signal.
Battery Strength Indicator: Shows the remaining
charge in your battery.
g
Voice MailI ndicator: Indicates that you have
messages in your Voice Mail box. A flashing Voice
Mail icon indicates that you have new, unheard
messages.
17
Page 22
c
New Me ssage Mail F lashing Indicator: Indicates
that you have new incoming messages.
s
p
[;:
d
Unread Message Mail Indicator: Indicates that you
have unread but saved messages.
CallForward Indicator: Indicates that incoming
phone calls have been forwarded.
Private/GroupSpeaker Indicator: Indicates that
the Private/Group speaker is off. Y ou will hear
Nextel Direct Connect calls through the earpiece.
MoreInformationIndicator: Indicates that there is
more text to read above and/or below t he current
screen.
Disk Icon: Indicates that you have subscribed to
Nextel Wireless Web services. Arrows indicate when
data is being transferred.
SecureData ConnectionI con: Indicates that your
data information is encrypted during transmission.
18
nextel.com
Page 23
Modes and Menus
Modes and Menus
When you first turn on your phone, the display de faults to Phone mode.
However, your i550plus phone operates in four different modes. To
switch between modes, press m. The table below provides more
details about the four modes:
Mode
What the Display
Looks Like
Function
Phone Mode To make digital
ab
Phone Ready
Nextel
10:25a 03/12
Name Mail
cellular phone
calls.
Private Mode To make private
ab
Prvt Ready
Bob Smith
10:25a 03/12
Alert Name
two-wayradiocalls
usingNextelDirect
Connect.
Group Mode To make group
ab
Group Ready
Talkgrp 1
10:25a 03/12
Alert Mail
two-wayradiocalls
usingNextelDirect
Connect.
19
Page 24
Mode
What the Display
Looks Like
Function
Net Mode To access Nextel
ab
Net Ready
Nextel
10:25a 03/12
Ok
Mail
Wireless Web
services.
If the word Ready does not appear after the mode name in the display,
thatm ode is either unavailableor it hasnot been a ctivated. Once a mode
is activated, there are various menu options (within each mode) that
allow you to access different functions. To switch between menu
options follow the steps below:
1
Press n.
2
Pressounder the displayed menu option that you want to
select.
Quick Guide to i550plus Phone Functions
Now that you understand different modes, here’saquickwaytoget
started using them. This Quick Guide highlights some of the most
commonly used functions in Phone,Private, Group,andNet modes.
These functions are described in more detail in later sections.
20
nextel.com
Page 25
Quick Guide to i550plus Phone Functions
Phone Mode
You must be in Phone mode to pe rform the following
functions:
Function Action
Programming
Your Own
Phone Number
1
Press * then # then 1 then o
under “Ok.” After you program your
phone number, this option will read
“Edit.”
2
Enter your phone number and presso
under “Store” thenounder “Exit.”
DisplayingYour
NOTE: Your phone number is automati-
Press*then#then
cally programmed when you
receive your first call.
Phone Number
Making a Phone
Call
Ending a Phone
Using the keypad, enter the phone
number and press e.
Press e .
Call
ab
Phone Ready
Nextel
10:25a 03/12
Name
Mail
1.
Last Number
Redial
Receiving a
Phone Call
Press e .
Press e, *, #, or any key (0 through
9).
21
Page 26

Private Mode*
You must be in Private mode to perform private twoway radio functions.P ress m to switch from Phone
to Private mode.
Function Action
ab
Prvt Ready
1234
10:25a 03/12
Alert
Store
Sending a Private
Call
From the Prvt Ready screen, your most
recently used Nextel DirectConnect call
displays.To call another number, enter the
Private ID.
To placethe call, press and hold the Nextel
DirectConnect Push-To-Talk button.Wait
for the c hirp, then speak into the
microphone.
To listen, release the Nextel Direct
Connect Push-To-Talk button.
* This feature is only available in your home market area.
22
nextel.com
Page 27
Quick Guide to i550plus Phone Functions
Group Mod e*
You must be in Group mode to perform group twoway radiofunctions. Press m to switch from Private
to Group mode.
Function Action
Sending a Gr oup
Call
From the Group Readyscreen, your most
recently used Talkgroup displays. To
scroll other Talkgroups, press lr.
To place a call to a T alkgroup, press and
hold the Nextel Direct Connect Push-ToTalk button. Wait for the chirp, then speak
into the microphone.
To listen, release the Nextel Direct
Connect Push-To-Talk button.
* This feature is only available in your home market area.
Net Mode*
See “Net Mode” on page 79.
* This feature is only available in the continental United States.
ab
Group Ready
Talkgrp 1
10:25a 03/12
Alert
Mail
23
Page 28

Page 29

Creating, Editing and
UsingStoredLists
A stored list is made up of names, phone numbers, P rivate IDs and
Speed Dial numbers. Stored lists are convenient because you do not
need to remember names and numbers. Instead, you simply scroll
through your stored list, press a button and the number is dialed for you.
You can create and edit your lists using any of the following methods:
• Phone—using the Programming functions
• Web/Phone—using Address Book
• Computer/Phone—using Nextel’siDENOrganizer
About This Section
This section includes instructions for the following tasks:
Phone Programming
• Storing Names and Numbers
• Pause Digit Entry
• Editing Stored List Entries
Address Book Page 30
iDEN Organizer Page 30
Page 26
Page 26
Page 27
Page 28
25
Page 30
Phone Programming
NOTE: You may want to read “Pause Digit Entry” on page 27 and
Storing Names and Numbers
This programing function allows you to store up to 100 names, phone
numbers and Private ID numbers. Your i550plus phone will
automatically assign the next available Speed Dial number, which you
can change. Once you have stored an individual, you can call them by
scrolling through the list and finding their name, using the Speed Dial
number or using Nextel Direct Connect (see “Nextel Direct Connect®”
on page 71). And, whenever the person calls you, your phone will
display their name if you entered their 10-digit phone number. The
displayholds 12 phone-numbercharacters. If the phone numberexceeds
12 characters, you can pressounder “More” to see the remaining
characters. To return to the start of the number, pressounder
“Numbr.”
You can store up to 100 na mes, phone numbers and Private IDs using
the following steps:
1
2
“Plus Dialing” on page 35 before you createa stored list.
Using Pause Digit Entry and Plus Dialing will enable you to
create stored lists that will save time when placing calls.
Press * then # then 2 then 0.
The message: 20=Phone / Prvt List displays. Pressounder
“Ok.” Another m essage will display with the remaining number
of slots available. The phone will then display the Enter Name
screen.
26
nextel.com
Page 31

Phone Programming
3
Enter the na me of the individualyou want to store. (Notice, each
key has a number and several letters. To select different letters
on a key, quickly press the key until the desired letter displays.
For example, to enter the letter Y you must press 9 3times
quickly. Also, you c an press and hold # to change the case of
the letter you just entered—lower to uppercase and upper to lowercase. The default style is uppercase.)
NOTE: Press the left side of lr to backspace or deletea let-
ter. Press the right side of
lr to insert a space.
After you have entered the name, pressounder “Store.”
4
Enter Phone Number displays. Enter the area code and phone
number.
Remember to add plus and pause entries if desired. S ee “Pause
Digit Entry” on page 27 and “Plus Dialing” on page 35.
Pressounder “Store.”
5
The name and Spd# = displays. The system automatically
assigns a Speed Dial number which you can change by entering
a new number. Pressounder “Store.”
6
Enter PrvtID displays. Enter the Direct Connect Private ID.
Pressounder “Store.” If you do not wish to store a Private ID,
press ounder “Skip.”
7
Repeat steps 2 through 6 to add additional names/numbers.
8
Pressounder “Exit” when you have finished.
Pause Digit Entry
When storing a number, you can program your phone so that it will not
only dial a number but also pause and enter another series of numbers
such as a personal identification number (PIN) or password. This
27
Page 32

feature is particularly useful for automated services such as voice mail
and b anking systems.
Example: Let’s say you have a company voice mail account that you
frequently c heck while traveling. And, to access that account you must
do the following:
• Dial your work number;
• Press # while the voice mail greeting is being played; and
• Enter your PIN to access your messages.
You can program your i550plus phone to enter all of the above
information for you by separating each entry with a pause. The stored
data would look like this: 17035551234P#P1234.The first eleven digits
representthe number that must be dialed to access your voice mail. The
P represents a 3-second pause. The # interrupts your greeting. The
second P represents another 3-second pause. The last four digits
represent your PIN.
To create a three-second pause follow the steps below:
Press and hold * for two seconds. The pause s ymbol (P) will
appear on the display screen.
NOTE: You can enter up to 20 numbers/characters in a single entry,
NOTE: You can program your phone to pause for more than 3 sec-
stored or dialed.
onds. For example, performing the above step twice will program two pauses and cause your phone to wait 6 seconds
before entering the next set of numbers.
Editing Stored List Entries
Once you have created lists, you can edit them as necessary. Select the
applicable option below to edit a portion of a list.
28
nextel.com
Page 33

Phone Programming
Edit a Phone Number o r Associated
Name or Speed Dial Number
1
Press * then # then 2 then 1.
2
At the Phone ListEdit screen, p re ssounder “Ok.”
3
At the Edit Entry? screen, pressounder “Ok.”
4
Press lr until the desired entry appears.
5
Pressounder “Ok.”
6
Edit the desired information (Number, Name, Speed Dial Number) and pressounder “Store.” If you do not wish to edit one or
more of the components, just pressounder “Store.”
7
Pressounder “Exit” until you see the Phone Ready screen.
Edit a Private ID or Associated Name
1
Press * then # then 2 then 2.
2
At the Prvt ID List Edit s creen, pressounder “Ok.”
3
At the Edit Entry? screen, pressounder “Ok.”
4
Press lr until the desired entry appears, pressounder
“Ok.”
5
Edit the desired information (Private ID, Name) and presso
under “Store.” If you do not wish to edit one or more of the
components, just pressounder “Store.”
6
Pressounder “Exit” until you see the Phone Ready screen.
29
Page 34

Erasing List Entries
Erasing stored list entriesis as easy as creating them. To erase an entry
item, follow the steps below:
1
Press * then # then 2 then 1 to erase a phone number
entry or * then # then 2 then 2 to erase a Private ID
entry.
2
At the Phone (or Prvt ID) List Edit screen, pressounder
“Ok.”
3
Press lr at the Edit Entry? screen until you see Erase
Entry?
4
Pressounder “Ok.”
5
Press lr until the desired entry appears.
6
Pressounder “Ok.”
7
Pressounder “Yes” at the Erase? screen.
8
Pressounder “Exit” until you see the Phone Ready screen.
Address Book
See “Address Book” in the Nextel Wireless Web User’s Guide.
iDEN Organizer
If you want to use your computer to create stored lists for your i550plus
phone, use Nextel’siDENOrganizer.It’s available for programming
names, phone numbers, and Private IDs into your phone. To order, call
Nextel Ne xtday
Authorized Representative.
30
SM
Accessoriesat 1-800-914-3240 or contact your Nextel
nextel.com
Page 35

Digital Cellular
Phone Mode
In Phone mode, you can enjoy Nextel’s all-digital
National Network for digital cellular service, and you
can roam internationa lly on other iDEN networks. See
nextel.com for coverage.
NOTE: For most phone functions, you will need to
be in Phone mode.Press
Phone Ready.See“Modes and Menus” on page 19.
m untilyou see
ab
Phone Ready
Nextel
10:25a 03/12
Name
About This Section
This section includes the following:
Making Phone Calls Page 31
Placing International Phone Calls Page 34
Receivinga Phone Call Page 36
Last 10 Numbers Received/Sent Calls List Page 37
Ending a Phone Call Page 38
Standard Features Page 39
AdditionalPhone Services Page 43
Making Phone Calls
There are four ways to make a phone call: Direct Dial, Scroll, Name
Search, and Speed Dial.
Mail
31
Page 36

Direct Dial
1
From Phone Ready, enter the number using the keypad.
2
Press e to place the call.
3
Press e to end the call.
If you make a mistake:
To Clear One
Digit
To Clear All Digits To Cancel
Press lr
Press and hold lr
Pressounder
“Cancl”
MakingPhoneCallsFromtheStoredList
Before you can use the Scroll, Name Search or Speed Dialmethods, you
first must create a phone list. See “Creating, Editing and Using Stored
Lists” on page 25.
Scroll
1
Press lr to select the individual you want to call.
2
Press e .
Name S earch
1
Pressounder “Name.”
2
Using the keypad, enter the first letter of the desired name.
nextel.com
32
Page 37

3
Press lr to scrol l names.
4
Press e .
Speed Dial
1
Press n until you see the “Spd#” option.
2
Pressounder “Spd#.”
3
Enter the Speed Dial number.
4
Press e .
Last Number Redial
Press e to redial the last number you called.
Digital Cellular
NOTE: Ifyou receive “System Busy, Try Later”,presse to redial the
number automatically. You will hear a ring-back tone when the
call is successful.
Emergency Calling
Nextel phones fully support emergency calling. To place a call in an
emergency, dial 911e. You will be connected to the nearest
emergency dispatch center. If you are on an active call, you must end it
before calling 911.
Special Dialing Codes
Nextel supports “non-emergency” numbers (such as #77, 311,...)
provided by local and state governments. These numbers are used to
report non-emergency incidents. If the situation includes imminent
danger or loss of life, you should dial 911. Nextel does not yet support
33
Page 38

all local and state non-emergency numbers but is continuously
expanding support.
Mute
If there is background noise in your area, you may have difficulty
hearing a caller’s voice or messages. Muting the phone, which places
you in “listen only” mode, may resolve this problem.
Mute On
Whileonanactivecall:
Press n until you see “Mute.” Pressounder “Mute.” The
display changes from Phone- In Use to Phone - MUTE.
Mute Off
While the m icrophone is muted, you can hear incoming audio, but a
caller cannot hear you speak. You must turn “Mute” off to speak.
Press o under “Mute.” The display changes from Phone -
MUTE to Phone - In Use, indicatingthat the microphone is on.
Placing International Phone Calls
When making an international call, you can either e nter the international
access code directly (011 in the United States) or use “Plus Dialing.”
You can alsomake international calls from your storedlist (see “Storing
Names and Numbers” on page 26) using Scroll, Name Search or Speed
Dial provided you have stored the number with Plus Dialing. To place
an international call using the “Plus Dialing” feature, see the following
section.
NOTE: Your phone’s default is “International Calls Restricted.” Con-
tact Customer Care to obtain international dialing access.
34
nextel.com
Page 39

Digital Cellular
Plus Dialing
This feature enables you to place an international call from most
countries without entering the local international access code.
1
Press and hold 0 for two seconds.A “0”appears, then changes
to a “+”.
NOTE: The network translates the “+” into the appropriate interna-
2
Enter the country code, city code and phone number.
3
Press e.
tionalaccess code needed to place the call.
Country-to-Countr y (Using Plus Dialing)
1
Press and hold 0 for two seconds. A “0” appears, then cha nges
to a “+”.
2
After the “+” appears, enter the country code, city or area code
and phone number.
3
Press e to send the call.
4
Press e to end the call.
35
Page 40

Country-to-Countr y (Using Direct Dial)
1
Dial the international access c ode, the country c ode, city or area
code and phone number.
2
Press e to send the call.
3
Press e to end the call.
Within-Country
The steps for placing an international call within the same country are
identical to those for calling country-to-country except it is not
necessary to enter the country code. However, many in-country phone
numbers will require you to enter “0” before the local number.
Receiving a Phone Call
An incoming call is indicated by a ring or backlight illumination. You
can answer the call by pressing any numeric key (0-9), or by pressing
e, #,or* .
Missed Call Indicator
Your i550plus phone notifies you of unanswered
phone calls. If you subscribe to Caller ID (and it is
available in your area), your i550plus phone
temporarily storesthe caller’s phone numberin your
Last 10 Received Calls list. Your screen displays a
flashing message with the number of m issed c alls.
ab
Phone Ready
Nextel
2 Rcvd Calls
MailName
Press any key to clear the flashing indicator.
36
nextel.com
Page 41

Digital Cellular
Retrieving a List of Missed Calls
1
Press n until you see the “Calls” option.
2
Pressounder “Calls.”
3
Press lr to scroll the list.
Last 10 Numbers Recei ved/Sent Calls L ist
If you subscribe to Caller ID, you can view, dial, and store the last ten
received and last t en sent telephone numbers. The most recently
received or sent calls appear first in your call lists. The name (if stored)
or the phone number displays along with the time and date the call was
received or sent.
Quickstore of Phone Numbers
Quickstore allows you to quickly store a received or sent phone number
without going through the Programming menu.
Reviewing/Storing/Dialing Received Calls
1
Press n until you see the “Calls” option.
2
Pressounder “Calls.” The Rcvd Calls screen appears.
3
Press lr to scroll entries.Press e to dial the number. Or,
press ounder “Store” to store the number in the first available
storage space.
4
To store the number, enter the name using the keypad. (Notice,
each key has a number and several letters. To select different letters on a key, quickly press the key until the desired letter displays. For example, to enter the letter Y you must press 9 3
times quickly.)
37
Page 42

5
Pressounder “Store” after you ha ve entered the name.
6
Pressounder “Cancl” to close the Rcvd Calls screen.
Reviewing/Storing/Dialing Sent Calls
1
Press n until you see the “Calls” option.
2
Pressounder “Calls.”
3
Press n until you see “Sent” if this optionisn’t already visible.
4
Pressounder “Sent.”
5
Press lr to scroll entries. (To store an entry from the Sent
list, pressounder “Store” and follow steps 4-6 in “Reviewing/
Storing/Dialing Received Calls” on page 37). Or press e to
dial the number.
Ending a Phone Call
Press e.
38
nextel.com
Page 43

Digital Cellular
Standard Features
Nextel offers a variety of services to help you better manage your
business and personal calls.
About This Section
This section includes:
Call Hold Page 39
Call Forwarding Page 39
Call Waiting Page 42
Call Hold
When you are on an active call, you can place the call on hold and make
asecondcall.
1
To place an active call on hold, pressounder “Hold.” You may
then place anothercall.
2
Pressounder “Hold” to toggle be tween c alls.
3
To take the active call off hold, pressounder “Hold.”
Call Forwarding
Nextel’s Call Forwarding features forward calls to the number you
designate. There are four Call Forwarding options available:
• CallForwardingFor All Calls (On)—
All calls will be sent automatically to the number you s elect.
• CallForwardingWhen Busy (Busy)—
Calls will be sent to the designated number when your phone is
engaged in other activities.
39
Page 44

• CallForwardingWhen YouDo Not Answer (NoAns)—
Callswill be sent to the designatednumber when you do not answer
the call. The phone will ring 4 times before forwarding the call.
• Call Forwarding W hen You Are Not Available (NoRch)—
Calls will be sent to the designated number when your phone is not
on the network.This includes when the unit is powered offor out of
thecoveragearea.
NOTE: In orderto receive Voice Mail messages, Call Forwarding
NOTE: YoumustbeinacoverageareatoactivateormodifyCall
“Busy,”“NoAns,” and “NoRch” must be set to the Voice Mail
access number. Your VoiceMail accessnumber is the first six
digits of your 10-digit phone number followed by 6245 (for
example, 703-555-6245). This is the default setting.
Forwarding.
Turning On Call For warding For All Calls
1
Press n until you see “Forwd.”
2
Pressounder “Forwd.”
3
Enter the phone number you want incoming calls forwarded to.
(Or, you may press lr to select a number from your stored
list.)
4
Pressounder “On.” The Please Wait message displays.
5
Pressounder “Exit.”
Your calls will now be forwarded to the number that you selected and
you will see the Call Forward icon w on your screen display.
Turning Off Call Forwarding For All Calls
1
Press n until you see “Forwd.”
2
Pressounder “Forwd.”
nextel.com
40
Page 45

Digital Cellular
3
Pressounder “Off.” The Please Wait message displays.
4
Pressounder “Exit.”
Call Forwarding will now be set to forward calls to Voice Mail when
you are not available. If you are not receiving your Voice Mail
messages, see “Setting Call Forwarding to Voice Mail” on page 41.
Setting Call Forwarding to Voice Mail
For you to receive Voice Mail messages, Call Forwa rding for “Busy,”
“NoAns” and “NoRch” must be set to “On” with your Voice Mail
access number.
1
Press n until you see “Forwd.”
2
Pressounder “Forwd.”
3
Press n until you see “Busy.”
4
Pressounder “Busy. ”“Busy” should be s et to “On.”If it is not,
pressounder “On.”
5
Enter your Voice Mail access number. Your Voice Mail access
number is the first six digits of your 10-digit phone number followed by 6245. (For example, 703-555-6245.)
6
Pressounder “Exit.”
7
Repeat steps 1-6 for “NoAns” and “NoRch.”
NOTE: You can use the “Busy,”“NoAns” and “NoRch” options to for-
ward calls to other numbers if desired. However, it is recommended that you leave these options set to the Voice Mail
access number and use the “On” option to turn Call Forwarding on for all calls if you wish to forward your calls to another
number.
41
Page 46

Call Waiting
Call Waiting allows you to receive a second call while you are talking
on the phone. With the i550plus phone you can switch between calls so
you never have to miss a call. By default, Call Waiting is always “On”
unless you turn it “Off” for a specific call.
If you’re on a call and you receive a second call, you
will:
• Hear atone;and
• See a message on your d isplay informing you of
another incoming call.
ab
7035551212
Take Call
On Line 1?
YesNo
Accepting Calls
Pressounder “Yes.”
Declining Calls
Pressounder “No.” If you’re a Nextel Voice Mail customer,
the call will be forwarded to your Nextel Voice Mail box.
Switching Between Calls
Pressounder “Hold.” Your phone will refer to the first call as
Call-1 and the second call as Call-2. If call 1 is on hold your
display will read: Call 1 - Hold 7035551234.
Ending the Active Call
Press e.
42
nextel.com
Page 47

Digital Cellular
Turning Call Waiting Off
If you do not want to be interrupted during a call, you can turn Call
Waiting off prior to making/receiving a call.
1
Press n until you see “Wait.”
2
Pressounder “Wait.”
3
Pressounder “Off.”
Call Waiting is now disabled for the next call. It will
automatically reset to “On” when you end the call.
Additional Phone Services
In addition to the standard features that are included for all Nextel
Digital Cellular subscribers, there are also several features that are
available at an additional monthly or per-use fee. See the following
sections for more information on these services. Contact Nextel
Customer Care for a dditional information.
NOTE: Some services are not available outside of the continental
UnitedStates.
About This Section
This section includes:
Call Restrictions Page 44
Caller ID Page 44
Nextel 411 Page 45
43
Page 48

Call Restrictions
You can prevent your phone from m aking or receiving specific types of
calls. Nextel currently offers three types of Call Restrictions:
• No long distance calls allowed
• No incoming calls
• No outgoing calls (except 911)
Contact Customer Care for more information.
Caller ID
If you subscribe t o Caller ID, your i550plus phone automatically
displays the phone number and/or name of the person calling (unless
blocked by the caller),enabling you to decide whether to take the call or
forward it to Voice Mail.
NOTE: Caller ID information is not available on all calls.
Displaying the Caller’sName
Acaller’s name is displayed on your Nextel phone if you previously
programmed the person’s name into your phone list (see “Storing
Names and Numbers” on page 26). Otherwise, the caller’s phone
number will be displayed.
Maintaining Your Privacy with Per-Call/Per-Line Blocking
Nextel provides two methods to prevent those you call from seeing your
number on their own Caller ID displays.
NOTE: YourNextelphonenumbercannot be blocked from calls made
to 911, 800, 855, 866, 877 or 888 phone numbers.
44
nextel.com
Page 49

Digital Cellular
Per-Call Blocking
You can block delivery of your phone number to other Caller ID units
for one call.
Press * 6 7 before dialing the call.
Per-Line Blocking
You can permanently block delivery of your phone number on every
call you m ake. Contact Customer Care to order this fe ature.
You can disable this fea ture on a per-ca ll basis by pres sing *
8 2 before the call.
Nextel 411
Nextel 411 provides friendly services for on-the-go professionals
including:
White Page Listings
You can request a telephone number for any person, business, or
governmentagency in the continental United States and Hawaii.
Operators can also provide address information if available.
Yellow Page Listings
You can ask the operator to perform a search by category if the specific
business name is unknown. For example, you can request information
for the nearest c opy center to your hotel while on business travel.
45
Page 50

Nationwide Call Completion
Nextel 411 operators can connect you to any listing in the continental
United Statesand Hawaii.If requested,the operatorwill stayon the line
while connecting to the number.
Driving Directions
Nextel 411 operators are able to provide directions to reach a specific
destination.Operators will work with you to determine your starting
point and provide clear directions to the destination.
Restaurant Reservations
Nextel 411 operators can assist in finding a restaurant and then
coordinate reservations. A Nextel 411 operator will confirm your
reservation information through a return phone call. For your
convenience, the reservation will be in your name.
Movie Listings and Showtimes
Nextel 411 operators have access to movie listings at most theaters in
the continental United States and Hawaii. You only need to ask for a
specific movie or movie theater to get current movies, locations or
showtimes. Additional information such as running time, synopsis, and
ratings are also available. Showtimes and listings are available 24-48
hours in advance.
Local Event Information
You can request information on local events such as sporting events,
concerts, state and county fairs and other current events. Nextel 411
operators can provide dates, times, and locations for these events.
Simply dial 411efrom your Ne xtel phone anywhere within
the continental United States a nd Hawaii.
46
nextel.com
Page 51

Nextel Voice M ail Service
Nextel Voi ce Mail Service
Nextel Voice Mail Service is a flexible, easy-to-use system that takes
messages when you’re not available—so you never miss an important
call!
About This Section
The main topics covered in this section are listed below:
Setting Up YourVoice Mail Box Page 47
ReceivingVoice Mail Messages Page 48
Using Voice Mail Page 49
Advanced Voice Mail Features Page 54
Voic e Mai l Tree Page 64
This section covers the mostcommonly used Voice M ail features. Once
you log into Voice M ail, you can access a number of innovative features
covered in this c hapter. After you access Voice Mail, an automated
system tells you each menu option and which button to press to m ake a
menu selection.
SettingUpYourVoiceMailBox
You must set up your Voice Mail box before you can retrieve messages.
Before getting started, s ee “Recording Your Active Greeting” on
page 53 for information you may want to include in your greeting.
47
Page 52

1
Using your Nextel phone, dial your 10-digit Nextel Personal
Te lephone Number (PTN).
If you are calling from a phone other than your Nextel i550plus
dial your 10-digit Nextel Personal Telephone
phone,
Number(PTN).
When you hear the greeting, press * to access
your Voice Ma il box.
2
Thesystemwillpromptyouto“Enter your password.” Enter the
last seven digits of your Nextel phone number (example:
5557777). This is your temporary password.
3
The first time you access Voice Mail, you will be prompted to
follow a tutorial in order to:
• Create a new four- to seven-digit password (see “Changing
Your Password” on page 52).
• Record your name (see “Recording Your Name” on
page 53).
• Recorda greeting (see “Recording YourActive Greeting” on
page 53).
4
When the system says, “Enjoy using Nextel Voice Mail,” your
mailbox is set up.
Receiving Voice Mail Messages
Your phone is pre-programmed with default Call Forwarding settingsto
forward your calls to Voice Mail when you are not available. The
default settings are as follows: Call Forwarding for All Calls is turned
“Off,” and the “Busy,”“NoAns” and “NoRch” options are set to “On”
with your Voice Mail access number. If you have subscribed to Voice
Mail and have set up your Voice Mail box, but are not receiving your
Voice Mail messages, see “Setting Call Forwarding to Voice Mail” on
page 41.
48
nextel.com
Page 53

Nextel Voice M ail Service
New Message Indicators
When you receive a new message, the following occurs:
• New Voice Mail Waiting will display on the screen.
a g b
New Voice
Mail Waiting
Exit
Dial
Voice Mail
Indicator
• The g icon will flash at the top of the display.
• Your i550plusphone will alert you every30 seconds until you press
o under “Exit” or “Dial.”
Transferring Calls to Voice Mail
Press o under “End” while your phone is ringing to transfer
incoming calls directly to Voice Mail.
Using Voice Mail
Logging Into Voice Mail
1
From the Phone Ready screen, press o under “Mail.”
2
Select VoiceMail by using lr to highlight VoiceMail or by pressing 1.An
asterisk indicates new message s.
a g b
*1>VoiceMail
2>Mesg Mail
3>Net Mail
OkExit
49
Page 54

3
Press o under “Ok.” The Voice Mail
screen appears.
The numbers of new and total messages
display. An exclamation point (!) indicates
an urgent message.
4
Press o under “Dial” to log into Nextel Voice Mail Service.
a g b
Voice Mail
2 New !
3 Total
Exit
Phone-In Use displays as you are connected to the network.
Dial
NOTE: If you hear a message that says, “Enter the phone number
5
When prompted, enter your password.
NOTE: You must receive a messagebefore you canaccess Voice Mail
of the subscriber you are trying to reach,” enteryourown
Nextel Personal Telephone Number. When the greeting
plays,press
by pressing
You can leave yourself a message.)
* to receive a password prompt.
o under “Dia l” from your i550plusphone. (Tip:
Main Voice Mail Menu
You are at the main Voice M ail menu when you hear the options listed
below.
• T o play your messages, press 1. (This option plays only if you
have new or saved messages.)
• To record a m essage, press 2.
• To change your greeting, press 3.
• To access your personal options, press 4.
If you press * while you are in a sub-menu, you will go to the
previous menu. If you press **, you will go to the main Voice Mail
menu.
50
nextel.com
Page 55

Nextel Voice M ail Service
From the main Voice Mail m enu, press # to exit Voice Mail. At any
timeyoumaysimplyendthecallbypressinge.
Playing Messages
When you receive a new Voice Mail message, you can either listen to it
immediatelyor later.Press o under “Dial” to listen now or press o
under “Exit” to listen later.
Options available while listening to a message:
Replay the previous six seconds. Press 1 .
Replay from the beginning of the
Press 1 then 1.
message.
Pause/continuethe current message. Press 2.
Fast forward six seconds. Press 3.
Fast forward to the end of the
Press 3 then 3.
message.
Play the day and time the message
Press 5 then 5.
was received.
Options available while a message is playing or after it has played:
Copy the message to another
Press 6.
subscriber. (See “Recording,
Copying and Replying to
Messages” on page 57.)
Delete the message. Press 7.
Reply to the message. Press 8.
51
Page 56

Save t he message. Press 9.
Skip to the next message. Press #.
Saving and Deleting Mess ages
While a message is playingor after you have finished listening to it, you
cansaveitordeleteit.Tosaveamessage,press9. To delete a
message, press 7. To have m essages a utomatically saved, see
“Automatic Playback” on page 56.
Messages that are not saved or deleted remain in your mailbox as new
messages. All messages are automatically deletedafter 30 days.
Recovering Deleted Messages
To retrieve deleted messages, press * then 3. This option only
applies to the c urrent Voice Mail session. If you end the call, the
messages will be permanently deleted.
After exiting th e Voice Mail session, you
cannot recover del ete d me ss ag es .
!
C a u t i o n
Changing Your Pas swo rd
To change your current password follow the steps below.
1
From the main Voice Mail menu, press 4 to access Personal
Options.
2
Press 4 to access Personal Preferences.
3
Press 1 to modify password.
nextel.com
52
Page 57

Nextel Voice M ail Service
4
Enter your new password (four to seven digits).
5
Press ** to return to the main m enu.
NOTE: If you forget your password, contact Customer Care.
For security purposes, it is re commended
that you do not choose sequential or
!
!
repeat e d di g it s lik e 1- 2 -3- 4 or 5-5 - 5- 5 for
your password.
W A R N I N G
Recording Your Name
When you send, reply to, or copy a message, your name precedes the
message. To record or re-record your name at any time, use the
following steps:
1
From the main Voice Mail menu, press 4 to access Personal
Options.
2
Press 4 to access Personal Preferences.
3
Press 3 to access the Record Your Name option.
4
Press 2 to record your na me.
5
Press ** to return to the main m enu.
Recording Your Active G r eeting
Through Nextel Voice Mail Service, there are a number of ways people
can reach you. You may want to include one or all of the following
options in your gre eting so that callers will know they are available.
• Press 1 to send a numeric message.
53
Page 58

• Press 2 to send an operator assisted message. (This option is
available only if you are a subscriber of Operator Assisted
Messaging. Contact Nextel Customer Care for more information.)
• Press # to skip the greeting a nd recorda message immediately.
To record or alter your greeting at any time follow t he steps below.
1
From the main Voice Mail menu, press 3 to change your greeting.
2
Press 1 to play, press 2 to record or re-record, or press 3
to delete your active greeting.
3
Record your greeting a nd press # when you have finished.
4
Press ** to return to the main m enu.
Advanced Voice Mail Features
Multiple Greetings
NextelVoice Mail Serviceallows you to have up to five different
greetings. You can de signate which greetingwill be your active greeting
at any given time. For example, instead of your regular greeting, you
may wish to activate a different greeting for days when you are out of
the office or on vacation.
The greeting that was recorded during your initial Voice Mail box setup
is Greeting 1. This is your default active greeting.
54
nextel.com
Page 59

Nextel Voice M ail Service
Recording Additional Greetings
To record a dditional greetings, follow the steps below.
1
From the main Voice Mail menu, press 3 to access the Greetings menu.
2
Press 4 to modify greetings.
3
Enter the greeting number you wish to create or modify.
4
Press 2 to record a greeting.
5
Record your greeting a nd press # when you have finished.
6
Press ** to return to the main m enu.
Selecting Your Active Greeting
To select your a ctive greeting, follow the steps below.
1
From the main Voice Mail menu, press 3 to access the Greetings menu.
2
Press 3 to select another greeting to be active.
3
Enter the number of the greeting that you would like to be
active.
4
The system will confirm your active greeting number.
5
Press 1 to play your active greeting.
6
Press ** to return to the main m enu.
55
Page 60

Greeting Schedule
You can choose to have your greetings a utomatically activated based on
a pre-determined time schedule.By activating the Greeting Schedule,
Greetings 1, 2 and 3 will automatically play according to the time
schedule listed below.
Greeting 1
Greeting 2
Greeting 3
Activating the Greeting Schedule
Evenings&
Weekends
Weekday
Mornings
Weekday
Afternoons
5:00 pm–7:59 a m, Monday–Friday
24 hours, Saturday and Sunday
8:00 am–11:59 am
Monday–Friday
Noon–4:59 pm
Monday–Friday
To activate the greeting schedule, follow the steps below.
1
From the main Voice Mail menu, press 3 to access the Greetings menu.
2
Press 9 to a ctivate (or deactivate)the greeting schedule.
3
Press ** to return to the main m enu.
Automatic Playback
By default, the Playback Mode of your Nextel Voice Mail Service is set
to Normal. Nextel’s Automatic Playback feature automatically plays
56
nextel.com
Page 61

Nextel Voice M ail Service
and saves new messages when you log in. To activate Automatic
Playback, follow the steps below.
1
From the main Voice Mail menu, press 4 to access Personal
Options.
2
Press 4 to access Personal Preferences.
3
Press 2 to access Playback Preferences.
4
Press 2 to switch between Automatic and Normal Playback.
5
Press ** to return to the main m enu.
Changing the Playback Order of Messa ges
With Nextel Voice Mail Service, you can select the order in which you
want unheard m essages to be played. You may listen to the last received
message first, or you may listen to the first received message first. To
select the order in which new messages should be played, follow the
steps below.
1
From the main Voice Mail menu, press 4 to access Personal
Options.
2
Press 4 to access Personal Preferences.
3
Press 2 to access Playback Preferences.
4
Press 1 to switch between the playback orders.
5
Press ** to return to the main m enu.
Recording, Copying and Replying to Messages
These functions allow you to record and send, reply to, or copy a
message to an assigned destination address or Group List number.
57
Page 62

NOTE: Ifyourecorda complete or partialmessage, butdo not sendit,
Nextel Voice Mail Service will refer to this message as an “in
preparation” message. (Before sending messagessee “Deliv-
ery Options” on page 58.)
To record and send a message, follow the steps below:
1
From the main Voice Mail menu, press 2 to record a message.
2
Record your message and press # to end the message.
3
Press 9 at the prompt to indicate that you want to send the message or press 5 for Delivery Options.
4
Enter the mailbox number and/or group list number(s). (A mailbox numberis the 10-digitNextel Personal Telephone Number of
a Nextel customer. The name of the recipient plays if it is
recorded.)
5
Press # to send.
6
Press ** to return to the main m enu.
NOTE: You can only send messages using this method to Nextel cus-
tomers in your home market.
Delivery Options
After you have created a message, you can assign delivery options
before you send it. Below is a list of the options that can be applied to a
message:
Urgent
Recipient will hear this message before other
messages.
Private
Recipient cannot copy the message to another
mailbox or phone number.
58
nextel.com
Page 63

Nextel Voice M ail Service
Notification of
Non-Delivery
You will be notified if the recipient has not
listened to your message by a certain time and
date.
Future Delivery
Youcanspecifyatimeanddate(uptothree
months in advance) for the message to be
delivered. (See “Time and Date Charts” on
page 63.)
Important: Once a message has been sent for
future delivery, it cannot be retrieved or
deleted.
To set a special delivery option, follow the steps below.
1
After recording your message but before sending it, press 5
for Delivery Options.
2
Press the number that corresponds with the desired delivery
option:
• Press 1 for Urgent.
• Press 2 for Private.
• Press 3 for Notificationof Non-Delivery. At prompt,
specify time and date.
• Press 4 for Future Delivery of Messages. At prompt,
specify time and date.
• Press 9
to send the message immediately.
3
The list of options will be presented again. Select an additional
option or press 9 to send the message.
4
Enter the destination mailbox or Group List number of the
recipient(s).
59
Page 64

5
Press # to send.
6
Press ** to return to the main m enu.
Working With Group Lists
The Group List feature enables you to create a list and assign it a unique
name. Then, you can add mailbox numbers, group lists or individuals—
by name—to the list. Once you create a list you can send a voice
message to everyone on the list by entering the group list number. You
can store up to 40 group lists. Each list can hold up to 50 addresses.
Creating a Group List
To set up a Group List follow the steps below.
1
From the main Voice Mail menu, press 4 to access Personal
Options.
2
Press 2 to access your Group Lists.
3
Press 2 to create a Group List.
4
Enter the one- or two-digit Group List number and press #.
5
Recordanameforthelistandpress#.
6
Select group members by mailbox number, Group List, or name.
7
Press # to save all entries added to the list.
8
Press ** to return to the main m enu.
nextel.com
60
Page 65

Nextel Voice M ail Service
Modifying a Group List
1
From the main Voice Mail menu, press 4 to access Personal
Options.
2
Press 2 to access Group Lists.
3
Press 4 to modify a Group List.
4
Enter the number of the Group List you want to modify.
5
Press 1 to add a new recipient.
6
Press # to save your changes.
7
Press ** to return to the main m enu.
Deleting a Group List
1
From the main Voice Mail menu, press 4 to access Personal
Options.
2
Press 2 to access Group Lists.
3
Press 3 to delete a Group List.
4
Enter the number of the Group List you want to delete. The system will play the name of the Group List.
5
Press # to delete the list.
6
Press ** to return to the main m enu.
61
Page 66

Message Forwarding
This featureallows you to program your phone to automaticallyforward
incoming messages to another Nextel customer’s mailbox. There are
threetypes of forwarding: Immediate, Silent and Delayed.
• Immediate Forwarding—Caller is notified that the message will
be forwarded.
• Silent Forwar ding—Caller is not notified that the m essage will be
forwarded.
• Delayed Forwarding—If a caller’s message is not retrievedafter a
certain amount of time, the message will automatically be
forwarded to another mailbox or telephone number.
1
From the main Voice Mail menu, press 4 to access Personal
Options.
2
Press 5 to modify Forwarding Options.
3
Select the applicable option below:
• To create a forwarding number, press 2.
• If you have already created a forwarding number, press 2
to modify the number.
• To enable or disable Message Forwarding, press 3.
• To change the forwarding type, pre ss 4.
• Press 1 for Immediate Forwarding.
• Press 2 for Silent Forwarding.
• Press 3 for Delayed Forwarding.
4
Press ** to return to the main m enu.
NOTE: You can only forward messages to N extel customers in your
home market.
nextel.com
62
Page 67

Nextel Voice M ail Service
Time and Date Charts
Time and Date Charts can be referenced for specific tasks throughout
NextelVoice Mail Service.
24-hour Clock
Nextel Voice Mail Service uses a 24-hour clock:
NOTE: To compute the 24-hour clock time for pm, add 1200.
Below is a list of hours translated into 24-hour time:
Hour
24-hour
Dates
12:00am4:00am8:00
am
12:00
pm
4:00
pm
10:00
pm
0000 0400 0800 1200 1600 2200
All dates must have 4 digits in the MM/DD format (2 digits for the
month and 2 digits for the day). January is 01, February is 02, etc. The
first day of the month is 01, the second day of the month is 02, etc.
For the days of the week, Sunday is 1, Monday is 2, etc.
63
Page 68

64
nextel.com
1
2
3
*
**
*3
Main Menu
Play
Messages
Record
Message
Change
Greetings
Personal
4
Options
#
Exit
Voice Mail
Global Options
Previous
Menu
Main
Menu
Recover
Deleted Messages
Nextel Voice Mail Tree
To access Voice Mail:
From your own Nextel phone, follow the instructions in the User's
Guide that came with your phone.
From any other phone:
1. Dial your own 10-digit Nextel phone number.
If you hear Please enter the number of the subscriber you are trying
to reach, enter your own 10-digit Nextel phone number.
2. Press * when you hear your greeting.
3. Enter your password.
Change Greeting
Personal
2
4
1
2
3
Options
Access
Group Lists
Personal
Preferences
Modify
Password
Playback
Preferences
Record
Name
1
2
3
4
7
9
Play Active
Greeting
Record Active
Greeting
Select Active
Greeting
Modify Another
Greeting
Delete Active
Greeting
Activate Greeting
Schedule
Play Messages
Replay Last
1
3 Seconds
2
3
6
7
8
9
#
Pause/
Continue
Fast
Forward
Copy
Message
Delete
Message
Reply To
Message
Save
Message
Play Next
Message
Voice Mail Tree
Page 69

Messaging Services
Messagin g Services
Your Nextel phone offers two choices in text messaging services with
Nextel Mobile Messaging—Text and Numeric Me ssaging and Nextel
Two-Way Messaging.
• Te xt and Numeric Me ssaging a llows others to send you a message
that is displayed directly on your Nextel phone.
• Two-Way Messaging uses the Nextel Wireless Web to provide
immediate contact, even when you can’tmakeortakeacall.TwoWay Messaging allows you to send, receive and respond to text
messages quickly and discreetly.
About This Section
The main topics covered in this section are as follows:
Nextel Two-Way Messaging Page 65
Text and Numeric Messaging Page 66
Nextel Two-Way Messaging
With Two-Way Messaging, you can:
• Receive messages (up to 500 characters in length) with built-in
replies and respond to them at the touch of a button.
• Create and store your own frequently used responses that let you
send informative answers without keying in text.
• Send messages to one individual from your phone or contact
several at once from any email system or nextel.com.
• Respond to messages when you’re in a meeting or noisy location.
To activate this service, contact Nextel Customer Care. For information
on how to use this service, see “Two-Way Messaging” in the Nextel
Wireless Web User’sGuide.
65
Page 70

Text and Numeric Messaging
Te xt and Numeric M es saging Features
With Nextel Text and Numeric Messaging, Nextel will:
• Allow numeric messages up to 20 characters in length and text
messages up to 140 characters in length.
• Accept your messages even if you a re unavailable, if your phone is
turned off, or if you are busy on another call.
• Alert you of a new text or numeric message, even if you are on
another call.
• Store a message if you are using Nextel Direct Connect and deliver
it upon c ompletion of the call.
• Store the message if you are outside of the coverage area and
deliver it as soon as you are back in a coverage area.
• Attempt continuousdelivery of messages until successful, for up to
7days.
With Nextel Text and Numeric Me ssaging, your Nextel phone will:
• Refer to text and numeric messages as Message Mail.
• Stamp the message with the time and date the message was left.
• Store up to 16 messages at a time that will remain until you delete
them.
NOTE: “Mail Waiting, Memory Full” displays when 16 message regis-
tersarefull.(Messagesmustbe erased before you canreceive
others.)
• Allow for “Auto Call Back” of a phone number that is included
within a message, by pressing e. If the message contains two
phone numbers, Auto Call Back will dial the last number.
66
nextel.com
Page 71

Messaging Services
Notification of New Messages
When a new message arrives:
• “New Mail Read?” displays.
• c flashes at the top of the screen.
• Phone rings every 30 seconds as an alert/reminder until you press
o under “Now” or “Later.”
Accessing New Messages
When you receive a message, you can view it immediately or later:
Viewing a Message Immediately
1
Press o under “Now.” The numbers of new and saved messages display briefly, followed by your first message.
2
Press o under “Read.”
3
If the message fills more than one screen, use lr to scroll
through the rest of the message.
4
Press o under “Save”to save the message. Or, press o under
“Erase” to delete the message.
Viewing a Message Later
Press o under “Later.” The c icon will stop flashing but
the sicon will remain on the display to remind you that
youhaveastoredmessage.
67
Page 72

Viewing Stored Messages
1
While in Phone mode (see “Modes and Menus” on page 19),
press o under “Mail.”
2
Select Mesg Mail by using lr to highlight Mesg Mail or by
pressing 2. An asterisk indicates a new message.
3
Press o under “Ok.” The Message Mail screen appears
briefly, displaying the numbers of new and s aved messages.
4
Press o under “Read.”
5
If the message fills more than one screen, use lr to scroll
through the rest of the message.
6
Press o under “Save” to save the m essage.
Or, press o under “Erase” to delete the message.
7
Press o under “Exit” to exit Mesg Mail.
Sending a Message
Nextel’s Messaging feature includes four options: Web Messaging on
nextel.com,Email Messaging, Numeric Messaging and Operator
Assisted Messaging.
Web Messaging on nextel.com
Nextel’s Web Messaging enables you to send a message to yourself,
someone else or a group of Ne xtel customers. It also includes a
“Schedule For Later” option, which allows you to send yourself
reminders. You can a lso check on the delivery status of your messages.
For more information or to send a Web message, go to nextel.com and
click on Send a Message or Nextel M obile Messaging.
68
nextel.com
Page 73

Messaging Services
Email Messaging
From any email account, type the 10-digit phone number of a Nextel
customer in the To field and add @messaging.nextel.com (for
example,7035551234@messaging.nextel.com).The entire message can
be up to 140 characters.
Numeric Messaging
• The caller must press “1” during your Voice Mail greeting.
• Only numeric messages can be sent.
Operator Assisted Messaging*
• The caller can press “2” during your Voice Mail greeting. Or, call
1-800-NEXGRAM (1-800-639-4726). Outside of the U.S., call 1858-279-8495.
• A text message can be sent immediately or for future delivery.
• The operator will send the message.
* The Operator Assisted Messaging feature is required.There is also an
additional charge for each message sent. For more information, contact
Customer Care.
69
Page 74

Using Your Phone as a Modem
With Nextel OnlineSMDial-Up Service,you can use your i550plus phone
as a wireless modem! You can connect your IBM
TM
-compatible
computer* or Personal Digital Assistant* (PDA) to your i550plusphone
and access your company’s network or the Internet—all without the
hassle of locating a telephone jack for a landline connection.
To use Ne xtel Online Dial-Up Service, you must subscribe to a Nextel
SM
Online
Service Plan and have Dial-Up Service activated. To activate
this service, please contact Nextel Customer Care.
* Visit nextel.com for information on compatibleoperating systems.
NOTE: Nextel Online Dial-Up Service is only available in the continen-
tal United States and Hawaii.
70
nextel.com
Page 75

Private/Group Mode
Nextel Direct Connect
®
Nextel Direct Connect is a digital two-way radio feature that allows you
to communicate with your co-workers and clients for a fraction of the
cost of traditional cellularcalls.
With Nextel Direct Connect, you can use the Private Call feature to
contact an individual. You can use the Group Call feature to contact a
group of people designated a s a T alkgroup.
®
In addition, Nextel has created Nextel Business Networks
,which
allows you to communicate with individuals outside your company.
These Networks link Ne xtel customers in similar industries or
geographies. So, if you need to reach a client, vendor, or contractor
instantly, work smarter by joining the Nextel Business Networks. For
more information, call 1-888-NEXTEL2 (1-888-639-8352).
NOTE: Nextel Direct Connect is only available in your home calling
area.
About This Section
This section includes everything you need to take advantage of Nextel
Direct Connect (two-way radio) service:
Displaying Your Private ID Page 72
Using the Private/Group Speaker P age 72
Placing Private Calls Page 73
ReceivingPrivate Calls Page 73
Quickstore of Private IDs Page 74
71
Page 76

Sending a Call Alert Page 74
Receiving/Responding to a Call Alert Page 75
Call Alert Queuing Page 75
Group Call Page 76
Group-Silent Programming Page 78
Displaying Your Private ID
To display your Private ID:
Press * then # then 2.
Using the P riva te/ Gro up Speaker
You can disable or enable the speaker on your i550plus phone for
Nextel Direct Connect use. The default setting is Speaker On. When the
speakeris on, the caller’s voice can beheard over the speaker. When the
speaker is off, the caller’s voice can only be heard through the earpiece
of your phone.
Turning the Speaker Off
Press k. p will appear on your display. A brief alert tone will
notify you of incoming Private or Group calls.
Turning the Speaker On
Press k.
72
nextel.com
Page 77

Placing Private Calls
Placing Private Calls
From P rivate mode, there are two ways to reach an individual using
Nextel Direct Connect.
Entering t he Private ID
1
Press m until you see Prvt Ready.
2
Enter the Private ID.
3
Press and hold the Push-To-Talk button on the side of the phone
to talk. Both phones will chirp before your voice can be heard.
4
Release the Push-To-Talk button to listen.
SelectingaNamefromaStoredList
NOTE: See“Creating, Editing and Using Stored Lists” on page 25.
1
Press m until you see Prvt Ready.
2
Press lr to scroll through the names.
Or, press n until “Name” appears. Pressounder “Name”
and enter the first initial of the name then press lr to scroll
through the names.
3
Press and hold the Push-To-Talk button on the side of the phone
to talk. Both phones will chirp before your voice can be heard.
4
Release the Push-To-Talk button to listen.
Receiving Private Calls
When you receive a Nextel Direct Connect Private call, your phone will
automatically switch to Private mode. You will he ar a chirp indicating
73
Page 78

that someone is calling you. Press and hold the Push-To-Talk button to
talk and release it to listen.
Quickstor e of P riv ate IDs
Quickstore allows you to quickly store the Private ID for a received or
sent call without having to enter the Programming menu.
With the Private ID displayed:
1
Pressounder “Store.”
2
Enter the name associated with the Private ID.
3
Pressounder “Store.” The Stored message displays with the
name that you entered.
Sending a Ca ll Alert
You can send a call alert, which lets the recipient know that you would
like to talk with them. When you send an alert, the recipient’s phone
will chirp several times and your name (if stored) or Private ID will
appear on their display.
1
Press m until you see Prvt Ready.
2
Pressounder “Alert.”
3
Select the person you want to alert by e ntering their Private ID
or selecting their name from a stored list. (See “Selecting a
NamefromaStoredList” on page 73.)
4
Press and hold the Push-To-Talk button until Alert-Sent Successful displays. The alert plays intermittently until the individ-
ual answers, queues, or clears it.
74
nextel.com
Page 79

Receiving/Respondingto a Call Alert
Receiving/Responding to a Call Alert
When you receive a call alert, your phone will automatically change to
Private mode. It will also chirp and you will see the name (if stored) or
the Private ID number of the caller. You can either answer, queue, or
clear the call alert.
• Press and hold the Push-To-Talk button to answer t he call alert. Or,
• Pressounder “Queue” to queue the call alert (see “Call Alert
Queuing” on page 75). Or,
• Pressounder “Clear” to clear the call alert.
NOTE: Until you answer, queue or clear the call alert, you will not
receive any additional Phone,Private, or Group calls.
To customize your call alert tone, see “Selecting a Call Alert Style” on
page 87.
Call Alert Queuing
Call alert queuing is a feature that allows you to save up to eight call
alerts in a queue or list.
Placing/Clearing a Call Alert in the Queue
When you receive a call alert, you can either clear the callalert or save it
to the list for later recall.
To place a call alert in the queue, pressounder “Queue.”
T o clear a call alert, pressounder “Clear.”
NOTE: If you receive multiple call alerts,the last received call alert
displays and the remaining call alerts are stacked at the beginning of the queue.
75
Page 80

Responding to a Call Alert within the Queue
You can respond to the call alerts in any order. To select a call a lert for
response:
1
From P rvt Ready,pressounder “Alert.”
2
Pressounder “Queue.”
3
Press lr to scroll to the desired call alert.
4
Press and hold the Push-To-Talk button to answer the call alert.
After you respond to the alert, it is removed from the queue.
Group Call
In a Group call, you can communicate instantly with a group of people
that you have previously set up as a “Talkgroup.” Your Sales
Representative or Nextel Customer Care must set up your Talkgroup by
providing you with a Talkgroup number for each Talkgroup. After you
have the number, you can assign each Talkgroup number a name and
store it in your i550plus phone (see “Naming a Talkgroup” on
page 76).
Talkgroups appear on your display as numbers or programmed names
such as SALES TEAM or Talkgrp 5. Your Ne xtel phone can store up
to 30 Talkgroups. You may i nitiate or participate in Group Calls for
Talkgroups that have been created for you and that are stored in your
phone. Any communication activity within a Talkgroup automatically
switches your phone to Group mode.
Naming a Talkgroup
1
Press * then # then 2 then 3.
2
At the T alkgroup List Program screen, pressounder “Ok.”
nextel.com
76
Page 81

Group Call
3
At Add New Entry?, pressounder “Ok.”
4
At Enter ID, enter the assigned Talkgroup number.
5
Pressounder “Store.”
6
At Enter Name, enter the desired Talkgroup name.
7
Pressounder “Store.”
8
When finished, pressounder “Exit.”
Making a Group Call
1
From Group mode, press lr to scroll to the desired Talk-
group.
2
Press and hold the Push-To-Talk button to talk. Release the
Push-To-Talk button to listen.
Receiving a Group Call
When you receive a Group call, you will hear a chirp. Your Nextel
phone automatically switches to Group mode and the Talkgroup name
displays. T o join a Group call:
1
Wait for the caller to finish speaking.
2
Press and hold the Push-To-Talk button to talk. Release the
Push-To-Talk button to listen.
NOTE: You can receive Group calls only in the Talkgroups that you
have predefined.
77
Page 82

Group-Silent Programming
Group-Silent Programming enables you to silence incoming Group
alerts and communication:
Turning Group-Silent On/Of f
1
Press * then # then 3 then 8.
2
Pressounder “On” or “Off.” (The available option depends on
the current setting being used. For example, if “On” is the current setting, “Off” will be an option.)
3
If changing the setting to “On,” a confirmation screen displays.
Pressounder “Ok.”
4
Pressounder “Exit.” The Group Ready screen displays as
Group-Silent.
78
nextel.com
Page 83

Net Mode
Net mode uses your phone’s built-in microbrowser to access a suite of
wirelessdata products known as Nextel Wireless Web services. You can
use your Nextel Internet-ready phone to send and receive email, obtain
driving directions, check weather and news updates, view thelatest stock
quotes, conduct financialtransactions,and more. Access the specific
information you need to get business done…easily…wirelessly!
Nextel Wireless Web* requires the activation of a Nextel Online
Service Plan. Nextel Online Service Plans vary in product and service
offerings.Select services are only available with the Nextel Online Plus
Service Plan.
To order, c ontact Customer Care.
For more information, s ee the Nextel Wireless Web User’s Guide.
* Nextel Wireless Web is only available in the continentalUnited States.
About This Section
The topics covered in this section include:
Wireless Web Navigation Ke ys Page 80
Starting the Microbrowser Page 80
SM
79
Page 84

Wireless Web N av igat ion Keys
Some keys and buttons assume different functions when you are in Net
mode. You can navigate within the phone’s microbrowser by using the
following keys:
Mode: Your Internet-ready phone operates in four different modes:
Phone mode, Private mode, Grou p mode, and Net mode. Press
m to
switch between the four different modes.
Home: Press # to return to the home page.
Back: Press * to return to a previous page or screen.
Scroll: Arrows at the bottom of the phone screen ([:;)indicatethat
additionaltext can be viewed. Press lr (scroll keys) or (volume
control/lis t buttons) to scroll one line at a time, or press a nd hold to
scrollonepageatatime.
Starting the Microbrowser
Just as you use Netscape Navigator®or Microsoft®Internet Explorer to
browse the We b from your desktop,the microbrowser contained in your
phone allows you to explore and use a variety of Internet services.
Follow the steps below to begin using the Nextel Wireless Web:
1
Press m until the Net Ready screen displays.
2
Pressounder “Ok.” A s eries of screens displays.
nextel.com
80
Page 85

3
Y our home page displays.
Starting the Microbrowser
NOTE: The first time you access your home page, you will be
4
Scroll to highlight the service you wish to access and presso
asked to enable security to ensure your information
remains private and secure.
Press
ounder “Yes.” The phone will display: Generating,
Computing, Sending))))).
You may be asked to (re)enable security as Nextel adds
new services or upon your return to the U.S. after traveling.
When transmitting highly personal or sensitive data, such
as a credit card number, you will see the Secure Data icon
.Thisiconindicatesthatthedataisencryptedduring
transmission.
under “OK,” or press the number shown to the left of your
desired selection to automatically jump to that service.
To return to the home page from anywhere within the various
menus and sub-menus, press #, the home key.
NOTE: Home pages will vary depending on the Nextel Online Ser-
5
Press m at any time to return to Phone, Private or Group
vice Plan to which you have subscribed.
mode.
81
Page 86

Page 87

Customizing the i550plus
Phone
About This Section
This section includes everything you need to customize your i550plus
phone:
Changing the Display Language Page 83
Setting the Time and Date Format Page 84
BacklightT imer Page 85
Keypad Silence Page 86
Setting the Ringer Volume Page 86
Selectinga Ring Style Page 87
Selecting a Call Alert Style Page 87
Programming M enu Page 88
Changing the Display Language
You can customize the i550plus phone to display menus in English,
Spanish, French, or Portuguese. The default language is English. To
change the display language:
1
Press * then # then 7 then 0.
2
Pressounder “Ok.”
83
Page 88

3
Press lr to scroll the language options.
4
Pressounder “Ok” to select the desired language.
5
Pressounder “Exit.”
Setting the Time and Date Format
You have a choice of a 12- or a 24-hour clock format, as shown in the
table below:
12-Hour Display
24-Hour Display
12:00a 6:25a 12:00p 10:25p
00:00 06:25 12:00 22:25
You have a choice of either a MM/DD (month/day) or a DD/MM (day/
month) date format as shown in the table below.
Date
Month/Day Format
(MM/DD)
Day/Month Format
(DD/MM)
January 2nd 01/02 02/01
December 31st 12/31 31/12
All of the modes (Phone, Private, Group , Net) display the time and
date on the third line of the display. To set the time and date format,
follow the steps below:
1
Press * then # then 7 then 1.
2
Pressounder “Ok.” The Time/Date Display screen appea rs.
The default (preset) time and date format is “On.” You may turn
“Off” this feature at this point.
84
nextel.com
Page 89

Backlight Timer
3
Press lr until you see the Time Format: screen.
4
The hour format currently being used appears under Time Format:. To keep the current setting, simply skip to the next step.
Or,pressounder the availableoption. (For example,if 12 hour
is the current setting, “24hr” will appear as an option.)
5
Press lr until you see the Date Format: screen. T he format
being used appears under Date Format:.
6
To keep your current format, pressounder “Exit.”
Or, pressounder the available date format. (For example, if
MM/DD is the current setting, “DD/MM” will appear as an
option.)
7
Pressounder “Exit.”
Backlight Timer
Your phone’s backlight is what illuminates the display when you, for
example, receive or make calls. You can customize the amount of time
that your backlight remains illuminated, either 10, 20, or 30 seconds.
To adjust the Backlight Timer, follow the steps below.
1
Press * then # then 1 then 6.
2
The current timer setting displays. Pressounder “Ok” to
change the timer.
3
Press lr to scroll through the available options.
4
Once the desired timer is found, press o under “Ok.”
5
Press o under “Exit.”
85
Page 90

Keypad Silence
You may want to silence your keypad when entering text on your
phone. To silence your keypad, follow the steps below.
1
Press * then # then 3 then 4.
2
Use to lower the keypad volume until the display reads
Silent.
3
Press o under “Exit.”
Setting the R in ger Volume
You can adjust the ringer volume for incoming calls.
1
Press * then # then 3 then 0. The display shows your
current ringer volume.
2
Press on the side of your phone to raise or lower the volume.
The lowest setting is V olume Silent.
3
Once the desired level is found, pressounder “Exit.”
86
nextel.com
ab
30=Ringer
Volume
Exit
Page 91

Selecting a Ring Style
Selecting a R in g Style
ab
Your Nextel phone has nine s electable ring styles.
1
Press * then # then 3 then 1. The display shows your
Ring
Style 4
Cancl
Ok
current ring style.
2
Pressounder “Ok.”
3
Press lr to scroll through the available ring styles.
4
Press on the side of the phone to listen to the selected ring
style.
5
Once the desired ring style is found, pressounder “Ok.”
6
Pressounder “Exit.”
Selecting a Call Alert Style
NOTE: Before you change the call alert style, make sure that the
You can select one of ten ring styles for incoming callalerts. Ring styles
one through nine are the same a s your phone ring styles.Ring style 10 is
the default call alert style.
Speaker Volume is set to “On.” You can do this through Programming Menu option 36.
To change your call alert style, follow the steps below:
1
Press * then # then 3 then 7.TheSet Alert Style #
screen displays. The “#” represents the currently selected call
alert style.
2
Press o under “Ok.” The Alert Style screen displays.
87
Page 92

3
Press lr to scroll through the available alert styles.
4
Press on the side of the phone to listen to the selected alert
style.
5
Once the desired alert style is found, pressounder “Ok.”
6
Press ounder “Exit.”
Programming Menu
You can customize the settings on your phone using the Programming
menu. Many of these settings have been discussed throughout this
guide.
You can access this menu from the Phone, Private,orGroup modes.
1
Press * then #.
2
Press lr to scroll the Programming m enu options. Or, enter
the option using the “Programming Menu Shortcuts and
Options” on page 89.
88
nextel.com
Page 93

Programming Menu Shortcuts and Options
Programming Menu
Option
Number
1
2
3
4
5
6
10
11
Menu Option Function
Own Ph# Display your own Nex tel te lephone number.
Own PvtID Display the Private ID numb er of your phone.
Mail Display Turn on or off the New Mail message that is
Manual
Lock:On/Off
Auto
Lock:On/Off
Auto
Answer:
On/Off
Last Call
Timer
Display
Timer:
On/Off
This number i s automatically stored after you
receive the first inco ming call. Or you ca n
enter the number. See “Pr ogramming Your
Own Phone Number” on pa ge21.
See “Displayi ng Your Private ID” on
page 72.
displayed w ith incoming Voice, Message, or
Net Mail.
Lock your phone to prevent unauthorized us e.
You must enter a password to unlock it.
Automatically lock your phone each time it is
powered off to prevent unauthor ized use.
Turn on or off aut omatic answering of
incoming phone calls af ter 1-4 rings.
Display th e duration of the most recent phone
call.
Turn on or off automatic display of the Last
Call Timer at the end of each phone call.
12
13
Reset Timer Display cumu lati ve airtime of all phone calls
since the last time the timer was reset.
Total Timer Display cumulative airtime of all phone calls.
89
Page 94

Option
Number
Menu Option Function
14
15
16
20
21
22
23
24
30
31
1 Minute
Beep:On/Off
Automatically signal each minute of elapsed
phone airtime with an audible beep.
Alert Receipt Delay Voice Mail and Message Mail alerts so
that you are not int errupted by the alert tone
while on a call. You can choose to receive all
alerts , delay all alerts, or receive Message
Mail alerts only.
Backlight
Timer
Phone/Prvt
List
Specify the duration of the Backlight Tim er
(10, 20, or 30 seconds).
Add phone and Private ID numbers in one
procedure. See “Creating, Editing and Using
Stored Lists ” on page 25.
Phone List
Edit
Edit or er ase up to 100 stored phone numbers
and associ ated names. See “Editing Stored
List Entries” on page 28.
Prvt ID List
Edit
Edit or erase up to 100 st or ed Private ID
numbers and associate d nam es. See “Editing
Stored List Ent ries” on page 28.
Talkgrp List
Program
Add, edit, or erase numbers and asso ciated
names for up to 30 pre-programmed
Talkgroups. See “Naming a Talkgroup” on
page 76.
Area List
Program
Ringer
Volume
Add, edit, or erase numbers and asso ciated
names for up to 50 targeted areas.
Set the ringer volume using the volume
control keys, or l o w er the volume to silence
the ringe r.
Set Ring
Style
Select a disti nct ri ng st yle for inco ming phone
calls.
90
nextel.com
Page 95

Programming Menu
Option
Number
32
33
34
35
36
37
38
40
60
Menu Option Function
Mail Volume S et the volume of Message Mail, Voice Mail,
and Net Mail al ert tones using t he volume
control keys. Or lower the volume to silence
the mail alert tones.
Earpiece
Volume
Keypad
Volume
Set the default earpiece volume using the
volume cont rol keys.
Set the volume of the keypad tones us ing the
volume cont rol keys. Or, lower the volu m e to
silence the keypad tones.
Speaker
Volume
Spkr Vol Set
Temporarily adjust the Private/Group speaker
volume for noisy environm ents.
Turn the speaker volume set tones on or off.
Tone
Set Alert
Style
Silent Group:
On/Off
Select a distinct ring style for incoming call
alerts.
Silence al l incoming Group call alerts and
voice activity. When set, your screen displays
the message, Group-Silent. See “Turning
Group-Silent On/Off” on page 78.
Change
Passcode
Set Baud
Rate
Change your secret four -digit password from
the initial setting 0000.
Set the modem baud rate between the phone
and the PC. See Nextel Online Dial-Up
Service User’s Guid e.
61
Data Ring
Volume
Set the default data ringer volume using the
volume cont rol buttons. See Nextel Online
Dial-Up Ser vice User’s Guide.
91
Page 96

Option
Number
Menu Option Function
62
63
64
65
70
71
Pgm Data# View your circuit data number. See Nextel
Online Dial-Up Service User’s Guide.
IP Address View the Ca rrier Internet Pr otocol (IP)
Address for your microbrowser, as
programmed i n your phone.
Reset KBytes
Tx/Rx
Lines per
Screen
View the number of Kilobytes sent and
receive d for data.
Select 4 lines, 12 characters or 6 lines,
16 characters (default).
Language Select one of four languages for your display
text. The default is English. See “Changing
the Display Language” on page 83.
Time/Date Select the standard or 24-hour time and MM/
DD or DD/MM date format. See “Se tting the
Time and Date Format” on page 84.
92
nextel.com
Page 97

!
!
W A R N I N G
Programming Menu
Do not try to program menus 41 through
51 asyou could permanently damage your
phone. They are for NextelCustomerCare
use only and should never be
programmed by customers.
Option
Number
41
42
43
44
50
51
Menu
Option
Feature
Reset
Master
Clear
Master
Reset
Change
Service
Return all feature settings to their
original defaults.
Perform Feature Reset and erase a ll
stored lists.
Reset the phone’s identification
number.
Change or reset the fraud prevention
service key.
Function
Key
NAM Select alternate Numeric Assignment
Module (NAM).
Network
ID
Edit the pre-programmed Network
number list and select roaming
options.
93
Page 98

Page 99

Accessories
To order additional accessories or an accessories catalog, log on to our
Web site at nextel.com, call NextelN extday
SM
Accessoriesat 1-800-9143240 or contact your Nextel Authorized Retailer or Authorized
Representative.
About This Section
This section includes information on the following accessories:
Batterie s Page 95
Travel Chargers Page 96
Batteries
NOTE: For best results, charge the batteries within the temperature
Charging the Battery
The following table provides the approximate time to fully charge a
battery using a Motorola iDEN Approved NiMH charger.
Attach the charger to the i550plus phone via the Side Charging Jack
(see “i550plus Phone Features” on page 8), and plug the charger into
an electricaloutlet.
range of 10°Cto40°C(50°Fto104°F). Prolonged charging is
not recommended.See below for battery charging times.
95
Page 100

Battery Charging Times
Motorola Battery ChargingTimeto90%:
Description
Chemistry
Standard
Travel
Charger
Rapid Travel
Charger
Standard NiMH 7 hours 105 minutes
Battery Operating Instructions
• Extreme temperatures will degrade battery performance. Do not
store your battery where temperatures exceed 60°C (140°F) or fall
below -20°C(4°F).
• The battery capacity will be degraded if stored for long periods
while fully charged. If long term storage is required, store at half
capacity.
• For optimal battery life, use a Motorola iDEN approved NiMH
charger with your Motorola IDEN NiMH battery. Other chargers
may not fully charge your NiMH or may yield reduced number of
charge cycles.
Travel Charg ers
Using a Travel Charger, you can charge a battery from an electrical
outlet.
You can use:
• The Standard Travel Charger
• The Rapid Travel Charger with U.S. adapter plug
96
nextel.com
 Loading...