

Page 1

Gebrauchsanweisung
Trockenautomat
Operating Instructions
Tumble Dryers
Mode d’emploi
Sèche-linge
Istruzione d’uso
Essiccatoio
T 6550 TR
Dieses Papier besteht aus 100% chlorfrei
gebleichtem Zellstoff und ist somit umweltschonend.
PQRS
T.-Nr. 4078220
Page 2

Diese Seite wurde bewußt leer gelassen.
This page has been left blank intentionally.
Cette page a été laissée vierge intentionnellement.
Questa pagina é stata lasciata in bianco volutamente.
- Diese Gebrauchsanweisung besteht aus 60 Seiten. -
2 «T.-Nr.4078220 - D - »
Page 3

Inhaltsverzeichnis
Gerätebeschreibung . . . . . . . . . . . . . . . . . . . . . . . . . . . . . . . 5
Sicherheitshinweise und Warnungen . . . . . . . . . . . . . . . . . . . . . . 6
Vor der ersten Inbetriebnahme . . . . . . . . . . . . . . . . . . . . . . . . . . 8
Wäsche vorbereiten . . . . . . . . . . . . . . . . . . . . . . . . . . . . . . . 8
Wäsche-Füllgewichte . . . . . . . . . . . . . . . . . . . . . . . . . . . . . . . 8
Programm wählen . . . . . . . . . . . . . . . . . . . . . . . . . . . . . . . . 9
Hinweise . . . . . . . . . . . . . . . . . . . . . . . . . . . . . . . . . . . . . 11
Reinigung und Pflege . . . . . . . . . . . . . . . . . . . . . . . . . . . . . . . 12
Bedeutung der Symbole auf dem Typenschild . . . . . . . . . . . . . . . . . . 13
Hinweise für den Aufsteller . . . . . . . . . . . . . . . . . . . . . . . . . . . . 14
Elektroanschluß . . . . . . . . . . . . . . . . . . . . . . . . . . . . . . . . . 15
Dampfanschluß . . . . . . . . . . . . . . . . . . . . . . . . . . . . . . . . . . 15
Der Trockenautomat darf nur vom Werks-Kundendienst
oder einem autorisierten Fachhändler aufgestellt werden.
Seite
Entsorgung der Verpackung
Die Verpackung schützt das Gerät vor Transportschäden. Die Verpackungsmaterialien sind
nach umweltverträglichen und entsorgungstechnischen Gesichtspunkten ausgewählt und
deshalb recycelbar.
- Die Holzrahmen aus Restholz sind unbehandelt.
- Die Polyethylen-Folie (PE) besteht zu einem Teil aus Sekundärrohstoff.
Das Rückführen der Verpackung in den Materialkreislauf spart Rohstoffe und verringert das
Abfallaufkommen. Ihr Fachhändler nimmt die Verpackung im allgemeinen zurück. Wenn Sie
die Transportverpackung selbst entsorgen, erfragen Sie bitte die Anschrift des nächsten
Werkstoffcenters oder Recyclinghofes bei Ihrer Stadt-/Gemeindeverwaltung.
Entsorgung des Altgerätes
Altgeräte enthalten noch wertvolle Stoffe. Geben Sie deshalb Ihr Altgerät nicht einfach auf die
nächste Mülldeponie, sondern erkundigen Sie sich bei Ihrer Stadtverwaltung oder nächstgelegenen Auto- oder Schrottverwertung nach den Möglichkeiten der Wiederverwertung.
3 «T.-Nr.4078220 - D - »
Page 4

Contents
Table des matires Indice
Q
Contents . . . . . . . . . . . . . . . . . . . . . . . . . . . . . . . . . . . . . 19
R
Table des matires . . . . . . . . . . . . . . . . . . . . . . . . . . . . . . . . 33
Page
Page
S
Indice . . . . . . . . . . . . . . . . . . . . . . . . . . . . . . . . . . . . . . . 47
Pagina
4 «T.-Nr.4078220 - D - »
Page 5

Gerätebeschreibung
8109
1234567
1 -Temperaturanzeige 6 -Starttaste
2 -Zeitwähler 7 -Schalter “Not-Aus”
3 -Schlüsselschalter 8 -Anzeigeleuchte “Waschbare Oberbekleidung”
“Waschbare Oberbekleidung” 9 -Anzeigeleuchte “Betrieb”
4 -Temperaturwähler 10 -Anzeigeleuchte “Flusensieb reinigen/Störung”
5 -Programmwähler (nicht bei Trockenautomaten mit Dampfheizung)
1
2
3
4
85
6
7
1 -Hauptschalter 5 -Flusensieb
2 -Schalterblende 6 -Flusenraumklappe
3 -Tür 7 -Schraubfuß, verstellbar (4 Stück)
4 -Türgriff 8 -Abluftleitung / Abluftstutzen
5 «T.-Nr.4078220 - D - »
Page 6

Sicherheitshinweise
und Warnungen
Lesen Sie bitte die Gebrauchsanweisung, bevor Sie Ihren Trockenautomaten in Betrieb
nehmen. Dadurch schützen Sie sich und vermeiden Schäden an Ihrem Trockenautomaten.
Dieser Trockenautomat darf ausschließ-
lich für das Trocknen von Textilien verwendet werden, die für das maschinelle Trocknen
gemäß Pflegeetikett geeignet sind und die in
Wasser gewaschen wurden.
Achtung!
Keine Textilien trocknen, die mit Lösungsmitteln gereinigt worden sind, z.B. Per, FCKW.
Die entstehenden Dämpfe verbinden sich bei
erhöhten Temperaturen mit dem Wasserdampf zu Salzsäure. Dieses führt zu Zerstörungen im oder am Gerät! Ebenfalls kann
es zu gesundheitlichen Beeinträchtigungen
kommen.
Brandgefahr besteht bei Textilien
– die Schaumgummi-, Gummi- oder gummi-
ähnliche Anteile enthalten.
– die mit feuergefährlichen Reinigungsmitteln
behandelt sind.
– die mit Haarfestiger-, Haarspray- und Nagel-
lackentferner- oder ähnlichen Rückständen
behaftet sind.
– z.B. Küchenwäsche, die öl-, fetthaltige oder
sonstige Rückstände aufweist.
Außerdem dürfen in diesem Trockenauto-
maten keine Mops, Aufnehmer und Wischlappen, die mit Rückständen, wie z.B. Wachs
oder Chemikalien behaftet sind, behandelt
werden.
Erlauben Sie Kindern nie, im, auf oder in
der Nähe des Trockenautomaten zu spielen oder sogar selbst den Trockenautomaten
zu bedienen.
Die elektrische Sicherheit dieses Gerätes
ist nur dann gewährleistet, wenn es an ein
Schutzleitersystem angeschlossen wird.
Es ist sehr wichtig, daß diese grundlegende
Sicherheitsvorkehrung vorhanden ist. Im Zweifelsfall die Hausinstallation durch einen
Fachmann überprüfen lassen. Der Hersteller
kann nicht verantwortlich gemacht werden für
Schäden, die durch eine fehlende oder unterbrochene Schutzleitung verursacht werden.
Der Trockenautomat ist nur dann elek-
trisch vom Netz getrennt, wenn der Netzstecker gezogen, der Hauptschalter oder die
Sicherung (bauseitig) ausgeschaltet ist.
Beschädigen, entfernen oder umgehen
Sie nicht die Sicherheitseinrichtungen und
Bedienungselemente des Trockenautomaten.
Geräte bei denen Bedienungselemente
oder die Isolierung von Leitungen beschädigt sind, dürfen vor einer Reparatur nicht
mehr betrieben werden.
Die Dampfzuleitungsbauteile dürfen auf
Grund von Verbrennungsgefahr nicht berührt werden.
Überzeugen Sie sich vor der Wäscheent-
nahme stets davon, daß die Trommel stillsteht. Greifen Sie niemals in die noch
drehende Trommel.
Sollten Sie einen alten Trockenautomaten
ausrangieren (zur Verschrottung geben),
dann entfernen Sie vorher die Flusenraumklappe. Sie verhindern damit, daß sich spielende Kinder einsperren und in Lebensgefahr
geraten.
Benutzen Sie den Trockenautomaten nur,
wenn alle abnehmenbaren Außenverkleidungsteile montiert sind und somit kein Zugriff
zu stromführenden oder sich drehenden Maschinenteilen besteht.
Reparaturen an Elektro-, Gas- und Dampf-
geräten dürfen nur von Fachkräften durchgeführt werden. Durch unsachgemäße
Reparaturen können erhebliche Gefahren für
den Benutzer entstehen.
6 «T.-Nr.4078220 - D - »
Page 7

Sicherheitshinweise
und Warnungen
Brand- und Explosionsgefahr!
Lagern oder verwenden Sie in der Nähe
des Trockenautomaten kein Benzin, Petroleum oder sonstige leicht entzündliche Stoffe.
Brandgefahr!
Betreiben Sie den Trockenautomaten niemals ohne das eingebaute Flusensieb. Ein
beschädigtes Flusensieb muß umgehend ausgetauscht werden.
Die Flusen verstopfen sonst die Luftwege,
Heizung und Abluftleitung.
Eine einwandfreie Funktion desTrockenautomaten kann dann nicht mehr gewährleistet
werden.
Desinfektions- und Reinigungsmittel ent-
halten häufig Chloride (Salze). Trocknen
solche Mittel auf Edelstahloberflächen ab, greifen die verbleibenden Chloride den Edelstahl
an und erzeugen Rost.
Am sichersten schützen Sie den Edelstahl Ihres Gerätes vor Rostschäden, wenn Sie nur
chloridfreie Mittel zum Waschen/Desinfizieren
und zum Reinigen aller Edelstahlflächen verwenden. Lassen Sie sich im Zweifelsfall die
Unbedenklichkeit des Mittels durch den Hersteller bestätigen.
Versehentlich auf die Edelstahloberfläche
geratene chloridhaltige Mittel mit Wasser abwaschen. Danach die Oberfläche mit einem
Tuch trockenreiben.
Werden weitere Personen in die Handhabung
des Trockenautomaten eingewiesen, so sind
ihnen diese wichtigen Sicherheitshinweise zugängig zu machen und/oder vorzutragen.
Bewahren Sie diese Gebrauchsanweisung
auf!
Achtung !
Schaltet der Trockenautomat während des
Trocknungsvorganges vorzeitig ab -ohne die
Störmeldung durch die rote Leuchte anzuzeigen- kann dieses auf erhöhte Temperaturen
im Motorraum zurückzuführen sein.
Thermostate setzen den Trockenautomaten
still. In diesem Falle prüfen Sie bitte die Dichtungen und Verschlüsse an der Einfülltür und
der Flusenklappe.
Der Zustand der Zu- und Abluftleitungen bzw.
Öffnungen ist ebenfalls zu überprüfen.
Werden keine Schäden an den überprüften
Teilen festgestellt, kann der Trockenautomat
neu gestartet werden.
Im Fehlerfalle bitte sofort den Kundendienst
benachrichtigen.
7 «T.-Nr.4078220 - D - »
Page 8
Vor der ersten Inbetriebnahme
Wäsche vorbereiten
Vor der ersten Inbetriebnahme
Bevor Sie den Trockenautomaten mit Wäsche
beladen, sollten Sie das Innere der Trommel
mit einem weichen, trockenen Tuch reinigen.
Wäsche vorbereiten
Sortieren Sie die Wäsche nach Faser- und Gewebeart. Dadurch erreichen Sie ein gleichmäßiges Trockenergebnis.
Nicht alle Textilien eignen sich zum Trocknen
in einem Trockenautomaten. Beachten Sie
deshalb die Angaben des Textilherstellers im
Pflegeetikett. (s = Trocknen im Trockenautomaten nicht möglich).
Textilien aus Wolle/Wollgemischen neigen
zum Verfilzen. Sie sollten deshalb nicht im
Trockenautomaten getrocknet werden (gilt
nicht für T6550 TR).
Stärkewäsche kann im Trockenautomaten getrocknet werden. Die richtige Feuchtigkeit für
das Bügeln oder Mangeln erreichen Sie durch
entsprechende Programmwahl.
Sortieren Sie die Wäsche nach dem gewünschten Trockengrad. Ein Sortieren nach
Größe ist nicht erforderlich.
Bett- und Kopfkissenbezüge sollten zugeknöpft werden, damit beim Trocknen keine
Kleinteile hineingeraten.
Nutzen Sie möglichst die angegebene maximale Beladungsmenge. Unterbeladung ist unwirtschaftlich. Überfüllung beeinträchtigt das
Trockenergebnis und die Wäscheschonung.
Wäsche einfüllen
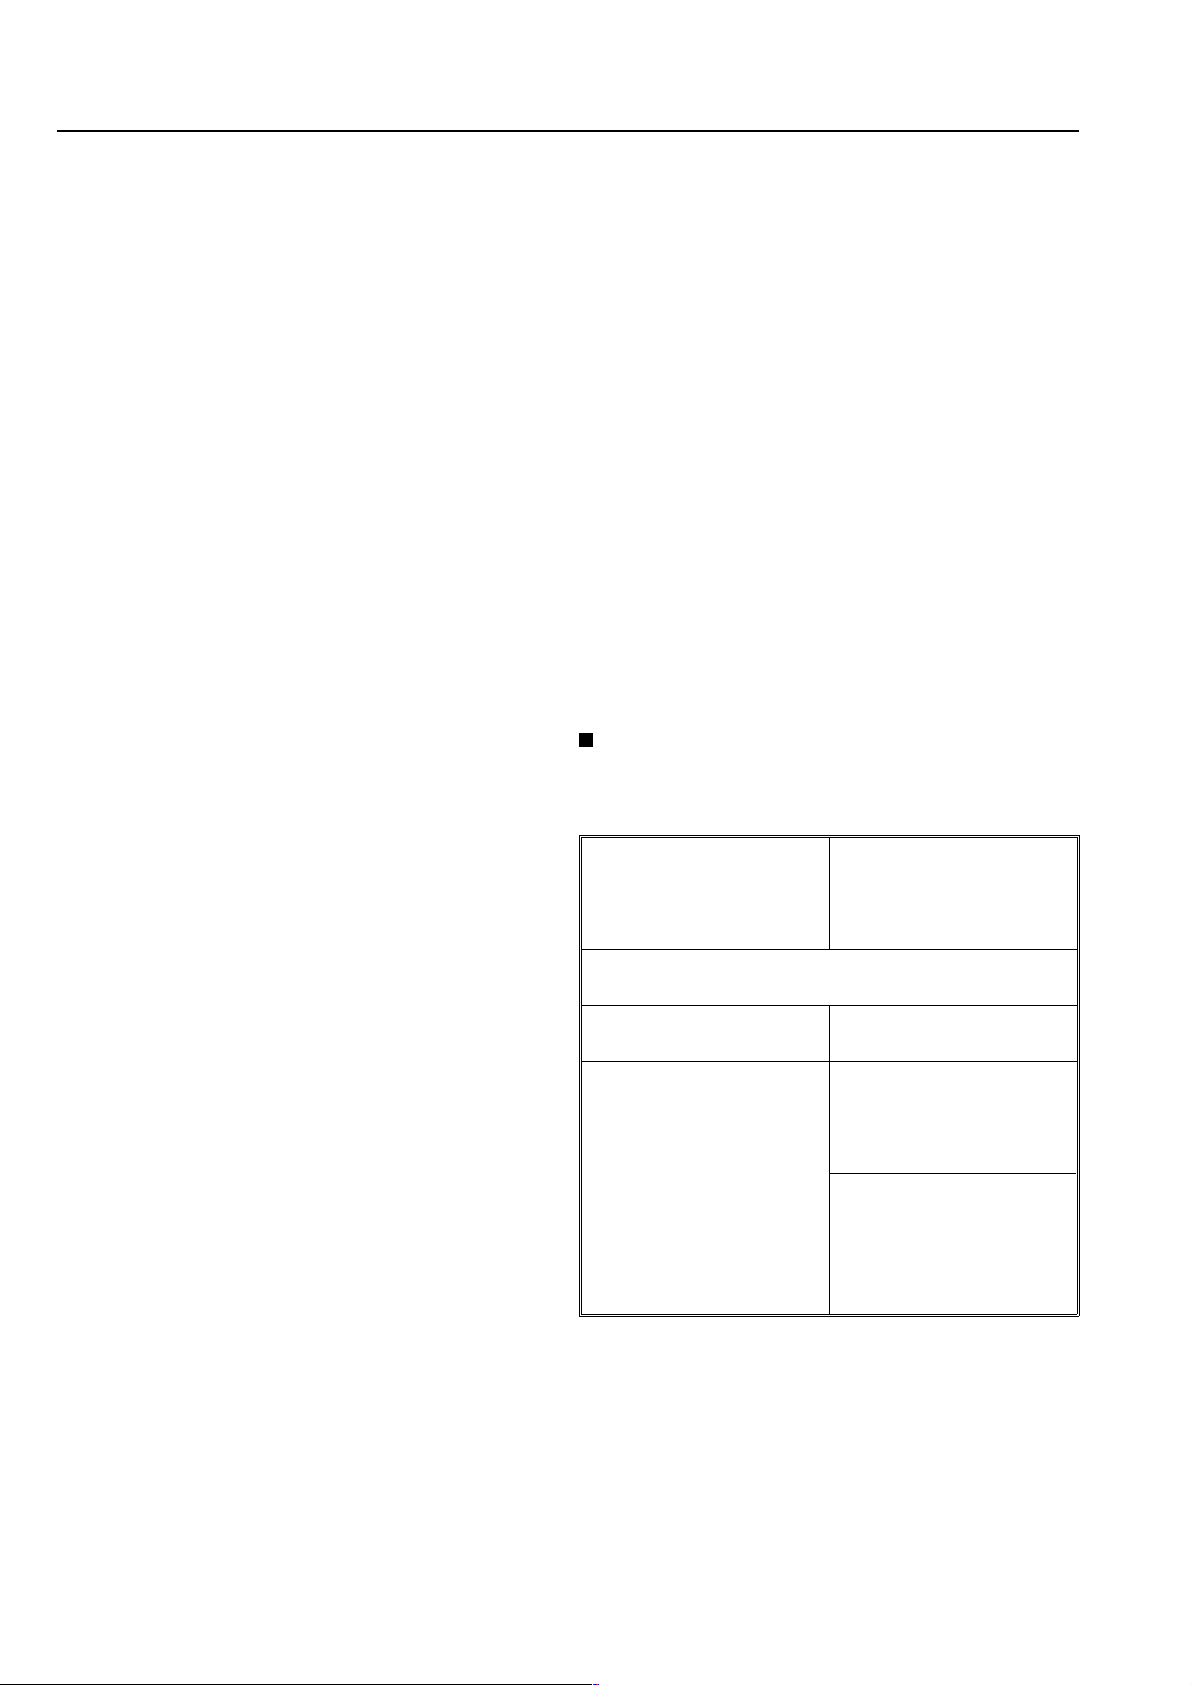
Wäsche-Füllgewichte (Trockenwäsche)
Reine Leinengewebe neigen im Trockenautomaten zum “Aufrauhen”. Beachten Sie deshalb die Herstellerangaben.
Wichtig! An Textilien befindliche größere Metallteile (Schnallen, Haken. Ösen, Schließer
von Reißverschlüssen usw.) müssen vor dem
Trocknen in ein Tuch eingebunden werden.
Dieses schützt die Trommel des Trockenautomaten vor Beschädigungen (Kratzer und Beulen).
Bei Textilien mit geschlossenem Metallreißverschluß besteht die Gefahr, daß die Abtastelektroden an den Trommelrippen überbrückt
werden. Das bewirkt, daß der Trockenvorgang
nicht oder erst zu spät beendet wird. Trocknen
Sie diese Textilien nur mit geöffnetem Reißverschluß.
Gewirkte Textilien (Trikotwäsche) neigen zum
Einlaufen. Übertrocknen verstärkt diesen Effekt. Deshalb sollten Sie für diese Textilien
das Programm “Extratrocken” nicht wählen.
T 6550 TR T6550
Trommelinhalt
550 Liter 550 Liter
Koch/Buntwäsche
Waschbare Oberbe-
kleidung max.
15 kg
max. 22 kg
Pflegeleicht u.
Fein/Synthetik
max. 7,5 kg
8 «T.-Nr.4078220 - D - »
Page 9
Programm wählen
Tür schließen.
Hauptschalter einschalten
(bauseitig).
Schlüsselschalter einschalten;
Stellung “Waschbare Oberbekleidung”
Trockenzeit einstellen:
Für das zeitliche Trocknen empfindlicher
Textilien [z.B. Angora (max. 5 Minuten),
Lambswool, Seide, Viskose usw.] können
mit dem Zeitwähler - zusätzlich zum gewählten Programm - Laufzeiten bis maximal 15 Minuten gewählt werden.
Der Zeitwähler darf in Links- und Rechtsdrehung betätigt werden.
Den Zeitwähler nicht über die Anschläge
hinaus drehen, da er sonst zerstört wird.
Hinweis: Wird kein zeitliches Trocknen
eingestellt, den Zeitwähler auf Position
"Summer aus " stellen.
Temperaturstufe C Programm
Für Wäsche die mit LANADOL normal gewaschen wurde.
Temperaturstufe C Programm
Für Wäsche die mit LANADOL Extra gewaschen wurde.
Temperaturstufe C Programm
Seide, Angora oder ähnliche empfindliche
Wäsche.
Für die verschiedenen Textilarten und je
nach gewünschter Weiterbehandlung sind
mit dem Programmwähler verschiedene
Programme wählbar:
Extratrocken
1
2
3
4
Programm wählen:
Der Trockenautomat ist mit einem elektronischen Abtastsystem ausgestattet, das
den Feuchtigkeitsgehalt der Wäsche ständig überwacht.
Sobald der gewählte Trockengrad erreicht
ist, wird die Wäsche abgekühlt und der
Trockenvorgang automatisch beendet.
-Der Programmwähler kann in Rechtsoder Linksdrehung betätigt werden.-
Waschbare Oberbekleidung
Temperaturstufe C Programm
oder
Temperaturstufe C Programm
1
2
Schranktrocken
2
Leichtfeucht
3
Mangelfeucht ,
4
Mangelfeucht .
5
Mangelfeucht -
6
20 Minuten
7
f Stop
Um das Programmschaltwerk in die Grundstellung (Startstellung) zu bringen, ist nach
dem Trockenvorgang der Programmwähler
auf “Stop” zu stellen.
Für Wäsche die mit LANADOL normal gewaschen und imprägniert wurde.
9 «T.-Nr.4078220 - D - »
Page 10

Programm wählen
Temperatur wählen:
-Der Temperaturwähler kann in Rechtsoder Linksdrehung betätigt werden.-
Temperaturstufe A
kalt
zum Durchlüften von Textilien.
Temperaturstufe B
Fein/Synthetik
Zum Trocknen von Fein/ Synthetik-Textilien.
Temperaturstufe C
Pflegeleicht
Zum Trocknen von Pflegeleicht-Textilien.
Das Ende des Zeitprogramms wird durch
Ertönen eines Summers angezeigt.
Die empfindlichen Textilien entnehmen.
Den Summer durch Linksdrehung des Zeitwählers ausschalten, und das Programm
durch erneutes Betätigen der Starttaste
fortsetzen.
Das Ende des Trockenprogramms wird
durch Ertönen eines Summers angezeigt.
Die Wäsche sollte nicht vor Programmende
entnommen werden, da das Programmschaltwerk dann noch nicht in Grundstellung (Startstellung) gelaufen ist.
Programmwähler auf “Stop” stellen.
Die Tür öffnen.
Temperaturstufe D
- Nicht bei Schlüsselschalterstellung
“Waschbare Oberbekleidung" -
Koch-/Buntwäsche
Zum Trocknen von Baumwoll/ Leinen-Textilien.
0 Trockenautomat
ausgeschaltet.
Starttaste eindrücken.
Das gewählte Trockenprogramm wird gestartet. Drücken Sie die Starttaste solange ein,
bis sich die Trommel dreht und die Anzeigeleuchte “Betrieb” aufleuchtet.
Wäsche entnehmen.
Nach dem Trocknen:
Temperaturwähler auf “0" stellen.
Hauptschalter ausschalten (bauseitig).
Flusensieb reinigen.
Anzeigeleuchte “Flusensieb reinigen / Störung” leuchtet auf, wenn
– das Flusensieb gereinigt werden muß (siehe
Seite 12).
– die Abluftleitung verschlossen oder stark ein-
geengt ist (der Trockner wird abgeschaltet).
10 «T.-Nr.4078220 - D - »
Page 11

Hinweise
Wird die Wäsche nach beendetem Trockenprogramm nicht gleich dem Trockenautomaten entnommen, setzt automatisch ein
Knitterschutz- Intervallbetrieb ein. Das heißt,
die Trommel wird in kurzzeitigen Abständen
bewegt, so daß eine Bildung von Liegefalten
weitgehend verhindert wird. Der KnitterschutzIntervallbetrieb endet nach ca. 27 Minuten.
Die Tür sollte während des Betriebes nur geöffnet werden, um Textilstücke nachzulegen
oder vorzeitig zu entnehmen.
Ein häufiges Öffnen der Tür führt zu Störungen bei der automatischen Feuchtigkeitsmessung und ist zu vermeiden.
Zur Fortsetzung des Trockenprogramms die
Tür schließen und die Starttaste eindrücken.
Not-Aus-Schalter
Betätigen Sie diesen Schalter nur im Moment
der Gefahr!
Der Trockenautomat wird dann augenblicklich
außer Betrieb gesetzt. Benutzen Sie diesen
Schalter im normalen Betrieb bitte nicht zum
Ausschalten des Trockenautomaten. Ein betätigter “Not-Aus”-Schalter wird durch Rechtsdrehung der gerändelten Scheibe wieder entriegelt.
Wurde das Trockenprogramm durch Öffnen
der Tür oder Flusenraumklappe (6). sowie
durch Stellen des Temperaturwählers auf “0"
bzw. ”Stop" oder durch Betätigung des “Not-
Aus” Schalters unterbrochen, ist zur Wiederinbetriebnahme die Starttaste zu betätigen.
11 «T.-Nr.4078220 - D - »
Page 12

Reinigung und Pflege
Vor Beginn der Reinigung ist der Trockenautomat über den Hauptschalter (bauseitig) auszuschalten.
Zur Reinigung des Trockenautomaten darf
kein Hochdruckreiniger und kein Wasserstrahl benutzt werden.
Zu reinigen ist:
Auf Flusenablagerungen zu kontrollieren und,
wenn nötig, zu reinigen sind jährlich einmal
durch den Werkskundendienst:
Heizregister und Heizschacht (bei Elektroheizung)
der gesamte Innenraum des Trockenautomaten
Lüfterflügel des Abluftgebläses
Bei nicht zeit -und fachgerechter Wartung sind
Leistungsverluste und Funktionsstörungen
(Brandgefahr) nicht auszuschließen.
Bei Störungen benachrichtigen Sie bitte den
Werks-Kundendienst.
Der Kundendienst benötigt Typ und Maschinennummer (Ser.No).
Beide Angaben finden Sie auf den Typenschildern:
Täglich 1 mal oder mehrere Male je nach Flusenanfall und bei Aufleuchten der Anzeigeleuchte “Flusensieb reinigen/Störung” das
Flusensieb (5). Das Flusensieb ist nicht zu entfernen. Es ist darauf zu achten, daß das Flusensieb nicht beschädigt wird.
Nach dem Trocknen von Stärkewäsche sollte
die Trommel mit einem weichen feuchten
Tuch ausgewischt werden.
Trocknergehäuse, Schalterblende und Kunststoffteile nur mit einem milden Reinigungsmittel oder einem weichen, feuchten Tuch
reinigen und anschließend trockenreiben.
Zur Reinigung der Gehäuseteile aus Edelstahl
ist ein handelsüblicher Edelstahlreiniger zu
verwenden.
Reinigen Sie den Trockenautomaten auf kei-
nen Fall mit einem Scheuermittel.
bei geöffneter Tür,
oder:
an der Maschinenrückseite in der Nähe des
Abluftstutzens.
Im Ersatzfall dürfen ausschließlich OriginalErsatzteile verwendet werden (auch in die-
sem Fall benötigt der Kundendienst Typ und
Maschinennummer (Ser.No).
12 «T.-Nr.4078220 - D - »
Page 13

Bedeutung der Symbole
auf dem Typenschild
1
2
3
4 17
5
6
8 18
9
7
10 21
11 22
12
13 23
14 15 16 20
1
2
20
1 Maschinentyp
2 Maschinennummer/(Baujahr*)
3 Spannung/Frequenz
4 Steuersicherung
5 Antriebsmotor
6 Tellerdurchmesser/Telleranzahl *
7 Trommeldaten
8 Trommeldurchmesser/Trommeltiefe *
9 Schleuderdrehzahl *
10 Trommelinhalt/Wäschetrockengewicht
11 Kinetische Energie *
12 Hochlaufzeit *
13 Bremszeit *
14 Heizung
15 Elektroheizung
16 Sicherung (bauseitig)
17 Dampfheizung indirekt
18 Dampfheizung direkt *
19 Gasheizung
20 Inbetriebnahmedatum
21 Gas-Registrierung
22 Wasser-Registrierung *
23 Feld für Prüfzeichen
* gilt nicht für Trockenautomaten
19
Geräuschemission
A-bewerteter Schalleistungspegel
T 6550 TR 72,8 dB
gemessen nach DIN (IEC) 45 635
Kennzeichnung nach Maschinen-Lärmverordnung 3. GSGV § 1 1.a
13 «T.-Nr.4078220 - D - »
Page 14

Hinweise für den Aufsteller
Der Trockenautomat darf nur vom Werks-Kundendienst oder einem autorisierten Fachhändler aufgestellt und in Betrieb genommen
werden.
Beachten Sie die beiliegenden Installationsanweisungen und den Installationsplan, sie sind
wichtig für die Aufstellung.
Stellen Sie den Trockenautomaten nicht in
frostgefährdeten Räumen auf.
Während des Betriebes ist für eine ausreichende Belüftung des Raumes zu sorgen.
Führen Sie dem Trockenautomaten saubere
Frischluft und keine mit Chlor-, Fluor- oder anderen Lösungsmittel-Dämpfen durchsetzte
Frischluft zu.
Die Umgebung des Trockenautomaten
-insbesondere der Bereich der zentralen Luftansaugung- muß frei von Flusen gehalten werden, damit diese nicht angesaugt werden
können. Angesaugte Flusen setzen sich im
Trockenautomaten fest und führen zu Funktionsstörungen.
Zur Erleichterung der späteren Rohrreinigung
sollten möglichst an Bögen Reinigungsklappen
angebracht werden.
Bei ansteigenden Abluftleitungen ist an der
tiefsten Stelle eine Kondensatabführung vorzusehen.
Ein Fundament ist für den Trockenautomaten
nicht erforderlich. Unebenheiten des Bodens
sind jedoch auszugleichen.
Für einen einwandfreien Lauf ist es wichtig,
daß der Trockenautomat waagerecht aufgestellt wird.
Um dem Kundendienst eine spätere Wartung
zu erleichtern, dürfen die im Installationsplan
angegebenen Mindestmaße und der Wandabstand nicht unterschritten werden.
Die Abluftleitung darf nicht in einen mit Gas-,
Kohle- oder Ölfeuerstellen belegten Kamin geführt werden. Die feuchtwarme Luft ist auf
dem kürzesten Weg ins Freie oder in einen
hierfür geeigneten Entlüftungskanal zu leiten.
Die Abluftleitung muß, bedingt durch die höhere Luftgeschwindigkeit, strömungstechnisch
günstig verlegt werden (wenig Bögen, kurze
Leitungen, gut ausgebildete und auf Luftdichtigkeit geprüfte Anschlüsse und Übergänge).
Siebe und Jalousien dürfen in die Abluftleitung nicht eingebaut werden.
Beim Anschluß der Abluftleitung an den Abluftstutzen des Trockenautomaten muß auf besonders gute Verbindung und Luftdichtigkeit
geachtet werden.
Das Rohrende einer ins Freie geleiteten Abluftleitung ist gegen Witterungseinflüsse durch einen z.B. nach unten gehenden 90o -Bogen zu
schützen.
14 «T.-Nr.4078220 - D - »
Page 15

Hinweise für den Aufsteller
Den Trockenautomaten durch Verstellen der
Schraubfüße waagerecht ausrichten.
Nach dem Ausrichten müssen die Scheiben
mit einem Schraubendreher zum Bodenblech
festgezogen werden.
Die Anschlüsse des Trockenautomaten sind
nach beiliegendem Installationsplan vorzunehmen.
Der Trockenautomat darf nur an die auf dem
Typenschild angegebene Spannung und Frequenz angeschlossen werden.
Die Elektroheizung ist werkseitig auf
27 kW eingestellt.
Nach erfolgtem Elektroanschluß sind unbedingt alle demontierten Außenverkleidungsteile wieder zu montieren.
Dampfanschluß
Den Dampfanschluß darf nur ein zugelassener Installateur vornehmen.
Beachten Sie bitte den beiliegenden Installationsplan und die Installationsanweisung, sie
sind wichtig für den Dampfanschluß.
Nach erfolgtem Dampfanschluß sind unbedingt alle demontierten Außenverkleidungsteile wieder zu montieren.
Nach erfolgter Aufstellung des Trockenautomaten sind unbedingt alle demontierten
Außenverkleidungsteile wieder zu montieren.
Elektroanschluß
Den Elektroanschluß darf nur ein zugelassener Elektro-Installateur unter Beachtung der
VDE-Vorschriften und der Vorschriften des zuständigen Elektrizitätswerkes vornehmen.
Beachten Sie den beiliegenden Schaltplan
und Installationsplan. Diese Pläne sind wichtig
für den Elektroanschluß.
Achtung!
Auf richtige Drehrichtung des Lüftermotors
achten, hierzu Flusenraumklappe öffnen,
Lüftermotor muß rechts herum drehen.
15 «T.-Nr.4078220 - D - »
Page 16

Diese Seite wurde bewußt leer gelassen.
16 «T.-Nr.4078220 - D - »
Page 17

Diese Seite wurde bewußt leer gelassen.
17 «T.-Nr.4078220 - D - »
Page 18

This paper consists of cellulose which has
been bleached without the use of chlorine.
18 «T.-Nr.4078220 - GB - »
Page 19

Contents
Description of the machine . . . . . . . . . . . . . . . . . . . . . . . . . . . . 20
Warning and safety instructions . . . . . . . . . . . . . . . . . . . . . . . . . 21
Before using for the first time . . . . . . . . . . . . . . . . . . . . . . . . . . . 23
Preparation of washing . . . . . . . . . . . . . . . . . . . . . . . . . . . . . . 23
Laundry-Weight of load . . . . . . . . . . . . . . . . . . . . . . . . . . . . . . 23
Programme selection . . . . . . . . . . . . . . . . . . . . . . . . . . . . . . . 24
Notes . . . . . . . . . . . . . . . . . . . . . . . . . . . . . . . . . . . . . . . 26
Cleaning and care . . . . . . . . . . . . . . . . . . . . . . . . . . . . . . . . 27
Symbols on the data plate . . . . . . . . . . . . . . . . . . . . . . . . . . . . 28
Note for the installer . . . . . . . . . . . . . . . . . . . . . . . . . . . . . . . 29
Electrical connection . . . . . . . . . . . . . . . . . . . . . . . . . . . . . . . 30
Steam connection . . . . . . . . . . . . . . . . . . . . . . . . . . . . . . . . 30
The tumble dryer must be installed only by a Miele
engineer or a Miele authorized Service dealer.
Page
Make your contribution to protect our environment
Disposal of the packing material
The transport and protective packing is mostly manufactured from the following re-useable
materials:
-polyethylene foil (transparent)
-untreated wood
Don’t throw these materials away with your ordinary rubbish. Take them to the nearest
collection point. Your local authority will tell you where it is.
Disposal of your old machine
There are materials in old machines which can be re-used, so please don’t simply dispose
of your old machine, but ask your local authority or scrap merchant whether those parts are
re-useable or recyclable.
19 «T.-Nr.4078220 - GB - »
Page 20

Description of the machine
8109
1234567
1 -Temperature display 6 -Start button
2 -Time selector 7 -“Emergency Stop” switch
3 -Key switch 8 -Indicator light “Washable outer garments”
“Washable outer garments” 9 -Indicator light “In operation”
4 -Temperature selector 10 -Indicator light “Clean fluff filter / Fault”
5 -Programme selector (not for steam-heating dryer)
1
2
3
4
85
6
7
1 -Mains switch 5 -Fluff filter
2 -Control panel 6 -Fluff filter access panel
3 -Door 7 -Adjustable feet (4)
4 -Door handle 8 -Exhaust ducting / Exhaust connection
20 «T.-Nr.4078220 - GB - »
Page 21

Warning and
safety instructions
Read the operating instructions through before
using this machine for the first time. This way
you will avoid the risk of accidents and damage to the machine.
This dryer is designed for commercial use
only. Do not use for purposes other than
those for which it is designed.
Not all fabrics are suitable for drying in a
tumble dryer. Therefore pay special attention to the manufacturer’s instructions on the
wash care label (s = do not tumble dry).
This dryer should not be used if anything other
than a water solution has been used in the
cleaning process.
Important
Garments which have been treated with
solvents such as CFCs must not be dried in
this tumble dryer. The vapours which these
substances give off combine with high temperatures to produce hydrochloric acid. This
will damage the machine and is a health hazard.
There is a danger of fire with the follow-
ing, and on no account should they be
dried in this machine:
– Articles containing foam rubber, rubber or
rubber like materials.
– Articles which have been treated with in-
flammable cleaning agents.
– Articles which have been splashed with hair
lacquer, hair spray, nail varnish remover,
etc). These items must be washed before
tumble drying.
– kitchen overalls which may be greasy, fatty
or impregnated with other residues.
The electrical safety of this appliance can
only be guaranteed when continuity is complete between the appliance and an
effective earthing system which complies with
local and national regulations.
It is most important that this basic safety
requirement is regularly tested by a qualified
electrician.
The manufacturer can not be held responsible for the consequences of an inadequate
earthing system.
The machine is only completely isolated
from the electricity supply either when it is
switched off at the wall switch or when the
mains fuses are withdrawn from the distribution board.
Do not damage, remove or bypass the
safety components, fixtures and control
elements of this machine.
Where there is any damage to the controls
or to the cable insulation the machine
must not be used until it has been repaired.
Do not touch the steam pipework and com-
ponents, there is a danger of being burnt.
Before reaching into the drum ensure that
the drum is stationary. Never reach into a
moving drum.
When disposing of an old machine, make
the door lock inoperative and remove the
fluff filter access panel . This should prevent
children at play from being accidentally locked
in and endangering their lives.
Only use the machine if all of the remova-
ble outer housing parts are in place. This
way any moving parts or electrical components cannot be accessed.
Do not dry mops, floor cloths etc in this machine if they contain substances such as
wax or chemical cleaning agents.
Do not let children play in or near the machine and do not let them play with the
controls or operate it.
Repairs to machines operated by gas, ste-
am or electricity must only be carried out
by fully trained and qualified service engineers. Unauthorized repairs could be dangerous.
Fire and Explosion risk
Never use or store petrol or petroleum
based substances or any easily inflammable
substances near the machine.
Fire risk
Do not use the machine without the built-in
fluff filter in place. If the fluff filter is damaged
it must be replaced immediately.
A build up of fluff could block the air flow,
heating and ventilation, and impair the efficiency of the machine.
21 «T.-Nr.4078220 - GB - »
Page 22

Warning and
safety instructions
Disinfecting and Cleaning agents often
contain chlorides (salts). If these substances dry onto the steel surfaces the residual chlorides attack the steel and can cause
rusting.
To protect your machine from rust damage we
recommend only using chloride free disinfecting and cleaning agents for washing and disinfecting and for cleaning the machine. If you
are not sure about a particular agent contact
the manufacturer for advice.
If you accidentally spill an agent containing
chloride on the machine it should be rinsed off
with water and dried with a soft cloth.
Caution
If the tumble dryer switches off prematurely during the drying cycle, without the fault
indication light showing, this could be due to
high temperatures in the area of the motor.
Heater limiters stop the tumble dryer.
In this case please check the seals and locks
on the machine door and the fluff filter.
Check the condition of the air inlet and air outlet vents. If no damage is evident to any of the
parts checked, the dryer can be re-started.
If the fault occurs again, call the approved Service engineer.
All personnel working with this machine must
be fully trained in all aspects of its use and
safety.
Keep these operating instructions in a safe
place.
22 «T.-Nr.4078220 - GB - »
Page 23

Before using for the first time
Preparation of washing
Before using for the first time
Wipe the inside of the drum with a soft dry
cloth before loading the drum with laundry.
Preparing the laundry
Sort the laundry according to fabric type and
weights and materials in order to achieve an
even drying result.
Not all textiles are suitable for drying in a
tumble dryer. Therefore pay special attention
to the manufacturer’s instructions in the wash
care label. (s = Not suitable for drying in a
tumble dryer).
The surface of pure linen is liable to be roughened by tumble drying. Consult the manufacturer’s instructions.
Duvet covers and pillow cases should be
closed to prevent smaller items rolling up inside them.
For greater economy dry a full load, underloading is uneconomical. Do not overload as this
will impair the drying result and the laundry
finish.
Load the drum
Laundry-Weight of load (Dry laundry)
T 6550 TR T 6550
Drum capacity
550 Litres 550 Litres
Important! Any laundry item with metal
buckles, hooks, eyes, zip tags etc. should be
put into the dryer in a cloth bag (eg. pillowcase) to protect the drum from scratches and
dents.
Closed zips in garments may bridge the sensor electrodes in the drum ribs causing the
drying process not to end or to end too late.
Items with zips should be dried with the zips
open.
Some woven and loopknit materials tend to
shrink to varying extents depending on their
quality. This tendency is exaggerated by overdrying. Avoid the Extra dry programme for
such fabrics.
Starched washing can be dried in the tumble
dryer. Select the most suitable programme for
ironing by hand or machine.
“Washable outer
garments”
max. 15 kg
Cottons
max.22 kg
Minimum iron
and delicates
max. 7.5 kg
Sort the laundry according to the level of
dryness required. It is not necessary to sort
according to size.
23 «T.-Nr.4078220 - GB - »
Page 24

Programme selection
Close the door.
Switch on at the mains
(installed on site).
Set the key switch to position:
“Washable outer garments”
Set the drying time:
Where fabrics needing special care are to
be dried, such as (e.g. angora, 5 minutes
maximum) lambswool, silk or viscose etc.,
the time selector can be used to temporarily halt the programme already selected
after up to 15 minutes of timed drying.
The time selector can be turned clockwise
or anti-clockwise.
DO NOT try and turn the selector beyond
the resistance, as this would damage it.
Note: If timed drying is not chosen, turn the
time selector to the position "Buzzer off ".
Temperature level
for laundry which has been washed
with LANADOL.
Temperature level C Programme
for laundry which has been washed
with LANADOL Extra.
Temperature level C Programme
for silks, angora and other delicate
fabrics.
Different drying programmes can be selected with the programme selector depending on the dryness level required for further
handling:
Extra dry
1
Programme
C
2
3
4
Programme selection:
The dryer has an electronic sensor
system, which monitors the residual moisture in the laundry.
Once the required level of dryness has
been reached the laundry is cooled down
and the drying programme finishes automatically.
-The Programme selector can be turned in
a clockwise or anti-clockwise direction.
Washable outer garments
Temperature level C Programme
or
Temperature level
Programme
C
1
2
Normal
2
Minimum Iron
3
Machine iron ,
4
Machine iron .
5
Machine iron -
6
7 20 Minutes
f Stop
At the end of a drying programme the programme selector should be turned back to
the “Stop” position. The machine is then
ready for use again.
for laundry which has been washed
or impregnated with LANADOL.
24 «T.-Nr.4078220 - GB - »
Page 25

Programme selection
Temperature selection:
-The temperature selector can be turned
clockwise and anti-clockwise.-
Temperature level
Cold:
for airing laundry.
Temperature level
Low: Delicates/Synthetics
For drying delicates/ synthetics.
Temperature level
Medium: Minimum iron
For drying minimum iron laundry
Temperature level
- Not with key switch positioned
High: Cottons
For drying laundry made from cotton and
linen
A
B
C
D
“Washable outer garments”
A buzzer sounds at the end of the timed
drying programme.
Remove the special care fabrics.
Cancel the buzzer by turning the time
selector anti-clockwise, and continue the
programme by pushing in the start button
again.
A buzzer sounds at the end of the drying
programme.
Do not remove laundry before the end of a programme as the selector switch will not have
moved around to the start position.
Turn the programme selector to “Stop”.
Open the door.
Take out laundry.
After drying:
0 Dryer
switched off.
Press the start button
This will start the pre-selected drying programme. Press the start button until the
drum begins to turn and the “In operation”
indicator light comes on.
The warning light for the fluff filter comes
on when
– the fluff filter needs cleaning ( see page 27)
– the exhaust ducting is blocked or constricted
(the dryer will switch itself off.)
Turn the temperature selector to “0".
Switch off at the mains.
Clean the fluff filter.
25 «T.-Nr.4078220 - GB - »
Page 26

Notes
If the laundry is not removed from the machine
at the end of the programme an anti-crease
phase switches in automatically. There is
drum movement at intervals to prevent laundry creasing. The anti-crease phase lasts
about 27 minutes.
The door should only be opened during operation if more garments need to be added to
the dryer or if they need to be taken out early.
Do not open the door too often. This will
prevent the automatic moisture measuring
system from functioning correctly.
To continue the drying process close the door
and press the start button.
“Emergency Stop” switch
Operate this switch only in a moment of
danger.
The dryer is then immediately put out of operation. Do not use this switch in normal operation to switch the machine off.
To reset the “Emergency Stop” switch after it
has been used, turn the ribbed disc clockwise.
If the drying programme is interrupted, either
by opening the door, opening the fluff filter
panel (6), turning the temperature selector to
“0", or operating the ”Emergency stop"
switch, to start the machine again the “Start”
button has to be pressed.
26 «T.-Nr.4078220 - GB - »
Page 27

Cleaning and care
Switch off at the mains before cleaning the machine.
Do not use a high pressure cleaner or water
jet to clean the machine.
Cleaning:
The following should be checked and if necessary cleaned once a year by a Customer Service Engineer:
Any build up of fluff which collects elsewhere
within the machine, such as:
Heater elements and heater duct work
(electric heating).
The whole interior of the tumble dryer
Exhaust fan impeller
If appropriate maintenance is not carried out
regularly the efficient operation of the dryer
may be impaired and operational faults representing a fire hazard could occur.
Should a fault occur please contact your nearest Customer Service Dept.
Clean the fluff filter (5) at least once a day
depending the amount of fluff that has collected and when the “Clean fluff filter” indicator
light comes on. Do not remove the fluff filter
and be very careful not to damage it.
After drying starched laundry the drum should
be wiped out with a soft, damp cloth.
The housing, control panel and the plastic
parts may only be cleaned using a mild cleaning agent or with a soft, damp cloth and then
dried.
Stainless steel housing should be cleaned
with a proprietary stainless steel cleaning
agent.
Never use abrasive cleaning agents to clean
the machine.
When contacting the Customer Service Department please give both the model type and
the machine number (Ser.N
These can be found on the data plate:
with the door open,or:
at the rear of the machine next to the exhaust
connection.
Only use genuine Miele spare parts (when
ordering spare parts the Spare Parts Dept. will
also need to know the model type and the machine number (Ser.No).
o
).
27 «T.-Nr.4078220 - GB - »
Page 28

Explanation of symbols
on the data plate
1
2
3
4 17
5
6
8 18
9
7
10 21
11 22
12
13 23
14 15 16 20
1
2
20
1 Machine type
2 Machine number/(year of manufacture *)
3 Voltage/Frequency
4 Mains fusing
5 Drive motor
6 Plate diameter/Plate qty. *
7 Drum data
8 Drum diameter/Drum depth *
9 Spin speeds *
10 Drum volume/Laundry dry weight
11 Kinetic Energy *
12 Top running time *
13 Braking time *
14 Heating
15 Electric heating
16 Fusing (on site)
17 Steam heating indirect
18 Steam heating direct *
19 Gas heating
20 Commissioning date
21 Gas-Registration
22 Water-Registration*
23 Space for test certificate
* not valid for Tumble Dryers
19
Noise emission
T 6550 TR 72.8 dB
registered on the “A” scale.
(measured in Germany in accordance with
DIN (IEC) 45 635, machine noise regulations
3. GSGV p 1. 1.a)
28 «T.-Nr.4078220 - GB - »
Page 29

Note for the installer
The Tumble Dryer may only be installed and
commissioned by a Service Engineer or by an
authorized Service Dealer.
Pay careful attention to the enclosed installation instructions and the installation diagram.
Do not install the dryer in a room where there
is danger of frost.
Ensure that there is adequate ventilation for
operation in the room where it is installed.
Machines heated by liquid gas must have adequate ventilation and must not be installed in a
cellar situation.
Ensure that the air being drawn into the
machine is fresh and that it does not contain
chlorine, fluoride or solvent-vapours.
Machines heated by gas and electricity must
not be installed in the same room as dry cleaning machines which use solvents containing
CFCs. Escaping vapours break down into hydrochloric acid if ignited. This would damage
any laundry as well as the machine.
If installed in an adjacent room there must be
no exchange of air between them.
Where the exhaust is ducted directly to the atmosphere, the outlet of the duct should be protected against the weather, ideally by a
downward angle of 90o.
To facilitate subsequent cleaning of the duct,
inspection panels should be fitted on the
bends wherever possible.
With upward sloping exhaust ducting a condensate drain must be made at the lowest
point.
The machine does not need to be installed on
a base, however any uneveness in the floor
must be compensated for.
The machine must be installed evenly for it to
function smoothly.
To facilitate any subsequent service or maintenance work, the minimum dimensions and
distance required from the wall, as shown in
the installation diagram, should be observed.
The area around the dryer - particularly
around the central air inlet must be kept free
from lint fibres, so that these do not get drawn
into the machine. Any lint trapped in the machine could lead to operational damage.
The exhaust must not be fed into a chimney
used by another gas, coal or oil heated appliance. The warm humid exhaust vapours
should be directed by the shortest possible
route to the atmosphere or into a suitable venting duct. The duct must be so designed and
installed to accommodate the high throughput
of air (few bends, as short a duct as possible,
well shaped and leakproof joints).
No filters or louvres or restrictions should be
built into the exhaust duct work.
The connection between the exhaust ducting
and the exhaust connection on the dryer must
be airtight.
29 «T.-Nr.4078220 - GB - »
Page 30

Note for the installer
The machine can be levelled by adjusting the
screw feet.
Once levelled the locking ring must be turned
(clockwise)with a screwdriver against the machine’s base plate .
WARNING
THIS APPLIANCE MUST BE EARTHED.
Warning
Ensure that the ventilation motor is turning in
the correct direction.To do this open the panel
to the fluff filter. The ventilation motor must
turn clockwise.
The dryer may only be connected to the same
voltage and rated load as shown on the data
plate.
The electrical heater rating is set at the factory
to 27 kW.
All removable outer housing parts must be refitted after the electrical connection has been
made.
Steam connection
The electrical connections to the dryer must
be in accordance with instructions given on
the installation diagram and comply with local
regulations.
Once installed in position all detachable outer
casing parts must be refitted.
Electrical connection
The electrical connection may only be carried
out by a fully qualified electrical engineer in accordance with local and national safety regulations.
The supply outlet should incorporate an OnOff switch and be easily accessible for servicing work.
Steam connection must only be undertaken by
an authorized installer.
For steam connection it is essential to follow
the Installation plan and instructions provided.
When connection to steam has been completed, ensure that all removable outer housing parts have been put back in place.
Follow instructions given on the enclosed wiring diagram and on the installation diagram.
These are important for the correct electrical
connection to be made.
30 «T.-Nr.4078220 - GB - »
Page 31

This page has been left blank intentionally.
31 «T.-Nr.4078220 - GB - »
Page 32

Ce papier est composé de cellulose blanchie 100%
sans chlore et contribue ainsi à protéger l’environnement.
32 «T.-Nr.4078220 - F - »
Page 33

Table des matières
Description de l’appareil . . . . . . . . . . . . . . . . . . . . . . . . . . . . . 34
Prescriptions de sécurité et mises en garde . . . . . . . . . . . . . . . . . . . 35
Avant la première mise en service . . . . . . . . . . . . . . . . . . . . . . . . 37
Préparation du linge . . . . . . . . . . . . . . . . . . . . . . . . . . . . . . . 37
Charges de linge . . . . . . . . . . . . . . . . . . . . . . . . . . . . . . . . . 37
Sélection des programmes . . . . . . . . . . . . . . . . . . . . . . . . . . . . 38
Remarques . . . . . . . . . . . . . . . . . . . . . . . . . . . . . . . . . . . . 40
Nettoyage et entretien . . . . . . . . . . . . . . . . . . . . . . . . . . . . . . 41
Explication des symboles indiqués sur la plaque signalétique . . . . . . . . . . 42
Concerne l’installateur . . . . . . . . . . . . . . . . . . . . . . . . . . . . . . 43
Branchement électrique . . . . . . . . . . . . . . . . . . . . . . . . . . . . . 44
Raccordement vapeur . . . . . . . . . . . . . . . . . . . . . . . . . . . . . . 44
Le sèche-linge doit être installé exclusivement par le
Service Après Vente Miele ou par un revendeur agréé.
Page
Elimination de l’emballage
L’emballage protège l’appareil des avaries de transport. Les matériaux utilisés sont choisis en
fonction de critères écologiques de façon à en faciliter le recyclage.
- Socles en bois de récupération non traité.
- Feuille de polyéthylène composée en partie de matières recyclées.
Le recyclage de l’emballage économise les matières premières et réduit le volume des déchets
à éliminer. En principe le revendeur reprend l’emballage de votre appareil à sa mise en service.
Si vous devez vous en débarrasser vous-même, renseignez-vous auprès de la mairie de votre
municipalité sur la localisation du container le plus proche acceptant ces déchets.
Elimination de l’ancien appareil
Les anciens appareils comportent des matériaux recyclables. Ne vous contentez pas de le
déposer à la décharge la plus proche, mais renseignez-vous sur les possibilités de ramassage
d’objets encombrants auprès de la mairie de votre domicile.
33 «T.-Nr.4078220 - F - »
Page 34

Description de l’appareil
8109
1234567
1 -Afficheur de température 6 -Touche départ
2 -Minuterie 7 -Bouton “Arrêt d’urgence”
3 -Interrupteur à clé 8 -Voyant “Vêtements lavables”
"Vêtements lavables" 9 -Voyant “Fonctionnement”
4 -Sélecteur de température 10 -Voyant “Nettoyage du filtre/Alarme”
5 -Sélecteur de programme (Pas sur sèche-linge avec chauffage vapeur)
1
2
3
4
85
6
7
1 -Interrupteur principal 5 -Filtre
2 -Tableau de commande 6 -Trappe d’accès au filtre
3 -Porte 7 -Pied à vis réglable en hauteur (x 4)
4 -Poignée de porte 8 -Conduit/raccord d’évacuation
34 «T.-Nr.4078220 - F - »
Page 35

Prescriptions de sécurité
et mises en garde
Lisez le mode d’emploi avant de mettre votre
appareil en service. Vous vous protégerez
ainsi et éviterez des détériorations sur votre
sèche-linge.
Ce sèche-linge est réservé exclusivement
au séchage de textiles appropriés à un séchage en machine conformément à l’étiquette
d’entretien et lavés à l’eau.
Attention
Ne séchez pas de textiles nettoyés aux
solvants, perchloréthylène, CFC par ex. Les
vapeurs dégagées mélangées à la vapeur
d’eau se transforment en acide chlorhydrique
à températures élevées, ce qui peut endommager l’intérieur et l’extérieur de l’appareil et
être nocif à la santé.
Attention au risque d’incendie pour les
textiles
– qui contiennent de la mousse, du caout-
chouc ou des matières similaires.
– qui sont traités aux détachants inflamma-
bles.
– qui sont imprégnés de fixateurs, laques
pour cheveux, dissolvants ou produits similaires.
– qui contiennent des salissures huileuses ou
graisseuses, linge de cuisine par ex.
Le sèche-linge n’est déconnecté du ré-
seau que s’il est débranché, que l’interrupteur principal est coupé ou que le fusible (à
prévoir par l’utilisateur) est ôté.
N‘endommagez, n’enlevez ou ne modifiez
pas les dispositifs de sécurité et éléments
de commande de la machine.
Ne faites pas fonctionner les machines sur
lesquelles les éléments de commande et
les liaisons électriques ont été endommagés avant d’avoir réparé.
Ne touchez pas aux pièces d’alimentation
en vapeur en raison du risque de brûlure.
Assurez-vous toujours que le tambour est
à l’arrêt lors du déchargement du linge.
Si vous devez vous débarrasser d’un an-
cien sèche-linge, enlever la trappe d’accès
au filtre au préalable. Vous éviterez que des
enfants ne s’y enferment en jouant et ne
soient ainsi en danger de mort.
Utilisez le sèche-linge uniquement lorsque
toutes les pièces d’habillage extérieur
démontables sont montées et qu’il n’y a ainsi
aucun accès aux pièces électriques ou
d’entraînement.
Ne traitez dans ce sèche-linge aucun faubert ni serpillière imprégnés de produits
chimiques ou cire par ex.
Interdisez l’utilisation et l’accès du sèchelinge aux enfants.
Les interventions techniques sur les appa-
reils électriques, gaz ou vapeur doivent
être effectuées uniquement par des professionnels. Les réparations incorrectes peuvent
entraîner de graves dangers pour l’utilisateur.
La sécurité électrique de cet appareil
n’est garantie que s’il est raccordé à un
système de mise à la terre homologué. Il est
très important que cette condition de sécurité
élémentaire et en cas de doute toute l’installation domestique soient contrôlées par un
professionnel. Le fabricant ne peut être tenu
responsable de dommages causés par une
terre manquante ou défectueuse.
Risque d’incendie ou d’explosion
Ne stockez ni n’utilisez d’essence, de pétrole ou autre produit inflammable à proximité
du sèche-linge.
Risque d’incendie
Ne faites jamais fonctionner le sèche-linge
sans filtre. Il faut changer immédiatement
un filtre endommagé. Sinon les peluches obstruent les circuits d’air, le chauffage et le
conduit d’évacuation.
Le bon fonctionnement du sèche-linge ne peut
plus être garanti.
35 «T.-Nr.4078220 - F - »
Page 36

Prescriptions de sécurité
et mises en garde
Les produits désinfectants et nettoyants
contiennent souvent des chlorures. Si ces
produits sèchent sur des surfaces en inox, les
résidus de chlorure attaquent l’inox et provoquent une formation de rouille.
Pour plus de sécurité protégez l’inox de votre
appareil en n’utilisant que des produits de
lavage/de désinfection/de nettoyage sans chlorure. Faites-vous confirmer par le fabricant de
produit qu’il n’attaque pas l’inox.
Lavez à l’eau les produits contenant des chlorures qui se seraient renversés sur les
surfa-ces inox. Puis séchez avec un chiffon
sec.
Attention !
Des températures anormalement élevées
dans le carter du moteur peuvent provoquer
un arrêt prématuré du sèche-linge en cours
de séchage sans que s’affiche un message
d’erreur par voyant rouge.
Les thermostats arrêtent le sèche-linge.
Dans ce cas contrôlez les joints et verrouillages de la porte et de la trappe d’accès au filtre.
Contrôlez également l’état des conduits et orifices d’entrée d’air et d’évacuation.
Vous pouvez faire redémarrer le sèche-linge,
si vous n’avez pas constaté de détériorations
sur les pièces à contrôler.
Avertissez immédiatement le revendeur ou le
SAV en cas d’anomalie.
Informez les personnes autorisées à utiliser le
sèche-linge de ces prescriptions de sécurité
extrêmement importantes.
Conserver ce mode d’emploi
36 «T.-Nr.4078220 - F - »
Page 37

Avant la première mise en service
Préparation du linge
Avant la première mise en service
Nettoyez le tambour avec un chiffon doux et
sec avant de charger le linge dans l’appareil.
Préparation du linge
Triez le linge suivant la nature des fibres et
des tissus. Vous obtiendrez un séchage plus
uniforme.
Tous les textiles ne sont pas appropriés à un
séchage en machine. Respecter par conséquent les indications du fabricant portées sur
l’étiquette d’entretien. (
chine interdit).
Les textiles en laine/laine mélangée ont tendance à feutrer. Ne les séchez pas en sèchelinge (Ne concerne pas le T6550 TR).
= séchage en ma-
s
Triez le linge en fonction du degré de séchage
souhaité. Il n’est pas indispensable de trier le
linge par taille.
Boutonnez housses de couette et taies d’oreiller afin d’éviter que des petites pièces de linge
ne s’y glissent.
Utilisez la capacité maximale indiquée dans la
mesure du possible. Une charge insuffisante
n’est pas économique. Une surcharge donne
de mauvais résultats de séchage et protège
moins bien le linge.
Chargez le tambour
Charges de linge (sec)
T 6550 TR T 6550
Les tissus pur lin peluchent souvent lorsqu’ils
sont passés au sèche-linge. Respectez impérativement les prescriptions du fabricant.
Important - Enroulez les grosses pièces métalliques (boucles, agrafes, oeillets, fermoirs
de fermetures Eclair...) sur les vêtements d’un
chiffon avant de les passer au sèche-linge.
Cela protège le tambour du sèche-linge des
détériorations (rayures et bosselures).
Séchez le linge qui comporte une fermeture éclair, fermeture ouverte, sinon les sondes électroniques sur les aubes du tambour sont
pontées et entraînent la prolongation ou l’arrêt
tardif du séchage.
Les tissus à mailles (T-shirts) ont tendance à
rétrécir. Un séchage excessif renforce ce phénomène. Il ne faut par conséquent pas sélectionner le programme “Séchage intensif” pour
ce type de textiles.
Volume du tambour
550 litres 550 litres
Vêtements lavables
max.
15 kg
Blanc/Couleurs
Non repassable et
Fin/Synthétique
22 kg max.
7,5 kg max.
Le linge amidonné peut se sécher en machine. Vous obtenez l’humidité appropriée au
repassage au fer ou à la repasseuse en sélectionnant le programme correspondant.
37 «T.-Nr.4078220 - F - »
Page 38

Sélection des programmes
Fermez la porte
Enclenchez l’interrupteur principal
(à prévoir par l’utilisateur)
Enclenchez l’interrupteur à clé en
position “Vêtements lavables”.
Réglage du temps de séchage:
Vous pouvez ajouter au programme sélectionné des temps de séchage jusqu’à 15
minutes avec la minuterie pour sécher et
décharger plus tôt des textiles délicats
[angora (5 minutes max.), lambswool,
soie, viscose etc.].
Vous pouvez actionner la minuterie indifféremment dans les deux sens.
Ne forcez pas au-delà des butées, cela
peut détériorer la minuterie.
Remarque: si vous ne sélectionnez pas de
séchage minuté, amenez la minuterie en
position "Arrêt signal sonore ".
Palier thermique C Programme
Pour linge lavé en LANADOL normal
Palier thermique C Programme
Pour linge lavé en LANADOL Extra
Palier thermique C Programme
Soie, angora et autre linge délicat.
Le sélecteur de programme permet de
choisir différents programmes en fonction
des différents types de textiles et du traitement ultérieur souhaité.
Séchage intensif
1
Séchage normal
2
Humidité légère
3
2
3
4
Sélectionnez le programme :
Le sèche-linge est équipé d’un système de
sondes électroniques, qui contrôle en permanence le degré d’humidité du linge. Dès
que le degré de séchage choisi est atteint,
le linge est passé dans un flux d’air froid et
le séchage se termine automatiquement.
Actionnez le sélecteur de programme indifféremment dans les deux sens.
Vêtements lavables
Palier thermique C Programme
ou
Palier thermique C Programme
Pour linge lavé et imprégné en
LANADOL normal
1
2
Repasseuse ,
4
Repasseuse .
5
Repasseuse -
6
20 minutes
7
f Arrêt
Placez le sélecteur de programme sur
“Arrêt” en fin de séchage pour remettre le
programmateur en position de départ.
38 «T.-Nr.4078220 - F - »
Page 39

Sélection des programmes
Sélectionnez la température :
- Actionnez le sélecteur de température indifféremment dans les deux sens.
Palier thermique
Froid
pour aérer les textiles
Palier thermique
Fin/Synthétique
Pour sécher les textiles fins/synthétiques
Palier thermique
Non repassable
Pour sécher les textiles non repassables
Palier thermique
- Pas en position d’interrupteur à clé
Blanc/Couleurs
Pour sécher textiles en coton/lin
A
B
C
D
“Vêtements lavables” -
La fin du programme sélectionné à la minuterie est indiquée par un signal sonore
Déchargez les textiles fragiles.
Arrêtez le signal sonore en tournant la minuterie vers la gauche et faites redémarrer
le programme en réenfonçant la touche Départ.
La fin du programme de séchage est indiquée par un signal sonore
Ne déchargez pas le linge avant la fin du programme, puisque le programmateur n’est pas
revenu en position de départ.
Positionnez le sélecteur de programme sur
“Arrêt”.
Ouvrez la porte.
Déchargez le linge.
Après le séchage :
0 Sèche-linge
déconnecté
Enfoncez la touche départ.
Le programme de séchage sélectionné démarre. Enfoncez la touche départ jusqu’à
ce que le tambour tourne et le voyant
“Fonctionnement” s’allume.
Le voyant “Nettoyage du filtre/Alarme” s’al-
lume lorsque:
– le filtre doit être nettoyé (voir page 41).
– le conduit d’évacuation est obturé ou for-
tement rétréci (le sèche linge s’arrête).
Positionnez le sélecteur de température
sur “0”
Coupez l’interrupteur principal (à prévoir
par l’utilisateur).
Nettoyez le filtre.
39 «T.-Nr.4078220 - F - »
Page 40

Remarques
Si le linge n’est pas déchargé immédiatement
en fin de programme, le dispositif “infroissable” se déclenche. Le tambour tourne par intermittence afin d’éviter dans une large mesure
la formation de faux plis. Ce dispositif “infroissable” fonctionne pendant env. 27 minutes.
Ouvrez la porte en cours de fonctionnement uniquement pour ajouter ou décharger des
pièces de linge.
Des ouvertures de porte fréquentes
entraînent des dysfonctionnements
du système de mesure automatique
de l’humidité et sont à éviter.
Fermez la porte et enfoncez la touche “Start”
pour poursuivre le programme de séchage.
Bouton d’arrêt d’urgence
Actionnez ce bouton uniquement en cas de
danger.
Le sèche-linge est alors momentanément mis
hors service. N’utilisez pas ce bouton en
fonctionnement courant pour arrêter le sèchelinge.
La commande du bouton d’arrêt d’urgence
se déverrouille en tournant la rondelle moletée
vers la droite.
Actionnez la touche “Start” pour remettre le
sèche-linge en service, si le programme le séchage a été interrompu par ouverture de la
porte, de la trappe d’accès au filtre(6), par positionnement de thermostat sur “0" ou commande du bouton ”Arrêt d’urgence".
40 «T.-Nr.4078220 - F - »
Page 41

Nettoyage et entretien
Mettez l’interrupteur principal sur "Arrêt" (à prévoir par l’utilisateur) avant de commencer
à nettoyer le sèche-linge.
N’utilisez pas de nettoyeur haute pression
ni de jet d’eau pour nettoyer le sèche-linge.
Sont à nettoyer :
Contrôlez les dépôts de peluches et si nécessaire faites nettoyer une fois par an par le
Service Après Vente :
la batterie de chauffe et le conduit de
chauffage (en chauffage électrique)
tout l’intérieur du sèche-linge
les palettes de ventilateur.
Si l’entretien n’est pas effectué régulièrement
et par du personnel qualifié, les performances
de l’appareil diminuent et il y a risque de
panne (incendie par ex.).
En cas de pannes avertissez le revendeur agréé ou le Service Après Vente.
Indiquez le type et le numéro de machine.
Ces deux indications figurent sur la plaque
signalétique.
le filtre (5) une ou plusieurs fois par jour suivant la quantité de peluches et lorsque le
voyant “Nettoyage du filtre/Alarme” s’allume.
N’enlevez pas le filtre et veillez à ce qu’il soit
en parfait état.
Essuyez le tambour avec un chiffon doux
humide après le séchage de linge amidonné.
Carrosserie, tableau de commande et pièces
plastique se nettoient avec un détergent doux
ou un chiffon humide. Séchez ensuite avec un
chiffon doux.
Les pièces inox de la carrosserie se traitent
avec un produit nettoyant courant pour inox.
N’utilisez en aucun cas de produit abrasifs
pour nettoyer le sèche-linge.
porte ouverte,
ou :
à l’arrière de l’appareil au niveau du raccord
d’évacuation.
N’utilisez que des pièces de rechange d’origine (indiquez également le type et le numéro
de machine au Service Après Vente).
41 «T.-Nr.4078220 - F - »
Page 42

Explication des symboles de la
plaque signalétique
1
2
3
4 17
5
6
8 18
9
7
10 21
11 22
12
13 23
14 15 16 20
19
1
2
20
1 Type de machine
2 Numéro de machine/(année de construction *)
3 Tension/fréquence
4 Fusible
5 Moteur d’entraînement
6 Diamètre d’assiettes/nombre d’assiettes*
7 Caractéristiques du tambour
8 Diamètre du tambour/profondeur du tambour*
9 Vitesse d’essorage*
10 Volume du tambour/capacité de linge sec
11 Energie cinétique*
12 Durée de rotation grande vitesse*
13 Temps de freinage*
14 Chauffage
15 Chauffage électrique
16 Fusible (à prévoir par l’utilisateur)
17 Chauffage vapeur indirect
18 Chauffage vapeur direct*
19 Chauffage gaz
20 Date de mise en service
21 Enregistrement gaz
22 Enregistrement eau*
23 Labels de contrôle
* Ne concerne pas les sèche-linge
Niveau sonore
Niveau de la puissance acoustique
classé A
T 6550 TR 72,8 dB
mesuré suivant norme DIN (CEI) 45 635
42 «T.-Nr.4078220 - F - »
Page 43

Concerne l’installateur
Ce sèche-linge doit être installé et mis en service uniquement par le revendeur agréé de la
marque ou par le Service Après Vente.
Respectez les indications très importantes
fournies ici en ce qui concerne l’installation et
conformez-vous au plan d’installation.
N’installez pas le sèche-linge dans des pièces
exposées au gel.
Assurez une aération suffisante de la pièce
pendant son fonctionnement.
Veillez à ce que l’air aspiré par le sèche-linge
soit pur et non pollué de vapeurs de chlore,
fluor ou autres solvants.
Veillez à ce que l’air dans l’environnement direct du sèche-linge notamment au niveau de
l’aspiration centrale soit totalement exempt de
peluches.
Les peluches aspirées se déposent dans le
sèche-linge et peuvent entraîner des diyfonctionnements.
Posez des trappes aux coudes pour faciliter le
nettoyage ultérieur du tuyau.
Prévoyez une évacuation de l’eau condensée
à l’endroit le plus bas en cas de conduits montés en pente.
Il n’est pas indispensable de sceller le sèchelinge. Compensez néanmoins les inégalités
du sol.
Installez le sèche-linge de niveau afin d’en assurer un parfait fonctionnement.
Ne réduisez pas les dimensions minimales
et l’écart au mur indiqués sur le plan d’installation afin de faciliter les travaux d’entretien
ultérieurs du Service Après Vente.
Le conduit d’évacuation ne doit pas être dirigé
dans une cheminée desservant des foyers à
gaz, à charbon ou à mazout. Evacuez l’air humide et chaud directement à l’air libre par le
plus court chemin ou dans un conduit d’aération approprié.
Posez le conduit d’évacuation de la façon la
plus favorable possible en raison de la vitesse
aérodynamique élevée (peu de coudes,
conduites courtes, raccords de bonne qualité
et parfaitement étanches à l’air).
Ne montez pas de filtres, ni de lamelles de
stores dans le conduit d’évacuation.
Veillez à effectuer une liaison parfaite et absolument étanche entre le conduit d’évacuation
et le raccord du sèche-linge.
Protégez l’extrémité du conduit d’évacuation
sortant à l’air libre des intempéries par un
coude de 90° orienté vers le bas.
43 «T.-Nr.4078220 - F - »
Page 44

Concerne l’installateur
Ajustez la position du sèche-linge en réglant
les pieds à vis.
Serrez les rondelles à fond contre la tôle de
sol avec un tournevis après l’ajustage.
Raccordez le sèche-linge suivant le plan d’installation fourni.
Ne branchez le sèche-linge qu’à la tension et
à la fréquence indiquées sur la plaque signalétique.
Le chauffage électrique est réglé à l’usine sur
27 kW.
Remontez impérativement toutes les pièces
d’habillage extérieur après le branchement électrique.
Raccordement vapeur
Le raccordement vapeur doit être exécuté exclusivement par un installateur agréé.
Observez le plan et la notice d’installation fournis, très importants pour le raccordement vapeur.
Remontez impérativement toutes les pièces
d’habillage après avoir effectué le raccordement vapeur.
Remontez impérativement toutes les pièces
d’habillage extérieur après l’installation.
Branchement électrique
Faites effectuer le branchement électrique par
un électricien agréé en respectant les prescriptions en vigueur de la Compagnie distributrice
d’électricité.
Respectez le schéma électrique et le plan
d’installation (c’est particulièrement important
pour le branchement électrique).
Attention
Veillez à ce que le moteur du ventilateur
tourne dans le bon sens. A cet effet ouvrez la
trappe d’accès au filtre, le moteur du ventilateur doit tourner vers la droite.
44 «T.-Nr.4078220 - F - »
Page 45

Cette page a été laissée vierge intentionnellement.
45 «T.-Nr.4078220 - F - »
Page 46

Questa carta consiste di cellulosa sbiancata, al 100%
esente da cloruri ed è quindi ecologica.
46 «T.-Nr.4078220 - I - »
Page 47

Indice
Descrizione macchina . . . . . . . . . . . . . . . . . . . . . . . . . . . . . . 48
Indicazioni per la sicurezza ed avvertenze . . . . . . . . . . . . . . . . . . . . 49
Alla prima messa in funzione . . . . . . . . . . . . . . . . . . . . . . . . . . . 51
Preparare la biancheria . . . . . . . . . . . . . . . . . . . . . . . . . . . . . . 51
Capacità di carico biancheria . . . . . . . . . . . . . . . . . . . . . . . . . . . 51
Scelta del programma . . . . . . . . . . . . . . . . . . . . . . . . . . . . . . 52
Indicazioni . . . . . . . . . . . . . . . . . . . . . . . . . . . . . . . . . . . . 54
Cura e pulizia . . . . . . . . . . . . . . . . . . . . . . . . . . . . . . . . . . . 55
Significato dei simboli sulla targhetta dati . . . . . . . . . . . . . . . . . . . . 56
Indicazioni per il tecnico . . . . . . . . . . . . . . . . . . . . . . . . . . . . . 57
Allacciamento elettrico . . . . . . . . . . . . . . . . . . . . . . . . . . . . . . 58
Allacciamento vapore . . . . . . . . . . . . . . . . . . . . . . . . . . . . . . . 58
L’essiccatoio può essere installato solamente dal
servizio di assistenza Miele oppure da un tecnico
autorizzato.
Pagina
Date il Vostro contributo alla tutela dell’ambiente (all’ecologia)*
Smaltimento dell’imballaggio
L’imballaggio per il trasporto e la protezione delle merci è prevalentemente realizzato con i
seguenti materiali riutilizzabili:
-fogli di polietilene (trasparenti)
-legno non trattato
Abbiate cura di trasportare questo materiale fino agli appositi contenitori predisposti per la
raccolta e non buttatelo invece nei bidoni delle immondizie.
Smaltimento di vecchie apparecchiature
Le vecchie apparecchiature contengono ancora sostanze preziose. Non trasportate quindi
il Vostro vecchio apparecchio semplicemente al piú vicino deposito rifiuti, ma informateVi
presso l’amministrazione comunale o gli organi competenti circa le possibilità di riutilizzazione.
47 «T.-Nr.4078220 - I -»
Page 48

Descrizione macchina
8109
1234567
1 -Indicazione temperatura 6 -Tasto di avvio
2 -Selettore tempo 7 -Interruttore “Arresto d’emergenza”
3 -Interruttore a chiave 8 -Spia “Abbigliamento lavabile”
“Abbigliamento lavabile” 9 -Spia di controllo “Esercizio”
4 -Selettore temperatura 10 -Spia di controllo “Pulire il filtro/Guasto”
5 -Selettore programma (non per essiccatoi con riscaldamento a vapore)
1
2
3
4
85
6
7
1 -Interruttore principale 5 -Filtro impurità
2 -Pannello comandi 6 -Pannello d’accesso al filtro
3 -Sportello 7 -Piedino, regolabile (4 pezzi)
4 -Maniglia sportello 8 -Conduttura di sfiato/Bocchettone di sfiato
48 «T.-Nr.4078220 - I - »
Page 49

Indicazioni per la sicurezza
e avvertenze
Leggere le istruzioni d’uso prima di mettere in
funzione la macchina. In questo modo ci si protegge e si evitano danni al proprio essiccatoio.
Questo essiccatoio può essere utilizzato
esclusivamente per l’asciugatura di tessuti
adatti per il trattamento in macchina dopo essere stati lavati con acqua.
Attenzione
Non asciugare tessuti, precedentemente
trattati con solventi (p.es. Per, CFC). A temperatura elevata, i vapori sviluppantisi si uniscono al vapore acqueo, trasformandosi in acido
cloridrico.
Ciò può causare danni alla macchina e nuocere inoltre alla salute!
Vi è pericolo di incendio per tessuti
– che contengono componenti di gommapiu-
ma, gomma o similari
– che sono trattati con smacchiatori infiamma-
bili
– che contengono residui di fissatore, spray
per capelli, acetone e similari.
– p. es. biancheria da cucina, contenente resi-
dui di olii e grassi.
La sicurezza elettrica è garantita solo se la
macchina viene allacciata ad un regolamentare conduttore di messa a terra. E’ molto
importante che questo sistema di sicurezza
basilare sia presente. In caso di dubbio, far
controllare l’installazione della casa da un tecnico qualificato. La casa produttrice non può
essere ritenuta responsabile per danni, causati dalla mancanza o dall’interruzione del conduttore di messa a terra.
L’essiccatoio è staccato dalla rete di ali-
mentazione solo se la spina è estratta dalla presa, o se viene disinserito l’interruttore
principale (predisposto dal committente).
Non danneggiare, togliere o ignorare i di-
spositivi di sicurezza e gli elementi di comando dell’essiccatoio.
Macchine, nelle quali sono danneggiati
elementi di comando o l’isolamento delle
condutture, non devono essere messe in
funzione prima della riparazione.
Le condutture di alimentazione vapore non
devono essere toccate: pericolo d’ustioni.
Assicurarsi, prima di estrarre la biancheria,
che il tamburo si sia fermato. Non mettere
le mani nel tamburo ancora rotante.
Con questo essiccatoio non possono esse-
re inoltre asciugati mop, stracci e panni che
contengono residui come p.es. di cera o di
prodotti chimici.
Non consentire a bambini di giocare nelle
vicinanze della macchina o di farla addirittura funzionare.
Riparazioni ad apparecchiature elettriche,
a gas e a vapore possono essere eseguite
solo da personale qualificato. Riparazioni non
eseguite correttamente possono rappresentare notevoli pericoli per l’utente.
Se si desidera eliminare un vecchio essic-
catoio (discarica), si abbia cura di togliere
prima il pannello d’accesso al filtro. Si può così impedire che bambini, durante i loro giochi,
possano chiudersi dentro ed essere in pericolo di vita.
Impiegare l’essiccatoio solo se sono mon-
tati tutti i pezzi del rivestimento esterno in
modo da impedire contatti con parti rotanti o
sotto tensione.
Pericolo di incendio o esplosione!
Non conservare o usare nelle vicinanze
dell’essiccatoio benzina, petrolio od altre sostanze facilmente infiammabili.
49 «T.-Nr.4078220 - I -»
Page 50

Indicazioni per la sicurezza
e avvertenze
Pericolo di incendio!
Non utilizzare mai l’essiccatoio senza il filtro impurità. Un filtro eventualmente
danneggiato deve essere immediatamente sostituito.
In caso contrario le impurità intasano le vie
dell’aria, il riscaldamento e la conduttura di
sfiato.
Un ineccepibile funzionamento dell’essiccatoio non potrebbe più essere garantito.
Disinfettanti e detergenti contengono spes-
so cloruri (sali). Se questi mezzi si asciugano su superfici di acciaio inossidabile, i residui
di cloruro intaccano l’acciaio e causano ruggine.
Il modo più sicuro di proteggere l’acciaio inossidabile della vostra macchina da danni causati dalla ruggine, è quello di utilizzare per
lavare, disinfettare e pulire mezzi senza cloruri.
Nel dubbio chiedere conferma alla casa produttrice.
Eliminare con acqua mezzi contenenti cloruri
e giunti inavvertitamente sulla superficie di acciaio inossidabile. Infine asciugare la superficie con un panno.
Istruendo altre persone nell’uso dell’essiccatoio, avere cura di sottoporre alla loro attenzione
queste importanti indicazioni per la sicurezza.
Conservare queste istruzioni d’uso!
Attenzione !
Se, durante il procedimento di asciugatura, l’essiccatoio dovesse anticipatamente disinserirsi senza segnalazione guasto mediante la
spia rossa, ciò potrebbe essere imputabile a
temperature elevate nel vano motore.
I termostati fermano l’essiccatoio.
In questo caso controllare le guarnizioni e le
chiusure dello sportello di carico e del filtro
impurità.
Controllare altresì le condizioni delle condutture d’areazione e di sfiato nonchè le aperture.
Se non viene rilevato alcun danno a queste
parti, l’essiccatoio può essere rimesso in funzione.
50 «T.-Nr.4078220 - I - »
Page 51

Alla prima messa in funzione
Preparare la biancheria
Alla prima messa in funzione
Prima di caricare l’essiccatoio con la biancheria, pulire l’interno del tamburo con un panno
morbido e asciutto.
Preparare la biancheria
Suddividere la biancheria secondo la fibra e il
tipo di tessuto. In questo modo si ottiene un
uniforme risultato di asciugatura.
Non tutti i tessuti possono essere asciugati nell’essiccatoio. Fare attenzione quindi alle indicazioni della casa produttrice riportate
sull’etichetta (
non possibile).
Tessuti in pura lana o misto lana non sono
adatti per l’asciugatura in essiccatoio. (Non
vale per T6550 TR)
Tessuti in puro lino tendono a diventare ruvidi
se asciugati in essiccatoio. Fare quindi attenzione alle indicazioni della casa produttrice.
Importante! Parti metalliche di maggiore volume (fibbie, ganci, asole, piastrine di cerniere,
ecc.), applicate ai capi da trattare, devono essere avvolte in un panno prima dell’asciugatura. Il tamburo dell’essiccatoio viene in questo
modo protetto da danni (graffi e ammaccature).
Per capi con cerniere di metallo chiuse, c’è il
pericolo che gli elettrodi tastatori vengano ponticellati.Questo significa che il procedimento di
asciugatura non finirà o terminerà troppo tardi.
Asciugare questi tessuti solo con le cerniere
aperte.
= asciugatura in essiccatoio
s
Federe di cuscini e piumini devono essere abbottonate in modo che durante l’asciugatura
non possano entrarvi capi piccoli.
Utilizzare possibilmente la quantità massima
di carico indicata. Un carico inferiore è antieconomico. Un sovraccarico compromette il risultato di asciugatura e il trattamento delicato
della biancheria.
Introdurre la biancheria
Capacità di carico della biancheria (biancheria asciutta)
T 6550 TR T 6550
Volume del tamburo
550 litri 550 litri
Abbigliamento
lavabile max.
15 kg
Bollitura/Colorata
max. 22 kg
Delicato e
Delicato/Sintetico
max. 7,5 kg
Tessuti lavorati a maglia (biancheria tricot) sono inclini al restringimento. Un’asciugatura eccessiva rafforza questo effetto. Quindi per
questi tessuti non deve essere scelto il programma “Secco”.
Biancheria inamidata può essere asciugata
nell’essiccatoio.La giusta umidità per stirare
o passare la biancheria al mangano, la si raggiunge con la corrispondente scelta del
programma.
Suddividere la biancheria a seconda dei desiderati gradi di asciugatura. Non è necessario
suddividerla a seconda della grandezza.
51 «T.-Nr.4078220 - I -»
Page 52

Scelta del programma
Chiudere lo sportello
Inserire l’interruttore principale
(predisposto dal committente).
Inserire l’interruttore a chiave;
posizione “Abbigliamento lavabile”
Impostare il tempo di asciugatura:
Per l’asciugatura a tempo di tessuti sensibili [p.es. angora (max.5 minuti), Lambswool,
seta, viscosa, ecc.], con il selettore tempo
possono essere scelti - oltre al programma
selezionato - tempi della durata massima
di 15 minuti. Il selettore tempo può essere
ruotato sia verso sinistra che verso destra.
Non ruotare il selettore tempo oltre la battuta d’arresto, in quanto ne verrebbe
danneggiato.
Indicazione: Se non viene impostata
l’asciugatura a tempo, portare il selettore
tempo in posizione "Cicalino spento ".
Scegliere il programma:
L’essiccatoio è dotato di un sistema tastatore elettronico che controlla permanentemente il contenuto di umidità della
biancheria.
Non appena viene raggiunto il grado di asciugatura scelto, la biancheria viene
raffreddata e il procedimento di asciugatura termina automaticamente.
-Il selettore programma può essere ruotato
sia a destra che a sinistra.
Livello temperatura
Per biancheria, normalmente lavata
con LANADOL.
Livello temperatura C Programma
Per biancheria lavata con LANADOL
Extra.
Livello temperatura C Programma
Seta, angora e simile biancheria
delicata.
Per tipi di tessuti diversi e a seconda del
desiderato proseguimento del trattamento,
sono disponibili diversi programmi di asciugatura impostabili con il selettore programmi:
Secco
1
Asciutto
2
Leggermente umida
3
Stiratura a macchina ,
4
Stiratura a macchina .
5
Stiratura a macchina -
6
20 minuti
7
Programma
C
2
3
4
Abbigliamento lavabile
Livello temperatura C Programma
oppure
Livello temperatura
Per biancheria, lavata normalmente
e impregnata con LANADOL.
Programma
C
1
2
f Stop
Per portare il programmatore al punto di
partenza, posizionare il selettore programma su “Stop” dopo il procedimento di asciugatura.
52 «T.-Nr.4078220 - I - »
Page 53

Scegliere il programma
Scelta della temperatura:
-Il selettore temperatura può essere ruotato sia a destra che a sinistra.
Livello di temperatura
freddo
per arieggiare i tessuti.
Livello di temperatura
Delicato/Sintetico
per asciugare tessuti delicati/sintetici.
Livello di temperatura
Lava/Indossa
per asciugare tessuti lava/indossa.
A
B
C
Il termine del programma a tempo viene segnalato mediante il suono di un cicalino.
Estrarre i tessuti delicati.
Disinserire il cicalino ruotando il selettore
tempo verso sinistra e proseguire il programma, azionando nuovamente il tasto d’avvio.
La fine di un programma di asciugatura viene segnalata dal risuonare di un cicalino.
La biancheria non deve essere estratta prima
della fine del programma, dal momento che il
programmatore non è ancora arrivato alla posizione di partenza.
Portare il selettore programma su “Stop”.
Aprire lo sportello.
Livello di temperatura
- Non per posizione interruttore a chiave
“Abbigliamento lavabile" -
Bollitura/Colorata
per asciugare tessuti di cotone/lino.
D
0 Disinserimento
essiccatoio.
Premere il tasto di avvio.
Il programma di asciugatura prescelto viene
avviato. Premere il tasto di avvio fino a quan-
do il tamburo gira e si accende la spia di
controllo “Esercizio”.
La spia “Pulire filtro/guasto” si accende se
Estrarre la biancheria.
Dopo l’asciugatura:
Portare il selettore temperatura su “0".
Disinserire l’interruttore principale (predisposto dal committente).
Pulire il filtro impurità.
– deve essere pulito il filtro impurità (ved. pa-
gina 55);
– la conduttura di sfiato è ostruita o comunque
fortemente ridotta (l’essiccatoio viene disinserito);
53 «T.-Nr.4078220 - I -»
Page 54

Indicazioni
Se la biancheria non viene estratta subito dall’essiccatoio dopo la fine del programma di
asciugatura, si inserisce automaticamente una
fase antipiega.
Ciò significa che il tamburo viene mosso a brevi intervalli, in modo che venga eliminata la
possibilità di formazione di pieghe.
La fase antipiega termina dopo circa 27 minuti.
Durante il funzionamento della macchina, lo
sportello può essere aperto solo per introdurre
altri capi oppure per prelevarli anzitempo.
La ripetuta apertura dello sportello può
causare disturbi alla misurazione automatica dell’umidità ed è quindi da evitare.
Per il proseguimento del programma di
asciugatura, chiudere lo sportello e premere il
tasto di avvio.
Interruttore “Arresto d’emergenza”
Azionare questo interruttore solo nel momento di reale pericolo!
L’essiccatoio viene immediatamente disinserito. Non usare questo interruttore per disinserire la macchina durante il normale esercizio.
L’interruttore “Arresto d’emergenza” azionato
viene nuovamente sbloccato mediante rotazione destrorsa del disco zigrinato.
Se il programma di asciugatura è stato interrotto causa apertura dello sportello, dello sportello filtro (6), spostamento del selettore
temperature su “0" oppure azionando l’interruttore ”Arresto d’emergenza", premere il tasto d’avvio per rimettere in funzione la macchina.
54 «T.-Nr.4078220 - I - »
Page 55

Cura e pulizia
Prima di iniziare il procedimento di pulizia dell’essiccatoio, disinserire l’interruttore principale
(predisposto dal committente).
Per pulire l’essiccatoio non usare mai un ap-
parecchio ad alta pressione e un getto d’acqua .
Dal servizio di assistenza vanno controllati
una volta all’anno ed eventualmente puliti:
gruppo riscaldante e canale di riscaldamento
(in caso di riscaldamento elettrico)
E’ da pulire:
giornalmente una o più volte a seconda della
raccolta di impurità o con l’accensione della
lampada di controllo “Pulizia filtro impurità/Guasto”, il filtro (5). Il filtro impurità non
deve essere rimosso. Bisogna fare attenzione
che il filtro impurità non sia danneggiato.
tutto l’interno dell’essiccatoio
ventola dell’aspiratore di sfiato
In caso di non corretta manutenzione non sono da escludere perdite di potenza e disturbi
di funzionamento (pericolo di incendio).
In caso di guasti contattare l’assistenza tecnica.
L’assistenza tecnica necessita di sapere il tipo
ed il numero della macchina (Ser.No.).
Dopo l’asciugatura di biancheria inamidata, il
tamburo deve essere pulito con un panno morbido e umido.
Involucro, guarnizione sportello e pezzi di materiale sintetico, vanno puliti solo con un detergente delicato oppure con un panno morbido
e subito dopo asciugati.
Per la pulizia di parti della macchina in acciaio
inossidabile, utilizzare solo mezzi di pulizia per
acciaio in commercio.
Non pulire l’essiccatoio per nessun motivo
con mezzi abrasivi.
Entrambi i dati si trovano sulla targhetta dati:
a sportello aperto, oppure:
sul retro della macchina vicino al bocchettone
di scarico.
In caso di sostituzione devono essere usati
solamente pezzi di ricambio originali
(anche in questo caso l’assistenza tecnica
necessita del tipo e numero di macchina)
(Ser.No).
55 «T.-Nr.4078220 - I -»
Page 56

Significato dei simboli
sulla targhetta dati
1
2
3
4 17
5
6
8 18
9
7
10 21
11 22
12
13 23
14 15 16 20
19
1
2
20
1 Tipo di macchina
2 Numero della macchina/(Anno di costruzione*)
3 Tensione/Frequenza
4 Fusibile circuito di comando
5 Motore d’avviamento
6 Diametro piatti/Quantità piatti *
7 Dati del tamburo
8 Diametro tamburo/Profondità tamburo *
9 Giri in centrifugazione *
10 Volume tamburo/Peso biancheria asciutta
11 Energia cinetica *
12 Tempo di aumento giri *
13 Tempo di frenata *
14 Riscaldamento
15 Riscaldamento elettrico
16 Protezione (predisposta dal committente)
17 Riscaldamento vapore indiretto
18 Riscaldamento vapore diretto *
19 Riscaldamento a gas
20 Data di messa in funzione
21 Registrazione gas
22 Registrazione acqua *
23 Segno di verifica
* non vale per essiccatoi
Rumorosità
Picco di potenza sonora valutazione A
T 6550 TR 72,8 dB
misurato secondo DIN (IEC) 45 635
Contrassegno secondo normativa concernente la rumorosità delle macchine
3. GSGV § 1. 1.a
56 «T.-Nr.4078220 - I - »
Page 57

Indicazioni per il tecnico
L’essiccatoio può essere installato e messo in
funzione solo dall’assistenza tecnica o da un
rivenditore autorizzato.
Osservare le allegate istruzioni ed il piano di
installazione. Sono importanti per la posizionatura.
Non posizionare l’essiccatoio in ambienti esposti al gelo.
Durante il funzionamento provvedere ad una
sufficiente areazione dell’ambiente.
Si provveda affinchè l’essiccatoio possa aspirare aria fresca e pulita ed in nessun caso aria
impregnata di cloro, fluoro e altri vapori dissolti.
Macchine riscaldate elettricamente oppure a
gas non devono essere installate in un ambiente ove sono già allacciate macchine che
operano con solventi contenenti CFC.
I vapori fuoriuscenti all’atto del processo di
combustione, si dissolvono in acido cloridrico
provocando in seguito spiacevoli danni a biancheria e macchina.
In caso di installazione in ambienti separati,
non deve avvenire alcuno scambio d’aria.
Collegando la conduttura di sfiato al bocchettone di sfiato dell’essiccatoio, fare particolare attenzione ad un buon collegamento ed alla
tenuta aria.
Portandola all’aria aperta, l’estremità della conduttura dovrà essere protetta contro le intemperie p.es. mediante una curva di 90o rivolta
verso il basso.
Per facilitare in un secondo tempo la pulizia
delle tubature, nelle curve dovrebbero essere
montati degli sportellini di pulizia.
Per tubi di sfiato in salita va predisposto nel
punto più basso un dispositivo per lo scarico
della condensa.
Non è necessario predisporre un basamento
per l’essiccatoio. Irregolarità del pavimento sono tuttavia da compensare.
Per un perfetto funzionamento è necessario
che l’essiccatoio sia installato in posizione perfettamente orizzontale.
Per facilitare all’assistenza tecnica una successiva manutenzione, le misure minime e la
distanza dal muro non devono essere inferiori
a quelle descritte nei piani di installazione.
L’ambiente attorno all’essiccatoio - soprattutto
l’area dell’aspirazione centrale dell’aria - deve
essere mantenuto libero da impurità e lanuggine affinchè queste non possano essere aspirate. Ciò potrebbe causare guasti di
funzionamento.
La conduttura di sfiato non deve essere portata in un camino già in funzione per apparecchi
a gas o carbone. L’aria calda e umida deve essere portata all’esterno per la via più breve oppure in un canale di areazione idoneo. A
causa dell’alta velocità dell’aria, la conduttura
deve essere posata in modo opportuno (poche curve, condutture brevi, allacciamenti e
passaggi idonei).
Non possono essere installati nella conduttura
di sfiato filtri o saracinesche.
57 «T.-Nr.4078220 - I -»
Page 58

Indicazioni per il tecnico
Posizionare l’essiccatoio in bolla tramite regolazione dei piedini svitabili.
Dopo la posizionatura le rondelle devono essere strette verso la lamiera base con un cacciavite.
Gli allacciamenti dell’essiccatoio devono essere effettuati secondo l’allegato piano di installazione.
L’essiccatoio può essere collegato solo alla
tensione e frequenza indicate sulla targhetta
dati.
Il riscaldamento elettrico è impostato da parte
della fabbrica su 27 kW.
Dopo aver eseguito l’allacciamento elettrico, è
assolutamente necessario rimontare tutti i pezzi del rivestimento esterno precedentemente
smontati.
Allacciamento vapore
L’allacciamento al vapore può essere eseguito
solo da un tecnico qualificato.
Osservare l’allegato piano d ’installazione e le
relative istruzioni d’uso, importanti per l’allacciamento del vapore.
Eseguito l’allacciamento al vapore, rimontare
assolutamente tutte le parti di rivestimento
esterno precedentemente smontate.
Dopo aver posizionato l’essiccatoio, devono
essere assolutamente rimontati tutti i pezzi
del rivestimento esterno precedentemente
smontati.
Allacciamento elettrico
L’allacciamento elettrico può essere eseguito
solo da un installatore autorizzato secondo le
indicazioni VDE e secondo le vigenti norme
della competente azienda elettrica.
Osservare l’allegato schema elettrico ed il
piano di installazione. Questi piani sono importanti per l’allacciamento elettrico.
Attenzione!
Fare attenzione alla corretta direzione di rotazione del motore del ventilatore. Allo scopo
aprire lo sportello filtro - il motore deve girare
verso destra.
58 «T.-Nr.4078220 - I - »
Page 59

Questa pagina é stata lasciata in bianco volutamente.
59 «T.-Nr.4078220 - I -»
Page 60

United Kingdom:
Miele Co. Ltd.
Fairacres, Marcham Road, Abingdon Oxon OX14 1TW
Tel. Head Office (01235) 554455
Abingdon Service Office (01235) 554466
Telex 837 121
Telefax (01235) 554477
France:
Miele S.A.
Siège Social
93151 - Le Blanc-Mesnil CEDEX
9 av. Albert Einstein - Z.I. le Coudray
Tél.: (1) 49 39 44 00 - Télécopie: 49 39 44 72
R.C.S. Bobigny B 708 203 088
Italia:
Miele Italia S.r.l.
39057 Appiano - S. Michele (Bz) (Sede)
Strada di Circonvallazione, 27
Tel.: (0471) 66 61 11 / 2
Telefax: (0471) 66 05 18 / 66 63 34
Miele & Cie. GmbH & Co.
D-33325 Gütersloh
Telefon (05241) 89-0 - Telefax (05241) 89 - 2090
Fernschreiber 9 33 545 - 0 mi d
Btx-Nr.: *63800 #
Änderungen vorbehalten 07.94
Alteration rights reserved
Sous réserve de modifications
Salvo modifiche
 Loading...