

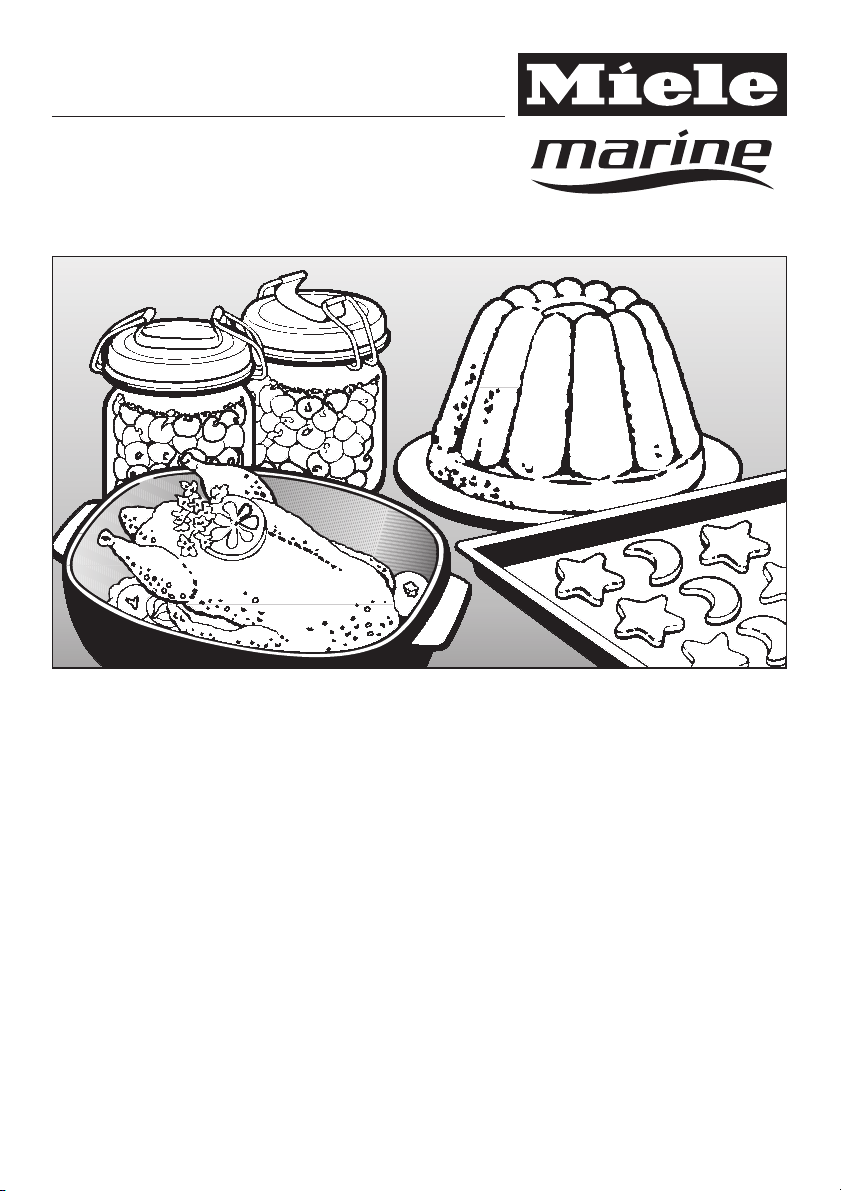
User instructions
Baking, Roasting, Grilling
Defrosting, Cooking
Automatic Programmes
To avoid the risk of accidents or
damage to the appliance it is
essential to read these instructions
before it is installed and used for the
first time.
en-GB
M.-Nr. 07 450 080

Contents
Automatic programmes.............................................5
To use an Automatic programme ......................................6
Notes on using these programmes .....................................6
Food probe .......................................................7
How the food probe works............................................7
Applications .......................................................7
Important notes about using the food probe ..............................8
To use the food probe ...............................................8
Making use of residual heat ........................................9
Baking tips ......................................................10
Bakeware ........................................................10
Baking parchment ..............................................10
Universal tray ..................................................10
Loaf tins ......................................................10
Notes about the charts .............................................11
Temperature, baking duration .....................................11
Shelf level .....................................................11
Frozen food ......................................................11
Baking chart .....................................................12
Fan plus .........................................................12
Conventional heat .................................................13
Intensive bake ....................................................14
Roasting tips ....................................................15
Browning......................................................16
Standing time ..................................................16
Roasting poultry ................................................16
Frozen meat ...................................................16
Roasting chart ...................................................17
Slow cooking ....................................................18
Using the Slow cooking programme ...................................18
Grilling tips ......................................................20
Grill chart .......................................................23
Defrost .........................................................24
Cooking ready meals..............................................25
2

Contents
Cakes ..........................................................26
Open apple tart ...................................................26
Apple cake.......................................................27
Apple pie ........................................................28
Apple hazelnut streusel .............................................29
Butter cake.......................................................30
Guglhupf ........................................................31
Plaited loaf .......................................................32
Yeast dough......................................................33
Marble cake ......................................................34
Fruit streusel cake .................................................35
Swiss apple pie ...................................................36
Sponge cake .....................................................37
Streusel cake .....................................................38
Cookies/muffins ..................................................39
Biscuits .........................................................39
Chocolate cherry muffins............................................40
Walnut muffins ....................................................41
Drop cookies .....................................................42
Chocolate dessert (French speciality)..................................43
Chocolate sponge puddings (Austrian speciality) ........................44
Bread...........................................................45
White bread with herbs .............................................45
Rye bread .......................................................46
Sweet bread......................................................47
White bread on a tray ..............................................48
Bread mixtures...................................................49
Notes for baking bread using Automatic programmes .....................49
Bread rolls ......................................................50
Yeast rolls .......................................................50
Croissants .......................................................50
Pizza ...........................................................51
Meat............................................................53
Notes for cooking meat using Automatic programmes .....................53
3

Contents
Poultry..........................................................54
Notes for cooking poultry using Automatic programmes ...................54
Fish ............................................................55
Notes on cooking fish using Automatic programmes ......................55
Bakes/gratin .....................................................56
Potato gratin in a mustard sauce......................................56
Potato cheese bake ................................................57
Lasagne .........................................................58
4

Automatic programmes
Your oven has a wide range of Auto
matic programmes to enable you to
achieve excellent results with ease.
Each programme contains information
such as cooking function, temperature
and duration.
All you have to do is select the Auto
matic programme and when baking
with an Automatic programme you can
also select whether you want your cake
to have a normal or darker finish.
-
-
The following are available:
Auto roast (oven function, depending
–
on model)
Slow cooking
–
Cakes
–
Cookies/muffins
–
Bread
–
Bread mix
–
Bread rolls
–
Pizza
–
– Meat
– Poultry
– Fish
– Bakes/gratin
– Frozen food
Sample recipes for different Automatic
programmes are given at the end of
this booklet.
5

Automatic programmes
To use an Automatic
programme
"Select c.
^
Use the ; or ? sensor to scroll
^
through the list until the option you
want is highlighted.
Use the OK sensor to select the
^
option you want, e.g. Cakes.
A list of different cake options will
appear in the display.
Select the relevant sub-menu for the
^
dish you want to cook (e.g. Apple
tart).
^ Next you need to enter your specific
cooking requirements, following the
instructions in the display.
The degree of doneness, browning
level etc. are shown by a seven
segment bar. The middle setting is
displayed by a filled-out segment in the
middle of the bar.
NH H H TTTTT H H HN
To change the setting, move the
filled-out segment to the left or right
with the ; or ? sensor.
Notes on using these
programmes
When using the Automatic
–
programmes the recipes provided
are designed as a guide only.
You can use them for other similar
recipes, including those using
different quantities.
The oven interior should be at room
–
temperature before starting an Auto
matic programme.
Some programmes require the
–
addition of liquid or vegetables
during cooking. You will be
prompted by a message in the
display when this needs to be done
(e.g. "Add liquid at ...").
– Some programmes require a
pre-heating phase before food is
placed in the oven. A prompt will
appear to tell you when to add the
food.
–
For frozen food follow the instructions
in the display.
-
You can delay the start by selecting the
"Start later" option.
Entries made are shown in the display.
To finish an Automatic programme early
you have to switch the oven off.
If by the end of an Automatic
programme the food is not cooked
enough, select the "Cont. cooking"
function.
6

Food probe
Applications
Apart from Automatic programmes, the
food probe can be used with the
following functions:
Using the food probe enables the
roasting process to be monitored
simply and reliably.
How the food probe works
The metal tip of the food probe is
inserted into the food. There is a
temperature sensor in the metal tip
which measures the core temperature
of the food during cooking. The rise in
the core temperature reflects the extent
to which the food is cooked.
You can programme the core
temperature to be lower or higher,
depending on whether you want your
meat to be medium or well done.
The core temperature can be set within
a range of 30 to 99 °C. Refer to the
Roasting chart for the core temperature
range applicable for different types of
meat.
The duration for roasting meat by
temperature using the probe is similar
to the duration when cooking by time.
ß Auto roast
ß Fan plus
ß Conventional heat
ß Fan grill
7

Food probe
Important notes about using
the food probe
Please note:
You can place the meat in a pot or
–
on the rack in the universal tray with
the anti-splash insert (if present).
The metal tip of the food probe must
–
be fully inserted into the centre of the
food.
When cooking poultry, insert the
–
metal tip into the thickest part of the
breast.
– Do not let the metal tip touch any
bones or insert it into a particularly
fatty area of the meat. If fat or bone
come into contact with the probe,
this can lead to the oven being
switched off too early.
– If the meat is very heavily marbled
with fat, select the highest core
temperature given in the roasting
chart.
To use the food probe
Insert the metal tip fully into the food.
^
Place the food in the oven.
^
^ Insert the plug of the food probe into
the socket until you feel it engage.
^ Close the door.
^ Select the oven function or Automatic
programme.
^ Alter the recommended temperature
if necessary
–
When using roasting bags or
aluminium foil, insert the probe
through the bag or foil into the centre
of the meat. You can also place the
meat, with the food probe inserted,
inside the foil. Follow the roasting
bag / aluminium foil manufacturer's
instructions.
8

Food probe
Alter the recommended core
^
temperature of 60°C, if required.
For Automatic programmes, the core
temperature is pre-set.
You can also delay the start of the
cooking programme to a later time.
Select the "Start time" option or if using
an Automatic programme, the "Start
later" option. The duration of the
cooking programme is about the same
as if you were cooking the food without
using the food probe.
When the core temperature selected
has been reached,
– the oven switches off automatically.
– "Prog. finished" will appear in the
display.
– a buzzer will sound.
If the food is not yet cooked sufficiently,
insert the food probe into another place
and repeat the programme.
Making use of residual heat
The heating in the oven switches off
shortly before the end of the cooking
programme. The residual heat in the
oven is sufficient to complete the
cooking process.
Using the residual heat in the oven
saves energy.
"Use residual heat" will appear in the
display to show that the oven is in
energy save mode. The current core
temperature of the food will no longer
be shown.
The cooling fan continues to run, as
does the hot air fan if a "fan" setting has
been chosen.
9

Baking tips
Refer to the baking charts for
suggestions of temperatures, shelf
levels and cooking durations. These
take into account a range of different
baking tins, quantities and cooking
traditions.
Handling and preparing food
correctly is essential for maintaining
good health.
Only bake cakes, pizza, chips etc
until they are golden. Do not
overcook them.
Bakeware
Please take into account the material of
your bakeware in your choice of oven
function:
Fan plus U, Intensive bake O
Any heat-resistant material can be
used.
Baking parchment
Because of their PerfectClean anti-stick
surface the baking tray and the
universal tray do not need to be
greased or lined with baking parchment
for baking.
Baked goods are easily removed when
done.
Baking parchment is only necessary
when baking:
Anything with a high salt content
–
(e. g. pretzels, bread sticks),
because sodium can damage the
PerfectClean surface.
– Meringues or biscuits with a high
egg-white content, because they
are more likely to stick.
Universal tray
When baking cakes with fresh fruit
toppings and deep sponge cakes
place the tin in the universal tray to
catch any spillages and keep the oven
cleaner.
Conventional V
Dark metal, enamel or aluminium
baking tins with a matt finish, as well as
heat-resistant glass and ceramic
dishes can be used.
Bright, shiny metal tins result in uneven
or poor browning and in some cases
cakes might not cook properly.
10
Loaf tins
Place cakes in loaf tins and rectangular
tins with the longer side across the
width of the oven for optimum heat
distribution and even results.

Notes about the charts
The figures in square brackets [ ]
relate to appliances with three shelf
levels.
Temperature, baking duration
To achieve even results without
over-browning the food,
always select the lowest
–
temperature given in the chart.
Do not set a temperature higher than
that recommended. Increasing the
temperature may reduce the cooking
time, but will lead to uneven
browning, and unsatisfactory
cooking results.
– Check if the food is cooked at the
end of the shortest time quoted.
To check if a cake is ready, insert a
wooden skewer into the centre.
It is ready if the skewer comes out
clean, without dough or crumbs
sticking to it.
Shelf level
The shelf levels are counted from the
bottom of the oven upwards (1= lowest,
5 = highest).
A maximum of two trays can be used at
once in an oven with three shelf levels.
If you are using both universal trays
and baking trays on several shelf levels
at the same time, the universal tray(s)
should be placed below the baking
tray(s).
Baking tips
Number
of trays
U 12
2 1 and 3 [1 and 2]
3 1,3and5*[–]
d 1 2 [1]
O 1 1 or 2
V 1 1 or 2
* When baking moist cakes, bread etc
do use more than two baking trays at
the same time.
Frozen food
When baking frozen products such as
cakes, pizza and baguettes, use the
lowest temperature quoted on the
manufacturer's packaging. Bake on a
layer of baking parchment placed on
the rack. Cooking large frozen items on
the baking tray or the universal tray can
cause the metal to distort. This
distortion would increase with
subsequent use.
Small items of frozen food such as
oven chips or potato croquettes can
be cooked on the universal tray. Place
them on baking parchment and select
the lowest temperature quoted on the
manufacturer's packaging. Turn several
times during cooking.
Shelf level(s)
11

Baking chart
Fan plus
Cakes/biscuits
Temperature
in °C
Recommended
shelf level
1)
Creamed mixture
Sponge cake
Ring cake
Foam cake (tray)
Marble, nut cake (tin)
Fresh fruit cake with filling (tray)
Fresh fruit cake (tray)
Fresh fruit cake (tin)
Flan base
Small cakes4)(tray)
Sponge mix
Sponge cake (3 to 6 eggs)
Sponge cake (2 eggs)
Swiss roll
4)
4)
4)
4)
3)
150 – 170
150 – 170
150 – 170
150 – 170
150 – 170
150 – 170
150 – 170
150 – 170
150 – 170
160 – 180
160 – 180
160 – 180
2
2
2
2
2
2
2
2
1, 3 [1, 2]
2
2
2
5)
Rubbed in mixture
Tart/flan base
Streusel cake
Small cakes/biscuits
4)
Cheese cake
Apple pie
Apricot tart with topping
Swiss open fruit/savoury flan
3)
150 – 170
150 – 170
150 – 170
150 – 170
150 – 170
150 – 170
190 – 210
Yeast mixtures and quark dough
To prove dough
Guglhupf
Streusel cake
Fresh fruit cake (tray)
White bread
Wholegrain bread
Pizza (tray)
3)
4)
Onion tart
Apple turnvovers
30–50
150 – 170
150 – 170
160 – 180
160 – 180
170 – 190
170 – 190
170 – 190
150 – 170
Choux pastry4), Eclairs 160 – 180 1, 3 [1, 2]
Puff pastry 170 – 190 1, 3 [1, 2]
Meringues, Macaroons 120 – 140 1, 3 [1, 2]
2
2
1, 3 [1, 2]
2
2
2
2
Oven floor
2 [2]
2
2
2
2
2
2
1, 3 [1, 2]
5)
6)
5)
5)
5)
5)
1) The figures in square brackets relate to appliances with three shelf levels, if different.
2) Unless otherwise stated, the times given are for an oven which has not been pre-heated.
With a pre-heated oven, shorten times by up to 10 minutes.
3) Pre-heat the oven.
4) Use a standard setting to pre-heat the oven. Do not use Rapid heat-up to pre-heat the oven.
5) Take baking trays out of the oven early if the food is sufficiently browned before the specified
time has elapsed.
6) Place the rack on the floor of the oven, and stand the bowl containing the dough on the rack.
Time
in min.
60–70
65–80
25–40
60–80
45–50
35–55
55–65
25–30
20–25
25–35
20–25
20–25
20–25
45–55
15–25
70–90
50–70
55–75
25–35
15–30
50–60
35–45
40–50
40–50
50–60
35–45
35–45
25–30
30–40
20–25
25–50
2)
In general, if a range of temperatures/times is given, it is best to select a lower temperature and
to check the food after the shortest time.
12

Baking chart
Conventional heat
Cakes/biscuits
Temperature
in °C
Recommended
shelf level
1)
Creamed mixture
Sponge cake
Ring cake
Foam cake (tray)
3)
Marble, nut cake (tin)
Fresh fruit cake, with filling (tray)
Fresh fruit cake (tray)
Fresh fruit cake (tin)
Flan base
Small cakes/biscuits
Sponge mix
Sponge cake (3 to 6 eggs)
Sponge cake (2 eggs)
Swiss roll
3) 4)
3) 4)
3) 4)
3) 4)
3) 4)
3) 4)
150 – 170
170 – 190
170 – 190
150 – 170
170 – 190
170 – 190
160 – 180
170 – 190
170 – 190
170 – 190
170 – 190
180 – 200
2
2
2
2
2
2
2
2
3 [2]
3 [2]
3 [2]
3 [1]
Rubbed in mixture
Tart/flan base
Streusel cake
Small cakes/biscuits
Cheesecake
Apple pie
3)
Apricot tart, with filling
Swiss open fruit/savoury flan
3) 4)
3)
3)
Yeast mixtures and quark dough
To prove dough
Guglhupf
Streusel cake
Fresh fruit cake (tray)
White bread
Wholegrain bread
Pizza (tray)
Onion tart
Apple turnvovers
Choux pastry
Puff pastry
3) 4)
3)
3)
3) 4)
, Eclairs 180 – 200 3 [2] 35 – 45
3)
170 – 190
170 – 190
160 – 180
170 – 190
170 – 190
170 – 190
220 – 240
30–50
160 – 180
170 – 190
180 – 200
160 – 180
190 – 210
190 – 210
180 – 200
160 – 180
190 – 210 2 15 – 25
2
2
3 [2]
2
2
2
1 [2]
Oven floor
1[1or2]
6)
2
[2]
6)
2
[2]
1 [2]
2
1 [2]
2
2
5)
Meringues3), Macaroons 120 – 140 2 25 – 50
1) The figures in square brackets relate to appliances with three shelf levels, if different.
2) Unless otherwise stated, the times given are for an oven which has not been pre-heated.
With a pre-heated oven, shorten times by up to 10 minutes.
3) Pre-heat the oven.
4) Use a standard setting to pre-heat the oven. Do not use Rapid heat-up to pre-heat the oven.
5) Place the rack on the floor of the oven, and stand the bowl containing the dough on the rack.
6) Shelf level for yeast dough. For quark dough, use shelf level 3.
Time
in min.
60–70
65–80
25–40
60–80
45–50
35–55
55–65
20–25
15–25
20–35
15–20
12–16
15–20
45–55
15–25
70–90
45–65
55–75
25–35
15–30
50–60
35–45
40–50
50–60
50–60
30–40
25–35
25–30
2)
In general, if a range of temperatures/times is given, it is best to select a lower temperature and
to check the food after the shortest time.
13

Baking chart
Intensive bake
Particularly suitable for
dishes that require a moist topping and crisp base like pizza and quiche
–
lorraine.
cakes with a filling where the base has not been pre-baked, e.g. some
–
cheesecakes.
Cakes/biscuits
Creamed mixture
Fresh fruit cake, with filling (tray) 150 – 170 2 [1] 30 – 35
Rubbed in mixture
Cheesecake
Apple pie
Apricot tart, with filling
Swiss open fruit/savoury flan
Yeast mixtures and quark dough
Pizza (tray)
Onion tart
1) The figures in square brackets relate to appliances with three shelf levels, if different.
2) Unless otherwise stated, the times given are for an oven which has not been pre-heated.
With a pre-heated oven, shorten times by up to 10 minutes.
3) Use a standard setting to pre-heat the oven. Do not use Rapid heat-up to pre-heat the oven.
3)
Temperature
in °C
150 – 170
150 – 170
150 – 170
190 – 210
170 – 190
170 – 190
Recommended
shelf level
1)
2
2
2 [1]
1or2
2
2
Time
in min.
65–75
50–60
50–60
25–30
40–50
25–35
2)
In general, if a range of temperatures/times is given, it is best to select a lower temperature and to
check the food after the shortest time.
14

Subject Notes
Function
Auto roast [ You can also use Conventional heat V.
Containers
Any heat-resistant
containers
Shelf level
1or2
Pre-heating
not required
Temperature
Please refer to the
Roasting chart.
Roasting times
Please refer to the
Roasting chart.
The Miele Gourmet oven dish, roasting pans with a lid,
ovenproof china or glass, roasting bags, dishes made from
earthenware or cast iron, the universal tray, the rack on top of
the universal tray.
We recommend roasting in a covered pot, as
this ensures that sufficient stock remains for making gravy.
–
and the oven stays cleaner, too.
–
On ovens with 3 shelf levels, use shelf level 1 or 2, depending
on the height of the meat.
Place the roasting pan on the rack into a cold oven.
Exception: roast beef / fillet.
– Do not select a higher temperature than that suggested.
The meat will become brown, but will not be cooked
properly.
– With Auto roast [, set the temperature 20°C less than for
Conventional heat V .
– For cuts which weigh 3 kg or more, set the temperature
approx. 10 °C lower than that given in the Roasting chart.
Roasting will take longer at the lower temperature, but will
be more even.
–
For roasting directly on the rack, set the temperature
about 20°C lower than for roasting in a covered pot.
To calculate the roasting time: The traditional British method is
to allow 15 to 20 minutes per lb/450 grammes, according to
type of meat, plus approx. 20 minutes, adjusting the length of
time as roasting proceeds to obtain the required result.
Roasting tips
15

Roasting tips
Useful tips
Browning
Browning only occurs towards the end
of the roasting time. Remove the lid
about halfway through the roasting time
if a more intensive browning result is
desired.
Standing time
At the end of the programme, take the
roast out of the oven, wrap in aluminium
foil and leave to stand for about
10 minutes. This helps retain juices
when the meat is carved.
Roasting poultry
For a crisp finish, baste the poultry ten
minutes before the end of cooking time
with slightly salted water.
Frozen meat
Do not roast deep frozen meat. Meat
should be thoroughly defrosted before
roasting.
16

Roasting chart
For ovens with 5 shelf levels, use shelf level 2.
For ovens with 3 shelf levels, use shelf level 1 or 2, depending on the height of the
meat.
Time
in min.
1)
4)
Core temp.
2)
in °C
6)
Auto roast [ Conventional V
Food
Topside of beef, approx.
1kg
Beef fillet or roast beef,
approx. 1 kg
Venison, approx. 1 kg 180 – 200 90 – 120 190 – 210 90 – 120 80 – 90
Pork joint, approx. 1 kg 170 – 190 100 – 120 200 – 220 100 – 120 80 – 90
Pork joint with crackling,
approx. 2 kg
Gammon joint, approx. 1 kg 170 – 190 60 – 70 200 – 220 60 – 70 75 – 85
Meat loaf, approx. 1 kg 160 – 180 70 – 80 190 – 210 70 – 80 75 – 80
Veal, approx. 1.5 kg 170 – 190 100 – 120 190 – 210 100 – 120 70 – 75
Leg of lamb, approx. 1.5 kg 170 – 190 90 – 120 200 – 220 90 – 120 80 – 85
Rack of lamb, approx.
1.5 kg
Poultry, 0.8–1kg 170–190 60–70 190–210 60–70 85–90
Poultry, approx. 2 kg 170 – 190 90 – 110 190 – 210 90 – 110 85 – 90
Poultry, stuffed, approx.
2kg
Poultry, approx. 4 kg 160 – 180 150 – 180 180 – 200 150 – 180 85 – 90
Fish, whole, approx. 1.5 kg 160 – 180 35 – 55 190 – 210 35 – 55 75 – 85
1) We recommend Auto roast [ for roasting. However, Conventional heat V
can also be used.
2) When roasting with the food probe.
3) Temperature in a covered pot.
If open roasting, set the temperatures 20°C lower.
4) Unless otherwise stated, the times given are calculated on the basis of an oven which has not
been pre-heated.
5) Pre-heat the oven.
6) Rare: 60 – 65°C, medium: 70 – 75°C, well done: 80-85 °C
5)
5)
Temperature
3)
in °C
170 – 190 100 – 120 190 – 210 100 – 120 80 – 90
190–210 45–55 200–220 45–55 60–85
150 – 170 160 – 180 180 – 200 120 – 150 80 – 90
170–190 50–60 190–210 50–60 70–75
170 – 190 110 – 130 190 – 210 110 – 130 85 – 90
Time
in min.
Temperature
4)
in °C
3)
In general, if a range of temperatures and times is given, it is best to select a temperature in the
middle and to check the food after the shortest time.
17

Slow cooking
This Automatic programme
incorporates a cooking function,
temperature and core temperature and
is ideal for cooking beef, pork, veal or
lamb when a tender result is required.
Meat cooked at a low temperature over
a long period will be tender and
succulent.
First the meat needs to be seared all
over at a high temperature on the hob
in order to seal it.
The cooking process is then continued
in the oven on the Slow cooking
programme. The meat juices inside the
joint start to circulate evenly throughout
the meat to reach the outer layers.
This gives very tender and succulent
results.
Using the Slow cooking
programme
Select Slow cooking from the main
^
menu or from the list of Automatic
programmes.
Follow the messages given in the
^
display until the programme starts.
Place the universal tray with the rack
on top in the oven for the pre-heating
phase.
Whilst the oven is pre-heating, sear
^
the meat thoroughly on the hob.
^ Then place the meat on the rack and
insert the food probe into a fleshy
part of the meat.
Refer to the section "Food probe".
^ Place the rack together with the
universal tray on the shelf level
specified.
,
The top heating element/grill
element is hot. Danger of burning.
18
At the end of the programme the
message "Programme finished" will
appear in the display and the buzzer
will sound.
If the meat is not cooked to your
satisfaction, you can extend the
cooking programme.

Tips
Use lean meat which has been
correctly hung and trimmed. Bones
should be removed before cooking.
For searing use a suitable cooking oil
that can withstand high temperatures.
Do not cover meat during cooking.
Cooking takes between 2-4 hours
depending on the size and amount of
meat and on the degree of doneness
and browning required.
Meat can be carved straight from the
oven. It does not need to rest.
Useful tips
Because it has been cooked using low
temperatures,
– meat can be kept warm quite safely
in the oven until it is served. This will
not affect results in any way.
Slow cooking
– the meat is an ideal temperature to
eat straight away. Serve on
pre-heated plates with very hot
sauce or gravy to prevent it cooling
down too quickly.
19

Grilling tips
Grill with the oven door closed.
,
If you grill with the door open, hot air will escape from the oven instead of being
cooled by the cooling fan. The controls will get hot. Danger of burning.
Functions Notes
Grill Y: For grilling thin cuts in large quantities and for browning large
baked dishes.
The whole grill element will get hot.
Economy grill Z: For grilling thin cuts in small quantities and for browning
small baked dishes.
The inner part of the grill heating element will get hot.
Fan grill \: For grilling thicker items, e.g. rolled meat, poultry pieces.
20

Subject Notes
Containers
Rack on top of universal
tray
Recommended shelf
level,
from the bottom
Please refer to the Grill
chart.
Pre-heating
is necessary
Temperature
Please refer to the Grill
chart.
Grilling duration
Please refer to the Grill
chart.
Do not use the baking tray.
Ovens with 5 shelf levels:
For thin cuts use shelf level 4 or 5
–
For thicker cuts use shelf level 3 or 4
–
Ovens with 3 shelf levels:
For thin cuts use shelf level 2 or 3
–
For thicker cuts use shelf level 1 or 2
–
Pre-heat the grill for approx. 5 minutes with the door
shut before grilling.
– For thin cuts of meat (e. g. chops or steak): 275°C
– For grilling thicker items, (e. g. rolled meat, poultry)
240°C
– Do not select a higher temperature than that
suggested. The meat will brown on the outside, but
will not be properly cooked through.
– Flat pieces of fish and meat usually take6–8
minutes per side. Thicker pieces take a little longer.
– With rolled meat, allow approx. 10 minutes per cm
diameter.
–
Most items should be turned half way through
cooking.
Grilling tips
21

Grilling tips
Preparing food for grilling
Rinse briefly under running cold water,
pat dry and season with pepper and
herbs. Do not season meat with salt
before grilling as this draws the juices
out.
Add a little oil if necessary. Do not use
other types of fat as they can burn and
cause smoke.
Clean fish in the normal way. To
enhance the flavour, add a little salt or
squeeze a little lemon juice over the
fish.
Grilling on the rack
^ Place the rack on top of the universal
pan as illustrated.
^
Place the food on the rack.
Useful tips
It is best to grill food of a similar
thickness at the same time so that the
grilling time for each item does not vary
too greatly.
To grill thicker pieces of food more
gradually after an initial high
temperature, continue grilling at a lower
temperature setting or use a lower shelf
runner to allow the food to cook through
to the centre.
One way of finding out how far through
a piece of meat has been cooked is to
press down on it with a spoon.
– If there is very little resistance to the
pressure of the spoon, it will still be
red on the inside ("rare").
– If there is some resistance the inside
will be pink ("medium").
– If there is great resistance, it is
throughly cooked through ("well
done").
^
Select the required function and set
the temperature.
^
Pre-heat the grill for approx.
5 minutes with the door shut.
^
Place the food under the grill and
shut the door.
^
Turn food half way through cooking.
22

Grill chart
Pre-heat the grill for approx. 5 minutes with the door shut.
The figures in square brackets relate to appliances with three shelf levels.
Food to be grilled Full grill Y /Economy
Recommended
shelf level
Thin cuts
Fillet steak 4 [2] 275 10 – 16 220 20 – 25
Kebabs 4 [2] 240 25 – 30 200 20 – 30
Chicken kebabs 4 [2] 240 20 – 25 200 23 – 27
Escalopes 4 [2]
Liver 4 or 5 [2 or 3]
Burgers 3 or 4 [2 or 3]
Sausages 3 or 4 [2 or 3]
Fish fillet 4 or 5 [2 or 3]
Trout 3 or 4 [2 or 3]
Toast 3 or 4 [2 or 3]
Croque monsieur 3 or 4 [2 or 3]
Tomatoes 4 [2] 275 6 – 8 220 8 – 10
Peaches 4 [2] 275 6 – 8 220 15 – 20
Thicker cuts
Chicken
(approx. 1 kg)
Rolled pork,
C 7 cm, (approx. 1 kg)
Pork shank
(approx. 1 kg)
Sirloin, fillet of beef,
approx. 1 kg
1) Turn half way through the grilling time.
2) Select the appropriate shelf level for the thickness of the food.
2)
3 [1] 240 50 – 60 190 60 – 65
2 [1] 240 75 – 85 190 100 – 130
2 [1] 240 100 – 120 200 95 – 100
2 [1] – – 250 25 – 35
Tempe-
2)
2)
2)
2)
2)
2)
2)
grill Z
Total
rature
in °C
275 12 – 18 220 23 – 27
275 8 – 12 220 12 – 15
275 15 – 25 220 18 – 22
275 10 – 15 220 9 – 13
275 12 – 16 220 13 – 18
275 16 – 20 220 20 – 25
275 2 – 4 220 3 – 6
275 7 – 9 220 5 – 10
grilling time
in min.
1)
Fan grill \
Tempe-
rature
in °C
Total
grilling
time
in min.
1)
23

Defrost
The Defrost P function uses the fan to
circulate the air in the oven.
You can set a temperature of between
25 and 50 °C.
Please note:
Where possible remove the
–
packaging and put the food to be
defrosted on the universal tray or into
a suitable dish.
When defrosting poultry, put it on the
–
rack over the universal tray to catch
the defrosted liquid so that the meat
is not lying in this liquid.
It is particularly important to
,
observe food hygiene rules when
defrosting poultry. Do not use the
liquid from the defrosted poultry.
Pour it away, and wash the tray, the
sink and your hands. Danger of
salmonella poisoning.
– Fish does not need to be fully
defrosted before cooking.
Defrost so that the surface is
sufficiently thawed to take herbs and
seasoning.
Defrosting times
The time needed for defrosting
depends on the type and weight of the
food, and at what temperature it was
deep frozen. The following chart is for
guidance only. It is important to check
that food is thoroughly defrosted.
Food Weight Time in
min.
Chicken 800 g 90–120
Meat 500 g 60–90
1 000 g 90–120
Sausages 500 g 30–50
Fish 1 000 g 60–90
Strawberries 300 g 30–40
Sponge cake 500 g 20–30
Bread 500 g 30–50
24

Cooking ready meals
We recommend using Fan plus U.
Select the required function and set the temperature.
^
Pre-heat the oven.
^
Place the food in the oven once it has heated up.
^
Cook frozen pies and pizza on baking paper on the rack rather than on the
baking tray or the universal tray. Cooking large frozen items on the baking tray
or the universal tray can cause the metal to distort. This distortion will increase
with each subsequent use.
Frozen food such as oven chips or croquette potatoes can, however, be
cooked on the baking tray or the universal tray.
Examples of ready meals
Food Temperature
Potato, pasta or
vegetable bake
Lasagne, cannelloni 190 2 35 – 40 Remove the lid
Filled baguette, panini 200 2 12 – 15 Place on baking paper,
Pre-cooked pizza 200 2 12 – 20 Place on baking paper,
Pre-cooked mini pizza 220 2 8 – 10 Place on baking paper,
Potato pancakes,
Rösti, croquettes
in °C *
250 2 20 – 25 Place in a suitable dish
220 2 12 – 20 Place on baking paper,
Shelf level from
the bottom*
Time
in min.*
Notes
directly on the rack
directly on the rack
directly on the rack
directly on the rack
* Observe recommended temperatures, cooking times and position in the oven
given on the manufacturer's packaging.
25

Cakes
Open apple tart
Serves approx. 12
Pastry base:
220 g plain flour
100 g butter
60 g icing sugar
A pinch of salt
1 egg
Topping:
600 g sharp dessert or cooking apples
Juice of half a lemon
100 g sugar
20 ml apple juice
To dust:
Icing sugar
Method:
1. Mix together the flour, butter, icing
sugar, salt and egg and knead into a
smooth dough. Place the dough in the
refrigerator for 30 minutes to cool.
2. Roll the dough out onto a floured
surface and use it to line the base of a
C 26 cm flan or pie dish. Peel, core and
cut the apples into thick slices. Arrange
in the pastry case.
3. Caramelise the sugar in a pan on the
hob, stirring all the time. Add apple and
lemon juice and stir to make a syrup.
Pour over the apples and bake for a
further 10 minutes.
Use one of the following functions:
c / Cakes / Apple tart
or:
If using the Automatic programme,
you will need to add the caramel at
the very beginning.
Intensive bake
Temperature: 170-190 °C
Shelf level: 1
Duration: 40-45 minutes
or:
Conventional heat
Temperature: 180-200 °C
Shelf level: 1
Duration: 40-50 minutes + pre-heating
Note
As a variation, this tart can be baked
using a filling made of 150 g crème
fraîche, 2 eggs, 1 tbsp icing sugar and
2 tsp of vanilla sugar instead of the
caramel. Pour this mixture over the
apples at the end of the first 30 minutes
of baking, and then continue baking.
This recipe will take about 10 minutes
longer than the recipe above.
26

Cakes
Apple cake
Serves approx. 12
Pastry base:
150 g butter or margarine
150 g sugar
2 tsp vanilla sugar
3 eggs
Juice of half a lemon
150 g plain flour
1/2 tsp baking powder
Topping:
650 g sharp dessert or cooking apples
Icing sugar or apricot jam
Method:
1. Cream together the butter or
margarine, sugar and vanilla sugar,
then mix in the eggs one at a time.
2. Sift the baking powder and flour
together and fold into the creamed
mixture together with the lemon juice.
Spoon into a greased and floured
springform cake tin (C 26 cm).
Use one of the following functions:
c / Cakes / Apple... / tart
or:
Fan plus
Temperature: 150-170°C
Shelf level: 2
Duration: 55-65 minutes
or:
Conventional heat
Temperature: 160-180 °C
Shelf level: 2
Duration: 55-65 minutes
3. Peel, quarter and core the apples.
Make several cuts into the top of each
quarter and gently press into the cake
mixture. Bake until golden.
4. Leave to cool to room temperature,
then dust with icing sugar or spread a
little apricot jam over the top.
27

Cakes
Apple pie
Serves approx. 12
Pastry:
350 g plain flour
1/2 tsp baking powder
200 g butter or margarine
100 g sugar
2 tsp vanilla sugar
1 egg
Topping:
1000 g sharp dessert or cooking
apples
50 g raisins
50 g sugar
1/2 tsp cinnamon
To glaze:
1 egg, beaten
2 tbsp milk
Method:
1. Mix the flour, baking powder, butter
or margarine, sugar, vanilla sugar and
egg together and knead to a smooth
dough. Press approx. 2/3 of the pastry
into the bottom of a greased and
floured springform cake tin (C 26 cm)
to make a base. Form a rim about 2 cm
high around the edges of the tin. Bake
blind. (This is not necessary with
Intensive bake or the Automatic
programme).
2. Peel and core the apples, then either
dice or slice them. Steam them gently
in a saucepan together with the raisins,
sugar, cinnamon and 3 tablespoons of
water. Leave to cool and then place in
the (blind-baked) pastry case.
3. Roll the remaining pastry out on a
floured surface and place it over the
apples. Press the edges together, then
bake. About 10 minutes before the end,
brush the surface with a mixture of milk
and egg.
When using the Automatic
programme, you will need to glaze
the pie before it goes into the oven.
Do not open the door during baking.
Use one of the following functions:
c / Cakes / Apple... / Pie
or:
Fan plus
Temperature: 150-170°C
Shelf level: 1
Pre-baking: 20-25 minutes
Baking: 30-35 minutes
or:
Conventional heat
Temperature: 170-190 °C
Shelf level: 1
Duration:
Pre-baking: 15-20 minutes +
pre-heating
Baking: 30-35 minutes
or:
Intensive bake
Temperature: 150-170°C
Shelf level: 1
Baking: 50-60 minutes
28

Cakes
Apple hazelnut streusel
Serves approx. 12
Base/Streusel topping:
200 g melted butter
350 g plain flour
1 tsp baking powder
150 g sugar
2 tsp vanilla sugar
60 g hazelnut brittle
Topping:
800 g sharp dessert/cooking apples
50 g sugar
Juice and zest of one lemon
Method:
1. Mix the flour, baking powder, sugar
and vanilla sugar together. Add the
slightly cooled butter. Rub together to
make a crumbly mixture,
2. Press about 2/3 of the mixture into
the base of a C 26 cm springform cake
tin. Make a rim about 2 cm high around
the edges of the tin. Mix the remaining
streusel mixture with the broken up
hazelnut brittle.
Use one of the following functions:
c / Cakes / Apple... / With streusel
or:
Intensive bake
Temperature: 160-180 °C
Shelf level: 2
Duration: 65-75 minutes
or:
Conventional heat
Temperature: 180-200 °C
Shelf level: 2
Duration: 70-80 minutes
3. Peel, quarter, core and dice the
apples. Mix with the sugar, lemon juice
and zest and arrange over the base.
Sprinkle the streusel-brittle mix over the
top and bake.
29

Cakes
Butter cake
Serves approx. 20
Mixture:
480 g strong white flour
50 g soft butter
180-220 ml lukewarm milk
40 g fresh yeast or2x7gsachets of
fast action dried yeast
60 g sugar
A pinch of salt
1 egg yolk
Topping:
150 g soft butter
4 tsp vanilla sugar
100 g sugar
150 g flaked almonds
Method:
1. Place the flour, butter, yeast, sugar,
salt and egg yolk in a mixing bowl. Add
enough milk to blend into a smooth,
velvety dough.
2. Leave to prove for about 20 minutes
at room temperature. Punch down,
then roll out on a baking tray and leave
to rise for another 20 minutes. When
risen make indentations in the top with
your fingers.
Use one of the following functions:
c / Cakes / Butter cake
or:
Fan plus
Temperature: 160-180 °C
Shelf level: 2
Duration: 25-30 minutes
or:
Conventional heat
Temperature: 180-200 °C
Shelf level: 2
Duration: 15-22 minutes + pre-heating
Note
To make your own vanilla sugar:
Split a vanilla pod lengthwise and then
cut each half into quarters. Place in a
sealed jar with 500 g of caster sugar
and leave for 3-4 days before using to
allow the flavours to blend. The pulp
can be scraped out of the pods for an
even more intense flavour.
3. To make the topping, mix the butter
with the vanilla sugar and half of the
sugar. Using two teaspoons, drop small
balls of the mixture into the
indentations. Sprinkle the remaining
sugar and flaked almonds over the top.
4. Bake until golden.
30

Cakes
Guglhupf
(A typical Austrian/South German cake)
Serves approx. 16
60 g butter
50 g sugar
1 egg
Zest of 1/2 half a lemon
A pinch of salt
500 g strong white flour
20 g fresh yeast or1x7gsachet of
fast action dried yeast
375 ml milk
50 g raisins
To dust:
Icing sugar
Method:
1. Beat the butter until creamy. Add the
sugar and egg yolk and mix well. Mix
the lemon zest, salt, flour, yeast and
milk, and mix all the ingredients to a
smooth dough.
Use one of the following functions:
c / Cakes / Guglhupf
or:
Fan plus
Temperature: 150-170°C
Shelf level: 2
Duration: 50-60 minutes
or:
Conventional heat
Temperature: 160-180 °C
Shelf level: 2
Duration: 50-60 minutes
2. Fold the stiffly beaten egg white into
the mixture, together with the raisins.
3. Grease and flour a ring tin (C 24 cm)
and pour the mixture into it. Bake until
golden.
4. When cool, dust with the icing sugar.
31

Cakes
Plaited loaf
Serves approx. 16
750 g strong white flour
60 g fresh yeast or3x7gsachets of
fast action dried yeast
200-250 ml lukewarm milk
100 g sugar
125 g soft margarine or butter
A pinch of salt
2 eggs
75 g raisins
Zest of one lemon
To glaze:
1 egg yolk beaten with 2 tbsp milk
30 g crystal sugar
50 g flaked almonds
Method:
1. Place the flour, crumbled yeast,
sugar, salt, butter or margarine and
eggs in a mixing bowl. Add the milk
and knead to a smooth, elastic dough.
Then mix in the raisins and lemon zest.
2. Leave to prove at room temperature
for 30 minutes, or in the oven set at
50°C for about 20 minutes. The dough
should double in size.
Use one of the following functions:
c / Cakes / Plaited loaf
or:
Fan plus
Temperature: 150-170°C
Shelf level: 1
Duration: 45-55 minutes
or:
Conventional heat
Temperature: 180-200 °C
Shelf level: 1
Duration: 45-55 minutes
Note
This recipe can also be used to make a
wreath. For an Easter table display,
plait or braid the loaf into a circle and
arrange coloured hard-boiled eggs in
the centre.
3. Divide into 3 pieces and roll each
one out to about 40 cm in length. Plait
the three rolls and place on a baking
tray.
4. Brush with the beaten egg yolk/milk
mixture and sprinkle with the crystal
sugar and almonds. Bake until golden.
32

Yeast dough
c/ Cakes / Yeast dough
This Automatic programme can be
used to prove dough.
You can choose between the following
times:
15 minutes
–
30 minutes
–
45 minutes
–
Cakes
33

Cakes
Marble cake
Serves approx. 18
250 g butter or margarine
200 g sugar
2 tsp vanilla sugar
4 eggs
4 tbsp rum
500 g strong white flour
3 tsp baking powder
3 tbsp cocoa powder
3 tbsp milk
Method:
1. Cream together the butter or
margarine, sugar, vanilla sugar and
eggs. Stir in the rum and then fold in
the flour and baking powder.
2. Stir the cocoa power and milk into
about 1/3 of the mixture.
3. Spoon about 1/2 of the remaining
plain mixture into a greased and floured
baking tin (C 26 cm). Spread the
cocoa-flavoured mixture over the top,
and finally the rest of the plain mixture.
Use one of the following functions:
c / Cakes / Marble cake
or:
Fan plus
Temperature: 150-170°C
Shelf level: 2
Duration: 60-70 minutes
or:
Conventional heat
Temperature: 150-170°C
Shelf level: 2
Duration: 60-70 minutes
4. Swirl a fork through the mixture to
give a marbled effect, and bake.
34

Cakes
Fruit streusel cake
Serves approx. 20
Pastry base:
450 g strong white flour
40 g fresh yeast or2x7gsachets of
fast action dried yeast
Approx. 150 ml lukewarm milk
50 g sugar
90 g butter or margarine, melted
1 egg
Filling:
Approx. 1000 g sharp apples, plums or
cherries
Streusel topping:
240 g plain flour
150 g sugar
4 tsp vanilla sugar
130 g butter or margarine
1 tbsp cinnamon
Method:
1. Sift the flour into a large bowl and
make a well in the centre. Put the yeast
into the well together with a little sugar
and some of the milk, and combine
these ingredients with some of the flour.
Place in the oven at 50°C for 20
minutes to rise.
4. Rub the topping ingredients together
until you get a crumbly texture, and
scatter over the fruit. Place in the oven
at 50°C for 30 minutes to rise again,
and then bake until golden.
Use one of the following functions:
c/ Cakes / Fruit streusel cake
or:
Fan plus
Temperature: 160-180 °C
Shelf level: 2
Duration: 50-60 minutes
or:
Conventional heat
Temperature: 180-200 °C
Shelf level: 3
Duration: 40-50 minutes
2. Add the rest of the ingredients for the
base to this mix, and knead to a smooth
dough. Return to the oven for a further
30 minutes at 50°C to rise. Punch
down, then roll out into the universal
tray.
3. Arrange the prepared fruit (apples
peeled and cut into 1/2 cm slices;
cherries stoned; plums stoned and
halved) evenly over the base.
35

Cakes
Swiss apple pie
Serves approx. 20
Pastry base:
250 g plain flour
80 ml water
100 g margarine
900 g fruit (berries, peaches, cherries,
apples etc.)
Topping:
175 ml double cream
4 dessertspoons of sugar
2 eggs
Method:
1. Briskly mix the flour, margarine and
water to a smooth dough, and leave in
a cool place for a while.
2. Mix together all of the ingredients for
the topping. Drain the fruit if necessary.
3. Roll out the pastry thinly, and place
on the baking tray. Roll over the edges
to form a lip.
Use one of the following functions:
c/ Cakes / Swiss apple cake
or:
Intensive bake
Temperature: 190-200ºC
Shelf level: 2
Duration: 30-40 minutes
or:
Conventional heat
Temperature: 180-200ºC
Shelf level: 1
Duration: 40-50 minutes + pre-heating
4. Start the Automatic programme.
5. Arrange the fruit on the pastry, then
spread the topping over and place in
the pre-heated oven.
36

Cakes
Sponge cake
Serves approx. 12
200 g butter
200 g sugar
4 eggs
Juice and zest of one lemon
125 g cornflour
125 g self-raising flour
1 tsp baking powder
Method:
1. Cream together the butter and sugar.
Add the eggs, lemon juice and zest.
2. Sift together the flour with the
cornflour and the baking powder, and
fold into the mixture.
3. Transfer the mixture into a loaf tin
lined with baking parchment, and make
a slight dip down the centre with a
knife. Then bake until golden.
4. When ready, turn the cake out onto a
wire rack, and peel off the paper. Dust
with icing sugar or cover with lemon
icing.
Use one of the following functions:
c / Cakes / Sponge cake
or:
Fan plus
Temperature: 140-160 °C
Shelf level: 2
Duration: 60-70 minutes
or:
Conventional heat
Temperature: 160-180 °C
Shelf level: 2
Duration: 60-70 minutes
Note
Orange juice may be used instead of
lemon juice. For a special occasion,
pierce the top of the cake several times
with a fork and drizzle Gran Marnier or
Cointreau over, and use chocolate icing
instead of lemon icing.
37

Cakes
Streusel cake
Serves approx. 16
Base:
500 g strong white flour
40 g fresh yeast or2x7gsachets of
fast action dried yeast
250 ml lukewarm milk
50 g melted butter
50 g sugar
1 egg
A pinch of salt
Filling:
125 g soft butter
125 g sugar
1 egg
350 g quark
1 tbsp cornflour
3 tbsp lemon juice
Streusel topping:
350 g plain flour
200 g sugar
1/2 tsp ground cinnamon
200 g butter, melted
Method:
1. To make the base, sift the flour into a
large bowl and make a well in the
centre. Crumble the yeast into the well,
and mix with a little milk and some of
the flour. Leave for 15 minutes to rise.
3. To make the filling, beat together the
sugar and egg until creamy, then stir in
the quark, cornflour and lemon juice.
Spread this mixture over the base.
4. Mix together the flour, sugar and
cinnamon for the streusel topping. Add
the slightly cooled butter to the dry
ingredients. Rub together to make a
crumbly mixture, and scatter over the
quark mixture.
5. Leave to rise for another 15 minutes
before baking until golden.
Use one of the following functions:
c / Cakes / Streusel cake
or:
Fan plus
Temperature: 150-170°C
Shelf level: 2
Duration: 55-60 minutes
or:
Conventional heat
Temperature: 160-180 °C
Shelf level: 3
Duration: 45-55 minutes + pre-heating
2. Add the rest of the ingredients, and
knead to a smooth dough. Leave in a
warm place for about 15 minutes to
rise, then roll out onto the universal tray.
38

Cookies/muffins
Biscuits
Ingredients:
250 g plain flour
1 level tsp baking powder
80 g sugar
2 tsp vanilla sugar
1 1/2 tbsp rum
2 tbsp water
120 g butter
Method:
1. Sift together the flour, baking
powder, sugar and vanilla sugar. Add
the rest of the ingredients and knead to
a smooth dough. Leave to cool for at
least 1 hour.
Roll out the dough to a thickness of
approx. 3 mm, and make biscuits using
a cookie cutter. Place on a baking tray
and bake.
Use one of the following functions:
c / Cookies/muffins / Biscuits
or:
Fan plus
Temperature: 140-160 °C
Shelf level: 1, 3 and 5
Duration: 25-35 min
39

Cookies/muffins
Chocolate cherry muffins
Makes approx. 12
Mixture:
100 g mocha or bitter chocolate
100 g butter
3 eggs
80 g icing sugar
10 g instant cappuccino powder
100 g plain flour
1 tsp baking powder
Filling:
200 g cream cheese, e.g. mascarpone
70 g icing sugar
1 egg
10 g plain flour
200 g jar of cherries, drained
12 muffin cases (7 cm C)
Method:
1. Melt the chocolate in the microwave
for 3 minutes at 450 watts.
2. Beat the butter until creamy, stir in
the eggs and sugar alternately, a little
at a time. Fold in the cooled, melted
chocolate, the cappuccino powder, the
flour and the baking powder.
Use one of the following functions:
c / Cookies/Muffins / Muffins / With
fruit
or:
Fan plus
Temperature: 150-170°C
Shelf level: 2
Duration: 40-50 minutes
or:
Conventional heat
Temperature: 160-180 °C
Shelf level: 2
Duration: 40-50 minutes + pre-heating
Note
The mixture can be baked in a large
cake tin instead of muffin cases.
Double the quantity of fruit and
increase the baking time to approx. 50
minutes. Apricots can be used instead
of cherries.
3. Blend together the mascarpone,
icing sugar, egg and flour for the filling.
Drain the cherries.
4. Spoon half the chocolate mixture into
the bottom of the muffin cases, followed
by half of the cherries and all of the
mascarpone mixture. Then add the rest
of the chocolate mixture and the
cherries. Bake, then decorate with plain
or milk chocolate cake covering if you
wish.
40

Cookies/muffins
Walnut muffins
Makes approx. 12
100 g raisins
5 tbsp rum
150 g butter
150 g sugar
2 tsp vanilla sugar
3 eggs
150 g plain flour
1 tsp baking powder
125 g walnuts, roughly chopped
12 muffin cases (7-8 cm C) or a muffin
tin
Method:
1. Drizzle the rum over the raisins and
leave to soak for approx. 30 minutes.
2. Beat the butter until creamy, mix in
the sugar, the vanilla sugar and then
the eggs. Sift the flour with the baking
powder and fold into the mixture
together with the walnuts. Stir in the
rum-soaked raisins.
Use one of the following functions:
c / Cookies/Muffins / Muffins / Without
fruit
or:
Fan plus
Temperature: 150-170°C
Shelf level: 2
Duration: 35-40 minutes
or:
Conventional heat
Temperature: 160-180 °C
Shelf level: 2
Duration: 25-30 minutes + pre-heating
3. Spoon the mixture into the muffin
cases or the tin using 2 tablespoons. If
using paper cases, place on the
universal tray. Bake.
41

Cookies/muffins
Drop cookies
Makes approx. 50
160 g butter
50 g brown sugar
50 g icing sugar
2 tsp vanilla sugar
A pinch of salt
1 egg white
200 g plain flour
Method:
1. Beat the butter until creamy, then
beat in the brown sugar, icing sugar,
vanilla sugar and salt until soft. Then
fold in the egg white and flour.
2. Spoon the mixture into a forcing bag
fitted with a size 9 or 11 rosette or
zig-zag nozzle. Pipe onto a baking tray
and bake until golden.
Use one of the following functions:
c / Cookies/muffins / Drop cookies
or:
Fan plus
Temperature: 150-170°C
Shelf level: 1 and 3
Duration: 20-25 minutes
or:
Conventional heat
Temperature: 160-180 °C
Shelf level: 2
Duration: 12-15 minutes + pre-heating
42

Cookies/muffins
Chocolate dessert (French
speciality)
Serves 6-8
200 g dark chocolate
200 g butter
200 g sugar
3 egg yolks
3 egg whites
6-8 ramekins (C ca. 10 cm)
Method:
1. Melt together the chocolate and
butter in a pan over a low heat. Leave
to cool slightly, and then beat in the
sugar and egg yolks.
2. Beat the egg whites until stiff, and
fold them gently into the chocolate
mixture.
3. Spoon the mixture into the dishes,
and place in the oven.
Use one of the following functions:
c / Cookies/muffins / Chocolate
dessert
or:
Fan plus
Temperature: 170-190 °C
Shelf level: 1
Duration: 15-20 minutes + pre-heating
43

Cookies/muffins
Chocolate sponge puddings
(Austrian speciality)
Serves 7
70 g butter
70 g sugar
4 egg yolks
70 g dark chocolate, melted
70 g ground almonds
20 g breadcrumbs
4 egg whites
7 ramekins (each C 6 cm)
500 ml homemade custard
200 ml stiffly whipped cream
Chocolate sauce
Icing sugar
Method:
1. Beat the butter, sugar and egg yolk
together until creamy. Fold in the
cooled, melted chocolate, almonds and
breadcrumbs. Then carefully fold in the
stiffly beaten egg whites.
Use one of the following functions:
c / Cookies/muffins / Chocolate
sponge
or:
Fan plus
Temperature: 140-160 °C
Shelf level: 1
Duration: 35-40 minutes
or:
Conventional heat
Temperature: 150-170°C
Shelf level: 1
Duration: 35-40 minutes + pre-heating
2. Divide the mixture between the
greased ramekins. Stand in the
universay tray, filled with about 750 ml
water and bake uncovered.
3. Mix the cream with the vanilla
custard and spoon a pool of this onto
each dessert plate. Drizzle squirls of
chocolate sauce onto each one, using
a cocktail stick to create a marbled
effect.
4. Turn the puddings out and arrange
one in the middle of each pool of
sauce. Dust with icing sugar and serve
warm.
44

Bread
White bread with herbs
Ingredients:
500 g strong white flour
300 ml lukewarm milk
1 level tsp salt
25 g fresh yeast or1x7gsachet of
fast action dried yeast
1 level tbsp finely chopped chives
1 level tbsp chopped parsley
1 level tbsp chopped dill
To glaze:
1 tbsp milk
Method:
1. Mix together the flour, salt and herbs.
Make a well in the centre. Put the yeast
into the well, add the milk and knead
together to a smooth dough.
2. Place in the oven and run the "Cakes
/ Yeast dough" Automatic programme
for 30 minutes to prove the dough.
Use one of the following functions:
c / Bread / White bread in tin
or:
Fan plus
Temperature: 160 °C
Duration: 45-50 minutes
Shelf level: 2
3. Knead the dough and place in a
greased 30 cm bread tin and return to
the oven for a further 15 minutes to rise.
4. Use a damp knife to makea1cm
deep slash down the middle. Brush
with milk and bake until golden.
45

Bread
Rye bread
Ingredients:
500 g rye flour
250 g strong white bread flour
50 g sourdough
1 tsp honey
15 g salt
42 g fresh yeast or2x7gsachets of
fast action dried yeast
500 ml lukewarm water
50g linseed
50 g sunflower seeds
Method:
1. Mix together the rye flour, strong
white bread flour and salt. Add the
sourdough, water, yeast and honey and
knead. Then knead in the linseed and
the sunflower seeds.
2. Place in the oven and run the "Cakes
/ Yeast dough" Automatic programme
for 30 minutes to prove the dough.
Use one of the following functions:
c / Bread / Rye bread
or:
Fan plus
With pre-heating
Temperature/time:
220 °C 15 minutes
170 °C 45-55 minutes
Shelf level: 2
3. Place the soft dough in a greased 30
cm bread tin, flatten and return to the
oven for a further 30 minutes to rise.
4. Use a damp knife to make several 1
cm deep diagonal slashes across the
top in both directions to form a rough
grid pattern. Place in the oven immedi
ately and bake.
46
-

Bread
Sweet bread
Ingredients:
500 g strong white bread flour
100 g sugar
42 g fresh yeast or2x7gsachets of
fast action dried yeast
240 ml lukewarm buttermilk
20 g melted butter
A pinch of salt
125 g low fat quark
250 g raisins
To glaze:
1 tbsp lukewarm milk
Method:
1. Mix together the flour, sugar and salt.
Add the buttermilk, quark, butter and
yeast and knead together to a smooth
dough. Finally knead in the raisins.
2. Place in the oven and run the "Cakes
/ Yeast dough" Automatic programme
for 30 minutes to prove the dough.
Use one of the following functions:
c / Bread / Sweet bread
or:
Fan plus
Temperature: 140-160 °C
Duration: 60-70 minutes
Shelf level: 2
3. Place the dough in a greased 30 cm
bread tin and return to the oven for a
further 30 minutes to rise.
4. Use a damp knife to makea1cm
deep slash down the middle. Brush
with milk and bake until golden.
47

Bread
White bread on a tray
Ingredients:
500 g strong white bread flour
300 ml lukewarm milk
1 tsp sugar
1/2 tsp salt
20 g fresh yeast or1x7gsachet of
fast action dried yeast
1 tbsp butter
To glaze:
2-3 tbsp cream
Method:
1. Mix together the flour, salt and sugar.
Mix the yeast with the milk and add this
with the butter to the flour mixture.
Knead to a smooth dough.
2. Place in the oven and run the "Cakes
/ Yeast dough" Automatic programme
for 30 minutes to prove the dough.
3. Knead the dough again, form into an
oval loaf, place on a baking tray and
return to the oven for a further 15
minutes to rise.
Use one of the following functions:
c / Bread / White bread on tray
or:
Fan plus
Temperature: 160 °C
Duration: 50-60 minutes
Shelf level: 2
4. Use a damp knife to make several 1
cm deep diagonal slashes in the top.
Brush with cream and bake until
golden.
48

Bread mixtures
Choice of Automatic programmes:
Farmhouse bread
–
Multigrain bread
–
Wholegrain bread
–
White bread in tin
–
Notes for baking bread using
Automatic programmes
Prepare the dough according to the
–
packet instructions.
Bake all bread mixtures in a loaf tin
–
(25 x 10 cm).
For the perfect crust, cuta1cm
–
incision with a damp knife along the
length of the dough after the final
proving.
The "c / Cakes / Yeast dough"
–
Automatic programme can be used
to prove the dough in the oven.
– For some Automatic "Bread"
programmes the oven needs to be
pre-heated. Remove dough that is
proving from the oven before
pre-heating, then place it back in the
oven once the heating up phase is
completed.
49

Bread rolls
Yeast rolls
Ingredients:
500 g strong white bread flour
300 ml lukewarm milk
1 1/2 tsp salt
20 g fresh yeast or1x7gsachet of
fast action dried yeast
1 tbsp soft margarine
1/2 tsp vanilla sugar
To glaze:
1 tbsp milk
Method:
1. Put the flour in a bowl and crumble in
the yeast. Add the salt, margarine,
vanilla sugar, butter and milk. Knead to
a smooth dough.
2. Form the dough into 10 evenly sized
rolls and place on a baking tray. Place
in the oven and run the "Cakes / Yeast
dough" Automatic programme for 30
minutes to prove the dough.
Croissants
Ready-to-bake croissants
1. Prepare and roll out the dough
according to the instructions on the
packet.
2. Arrange the croissants on a baking
tray.
Use the following:
c / Bread rolls / Croissants
3. Make a cross in the top of the rolls,
brush with milk and bake.
Use one of the following functions:
c / Bread rolls / Yeast rolls
or:
Conventional heat
Temperature: 180 °C
Duration: 30-40 minutes
Shelf level: 2
50

Pizza
Choice of Automatic programmes:
Fresh
–
Yeast dough
Quark dough
Frozen
–
Not pre-baked
Pre-baked
American style
Pizza variations
Ingredients for 1 tray:
Basic yeast dough
320 g strong white flour
30 g fresh yeast or2x7gsachets of
fast action dried yeast
1 tsp salt
30 g oil
170-180 ml lukewarm water
Basic quark dough:
180 g quark
60 ml milk
60 g oil
1 tsp salt
3 egg yolks
375 g strong white flour
3 tsp baking powder
Approx. 300 g tomato passata per
pizza
Topping:
Margherita:
–
600 g sliced tomatoes
300 g mozzarella cheese, sliced
Olive oil
Oregano
Onion pizza:
–
650 g finely sliced onions
Salt, fresh rosemary
4 tbsp olive oil
Vegetarian:
–
300 g broccoli florets, cooked
300 g sliced white mushrooms
120 g leeks, sliced in rings and
cooked
300 g mozzarella cheese, diced or
sliced
– Rainbow pizza:
One red, yellow and green pepper,
washed and cut into strips
5 tomatoes, sliced
250 g Emmental cheese, coarsely
grated
–
Salmon:
400 g salmon pieces
5-6 slices of smoked salmon, cut into
strips
6 hard boiled eggs, quartered
1 tsp oregano
250 g grated Cheddar cheese
–
Leek and Gorgonzola:
800 g leeks, sliced into rings
2 tbsp walnut oil for gently frying the
leeks
Salt and pepper
200 ml white wine, added to the fried
leeks
300 g Gorgonzola cheese, diced
51

Pizza
Ricotta and basil:
–
60 g ricotta cheese or quark mixed
with
100 ml double cream
4 eggs
2 tbsp walnut oil
Salt and pepper
2 tbsp chopped basil, stirred into the
cream/egg mixture which is then
spread over the pizza base
4 tomatoes, diced and scattered
over the cream/egg mixture
200 g Gorgonzola, diced and
scattered over the cream/egg
mixture
Method:
1a. To prepare the pizza dough:
Mix the flour, yeast, salt, oil and water
together and knead until you have a
smooth dough. Leave to rise at room
temperature for approx. 20 minutes.
1b. To prepare the quark dough:
Mix together the quark, milk, oil, salt
and egg yolk. Sift together the flour and
baking powder, and fold half into the
quark mixture, then knead in the rest of
the flour to a smooth dough.
Use one of the following functions:
c / Pizza / Fresh
or:
Fan plus
Temperature: 180-200 °C
Shelf level: 2
Duration: 35-45 minutes
or:
Conventional heat
Temperature: 200-220 °C
Shelf level: 2
Duration: 30-40 minutes + pre-heating
or:
Intensive bake
Temperature: 170-190 °C
Shelf level: 2
Duration: 35-45 minutes
2. Roll out onto a baking tray.
3. Spread some tomato passata over
the pizza, and season with salt, pepper
and oregano.
4. Arrange the topping of your choice
on the pizza and bake immediately.
52

Notes for cooking meat using
Automatic programmes
Meat weighing less than 1000 g is
–
not suitable for cooking with the
Automatic programme as it is likely to
dry out.
The Miele Gourmet dishes are ideal
–
for cooking meat with the Automatic
programmes, as there is plenty of
space to add liquid. When using
ovenproof glass, ceramic or stainless
steel roasting dishes, it might be
necessary to reduce the quantity of
liquid being added.
– With the exception of roast beef,
meat can be cooked covered or
uncovered. The programme you
select will guide you.
– Some programmes require the
addition of extra liquid part way
through the cooking time, and
sometimes the lid needs to be
removed. This will be indicated in the
display.
Meat
If you are using the food probe,
–
make sure that the metal tip is
inserted into the thickest part of the
meat.
If you are cooking several pieces of
–
meat together, select pieces that are
similar in size. The food probe should
be inserted into the largest piece.
When using the food probe, you will
–
be given an approximate cooking
duration, which will be adjusted more
accurately as the programme
proceeds.
–
Trim the meat before cooking.
Season according to taste, dot with
butter or (in the case of game) bard
with rashers of bacon. To tenderise
game, marinate in butter milk for
several hours or overnight before
cooking.
53

Poultry
Notes for cooking poultry
using Automatic programmes
Poultry weighing less than 900 g is
–
not suitable for cooking with the
Automatic programme as it is likely to
dry out.
The Miele Gourmet dishes are ideal
–
for cooking poultry with the Automat
ic programmes, as there is plenty of
space to add liquid. When using
ovenproof glass, ceramic or stainless
steel roasting dishes, it might be
necessary to reduce the quantity of
liquid being added.
– Season the poultry to your taste and
brush with oil before putting it in the
oven.
– Always place poultry in the oven with
the breast uppermost. Some
programmes require the addition of
extra liquid part way through the
cooking time, and sometimes the lid
needs to be removed. This will be
indicated in the display.
Insert the food probe into the area
–
between the thigh and the breast,
and on larger birds into the breast.
Make sure that the metal tip is
inserted as deeply as possible into
the thickest part of the bird.
If you are cooking several birds
–
together, select ones that are similar
in size. Insert the food probe into the
largest bird.
When using the food probe, you will
–
be given an approximate cooking
duration, which will be adjusted more
accurately as the programme
proceeds.
54

Notes on cooking fish using
Automatic programmes
Season the fish to your taste and dot
–
with butter before putting it in the
oven.
If using the food probe, make sure
–
that the metal tip is inserted into the
thickest part of the flesh.
When cooking several fish or pieces
–
of fish together, select fish that are
similar in size. Insert the food probe
into the largest fish.
– Fish can also be cooked wrapped in
aluminium foil, in a roasting bag or in
a salt crust. Simply insert the food
probe through the foil.
– When using the food probe, you will
be given an approximate cooking
duration, which will be adjusted more
accurately as the programme
proceeds.
Fish
55

Bakes/gratin
Potato gratin in a mustard
sauce
Serves 4
800 g potatoes
Salt and pepper
1 onion, finely diced
1 clove of garlic, finely diced
30 g butter
2 tbsp coarse grained mustard
250 ml vegetable stock
A few strands of saffron
125 ml double cream
50 g grated Cheddar cheese
Method:
1. Peel and slice the potatoes, and
parboil in salted water for about 5
minutes. Drain and arrange in the
bottom of an oven-proof dish.
2. Fry the onions and garlic gently in
butter. Add the mustard, stock, saffron
and cream, and bring to the boil.
Season with salt and pepper.
Use one of the following functions:
c / Bakes/gratin / Potato gratin /
Cooked potatoes
or:
Fan plus
Temperature: 170-190 °C
Shelf level: 1
Duration: 50-60 minutes
or:
Conventional heat
Temperature: 180-200 °C
Shelf level: 1
Duration: 50-60 minutes
3. Pour the sauce over the potatoes,
and sprinkle over the grated cheese.
Bake in the oven uncovered.
56

Bakes/gratin
Potato cheese bake
Serves 4
500 g peeled, floury potatoes
250 ml double cream
125 g crème fraîche
150 g grated Cheddar cheese
1 clove of garlic
Salt, black pepper, nutmeg
Method:
1. Slice the potatoes thinly and mix with
2/3 of the cheese.
2. Grease an oven-proof dish (approx.
(C 20 cm) and rub with the garlic clove.
3. Blend together the cream, crème
fraîche, salt, pepper and nutmeg and
pour evenly over the potatoes. Scatter
the rest of the cheese over the top and
bake uncovered in the oven until
golden.
Use one of the following functions:
c / Bakes/gratin / Potato gratin / Raw
potatoes
or:
Fan plus
Temperature: 160-180 °C
Shelf level: 1
Duration: 50-60 minutes
or:
Conventional heat
Temperature: 180-200 °C
Shelf level: 1
Duration: 50-60 minutes
Note
For a low-calorie variation, arrange
750 g sliced potatoes in an oven-proof
dish. Season with salt and pepper, and
pour over 250 ml of vegetable stock.
Bake as above. About 10 minutes
before the end of baking, scatter 3 tbsp
grated Parmesan over the top.
57

Bakes/gratin
Lasagne
Serves 4
10-12 sheets of lasagne, not
pre-cooked
Meat sauce:
50 g smoked streaky bacon, finely
diced
3 onions (150 g)
375 g minced beef
Salt and freshly ground black pepper
1 tsp thyme
1 tsp oregano
1 tsp basil
1 tin (500 g) tomatoes, skinned
2 tbsp tomato purée
125 ml stock
Mushroom sauce:
20 g butter
150 g mushrooms, sliced
2 tbsp (40 g) plain flour
250 ml double cream
250 ml milk
Salt and ground nutmeg
2 tbsp chopped parsley
200 g grated Cheddar cheese
2. To make the mushroom sauce, melt
the butter in a pan on the hob, and fry
the rest of the onions until golden. Add
the sliced mushrooms. Sprinkle in the
flour a little at a time, stirring constantly.
Stir in the cream and milk gradually to
make a smooth sauce, season, and
cook for approx. 5 minutes, continuing
to stir. Add the parsely.
3. Grease an oven-proof dish, and
assemble the lasagne in layers as
follows: 1/3 of the meat sauce, 1/2 of
the lasagne sheets, 1/3 of the meat
sauce, 1/2 of the mushroom sauce, the
rest of the lasagne sheets, the rest of
the meat sauce and finally the rest of
the mushroom sauce.
4. Sprinkle with grated cheese, then
bake uncovered in the oven.
Use one of the following functions:
c / Bakes/Gratin / Lasagne
or:
Method:
1. Gently fry the bacon with 2/3 of the
onion. Add the minced beef, and fry
until brown all over, turning frequently.
Season with salt, pepper and herbs.
Chop the tomatoes coarsely, and stir
into the meat together with the tomato
purée and the stock. Simmer for
approx. 5 minutes.
58
Fan plus
Temperature: 170-190 °C
Shelf level: 2
Duration: 40-50 minutes
or:
Conventional heat
Temperature: 180-200 °C
Shelf level: 1
Duration: 40-50 minutes

59

Alteration rights reserved / 22 / 5010
(User instructions for ovens H 5051, H 5361)
M.-Nr. 07 450 080 / 01
 Loading...