

Page 1
Reference Manual
Page 2

Copyright © 2011 by Microtek International, Inc.
All rights reserved.
Trademarks
Microtek, ScanMaker, ArtixScan, ScanWizard and ColoRescue are trademarks or registered
trademarks of Microtek International, Inc. Adobe and Acrobat are registered trademarks of
Adobe Systems Incorporated. Windows is a registered trademark of Microsoft Corporation.
All other trademarks or registered trademarks are the property of their respective holders.
Software function or specifications are subject to change without notice. Not responsible
for typographical errors.
Important
Documents that you scan may be protected under copyright law. The unauthorized use of
such documents could be a violation of the rights of the copyright holder. Microtek bears
no responsibility for the unauthorized use of copyrighted materials.
To obtain optimal results from the Microtek scanning software and user's manual, you
should be familiar with such Windows concepts as pointing, clicking, dragging, and
selecting from menus and dialog boxed. If these things are new to you, refer to your
Microsoft Windows User's Guide.
March 2011
Microtek International, Inc.
6, Industry East Road 3, Science Based Industrial Park, Hsinchu, 30077, Taiwan
Tel: 886-3-5772155, Fax: 886-3-5772598, http://www.microtek.com
ii
Page 3

Contents
Introduction ................................................................................... 1
System Requirements .................................................................................2
Launching ScanWizard EZ .........................................................................2
Exiting ScanWizard EZ ...............................................................................2
The EZ Mode ................................................................................. 3
The EZ Mode Interface .............................................................................. 3
Scanning with the EZ Mode ........................................................................4
Function Buttons on the EZ Mode..............................................................5
Scan Button ........................................................................................5
Professional Mode Button .....................................................................
Advanced Mode Button ......................................................................5
Preferences Button .............................................................................6
Auto Settings Panel ......................................................................6
Auto-crop ............................................................................. 6
Auto-deskew.........................................................................6
Auto Color Enhancement ......................................................7
Do preview at launch (Advanced mode only) .........................7
Scan Mode Panel .........................................................................7
Scan Materials.......................................................................7
Image Resolution (EZ mode only) ..........................................7
Scan Quality ....................................................................... 7
Rotate (Advanced mode only) ...............................................8
Mirror (Advanced mode only) ...............................................8
Save Panel .................................................................................10
Save as type ........................................................................ 10
Save multiple images as a single file ......................................10
Save path ............................................................................10
Auto filename .....................................................................10
Filename prefix ................................................................... 11
Prefix# ................................................................................ 11
File Option .........................................................................11
Send image to .....................................................................12
iii
Page 4

Theme Panel (EZ Mode only)......................................................13
EZ Mode Theme ..................................................................13
Theme Preview ................................................................... 13
Minimize Button ...............................................................................14
Exit Button........................................................................................14
The Advanced Mode ..................................................................... 15
The Advanced Mode Interface .................................................................15
Switching to the Advanced Mode .............................................................16
Scanning with the Advanced Mode ..........................................................17
Function Buttons on the Advanced Mode ................................................ 22
Preview Button ................................................................................. 22
Select Button ....................................................................................22
Nine Types of Image Effects ...............................................................22
Scan Button ......................................................................................25
Cancel Button ...................................................................................25
Help Button ......................................................................................25
Preferences Button ...........................................................................25
EZ Mode Button ...............................................................................25
Professional Mode Button ................................................................. 25
Return Button ...................................................................................25
Zoom In Button ................................................................................ 25
Zoom Out Button .............................................................................25
Image Correction Controls for Document Adjustment Section .................26
Type..................................................................................................26
Threshold .........................................................................................27
Brightness/Contrast .......................................................................... 28
Descreen ..........................................................................................28
Auto Color Correction ......................................................................28
Document Enhancement ..................................................................28
Default Button ..................................................................................28
Advanced... Button ...........................................................................29
Image Adjusment .......................................................................29
Auto Threshold ...................................................................29
Shadow/Highlight ................................................................29
Gamma ...............................................................................30
Lamp Filter ................................................................................ 30
iv
Page 5
Introduction
ScanWizard EZ is scanning software developed exclusively for Microtek
scanners. ScanWizard EZ has three unique scan modes that novices and
experienced users will find productive and easy to use.
The three scan modes of ScanWizard EZ are the EZ mode, the Advanced mode,
and the Professional mode.
This Reference manual covers the various commands and features found in the
ScanWizard EZ scanning software. The reference information is divided into
three major parts, corresponding to the three scan modes of the scanning
software:
• The EZ mode
• The Advanced mode
• The Professional mode
Microtek ScanWizard EZ Reference Manual 1
Page 6
System Requirements
• Windows 2000, XP, Vista or Windows 7
• 256 MB RAM required; 1 GB or more suggested for better performance
• Free hard disk space as required by the size of your scanned images and for
additional working files
• CD-ROM drive (internal or external)
• “Thousands of colors” display or better
• Microtek scanners that support ScanWizard EZ
Launching ScanWizard EZ
ScanWizard EZ can be launched in either Stand-alone or Plug-in mode.
• From Stand-alone mode: Double-click the ScanWizard EZ icon on the
desktop, or choose Start, Programs, Microtek ScanWizard EZ for Windows, and
then ScanWizard EZ.
• From Plug-in mode: Choose the Import or Acquire command from the File
menu of your image-editing software, then select Microtek ScanWizard EZ.
Exiting ScanWizard EZ
To exit ScanWizard EZ, click the Exit button ( ) in the EZ mode, the button
( ) in the Advanced mode, or the button ( ) in the Preview window of the
Professional mode.
2 Microtek ScanWizard EZ Reference Manual
Page 7
The EZ Mode
The EZ mode is the default scan mode when the ScanWizard EZ is launched the
first time. It is meant to offer you a direct, intuitive and fast way to access a
scanning process and to get a satisfied image output. There are six buttons on
the EZ mode interface. They are the Scan, Professional mode, Advanced mode,
Preferences, Minimize and Exit buttons. Details on how to use these buttons are
discussed in later chapters.
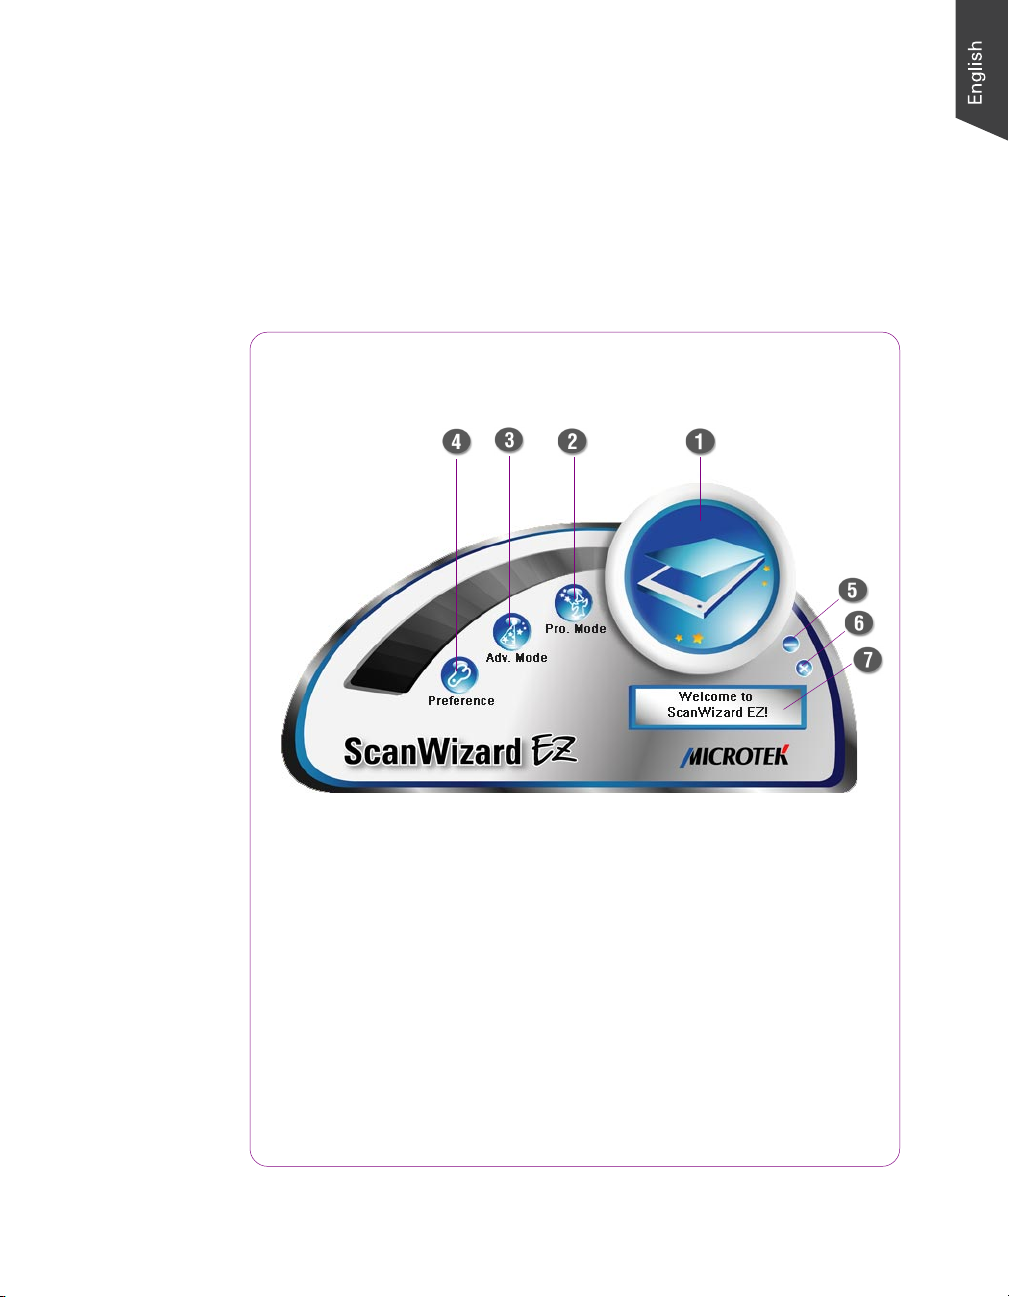
The EZ Mode Interface
1. Scan button - Press to start the scanning process.
2. Professional Mode button - Press to switch to the Professional mode.
3. Advanced Mode button - Press to switch to the Advanced mode.
4. Preferences button - Press to bring up a dialog box where you can
customize scanning settings for the output images.
5. Minimize button - Press to minimize ScanWizard EZ.
6. Exit button - Press to close ScanWizard EZ.
7. Information window - Display information pertinent to the ongoing
or on the way to be performed operation.
Microtek ScanWizard EZ Reference Manual 3
Page 8

Scanning with the EZ Mode
This section provides the easiest and most basic scanning scenario with the EZ
mode of the ScanWizard EZ scanning software.
1. Place the material to be scanned on the scan bed.
2. Launch ScanWizard EZ (either as a stand-alone by clicking on the program
icon, or by using the File-Import or Scan command from an application
program).
3. Click the Scan button to start scanning.
The ScanWizard EZ will automatically detect the material on the scan bed
and calibrate the scanner first; then, crop the image, and at last carry out
the final scan with scanning settings. When the scan is done, the output
image can be saved in a file, delivered to the specified location or opened in
your chosen application.
• If ScanWizard EZ is launched from an application program, the
scanned image is delivered to your application, where the image can be
saved, printed, or modified further.
• If ScanWizard EZ is launched as a stand-alone program, the scanned
image can be saved as a file in your selected folder or opened in an
application program.
4 Microtek ScanWizard EZ Reference Manual
Scan button
Page 9
Function Buttons on the EZ Mode
Scan Button
The Scan button performs a final scan of your image, executing the scanning
settings specified under Preferences window.
When pressing the Scan button, the ScanWizard EZ automatically performs an
image scan with some auto-function scanning settings, such as the Auto-crop,
Auto-deskew, Auto Color Enhancement, etc. If you want to adjust those
scanning settings, you need to activate the Preferences window, mentioned and
explained in the later section of the manual.
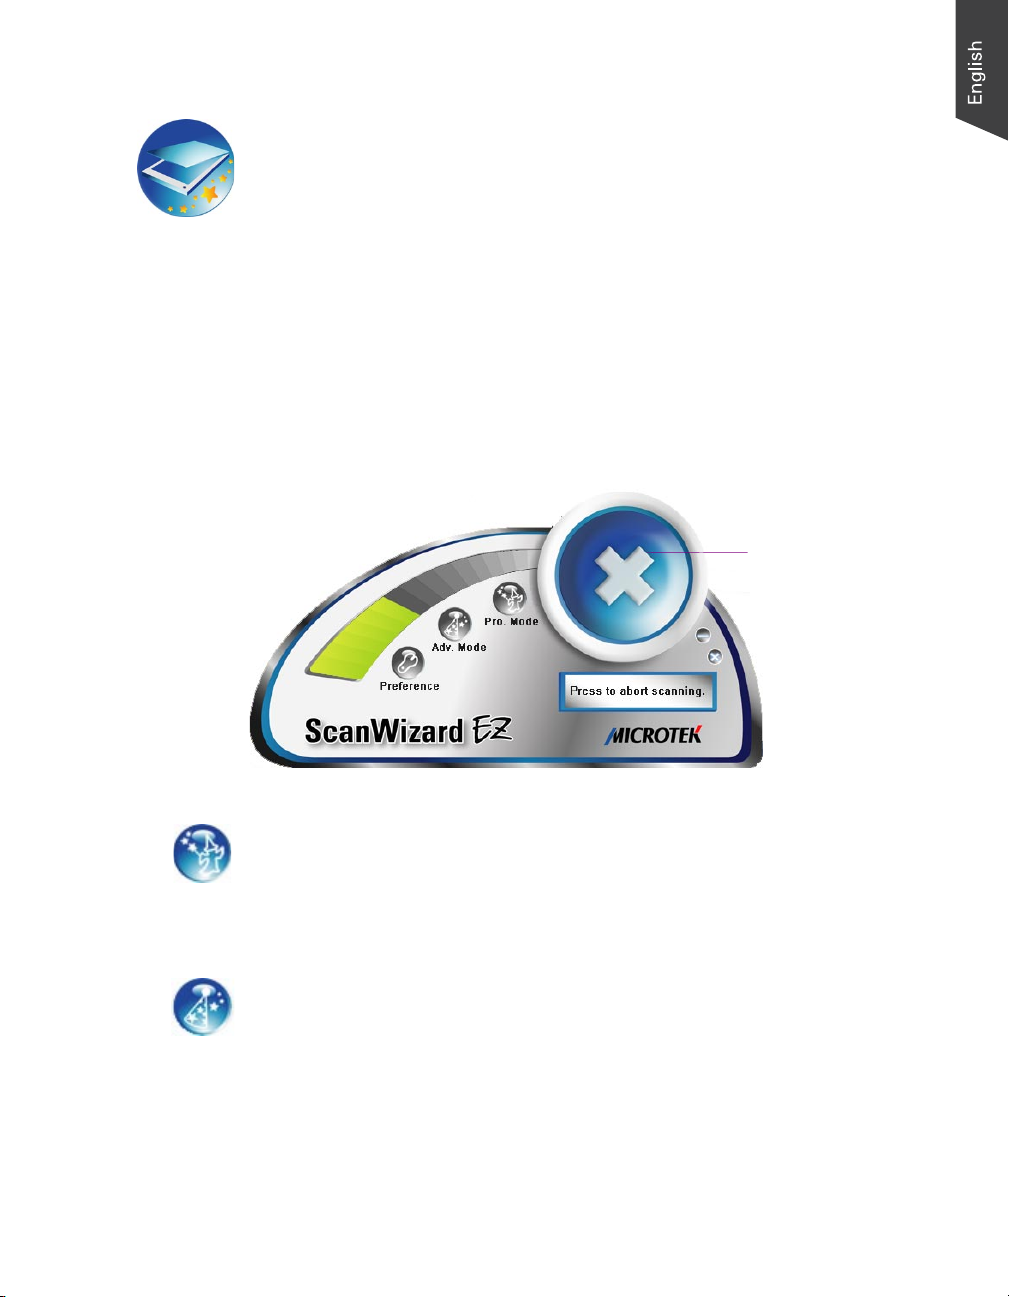
To cancel an ongoing scanning job, press the Cancel button (where the position
of the Scan button). The scanning job will be terminated immediately.
Cancel button
Professional Mode Button
The ScanWizard EZ Professional mode covers the various commands and
features, including the Advanced Image Correction (AIC) tools for image
enhancements. Press the Professional mode button to switch to the Professional
mode. For more details, see the section “The Professional Mode”.
Advanced Mode Button
The ScanWizard EZ Advanced mode provides you with some basic and useful
features for greater controls over the entire scanning process. Press the
Advanced mode button to switch to the Advanced mode. For more details, see
the section “The Advanced Mode”.
Microtek ScanWizard EZ Reference Manual 5
Page 10
Preferences Button
Press the Preferences button to bring up the Preferences window, which allows
you to change scanning settings for output images. You may see different
function tabs appearing at the top of the window depending on which scan
mode you are using. Click any of the tabs to customize the function settings
according to your needs.
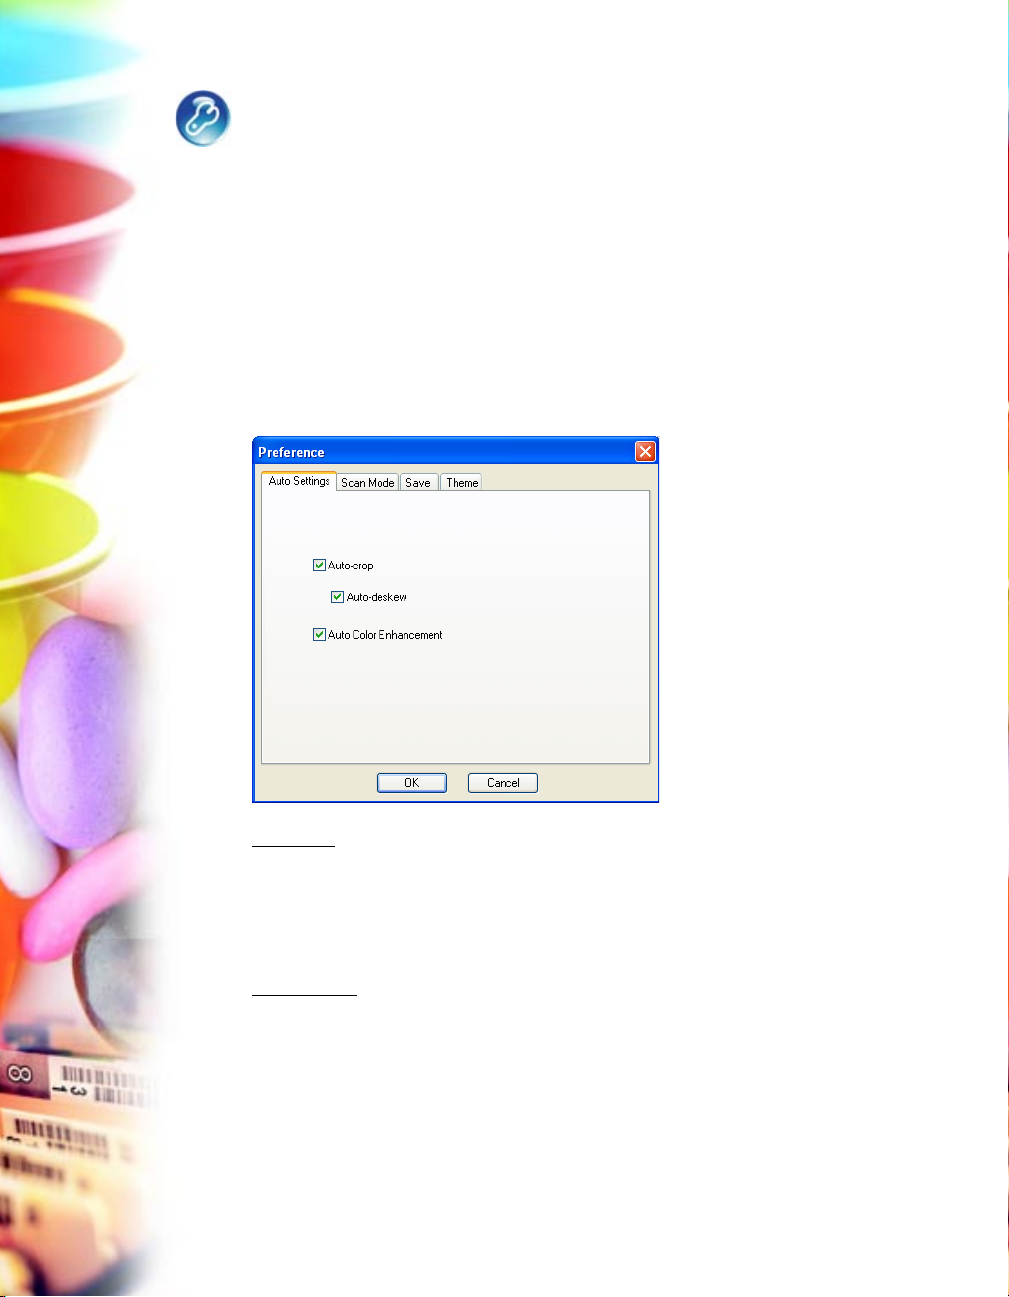
Auto Settings Panel
The Auto Settings panel contains several automatic functions, such as Autocrop, Auto-deskew, and Auto Color Enhancement. These functions are checked
by default when ScanWizard EZ is launched for the first time. You may uncheck
the function by clicking the check box of each function in the panel.
Auto-crop
The Auto-crop function automatically detects the size of the original image,
crops the full scan frame to fit the image, and removes unwanted black borders.
It is disabled when the scan material is set as Negative or Positive Film in the
Scan Mode panel of the Advanced mode.
Auto-deskew
The Auto-deskew function automatically rotates and corrects the distorted
image for a proper alignment after scanning. It is disabled when the scan
material is set as Negative or Positive Film in the Scan Mode panel of the
Advanced mode.
Note: The Auto-deskew function is available only when the Auto-crop function is
activated.
6 Microtek ScanWizard EZ Reference Manual
Page 11
Auto Color Enhancement
The Auto Color Enhancement function improves the contrast and saturation of
an image, resulting in more vibrant colors.
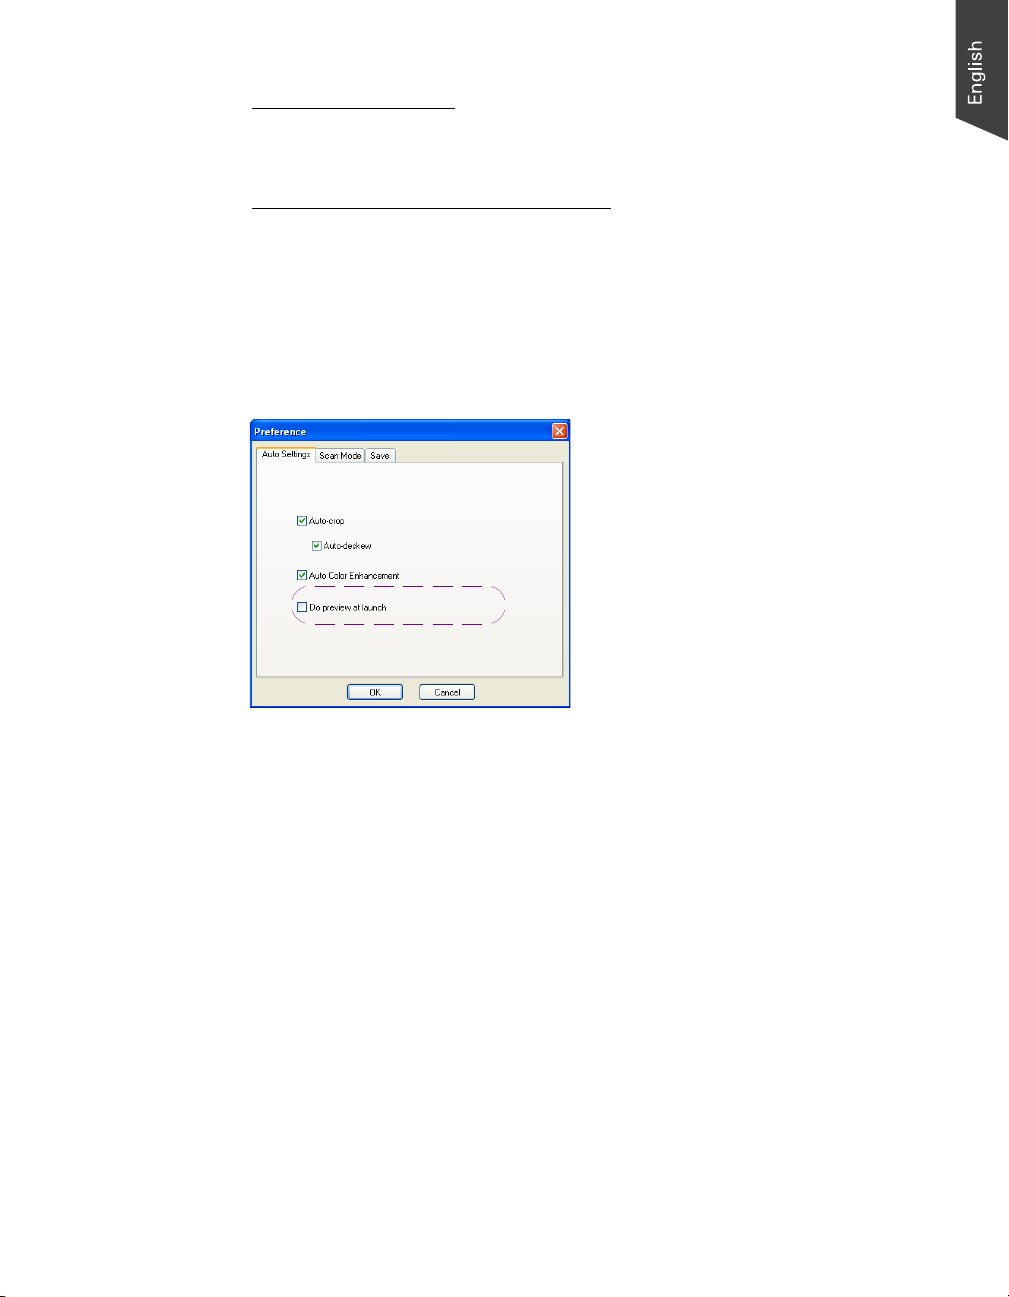
Do preview at launch (Advanced mode only)
This function automatically detects and creates a preview image for your original
material in the Preview area once when you activate the Advanced mode. This
function appears only when you are in the Advanced mode.
If you disable the auto-preview function in the Preference window, you will need
to click the Preview button manually to prescan and preview your material.
Microtek ScanWizard EZ Reference Manual 7
Page 12
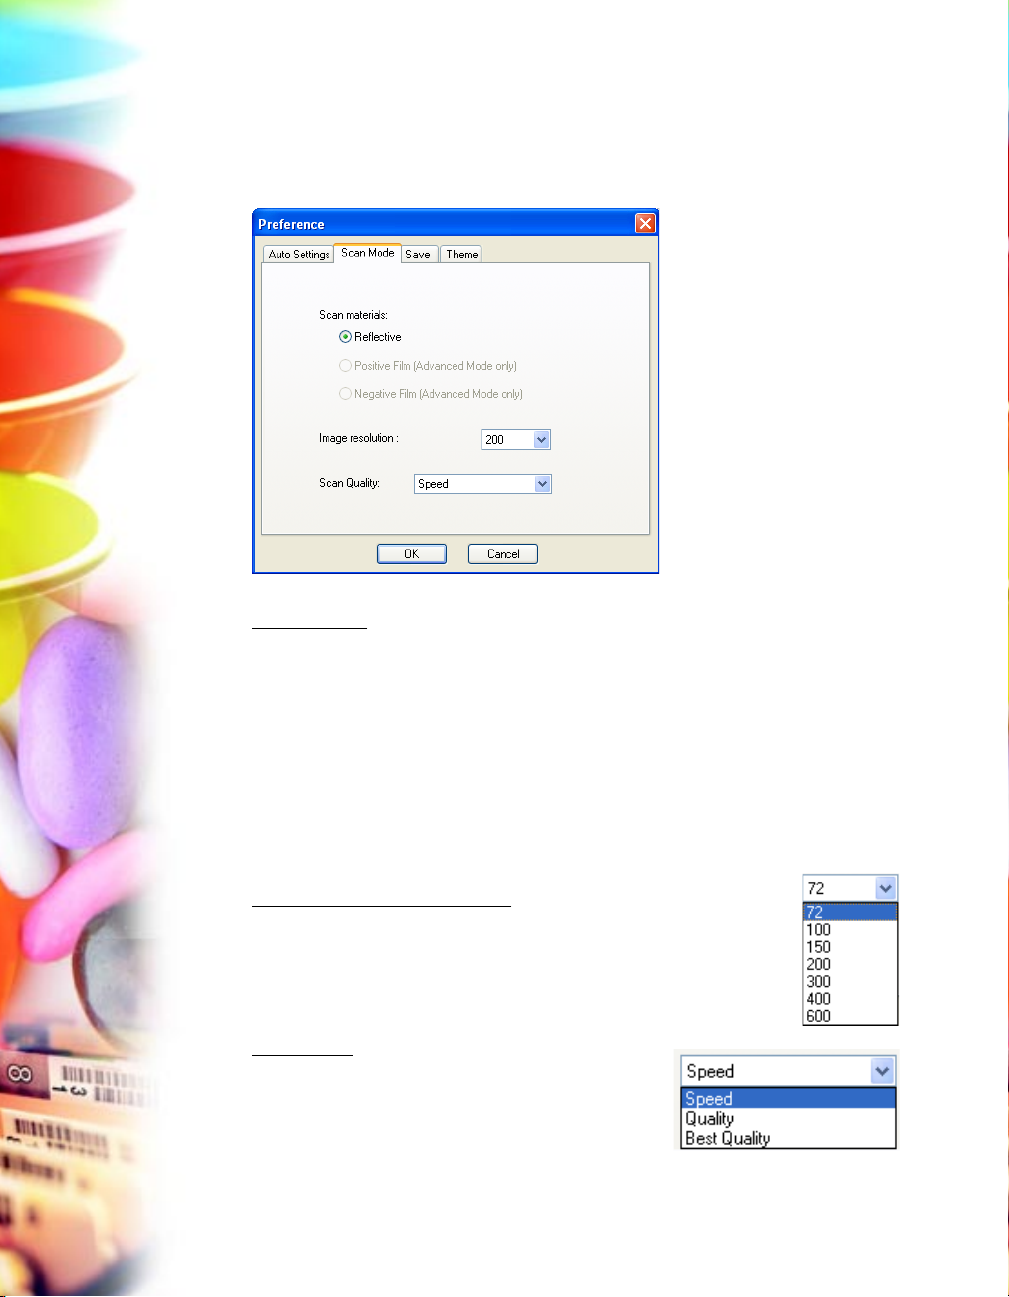
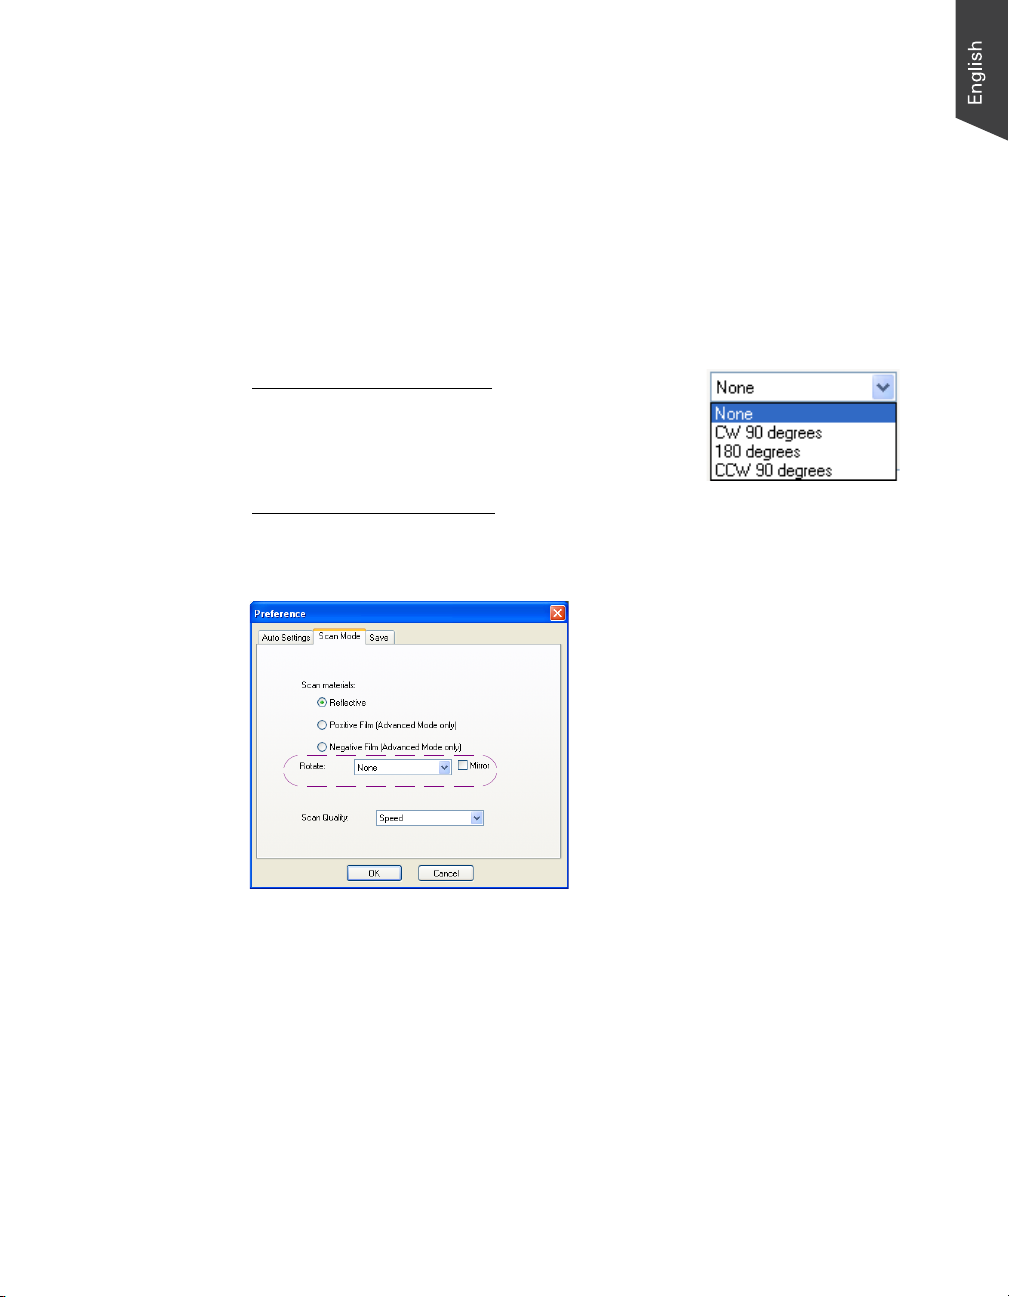
Scan Mode Panel
The Scan Mode panel allows you to choose scan material and desired resolution
for the scanned images.
Scan Materials
The Scan materials function allows you to select your scan material, which can
be one of the following:
• Reflective, such as photographs, documents or prints.
• Positive Film, such as 35mm slides or X-ray films.
• Negative Film, such as 35mm filmstrips.
Note: The Positive Film and Negative Film are available only when you are in the
Advanced mode.
Image resolution (EZ mode only)
The Image resolution function allows you to specify a desired
resolution for the scanned image. To choose a desired
resolution, press the drop-down arrow next to the box and
choose one value from a predefined list.
Scan Quality
The Scan Quality function allows you to select the
image quality by controlling the scanner hardware
and the maximum image processing depth.
8 Microtek ScanWizard EZ Reference Manual
Page 13
• Speed: This is the default setting. Choose this option if your primary
concern during scanning is speed. Image data is delivered faster.
• Quality: Scanned data is delivered a little slower but in high quality, and the
image data is processed in 8 bits per channel.
• Best Quality: This setting is available only to higher-depth scanners (10-, 12bit, or higher). Scanned data is delivered a little slower but in high quality,
and image data is processed in maximum bits per channel (i.e., 10-, 12-bit,
or higher), and then converted to the desired output depth. This special
operation results in the best image quality possible.
Rotate (Advanced mode only)
The Rotate function lets you rotate the image in
increments of 90 degrees. This function appears only
when you are in the Advanced mode.
Mirror (Advanced mode only)
The Mirror function lets you flip the image horizontally. This function appears
only when you are in the Advanced mode.
Microtek ScanWizard EZ Reference Manual 9
Page 14
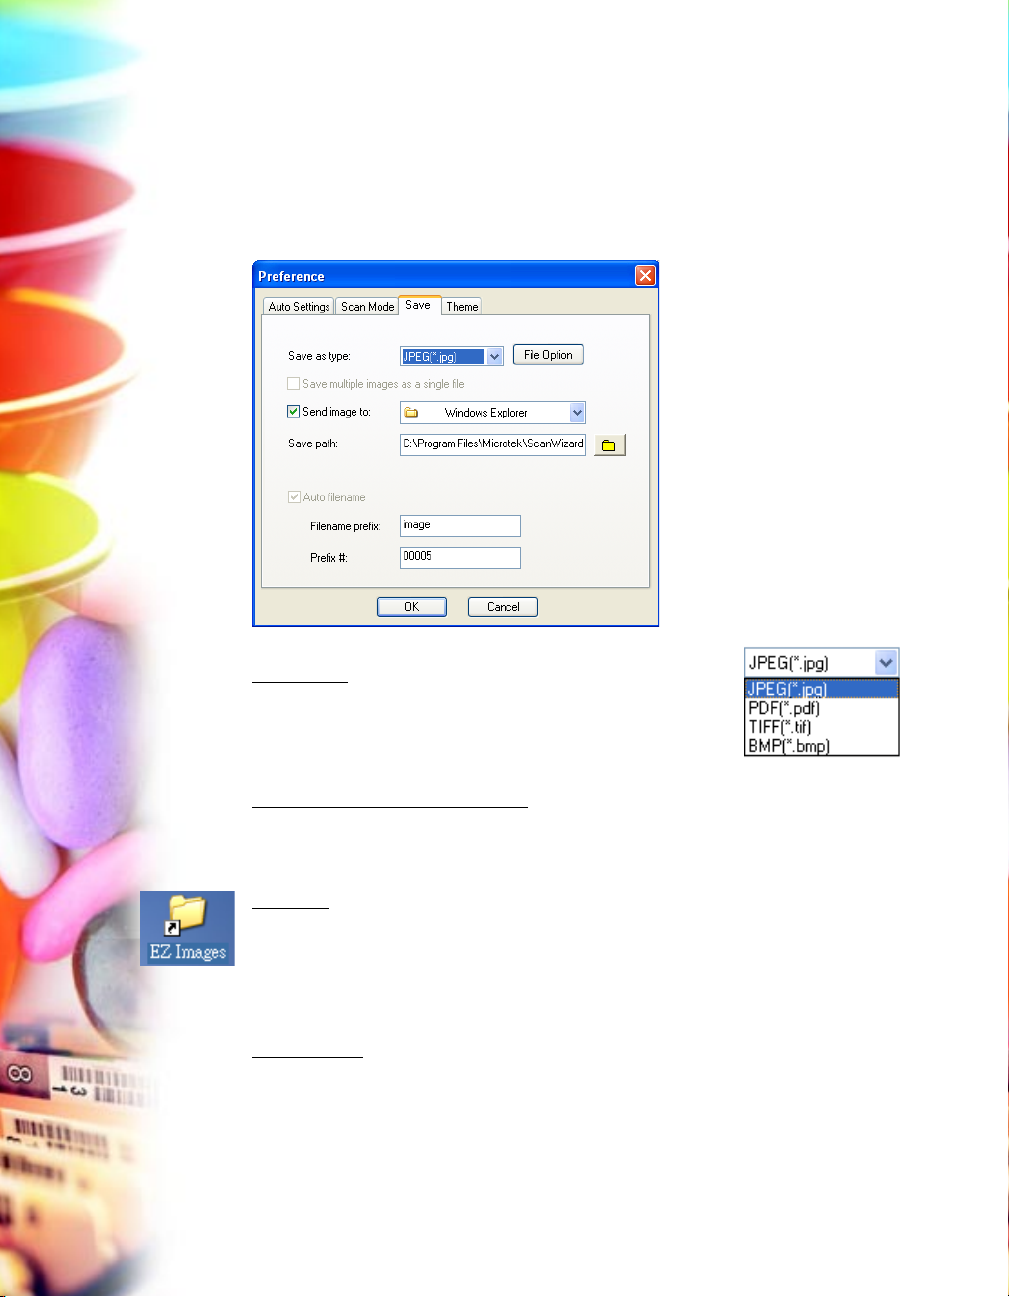
Save Panel
The Save panel allows you to choose a file format for the scanned images, to
specify the desired folder for storing the images, and to name the images as
desired. Also, it allows you to open the output image in your preferred
application.
Save as type
This option allows you to choose a file format when
saving a file. The selectable file format includes JPEG,
PDF, TIFF and BMP. “JPEG” is the default file format.
Save multiple images as a single file
This option allows you to save the scanned images to a single file. You can
enable this function if the output image file format is PDF or TIF.
Save path
This option allows you to assign the preferred folder into which the scanned
images are saved. If you use the default folder “C:/Program Files/Microtek/
ScanWizard EZ/My Images/” as your preferred folder, you can access it directly
by clicking the “EZ Images” icon on the desktop of the Windows.
Auto filename
If Auto filename is checked, the file name consists of the file prefix, plus the file
serial number. By default, this option is grayed out and users are not allowed to
uncheck it.
10 Microtek ScanWizard EZ Reference Manual
Page 15

Filename prefix
This edit box lets you enter a root file name. “Image” is the default.
Prefix #
This edit box lets you enter a starting number to be appended to the file name.
“00001” is the default.
File Option
When the file format for the scanned image is selected, you are allowed to
change the image compression ratio depending on the file format chosen.
• JPEG format: When “JPEG” is
selected and then you click the
File Option button, the “JPEG
Save Options” window will
appear. You are allowed to
adjust image compression
quality from a range of 0 to 100.
• PDF format: When “PDF” is
selected and then you click the
File Option button, the “PDF
Save Options” window will
appear.
ZIP and JPEG options are
available for Encoding. If ZIP is
selected, image compression
control will not be available for
adjustment.
• TIFF format: When “TIF” is selected
and then you click the File Option
button, the “TIF Save Options”
window will appear.
You are allowed to adjust settings
based on your preferences. If
“None” is selected for Encoding, the
JPEG image compression control
will not be available for adjusting; if
“JPEG” is selected, the Strip size
options are grayed out and not
being used.
Microtek ScanWizard EZ Reference Manual 11
Page 16
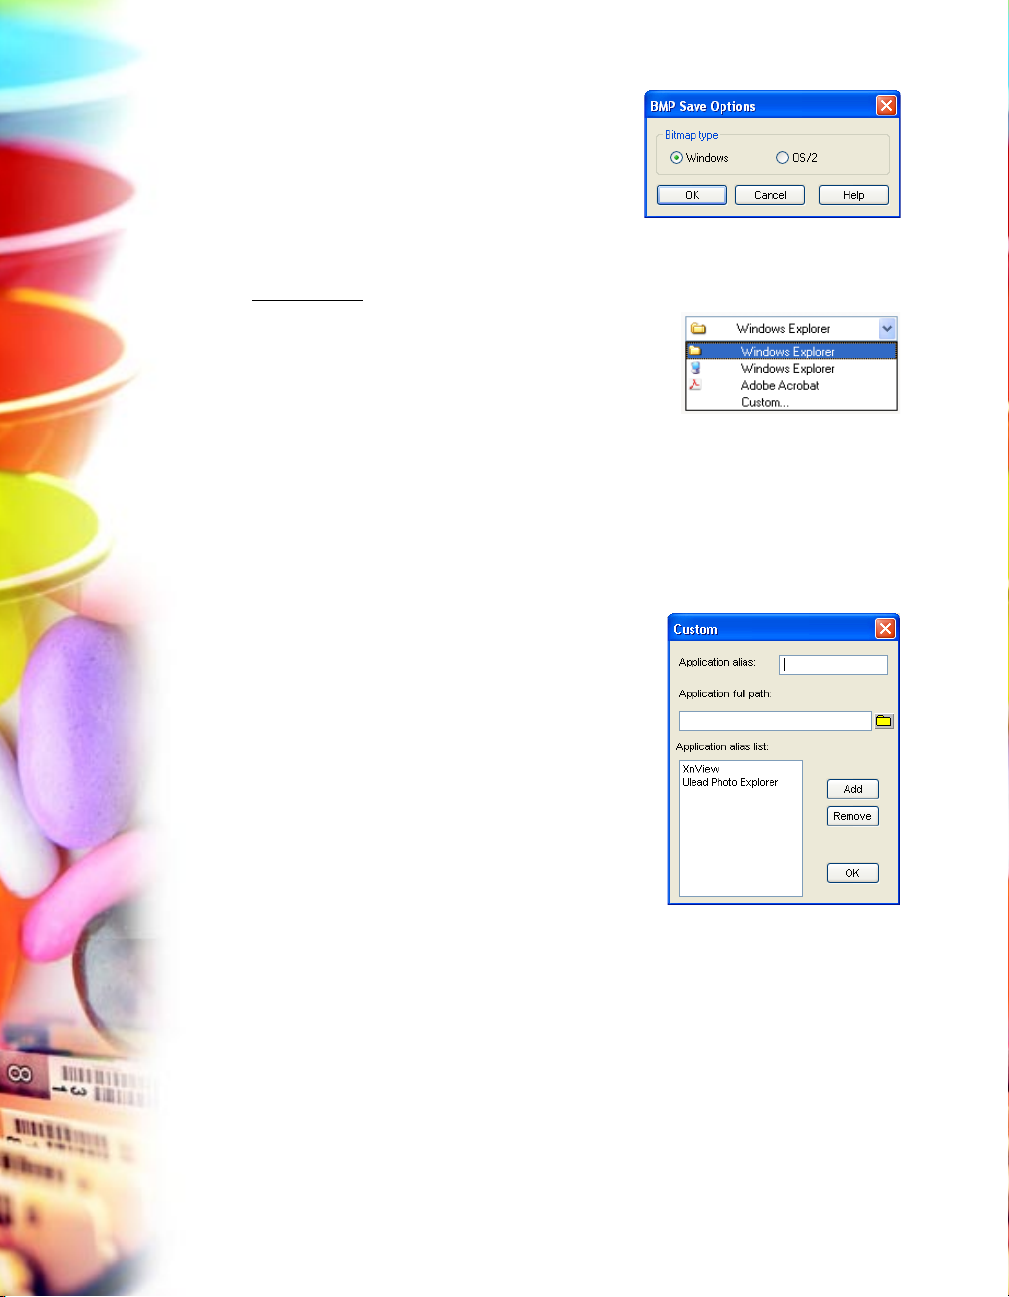
• BMP format: When “BMP” is
selected and then you click the File
Option button, the “BMP Save
Options” window will appear. Two
options are available for users to
save a BMP file.
Send image to
This option allows you to deliver the scanned
images to the chosen application. You can
choose a desired application from a list of
predefined applications. The default application
is Windows Explorer.
You may also add your own application to the list of applications and assign it as
your desired application.
To add your own application, press the drop-down arrow next to the box and
choose Custom. When a Custom dialog box appears, do the following:
1. Key in the application name as desired in
the Application alias column.
2. Assign the path where the application can
be found in the Application full path column.
3. Press the Add button to add the new
application.
4. You can see the added application name
appearing inside the Application alias list
column.
5. Repeat the step 1-4 until done, then press
the OK button to save.
Next time, when expanding the list of the predefined applications, you can see
the added application in the list. Then you can assign it as your favorite for use
in subsequent scans.
To remove an application, highlight the application name in the Application alias
list, then press the Remove button to remove it.
12 Microtek ScanWizard EZ Reference Manual
Page 17
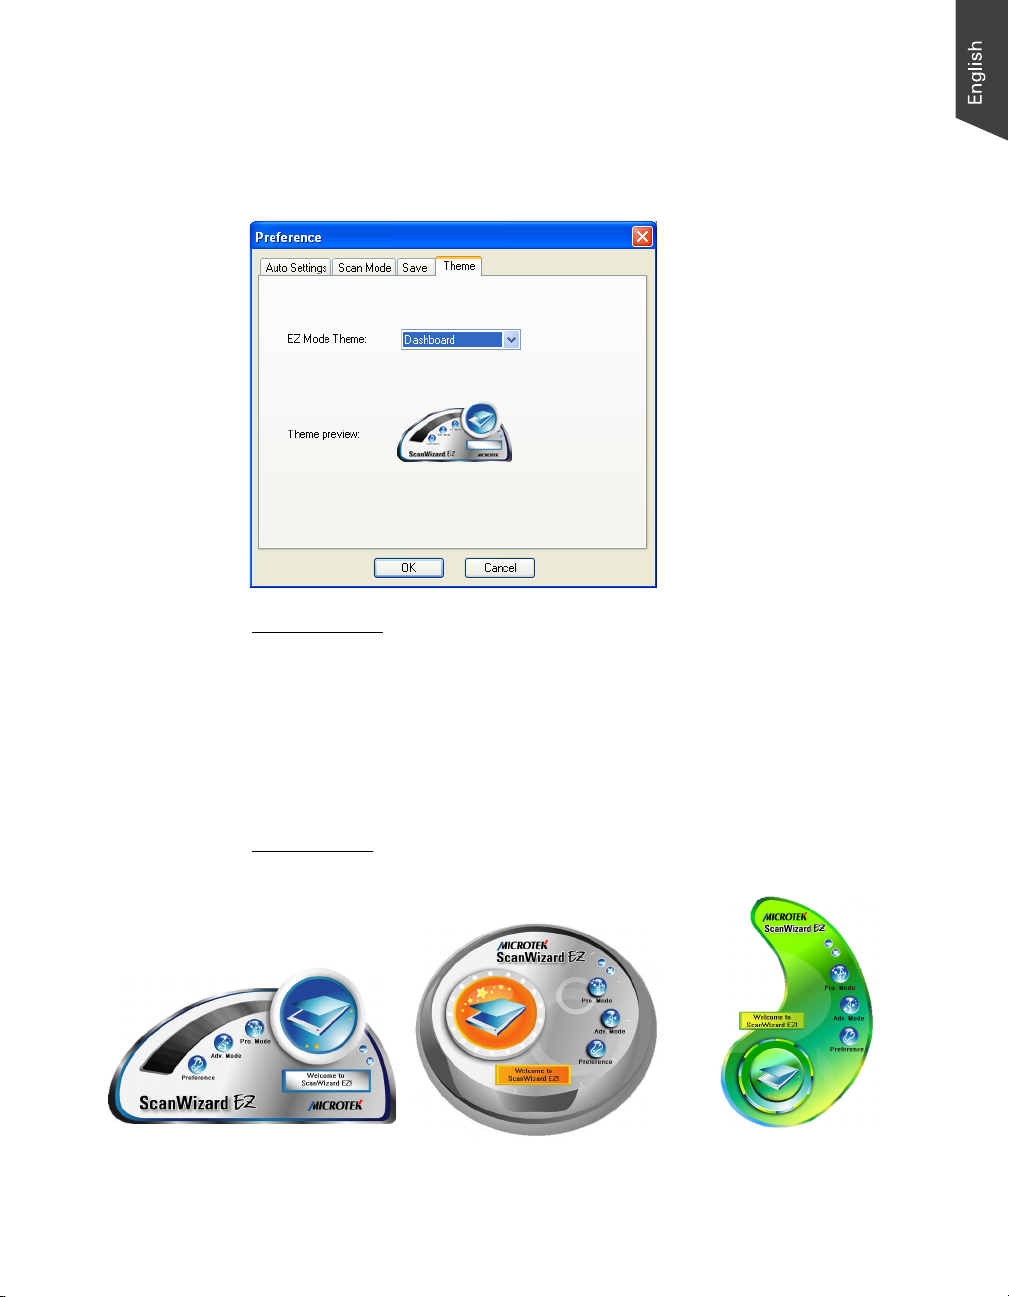
Theme Panel (EZ mode only)
The Theme panel appears only when you are in the EZ mode. This setting allows
you to change the appearance of the control panel for the EZ mode and
therefore adds more fun on using the ScanWizard EZ.
EZ Mode Theme
This option allows you to alter the appearance of the control panel for the EZ
mode. Three themes are available for you to choose. They are Dashboard,
Clock, and Remote Control. The “Dashboard” is the default appearance when
the EZ mode is launched for the first time.
To choose your desired appearance, click the drop-down arrow next to the box
and choose one setting from the list.
Theme Preview
This area is where the theme image will be displayed after you choose one theme
as your desired appeararnce of the control panel.
Dashboard Theme
Clock Theme
Remote Control Theme
Microtek ScanWizard EZ Reference Manual 13
Page 18

Minimize Button
When clicking the Minimize button, ScanWizard EZ will be shrunk down to the
Windows task bar.
Exit Button
When pressing the Exit button, ScanWizard EZ will be terminated and users exit
the ScanWizard EZ program immediately.
14 Microtek ScanWizard EZ Reference Manual
Page 19

The Advanced Mode
The Advanced mode offers you more choices when outputting your scanned
images, including modifying output sizes, resolutions, and a variety of image
effects, based on the purpose dealing with your image. Details on how to use
this mode is discussed in later chapters.
The Advanced Mode Interface
1. Preview button - Press to perform a preliminary view of the entire
image.
2. Select button - Press to show image effects in a composite display of
nine images.
3. Preference button - Press to bring up a dialog box where you can
customize your scanning settings for the output images.
4. Help button - Press to access the e-manual of the ScanWizard EZ.
5. EZ Mode button - Press to switch to the EZ mode.
6. Professional Mode button - Press to switch to the Professional mode.
7. Information window - Display information pertinent to the ongoing
or on the way to be performed operation.
8. Preview area - Display a pre-scanned image.
9. Scan Frame - Allow to resize the scan frame by dragging on the edge
or corner of the scan frame.
Microtek ScanWizard EZ Reference Manual 15
Page 20

Switching to the Advanced Mode
When you launch ScanWizard EZ for the first time, the EZ mode is the default
scanning mode shown on your screen. Press the Advanced mode button on the
EZ mode interface, and the EZ mode is immediately switched to the Advanced
mode.
If you are in the Advanced mode and quit ScanWizard EZ, the Advanced mode
will remain same and reappear again when you launch ScanWizard EZ in the
next time.
Press to switch to
the Advanced mode
16 Microtek ScanWizard EZ Reference Manual
Page 21

Scanning with the Advanced Mode
This section helps you to start the use with the Advanced mode of the
ScanWizard EZ scanning software.
1. Place the material to be scanned on the scan bed.
2. Launch ScanWizard EZ (either as a stand-alone by clicking on the program
icon, or by using the File-Import or Scan command from an application
program).
When you launch ScanWizard EZ for the first time, click the Advanced mode
button ( ) on the EZ mode interface to switch to the Advanced mode.
The Advanced mode interface appears.
3. Click the Preference button to activate the Preference window. Then, click
the Scan Mode tab at the top of the window to select the correct scan
material for your scan target.
• Reflective, such as
photographs, documents or
prints.
• Positive Film, such as 35mm
slides or X-ray films.
• Negative Film, such as 35mm
filmstrips.
Microtek ScanWizard EZ Reference Manual 17
Page 22

4. Click the Preview button. The program will automatically detect and create
a preview image for your original material in the Preview area with some
auto function settings, such as Auto-crop and Auto-deskew.
Preview image
Preview area
5. After a preview image is shown in the Preview area, if necessary, you can
resize the scan frame (floating dotted line) around the image by dragging on
the edge or corner of the scan frame to determine the final size of the actual
scan.
18 Microtek ScanWizard EZ Reference Manual
Scan fame
(floating dotted line)
Page 23

6. When the desired area to be scanned is chosen, click the Select button to
enter the image effects window.
In the image effects window, the program will automatically apply nine
different images effects to the original image and display the results on the
screen immediately in a composite display of nine images.
The display of nine-image
effects
At this stage, the program allows you to decide how your scanned image will
be manipulated based on two purposes. Choose a desired purpose from
the purposes below.
For DisplayFor Display
•
For Display: Choose “For Display” if your scanned image is intended
For DisplayFor Display
for an on-screen display. This option allows you to set the dimensions
(viewing size) of the image; the maximum viewing size can be set up to
5 times bigger than the size of the original one.
The size adjustment can be set from 0.5x to 5.0x in an 0.5 step-up
increment. The default size is 1.0x.
Microtek ScanWizard EZ Reference Manual 19
Page 24

For PrintingFor Printing
•
For Printing: Choose “For Printing ” if your scanned image is intended
For PrintingFor Printing
to be printed. This option allows you to set the dimensions (output
size) and resolution of the image based on your own preferences.
Output SizeOutput Size
–
Output Size: You can choose an desired output
Output SizeOutput Size
size from a predefined list. To do this, press the
drop-down arrow next to the box and choose
one output size from the list. The default size is
4" x 6". The default size is 4" x 6".
Printing ResolutionPrinting Resolution
–
Printing Resolution: You can choose an desired
Printing ResolutionPrinting Resolution
resolution from a predefined lis. To do this,
press the drop-down arrow next to the box and
choose one value from the list. The maximum
resolution value will be the value which is
supported by the scanner model. The default
resolution is 300 dpi.
7. If you like to check how image effect is more closely and detailed, you can
use the Zoom In and Zoom Out buttons to zoom in and out the image.
• Point your mouse to the
thumbnail image of the
image effect you
desired, and click the
Zoom In button on the
top right corner of the
image. The chosen
image will be enlarged
and fit into the whole
Preview area.
20 Microtek ScanWizard EZ Reference Manual
Page 25

• When an image is
magnified, you can use
the mouse wheel to
toggle through different
image effects and
display them
consequently on the
screen directly.
To return to the display
of nine-image effects,
click the Zoom Out
button.
8. Choose a desired image effect to be applied, click the Scan button to start
scanning.
The ScanWizard EZ will calibrate the scanner and perform the final scan
with the scanning settings you made in the previous steps. When the scan is
done, the output image can be saved in a file, delivered to the specified
location or opened in your chosen application.
• If ScanWizard EZ is launched from an application program, the
scanned image is delivered to your application, where the image can be
saved, printed, or modified further.
• If ScanWizard EZ is launched as a stand-alone program, the scanned
image can be saved as a file in your selected folder or opened in an
application program.
Microtek ScanWizard EZ Reference Manual 21
Page 26

Function Buttons on the Advanced Mode
Preview Button
The Preview button performs a preview scan of the entire image and displays the
result in the Preview window. When pressing the Preview button, the
ScanWizard EZ automatically and immediately performs a preview scan for your
image with some automatic settings, such as Auto-crop and Auto-deskew. They
help you to get a better viewing experience.
Select Button
The Select button performs a preliminary view of the scan frame with different
image settings and shows all effects in a composite display of nine images on the
screen.
When pressing the Select button, it takes a while for the system to generate and
apply various image effects to the original image. When done, you will see nine
thumbnail images with the same content of the original image on the screen,
which is that each one contains one specific image processing effect.
Nine Types of Image Effects
One major advanced feature offered by the ScanWizard EZ program is that the
system automatically provides a pre-screened parameter of image effects to scan
materials, which help you to exactly get what they see on the screen. It means
that no more fuzzy and tedious steps are required when you want to apply some
image effects to your scan materials. The nine types of image effects include the
followings:
22 Microtek ScanWizard EZ Reference Manual
To choose a desired image
effect, simply move your
cursor (mouse) up on the
thumbnail and click it. The
chosen image effect will be
applied to your original image
after scan.
Page 27

Normal
This is the default setting presented by
your scanner. It represents the original
status of scan image.
Auto Shadow/Highlight
This effect balances light/dark shades
of scan image.
Auto Shadow/Highlight/Lightness
This effect balances light/dark shades
of scan images. Also, it dims the
brightness of the light shades of scan
image.
ACR + Auto Shadow/Highlight
This effect restores faded colors of
scan image back to life. Also, it
balances light/dark shades of scan
image.
Auto Color Restoration (ACR)
This effect restores faded colors of
scan image back to life.
ACR + Auto Shadow/Highlight/
Lightness
This effect restores faded colors of
scanned materials back to life. Also, it
balances light/dark shades and dims
the brightness of the light shades of
scan image.
Microtek ScanWizard EZ Reference Manual 23
Page 28

ACR Gray
This effect presents images use
shades of gray to simulate gradations
of color or tonal values, and contain 8
bits per pixel.
Document Adjustment Section
This effect is specifically designed for your scan material
which is paper document. You can adjust image settings from
its control panel based on the characteristics of scan
document. To enter the control panel move and click the cursor
(mouse) up on the thumbnail image.
ACR Line Art
This effect presents images made up
of one bit of color (black or white)
per pixel. It is useful for images
consisting purely of black and white
or even single colors, such as
mechanical drawings or blueprints.
24 Microtek ScanWizard EZ Reference Manual
Page 29

Scan Button
Press the Scan button to start the final scanning process, based on the scanning
settings you have made to the current image.
Cancel Button
Press the Cancel button to stop the scanning process and to cancel an ongoing
scan job.
Help Button
Press the Help button to access an electronic help document for ScanWizard EZ
and to give you information on the ScanWizard EZ scanning software.
Preference Button
Press the Preference button to bring up the Preference window, which allows
you to change scanning settings for the output images. You may see different
function tabs appearing at the top of the window depending on which scan
mode you are using. Click any of the tabs to customize the function settings
according to your needs. For more details, see the topic “Preference Button” in
the “Function Buttons on the EZ Mode” section.
EZ Mode Button
Press the EZ mode button to activate the EZ mode on the screen. To shift back
to the Advanced mode again, press the Advanced mode button on the EZ mode
interface.
Professional Mode Button
Press the Professional mode button to activate the Professional mode on the
screen. To shift back to the Advanced mode again, press the Advanced mode
button in the Preview window of the Professional mode.
Return Button
Press the Return button to back to the previous user interface.
Zoom In Button
Press the Zoom In button to magnify the chosen image effect and to fit it into the
whole Preview area.
Zoom Out Button
Press the Zoom Out button to return from the magnified image to the display of
nine-image effects.
Microtek ScanWizard EZ Reference Manual 25
Page 30

Image
correction
controls (for
Document
Adjustment
Section only)
Image Correction Controls for Document
Adjustment Section
The Document Adjustment Section contains some advanced image correction
controls for you to adjust for your output images, such as Brightness, Contrast,
etc. By selecting different type as your image output type, you may see different
image correction controls on the screen.
Threshold / Auto Threshold v
Brightness v v
Contrast v v
Descreen v v
Auto Color Restoration v v
Document Enhancement v
Shadow / Highlight v v v
Gamma v v
Lamp Filter v v
Type
This allows you to select the appropriate image type (e.g., Color) as your image
output type.
• Select Color to scan the image in color.
• Select Gray to scan the image in grayscale.
• Select Line Art to scan the image in black-and-white.
26 Microtek ScanWizard EZ Reference Manual
Color Gray Line Art
Page 31

Threshold
The Threshold control is active only when the Type setting is ”Line Art” and the
“Auto Threshold” is unchecked in the Advanced Settings window. The default
Threshold is preset to 127.
Uncheck the Auto Threshold to set up
To change the default Threshold
the Threshold manually
setting, you should disable the
“Auto Threshold” setting in the
Advanced Settings window. To do
this, click the Advanced... button
to open the Advanced Settings
window, uncheck “Auto
Threshold”, and click OK. Then
return to the control panel to drag
the slider, or enter a desired value
in the Threshold edit box.
Threshold is the dividing point between black and white; the range is 0 to 255,
and the default is 127. Thus, gray levels below the Threshold are converted to
black, while gray levels equal to or above the Threshold are converted to white,
resulting in a high-contrast, black-and-white representation of the image.
• To darken the original, drag the slider to the right or enter a value in the edit
box. This increases the Threshold value so that more pixels are turned to
black, resulting in a darker image.
• To lighten the original, drag the slider to the left or enter a value in the edit
box. This lowers the Threshold value so that more pixels are turned to
white, resulting in a lighter image.
Original Threshold: 50 Threshold: 200
Microtek ScanWizard EZ Reference Manual 27
Page 32

Brightness/Contrast
The Brightness/Contrast feature lets you control the brightness and contrast
levels of the selected frame image.
Increasing the brightness makes all tones in the image lighter. Contrast, on the
other hand, is the range between the darkest and lightest shades in the image,
and increasing the contrast makes for greater separation between the darkest
and lightest areas of the image. Levels of brightness or contrast are from -100%
to 100%, where 0 means no brightness/contrast is applied.
Descreen
The Descreen feature lets you remove moiré
patterns from printed materials. Moirés occur when
you scan a screened original (mostly reflective or
previously printed material, such as pictures from a
newspaper or magazine). These patterns appear to
the naked eye like a series or grid of dots or as
shown in the example below.
To set the screen for your needs, press the drop-down arrow next to the box
and choose one setting from a predefined list.
Auto Color Restoration
The Auto Color Restoration feature brings faded colors back to life and to their
near-original colors. This feature is active only when the Type setting is “Photo”
or “Gray”.
Document Enhancement
The Document Enhancement feature enables you to bring out and improve
readability of text in a document that includes other elements such as pictures
or graphs. This feature is active only when the Type setting is “Line Art”.
Default Button
The Default button cancels the changes you have made with the image
correction controls and restores all settings to their default values.
28 Microtek ScanWizard EZ Reference Manual
Page 33

Advanced... Button
Comparing with the image correction controls, Document Adjust Section
provides a few additional optional features for scanner control such as Image
Adjustment and lamp filter. When you press the Advanced ... button, the
Advanced Settings window will appear. The variety of the tabs for optional
functions appearing is determined by the scanner you are using.
Click any of the tabs to customize the function settings according to your needs.
Image Adjustment
This layer allows you to change the shadow/highlight and gamma points of an
image. It also let you enable the Auto Threshold setting.
•
Auto ThrAuto Thr
Auto Thr
Auto ThrAuto Thr
esholdeshold
eshold: This feature is active only when the Type setting is “Line
esholdeshold
Art”. When you check this option, the Threshold value is automatically
given according to your preview image. To manually adjust Threshold,
uncheck the “Auto Threshold” option, and then assign a customized
Threshold setting.
Shadow/HighlightShadow/Highlight
•
Shadow/Highlight: This lets you manipulate shades so that the Shadow
Shadow/HighlightShadow/Highlight
point becomes the new darkest value and the Highlight point becomes the
new lightest value.
Shades that are darker than the shadow then become black, and shades
lighter than the highlight become white. For example, if you set the
highlight point to 200, all points in the image with a value greater than 200
will be mapped to a value of 255, since 255 represents the “whitest” white.
Microtek ScanWizard EZ Reference Manual 29
Page 34

– Auto: When you check Auto, the Shadow/Highlight value is
automatically given according to your preview image. To manually
adjust Shadow/Highlight, uncheck the “Auto” option and give value to
the .
– Shadow: Drag the black (left) triangle, or enter the value in the edit box
to control the shadows. Moving this triangle to the right will emphasize
shadows and create a darker image. Acceptable ranges are from 0 to
252. The default is “0”.
– Highlight: Drag the white (right) triangle, or enter the value in the edit
box to control the highlights. Moving this triangle to the left will
emphasize highlights and create a lighter image. Acceptable ranges are
from 3 to 255. The default is “255”.
GammaGamma
•
Gamma: This lets you adjust the intensity of the midtones of an image,
GammaGamma
making them consistent between the preview image and the final scanned
image. To change the Gamma of an image, drag on the Gamma slide bar.
Dragging the slider to the left decreases intensity; dragging it to the right
increases intensity. Acceptable ranges are from 0.1 to 3.0. A value of 1.0
means that no gamma value is applied; default is 1.0.
Lamp Filter
The Lamp Filter tab appears only when all of the following conditions have been
met:
• The scanner you are using implements the lamp filter function.
• The “Gray” or “Line Art” image type is selected as your image output type.
The Lamp Filter function allows you to remove an unwanted color cast (i.e.,
green, red, or blue) from your originals. For example, to eliminate a greenish
color cast, select Green as your lamp filter. For some scanner models, only the
green and red filter options are available for you to choose.
30 Microtek ScanWizard EZ Reference Manual
 Loading...