

Page 1

version 4.0
User Guide
Page 2

First English edition for Photo Express version 4.0, December 2000
© 2001 Ulead Systems, Inc.
All rights reserved. No part of this publication may be reproduced or transmitted in any form
or by any means, electronic or mechanical, including photocopying, recording or storing in a
retrieval system, or translated into any language in any form without the prior written
permission of Ulead Systems, Inc.
Software license
The software described in this document is furnished under a License Agreement which is
included with the product. This Agreement specifies the permitted and prohibited uses of the
product.
Licenses and trademarks
Ulead Systems, Inc., the Ulead logo, Photo Express, and Album are trademarks of Ulead
Systems, Inc. PhotoDisc® Copyright 2000, PhotoDisc. PhotoDisc is a trademark of
PhotoDisc, Inc. All other product names and any registered and unregistered trademarks
mentioned in this manual are used for identification purposes only and remain the exclusive
property of their respective owners.
Sample files
Files provided as samples on the program CD can be used for personal demonstrations,
productions and presentations. No rights are granted for commercial reproduction or
redistribution of any sample files.
Ulead Systems, Inc.
North & South America: International:
Ulead Systems, Inc. Ulead Systems, Inc.
http://www.ulead.com http://www.ulead.com
E-mail: info@ulead.com http://www.asiapac.ulead.com
http://www.ulead.com.tw
E-mail: info@ulead.com.tw
Europe: Japan:
Ulead Systems GmbH Ulead Systems, Inc.
http://www.ulead.de http://www.ulead.co.jp
E-mail: info@ulead.de E-mail: info@ulead.co.jp
2
Page 3

What's inside
Welcome to Photo Express! ......................................................................................................................... 4
What’s new in this version? ........................................................................................................................ 4
Getting started ............................................................................................................................................... 6
Overview ............................................................................................................................... ......................... 7
Customizing the look ....................................................................................................................................... 9
Ulead Links .................................................................................................................... ................................... 9
Browse mode .................................................................................................................................................. 10
Photo mode ..................................................................................................................................................... 11
Project mode ................................................................................................................... ................................ 11
Preparation ................................................................................................................................................... 12
Getting photos from digital imaging devices ................................................................................................ 12
Batch Adjust ................................................................................................................... ................................. 13
Editing ............................................................................................................................... ............................ 14
Selecting the appropriate tool ........................................................................................................................ 14
Using the Selection tools ........................................................................................................................... 19
After the selection process ............................................................................................................................ 21
A few words about objects............................................................................................................................. 21
Working with Text ....................................................................................................................................... 22
Improving how your text looks ....................................................................................................................... 22
Working with Painting and Cloning tools ................................................................................................. 24
The Effect menu ................................................................................................................ .......................... 25
Adding decoration .............................................................................................................. ......................... 27
Beyond Photos............................................................................................................................................. 30
Working with templates .................................................................................................................................. 3 0
Customizing a template ................................................................................................................................. 31
Web Studio ..................................................................................................................................................... 32
Calendars and Planners ................................................................................................................................36
Wal lpa per ....................................................................................................................................................... 37
Planner ............................................................................................................................................................ 37
Printing and Sharing........................................................................................................... ......................... 38
Printing............................................................................................................................................................ 38
Saving your work ............................................................................................................... ............................. 40
Sharing across the Internet .................................................................................................... ....................... 41
Glossary ....................................................................................................................................................... 42
3
Page 4
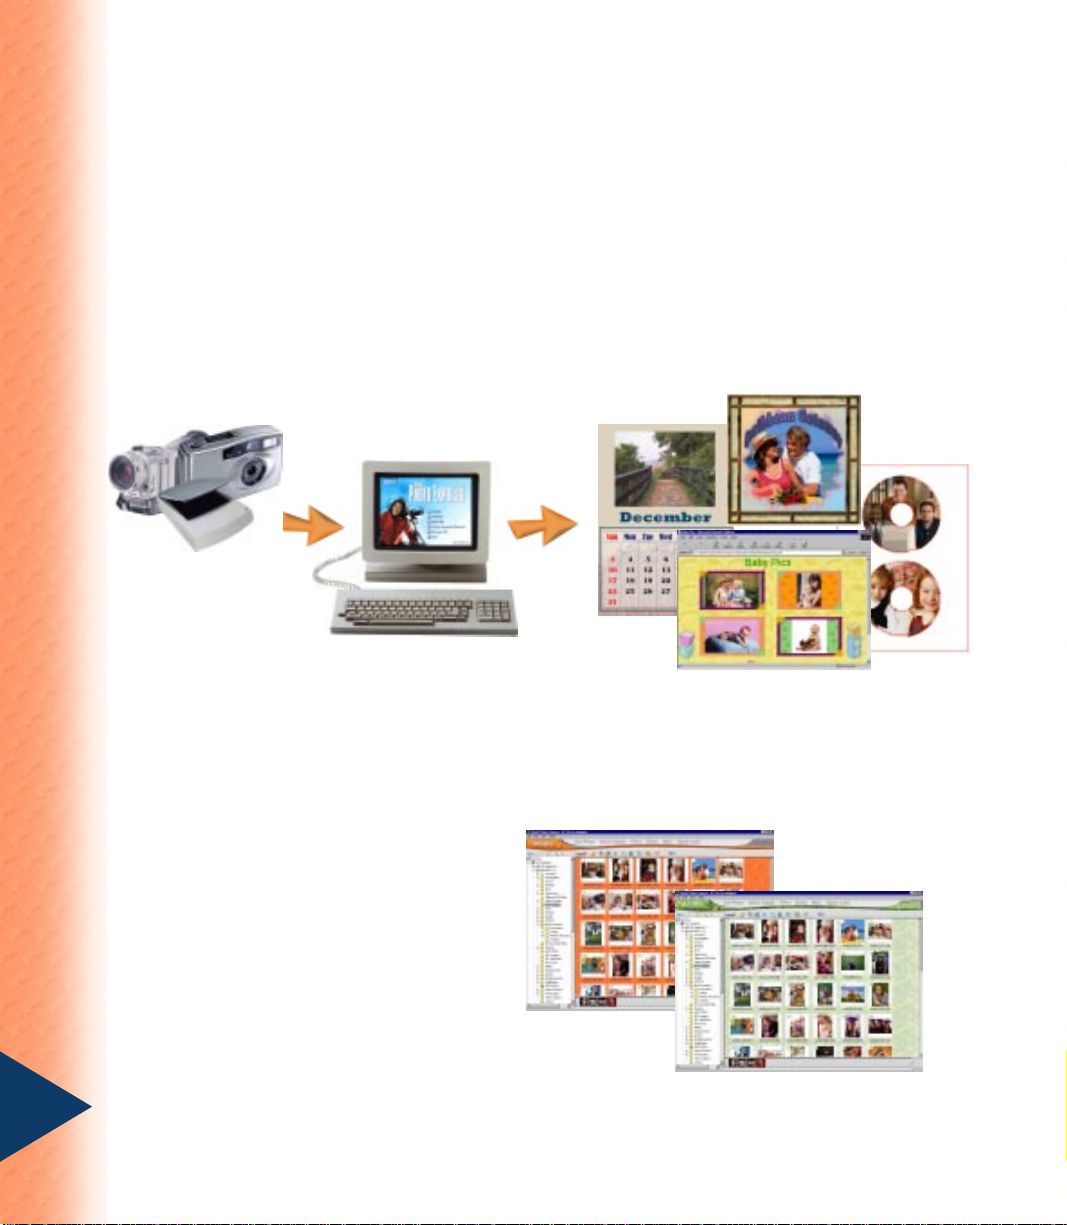
Welcome to Photo Express!
Welcome to Photo Express, the ultimate tool for creating cool photos and projects that you
can share with family and friends. Photo Express is much more than just a simple imageediting program. It’s a fun and exciting way of Expressing your creativity. Transform your
ordinary, lackluster pictures into extraordinary, artistic greeting cards, calendars, banners, and
even animated Web cards, or Web pages.
In this digital age, you need software that is able to get images from a wide variety of devices,
easily modifies the images, and offers many different options for distributing them to your
nearest and dearest.
What’s new in this version?
There is a host of new features and tools available for you in this version of Photo Express.
Some of these features include:
Completely new look and feel Redesigned
and improved layout for greater convenience
and efficiency. Browse for files and folders,
and edit and enhance images all within the
Photo Express workspace. That’s not all.
There are a number of skins and
backgrounds to choose from for customizing
4
the look.
Page 5
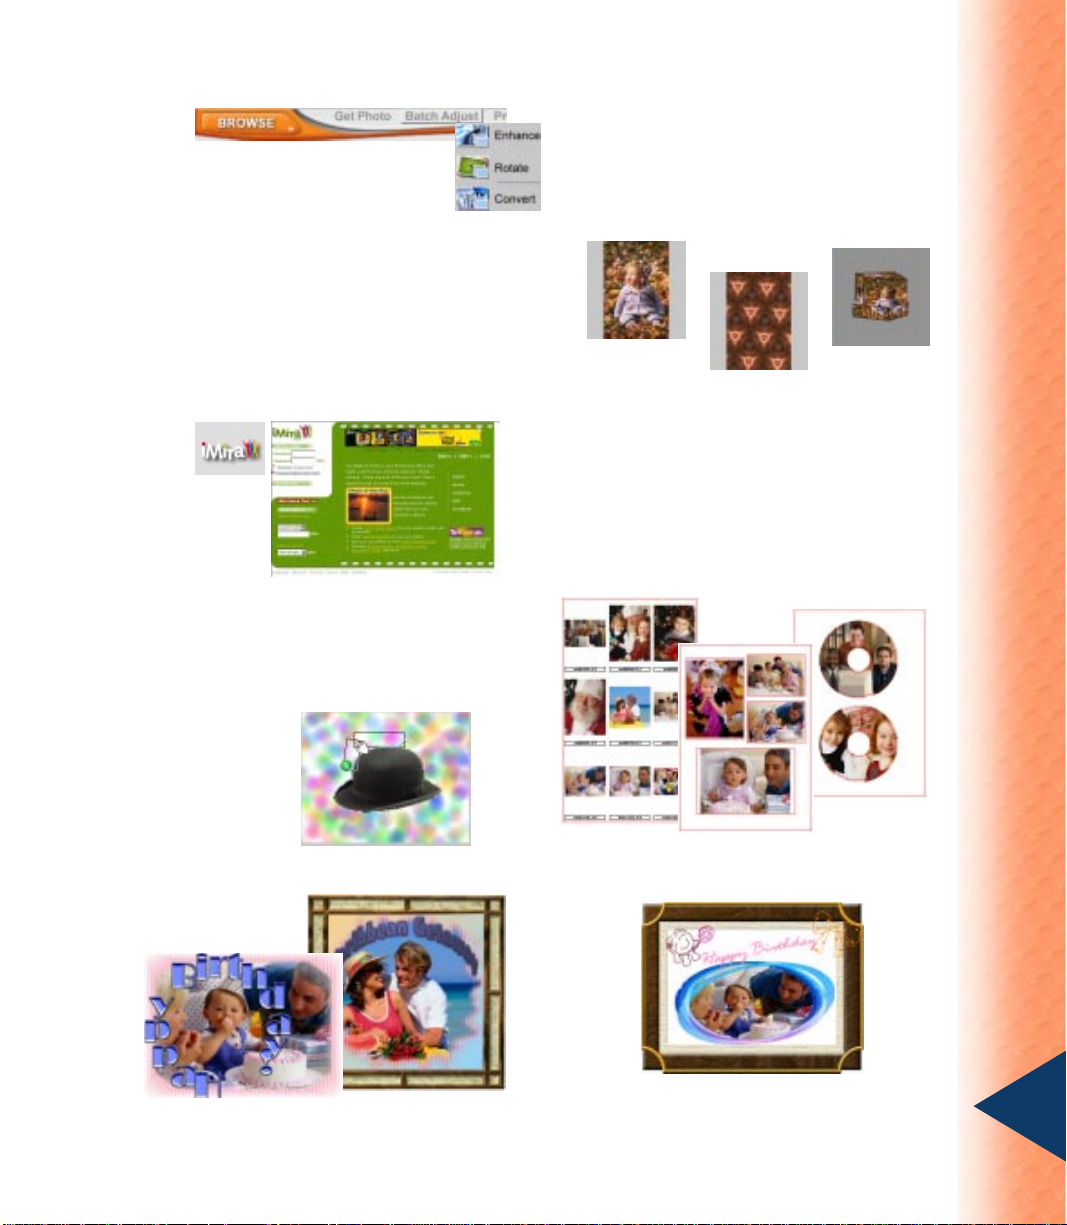
Animation effects Create stunning animated
graphics to put on your Web pages or share
via e-mail. You only need to select a preset
from Fireworks, Kaleidoscope, or Magic
Cube, and Photo Express will do the rest.
Enhanced features and tools A number of
features have been improved for better
performance, and some new tools have also
been added.
Batch Adjust Apply common corrective
adjustments to multiple files at once rather
than opening each file individually . This can
also be used for converting file formats.
Fireworks
Kaleidoscope
Magic cube
iMira Maintain your own online photo album
with iMira’s free online photo sharing service.
After creating your personal account, you
will be able to post your photos directly from
within Photo Express.
Enhanced SmartSelect tool.
Added text effects.
Added printing options.
New Signature tool.
5
Page 6
Getting started
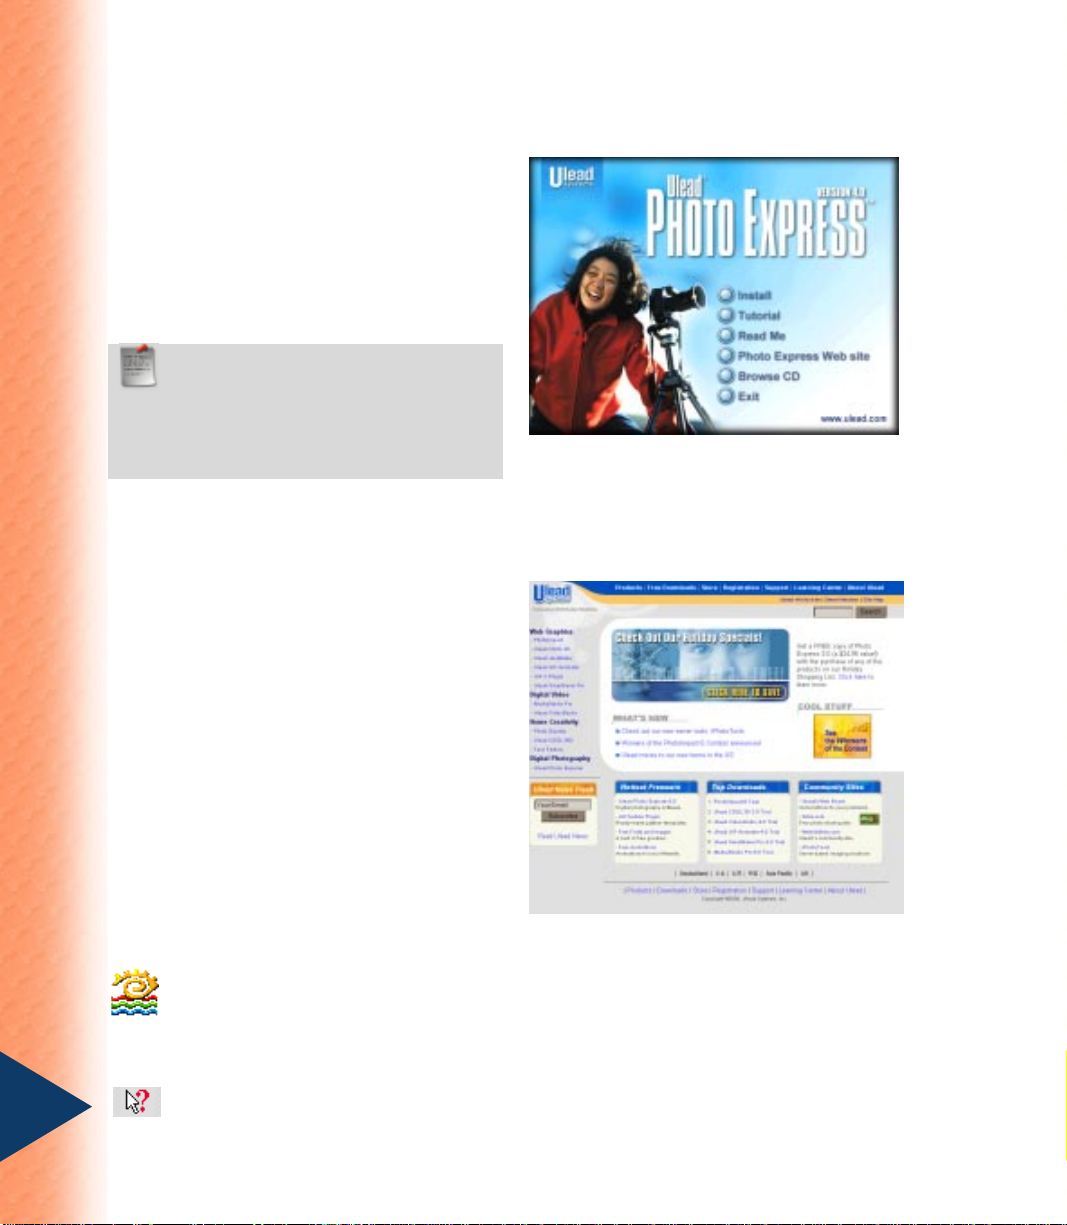
To install Photo Express:
1 Place the Photo Express CD into your
CD-ROM drive.
2 When the Setup screen appears, follow
the instructions to install Photo Express
onto your computer.
Note:
If the Setup screen doesn’t appear
after loading the CD, double-click the My
Computer icon on your Windows desktop
then double-click the icon for the CD-ROM
drive. When the CD-ROM window opens,
double-click the Setup icon.
After you have installed Photo Express,
please take a moment to register online. If
Photo Express is open, on the Help menu
select Online Registration. Alternatively,
you can point your Web browser to the Ulead
Web site (http://www.ulead.com). Becoming
a registered user entitles you to product
updates, free downloads, and technical
support should you have any problems with
the Photo Express program. When you run
Photo Express, make sure your display is set
to a resolution of at least 800x600 and either
HiColor (15/16 bit) or True Color (24 bit)
mode.
(Autorun screen is subject to change, depending on
your version of Photo Express)
To run Photo Express:
• Double-click the Photo Express icon on your Windows desktop.
• Or, select the Photo Express icon from the Ulead Photo Express program group on
the Windows Start menu.
Remember, if you get really stuck while running Photo Express, you can always use
6
the Help button found on the Shortcut bar. Simply click the button and when your
mouse cursor changes, click on the option or tool you don’t understand.
Page 7
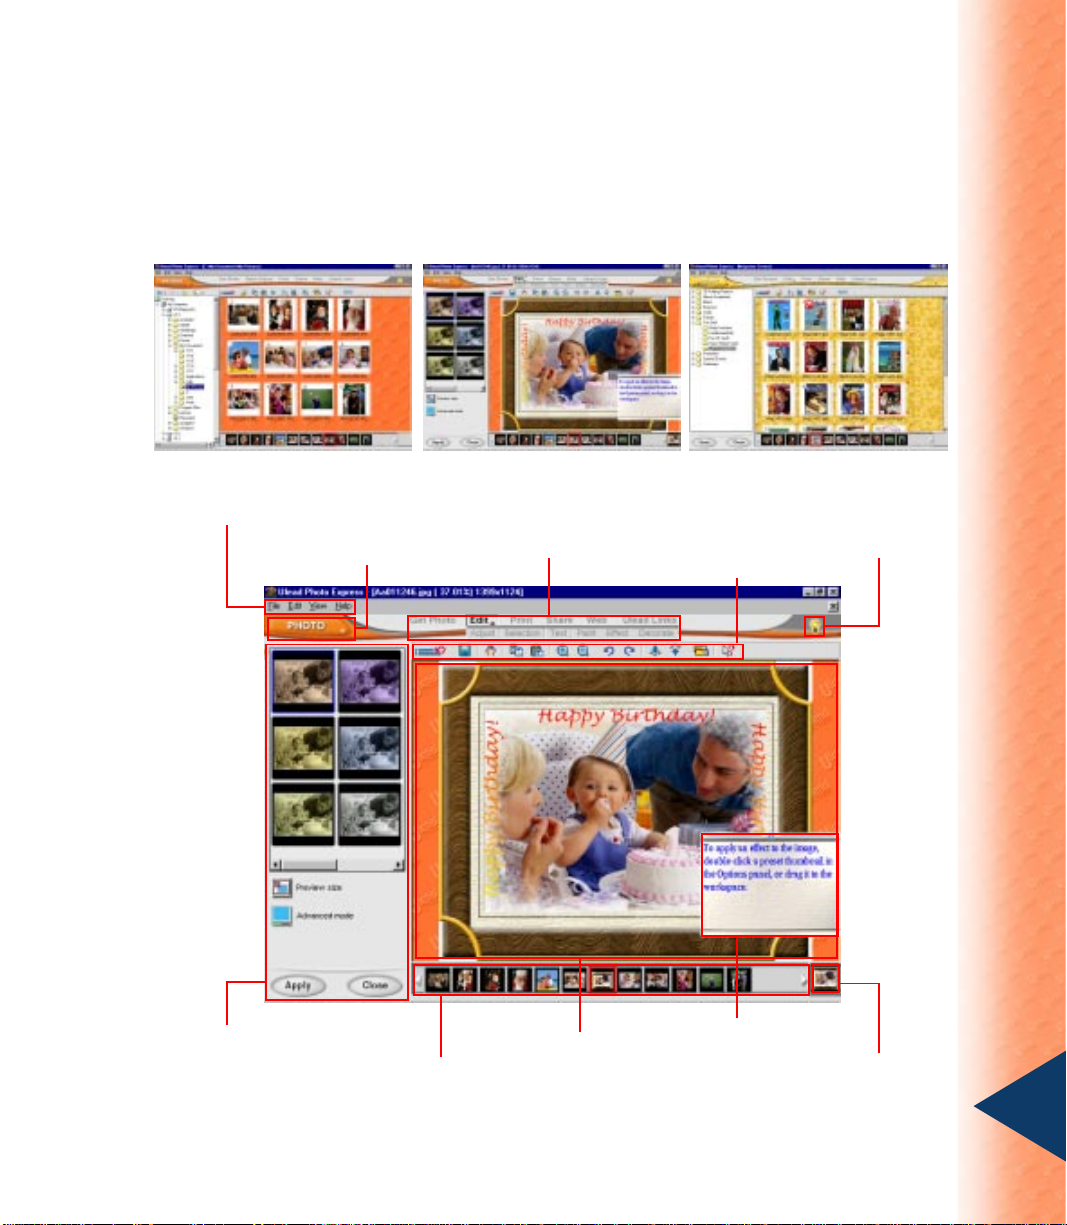
Overview
Photo Express is a self-contained program, so browsing, editing, and creating are all done
from a single screen. Below is a guide to all the main elements of the program window.
Browse mode
Menu bar
Options panel
Mode menu
Thumbnail strip
Photo mode
Menu Command bar
Workspace
Project mode
Open
Guide tips
Shortcut bar
Guide tips
Global
Viewer
7
Page 8
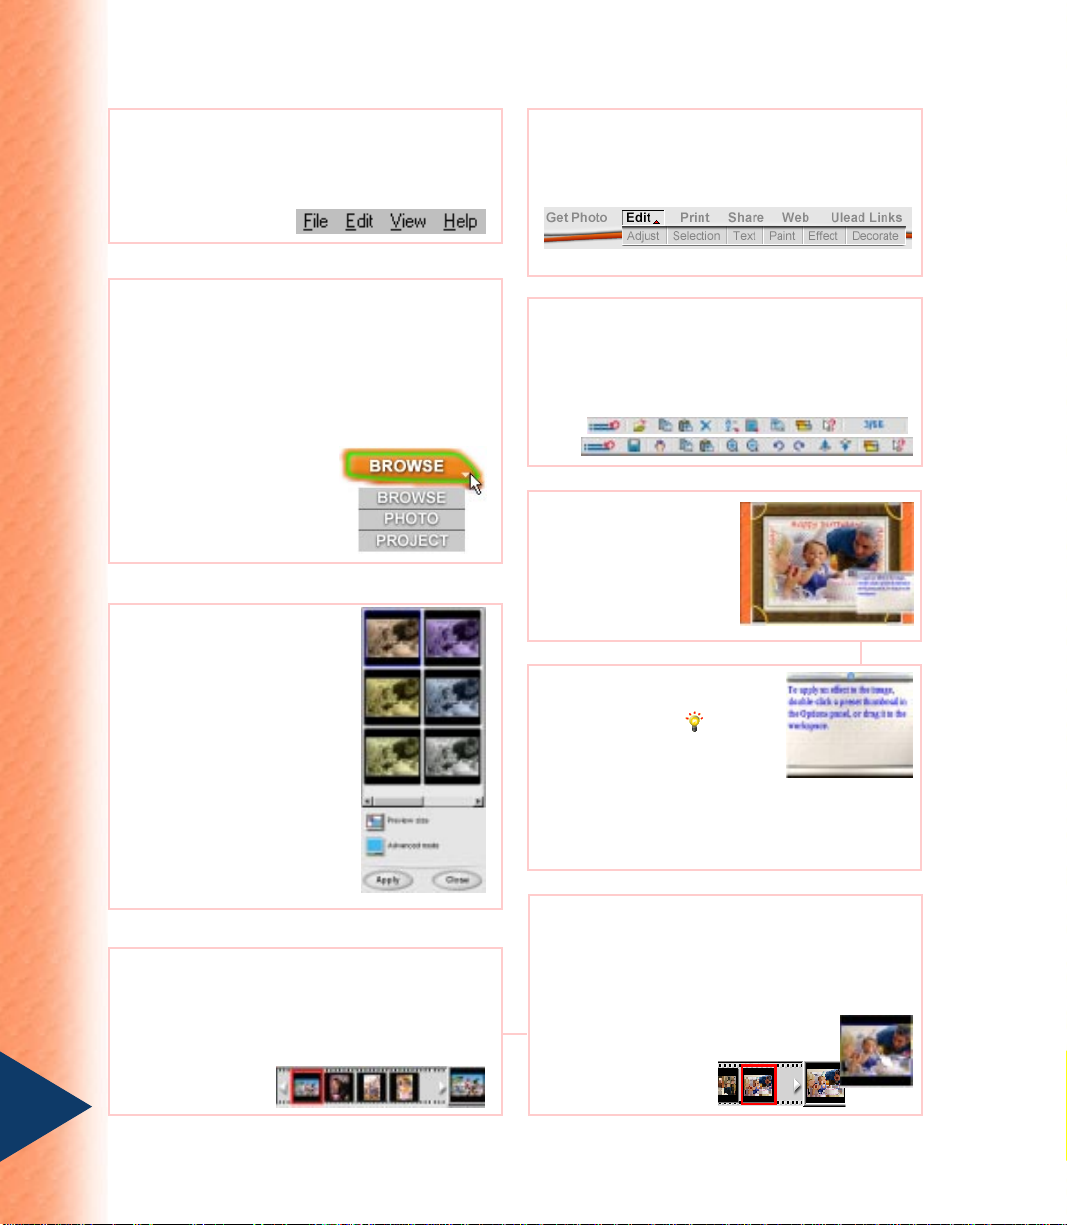
Menu bar
A number of commands common to Windows
applications are found here.
Mode menu
Switch among Browse, Photo, and Project
modes. Browse mode is where you locate and
organize files. Photo mode is where the majority
of image-editing and enhancing takes place.
Project mode is where you create cards and other
items from templates.
Options panel
Displays all the different
possibilities and settings
available for any given
function. Set all tool attributes
from this panel.
Menu Command bar
Lists all the command categories and tools
available for the mode you are currently using.
Shortcut bar
Depending on the current mode, command
category and tool, various useful commands are
made readily accessible.
Workspace
This is where you
actually view and edit
your projects.
Guide tips
Click the lightbulb to
open the guide tips for the
currently selected function.
This walks you through the
basics of a function. You
can turn them on or off in
File: Preferences [F6].
Global Viewer
Thumbnail strip
Displays all the images you have opened.
Double-click an image on the Thumbnail strip to
open it in the workspace.
Just to the right of the Thumbnail strip, this tool
lets you navigate around magnified images that
can no longer be displayed entirely on screen.
8
Page 9
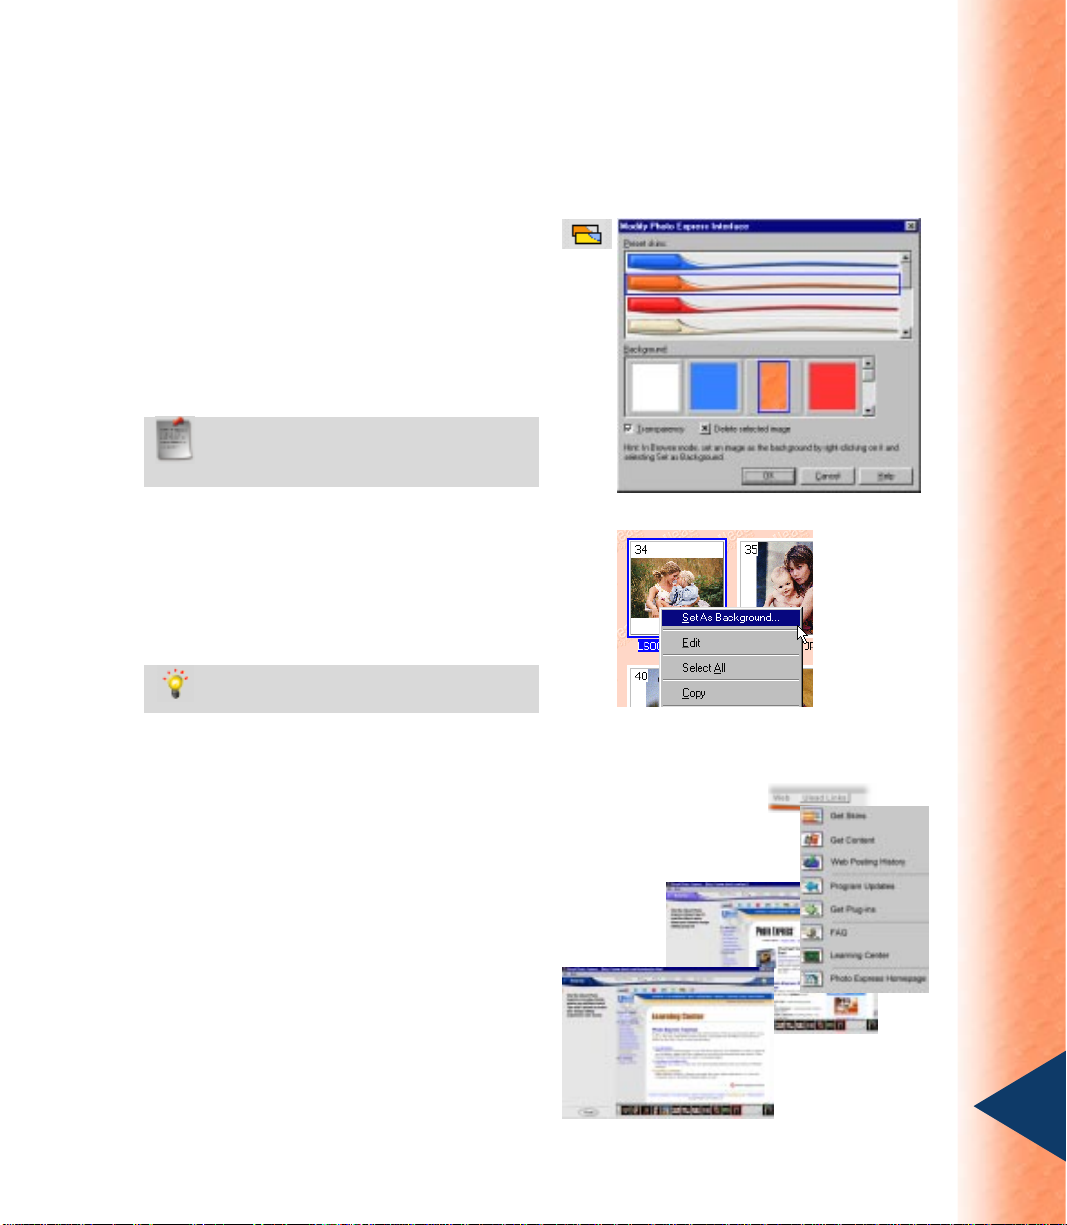
Customizing the look
Tired of looking at the same dreary windows all the time? Photo Express now makes it
possible to change the workspace background and the skin around the Menu Command bar.
Selecting a skin and background:
1 On the Shortcut bar, click Change the
appearance of Photo Express.
2 In the dialog box that appears, select from
among the preset skins and backgrounds.
3 Click OK.
Note:
Checking the Ulead Web site for
new skins is easy , just select Get Skins
on the Ulead Links menu.
Using your own image as the background:
1 Select an image in Browse mode.
2 Right-click and select Set As
Background on the pop-up menu.
Tip:
The Modify Photo Express Interface
dialog box also has transparency options.
Ulead Links
Check out the Ulead W eb site periodically to
keep yourself up-to-date with important
program news and promos. The Ulead Links
menu offers quick access to a number of
useful links related to the program, and
displays these Web pages instantly in the
Photo Express workspace.
9
Page 10
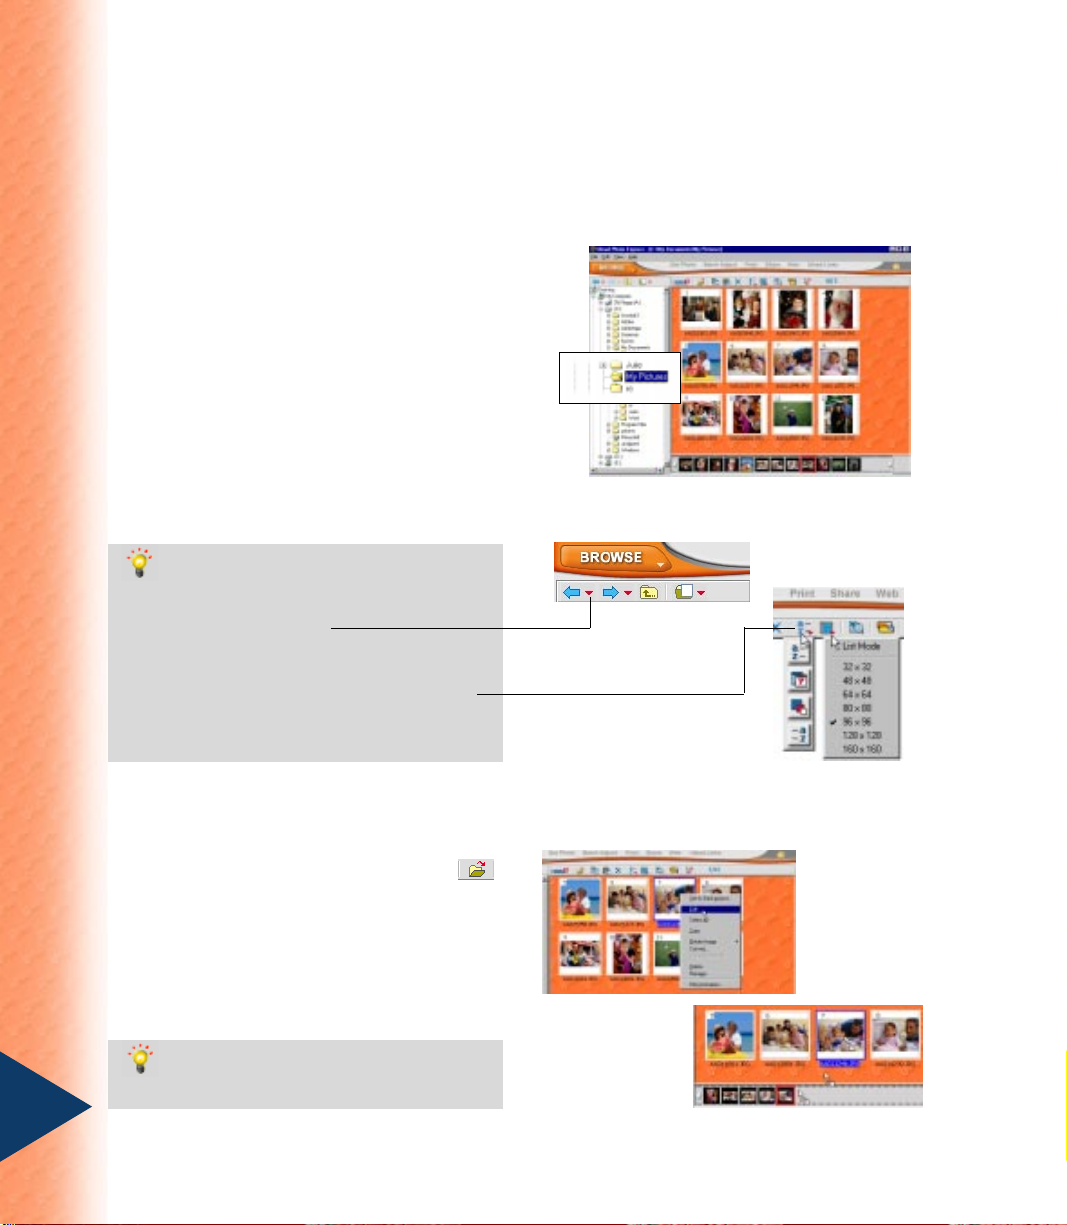
Browse mode
Browse mode is arranged in a convenient way for locating multimedia files. There is a folder
tree in the Options panel, and the selected folder contents are viewed as thumbnails in the
workspace.
A variety of display options are available on
the Shortcut bar and View menu. You can
arrange icons, change the thumbnail size, and
specify the types of multimedia files to
display. An integrated search tool is also
available to help you find files easily.
Using Browse mode:
Locate and select a folder from the folder tree
to display the contents in the workspace.
Tips:
•
Use the tools on the folder tree toolbar
to move quickly between recently
browsed folders.
•
Use the tools on the Shortcut bar or on
the View menu to change how files are
displayed.
•
You can also change the thumbnail
size with [+] and [-] keys.
10
Once you’ve located the images to edit, there are four ways to open them to the workspace:
• Double-click a thumbnail.
• With thumbnails selected, click Open
on the Shortcut bar.
• Drag selected thumbnails to the Thumbnail
strip.
• Right-click a selected thumbnail and select
Edit on the pop-up menu.
Tip:
Select multiple images by pressing
[Ctrl] or [Shift] while clicking the
thumbnails.
Page 11
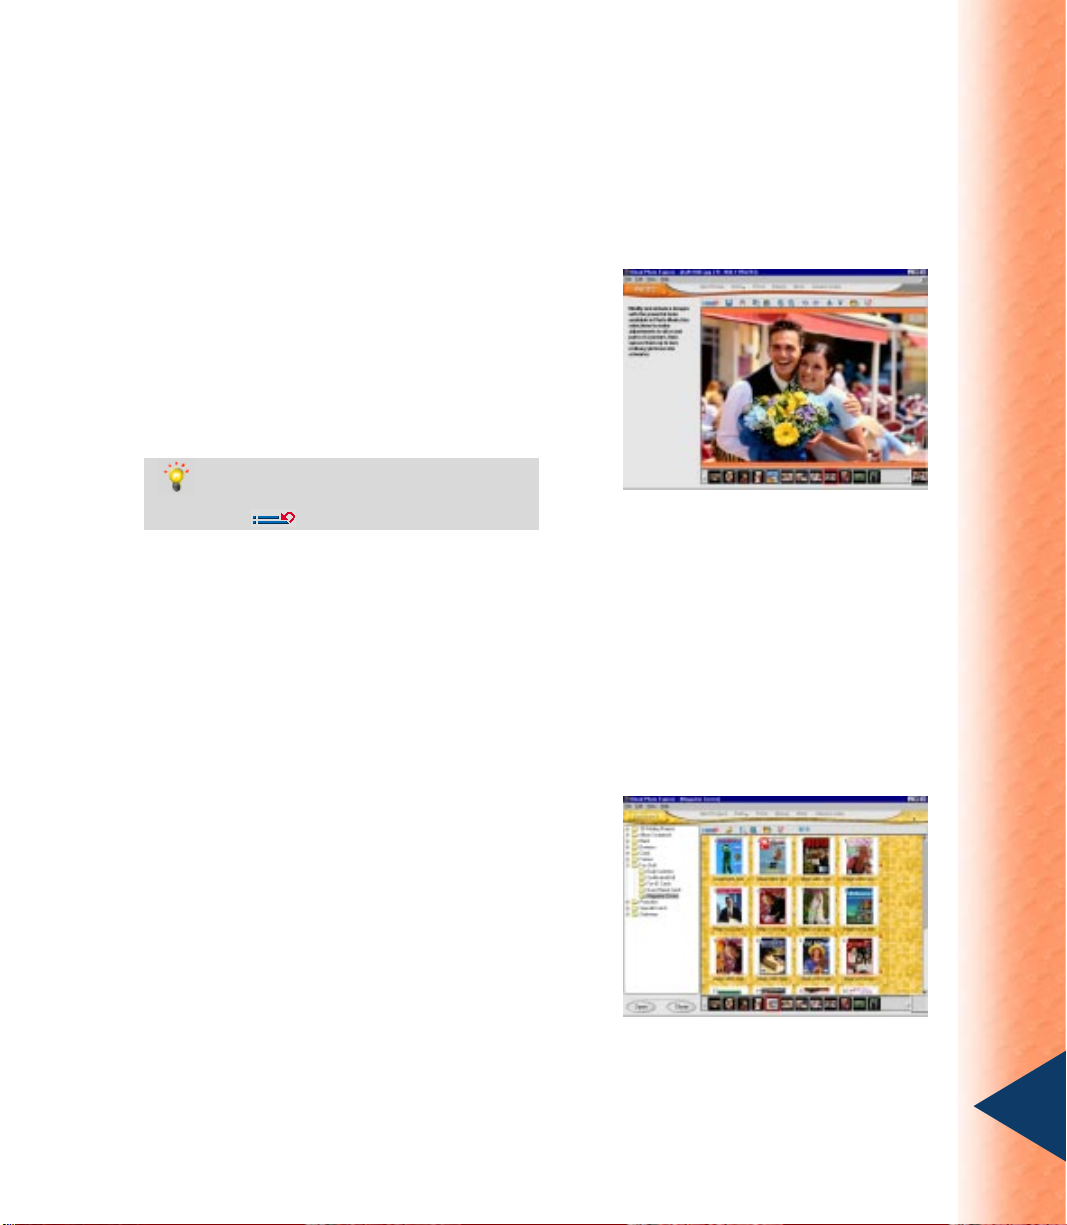
Photo mode
If you’ve already opened images in the workspace, then you’re ready to begin editing and
enhancing. In Photo mode, there is a large selection of tools to prepare your images for
projects, add special effects, or just make touch-ups.
The editing and enhancing tools are all
available on the Menu Command bar Edit
menu. When you select Edit, a submenu
opens to display a list of categories. Select
any of the categories to display the available
tools.
Tip:
Quickly access tools that you’ve just
closed by clicking List the recently used
tools
on the Shortcut bar.
Project mode
Project mode gives you a focused environment in which to create custom greeting cards,
name cards, invitations, and much more by providing you with a large range of templates.
While in Project mode, you can only open template files, but you can add image files of any
type to your templates in order to customize them.
Project templates are available on the Menu
Command bar Get Project menu. There is a
wide variety of categories to choose from.
For more information about working with
templates, see page 30.
11
Page 12
Preparation
Photo Express is an excellent tool for transferring images from a digital imaging device to your
computer simply and efficiently.
For this chapter, we will discuss the various means available for making the import process
more efficient, as well as introduce you to the Batch Adjust tools for making simple
adjustments to multiple images without opening them.
Getting photos from digital imaging devices
While photos may be imported to your computer from within any mode, for the purpose of
showing you all the import options, we’ll work in Browse mode.
The process for importing images from any digital imaging device is basically the same.
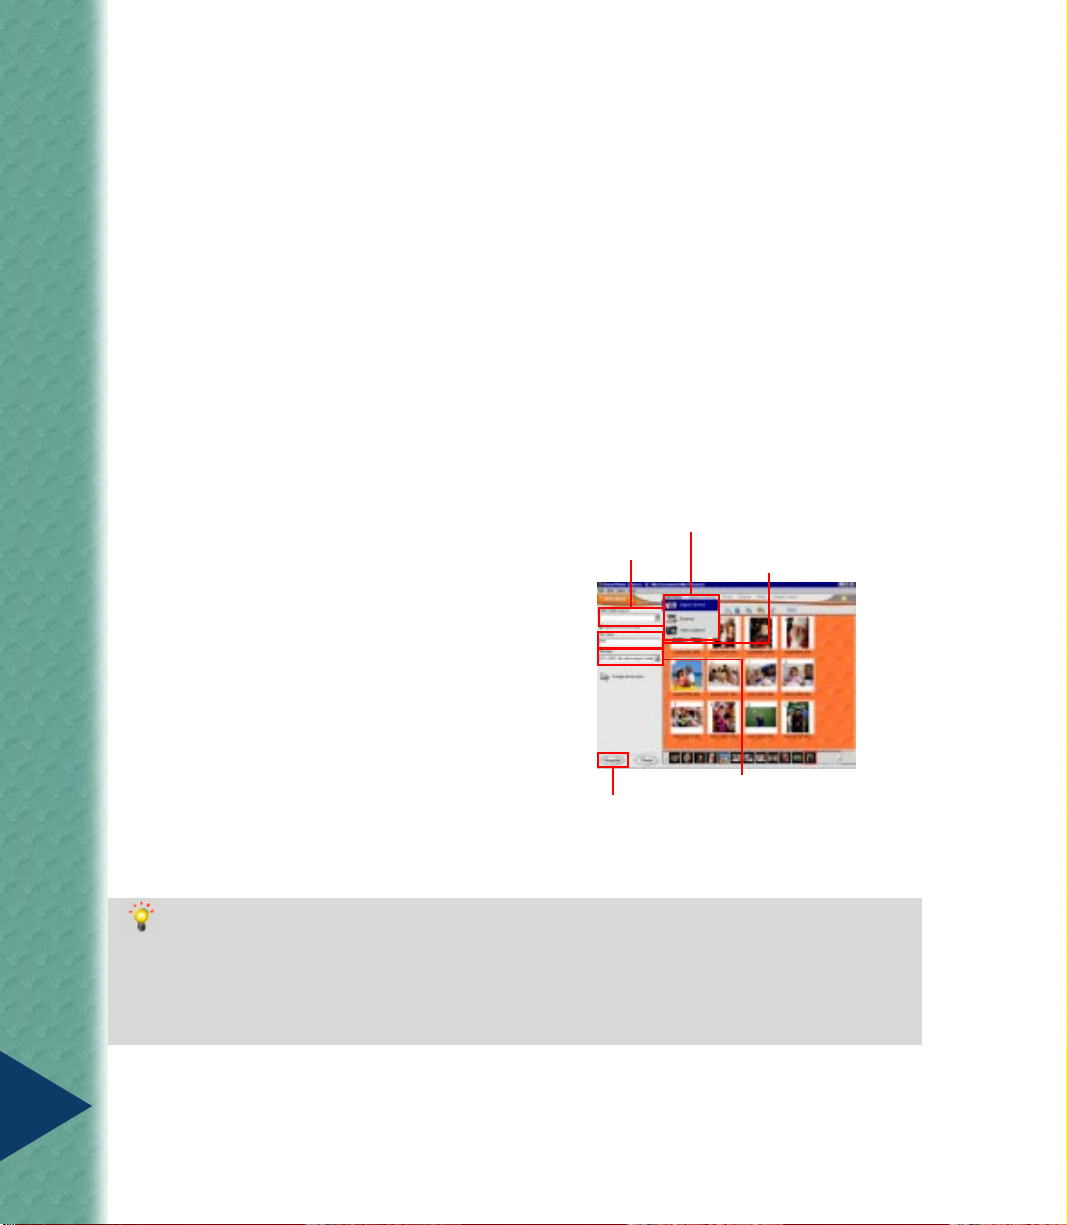
Acquiring images:
1 Select Get Photo and then select your
device type.
2 In the Options panel, select your device
from the list.
3 Enter a File name prefix, which will be
appended with a sequential number (ex.
Pict001, Pict002, and so on.).
4 Select a File type.
5 Click Acquire. (Import for V ideo
Capture).
Tips:
• Apply post-processing Automatically make minor adjustments to the imported files, such as
alignment and lighting.
• Enable slicing Scan multiple images at once and have them cut into separate files.
• Show TW AIN data source Clear this option to scan images without opening the external
program (TWAIN).
Step 2
Step 5
Step 1
Step 3
Step 4
12
Page 13
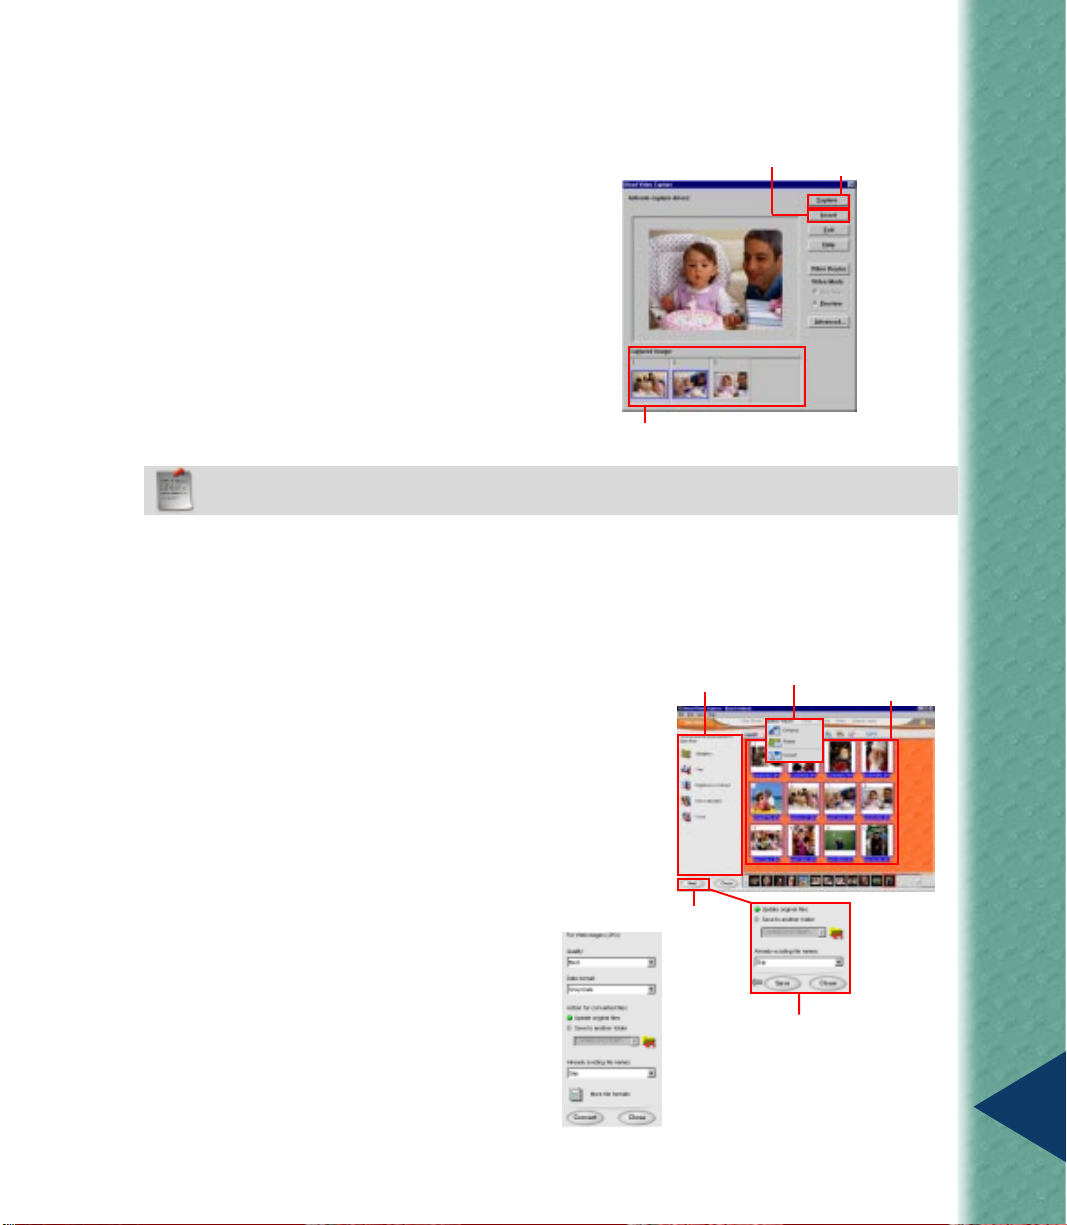
Ulead Video Capture, an integrated component of Photo Express, makes capturing still
images a snap.
Step 3
Step 1
Using Ulead Video Capture:
1 In the Ulead Video Capture dialog box,
click Capture when you see your desired
image in the preview window.
2 In the Captured Image preview box,
while pressing [Ctrl], select the images
you want to import.
3 Click Insert to import the selected images
into Photo Express.
Note:
Advanced opens options for changing video camera settings. For more information about
the settings, refer to the device manual.
Step 2
Batch Adjust
This new feature for Photo Express makes editing multiple images much less time-consuming.
You can Enhance, Rotate, and Convert images without opening a single file.
Using Batch Adjust:
Step 3
Step 2
Step 1
1 In Browse mode, select the images to be
modified.
2 Select the type of modification on the
Batch Adjust menu.
3 For Enhance and Rotate, click the icons
for the adjustments you want to apply.
4 Click Next when you have completed
your adjustments.
5 Select a saving option, then click Save.
For Convert:
• To specify a particular format for
converting, click More file formats.
• The Quality level you select will determine
the file size.
Step 4
Step 5
13
Page 14

Editing
Photo Express can help you create “the perfect photograph” without having to spend a lot of
time or energy trying to understand photographic techniques. Photo Express allows you to
correct common photographic errors such as overexposed and unfocused shots.
For this chapter, we will discuss:
• the various features of the Adjust and Selection tools to give you a better understanding of
what’s available for accomplishing specific corrective tasks.
• the various types of objects and the features available for working with them.
14
Edit: SmartEnhance
Edit: Shape
Edit: Rotate & Resize
Selecting the appropriate tool
Images will often need some adjustments, especially if you’ve retrieved them from a digital
camera or scanner. The following tools are available on the Adjust menu.
Automatically enhancing your photos:
1 In Photo mode, click Edit on the Menu
Command bar then select Adjust:
SmartEnhance.
2 In the Options panel, select the tool that
you want to use. Photo Express will
automatically find the optimal settings for
each tool and immediately effect the
changes as you click the icons.
Original
Color Enhancer
Page 15

Rotating and resizing your image:
1 In Photo mode, click Edit on the Menu
Command bar then select Adjust: Rotate
& Resize.
2 In the Options panel, select a rotating or
flipping icon to apply to your image.
3 Click Close when done.
Notes:
•
If you want more control on how you
rotate your image, use the round,
corner control handles on the image.
•
Resize your image by dragging the
small, round control handles on the
image.
Trimming your images:
1 In Photo mode, click Edit on the Menu
Command bar then select Adjust: Trim.
2 Select a Trim shape in the Options panel.
3 Reposition the trim shape on the image.
4 Select a Soft edge value for the trim
shape. This helps the edges of the trimmed
area blend more with the background.
Resizing height
Rotating manually
Flipping horizontally
5 Click Apply.
Notes:
•
If you want to create a new image out
of the trimmed area, select Create a
new image in the Options panel.
•
You can create your own trim shapes
by making a selection and then using
the Crop function.
Selections,” on
See “Using
page 19
.
15
Page 16

Resizing your images:
1 In Photo mode, click Edit on the Menu
Command bar then select Adjust: Resize.
2 In the Options panel, select a Standard
size or enter the custom size you want to
resize the image to in User-defined.
3 Click Apply.
Notes:
•
Select Keep aspect ratio to prevent
the image from stretching unnaturally.
•
The image resolution determines how
the image prints on paper - lower
resolution uses less and larger pixels
to generate the image, while higher
resolution uses more and finer pixels.
Adjusting the focus on an image:
1 In Photo mode, click Edit on the Menu
Command bar then select Adjust: Focus.
2 Apply a Focus preset by double-clicking a
thumbnail or dragging it to the image. Or,
click the Advanced mode button to make
your own adjustments.
3 In Advanced mode, adjust the Level and
Range sliders. The Preview window at the
top of the Options panel will show the
effect of the adjustments as you make
them.
A 1156x763 image
at 200 dpi
A 1156x763 image at
400 dpi
Original
16
4 After making the adjustments, click
Apply.
After
Page 17

Adjusting the lighting on an image:
1 In Photo mode, click Edit on the Menu
Command bar then select Adjust:
Lighting.
2 Apply a Lighting preset by double-
clicking a thumbnail or dragging it to the
image. Or, click the Advanced mode
button to make your own adjustments.
3 In Advanced mode, adjust the Brightness,
Contrast and Gamma. Check the
Preview window in the Options panel to
see the effect of your adjustments as you
make them.
4 After making the adjustments, click
Apply.
Balancing the colors on an image:
1 In Photo mode, click Edit on the Menu
Command bar then select Adjust:
Balance Color.
Original
After
2 Apply a Balance Color preset by double-
clicking a thumbnail or dragging it to the
image. Or, click the Advanced mode
button to make your own adjustments.
3 In Advanced mode, adjust the Cyan to
Red, Magenta to Green and Yellow to
Blue. Check the Preview window in the
Options panel to see the effect of your
adjustments as you make them.
4 After making the adjustments, click
Apply.
Original
After
17
Page 18

Red Eye tool
This tool is most commonly used for removing the red on an eye caused by a camera flash.
However, it can also be used for changing eye color.
Removing red eye from a photo:
1 Select a Brush size by clicking one of the
circles to define the stroke size when the
brush is used on the image.
2 Set the color Similarity as reference for
adjusting. Use a higher similarity to
replace more of the red eye.
3 Set the Strength of the replacement color
over the existing color.
4 Select Remove Red Eye to replace red
with black. If you want a totally new eye
color, select Change Eye Color and then
click on a color square for choosing a new
color.
5 Brush over the area you want to replace.
6 Click Close when you are satisfied with
the result.
Step 6
Step 2
Step 1
Step 3
Step 4
Tips:
•
Click Reset attributes to revert to the
default settings.
•
Zoom in on the image by pressing the
[+] key. Zoom out with the [-] key.
Step 5
18
Page 19

Using the Selection tools
At this stage, you should be familiar with the adjustment tools. You’ve probably noticed that
some images only require adjustments to certain areas, or perhaps you would rather remove
those areas from the image entirely. This is where the selection tools come in handy. With
selections, you are able to modify specific parts of an image while leaving the rest intact.
In Photo mode, you will find the available
selection tools on the Edit: Selection menu.
After creating your selection areas, you can
convert them into objects by simply dragging
them with the mouse. These objects can then
be moved, edited, and changed without
affecting the rest of the photo. You can also
cut and paste them into other images or
projects.
Selecting an area using a simple shape:
1 In Photo mode, click Edit on the Menu
Command bar then select Selection:
Shape.
2 In the Options panel, choose a shape.
3 In the workspace, make a selection area by
dragging the cursor over the image.
4 Release the mouse button to complete the
selection.
Note:
To create a selection area using a
center point as a reference as you move
outwards, select Draw from center on
the Selection tools options pop-up
menu.
Step 1
Step 2
Step 3
19
Page 20

Making selections using the SmartSelect
tool:
1 In Photo mode, click Edit on the Menu
Command bar then select Selection:
SmartSelect.
2 Click at the point where you want to begin
the selection area. When the red button
appears, click at areas around the image to
make new reference points.
3 Click the red button again to close the
selection. The button then turns to green.
4 To fine tune the current selection, move
the mouse over an area of the selection
frame until the cursor changes to a
pointing finger.
Step 2
Step 1
Step 3
Step 2
20
5 Click and drag to modify the highlighted
portion of the selection frame.
6 When done editing, click the green button
to create the actual selection.
Selecting an area by color:
1 In the Menu Command bar, select Edit:
Selection - By Color.
2 Click on or drag over the base image to
select reference colors.
Notes:
•
The Similarity value determines the
range of colors to include in the
selection. Adjust it if you find that your
selection is not clean or does not
cover the entire range of the selected
color.
•
The Expand selection option selects
all areas of a similar color throughout
the entire image.
Step 1
Tip:
When the surrounding colors are
very similar to the edge colors, adjust the
Tolerance slider to the left.
Step 1
Step 2
Page 21

After the selection process
Once you have made your selection, there are a number of things that you can do with it.
• Use the selection to crop the photo. This means that only the selected area will remain while
other parts of the image will be removed. In the Options panel, click Next, and then click
Crop with current selection.
• Create stunning edge effects.
Using the Edges effect:
1 Click Next to go to the Other Options
panel.
2 Select an Edge type on the drop-down
menu.
3 Click Show selected edge type presets.
4 Double-click a preset to apply it to the
image.
5 Click Close when done.
Notes:
•
Drag the selection to turn it to an object, or straight to the Thumbnail strip for a new image.
•
Maintain the current selection shape even when the Edge preset is of different shape by
selecting Keep original shape.
•
Select colors for the edges of the 2D/Mask and Magic effects in Advanced mode.
•
Personalize the Text edge effect by typing in your own words in Advanced mode.
Step 1
Step 3
Step 5
Step 2
Step 4
A few words about objects
Objects are self-contained components placed on images or projects. These can be frames,
shadows, text, image, or the background. When saved to a *.UPX (for images) or *.TPX (for
projects) format, each object’s characteristics and attributes remain editable for future editing.
Below are some useful object information:
• Most objects can be adjusted using the tools used to create it.
• Adjust an object’s layer by using the Object Level buttons on the Shortcut bar.
• Right-click on an object and select Transparency to define how see-thru the object is
against a background.
• In order to integrate an object into an image permanently, right-click the object and select
Merge on the pop-up menu.
21
Page 22

Working with Text
Adding text is a quick and easy way to liven up any photo or to make postcards, greeting
cards, invitations, and birthday cards. Photo Express also provides you with an extensive
range of cool effects that you can apply to your text to create even more unique and
impressive projects. The Text tools are available in Photo or Project mode on the Edit: Text
menu.
Step 3
Adding new text:
Step 2
Step 1
1 Select Edit: Text - Add/Edit on the
Menu Command bar.
2 In the Options panel, enter the text in the
Text entry box.
3 Adjust the available options to the desired
settings.
4 With the Enter new text option selected,
Step 4
click Apply to add the text to the photo or
project.
5 Click Close when you are satisfied with
the result.
Tip:
Resize the text manually by
adjusting the text object marquee in the
workspace.
Note:
workspace by double-clicking the text
object then in the Options panel make the
necessary adjustments and select
Update the selected text before clicking
Apply.
Step 5
Edit the text object in the
Improving how your text looks
Simply adding text to an image is often enough to attract attention, but if you really want the
text to get noticed, try flaunting it with some of the incredible effects in Photo Express.
22
Note:
Remember that you need to make the text object active first in the workspace (done by
simply clicking on it) before you can use any of the Text tools for creating effects.
Page 23

Transforming text objects:
1 Select Edit: Text - Transform on the
Menu Command bar.
2 In the Options panel, select a transform
tool of your choice.
3 Move your mouse over any of the control
handles. As soon as the pointer changes to
a four-directional arrow, click and drag in
the desired direction.
4 Click Close when done editing.
Step 2
Step 4
Step 1
Step 3
Reshaping text objects:
1 Select Edit: Text - Reshape on the Menu
Command bar.
2 In the Options panel, select a reshape type
on the drop-down menu.
3 Apply a preset by double-clicking a
thumbnail or dragging it to the image.
Note:
The Text Special F/X is not available in the PhotoExpress SE version.
Step 2
Step 3
Step 1
23
Page 24

Working with Painting and Cloning tools
These tools give you the opportunity to reveal your creative side. Use the Paint tool to add
personal touches to your images and use the clone tool to replicate portions of the image to
create interesting artworks. The Paint tools are available in Photo mode on the Edit: Paint
menu.
Painting with the Brush tool:
1 In the Options panel, adjust the necessary
attributes.
2 Move your mouse over the image to the
position where you want to start painting.
3 Click and hold the mouse button down
while dragging.
4 Release the mouse to end the stroke.
5 Paint to your heart’s content. When you
are satisfied with the result, click Close.
Tip:
You can press Ctrl + Z to instantly
remove the last stroke you made.
Using the Clone tool:
Step 1
Step 2
Step 2
Step 4
Step 1
Step 3
Step 5
Step 5
24
1 In the Options panel, click the thumbnail
image to clone in the Select source photo
thumbnail strip.
2 Click within the Source photo view
window to mark a reference point on your
source image.
3 Click the Adjust brush attributes icon.
4 Adjust the other settings in the Options
panel as desired, then click OK.
5 Paint on the target image in the
workspace to start cloning.
Step 3
Tip:
Use the Selection tools to isolate
areas of an image that you want to paint
on. For information on how to use the
selection tools, see page 19.
Step 4
Page 25

The Effect menu
Photo Express’ Effect menu offers a variety of enhancement tools and special effects that can
spruce up your images. Select from a wide range of tools available under this menu. Let your
creativity run wild!
Transforming your images into works of art:
1 On the Menu Command bar, click Edit
then select Effect: Artist.
2 On the Artist submenu, select an artist
style.
3 Select a preset by double-clicking a
thumbnail or dragging into the image. Or,
click the Advanced mode button to make
your own adjustments.
4 In Advanced mode, adjust the available
options to the desired settings.
5 After adjusting, click Apply.
Tip:
Try mixing the various Artist tools on
your images. You’ll be amazed by the
creative effect you can produce.
Applying a spotlight to an image:
1 On the Menu Command bar, click Edit
then select Effect: Lenses.
Colored pencil
Spotlight
2 On the Lenses menu, select Spotlight.
3 Select a preset spotlight effect from the
thumbnails, or click the Advanced mode
button to make your own adjustments.
4 After you choose a preset or customize
settings, click Apply.
25
Page 26

Adding bubbles to an image:
1 On the Menu Command bar, click Edit
then select Particle: Bubble.
2 Select a Bubble preset and click Apply.
Or, click the Advanced mode button to
customize the bubbles.
3 In Advanced mode, adjust sliders for the
Amount and Size of the bubbles then
select a preset Style from the thumbnails.
4 To set colors for your bubbles, click the
Adjust bubble button then either choose a
color preset from the thumbnails or
customize the colors yourself.
5 Click OK to accept the color settings then
click Apply.
Tip:
In Advanced mode, when a star,
bubble or firefly is selected, you can edit
individual elements. Just click on one,
then adjust the options to the desired
settings. To deselect the current
element, just click elsewhere in the
preview window or click the Deselect
button.
Bubble
26
Other cool effects you can apply to your images
Page 27

Adding decoration
The Decorate category in both Photo and Project modes gives you access to ornamental
effects. These are special, object-based effects such as Frames, Edges, Props, Shadows, and
the unique Add Signature tool that you can use to enhance photos and photo objects.
Adding special edge effects:
1 On the Menu Command bar, select
Edit: Decorate - Edges then select the
desired type of edge effect to use.
2 In the Options panel, select from the
available Preset edges.
3 Apply a preset by double-clicking a
thumbnail or dragging it to the image.
Using the Text edge effect:
1 On the Menu Command bar, select
Edit: Decorate - Edges - Text.
2 In the Options panel, select a Preset
edge.
3 Select Edge color then select the color
you want for your text.
4 Click the Advanced mode icon.
5 Enter the desired text for your text
edge effect in their respective fields.
6 Select the font type on the drop-down
menu and select the font style for your
text edge.
7 Click Apply.
Step 3
Step 3
Step 4
Step 1
Step 2
Step 2
Step 5
Step 7
Notes
:
•
Conform the text edge effect to the
selection or image shape by selecting
Keep original shape.
•
Select Stretch text to edges to span the
text to the length of the sides.
Step 1
Step 6
27
Page 28

Adding a signature to an image:
1 On the Menu Command bar, select Edit:
Decorate - Signature.
2 Select a Category in the Options panel.
3 Select a Signature preset in the Options
panel.
4 Double-click your choice or click Apply.
You can also drag it to the workspace.
Creating your own signature:
1 Click the Create a new signature button
in the Options panel.
2 In the New Signature dialog box, create
your custom signature.
3 Adjust the necessary settings.
4 Click Save.
Note
: Clicking Save will add your custom
signature to the other thumbnail presets
in the Category (in the Options panel)
before you clicked the Create a new
signature button.
Step 4
Step 1
Step 2
Step 3
Step 2
Step 1
Step 3
Step 4
28
Adding a frame to an image:
1 On the Menu Command bar, select Edit:
Decorate - Frame.
2 Select a frame in the Options panel then
click Apply.
Step 1
Step 2
Step 3
Page 29

Adding props:
1 On the Menu Command bar, select Edit:
Decorate - Props.
2 Select a prop category in the Options
panel. The props for that category appear.
3 Select a clip-art image from the thumbnail
window.
4 Double-click your choice or click Apply.
You can also drag it to the workspace.
Tip:
You can resize a prop object the
using the Edit: Adjust - Rotate & Resize
command.
Step 4
Step 1Step 2
Step 3
Adding a shadow to an object:
1 On the Menu Command bar, select
Edit: Decorate - Shadow.
2 Click the Add shadow button. A
shadow will appear under the selected
object, along with a shadow handle.
3 Drag the shadow handle to adjust the
position of the shadow.
4 Adjust the settings for the shadow’s
Color, Transparency, and Soft edge.
Tip:
To remove the shadow from an
object, right-click the object in the
workspace, then select the Remove
Shadow option on the pop-up menu.
Or, click the Remove shadow button
in the Options panel for the Shadow
effect. You can restore the shadow by
clicking the Add shadow button in the
Options panel.
Step 1
Step 2
Step 3
Step 4
29
Page 30

Beyond Photos
Now that you’ve worked your way from importing your photos through editing and enhancing
them, it is time for the next set of tools for designing your project output. Take advantage of
scores of ready-made templates for creating animated Web pages, calendars, cards, posters, and
much more.
30
Get Project tools
Web tools
Working with templates
Coming up with a good layout for a Web page, greeting card, or letterhead can really be a
challenge. Fortunately, Photo Express includes a wide variety of ready-to-use templates so you
don’t have to spend a lot of time worrying about the layout. The templates come with
customizable features so you can personalize them to suit your needs.
Selecting a template:
Step 1
Step 2
Step 3
1 Click the Mode menu and select Project
on the drop-down menu.
2 On the Menu Command bar, select Get
Project. The submenu displays the
available project template categories. (The
folder tree-like structure functions just like
Windows Explorer.)
3 Select a subcategory to display its
templates in the workspace.
4 Double-click a template to open it in the
Step 4
workspace.
Page 31

Customizing a template
After selecting the template of your choice, you are now ready to personalize it. A template
consists of several elements that can be changed to best suit your project. Here’s an example of
how you can personalize your template to surprise your family and loved ones.
Personalizing a template:
1 With an open template in the workspace,
click a text object to make it active. Click a
text placeholder button to open the Add/
Edit Text dialog box in the Options panel.
2 Modify your text and adjust any settings.
3 Click Apply when done editing. Drag an
Step 1
active text to reposition.
4 Replace an image by clicking on it. Then,
click the image placeholder button to
change original image (be it the insert
picture or the background picture) with
your own.
5 On the pop-up menu, select a source for
your replacement. Then, in the Options
panel, select an image to replace the
original one.
Tips:
•
You may also drag a few of your
images into the Thumbnail strip for
easy access. When you need an image
from there, click and drag it onto a
selected image in the workspace for
replacement.
•
If your photo needs a little touch-up,
select Edit: Adjust. Here, you’ll find
tools for rotating your image, and
adjusting its lighting and color balance,
among others.
Step 2
Step 4
Step 5
Step 3
31
Page 32

Web Studio
The Web Studio plug-in gives you the tools to create great-looking Web pages without writing a
single line of code. The Web Studio has a large collection of beautiful and ready-made
templates for you to choose from and lets you start creating those Web page masterpieces.
Web Page offers various templates that
allow you to share a single image over the
Web. This is a very attractive and convenient
way of sharing images with others.
Web Page
Create the coolest electronic photo albums
that you can either send via e-mail or post to a
Web site for the whole world to see and enjoy.
(Only available in Browse mode.)
Web Album
32
Impress and delight your friends by
sending them a multimedia Web card,
which can include photos, videos, sounds
and more!
Web Card
Web Show provides a fast and convenient
way to create your own slide show with your
images on a Web page. Place your photos in
one of the templates and send them to your
friends, save them to a disk, or burn it to a
CD. (Only available in Browse mode.)
Web Show
Page 33

Your Web projects
The Web Studio functions are meant to be configured by working through the Options panel.
Navigate through the various panels using the Next and Back arrow buttons at the bottom of
the Options panel.
Step 2
Choosing the layout:
Step 1
1 Click the Template drop-down menu box
to open a list of categories. Select the
category to display in the Options panel.
2 Select a thumbnail to display it in the
workspace.
3 Click Next.
Step 3
Adding personalized titles and image
information:
Note:
This panel is bypassed for Web
Card.
4 Enter your own title text in the Title entry
box.
5 Click the Description type drop-down
menu and select User defined to enter
your own caption.
6 Click Next.
Note:
For Web Album and Web Show, if there’s more than one image selected, selecting User
defined for Description type requires the addition of an extra panel after clicking Next. This
allows you to write a description for each of your images.
For Web Album and Web Show (only when
more than one image is selected), clicking
Photo order opens a dialog box where you can
rearrange the display order of your images.
Step 4
Step 6
Step 5
33
Page 34

Adding extra decorations:
7 All the features available on this panel can
be added by clicking the respective icons.
• Signature is usually used for adding
contact information such as your name
or e-mail address.
• Background music is automatically set
to play while your project is being
viewed. Use this tool to change or
remove the music file.
Step 7
For Web Card only - Many of
the elements contained in the
pre-designed Web Card and
any of the elements you add to
it can be modified after
selecting them in the
workspace.
Tip:
For Web Cards, link text and image
objects to Web sites or to your own e-mail
address. Select first the text or image
object then select Add URL or e-mail link
in the Options panel, then type in the URL
or e-mail address.
Sharing your project:
8 Select the kind of output you want for your
Web project.
• CD, available for Web Album and
Web Show, creates files necessary for
making a CD that plays automatically
when inserted in the CD-ROM drive.
For Web Show only - Set the
Play mode of the Web show.
You can set a time duration for
each image to be displayed or
set it to manual mode where
buttons will be available for
you to navigate through the
images.
Step 8
34
Page 35

• Post to Web lets you upload your Web
projects to an account you’ve
established at any of the Web services
listed on the drop-down menu.
Tips:
•
To create an account, select a Web
service then click Create an account
first to open the registration page of
the selected service.
•
To view records of files uploaded to the
Web service, select Ulead Links: Web
Posting History. There is an option for
sending e-mail with a link to the posted
pages.
Animated Graphics
The new animation functions create lively graphics for you to save to a disk or place on a Web
page before posting to the Web or sending by e-mail.
1 With images selected, select one of the
animation functions on the Web menu.
2 In the Options panel, select a preset to
apply it to the image in the workspace.
3 Click the Play the animation preview
button on the Shortcut bar. Click the Stop
button on the resulting Shortcut bar when
satisfied with the result before clicking
Next.
4 Click GIF animation file to save the file
to disk or Output to Web page where
you’ll go through easy steps of creating
Web pages.
Tips:
•
Only the first frame of the animation will be displayed.
•
Up to six (6) images can be used for creating a single Magic Cube animation file.
•
When saving as a GIF animation file, you can increase the number of frames to create
smoother animations, but remember that this will result to larger file size.
Step 2
Step 3
Step 1
Step 3
Step 4
35
Page 36

Calendars and Planners
The Calendar is available on the Share menu in all modes. This function is arranged to be
configured by working through four (4) Options panels. Navigate through the various panels
using the Next and Back arrow buttons at the bottom of the Options panel.
Creating a calendar:
1 With an image (in Photo mode) or a
template (in Project mode) open in the
workspace, select Share and then select
Calendar. (Select multiple images in
Browse mode to save time in applying the
same calendar settings to several images.)
2 In the Options panel, set the Calendar
template by selecting the Calendar type
and Orientation, then click a thumbnail of
your desired style.
3 Click Next.
4 Set the start date by the year, month or
week, and click Next.
Note:
The available fields that you can
adjust will depend on the Calendar type
selected.
5 Click the icons of template elements to add
or modify.
Note:
The Modify selected element
option reflects which element is currently
active for editing.
Step 2
Step 3
Step 4
Step 1
Step 5
36
6 Click Next.
7 Choose an appropriate method of sharing
your work with friends and family.
Notes:
• Wallpaper option can set the calendar
as your Windows Desktop wallpaper.
Ulead Calendar Checker will
automatically update it for you.
•
Use Organize templates to store your
current calendar project as template for
future use.
Step 6
Tip:
To quickly access a variety of useful
commands, right-click an object.
Step 7
Page 37

Planner
There is an additional feature, Planner, that may be accessed on the Shortcut bar at any time
while using the Calendar function.
Using the Planner:
1 Click the Planner button on the Shortcut
Step 2
bar. The Planner dialog box opens.
2 Click a day to open the menu of planning
options, then enter the necessary
information for the selected options.
3 Add a pop-up reminder with or without
sound that can be set to display at any
time. The reminder need not be set to the
same day as the note or the holiday.
4 Change the text color for notes and
holidays.
5 Spice up your planner by adding clip art to
mark special days.
Wallpaper
Set your favorite images to be displayed as your desktop wallpaper.
Changing your desktop wallpaper:
Step 2
Step 5
Step 4
Step 1
Step 3
Step 1
1 In Photo or Project mode with an image
open in the workspace or in Browse mode
with an image selected on the Menu
Command bar, select Share: Wallpaper.
2 Select the display format in the Options
panel.
3 Click Apply to set the desktop wallpaper.
4 Click Close to exit the function.
Step 3
Step 4
37
Page 38

Printing and Sharing
Once you’ve put the finishing touches onto your photos, Photo Express provides just what you
need to share them with your friends and loved ones. For this final chapter, you will learn
about the numerous printing options as well as ways for sharing your work across the Internet.
Print tools Share tools
Printing
Create posters, name cards, stickers, T-shirts, and many other fun projects. All of the printing
options available (except Multiple) in Photo Express follow a basic procedure.
Basic printing steps:
1 In Browse mode, select an image or
images. On the Menu Command bar,
select Print and then select the
appropriate printing function.
Step 2
Step 3
Step 1
38
2 In the Options panel, make sure that the
correct printer is selected. If you need to
change any printer settings, open the
Printer Properties dialog box.
3 Select a Paper Size and Layout.
4 Select the number of copies.
5 Click Print.
Notes:
•
When multiple images are selected and they don’t fit in one page, use the arrow keys on the
Shortcut bar to navigate through the images/pages.
•
Adjust the printable area by clicking the Modify Printable Area button on the Shortcut bar to
precisely adjust the position of the image within the page.
•
In Photo mode, you can only print the currently opened image in the workspace.
•
The Thumbnails and CD cover print options are only available in Browse mode.
Step 4
Step 5
Page 39

Multiple
The Multiple print option is different from the other options available on the Print menu and
therefore, follows a procedure all its own.
Step 2
Step 1
Printing several images on a page:
1 Select the images that you want to print,
and then select Print: Multiple.
2 Select the type of layout you want to use
for your images, then click Next.
Note:
You can still rearrange and further
resize or realign images in the layout.
Click the specific image frame to make it
active for adjustments.
3 Add or replace images in the layout by
dragging desired thumbnails over the
image frame you want to place your
image. Click Next.
4 Set the number of copies to print, then
Step 3
click Print.
Note:
You can also use the images in the
Thumbnail strip to replace the images in
the layout.
Step 4
Other printing choices
39
Page 40

Saving your work
It is a good habit to save your work periodically to ensure that you don’t have to redo
everything when unexpected events happen. Keep in mind that saving a project in a *.TPX
(*.UPX for image files) format means that you will be able to edit the individual objects when
you reopen the file.
Saving a photo or project:
1 On the Menu Command bar, select Share:
Save.
2 In the Options panel, enter a saving
location and file name.
3 Select a File type on the drop-down menu.
4 Click Save.
Notes:
• Data type describes how much color
information is saved with the image.
The more color information included in
the file, the larger the file tends to be.
The highest color data type is True
Color. Indexed-256 and Grayscale
each contains up to a maximum of 256
distinct colors and are generally quite
small. (48-bit True Color and 16-bit
Grayscale are supported in TIF
format.)
•
Possible File types for saving are:
BMP and TIF can keep the highest
level of quality; JPEG is ideal for
photos to be used on the Web or sent
via e-mail because the file size can be
significantly reduced down to the
minimum relative to your acceptable
quality; UPX for saving photos with
unmerged, free-floating objects. These
objects can be used again when the
file is reopened in Photo Express.
40
Page 41

Sharing across the Internet
Photo Express offers a number of different ways that you can share your images with your
friends and family across the Internet.
E-mail
Photo Express is integrated with popular e-mail applications such as Microsoft Outlook,
Microsoft Outlook Express, Netscape Messenger, and Qualcomm Eudora, among others.
Sending via e-mail:
Step 2
Step 3
Step 1
Step 5
1 On the Menu Command bar, select Share:
E-mail.
2 In the Options panel, select Send as an
HTML e-mail (to display the images
within the body of the e-mail message) or
simply as a file attachment.
3 Adjust the Image Dimension and Quality
of the image (not applicable for GIF
animation, audio, and video files). This
will affect the file size.
4 Click Send to open the Send Mail dialog
box, then enter the necessary information.
Step 4
Note:
Selecting the Send separate mails
option creates individual e-mails for each
image to a single recipient. This is
recommended when sending several
images for faster download.
5 Click Send.
Post to iMira
Display your photos in your own free online
gallery.
Uploading to iMira:
1 In any mode, select Share: Upload to
iMira on the Menu Command bar.
2 If you have already registered for an
account at iMira, enter your user
information in the spaces provided in the
Options panel then click Upload.
Step 2
Step 1
41
Page 42

Glossary
42
Advanced mode
Contains options of a selected tool or effect that you
can modify with great precision.
Batch Adjust menu
Contains tools that can be used to modify multiple
images at once.
Brush
Allows you to apply “electronic paint” to images.
Browse mode
This is where you can quickly locate and organize
your multimedia files.
Clip art
Ready-made, resizable illustrations which may be cut
and pasted or inserted as artwork.
Clone
Copies or duplicates areas of an image onto the same
image or onto another.
Decorate menu
Contains tools and effects that can add creative
touches, like frames or shadows, to simple images.
Edges
A special effect that lets you add torn paper edges or
other interesting borders to a picture.
Effect menu
Contains tools that you can use to enhance, adjust,
correct, or otherwise creatively modify your pictures.
Fill
The process of applying or dumping color into a
region or area.
Frame
An effect that lets you put a picture frame or border
around your images.
Global viewer
The window to the right of the Thumbnail strip that
can be used to quickly move around a magnified
image that cannot be displayed entirely on-screen.
Gradient
A gradual transition between two or more colors.
HTML
HTML is the dominant language for publishing
hypertext on the World Wide Web. HTML uses tags
like <h1> and </h1> to structure text into headings,
paragraphs, lists, hypertext links and more. It is the
code behind your Web page.
iMira
Free online photo sharing service, where you can
create and manage your own photo albums to share
with friends and family.
Marquee
Frame outlining or surrounding an object or selection.
Selection marquees are dashed lines. Object marquees
are solid lines.
Magic texture
Contains random color patterns that you can use to
create a background or to fill an object or selection.
Menu Command bar
This is located at the top of the program UI and
contains all of the available tools you can use to
enhance your images.
Object
This is an identifiable component that is selfcontained or simply a “thing” in a Photo Express
project. Examples of some objects are: frames,
shadows, text, and background objects. Each has its
own characteristics and attributes.
Options panel
This is located at the left side of the Photo Express
program UI and is where you can customize the tools
and effects.
Page 43

Photo mode
This is where most image editing and enhancing is
performed.
Placeholder
A button that appears on an active element within a
project template, indicating that the element may be
modified or replaced. Click the button to view the
available options.
Preset mode
Contains samples using the selected tool with varying
degrees of predefined settings. You can quickly
enhance your image by simply dragging or doubleclicking a sample thumbnail.
Project mode
This mode contains fun projects and useful templates
for creative expression.
Props
These are clip art type objects that you can add to
your projects that will make them more interesting
and fun.
Selection
Selections and selection tools are used to create areas
of an image that can be modified independently of the
rest of an image. Selections can be drawn by hand, or
chosen by color or shape. Selection areas can be
converted to objects.
Share menu
Contains tools for outputting your photos or projects.
You can save or send them to friends via e-mail, post
them to a free photo sharing service, or create
Windows desktop calendars or wallpaper.
Shortcut bar
This toolbar, located at the top of the Photo Express
workspace, contains commonly used commands for
easy access.
Skins
Customizable component of the UI that allows you to
change its appearance.
Soft edge
This is used to blend the edges of an object with the
background. The higher the value the more the edges
blend in.
Templates
Templates are project designs that can easily be
customized with your images and text. They can help
you get started quickly on a new project. You can
create and save your own templates for future use.
Thumbnail
A small, low resolution representation of an image.
Thumbnail strip
A small strip located at the bottom of your screen.
This holds all the images and projects that you have
open. Here, you can click once on a thumbnail to see
a larger preview of it and click twice to open it into
the workspace.
Transparency
Specifies the visibility of one object or image over
another. It affects how much you can see through an
object or the intensity of an applied effect.
Ulead Links menu
Provides you with quick access to several useful
Photo Express related Web sites.
User interface (UI)
The parts of the program which can be seen and the
commands and mechanisms used to control its
operation.
Wallpaper
The color or image that is used as the background for
the Windows desktop.
Web Studio
The collection of tools and functions available from
the Web menu, which can be used to create various
Web related projects including, Web pages, cards,
albums, shows, and animated graphics.
43
 Loading...