

Page 1
Model DR6000 User Guide
Compact Disc Recorder
R
CLASS 1 LASER PRODUCT
LUOKAN 1 LASERLAITE
KLASS 1 LASERAPPARAT
Recordable
ReWritable
Page 2

ENGLISH
WARRANTY
For warranty information, contact your local Marantz distributor.
RETAIN YOUR PURCHASE RECEIPT
Your purchase receipt is your permanent record of a valuable purchase. It should be kept in a safe place to be referred to as necessary
for insurance purposes of when corresponding with Marantz.
IMPORTANT
When seeking warranty service, it is the responsibility of the consumer
to establish proof and date of purchase. Your purchase receipt or invoice is adequate for such proof.
FOR U.K. ONLY
This undertaking is in addition to a consumer’s statutory rights and
does not affect those rights in any way.
FRANÇAIS
GARANTIE
Pour des informations sur la garantie, contacter le distributeur local
Marantz.
CONSERVER L’ATTESTATION D’ACHAT
L’attestation d’achat est la preuve permanente d’un achat de valeur.
La conserver en lieur sûr pour s’y reporter aux fins d’obtention d’une
couverture d’assurance ou dans le cadre de correspondances avec
Marantz.
IMPORTANT
Pour l’obtention d’un service couvert par la garantie, il incombe au
client d’établir la preuve de lachat et d’en corroborer la date. Le reçu
ou la facture constituent des preuves suffisantes.
ITALIANO
CONDIZIONI DI GARANZIA
L’apparecchio e’ garantito per 365 giorni dalla data di acquisto comprovata da un documento attestante il nominativo del rivenditore e la
data di vendita. La garanzia sara’ prestata con la sostituzione o riparazione gratuita delle parti difettose.
Non sono coperti da garanzia difetti derivanti da uso improprio, errata
installazione, manutenzione effettuata da personale non autorizzato
o, comunque, da circostanze che non passano riferirsi a difetti di funzionamento dell’apparecchio.
Sono inoltre esclusi dalla garanzia gli interventi inerenti l’installazione
e l’allacciamento agli impianti di alimentazione.
Gli apparecchi verranno riparati presso i nostri Centri di Assistenza.
Le spese ed i rischi di trasporto sono a carico del cliente.
La casa costruttrice declina ogni responsabilita’ per danni diretti o indiretti provocati dalla inosservanza delle prescrizioni di installazione,
uso e manutenzione dettagliate nel presente manuale.
Per informazioni sull’abbonamento al servizio Assistenza
postgaranzia e per conoscere l’indirizzo dei Centri Assistenza
Marantz rivolgetevi al nostro servizio consumatori (telefono 167820026 – numero verde).
PORTUGUÊS
GARANTIA
Para informações sobre a garantia, contactar o distribuidor Marantz
local.
GUARDAR O RECIBO DE COMPRA
O recibo é o registo permanente da compra que fez. Deve ser guardado num local seguro, para ser apresentado em questões relacionadas
com o seguro ou para quando tiver de contactar a Marantz.
SVENSKA
GARANTI
Angáende garanti,kontakta din lokala Marantz handlare.
SPAR KVITTOT
Kvittot är din lnköpshandllng över lnköp av en värdefull vara.Det ska
placeras pá ett säkert ställe och hänvlsas till vid försäkringsfrágor eller
vid korrespondens med Marantz.
VIKTIGT
När garantiservice áberopas är det konsumentens ansver att visa datum för inköp.Ditt kvitto eller din faktura är ett tillfredsställande bevis.
ENGLISH:
CAUTION – USE OF CONTROLS OR ADJUSTMENTS OR PERFORMANCE OF PROCEDURES
OTHER THAN THOSE SPECIFIED HEREIN MAY RESULT IN HAZARDOUS RADIATION EXPOSURE.
FINNISH:
VAROITUS! Laitteen käyttäminen muulla kuin tässä käyttöohjeessa mainitulla tavalla saattaa
altistaa käyttäjän turvallisuusluokan 1 ylittävuälle näkymättömälle lasersäteilylle.
SWEDISH:
VARNING!
Om apparaten används påannat sätt än vad som beskrivs 1 denna bruksanvisning kan
användaren utsättas för osynlig laserstrålning som overskrider gränsen för laserklass 1
.
WARNINGS FOR LASER RADIATION
DANSK
GARANTI
Henvend dem til Deres MARANTZ-forhandler angående inrformation
om garantien.
GEM DERES KVITTERING
Deres købskvittering er Deres varige bevis på et dyrt køb. Den bør
gemmes godt og anvendes som bevis, hvis De vil tegne en forsikring,
eller hvis De kommunikerer med Marantz.
VIGTIGT
Det påhviler forbrugeren at skaffe bevis for købet og købsdatoen, hvis han eller hun ønsker garantiservice. Deres købskvittering eller faktura er et fuldgyldigt bevis herpå.
DEUTSCH
GRANTIE
Bei Garantiefragen wenden Sie sich bitte an Ihren Marantz-Händler.
HEBEN SIE IHRE QUITTUNG GUT AUF
Die Quittung dient Ihnen als bleibende Unterlage für Ihre wertvolle
Anschaffung Das Aufbewahren der Quittung ist wichtig, da die darin
enthaltenen angaben für Versicherungszwecke oder bei
korrespondenz mit Marantz angeführt werden müssen.
WICHTIG!
Bei Garantiefrangen muß der Kunde eine Kaufunterlage mit
kaufdatum vorlegen. Ihre Quittung oder Rechnung ist als Unterlage
ausreichend.
NEDERLANDS
GRANTIE
Voor inlichtingen omtrent garantie dient u zich te wenden tot uw
plaatselijke Marantz-handelaar.
UW KWITANTIE, KASSABON E.D. BEWAREN
Uw Kwitantie, kassabon e.d. vormen uw bewijs van aankoop van een
waardevol artikel en dienen op een veilige plaats bewaard te worden
voor evt. verwijzing, b.v. in verband met verzekering of bij
correspondentie met Marantz.
IMPORTANTE
Quando procurar assisténcia técnica ao abrigo da garantia, é da responsabilidade do consumidor estabelecer a prova e data de compra.
O recibo é prova adequada.
ESPAÑOL
GARANTÍA
Para información sobre las Condiciones de Garantía, sírvase consultar el Certificado que encontará en le interior del embalaje del equipo.
CONSERVE EL COMPROBANTE DE LA COMPRA
La factura es el comprobante de la adquisición de un producto valioso. Consérvela en lugar seguro para poder consultarla en caso necesario.
IMPORTANTE
Para disponer de servicios cubiertos por la garantía, el usuario deberá
acreditar la fecha y el lugar de adquisición del equipo. La factura o recibo
de la compra constituyen un comprobante válido a tal efecto.
CAUTION : INVISIBLE LASER RADIATION WHEN OPEN. DO NOT STARE INTO BEAM.
DANGER : INVISIBLE LASER RADIATION WHEN OPEN. AVOID DIRECT EXPOSURE TO BEAM.
VARO! : AVATTAESSA JA SUOJALUKITUS OHITETTAESSA OLET ALTTIINANAKYMÄTTÖMÄALLE
LASERSÄTEILYLLE. ÄLÄ KATSO SÄTEESEEN.
VARNING! : OSYNLIG LASERSTRÅLNING NÄR DENNA DEL ÄR ÖPPNAD OCH SPÄRREN ÄR
URKOPPLAD. BETRAKTA EJ STRALEN.
BELANGRIJK
Bij een evt. beroep op de garantie is het de verantwoordelijkheid van
de consument een gedateerd bewijs van aankoop te tonen. Uw
kassabon of factuur is zijn voldoende bewijs.
iii
Page 3

6
7
8
CONTROLS AND CONNECTIONS
ENGLISH
TABLE OF CONTENTS
Display
52
51
50
Player front
CD RECORDER DR6000
Recordable
STANDBY
ON/OFF
POWER
ReWritable
OPEN/CLOSE
DISPLAY SCROLL
SOURCE ERASE
CANCEL
STORE
DELETE
MENU
123 4567 89101112 131415
REC TYPE REW FF
EASY JOG
FINALIZE
PUSH ENTER
Player back
REMOTE
CONTROL
IN
OUT
EXTERNAL
INTERNAL
39
40
41
42
53
54
55
56
57
58
59
60
61
62
63
64
65
INPUT
ANALOG IN/OUT
L
R
OUTPUT
INPUT
DIGITAL IN/OUT
OUTPUT
OPTICAL COAXIAL
INPUT OUTPUT
22 23 24 25 26 27 2829 30 31
32 33 34 35 36 37 38
43444546474849
161718192021
PLAY/PAUSESTOP
LEVEL PHONES
REC
-+
Remote control
TRACK
INCR.
SPACE
0
ENTER
321
654
987
SCROLL
CD
CANCEL/
DELETE
RANDOMPROG.REPEAT
SCAN
ABC DEF GHI
JKL MN OPQ
RST UVW XYZ
DISPLAY
FUNCTION
CDR
MENU/
STORE
73
72
71
70
69
6
6
6
CONTROLS AND CONNECTIONS...............iii
Player front...........................................................iii
Player back ..........................................................iii
Remote control.....................................................iii
Display .................................................................iii
INTRODUCTION.............................................1
Unpacking ............................................................ 2
Setup....................................................................2
Conpact discs ......................................................2
Maintenance ........................................................2
CONTROLS AND CONNECTIONS................3
INSTALLATION ..............................................5
The following options are available: ..................... 5
Analog connections..............................................5
Digital Coaxial connections.................................. 5
Digital Optical connections...................................6
D-BUS CONNECTION....................................6
Remote control cable connections....................... 6
USING THE RECORDER ...............................7
Switching ON and OFF ........................................ 7
Using the remote control...................................... 7
Inserting discs ...................................................... 7
RECORDING ..................................................8
Remarks about recording .................................... 8
Recording modes................................................. 8
CD-SYNC.............................................................9
Manual start recording ....................................... 10
FINALIZING/UNFINALIZING........................11
Finalizing CD-R & CD-RW discs........................ 11
Unfializing CD-RW discs.................................... 11
ERASING...................................................... 12
Erasing............................................................... 12
Erasing one or more tracks from the end...........12
Erasing the entire disc .......................................12
PLAYING.......................................................13
Playing a CD ...................................................... 13
Selecting a track ................................................13
Scan play ........................................................... 14
Search................................................................14
Random play...................................................... 14
Repeat play........................................................ 14
PROGRAMMING .......................................... 15
Programmed play...............................................15
MENU MODE................................................ 16
MENU MODE can set up: .................................. 16
Text settings ....................................................... 16
Recording settings ............................................. 17
OTHER INFORMATIONS .............................19
Fixing problems..................................................19
Diagnostic Program ........................................... 20
ABOUT TEXT................................................21
REMOTE CONTROLLER
RC6050DR
DISPLAY.......................................................18
General .............................................................. 18
Recording...........................................................18
Play .................................................................... 18
Others ................................................................ 18
Menu messages.................................................19
iii
Page 4
INTRODUCTION
ReWritable
Foreword
This section must be read carefully before any connection is
made to the mains supply.
WARNINGS
Do not expose the equipment to rain or moisture.
Do not remove the cover from the equipment.
Do not insert anything into the equipment through the
ventilation holes.
Do not handle the mains lead with wet hands.
CE marking (only EU version)
This product is in conformity with the EMC directive
and low-voltage directive.
Equipment mains working system
Your Marantz product complies with the household power and
safety requirements in your area.
“/N1” Version product can be powered by 230 V AC only.
IMPORTANT: (FOR U.K. version only)
This apparatus is fitted with an approved moulded 13 Amp plug.
To change a fuse in this type of plug proceed as follows:
1. Remove fuse cover and fuse.
2. Fix new fuse which should be a BS1362 5A, A.S.T.A. or BSI
approved type.
3. Refit the fuse cover.
If the fitted plug is not suitable for your socket outlets, it should
be cut off and an appropriate plug fitted in its place.
If the mains plug contains a fuse, this should have a value of
5A. If a plug without a fuse is used, the fuse at the distribution
board should not be greater than 5A.
Note :
The severed plug must be destroyed to avoid a possible shock
hazard should it be inserted into a 13A socket elsewhere.
Congratulations on the acquisition of your CD-Recorder. This
CD-Recorder now enables you to record, play and erase your
own audio Compact Discs. Naturally the recorder can also be
used to play all pre-recorded CDs.
With the exception of legal restrictions pertaining to copying,
you can now create your own high-quality audio recordings on
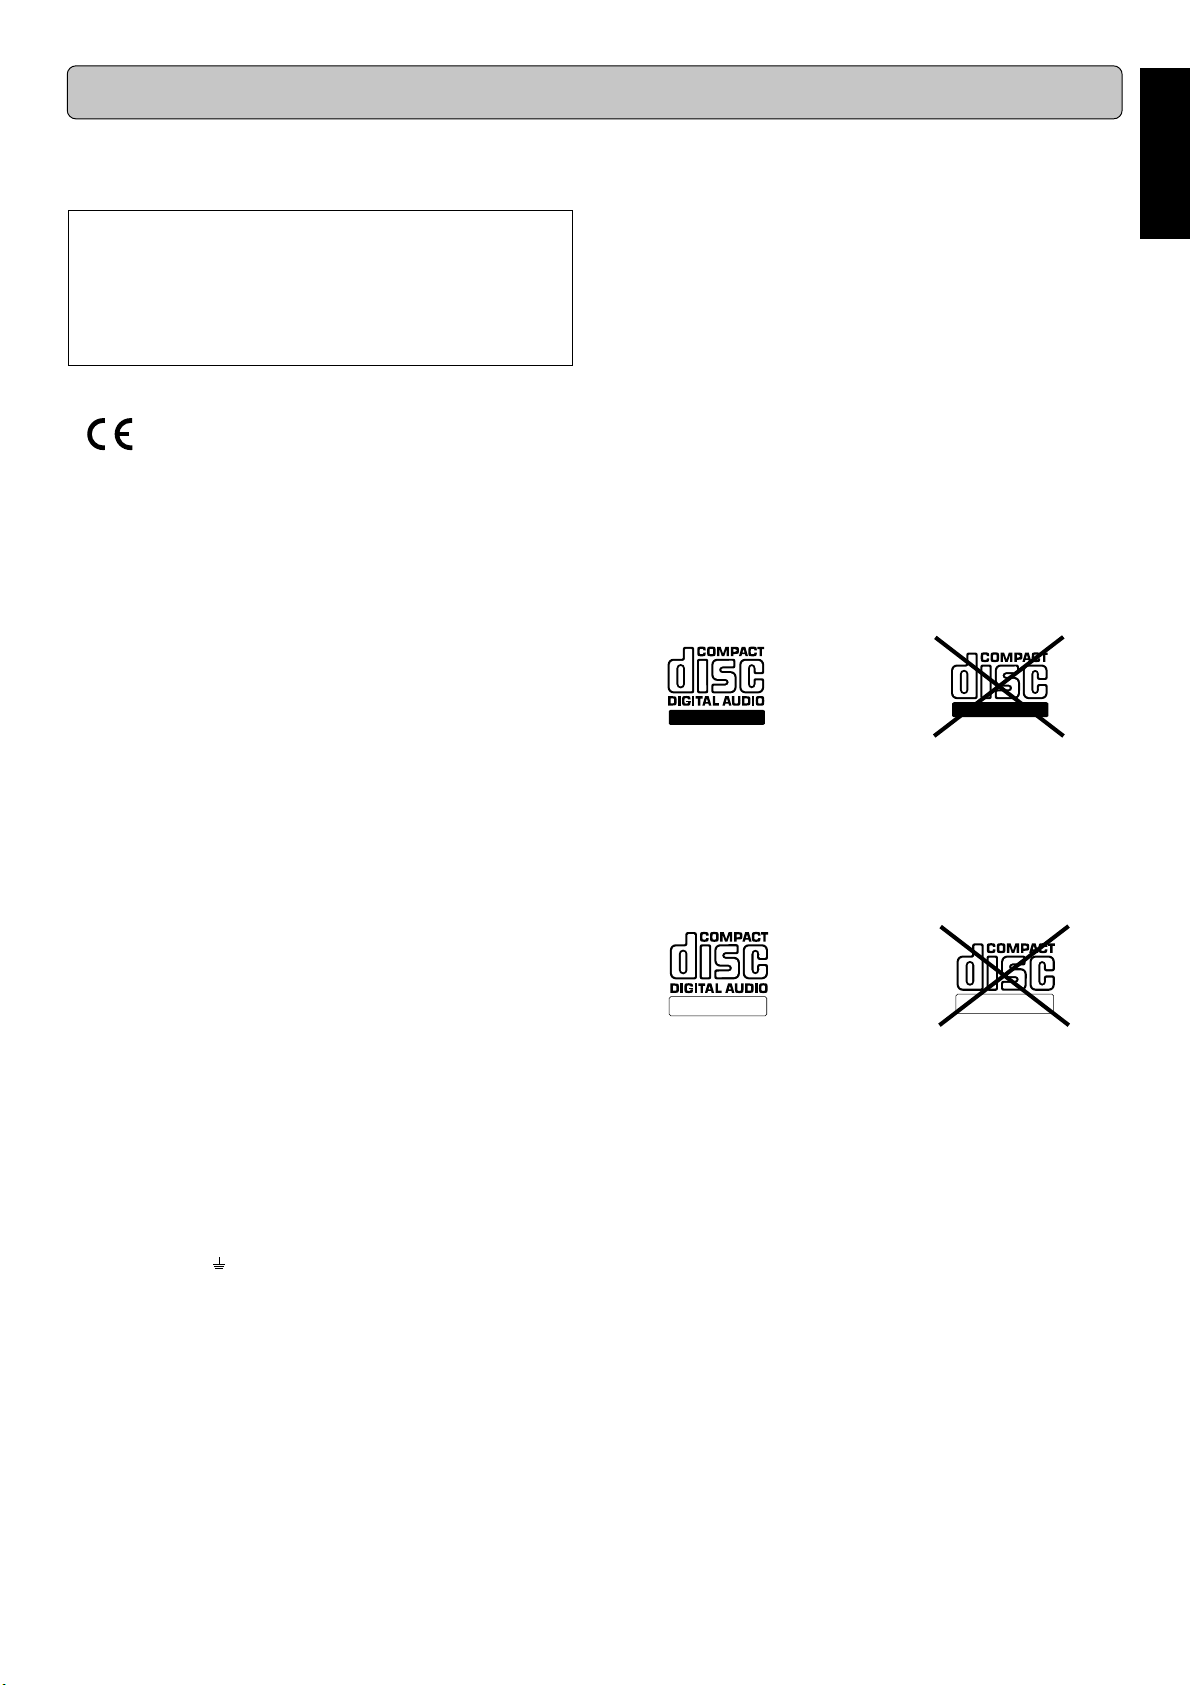
CD. The discs used to record must bear the logos shown below. Copyright fees have been paid on these discs in some
countries. Recording on other types of discs (e.g. CD-R for professional recordings) is not possible.
There are two types of recordable AUDIO discs:
CD-R(W) discs have a compatibility to play/record on the CDRecorders based on the ORENGE BOOK Part II/III. But the
discs might not be able to be played/recorded properly depending on the combinations of the discs and CD-Recorders.
1 CD Recordable Audio (record once):
Fully recorded and subsequently finalized audio CD-R discs
can be played on CD players and recorders that are suitable
for CD-R discs. A CD-R disc can be recognized by the following logo:
Recordable
2 CD ReWritable Audio (multiple recording):
Recorded and finalized audio CD-RW discs can be played
on CD players and recorders that are suitable for CD-RW
discs. An increasing number of players and recorders will be
suitable for these discs in the future. A CD-RW disc can be
recognized by the following logo:
Recordable
ENGLISH
HOW TO CONNECT A PLUG
The wires in the mains lead are coloured in accordance with the
following code:
BLUE—“NEUTRAL” (“N”)
BROWN—“LIVE” (“L”)
1. The BLUE wire must be connected to the terminal which is
marked with the letter “N” or coloured BLACK.
2. The BROWN wire must be connected to the terminal which is
marked with the letter “L” or coloured RED.
3. Do not connect either wires to the earth terminal in the
plug which is marked by the letter “E” or by the safety
earth symbol or coloured green or green-and-yellow.
Before replacing the plug cover, make certain that the cord grip
is clamped over the sheath of the lead — not simply over the
two wires.
Copyright
Recording and playback of some material may require permission. For further information refer to the following:
- Copyright Act 1956
- Dramatic and Musical Performers Act 1958
- Performers Protection Acts 1963 and 1972
- Any subsequent statutory enactments and orders
ReWritable
The CD-R(W)disc for ‘DIGITAL AUDIO’ can be both recording
and playing on this CD-Recorder. In addition, this CD-Recorder can play the CD-R(W) disc for ‘PROFESSIONAL RECORDING’, but cannot record it.
Once you start using the recorder, you will discover how easy it
is to ‘make’ your own CDs. Nevertheless, we recommend that
you use an erasable (CD-RW) digital audio disc on your first
attempt, while following the instructions given here.
Attention!
Recordings may only be made for personal use.
It is forbidden to copy material protected by copyright, in-
cluding computer programs, films, television and audio
recordings. This appliance may not be used for applications of this type.
Note:
Some CD players can not play the finalized CD-R(W) discs because of the low reflectivity of such discs.
Because of laser power differences, some DVD players cannot
play the finalized CD-R(W) discs.
Read the text carefully and keep the instructions close at hand
so that you can refer to them if necessary.
1
Page 5
ENGLISH
INTRODUCTION
Unpacking
First check the contents of the packaging. It should contain the
following:
- CD-Recorder DR6000
- Remote control with batteries packaged separately
- Audio cables (2 - with red and white plugs) × 2
- Digital coax cable (with black plugs) × 1
- Remote control cable (with orange plugs) × 1
- Instructions
If one of these components is missing, please inform your supplier immediately. Save the packaging material it may come in
handy if you move the appliance.
Setup
- Place the recorder on a strong, vibration-free surface.
- Do not use the recorder under extremely damp condi-
tions.
- If the recorder is placed in a cabinet, make sure that a
2.5 cm space remains free on all sides of the recorder
for proper ventilation.
Attention!
If the appliance is not used or operated in accordance with
the instructions, this may result in exposure to dangerous
radiation or other risks.
• Do not use conventional record cleaner for analog records,
as this will adversely affect the disc surface.
Store discs properly by placing them in their disc cases.
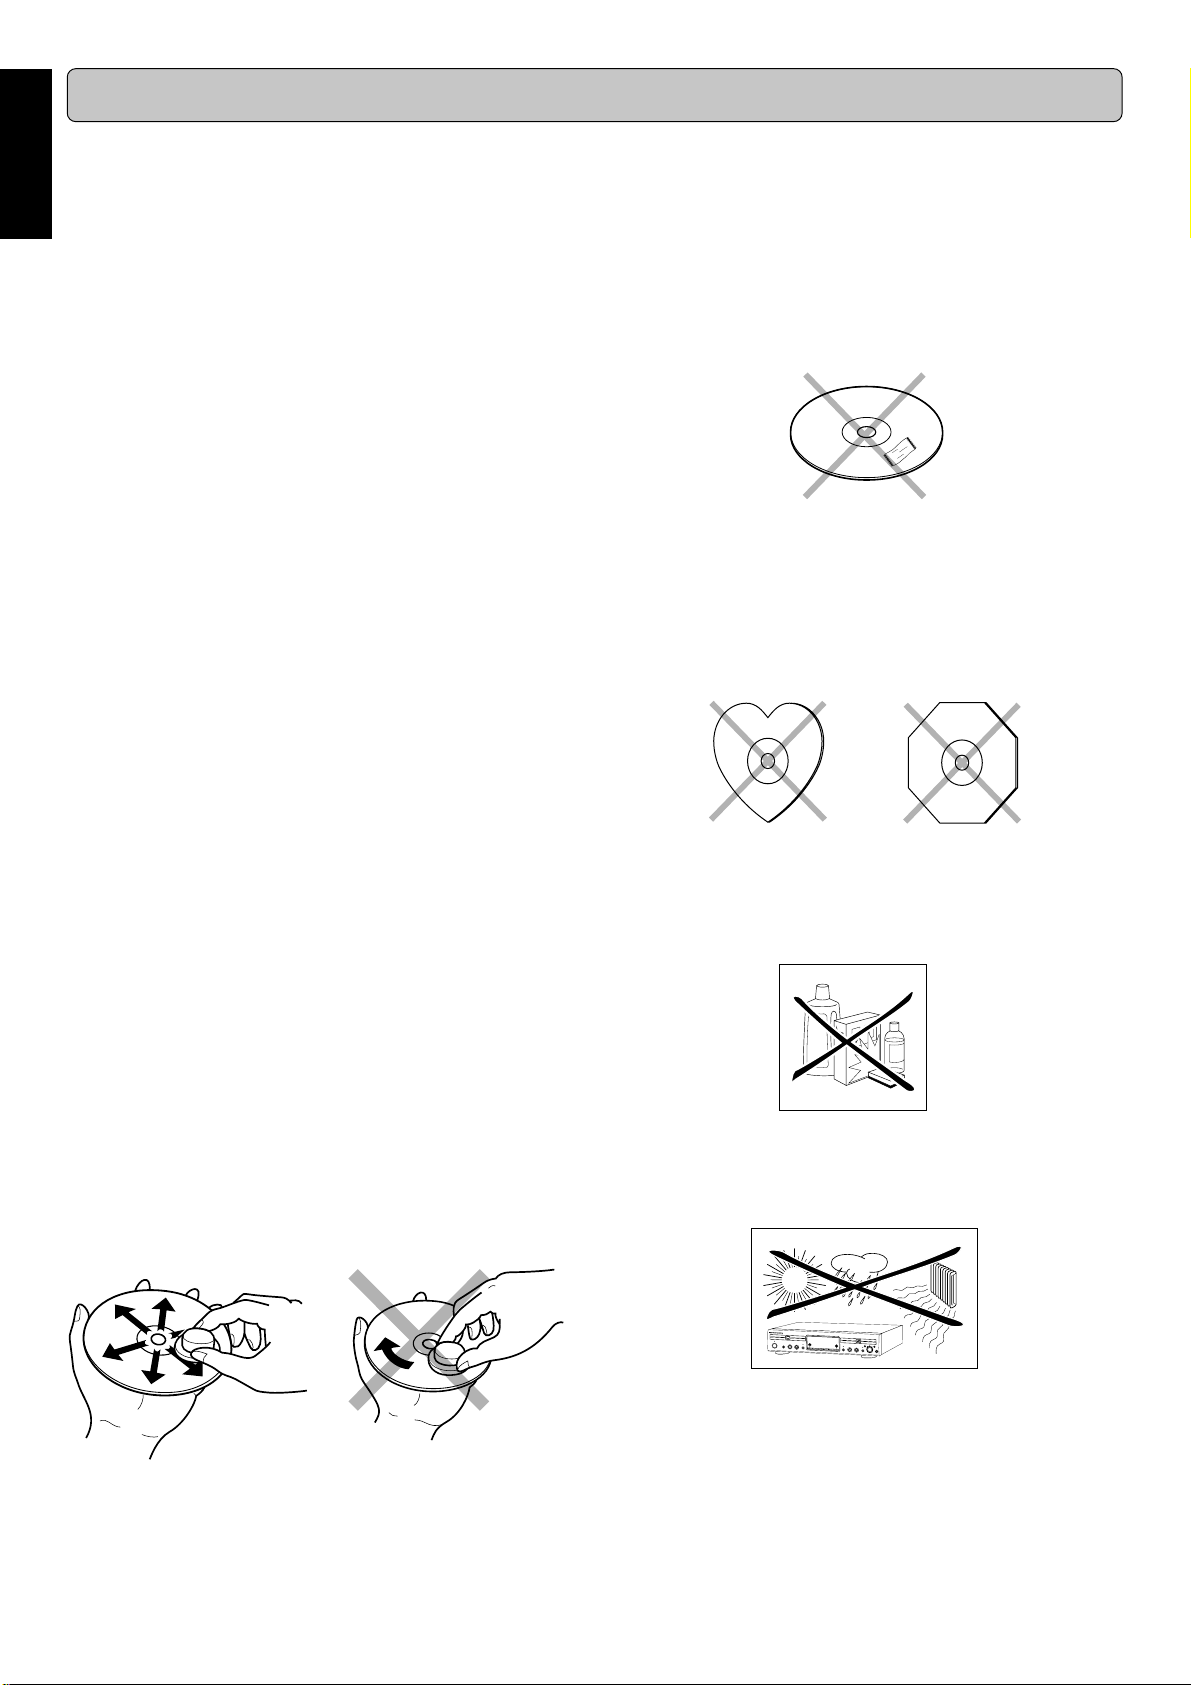
• Do not attach a piece of paper or sticker on the label side of
disc. When a disc has a piece of plastic tape or rental CD
label with paste protruded from the edge or when a disc has
a trace of such a sticky object, do not attempt to play the disc.
If such a disc is played on the CD player, impossibility of taking out the disc or other malfunction may result.
• Write only on the printed side of a CD-R or CD-RW, and only
with a soft felt-tipped pen.
• Do not use a disc with a special shape.
Do not attempt to play a disc with a special shape such as a
heart-shaped disc or octagonal disc. Otherwise the equipment malfunction may result.
Only authorized technicians are allowed to open the appliance casing or to perform repairs or maintenance.
Compact discs
The glossy side shining like a rainbow is the front side of the
disc, and the side on which the label is printed is the back.
Unlike conventional turntables for playing analog discs, the
DR6000 reads the information recorded on the disc from underneath without contacting it using a beam of laser light. Therefore, the performance of a compact disc will not degrade like
conventional analog records.
Handle discs carefully so as not to damage or scratch the
front side.
To protect the disc, avoid placing it in the following locations:
- In direct sunlight or near a source of heat like a heater.
- In a place which is damp or dirty.
- In a place which could be exposed to rain, such as near
a window.
Always keep the disc surface clean.
Up to six billion data units are recorded on the front side of the
disc. When cleaning the disc surface, always be sure to use a
special compact disc cleaner and wipe as shown below.
Maintenance
Clean the CD-Recorder with a soft, slightly dampened lint-free
cloth. Do not use any cleaning agents as they may have a corrosive effect.
Do not expose the CD-Recorder, batteries or CDs to humidity,
rain, sand or excessive heat (caused by heating equipment or
direct sunlight).
Wipe in a radial direction. Do not wipe in circumferential direction.
C
D
R
E
C
O
R
D
E
R
D
R
6
0
5
0
R
e
c
o
r
d
a
b
l
e
R
e
W
r
i
t
a
b
l
e
P
O
W
E
R
O
N
/
O
F
F
S
T
O
P
P
L
A
Y
/
P
A
U
S
E
O
R
P
E
E
N
C
/
S
T
O
R
E
/
M
E
N
U
E
A
S
Y
C
J
O
L
O
G
S
E
C
D
R
C
A
N
C
E
L
/
D
E
L
E
T
E
O
P
E
N
/
C
L
O
S
E
S
T
O
P
P
L
A
Y
/
P
A
U
S
E
R
E
C
T
Y
P
E
S
O
C
U
D
R
C
E
E
R
A
S
EF
I
N
A
L
I
Z
E
D
J
M
O
D
E
P
H
O
N
E
S
P
U
S
H
E
N
T
E
R
If the CD-Recorder cannot read CDs correctly use a commonly
available cleaning CD to clean the lens before taking the CD
player to be repaired. Other cleaning methods may destroy the
lens. Always keep the tray closed to avoid dust on the lens.
The lenses may cloud over when the CD-Recorder is suddenly
moved from cold to warm surroundings. It is not possible to play
a CD then. Leave the CD-Recorder in a warm environment until
the moisture evaporates.
2
Page 6
CONTROLS AND CONNECTIONS
Controls on the front
CD-Recorder
(1) POWER ON/OFF ...........
(2) Standby indicator
(3) Disc tray ........................ records CD-R(W) and plays CD
(4) DISPLAY........................selects display information/text
(5) SCROLL ........................ activate scrolling of text over the
(6) / OPEN/CLOSE ............ opens/closes disc tray
(7) SOURCE........................ selects external input source
(8) ERASE........................... selects erasing mode
(9) STORE/MENU ............... -enters Menu mode
(10) CANCEL/DELETE ......... - deletes tracks from a program
(11) FINALIZE .......................selects finalize mode General
(12) – EASY JOG +...............- previous/next track (Play and
PUSH/ENTER ................ - plays selected tracks
(push) ............................ - selects settings in Menu mode
(13) 0 REC (ord)...................
(14) LEVEL ............................. adjust the headphone volume
(15) PHONES ........................socket for headphones
(16) 2/; PLAY/PAUSE .......... starts play/interrupts play or re-
(17) 9 STOP .......................... stops/clears a program
(18) R ................................ - searches forward
(19) Q ................................ - searches backward
(20) REC (ord) TYPE ............selects recording modes
(21) Display .......................... information screen
turns the CD-Recorder ON and OFF
and CD-R(W)
display (once)
- stores Menu settings
- deletes text in Menu mode
- returns to a higher level in the
menu
Program mode)
- recording level control (recording)
- selects settings (menu on)
- programs track numbers
starts recording, finalizing, erasing
cording
- cursor control in Menu/Prog. review mode
- cursor control in Menu/Prog. review mode
DISPLAY indications
(32) REM/REC TIME .............remaining recording time / re-
(33) TRACK...........................track number
(34)
(35) TOTAL REM
TRACK TIME .................total or remaining time of disc or
(36) STEP.............................. indicates the number of tracks in
(37) 20 + ................................ disc or program contains more
(38) Track Number ...............tracks on a discs or in a program
(39) PROGRAM .................... flashes during programming/
(40) RANDOM ALL ...............plays tracks in random order
(41) SCAN .............................lights up when the first 10 sec-
(42) REPEAT TRACK/ALL ...lights up when a track/ complete
(43) L/R ................................. record/play level bar. Indicates
(44) 2 .....................................lights during play
(45) R (W).............................. unfinalized CD-R(W) disc in-
(46) 0 .................................... lights during recording
(47) ; ..................................... pause function active
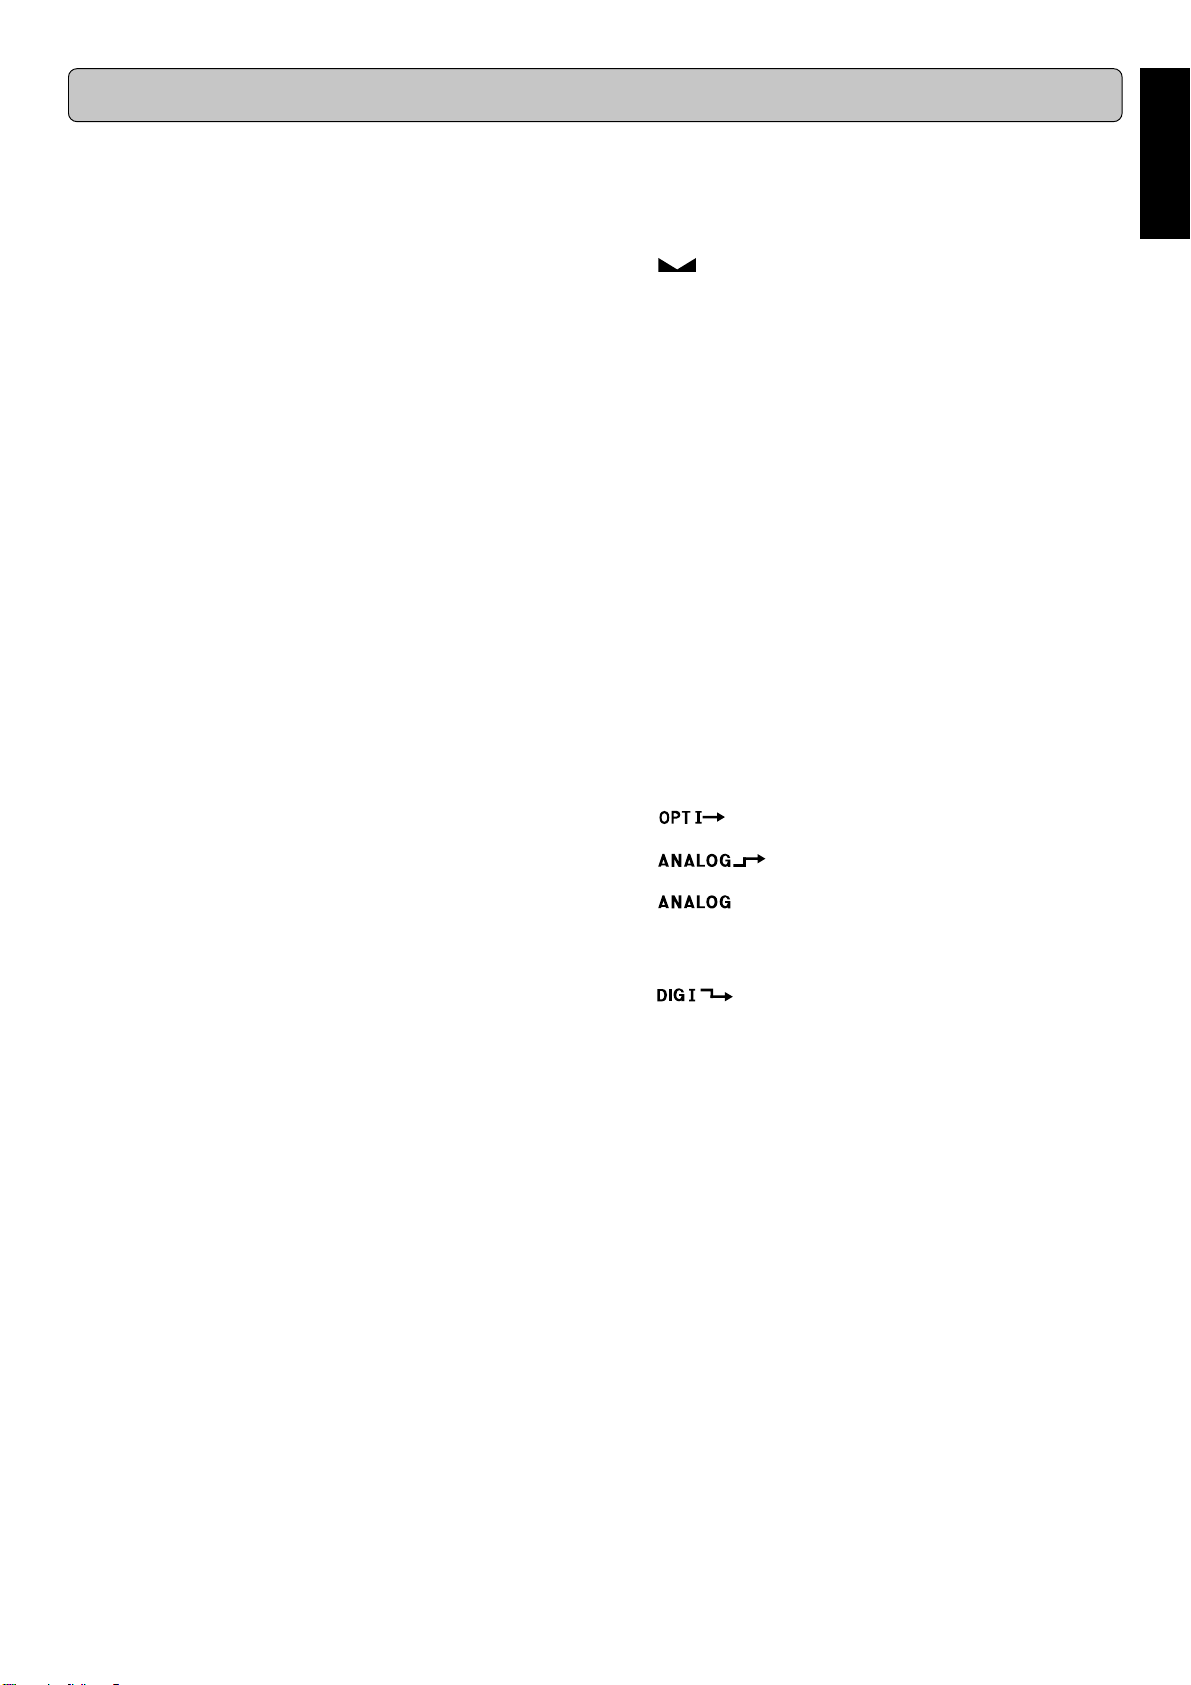
(48)
(49) ..................analog input selected for external
(50) MANUAL........................
(51) SYNC ............................. automatic or synchronized start
(52) ........................digital input I selected for external
cording time
...............................balance (lights during balance
adjustment)
track
a program
than 20 tracks
track in play
lights in program mode
onds of each track are played.
disc (or program) is repeated.
the audio signal level.
serted
..........................optical input I selected for exter-
nal recording
recording
........................analog recording
manual start of external recording
of external recording
recording
ENGLISH
Note:
- When provided on the remote control, you can also use the
corresponding buttons.
- Some buttons are only on the remote control.
Connections at the back
(22) ANALOG INPUT............ connects to the line output of an
amplifier (left and right)
(23) ANALOG OUTPUT........
(24) DIGITAL INPUT .............connects to the digital coaxial
(25) DIGITAL OUTPUT ......... connects to the digital coaxial in-
(26) OPTICAL INPUT............connects to the digital optical
(27) OPTICAL OUTPUT........connects to the digital optical in-
REMOTE CONTROL OUT
(28)
REMOTE CONTROL IN
(29)
(30)
REMOTE CONTROL SWITCH
(31) AC POWER CABLE
connects to the line input of an amplifier (left and right)
output of an external CD player
put of e.g. amplifier or recording
device
output of an external CD player
put of e.g. amplifier or recording
device
.....connects to a remote control in-
put on the Marantz amplifier
....connects to a remote control out-
put on the Marantz amplifier
3
Page 7

ENGLISH
REMOTE CONTROL
Remote control commands
(53) STANDBY ................. switches to Standby On/Off
(54) TRACK INCR. (ement).. increases track numbers during
recording
(55) SCAN ............................. plays the first 10 seconds of each
track
(56) REPEAT.........................repeat play(All, program or track)
Number/alphabet keys 0 - 9 ..
(57)
(58) DISPLAY........................selects display information/text
(59) CDR ............................... selects CD-Recorder
(60) 2 .....................................starts CD-R(W) play
(61) S ................................ previous track (Play and Pro-
(62) Q ................................ - searches backward
(63) ; .....................................
(64) MENU/STORE ............... - enters Menu mode
(65) ENTER ........................... - selects settings in Menu mode
(66) CANCEL/DELETE ......... - deletes tracks from a program
(67) R ................................ - searches forward
(68) 9 .....................................stops CD-R(W) and clears a pro-
(69) T ................................ next track (Play and Program
(70) CD .................................. selects CD player
(71) SCROLL ........................ activates scrolling of text over the
(72) PROG. (ram)..................opens/closes program memory
(73) RANDOM ....................... plays CD-R(W) or program in
- selects a track by number
- selects character for text input
gram mode)
- cursor control in Menu/Prog. review mode
interrupts CD-R(W) play/recording
- stores Menu settings
- programs track numbers
- starts playback of selected
track
- deletes text in Menu mode
- returns to a higher level in the
menu
- cursor control in Menu/Prog. review mode
gram
mode)
display
random order
4
Page 8
INSTALLATION
This CD-Recorder can be used to record directly or through a
(pre-) amplifier from any digital or analog audio source.
In addition, the appliance can be used as a regular CD player.
Read how to connect the CD-Recorder based on the possibilities your other audio equipment offers.
Please refer to the operating instructions for your other audio
equipment first.
The following options are available:
- analog connections
- digital coaxial connections
- digital optical connections
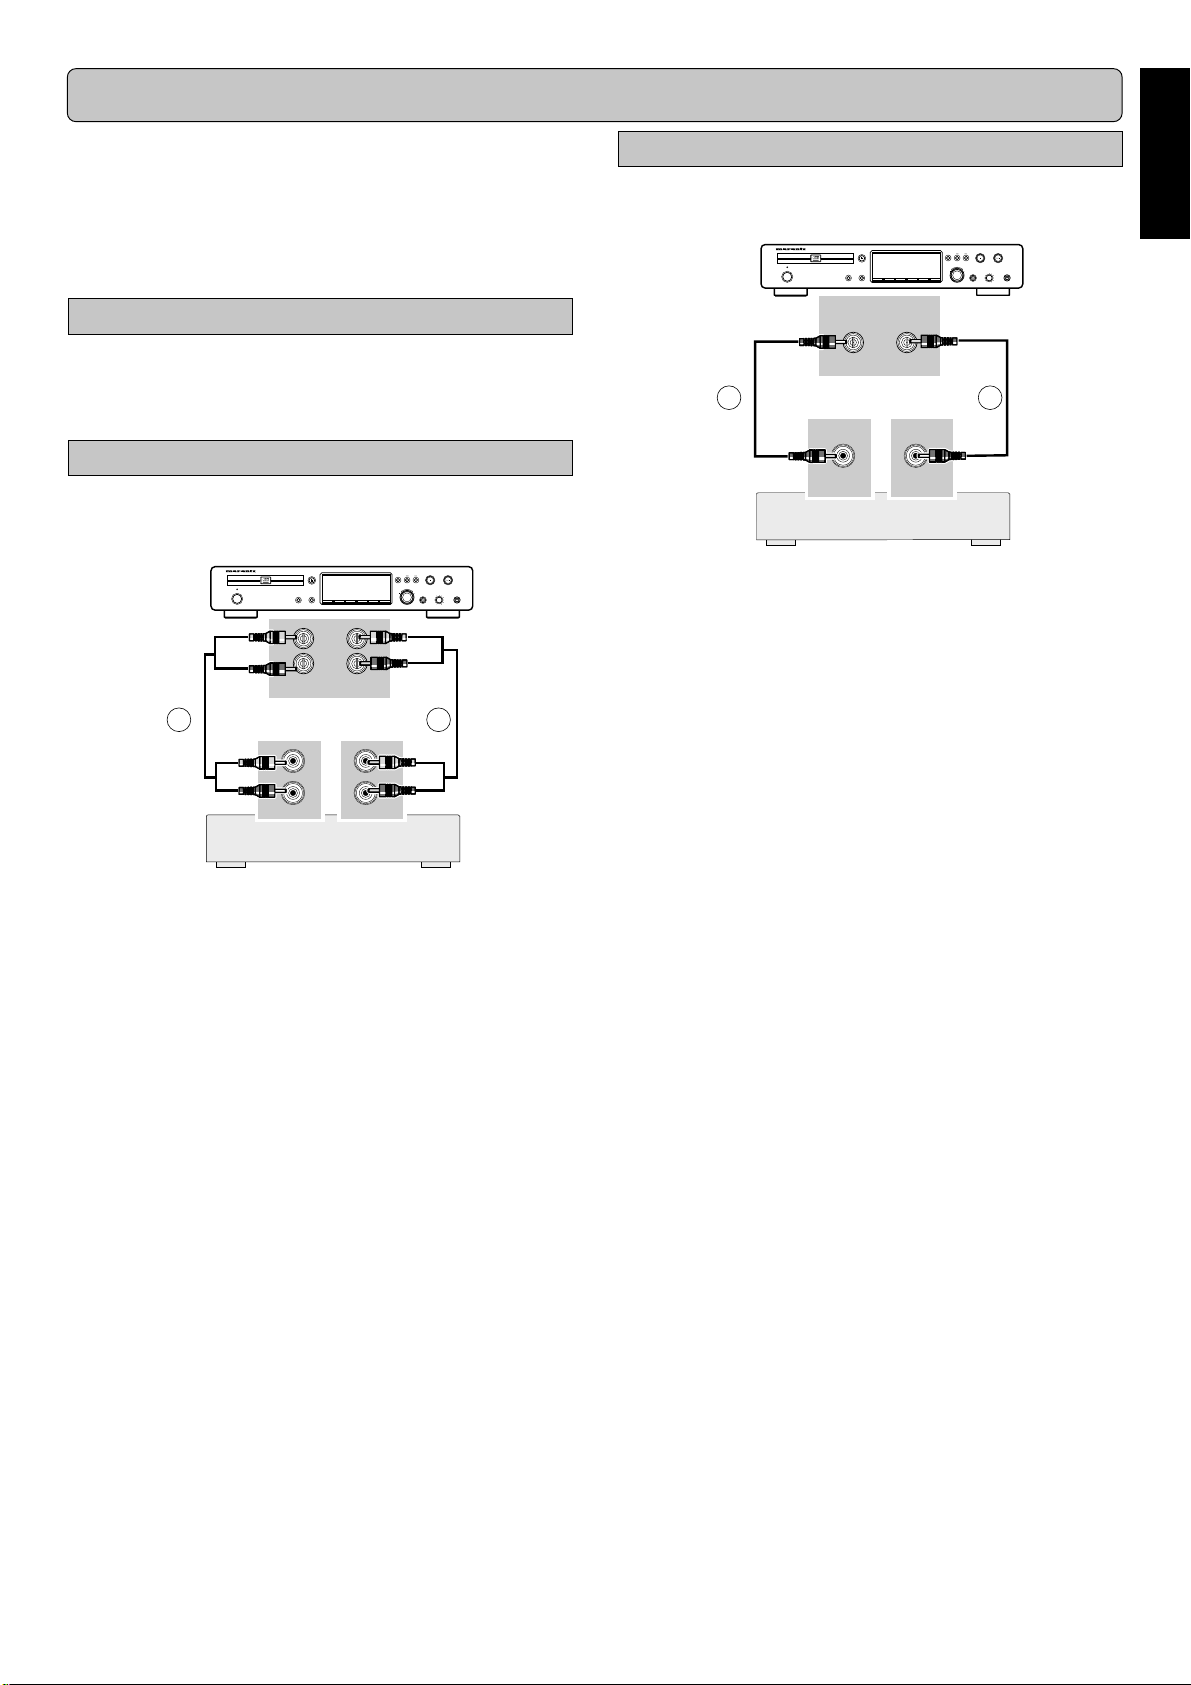
Analog connections
For recording and playing, connect the CD-Recorder to an amplifier (preferably the CD-Recorder or TAPE connection) based
on the diagram below:
CD RECORDER DR6000
OPEN/CLOSE
Recordable
ReWritable
ON/OFF
POWER
DISPLAY SCROLLPE
ANALOG IN/OUT
INPUT
SOURCE ERASE
L
R
12
L
R
OUTPUT
Amplifier
OUTPUT
L
R
STORE
MENU
INPUT
REC TYPE REW FF
PLAY/PAUSESTOP
EASY JOG
LEVEL PHONES
REC
CANCEL
FINALIZE
DELETE
-+
PUSH ENTER
Digital Coaxial connections
For recording and playing, connect the CD-Recorder to a digital
amplifier or other equipments based on the diagram below:
CD RECORDER DR6000
OPEN/CLOSE
Recordable
ReWritable
ON/OFF
POWER
DISPLAY SCROLLPE
INPUT
SOURCE ERASE
DIGITAL IN/OUT
OUTPUT
REC TYPE REW FF
PLAY/PAUSESTOP
EASY JOG
LEVEL PHONES
REC
CANCEL
STORE
FINALIZE
DELETE
MENU
-+
PUSH ENTER
34
OUTPUT INPUT
Amplifier
1 For an external recording, connect the cable 3 between the
DIGITAL INPUT-socket on the CD-Recorder and the DIGITAL OUTPUT-socket of an external amplifier or CD player.
2 For playback, connect cable 4 between the DIGITAL OUT-
PUT-socket on the CD-Recorder and the DIGITAL INPUTsocket of an amplifier e.g. DAT or DCC.
Digital Optical connections
ENGLISH
1 For recording, connect cable 1 between the ANALOG IN-
PUT-sockets on the CD-Recorder and the CD LINE- or
TAPE OUTPUT-sockets of an amplifier.
2 For playback, connect cable 2 between the ANALOG OUT-
PUT-sockets on the CD-Recorder and the ANALOG INPUT-sockets of an amplifier e.g. TAPE IN, CD or AUX.
Note:
Never use the PHONO input.
5
Page 9

ENGLISH
INSTALLATION D-BUS CONNECTION
For recording and playing, connect the CD-Recorder to a digital
amplifier or other equipments based on the diagram below. Before connection the cables, remove the dust caps from the digital optical connections. We recommend that you save the
caps.
CD RECORDER DR6000
OPEN/CLOSE
Recordable
ReWritable
ON/OFF
POWER
DISPLAY SCROLLPE
SOURCE ERASE
OPTICAL
INPUT OUTPUT
REC TYPE REW FF
PLAY/PAUSESTOP
EASY JOG
LEVEL PHONES
REC
CANCEL
STORE
FINALIZE
DELETE
MENU
-+
PUSH ENTER
56
OUTPUT INPUT
Amplifier
1 For external recording, connect a fiber-optic cable 5 be-
tween the DIGITAL OPTICAL INPUT of the CD-Recorder
and the DIGITAL OPTICAL OUTPUT of an external amplifier or CD player.
2 For playback, connect cable 6 between the OPTICAL OUT-
PUT-socket on the CD-Recorder and the DIGITAL OPTICAL INPUT-socket of an amplifier e.g. DAT or DCC.
By connecting DR6000 to the Marantz amplifier using a D-BUS
remote control cable 7, you can operate the operations of
DR6000 from the remote control of the amplifier. Set the re-
mote control selector to ‘EXTERNAL’.
CD RECORDER DR6000
OPEN/CLOSE
Recordable
ReWritable
ON/OFF
POWER
DISPLAY SCROLLPE
SOURCE ERASE
IN
OUT
REMOTE
CONTROL
REC TYPE REW FF
PLAY/PAUSESTOP
EASY JOG
LEVEL PHONES
REC
CANCEL
STORE
FINALIZE
DELETE
MENU
INTERNALEXTERNAL
-+
PUSH ENTER
7
REMOTE
CONTROL
IN
OUT
Note:
When you don’t use the D-BUS connection, ALWAYS set
the remote control selector to ‘INTERNAL’.
Marantz Amplifier
Note:
For playback, the digital coaxial outputs or analog outputs of
the CD Player and CD-Recorder should be connected to an
amplifier
Remote control cable connections
6
Page 10

USING THE RECORDER
The numbers between parentheses refer to the fold-out.
Switching ON and OFF
1 Connect the power cord into the mains.
AC IN
q
2 Press the
CD-Recorder to turn it on or off.
POWER ON/OFF
CD RECORDER DR6000
Recordable
STANDBY
ON/OFF
POWER
(1) button on the front of the
ReWritable
DISPLAY SCROLL
OPEN/CLOSE
Inserting discs
1 Press
2 Insert a CD, CD-R or CD-RW in the appropriate recess in
3 Press
//
/
➔
OPEN/CLOSE
//
lights up.
(6) to open the disc tray.
the tray, label side up.
//
/
➔
OPEN/CLOSE
//
lights up, followed by and the dis-
(6) to close the tray.
play will show the type of disc you inserted.
ENGLISH
w
Using the remote control
1 Open the battery compartment cover.
2 Insert 2 batteries (AA, LR-6 or UM-3; as supplied) as
shown.
3 Replace the cover.
Note:
- We recommend you use 2 batteries of the same type and
condition.
- Always point the remote control directly towards the recorder and make sure there.
• If a CD-R(W) is finalized it will show CD on the display.
• If CD-text is available the TITLE/ARTIST will scroll by.
Note:
- Only Audio CDs will be accepted. If a non-audio disc is
inserted, the display shows
- For recording it is important that the blank disc is completely
free from dust particles or scratches. (see Compact Discs
page 2).
- If you insert a blank or partly-recorded CD-R or unfinalized
CD-RW, the CD-Recorder will calibrate the disc for optimum
recording. During this process the display will first show
and then the number of audio tracks.
Calibration can take up to 25 seconds.
.
This remote control can switch “STANDBY ON/OFF” but cannot switch “POWER ON/OFF” the CD-Recorder.
Batteries contain chemical substances, so they should be
disposed of properly.
7
Page 11

ENGLISH
RECORDING
The numbers between parentheses refer to the fold-out.
Remarks about recording
You will soon discover how easy it is to make your own CDs.
Nevertheless, it is advisable to use a CD-RW disc for your first
try.
• If the disc is a CD-RW and is already finalized you must
unfinalize it first.
• The recording procedure is the same for CD-Rs and CDRWs.
• If the disc already contains recordings, the CD-Recorder will
automatically search for the end of the last track, so that recording can start from there.
• There must be at least 7 seconds of recording time left
on the disc, otherwise you will not be able to enter record
standby mode.
• If the display indicates
cording can be made of the source material. Recording will
not start.
• The Serial Copy Management System (SCMS) only allows digital recording under specific conditions:
- This means that it is not possible to make a digital copy
from a digital copy.
- Analog recording is always possible !
- The number of recordings from the original is unlimited.
Digital
CD
Analog
CDR,
DAT
CDR,
DAT
Digital
Analog
Digital
CDR,
DAT
CDR,
DAT
CDR,
DAT
• A maximum of 99 tracks can be recorded on a disc. Minimum
allowable track length is 4 seconds.
• Recordings from DAT or DCC players will not always stop
automatically.
Important:
If you want to play the recorded CD-R disc on any regular
CD player, it must first be finalized. (See FINALIZING/
UNFINALIZING.)
Finalized CD-RW discs play only on CD-RW compatible CD
players.
then lights up.
Digital
CDR,
DAT
Digital
CDR,
DAT
O :
X :
, no digital re-
Digital
CDR,
DAT
Can be recorded.
Cannot be recorded.
Recording modes
Your recorder offers several recording modes.
complete disc or a program simply by starting the source.
single track simply by starting the source.
- - to manualy start a recording simply by
pressing the REC key.
- - to make a synchronised recording of the complete disc or a program simply by starting the source. Finalizing will be done automatically.
Some remarks on recording:
- When Auto track is on (default setting), track numbers will
automatically be increased during recording.
- By programming tracks first, a compilation can be recorded.
- If a finalized CD recordable disc is inserted in the CD-Recorder, will be displayed. Recording is
not possible.
- If a finalized CD rewritable disc is inserted in the CD-Recorder,
played when the
(12, 65) is pressed, the disc will be unfinalized.
TER
- When you copy a special disc such as HDCD or DTS, you
have to
• set the sampling frequency at 44.1kHz.
• use the digital connection.
• set the digital rec-volume of the CD-Recorder at 0 dB.
- When you copy the tracks from a DAT recorded by different
sampling frequencies, noise might be recorded in the disc.
Please set a sampling frequency for every track in a DAT.
- This CD-Recorder can record about 17 seconds of a pause
time, which decreases the time count just before music start
in a track on the display. If you record a track including more
than 17-seconds-pause time by digital recording, the pause
time will be recorded the different length of time from original.
However, the entire track time will not be changed and be
able to listen to the music as same as original.
Warning:
No more recording possible after finalizing CD-R disc!
- to make a synchronised recording of the
- to make a synchronised recording of a
and will be dis-
REC TYPE
(20) is pressed. If
PUSH EN-
8
Page 12

RECORDING
The numbers between parentheses refer to the fold-out.
CD RECORDER DR6000
Recordable
ReWritable
ON/OFF
POWER
DISPLAY SCROLL
OPEN/CLOSE
SOURCE ERASE
STORE
MENU
REC TYPE REW FF
CANCEL
FINALIZE
DELETE
e r
CD-SYNC
The CD-SYNC feature enables you to make fast and easy recordings of a CD. Track increments are automatically detected
from the source material. Track increments cannot be added
manually. In analog source material a silence of 2.7 seconds or
more is automatically detected as a track increment.
Make sure the disc is absolutely free of scratches and
11
1
11
dust particles.
Connect the cable from an external CD player to the CD-
22
2
22
Recorder. (see INSTALLATION page 5 and 6.)
Press
33
3
33
SOURCE
appears on the display (depending on the digital connec-
tion used):
➔
, or lights up and ,
(7) repeatedly until the selected source,
or appears on the display.
EASY JOG
PUSH ENTER
PLAY/PAUSESTOP
LEVEL PHONES
REC
-+
y
To start recording, press
55
5
55
y
ABC DEF GHI
JKL MN OPQ
RST UVW XYZ
DISPLAY
CDR
MENU/
STORE
PLAY
on the selected source.
SPACE
0
FUNCTION
ENTER
SCROLL
321
654
987
CD
CANCEL/
DELETE
➔ The CD-Recorder automatically starts to record. The re-
cording time left appears on the display.
• If, however, you start the source during a track, CD-
SYNC recording starts at the beginning of the next track
or after 2.7 seconds of silence in analog recordings.
• To check the elapsed recording time, press
(4, 58). (This can also be done during recording)
• The recorder stops automatically.
To stop recording manually, press
66
6
66
• If 9
STOP
pressing
(17, 68) was pressed within 3 seconds after
PLAY
on the selected source, no recording will
99
9
STOP
99
(17, 68).
take place.
• To interrupt recording, press 2/;
PAUSE
To resume, press 0
(63).
REC
PLAY/PAUSE
(13) on the CD-Recorder.
After recording the display will show
eral seconds.
ENGLISH
DISPLAY
(16) or ;
for sev-
44
4 With the CD-Recorder stopped, press
44
once: to select ‘
’;
twice: to select ‘ ’;
four times: to select ‘ ’;
➔
and start to flash.
REC TYPE
(20).
Note:
- Recordings from DAT, DCC or analog sources will only stop
after 20 seconds silence.
- MAKE CD is a recording mode for auto finalized after syn-
chronized recording. It takes about 1 minute to start auto finalizing after finish recording the last track. (WAIT appears
STOP
on the display.) If you press 9
(17, 68) during WAIT on
the display, auto finalizing will be canceled.
Important:
If you want to play the recorded CD-R disc on any regular
CD player, it must first be finalized. See finalizing discs.
Finalized CD-RW discs play only on CD-RW compatible CD
players.
9
Page 13

ENGLISH
RECORDING
The numbers between parentheses refer to the fold-out.
CD RECORDER DR6000
Recordable
ReWritable
ON/OFF
POWER
DISPLAY SCROLL
OPEN/CLOSE
SOURCE ERASE
ABC DEF GHI
JKL MN OPQ
RST UVW XYZ
REC TYPE REW FF
EASY JOG
CANCEL
STORE
FINALIZE
DELETE
MENU
PUSH ENTER
PLAY/PAUSESTOP
LEVEL PHONES
REC
-+
u
DISPLAY
CDR
SPACE
0
FUNCTION
SCROLL
321
654
987
CD
er
Manual start recording
Manual recording from external CD player.
Make sure the disc is absolutely free of scratches and
11
1
11
dust particles.
Connect the cable from an external CD player to the CD-
22
2
22
Recorder. (see INSTALLATION page 5 and 6.)
Press
33
3
33
SOURCE
nal source appears on the display (depending on the
connection used):
➔ , or lights up and ,
About Auto Track increment
• When Auto Track is ON (default setting), track numbers
will automatically be increased during recording.
• To switch off the Auto Track function you have to enter
MENU MODE.
If you wish to increase track numbers manually, press
TRACK INCR(ement) on the remote control. For further
instructions see MENU MODE.
ON (AUTO): The track increments are automatically
OFF (MANUAL): Track numbers can be incremented
• Track numbers cannot be changed after recording.
Note:
Auto track works only with Consumer Sources with a digital
output signal according to the IEC 958 (consumer part) audio
standard.
(7) repeatedly until the selected exter-
or appears on the display.
taken over from the digital source material
or after 2.7 seconds silence during analog
recording.
manually by pressing
TRACK INCR
(ement) (54) on the remote control.
(Minimum track length is 4 sec.)
t
uy
With the recorder stopped, press
44
4
44
MENU/
STORE
CANCEL/
DELETE
ENTER
REC TYPE
times to enter the Manual Record standby mode.
➔ MANUAL starts to flash and the display shows
.
• If message also flashes, the digital con-
nection is incorrect.
Set the optimal recording level on the CD-Recorder.
55
5
55
q Play the source first to set the optimal recording level on
the CD-Recorder.
w Rotate the
EASY JOG
(12) key until, on the Record/Play
Level bar, all the white segments are alight, but the red
segments do not light continuously during the loudest
passages.
DIGITAL RECORDING : + 6dB ~ –63dB
ANALOG RECORDING : 0dB ~ –63dB
e Stop the source.
To start recording, press
66
6
66
00
0
00
REC
(13) on the CD-Recorder and immediately start the source (from Stopmode).
The track number and recording time left appear on the display.
• To record a 3-second silence at the start of a track,
press 2/;
PLAY/PAUSE
(16) on the CD-Recorder
before starting the source.
• To check the elapsed recording time, press
(58) on the CD-Recorder. (This can also be done during the recording.)
(63).
99
9
STOP
99
(17, 68).
PLAY/PAUSE
To stop recording, press
77
7
77
• If 9
STOP
(17, 68) was pressed within 3 seconds af-
REC
ter 0
(13), no recording will take place.
• To interrupt recording, press 2/;
or ;
PAUSE
After recording the display will show
eral seconds.
Important:
If you want to play the recorded CD-R disc on any regular
CD player, it must first be finalized. See finalizing discs.
Finalized CD-RW discs play only on CD-RW compatible CD
players.
(20) three
DISPLAY
(16)
for sev-
10
Page 14

FINALIZING/UNFINALIZING
The numbers between parentheses refer to the fold-out.
DISPLAY SCROLL
OPEN/CLOSE
SOURCE ERASE
REC TYPE REW FF
EASY JOG
CANCEL
STORE
FINALIZE
DELETE
MENU
PUSH ENTER
PLAY/PAUSESTOP
LEVEL PHONES
REC
-+
DISPLAY SCROLL
OPEN/CLOSE
SOURCE ERASE
ENGLISH
REC TYPE REW FF
EASY JOG
CANCEL
STORE
FINALIZE
DELETE
MENU
PUSH ENTER
PLAY/PAUSESTOP
LEVEL PHONES
REC
-+
w
e
Finalizing CD-R & CD-RW discs
Finalizing is a simple procedure, necessary to:
- be able to play the recorded CD-R(W) disc on a CD
PLAYER.
- avoid further unwanted recordings on a disc.
- avoid erasure of tracks on a CD-RW.
Auto finalizing
Auto finalizing is possible when using the recording function.
Manual finalizing
Make sure the disc (in the CD-Recorder) is absolutely
11
1
11
free of scratches and dust particles.
With the recorder stopped press
22
2
22
➔ The display shows
.
FINALIZE
and
(11).
q
q
w
Unfializing CD-RW discs
For CD-RW discs only.
If you want to make more recordings (or erasures of tracks) on
a finalized disc you must unfinalize it first. The Table of Contents (TOC) will be removed.
With the CD-Recorder stopped, press
11
1
11
ERASE
➔
(8).
and will appear on
the display.
REC TYPE
(20) or
00
Press
0
REC
(13).
➔
00
and the approximate finalization time
33
3
33
appears on the display.
The display counts down through the finalization.
On completion, the total number of tracks and the total
time recorded appears on the display.
For CD-R(W), CD-R(W) changes to CD on display.
Finalizing will take at least 2 - 4 minutes.
Note:
During finalization, the CD-Recorder accepts no operating
commands.
Press
22
2
22
PUSH ENTER
(12).
➔ The disc will now be unfinalized and can be recorded on
again.
Note:
- Unfinalizing will take approximately 1.5 minutes.
- When unfinalizing a CD-RW disc with text on it available, this
text will be transferred to the CD-Recorder memory. It may
occur that the text memory is full. The message
/ will be displayed.
You will now have to erase text, stored for other discs, or
finalize another disc in order to obtain memory space.
11
Page 15

ENGLISH
ERASING
The numbers between parentheses refer to the fold-out.
R6000
DISPLAY SCROLL
OPEN/CLOSE
SOURCE ERASE
STORE
MENU
q
REC TYPE REW FF
EASY JOG
CANCEL
FINALIZE
DELETE
PUSH ENTER
w
REC
PLAY/PAUSESTOP
LEVEL PHONES
-+
e
Erasing
For unfinalized CD-RW discs only.
You can erase:
- one or more tracks from the end,
- the entire disc.
Erasing one or more tracks from the end
Press
11
1
11
ERASE
➔ The display shows the number of tracks and their total
playing time. and
lights up.
• If the disc is finalized, CD appears on the display after
inserting a CD-RW in the recorder. The recorder will ask
you to confirm unfinalizing first. Confirm by pressing the
PUSH ENTER
control.
(8) once.
(12) key or
ENTER
(65) on the remote
DR6000
DISPLAY SCROLL
OPEN/CLOSE
SOURCE ERASE
STORE
MENU
q
REC TYPE REW FF
EASY JOG
CANCEL
FINALIZE
DELETE
PUSH ENTER
PLAY/PAUSESTOP
LEVEL PHONES
REC
-+
w
Erasing the entire disc
Press
11
1
11
ERASE
➔ The display shows the number of tracks and their total
playing time. and
light up.
• If the disc is finalized, CD appears on the display after
inserting a CD-RW in the recorder. The recorder will ask
you to confirm unfinalizing first. Confirm by pressing the
PUSH ENTER
control.
(8) twice.
(12) key or
ENTER
(65) on the remote
Select the track(s) you wish to erase by turning the
22
2
22
EASY JOG
(12) key to the left and confirm by pressing
this key.
➔ The selected track numbers start blinking on the track
bar.
➔ The display shows the remaining number of tracks and
the remaining playing time after erasing the selected
track(s).
00
Press
0
REC
33
3
33
00
(13).
➔ The display shows the total countdown time and
appears on the display.
➔ After the selected track(s) have erased, the display
shows the remaining tracks and their total playing time.
00
Press
0
REC
22
2
22
00
(13).
➔ The display shows the total countdown time and
appears on the display. The complete disc will be
erased.
Erasure of a complete disc may take up to 15 seconds.
12
Page 16

PLAYING
The numbers between parentheses refer to the fold-out.
ABC DEF GHI
JKL MN OPQ
6000
OPEN/CLOSE
DISPLAY SCROLL
SOURCE ERASE
REC TYPE REW FF
CANCEL
STORE
FINALIZE
DELETE
MENU
PLAY/PAUSESTOP
EASY JOG
LEVEL PHONES
REC
-+
PUSH ENTER
q
r
RST UVW XYZ
SPACE
DISPLAY
0
FUNCTION
CDR
t
MENU/
STORE
ENTER
REMOTE CONTROLLER
RC6050DR
w t
qer
e
Playing a CD
22
Press
11
1
11
➔ 2 lights up and the track number and track time of the
Press
22
2
22
➔ remaining track time, total remaining time, text informa-
To interrupt play temporarily, press
33
3
33
(16) again.
➔ ; lights on the display.
To continue play, press
44
4
44
To stop play, press
55
5
55
➔ The number of tracks and the total playing time appear
;;
2/
;
PLAY/PAUSE
22
;;
(16, 60) to start CD play.
track in play appear on the display.
DISPLAY
(4, 58) once, twice or three times to see:
tion (see MENU MODE page 16).
22
;;
2/
;
PLAY/PAUSE
22
;;
99
9
STOP
99
(17, 68).
on the display.
22
;;
2/
;
PLAY/PAUSE
22
;;
(16, 60) again.
321
654
987
SCROLL
CD
CANCEL/
DELETE
EX: Selecting a track when CD play is stopped
REC TYPE REW FF
EASY JOG
CANCEL
FINALIZE
DELETE
PUSH ENTER
DISPLAY SCROLL
OPEN/CLOSE
SOURCE ERASE
STORE
MENU
PLAY/PAUSESTOP
LEVEL PHONES
REC
-+
ENGLISH
qw w
Selecting a track
Selecting a track during play
On the DR6000 recorder.
11
1
11
Turn the
number appears on the display.
➔ Play skips to the beginning of the selected track.
On the remote control <i>.
22
2
22
Key in the required track number using the
(57) keys. For 2-digit track numbers, press the keys in rapid
succession.
➔ Play skips to the beginning of the selected track.
On the remote control <ii>.
33
3
33
Press
➔ Play skips to the beginning of the present, previous or
EASY JOG
(12) key until the required track
NUMERICAL
SS
S (61) or
SS
TT
T (69) one or more times.
TT
subsequent tracks, including tracks on other disc.
(Changer mode only.)
Selecting a track when CD play is stopped
On the DR6000 recorder.
11
1
11
q Turn the
number appears on the display.
w Press
PAUSE
On the remote control <i>.
22
2
22
q Key in the required track number using the
(57) keys. For 2-digit track numbers, press the keys in
rapid succession. Play starts.
On the remote control <ii>.
33
3
33
q Briefly press S (61) or T (69) one or more times.
w Start playback by pressing 2 (60) or
EASY JOG
PUSH ENTER
(12) key until the required track
(12) to confirm or press 2/;
(16) to start playing.
NUMERICAL
ENTER
(65).
PLAY/
13
Page 17

ENGLISH
PLAYING
The numbers between parentheses refer to the fold-out.
EX: Search
ERASE
q
REC TYPE REW FF
CANCEL
STORE
FINALIZE
DELETE
MENU
PLAY/PAUSESTOP
EASY JOG
LEVEL PHONES
REC
-+
PUSH ENTER
w
w
w
TRACK
INCR.
SCAN
ABC DEF GHI
JKL MN OPQ
RST UVW XYZ
SPACE
DISPLAY
0
FUNCTION
CDR
MENU/
STORE
ENTER
REMOTE CONTROLLER
RC6050DR
RANDOMPROG.REPEAT
321
654
987
SCROLL
CD
CANCEL/
DELETE
Scan play
To start scan play, press
11
1
11
trol.
- It plays the first 10 seconds of each track.
- It automatically stops after playing all tracks.
To stop playing, press
22
2
22
- The SCAN level disappears from the display.
SCAN
99
9 (17, 68).
99
(55) on the remote con-
Search
22
Press
11
1
11
Hold down
22
2
22
➔ The player first searches backwards or forwards at 10
Release the button at the desired passage.
33
3
33
➔ Play starts at the desired passage.
; ;
2/
;
PLAY/PAUSE
22
; ;
QQ
Q (19, 62) or
QQ
(16, 60).
RR
R (18, 67).
RR
times normal speed with sound at low volume, then
goes to 50 times normal speed with sound muted.
q
w
EX: Repeat play
q
w
TRACK
INCR.
SCAN
ABC DEF GHI
JKL MN OPQ
RST UVW XYZ
SPACE
DISPLAY
0
FUNCTION
CDR
MENU/
STORE
ENTER
REMOTE CONTROLLER
RC6050DR
RANDOMPROG.REPEAT
321
654
987
SCROLL
CD
CANCEL/
DELETE
Repeat play
Press
11
1
11
REPEAT
➔ When REPEAT TRACK lights up, the current track
plays repeatedly. When REPEAT ALL lights up, the disc
or program plays repeatedly.
To return to normal play, press
22
2
22
more times until:
➔ The REPEAT label disappears from the display.
Note:
- Repeat is also cleared if you open the disc tray.
-
REPEAT
(56) one or more times during CD play.
REPEAT
(56) one or
(56) button is only on the remote control.
Note:
During Random, Repeat Track or Programmed play, search is
restricted to within the track being played at the time.
Random play
Press
11
1
11
RANDOM
random play.
➔ The tracks on the CD (or program if set) play in random
order.
Press
22
2
22
RANDOM
Note:
RANDOM is also cleared if you open the disc tray.
- RANDOM button is only on the remote control.
(73) before or during CD play to start
(73) again to return to normal CD play.
14
Page 18

PROGRAMMING
The numbers between parentheses refer to the fold-out.
Programmed play
• You can program up to 99 tracks to play in any desired sequence.
• Tracks can be programmed more than once, but each time
counts as a track. (step)
Programming for playback
Press
PROG
11
1
11
gram mode.
➔
PROGRAM flashes and appears on the display.
Select the required track numbers by turning the
22
2
22
JOG
(12) key left or right and store by pressing
(12, 65).
TER
(72) on the remote control to enter Pro-
EASY
PUSH EN-
Clearing a program
99
Press
9
STOP
11
1
11
22
2
22
• The program is also cleared if you open the disc tray.
99
play.
99
Press
9
99
➔ PROGRAM disappears from the display.
(17, 68) if necessary to stop programmed
STOP
(17, 68) again to clear the program.
Erasing a track from a program
In Stop mode press
11
1
11
enter Program mode.
QQ
Use
Q (19, 62) or
22
2
22
33
3
33
QQ
which to delete.
➔ The track number and program step will be shown on
the display.
Press
CANCEL/DELETE
the program.
➔ The remaining program steps and the remaining playing
time of the program will be displayed.
PROG
(72) on the remote control to
RR
R (18, 67) to select the track from
RR
(10, 66) to erase the track from
ENGLISH
or:
Key in a track number with the
numbers, press the keys in rapid succession.
➔ The track will be stored in the program.
➔ The track number, total program time and the number of
programmed tracks (steps) are displayed.
Repeat step
33
3
33
Press
44
4
44
to end programming.
➔ PROGRAM lights continuously.
Press
55
5
55
22
2 for all tracks to be programmed.
22
STOP
(17, 68) or
22
;;
2/
;
PLAY/PAUSE
22
;;
PROG
(16, 60) to start programmed play.
NUMBER
(72) on the remote control
(57). For 2-digit
15
Page 19

ENGLISH
MENU MODE
The numbers between parentheses refer to the fold-out.
EX: Storing names of Text settings
CD RECORDER DR6000
Recordable
ReWritable
ON/OFF
POWER
DISPLAY SCROLL
OPEN/CLOSE
SOURCE ERASE
CANCEL
STORE
DELETE
MENU
wo ert
MENU MODE can set up:
• Text setting ................. adding erasing the CD text
• Recording setting ....... Auto track increment ON/OFF and
adjustment of the right-left-volume
balance adjustment during the recording
• All settings (except Balance) made in Menu mode will be
stored in the deck’s memory and can be called up and
changed at any time.
Note:
Text can only be edited for unfinalized discs. (finalized CD-RW
discs must be unfinalized first)
Text settings
The TEXT submenus allows you to enter text information on the
CD-R(W); for example the CD titles, the artist names, the track
names and so on. During the playback, the TEXT will be appeared on the display.
Storing names
Stay in the stop mode. (No Operation)
11
1
11
Press
22
2
22
STORE/MENU
control to enter Menu mode.
33
3
33
Rotate
EASY JOG
submenus.
Press
44
4
44
PUSH ENTER
control to confirm.
Rotate
55
5
55
EASY JOG
submenu: ALBUM Artist, ALBUM Title, Track 1 Artist,
Track 1 Title, etc.
Press
66
6
66
PUSH ENTER
control to confirm.
Select the characters by rotating the
77
7
77
by pressing the corresponding numeric/alphabet key
on the remote control.
(9, 64) on the deck or the remote
(12) to select the TEXT EDIT
appears on the display.
(12) or
ENTER
(65) on the remote
(12) to select the required option in the
(12) or
ENTER
(65) on the remote
EASY JOG
(12) or
ABC DEF GHI
JKL MN OPQ
RST UVW XYZ
SPACE
DISPLAY
0
FUNCTION
CDR
MENU/
STORE
ENTER
FINALIZE
REC TYPE REW FF
EASY JOG
PUSH ENTER
PLAY/PAUSESTOP
u
LEVEL PHONES
REC
-+
w
o
r
yui
Press
88
8
88
PUSH ENTER
y
i
(12) or
ENTER
control to store the characters and move to the next
cursor position.
Note:
- With the Q (19, 62) R (18, 67) keys you can move to a
required cursor position.
- With the
99
9
99
CANCEL/DELETE
Press
STORE/MENU
(10, 66) you can delete a character.
(9, 64) to store a name you have
entered and return to the submenu or
to exit.
Note:
- A maximum of 60 characters can be stored per item.
- By pressing the
PUSH ENTER
(12) or
remote control without selecting a character first, you can insert a space between characters.
- When an artist’s name has been stored for a certain track,
the name will automatically be copied for the next track. The
name can be confirmed by pressing
a new name can be entered as described above.
Erasing names
Stay in the stop mode. (No Operation)
11
1
11
Press
22
2
22
STORE/MENU
control to enter Menu mode.
33
3
33
Rotate
EASY JOG
ERASE.
appears on the display.
Press
44
4
44
PUSH ENTER
control to confirm.
55
5
55
Rotate
EASY JOG
the submenu: All Text, CD Title, CD Artist, Track 1 Title,
Track 1 Artist, etc.
Press
66
6
66
PUSH ENTER
control to confirm.
The display will ask you to reconfirm your selection.
Press
77
7
77
PUSH ENTER
control to reconfirm.
(9, 64) on the deck or the remote
(12) to select the submenu TEXT
(12) or
ENTER
(12) to select the required option in
(12) or
(12) or
ENTER
ENTER
REMOTE CONTROLLER
RC6050DR
(65) on the remote
9 9
9
9 9
ENTER
STORE/MENU
(65) on the remote
(65) on the remote
(65) on the remote
321
654
987
SCROLL
CD
CANCEL/
DELETE
STOP
(17, 68)
(65) on the
(9, 64) or
16
88
8
88
Press
9 9
STOP
9
9 9
STORE/MENU
(17, 68) to exit.
(9, 64) to return to the submenu or
Page 20

MENU MODE
The numbers between parentheses refer to the fold-out.
Text Memory Review/Erase Text Memory
The input text data of the disc is once saved in the text memory
until finalizing the disc. When the text memory is full,
will appear on the display and unable to add
more text data. If you want to add more text data, you have to
finalize the text data for each disc in order to obtain memory
space or erase the entire memory following the operation below.
Stay in the stop mode. (No Operation)
11
1
11
Press
22
2
22
33
3
33
44
4
44
55
5
55
66
6
66
STORE/MENU
control to enter Menu mode.
Rotate
submenu.
Press
control to confirm.
Select the disc you wish to erase.
Press
control to confirm.
EASY JOG
PUSH ENTER
PUSH ENTER
(9, 64) on the deck or the remote
(12) to select the TEXT VIEW
appears on the display.
(12) or
(12) or
appears on the display.
ENTER
ENTER
(65) on the remote
(65) on the remote
Auto track increment
Stay in the stop mode. (No Operation)
11
1
11
Press
22
2
22
33
3
33
44
4
44
55
5
55
66
6
66
77
7
77
STORE/MENU
control to enter Menu mode.
Rotate
submenu.
Press
control to confirm.
Select Auto track or by rotating
Press
control to confirm.
• When is selected, track numbers will be automati-
• When is selected, you can number the recorded
Press
to the submenu or
EASY JOG
PUSH ENTER
PUSH ENTER
cally incremented during recording.
tracks yourself.
STORE/MENU
(9, 64) on the deck or the remote
(12) to select the AUTO TRACK
appears on the display.
(12) or
(12) or
(9, 64) to store settings and return
9 9
9
9 9
ENTER
ENTER
STOP
(17, 68) to exit.
(65) on the remote
EASY JOG
(65) on the remote
Balance (Only active in Record/Standby mode)
Press
11
1
11
STORE/MENU
control to enter Menu mode.
(9, 64) on the deck or the remote
ENGLISH
(12).
Press the
77
7
77
mote control to confirm the erasure of the text for that
particular disc.
Press
88
8
88
9 9
9
STOP
9 9
PUSH ENTER
STORE/MENU
(17, 68) to exit.
(12) or
(9, 64) to return to the submenu or
ENTER
(65) on the re-
Note:
- If there are no discs in the memory, the message
appears on the display.
-
unfinalizing a CD-RW disc for which text was stored (see
‘UNFINALIZING CD-RW discs’ page 11.). The same
action(s) should be taken in order to obtain memory space.
/ may also appear when
Recording settings
• When Auto Track is ON, track numbers will automatically be
increase during the recording.
• You can adjust the right and left volume balance during the
recording.
Rotate
22
2
22
submenu.
Press
33
3
33
control to confirm.
➔ and appear on the display.
Adjust the internal and external recording balance by
44
4
44
turning the
55
5
55
Press
control to confirm.
Press
66
6
66
EASY JOG
appears on the display.
PUSH ENTER
EASY JOG
PUSH ENTER
STORE/MENU
(12) to select the SET BALANCE
(12) or
(12) or
(9, 64) to store settings.
(12).
ENTER
ENTER
(65) on the remote
(65) on the remote
Note:
The balance setting will not be stored.
17
Page 21

ENGLISH
DISPLAY
Messages, as listed and explained here, may appear on the
display for your guidance.
General
......................... reading disc information
................................. during tray opening
............................... during tray closing
......................... no disc inserted, disc unreadable or
disc inserted upside down
................... program full
.............. insert disc or insert disc in correct
way
................. inserted disc is no audio CD
.............. unfinalized CD-R(W) disc
................ indicates the amount of text
memory used for unfinalized discs
Recording
................................. - when 9 STOP is pressed during
recording
- when 9 STOP is pressed during
recording the first 4 seconds of a
track
............................ updating disc contents
.................... no more recording possible
.................... digital coaxial input selected
......................... digital optical input selected
........................... analog input selected
........... no digital recording can be made of
the external source
........... when opening the tray with an
unfinalized disc inserted (in the
CD-Recorder)
......................... Start of synchronised recording of a
complete disc and Auto Finalize
function selected
.............. Start of synchronised recording of a
complete disc
........... Start of synchronised recording of a
single track
................ manual start of recording selected
............................ level is being adjusted
........... time left on CD-R(W) disc is not
enough for proposed recording
................. copy prohibited track found during
recording. Track will be copied analog (Copy Protection Regulations).
.............. when erasing one or more tracks
................. when erasing a disc
.............. when finalizing a disc
.............. when REC is pressed while no dig-
ital source is detected
.............. time countdown when erasing a
track or a disc
................. time countdown when finalizing a
disc
........... to start manual recording, finalizing
or erasing
........... to start synchronised recording
from a source
.................. when trying to record on a finalized
CD-R(W) or a prerecorded CD
................. when trying to record on a
finalized CD-RW
.............. when a professional source is con-
nected
Play
......................... program mode selected
.............. will be followed by album title
.............. will be followed by track title
........... will be followed by artist name
........... will be followed by track artist name
Others
.............. when the recorder enters a data
track during recording
.............. laser power calibration performed
96 times, finalize disc
........... during laser power calibration for
unfinalized discs
........... during disc recovering after power
failure
................... OPC failure during OPC procedure
(OPC = Optimum Power Calibration)
........... recording error in menu mode
................. when trying to record on or finalize
a recovered disc
.............. when text memory is full. To add a
CD to the list, first finalize or erase
another disc from the list.
18
Page 22

DISPLAY
OTHER INFORMATIONS
Menu messages
................... when attempting to edit text for a
disc which has no tracks
................... when entering Text Edit mode
........... when editing or erasing an artist
name
.............. when editing or erasing a title
............... when editing or erasing an artist
name per track
................. when editing or erasing a title per
track
................. when entering Text Erase mode
...................... when entering All Text mode
...................... when confirmation for erasing has
to be given with ENTER key
........... when confirmation for erasing has
to be given with ENTER key
........... when waiting for confirmation when
erasing a disc
................... when selecting text review per
unfinalized disc in memory
........... when REVIEW is selected while no
text is in memory
............... when selecting auto track incre-
ment ON or OFF
...................................... Auto Track increment on
.................................... Auto Track increment off
.............. when selecting BALANCE
......................... no text stored for disc
Fixing problems
If you think your CD-Recorder is defective, it is wise to read this
list first. Maybe you forgot a simple step.
Warning!
Under no circumstances should you attempt to repair the
CD-recorder yourself as this will invalidate the guarantee.
No power
• ensure that the
CD-Recorder is in standby mode, press any button to
activate it
• ensure that the power cord is plugged in correctly
• switch the recorder OFF and then immediately back ON
Auto track does not work
• check if auto track is selected
• check if there are 2.7 seconds silence in between the
tracks (analog recording only)
• check if the source is consumer source with the digital
output according to IEC audio standard
• source is DVD disc (no track information)
No sound
• check the audio connections
• if using an amplifier, try using a different source
Amplifier sound is distorted
• check that the CD-Recorder analog output is not connected to the amplifier PHONE input.
Play will not start
• ensure that the label of the CD is facing up
• clean the disc
• check that the disc is not defective by trying another disc
POWER ON/OFF
(1) button is on: the
ENGLISH
Remote control does not work
• point the remote control directly at the CD-Recorder
• check the batteries and replace if necessary
• select the right source first
• set the remote control selector to ‘INTERNAL’
Will not record
• clean the disc
• check if CD-R(W) is an unfinalised disc
• check that the disc is recordable and replace if neces-
sary
• the disc is not an audio disc (
• wrong input source chosen.
•
text memory full ( / ).
When a CD-RW has to be unfinalised for recording.
Erase text for other disc(s) or finalise other disc(s) to
obtain memory space.
)
Recording is distorted
• make sure the recording level was not too high
20 second pause between recordings
• see ‘RECORDING’ CD SYNC
19
Page 23

ENGLISH
Recordable
ReWritable
POWER
CD RECORDER DR6000
STOP
REC
PUSH ENTER
EASY JOG
REC TYPE REW FF
FINALIZE
DELETE
CANCEL
MENU
STORE
SOURCE ERASE
OPEN/CLOSE
DISPLAY SCROLL
ON/OFF
qwe
ww
OTHER INFORMATIONS
The numbers between parentheses refer to the fold-out.
Player does not react
• use the
Player to switch it off and back on
• a power failure has occurred during recording the CDRecorder is attempting to repair the disc
• If then appears on the display, the disc
cannot be recorded further, and cannot be finalized. But
it can still be played on the CD-Recorder or another CDRecorder.
• on a CD-R(W) disc, the track being recorded is lost, but
further recording and finalisation can still be done
POWER ON/OFF
on display
(1) button on the front of the
Diagnostic Program
If the malfunction continues, perform the Diagnostic Program:
1 Switch the recorder off using the
POWER ON/OFF
(1).
2 Simultaneously press the R (18) and Q (19) and switch
the recorder back on using the
➔ The display will now indicate ‘
POWER ON/OFF
’.
(1).
➔ After a few minutes, the message will change to
‘ ’ or ‘ ’.
➔ If the
message appears, your recorder is defective and needs to be repaired. Consult your supplier or
call the Marantz Consumer Line to find the nearest service centre. The number of the Consumer Line can be
found in the guarantee booklet.
➔ If the ‘
’ message appears, there is no clear
defect and the malfunction may be a result of misinterpretation of the user instructions, an inappropriate disc,
a mechanical defect or an incorrect connection. To
solve this problem, carefully read the user instructions
once again; you can also contact your supplier.
➔ If you cannot solve the problem, go to the nearest serv-
ice centre.
3 Switch off the recorder using the
POWER ON/OFF
(1) to
exit from the Diagnostic Program.
20
Page 24

ABOUT TEXT
The input text data is saved in the text memory until the disc is
finalized. Therefore, the data is not written in the CD-R(W) disc
before finalizing the disc.
JAZZ 2
CLASSIC
POPS
ENGLISH
JAZZ 2
CLASSIC
POPS
Finalizing the disc transfers the text data from the text memory
to the disc.
CLA
SSIC
POPS
JAZZ 2
JAZZ 2
Unfinalizing the disc transfers the text data from the disc to the
text memory.
MY BEST
CLASSIC
POPS
ReWritable
MY BEST
When the text memory is full, appears on the
display and you cannot add more text data.
In this case, you need to make more space in text memory. You
can either finalize one or more disc(s) to transfer the text data
to each disc, or erase (part of) the text data in the text memory.
Note:
When the text memory is full depends on the amount of the
input text data per disc and the number of discs.
Typically the text memory can store for 50 discs of the text data
consisting of 60 characters of an artist name or title for 20
tracks.
21
Page 25

ENGLISH
TECHNICAL SPECIFICATIONS
GENERAL
System .................................................................................................. Compact disc digital audio
Number of channels............................................................................... 2 (stereo)
Applicable discs ..................................................................................... CD, CD-R (digital audio), CD-RW (digital audio)
Power Requirement ............................................................................... AC 230 V 50 Hz
Power Consumption .............................................................................. 24 W
Operating Temperature ......................................................................... 5 - 35 °C
Dimension (MAX)
Width ............................................................................................. 440 mm
Height ............................................................................................ 87 mm
Depth ............................................................................................. 317 mm
Weight ........................................................................................... 4.6 Kg
AUDIO
Frequency Response ............................................................................ 20 Hz - 20 kHz
Playback S/N ......................................................................................... 105 dB
Playback Dynamic Range...................................................................... 96 dB
Playback Total Harmonic Distortion ....................................................... 90 dB
Recording S/N (analog) ......................................................................... 90 dB
Recording Dynamic Range (analog) ...................................................... 92 dB
Recording Total Harmonic Distortion (analog) ....................................... 84 dB
Analog Output Voltage........................................................................... 2 Vrms
Digital Coaxial Output ............................................................................ 0.5 V (p-p)/75 Ω
Digital Optical Output ............................................................................. - 20 dB
Headphones .......................................................................................... 0 - 5 Vrms/ 8 - 2000 Ω
Recording values for line input
Digital Coaxial Input (automatic sample rate conversion)....................... 32 - 48 kHz
Digital Optical Input (automatic sample rate conversion)........................ 32 - 48 kHz
Analog Input .......................................................................................... 560 mVrms/ 50 kΩ
Specifications subject to change without prior notice.
2
Page 26

COUNTRY COMPANY ADDRESS
ALGERIE Azur 2000 8, Lotissement Ben Hatadi, Alger, Algerie
ARMENIA NGYIG Ltd. 47 A/75 St. Lalaiants, 375000 Yerevan, Armenia
AUSTRALIA Scan audio Pty. Ltd. 4 Station Street, Thornleigh NSW 2120, Australia
AUSTRIA Huber & Prohaska GmbH Taborstraße 95 / Ladestraße 1, Gebäude Hangartner, A-1200 Wien, Austria
BAHREIN Ambassador Stores P.O. Box 237,141, Government Avenue, Manama,Bahrein
BANGLADESH Target 1078, Ramjoy Mohanja Lane Asadgonj, Chittagong 4000, Bangladesh
BELGIUM Van der Heyden Audio N.V. Brusselbaan 278, 9320 Erembodegem, Belgium
BULGARIA Ariescommerce GmbH Makedonia Blvd. 16, 1606 Sofia, Bulgaria
CANADA Lenbrook Industries Limited 633 Granite Court, Pickering, Ontario
CYPRUS Empire Hifi systems Ltd. P.O. Box 5604, Nicosia, Cyprus
CZECH REPUBLIC Audio International Sokolska 41, 67902 Rajecko, OKR,Blansko, Czech Republic
DENMARK Audio Nord Dali Allé 1, 9610 Noerager, Denmark
DUBAI V.V.& SONS P.O. Box 105, Dubai, U.A.E.
EGYPT Solimco 9, El Attibaa St. Doki, Cairo, Egypt
ESTONIA HiFi Club Estonia Ehte 4, 90503 Haapsalu, Estonia
F.Y.R.O.M. T.P. KODI ul.Cedomir Kantargiev 21a, Skopje, Former Yugoslavian Republic of Macedonija
FINLAND Audio Nord Uudenmaankatu 4-6, Helsinki SF-00120, Finland
FRANCE Marantz France A division of Marantz Europe B.V., P.O. Box 301, 92 156 Suresnes Cedex, France
GERMANY Marantz Deutschland Hakenbusch 3, 49078 Osnabrück, Germany
GREECE Adamco S.A. 188, Hippocratous Street, 11471 Athens, Greece
HEADQUARTERS EUROPE: Marantz Europe B.V. Building SFF-2, P.O. Box 80002, 5600 JB Eindhoven, The Netherlands
HONG KONG Marantz Asia Ltd. Unit 1706, Metroplaza II, 223 Hing Fong Road, Kwai Fong, N.T., Kowloon, Hong Kong
HUNGARY Infovox Ltd. Terez Krt.31, 1067 Budapest, Hungary
ICELAND ID Electronics Ltd. Armula 38, 108 Reykjavik, Iceland
INDIA NOVA Audio Private 8,Punam Co-op.Society 29/30 Road#5, Union Park MUMBAI 400052, India
IRAN Home Co. 5th floor no 878 Philips Building Enghelab ave, P.O. 11365/7844 Tehran, Iran
IRELAND Marantz Ireland Clonskeagh, Dublin 14, Ireland
ISRAEL Elmor Ltd. 52 Heh Beiyar Street, Kikar Hamedina, Tel Aviv, Israel
ITALY Marantz Italy Via Casati 23, 20052 Monza (Milano), Italy, Servizio Consumatori 1678-20026, Numero Verde
IVORY COAST Hifivoir B.P. 2428, Abidjan 01, Ivory Coast
JAPAN Marantz Japan Inc. 35-1 Sagami Ohno 7-Chome, Sagamihara-shi, Kanagawa 228-8505, Japan
KOREA Mk Enterprises Ltd. 121-210, 2F Shinhan Bldg., 247-17 Seokyo-dong, Mapo-ku, Seoul, Korea
KUWAIT alAlamiah Electronics Intl. P.O. Box 8196, Salmiah 22052, Kuwait
LATVIA Ace Ltd. 61, LacPlesa Str., Riga LV 1011, Latvia
LEBANON AZ Electronics S.A., 1, P.O. Box 11 2833, Beirut, Lebanon
LITHUANIA Accapella Ltd. Ausros, Vartu G/5, Pasazo SKG., 2001 Vilnius, Lithuania
MALAYSIA Wo Kee Hong Electronics Sdn. Bhd. 102 Jalan SS 21/35, Damansara Utama, 47400 Petaling Jaya, Selangordarul Ehsan, Malaysia
MALTA Doneo Co Ltd. 78 The Strand, Sliema SLM07, Malta
MAURITIUS SKR Electronics Ltd. P.O. Box 685, Bell Village, Port Louis, Mauritius
MILITARY MARKET EUROPE PASCO GmbH PO BOX 1280, Sandhausen 69200, Germany
NETHERLANDS Marantz Domestic Sales
NEW ZEALAND Scan audio Pty. Ltd. 4 Station Street, Thornleigh NSW 2120, Australia
NORWAY Audio Nord Sandkerveien 64, Oslo 0483, Norway
OMAN Mustafa & Jawad Trading CO. P.O. Box 1918, Ruwi, Oman
POLAND Philips Polska Sp. z.o.o. Al.Jerozolimskie 195b, 02 222 Warszawa, Poland
PORTUGAL Corel2 Comércio de Electrónica Lda., Av. Luís Bívar, No 85 A, 1050 Lisboa, Portugal
PROFESSIONAL EUROPE Marantz Professional Products Kingsbridge House, Padbury Oaks, 575-583 Bath Road, Longford, Middlesex UB7 0EH, U.K.
PROFESSIONAL U.S.A. Marantz Professional Products Distributed by: Superscope Technologies Inc., 1000 Corporate Blvd. Ste.D, Aurora, Illino
QATAR Almana & Partners W.W.L. P.O. Box 49, Doha, Qatar
REUNION Vision + 180 Rue du Marechal Leclerc, 97400 Saint Denis, Ile de la Reunion
ROMANIA Nova Music Entertainment 5, Zagazului Str. Bl.1G,apt.18, sector 1,Bucharest, Romania
RUSSIA Absolute Audio 7/2, Montazhnaya Street, 107497 Moscow, Russia
SAUDI ARABIA Adawlia Univ. Electr. Apl P.O. Box 2154, Alkhobar 31952, Saudi Arabia
SINGAPORE Forward Marketing (S) Pte. Ltd. Wo Kee Hong Centre, 29 Leng Kee Road, Singapore 159099, Singapore
SLOVAKIA Bis Audio s.r.o. Nam. SNP 10, 96001 Zvolem, Slovakia
SLOVENIA Bofex Smartinska 152, HALA V/3, 61000 Ljubljana, Slovenia
SOUTH AFRICA Coherent Imports (PTY) Ltd. P.O. Box 1614, Alberton, 1450, South Africa
SPAIN Marantz Spain Martinez Villergas 2, Apartado 2065, Madrid 28027, Spain
SRI LANKA The listening Room Mezzanine Floor, The Landmark 385, Galle Road, Colombo - 3, Sri Lanka
SWEDEN Audio Nord Almedalsvagen 4, Gotenborg 402-23, Sweden
SWITZERLAND Sound Company AG Postfach, 8010 Zürich, Switzerland
SYRIA Hamzeh & Partners Hafez Ibrahim Str. No 117, Damascus Shalan, Syria
TAHITI Covecolor Av. Prince Hinoi, Cours de l'union sacré, P.O. Box 2334, Papeete, Tahiti
TAIWAN Pai-Yuing Co. Ltd. 6th No 148 Sung Kiang Road, Taipei 10429, Taiwan R.O.C.
THAILAND MRZ Standard Co. Ltd. 746-750 Mahachai Road, Wangburapa, Bangkok 10200, Thailand
TUNESIA Societe EDEVIG 40, Avenue du Golfe Arabe, El Menzah, 1004, Tunesia
TURKEY Türk Philips Ticaret A.S. Yukari Dudullu Organize sanayi Bolgesi, 2.Cadde no.28, 81260 Umraniye-Istanbul, Turkey
U.K. Marantz Hifi UK Ltd. Kingsbridge House, Padbury Oaks, 575-583 Bath Road, Longford, Middlesex UB7 0EH, U.K.
U.S.A. Marantz America Inc. 440 Medinah Road, Roselle, IL 60172, U.S.A.
YUGOSLAVIA ITM Company Omladinskih Brigada 86, 11070 Belgrade, Yugoslavia
EXPORT Marantz Domestic Sales
www.marantz.com
A division of Marantz Europe B.V., Building SFF2, P.O. Box 80002, 5600 JB Eindhoven, The Netherlands
A division of Marantz Europe BV,Building SFF2, P.O. Box 80002, 5600 JB Eindhoven, TheThe Netherlands
Printed in Japan
R
is a registered trademark.
00/05 MIT 385K851310
 Loading...