

Page 1
OMEGA STUDIO
™
SOFTWARE INSTALLATION GUIDE
USB Device Drivers, Cubase LE
Setup, and Pantheon™Reverb
Plug-in for Windows
®
XP
Cubase LE Setup and
Pantheon™ Reverb Plug-in
for Mac®OS X
Page 2
Congratulations on your purchase of the Lexicon Omega Studio. This guide contains the information
needed to install the required USB drivers and Steinberg’s Cubase LE recording software for use with
your Lexicon Omega hardware on either Windows
®
XP or Mac®OSX computer systems. Please follow
these instructions carefully to ensure smooth installation of each of these components.
OMEGA STUDIO™FOR WINDOWS®XP USERS
A. INSTALLING THE LEXICON USB DRIVERS
You must install the USB drivers to use your Lexicon Omega’s USB connection with your computer.
Follow the directions listed in the following section to complete the installation process.
1. Start your computer. Close any open programs you have running.
2. Take your Lexicon Omega hardware out of the box and plug the power in.
3. Connect the included USB cable to your computer and to the Omega.
4. You will see multiple messages pop up from the task bar indicating that your computer has found a
new USB device. There will be multiple messages because there are four USB devices in the Omega.
When Windows displays the message “Your new hardware is installed and ready to use”, Windows has
completed identifying your new hardware. However, your software installation
5. Put the Omega Studio Software Installation disk into your computer’s CD-ROM drive. If you have
Autorun enabled, the Omega Driver Installer Setup Wizard will automatically launch. If it does not
launch automatically, you can open it by selecting
Start>Run and entering D:\Omega.exe
(where D:\ is the letter of your CD-ROM drive).
6. Next, select the language that you’d like to run the installer in.
7. Continue selecting
Next and choose I agree to the terms of the License Agreement.
8. Select the Omega Driver Installer Software components (Cubase LE, Pantheon Reverb Plug-In, and
Help Files) that you wish to install and click
Next.
9. Choose your desired installation folder, or use the default setting and select
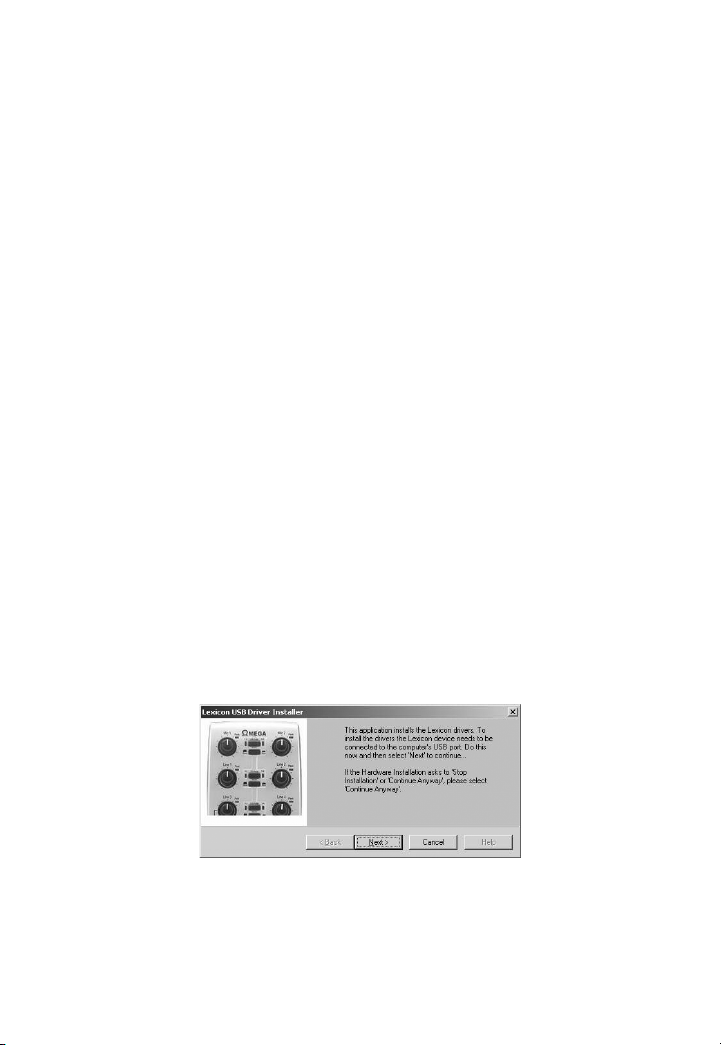
10. You will now see the window shown below. Click
Next to continue and follow the onscreen
instructions for the remainder of the installation.
IS NOT complete.
Install.
Page 3
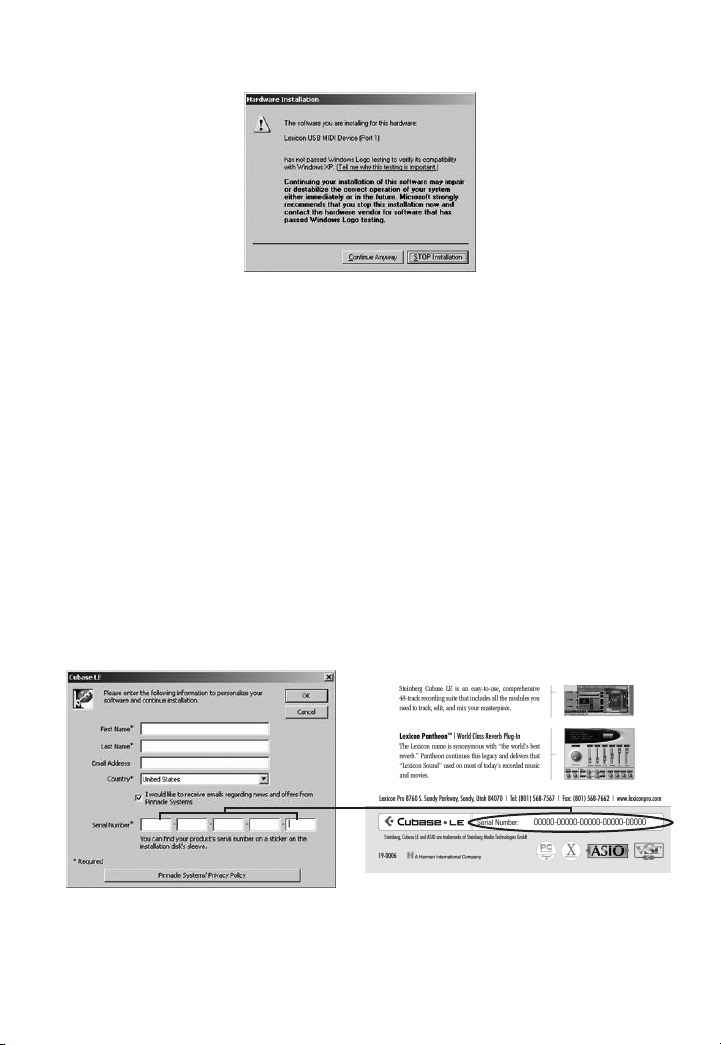
11. During this process you may be asked (4 times) to continue or stop the installation. Click
Continue Anyway each time as shown below.
12. Click Finish to complete the Driver Installation.
Note: If you chose to install Cubase LE in Step 8, the installation of Cubase LE will now
begin. Skip Steps 1 and 2 of the next section and continue following the rest of
the instructions to correctly install Cubase LE.
B. INSTALLING CUBASE LE RECORDING SOFTWARE
1. Start your computer. Close any open programs you have running. Put the Omega Studio Software
Installation disk into your CD-ROM drive.
2. If the disk doesn’t Autorun, you can open it by selecting
Start>Run and entering
D:\CubaseNotSilient\Cubase_LE.exe (where D:\ is the letter of your CD-ROM drive) then click
OK.
3. Enter your information as directed by the Cubase LE Installer (all required fields are denoted with an
asterisk). Your Serial Number is printed on the back of the Lexicon Omega Studio Software CD case
(as shown below). Select OK to continue with the installation after you’ve entered all the required
information.
4. Follow the onscreen installation instructions as directed. You will be prompted to restart your
computer when the installation has completed.
Page 4

C. SETUP WINDOWS AUDIO AND MIDI
When the Lexicon USB Audio and MIDI drivers were installed, Windows may have automatically selected
them as your default audio and MIDI outputs. This means that your Windows sounds will be sent to the
Omega rather than your computer’s sound card. We need to check if these have been changed and
return the settings to what they were before.
1. Select
Start>Control Panel>Sound and Audio Devices.
2. Select the
3. Under
Audio tab.
Sound Playback>Default device, open the pull-down menu and make sure your
computer’s sound card is selected.
4. Under
Sound Recording>Default device, open the pull-down menu and make sure your
computer’s sound card is selected.
5. Under
MIDI Music Playback>Default device, open the pull-down menu and make sure your
MIDI device is selected.
D. USING CUBASE LE WITH THE LEXICON OMEGA STUDIO
1. Start Cubase LE. The first time you use Cubase LE with the Lexicon Omega Studio your may be
asked to run the Multimedia test as shown below. Select
No.
2. Cubase LE will display the following warning that configuration has not been tested. Click OK.
Page 5

3. Once you are into Cubase, go to Device>Device Setup.
4. Under ASIO Drivers, click on VST Multitrack and select Lexicon USB ASIO if it is not already
selected. Click on
using your Omega Studio and Cubase LE.
Switch to switch the driver and click OK. You are now ready to begin recording
Page 6

OMEGA FOR MAC®USERS
The Omega hardware is designed to interface directly with your Mac computer via USB using OS X’s
Core Audio drivers. This means no separate driver installation is needed as long as your Mac system
software is 10.2.8 or greater (see Apple’s website for software update information if your system software
is 10.2.8 or earlier).
A. INSTALLING CUBASE LE RECORDING SOFTWARE FOR MAC
1. Start your computer. Close any open programs you have running. Place the Omega Studio Software
Installation disk in your CD-ROM drive.
2. Double-click the
3. When the Lexicon Installer window opens, double-click on the
click
Continue.
4. Click
Accept to agree to the terms of the Software Licensing Contract and continue.
Lexicon Installer CD icon when it appears on your desktop.
Cubase LE Installer icon and then
5. Choose your desired installation folder, or use the default setting and select
6. Enter your registration information as directed by the Cubase LE Installer. Your Authorization
Number is printed on the back of the Lexicon Omega Studio Software Installation CD case (as shown
below). You must include the hyphens when entering the number. Select
installation after you’ve entered your name and serial number.
7. Follow the instructions of the onscreen prompts. When the installation is finished, click on Quit.
B. INSTALLING THE LEXICON PANTHEON™ FOR MAC
1. Click on the Pantheon VST Installer icon. Next, click Continue and then Install. When the
License Agreement appears, click
Agree then wait for the Installer to finish and click Quit.
Install.
OK to continue with the
Page 7

C. SETTING UP CUBASE LE FOR USE WITH THE OMEGA STUDIO
1. Take your Lexicon Omega hardware out of the box and plug the power in.
2. Connect the included USB cable to your computer and to the Omega.
3. Open Cubase LE, and go to
Devices>Device Setup as shown below.
2. Click on
3. Cubase LE will now ask you if you would like to switch the driver. Select
4. Now, go to
VST Multitrack and select Lexicon Mac USB 1 as the ASIO Driver (as shown below).
Switch then OK.
Devices>VST Inputs. Make each of the 4 Mac USB inputs active by clicking on the
Active buttons and close the box. (If only 2 ports are shown, expand the window to show all 4 ports.)
You are now ready to start recording with Cubase LE.
Page 8

Lexicon Omega Support
As new recording software becomes available, the Lexicon Omega can be updated to ensure it works properly
with these applications. Please check the Lexicon website for future update information.
8760 South Sandy Parkway
Sandy, UT 84070
Tel: (801) 568-7567
Fax: (801) 568-7662
http://www.lexiconpro.com
Cubase and ASIO are trademarks of Steinberg Media T
Lexicon uses the Nullsoft Scriptable Install System (NSIS) - Copyright ©1999-2004 Nullsoft, Inc.
echnologies GmBH.
18-0542-B
 Loading...