

Leica DISTO Quick Start Guide

Quick Start Guide
Leica DISTO
TM
transfer v6
2
Leica DISTO
TM
transfer v6
Content
• Installation
• Connection with DISTO’s
• Bluetooth Connection
• Wi-Fi Connection
• Start screen – Connection Status
• Start screen – Overview
• Basic Measurement Process
• P2P Measurement Process
• Free Station
• CAD Plugin
• Settings
• Good to Know
3
5
6
7
8
9
12
16
19
23
37
40
Page
3
Leica DISTO
TM
transfer v6
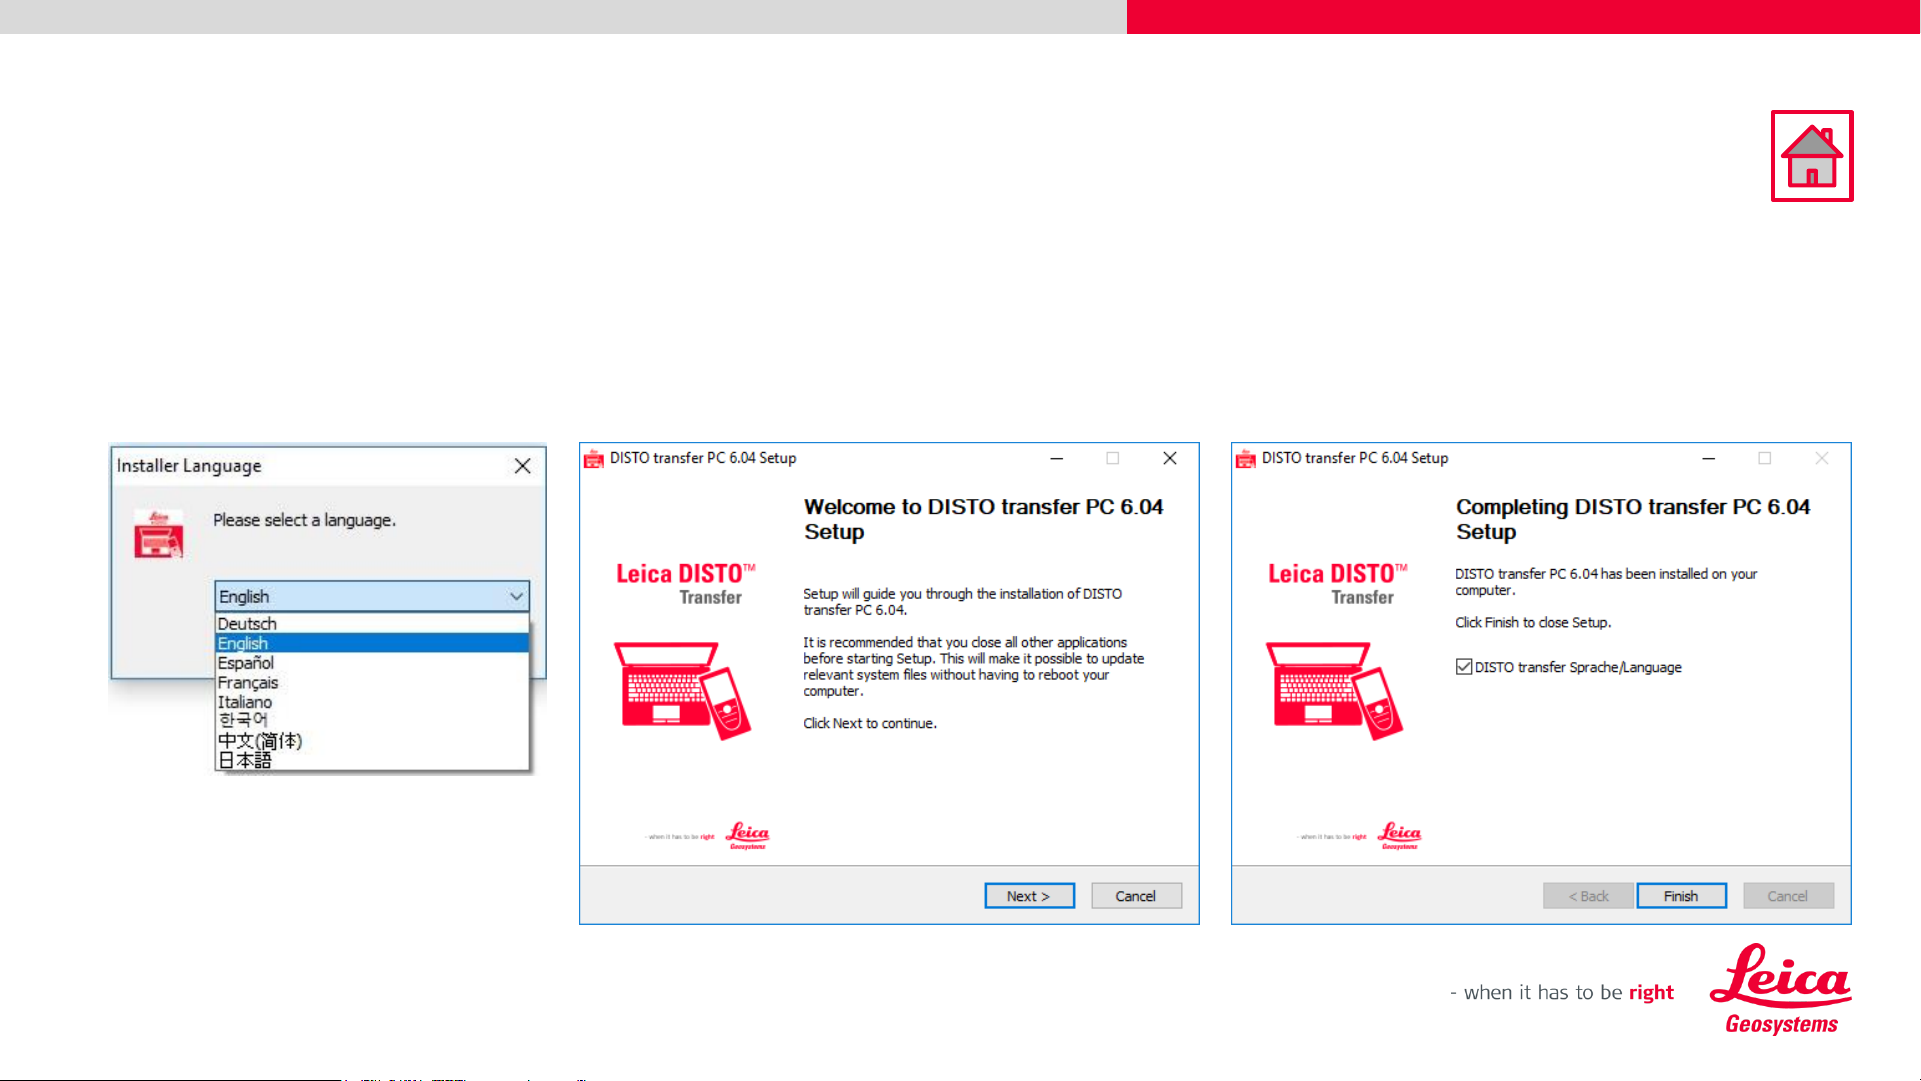
Installation
• An Installation Wizard is displayed on the screen to guide the user, through the whole process.
4
Leica DISTO
TM
transfer v6
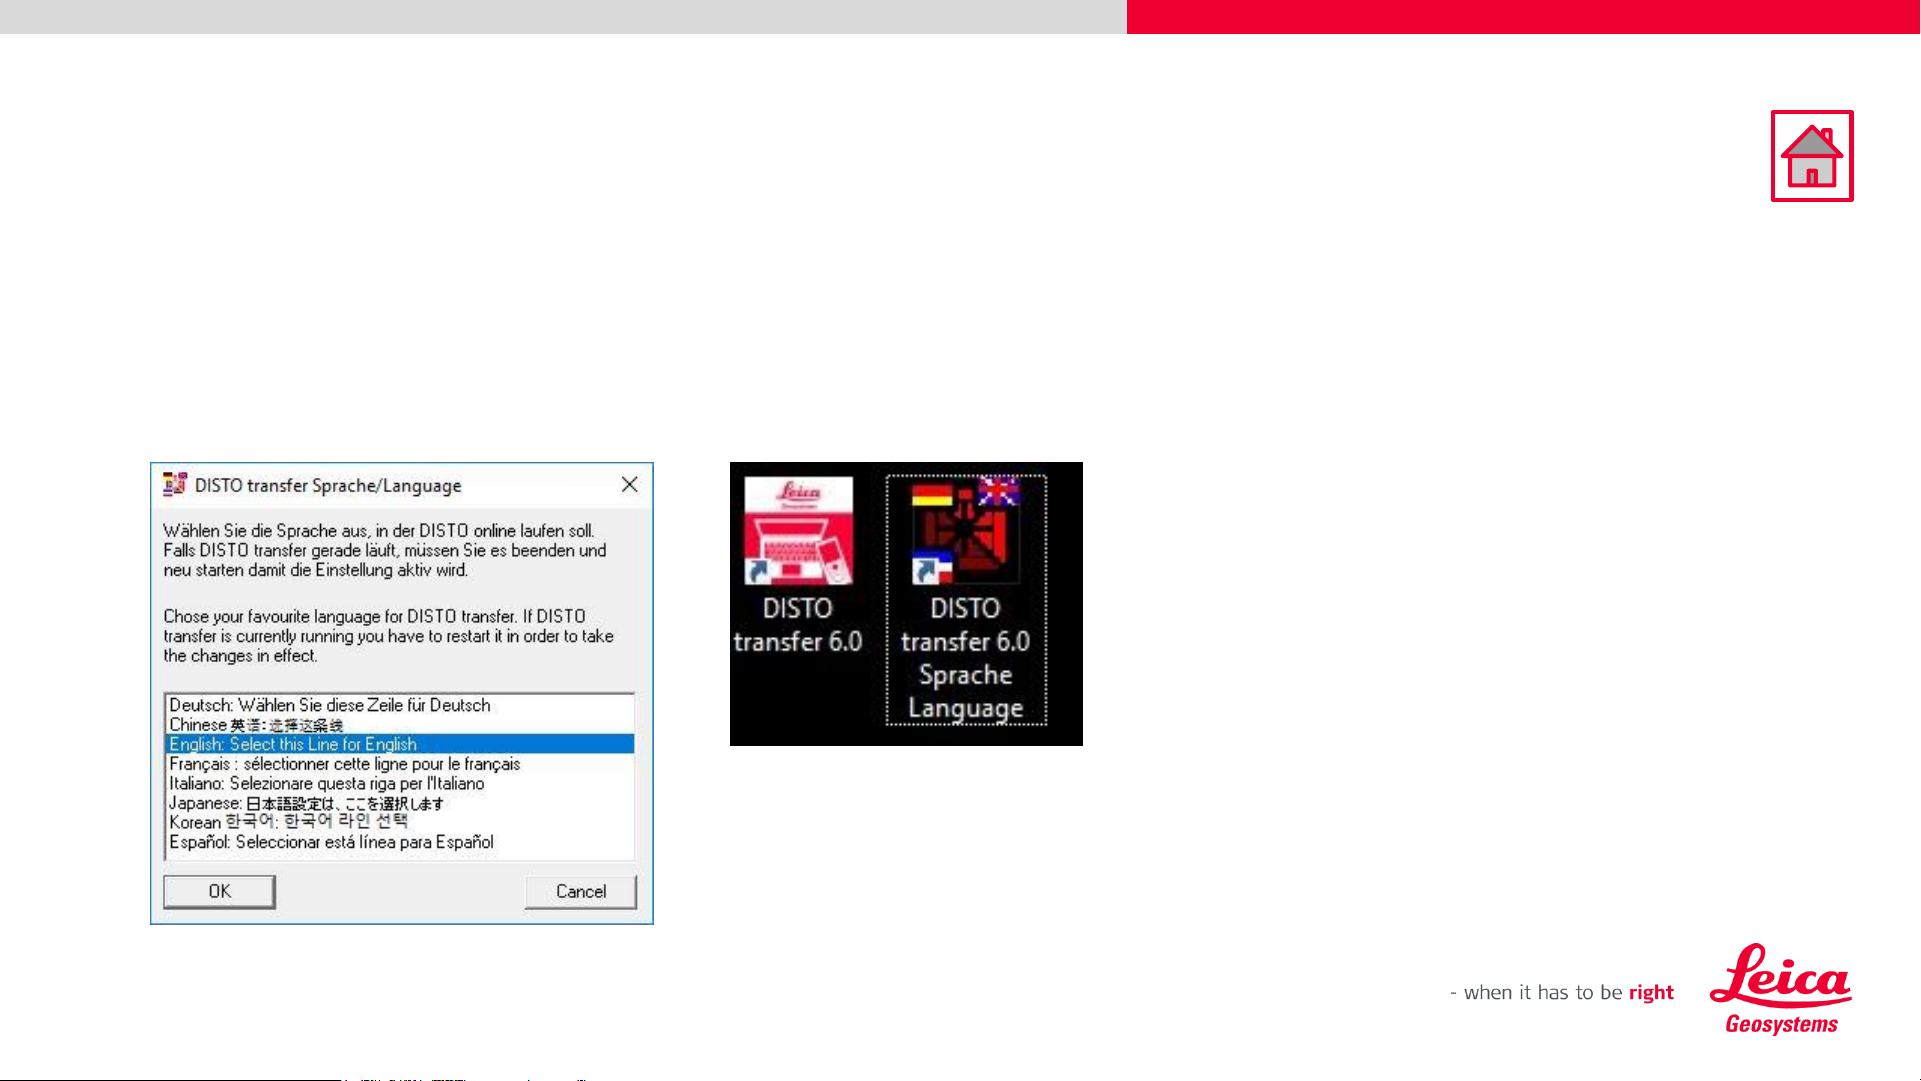
Installation
• DISTO transfer Sprache/Language allows the user to select different languages, accordingly to
the user’s preference.
• This setting can be changed later by clicking on the icon DISTO transfer 6.0 Sprache Language.
5
Leica DISTO
TM
transfer v6
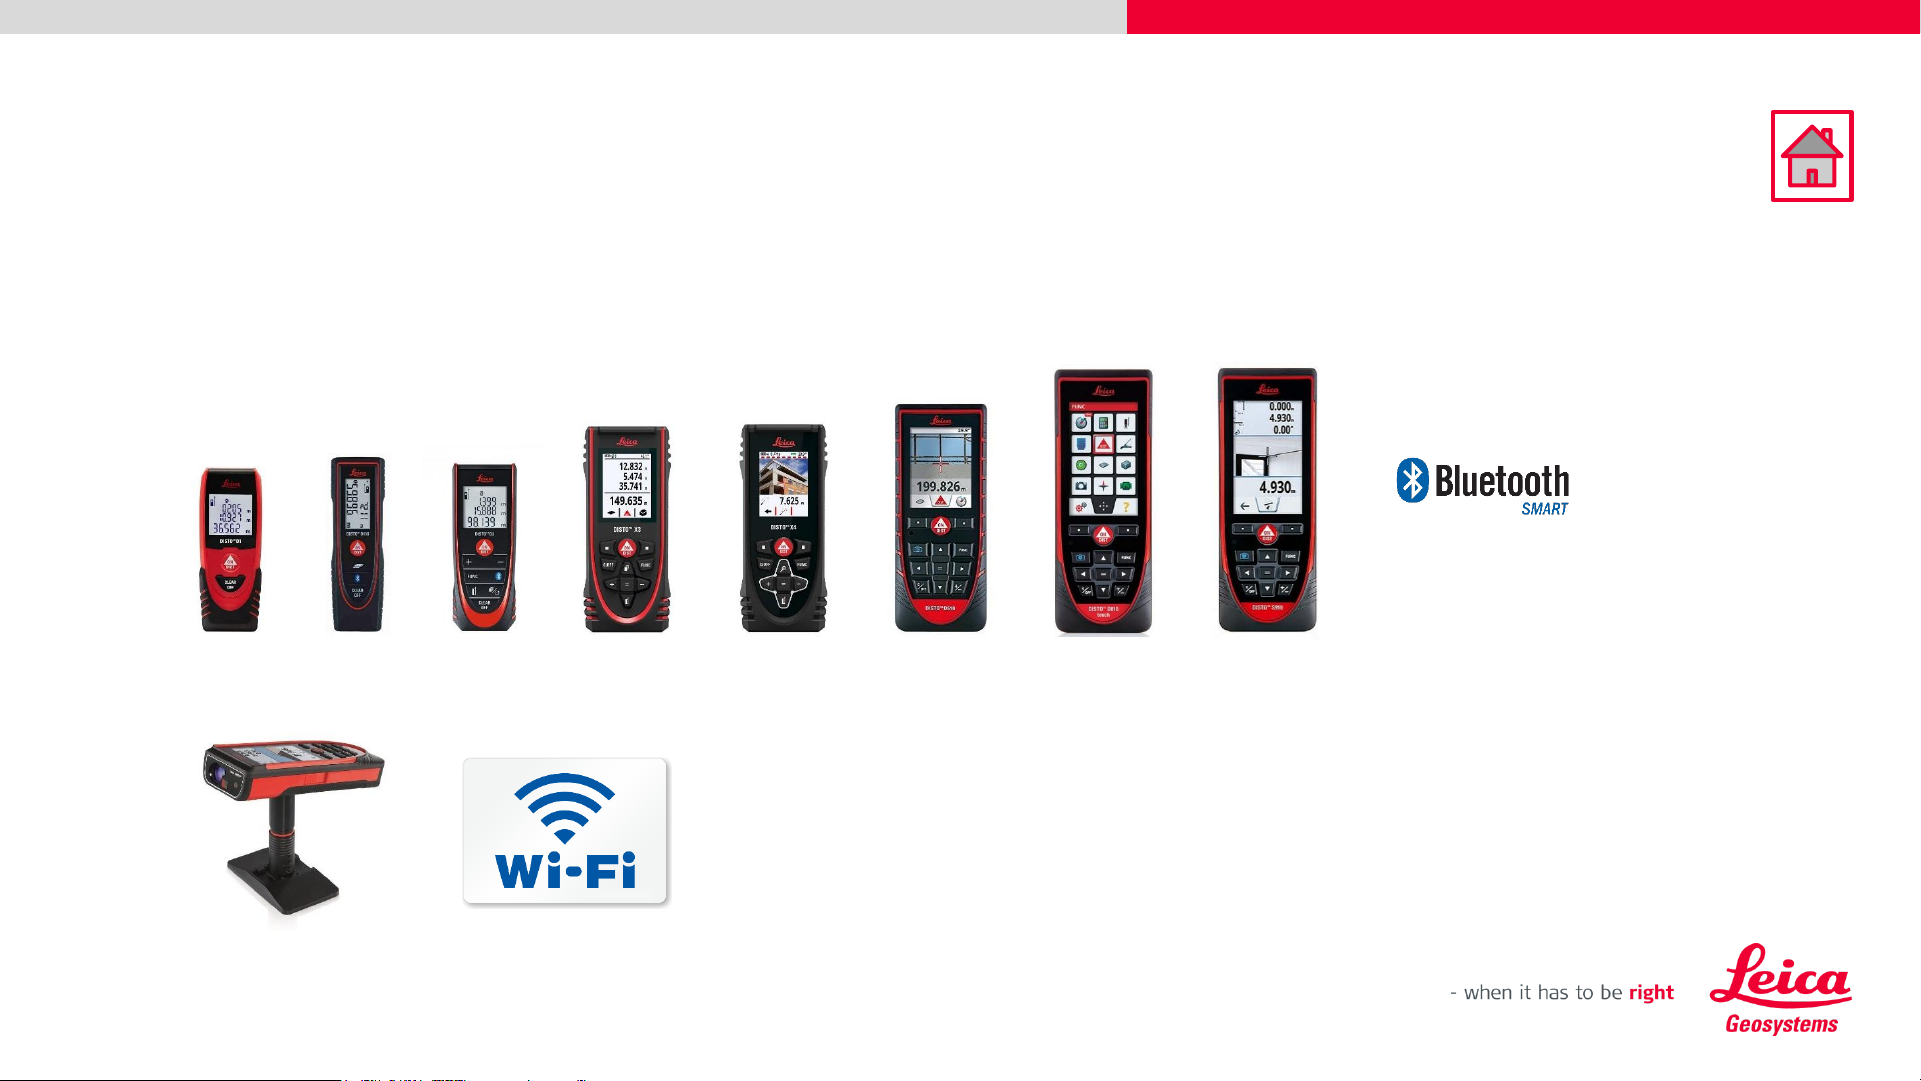
Connection with DISTO’s
• The Leica DISTO
TM
transfer v6 is compatible with all Leica products which have
Bluetooth® Smart and Wi-Fi technology.
D1
D110
D2
X3
X4
D510
D810
S910
S910
6
Leica DISTO
TM
transfer v6
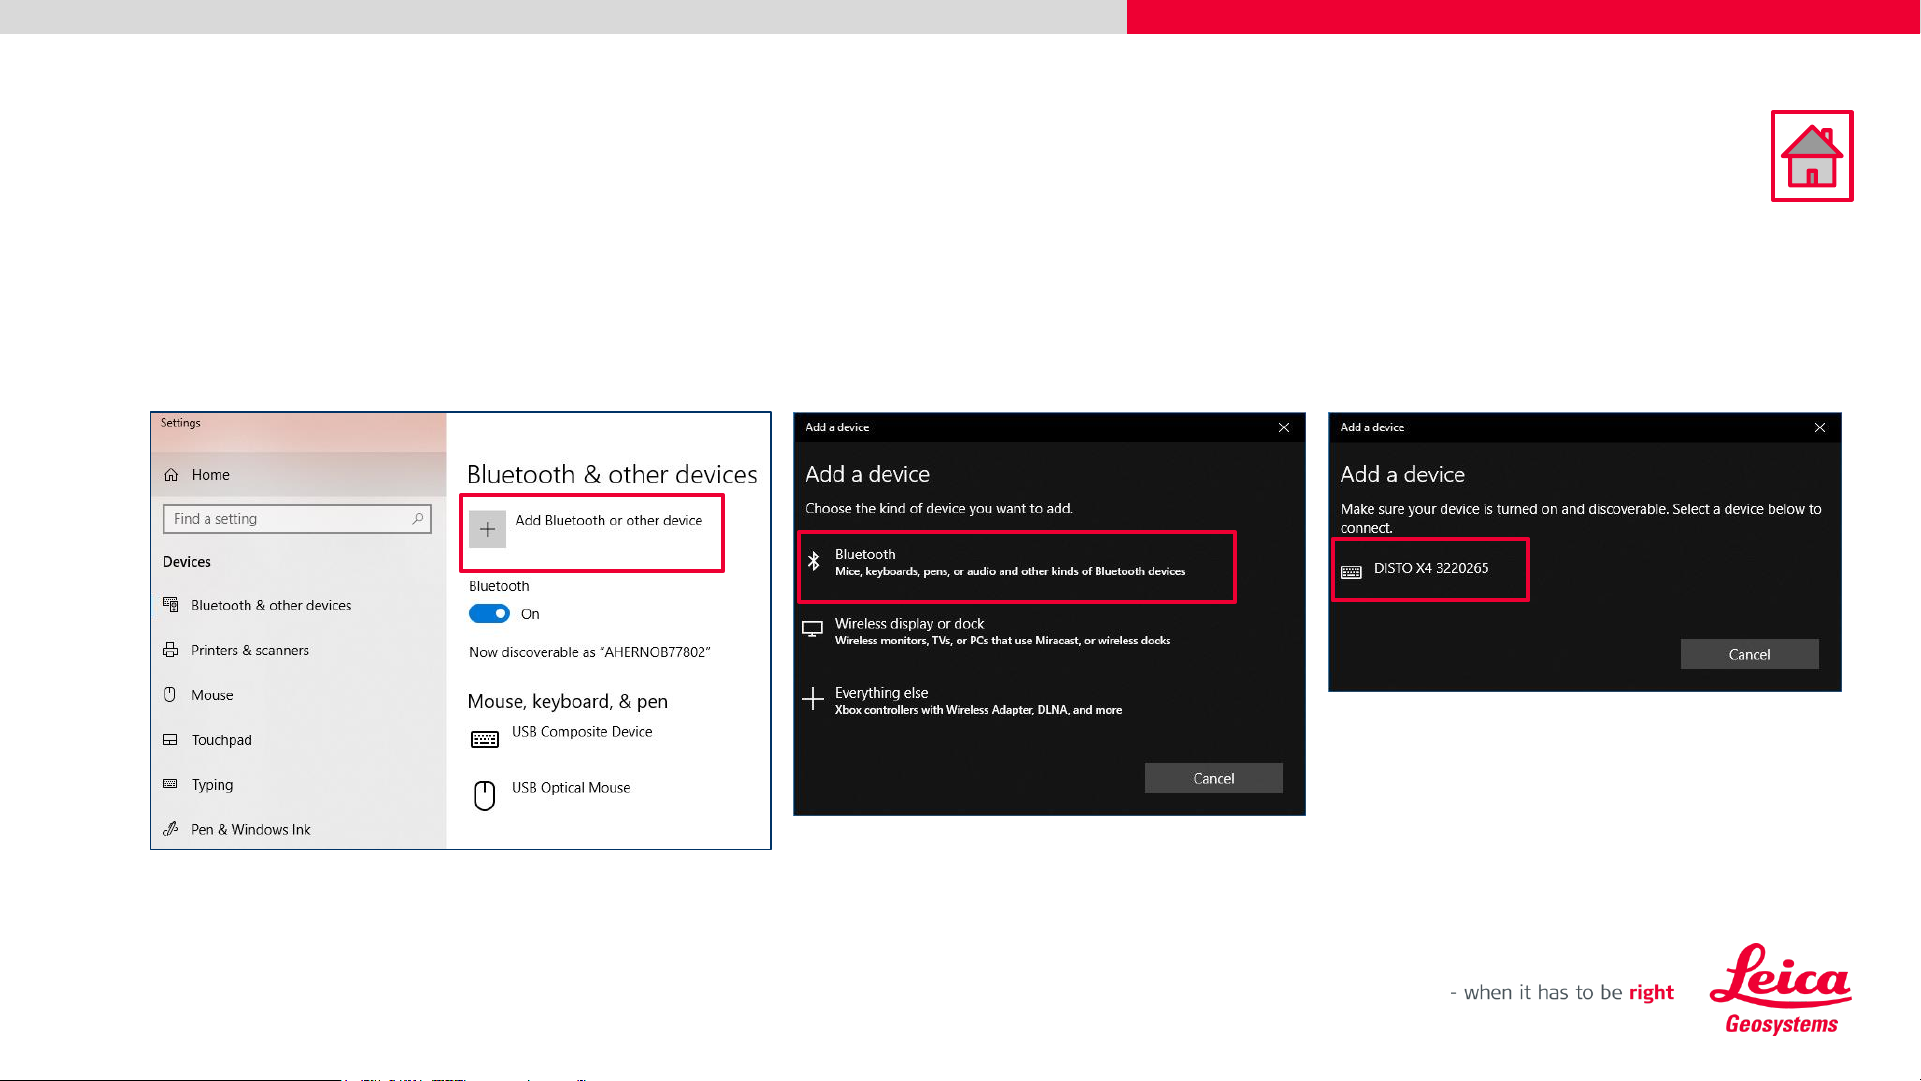
Bluetooth Connection
• Establish a Bluetooth connection between your Leica DISTO
TM
device and your tablet/laptop,
via Windows Operating System.
7
Leica DISTO
TM
transfer v6
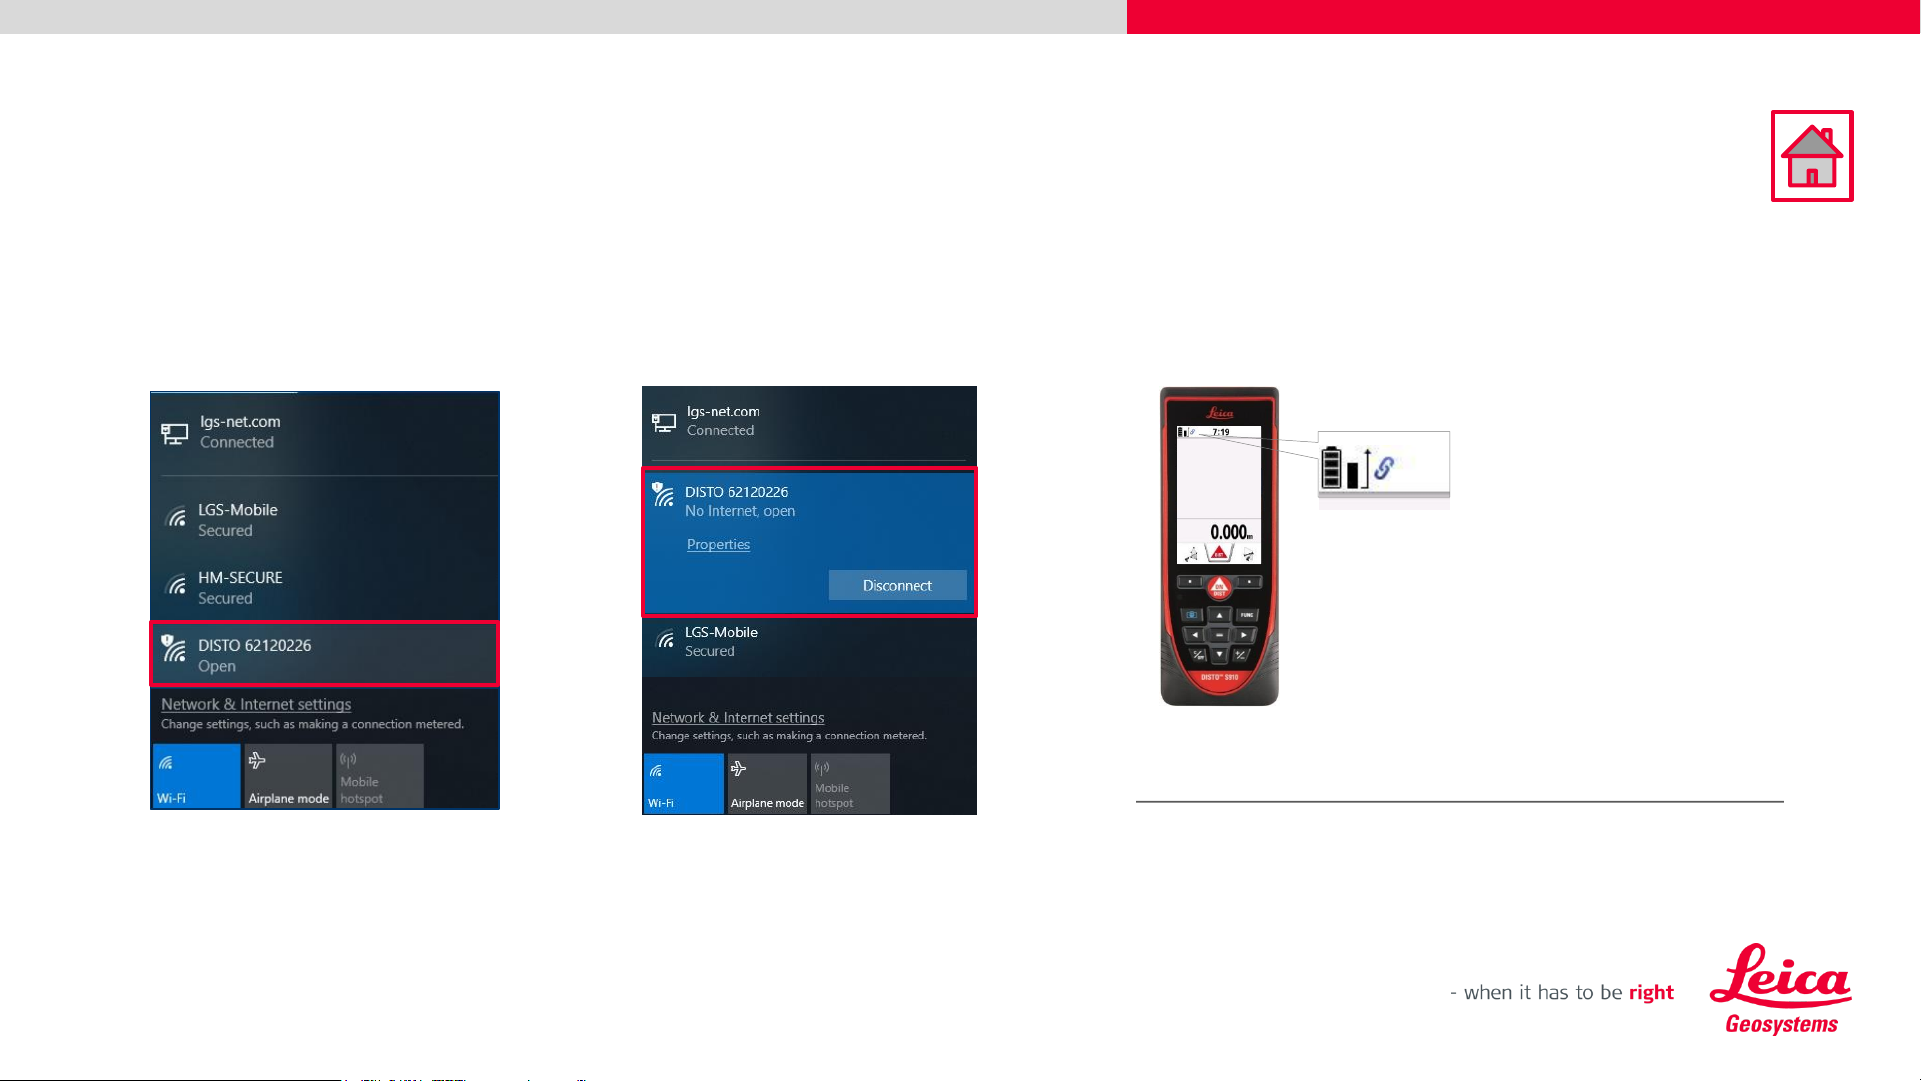
Wi-Fi Connection
• Establish a Wi-Fi connection between your Leica DISTO
TM
device and your tablet/laptop, via
Windows Operating System.
DISTO™ is connected
Please ensure that you have the latest firmware version installed
(https://lasers.leica-geosystems.com/global/firmware-update-s910)
Simplified View
8
Leica DISTO
TM
transfer v6
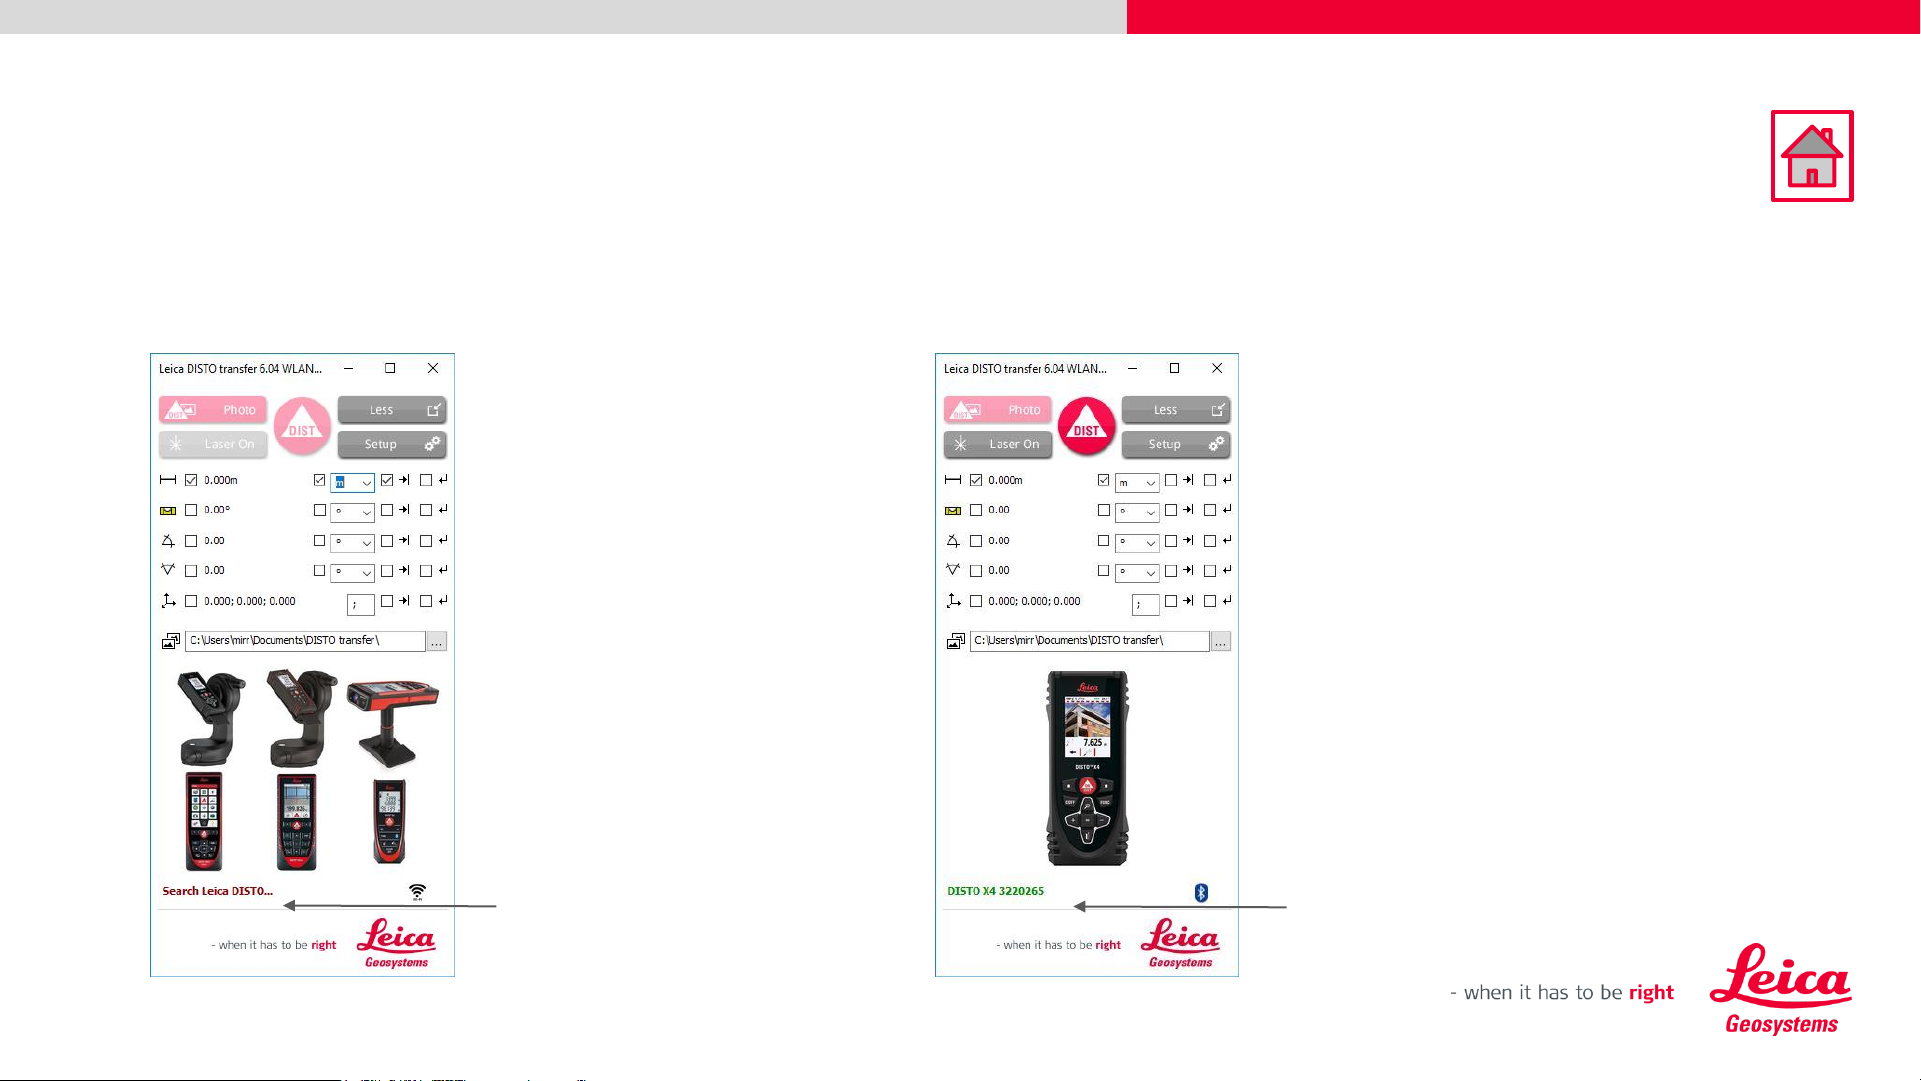
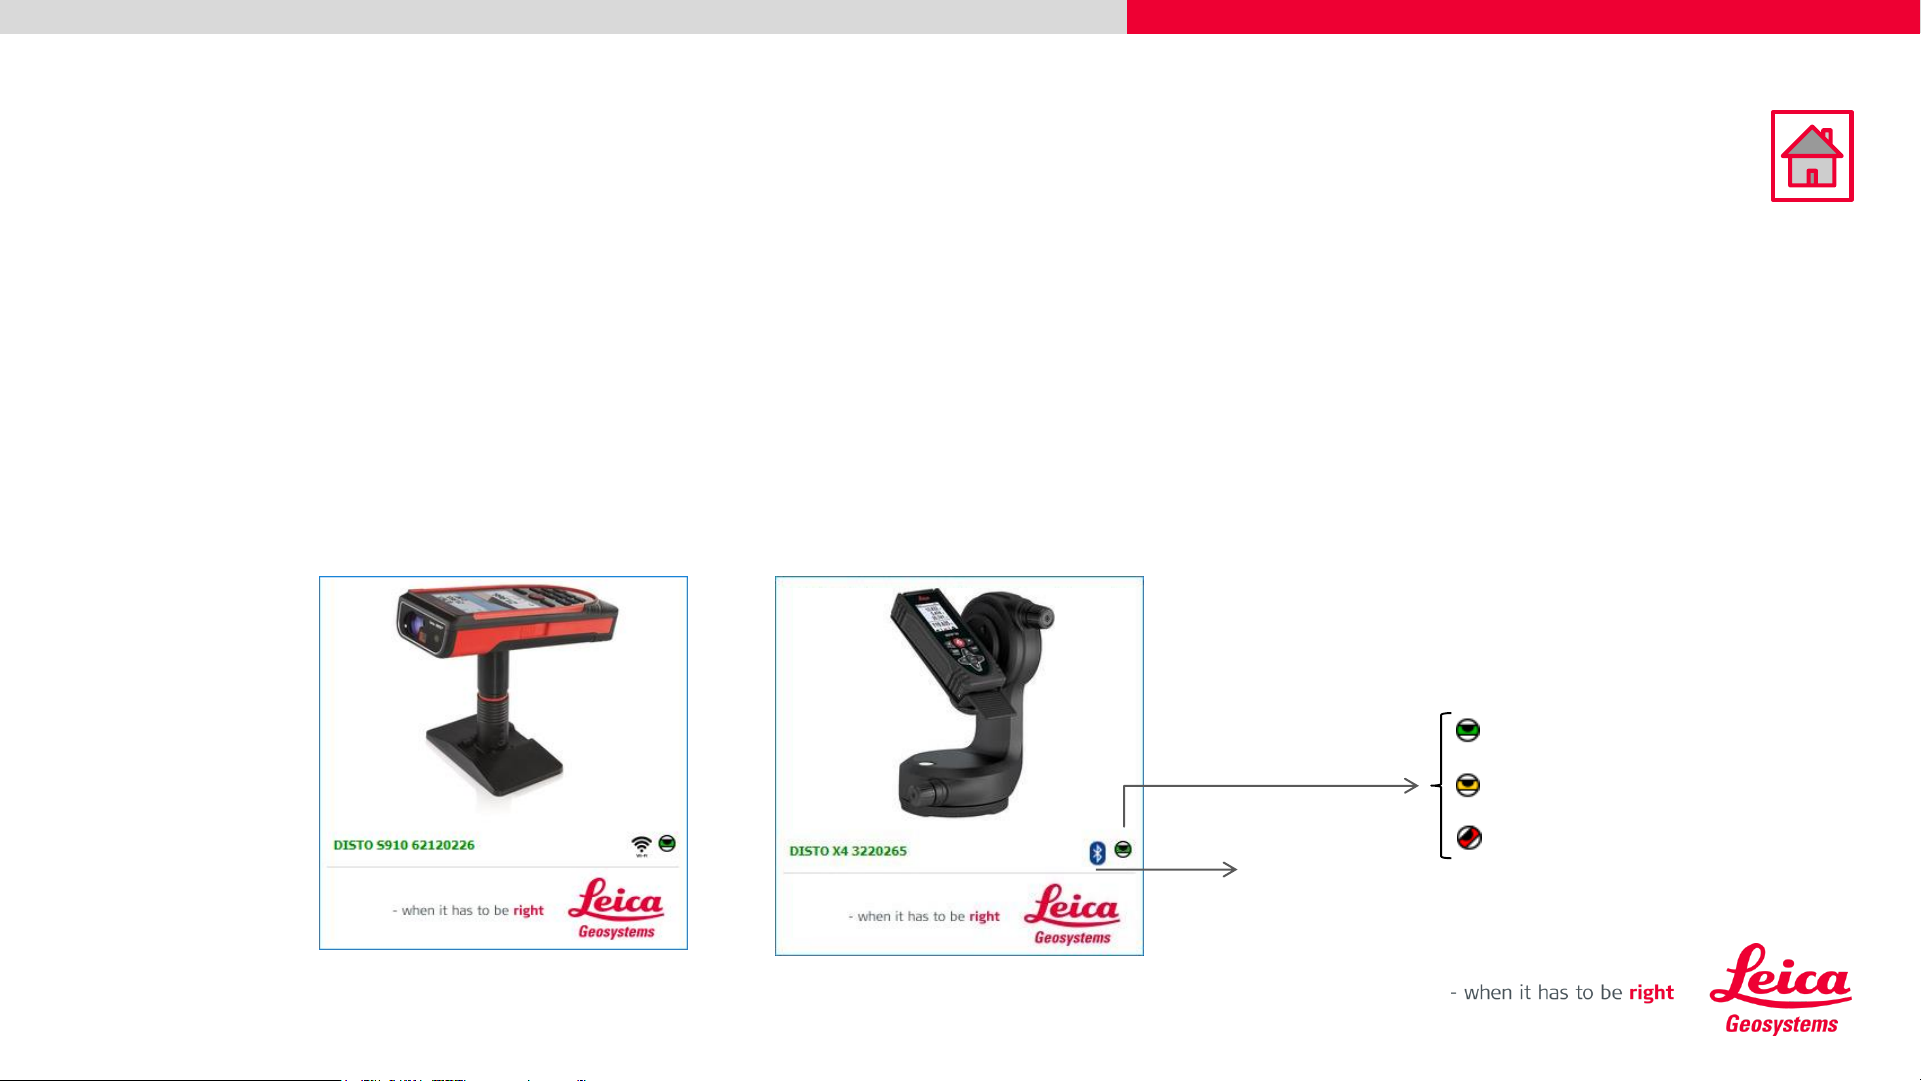
Start screen – Connection Status
• When the software is started, the initial screen is displayed and starts immediately to look for a
Leica DISTO™ device.
Looking for DISTO™
DISTO™ connected
9
Leica DISTO
TM
transfer v6
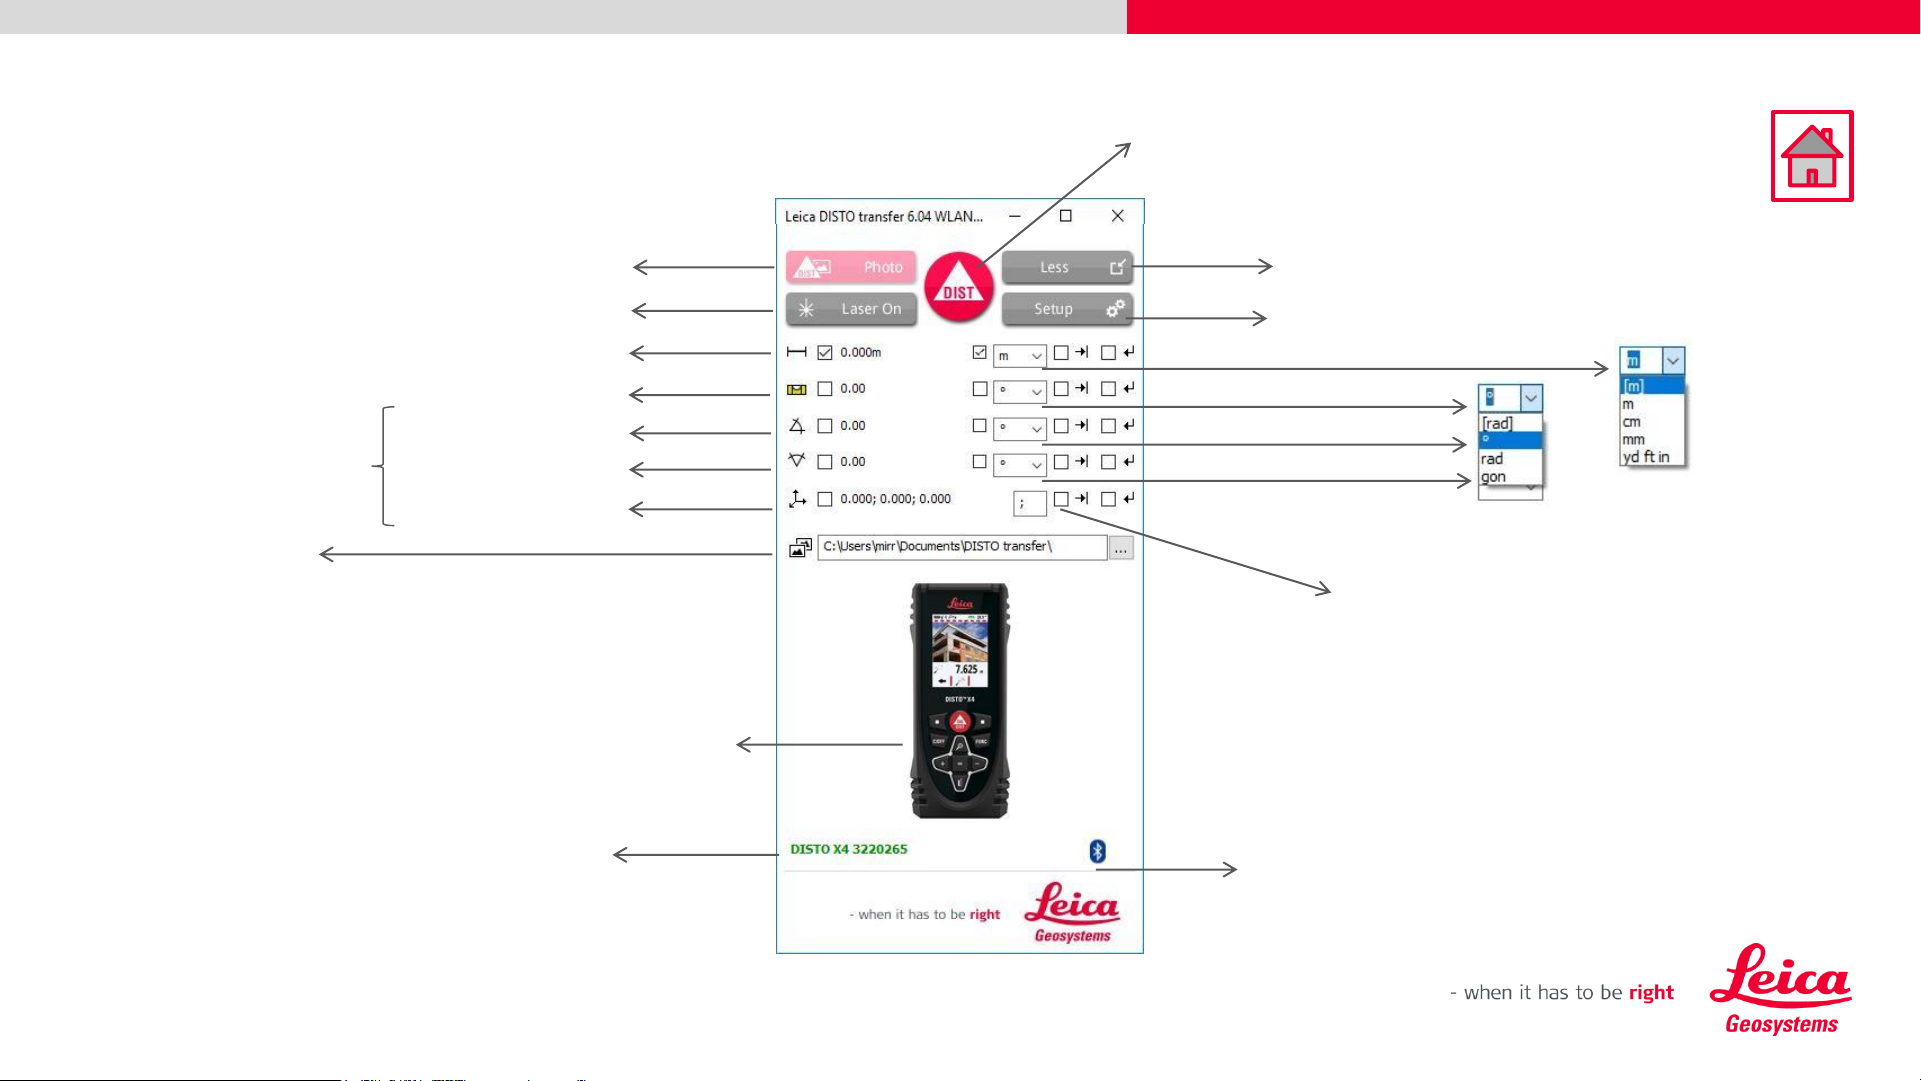
Start screen – Overview
Distance
Units
Angle
Units
Advance Settings
Simplified View
Location of captured data
Remote Distance measurement + Photo
(Wi-Fi only)
Switch ON Laser
Distance
Inclination
Horizontal Angle
X,Y,Z coordinates
Vertical Angle
Picture from connected
device
Model and Serial number
from connected device
Remote Distance
Termination method:
„Tabulator“ and/or
«Return» after values
Connection
type
Only applicable with
P2P technology
10
Leica DISTO
TM
transfer v6
Start screen – Overview
Connection
type
Levelling Status
Levelled – horizontal and vertical
information correct
Move Alert – DISTO™ has been moved
Not Levelled – no information about
horizontal and vertical
• Please note that, when DISTO™ X3 / X4 are mounted on a DST360 adapter, the levelling process
is automatically started and the levelling status is displayed on the Start screen.
• The same is applicable when the DISTO™ S910 has got the Smart Base folded down.
• These two modes, allow you to use P2P technology.
11
Leica DISTO
TM
transfer v6
Start screen – Overview
Devices which are paired with the
Windows Operating System
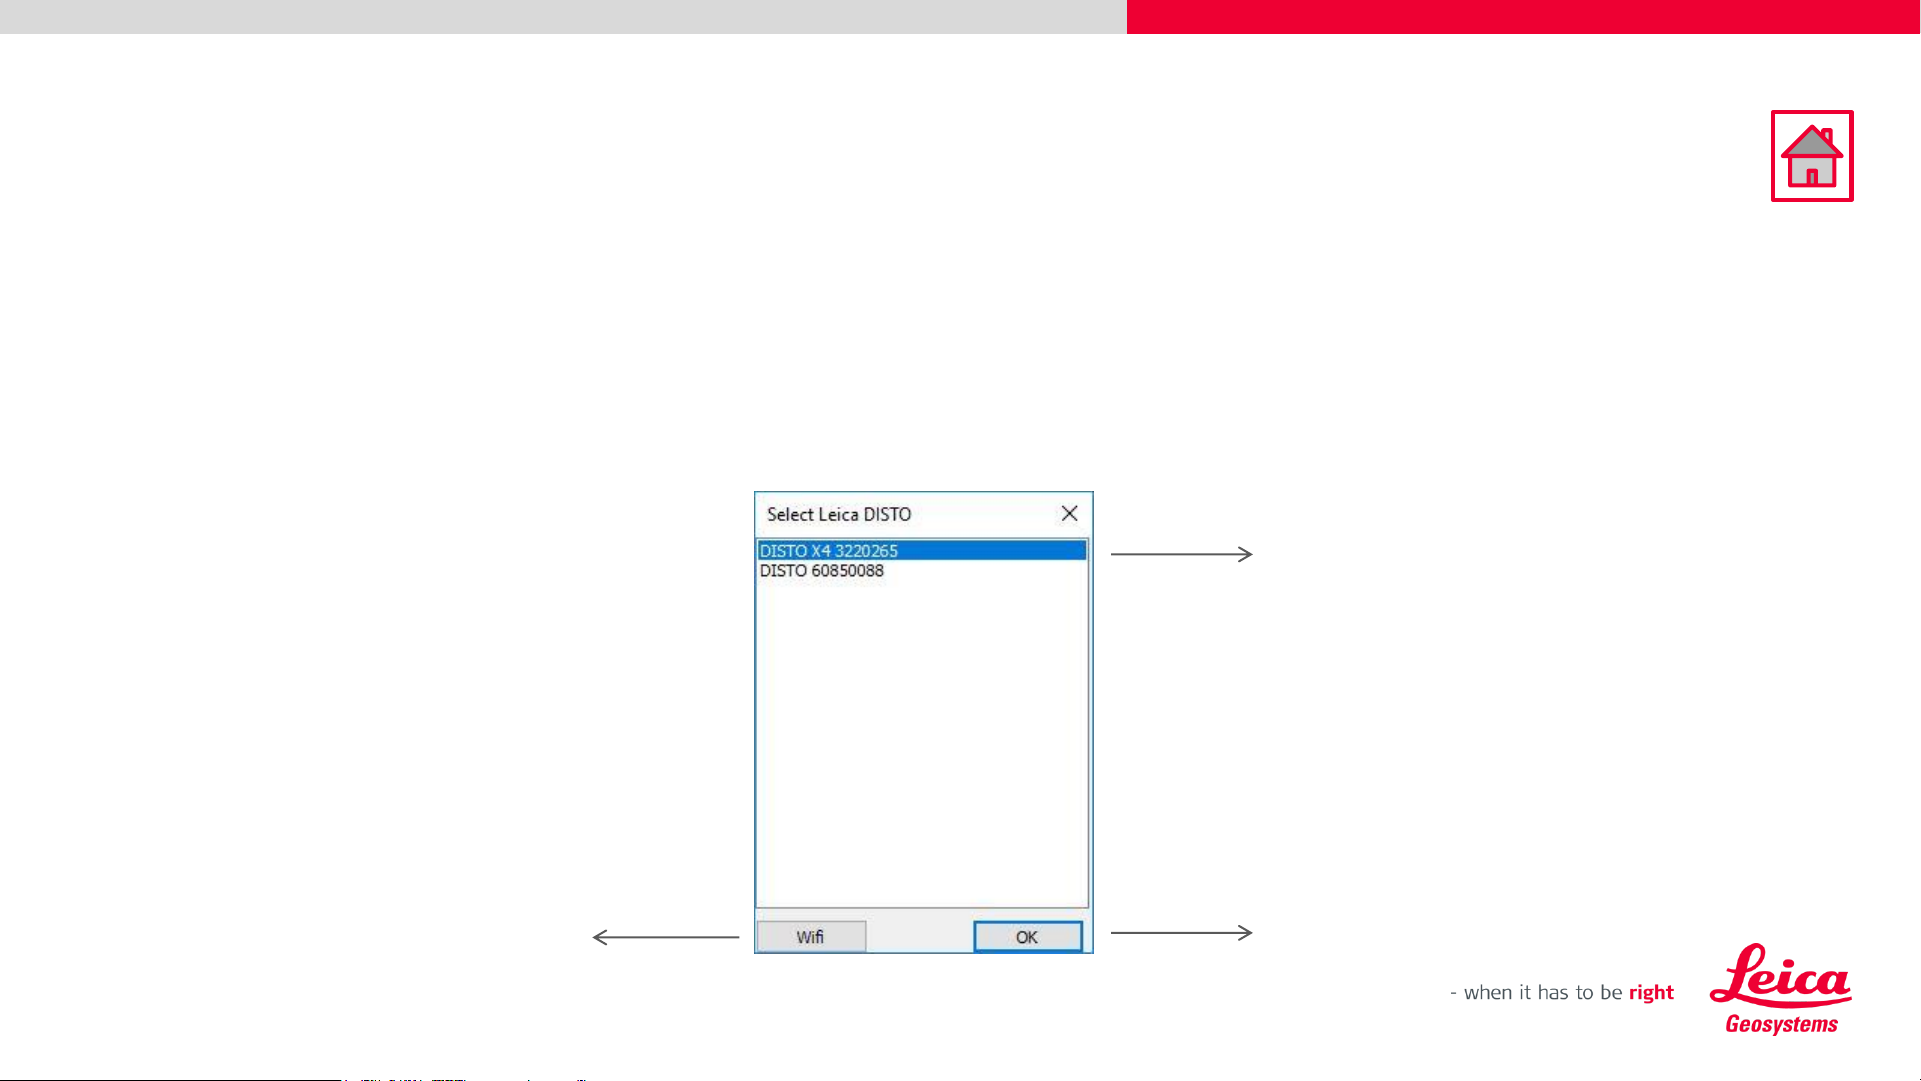
• If you have connected previously, more than one Leica DISTO™ device to your tablet/laptop, the
DISTO transfer software will display a multiple selection window.
• Inside this window, you will be offered the chance to select the desired DISTO™ and to switch
between Wi-Fi and Bluetooth.
Confirm selection
Displays the devices which support Wi-Fi
12
Leica DISTO
TM
transfer v6
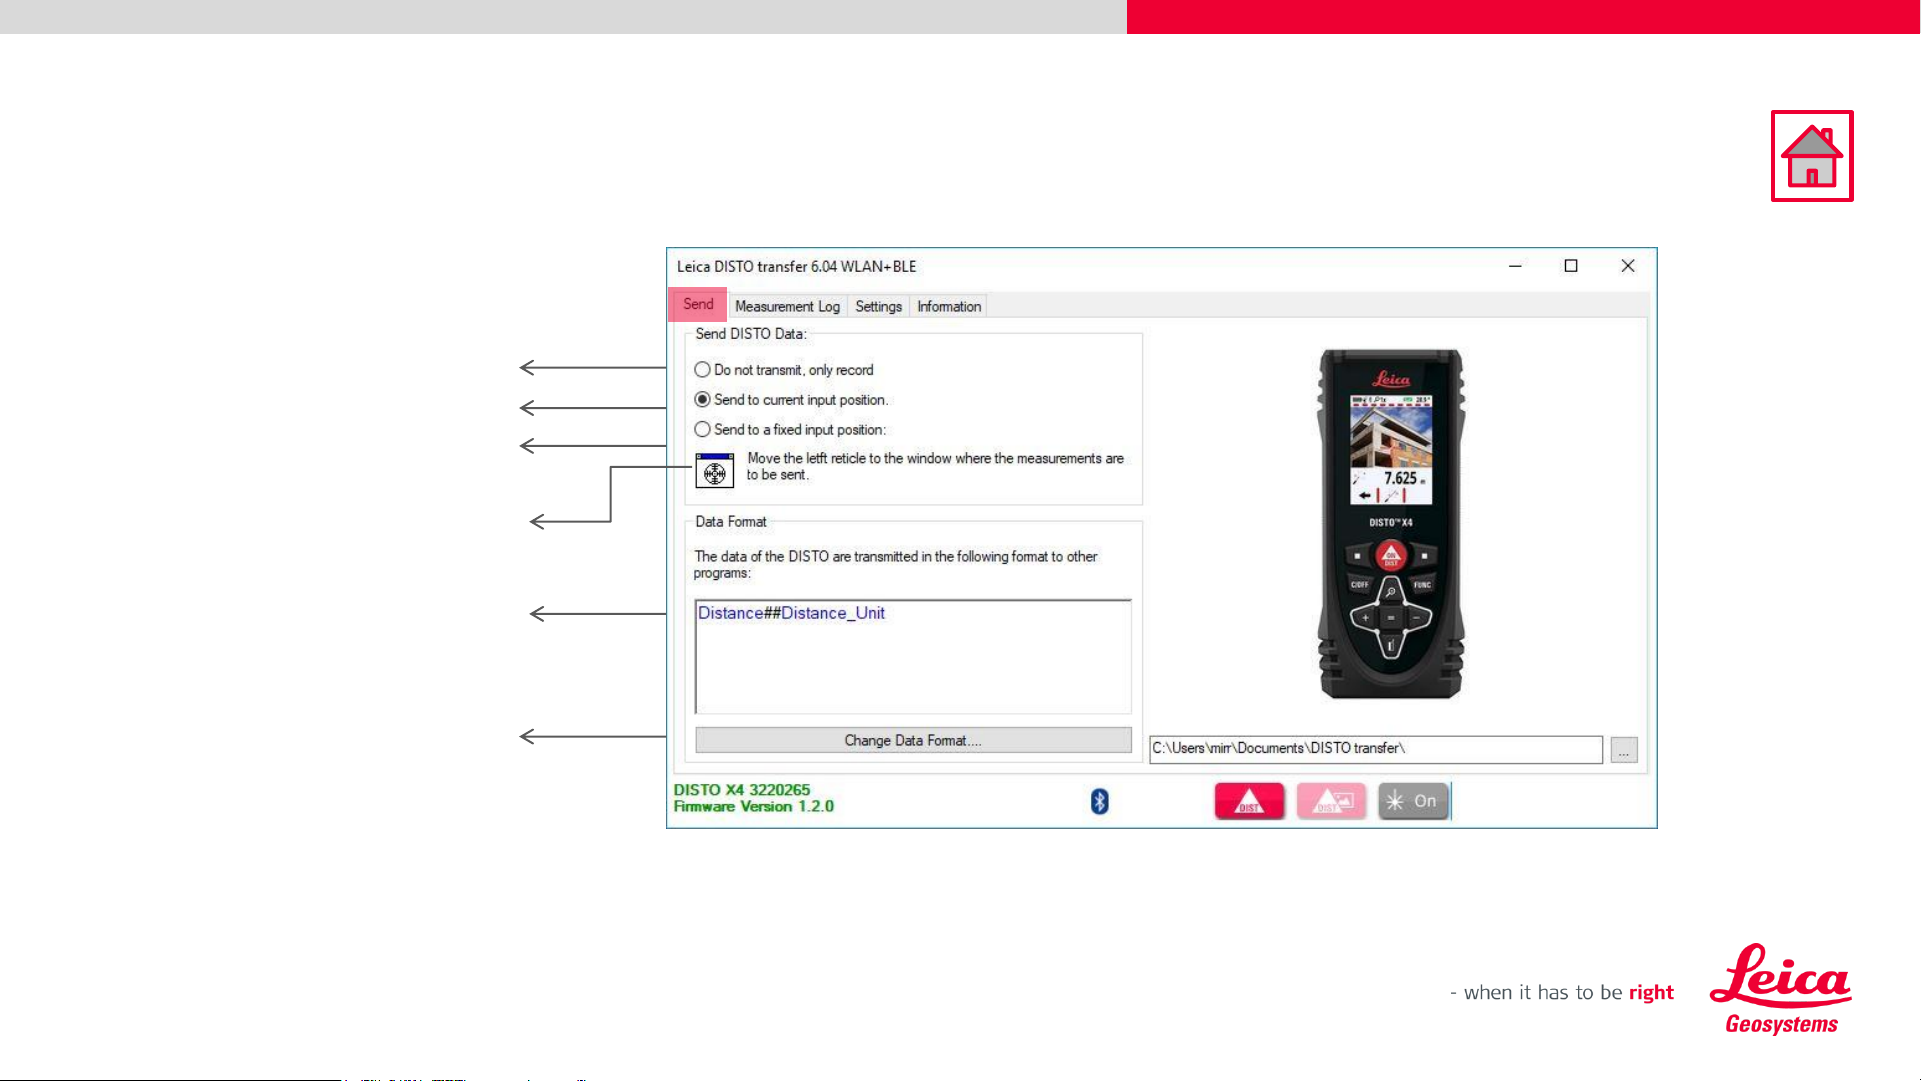
Basic Measurement Process
Characteristics sent to other programs
Measurements sent to a pre-selected window
Measurements sent to active window
Measurements sent to Measurement Log only
Window selection
Customized Data Format
(see next page)
13
Leica DISTO
TM
transfer v6
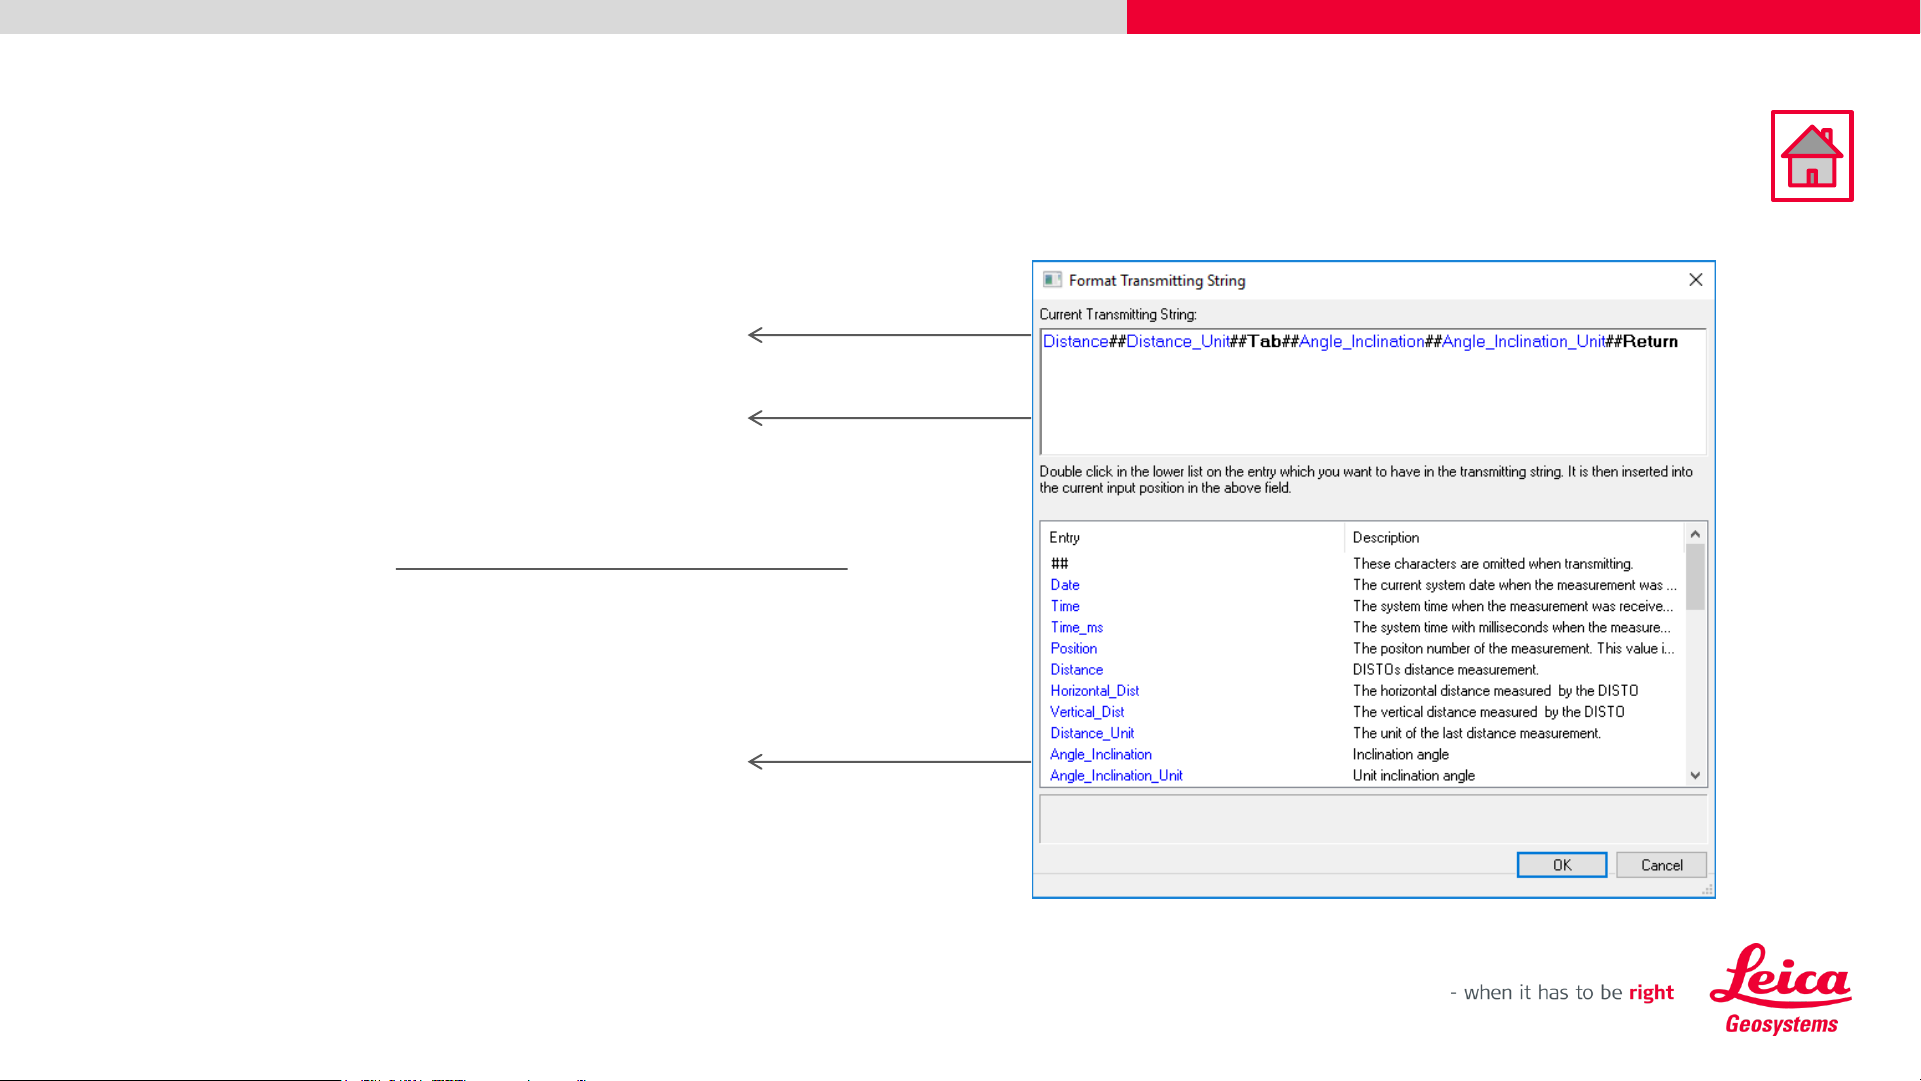
Basic Measurement Process
In this scenario the following characteristics will be sent:
Distance, Distance unit, Inclination, Inclination Unit
Active Configuration Window
Blue: Value format
## Separators
Black Control Signs
Double click on the item in this list to
move it into the active configuration
Separators are mandatory between every item
 Loading...