

Page 1

PageScope
Net Care 5.5
Quick Guide
Page 2

Foreword
Welcome
• KONICA MINOLTA PageScope Net Care is utility software that
provides central control over printers, copiers, and other devices on a
network. With KONICA MINOLTA PageScope Net Care, you can
use a Web browser to check the status of each device on a network
and configure device settings. KONICA MINOLTA PageScope Net
Care uses SNMP, which is standard network protocol, which means
it can be used to manage KONICA MINOLTA devices, as well as
other network devices that support standard Printer-MIB. KONICA
MINOLTA PageScope Net Care is implemented based on Java 2
technologies, enabling functions and operations that are equivalent
to those found on a most platforms that support Java.
• This product is compatible with the screen reader software IBM
JAWS version 3.7.
Important!
• When using screen reader software, be sure log in to the HTML mode.
Trademark Acknowledgements
KONICA MINOLTA and KONICA MINOLTA logo are trademarks or
registered trademarks of KONICA MINOLTA HOLDINGS, INC.
PageScope is a trademark or a registered trademark of KONICA
MINOLTA BUSINESS TECHNOLOGIES, INC.
Apple and Macintosh are registered trademarks of Apple Computer, Inc.
Ethernet is a registered trademark of Xerox Corporation.
Linux is a registered trademark of Linus Torvalds.
Microsoft, Windows, and Windows NT are either registered
trademarks or trademarks of Microsoft Corporation in the United
States and/or other countries.
Netscape and the Netscape N and Ship’s Wheel logos are registered
trademarks of Netscape Communications Corporation in the U.S. and
other countries. Netscape Navigator is also a trademark of Netscape
Communications Corporation and may be registered outside the U.S.
i
Page 3

Foreword
Java and Solaris are trademarks of Sun Microsystems, Inc.
IBM is a trademark of IBM Corporation.
Red Hat is either a trademark or registered trademark of Red Hat, Inc.
in the United States and other countries.
SUSE is a registered trademark of SUSE LINUX Products GmbH, a
division of Novell, Inc. in the United States.
Turbolinux is a trademark or registered trademark of Turbolinux, Inc.
All other product names are trademarks or registered trademarks of
their respective holders.
©
Copyright
TECHNOLOGIES, INC. All rights reserved.
The information contained in this manual is subject to change
without notice.
2003 KONICA MINOLTA BUSINESS
ii
Page 4

Contents
CONTENTS
1 System Requirements .................................1
Network Environment ......................................................1
Server ..............................................................................1
Client ...............................................................................2
2 Installing and Starting Up the Server ........4
2.1 Installing the Server ...................................... 4
Windows platform ............................................................4
Solaris and Linux platform ...............................................4
2.2 Upgrade Installation ...................................... 6
2.3 Starting Up the Server .................................. 7
Windows 98 or Me platform ............................................7
Windows NT 4.0 or 2000 platform ...................................7
Windows Server 2003 platform .......................................7
Windows XP platform ......................................................7
Solaris and Linux platforms .............................................8
2.4 Starting Up Console Tools ........................... 9
2.5 Restarting the Server .................................. 10
2.6 Shutting Down the Server .......................... 11
Windows 98 or Me platform ..........................................11
Windows NT 4.0 or 2000 platform .................................11
Windows Server 2003 platform .....................................11
Windows XP platform ....................................................11
Solaris and Linux platforms ...........................................12
2.7 Uninstalling .................................................. 13
Windows 98 or Me platform ..........................................13
iii
Page 5

Contents
Windows NT 4.0 or 2000 platform .................................13
Windows XP/Server 2003 platform ...............................14
Solaris and Linux platforms ...........................................14
3 Using PageScope Net Care Client ............15
3.1 Starting Up Client ........................................ 15
3.2 Displaying Help ........................................... 17
To display the help information from the login screen ...17
To display the help information from any of the
screens for specifying settings ......................................17
3.3 Logging In .................................................... 18
3.4 Specifying the Discovery Range ................ 20
4 Device Management ..................................22
4.1 Displaying the Device Management
Screen .......................................................... 22
4.2 Device Panel Window .................................. 24
4.3 Functions ..................................................... 25
5 Using Multi-Setting ....................................26
Displaying the Multi-Setting menu .................................26
5.1 Creating a Template .................................... 28
5.2 Performing a Multi-Setting Operation ........ 30
To retrieve a template ....................................................30
To apply the settings of a retrieved template .................30
iv
Page 6

6 Configuring PageScope Net Care
Settings ......................................................32
Displaying the Server Setting menu ..............................32
6.1 Preferences ..................................................33
Displaying the setting screen ........................................33
To configure Preference settings ...................................34
6.2 Initializing Settings ...................................... 35
Displaying the Initialize screen ......................................35
To initialize settings .......................................................36
6.3 Selecting Managed Devices ....................... 37
Displaying the List Manager screen ..............................37
To select managed devices ...........................................37
6.4 Removing a Managed Device ..................... 38
Displaying the List Manager screen ..............................38
To remove a device .......................................................38
6.5 Specifying the Device Discovery Range ... 39
Displaying the Discovery Setting screen .......................39
To add a network to the discovery range .......................42
To remove a network from the discovery range .............43
When automatic device discovery fails .........................43
To add settings used with a search for devices
compatible with SNMPv1 ..............................................44
To remove settings used with a search for devices
compatible with SNMPv1 ..............................................44
To add settings used with a search for devices
compatible with SNMPv3 ..............................................45
To remove settings used with a search for devices
compatible with SNMPv3 ..............................................45
Contents
6.6 Adding a Device Manually .......................... 47
Displaying the Add Device screen .................................47
v
Page 7

Contents
To add a device manually ..............................................47
6.7 Assigning an IP Address to a Device ........ 50
Displaying the Assign IP Address screen ......................50
To assign an IP address to a device ..............................50
6.8 Configuring Device Link Settings .............. 52
Displaying the Device Link Setting screen ....................52
To link devices ...............................................................53
To unlink devices ...........................................................53
6.9 Registering Users and Unregistering
Users ............................................................ 54
Displaying the User List screen .....................................54
To register a user ..........................................................55
To modify user registration settings ...............................56
To delete a user .............................................................57
6.10 Configuring Custom Group Settings ......... 58
Displaying the Custom Group Setting screen ...............58
To create a custom group ..............................................58
To view custom group settings ......................................59
To modify custom group settings ...................................59
To copy a custom group ................................................60
To delete a custom group ..............................................60
6.11 Registering Usable Devices for Each
User .............................................................. 61
Displaying the My Device Setting screen ......................61
To configure device settings ..........................................61
To remove a device from My Device ..............................62
6.12 Specifying E-Mail Transmission/Reception
Settings ........................................................ 63
E-mail transmission/reception settings ..........................64
vi
Page 8

Contents
6.13 Specifying Settings for Counter Notification,
Device Status Notification, Server Information
Notification and Command Mail Support .. 66
To specify the device status notification, server information
notification and command mail support settings ...........66
Configuring counter notification settings .......................69
To configure the counter notification settings ................69
Configuring device status notification settings ..............72
6.14 Specifying Security Settings for PageScope
Net Care ........................................................ 76
Displaying the Security Setting screen ..........................76
To configure the security settings ..................................76
To configure SSL transmission settings ........................78
To request a server certificate from an external
certification authority .....................................................79
6.15 Checking Models Compatible With
PageScope Net Care ................................... 86
To display the Supported Models screen ......................86
6.16 Checking Languages Compatible With
PageScope Net Care ................................... 88
To display the Supported Language screen ..................88
6.17 Checking the PageScope Net Care
Version ......................................................... 89
Displaying the Version screen .......................................89
7 Centralized Management for Controlling
Multiple Servers .........................................90
7.1 Linking With Other PageScope Net Care
Servers ......................................................... 92
vii
Page 9

Contents
7.2 Specifying PageScope Net Care Server
Information ................................................... 94
7.3 Viewing Device Information From a
PageScope Net Care Client ........................ 96
7.4 Unlinking a Server ....................................... 98
8 Automatically Checking for and
Downloading Update Files ........................99
8.1 Specifying Settings for Automatically
Checking for Update Files ........................ 100
8.2 Checking Update Files .............................. 103
8.3 Downloading Update Files ....................... 104
9 Obtaining and Viewing Device Job History
Data ...........................................................105
9.1 Specifying Initial PageScope Net Care
Server Settings for Obtaining Job History
Data-1 ......................................................... 107
9.2 Specifying Initial PageScope Net Care
Server Settings for Obtaining Job History
Data-2 ......................................................... 108
9.3 Specifying Initial Device Settings for
Obtaining Job History Data ......................110
9.4 Viewing Job History Data ......................... 113
9.5 Changing the Job History Data List
View ............................................................ 116
viii
Page 10

Contents
10Obtaining and Viewing Device Counter
Information ...............................................117
10.1 Configuring E-Mail Transmission and
Reception Settings for Devices
(This procedure is performed from the
device.) ....................................................... 120
10.2 Enabling the Copy Track Function on the
Device
(This procedure is performed from the
device.) ....................................................... 121
10.3 Enabling the User Authentication Function on
the Device
(This procedure is performed from the
device.) ....................................................... 122
10.4 Specifying Initial PageScope Net Care Server
Settings for Using This Function—1
(This procedure is performed from the
PageScope Net Care server.) .................... 123
10.5 Specifying Initial PageScope Net Care Server
Settings for Using This Function—2
(This procedure is performed from the
PageScope Net Care server.) .................... 124
10.6 Registering Devices Using This Function With
the PageScope Net Care Server
(This procedure is performed from the
PageScope Net Care server.) .................... 126
10.7 Viewing Counter Information ...................127
ix
Page 11

Contents
x
Page 12

1 System Requirements
1 System Requirements
The minimum system configuration detailed below is required to run
PageScope Net Care.
Network Environment
LAN Type Protocol
Ethernet (10/100BaseT) TCP/IP
Token Ring (4/16 Mbps)
Server
Operating System Hardware
[Windows platform (IA32)]
• Windows 98/Me
• Windows NT 4.0 with
Service Pack6a or later
• Windows 2000
Professional Service Pack
3 or later
• Windows 2000 Server
• Windows XP H ome
Service Pack 1 or later
• Windows XP Professional
Service Pack 2 or later
• Windows Server 2003
Web/Standard/Enterprise/
Datacenter Editions
Solaris 7/8/9/10 SPARC Station
[Linux platform (IA32)]
• Red Hat Enterprise Linux
2.1 or later
• SUSE Linux Enterprise
Server 8 or later
• SUSE 8.0 or later
• Turbo Linux 7.0 or later
CPU: Pentium 550 MHz or higher (800 MHz
or faster recommended)
RAM: 256 MB minimum
RAM: 256 MB minimum
CPU: Pentium 550 MHz or higher (800 MHz
or faster recommended)
RAM: 256 MB minimum
1
Page 13

Client
Java Mode
1 System Requirements
Operating System Web Browser
[Windows platform
(IA32)]
• Windows 98/Me*
• Windows NT 4.0 with
Service Pack6a or later
• Windows 2000
Professional Service
Pack 3 or later*
• Windows 2000 Server
• Windows XP H ome
Service Pack 1 or later*
• Windows XP
Professional Service
Pack 2 or later
• Windows Server 2003
We b/ St an dar d/
Enterprise/Datacenter
Editions
Solaris 7/8/9/10 Netscape 6.2.2 or higher
[Linux platform (IA32)]
• Red Hat Enterprise Linux
2.1 or later
• SUSE Linux Enterprise
Server 8 or later
• SUSE 8.0 or later
• Turbo Linux 7.0 or later
* Do not downgrade from the Web browser that comes installed with your
operating system.
Microsoft Internet Explorer
5.5 Service Pack 2 or higher
Netscape 6.2.2 or higher
Java
Environment
Java Plug-in 1.4
or higher
2
Page 14

1 System Requirements
HTML Mode
Operating System Web Browser
[Windows platform
(IA32)]
• Windows 98/Me*
• Windows NT 4.0 with
Service Pack6a or later
• Windows 2000
Professional Service
Pack 3 or later*
• Windows 2000 Server
• Windows XP H ome
Service Pack 1 or later*
• Windows XP
Professional Service
Pack 2 or later
• Windows Server 2003
We b/ St an dar d/
Enterprise/Datacenter
Editions
Solaris 7/8/9/10 Netscape 6.2.2 or higher
[Linux platform (IA32)]
• Red Hat Enterprise Linux
2.1 or later
• SUSE Linux Enterprise
Server 8 or later
• SUSE 8.0 or later
• Turbo Linux 7.0 or later
MacOS 8/9/X* Microsoft Internet Explorer 5.x or higher
* Do not downgrade from the Web browser that comes installed with your
operating system.
Microsoft Internet Explorer 5.5 Service Pack 2
or higher
Netscape 6.2.2 or higher
Netscape 6.2.2 or higher
3
Page 15

2 Installing and Starting Up the Server
2 Installing and Starting Up the Server
2.1 Installing the Server
Windows platform
1. Open the PageScope Net Care self-extracting archive.
This automatically starts the installer.
2. Follow the instructions that appear on the screen to complete the
installation.
Solaris and Linux platform
1. Expand the
gzip) in the directory you want.
This creates a temporary directory named
2. Run the
PageScope_Net_Care
Important!
PageScope Net Care
install.sh
script, which is located in the
directory.
tar archive (compressed with
PageScope_Net_Care
.
• To use PageScope Net Care, you must agree to be bound to the
terms and conditions of its License Agreement.
3. If you agree to be bound to the terms and conditions of the license
agreement, input
agree, input
4. Specify the installation destination.
The initial default destination is: /
you already have an older version installed, the directory for that
version appears first. You can leave the directory the way it is or
change it to something else.
Important!
• Do not use multi-byte characters in directory names.
Y
to proceed with the installation. If you don’t
N
to terminate installation.
opt/PageScope_Net_Care
. If
4
Page 16

2 Installing and Starting Up the Server
5. Installation in the specified directory starts. A message asking if
you want to restart your computer will appear after installation is
complete. Input
6. After completing installation, delete the temporary
PageScope_Net_Care
beginning of this procedure.
.
Y
directory, which was created at the
5
Page 17

2 Installing and Starting Up the Server
2.2 Upgrade Installation
Upgrade from PageScope Net Care Version 4.0 or later is supported.
You cannot upgrade from PageScope Version 3.x or earlier.
• If the older PageScope Net Care is running on the server, shut it
down.
• Install PageScope Net Care Version 5.
If you specify the folder where the old version of PageScope Net
Care is installed as the install destination and overwrite the older
version, you will be able to access the data created with the older
version.
Important!
• If you are using the PageScope Net Care 4.x Account
Management module...
The PageScope Net Care 5 Account Management module comes
with standard functions for obtaining device job history data and
for obtaining counter data. For more information, see
“9 Obtaining and Viewing Device Job History Data” (p. 105)
and “10 Obtaining and Viewing Device Counter Information”
(p. 117).
Note the following points.
- PageScope Net Care 5 does not provide totals for each group.
- Number of pages per department data is not passed on from
the old version.
6
Page 18

2 Installing and Starting Up the Server
2.3 Starting Up the Server
Windows 98 or Me platform
1. Click
Net Care
Net Care, you can configure the PageScope Net Care server to
start up automatically whenever the system is booted.
Windows NT 4.0 or 2000 platform
1. Click
2. Double-click the
Services
3. Select
services, and then click the
2000, select
select
Windows Server 2003 platform
1. Click
2. Double-click
3. Double-click the
KONICA MINOLTA PageScope Net Care
the service
→
Start
Start
Programs
→
Start Server
→
Settings
Services
icon is located inside the
KONICA MINOLTA PageScope Net Care
KONICA MINOLTA PageScope Net Care
on the
Start
→
Start
Control Panel
Administrative Tools
Services
→
Action
→
KONICA MINOLTA
. Note that when installing PageScope
Control Panel
.
icon. In the case of Windows 2000, the
Administrative Tools
button. In the case of Windows
Start
menu.
.
.
icon. In the
Services
, and then click
on the left side of the window.
→
on the list of
window, select
PageScope
folder.
, and then
Start
Windows XP platform
1. Click
2. In the case of Windows XP Professional, click the
and Maintenance
window, click
In the case of Windows XP Home Edition, click the
Administrative Tools
Start
→
Control Panel
icon. On the
Administrative Tools
icon.
.
Performance and Maintenance
.
Performance
7
Page 19

2 Installing and Starting Up the Server
3. Double-click the
KONICA MINOLTA PageScope Net Care
the service
Services
on the left side of the window.
icon. On the
Services
window, select
, and then click
Start
Solaris and Linux platforms
Important!
• Perform the following operation under root privileges.
• Change the path according to the environment.
1. PageScope Net Care starts up automatically after you install it.
You can use the following command to start it up manually when
necessary.
# /etc/init.d/nmu start
Execute the following command when PageScope Net Care is
already running, and you want to momentarily shut it down and
restart it.
# /etc/init.d/nmu restart
8
Page 20

2 Installing and Starting Up the Server
2.4 Starting Up Console Tools
The Console Tools provide various functions for maintaining
PageScope Net Care.
The following lists the operations you can perform using Console
Tool s.
• Change of the port used by PageScope Net Care Server (HTTP/
HTTPS server)
• Database initialization, backup, restore
• Download and installation of update files
• Upgrade PageScope Net Care
• Manual installation of update files
• Restart the PageScope Net Care server
1. On the log in screen, select the
the Console Tools screen.
Important!
• In order for the specified settings to be applied, the PageScope
Net Care server must be restarted. (Refer to “2.5 Restarting the
Server” (p. 10).)
Console Tools
link. This displays
9
Page 21
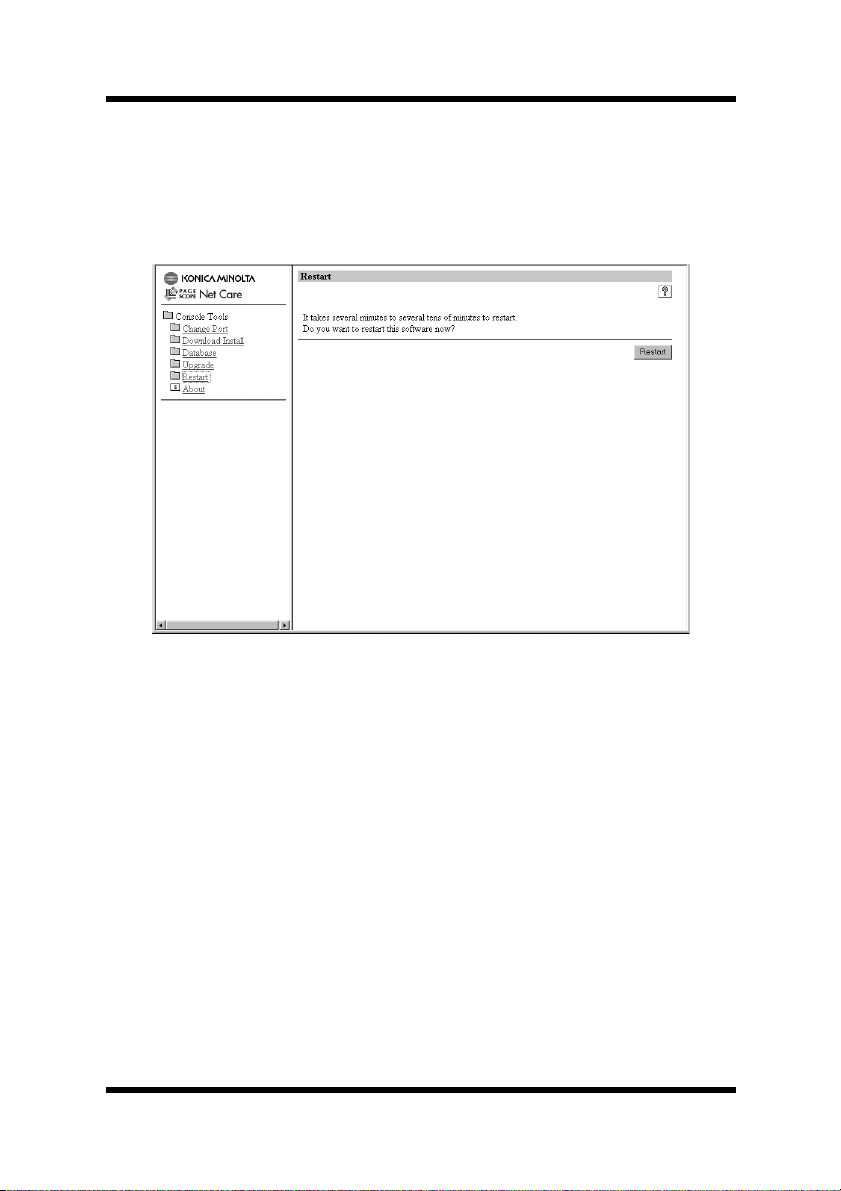
2 Installing and Starting Up the Server
2.5 Restarting the Server
1. In the login screen, select the
The Console Tools screen appears.
2. Click
3. Click the
4. A message appears, requesting confirmation to restart the server.
Restart
Click the
.
Restart
Yes
button.
button to restart the server.
Console Tools
link.
10
Page 22

2 Installing and Starting Up the Server
2.6 Shutting Down the Server
Windows 98 or Me platform
1. Right click the PageScope Net Care icon in the task tray, then
select
2. Click the
appears.
Windows NT 4.0 or 2000 platform
1. Click
2. Double-click the
Services
3. Select
services, and then click the
2000, select
select
4. In the case of Windows NT 4.0, click
dialog box that appears.
.
Exit
Shut Down
→
Start
icon is located inside the
KONICA MINOLTA PageScope Net Care
KONICA MINOLTA PageScope Net Care
on the
Stop
button on the confirmation window that
Settings
Services
Action
→
Control Panel
icon. In the case of Windows 2000, the
Administrative Tools
button. In the case of Windows
Stop
menu.
.
on the confirmation
Yes
folder.
on the list of
, and then
Windows Server 2003 platform
1. Click
2. Double-click
3. Double-click the
KONICA MINOLTA PageScope Net Care
the service
→
Start
Control Panel
Administrative Tools
Services
icon. In the
on the left side of the window.
.
.
Services
window, select
, and then click
Windows XP platform
1. Click
2. In the case of Windows XP Professional, click the
and Maintenance
window, click
In the case of Windows XP Home Edition, click the
Administrative Tools
start
→
Control Panel
icon. On the
Administrative Tools
icon.
.
Performance and Maintenance
.
Stop
Performance
11
Page 23

2 Installing and Starting Up the Server
3. Double-click the
4. On the
Net Care
Services
, and then click
Services
window, select
icon.
KONICA MINOLTA PageScope
Stop the service
on the left side of the
window.
Solaris and Linux platforms
Important!
• Perform the following operation under root privileges.
• Change the path according to the environment.
1. Execute the command shown below.
# /etc/init.d/nmu stop
12
Page 24

2 Installing and Starting Up the Server
2.7 Uninstalling
Important!
• Make sure the PageScope Net Care server is shut down (not
running) before you try to uninstall it. See “2.6 Shutting Down
the Server” (p. 11) for more information.
Windows 98 or Me platform
1. Click
2. Double-click the
3. On the
KONICA MINOLTA PageScope Net Care
and then click the
4. Follow the instructions that appear on the screen to complete the
uninstall operation.
Windows NT 4.0 or 2000 platform
1. Click
2. Double-click the
3. What you should do next depends on the Windows operating
system the computer is running.
→
Start
Add/Remove Programs Properties
Start
Settings
Add/Remove Programs
→
Settings
Add/Remove Programs
→
Control Panel
Add/Remove
→
Control Panel
button.
.
icon.
dialog box, select
in the list of programs,
.
icon.
• Windows NT 4.0 On the
Add/Remove Programs Properties
dialog box, select “KONICA MINOLTA
PageScope Net Care” in the program list, and
then click
• Windows 2000 On the
Add/Remove
Add/Remove Programs
.
dialog box,
select “KONICA MINOLTA PageScope Net
Care” in the program list, and then click
Remove
.
4. Follow the instructions that appear on the screen to complete the
uninstall operation.
13
Page 25

2 Installing and Starting Up the Server
Windows XP/Server 2003 platform
1. Click
start
2. Click the
in Windows Server 2003).
3. On the
MINOLTA PageScope Net Care
Add or Remove Programs
click the
4. Follow the instructions that appear on the screen to complete the
uninstall operation.
Control Panel
→
Add or Remove Programs
.
in the list of programs, and then
Change/Remove
button.
icon (double-click the icon
window, select
KONICA
Solaris and Linux platforms
Important!
• Perform the following operation under root privileges.
• Change the path according to the environment.
1. Execute the command below to shut down the PageScope Net
Care server.
# /etc/init.d/nmu stop
2. Run the
PageScope_Net_Care
uninstall.sh
script, which is located in the
directory.
3. The installation directory files are automatically deleted, and the
uninstall operation ends.
14
Page 26

3 Using PageScope Net Care Client
3 Using PageScope Net Care Client
The following operation is explained using the Java mode.
3.1 Starting Up Client
Start up your Web browser and access the URL shown below.
http://server_name:port_number/
In place of “server_name” in the above URL, type in the name or IP
address of the host that is running the PageScope Net Care server.
Example: When the IP address of the PageScope Net Care server is
192.9.200.200 and the port number is 9090 (the default port number is
“9090”.)
http://192.9.200.200:9090/
Note
SSL Enabled/Disabled
• If
Enabled
PageScope Net Care” (p. 76)), the URL becomes “https://
<
server_name
(as described in “6.14 Specifying Security Settings for
>:<
port_number
in the
SSL Setting
>/”.
section is set to
15
Page 27

3 Using PageScope Net Care Client
This accesses the PageScope Net Care server and displays the
PageScope Net Care login screen.
Important!
If
Windows Firewall
is set to
On (recommended)
in Windows XP
Service Pack 2 or Windows Server 2003 Service Pack 1, the login
screen will not appear.
To display the login screen, perform any of the following operations.
• Click
Firewall
Click the
JavaService.exe
click the
Check that
Services
→
Start
Control Panel
.
Windows Firewall
Add Program
in the
button.
OK
JavaService.exe
list of
Windows Firewall
, and then double-click
opens.
button on the
Add a Program
Exceptions
appears in the
, and then click the OK
Windows
tab, select
dialog box, and then
Programs and
button.
• Select
Firewall
Off (not recommended)
on the
, and then click the OK button.
General
tab of
Windows
16
Page 28

3 Using PageScope Net Care Client
3.2 Displaying Help
With PageScope Net Care, Help information provides detailed
descriptions on the buttons and controls displayed in each screen.
Use this Help information to solve a problem that you may have with
an operation or to find more detailed information on a function.
The Help information can be displayed from the login screen or from
any of the screens used to specify settings.
To display the help information from the login screen
1. Click
refer to “3.1 Starting Up Client” (p. 15) and “3.3 Logging In”
(p. 18).
2. In the
you wish to display.
in the login screen. For details on the login screen,
Help
screen, click the topic (from those listed below) that
Help
•
Introduction
•
•
3. Help information for the selected item appears.
: Selecting this option displays explanations on
Login
Display Structure
: Selecting this option displays a summary
about PageScope Net Care.
the login screen.
:
Selecting this option displays explanations on
the Web browser screen used by PageScope
Net Care clients.
To display the help information from any of the screens for specifying settings
1. Click the button in the screen for specifying the settings.
Help information for that screen appears.
17
Page 29

3.3 Logging In
3 Using PageScope Net Care Client
1. In the
2. In the
Language
PageScope Net Care text. You can choose from among the
following languages.
• English
• Czech
• Danish
• German
• Spanish
• French
• Italian
• Japanese
• Dutch
The client can increase the selection languages supported by the
Web browser by adding the appropriate language plug-in.
When a language is selected, the login screen appears in that
language.
The screens in the following descriptions assume that “English”
has been selected.
Login
Guest:
A Guest can view the status and settings of each device. Input of a
password is not required when logging in as Guest.
section, select the language you want to use for
section, select the appropriate login type (privileges).
Registered User:
A Registered User can change some of device settings and
PageScope Net Care server settings. Each registered user can log
in under a user name and password, which have been registered by
the administrator.
18
Page 30

3 Using PageScope Net Care Client
Administrator:
An administrator can configure device management settings and
PageScope Net Care server settings. Logging in as Administrator
requires input of the proper administrator password.
The initial default administrator password is admin.
3. In the
4. After all the settings are the way you want, click the
View Style
PageScope Net Care screen. Select either a Java mode or the
HTML mode.
Important!
Logging in a client in the Java mode where the Java plug-in is
not installed displays a message asking if you want to install the
Java plug-in. What happens after you agree depends on the Web
browser you are using, as described below.
• Internet Explorer:
The Java plug-in is downloaded automatically from the
Internet and installed.
• Netscape:
Your browser automatically accesses a Java plug-in download
site on the Internet. You must perform the required download
and installation manually.
section, select the style you want to use for the
Login
button.
19
Page 31

3 Using PageScope Net Care Client
3.4 Specifying the Discovery Range
You can use the following procedure to search for a specific device on
the network. (See “6.5 Specifying the Device Discovery Range” (p. 39)
for details on the procedure for specifying settings.)
1. Log in as Administrator. See “3.3 Logging In” (p. 18).
2. Click the down arrow button above the pane along the left side of
the window, and then select
Server Setting
appeared. If you are using the HTML mode, select
in the drop-down list, and then click the
3. Under
Server Setting
, double-click
Discovery Setting
click in the HTML mode). This causes the
in the list that
Server Setting
button.
Go
Discovery Setting
(single-
screen to appear on the right side of the window.
If you are using a Java mode and the Server Setting menu tree is
not expanded, double-click the following icons:
→
List Manager
→
Discovery Setting
.
Server Setting
20
Page 32

3 Using PageScope Net Care Client
4. The
Discovery Network / Range
list shows the local network
associated with the PageScope Net Care server. Whenever the
PageScope Net Care server starts up, it automatically adds the
local network associated with the server to the discovery range list.
If network discovery fails for some reason or if you want to add
other networks, click the
Add
button.
Important!
• The local network may not be discovered when PageScope
Net Care is started up while an SNMP agent is running on the
server where PageScope Net Care is installed. If this happens,
terminate the SNMP agent or add the local network manually
to the discovery range.
5. Enter a network address and subnet mask.
To specify a range of addresses, type the applicable IP addresses
into
Discovery From
and
Discovery To
.
6. To remove a specific network range from the searched area, select
the network in the
the
Remove
click the
button. When the confirmation message appears,
button.
OK
Discovery Network/Range
list, and then click
7. If you also want discovery to find other maker’s RFC-1759
Printer-MIB compatible devices, select the check box next to the
Enable Generic Device Discovery
Discovery
section. Then click the
option in the
button.
Apply
Device
21
Page 33

4 Device Management
4 Device Management
Use the procedures in this section to manage and configure devices on
the network. Note that the appearance of the screen for device
management and setup depends on the device type. See PageScope Net
Care online help for details about the functions described here.
The following operation is explained using the Java mode.
4.1 Displaying the Device Management Screen
1. Click the down arrow button above the pane along the left side of
the window, and then select
appears. In the HTML mode, select
then click the
menu that lists all managed devices.
Go
button. This displays a
Device Management
Device Management
Device Management
on the list that
and
• Click to display the table information in the CSV format in a
separate window. This information cannot be outputted to
printers or files.
• Click the
Device List
Filter
button to filter the data in each column of the
.
22
Page 34

4 Device Management
• Click the
the
• Click the
View Setting
Device List
Counter List
.
copies, prints, and scans) for the devices shown in the
.
List
button to display or hide the columns of
button to display the counters (total,
Device
2. You can change the view of the list by double-clicking an item in
the
Device Management
menu (single-clicking in the HTML
mode).
All Devices View
•
:
Shows all managed devices.
•
Subnet View
: Devices are arranged according to network
address.
•
Maker View
: Devices are arranged according to
manufacturer (KONICA MINOLTA and
Others).
•
Custom Group View
:
Devices are arranged according to custom
group. See “6.10 Configuring Custom Group
Settings” (p. 58) for more information.
•
My Device View
:
Shows the devices configured as My Device
for the current registered user. See
“6.11 Registering Usable Devices for Each
User” (p. 61) for more information.
3. In the
Device List
, double-click the device you want to select
(single-click in the HTML mode). This displays a device panel in
the pane on the right side of the window. Note that you cannot
select a device that does not respond.
Also note that clicking an icon in the device list immediately
updates the status of the device.
23
Page 35

4 Device Management
4.2 Device Panel Window
The following shows the layout of the device panel, which is used for
device management and setup.
➀
➁
➂
Buttons
➀
Each button represents a category of device management and setup
functions. Clicking a button displays, in the area below the
buttons, tabs for the functions associated with the applicable
category. See “4.3 Functions” (p. 25) for information about each
button.
Tabs
➁
The tabs provide sub-groupings of the functions that belong to the
category selected with the category buttons. The appearance of
each tab depends on the device type.
Information and Setup Area
➂
This area shows details about the currently selected tab.
24
Page 36

4 Device Management
4.3 Functions
The following are the functions of the buttons that appear on the device
management and setup screen.
•
Status
•
Network
•
System
•
Print
•
Scan
•
Count
•
Device Server
•
Device Link
Displays a graphical representation showing
device status and the types of options
equipped.
Displays tabs for configuring device network
settings.
Displays detailed device information and
allows configuration of device settings.
Displays print settings.
Displays the scanning status of only scanner
devices.
Displays printing, scanning and error counter
values. These values represent counts for up
to the past one year.
Opens a new Web browser window and
accesses the device’s built-in Web setting
page.
A
Device Link
button is shown only during
display of a device panel of device linked by
Device Link Setting. Clicking the
button displays the device panel of the
Link
Device
linked device. For information about device
link settings, see “6.8 Configuring Device
Link Settings” (p. 52).
25
Page 37

5 Using Multi-Setting
5 Using Multi-Setting
When there are multiple devices of the same type on the network under
the control of the PageScope Net Care server, you can obtain a
template of settings from one of the devices and then use the template
to apply the same settings to other devices of the same type.
Note
• If all devices in the
MINOLTA D evices”, even devices of a different type can be set
to the same settings (Multi-Setting).
The following Multi-Setting procedure is explained using the Java mode.
Multi-Setting
list appear as “KONICA
Displaying the Multi-Setting menu
Click the down arrow button above the pane along the left side of the
window, and then select
are using the HTML mode, select
click the
Go
button.
Multi-Setting
Multi-Setting
on the list that appears. If you
in the list, and then
26
Page 38

5 Using Multi-Setting
The devices that appear in the
an administrator or registered user is logged in.
Administrator:
An administrator can retrieve a template and perform MultiSetting from any device that is under the control of the PageScope
Net Care server.
Registered User:
A registered user can retrieve a template from any device that is
under the control of the PageScope Net Care server. The devices
for which a registered user can perform Multi-Setting are limited
to those assigned as custom groups when the user is registered.
Multi-Setting
menu depend on whether
27
Page 39

5.1 Creating a Template
5 Using Multi-Setting
1. From the
Multi-Setting
menu, double-click the icon of the devices
whose setting you want to make into a template (single-click when
using the HTML Mode).
2. After checking to make sure that the name of the device you want
to select is shown on the
Create
3. In the
button.
Template Name
Multi-Setting
box, type the name you want for the
screen title bar, click the
template.
Important!
• A template with the same name as one that already exists
cannot be created for devices of the same type.
4. The tree under the
Template Items
icon shows settings that can be
modified. Select the check boxes next to the settings that you want
to include in the template you are creating.
5. After everything is the way you want, click the
cancel your settings, click the
Cancel
button instead of
Apply
button. To
Apply
.
28
Page 40

5 Using Multi-Setting
6. You can use the following buttons to edit an existing template.
• Edit: For editing of template settings
• Copy: For copying template settings
• Remove: For deleting a template
29
Page 41

5 Using Multi-Setting
5.2 Performing a Multi-Setting Operation
To retrieve a template
1. On the
Multi-Setting
whose template you want to retrieve (single-click in the HTML
mode). This displays the
2. On the
Multi-Setting
you are using the HTML mode, select the radio button next to the
template name), and then click the
3. On the displayed device list, select the radio button of the template
whose settings you want, and then click the
On the displayed
template. In the Java mode, clicking the
the entire tree. Click the
tree.
4. After everything is the way you want, click the OK button.
To apply the settings of a retrieved template
1. On the displayed device list, select the template of the device
whose settings you want to apply for Multi-Setting (when using
the HTML mode, select the template’s radio button).
Important!
• You cannot use a device template for Multi-Setting or display
information about the template with the
the template has never been retrieved.
menu, double-click the icon of the device
Multi-Setting
screen.
screen, select the template you want (when
button.
Retrieve
Expand All
Information
button again.
button expands
Template Items
Collapse All
Retrieve
icon tree, check the settings of the
button to close the expanded
button if
2. After everything is the way you want, click the
3. Select the
to apply the template, and then click the
radio buttons of the devices for to which you want
Group
Restore
Restore
button again.
button.
4. A confirmation message appears asking if you want to overwrite
the settings of all the devices with the retrieved template settings
you selected in step 3.
5. Click the
button to replace the settings.
OK
30
Page 42

5 Using Multi-Setting
Important!
• At this time, you cannot change any settings that must be made
on a device-by-device basis (such as the network address).
31
Page 43

6 Configuring PageScope Net Care Settings
6 Configuring PageScope Net Care Settings
This section explains how to configure various PageScope Net Care
server settings. The following procedures are explained using the Java
mode.
Important!
• The settings that can be configured depend on whether an
administrator, a registered user, or a guest is logged in.
See PageScope Net Care online help for details about the
settings described here.
Displaying the Server Setting menu
Click the down arrow button above the pane along the left side of the
window, and then select
are using the HTML mode, select
click the
menu depend on the privileges of your current log in.
Go
button. The setting items that appear in the
Server Setting
Server Setting
on the list that appears. If you
in the list, and then
Server Setting
32
Page 44

6 Configuring PageScope Net Care Settings
6.1 Preferences
Use this screen to configure settings that control how PageScope Net
Care communicates with the devices on the network.
Displaying the setting screen
Double-click the
If you are using a Java mode and the
expanded, double-click the following icons:
Preference
Preference
→
Preference
icon (single-click in the HTML mode).
Server Setting
Server Setting
.
menu tree is not
→
33
Page 45

6 Configuring PageScope Net Care Settings
To configure Preference settings
1. Configure the settings described below as required.
Status Polling Interval Section
Device List (min.)
•
SNMP Communication Setting Section
Timeout (sec.)
•
Retries
•
: Input the number of retries that should be
2. After everything is the way you want, click the
cancel your settings, click the
:
Type in the update interval, in minutes, for
information about devices displayed in the
device list.
: Input the time in seconds that should be
allowed until the PageScope Net Care server
obtains information from a device following
an information request when there is an
update of information of a device displayed in
the device list.
attempted when an attempt to obtain
information from a device fails.
Apply
Cancel
button instead of
button. To
Apply
.
34
Page 46

6 Configuring PageScope Net Care Settings
6.2 Initializing Settings
Use the procedures below to initialize PageScope Net Care settings
configured by an administrator or registered user.
Displaying the Initialize screen
Double-click the
If you are using a Java mode and the
expanded, double-click the following icons:
Preference
→
Initialize
Initialize
icon (single-click in the HTML mode).
Server Setting
Server Setting
.
menu tree is not
→
35
Page 47

6 Configuring PageScope Net Care Settings
To initialize settings
1. Select the radio buttons next to one or more of the items described
below, and then click the
Restore Preference Default
•
Remove All Registered Users
•
Custom Group Setting Initialize
•
Apply
button.
:
Selecting this option returns
Preference
screen settings configured by an administrator
to their initial defaults. See “6.1 Preferences”
(p. 33) for more information.
:
Selecting this option deletes all registered
user information that was configured on the
User List
screen. See “6.9 Registering Users
and Unregistering Users” (p. 54) for more
information.
:
Selecting this option deletes all group
information configured on the
Group Setting
screen. See “6.10 Configuring
Custom
Custom Group Settings” (p. 58) for more
information.
Remove All Devices
•
:
Selecting this option deletes all device
information entered in the list on the
Manager
screen. See “6.3 Selecting Managed
List
Devices” (p. 37) for more information.
2. In the Java mode, a dialog box appears confirming whether you
really want to initialize the selected settings. Click the
Yes
(
button in HTML mode) to initialize the settings.
OK
button
36
Page 48

6 Configuring PageScope Net Care Settings
6.3 Selecting Managed Devices
Use the procedure below to select specific devices for management
from among those discovered on the network. Only the devices
selected here are listed as managed devices on the
Management
menu.
Displaying the List Manager screen
Double-click the
List Manager
If you are using a Java mode and the
expanded, double-click the following icons:
→
Manager
List Manager
icon (single-click in the HTML mode).
Server Setting
.
Device
menu tree is not
Server Setting
→
List
To select managed devices
1. The devices discovered on the network are displayed on the
Manager
screen. To refresh the device information on the list,
click the button.
2. All discovered devices are initially selected as managed devices.
To deselect a device, clear its check box in the
3. After everything is the way you want, click the
cancel your settings, click the
Cancel
button instead of
Manage
Apply
List
column.
button. To
.
Apply
37
Page 49

6 Configuring PageScope Net Care Settings
6.4 Removing a Managed Device
You can use the
List Manager
screen to remove a device found on the
network from the PageScope Net Care database when you no longer
need it.
Displaying the List Manager screen
Double-click the
List Manager
If you are using a Java mode and the
expanded, double-click the following icons:
→
Manager
List Manager
icon (single-click in the HTML mode).
Server Setting
Server Setting
menu tree is not
→
.
List
To remove a device
1. Click the down arrow button above the pane along the left side of
the screen, and then select
Remove Device
appears. If you are using the HTML mode, select
on the list that
Remove Device
in the control menu and then click the Go button.
2. On the list that appears, select the check box in the
Remove
column next to the device you want to remove.
3. After everything is the way you want, click the
cancel your settings, click the
Cancel
button instead of
Apply
button. To
.
Apply
38
Page 50

6 Configuring PageScope Net Care Settings
6.5 Specifying the Device Discovery Range
Use this screen to specify the network range for device discovery.
Displaying the Discovery Setting screen
Double-click the
mode).
If you are using a Java mode and the
expanded, double-click the following icons:
Manager
→
Discovery Setting
Discovery Setting
icon (single-click in the HTML
Server Setting
Server Setting
.
menu tree is not
→
List
Discovery Network/Range section
Specify the range on the network for searching for devices.
(Refer to “To add a network to the discovery range” (p. 42).)
39
Page 51

6 Configuring PageScope Net Care Settings
Discovery Setting section
•
IP Broadcast:
Select
used when searching for devices. A broadcast
is sent to devices on the network and a search
is performed. This increases the speed of the
search; however, devices that are not
compatible with the broadcast cannot be
found.
•
SNMP Ping:
Select
when searching for devices.
An SNMP request is sent to all devices within
a network search range and a search is
performed. This reduces the speed of the
search; however, a more reliable result can be
achieved.
SNMP Setting section
•
Time Out:
Type in the length of time (in milliseconds, 1
second = 1000 milliseconds) to wait for a
response when searching for devices.
•
Retries:
Type in the number of attempts that are made
when a search for devices fails.
Enabled
Enabled
if an IP broadcast is to be
if an SNMP ping is to be used
•
SNMPv1 Table:
Add or remove read community names and
port numbers used when searching for devices
compatible with SNMPv1.
(Refer to “To add settings used with a search
for devices compatible with SNMPv1” (p. 44)
and “To remove settings used with a search
for devices compatible with SNMPv1”
(p. 44).)
40
Page 52

6 Configuring PageScope Net Care Settings
•
SNMPv3 Table:
Add or remove user names, context names,
and port numbers used when searching for
devices compatible with SNMPv3.
(Refer to “To add settings used with a search
for devices compatible with SNMPv3” (p. 45)
and “To remove settings used with a search
for devices compatible with SNMPv3”
(p. 45).)
Important!
• When searching for devices compatible with SNMPv3, the
security level must be set to
No Auth/No Priv
.
Device Discovery section
•
Auto Discovery
: Select this check box to enable automatic
rediscovery of devices on the network.
•
Auto Discovery Interval (hour)
When
Auto Discovery
:
above is checked,
enter the auto discovery interval time in
hours.
•
Last Discovery Start Time
:
Shows the start time of device re-discovery.
•
Last Discovery Finish Time
:
Shows the finish time of device re-discovery.
•
Start Discovery
: Click the
Start
discovery.
•
Enable Generic Device Discovery
Select this check box for discovery of RFC1759 Printer-MIB compatible devices.
button to start device
:
41
Page 53

6 Configuring PageScope Net Care Settings
To add a network to the discovery range
1. On the
Discovery Network / Range
shown in the
Discovery Setting
Input Network Range
screen, click the
section. Network setting items are
section.
2. Type the IP address of the network you want to add into the
Network Address
boxes.
3. Type the subnet mask value of the network you want to add into
Subnet Mask
the
box.
4. If you want to change the host address discovery range, input the
start address into the
into the
Discovery To
Discovery From
box.
In the HTML mode, no values are input automatically into the
Discovery From
Discovery To
and
boxes, and they can be left
blank, if you want. Leaving these boxes blank searches within the
range specified by the
Network Address
boxes. If you want to specify a range, input the start address into
Discovery From
the
To
box.
box and the end address into the
5. After everything is the way you want, click the
clear all settings you have made on the setup screen, click the
Cancel
button.
Add
button in the
box, and the end address
Subnet Mask
and
Apply
Discovery
button. To
42
Page 54

6 Configuring PageScope Net Care Settings
6. If you also want discovery to find other maker’s RFC-1759
Printer-MIB compatible devices, select the check box next to the
Enable Generic Device Discovery
button.
Apply
option, and then click the
To remove a network from the discovery range
1. In the
Discovery Network / Range
want to remove from the discovery range and then click the
Remove
2. In the Java mode, click the
button.
OK
box that appears. The confirmation dialog box does not appear in
the HTML mode.
This selected network is deleted from the list.
list, click the network you
button in the confirmation dialog
When automatic device discovery fails
Click the
device discovery. Clicking the
in progress causes network discovery to restart from the beginning.
button in the
Start
Device Discovery
button while device auto discovery is
Start
section to restart network
43
Page 55

6 Configuring PageScope Net Care Settings
To add settings used with a search for devices compatible with SNMPv1
1. In the
click the
Setting
SNMP Setting
Add
button beside the
screen appears.
section of the
Discovery Setting
SNMPv1 Table
. The
SNMPv1
screen,
2. Type the settings into the
Number
3. Click the
boxes.
Apply
button. To cancel the operation, click the
Read Community Name
and
Port
Cancel
button instead.
To remove settings used with a search for devices compatible with SNMPv1
1. Select the
to delete from the
button.
2. In Java mode, a message appears, requesting confirmation to
delete the settings. Click the
settings. The confirmation message does not appear in HTML
mode.
Select
check box to the left of the settings that you wish
SNMPv1 Table
, and then click the
OK
button to delete the selected
Remove
44
Page 56

6 Configuring PageScope Net Care Settings
Important!
• If all settings are deleted, devices compatible with SNMPv1 can
no longer be searched for.
To add settings used with a search for devices compatible with SNMPv3
1. In the
click the
Setting
SNMP Setting
button beside the
Add
screen appears.
section of the
SNMPv3 Table
Discovery Setting
. The
SNMPv3
screen,
2. Type settings into the
Number
3. Click the
boxes.
Apply
button. To cancel the operation, click the
User Name, Context Name
, and
Port
Cancel
button instead.
To remove settings used with a search for devices compatible with SNMPv3
1. Select the
to delete from the
button.
check box to the left of the settings that you wish
Select
SNMPv3 Table
, and then click the
Remove
45
Page 57

6 Configuring PageScope Net Care Settings
2. In Java mode, a message appears, requesting confirmation to
delete the settings. Click the
settings. The confirmation message does not appear in HTML
mode.
Important!
• If all settings are deleted, devices compatible with SNMPv3 can
no longer be searched for.
button to delete the selected
OK
46
Page 58

6 Configuring PageScope Net Care Settings
6.6 Adding a Device Manually
Devices that could not be detected when the
the
Device Discovery
section during the procedure described in
button was clicked in
Start
“6.5 Specifying the Device Discovery Range” (p. 39) can be added to
List Manager from the
Add Device
screen.
Displaying the Add Device screen
Double-click the
Add Device
If you are using a Java mode and the
expanded, double-click the following icons:
→
Manager
Add Device
icon (single-click in the HTML mode).
Server Setting
Server Setting
menu tree is not
.
→
List
To add a device manually
1. In the
IP Address
address of the device that you want to add, and then type in the
Port Number
2. Type in the SNMP setting used when searching for the device to
be added.
box on the
Add Device
screen, type the IP
box the number of the port used by SNMP.
47
Page 59

6 Configuring PageScope Net Care Settings
SNMP Setting section
•
SNMPv1:
Select this option when searching for devices
compatible with SNMPv1.
•
Read Community Name:
Type in the read community name to be used
when searching for devices compatible with
SNMPv1.
•
SNMPv3:
Select this option when searching for devices
compatible with SNMPv3.
User Name:
•
Type in the user name to be used when
searching for devices compatible with
SNMPv3.
•
Context Name:
Type in the context name to be used when
searching for devices compatible with
SNMPv3.
•
Security Level:
Select
Auth/Priv
No Auth/No Priv, Auth/No Priv
for the security level when
searching for devices compatible with
SNMPv3.
•
Authentication (Auth) Password:
Type in the authentication (Auth) password
when
Security Level
Auth/Priv
.
is set to
, or
Auth/NoPriv
or
Privacy (Priv) Password:
•
Type in the privacy (Priv) password when
Security Level
is set to
Auth/Priv
3. After everything is the way you want, click the
cancel your settings, click the
Cancel
button instead of
Apply
.
button. To
.
Apply
48
Page 60

Important!
6 Configuring PageScope Net Care Settings
• It can take to 20 or 30 seconds after you click the
until the device is added. Wait until the procedure ends.
• In the Java mode, a dialog box appears to show the results of
address assignment. In the HTML mode, the results appear on
the
Add Device
screen.
Apply
button
49
Page 61

6 Configuring PageScope Net Care Settings
6.7 Assigning an IP Address to a Device
By assigning an IP address to a device on the network, you can add a
device to the
List Manager
this procedure, you must first find out the MAC address of the network
interface of the device to which your want to assign and IP address.
Displaying the Assign IP Address screen
Double-click the
mode).
If you are using a Java mode and the
expanded, double-click the following icons:
Manager
→
Assign IP Address
Assign IP Address
screen. Note that before you can perform
icon (single-click in the HTML
Server Setting
Server Setting
menu tree is not
→
List
.
To assign an IP address to a device
1. Type the IP address you want to assign to the device into the
Address
boxes.
2. Type the MAC address of the device network interface into the
MAC Address
3. After everything is the way you want, click the
cancel your settings, click the
boxes.
Cancel
button. To
Apply
button instead of
IP
Apply
.
50
Page 62

Important!
6 Configuring PageScope Net Care Settings
• It takes some time after you click the
address assignment to go into effect.
• In the Java mode, a dialog box appears to show the results of
address assignment. In the HTML mode, the results appear on
the
Assign IP Address
screen.
button for the IP
Apply
51
Page 63

6 Configuring PageScope Net Care Settings
6.8 Configuring Device Link Settings
When a device under the control of the PageScope Net Care server is
equipped with multiple NICs (such as a device that has both the printer
NIC and the scanner NIC), Device Link Setting can be used to link
their device panels.
Displaying the Device Link Setting screen
Double-click the
mode).
If you are using a Java mode and the Server Setting menu tree is not
expanded, double-click the following icons:
Manager
→
Device Link Setting
Device Link Setting
icon (single-click in the HTML
Server Setting
.
→
List
52
Page 64

6 Configuring PageScope Net Care Settings
To link devices
1. After making sure that
top of the
the
Device Link Setting
Link
column next to the devices you want to link.
2. After everything is the way you want, click the
cancel your settings, click the
Link Devices
screen, select the check boxes in
Cancel
is selected in the box at the
Apply
button instead of
To unlink devices
1. Click the down arrow of the box at the top of the
Setting
Screen and select
If you are using the HTML mode, select
list and then click the
2. On the device list, select the check boxes in the
next to the devices you want to unlink.
3. After everything is the way you want, click the
cancel your settings, click the
Unlink Devices
Go
button.
Cancel
on the list that appears.
Unlink Devices
Apply
button instead of
button. To
Apply
Device Link
from the
Unlink
column
button. To
Apply
.
.
53
Page 65

6 Configuring PageScope Net Care Settings
6.9 Registering Users and Unregistering Users
Use the procedures in this section to register and unregister users on the
PageScope Net Care server. You can also specify passwords and e-mail
addresses for registered users.
Displaying the User List screen
Double-click the
User List
If you are using a Java mode and the
expanded, double-click the following icons:
icon (single-click in the HTML mode).
Server Setting
Server Setting
menu tree is not
→
User List
.
A registered user can configure the settings described below.
Device Settings
• A registered user can change the settings of devices that belong to
the custom group associated with the registered user.
When logged in, the user can change the settings of only the devices
belonging to the custom group displayed by clicking
Management
, then
Custom Group View
.
Device
PageScope Net Care Server Settings
The following settings can be configured for the logged in user.
• Modification of registration settings
54
Page 66

6 Configuring PageScope Net Care Settings
•
My Device
•
Device Status Notification
selection on the
My Device Setting
screen settings
screen
To register a user
1. On the
User Setting
User List
settings that need to be configured to register a new user.
screen, click the
section on the
New
User List
button. This displays a
screen, which shows the
2. Configure settings for the items described below.
•
User Name
Password
•
Retype Password
•
Custom Group
•
: Type in the user name.
: Type in the user password.
: Re-input the password to confirm it.
: Select the custom group to be used by the user.
(Refer to “6.10 Configuring Custom Group
Settings” (p. 58).)
•
E-mail Address
: Type in the user e-mail address.
55
Page 67

6 Configuring PageScope Net Care Settings
•
E-mail Notification (display only)
:
This setting is turned on automatically
whenever the “Receive Device Status
Notification” check box is selected with the
procedure under “Configuring device status
notification settings” (p. 72).
•
: Use this box to input supplementary
Note
information about the user.
3. After everything is the way you want, click the
cancel your settings, click the
Cancel
button instead of
Apply
button. To
To modify user registration settings
1. On the
User List
you want to modify. In the HTML mode, select the check box to
the left of the name of the user.
2. Click the
User List
Edit
screen, which shows the user’s current settings.
screen, click the user whose registration settings
button. This displays a
User Setting
section on the
Apply
.
3. Make the changes you want. See “To register a user” (p. 55) for
information about each of the items.
56
Page 68

6 Configuring PageScope Net Care Settings
Important!
• User names cannot be changed.
4. After everything is the way you want, click the
cancel your settings, click the
Cancel
button instead of
Apply
To delete a user
1. On the
User List
HTML mode, select the check box to the left of the name of the
user.
2. Click the
Remove
3. If a confirmation dialog box appears, click the
the user you selected. To cancel the delete operation, click the
Cancel
button instead of
screen, click the user you want to delete. In the
button.
button to delete
OK
.
Apply
button. To
.
Apply
57
Page 69

6 Configuring PageScope Net Care Settings
6.10 Configuring Custom Group Settings
Use the procedures in this section to create custom groups of managed
devices.
Displaying the Custom Group Setting screen
Double-click the
Custom Group Setting
HTML mode).
If you are using a Java mode and the
expanded, double-click the following icons:
Custom Group Setting
.
icon (single-click in the
Server Setting
Server Setting
menu tree is not
→
To create a custom group
1. On the
Group Name
Custom Group Setting
box and the managed devices in the List Manager
are displayed.
2. Type the group name into the
Important!
• A new custom group cannot be created with the same name as
one that already exists.
screen, click the
Group Name
box.
New
button. The
58
Page 70

6 Configuring PageScope Net Care Settings
3. On the device list, select the check boxes in the
Group
column of
the devices you want to include in the group, and then click the
button. To cancel the device selection, click the
Apply
button instead of
Apply
.
Cancel
To view custom group settings
1. On the
Custom Group Setting
group whose settings you want to view (in the HTML mode, select
the check box to the left of the group name), and then click the
button.
View
2. This displays a list of devices included in the selected group.
screen, select the name of the
To modify custom group settings
1. On the
Custom Group Setting
group whose settings you want to modify (in the HTML mode,
select the check box to the left of the group name), and then click
the
button. The
Edit
Group Name
the List Manager are displayed.
2. Make the changes you want.
To rename a custom group
Type the new group name into the
screen, select the name of the
box and the managed devices in
Group Name
box.
To remove a device from the group
column of the device you want
Clear the check box in the
Group
to remove.
To add a device to the group
Select the check box in the
column of the device you want
Group
to add.
3. After everything is the way you want, click the
cancel the operation, click the
Cancel
button instead of
Apply
button. To
.
Apply
4. If you want to modify another custom group, select its group name
on the
Custom Group Setting
screen, (in the HTML mode, select
the check box to the left of the group name), and then click the
button. Next, repeat steps 2 and 3.
Edit
59
Page 71

6 Configuring PageScope Net Care Settings
To copy a custom group
1. On the
you want to copy (in the HTML mode, select the check box to the
left of the group name), and then click the
2. Type the name of the copy into the
Important!
• The name you assign to the copy cannot be the same as the
Custom Group Setting
screen, select the name of group
Copy
button.
Group Name
box.
name of an existing custom group. Make sure the group name
you assigned to the copy is a unique name.
3. After everything is the way you want, click the
cancel the operation, click the
Cancel
button instead of
Apply
button. To
To delete a custom group
1. On the
you want to delete (in the HTML mode, select the check box to the
left of the group name), and then click the
2. If a confirmation dialog box appears, click the
the custom group. To cancel the operation, click the
instead of
Custom Group Setting
Apply
.
screen, select the name of group
Remove
button.
OK
button to delete
Cancel
Apply
button
.
60
Page 72

6 Configuring PageScope Net Care Settings
6.11 Registering Usable Devices for Each User
By registering in
My Device
the desired devices from all of the devices
managed by the PageScope Net Care server, only the devices belonging
to My Device can be displayed in the Device List.
Displaying the My Device Setting screen
Double-click the
My Device Setting
If you are using a Java mode and the
expanded, double-click the following icons:
Device Setting
.
icon (single-click in the HTML mode).
Server Setting
Server Setting
menu tree is not
→
My
To configure device settings
1. On device list in the
boxes in the
to
My Device
My Device
.
My Device Setting
column of the devices you want to register
2. After everything is the way you want, click the
cancel the operation, click the
Cancel
screen, select the check
button instead of
Apply
button. To
.
Apply
61
Page 73

6 Configuring PageScope Net Care Settings
To remove a device from My Device
1. On device list in the
boxes in the
My Device View
from
My Device
2. After everything is the way you want, click the
cancel the operation, click the
My Device Setting
screen, select the check
column of the devices you want to remove
.
Cancel
button instead of
Apply
button. To
Apply
.
62
Page 74

6 Configuring PageScope Net Care Settings
6.12 Specifying E-Mail Transmission/Recep-
tion Settings
The SMTP and POP settings necessary for the transmission and
reception of e-mail will be specified here.
These settings are used by the following functions.
• Function that periodically sends a notification of the Counter List
information by e-mail
• Function for notifying the administrator/registered user by e-mail
when an error/warning occurred with the device or when the unit has
recovered from an error/warning (“6.13 Specifying Settings for
Counter Notification, Device Status Notification, Server Information
Notification and Command Mail Support” (p. 66))
• Command mail support and server information notification functions
“6.13 Specifying Settings for Counter Notification, Device Status
Notification, Server Information Notification and Command Mail
Support” (p. 66)
• Function for notifying the administrator by e-mail when a new
update files are released (“8 Automatically Checking for and
Downloading Update Files” (p. 99))
• Function that allows the PageScope Net Care server to obtain device
job history data (“9 Obtaining and Viewing Device Job History
Data” (p. 105))
The settings must be specified for the following devices.
• magicolor7300 (Only with the optional hard disk drive installed)
• magicolor2350 (Only with the optional hard disk drive installed)
• Function that allows the PageScope Net Care server to obtain device
counter information (“10 Obtaining and Viewing Device Counter
Information” (p. 117))
The settings must be specified for the following devices.
• CF3102/2002
• Di470/552
63
Page 75

6 Configuring PageScope Net Care Settings
Important!
• Before configuring the PageScope Net Care e-mail setup, you must
first create a PageScope Net Care mail account on your mail server.
• Enter information about the PageScope Net Care mail account
into the
Password
E-mail Address (From), POP Account
boxes.
, and
POP
• The POP settings are not required (it is not necessary to obtain
an account) when using only counter notification, device status
notification and server information notification.
E-mail transmission/reception settings
Double-click the
HTML mode) to display the
E-mail Function / Server
E-mail Function / Server
If you are using a Java mode and the
expanded, double-click the following icons:
→
Setting
1. Configure the
E-mail Function / Server
E-mail Server Setting
icon (single-click in the
screen.
Server Setting
Server Setting
menu tree is not
.
section settings as below.
→
E-mail
64
Page 76

6 Configuring PageScope Net Care Settings
•
SMTP Server Address
•
SMTP Port Number
•
Use POP before SMTP
•
POP3 Server Address
•
POP3 Port Number
•
E-mail Address (From)
:
Type in the SMTP server host name or IP
address.
:
Type in the SMTP server port number. The
default port number is 25.
:
Select this check box when the POP account
and password must be verified before an
SMTP transmission.
The POP settings are required when using this
function.
:
Type in the POP3 server host name or IP
address.
:
Type in the POP3 server port number. The
default port number is 110.
:
Type in the PageScope Net Care server mail
address.
•
POP Account
: Type in the PageScope Net Care server POP
account name.
•
POP Password
: Type in the PageScope Net Care server POP
account password.
POP Interval (min.)
•
:
Type in the POP server mail check interval, in
minutes. The default interval is 10 minutes.
2. After everything is the way you want, click the
cancel the operation, click the
Cancel
button instead of
Apply
button. To
.
Apply
65
Page 77

6 Configuring PageScope Net Care Settings
6.13 Specifying Settings for Counter Notifica-
tion, Device Status Notification, Server
Information Notification and Command
Mail Support
The settings for the counter notification, for the device status
notification, for the server information notification and for the
command mail support will be specified here.
Important!
• Note that you need to configure mail settings before you can use
these functions. See “6.12 Specifying E-Mail Transmission/
Reception Settings” (p. 63) for more information.
To specify the device status notification, server
information notification and command mail support
settings
Double-click the
mode).
If you are using a Java mode and the
expanded, double-click the following icons:
Setting
Specify settings for the following in the
section.
→
E-Mail Function/Server
E-Mail Function/Server
icon (single-click in HTML
Server Setting
Server Setting
.
E-mail Function Setting
menu tree is not
→
E-Mail
66
Page 78

6 Configuring PageScope Net Care Settings
1. For counter notification, device status notification, server
information notification and command mail support, select the
corresponding check box in the E
In addition, more than one check box can be selected.
-mail Function Setting
section.
•
Counter Notification
When this option is selected, a notification of
the Counter List information is periodically
sent by e-mail.
•
Device Status Notification
When this option is selected, the PageScope
Net Care server sends the administrator and
user e-mail whenever a device error or
warning occurs, or when the device recovers
from an error or warning.
:
:
67
Page 79

6 Configuring PageScope Net Care Settings
•
Server Information Notification
Selecting this option enables e-mail receipt of
the following information by the
administrator.
- Notification when the total number of
devices being managed exceeds 250
- Notification when an unsupported device is
detected
•
Command Mail Support
:
If this check box is selected, a user can
receive a device list, status report, or other
information by sending a command mail to a
server.
See “Command Mail Syntax” (p. 74) for
more information.
•
Counter Reader
: Enables/disables the Counter Reader
function. If this check box is selected, this
server periodically sends an e-mail to the
appropriate device, requesting counter
information. See “10 Obtaining and Viewing
Device Counter Information” (p. 117) for
more information.
:
•
Job Log Viewer
: Enables/disables the Job Log Viewer
function. If this check box is selected, this
server sets the appropriate device to
periodically send job history information by
e-mail. See “9 Obtaining and Viewing Device
Job History Data” (p. 105) for more
information.
2. After everything is the way you want, click the
cancel the operation, click the
Cancel
button instead of
Apply
button. To
.
Apply
68
Page 80

6 Configuring PageScope Net Care Settings
Configuring counter notification settings
Use the procedure described below to specify whether or not a
notification of the Counter List information will be sent by e-mail. The
Counter List information is saved on the server as a file in the CSV
format.
Important!
• Counter List information of devices not registered with the
PageScope Net Care server are not included in the notification.
(Refer to “10.6 Registering Devices Using This Function With
the PageScope Net Care Server (This procedure is performed
from the PageScope Net Care server.)” (p. 126).)
To configure the counter notification settings
Double-click the
HTML mode). If you are using Java mode and the Server Setting menu
tree is not expanded, double-click the following icons:
E-Mail Setting
→
Counter Notification/Restore
Counter Notification/Restore
→
icon (single-click in
Server Setting
.
69
Page 81

6 Configuring PageScope Net Care Settings
1. To enable receipt of notification mail messages containing Counter
List information, select the
Notification Setting
section, and then specify the recipient of the
e-mail message.
To add a recipient
Click the
the
E-mail Setting
button in the
Add
section. In the
settings for the following.
E-mail Notification
Notification Setting
E-mail Setting
check box in the
section to display
section, specify
•
E-mail Address
:
Type in the e-mail address of the recipient.
•
E-mail Language
:
From the drop-down list, select the language
of the e-mail message to be received.
After settings have been specified in the
mail Language
operation, click the
boxes, click the
Cancel
button instead.
Apply
E-mail Address
button. To cancel the
and
E-
To delete a recipient
Select the
wish to delete from the recipient list in the
section, and then click the
check box to the left of the recipient that you
Select
Notification Setting
Remove
button.
In Java mode, a message appears, requesting confirmation to
delete the recipient. Click the
button to delete the selected
OK
recipient. The confirmation message does not appear in HTML
mode.
2. To save the Counter List information on the server as a file in the
CSV format, select the
Restore setting
section, and then specify settings for the
Restore to server
check box in the
following.
•
Restore Directory (display only)
:
Shows the directory where the file is to be
saved.
70
Page 82

6 Configuring PageScope Net Care Settings
•
Restore Language
:
From the drop-down list, select the language
of the file to be saved.
3. To change the timing for sending e-mail notifications of the
Counter List information or for saving the information as a file in
the CSV format, specify settings for the following in the
Setting
•
section.
Once a day
: When this option is selected, Counter List
Interval
information is received/saved once a day.
•
: If
Time
Once a day
was selected, select from the
drop-down list the time for receiving/saving
the information.
•
Once a week
: When this option is selected, Counter List
information is received/saved once a week.
•
: If
Week
Once a week
was selected, select from the
drop-down list the day of the week for
receiving/saving the information.
•
: If
Time
Once a week
was selected, select from the
drop-down list the time for receiving/saving
the information.
•
Once a month
•
: If
Day
•
: If
Time
4. Click the
button instead.
: When this option is selected, Counter List
information is received/saved once a month.
Once a month
was selected, select from
the drop-down list the day of the month for
receiving/saving the information.
Once a month
was selected, select from
the drop-down list the time for receiving/
saving the information.
button. To cancel the operation, click the
Apply
Cancel
71
Page 83

6 Configuring PageScope Net Care Settings
Configuring device status notification settings
Use the procedure below to specify whether or not the currently logged
in user should receive device status notification mail from the
PageScope Net Care server.
To configure device status notification settings
Double-click the
Device Status Notification
icon (single-click in the
HTML mode).
If you are using a Java mode and the Server Setting menu tree is not
expanded, double-click the following icons:
Setting
Device Status Notification
→
.
Server Setting
→
E-Mail
72
Page 84

6 Configuring PageScope Net Care Settings
1. To enable receipt of device status notification mail, configure the
Notification Setting
section settings as described below.
•
Receive Device Status Notification
:
Select this check box to enable receipt of
device status notification mail. Before you
can select this check box, the mail address of
the currently logged in user must be
registered with the procedure under “To
register a user” (p. 55).
Important!
• An administrator can receive status notification mail of all the
devices controlled by the PageScope Net Care server. A
registered user, on the other hand, can receive status
notification mail of only devices included in the custom group
assigned to the user during user registration. In order to
receive mail, the e-mail address of the logged in user must be
registered on the PageScope Net Care server.
User Name (display only)
•
:
Shows the user name of the currently logged
in user.
•
E-mail Address (display only)
:
Shows the e-mail address of the currently
logged in user. See “To register a user” (p. 55)
for more information.
•
E-mail Language
:
Click the
E-mail Language
down arrow and
then select the e-mail language from the list that
appears. The languages you can select here are
those that are supported by the PageScope Net
Care server. The selection of languages can be
expanded by adding plug-ins.
73
Page 85

6 Configuring PageScope Net Care Settings
2. In the
Status to Notify
warnings for which you want to receive mail. In the
section, the contents of the e-mails that you wish to receive
Notify
section, select the device errors and
Recovery to
when the unit recovers from an error can be set separately for a
device error and for a warning. Note, however, that
Device Status Notification
Section
Status to Notify
must be selected before you can change the settings of the
section.
Error Warning
check box of the
Receive
Notification
• Fatal Error • Low Toner
• Paper Jam • Low Paper
• Toner Empty • Output Near Full
• Paper Empty • Off Line
• Output Full • Overdue PM
• Device Missing • Other Warning
• Other Error —
3. After everything is the way you want, click the
cancel the operation, click the
Cancel
button instead of
Apply
Command Mail Syntax
button. To
.
Apply
Command mail is e-mail with specific text in the subject line. A help
message containing details on the use of the commands can be received
from the server if an e-mail with the subject and body lines left blank is
sent to a mail address registered as a mail server.
To:
Subject:
Body Text:
<PageScope Net Care server mail address>
get <option> <device IP address>
<blank>
74
Page 86

6 Configuring PageScope Net Care Settings
Example: When the device IP address is 192.9.200.100
Information Obtained
by Mail Command
Device Status
Network Configuration
get -s 192.9.200.100
get -n 192.9.200.100
Example Subject
Information
System Information
Print Information
Scanner Information
Print Count
Jam Count
Service Call Count
Managed Device List
get -y 192.9.200.100
get -d 192.9.200.100
get -c 192.9.200.100
get -j* 192.9.200.100
get -j* 192.9.200.100
get -e* 192.9.200.100
get -l
*Indicates the month received
Important!
• Always send command mail from the registered mail address of
the user. Command mail sent from an unregistered mail address
is ignored.
• Registered users cannot obtain the settings for all devices if
Display of unsettable devices, Display of Counter
Information
Setting
is set to
, or
Display of Job Information
Disabled
(as described in “6.14 Specifying
below
Permission
Security Settings for PageScope Net Care” (p. 76)).
75
Page 87

6 Configuring PageScope Net Care Settings
6.14 Specifying Security Settings for PageScope Net Care
The PageScope Net Care security settings, such as the login
permissions for guests, the time until logout, and the SSL transmission
settings, are described below.
Displaying the Security Setting screen
Double-click the
If you are using Java mode and the Server Setting menu tree is not
expanded, double-click the following icons:
Security Setting
Security Setting
.
icon (single-click in HTML mode).
Server Setting
→
To configure the security settings
1. Change settings for the following, as required.
Permission Setting section
•
Guest Log-in
: To permit guests to log in, select
Disabled
available on the login screen.
is selected,
Guest
Enabled
is no longer
. If
76
Page 88

6 Configuring PageScope Net Care Settings
•
Display of unsettable devices
To display in the Device List devices other
than those in the custom group (devices that
can be set), select
selected, devices that cannot be set by the user
who is logged in are not displayed in the
Device List. For a guest, no devices are
displayed.
•
Display of Counter Information
To monitor counter information for devices
other than those in the custom group (devices
that can be set), select
is selected, counter information for devices
that cannot be set by the user who is logged in
cannot be monitored. For a guest, counter
information for no devices can be monitored.
•
Display of Job Information
To monitor job information for devices other
than those in the custom group (devices that
can be set), select
selected, job information for devices that
cannot be set by the user who is logged in
cannot be monitored. For a guest, job
information for no devices can be monitored.
:
Enabled
. If
Disabled
is
:
Enabled
. If
Disabled
:
Enabled
. If
Disabled
is
Auto Logout section
•
Logout Time
: If no operation is performed for the specified
length of time, a error message is displayed,
and an automatic logout is performed. From
the drop-down list, the length of time until an
automatic logout is performed.
77
Page 89

6 Configuring PageScope Net Care Settings
SSL Setting section
•
SSL Enabled/Disabled
:
To use SSL to transmit between the server and
client, select
Enabled
using SSL, select
. To transmit without
Disabled
.
In order for the specified settings to be
applied, the PageScope Net Care server must
be restarted. (Refer to “2.5 Restarting the
Server” (p. 10).)
•
Certificate
: Click the
Information
button to display
information on the server certificate used
when requesting SSL transmission from an
external certification authority.
Note
• For details on SSL transmissions, refer to “To configure SSL
transmission settings” (p. 78).
2. Click the
button. To cancel the operation, click the
Apply
Cancel
button instead.
To configure SSL transmission settings
In order to perform SSL transmissions, communication between the
PageScope Net Care server and clients must be encoded.
1. Make sure that
is set to
Enabled
SSL Enabled/Disabled
(as described in “6.14 Specifying Security
Settings for PageScope Net Care” (p. 76)).
2. Restart the PageScope Net Care server. (Refer to “2.5 Restarting
the Server” (p. 10).)
3. Use “https://<
server_name
>:<
port_number
in the
SSL Setting
>/” to start the client.
section
78
Page 90

6 Configuring PageScope Net Care Settings
4. A dialog box appears, requesting confirmation of the security
certificate information.
Click the
Note
• When transmitting with SSL on a closed network, a server
certificate from an external certification authority is not required
to guarantee server safety.
If it is necessary to request a server certificate from an external
certification authority, refer to “To request a server certificate
from an external certification authority” (p. 79), and make the
request.
button to perform SSL transmission.
Yes
To request a server certificate from an external certification authority
In order to request a server certificate from an external certification
authority, CSR (certificate signing request) data created from the server
certificate held by the PageScope Net Care server must be submitted to
the certification authority certifying the SSL transmission, and the
approved server certificate issued by the certification authority must be
installed on the PageScope Net Care server.
79
Page 91

6 Configuring PageScope Net Care Settings
1. In the
the
Information
The
Current Certificate
SSL Setting
section of the
button beside
section appears, and the server certificate
Security Setting
Certificate
.
currently held by the PageScope Net Care server is displayed.
2. Click the
Edit
button.
A dialog box appears, requesting confirmation to erase the
information in the current server certificate.
Important!
screen, click
• If an approved server certificate is installed and the server is not
restarted, the
button will not be available. (The
Edit
Edit
button
does not appear in HTML mode.)
3. Click the
The
Edit Certificate
OK
button (
button in HTML mode).
Apply
section appears.
Important!
• When the server certificate is edited, the information in the
current server certificate is erased.
80
Page 92

6 Configuring PageScope Net Care Settings
4. Enter settings for the following, as required.
•
Common Name
: Enter FQDN (URL entered as an address in
the browser for an SSL connection) for the
server submitting the application. Completely
enter the domain name, the subdomain name
and the host name without any omissions.
•
Organization
: Type in the name of the organization
submitting the application. Enter the full legal
name.
•
Organization Unit
:
Type in the name of the department
submitting the application.
: Type in the name of the city for the
•
City
organization submitting the application.
State/Province
•
: Type in the name of the state/province for the
organization submitting the application.
81
Page 93

6 Configuring PageScope Net Care Settings
•
Country
: Type in the name of the country for the
organization submitting the application. Type
in the country code (two uppercase letters)
regulated by ISO 3611.
Important!
• < > ~ ! @ # $ % ^ * / \ ( ) ? . , & cannot be used when submitting
a server certificate to an external certification authority.
• Click the
Default
• The information for the current certificate appears in the
Period (day)
Encryption Type
5. Click the
Apply
button to reset the settings to their defaults.
Validity
(period of validity for the certificate) and the
(encryption method for the certificate) boxes.
button. To cancel the operation, click the
Cancel
button instead.
6. Restart the PageScope Net Care server. (Refer to “2.5 Restarting
the Server” (p. 10).)
7. Click the
Certificate
Request
section appeared.
button in the screen where the
Current
82
Page 94

6 Configuring PageScope Net Care Settings
The
Certificate Signing Request
section appears, and the CSR
data required for the submission to certification authority is
displayed.
Important!
• If a server certificate is edited and the server cannot be restarted,
the
Request
button will not be available. (The
Request
button
does not appear in HTML mode.)
8. Click
File
.
Since the text data for the CSR appears in a separate window, use the
Save function of the browser to save the data as a text file.
9. Submit the saved CSR data to the certification authority.
Important!
• For details on submitting CSR data to the certification authority,
refer the guidelines provided by the certification authority being
applied to.
83
Page 95

6 Configuring PageScope Net Care Settings
10. After the approved certificate is issued by the certification
authority, click the
Certificate
section appeared.
button in the screen where the
Install
Current
The
Certificate Install
section appears.
Important!
• If a server certificate is edited and the server cannot be restarted,
the
button will not be available. (The
Install
Install
button does
not appear in HTML mode.)
• In order to install the certificate, the server certificate that is
currently held must be the same as that issued by the certification
authority.
84
Page 96

6 Configuring PageScope Net Care Settings
11. Install the approved certificate issued by the certification authority.
To install the approved certificate as a file
For a certificate issued as a file, select
Browse
button, and then select the issued certificate.
Install by File
, click the
To install the approved certificate as text data
For a certificate issued as text data, select
Install by Text Data
,
and then type the text data into the text box.
12. Click the
button. To cancel the operation, click the
Apply
Cancel
button instead.
13. Restart the PageScope Net Care server. (Refer to “2.5 Restarting
the Server” (p. 10).)
85
Page 97

6 Configuring PageScope Net Care Settings
6.15 Checking Models Compatible With Page-
Scope Net Care
A list of devices compatible with PageScope Net Care (supported
models) can be viewed.
Note
• By adding device plug-ins, more supported models can be
added. (Refer to “8 Automatically Checking for and
Downloading Update Files” (p. 99).)
To display the Supported Models screen
Double-click the
mode). If you are using Java mode and the Server Setting menu tree is
not expanded, double-click the following icons:
Supported Models
Supported Models
.
icon (single-click in HTML
Server Setting
→
•
Device Name
•
Version
: Name of devices compatible with PageScope
Net Care
: Plug-in version for devices compatible with
PageScope Net Care
86
Page 98

6 Configuring PageScope Net Care Settings
•
Creation Date
•
README
: Plug-in creation date for devices compatible
with PageScope Net Care
: If the plug-in for devices compatible with
PageScope Net Care has a Readme file, an
icon appears. Click the icon to display the
Readme file for the selected device in a
separate window.
87
Page 99

6 Configuring PageScope Net Care Settings
6.16 Checking Languages Compatible With PageScope Net Care
A list of display languages for PageScope Net Care clients can be
viewed.
Note
• By adding language plug-ins, more supported languages can be
added. (Refer to “8 Automatically Checking for and
Downloading Update Files” (p. 99).)
To display the Supported Language screen
Double-click the
mode). If you are using Java mode and the Server Setting menu tree is
not expanded, double-click the following icons:
Supported Language
Supported Language
.
icon (single-click in HTML
Server Setting
→
•
Language Name
•
Version
: Plug-in version for languages compatible with
: Languages compatible with PageScope Net
Care
PageScope Net Care
88
Page 100

6 Configuring PageScope Net Care Settings
•
Creation Date
: Plug-in creation date for languages
compatible with PageScope Net Care
6.17 Checking the PageScope Net Care Version
The version screen shows information about the PageScope Net Care
version.
Displaying the Version screen
From the drop-down list on the left side of the window, select
If you are using the HTML mode, select
and then click the
Go
button.
in the drop-down list,
About
About
.
89
 Loading...