

Page 1

Log Management Utility
User’s Guide
Page 2

Contents
1 Introduction
1.1 Operating Environment .................................................................... 1-1
1.2 Supported MFP Devices ................................................................... 1-1
1.3 Introduction to Functions .................................................................1-2
2 Installation of Log Management Utility
2.1 Installation ......................................................................................... 2-1
2.2 Items that are Installed .....................................................................2-3
2.3 Uninstallation ..................................................................................... 2-4
3 Starting Log Management Utility
3.1 To Start ............................................................................................... 3-1
3.2 Main Dialog Box ................................................................................3-3
3.3 To Exit ................................................................................................3-5
4 Log Confirmation
4.1 Device Registration ...........................................................................4-1
4.1.1 Search and Register .......................................................................4-2
4.1.2 Register from IP address ................................................................4-4
4.2 Receive Log from Device ................................................................. 4-7
4.2.1 Receive ........................................................................................... 4-7
4.2.2 Receive From Specified Devices ..................................................4-10
4.3 Confirm Logs ...................................................................................4-13
4.3.1 Select the Target History .............................................................. 4-13
4.3.2 Details of Log Display ................................................................... 4-14
4.4 Log Operations ................................................................................4-18
4.4.1 Sorting ..........................................................................................4-18
4.4.2 Filter .............................................................................................. 4-19
4.4.3 Log Search ...................................................................................4-22
4.4.4 Detailed Information ..................................................................... 4-26
4.4.5 Log Deletion ................................................................................. 4-28
Log Management Utility i
Page 3

5 Log Management Utility Settings
5.1 File Menu ............................................................................................ 5-1
5.1.1 Open/Close Log File ....................................................................... 5-1
5.1.2 Export ............................................................................................. 5-2
5.1.3 Properties ....................................................................................... 5-5
5.2 Edit Menu ...........................................................................................5-6
5.2.1 Copy ............................................................................................... 5-6
5.2.2 Search ............................................................................................ 5-6
5.2.3 Log Deletion ................................................................................... 5-6
5.2.4 Log Detail Information ....................................................................5-6
5.3 Display Menu .....................................................................................5-7
5.3.1 Toolbar Display ON/OFF ................................................................5-7
5.3.2 Separation ...................................................................................... 5-7
5.3.3 Record Display (Filter) .................................................................... 5-7
5.3.4 Sorting ............................................................................................ 5-7
5.3.5 Moving ............................................................................................ 5-8
5.3.6 Displayed Item Settings ..................................................................5-8
5.3.7 General Settings .............................................................................5-9
5.4 Log Menu .........................................................................................5-10
5.4.1 Receive ......................................................................................... 5-10
5.4.2 Receive From Specified Devices ..................................................5-10
5.5 Setup Menu ......................................................................................5-11
5.5.1 Registration of Device ..................................................................5-11
5.5.2 Protect Functions ......................................................................... 5-13
5.5.3 Options .........................................................................................5-17
5.6 Help Menu ........................................................................................5-21
5.6.1 Log Management Utility Help ....................................................... 5-21
5.6.2 Version Information ......................................................................5-21
6 Linkage with PageScope Data Administrator
6.1 Import device information from PageScope
Data Administrator ............................................................................ 6-1
7 Error message list
Log Management Utility ii
Page 4

About this Product
“KONICA MINOLTA Log Management Utility” accesses MFP products on
the network, and displays log files (operations and processing records that
include monitoring logs and communications history) stored on these devices. These can be used in management of device usage status, and in troubleshooting.
Trademarks and registered trademarks
Trademark acknowledgements
KONICA MINOLTA and the KONICA MINOLTA logo are either registered
trademarks or trademarks of KONICA MINOLTA HOLDINGS, INC.
PageScope is a registered trademark or trademark of KONICA MINOLTA
BUSINESS TECHNOLOGIES, INC.
®
Microsoft
Microsoft Corporation in the United States and/or other countries.
Intel and Pentium are trademarks or registered trademarks of Intel Corporation or its subsidiaries in the United States and other countries.
All other company and product names are trademarks or registered trademarks of their respective companies.
Dialog boxes
The dialog boxes shown in this manual are those that appear in Windows XP.
and Windows® are either registered trademarks or trademarks of
2
Note
The dialog boxes that appear in this document may differ from those that
appear on your computer, depending on the installed devices and specified settings.
2
Note
Unauthorized reproduction, translation or duplication of this document
whether in its entirety or in part, is strictly prohibited.
The content of this document is subject to change without notice.
Copyright © 2007 KONICA MINOLTA BUSINESS TECHNOLOGIES, INC. All
rights reserved.
Log Management Utility iii
Page 5

LICENSE ISSUES
The OpenSSL toolkit stays under a dual license, i.e. both the conditions of
the OpenSSL License and the original SSLeay license apply to the toolkit.
See below for the actual license texts. Actually both licenses are BSD-style
Open Source licenses. In case of any license issues related to OpenSSL
please contact openssl-core@openssl.org.
OpenSSL License
Copyright © 1998-2004 The OpenSSL Project. All rights reserved.
Redistribution and use in source and binary forms, with or without modification, are permitted provided that the following conditions are met:
1. Redistributions of source code must retain the above copyright notice,
this list of conditions and the following disclaimer.
2. Redistributions in binary form must reproduce the above copyright notice, this list of conditions and the following disclaimer in the documentation and/or other materials provided with the distribution.
3. All advertising materials mentioning features or use of this software must
display the following acknowledgment:
“This product includes software developed by the OpenSSL Project for
use in the OpenSSL Toolkit. (http://www.openssl.org/)”
4. The names “OpenSSL Toolkit” and “OpenSSL Project” must not be used
to endorse or promote products derived from this software without prior
written permission. For written permission, please contact opensslcore@openssl.org.
5. Products derived from this software may not be called “OpenSSL” nor
may “OpenSSL” appear in their names without prior written permission
of the OpenSSL Project.
6. Redistributions of any form whatsoever must retain the following acknowledgment:
“This product includes software developed by the OpenSSL Project for
use in the OpenSSL Toolkit (http://www.openssl.org/)”
THIS SOFTWARE IS PROVIDED BY THE OpenSSL PROJECT “AS IS” AND
ANY EXPRESSED OR IMPLIED WARRANTIES, INCLUDING, BUT NOT LIMITED TO, THE IMPLIED WARRANTIES OF MERCHANTABILITY AND FITNESS FOR A PARTICULAR PURPOSE ARE DISCLAIMED. IN NO EVENT
SHALL THE OpenSSL PROJECT OR ITS CONTRIBUTORS BE LIABLE FOR
ANY DIRECT, INDIRECT, INCIDENTAL, SPECIAL, EXEMPLARY, OR CONSEQUENTIAL DAMAGES (INCLUDING, BUT NOT LIMITED TO, PROCUREMENT OF SUBSTITUTE GOODS OR SERVICES; LOSS OF USE, DATA, OR
PROFITS; OR BUSINESS INTERRUPTION) HOWEVER CAUSED AND ON
ANY THEORY OF LIABILITY, WHETHER IN CONTRACT, STRICT LIABILITY,
OR TORT (INCLUDING NEGLIGENCE OR OTHERWISE) ARISING IN ANY
Log Management Utility iv
Page 6

WAY OUT OF THE USE OF THIS SOFTWARE, EVEN IF ADVISED OF THE
POSSIBILITY OF SUCH DAMAGE.
This product includes cryptographic software written by Eric Young
(eay@cryptsoft.com). This product includes software written by Tim Hudson
(tjh@cryptsoft.com).
Original SSLeay License
Copyright © 1995-1998 Eric Young (eay@cryptsoft.com) All rights reserved.
This package is an SSL implementation written by Eric Young (eay@cryptsoft.com).
The implementation was written so as to conform with Netscapes SSL.
This library is free for commercial and non-commercial use as long as the following conditions are aheared to. The following conditions apply to all code
found in this distribution, be it the RC4, RSA, lhash, DES, etc., code; not just
the SSL code. The SSL documentation included with this distribution is covered by the same copyright terms except that the holder is Tim Hudson
(tjh@cryptsoft.com).
Copyright remains Eric Young’s, and as such any Copyright notices in the
code are not to be removed.
If this package is used in a product, Eric Young should be given attribution
as the author of the parts of the library used.
This can be in the form of a textual message at program startup or in documentation (online or textual) provided with the package.
Redistribution and use in source and binary forms, with or without modification, are permitted provided that the following conditions are met:
1. Redistributions of source code must retain the copyright notice, this list
of conditions and the following disclaimer.
2. Redistributions in binary form must reproduce the above copyright notice, this list of conditions and the following disclaimer in the documentation and/or other materials provided with the distribution.
3. All advertising materials mentioning features or use of this software must
display the following acknowledgement:
“This product includes cryptographic software written by Eric Young
(eay@cryptsoft.com)”
The word ‘cryptographic’ can be left out if the rouines from the library being used are not cryptographic related.
4. If you include any Windows specific code (or a derivative thereof) from
the apps directory (application code) you must include an acknowledgement:
“This product includes software written by Tim Hudson (tjh@cryptsoft.com)”
Log Management Utility v
Page 7

THIS SOFTWARE IS PROVIDED BY ERIC YOUNG “AS IS” AND ANY EXPRESS OR IMPLIED WARRANTIES, INCLUDING, BUT NOT LIMITED TO,
THE IMPLIED WARRANTIES OF MERCHANTABILITY AND FITNESS FOR A
PARTICULAR PURPOSE ARE DISCLAIMED. IN NO EVENT SHALL THE AUTHOR OR CONTRIBUTORS BE LIABLE FOR ANY DIRECT, INDIRECT, INCIDENTAL, SPECIAL, EXEMPLARY, OR CONSEQUENTIAL DAMAGES
(INCLUDING, BUT NOT LIMITED TO, PROCUREMENT OF SUBSTITUTE
GOODS OR SERVICES; LOSS OF USE, DATA, OR PROFITS; OR BUSINESS
INTERRUPTION) HOWEVER CAUSED AND ON ANY THEORY OF LIABILITY, WHETHER IN CONTRACT, STRICT LIABILITY, OR TORT (INCLUDING
NEGLIGENCE OR OTHERWISE) ARISING IN ANY WAY OUT OF THE USE
OF THIS SOFTWARE, EVEN IF ADVISED OF THE POSSIBILITY OF SUCH
DAMAGE.
The licence and distribution terms for any publically available version or derivative of this code cannot be changed. i.e. this code cannot simply be copied and put under another distribution licence [including the GNU Public
Licence.]
Log Management Utility vi
Page 8

Introduction
1 Introduction
1.1 Operating Environment
The operating environment for Log Management Utility is described below.
1
Supported operating
systems
CPU According to the environment recommended for the operating sys-
Free hard disk space 100 MB or more
Memory According to the environment recommended for the operating sys-
File system NTFS
Web browser Microsoft Internet Explorer Ver.6.0 (Service Pack 1 or later)
Libraries Microsoft .NET Framework 1.1 (SP1)
Network Computer with properly configured TCP/IP and SNMP protocols.
Display 800 × 600 pixel or better.
Windows 2000 Professional (Service Pack 4 or later),
Windows XP Professional (Service Pack 2 or later),
Windows XP Professional x64 Edition, Windows Vista Business,
Windows Vista Enterprise
tem
However, a separate area for saving acquired log files is also required.
tem
The location for saving reception logs cannot be specified on FAT or
FAT32 file systems.
16 bit color or better
1.2 Supported MFP Devices
2
Reminder
Please refer to the README to confirm if your MFP is supported by Log
Management Utility.
Log Management Utility 1-1
Page 9

Introduction
1.3 Introduction to Functions
Overview
The main functions of Log Management Utility are described below.
- Acquisition of logs in devices
Acquire device audit logs, scan communication histories, and fax communication histories, and display these on the screen. Contents of the log
can be used to confirm the date and time of operations, operation users,
and operation results. Additionally, logs from multiple devices can be acquired.
- Management of acquired logs
The log display can be sorted by date or number, and searched using parameters such as transmission type and destination, allowing confirmation of device usage and errors status information. This is effective in
collective management of usage status information.
- Log export
Export an acquired log as a different file (log file). This enables ongoing
management through periodic saving of logs.
Log Data that can be Acquired
Log data that can be acquired by Log Management Utility is described below.
1
2
Note
Items to display, and the width of the display can be changed in
played Item Settings
.
Audit logs:
No. Item No. Item
1 Result 12 Individual Job Number
2 Result Code 13 Type
3 Operation Character String 14 Address
4 Date and Time of Implementation 15 File Name
5 IF Number 16 Own Box Number
6 Operator Information 17 Box Number of Other Machine
7 Settings/Status 18 Relay User Box Number
8 User/Account Number 19 TSI Table Number
9 Operation Box Number 20 Received Fax Number
10 Security print ID 21 User/Account Name
11 User Job Number 22 External Server Information
Log Management Utility 1-2
Dis-
Page 10

Introduction
Communication History (Scan) logs:
Communication History (Fax) logs:
1
No. Item
1Communication Result
2Result Code
3Number
4 Destination
5Time
6 Type
7 Number of Originals
8 Remarks
No. Item
1Communication Result
2Result Code
3 Log Type
4Number
5 Destination
6Time
7Transmission Time
8 Number of Originals
9 Remarks
Log Management Utility 1-3
Page 11

Introduction
1
Log Management Utility 1-4
Page 12
Installation of Log Management Utility
2 Installation of Log Management Utility
2.1 Installation
Install Log Management Utility using the following procedure.
2
Note
When installing, login as a user that has administrator privileges.
Be sure to quit all programs (including virus check programs) that are running.
Before installation, make sure that “Microsoft .NET Framework 1.1 (SP1)”
is installed on your computer.
To install
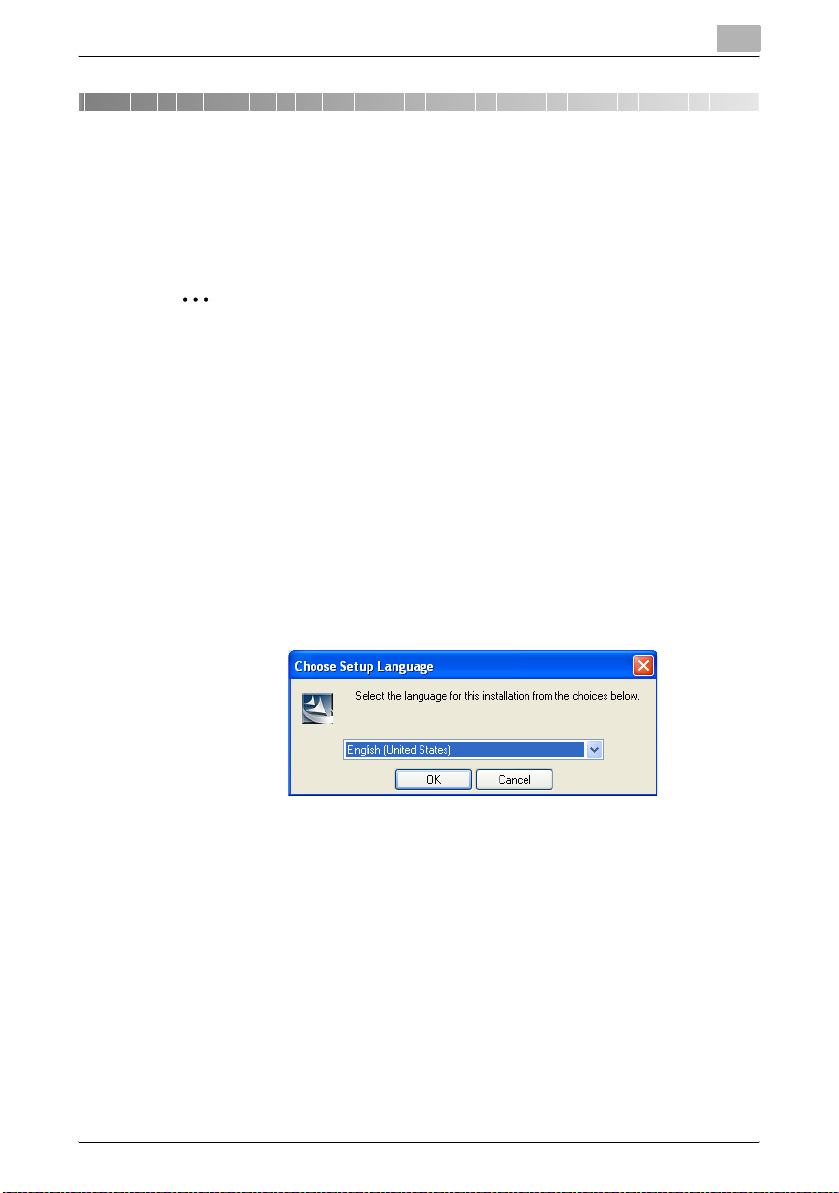
1 Double-click Setup.exe to start the installation program.
The installer starts.
2
2 Select the language, then click OK.
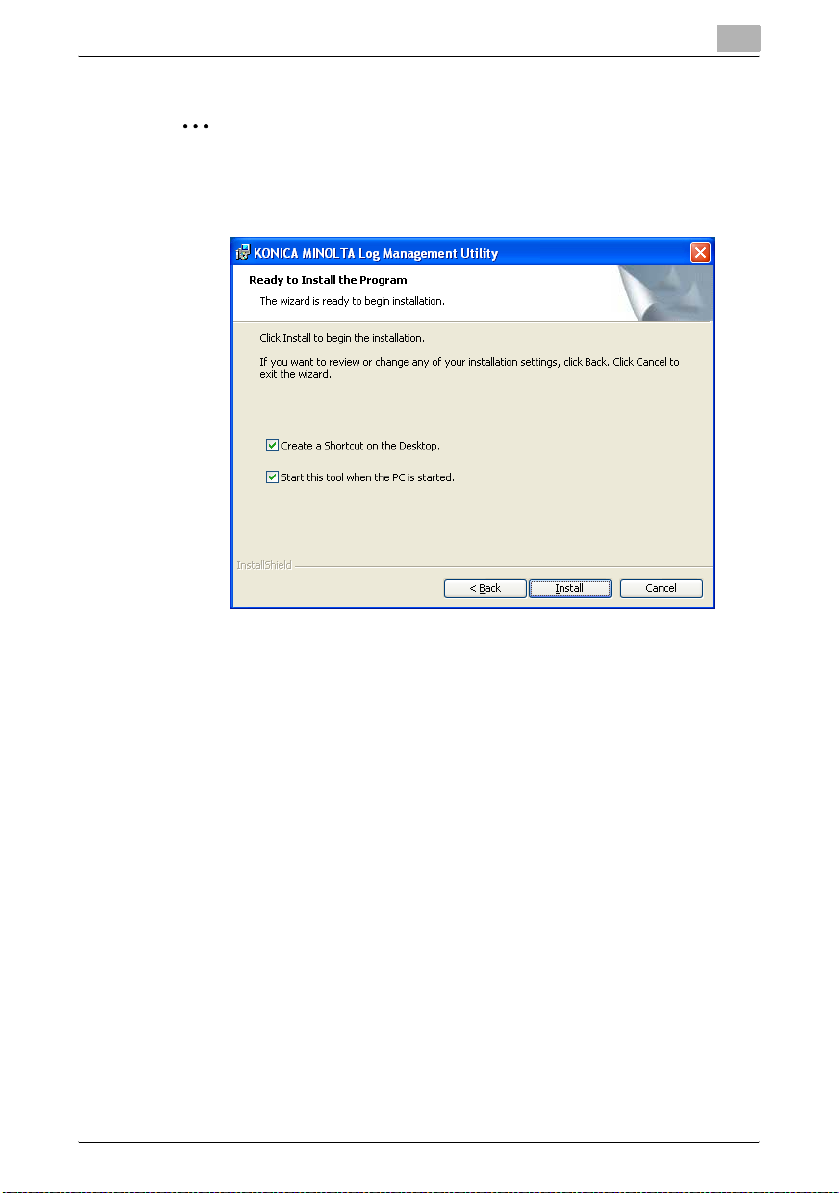
3 Follow the on-screen instructions to install.
Log Management Utility 2-1
Page 13
Installation of Log Management Utility
2
Note
If
Start this tool when the PC is started
screen, then Log Management Utility will be started when the computer
starts.
2
is selected in the following
Log Management Utility 2-2
Page 14

Installation of Log Management Utility
2.2 Items that are Installed
When installing Log Management Utility, the following items are installed in
the Start Menu and on the Desktop.
Items registered in the Start Menu
- Program
- Online help
- Readme
- Manual
Items registered on the Desktop
- Shortcut to the program
2
Note
It can also be specified that the “Readme” and “Manual” not be installed
in the Start Menu. When installing, select the
specify the items to install.
When installing, select whether or not to create registered shortcuts to
the program on the desktop.
Custom
2
setup type, and
Log Management Utility 2-3
Page 15

Installation of Log Management Utility
2.3 Uninstallation
Uninstall Log Management Utility using the following procedure.
- Use Add or Remove Programs (for Windows 2000, Add/Remove Pro-
grams).
- Run setup.exe again
2
Note
When uninstalling Log Management Utility, ensure that the program is
closed.
2
Note
When uninstalling, a message to confirm whether or not to delete user
settings data will be displayed.
If there are any automatically exported log files, then when uninstalling, a
message to confirm whether or not to delete these will be displayed.
2
Log Management Utility 2-4
Page 16

Starting Log Management Utility
3 Starting Log Management Utility
3.1 To Start
Start Log Management Utility using the following procedure.
- Start from the Windows Start Menu
In Windows, click Start, then Programs — KONICA MINOLTA — Log
Management Utility — Log Management Utility.
- Start using the shortcut on the desktop
Double click the “Log Management Utility” icon that has been created on
the desktop.
- Automatically start when the computer is started
When the software is started, the main dialog box will be displayed, and a
“Log Management Utility” icon will be displayed on the tasktray.
2
Note
During installation, you can select whether or not to create a “Log Management Utility” icon on the desktop.
Configure the program to start automatically with the computer either
during installation, or from the options dialog box. For details, please refer to “Options” on page 5-17.
3
At startup, a Protect Function dialog box will be displayed. To configure the
operation lock function for Log Management Utility, select Use Operation
Lock Function, and input a password in the dialog box that is displayed.
Log Management Utility 3-1
Page 17

Starting Log Management Utility
For details, please refer to “Protect Functions” on page 5-13.
At startup, a message prompting you to protect the folder for received logs
will be displayed. Confirm these details, and protect the folder if so required.
Select Do not show this message again in order to prevent this message
being displayed again at startup.
3
2
Note
If Log Management Utility is configured to start automatically at computer start-up, then the save folder message will not be displayed.
Display ON/OFF of this message can be configured in “Options”. For details, please refer to “Options” on page 5-17.
Log Management Utility 3-2
Page 18
Starting Log Management Utility
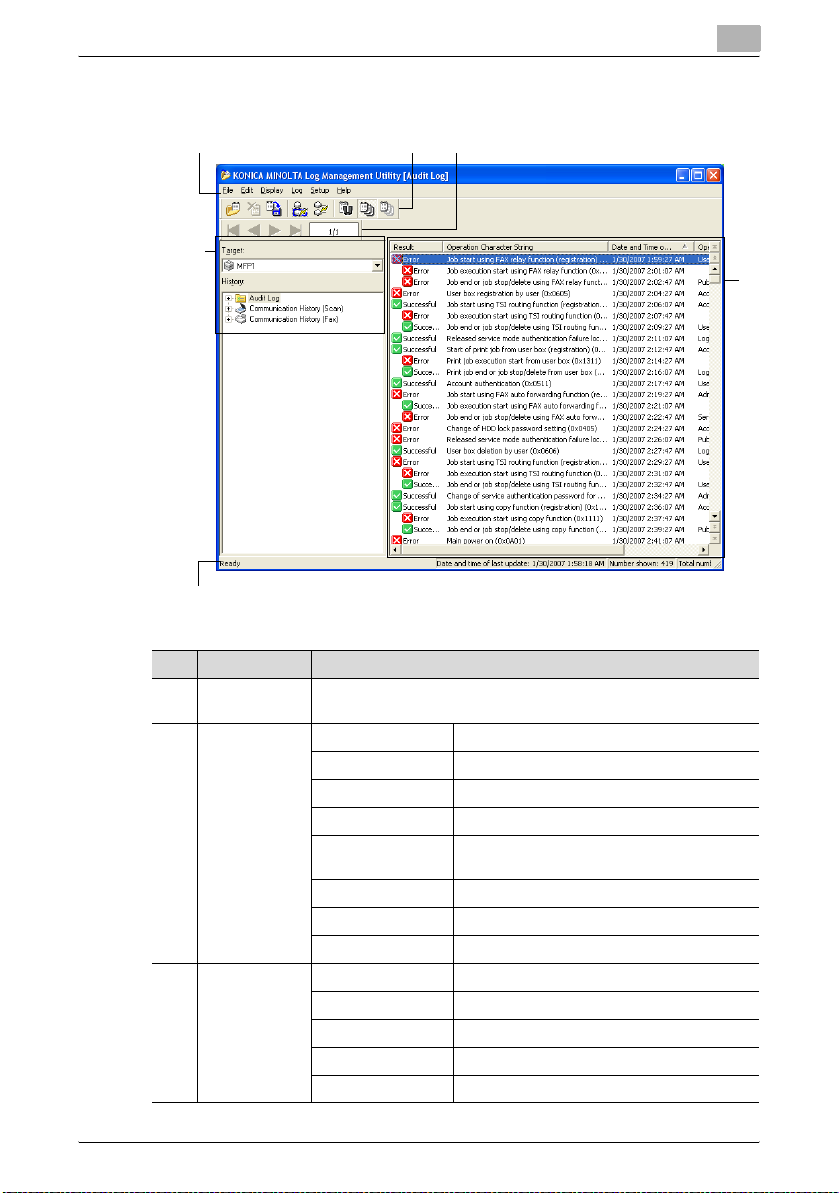
3.2 Main Dialog Box
123
4
6
3
5
No. Name Description
1 Menu Bar Specify Log Management Utility functions. For details, please refer to
2 Toolbar Open Log File Open a saved log file.
3 Page Bar First Page Displays the first page.
“Log Management Utility Settings” on page 5-1.
Close Log File Close a displayed log file.
Log export Save a list of displayed logs as a file.
Receive Receive logs from all registered devices.
Receive From Specified Devices
Search Search logs using specified conditions.
All Records Displays all logs.
Filter Displays only logs that match conditions.
Previous Page Displays the previous page.
Next Page Displays the next page.
Last Page Displays the last page.
Page Number Displays current and total page numbers.
Receive logs from all devices specified as “Target”.
Log Management Utility 3-3
Page 19

Starting Log Management Utility
No. Name Description
4 Selection View Target Select the devices or log files for which to dis-
5 Log Information
View
6 Status Bar Displays current status, and hints giving overviews of functions.
3
play logs.
History Select the type of logs to display.
Display the corresponding log list.
Log Management Utility 3-4
Page 20

Starting Log Management Utility
3.3 To Exit
Exit Log Management Utility using the following procedure.
- On the main dialog box, select File, then Exit Log Management Utility.
- Click the [x] (Close) button at the top right of the main dialog box.
- From the Taskbar, right click the “Log Management Utility” icon, and se-
lect Exit Log Management Utility.
- Shut down or log off from the computer.
3
Log Management Utility 3-5
Page 21

Starting Log Management Utility
3
Log Management Utility 3-6
Page 22

Log Confirmation
4 Log Confirmation
4.1 Device Registration
Acquisition of device logs requires registration of target devices in Log Management Utility.
Two types of registration are possible. “Search and Register”, in which devices are searched for from within a specified network range and then these
are registered, and “Register from IP address”, in which the device IP address is specified and then the device registered.
If the target device has already been registered, then this operation is not
necessary. For details, please refer to “Receive Log from Device” on
page 4-7.
2
Note
Multiple devices can not be registered with the same address.
Log Management Utility is an application for administrators. As such, its
use requires that you know the device administrator password.
4
2
Note
Up to a maximum of 100 devices can be registered.
Specifying a device from PageScope Data Administrator and then starting Log Management Utility can register the specified device in Log Management Utility.
Log Management Utility 4-1
Page 23
Log Confirmation
4.1.1 Search and Register
1 Start Log Management Utility.
The main dialog box will be displayed.
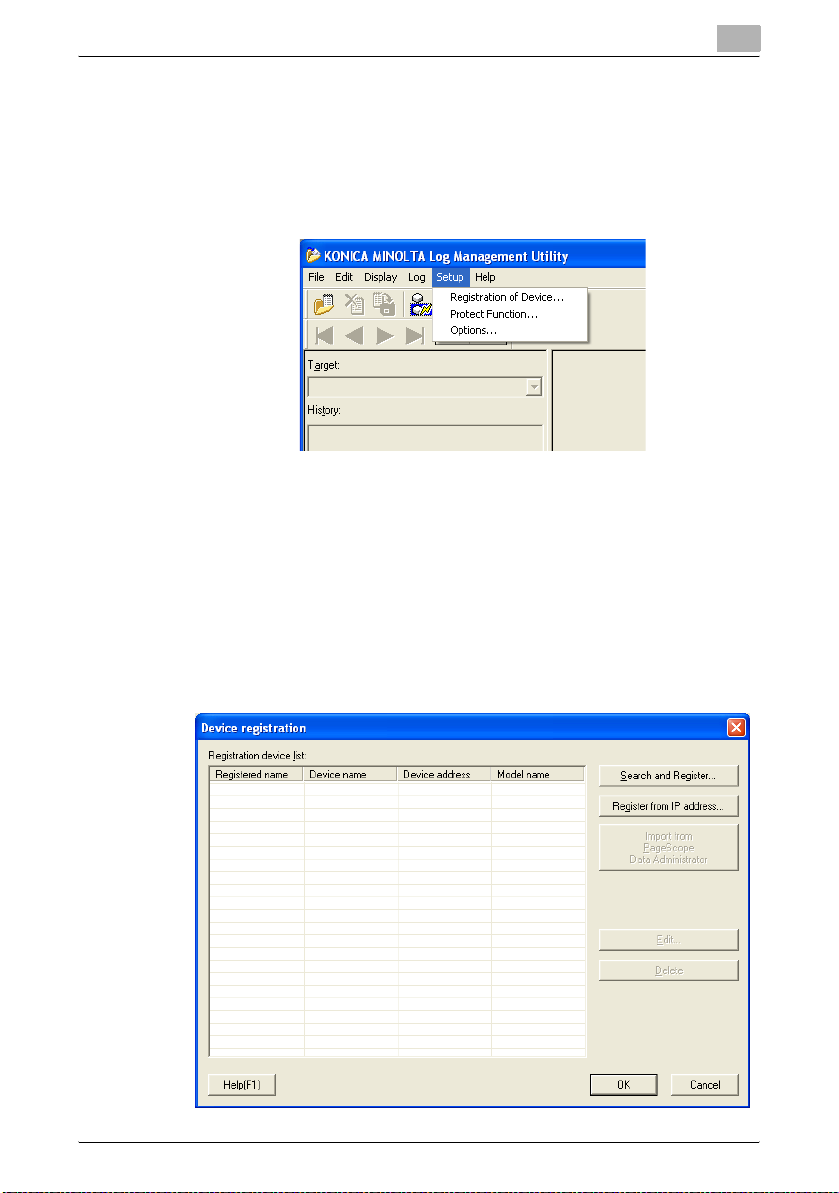
2 From the Setup menu, select Registration of Device.
The Device registration dialog box will be displayed.
3 Click Search and Register.
– Click Register from IP address in order to specify the IP Address
and register the device. For details, please refer to “Register from
IP address” on page 4-4.
– Click Import from PageScope Data Administrator to import de-
vice information from PageScope Data Administrator, and to register the device. For details, please refer to “Import device
information from PageScope Data Administrator” on page 6-1.
4
Log Management Utility 4-2
Page 24

Log Confirmation
4 Click Yes.
Searching for devices starts, and devices that are found are displayed.
5 Specify devices to register with Select, then click OK.
4
The devices are registered.
2
Note
The
Registration by search
Re-search
Search settings
Select
Unselect
registration.
Log Management Utility 4-3
: Search for devices within a specified search range.
: Specify the search range for devices.
: Specify the devices to register.
: Cancel the selection of devices that have been selected for
dialog box has the following buttons.
Page 25

Log Confirmation
4.1.2 Register from IP address
1 Start Log Management Utility.
The main dialog box will be displayed.
2 From the Setup menu, select Registration of Device.
The Device registration dialog box will be displayed.
3 Click Register from IP address.
– Click Search and Register to search for devices. For details,
please refer to “Search and Register” on page 4-2.
– Click Import from PageScope Data Administrator to import de-
vice information from PageScope Data Administrator, and to register the device. For details, please refer to “Import device
information from PageScope Data Administrator” on page 6-1.
4
Log Management Utility 4-4
Page 26

Log Confirmation
4 In Registered name, input the registered device name.
– A maximum of 64 byte characters can be input.
5 In Device address, input the IP address or the host name of the de-
vice.
– 1-255 single byte upper case alphanumeric characters or symbols
4
can be input.
6 In Administrator password, input the device administrator password.
– Select Save the administrator password to save the administra-
tor password for the device.
– If the device to register is specified as a Specify as Reception Tar-
get in Detail, then specify Save the administrator password.
– Click Detail to display the device detailed settings dialog box. For
details, please refer to “Registration of Device” on page 5-11.
7 Click OK.
This starts a connection test to the device, and then a confirmation
screen is displayed.
Log Management Utility 4-5
Page 27

Log Confirmation
8 Click OK.
The devices are registered.
2
Note
Devices to which a connection can not be made can not be registered.
4
Log Management Utility 4-6
Page 28

Log Confirmation
4.2 Receive Log from Device
There are two ways to receive logs. “Receive”, for receiving logs from specified devices only; and “Receive From Specified Devices”, for receiving logs
from all devices that are registered as targets for reception.
2
Note
While receiving logs, ensure that the power to the target device is not
switched off.
Depending on the number of logs, some time may be required for log reception.
2
Note
Periodic, automatic reception of logs can be specified in “Options”. For
details, please refer to “Options” on page 5-17.
4.2.1 Receive
1 Start Log Management Utility.
The main dialog box will be displayed.
4
2 From the Target list, select the devices from which to acquire logs.
Log Management Utility 4-7
Page 29

Log Confirmation
3 On the Toolbar, click the “Receive” icon.
– Alternatively, select RX from the Log menu.
If no administrator password has been saved, then an administrator
password input dialog box will be displayed. Proceed to step 4.
If an Administrator password has been saved, then neither administrator password input, nor an SSL connection confirmation dialog box will
be displayed.
4 In Administrator password, input the device administrator password,
then click OK.
– Select Save the administrator password to save the administra-
4
tor password for the device.
An SSL connection confirmation dialog box will be displayed.
5 Confirm the details in the dialog box, then click OK.
– If SSL communication has been specified, then a Confirm SSL
Certificate dialog box will be displayed.
– If SSL communication has not been specified, then a dialog box
asking whether to continue will be displayed.
Log Management Utility 4-8
Page 30

Log Confirmation
Receive logs from connected devices.
4
Log Management Utility 4-9
Page 31

Log Confirmation
4.2.2 Receive From Specified Devices
1 Start Log Management Utility.
The main dialog box will be displayed.
2 On the Toolbar, click the “Receive From Specified Devices” icon.
– Alternatively, select Receive From Specified Devices from the
Log menu.
4
If no administrator password has been saved, then an administrator
password input dialog box will be displayed. Proceed to step 3.
If an Administrator password has been saved, then neither an administrator password input dialog box, nor an SSL connection confirmation
dialog box will be displayed.
Log Management Utility 4-10
Page 32

Log Confirmation
3 In Administrator password, input the device administrator password,
then click OK.
– Select Save the administrator password to save the administra-
An SSL connection confirmation dialog box will be displayed.
4 Confirm the details in the dialog box, then click OK.
– If SSL communication has been specified, then a Confirm SSL
– If SSL communication has not been specified, then a dialog box
4
tor password for the device.
Certificate dialog box will be displayed.
asking whether to continue will be displayed.
Log Management Utility 4-11
Page 33

Log Confirmation
5 Repeat steps 3 and 4 for each device from which to acquire logs.
Receive logs from connected devices.
2
4
Note
Even if devices are registered, logs cannot be received from these unless
they are specified as targets for reception processing. Reception
processing target settings can be changed in “Device detail settings”. For
details, please refer to “Registration of Device” on page 5-11.
Log Management Utility 4-12
Page 34

Log Confirmation
4.3 Confirm Logs
Received “Audit logs”, “Scan communications histories”, and “Fax communications histories” are displayed by year and month. The target history can
be specified in Selection View.
4.3.1 Select the Target History
1 Start Log Management Utility, and acquire logs as required.
2 From the menu at left, select Target and History.
– Target: Select target devices and log files.
Devices are displayed with a printer icon, and log files with a text
icon.
– History: Select the log type. Further selection of each log type can
be carried out by year and month.
4
A list of logs that corresponds to the selected Target and History is
displayed in the Log Information View at right.
Log Management Utility 4-13
Page 35

Log Confirmation
If a log type is selected, then all records of that type will be displayed.
If year and month are selected, then records from that selected period
will be displayed.
4
4.3.2 Details of Log Display
In each of the displayed log records, you can confirm results of operations,
as well as the date these were carried out and by which user. Items displayed
will differ depending on the log type.
2
Note
Log type items to display, and the width of the display can be changed
in
Displayed Item Settings
Settings” on page 5-8.
Log Management Utility 4-14
. For details, please refer to “Displayed Item
Page 36

Log Confirmation
Audit logs:
Displays logs of operations carried out on the device. This allows confirmation of information such as results of operations, details of operations, and
users, etc.
4
2
Note
Operations results may be preceded by a blank space, and those that are
indented indicate that they are associated with the record above them in
the hierarchy. For these, the user job number is the same, with each operation being differentiated using an individual job number.
Associated
operations
Individual
operations
Log Management Utility 4-15
Page 37

Log Confirmation
Communication History (Scan):
Displays scan job logs. This allows confirmation of information such as communication results, job numbers, and destinations, etc.
Communication History (Fax):
Displays fax job logs. This allows confirmation of information such as communication results, job numbers, and destinations, etc.
4
Log Management Utility 4-16
Page 38

Log Confirmation
Results status indicates the following.
History Type Item Status Condition
Audit log Result Successful The operation was successful
Communication
History
(Scan)
Communication
History
(Fax)
Use the vertical scroll bar to confirm records on the page, and to scroll the
page.
Communication
Result
4
Error Error in the operation
Successful The communication was successful
Error Error in the operation
Information Cancelled in the operation
To first page
To previous
page
Content of
page
To next page
To last page
2
Note
Movement between pages can be carried out either with the icons on the
page bar, or by selecting
Log Management Utility 4-17
Move
from the
Display
menu.
Page 39

Log Confirmation
4.4 Log Operations
Log records can be sorted, selected using conditions, searched, and deleted.
4.4.1 Sorting
Records can be sorted in descending or ascending order for different items,
by clicking each item name.
The + mark indicates that items are sorted in ascending order: click this
again to sort in descending order.
Items that can be sorted differ as follows depending on the log type.
History Type Items that can be sorted
Audit log Date and Time of Implementation
Communication History (Scan) Number
Communication History (Fax) Number
4
User Job Number
Individual Job Number
Time
Time
2
Note
Depending on the number of records, some time may be required for
processing.
2
Note
If logs take up multiple pages, then information on all pages is sorted.
Log type items to display, and the width of the display can be changed
in
Displayed Item Settings
Settings” on page 5-8.
Log Management Utility 4-18
. For details, please refer to “Displayed Item
Page 40

Log Confirmation
4.4.2 Filter
Extract and display only records that match certain conditions.
Conditions that can be specified differ as follows depending on the log type.
4
Item Detail Audit log Commu-
Start Specify the target start date and
End Specify the target end date and
Result Specify the target operations re-
Communication Result
Operation Character
String*
User Information Specify the target operator in-
Type / Transmission
Type
Log Type Specify the target log type. o
Address* Specify the target address. o
Destination* Specify the target destination. oo
File Name* Specify the target file name. o
User/Account Name* Specify the target user names
External Server Information*
Remarks* Specify text for the target re-
Case sensitive Specify whether a distinction is
* For items that have text input, records that include input text are displayed as those which
match certain conditions (partial matching).
time.
time.
sult.
Specify the target communication result.
Specify the target operation
character string.
If no character string is specified, then this is “No Conditions”
formation.
Specify the target transmission
type.
and/or account names.
Specify the target external server information.
marks.
made between upper and lower
case for input text strings.
ooo
ooo
o
o
o
oo
o
o
ooo
nication
History
(Scan)
oo
oo
Communication
History
(Fax)
Log Management Utility 4-19
Page 41

Log Confirmation
Specifying a Filter
1 On the Toolbar, click the “Filter” icon.
– Alternatively, select Filter from the Display menu.
2 Specify conditions, then click Configure.
– Dialog boxes for configuring conditions will differ depending on the
Audit logs:
4
log type.
Log Management Utility 4-20
Page 42

Log Confirmation
Communication History (Scan):
Communication History (Fax):
4
Displays only records that match certain conditions.
Log Management Utility 4-21
Page 43

Log Confirmation
2
Note
Depending on the number of records, some time may be required for
processing.
2
Note
Items in which text is input cannot use characters that are used in wildcards (* and ?).
Click
Restore Standard Values
figured in order to restore original settings.
Deleting a Filter
To delete a filter, either click the “All Records” icon on the Toolbar, or select
Record All from the Display menu.
4.4.3 Log Search
Search records that match certain conditions.
Conditions that can be specified differ as follows depending on the log type.
4
on the screen where conditions are con-
Item Detail Audit log Commu-
Result / Communication Result
Operation Character
String*
Operator Information Specify the target operator in-
Type/Transmission
Type
Log Type Specify the target log type. o
Address* Specify the target address. o
Destination* Specify the target destination. oo
File Name* Specify the target file name. o
User/Account Name* Specify the target user names
External Server Information*
Specify the target operations result.
Specify the target operation
character string.
If no character string is specified, then this is “No Conditions”
formation.
Specify the target transmission
type.
and/or account names.
Specify the target external server information.
ooo
o
o
oo
o
o
nication
History
(Scan)
Communication
History
(Fax)
Log Management Utility 4-22
Page 44

Log Confirmation
4
Item Detail Audit log Commu-
Remarks* Specify text for the target re-
Distinguish upper
case and lower case
letters
Search Direction Specify the search direction. ooo
* For items that have text input, records that include input text are displayed as those which
match certain conditions (partial matching).
marks.
Specify whether a distinction is
made between upper and lower
case for input text strings.
ooo
nication
History
(Scan)
oo
Communication
History
(Fax)
Searching
1 Select the types of log, and periods for target logs from Selection View
at left.
2 On the Toolbar, click the “Search” icon.
– Alternatively, select Find from the Edit menu.
3 Specify conditions, then click Find Next.
– Dialog boxes for configuring conditions will differ depending on the
log type.
Log Management Utility 4-23
Page 45

Log Confirmation
Audit logs:
Communication History (Scan):
4
Log Management Utility 4-24
Page 46

Log Confirmation
Communication History (Fax):
Records that match certain conditions are sequentially searched, and
the found records selected.
The Filter configuration dialog box will remain displayed, from where
additional searches of records can be carried out.
4
4 To end searches, click Close.
2
Note
Depending on the number of records, some time may be required for
processing.
2
Note
The target for searches will be the log types and periods specified in “Selection View”. To change the target, re-select these in
Items in which text is input cannot use characters that are used in wildcards (* and ?).
Click
Restore Standard Values
figured in order to restore original settings.
Log Management Utility 4-25
on the screen where conditions are con-
Selection View
.
Page 47

Log Confirmation
4.4.4 Detailed Information
Confirm detailed information regarding selected records.
Either double click the records to confirm, or select the records, then select
Log Detail Information from the Edit menu.
Audit logs:
Communication History (Scan):
4
Log Management Utility 4-26
Page 48

Log Confirmation
Communication History (Fax):
2
Note
Switch between displayed records using
Click
Copy
to copy the text contents to the clipboard.
Previous
and
Next
4
.
Log Management Utility 4-27
Page 49

Log Confirmation
4.4.5 Log Deletion
Delete unnecessary log records.
2
Note
Deleted logs cannot be restored.
2
Note
Records within log files cannot be deleted.
Selected records only cannot be deleted. Select using a range.
If the range for deletion corresponds to a record that is at the top of a hierarchy, then all records included within this will be deleted.
1 Select the types of log, and periods for target logs from Selection View
at left.
2 Alternatively, select Delete Log from the Edit menu.
3 Specify the records to delete, then click Delete.
4
4 Click Yes.
The logs within the specified range will be deleted.
Log Management Utility 4-28
Page 50

Log Management Utility Settings
5 Log Management Utility Settings
5.1 File Menu
5.1.1 Open/Close Log File
Open an exported file and confirm the log records.
1 On the Toolbar, click the “Open Log File” icon.
– Alternatively, select Open Log File from the File menu.
2 Select the log file to open, then click Open.
The log file will be opened.
Sorting and filtering functions can be used on records in opened log
files, in the same way as with logs received from devices.
2
Note
Up to ten log files can be opened at the same time.
To close opened log files, either click the “Close Log File” icon on the
Toolbar, or select
is not available, then confirm that the “Target” is the log file in
View
at left.
Close Log File
from the
File
menu. If
Close Log File
5
Selection
Log Management Utility 5-1
Page 51

Log Management Utility Settings
5.1.2 Export
Save logs received from devices as log files.
1 On the Toolbar, click the “Log export” icon.
– Alternatively, select Log export from the File menu.
2 Select the device from which to export the log, then click Next.
– Only one device can be selected.
5
3 Select the log type, then click Next.
– Only one log can be selected.
– Logs without records will not be displayed.
Log Management Utility 5-2
Page 52

Log Management Utility Settings
4 Specify the range of the log, then click Next.
5 Specify the destination folder, file name, and file type.
–If Delete the saved record from the received log is selected, then
after saving, the record will be deleted from the received log.
5
2
Note
“MFP operation log file” is a file type that can be displayed using Log
Management Utility. If a different format is selected when saving the
file, then it will not be possible to view this using Log Management Utility.
Log Management Utility 5-3
Page 53

Log Management Utility Settings
If saved while using the filter functions to select the number of logs to
display, then all logs (including those that are not displayed) in “MFP
operation log file” format will be saved; whereas if these are saved in
other file formats, then only records that are displayed will be saved.
6 Click Next.
7 Confirm details, then click Start.
5
8 Click Finish.
– To save more logs, click Continue, and repeat from step 2.
Log Management Utility 5-4
Page 54

Log Management Utility Settings
2
Note
Records are saved sorted into “Date and Time of Implementation” and
“Time”.
5.1.3 Properties
Display detailed information about devices and log files selected as “Targets” in the Selection View at left.
1 In Selection View at left, select the target devices and log files.
2 From the File menu, select Properties.
Properties will be displayed.
5
Log Management Utility 5-5
Page 55

Log Management Utility Settings
5.2 Edit Menu
5.2.1 Copy
Copy the contents of a selected record to the clipboard.
1 Select the record.
2 From the Edit menu, select Copy.
The content of the displayed record is copied to the clipboard as text.
This text can be used by pasting it into other applications.
Example of copied text (Audit log):
Result: Successful
Operation Character String: User information write in administrator mode
Date and Time of Implementation: 12/27/2006 11:28:12 PM
Operator Information: Account: 1
User/Account Name:
5.2.2 Search
Select Find from the Edit menu in order to search for records that match certain conditions. For details, please refer to “Log Search” on page 4-22.
5
(network) (0x032A)
5.2.3 Log Deletion
Select Delete Log from the Edit menu in order to delete unnecessary log
records. For details, please refer to “Log Deletion” on page 4-28.
5.2.4 Log Detail Information
Select Log Detail Information from the Edit menu in order to confirm detailed information regarding selected records. For details, please refer to
“Detailed Information” on page 4-26.
Log Management Utility 5-6
Page 56

Log Management Utility Settings
5.3 Display Menu
5.3.1 Toolbar Display ON/OFF
From the Display menu, select ON/OFF for display of the “Toolbar”, “Status
Bar”, and “Page Bar”.
5.3.2 Separation
Select the proportions for display of Selection View on the left, and Log In-
formation View on the right.
Select Separation from the Display menu in order to move the border between the left and right parts of the screen. Move this with the mouse, and
click to fix the position.
2
5
Note
Alternatively, move the line between the left and right parts of the screen
by dragging it with the mouse.
5.3.3 Record Display (Filter)
Select Filter from the Display menu in order to extract and display only
records that match certain conditions. For details, please refer to “Filter” on
page 4-19.
Select Record All from the Display menu in order to cancel the filter, and to
display all records.
5.3.4 Sorting
Select List By from the Display menu, and then select an item from the menu
that is displayed in order to use that parameter to sort records in ascending
order. Select this item again to sort in descending order.
Alternatively, sorting using the Item name in Log Information View. For details, please refer to “Sorting” on page 4-18.
Log Management Utility 5-7
Page 57

Log Management Utility Settings
5.3.5 Moving
Select Move from the Display menu, and then select a destination from the
menu that is displayed in order to move the cursor (currently selected target).
Move the page either using the vertical scroll bar, or with the icons on the
page bar.
5.3.6 Displayed Item Settings
Change items to display for each log type, and the width of the display.
1 From the Display menu, select Displayed Item Settings.
2 Select the History Type for which to configure items.
5
3 From the Details list, select Show/Hide.
– If selected, an item will be shown.
– Settings can also be changed using Show/Hide at the right of the
dialog box.
4 Specify other conditions as required.
– Width of selected column (pixels): Specify the display width in
pixels. The range is 0 to 999.
– Move Up: Move an item up in the display.
– Move Down: Move an item down in the display.
Log Management Utility 5-8
Page 58

Log Management Utility Settings
2
Note
In Audit Log, the display order for “Result” and “Communication Result” cannot be changed.
5 Click Setting.
Display items will be changed.
5.3.7 General Settings
Specify the maximum number of records to display on one page.
1 From the Display menu, select General Settings.
2 Specify the maximum number of records to display on one page.
5
3 Click Setup.
The display settings will be changed.
Log Management Utility 5-9
Page 59

Log Management Utility Settings
5.4 Log Menu
5.4.1 Receive
Select RX from the Log menu in order to receive logs from selected devices.
For details, please refer to “Receive” on page 4-7.
5.4.2 Receive From Specified Devices
Select Receive From Specified Devices from the Log menu in order to receive logs from all devices that are registered as targets for reception. For
details, please refer to “Receive From Specified Devices” on page 4-10.
5
Log Management Utility 5-10
Page 60

Log Management Utility Settings
5.5 Setup Menu
5.5.1 Registration of Device
Select Registration of Device from the Setup menu in order to register in
Log Management Utility target devices from which to acquire logs, and to
change this registered information.
For details on how to register a new device, please refer to “Device Registration” on page 4-1. The following explains how to change registered settings
for an already registered device.
1 From the Setup menu, select Registration of Device.
2 Select the device to change from the Registration device list, then
click Edit.
– To remove a device from the list of managed devices, select that
device, then click Delete.
5
Log Management Utility 5-11
Page 61

Log Management Utility Settings
3 Change configured information.
–In Registered name, change the registered device name. A maxi-
mum of 64 byte characters can be input.
– Select Save the administrator password and input a password in
order to save an administrator password for the device.
– Device address cannot be changed.
5
4 Click Detail.
The Device detail settings dialog box will be displayed.
5 Change configuration information.
–In Action when HDD is full, specify the action for saving logs when
there is no space remaining on the device hard disk. To overwrite
logs on the device, select Overwrite the HDD; and to stop the de-
vice, select Stop the device. This can only be specified if a hard
disk is installed on the device.
–In TCP socket settings, change the port number to be used with
the TCP Socket interface. Ensure this is configured in accordance
with device settings. Settings are only required when changing TCP
Socket settings on the device. Click Reset to restore original set-
tings.
Log Management Utility 5-12
Page 62

Log Management Utility Settings
– Click Specify as reception target to set the device as a target for
reception processing. If this is deselected, then logs cannot be ac-
quired using Receive From Specified Devices or Periodic Re-
ception.
6 Click OK.
The Device detail settings dialog box will close.
5
7 Click OK.
The Edit the device registration information dialog box will be
closed, and the settings enabled.
5.5.2 Protect Functions
Select Protect Function from the Setup menu in order to specify that input
of a password is required when starting Log Management Utility, or when a
specified period has elapsed without any operation being carried out.
Ensure that the protect function is used as necessary in order that users other than administrators can not operate the Log Management Utility.
2
Note
Protect Functions
as the
Receive Log Periodically
Log Management Utility 5-13
cannot be configured to be enabled at the same time
function.
Page 63

Log Management Utility Settings
Specifying Protect Functions
1 From the Setup menu, select Protect Function.
2 Select Use Operation Lock Function.
A password entry dialog box will be displayed.
3 Input a password, then click Setup.
– Input 1-64 single byte alphanumeric characters. Passwords are
case-sensitive.
5
Log Management Utility 5-14
Page 64

Log Management Utility Settings
4 Specify a period in Time Until Locking Takes Place, then click Close.
Protect functions will be enabled
Canceling Protect Functions
1 From the Setup menu, select Protect Function.
2 Select Do Not Use Operation Lock Function.
5
A password entry dialog box will be displayed.
Log Management Utility 5-15
Page 65

Log Management Utility Settings
3 Input a password, then click Release.
4 Click Close.
5
The protect function will be canceled.
2
Note
To change the password, click
the password in the dialog box that is displayed.
Log Management Utility 5-16
Change Password
at step 2, and change
Page 66

Log Management Utility Settings
5.5.3 Options
Select Options from the Setup menu to specify Log Management Utility reception logs, and conditions for operation.
The Options settings dialog box has a Reception Log tab and a General tab
Reception Log tab:
5
Settings Item Description
Reception Log Fold-erChange Folder Specify the save location for logs acquired from
Display reception
log folder at startup
Operation when reception log is at maximum capacity
devices.
Specify whether or not to display the reception log
folder at startup.
Specify the operation when the reception log is at
maximum capacity.
Specify maximum size for each device and
overwrite log:
Overwrite the log when the reception log has
reached its maximum capacity. Click Detailed
Settings to specify the maximum disk capacity.
Automatically export log:
Automatically export the log when the reception
log has reached its maximum capacity. Click De-
tailed Settings to specify the proportion of the log
to be automatically exported.
The folder for automatic export of logs can be
specified in Auto export at the bottom of the dialog box.
Log Management Utility 5-17
Page 67

Log Management Utility Settings
Settings Item Description
Operation when log version is changed Specify handling of received logs when the ver-
Auto export Change Folder Specify the save location for the automatically ex-
2
Note
If there are already reception logs, then the save location for reception
logs cannot be changed. In order to change the save location, ensure this
has no logs stored, by either exporting or deleting any existing logs.
If the log version for registered devices has changed, then Log Management Utility cannot bulk manage reception logs that are created using log
versions from before the change together with those created using log
versions from after the change.
sion of the log for the registered device has
changed.
Delete old version of log:
Deletes saved old versions of reception logs.
Automatically export old version of log:
Automatically exports saved old versions of reception logs.
ported file.
5
Delete old version of log
If
is changed
, then the deleted reception logs cannot be restored.
is specified in
Operation when log version
2
Note
File names for automatically exported files are as follows.
LOG - Text string indicating the log type - date and time of first record date and time of last record
For example, when exporting an audit log for the period “2004/11/5
13:00:24 to 2005/2/25 04:39:12” the file name will be “LOG-AUD-200411-05-130024-2005-02-25-043912.lmu”.
The part of the string above indicating “AUD” for audit logs is replaced
with “SCAN” for communications (scan) logs, and “FAX” for communications (fax) logs.
Log Management Utility 5-18
Page 68

Log Management Utility Settings
General tab:
5
Settings Item Description
Receive Log Periodically Periodically acquires logs while Log Management
Start Log Management Utility at Windows
logon
Minimize when Log Management Utility is
started
Only show in task tray when minimized Shows Log Management Utility only in the task
Utility is running. Specify the interval for receiving
logs.
Start Log Management Utility at Windows logon.
Start Log Management Utility minimized.
tray, and not on the Taskbar when minimized.
2
Note
The
Receive Log Periodically
bled at the same time as
Log Management Utility 5-19
function cannot be configured to be ena-
Protect Functions
.
Page 69

Log Management Utility Settings
2
Note
Even if
Receive Log Periodically
from devices unless they are specified as targets for reception processing. Change reception processing target settings in “Device detailed settings”. For details, please refer to “Registration of Device” on page 5-11.
5
is selected, logs cannot be received
Log Management Utility 5-20
Page 70

Log Management Utility Settings
5.6 Help Menu
5.6.1 Log Management Utility Help
Select Log Management Utility Help from the Help menu to display the online help.
5.6.2 Version Information
Select Version information from the Help menu to display version information about Log Management Utility.
5
Log Management Utility 5-21
Page 71

Log Management Utility Settings
5
Log Management Utility 5-22
Page 72

Linkage with PageScope Data Administrator
6 Linkage with PageScope Data Adminis-
trator
6.1 Import device information from PageScope Data Administrator
You can Import PageScope Data Administrator device information, and register these devices as targets for Log Management Utility log reception.
Please refer to the PageScope Data Administrator User Guide for details on
operating PageScope Data Administrator.
1 Start Log Management Utility.
The main dialog box will be displayed.
2 From the Setup menu, select Registration of Device.
The Device registration dialog box will be displayed.
3 Click Import from PageScope Data Administrator.
The Import from PageScope Data Administrator dialog box will be
displayed.
6
4 Specify devices to register with Select, then click OK.
– To select multiple devices, repeat the selection.
– Click Unselect to cancel selection.
5 Click OK.
The devices are registered.
Log Management Utility 6-1
Page 73

Linkage with PageScope Data Administrator
6
Log Management Utility 6-2
Page 74

Error message list
7 Error message list
An error message may appear while Log Management Utility is being used.
An error code appears after the message describing the error.
The corrective measures for the various error codes are described below.
Follow the described procedure.
Error Code Number Description
12-13, 16-18, 101, 102, 201-203,
221, 245, 9110.
- The OS is not supported.
103 Unauthorized Windows login user.
110, 9024, 9109 A memory error has occurred.
9002, 9017, 9018, 9021, 90289030, 9032, 9035-9039, 9043,
9103, 9105, 9106
220, 287, 9003, 9102, 9107, 9108 Not supported by this device.
286, 9006, 9008, 9013, 9015 Change device settings, then try again.
9007 The device is in security protect status.
112, 113, 303, 306, 3034-3038,
3120-3151, 3200, 4000-4010,
9004, 9011, 9014
9005, 9012 Wait a short period, then try again.
104-106, 111, 222-244, 246-267,
270-274, 277-283, 285, 288-302,
304, 307-317, 400-413, 450-470,
472, 500, 700-716, 3100, 3101,
3110, 4011, 9000, 9001, 9010,
9019, 9020, 9100, 9101, 40039,
40041
9009, 9016, 9022, 9023, 90259027, 9031, 9033, 9034, 90409042, 9104
3006, 3007 Invalid device name.
Reinstall Log Management Utility.
A communications error has occurred.
Change settings, then try again.
Try again.
Consult with an administrator.
7
Log Management Utility 7-1
Page 75

Error message list
Error Code Number Description
3008-3010 Invalid device address.
107-109, 114-115, 3000-3004 The number of registered devices has reached the maxi-
3005, 3011, 3012, 3033 The specified device is already registered.
3013-3024, 3029-3032 Invalid search settings.
11, 14-15, 268, 269, 275, 276, 284 Restart Log Management Utility.
3025-3028 Invalid device detailed settings.
305, 471 Unsupported log file.
7
mum.
Log Management Utility 7-2
Page 76

2007
http://konicaminolta.com
Copyright
2007. 34343-PS312-02
 Loading...