

INSTRUCTION MANUAL
E
9224-2766-21 H-B109 (V11)

- 2 -
• This instruction manual may not be copied either in part or in its entirety without the prior
permission of Minolta Co., Ltd.
© 2001 Minolta Co., Ltd.
• Every precaution has been taken to ensure the accuracy of this material Please contact Minolta if
you have any questions, find any mistakes or notice missing information.
• Minolta cannot accept responsibility for any loss, damage or other problems caused by use of this
software.
• With the exception of personal, home or equivalent use No part of book, magazine, music, or other
copyrighted material may be used, copied or revised without the prior permission of the author or
copyright holder.

- 3 -
This instruction manual does not provide instructions for the basic operation of the
personal computers, or the basic operation of Windows® or Mac OS operating
systems.
Please refer to the manual that came with your computer for information on the
above mentioned topics.
• Microsoft® and Windows® are registered trademarks in the United States and other countries of
Microsoft Corporation.
• The official name of Windows® is Microsoft® Windows® Operating System.
• Pentium® is a registered trademark of Intel Corporation.
• Apple, the Apple logo, Macintosh, Power Macintosh, Mac OS and the Mac OS logo are registered
trademarks of Apple Computer, Inc.
• Other company and product names are the trademarks or registered trademarks of their respective
owners.

- 4 -
TABLE OF CONTENTS
TABLE OF CONTENTS..................................................................................................4
BEFORE YOU BEGIN.....................................................................................................6
TERMS USED IN THIS MANUAL..............................................................................6
SYSTEM REQUIREMENTS (Windows
®
).......................................................................8
INSTALLING THE SOFTWARE (Windows®)...............................................................10
INSTALLING THE SOFTWARE (Macintosh) ..............................................................13
STARTING THE SOFTWARE.......................................................................................16
For Windows ............................................................................................................16
For Macintosh ..........................................................................................................17
USING THE SOFTWARE – THUMBNAILS..................................................................18
To Display Thumbnails of All Images in the Folder..................................................19
To Display a Thumbnail of a Certain Image in the Folder .......................................21
To Open Minolta-RAW Files.....................................................................................23
To Save in the Minolta-RAW File Format (RAW File Processing) ...........................28
To Rotate, Flip and Sort Thumbnails .......................................................................30
To Change the Image Size ......................................................................................31
To Display the Image (Recording) Information ........................................................32
To Delete Thumbnails ..............................................................................................33
USING THE SOFTWARE – COLOR MATCHING........................................................34
USING THE SOFTWARE – SAVING IMAGES.............................................................38
To Save an Image File .............................................................................................38
To Save Multiple Images at One Time.....................................................................41

- 5 -
TABLE OF CONTENTS
COLOR CORRECTION................................................................................................46
Corrections using the tone curves ...........................................................................47
To Draw a Free Hand Tone Curve ...........................................................................48
To Correct Images Using the “Black Point” Button...................................................49
To Correct Images Using the “White Point” Button ..................................................50
To Correct Images Using the “Gray Point” Button....................................................51
Histogram Correction – Auto Setting .......................................................................52
Histogram Correction – To Correct RGB Channels Separately ...............................53
To Correct Brightness, Contrast and Color Balance................................................54
To Correct Hue, Saturation and Lightness...............................................................56
Variation Correction .................................................................................................58
Variation Correction – Color Balance.......................................................................59
Variation Correction – Brightness & Contrast ..........................................................60
Variation Correction – Saturation.............................................................................61
To Undo the Correction............................................................................................62
To Redo the Canceled Correction............................................................................62
To Undo All Color Corrections .................................................................................62
Snapshot..................................................................................................................63
Color Correction Job................................................................................................64
To Compare the Pre/Post Correction Images..........................................................66
To Display the Whole Post-Correction Image ..........................................................67
Thumbnail Number Display......................................................................................68
RGB Value Display...................................................................................................69
SHARPNESS................................................................................................................70
QUITING THE SOFTWARE..........................................................................................72

- 6 -
BEFORE YOU BEGIN
TERMS USED IN THIS MANUAL
• This manual assumes that your computer’s operating system (Windows®95/98/98 Second
Edition/Me/2000/NT 4.0 or Mac OS) as well as other necessary software such as device drivers
have been installed, and are operating properly.
• In general, the descriptions in this manual are illustrated by the displays for the Windows® version.
There are no major differences between the displays for the Windows® and Macintosh versions
except for some of the button layouts and other cosmetic features.
• This manual assumes the use of a two- button, right- handed mouse for Windows®. The terms
‘click’ and ‘double-click’ refer to a single or double click of the left mouse button. The term ‘drag’
refers to the action of holding down the left mouse button while moving the mouse.

- 7 -
BEFORE YOU BEGIN
• If you are using Macintosh OS, the term ‘Command Key’ refers to the key located next to the
Space Bar.
• Command names shown in this manual which are common both to the Windows® and Macintosh
systems do not indicate any of the shortcut keys found in Windows® command names.
Example No. 1: The File command appears as “File” on Windows® and “File” on Macintosh menus,
but in this manual it is shown as merely as “File.”
Example No. 2: The Save command appears as “Save” on Windows® and “Save” on Macintosh
menus, but in this manual it is shown merely as “Save.”

- 8 -
SYSTEM REQUIREMENTS (Windows®)
The system requirements for the operation of this software are as shown below:
IBM PC/AT and their compatible computers
CPU Intel Pentium® Processor 133MHz or higher
OS
Windows®2000 Professional, Windows®Me,
Windows®98 / 98 Second Edition, Windoes®95,
Windows®NT4.0 (Service Pack 6 or later)
RAM A minimum of 64MB of RAM
Hard Disk Space
100MB or more of free hard disk space for use as workspace
after the software installation
Monitor
Resolution: VGA (640 X 480 dots) or higher
XGA (1024 X 768 dots) or hjgher is recommrnded
Color Depth: True Color (24 bit) or higher
CD-ROM Drive Required for software installation
Interface USB port* that each PC maker guarantees to operate without problem
* You need a USB port when you connect a USB mass storage class supported digital camera
such as DiMAGE 7 or DiMAGE 5 to your PC with a USB cable and use (a CF card in) the digital camera as
a removable disc with this software. If you use Windows®98/98 Second Edition, you must install the USB
driver software in the attached CD-ROM to execute this operation. (See the digital camera’s instruction
manual for details.) If you use Windows®95/NT 4.0, you can not execute the above operation (because USB
pots are not normally supported), however, you can still operate image files copied on PC hard disks since
the software also runs on Windows®95/NT 4.0.

- 9 -
SYSTEM REQUIREMENTS (Macintosh)
The system requirements for the operation of this software are as shown below:
Apple Macintosh Series computers
CPU
PowerPC 100MHz or higher
(except a non-Macintosh Mac OS-compatible computer)
OS Mac OS 8.6 / 9 / 9.0.2 / 9.0.4 / 9.1
RAM 64MB or more of free memory
Hard Disk Space
100MB or more of free hard disk space for use as workspace
after the software installation
Monitor
Resolution: 640 dots X 480 dots or higher
1024 dots X 768 dots or higher is recommrnded
Color Depth: 24 bit Color or higher
CD-ROM Drive Required for software installation
Interface Standard built-in USB port*
* You need a USB port when you connect a USB mass storage class supported digital camera
such as DiMAGE 7 or DiMAGE 5 to your Macintosh with a USB cable and use (a CF card in) the digital
camera as a removable media with this software. If you use Mac OS 8.6, you must first download the
dedicated driver software from Apple Computer’s Web site, and then install the downloaded software on
your Macintosh to execute this operation. (See the digital camera’s instruction manual for details.) If you do
not download/install the dedicated driver software, you can not execute the above operation, however, you
can still operate image files copied on Macintosh hard disks since the software also runs on Mac OS 8.6.
- 10 -
INSTALLING THE SOFTWARE (Windows®)
Follow the procedure below to install the software on your Windows PC.
RAM stationed programs such as anti-virus programs or installation monitoring programs
may cause the installer to fail. Uninstall those programs from your system or temporarily
disable them before starting the installation, and then put them back on your system after
completing the installation.
For Windows®:
* In the procedure below, the hard disk drive for system startup is assumed as “drive C”, and the CD-ROM
drive as “drive D”.
• You should install the software on the Windows
®
2000/NT4.0 PC with the Administrator privilege.
1. Turn on your PC to start Windows®.
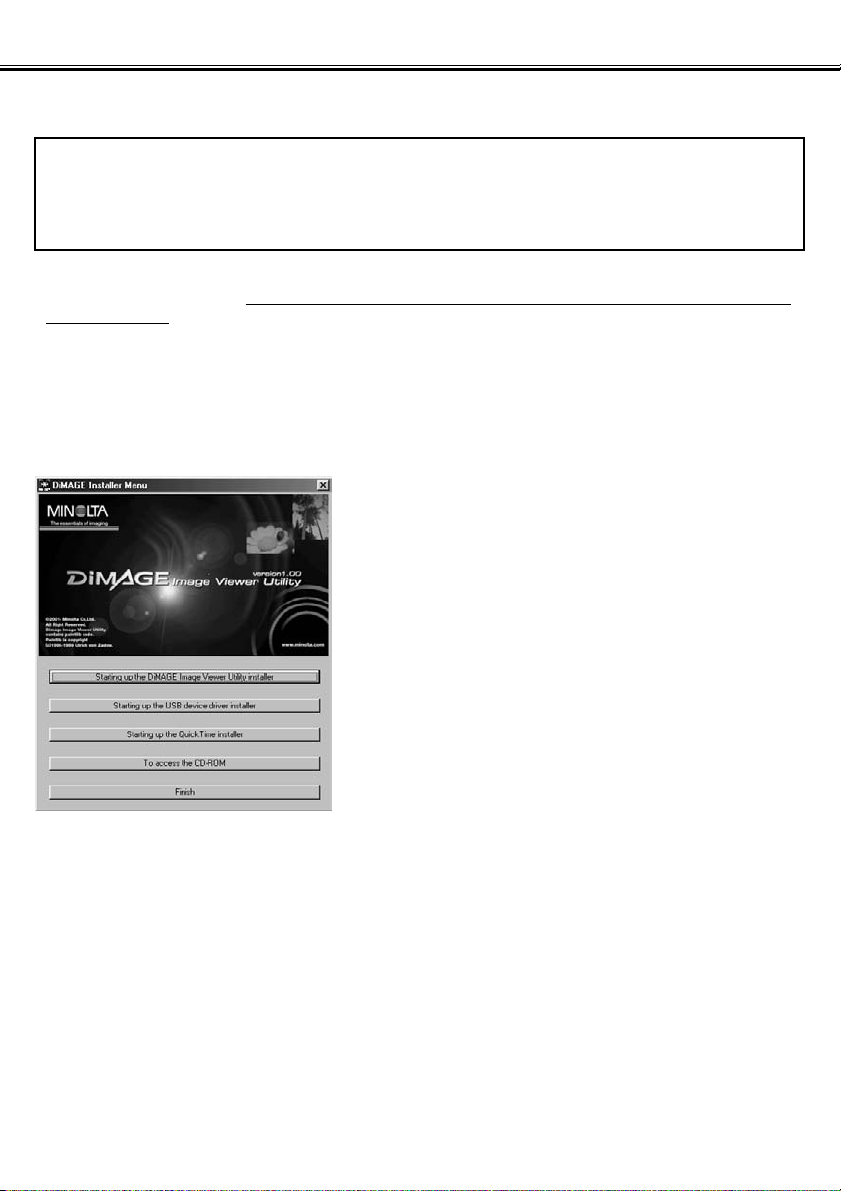
2. Insert the attached “DiMAGE Software CD-ROM” into the CD-ROM drive.
After a short time, the “DiMAGE Installer Menu”
window (figure-left) appears.
3. Click the “Starting up the DiMAGE
Image Viewer Utility installer” button.
The “InstallShield Wizard” program starts
automatically, and the “Welcome” window appears.
See the digital camera’s instruction manual for
details of the “Starting up the USB device driver
installer” (this button is active if you use
Windows
®
98/98 Second Edition) or the “Starting up
the QuickTime installer” button.
- 11 -
INSTALLING THE SOFTWARE (Windows®)
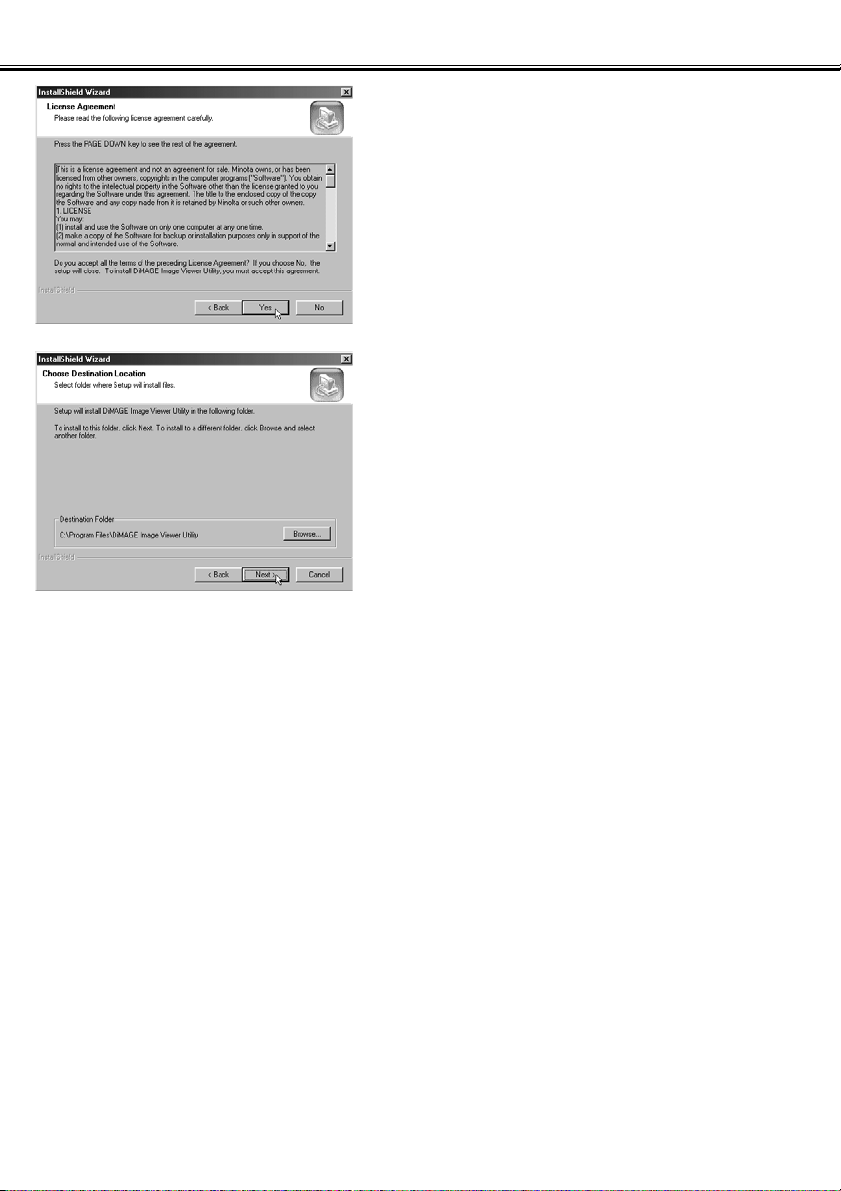
The “License Agreement” (figure-left) appears. Read
the entire “License Agreement” carefully before
continuing the installation
If you do not agree to the terms of the “License
Agreement”, click “No”.The installation procedure will
be terminated.
The window that lets you select a destination folder
of the software (figure-left) appears.
5. Click “Yes”.
6. To install the software in the default folder (C:\Program Files\DiMAGE Image
Viewer Utility), click “Next >”.
Subsequent parts of this document assume that the software has been installed in the default folder
described above.
To install the software in a different folder, click “Browse…”The “Choose Folder” window will appear.
Select the folder where you wish to install the software, and then click “OK”.
4. Click “Next >”.
- 12 -
INSTALLING THE SOFTWARE (Windows®)
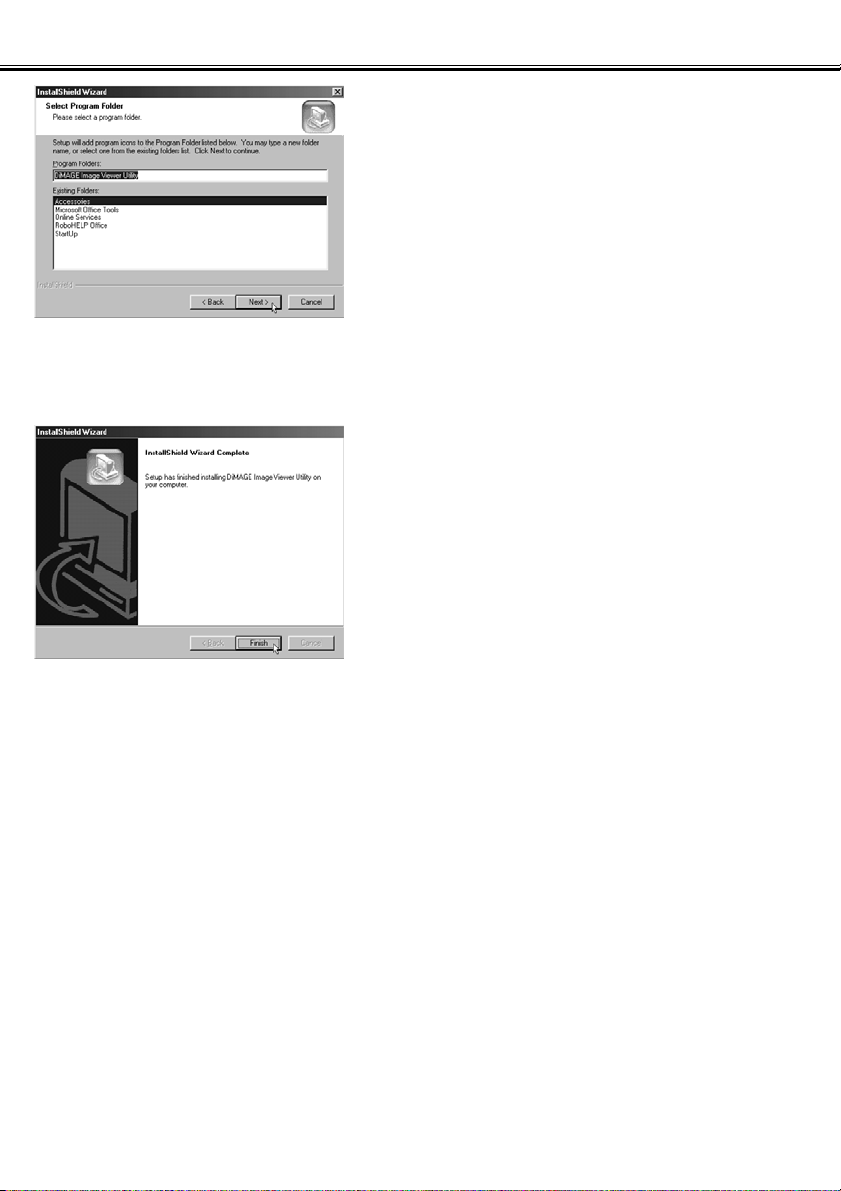
Click “Next >”, and the “Select Program Folder”
window (figure-left) will appear.
7. The name of the program folder where you will add the program icon is
shown in the window. Click “Next >” to add the icon in the default (reversed)
folder.
To add the program icon in a new folder, type the
folder name in the box under “Program Folders:” and
then click “Next >”.To add the program icon in an
existing folder, select the folder from the folder list in
the box under the “Existing Folders:” and click
“Next>”.
After you click “Next >”, the software installation will
start.
When the software installation has been completed,
a completion window of “InstallShield Wizard” (figureleft) appears.
8. Click “Finish”, then click “Finish” in the DiMAGE Installer Menu window.
The software installation procedure is complete.
- 13 -
INSTALLING THE SOFTWARE (Macintosh)
Follow the procedure below to install the software on your Macintosh computer.
Functional expansion programs such as anti-virus programs or control panel documents may
cause the installer to fail. Remove those programs/documents from your system using the
utility such as the functional expansion manager or temporarily disable them before starting
the installation, and then put them back on your system after completing the installation.
For Macintosh:
1. Turn on your Macintosh to start Mac OS.
2. When the desktop appears, insert the attached “DiMAGE software CD-ROM”
into the CD-ROM drive.
The contents of the CD-ROM appear automatically.
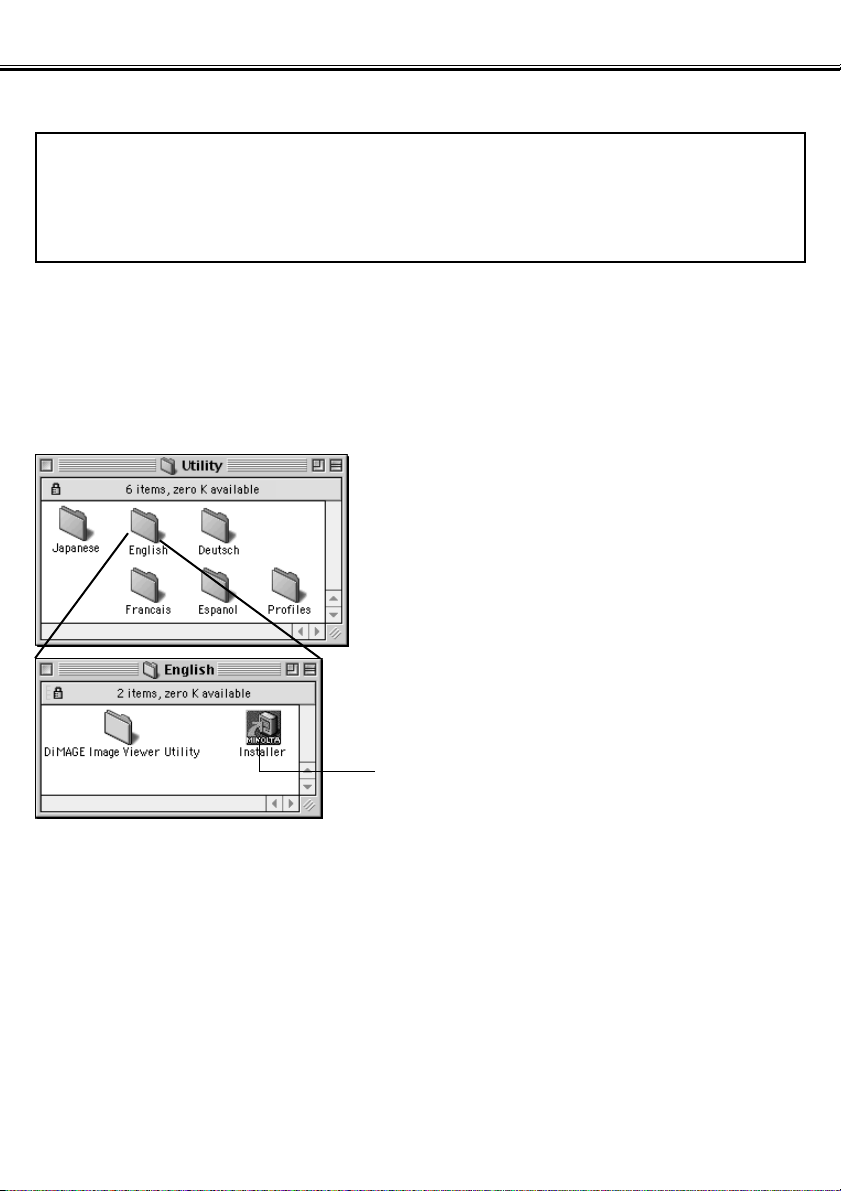
3. Double-click the “Utility” folder to open
it, and then double-click the “English”
folder.
The “DiMAGE Software Installer” icon appears.
4. Double-click the “DiMAGE Software
Installer” icon.
The Installer program starts and the initial window
appears.
“DiMAGE Software Installer” icon
When the contents of the CD-ROM do not appear
automatically, double-click the CD-ROM icon on the
desktop (named “DiMAGE Software”) to open it.
- 14 -
INSTALLING THE SOFTWARE (Macintosh)
6. Click “Next >>” in the Installer’s initial
window.
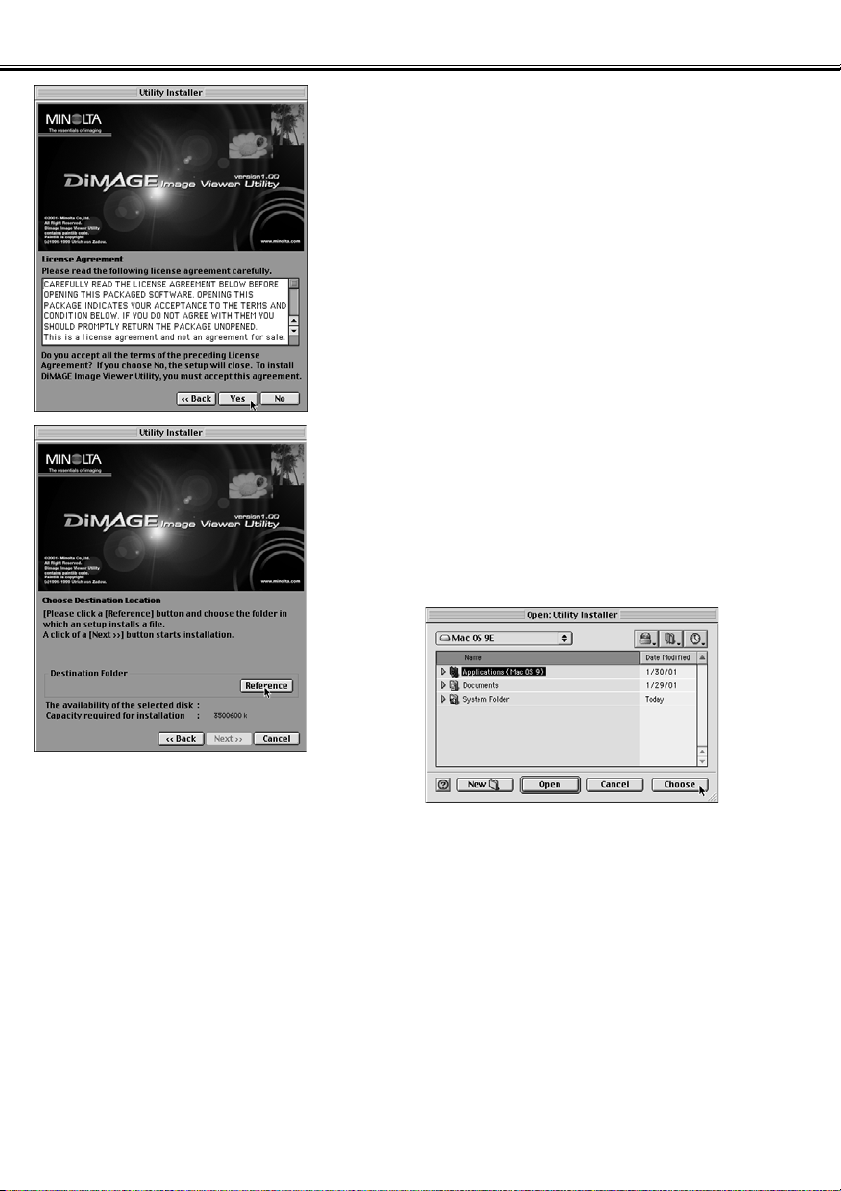
The “License Agreement” (figure-left) appears. Read
the entire “License Agreement” carefully before
continuing the installation.
If you do not agree to the terms of the “License
Agreement”, click “No”.The installation procedure will
be terminated.
7. Click “Yes”.
The window that lets you select a destination folder
of the software (figure-left) appears.
If you click “Reference”, the Mac OS standard folder
selection dialog box (figure-below) will appear. Select
the folder where you wish to install the software, and
then click “Choose” at the bottom right-hand corner
of the dialog box.
- 15 -
INSTALLING THE SOFTWARE (Macintosh)
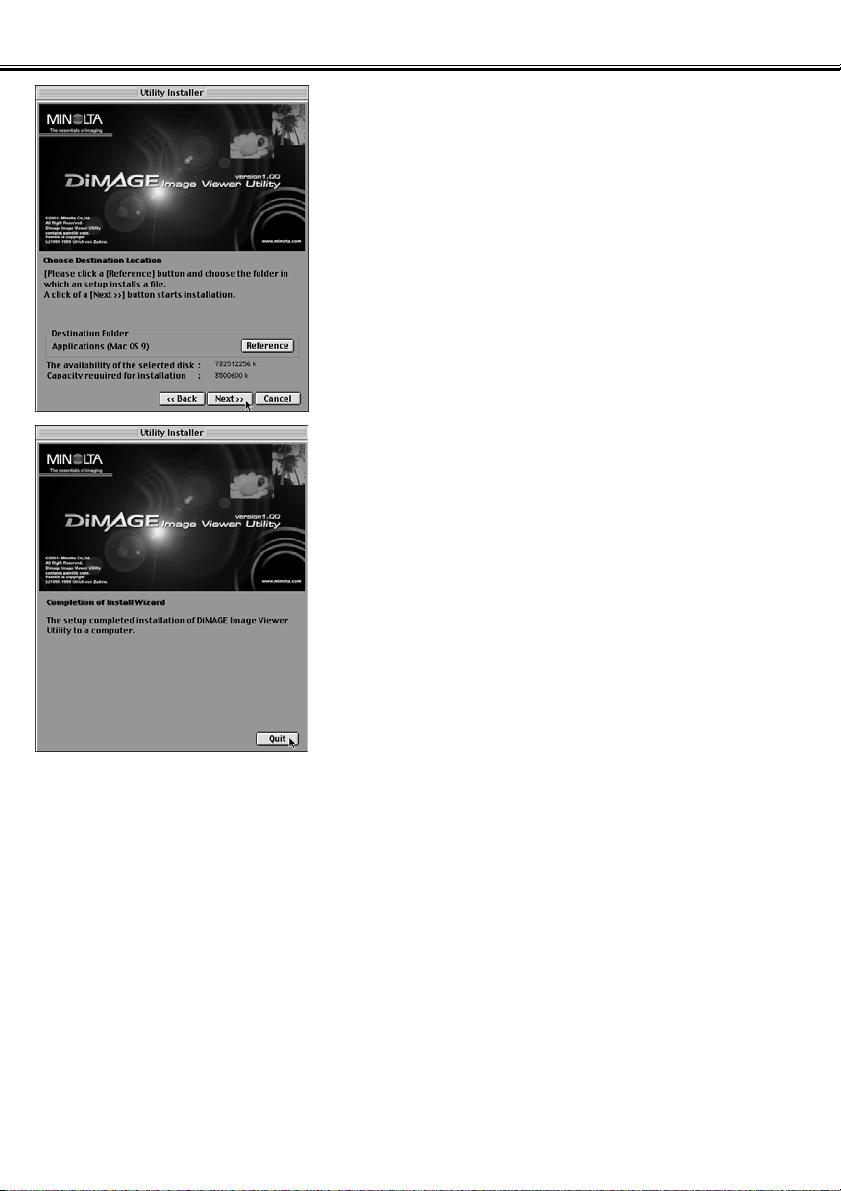
8. Make sure that you have selected a
proper folder for installation, and then
click “Next >>”.
The software installation starts. Follow the
instructions shown on the screen.
When the software installation has been completed,
the window shown in the lower left-hand corner
(Operation 9.) appears.
9. Click “Quit”.
The software installation procedure is complete.
- 16 -
STARTING THE SOFTWARE
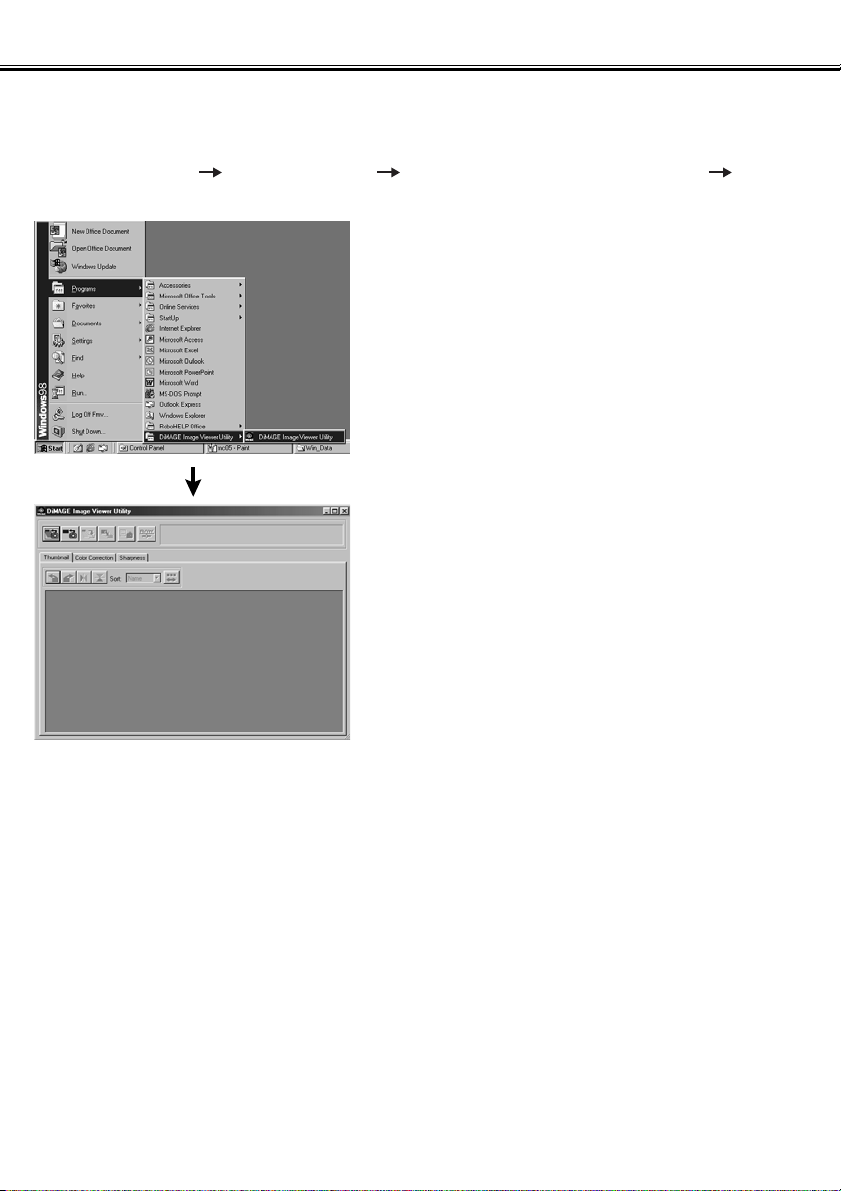
For Windows®:
1. Turn on your PC to start Windows®.
2. Select “Start” “Programs(P)” “DiMAGE Image Viewer Utility”
“DiMAGE Image Viewer Utility”.
The main window of the utility (figure-left) appears.
- 17 -
STARTING THE SOFTWARE
For Macintosh:
1. Turn on your Macintosh to start Mac OS.
2. Open the folder where you installed the application software (the folder that
you selected or created during the software installation), and open the
“DiMAGE Image Viewer Utility” folder in the same way.
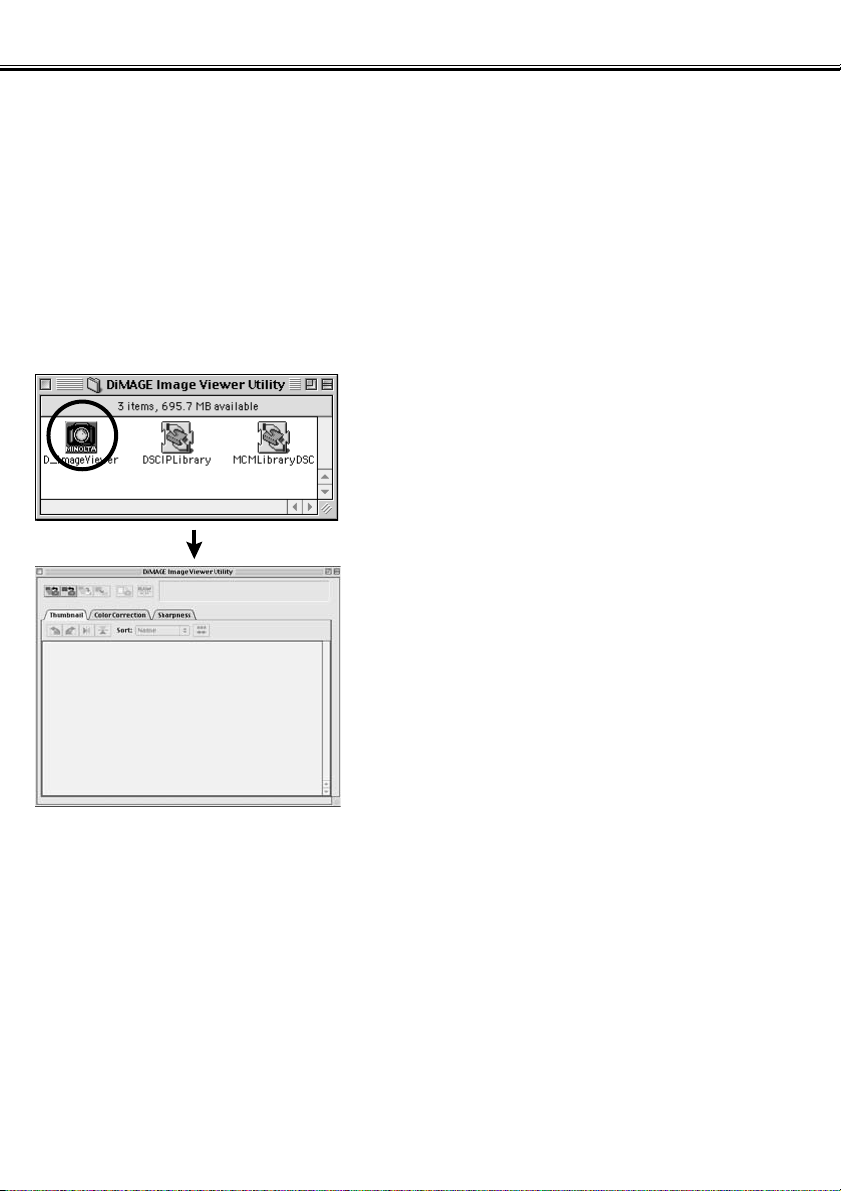
3. Double-click the “DiMAGE Image Viewer Utility” software application icon.
Double-click the “DiMAGE Image Viewer Utility”
software application icon (the icon circled in the lefthand figure).
The main window of the utility appears.

- 18 -
USING THE SOFTWARE – THUMBNAILS
This software reads all image files (or one file) in the selected folder, and displays their thumbnails (100 x 75
pixels) on the screen. Since the software also has color matching capability, you can select the output color
space when image files are read so that you can control colors for the monitor or the color space that you
use.
Note: Subsequent parts of this document assume the following three items:
The computer and digital camera are connected by the USB cable.
The computer recognizes the CF card in the digital camera as a “removable
disk (or a removable media)”.
Images in the “removable disk (or the removable media)” are (directly)
handled by this software.
If you use Windows
®
98/98 Second Edition, you must install the driver software from
the attached CD-ROM to execute the above operation. If you use Mac OS 8.6, you
must first download the dedicated driver software from Apple Computer’s Web site
and then install it on your Macintosh. See the digital camera’s instruction manual
about how to install the software or download the software.
If you use Windows
®
95/NT4.0, you can not execute the above operation, however, the
software also runs on Windows
®
95/NT4.0. So, you can still use this software to image
files after copying those files in your selected folder from the CF card by using a CF
card reader.
321
1. Set the CF card to the digital camera according to the digital camera’s
instructions. Set the digital camera to the computer connection mode, and
then connect it to your computer using the USB cable.
2. Start the “DiMAGE Image Viewer Utility” application software.
The main window of the utility appears.
- 19 -
USING THE SOFTWARE – THUMBNAILS
To Display Thumbnails of All Images in the Folder:
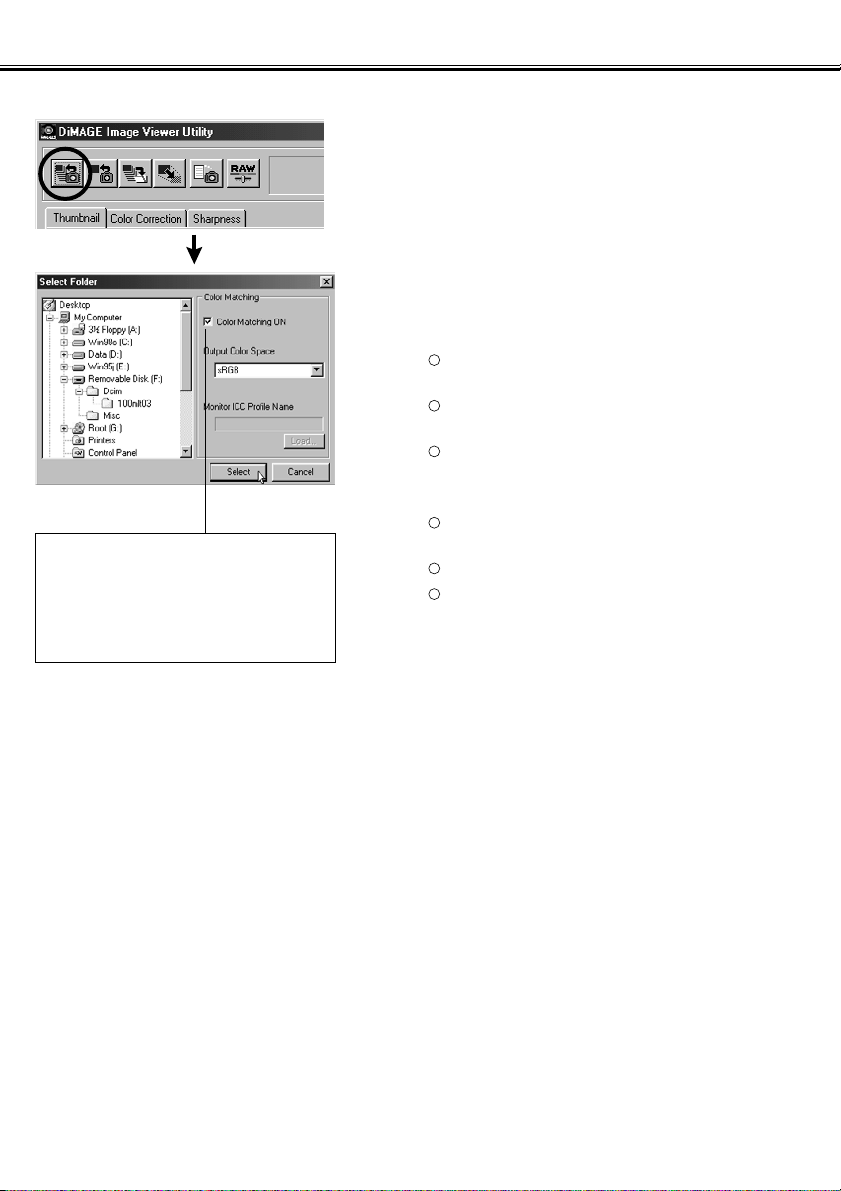
3. Click the “Load All Images” button of
the main window.
The OS (operating system) standard folder selection
dialog box appears. (The left-hand figure is for
Windows®.)
4. Select the folder where image files are
stored, and then click “Select”.
For Windows®:
Click the plus (+) sign located on the left of the
disk icon described as Removable Disk.
Click the plus (+) sign located on the left of the
folder named Dcim.
Select the folder named 100mlt03 for DiMAGE 7,
100mlt04 for DiMAGE 5.
For Macintosh:
Double-click the removable media icon described
as Unknown.
Double-click the folder icon named Dcim.
Select the folder named 100mlt03 for DiMAGE 7,
100mlt04 for DiMAGE 5, and then click “Choose”
in the bottom of the dialog box.
321
321
To execute the color matching process,
click here and select the output color
space from the drop-down list (or specify
the monitor ICC profile).
See page 34 for details about the color
matching (process).
- 20 -
USING THE SOFTWARE – THUMBNAILS
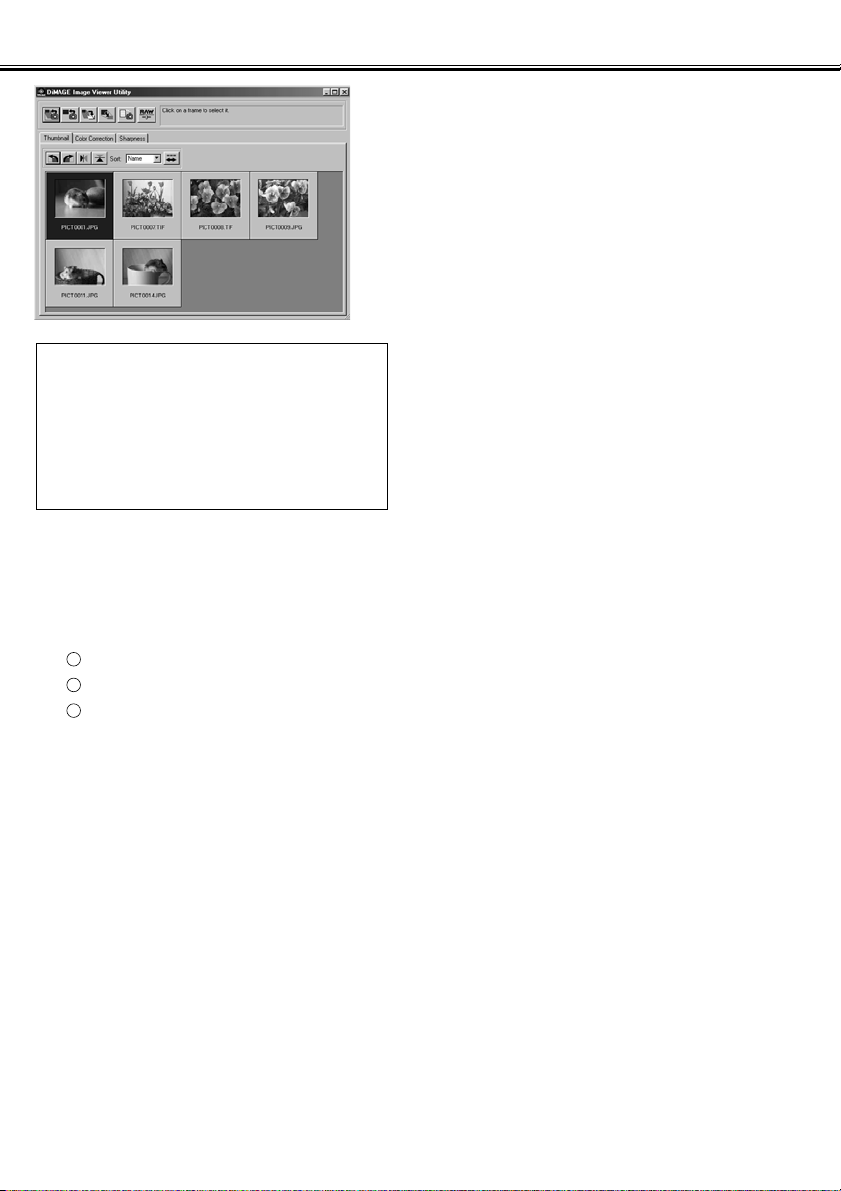
5. Image files in the selected folder are
read, and their thumbnails are
displayed (figure-left).
* If Minolta-RAW files (image files with the .mrw
extension) exist in the selected folder, thumbnail
filenames of Minolta-RAW files that the “RAW File
Processing” (see page 23) has not been performed
are shown in “red”.
* If you click a thumbnail of a Minolta-RAW file and
then click the “RAW File Process” button, the “Open
the Minolta-RAW File” window appears so that you
can adjust its saturation, contrast or sharpness.
See page 24 of this document for details.
* Thumbnails for animation files (files with the .avi
extension) will not be displayed.
* See the DiMAGE 7/DiMAGE 5 instruction manual
about “Minolta-RAW files”.
If you selected a folder (folder where image files exist) on the computer hard disk rather than a folder in the
CF card, only following kinds of image files can be read and displayed as thumbnails.
Image files recorded by DiMAGE 7/DiMAGE 5/DiMAGE S304 (excluding animations).
Minolta-RAW files stored by this software.
JPEG and TIFF files stored by this software.
321
If many image files exist in the selected folder
and the display area is filled with those
thumbnails when they are loaded, the display
area is scrolled downward automatically to
show all of them within that area (the thumbnail
of the last loaded image file is displayed at the
last place).
- 21 -
USING THE SOFTWARE – THUMBNAILS
To Display a Thumbnail of a Certain Image in the Folder:
(continued from page 18, Operation 2)
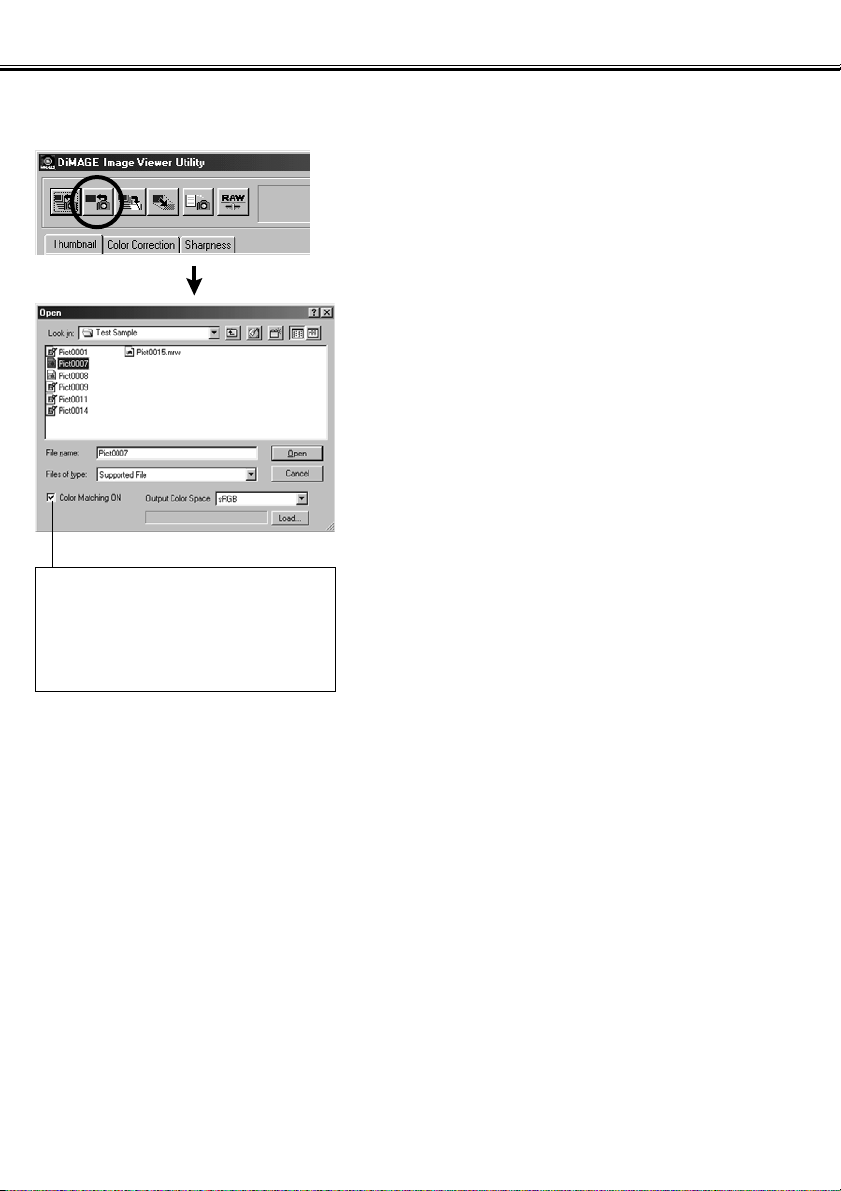
3. Click the “Load an Image” button in the
main window.
The OS (operating system) standard folder selection
dialog box appears. (The left-hand figure is for
Windows
®
.)
4. Select the image file that you wish to
see, and click “Open”.
In case of Windows®, follow “Removable Disk”, “Dcim
(folder)” from the drop-down list of the “Look in:”
selection box until the folder named “100mlt03” (for
DiMAGE 7) is displayed in the box (“100mlt04” for
DiMAGE 5).
In case of Macintosh, follow “untitled (removable
media)”, “Dcim (folder)” from the pop-up menu in the
top of the dialog box until the folder named
“100mlt03” (for DiMAGE 7) is displayed in the box
(“100mlt04” for DiMAGE 5).
To execute the color matching process,
click here and select the output color
space from the drop-down list (or specify
the monitor ICC profile).
See page 34 for details about the color
matching (process).

- 22 -
USING THE SOFTWARE – THUMBNAILS
* If you select Minolta-RAW files (image files with the .mrw extension), thumbnail filenames of Minolta-RAW
files that the “RAW File Processing” (see page 23) has not been performed are shown in “red”.
* If you click a thumbnail of a Minolta-RAW file and then click the “RAW File Process” button, the “Open the
Minolta-RAW File” window appears so that you can adjust its saturation, contrast or sharpness. See page
24 of this document for details.
* Thumbnails for animation files (files with the .avi extension) will not be displayed.
* See the DiMAGE 7/DiMAGE 5 instruction manual about “Minolta-RAW files”.
If you selected an image file copied in a certain folder on the computer hard disk rather than a file in the CF
card, only the following kinds of image files can be read and displayed as thumbnails.
Image files recorded by DiMAGE 7/DiMAGE 5/DiMAGES304 (excluding animations).
Minolta-RAW files stored by this software.
JPEG and TIFF files stored by this software.
3
2
1
If JPEG or TIFF files are retouched and overwritten with image processing
applications that do not support Exif files such as Adobe®Photoshop®, they can
not be read or displayed in the DiMAGE Image Viewer Utility (an error message
“File not supported” appears).
 Loading...