

Page 1

Thank you for buying a Samsung Camera. This manual will guide you through using the Digimax 200,
Including taking pictures, downloading images and using MGI PhotoSuite software.
Please read this manual before using your new camera.
ENGLISH
Page 2

SPECIAL FEATURES
FCC warning
Thank you for buying a Samsung Digital Camera.
This digital camera possesses the following features.
A high resolution of 2.1 mega pixels
2x digital zoom
Moving image function
USB interface function
1.5 inch TFT LCD monitor
This device has been tested in accordance with the limits of a class B digital device under
item 15 of the FCC rules. These limits are designed to provide protection against harmful
interference in commercial installation.
This equipment generates, absorbs and can emit radio frequency energy. If it is not
installed and used in accordance with the instructions, it may cause harmful interference to
radio communication.
There is however, no guarantee that interference will not occur in a some situations.
Should any interference occur when this device is in operation, please try one or more of
the following measures.
Change the location and direction of any aerial.
Increase distance between camera and affected device.
Use a different socket away from the affected device.
Please contact a Samsung agent or a radio/TV engineer.
This device complies with part 15 of the FCC Rules.
Page 3

ENGLISH
MANUFACTURE’S CONTENTS
MANUFACTURE’S CONTENTS
Please check that you have the correct contents before using this product.
Digital camera
USB cableWarranty card
SmartMedia
TM
card
AC Adapter ( 3V / 1.5A )
2 x AA Batteries
Pouch
Driver & application software
CD ROM
Camera strapVideo cable
User manual
Accessories (Optional)
Page 4

THIS DIGITAL CAMERA CAN BE USED FOR
Viewing images on
TV
Editing images
on a PC
Recording images onto
CD
Printing images
Page 5
ENGLISH
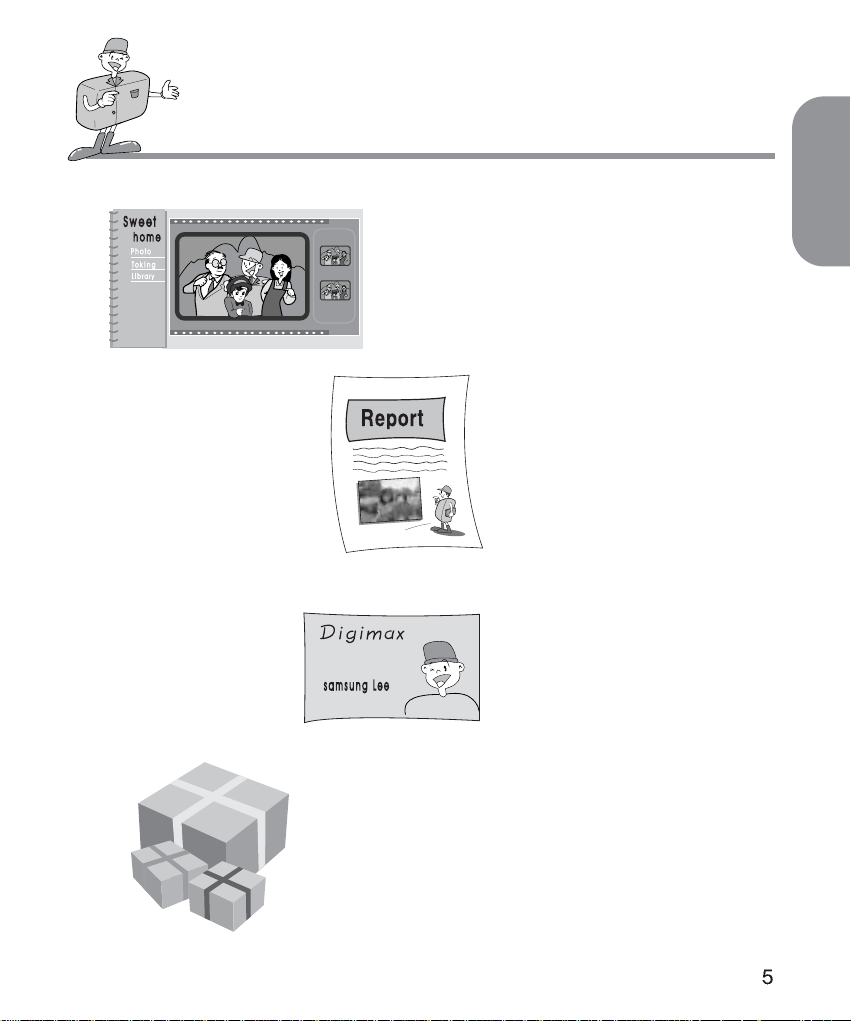
THIS DIGITAL CAMERA CAN BE USED FOR
Inserting images
directly into any
electronic document
Taking a self-portrait
and using the image
to personalize name
cards
You can even create your
own unique gift-wrap paper
by using your digital
images.
Creation of
a digital photo album
Page 6
CONTENTS
Ready
Basic
Advanced
Software
Getting to know your camera 7
Safety note 8
Identification of features 10
Product Exterior 10
Viewfinder 12
LCD panel indicator 13
Ready 14
Connecting to Power 14
Using the batteries 14
Using the AC power adapter 15
Attaching the strap 15
Inserting the SmartMediaTMcard 16
Removing the SmartMedia
TM
card 16
How to set up the software 48
Setting up the MGI PhotoSuite III SE 48
How to use editing software 50
MGI PhotoSuite III SE 50
Setting up the shooting function 27
LCD menu 27
Details of every function mode 29
Record mode 29
Play mode 32
Motion mode 35
Set up mode 36
PC mode 37
Connection to an external monitor 38
Connection to an external monitor 38
How to download the images into your PC 39
Note in using 42
Caution 42
Warning indicator 43
Before contacting a service center 44
Specification 46
System requirements Digimax 200 47
Camera working mode 19
Camera working mode 19
Taking pictures 20
Now let’s take a picture 20
Setting up the shooting function 23
Shooting functions details using LCD panel
23
Select the flash mode 23
Macro picture indicator 24
Checking the battery 24
Page 7

GETTING TO KNOW YOUR CAMERA
About the image mark
Prior to using this camera, please read the user manual thoroughly.
Keep the manual in a safe place.
This manual contains instructions on using this camera that will help you to use this camera
safely and correctly. This will help prevent danger and injury to others.
ENGLISH
Warning
This is a descriptive statement warning of the result if the instructions are ignored or not
understood.
Note
This explains use of the camera, please refer to this.
Reference
This should assist further in the operation of the camera.
Page 8

SAFETY NOTE
WARNING
Do not attempt to modify this camera in any way. This may result in fire, injury, electric shock
or severe damage to you or your camera. Internal inspection, maintenance and repairs
should be carried out by your dealer or Samsung Camera Service Center.
Do not use the flash in close proximity to the people or animals. Positioning the flash too
close to your subject’s eyes, may cause eyesight damage. Do not attempt to photograph
children using a flash, closer than 1 meter proximity.
When taking photographs, never point the lens of the camera directly into very strong light.
This may result in permanent damage to the camera or your eyesight.
Please do not use this product in close proximity to flammable or explosive gases, as this
could increase the risk of explosion.
For safety reasons keep this product and accessories out of reach of children or animals to
prevent accidents e.g.:
Swallowing batteries or small camera accessories.
In case of accidents, please consult a doctor immediately.
There is a risk of permanent eye damage if the flash is operated at a distance of less than
one meter from a person’s eyes.
There is a possibility of injury from the camera’s moving parts.
Should any form of liquid enter the camera, do not use it. Switch off the camera, and then
disconnect the power source (batteries or AC Power Adapter). You must contact your dealer
or Samsung Camera Service Center. Do not continue to use the camera as this may cause
a fire or electric shock.
Turn the camera off immediately, then disconnect the power source (batteries or AC Power
Adapter). Then contact your dealer or Samsung Camera Service Center. Do not continue to
use the camera as this may cause a fire or electric shock.
Do not insert or drop metallic or inflammable foreign objects into the camera through access
points e.g. CARD slot and battery chamber. This may cause a fire or electric shock.
Do not operate this camera with wet hands. This could pose a risk of electric shock.
Page 9
ENGLISH
SAFETY NOTE
NOTE
Do not leave this camera in places subject to extremely high temperatures, such as a sealed
vehicle, direct sunlight or other places of extreme variances in temperature. Exposure to
extreme temperatures may adversely affect the camera’s internal components and could
cause a fire.
When in use, do not cover the camera or AC Power Adapter. This may cause heat to build
up and distort the camera case or cause a fire.
Always use the camera and its accessories in a well-ventilated area.
Leakage, overheating, or burst batteries could result in fire or injury.
Do not short circuit, heat or dispose of batteries in fire.
Do not use old batteries with new ones, or mix brands of batteries.
Ensure the batteries are positioned correctly with regard to polarity (+ / -).
When the camera is not in use for long periods, always unplug the camera from its power
source (batteries or AC Power Adapter) for safety purposes.
Leaking batteries can cause fire and pollution to the environment.
Allowing dust to accumulate in the camera over a long period is hazardous as extreme
circumstances may cause a fire. It is best to clean your camera prior to seasonal periods of
high humidity.
Consult your dealer or Samsung Camera Service Center for information on the cost of
cleaning your camera.
Do not move the camera while it is switched on, if you are using the AC Power Adapter.
After use, always switch off the camera before unplugging the adapter from the AC Power
wall socket. Then make sure that any connector cords or cables to other devices are
disconnected before moving the camera.
Failure to do so may damage the cords or cables and cause a fire or electric shock.
Page 10

IDENTIFICATION OF FEATURES
Product Exterior ( Top / Front )
Product Exterior ( Rear )
Lens
Viewfinder
Auto focus LED
Flash LED
(RED LED)
MENU/ENTER button
Power switch
Direction button : Up (
button
Direction button : Right(
button
Direction button : Down( button
Direction button : Left(
button
LCD Monitor
LCD button
LCD Panel Flash button
Shutter button
Mode dial
Self-timer lamp
Viewfinder
Macro button
Connection ports cover
Flash
Page 11
ENGLISH
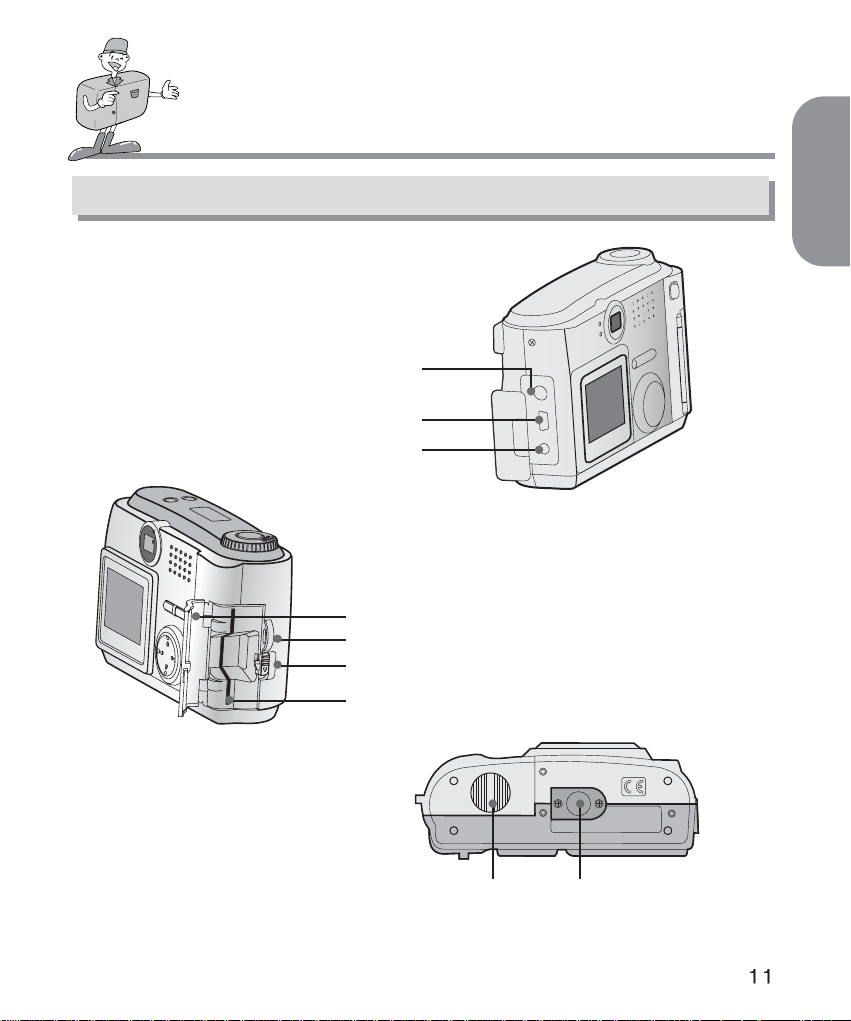
IDENTIFICATION OF FEATURES
Product Exterior ( Side / Bottom )
Video connection terminal
(Video output terminal)
USB connection terminal
DC input connection point
(DC 3V IN)
Strap eyelet
Card cover open lever
Memory card slot
Tripod socketBattery chamber cover
Card cover
Page 12

IDENTIFICATION OF FEATURES
Viewfinder
Focus mark
Picture area frame
Reference
Vertical and Horizontal shots are taken in the same way.
Avoid obstructing the lens or the flash when you take a picture.
A picture can be spoiled when a finger, hair or camera strap is in front of the lens or the flash.
Note
Please use the LCD monitor when using Macro mode (0.2m~0.6m).
As there can be some differences between what is seen through the viewfinder and the resulting
image when taken at a range closer than 1.5m. It is recommended that you use the LCD monitor
to compose the shot.
Page 13

ENGLISH
IDENTIFICATION OF FEATURES
LCD panel indicator
: Macro Photography
: Batteries status good
RECORD/MOTION mode
: Number of available shots
remaining
PLAY mode
: Number of images captured
PC mode
: PC connection mode
: Batteries low, prepare to install new batteries
: Batteries exhausted. Replace
: Flash off
: Red-eye reduction
: Fill-in Flash
: Auto Flash
: Setting up the self-timer
E1 : Card error
E2 : Protected card
000 : No card
0 : Card full
Macro Indicator
Checking the batteries
Picture information indicator
Flash mode indicator
Self-timer mode indicator
Error message
Page 14

READY
Connecting to Power
There are two ways in which to provide the camera with power.
Either use batteries (AA Alkaline or Ni-MH) or, alternatively, use an AC Adaptor.
Using the batteries
1
Open the battery chamber cover by pushing in the direction of
the arrow.
2
Insert the batteries taking note of the polarity (+ / -).
3
To close the battery chamber cover, push it until it clicks.
Note
Important information about battery usage
Please remove the batteries if the camera will not be used for long periods.
Batteries can lose power over time and are prone to leak if kept inside the camera.
Do not use manganese batteries as they cannot deliver sufficient power.
Low temperatures (below O C) can cause the camera to work for a shorter period of time due to
reduced battery performance. The batteries will recover at normal temperatures.
Do not use old and new batteries or different types together.
Extended use of the camera may cause the camera body to become warm.
This is perfectly normal.
If you are planning to use this camera for long periods of time, it is advisable to use an AC
adapter.
Page 15
ENGLISH
READY
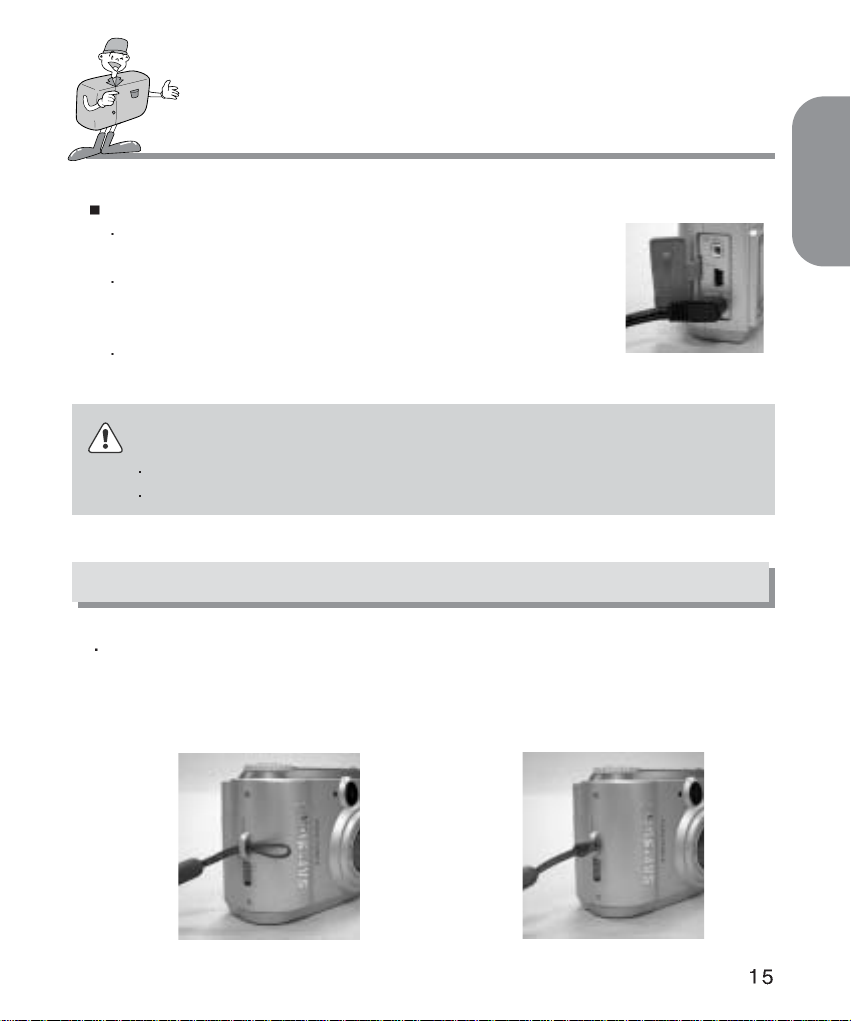
Attaching the strap
Using the AC power adapter
If you have access to a main supply, using an AC Adapter allows the
camera to be used for long periods of time.
Plug the adapter into the connection point on the camera.
Please ensure that you use an AC adapter with the correct
specification for the camera.
Failure to do so may affect your warranty.
To prevent accidental damage to the camera, always use the camera strap.
Refer to the illustrations below
WARNING
Always turn off the power before taking the AC adapter out of the main supply.
Keep the metallic part of camera away from any metallic material to prevent fatal damage.
12
Page 16

Inserting the SmartMedia
TM
card
Removing the SmartMedia
TM
card
READY
1
Pull down the card cover open lever in the
direction of the arrow to open.
2
Inserting the SmartMediaTMcard.
3
To close the card cover, push the card cover
toward the open switch until you hear a click.
1
Turn the power off using the power switch.
2
Open the cover.
3
Remove the card.
Page 17

ENGLISH
READY
Reference
Using an 8MB SmartMediaTMcard, the specification / shooting capacity will be as follows.
( This is based on the conditioning standard of our company )
The number of normal shots can vary according to the picture content.
7 1
14 1
30
2
24
2
52 3
83 4
Image resolution
Recorded picture quality
Super fine quality
.JPG
.JPG
.JPG
.JPG
.JPG
.JPG
Fine quality
Normal quality
Super fine quality
Fine quality
Normal quality
File format
Number of shots
L
(1600
1200 pixels)
S
(800
600 pixels)
Using a new SmartMediaTMcard for the first time
Before using the CARD, it must be initialized
Initializing prepares the CARD for recording data
For more details, please refer to the page 34
Note
If used over extended periods, SmartMediaTMcards may deteriorate and performance may be
impaired. If this occurs, it is best to replace with a new SmartMedia
TM
card. Should this be the
case, you will need to purchase a new SmartMediaTMcard.
Always turn the power off when replacing the SmartMediaTMcard
Page 18

READY
Preserving the memory card data
If the card is subjected to any of the following, the recorded data may become corrupted:
When the card is used incorrectly.
If the power is switched off while initializing, reading or removing the card.
It is advisable to copy important data onto other media as back-up e.g. floppy disks, hard
disks etc.
Samsung cannot be held responsible for lost data
Note
Important information whilst using the SmartMediaTMcard
If you switch off the camera while it is reading, initializing or playing, the information on the
SmartMediaTMcard may be corrupted.
The SmartMediaTMcard is an electronic precision device.
Do not bend, drop or subject the card to any heavy impact.
Do not store the SmartMediaTMcard in an environment with strong electronic or magnetic fields,
e.g. near loud speakers or TV receivers.
Please do not use or store in an environment where there are extremes of temperature.
Do not allow the SmartMediaTMcard to come into contact with dirt.
Should this happen, clean the dirt off with a soft cloth.
Do not allow the camera to get into contact with sand, water or other contaminants.
Damage caused in this way will invalidate the warranty and may damage the camera beyond
economic repair.
Please keep the SmartMediaTMcard in its case when not in use.
During and after periods of extended use, you may notice that the SmartMedia
TM
card is warm.
This is perfectly normal.
Page 19

CAMERA WORKING MODE
Camera working mode
You can select the appropriate working mode by using the mode dial located at the top of the
camera. This digital camera has 5 working modes.
These are listed below.
Record mode( )
This mode is used for taking normal pictures between 0.6m ~ infinity
and close range photography between 0.2m ~ 0.6m.
Press Marco ( ) button, then you will get the close up pictures
Play mode( )
In this mode, the stored images on the memory card including still
images and motion images, can be reviewed on the LCD monitor
on the back of the camera or on an external monitor using a Video
output terminal.
Motion mode( )
In this mode, you can record the motion image within the recording time you specify
Set up mode( )
In this mode, you can set up the functions of DATE/TIME, LCD BRIGHTNESS, VIDEO
MODE, BEEP, RESET TO DEFAULT, LANGUAGE.
PC mode( )
You can download still images and motion images stored on the memory card directly to
your PC.
ENGLISH
MODE DIAL
Page 20

TAKING PICTURES
Now let’s take a picture
3
Select the desired image quality and file size on Record menu under Record mode ( ).
This can be selected by pressing the MENU/ENTER button.
1
To switch on the POWER switch ( )
After the power is turned on you will hear one beep sound and then you will hear one more
beep sound after the camera is ready
2
Turn the mode dial to the RECORD mode ( ) and select the desired mode ( Marco or
Normal ) according to the object distance. To check the macro status, please ensure the
macro ( ) button has been pressed. This is located on the top of the camera. Check if the
( ) icon is seen on LCD panel. If not, press the macro button again.
Macro ( ) : between 0.2m ~ 0.6m
Normal : between 0.6m ~ infinity
Note
You must select the appropriate shooting mode (macro or normal), depending on the
camera/subject distance.
Page 21

ENGLISH
TAKING PICTURES
4
Set up the picture function using the LCD panel and the LCD monitor.
For details of shooting function on the LCD monitor, please refer to page 27~37
5
You can compose your picture by using the viewfinder or the LCD monitor.
In macro mode, you should compose your picture composition using the LCD monitor.
Note
Extensive use of the LCD monitor to review the potential picture will drain the batteries in a short
period of time. To safeguard against this, please use the Viewfinder.
Reference
If there is insufficient memory available
To check the status of the remaining card memory, turn mode dial to record or motion mode. If
the card is full, the message "CARD FULL" and "0" will appear in the LCD monitorand LCD
panel respectively.
To extend the amount of memory on the camera, replace the SmartMediaTMcard or delete
unnecessary images stored on the SmartMediaTMcard.
6
When taking pictures, press the shutter button gently to avoid camera shake.
Press the shutter button down halfway, you will see the AF LED is blinking and the autofocus will be
activated.
Pressing the shutter button down fully, will take a picture and the data regarding the picture will be
stored. The LCD counter display will reduce by one and the auto focus LED will stop flashing.
Page 22

TAKING PICTURES
Note
Under certain conditions, the auto focus system may not perform as expected.
- When photographing an object that has little contrast.
- If the subject is highly reflective or shiny.
- If the subject is moving at high speed.
- When the subject only features horizontal lines or when the subject is very thin.
- When the chosen subjects are at various distances from the camera
Reference
LED status mark is beside the viewfinder.
During the image is storing onto the memory card, the green LED flash.
The LED will cease when the image and data has been safely stored on the memory card.
After the green LED light has gone out, you can resume taking pictures.
Page 23
SETTING UP THE SHOOTING FUNCTION
Shooting Functions details using LCD panel
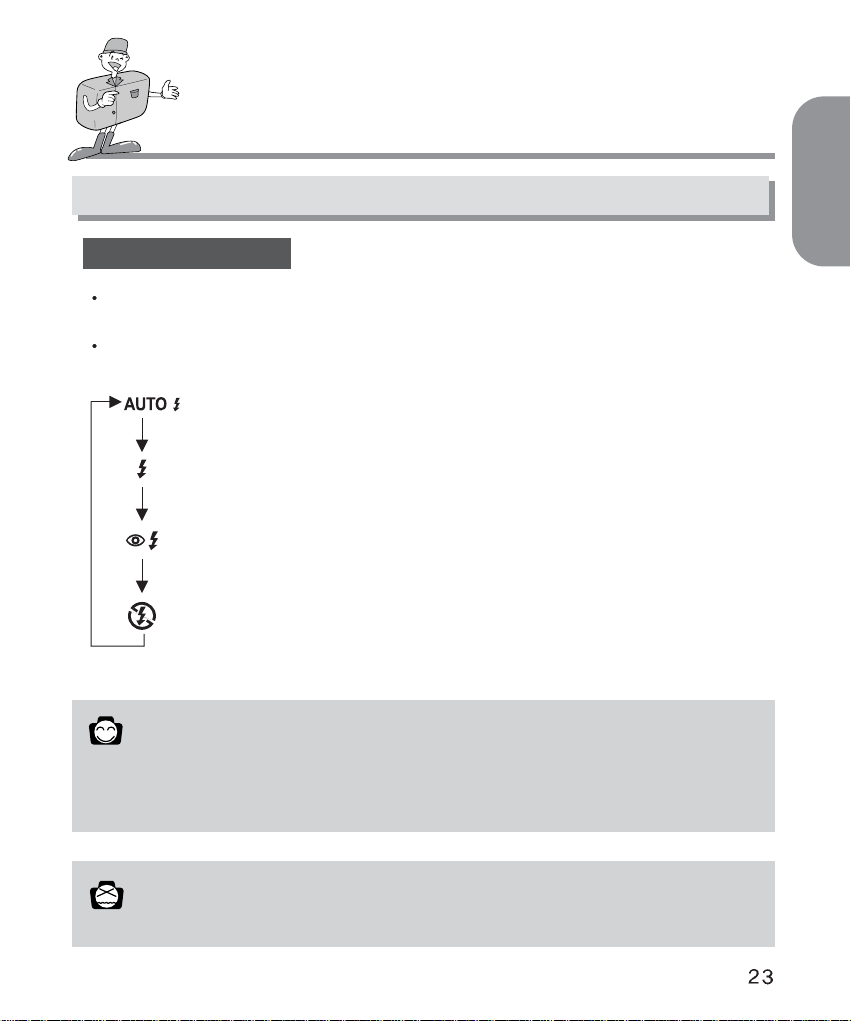
Select the Flash mode
Four different flash modes can be selected by pressing the flash button which is located on
the top of the camera.
Use the correct flash to suit the environment.
Auto Flash : If the object that is being photographed is too dark,
the camera flash will work automatically
Red-eye reduction : The flash will work automatically if there is insufficient ambient
light. The problem of red eye will also be reduced.
Fill in Flash : If the background behind the subject is very bright, fill in flash will
help to make the subject appear relatively bright.
The result should be an acceptable lighting balance.
Flash Off : The flash is disabled.
ENGLISH
Reference
Using the flash frequently will reduce the life of the batteries.
Under normal operating conditions, the charging time for the flash is normally under 10seconds.
If the batteries are weak, the charging time will be longer.
Note
The effective distance for flash is from 0.5m to 3m.
Page 24

SETTING UP THE SHOOTING FUNCTION
Shooting Functions details using LCD panel
When the Macro button is operated, a symbol ( ) will appear both on LCD panel and on
the top left side of the LCD monitor ( when LCD is ON ).
When you press the Marco button again, then it will back to the normal shooting mode, the
symbol ( ) will disappear.
The battery status symbol is shown on LCD panel when you switch on the power button.
: Batteries status good
: Batteries low, prepare to install new batteries
: Batteries exhausted. Replace
Macro picture indicator
Checking the battery
Page 25

ENGLISH
SETTING UP THE SHOOTING FUNCTION
Indicator for the number of remaining shots, status of the memory card and other
information. Camera and memory card status is shown as follows:
When the memory card is set up properly
The number of available pictures is determined by the image quality selected and the
recording size.
The maximum pictures available will be 999 ( subject to memory size and picture quality ).
The LCD panel will count as far as 999 pictures. If this number of shots is exceeded, the
counter will remain at 999.
When the memory card is not set up properly
" No card " and "000" symbol will show on LCD monitor and LCD panel respectively.
No functions and no buttons can be operated.
If there is no card, the three audible warning " beep " will sound.
When card memory is low:
The video function will not operate if there is less than 2MB of memory available on the card.
A warning will appear on the LCD monitor.
At this point, the menu cannot be set and the shutter release will not operate.
Indicator for the card error
When the error occurs while the using of the camera, a symbol " E1" and "Card error" will
appear on the LCD panel and TFT LCD respectively.
Reference
When the memory capacity is low, it will not be possible to take a picture.
Page 26

SETTING UP THE SHOOTING FUNCTION
The following options are available on the LCD monitor by pressing the " MENU/ENTER" button.
It is important that the correct mode is selected on the mode dial before you attempt to
operate the "MENU/ENTER" function.
To download images, please connect the camera and your PC via a USB cable
Menu Mode
RECORD
PLAY
MOTION
SET UP
PC
Quality
EV Compensation
White Blance
Resolution
Self Timer
Digital Zoom
Superfine Fine Normal
-1.8 ~ -1.3 ~ 0 ~ +1.3 ~ +1.8
AUTO DAYLIGHT FLUORESCENT TUNGSTEN
1600
1200 800
2 4 6 8 10
ON OFF
OFF ON
OFF ON ONE ALL FORMAT
Quantity : 0, 1, 2, 3, 4, 5, 6, 7, 8, 9
OFF ON
5 10 15 20
dd - mm - yyyy ( 01-01-2001 )
hh : mm AM / PM
darker brighter
NTSC PAL
ON OFF
YES NO
ENGLISH DEUTSCH FRANÇAIS ESPAÑOL
Please connect the camera to your PC with a
USB cable for images downloading
Slideshow
Picture info
Thumbnail
Erase
DPOF
Digital Zoom
Exit
Recording time
Date / Time
LCD Brightness
Video mode
Beep
Reset to Default
Language
Function Detail Items
Page 27

ENGLISH
RECORD Mode
Quality : To select a compression rate
EV Compensation : To select the exposure compensation
White Balance: To obtain more naturally colored images depending on light conditions.
Resolution : To select the image size.
Self Timer : To allow the photographer to also be in the picture
Digital Zoom : To enlarge an area of the object being photographed.
You can set up or cancel the digital zoom function by choosing " on " or " off ".
PLAY Mode
Slideshow : You can view each image at a set interval using the slideshow function.
Picture Info : You can view the picture information such as date/time, picture quality, flash,
resolution and file name on the LCD monitor.
Thumbnail : The thumbnail screen allows you to view up to 9 images at a time.
ERASE : To erase ONE / ALL images saved in the memory card or to format the card.
DPOF : Digital Print Order Format.
Digital Zoom : To enlarge an area of the object being photographed.
MOTION Mode :
Recording Time : To select the time you would like recorded.
SET UP Mode
Date / Time : This function sets the date and time of the camera.
LCD Brightness : Here you can adjust the brightness of the TFT LCD monitor.
Video mode : To view still images from the moving images you have taken on TV.
You will need to choose from either ( NTSC or PAL ) video output.
Beep :
For a " beep " to sound when any button or function key is pressed if the function is on.
Reset to default : All the functions you have selected will be overridden by the original
settings installed in the camera during manufacturing.
Language : To select the language you want. There are 6 different languages available which
are English, German, French, Spanish, Traditional chinese and Korean.
SETTING UP THE SHOOTING FUNCTION
LCD menu
Page 28

SETTING UP THE SHOOTING FUNCTION
PC Mode :
To download the images from camera to PC
When the camera is connected to PC successfully you will be heard the beep sound (beep-)
Note
After you have selected and set the required functions, press the "MENU/ ENTER" button to
save these, before quitting each menu mode.
About the issue that AVI file downloaded from your camera can’t play back on Window please
refer to below solution.
- Please install "QuickTime" software in your PC
( "QuickTime" is a trademark of Apple Computer, Inc.)
- Please install the DirectX8.0 in your PC. Driver is served from camera driver or Microsoft
homepage.
User must login as an Administrator or own the Administrator privilege to install DirectX 8.0a
Runtime under Windows 2000.
Or the DirectX Setup will show the below message and can not install completely. Current
logon user doesn’t have the Administrator privilege. Please logon again as an Administrator or
contact your PC Administrator.
When you press the shutter button in the Set Up menu on the LCD monitor, the camera will not
take a picture.
Please ensure that you press the "MENU/ ENTER" button to save the function you have
selected.
The PC connection function will only operate after you have turned the Mode dial to PC Mode.
Even if the camera is connected to the PC via USB, unless PC Mode has been selected, the
function will not operate.
After the camera is connected to PC, the TFT LCD will be turned off automatically.
But the camera will not turned off until the camera is disconnected from PC.
Page 29

ENGLISH
SETTING UP THE SHOOTING FUNCTION
Details of Every Function Mode
In RECORD mode, after you have pressed the " MENU/ENTER " button, on the RECORD menu
screen you can change the set status on it by using the UP
or DOWN buttons first
and then by pressing the RIGHT or LEFT buttons to select your choice.
Press the MENU / ENTER Button to set up the Record Menu.
By selecting QUALITY, you can change the compression
rate of the picture.
The symbol of
means that the quality is set to
"Super Fine"
The symbol of
means that the quality is set to "Fine"
The symbol of
means that the quality is set to "Normal"
EV COMPENSATION allows you to increase or decrease
the exposure.
This camera will automatically control the exposure, but you can also select exposure
compensation.
Select the exposure value by using the RIGHT and LEFT directional buttons after moving
the cursor bar onto EV.
If you increase the exposure, you will obtain a brighter image.
If you decrease the exposure, you will obtain a darker image.
RECORD MODE
RECORD MENU
FINE
QUALITY
EV COMPENSATION
WHITE BALANCE
RESOLUTION
SELF TIMER
DIGITAL ZOOM
Page 30

SETTING UP THE SHOOTING FUNCTION
Reference
Start setting the exposure compensation : 0 EV
The set range of the exposure compensation is : -1.8 ~ -1.3 ~ 0 ~ +1.3 ~ + 1.8
The selected exposure compensation will stay the same until the power has been turned off.
When you switch on the power again, the exposure compensation will automatically set itself to
0 EV ( canceling the exposure compensation ).
Be cautious when using exposure compensation, as the LCD monitor looks black and exposure
will be minimal when using the ( - ) exposure compensation.
The LCD monitor looks white and over-saturation can happen if you see the ( + ) exposure
compensation.
Reference
The image quality and recording size determines the number of images that can be shot.
The recording size stored in the memory can not be changed. Once an image is captured, the
size of the stored file cannot be altered.
WHITE BALANCE function is used to help obtain more naturally colored images, depending
on light conditions.
The colours of the captured images may alter according to lighting conditions.
- Auto : The camera automatically selects the optimum white balance depending on the
conditions of the ambient lighting.
- Day Light : The white balance should be used to obtain shots in normal outdoor light
conditions
- Fluorescent Light : This white balance is suitable for indoor shooting under fluorescent
light conditions.
- Tungsten : This white balance is suitable for indoor shooting with artificial or tungsten
lighting.
RESOLUTION is related to file size. You can choose the size ( 1600 x 1200 or 800 x 600 )
by pressing the RIGHT / LEFT button to set it.
Page 31

ENGLISH
SETTING UP THE SHOOTING FUNCTION
The " SELF TIMER " function is used when the photographer also wants to be in the
picture.
If you select " ON ", the indicator ( ) is displayed on LCD panel and LCD monitor(when
LCD monitor is powered on)
The image will be captured 10 seconds later after you have pressed the shutter button and
the function is then cancelled.
If you select " DIGITAL ZOOM " on, the function of the digital zoom is selected. It is
cancelled automatically after the pictured image is stored in the memory card.
Reference
The Self Timer Lamp will flash with beep sound while the self timer is in operation.
7 seconds after pressing the shutter button, the Self Timer Lamp will flash slowly in 1 second
intervals.
In the last 3 seconds, the Self Timer Lamp light will be blinking quickly in 1/2 second
intervals.
Reference
Pictures taken using the digital zoom take a little longer to download.
Please allow extra time between shots.
Page 32

Details of Every Function Mode
SETTING UP THE SHOOTING FUNCTION
Date / Time indicator
When you select the play mode, the
last captured image is displayed
This directory is fixed
Resolution indicator
1600 1200
800 600
Auto Flash
Fill – in Flash
Flash Off
Red- eye Reduction
Quality indicator
Superfine
Fine
Normal
PLAY MODE
File NO. for image
Location of the storage directory
Order of files stored in the memory card
Flash mode indicator
Page 33

ENGLISH
SETTING UP THE SHOOTING FUNCTION
After set up is completed, please press the " MENU / ENTER " button to save your selections ,
before you quit this menu.
SLIDE SHOW
Images can be displayed automatically at pre-set intervals.
To save power, the camera will switch off automatically if
there is no operation of camera for 10 second after
presentation of all images stored in the memory card.
PICTURE INFO
When this function is " ON ", you can view the picture
information of date/time, image quality, file No. flash, and image resolution on the LCD
monitor.
THUMBNAIL
This function allows you to view 9 individual images at the same time on the LCD monitor.
To select the image you require in the thumbnail screen, move the UP
or DOWN button .
To view the selected picture, just press " MENU/ENTER " to enlarge the thumbnail for easy
viewing.
To select the previous 9 thumbnail images or the next 9 thumbnails,
just move the LEFT button or RIGHT button .
PLAY MENU
OFF ON
SLIDESHOW
PICTURE INFO.
THUMBNAIL
DIGITAL ZOOM
ERASE
DPOF
EXIT
Page 34

SETTING UP THE SHOOTING FUNCTION
ERASE
In this mode, you can erase data ( One / All ) or format the SmartMediaTMcard.
- Erase One
After moving the bar cursor to " ONE " and pressing " MENU/ENTER " , you will be asked
" ARE YOU SURE ? ".
If you do want to proceed with deleting, press " YES". The last single image you select will
be deleted from the memory card after you press the " MENU/ENTER " button.
If you select " NO ",the screen will return to the PLAY Menu, and no images will be
deleted.
- Erase All
All image data which is saved in the SmartMediaTMcard will be erased if you choose
" ALL " and press the" MENU/ENTER " button and then choose " YES ".
- Format
This function is for formatting a SmartMediaTMcard.
- During the formatting the symbol" Please wait" will be appeared on the LCD monitor.
Page 35

ENGLISH
SETTING UP THE SHOOTING FUNCTION
Press the MENU/ENTER button to set up the Motion Menu.
To record a moving image, please set the recording time and
press the " MENU/ENTER" button. Then press the shutter
button to start recording. To obtain a good quality AVI file,
please do not shake the camera when recording. Move it
slowly and smoothly.
DPOF ( Direct Print Order Format )
You can print the saved images stored in the SmartMediaTMcard. The selected image will be
printed out in the quantity you set up in the DPOF menu. The quantity you can choose for
every image is 0 ~ 9. If you select " 0 ",no image will be printed. If you select " 2 ", then the
image you selected will be printed twice.
DIGITAL ZOOM
There is 2x digital zoom available in play mode. When the digital zoom function is set to "
ON", the picture is divided into 4 area.
To view one of them, please use the RIGHT button or LEFT button .
MOTION MENU
RECORDING TIME
MOTION MODE
Page 36

SETTING UP THE SHOOTING FUNCTION
Press the MENU/ENTER Button to set up the Set up Menu
DATE / TIME
The date and time can be changed in this menu. When the
cursor is moved to this function, you will be able to enter
the date and time with the 4 directional buttons. Once you
have completed this, press the MENU/ENTER button
again. The date and time you have changed is now saved
and displayed on the LCD monitor.
- LEFT / RIGHT button
To select the item you would like to set, such as month, date,year, hour, minutes, AM/PM.
- UP/ DOWN button
To change the date or time.
- The DOWN button is for setting the previous date or time such as 02/02/2002 to
01/01/2001 and 02:00 AM to 01:00 AM.
- The UP button is for setting the later date or time such as 01/01/2001 to 02/02/2002 and
01:00 AM to 02:00 AM.
LCD BRIGHTNESS
This function allows you adjust the LCD brightness to your preference. To make it darker or
brighter, move the LEFT / RIGHT button to choose. Move the cursor to the left to make it
darker and to the right to make it brighter.
VIDEO MODE
You can set up the video output signal from the camera in NTSC or PAL type depending on
the type of machine ( monitor or TV, etc. ) to which the camera is connected. Select what is
compatible with the Video type of the outer monitor. Press the MENU/ENTER button after
you have selected the video output type you require.
BEEP
You can select whether to have the beep turned on or off.
When it is ON, you will hear one " Beep" sound once you press any button of the camera.
And 2 sounds of " beep-beep " acts as a warming, meaning that the environment is not ideal
for taking a picture, but the camera is still functional.
And 3 sounds of " beep-beep-beep" means the camera failed to execute the command you
have ordered. Please check the camera status ( no memory card ? no image ? too dark
environment…etc ? )
SET UP MENU
21 - 11 - 2001
10 : 25 AM
SET UP MODE
DATE TIME
LCD BRIGHTNESS
VIDEO MODE
BEEP
RESET TO DEFAULT
LANGUAGE
Page 37

ENGLISH
To download the still or moving images saved in the memory card, please power on the camera
and select PC mode from the Mode Dial, and then plug the USB cable into your computer and
ensure that it is connected securely. If the connection is successful, the symbol " PC" appeared
on the LCD panel and LCD monitor will be turned off automatically.
Please DO NOT remove the USB cable while the image data is being transferred, otherwise
the downloading will be stopped.
SETTING UP THE SHOOTING FUNCTION
RESET TO DEFAULT
All of the functions will be reset to default when you select "ON ", except the DATE/TIME,
VIDEO MODE and LANGUAGE you have set.
LANGUAGE
There are 6 languages available for your choice in the camera which includes English,
German, French, Spanish, Traditional chinese, Korean.
Press the " MENU/ENTER" button after you have selected the language version you want.
Note
While in PC mode, you will not be able to execute the functions of other modes.
If you change the Mode dial to another function, the camera will have no connection to the PC
even though the USB cable might be connecting the camera to it.
Please therefore ensure that the Mode dial is in PC mode when you wish to download images
from the camera to the PC.
PC MODE
Page 38

CONNECTION TO AN EXTERNAL MONITOR
Connection to an external monitor
Connect the video connection terminal on the camera to an external monitor with a video cable.
Set the camera PLAY mode in order to view the Moving / Still images on the external monitor.
The LCD monitor of the camera will be changed to “ON” or “OFF” by pressing the LCD button.
The information on the external screen will be exactly the same as on the LCD monitor on the
camera.
Selecting the Video output type
You can select an NTSC or PAL video output signal, depending on the external equipment and
the video output selected on the camera.
Reference
When using a TV as an external monitor, you will need to select the external or AV channel.
If there is noise (the picture is fuzzy) please refer to your TV manual for more information.
If the picture is not in the center of the screen, please use the TV controls to center it.
Page 39

ENGLISH
HOW TO DOWNLOAD THE IMAGES INTO YOUR PC
1
Connect the digital camera to your computer, it will create a new disk named " Removable
Disk ".
All the images stored the SmartMediaTMcard can be found in the folder " 100sscam " which
is under the directory " DCIM " in the " Removable Disk".
Please note that the " Removable Disk " only exists when the digital camera is connected
to the computer.
i.e. : 3 images in JPG files in " Removable Disk, DCIM / 100sscam".
2
You can delete the images or copy them to another hard disc in your computer if you wish.
i.e. : Copy the images to Hard Disk " C / My documents
.
Page 40

HOW TO DOWNLOAD THE IMAGES INTO YOUR PC
3
Start MGI PhotoSuite III SE and click on " File" and then click on " Open ".
4
Choose the image(s) you would like to preview and edit.
i.e. Choose the 3 images in " My Documents ".
Page 41
ENGLISH
HOW TO DOWNLOAD THE IMAGES INTO YOUR PC
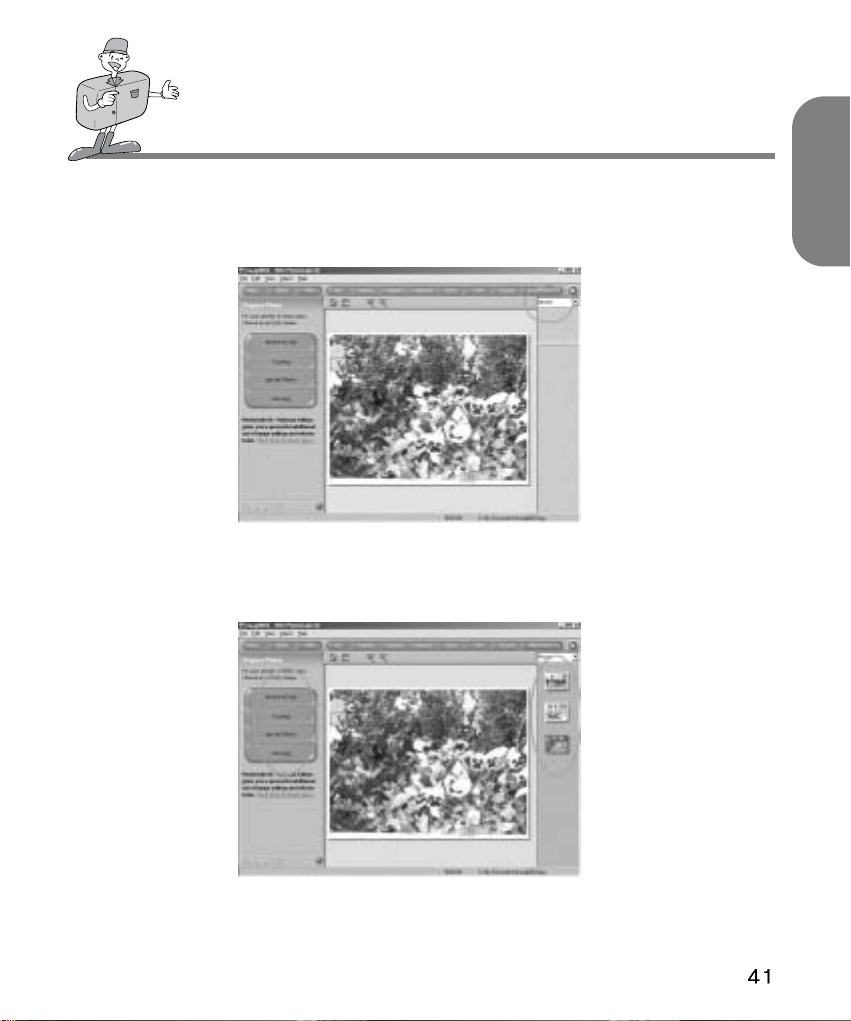
5
If more than 1 image is selected, please switch to " Photos" which is on the upper right
corner of the screen and thumbnails of the selected images will appear.
6
Double click on one thumbnail and it will turn into a normal size image and you can now
start editing it by using the editing tool-bars on the left side of the screen.
Page 42

NOTE IN USING
Caution!
This camera is composed of very sophisticated parts.
If exposed to any of the following unsuitable environmental conditions, the camera
operations will be impaired.
The camera should be kept away from:
- Severe changes in temperature and humidity.
- Dust and dirt
- Direct sunlight or the inside of a vehicle in hot weather.
- Do not place the camera in an environment where there is high magnetism or excessive
vibration.
- An area with high explosives or highly flammable materials
- Pesticides, etc
Never bring into contact with sand
If sand gets into electronic devices like a Digital camera, it can cause severe malfunctions.
Please ensure that there is no contact with sand or similar particles.
Always be careful not to expose the camera to extremes in temperature.
If the device is transferred from a very cold to a very hot environment or vice versa,
condensation can occur inside the device.
If moisture gets into the camera, turn off the device and wait about 1 hour until all moisture
has evaporated.
Similarly, moisture build up can occur in the SmartMedia
TM
card.
If this happens, turn off the device and remove the Memory Card. Wait until the moisture has
dispersed.
Caution with the Lens.
Avoid direct sunlight to lens. Direct sunlight can affect Complementary CCD(Charge
coupled device) by causing overheating and fading.
If the Digital camera is not used for a long period, electric discharge can occur. Please make
sure the device, batteries, and SmartMediaTMcard are stored separately.
Maintenance
To clean the Lens or the LCD panel, a soft brush should be used. If this does not work, lenscleaning paper with lens cleaning fluid can be used.
Clean the camera with a soft cloth or a mild detergent.
Please ensure that it is a mild detergent otherwise it may cause deterioration, deformation or
paint flaking off.
The LCD monitor can be damaged very easily. Please ensure that it does experience any
sharp impact.
Page 43

ENGLISH
NOTE IN USING
Do not attempt to disassemble or modify the device by yourself.
The power can be turned off if exposed to shock. This is for the protection of the memory
card, which means that you will be able to just turn the camera on again and use it.
The flash may fire if the camera is exposed to static electricity. This does not affect the
workings of the camera and is not a fault.
The warning indicator displayed on the LCD monitor is as follows.
Warning indicator Warning contents Treatment
NO CARD
CARD FULL
NO IMAGE
No memory card
The card cannot be read
The card is full
No images in SmartMedia
TM
card
Insert the memory card.
Insert the memory card again
Replace the card with the
new one.
Take picture and save it
onto the SmartMedia
TM
card
PROTECTED CARD
The card is in the condition of
protection
To record a picture, please
remove the protection sticker
Warning Indicator
Page 44

BEFORE CONTACTING A SERVICE CENTER
Symptoms
The power is not
turned on
The power is
turned off during
use
The battery
power is draining
quickly
Camera does not
take pictures
when the Shutter
button is being
pressed
The focus cannot
be adjusted
The flash does
not work
The incorrect
date/time is
displayed
Camera fails to
work by any
button or switch
The batteries need replacing
The camera has automatically turned itself
off.
The card is taken out before the image is
saved onto it.
The adapter has not been connected
properly
The external temperature is too cold
The camera is using both old and new
batteries
The camera is not set to RECORD mode
SmartMediaTMcard is not inserted
The memory card has not been initialized.
Memory card is almost drained
The batteries are weak
The power has not been switched on
You have selected the incorrect shooting
mode
The camera flash is turned off
The wrong date/time is displayed or has
been saved as basic numbers
Camera is not working properly
Replace the batteries with new ones
Power on.
Do not remove the memory card while you
save the image.
Plug the adapter in correctly
Keep batteries at the correct temperature
Replace all batteries with new ones
Set it to RECORD mode
After turning off the camera, insert the Card
Initialize
Insert new Card from manufacturer
Replace the batteries with new ones
Power on
If the subject is closer than 0.6m, select
macro mode and if the subject is beyond
0.6m, select normal mode
Please change the flash mode to Fill in or
Auto
Select the appropriate date in SETUP mode
Remove the batteries and insert them again.
The batteries need replacing
The AC Power Adapter is not connected
Replace the batteries with new ones
Connect the AC Power Adapter
Causes Steps
Page 45

ENGLISH
BEFORE CONTACTING A SERVICE CENTER
Symptoms
The card error
indicator is on
with the memory
card inserted.
There is something
wrong with the color
of the captured
image
The screen is too
bright
The screen is not
very clear
The play screen
is not displayed
on the external
Monitor.
The camera does
not download
files with USB
cable into PC
Unable to start using the memory card.
There are problems using the W.B mode.
There is excessive exposure Reset exposure compensation.
The LCD cover is smudged or dirty
The video cable is not connected to the
camera or external monitor.
Cable is not connected properly
Camera is off.
There is no battery or the adapter is not
connected.
The mode dial is not on the PC connection
mode.
OS is not Window 98/98SE/2000/ME or PC
is not equipped with USB port.
Format the memory card and use it
Set up the right one for each light source.
Refer to W.B. on the page 30
You should clean the LCD cover
Connect the cable properly
Check the connections
Turn on the camera
Insert new batteries or connect with AC
Power Adapter
Use the PC connection mode.
Install Windows 98/98SE/2000/ME
Causes Steps
Page 46

SPECIFICATION
Image Sensor
Lens
Digital Zoom
Viewfinder
LCD Monitor
Focusing
Focusing Range
Shutter
Shutter Speed
Exposure
ISO Equivalent
White Balance
Flash
Flash Range
Self-timer
Video Clips
Storage
File Format
Image size
Storage Capacity (8MB)
Image Play
Interface
Power Source
Dimensions (W x H x D)
Weight
Software
1/2.7
CCD with 2.1 Mega pixels
f=6.8mm (35mm film equivalent : 43mm)
F2.8 / F4.0 / F5.6 / F8.0
Record mode : 2X, Play mode : 2X
Real image optical viewfinder
1.5 color TFT LCD
Auto focusing
Normal : 0.6m ~ infinity , Macro : 0.2 ~ 0.6m
Mechanical and Electronic shutter
1/4 ~ 1/1,000 sec
Program AE / Exposure compensation ±1.8EV (0.3EV steps)
100, 200 (Automatic)
Auto / Manual (Daylight, Fluorescent, Tungsten)
Auto flash / Fill-in flash / Red - eye reduction / Flash off
0.5 ~ 3.0m
10 sec.
Size : 320x240
Recording time : up to 20 sec
SmartMedia
TM
card
JPEG (DCF compliant), DPOF, AVI (Motion JPEG) compliant
Large : 1600x1200 pixels, Small : 800x600 pixels
Large : Super fine 7±1, Fine 14±1, Normal 30±2
Small : Super fine 24±2, Fine 52±3, Normal 83±4
Single image / Thumbnail / Slide show
Digital output connector : USB
Video output : NTSC / PAL (user selectable)
DC power input connector : 3.0V
2 x AA alkaline (high capacity recommended) / Ni-MH batteries.
AC adapter (optional)
103 x 69 x 42.7mm / 4.0 x 2.7 x 1.7in
172g / 6.1oz (without batteries and card)
Camera driver, MGI PhotoSuite
Specifications are subject to change without prior notice.
Page 47

ENGLISH
SYSTEM REQUIREMENTS DIGIMAX 200
FOR WINDOWS
System Requirments
FOR MACINTOSH
PC with processor better than MMX Pentium 233MHz
Windows 98/98SE/2000/ME
Minimum 64MB RAM
100MB of available hard-disk space
USB port
CD-ROM drive
800
600 pixels, 16-bit color display compatible monitor.
(24-bit color display recommended)
Power Mac G3 or later
Mac OS 9.x
Minimum 64MB RAM
50MB of available hard-disk space
USB port
CD-ROM drive
Page 48

HOW TO SET UP THE SOFTWARE
Setting up the MGI PhotoSuite lll SE
1
Click the MGI PhotoSuite lll SE icon on autorun frame.
2
Select language.
Chinese(PRC), Chinese(Taiwan), English,
French(Standard), German, Italian, Spanish.
3
A Welcome window will be displayed.
Click [Next >] to move to the next step.
4
The Software License Agreement window will be
displayed.
If you agree to this, click [Yes], the window will then
move to the next step.
If you disagree, click [Cancel] and the install program
will be canceled.
5
Select set up type.
Full : the program will be installed with all the options.
Custom : you can choose what you would like to install.
Page 49

ENGLISH
HOW TO SET UP THE SOFTWARE
Setting up the MGI PhotoSuite lll SE
6
Start Copying Files window will display.
Click [Next >] to start installation.
7
The MGI Registration window will be displayed before
completing installation.
Send : send your name and e-mail address to MGI.
Register now : move to the on-line registration window.
Register later : postpone registration.
8
Installation is completed.
9
You should restart computer after finishing installation.
Page 50

HOW TO USE EDITING SOFTWARE
MGI PhotoSuite lll SE
This software is only compatible with Windows.
To open MGI PhotoSuite lll SE, click the [start programs MGI PhotoSuite lll SE
MGI PhotoSuite lll SE] and MGI PhotoSuite lll SE will then open.
Page 51

ENGLISH
HOW TO USE EDITING SOFTWARE
MGI PhotoSuite lll SE
An introduction to the Welcome screen
Get
Get images.
Prepare
A number of photo editing activities can be performed
within this module.
Compose
Use your photos in a variety of fun, creative and
interesting ways.
Organize
Organize your photos and other media files into albums.
Share
Save your results to show to others.
Print
Print hard copies of photos and projects.
Page 52

HOW TO USE EDITING SOFTWARE
MGI PhotoSuite lll SE
Introduciton to navigation bar
Back
return to the previous step.
Home
Return to Welcome screen.
Help
Display help window.
Get
Get images.
Prepare
A number of photo editing activities can be performed within this module.
Compose
Use your photos in a variety of fun and interesting ways.
Organize
Organize your photos and other media files into albums.
Share
Save your results to show to others.
Print
Print hard copies of photos and projects.
Browse
Browse the web site.
Page 53

ENGLISH
HOW TO USE EDITING SOFTWARE
MGI PhotoSuite lll SE
1
To acquire images,Click the large [Get] button
on the Welcome screen, or the [Get] button on
the Navigation bar. Click [Computer] from the
list of options displayed on the activity panel.
2
The Open file selector is displayed. Now select
the image file and click [open].
3
The Welcome screen will change to the next
work step, with the selected image displayed.
GET : Get images
To obtain images from the computer
Page 54

HOW TO USE EDITING SOFTWARE
MGI PhotoSuite lll SE
When you obtain images from the digital camera.
Note
When you connect a PC to the Camera, use the following sequence :
1. Turn the Mode dial to PC mode.
2. Turn the power on.
3. Connect the USB cable.
1
To acquire images, click the large [Get] button
on the Welcome screen, or the [Get] button on
the Navigation bar.
2
Click [Computer] from the list of options
displayed on the activity panel. The Open file
selector is displayed. Click Look in : to
choose Removable Disk( :) and click open
for the open file window to be displayed.
Page 55

ENGLISH
HOW TO USE EDITING SOFTWARE
MGI PhotoSuite lll SE
3
Select [Removable Disk ( :)] and select folder.
Then select image and click [ Open ].
4
The Welcome screen will change to the next
work step, with the selected image displayed.
Page 56

HOW TO USE EDITING SOFTWARE
MGI PhotoSuite lll SE
Acquiring images from an Album.
1
To acquire images, click the the large [Get]
button on the Welcome screen, or the [Get]
button on the Navigation bar. Click [Album]
from the list of options displayed on the activity
panel.
2
After selecting Album on the Choose a
photo album, click an image in the album and
click [Open].
3
The Welcome screen will change to the next
work step, with the selected image displayed.
Page 57

ENGLISH
HOW TO USE EDITING SOFTWARE
MGI PhotoSuite lll SE
PREPARE
When the image is loaded, the step changes to Prepare automatically.
Menu of [PREPARE] step
Rotate & Crop
You can rotate, flip or crop images along with a host of
others.
Touchup
Remove Red eye, Remove Scratches etc.. are available
in this menu.
Special Effects
A number of special effects can be applied.
Stitching
Join a series of photos together to create a sweeping
panoramic effect.
Page 58

HOW TO USE EDITING SOFTWARE
MGI PhotoSuite lll SE
COMPOSE
Add Text , Compound Images etc.. are available in this step.
Menu of [COMPOSE] steps
Collage : A collage consists of several photos or
sections of photos arranged together on a
common background.
Photo Layouts : The Photo Layouts activity includes
many collage and layout options.
Card & tag : Use your photos to create items such as
Gift Tags, Greeting Cards, Invitations,
Postcards, and Sports Cards.
Calendars : Use your photos to create a variety of
calendars (monthly, quarterly,seasonal,
yearly).
Collections : Photos can also be used to create a
variety of items for business purposes.
Add frames and boarder effects to your photos with the
predefined templates.
Page 59

ENGLISH
HOW TO USE EDITING SOFTWARE
MGI PhotoSuite lll SE
ORGANIZE
Organize your photos and other media files into albums.
Menu of [ORGANIZE] step
Choose a photo album to view or edit
Select Album : To create an Album, click [Organize] in
the welcome screen or navigation bar.
Album.. : Open Master Album.
Select a photo, and choose an action below.
Open : Open selected image.
Delete : Delete selected image.
Properties.. : view image information.
Choose an action to manage your album.
Add: click [Add] to add an image to an Album.
Sort: click [Sort] to Sort saved images.
Search: click [Search] to Search saved images.
Reset: click [Reset] to reset the setting.
Update: click [Update] to update images.
Create Slide Show.. : click [Create Slide Show]
to create a Slide Show.
Always start on this page : If you select this option,
the program will start in [Organize].
Page 60

HOW TO USE EDITING SOFTWARE
MGI PhotoSuite lll SE
Creating an Album
1
To create an Album, click the large Organize
button on the Welcome screen, or the Organize
button on the Navigation bar.
2
Click [Album..] in Choose a photo album to
view or edit.
3
The Master Album window will be displayed,
then click [New..].
4
Put a new Album name in the New Album
window and click [OK]. A new album will now
be created.
Page 61

ENGLISH
HOW TO USE EDITING SOFTWARE
MGI PhotoSuite lll SE
Saving images
1
Saving or sharing images.
Menu of [SHARE] step
Save
To save the active file according to its
current name and path.
Save As
To assign a new name or path to the file.
Send E-mail
e-mailing images.
Send to Kodak PhotoNet Online
Sending images to Kodak PhotoNet.
Share Your Pictures At GatherRoom.com
Sending images to GatherRoom.com and
sharing images.
Slide Show
Viewing images as a slide show.
2
Click [SAVE] and the Save Project window will
be displayed. Enter the file name and click
[Save(S)] to save an image.
SHARE
Page 62

HOW TO USE EDITING SOFTWARE
MGI PhotoSuite lll SE
Printing images
1
You can print images.
Menu of [PRINT] step
Print
Printing images.
Print Multiples
Print multiple copies of a photo or project, or
one copy of each of the photos included in
an album, according to a predefined
template.
2
Choose a printer, choose an orientation,
choose the print size, choose the number of
copies. You can then print the images.
PRINT
Reference
For more information, please refer to the Help file in [Help MGI PhotoSuite lll help].
Page 63

ENGLISH
MEMO
Page 64

SAMSUNG TECHWIN CO., LTD.
OPTICS & DIGITAL IMAGING DIVISION
145-3, SANGDAEWON 1-DONG, JUNGWON-GU,SUNGNAMCITY, KYUNGKI-DO, KOREA 462-121
TEL : (82) 31-740-8086,8088, 8090, 8092, 8099
FAX : (82) 31-740-8398, 8399
SAMSUNG OPTO-ELECTRONICS AMERICA, INC.
HEADQUARTERS
40 SEAVIEW DRIVE, SECAUCUS, NJ07094
TEL : (1) 201-902-0347
FAX : (1) 201-902-9342
WESTERN REGIONAL OFFICE
18600 BROADWICK ST.,
RANCHO DOMINGUEZ, CA 90220
TEL : (1) 310-537-7000
FAX : (1) 310-537-1566
SAMSUNG U.K. LIMITED.
PHOTO PRODUCTS DIV.
SAMSUNG HOUSE, 3 RIVERBANK WAY,
GREAT WEST ROAD, BRENTFORD,
MIDDLESEX,TW8 9RE, U.K.
TEL : (44) 20-8232-3348
FAX : (44) 20-8569-8385
SAMSUNG DEUTSCHLAND GmbH
SAMSUNG HAUS
AM KRONBERGER HANG 6, 65824 SCHWALBACH,
GERMANY
TEL : (49) 6196-66 53 01
FAX : (49) 6196-66 53 33
SAMSUNG FRANCE S.A.R.L.
BP 51 TOUR MAINE MONTPARNASSE 33,
AV .DU MAINE 75755,
PARIS CEDEX 15, FRANCE
TEL : (33) 1-4279-2282
FAX : (33) 1-4320-4510
S.MARKET COM.IMP.EXP.LTDA
Av.zaki narchi 1392. v. guilherme cep : 02029-001
SÃO PAULO-SP BRAZIL
TEL : (55) 11-6221-6833
FAX : (55) 11-6221-6833
SAMSUNG TECHWIN MOSCOW OFFICE
KOSMODAMIANSKAYA NABEREZNA 40/42,
MOSCOW, 113035, RUSSIA
TEL : (7) 095-937-7950
FAX : (7) 095-937-4851
SAMSUNG (Aust.) PTY. LTD.
LEVEL 33, NORTHPOINT BLDG., 100 MILLER STREET,
NORTH SYDNEY,
NSW 2060, AUSTRALIA
TEL : (61) 2-9955-3888
FAX : (61) 2-9955-4233
TIANJIN SAMSUNG OPTO-ELECTRONICS CO.,LTD.
7 PINGCHANG ROAD NANKAI DIST., TIANJIN
P.R CHINA
POST CODE:300190
TEL : (86) 22-2761-8867
FAX : (86) 22-2761-8864
Internet address - http : //www.samsungcamera.com/
The CE Mark is a Directive conformity mark of the
European Community (EC)
 Loading...