


Kenmore 110C69133410, 110C69132410, 110C68133410, 110C68132410, 11079133413 Owner’s Manual
...Use & Care Guide
Manual de uso y cuidado
Guide d’utilisation et d’entretien
English / Español / Français
Table of Contents...2 / Índice...17 / Table des matières...34
Models/Modelos/Modèles: 110.6813*410, 110.7813*410
110.6913*410, 110.7913*410, 110.C6813*413, 110.C6913*413
Kenmore®
Electric or Gas Dryer Secadora eléctrica o a gas Sécheuse électrique ou à gaz
* = color number, número de color, le numéro de la couleur
P/N W10680143F
Sears Brands Management Corporation
Hoffman Estates, IL 60179 U.S.A.
www.kenmore.com
Sears Canada Inc.
Toronto, Ontario, Canada M5B 2C3
www.sears.ca
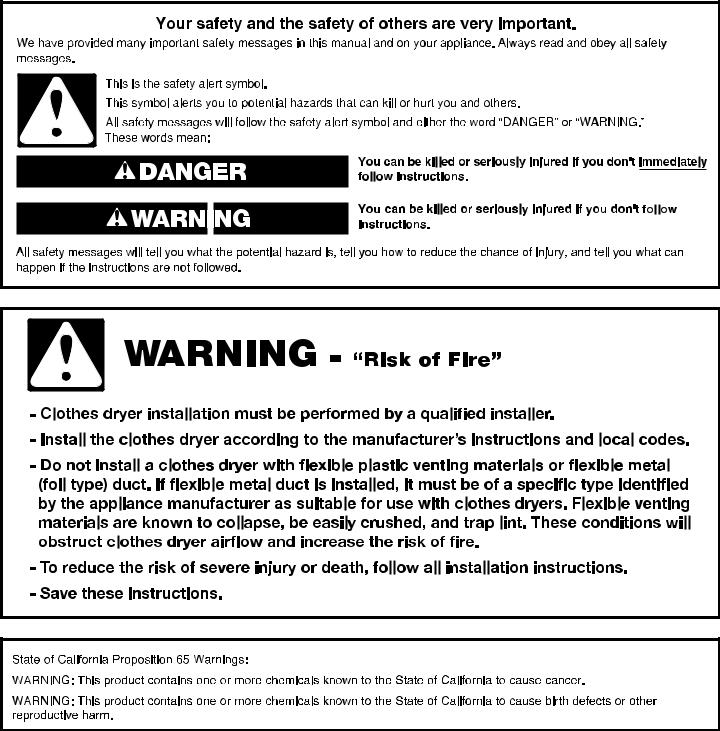
TABLE OF CONTENTS
DRYER SAFETY........................................................................... |
2 |
CHECK YOUR VENT SYSTEM FOR GOOD AIR FLOW.... |
4 |
USE SENSING CYCLES FOR BETTER FABRIC CARE |
|
AND ENERGY SAVINGS......................................................... |
4 |
CONTROL PANEL AND FEATURES........................................ |
5 |
CYCLE GUIDE............................................................................ |
6 |
USING YOUR DRYER............................................................... |
8 |
ADDITIONAL FEATURES........................................................ |
10 |
DRYER CARE............................................................................. |
11 |
TROUBLESHOOTING.............................................................. |
13 |
PROTECTION AGREEMENTS................................................. |
16 |
WARRANTY.............................................................................. |
16 |
ASSISTANCE OR SERVICE.................................... |
Back Cover |
DRYER SAFETY
2

3
CHECK YOUR VENT SYSTEM FOR GOOD AIR FLOW
Good Air Flow
Along with heat, dryers require good air fl ow to efficiently dry laundry. Proper venting will reduce your drying times and improve your energy savings. See Installation Instructions.
The venting system attached to the dryer plays a big role in good air fl ow. Blocked or crushed vents as well as
improper venting installation will reduce air fl ow and dryer performance.
Service calls caused by improper venting are not covered by the warranty and will be paid by the customer, regardless of who installed the dryer. To clean or repair venting, contact a venting specialist.
Maintain good air fl ow by:
nCleaning your lint screen before each load.
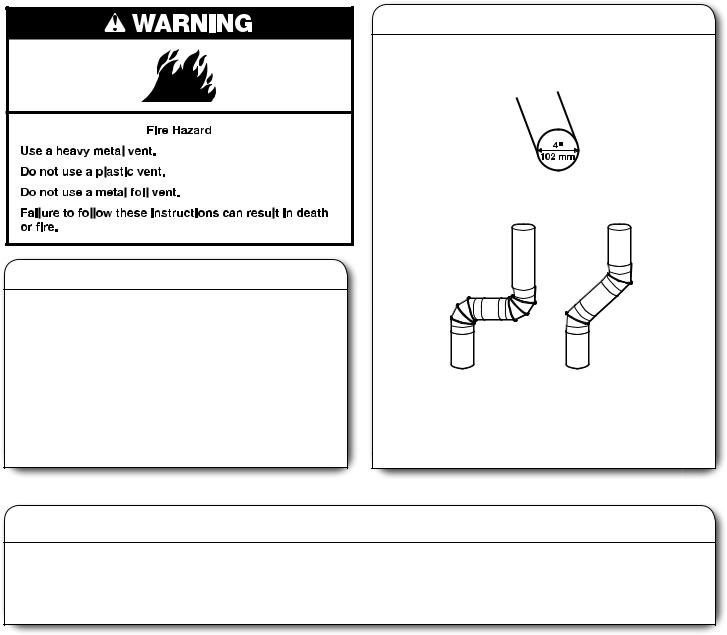
nReplacing plastic or foil vent material with 4" (102 mm) diameter heavy, rigid vent material.
nUsing the shortest length of vent possible.
nUsing no more than four 90° elbows in a vent system; each bend and curve reduces air fl ow.
Good  Better
nRemoving lint and debris from the exhaust hood.
nRemoving lint from the entire length of the vent system at least every 2 years. When cleaning is complete,
be sure to follow the Installation Instructions supplied with your dryer for fi nal product check.
nClearing away items from the front of the dryer.
USE SENSING CYCLES FOR BETTER FABRIC CARE AND ENERGY SAVINGS
Use the Sensing Cycles to get the most energy savings and enhanced fabric care from the dryer. During Sensing Cycles, drying air temperature and moisture level are sensed in the load. This sensing occurs throughout the drying cycle and the dryer shuts off when the load reaches the selected dryness. Choose Normal cycle to save energy.
With Timed Cycles, the dryer runs the amount of time set and sometimes results in shrinkage, wrinkling, and static due to overdrying. Use Timed Cycles for the occasional damp load that needs a little more drying time or when using the drying rack.
4

CONTROL PANEL AND FEATURES
STEAM MODEL |
1 |
2 |
3 |
5 |
6 |
4
|
|
|
7 |
|
|
NON-STEAM MODEL |
1 |
2 |
3 |
5 |
6 |
|
|
|
|
|
|
|
|
|
4 |
|
|
7
Not all features and options are available on all models. Appearance may vary.
1 POWER BUTTON
Touch to turn the dryer on and off. Touch to stop/cancel a cycle at any time.
2 CYCLE KNOB
Use your cycle knob to select available cycles on your dryer. Turn the knob to select a cycle for your laundry load. See “Cycle Guide” for detailed descriptions of cycles.
Timed Cycles
Will run the dryer for the specified time on the control. On models with a selectable temperature button, you may choose a setting based on the fabrics in your load. Drying time and temperature will vary depending on your dryer model.
Sensing Cycles
Sensing cycles give the best drying in the shortest time. Drying time will vary based on fabric type, load size, and dryness setting.
3 LED DISPLAY AND SETTINGS
When you select a cycle, its default settings will light up and the Estimated Time Remaining (for Sensing Cycles) or actual time remaining (for Timed Cycles) will be displayed.
Touch the setting names next to the display to adjust settings. See “Cycle Guide” for available settings on each cycle. Not all settings are available with all cycles.
Dry Temp
Select a drying temperature based on the fabrics in your load. If you are unsure of the temperature to select for a load, select the lower setting rather than the higher setting. See “Cycle Guide.”
NOTE: Sensing Cycles allow temperature adjustment. At most, 3 of the available temperatures (not including Air) are allowed.
Dry Level
You may adjust the Dry Level on Sensing Cycles (except for the Sanitize cycle) if desired.
NOTE: Dry Level is for use with Sensing Cycles only.
Cycle Signal
The Cycle Signal produces an audible sound when the drying cycle is finished. Promptly removing clothes at the end of the cycle reduces wrinkling.
NOTES:
nWhen the Wrinkle Guard™ option is selected and the Cycle Signal is on, the tone will sound at 15 minutes,
30 minutes, and at the end of Wrinkle Guard™.
nYou may also turn off the tones that sound when a cycle is selected, or when a feature or option is touched. Touch and hold CYCLE SIGNAL for about three seconds to turn sounds off or on.
4 Time Adjust for Timed Cycles Only
Use “+” and “–” with Timed Cycles to increase or decrease the length of a Timed Dry or Express cycle.
5 OPTIONS
Use to select available options for your dryer. Not all cycles and options are available on all models.
Energy Saver option
Activate the ENERGY SAVER setting to increase your energy savings. This setting uses a lower heat level and extends cycle time. Turn on for optimal energy savings.
Turn off for optimal cycle times. Energy Saver will default on for Normal.
NOTE: Energy savings are not available on all cycles and may vary across loads and cycles.
Wrinkle Guard™ or Wrinkle Guard™ w/Steam option (depending on model)
When you are unable to remove a load of clothes from the dryer as soon as it stops, wrinkles can form. The Wrinkle Guard™ option periodically tumbles, rearranges, and fluffs the load to help keep wrinkles from forming. The Wrinkle Guard™ w/Steam setting (depending on model) will add a short steam cycle after 60 minutes to help smooth out wrinkles.
nGet up to 150 minutes of heat-free, periodic tumbling at the end of a cycle. Touch WRINKLE GUARD™
to select ON or OFF at any time before the cycle has ended.
NOTE: If you open the dryer door prior to the end of the Wrinkle Guard™ option, the dryer will go into Pause mode. You will need to touch Power to turn off or touch
Start/Pause to continue Wrinkle Guard™ option.
5
Damp Signal
Touch to select the Damp Signal to On or Off. When selected, a series of beeps will sound when the load is damp but not completely dry. This will allow you to take clothes out of the load that do not need to dry completely. This option is not available on Sanitize, Steam Refresh, and the Timed cycles.
6 CYCLE STATUS LIGHTS
The indicator bar on the right side of the control will let you know what stage of the drying cycle is in process.
Check Vent
The Check Vent indicator will light if there is a blocked vent or low air flow.
Damp
This indicator shows that the load is partially dried and items that you may wish to hang up or iron while still damp may be removed.
Cool Down
The dryer has finished drying with heat, and is now tumbling the load without heat to cool it down and reduce wrinkling.
Complete
This will indicate that the selected cycle has ended and the load may be removed from the dryer. If Wrinkle Guard™ option has been selected, the dryer may continue to tumble the load, even if the Complete indicator is lit.
Wrinkle Guard™
This indicator will light if the Wrinkle Guard™ option has been selected and is running. The dryer will periodically tumble the load for up to 150 minutes after the cycle has ended.
Check Lint Screen
The Check Lint Screen indicator light will flash as a reminder to clean the lint screen. It will flash until the door is opened or a cycle is started. It will turn off when the dryer is turned off.
7 START/PAUSE BUTTON
Touch and hold START/PAUSE button for up to 3 seconds or until the dryer starts to begin the selected cycle; touch again to pause a cycle.
CYCLE GUIDE – SENSING CYCLES
SENSING CYCLES – Senses moisture in the load and shuts off when the load reaches the selected dryness level. The dry temperature shown is the default temperature. This setting can be modified on some cycles but is not retained for future drying with this cycle. The dryness level shown is the default dryness setting. This setting can be changed on some cycles and will be retained for future drying with this cycle. Available options shown in bold are default settings for that cycle.
To get the most energy savings and enhanced fabric care from your dryer, use the Sensing cycles. These cycles measure the drying air temperature and moisture levels to turn the dryer off once the load reaches the selected dryness level. For electric models, dryer performance and results may vary with service voltage less than 240.
Items to Dry: |
Cycle: |
Dry Temp: |
Dry Level:† |
Available |
Cycle Details: |
|
|
|
|
|
|
Options: |
|
|
|
|
|
|
|
|
Towels and |
Sanitize* |
|
|
|
Wrinkle Guard™ |
Extended high-heat drying cycle intended |
bedding |
|
|
|
|
Cycle Signal |
to help sanitize items such as bedding and |
|
|
|
|
|||
|
|
|
|
|||
|
|
|
|
|
|
towels. This cycle is not recommended for |
|
|
|
|
|
|
all fabrics. For best results, run cycle to |
|
|
|
|
|
|
completion; do not interrupt. |
|
|
|
|
|
|
NOTE: Steam portion of Wrinkle Guard™ |
|
|
|
|
|
|
w/Steam option is disabled for this cycle. |
Jackets, |
Bulky/ |
|
|
|
Damp Dry Signal |
Use for drying large, bulky items; do not |
comforters, pillows |
Bedding |
|
|
|
Wrinkle Guard™ |
overfill dryer drum. |
|
|
|
||||
|
|
|
||||
|
|
|
|
|
Cycle Signal |
|
|
|
|
|
|
|
|
Heavyweight items |
Heavy |
|
|
|
Damp Dry Signal |
Use for drying large or heavy items. |
such as towels and |
Duty |
|
|
|
Wrinkle Guard™ |
|
|
|
|
|
|||
|
|
|
|
|||
jeans |
|
|
|
|
Cycle Signal |
|
|
|
|
|
|
|
|
Corduroys, work |
Normal |
|
|
|
Damp Dry Signal |
Medium to large loads of mixed fabrics |
clothes |
|
|
|
|
Energy Saver |
and items. |
|
|
|
|
|||
|
|
|
|
|
Wrinkle Guard™ |
|
|
|
|
|
|
Cycle Signal |
|
No-iron fabrics, |
Casual |
|
|
|
Damp Dry Signal |
For normal lightto medium-weight |
cottons, perm |
|
|
|
|
Energy Saver |
fabrics. Drying time varies based on |
|
|
|
|
|||
press, linens, |
|
|
|
|
Wrinkle Guard™ |
fabric type, load size, and dryness setting. |
synthetics |
|
|
|
|
Cycle Signal |
|
Lingerie, blouses, |
Delicates |
|
|
|
Damp Dry Signal |
For gently drying delicate items. |
washable knit |
|
|
|
|
Energy Saver |
NOTE: Steam portion of Wrinkle Guard™ |
|
|
|
|
|||
fabrics |
|
|
|
|
Wrinkle Guard™ |
w/Steam option is disabled for this cycle. |
|
|
|
|
|
Cycle Signal |
|
|
|
|
|
|
|
|
*Extended high-heat drying cycle intended to help sanitize items such as sheets and towels. This cycle is not recommended for all fabrics. For best results, this cycle should be run to completion to ensure sanitization and do not interrupt cycle.
†If loads do not seem as dry as you would like or are drier than you would like, select More Dry or Less Dry next time you dry a similar load.
6
CYCLE GUIDE – TIMED CYCLES
TIMED CYCLES – Will run the dryer for the specifi ed time on the control. Settings shown are default settings for that cycle.
Items to Dry: |
Cycle: |
Default |
Available |
Cycle Details: |
|
|
Time: |
Options: |
|
|
|
|
|
|
Any load |
Timed Dry |
40 |
Wrinkle Guard™* |
Select a drying temperature based on the fabrics in your |
|
|
|
Cycle Signal |
load. If you are unsure of the temperature to select for a |
|
|
|
|
load, select the lower setting rather than the higher setting. |
Any load |
Touch Up |
20 |
Wrinkle Guard™* |
Use this cycle to quickly refresh an item or remove light |
|
|
|
Cycle Signal |
wrinkles. The load is cooled slowly to reduce wrinkling and |
|
|
|
|
make it easier to handle. |
Small loads and |
Express |
15 |
Wrinkle Guard™* |
For small loads of 2 to 3 items. |
sportswear (2 to |
|
|
Cycle Signal |
|
3 items) |
|
|
|
|
*Depending on settings, steam option may be disabled to protect clothing and optimize performance.
CYCLE GUIDE – STEAM CYCLE
STEAM CYCLE – Designed for use with dry loads to loosen wrinkles, reduce odors, and refresh fabrics. Settings shown are default settings for that cycle. Not all settings and options are available on each cycle.
Items to Dry: |
Cycle: |
Dry Temp: |
Dry Level: |
Available |
Cycle Details: |
|
|
|
|
|
|
Options: |
|
|
|
|
|
|
|
|
Mixed loads |
Steam |
|
|
|
Wrinkle Guard™ |
Use to smooth out wrinkles and reduce |
|
Refresh |
|
|
|
Cycle Signal |
odors from loads consisting of 2 to 4 |
|
|
|
|
|||
|
|
|
|
|||
|
|
|
|
|
|
dry items of wrinkle-free cotton, cotton- |
|
|
|
|
|
|
polyester blend, common knits, and |
|
|
|
|
|
|
synthetic garments. |
Setting the Dry Temp
Select a drying temperature based on the fabrics in your load. If you are unsure of the temperature to select for a load, select the lower setting rather than the higher setting.
Temperature Tips
nA High heat setting may be used for drying heavyweight items such as towels and work clothes.
nA Medium to Medium High heat setting may be used for drying medium-weight items such as sheets, blouses, dresses, underwear, permanent press fabrics, and some knits.
nA Low heat setting may be used for drying lightweight items such as lingerie.
nUse an Air (no heat) setting for foam, rubber, plastic, or heat-sensitive fabrics.
nLine dry bonded or laminated fabrics.
NOTE: If you have questions about drying temperatures for various loads, refer to the care label directions.
7
USING YOUR DRYER
WARNING: To reduce the risk of fire, electric shock, or injury to persons, read the IMPORTANT SAFETY INSTRUCTIONS before operating this appliance.
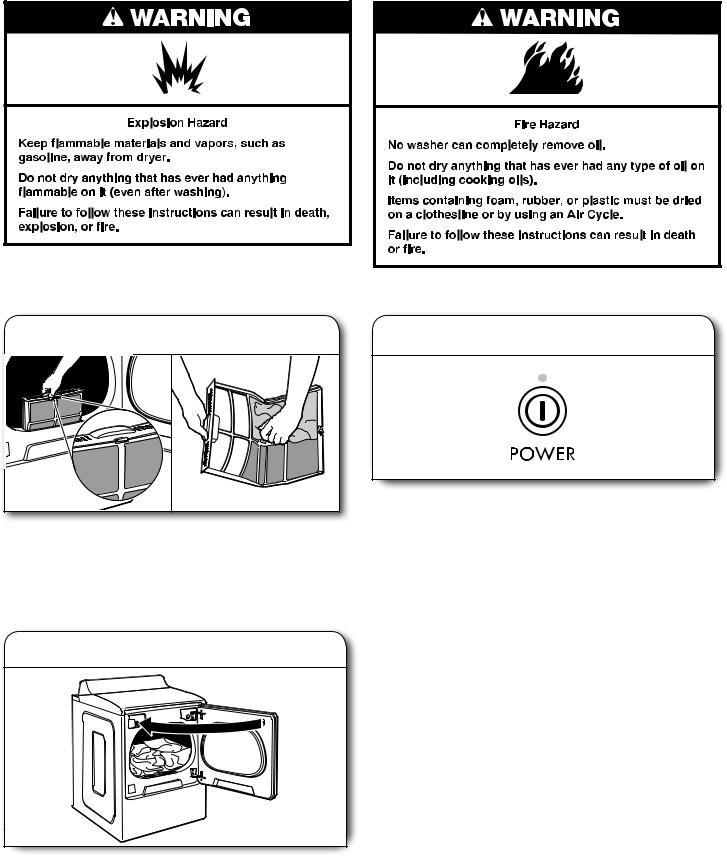
1. Clean the lint screen
Clean the lint screen before each load. Pull the lint screen straight up and out. Press tab down on front to open lint screen.
Roll lint off the screen with your fi ngers. Do not rinse or wash screen to remove lint. Wet lint is hard to remove. Close lint screen and push the lint screen fi rmly back into place.
For additional cleaning information, see “Dryer Care.”
3. Touch POWER
Touch POWER to turn on the dryer.
2. Load the dryer
Place laundry in the dryer. Close the door. Do not tightly pack the dryer; clothes should be able to tumble freely.
8
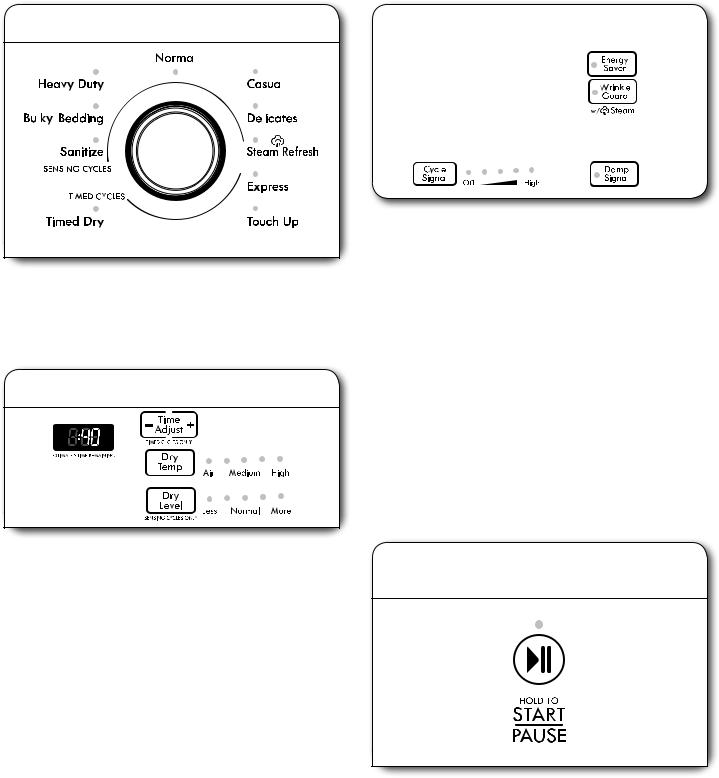
4. Select the desired cycle |
6. Select any additional options |
||||||||||||||
|
|
|
|
|
|
|
|
|
|
|
|
|
|
|
|
|
|
|
|
|
|
|
|
|
|
|
|
|
|
|
|
|
|
|
|
|
|
|
|
|
|
|
|
|
|
|
|
|
|
|
|
|
|
|
|
|
|
|
|
|
|
|
|
|
|
|
|
|
|
|
|
|
|
|
|
|
|
|
|
|
|
|
|
|
|
|
|
|
|
|
|
|
|
|
|
|
|
|
|
|
|
|
|
|
|
|
|
|
|
|
|
|
|
|
|
|
|
|
|
|
|
|
|
|
|
|
|
|
|
|
|
|
|
|
|
|
|
|
|
|
|
|
|
|
|
|
|
|
|
|
|
|
|
|
|
|
|
|
|
|
|
|
|
|
|
|
|
|
|
|
|
|
|
|
|
|
|
|
|
|
|
|
|
|
|
|
|
|
|
|
|
|
|
|
|
|
|
|
|
|
|
|
|
|
|
|
|
|
|
|
|
|
|
|
|
|
|
|
|
|
|
|
|
|
|
|
|
|
|
|
|
|
|
|
|
|
|
|
|
|
|
|
|
|
|
|
|
|
|
|
|
|
|
|
|
|
|
|
|
|
|
|
|
|
|
|
|
|
|
|
|
Steam model shown
Select the desired cycle for your load. See the “Cycle Guide” for more information about each cycle.
Steam Refresh:
Reduces light wrinkles and odors from a few garments at a time. Do not add dryer sheets.
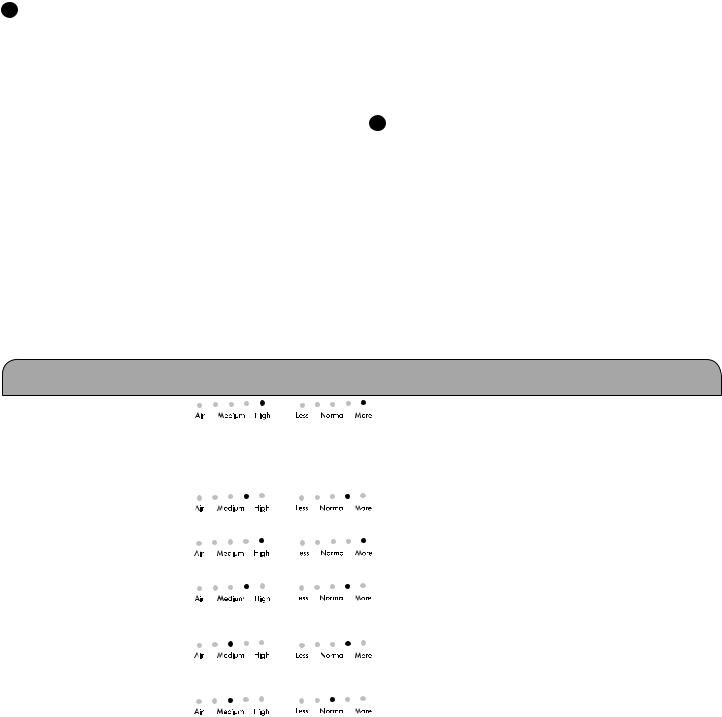
5. Set cycle settings, if desired
You may adjust diff erent settings, depending on whether you have selected a Sensing Cycle, Timed Cycle, or Steam Refresh Cycle. See the “Cycle Guide” for detailed information.
NOTE: Not all options and settings are available with all cycles. Not all cycles are on all models.
Sensing Cycles:
You can select a diff erent dryness level, depending on your load, by touching DRY LEVEL to scroll to More, Normal, or Less. Selecting More, Normal, or Less automatically adjusts the dryness level at which the dryer will shut off . Dry Level can be
changed in the fi rst 5-8 minutes of the cycle. Sensing cycles give the best drying in the shortest time. Drying time varies based on fabric type, load size, and dryness setting.
NOTE: More Dry removes more load moisture. Normal Dry is used for a starting point for Sensing cycles. Choose Normal to save energy. Less Dry removes less moisture and is used for loads you may want to put on a hanger to complete drying.
Timed Cycles:
When you select a Timed Cycle, the default time appears in the display. Touch “+” and “–” to increase or decrease the time in 1-minute increments. Touch and hold to change the time in 5-minute increments. The default temperature may be changed by touching Dry Temp until the desired dry temperature is lit.
Add additional options such as Energy Saver or Damp Signal by touching that option. If you will be unable to remove the load promptly, select the Wrinkle Guard™ options before touching START.
Wrinkle Guard™ or Wrinkle Guard™ w/Steam
option (depending on model)
When you are unable to remove a load of clothes from the dryer as soon as it stops, wrinkles can form. The Wrinkle
Guard™ option periodically tumbles, rearranges, and fl uff s the load to help keep wrinkles from forming. The Wrinkle Guard™ w/Steam setting (depending on model) will add a short steam cycle after 60 minutes to help smooth out wrinkles. Get up
to 150 minutes of heat-free, periodic tumbling at the end of a cycle. Touch the WRINKLE GUARD™ button to select
ON or OFF at any time before the cycle has ended.
NOTES:
nWhen the Wrinkle Guard™ option is selected and the
Cycle Signal is on, the tone will sound at 15 minutes,
30 minutes, and at the end of Wrinkle Guard™.
nIf you open the dryer door prior to the end of the Wrinkle Guard™ option, the dryer will go into Pause mode. You will need to touch Power to turn off or touch Start/Pause to continue Wrinkle Guard™ option.
7.Touch and hold START/PAUSE to begin cycle
Touch and hold the START/PAUSE button to begin the cycle.
Promptly remove items after cycle has completed to reduce wrinkling. Use the Wrinkle Guard™ option to avoid wrinkling when you are unable to remove a load from the dryer as soon as it stops.
9
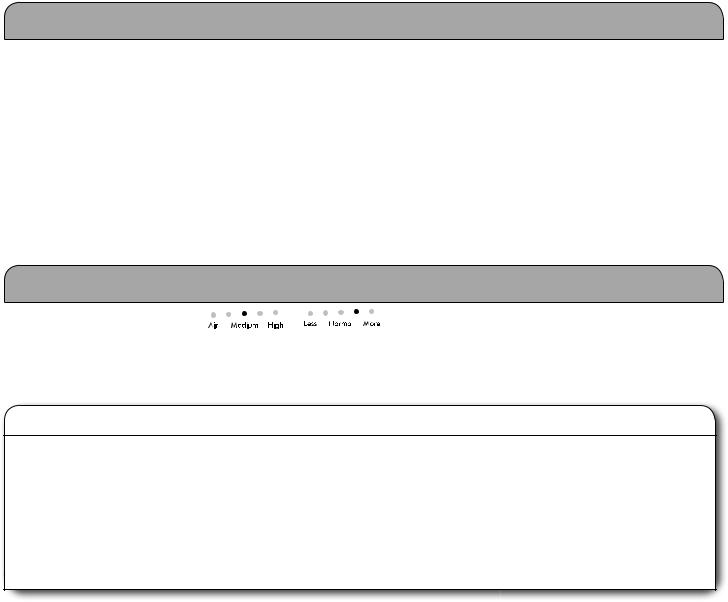
Changing the Sensing Cycle settings to increase or decrease drying time
If all your loads on all Sensing Cycles are consistently less dry or more dry than you would like, you may change the default settings to increase or decrease the default dryness level.
Your sensing drying settings can be adjusted to adapt to diff erent installations, environmental conditions, or personal preference. This change is retained and will aff ect all of your
Sensing Cycles, not just the current cycle/load. There are
5 drying settings, which are displayed using the time display:
0Much wetter clothes, 30% less drying time.
1Slightly wetter clothes, 15% less drying time.
2Factory preset dryness level.
3Slightly drier clothes, 15% more drying time.
4Much drier clothes, 30% more drying time.
To change the drying settings:
NOTE: The settings cannot be changed while the dryer is running or paused. The dryer must be in standby mode
(power is off ) to adjust the default settings.
1.Before starting a cycle, touch and hold DRY LEVEL for 3 seconds.
2.Touch DRY LEVEL to select the dryness level shown in the time display: 0, 1, 2, 3, or 4.
3.Touch START/PAUSE to save the new dryness level setting.
ADDITIONAL FEATURES
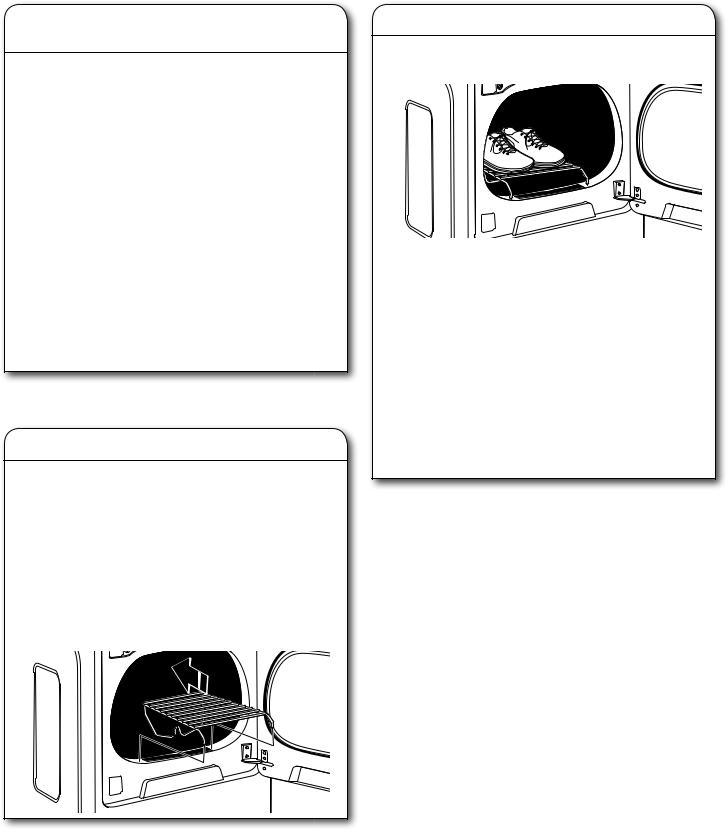
Using the Drying Rack
To obtain a drying rack for your dryer, order by calling
1-844-553-6667 (U.S.) or 1-800-469-4663 (Canada). You will need your model and serial number and the purchase date. Remove and discard any packing material before use.
Use the Drying Rack for items that you do not want to tumble dry, such as sweaters and tennis shoes. When you use the drying rack, the drum continues to turn, but the rack remains stationary.
The drying rack is intended for use with the Timed Cycles only. The drying rack cannot be used with Sensing Cycles.
To use the drying rack:
IMPORTANT: Do not remove the lint screen. 1. Open dryer door.
Using the Drying Rack (cont.)
2.Align the two hooks on the front of the drying rack with the holes in the dryer door opening and press down fully into holes. Rest the rear support on the dryer back ledge.
3.Place wet items on top of the drying rack. Allow space around items for air to circulate. The drying rack does not move, but the drum will rotate; be sure to leave adequate clearance between items and the inside of the dryer drum. Make sure items do not hang over the edges or between drying rack grille.
4.Close the door.
5.Select a Timed Dry/Air Only, or Low Temperature cycle. Items containing foam, rubber, or plastic must be dried on a clothesline or by using the Air Only setting.
6.When the cycle is selected, the Estimated Time Remaining display shows the default time. You can change the actual time in the cycle by increasing or decreasing the cycle time.
7.Start the dryer.
NOTE: Check the lint screen and remove any lint accumulated from items dried on the drying rack after the cycle is fi nished.
10
DRYER CARE
Cleaning the dryer location
Keep dryer area clear and free from items that would block the air fl ow for proper dryer operation. This includes clearing piles of laundry in front of the dryer.
Cleaning the dryer interior
To clean dryer drum
1.Apply a liquid, nonfl ammable household cleaner to the stained area of the drum and rub with a soft cloth until stain is removed.
2.Wipe drum thoroughly with a damp cloth.
3.Tumble a load of clean cloths or towels to dry the drum
OR
Use a microfi ber cloth and hot water in a spray bottle to clean the drum and a second microfi ber towel to dry.
NOTE: Items that contain loose dyes, such as denim blue jeans or brightly colored cotton items, may discolor the dryer interior. These stains are not harmful to your dryer and will not stain future loads of clothes. Dry these items inside out to avoid drum staining.
Removing accumulated lint
From Inside the Dryer Cabinet
Lint should be removed every 2 years, or more often, depending on dryer usage. Cleaning should be done by a qualifi ed servicer.
From the Exhaust Vent
Lint should be removed every 2 years, or more often, depending on dryer usage.
Cleaning the lint screen
Every load cleaning
The lint screen is located in the door opening of the dryer. The control panel has a “Check Lint Screen” indicator light to remind you to clean the lint screen before each load.
A screen blocked by lint can increase drying time.
To clean:
1. Pull the lint screen straight up and out. Press tab down on front to open lint screen. Roll lint off the screen with your fi ngers. Do not rinse or wash screen to remove lint. Wet lint is hard to remove.
2. Close the lint screen and push fi rmly back into place.
IMPORTANT:
nDo not run the dryer with the lint screen loose, damaged, blocked, or missing. Doing so can cause overheating and damage to both the dryer and fabrics.
nIf lint falls off the screen into the dryer during removal, check the exhaust hood and remove the lint. See “Venting Requirements” in the Installation Instructions.
nClean space where lint screen is located, as needed. Using a
vacuum, gently remove any lint that has accumulated outside of the lint screen.
As needed cleaning
Laundry detergent and fabric softener residue can build up on the lint screen. This buildup can cause longer drying times for your clothes or cause the dryer to stop before your load is completely dry. The screen is probably clogged if lint falls off while the screen is in the dryer.
Clean the lint screen with a nylon brush every 6 months, or more frequently, if it becomes clogged due to a residue buildup.
To wash:
1.Roll lint off the screen with your fi ngers.
2.Wet both sides of lint screen with hot water.
3.Wet a nylon brush with hot water and liquid detergent. Scrub
lint screen with the brush to remove residue buildup.
4. Rinse screen with hot water.
5. Thoroughly dry lint screen with a clean towel. Reinstall screen in dryer.
11
 Loading...