

Page 1
KD-AR959BS / KD-R950BT / KD-R85MBS /
KD-AR855BT / KD-R850BT
ENGLISH
ESPAÑOL
FRANÇAIS
CD RECEIVER
INSTRUCTION MANUAL
RECEPTOR CON CD
MANUAL DE INSTRUCCIONES
RÉCEPTEUR CD
MANUEL D’INSTRUCTIONS
Please read all instructions carefully before
operation to obtain the best possible performance
from the unit.
Por favor lea detenidamente este manual para
comprender a fondo todas las instrucciones y
obtener un máximo disfrute de esta unidad.
Veuillez lires les instructions attentivement avant
d’utiliser l’appareil afin d’obtenir les meilleures
performances possibles de l’appareil.
For customer Use:
Enter below the Model No. and Serial No. which are
located on the top or bottom of the cabinet. Retain this
information for future reference.
Model No.
Serial No.
GET0981-001B [J]
Page 2

CAUTION
Use of controls or adjustments or performance of procedures other than those specified
herein may result in hazardous radiation exposure.
In compliance with Federal Regulations, following are reproductions of labels on, or inside
the product relating to laser product safety.
JVC KENWOOD Corporation
2967-3, ISHIKAWA-MACHI,
HACHIOJI-SHI, TOKYO, JAPAN
THIS PRODUCT COMPLIES WITH DHHS RULES 21CFR
SUBCHAPTER J IN EFFECT AT DATE OF MANUFACTURE.
Location : Top Plate
Información acerca de la eliminación de equipos eléctricos y electrónicos al final de
la vida útil (aplicable a los países que hayan adoptado sistemas independientes de
recogida de residuos)
Los productos con el símbolo de un contenedor con ruedas tachado no
podrán ser desechados como residuos domésticos. Los equipos eléctricos y
electrónicos al final de la vida útil, deberán ser reciclados en instalaciones
que puedan dar el tratamiento adecuado a estos productos y a sus
subproductos residuales correspondientes. Póngase en contacto con su
administración local para obtener información sobre el punto de recogida
más cercano. Un tratamiento correcto del reciclaje y la eliminación de
residuos ayuda a conservar los recursos y evita al mismo tiempo efectos
perjudiciales en la salud y el medio ambiente.
FCC WARNING
This equipment may generate or use radio frequency energy. Changes or modifications
to this equipment may cause harmful interference unless the modifications are expressly
approved in the instruction manual. The user could lose the authority to operate this
equipment if an unauthorized change or modification is made.
FCC NOTE
This equipment has been tested and found to comply with the limits for a Class B digital
device, pursuant to Part 15 of the FCC Rules. These limits are designed to provide reasonable
protection against harmful interference in a residential installation. This equipment may
cause harmful interference to radio communications, if it is not installed and used in
accordance with the instructions. However, there is no guarantee that interference will
not occur in a particular installation. If this equipment does cause harmful interference to
radio or television reception, which can be determined by turning the equipment off and
on, the user is encouraged to try to correct the interference by one or more of the following
measures:
• Reorient or relocate the receiving antenna.
• Increase the separation between the equipment and receiver.
• Connect the equipment into an outlet on a circuit different from that to which the receiver
is connected.
• Consult the dealer or an experienced radio/TV technician for help.
CALIFORNIA, USA ONLY
This product contains a CR Coin Cell Lithium Battery which contains Perchlorate Material—
special handling may apply. See www.dtsc.ca.gov/hazardouswaste/perchlorate
Informação sobre a eliminação de pilhas
Este produto não deve ser eliminado como lixo doméstico geral. Devolva a pilha usada
ao revendedor ou entidade autorizada para que a mesma seja devolvida ao fabricante ou
importador.
A reciclagem e a eliminação de lixo de maneira apropriada ajudarão a conservar os recursos
naturais ao mesmo tempo que prevenirão os efeitos prejudicais à nossa saúde e ao meio
ambiente.
i
Page 3

Para cumplimiento de la COFETEL:
“La operación de este equipo está sujeta a las siguientes dos condiciones:
(1) es posible que este equipo o dispositivo no cause interferencia perjudicial y
(2) este equipo o dispositivo debe aceptar cualquier interferencia, incluyendo la que pueda
causar su operación no deseada”
IC (Industry Canada) Notice
This device complies with Industry Canada licence-exempt RSS standard(s).
Operation is subject to the following two conditions:
(1) This device may not cause interference, and
(2) this device must accept any interference, including interference that may cause
undesired operation of the device.
The term “IC: ” before the certification/ registration number only signifies that the Industry
Canada technical specification were met.
Note de IC (Industrie Canada)
Le présent appareil est conforme aux CNR d’Industrie Canada applicables aux appareils radio
exempts de licence.
L’exploitation est autorisée aux deux conditions suivantes:
(1) l’appareil ne doit pas produire de brouillage, et
(2) l’utilisateur de l’appareil doit accepter tout brouillage radioélectrique subi, même si le
brouillage est susceptible d’en compromettre le fonctionnement.
L’expression “IC:” avant le numéro d’homologation/ enregistrement signifie seulement que
les specifications techniques d’Industrie Canada ont été respectées.
CAUTION
This equipment complies with FCC/IC radiation exposure limits set forth for an uncontrolled
environment and meets the FCC radio frequency (RF) Exposure Guidelines in Supplement C
to OET65 and RSS-102 of the IC radio frequency (RF) Exposure rules. This equipment has very
low levels of RF energy that it deemed to comply without maximum permissive exposure
evaluation (MPE). But it is desirable that it should be installed and operated keeping the
radiator at least 20cm or more away from person’s body (excluding extremities: hands,
wrists, feet and ankles). Under Industry Canada regulations, this radio transmitter may
only operate using an antenna of a type and maximum (or lesser) gain approved for the
transmitter by Industry Canada. To reduce potential radio interference to other users, the
antenna type and its gain should be so chosen that the equivalent isotropically radiated
power (e.i.r.p.) is not more than that necessary for successful communication.
ATTENTION
Cet équipement est conforme aux limites d’exposition aux rayonnements énoncées
pour un environnement non contrôlé et respecte les règles d’exposition aux fréquences
radioélectriques (RF) CNR-102 de l’IC. Cet équipement émet une énergie RF très faible qui
est considérée conforme sans évaluation de l’exposition maximale autorisée. Cependant,
cet équipement doit être installé et utilisé en gardant une distance de 20 cm ou plus entre
le dispositif rayonnant et le corps (à l’exception des extrémités : mains, poignets, pieds et
chevilles). Conformément à la réglementation d’Industrie Canada, le présent émetteur radio
peut fonctionner avec une antenne d’un type et d’un gain maximal (ou inférieur) approuvé
pour l’émetteur par Industrie Canada. Dans le but de réduire les risques de brouillage
radioélectrique à l’intention des autres utilisateurs, il faut choisir le type d’antenne et son
gain de sorte que la puissance isotrope rayonnée équivalente (p.i.r.e.) ne dépasse pas
l’intensité nécessaire à l’établissement d’une communication satisfaisante.
• Contains Bluetooth Module FCC ID: XQN-BTR60X
• Contains Bluetooth Module IC: 9688A-BTR601
ii
Page 4
CONTENTS
BEFORE USE
BEFORE USE 2
BASICS 3
GETTING STARTED 4
CD / USB / iPod 5
RADIO 7
AUX 8
Pandora® 9
iHeartRadio® 10
SiriusXM® Radio
(for
KD-AR959BS
/
KD-R85MBS
) 11
BLUETOOTH® 13
AUDIO SETTINGS 19
DISPLAY SETTINGS 20
MORE INFORMATION 21
TROUBLESHOOTING 23
Warning
Do not operate any function that takes your attention away from safe driving.
Caution
Volume setting:
• Adjust the volume so that you can hear sounds outside the car to prevent accidents.
• Lower the volume before playing digital sources to avoid damaging the speakers by the sudden increase of
the output level.
General:
• Avoid using the USB device or iPod/iPhone if it might hinder safe driving.
• Make sure all important data has been backed up. We shall bear no responsibility for any loss of recorded
data.
• Never put or leave any metallic objects (such as coins or metal tools) inside the unit, to prevent a short
circuit.
• If a disc error occurs due to condensation on the laser lens, eject the disc and wait for the moisture to
evaporate.
Remote control (RM-RK52):
• Do not leave the remote control in hot places such as on the dashboard.
• The Lithium battery is in danger of explosion if replaced incorrectly. Replace it only with the same or
equivalent type.
• The battery pack or batteries shall not be exposed to excessive heat such as sunshine, fire or the like.
• Keep the battery out of reach of children and in its original packaging when not in used. Dispose of used
batteries promptly. If swallowed, contact a physician immediately.
INSTALLATION /
CONNECTION 26
SPECIFICATIONS 29
How to read this manual
• Operations are explained mainly
using buttons on the faceplate of
KD-AR855BT
•
[XX]
indicates the selected items.
•
( XX)
available on the stated page.
.
indicates references are
2
Maintenance
Cleaning the unit: Wipe off dirt on the faceplate with a dry silicone or soft cloth.
Cleaning the connector: Detach the faceplate and clean the connector
gently with a cotton swab, being careful not to damage the connector.
Handling discs:
• Do not touch the recording surface of the disc.
• Do not stick tape etc. on the disc, or use a disc with tape stuck on it.
• Do not use any accessories for the disc.
• Clean from the center of the disc and move outward.
• Clean the disc with a dry silicone or soft cloth. Do not use any solvents.
• When removing discs from this unit, pull them out horizontally.
• Remove burrs from the center hole and disc edge before inserting a disc.
Connector (on the reverse
side of the faceplate)
Page 5
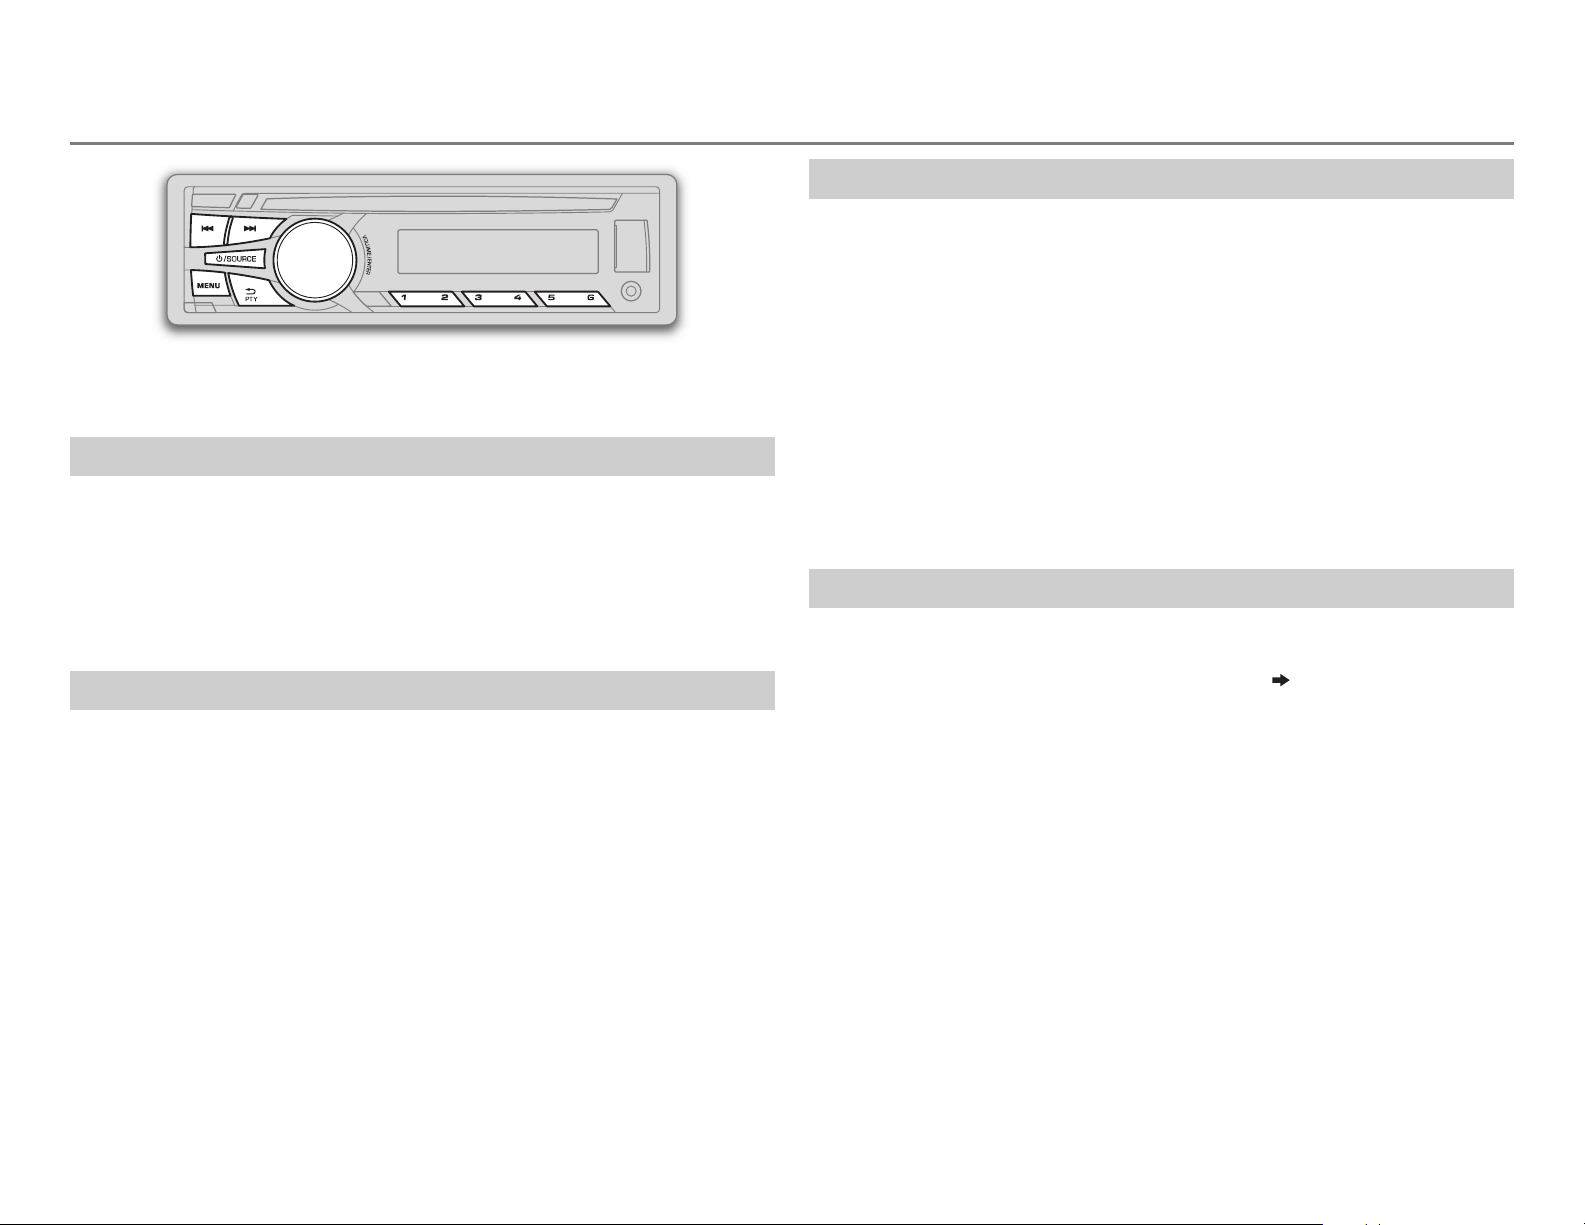
BASICS
Faceplate
Detach
button
Display window
KD-AR959BS
KD-R950BT
Volume knob
(turn/press) Loading slot
Attach
Detach
How to reset
Your preset adjustments
will also be erased.
Remote control (RM-RK52)
KD-R85MBS
optionally purchased remote control.
How to replace the battery
can be remotely controlled with an
Remote sensor (Do not expose
to bright sunlight.)
Pull out the insulation sheet
when using for the first time.
To Do this (on the faceplate) Do this (on the remote control)
Turn on the power
Adjust the volume Turn the volume knob. Press VOL+ or VOL–.
Select a source
Change the display
information
Press B /SOURCE.
• Press and hold to turn off the power.
Press the volume knob to mute the sound or pause playback.
• Press again to cancel.
• Press B /SOURCE repeatedly.
• Press B /SOURCE, then turn the volume knob within 2 seconds.
Press DISP repeatedly.
• Press and hold to scroll the current display information.
( 23)
( not available )
Press
• Press again to cancel.
Press SOURCE repeatedly.
( not available )
to mute the sound or pause playback.
ENGLISH |
3
Page 6
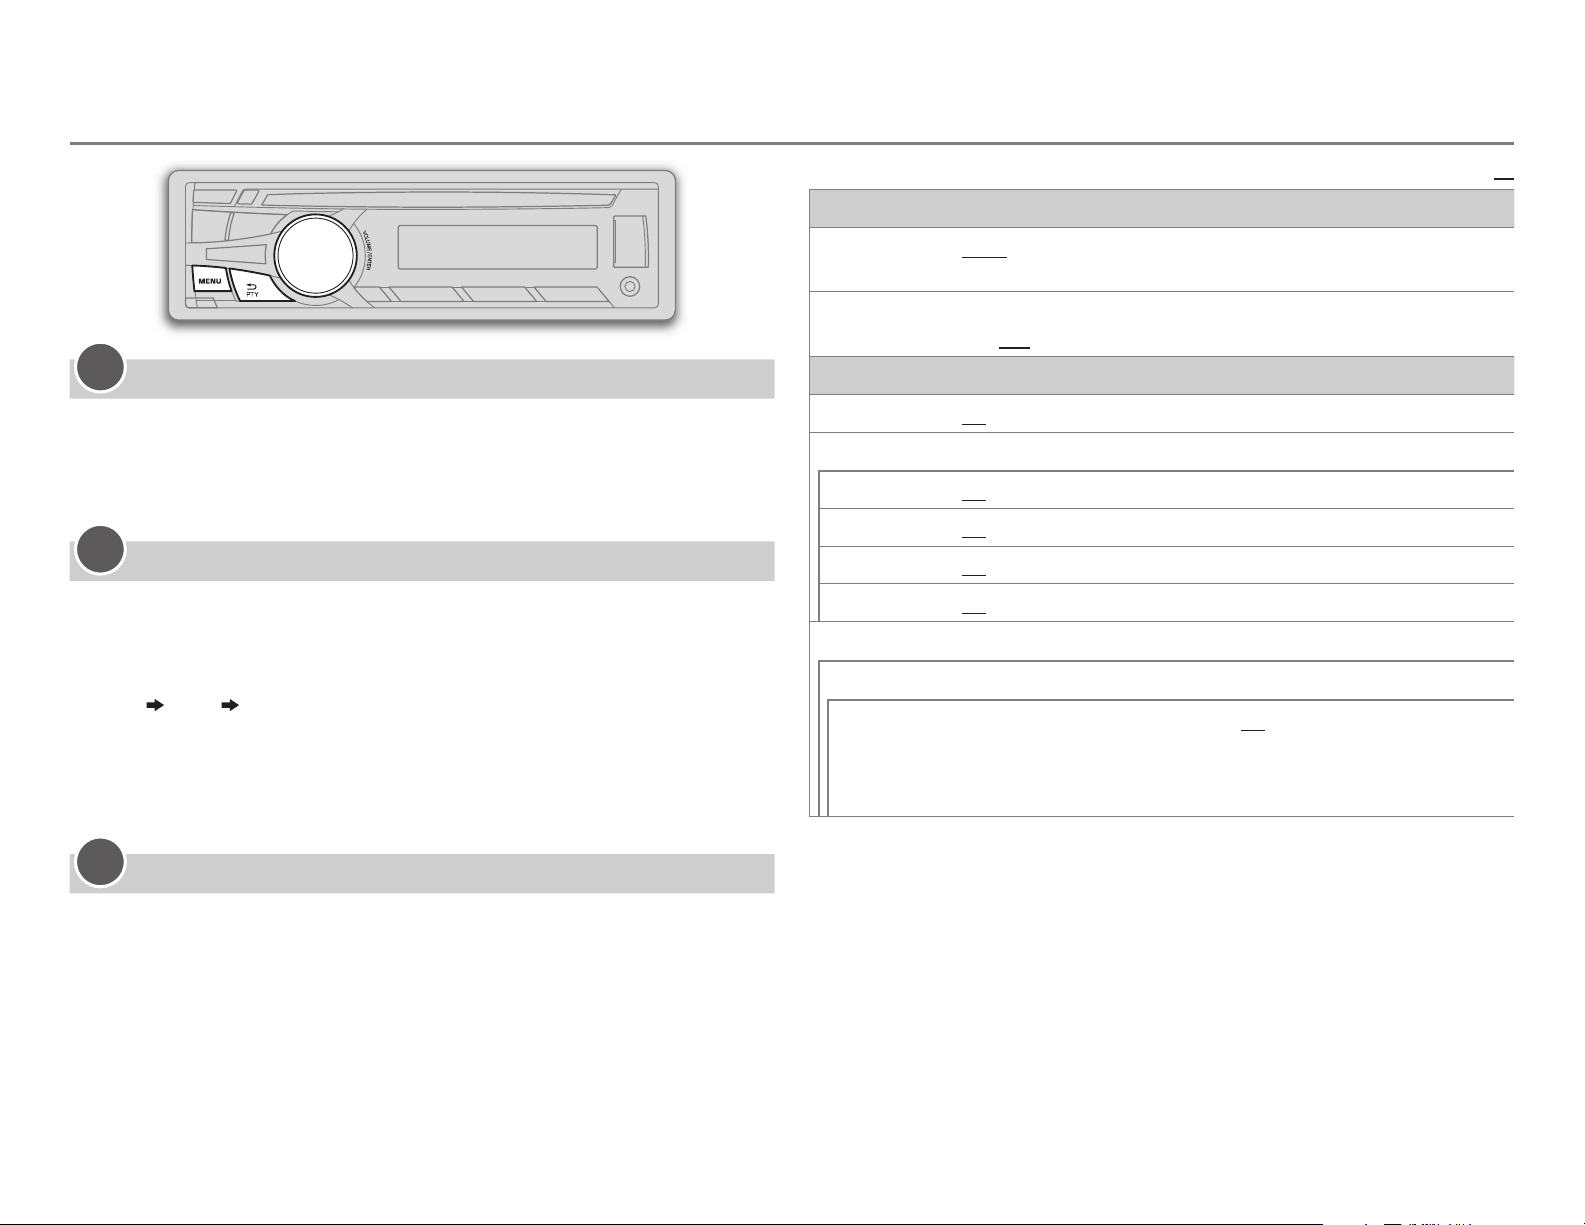
GETTING STARTED
1
Cancel the demonstration
Press and hold MENU.
1
2 Turn the volume knob to select
3 Turn the volume knob to select
[DEMO]
[DEMO OFF]
, then press the knob.
, then press the knob.
4 Press MENU to exit.
2
Set the clock
Press and hold MENU.
1
2 Turn the volume knob to select
3 Turn the volume knob to select
[CLOCK]
[CLOCK SET]
, then press the knob.
, then press the knob.
4 Turn the volume knob to make the settings, then press the knob.
Day
5 Turn the volume knob to select
6 Turn the volume knob to select
Hour Minute
knob.
[24H/ 12H]
[12 HOUR]
, then press the knob.
or
[24 HOUR]
, then press the
7 Press MENU to exit.
3
Set the basic settings
CLOCK
CLOCK ADJ
CLOCK DISP ON
SETTINGS
BEEP
SRC SELECT
AM
*
PANDORA
IHEART
*
AUX
*
AUTO
:The clock time is automatically set using the Clock Time (CT) data
in FM Radio Broadcast Data System signal.;
:The clock time is shown on the display even when the unit is turned
off.;
OFF
:Cancels.
ON
:Activates the keypress tone.;
ON
:Enables AM in source selection.;
*
ON
:Enables PANDORA in source selection.;
ON
:Enables IHEARTRADIO in source selection.;
ON
:Enables AUX in source selection.;
OFF
:Deactivates.
OFF
OFF
OFF
:Cancels.
:Disables.
OFF
:Disables.
OFF
:Disables.
:Disables.
F/W UPDATE
SYSTEM / BLUETOOTH
F/W xxxx
* Not displayed when the corresponding source is selected.
YES
:Starts upgrading the firmware.; NO:Cancels (upgrading is not
activated).
For details on how to update the firmware, see:
<http://www.jvc.net/cs/car/>.
Default:
XX
Press and hold MENU.
1
2 Turn the volume knob to make a selection (see the following table),
then press the knob.
3 Press MENU to exit.
To return to the previous setting item or hierarchy, press PTY.
4
Page 7
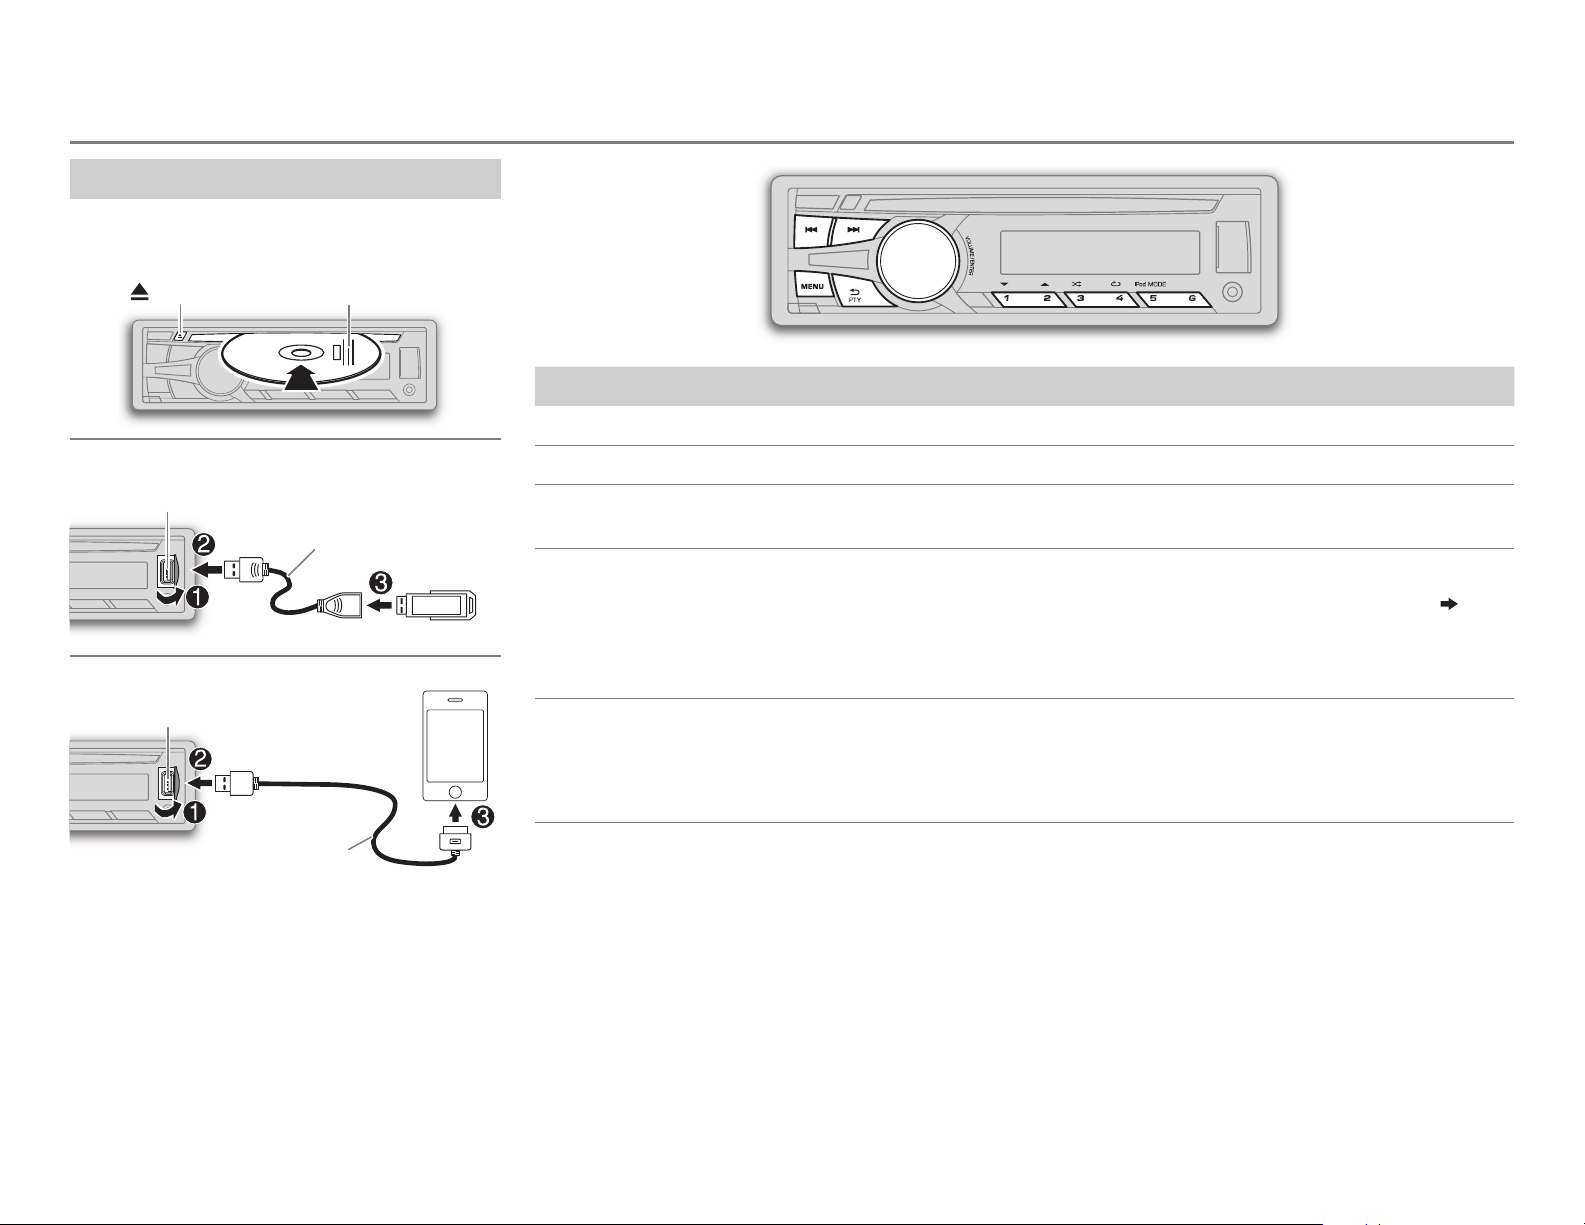
CD / USB / iPod
Start playback
The source changes automatically and
playback starts.
CD
Eject disc Label side
USB
USB input terminal
USB 2.0 cable
*1
(commercially available)
iPod/iPhone
USB input terminal
(Accessory of the iPod/iPhone)
Press 5 iPod MODE repeatedly to select the
control mode (
HEAD MODE
IPHONE MODE
[HEAD MODE]
: From the unit.
: From the iPod/iPhone.
1
*
/
[IPHONE MODE]
*
).
2
To Do this
Select a track/file
3
Select a folder
*
Reverse/
Fast-forward
4
Repeat play
Random play
1
*
Do not leave the cable inside the car when not using.
2
*
You can still play/pause, file skip, fast-forward or reverse files from the unit.
3
*
Only for MP3/WMA/WAV files. This does not work for iPod.
4
*
For iPod: Applicable under
*
4
*
Press S/ T (or press H / I on RM-RK52).
Press 1 K / 2 J (or press J / K on RM-RK52).
Press and hold S/ T (or press and hold H / I on RM-RK52).
Press 4 repeatedly to make a selection.
• Audio CD or JVC Playlist Creator (JPC) / JVC Music Control (JMC) file
TRACKRPT, RPT OFF
• MP3/WMA/WAV file: TRACKRPT, FOLDER RPT, RPT OFF
• iPod: ONE RPT, ALL RPT, RPT OFF
Press 3 repeatedly to make a selection.
• Audio CD: ALL RND, RND OFF
• MP3/WMA/WAV file or JPC / JMC file: FOLDERRND, ALL RND, RND OFF
• iPod: SONG RND, ALL RND, RND OFF
[HEAD MODE]
only.
( 22)
:
ENGLISH |
5
Page 8

CD / USB / iPod
Select a track/file from a list
For iPod: Applicable only when
[HEAD MODE]
is selected.
( 5)
1 Press MENU .
2 Turn the volume knob to make a selection, then press the knob.
• MP3/WMA/WAV file: Select the desired folder, then a file.
• iPod or JPC / JMC file: Select the desired file from the list (PLAYLISTS,
ARTISTS, ALBUMS, SONGS, PODCASTS*, GENRES, COMPOSERS*,
AUDIOBOOKS*).
*
Only for iPod.
If you have many files....
You can search through them quickly (on step
volume knob quickly.
• Not applicable for iPod.
2 above) by turning the
Select a song by name
While listening to the iPod and
If you have many folders or tracks/files, you can search through them
quickly according to the first character (A to Z, 0 to 9 and OTHERS).
• “OTHERS” appear if the first character is other than Ato Z, 0 to 9.
[HEAD MODE]
is selected
( 5)
....
1 Press MENU .
2 Turn the volume knob to select the desired list, then press the
knob.
3 Press 1 K / 2 J or turn the volume knob quickly to select the desired
character.
4 Turn the volume knob to select the desired folder or track/file, then
press the knob.
Change the USB drive
When a smartphone (Mass Storage Class) is connected to the USB input
terminal, you can select its internal memory or external memory (such as an
SD card) to playback the stored songs.
You can also select the desired drive to playback when a multiple drives
device is connected.
Press 5 iPod MODE repeatedly to select the desired drive.
(or)
1 Press and hold MENU .
2 Turn the volume knob to select
3 Turn the volume knob to select
4 Press the volume knob to select
The next drive is selected automatically.
Repeat steps 1 to 4 to select the following drives.
Selectable items:
[DRIVE1]
to
[DRIVE5]
[USB/IPOD]
[USB]
[DRIVECHANGE]
, then press the knob.
, then press the knob.
.
Change the playback speed of the Audiobook
While listening to the iPod and
[HEAD MODE]
is selected
( 5)
....
1 Press and hold MENU .
2 Turn the volume knob to select
3 Turn the volume knob to select
[USB/IPOD]
[IPOD]
, then press the knob.
, then press the knob.
4 Turn the volume knob to make a selection, then press the knob.
BOOK NORMAL
speed of the Audiobooks sound file in your iPod/iPhone.
(Default: Depends on your iPod/iPhone setting.)
• To return to the previous setting item or hierarchy, press PTY.
• To cancel, press MENU.
/
BOOK FASTER
/
BOOK SLOWER
: Select the desired playback
6
Page 9
RADIO
“ST” lights up when receiving an FM stereo broadcast with sufficient
signal strength.
Search for a station
Press B /SOURCE to select FM or AM.
1
2 Press S/ T (or press H / I on RM-RK52) to search for a station
automatically.
(or)
Press and hold S/ T (or press and hold H / I on RM-RK52) until
“M” flashes, then press repeatedly to search for a station manually.
Store a station
You can store up to 18 stations for FM and 6 stations for AM.
While listening to a station....
Press and hold one of the number buttons (1 to 6) to store.
(or)
1 Press and hold the volume knob until “PRESETMODE” flashes.
2 Turn the volume knob to select a preset number, then press the
knob.
The preset number flashes and “MEMORY” appears.
Search for your favorite program (PTY Search)
Available only for FM source.
1 Press and hold PTY.
2 Turn the volume knob to select a PTY code, then press the knob to
start searching.
If there is a station broadcasting a program of the same PTY code as
you have selected, that station is tuned in.
PTY code:
ADLT HIT
(nostalgia),
and blues),
(personality),
HIP HOP, WEATHER
NEWS, INFORM
(adult hits),
JAZZ, CLASSICL
LANGUAGE, REL MUSC
PUBLIC, COLLEGE, HABL ESP
(information),
SOFT RCK
(classical),
(softrock),
SPORTS, TALK, ROCK, CLS ROCK
TOP 40, COUNTRY, OLDIES, SOFT, NOSTALGA
R & B
(rhythm and blues),
(religious music),
(Spanish talk),
REL TALK
MUSC ESP
(classic rock),
SOFT R&B
(religious talk),
(soft rhythm
(Spanish music),
PERSNLTY
Other settings
Press and hold MENU.
1
2 Turn the volume knob to select
3 Turn the volume knob to make a selection
knob.
[TUNER]
, then press the knob.
( 8)
, then press the
4 Press MENU to exit.
To return to the previous setting item or hierarchy, press PTY.
• To select a stored station: Press one of the number buttons (1to6).
(or)
Press MENU, then turn the volume knob to select a preset number and
press the knob to confirm.
ENGLISH |
7
Page 10
RADIO
AUX
RADIO
TIMER
SSM
IF BAND AUTO
MONO
Turns on the radio at a specific time regardless of the current source.
1 ONCE/ DAILY/ WEEKLY/ OFF
2 FM/ AM
3 01
4
Set the activation day * and time.
• “
* Selectable only when
Radio Timer will not activate for the following cases.
• The unit is turned off.
•
[OFF]
selected.
SSM 01 – 06
stations for FM. “SSM” stops flashing when the first 6 stations are stored. Select
SSM 07 – 12
adjacent FM stations. (Stereo effect may be lost.);
interference noises from adjacent FM stations, but sound quality will not be
degraded and the stereo effect will remain.
Displayed only when the source is FM.
ON
:Improves the FM reception, but the stereo effect will be lost.;
:Select how often the timer will be turned on.
:Select the FM or AM band.
to 18 (for FM)/ 01 to 06 (for AM):Select the preset station.
” lights up when complete.
[ONCE]
or
[WEEKLY]
is selected for
( 4)
/
/
:Increases the tuner selectivity to reduce interference noises from
[AM]
SSM 07 – 12
SSM 13 – 18
in
[SRC SELECT]
/
SSM 13 – 18
to store the following 12 stations.
is selected in step 1.
after Radio Timer for AM is
:Automatically presets up to 18
WIDE
:Subjects to
Default:
OFF
:Cancels.
XX
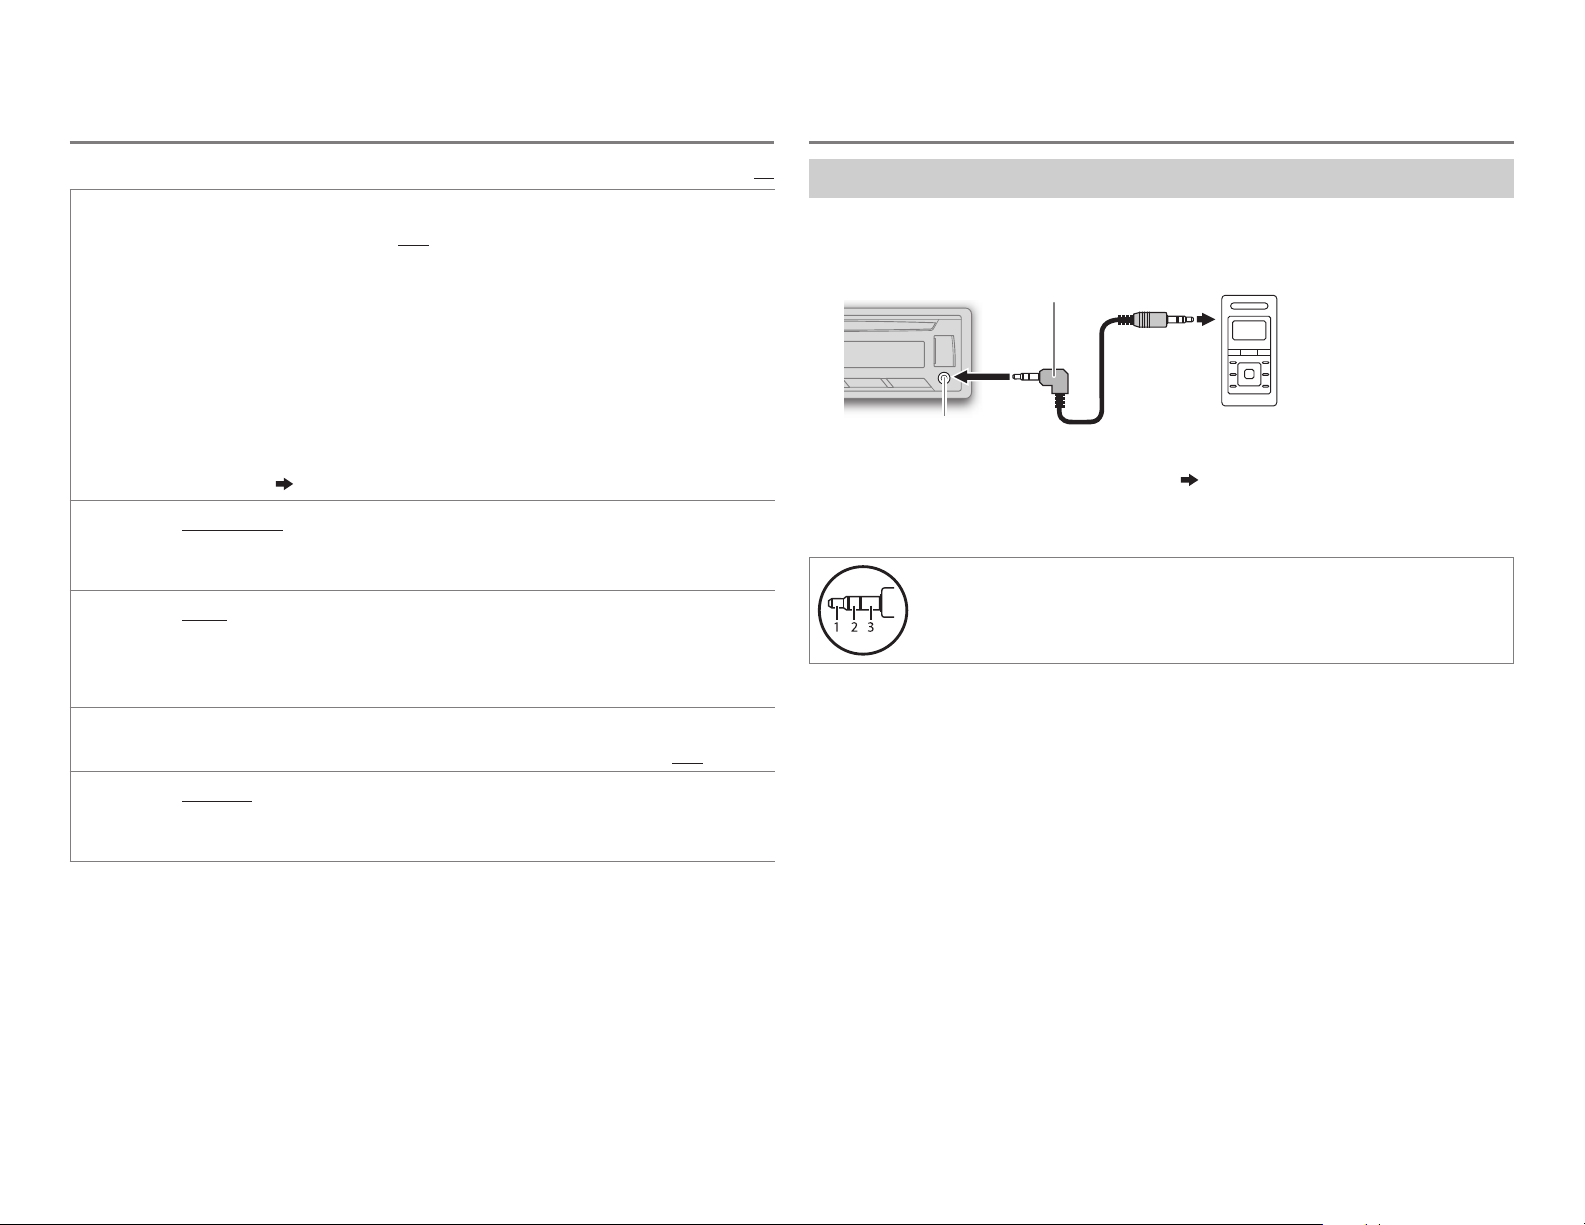
Use a portable audio player
Connect a portable audio player (commercially available).
1
3.5mm (1/8") stereo mini plug with “L” shaped connector
(commercially available)
Auxiliary input jack
Portable audio player
2 Select
[ON]
for
[AUX]
in
[SRC SELECT]. ( 4)
3 Press B /SOURCE to select AUX.
4 Turn on the portable audio player and start playback.
Use a 3-core plug head stereo mini plug for optimum audio
output.
AREA AREA US
AREA EU
some South American countries, AM/FM intervals: 10kHz/50kHz.
8
: For North/Central/South America, AM/FM intervals: 10kHz/200kHz.;
:For any other areas, AM/FM intervals: 9kHz/50kHz.;
AREA SA
:For
Page 11
Pandora®
Preparation:
Install the latest version of the Pandora application onto your device
(iPhone/ iPod touch), then create an account and log in to Pandora.
• Select
[ON]
for
[PANDORA]
in
[SRC SELECT]. ( 4)
Start listening
Open the Pandora application on your device.
1
2 Connect your device to the USB input terminal.
USB input terminal
(Accessory of the iPod/iPhone)
*
The source changes to PANDORA and broadcast starts.
* Do not leave the cable inside the car when not using.
To Do this
Pause or resume
playback
Press the volume knob (or press
RM-RK52).
on
Create a new station
Press MENU.
1
2 Turn the volume knob to select
3 Turn the volume knob to select
press the knob.
A new station is created based on the current song or artist.
[NEW STATION]
[FROM TRACK]
, then press the knob.
or
[FROM ARTIST]
, then
Search for a registered station
Press MENU.
1
2 Turn the volume knob to make a selection, then press the knob.
[BY DATE]:
[A-Z]:
According to the registered date.
Alphabetical order.
3 Turn the volume knob to the desired station, then press the knob.
Bookmark a song or artist information
Press and hold the volume knob.
1
2 Turn the volume knob to select
press the knob.
“BOOKMARKED” appears and the information is stored to your device.
The bookmark is available on your Pandora account but not on this
unit.
[THIS TRACK] or [THIS ARTIST]
, then
Thumbs up or
thumbs down
Skip a track
Press 2 /1 (or press J / K on RM-RK52).
• If thumbs down is selected, the current track is
skipped.
Press T (or press I on RM-RK52).
ENGLISH |
9
Page 12

iHeartRadio®
Preparation:
Install the latest version of iHeart Link for JVC application onto your
device (iPhone/ iPod touch), then create an account and log in to
iHeartRadio.
• Select
[ON]
for
[IHEART]
in
[SRC SELECT]. ( 4)
Start listening
Open the iHeart Link application on your device.
1
2 Connect your device to the USB input terminal.
USB input terminal
(Accessory of the iPod/iPhone)
*
* Do not leave the cable inside the car when not using.
3 Press B /SOURCE to select IHEARTRADIO.
Broadcast starts automatically
To Do this
Pause or resume playback
Thumbs up or thumbs down
for custom station
Skip a track for custom station
Create a new/custom station
Add to favorite stations for
live station
Scan for live station
Press the volume knob (or press
on RM-RK52).
Press 2 /1 (or press J / K on
RM-RK52).
• If thumbs down is selected, the
current track is skipped.
Press T (or press I on RM-RK52).
Press and hold the volume knob.
Press and hold 3.
Press 3.
Search for a station
Press MENU.
1
2 Turn the volume knob to select a category, then press the knob.
3 Turn the volume knob to the desired station, then press the knob.
When a city list appears, you can skip cities in alphabetical order.
4 Press MENU to exit.
10
Skip cities by alphabetical order
While a city list appears during search...
1 Turn the volume knob quickly to enter character search.
You can search through the list quickly according to the first character
(A to Z).
2 Turn the volume knob or press 2 /1 to select the character to
be search for.
3 Press the volume knob to start searching.
Page 13
SiriusXM® Radio
(for
KD-AR959BS
/
KD-R85MBS
)
Preparation:
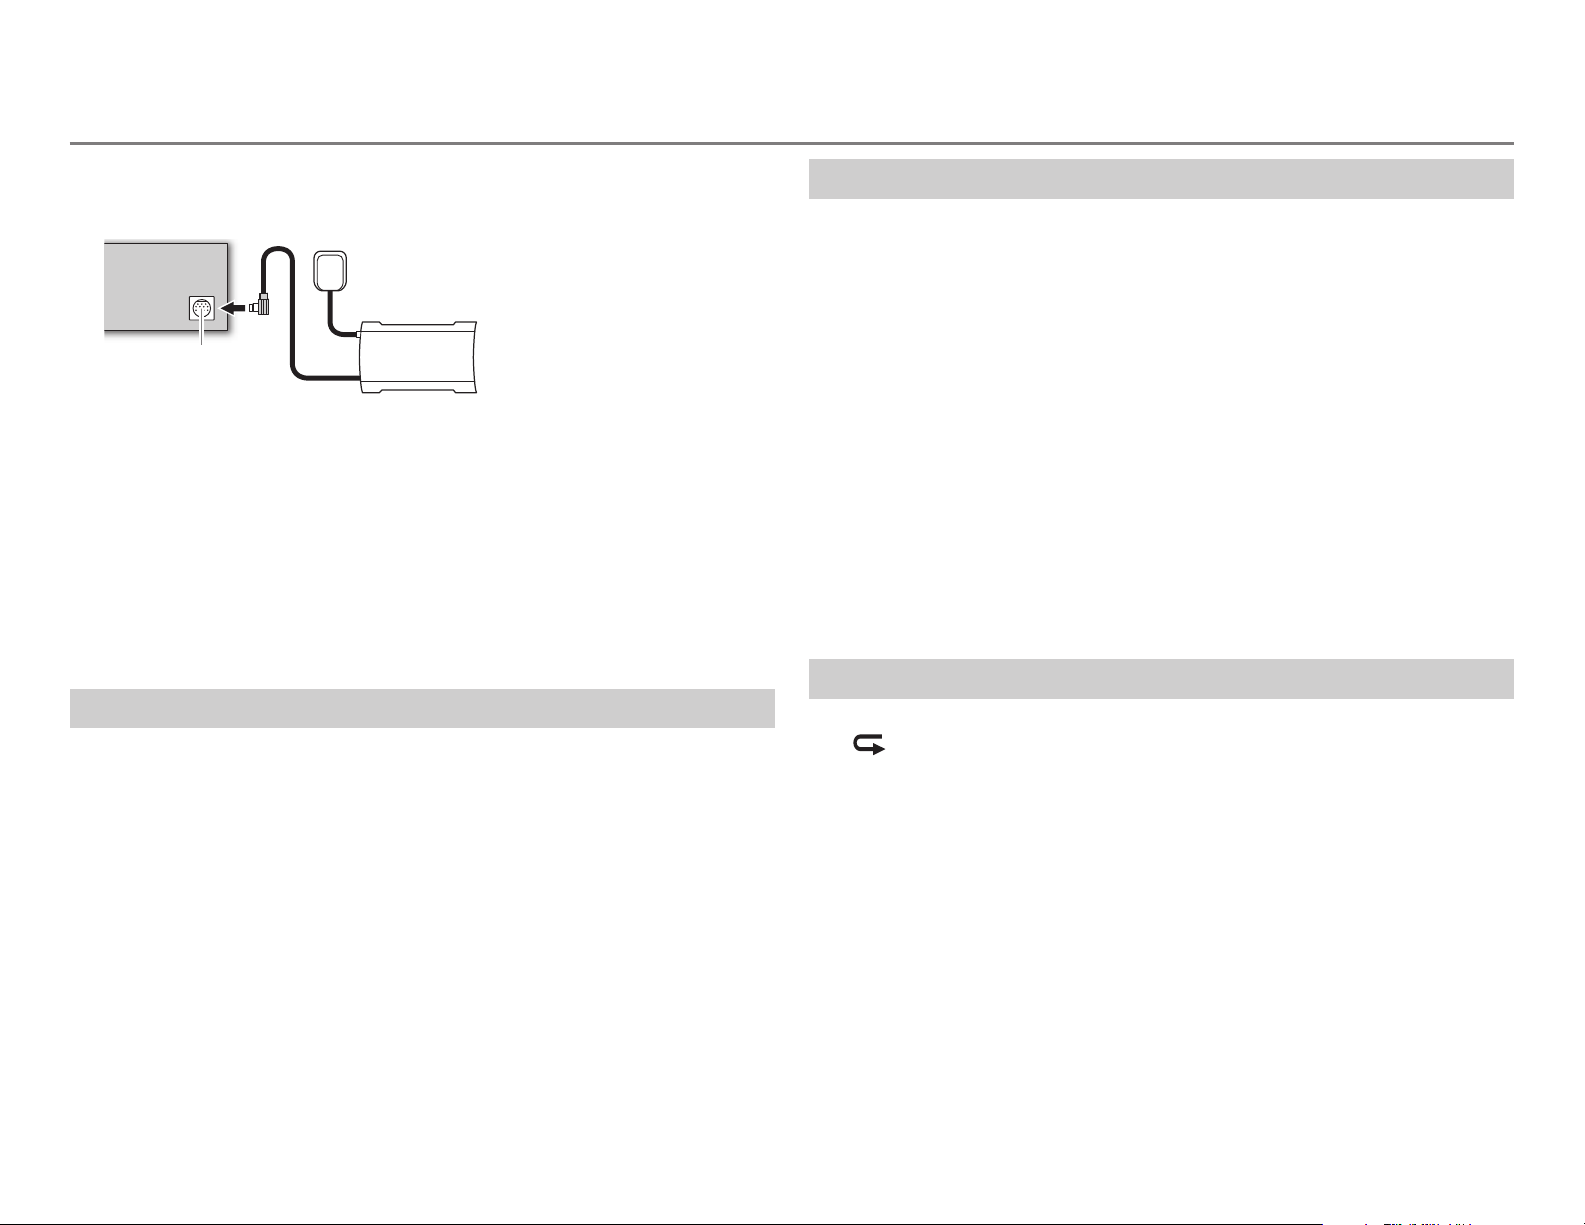
1 Connect the optional SiriusXM Vehicle Tuner (commercially
available).
Antenna
SiriusXM Vehicle TunerExpansion port on
the rear panel
2 Activate the subscription through www.siriusxm.com/activatenow
or call 1-866-635-2349.
The Radio ID is required to activate the SiriusXM Vehicle Tuner.
The Radio ID is located on the label of the SiriusXM Vehicle Tuner
and can also be shown on the unit’s display window when you select
“Channel 0” after SiriusXM Vehicle Tuner is connected.
For users in Canada: To activate SiriusXM Canada service go to
www.xmradio.ca and click on “ACTIVATE RADIO” in the top right
corner, or call 1-877-438-9677.
3 Press B /SOURCE to select SIRIUSXM to start updating.
Start listening
Press B /SOURCE to select SIRIUSXM.
1
2 Press MENU.
3 Turn the volume knob to select a CATEGORY, then press the knob.
4 Turn the volume knob to select a category from the list, then press
the knob.
If “ALL CHANNELS” is selected, all the available channels will be
shown.
5 Turn the volume knob to select a channel, then press the knob.
(or)
Press S/ T to search for a channel manually.
• Pressing and holding S/ T changes the channel rapidly.
If a locked channel or a mature channel (
selected, a pass code input screen appears. Enter the pass code to receive
the channel.
[MATURE CH]
is set to
[ON]
) is
Store a channel
You can store up to 18 channels.
Press and hold one of the number buttons (1 to 6).
(or)
1 Press and hold the volume knob until “PRESETMODE” flashes.
2 Turn the volume knob to select a preset number, then press the
knob.
The preset number flashes and “MEMORY” appears.
To select a stored channel:
Press one of the number buttons (1 to 6).
(or)
1 Press MENU.
2 Turn the volume knob to select PRESET, then press the knob.
3 Turn the volume knob to select a preset number, then press the
knob.
(or)
Press J / K on RM-RK52.
SiriusXM Replay™
Press the volume knob.
1
“
” lights up and the unit memorizes this paused position.
2 Press the volume knob to start Replay.
Replay starts from the paused position in step
During Replay...
• To pause or resume playback, press the volume knob.
• To skip the current song backward/forward, press S/ T (or press
H / I on RM-RK52).
• To rewind/fast-forward, press and hold S/ T (or press and hold
H / I on RM-RK52).
• To exit from Replay and go to live, press and hold the volume knob.
1.
ENGLISH |
11
Page 14

SiriusXM® Radio
Smart Favorites
User preset channels 1 to 6 are initially assigned as the Smart Favorites
channels. SiriusXM Vehicle Tuner automatically buffers the broadcast
audio content of the Smart Favorites channels in the background.
• Smart Favorite channel is available with SXV200 or later SiriusXM tuner
models.
• “ * ” appears at the last character of the channel name for the Smart
Favorites channels.
• This unit can store a maximum of six Smart Favorites channels. If you try
to assign the 7th channel, an error beep tone will be heard.
To cancel the Smart Favorites channels...
1 Press MENU.
2 Turn the volume knob to select PRESET, then press the knob.
3 Turn the volume knob to select a preset number, then press and
hold the knob.
“
” are removed from the last character.
*
To reassign the Smart Favorites channels...
Repeat steps
“
” appears at the last character.
*
When you select a Smart Favorites channel, you can rewind and replay
up to 30 minutes of any of the missed news, talk, sports or music content.
1 to 3.
SiriusXM settings
Press and hold MENU.
1
2 Turn the volume knob to select
[SIRIUS XM]
, then press the knob.
3 Turn the volume knob to make a selection (see the following table),
then press the knob.
4 Press MENU to exit.
To return to the previous setting item or hierarchy, press PTY.
There are two types of lock functions available:
• SiriusXM-defined: When
• User-defined: Using
CH LOCK
CODE SET
CH EDIT
CH CLEAR*YES
MATURE CH ON
SIGNAL LVL WEAK/ GOOD/ STRONG
BUF USAGE 0%
SXM RESET YES
* Displayed only when
To unlock settings:
1
Turn the volume knob to select a number.
2
Press
3
Repeat steps 1 and 2 to enter the current pass code. (Initial pass code is
0000.)
4
Press the volume knob to confirm.
1
Turn the volume knob to select a number.
2
Press
3
Repeat steps 1 and 2 to enter a new 4-digit pass code.
4
Press the volume knob to confirm.
5
Repeat steps 1 to 4 to reconfirm the pass code.
• Make a note of the new pass code to enter channel lock settings from next
time.
*
1
Turn the volume knob to select a category, then press the knob.
2
Turn the volume knob to select a channel you want to lock, then press the
3
Press and hold
:Turns on the SiriusXM-defined lock setting (mature channel).;
off.
• If
default.;
[MATURE CH]
[CHANNEL EDIT]
S/ T
S/ T
knob. “L” appears in front of the channel number.
:Clears all the locked channels.; NO:Cancels.
[ON]
is selected, your setting
—
100%(0
:Resets stored channel, locked channel setting and Mature CH setting to
NO
:Cancels.
[MATURE CH]
when
to move to the entry position.
to move to the entry position.
PTY
:Shows the strength of the current received signal.
):Shows the memory usage for Replay buffer.
is set to
[MATURE CH]
to exit.
is set to
[ON]
[CH EDIT]
[OFF]
is set to
is temporary ignored.
.
[OFF]
Default:
OFF
:Turns
XX
12
Page 15

BLUETOOTH®
You can operate Bluetooth devices using this unit.
Connect the microphone
Rear panel
Microphone (supplied)
Microphone input jack
Adjust the microphone
angle
* For
KD-AR959BS
( 27)
If you turn off the unit or detach the control panel during a phone call
conversation, the Bluetooth connection is disconnected. Continue the
conversation using your mobile phone.
/
KD-R85MBS
*
Secure using cord clamps
(not supplied) if necessary.
, connect to the microphone input terminal.
Supported Bluetooth profiles
– Hands-Free Profile (HFP1.5)
– Advanced Audio Distribution Profile (A2DP)
– Audio/Video Remote Control Profile (AVRCP1.3)
– Object Push Profile (OPP)
– Phonebook Access Profile (PBAP)
– Serial Port Profile (SPP)
Pair a Bluetooth device
When connecting a Bluetooth device to the unit for the first time,
perform pairing between the unit and the device. Once the pairing is
completed, the Bluetooth device will remain registered in the unit even if
you reset the unit.
• Up to five devices can be registered (paired) in total.
• A maximum of two Bluetooth phones and one Bluetooth audio device
can be connected at any time.
• This unit supports Secure Simple Pairing (SSP).
• Some Bluetooth devices may not automatically connect to the unit
after pairing. Connect the device to the unit manually. Refer to the
instruction manual of the Bluetooth device for more information.
1 Press B /SOURCE to turn on the unit.
2 Search and select “JVC UNIT” on the Bluetooth device.
“BTPAIRING” flashes on the display.
• For some Bluetooth devices, you may need to enter the Personal
Identification Number (PIN) code immediately after searching.
3 Perform (A) or (B) depending on what scrolls on the display.
• For some Bluetooth devices, pairing sequence may vary from the
steps described below.
(A) “[Device Name]” “XXXXXX” “VOL–YES” “BACK–NO”
• “XXXXXX” is a 6-digit passkey randomly generated during each
pairing.
Ensure that the passkey which appears on the unit and
Bluetooth device is the same.
Press the volume knob to confirm the passkey.
Operate the Bluetooth device to confirm the passkey.
(B) “[Device Name]” “VOL–YES” “BACK–NO”
• If only “PAIRING” appears, operate the Bluetooth device to
Press the volume knob to start pairing.
• If “PAIRING” “PIN 0000” scrolls on the display, enter the PIN
code “0000” into the Bluetooth device.
You can change to a desired PIN code before pairing.
confirm pairing.
( 17)
ENGLISH |
13
Page 16

BLUETOOTH®
“PAIRING COMPLETED” appears when pairing is completed.
• “
” or “ ” will light up when a Bluetooth mobile phone is connected.
• “
” will light up when a Bluetooth audio player is connected.
Bluetooth compatibility check mode
You can check the connectivity of the supported profile between the
Bluetooth device and the unit.
• Make sure there is no Bluetooth device connected.
1 Press and hold .
“BLUETOOTH”
PHONE”
“PIN IS 0000” scrolls on the display.
“CHECK MODE” appears. “SEARCH NOW USING
2 Search and select “JVC UNIT” on the Bluetooth device within
3minutes.
3 Perform (A), (B) or (C) depending on what appears on the display.
(A) “PAIRING”
passkey appears on the unit and Bluetooth device, then operate
the Bluetooth device to confirm the passkey.
(B) “PAIRING”
(C) “PAIRING”: Operate the Bluetooth device to confirm pairing.
After pairing is successful, “PAIRING OK”
Bluetooth compatibility check starts.
If “CONNECT NOW USING PHONE” appears, operate the Bluetooth device
to allow phonebook access to continue.
“XXXXXX” (6-digit passkey): Ensure that the same
“PIN IS 0000”: Enter “0000” on the Bluetooth device.
“[Device Name]” appears and
Bluetooth mobile phone
To Do this
Receive a call
Press or the volume knob.
On RM-RK52: Press J / K / H / I .
• When
unit answers incoming call automatically.
Reject an
incoming call
End a call
Press and hold or the volume knob.
On RM-RK52: Press and hold J / K / H / I .
Press and hold or the volume knob.
On RM-RK52: Press and hold J / K / H / I .
Activate or
deactivate
hands-free
mode
Adjust the
phone volume
Switch between
two connected
phones
Press the volume knob during a call.
• Operations may vary according to the connected
Bluetooth mobile phone.
Turn the volume knob during a call.
Phone volume:
• This adjustment will not affect the volume of the
other sources.
Press repeatedly.
• Not applicable during a call.
[AUTO ANSWER]
[00]
is set to the selected time, the
( 15)
to
[50]
(Default:
[15]
)
The connectivity result flashes on the display.
“PAIRING OK” and/or “H.FREE OK”*1 and/or “A.STREAM OK”*2 and/or
“PBAP OK”*
1
*
Compatible with Hands-Free Profile (HFP)
2
*
Compatible with Advanced Audio Distribution Profile (A2DP)
3
*
Compatible with Phonebook Access profile (PBAP)
After 30 seconds, “PAIRING DELETED” appears to indicate that pairing has
been deleted, and the unit exits check mode.
• To cancel, press and hold B /SOURCE to turn off the power, then turn
on the power again.
3
: Compatible
14
Improve the sound quality during a call
While talking on the phone....
1 Press and hold MENU.
2 Turn the volume knob to make a selection
knob.
( 15)
, then press the
3 Press MENU to exit.
To return to the previous setting item or hierarchy, press PTY.
Page 17

BLUETOOTH®
MIC LEVEL
NOISE RDCT –05
ECHO CANCEL 1
–20
number increased.
noise is being heard during a phone conversation.
—10(4):Adjust the echo cancellation delay time until the least
echo is being heard during a phone conversation.
—
+08(0
—–20(
Default:
):The sensitivity of the microphone increases as the
–10
):Adjust the noise reduction level until the least
XX
Bluetooth mode operations
Press to enter Bluetooth mode.
1
2 Turn the volume knob to make a selection (see the following table),
then press the knob.
3 Press MENU to exit.
To return to the previous setting item or hierarchy, press PTY.
1
RECENT CALL
PHONEBOOK
Press the volume knob to select a name or a phone number.
• “>” indicates call received, “<“ indicates call made, “M” indicates
call missed.
• “NO HISTORY” appears if there is no recorded call history or call
number.
2
Press the volume knob to call.
1
Turn the volume knob to select a name, then press the knob.
2
Turn the volume knob to select a phone number, then press the knob to
call.
• If the phone supports PBAP, the phonebook of the connected phone is
automatically transferred to the unit when pairing. If the phone does
not support PBAP, “SEND P.BOOK MANUALLY” appears. Transfer the
phonebook manually.
• This unit can display only non-accent letters. (Accent letters such as “Ú”
is showns as “U”.)
• If the phonebook contains many contacts,
name).
(17, P.BOOK WAIT)
(16, Select a contact by
DIAL NUMBER
VOICE
SETTINGS
AUTO ANSWER
RING TONE IN UNIT:
RING COLOR
(for
KD-AR959BS
KD-R950BT
MSG NOTICE
* Functionality depends on the type of the phone used.
1
Turn the volume knob to select a number (0 to 9) or character ( , #,
+).
2
Press
S / T
Repeat steps
3
Press the volume knob to call.
Speak the name of the contact you want to call or the voice command to
control the phone functions.
01 SEC —30 SEC
selected time (seconds).;
The unit rings to notify you when a call/text message comes in.
(Default ring tone is different according to the paired device.)
•
CALL:
Selects your preferred ring tone (
calls.
•
MESSAGE:
incoming text messages.
IN PHONE:
when a call/text message comes in. (The connected phone will ring if it
does not support this feature.)
COLOR01
the selected color during a call or when a text message comes in.;
/
OFF
:Cancels.
)
*
ON:
The unit rings and “RCV MESSAGE” appears to notify you of an
incoming text message.;
Selects your preferred ring tone (
The unit uses the connected phones’ ring tone to notify you
—
to move the entry position.
1
and 2 until you finish entering the phone number.
(16, Use Voice Recognition)
:The unit answer incoming call automatically in the
OFF
:Cancels.
TONE 1 — 5
TONE 1 — 5
COLOR29(COLOR 06
OFF
): Display zone will change to
:Cancels.
Default:
) for incoming
) for
XX
ENGLISH |
15
Page 18
BLUETOOTH®
Text message notification
When the phone receives a text message, the unit rings and “RCV
MESSAGE” appears.
• You cannot read, edit, or send a message through the unit.
• To clear the message, press any button.
Use Voice Recognition
Press and hold .
1
The connected phone (which has been paired the earliest) is
activated. However, if priority device is connected, pressing and
holding
activate the priority device.
( 17, PRIORITY)
2 Speak the name of the contact you want to call or the voice
command to control the phone functions.
• Supported Voice Recognition features vary for each phone. Refer to the
instruction manual of the connected phone for details.
• This unit also supports the intelligent personal assistant function of
iPhone.
Select a contact by name
• You can search through the contacts quickly according to the first letter
(A to Z, 0 to 9, and OTHERS).
• “OTHERS” appears if the first character is other than A to Z, 0 to 9.
1 Press to enter Bluetooth mode.
2 Turn the volume knob to select
[PHONEBOOK]
, then press the knob.
3 Press 1 K / 2 J to select the desired letter.
4 Turn the volume knob to select a name, then press the knob.
5 Turn the volume knob to select a phone number, then press the
knob to call.
To return to the previous setting item or hierarchy, press PTY.
Store a contact in memory
You can store up to 6 contacts.
1 Press to enter Bluetooth mode.
2 Turn the volume knob to select
[DIAL NUMBER]
, then press the knob.
[RECENT CALL], [PHONEBOOK]
, or
3 Turn the volume knob to select a contact or enter a phone number.
If a contact is selected, press the volume knob to show the phone
number.
4 Press and hold one of the number buttons (1 to 6).
“MEMORY P(selected preset number)” appears when the contact is
stored.
To erase a contact from the preset memory, select
step
2
and store a blank number.
[DIAL NUMBER]
in
Make a call from memory
Press to enter Bluetooth mode.
1
2 Press one of the number buttons (1 to 6).
3 Press the volume knob to call.
“NO PRESET” appears if there is no contacts stored.
Delete a contact
Not applicable for mobile phone that supports PBAP.
1 Press to enter Bluetooth mode.
2 Turn the volume knob to select
press the knob.
[RECENT CALL]
or
[PHONEBOOK]
, then
3 Turn the volume knob to select a contact or a phone number.
4 Press and hold PTY.
5 Turn the volume knob to select
the knob.
DELETE
DELETE ALL
step
: Selected name or phone number in step 3 is deleted.
: All names or phone numbers from the selected menu in
2 is deleted.
6 Turn the volume knob to select
[DELETE]
[YES]
or
or
[DELETE ALL]
[NO]
, then press the knob.
, then press
16
Page 19

BLUETOOTH®
Bluetooth mode settings
Press and hold MENU.
1
2 Turn the volume knob to select
[BLUETOOTH]
, then press the knob.
3 Turn the volume knob to make a selection (see the following table),
then press the knob.
4 Press MENU to exit.
To return to the previous setting item or hierarchy, press PTY.
PHONE
AUDIO
APPLICATION
DELETE PAIR
PRIORITY
P.BOOK WAIT
Selects the phone or audio device to connect or disconnect.
Shows the connected phone name using the JVC Smart Music Control
app. “
” appears in front of the device name.
1
Turn the volume knob to select a device to delete, then press the
knob.
2
Turn the volume knob to select
Selects a device to be connected as priority device. “ ” appears in front
of the device name set as priority.
•
“NO PAIR” appears if there is no registered device found.
2
*
Copies up to 400 numbers from the phonebook memory of a connected
phone.
[YES]
or
[NO]
, then press the knob.
Default:
XX
*1
AUTO CNNCT ON
INITIALIZE YES
INFORMATION
1
*
JVC Smart Music Control is designed to view JVC car receiver status
and perform simple control operations on Android smart phones.
For JVC Smart Music Control operations, visit JVC website:
<http://www.jvc.net/cs/car/>.
2
*
Selectable only when the connected phone supports OPP.
:The unit automatically reconnect when the Bluetooth device is
within range.;
:Updates all the Bluetooth settings (including stored pairing,
phonebook, and etc.).;
MYBTNAME
MYADDRESS
OFF
:Cancels.
NO
:Cancels.
: Displays the unit name (JVCUNIT).;
: Shows address of this unit.
SET PINCODE
(0000)
Changes the PIN code (up to 6 digits).
1
Turn the volume knob to select a number.
2
Press
S / T
Repeat steps
3
Press the volume knob to confirm.
to move the entry position.
1
and 2 until you finish entering the PIN code.
ENGLISH |
17
Page 20

BLUETOOTH®
Internet radio via Bluetooth
Listen to Pandora
Preparation:
Select
You can listen to Pandora on your smart phone (Android OS) through
Bluetooth on this unit.
[ON]
for
[PANDORA]
in
[SRC SELECT]. ( 4)
1 Open the Pandora application on your device.
2 Connect to Bluetooth audio player.
( 13)
3 Press B /SOURCE to select PANDORA.
The source switches and broadcast starts automatically.
• You can operate Pandora in the same way as Pandora for iPod/iPhone.
( 9)
Listen to iHeartRadio
Preparation:
Select
You can listen to iHeartRadio on your smart phone (Android OS) through
Bluetooth on this unit.
[ON]
for
[IHEART]
in
[SRC SELECT]. ( 4)
1 Open the iHeart Link application on your smart phone.
2 Connect your smart phone via Bluetooth connection.
( 13)
3 Press B /SOURCE to select IHEARTRADIO.
The source switches and broadcast starts automatically.
• You can operate iHeartRadio in the same way as iHeartRadio for iPod/
iPhone.
( 10)
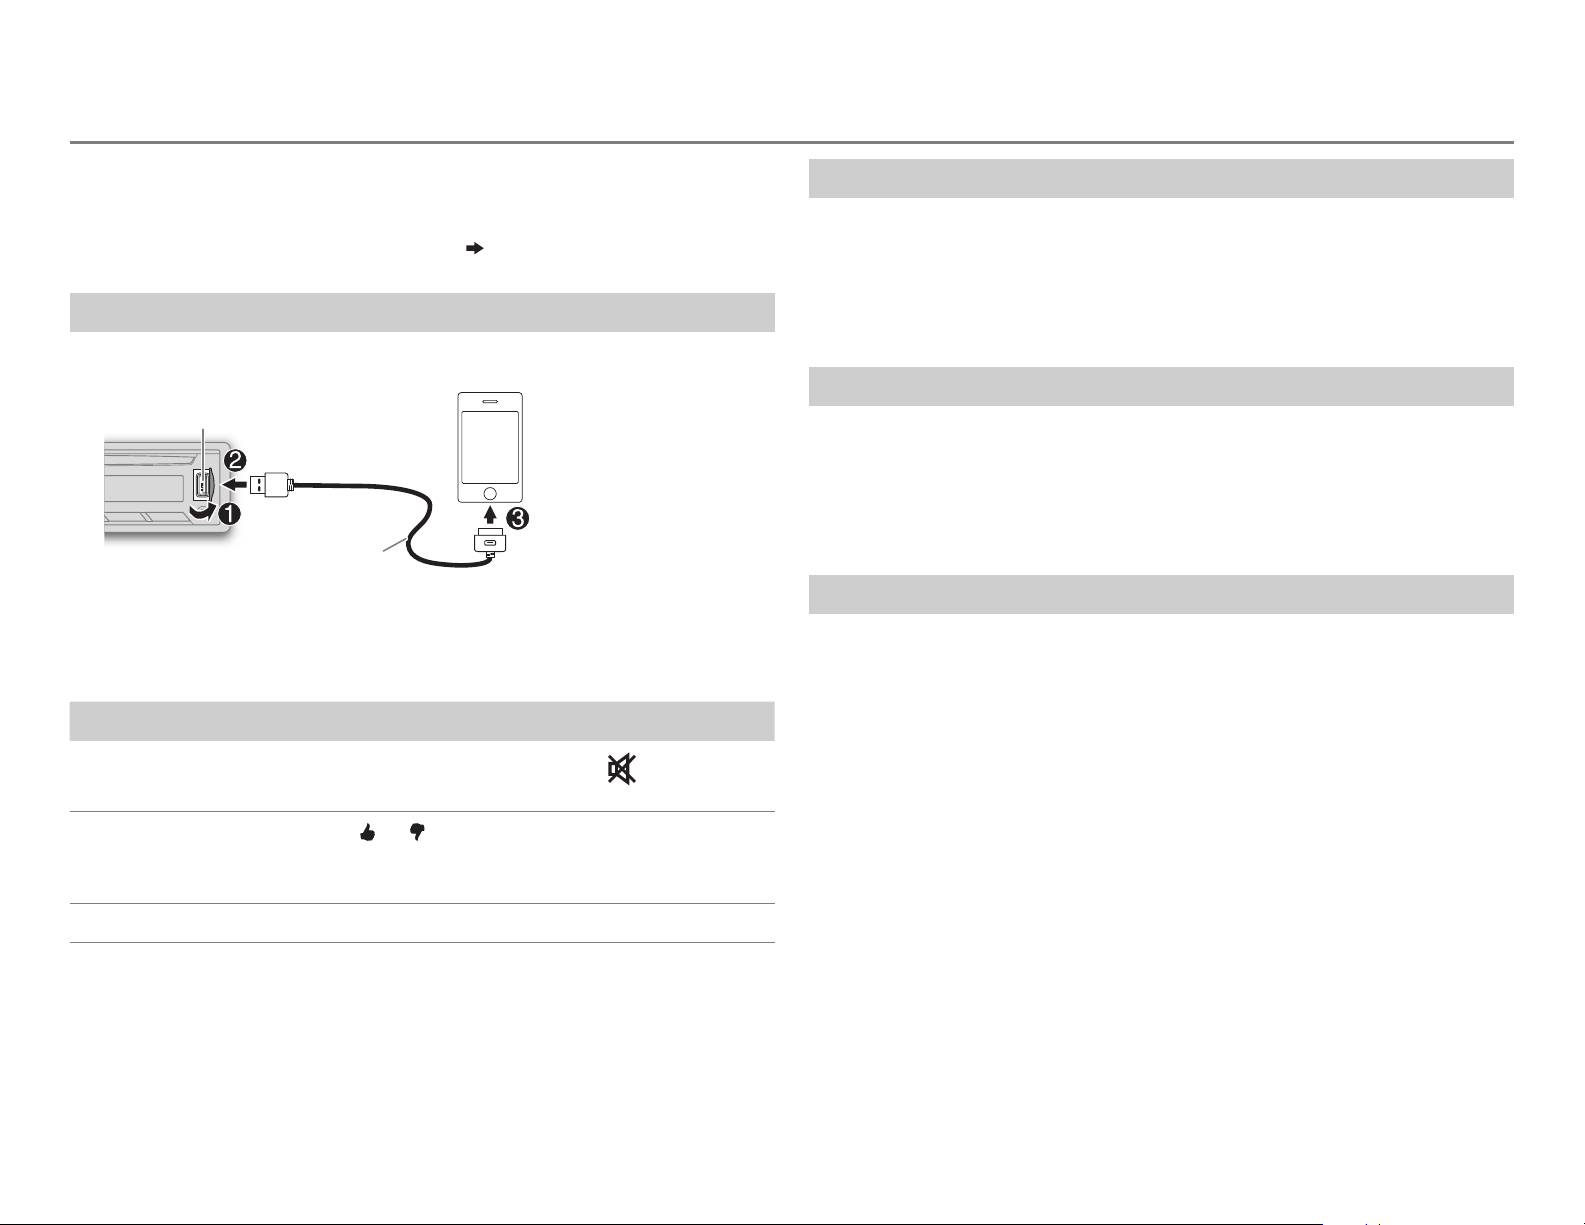
Bluetooth audio player
Operations and display indications may differ according to their
availability on the connected device.
To Do this
Playback
1 Press B /SOURCE to select BTAUDIO.
2 Operate the Bluetooth audio player to start
playback.
Pause or
resume
playback
Select group or
folder
Reverse/
forward skip
Reverse/
fast-forward
Repeat play
Random play
Press MENU (or press on RM-RK52).
Press 1 K / 2 J (or press J / K on RM-RK52).
Press S / T (or press H / I on RM-RK52).
Press and hold S / T (or press and hold H / I on
RM-RK52).
Press 4 repeatedly to make a selection.
TRACKRPT, ALLRPT, RPTOFF
Press 3 repeatedly to make a selection.
GROUPRND, ALLRND, RNDOFF
18
Page 21

AUDIO SETTINGS
1 Press and hold MENU.
2 Turn the volume knob to make a selection, then press the knob.
Repeat step 2 until the desired item is selected.
3 Press MENU to exit.
To return to the previous setting item or hierarchy, press PTY.
Default:
EQSETTING
EQPRESET
EASYEQ
Default:
PRO EQ
(for
KD-R85MBS
KD-AR855BT
KD-R850BT
FLAT/
HARD ROCK/
VOCALBOOST/
equalizer.
1 USER1/ USER2
00
2
Adjust your own sound settings.
(For
KD-R85MBS
1
SUB.W
*
:
MIDLVL:–06
(For
KD-AR959BS
1
SUB.W
*
:
MIDLVL:–10
1 USER1/ USER2
2 BASS
/
3
/
Level:
)
/
MIDDLE
Adjust the sound elements of the selected sound tone.
BASS
Frequency: 60/ 80/
Q:
MIDDLE
Frequency:
Level:
Q:
TREBLE
Frequency:
Level:
Q:
JAZZ/
POP/
BASSBOOST/
:Select a preset name.
/
KD-AR855BT
–08
to
+08/ BASSLVL: –06
to
+06/ TRELVL: –06
/
KD-R950BT
–08
to
+08/ BASSLVL: –10
to
+10/ TRELVL: –10
:Select a preset name.
/
TREBLE
–06
to
Q1.0/ Q1.25/ Q1.5/ Q2.0 (
0.5/ 1.0/ 1.5/ 2.5kHz
–06
to
Q0.75/ Q1.0/ Q1.25
10.0/ 12.5/ 15.0/ 17.5kHz
–06
to
QFIX
R&B/
TALK/
CLASSICAL/
/
KD-R850BT
to
DANCE
to
+06
+06
USER1/
USER2/
:Selects a preset
)
/
)
to
+10
/
to
+10
:Select a sound tone.
100/ 200Hz
+06
(
Default: (
Default: (
+06
(00)
(
Default: (
+06
(00)
(
80Hz
00
)
Q1.0
1.0kHz
Q1.25
10.0kHz
QFIX
PRO EQ
(for
KD-AR959BS
KD-R950BT
XX
1 USER1/ USER2
)
/
2 BASS
3
/
MID BASS / MID / MID HIGH
Adjust the sound elements of the selected sound tone.
BASS
Frequency: 63/ 80/
Level:
Q:
MID BASS
Level:
Q:
MID
Frequency:
Level:
Q:
MID HIGH
Level:
Q:
HIGH
Frequency:
Level:
Q:
:Select a preset name.
–10
Q1.0/ Q1.25/ Q1.5/ Q2.0 (
Frequency:
200/ 250/ 315/ 400Hz
–10
Q1.0/ Q1.25/ Q1.5/ Q2.0 (
630/ 800Hz/ 1.0/ 1.25kHz
–10
Q0.75/ Q1.0/ Q1.25/ Q2.0 (
Frequency:
2.0/ 2.5/ 3.15/ 4.0kHz
–10
Q0.75/ Q1.0/ Q1.25/ Q2.0 (
6.3/ 8.0/ 10.0/ 12.5kHz
–10
Q0.75/ Q1.0/ Q1.25/ Q2.0 (
100/ 125Hz
to
+10
to
+10
to
+10
to
+10
to
+10
/
HIGH
:Select a sound tone.
(
Default: (
Default: (
(00)
Default: (
(00)
Default: (
(00)
Default: (
(00)
80Hz
00
)
Q1.25
250Hz
Q1.25
800Hz
Q1.0
)
2.5kHz
Q1.0
)
8.0kHz
Q1.0
)
)
)
)
)
)
)
)
AUDIO
BASS BOOST
LOUD 01
)
SUB.W LEVEL
)
SUB.W
2
*
)
SUB.WLPF
)
)
1
*
Displayed only when
)
[ON]
.
2
*
Displayed only when
+01
/
+02
: Selects your preferred bass boost level.;
/02:Boosts low or high frequencies to produce a well-balanced sound at
1
*
1
*
low volume.;
–08
—
ON
/
OFF
THROUGH
HIGH120Hz
OFF
:Cancels.
+08(00
):Adjusts the subwoofer output level.
: Turns on or off the subwoofer output.
:All signals are sent to the subwoofer. ;
:Audio signals with frequencies lower than 55Hz/ 85Hz/
120Hz are sent to the subwoofer.
[L/OMODE]
[L/O MODE]
is set to
is set to
[SUB.W]
[SUB.W]
and
.
OFF
:Cancels.
LOW55Hz
[SUB.W]
/
MID85Hz
is set to
/
ENGLISH |
19
Page 22

3
*
HPF
FADER
BALANCE
DISPLAY SETTINGS
KD-R85MBS / KD-AR855BT / KD-R850BTKD-AR959BS / KD-R950BT
OFF
:All signals are sent to the front/rear speakers.;
MID120Hz
/
HIGH150Hz
:Audio signals with frequencies lower than
AUDIO SETTINGS
LOW100Hz
/
100Hz/ 120Hz/ 150Hz are cut off from the front/rear speakers.
4
5
*
*
*
R06
—
F06(00
):Adjusts the front and rear speaker output balance.
4
L06
—
R06(00
):Adjusts the left and right speaker output balance.
VOL ADJUST –05
—
+05(00
):Presets the volume adjustment level of each source
(compared to the FM volume level). Before adjustment, select the source
you want to adjust. (“VOLADJFIX” appears if FM is selected.)
AMP GAIN LOWPOWER
:Limits the maximum volume level to 30. (Select if the
maximum power of each speaker is less than 50W to prevent damaging
D.T.EXP
(Digital Track
Expander)
L/O MODE
the speakers.);
ON
:Creates realistic sound by compensating the high-frequency
components and restoring the rise-time of the waveform that are lost in
audio data compression.;
6
*
SUB.W
HIGHPOWER
/
REAR
:Selects whether rear speakers or a subwoofer are
:The maximum volume level is 50.
OFF
:Cancels.
connected to the REAR/SW line out terminals on the rear panel (through an
external amplifier).
3
*
For
KD-AR959BS
4
*
This adjustment will not affect the subwoofer output.
5
*
If you are using a two-speaker system, set the fader level to
6
*
For
KD-R950BT
/
KD-R950BT
/
KD-R850BT
/
KD-R85MBS
.
/
KD-AR855BT
.
[00]
1 Press and hold MENU.
2 Turn the volume knob to make a selection (see the following table),
then press the knob.
Repeat step
2 until the desired item is selected.
3 Press MENU to exit.
To return to the previous setting item or hierarchy, press PTY.
Default:
DISPLAY
DIMMER
Selects the display and button illumination adjusted in the
[BRIGHTNESS]
setting.
AUTO
:Changes between the day and night adjustments when you turn off
or on the car headlights. *
.
BRIGHTNESS
the day adjustments.
Sets the button, display and USB input terminal brightness for day and night
1
; ON:Selects the night adjustments.;
OFF
separately.
1 DAY / NIGHT
2
Select a zone for setting.
3
Set the brightness level (00 to 31). (Default:
SCROLL
2
*
ONCE
:Scrolls the display information once.;
5-second intervals.;
1
*
The illumination control wire connection is required.
2
*
Some characters or symbols will not be shown correctly (or will be blanked).
:Select day or night.
( Illustration above)
OFF
:Cancels.
DAY:31
AUTO
( 27, 28)
;
NIGHT:15
:Repeats scrolling at
XX
:Selects
)
20
Page 23

DISPLAY SETTINGS
MORE INFORMATION
COLOR
(for
PRESET
DAY COLOR
NIGHT COLOR
KD-AR959BS
You can select a color for [
[
ZONE 2
Default color:
ALL ZONE
DISP ZONE
1
Select a zone for setting.
2
Select a color for the selected zone.
•
•
•
•
* If one of these color pattern is selected, the [
[
Store your own day and night colors for different zone.
1
Select a zone for setting.
2 RED
3 00
Repeat steps
• Your setting is stored to
• If
appears on the display.
/
KD-R950BT
] separately. For [
: [
: [
COLOR 01
USER
: The color you have created for [
[
NIGHT COLOR
COLOR FLOW 01
speeds.
SPECTRUM/ GROOVE/ TECHNO/ EMOTION/ RELAX
NIGHT SWEEP
only when [
ZONE 2
] illumination color will change to the default color.
/
GREEN
to 31:Select the level.
[00]
is selected for all primary colors for
)
ALL ZONE
ALL ZONE
COLOR 06
COLOR 01
2
],
ZONE 1
],
ZONE 2
to
COLOR 29
] is shown.
to
COLOR FLOW 03
: The selected color pattern is shown.* (Selectable
ALL ZONE
/
BLUE
and 3 for all the primary colors.
] is selected in step
:Select a primary color.
[USER]
], [
], you can also select a color pattern.
: [
COLOR 06
: [
COLOR 27
( 20)
( 20)
in
[PRESET]
ZONE 1
], [
DISP ZONE
],
]
DAY COLOR
: Color changes at different
1.)
ZONE 1
.
[DISP ZONE]
] or
/
], [
DISP ZONE
, nothing
Default:
], or
],
XX
About discs and audio files
• This unit can only play the following CDs:
• This unit can play back multi-session discs; however, unclosed sessions will be skipped
during playback.
•
Unplayable discs:
- Discs that are not round.
- Discs with coloring on the recording surface or discs that are dirty.
- Recordable/ReWritable discs that have not been finalized.
- 8 cm CD. Attempting to insert using an adapter may cause malfunction.
•
DualDisc playback:
Disc Digital Audio” standard. Therefore, the use of Non-DVD side of a DualDisc on this product
cannot be recommended.
•
Playable files:
- File extensions: MP3(.mp3), WMA(.wma)
- Bit rate: MP3: 8kbps — 320kbps
WMA: 32kbps — 192kbps
- Sampling frequency:
MP3: 48kHz, 44.1kHz, 32kHz, 24kHz, 22.05kHz, 16kHz, 12kHz, 11.025kHz, 8kHz
WMA: 8kHz — 48kHz
- Variable bit rate (VBR) files.
•
Maximum number of characters for file/folder name:
It depends on the disc format used (includes 4 extension characters—<.mp3> or
<.wma>).
- ISO 9660 Level 1 and 2: 32 characters
- Romeo: 32 characters
- Joliet: 32 characters
- Windows long file name: 32 characters
The Non-DVD side of a “DualDisc” does not comply with the “Compact
COLOR GUIDE
[NIGHT COLOR]
headlight.
ON
:Changes the button, display and USB input terminal illumination
when settings are performed on menu and list search. Display zone will
automatically change depending on volume level.;
or
[DAY COLOR]
is changed by turning on or off your car’s
OFF
:Cancels.
ENGLISH |
21
Page 24

MORE INFORMATION
About USB devices
• This unit can play MP3/WMA/WAV files stored on a USB mass storage class device.
• You cannot connect a USB device via a USB hub.
• Connecting a cable whose total length is longer than 5m may result in abnormal playback.
• The maximum number of characters for:
- Folder names: 64 characters
- File names: 64 characters
- MP3 Tag: 64 characters
- WMA Tag: 64 characters
- WAV Tag: 64 characters
• This unit can recognize a total of 20 480 files, 999 folders (999 files per folder including folder
without unsupported files), and of 8 hierarchies.
• This unit cannot recognize a USB device whose rating is other than 5V and exceeds 1A.
About iPod/iPhone
• Made for
- iPod touch (1st, 2nd, 3rd, 4th, and 5th generation)
- iPod classic
- iPod nano (3rd, 4th, 5th, 6th and 7th generation)
- iPhone, iPhone 3G, 3GS, 4, 4S, 5
• It is not possible to browse video files on the “Videos” menu in
• The song order displayed on the selection menu of this unit may differ from that of the iPod/
iPhone.
• If some operations are not performed correctly or as intended, visit:
<http://www.jvc.net/cs/car/>.
[HEAD MODE]
.
About Pandora
• Pandora is available only in the U.S., Australia and New Zealand.
• Because Pandora is a third-party service, the specifications are subject to change without
prior notice. Accordingly, compatibility may be impaired, or some or all of the services may
become unavailable.
• Some functions of Pandora cannot be operated from this unit.
• For issues using the application, please contact Pandora at pandora-support@pandora.com.
About iHeartRadio
• iHeartRadio® is a third-party service, therefore the specifications are subject to change
without prior notice. Accordingly, compatibility may be impaired or some or all of the
services may become unavailable.
• Some iHeartRadio® functionality cannot be operated from this unit.
About JVC Playlist Creator and JVC Music Control
• This unit supports the PC application JVC Playlist Creator and AndroidTM application JVC Music
Control.
• When you play audio file with song data added using the JVC Playlist Creator or JVC Music
Control, you can search for audio file by Genres, Artists, Albums, Playlists, and Songs.
• JVC Playlist Creator and JVC Music Control are available from the following web site:
<http://www.jvc.net/cs/car/>.
About Bluetooth
• Depending on the Bluetooth version of the device, some Bluetooth devices may not be able
to connect to this unit.
• This unit may not work with some Bluetooth devices.
• Signal conditions vary, depending on the surroundings.
• For more information about Bluetooth, visit the following JVC website:
<http://www.jvc.net/cs/car/>.
22
Page 25

MORE INFORMATION
TROUBLESHOOTING
Change the display information
Press DISP repeatedly.
FM
or
AM
CD
or
USB
USB-IPOD
PANDORA
IHEART
SiriusXM
AUX
BT AUDIO
Station name (PS)*1 Frequency Program type (PTY)*1*2 Title*1*2
Day/Clock
1
*
For FM Radio Broadcast Data System stations only.
2
*
If unavailable, “NO PTY” / “NO TEXT” appears.
(back to the beginning)
Playing time Day/Clock Disc name*3 Album title/Artist*4 Track
5
title*
*
*
*
*
Folder/file name*6 (back to the beginning)
3
Only for CD-DA: If not recorded, “NO NAME” appears.
4
Only for MP3/WMA/WAV files: If not recorded, “NO NAME” appears.
5
If not recorded, “NO NAME” appears.
6
Only for MP3/WMA/WAV files.
Playing time Day/Clock Album title/Artist*7 Track title*7 (back to
the beginning)
7
*
If not recorded, “NO NAME” appears.
Station name Album title/Artist Track title Playing time Day/Clock
(back to the beginning)
Station name Track title*8 Track Artist*8 Day/Clock (back to the
beginning)
8
*
If unavailable, station name appears.
Channel no./Channel name B Artist B Song title B Content information B
Category name
B
Day/Clock B (back to the beginning)
AUX Day/Clock
Playing time Day/Clock Album title/Artist*9 Track title*9 (back to
the beginning)
9
*
If not recorded, “NO NAME” appears.
Symptom Remedy
Sound cannot be heard. • Adjust the volume to the optimum level.
• Check the cords and connections.
“MISWIRING CHK WIRING
THEN RESET UNIT” /
“WARNING CHK WIRING THEN
RESET UNIT” appears and no
operations can be done.
Source cannot be selected. Check the
Radio reception is poor. /
Static noise while listening to
the radio.
Correct characters are not
displayed.
“PLEASE” and “EJECT” appear
alternately.
“IN DISC” appears. Make sure nothing is blocking the loading slot when you
Disc cannot be ejected.
Playback order is not as
intended.
Elapsed playing time is not
correct.
“NOT SUPPORT” appears and
track skips.
Check to be sure the terminals of the speaker wires are
insulated properly, then reset the unit. If this does not
solve the problem, consult your nearest service center.
[SRC SELECT]
setting.
( 4)
• Connect the antenna firmly.
• Pull the antenna out all the way.
This unit can only display uppercase letters, numbers, and
a limited number of symbols.
Press
, then insert the disc correctly.
eject the disc.
Press and hold
to forcibly eject the disc. Be careful not
to drop the disc when it is ejected.
The playback order is determined by the file name (USB) or
the order in which files were recorded (disc).
This depends on the recording process earlier.
Check whether the track is a playable format.
( 21)
ENGLISH |
23
Page 26

TROUBLESHOOTING
Symptom
“CANNOT PLAY” flashes
and/or connected device
cannot be detected.
“READING” keeps flashing. • Do not use too many hierarchical levels and folders.
The iPod/iPhone does not
turn on or does not work.
“ADDERROR”
“SEARCHERR”
“CHKDEVICE” Check the Pandora application on your device.
“NOSKIPS” The skip limit has been reached.
“NOSTATIONS” No stations are found.
“STATIONLIM” The number of registered stations has reached its limit. Retry
Pandora
“UPGRADEAPP” Make sure you have installed the latest version of the Pandora
“CONNECT ERR” Communication is unstable.
“RATING ERR” Registration of thumbs up/thumbs down has failed.
“LICENSE ERR” You try to access from a country which Pandora is not
Remedy
• Check whether the connected device is compatible with this
unit and ensure the files are in supported formats.
• Reattach the device.
• Reload the disc or reattach the USB device.
• Check the connection between this unit and iPod/iPhone.
• Detach and reset the iPod/iPhone using hard reset.
New station creation is unsuccessful.
after deleting unnecessary stations from your device.
application on your device.
deliverable.
( 21)
Symptom Remedy
“NOSKIPS” The skip limit has been reached. Retry later.
“NOSTATIONS” No stations are found.
“NOT CONNCTD” Link to the application is impossible.
“UPDATE APP” Make sure you have installed the latest version of the iHeart
Link for JVC application on your device.
“PLS LOGIN” You haven’t log in. Log in again.
“STATION NOT
AVAILABLE”
iHeartRadio
“STATION NOT
SELECTED”
“STREAM ERR” Broadcast data is interrupted.
“THUMBS ERR” Registration of Thumbs Up/Down has failed.
“TIMED OUT” The request has resulted in time-out.
“CHLOCKED” The selected channel is locked. Enter the correct pass code to
“CHANUNSUB” The selected channel is unsubscribed.
“CHUNAVAIL” The selected channel is unavailable.
“CHKANTENNA” Check the antenna and its connection are in good condition.
Broadcast from the station is over.
No station is selected.
unlock.
( 12)
Call 1-866-635-2349 or 1-877-438-9677 to subscribe.
Station cannot be
selected.
“CREATE ERR” Custom station name creation is unsuccessful.
iHeartRadio
“SAVE ERROR” Addition to the favorite category failed.
“DISCONNCTED” Check the connection to the device.
If “Explicit Content” in [Account Settings] is checked in
the web version of iHeartRADIO, custom stations become
unavailable.
24
“CHECKTUNER” Make sure the SiriusXM Vehicle Tuner is connected to the unit.
SiriusXM® Radio
“NOSIGNAL” Make sure the antenna is mounted outside the vehicle.
“SUBSCRIPTN UPDATED
– ENTER TO CONTINUE”
“WRONGCODE” Make sure you have entered the correct pass code.
Your subscription is updated. Press the volume knob to
continue.
( 12)
Page 27

TROUBLESHOOTING
Symptom Remedy
No Bluetooth device
is detected.
Pairing cannot be
made.
“PAIRING FULL”
appears.
“PLEASE WAIT”
appears.
“BT DEVICE NOT
FOUND” appears.
Bluetooth®
Echo or noise occurs. • Adjust the microphone unit’s position.
Phone sound quality
is poor.
“NOT SUPPORT”
appears.
“ERROR” appears. Try the operation again. If “ERROR” appears again, check if
• Search from the Bluetooth device again.
• Reset the unit.
• Make sure you have entered the same PIN code to both the
unit and Bluetooth device.
• Delete pairing information from both the unit and the
Bluetooth device, then perform pairing again.
The number of registered devices has reached its limit. Retry
after deleting an unnecessary device.
The unit is preparing to use the Bluetooth function. If the
message does not disappear, turn off and turn on the unit,
then connect the device again.
The unit failed to search for the registered Bluetooth devices
during
and connect manually.
• Check the
• Reduce the distance between the unit and the Bluetooth
device.
• Move the car to a place where you can get a better signal
reception.
The connected phone does not support Voice Recognition
feature.
the device supports the function you have tried.
( 3)
[AUTO CNNCT]
[ECHO CANCEL]
( 17, DELETE PAIR)
. Turn on Bluetooth from your device
( 17)
( 13)
setting.
( 15)
( 13)
Symptom Remedy
The unit does not respond
when you try to copy the
phonebook to the unit.
Sound is being interrupted or
skipped during playback of a
Bluetooth audio player.
The connected Bluetooth
audio player cannot be
Bluetooth®
controlled.
“H/W ERROR” appears. Reset the unit and try the operation again. If “H/W
“BT ERROR PLS UPDATE”
appears.
You may have tried to copy the same entries (as
stored) to the unit. Press
exit.
• Reduce the distance between the unit and the
Bluetooth audio player.
• Turn off, then turn on the unit and try to connect
again.
• Other Bluetooth devices might be trying to connect
to the unit.
• Check whether the connected Bluetooth audio
player supports Audio/Video Remote Control Profile
(AVRCP). (Refer to the instructions of your audio
player.)
• Disconnect and connect the Bluetooth player again.
ERROR” appears again, consult your nearest service
center.
Update the Bluetooth firmware.
DISP
or
( 4)
If you have any troubles, try the following:
1 Check TROUBLESHOOTING
2 Reset the unit (
3)
3 Contact (USA only)
Call: 1-800-252-5722 ( or ) visit: http://www.jvc.com
PTY
to
ENGLISH |
25
Page 28

Warning
• The unit can only be used with a 12V DC power supply, negative ground.
• Disconnect the battery’s negative terminal before wiring and mounting.
• Do not connect Battery wire (yellow) and Ignition wire (red) to the car
chassis or Ground wire (black) to prevent a short circuit.
• Insulate unconnected wires with vinyl tape to prevent a short circuit.
• Be sure to ground this unit to the car’s chassis again after installation.
Caution
• For safety’s sake, leave wiring and mounting to professionals. Consult the
car audio dealer.
• Install this unit in the console of your vehicle. Do not touch the metal parts
of this unit during and shortly after use of the unit. Metal parts such as the
heat sink and enclosure become hot.
• Do not connect the
(black), or connect them in parallel.
• Connect speakers with a maximum power of more than 50W. If the
maximum power of the speakers is lower than 50W, change the
[AMP GAIN]
• Mount the unit at an angle of less than 30º.
• If your vehicle wiring harness does not have the ignition terminal, connect
Ignition wire (red) to the terminal on the vehicle’s fuse box which provides
INSTALLATION / CONNECTION
12 V DC power supply and is turned on and off by the ignition key.
• After the unit is installed, check whether the brake lamps, blinkers, wipers,
etc. on the car are working properly.
• If the fuse blows, first make sure the wires are not touching car’s chassis,
then replace the old fuse with one that has the same rating.
setting to avoid damaging the speakers. (
wires of speakers to the car chassis or Ground wire
20)
Basic procedure
1
Remove the key from the ignition switch, then
disconnect the
terminal of the car battery.
2 Connect the wires properly.
See Wiring connection.
(27, 28)
3 Install the unit to your car.
See Installing the unit (in-dash mounting).
4 Connect the terminal of the car battery.
5 Reset the unit.
(3)
Installing the unit (in-dash mounting)
Hook on the top side
Orientate the trim plate as
illustrated before fitting.
When installing without the
mounting sleeve
Use only the specified screws. Using wrong
screws might damage the unit.
Flat or round head screws
(not supplied)
M5 × 8mm (M5 × 3/8")
Pocket
Bracket (not supplied)
Do the required wiring.
(27, 28)
Dashboard of
your car
Bend the appropriate tabs to
hold the sleeve firmly in place.
How to remove the unit
26
Page 29

Wiring connection
(for
KD-AR959BS
Factory wiring
harness (vehicle)
/
KD-R85MBS
Vehicle dashboard
)
Rear output
JVC Amplifier
Front output
Subwoofer output
Signal cord (not supplied)
Fuse (10A)
MIC (Microphone input
terminal)
( 13)
To the optional SiriusXM Vehicle Tuner
(commercially available)
( 11)
Antenna terminal
To the steering
wheel remote
control adapter
Light blue/yellow
STEERING
WHEEL
REMOTE
Remote wire
(not supplied)
Vehicle-specific Wiring
Harness (separately
purchased)
For more information:
Metra Electronics:
www.metraonline.com
Scosche Industries:
www.scosche.com
Recommended
connection
Blue: To power antenna
Blue/white: To amplifier
Join the same color wires together.
Blue/white: Remote (200mA max.)
Orange/white: Illumination
(Not used) Insulate to prevent short circuit
Yellow: Battery 12V
Red: Ignition 12V
Black: Ground
White: Front speaker (left)
White/black
Gray: Front speaker (right)
Gray/black
Green: Rear speaker (left)
Green/black
Purple: Rear speaker (right)
Purple/black
Ignition switch
Car fuse block
Separate
red wire
Make this connection if your
vehicle factory wiring harness
does not have “12V ignition
switch” wire.
ENGLISH |
27
Page 30

Wiring connection (for
Rear output
Front output
Subwoofer output
Vehicle dashboard
Factory wiring
harness (vehicle)
Vehicle-specific Wiring
Harness (separately
purchased)
KD-R950BT
/
KD-AR855BT
control adapter
Recommended
connection
Blue: To power antenna
Blue/white: To amplifier
/
KD-R950BT / KD-R850BTKD-AR855BT
To the steering
wheel remote
KD-R850BT
)
Front output
Rear/subwoofer output
Antenna terminal
Light blue/yellow
STEERING
WHEEL
REMOTE
Join the same color wires together.
Blue/white: Remote (200mA max.)
Orange/white: Illumination
(Not used) Insulate to prevent short circuit
Yellow: Battery 12V
Signal cord (not supplied)
Fuse (10A)
Remote wire
(not supplied)
Microphone input
jack
( 13)
Ignition switch
JVC Amplifier
Part list for
installation
(A)
Faceplate
(B)
Trim plate
(C)
Mounting sleeve
(D)
Wiring harness
For more information:
Metra Electronics:
www.metraonline.com
Scosche Industries:
www.scosche.com
28
Red: Ignition 12V
Black: Ground
White: Front speaker (left)
White/black
Gray: Front speaker (right)
Gray/black
Green: Rear speaker (left)
Green/black
Purple: Rear speaker (right)
Purple/black
Car fuse block
Separate
red wire
Make this connection if
your vehicle factory wiring
harness does not have
“12V ignition switch” wire.
(E)
Extraction key
Page 31

SPECIFICATIONS
FM Frequency Range 87.9MHz to 107.9MHz (200kHz step)
87.5MHz to 108.0MHz (50kHz step)
Channel Space Selection 50kHz/200kHz
Usable Sensitivity (S/N=26dB) 8.2dBf (0.71μV/75Ω)
Quieting Sensitivity (DINS/N=46dB) 17.2dBf (2.0μV/75Ω)
Frequency Response (±3dB) 30Hz to 15kHz
Signal-to-Noise Ratio (MONO) 64dB
TUNER
Stereo Separation (1kHz) 40dB
AM Frequency Range 530kHz to 1700kHz (10kHz step)
531kHz to 1611kHz (9kHz step)
Channel Space Selection 9kHz/10kHz
Usable Sensitivity (S/N=20dB) 29dBμ (28.2μV)
Laser Diode GaAIAs
Digital Filter (D/A) 8 times over sampling
Spindle Speed 500 rpm — 200 rpm (CLV)
Wow & Flutter Below measurable limit
Frequency Response (±1dB) 20 Hz — 20 kHz
Total Harmonic Distortion (1 kHz) 0.01 %
Signal-to-Noise Ratio (1 kHz) 105 dB
CD player
Dynamic Range 90 dB
Channel Separation 85 dB
MP3 Decode Compliant with MPEG-1/2 Audio Layer-3
WMA Decode Compliant with Windows Media Audio
USB Standard USB1.1, USB2.0 (Full speed)
Compatible Devices Mass storage class
File System FAT12/16/32
Maximum Supply Current DC5V
USB
MP3 Decode Compliant with MPEG-1/2 Audio Layer-3
WMA Decode Compliant with Windows Media Audio
WAV Decode Linear-PCM
1A
Frequency Response (±3dB) 20Hz—20kHz
Input Maximum Voltage
Auxiliary
Input Impedance 30kΩ
Version
Frequency Range
Output Power
Maximum Communication Range
Profile
Bluetooth
Maximum Output Power 50W×4
Full Bandwidth Power
(at less than 1% THD)
Speaker Impedance 4Ω—8Ω
Preout Level/Load (CD)
Audio
Preout Impedance ≤600Ω
Operating Voltage
(10.5V—16V allowable)
Maximum Current Consumption 10A
Operating Temperature Range 0°C to +40°C
General
Installation Size (W×H×D) 182mm×53mm×158mm
Weight
Subject to change without notice.
KD-AR959BS
KD-R85MBS
1200mV
Bluetooth Ver.2.1+EDR
2.402 GHz — 2.480 GHz
+4 dBm (MAX), 0 dBm (AVE) Power Class 2
Line of sight approx. 10 m
HFP1.5 (Hands-Free Profile), A2DP (Advanced
Audio Distribution Profile), AVRCP1.3 (Audio/
Video Remote Control Profile), OPP (Object
Push Profile), PBAP (Phonebook Access
Profile), SPP (Serial Port Profile)
22W×4
KD-AR959BS
4800mV/10kΩ load
KD-R950BT
2500mV/10kΩ load
14.4V
(7-3/16"×2-1/8"×6-1/4")
1.2k
g
/
/
/
/
(2.65lbs)
KD-R950BT
KD-AR855BT
KD-R85MBS
KD-R850BT:
: 1000mV
/
KD-R850BT:
/
KD-AR855BT
:
ENGLISH |
29
Page 32

• Microsoft and Windows Media are either registered trademarks or trademarks of Microsoft Corporation in the United States and/or other countries.
• “Made for iPod,” and “Made for iPhone” mean that an electronic accessory has been designed to connect specifically to iPod, or iPhone, respectively, and has been certified by the developer to
meet Apple performance standards. Apple is not responsible for the operation of this device or its compliance with safety and regulatory standards. Please note that the use of this accessory
with iPod or iPhone may affect wireless performance.
• iPhone, iPod, iPod classic, iPod nano, and iPod touch are trademarks of Apple Inc., registered in the U.S. and other countries.
• Lightning is a trademark of Apple Inc.
• Pandora, the Pandora logo, and the Pandora trade dress are trademarks or registered trademarks of Pandora Media, Inc., used with permission.
• iHeartRadio® is a registered mark of Clear Channel Broadcasting, Inc. in the United States and other countries. Such marks are used under license.
• Sirius, XM and all related marks and logos are trademarks of Sirius XM Radio Inc. All rights reserved.
• Android is trademark of Google Inc.
• The Bluetooth® word mark and logos are registered trademarks owned by Bluetooth SIG, Inc. and any use of such marks by JVC KENWOOD Corporation is under license. Other trademarks and
trade names are those of their respective owners.
© 2013 JVC KENWOOD Corporation
1213DTSMDTJEIN
Page 33

WHEN
IT
IS
NOT
REQUIRED
TO
PANEL
USE
DETACH
FROM
THE
PROVIDED
THE
THE
FRONT
MAIN
SCREW
CONTROL
UNIT
,
TO
ATTACHTHECONTROLPANELTO
THE
MAIN
UNIT.
GE40401-001A
Page 34

CANADA
JVC
CANADA
INC.
.JVC
JVC
CANADA
INC.
Canada
by
maintenance,
1.
To
Obtain
(a)
JV
C
wi
th
(b)
The
a
uthorized
2.
Limitation:
Thi
s
Wa
(a)
Repa
co
nne
gr
ills
sa
vers
(b)
Any
mi
su
insu
(
c)
A
ny
fo
ll
(d)
Any J
any
personnel.
(e)
Any
def
(f)
M
aintenanc
(g) Co
nv
(h) A
ny
Re
gu
(i)
Any
re
ntal.
Part
Labo
(j)
Any
by the o
(k)
P
ro
'
liquid
(I)
Any
other
(m
)
FOR
Wa
i
nt
erf
fo
r the
Product
Registration
We
su
gge
st
co
nd
i
tion
in y
For
customer
Enter
below
ref
e
renc
e.
Model
Pur
JVC
Warranty
pr
o
duct
proof
JVC
rran
ir
or
c
ti
,
s
peaker
,
and
defects
s
e,
ff
icien
defe
o
wing
VC
party
JVC
ace
d, mo
ersion
JVC
l
ation
JVC
or
s
..
.
...
ur
...
JV
C
riginal
duct
a
tor
defects
events
AUTO
r
ranty
eren
re
th
at
ou
th
e
No.:
c
ha
se
abusive
pur
(hereafter
and
sold
from
any
Service
requ
iri
of
purch
as
product
mu
JVC
Servic
ty
shall
not
replacement
on c
ord
s.
ant
co
n
es,
all
ac
ce
c
au
s
ed
operation
t
care.
ct
ca
used
or
the
instru
c
produc
t
tamp
other
than
pr
o
du
cts on
difi
ed or
e, c
leaning
to
foreign
product
wi
s
ID.
product
s us
display
purpo
1 ye
ar
(e
xc
90
days
prod
u
ct
whi
pur
c
ha
c
hased
fro
'.
caused
beyond
PRODUCT
d
oes
n
ot
cov
ces
. cl
ea
ni
mov
al
or
r
ei
yo
u
reg
is
ter
r p
ro
du
ct.
Yo
use:
Model
No.
and
date:
Warranty
applies
only
called
"JVC")
by
an
defects
ng
ser
e.
st be
e C
ent
appl
y t
of any c
e
nn
as.
p
ro
j
sso
ri
es
or
repairs
repa
ti
ons in
ere
d with,
JV
C or
whi
ch
rem
oved.
or
or
dom
tho
ut
the C
ed
for co
ses
ept
v
ch h
as
se
r.
m
·
ou
by
fire
the
c
ontr
S
er
elim
ng
of
n
stall
TEL:
yo
ur
u
can
Ser
authorized
in
:
vic
e
brough
re
o:
d
ec
ti
on
.
,
neg
ir
s req
the
au
th
per
io
es
mm
.
id
eo he
bee
t
si
. ll
ood
ol of
i
na
he
ad
at
i
on
(90
pr
oduc
re
gi
ial N
gives
JVC
material
and
mu
st
be
present
t
in
for
service
. s
ab
inets,
batteri
ust
cove
rs,
knob
sc
reens,
pr
oj
re
quired
as
a
,
improper
red
as
peration
adju
sted
ri
z
ed
JVC
erial
number
che
c
k-up
voltage
Electrical
ercial
or
ad
-
90
eso
ld and no lon
C
anada"
lightning,
JVC.
ion
of
car
s
tment
th
e
unit
6
070
kestrel
67
0-3381
t
si
nce it
at h
tt
whi
ch
re
a
re
s
manua
or
S
or
instituti
day
s)
, "
bankru
power
s
tati
s.
for
FAX:
http
will
p://
ww
is
l
oca
rep
://
ligence
ui
o
tho
e s
dic
tic
anadian
n r
de
,
t
,
adju
of
5)
ster
o.
WARRANTY
to
PRODUC
T
distributed
the
following
dealer.
JVC
w
an
la
tes
spea
on
sc
of
us
e a
not
l.
ir
ed by
Centre
b
ee
en
cy.
f
ety
o
nal
ge
r
ptcy"
surg
le
r.
JVC
,
Mis
(905
.
jv
a
ble
vc
.
eit
th
.
ke
r
nd
n
,
ow
e,
ctrical
cost
)
670-
c.
us
ca
her
arrants
ip
subject
er
r
ee
n
/o
r
ned
or
or
CANADA
sisauga,
72
44
ca
E-m
to
co
nta
/w
ww
/S
on
th
e
workmansh
ed toge
to
es,
p
s,
ec
ti
s
ult
ult
of
a
ervi
ce
h
as
frequ
Sa
c or e
or
labour
re
p
ai
Road
www
en
w.j
t
ed
in
express
warranty
that this
to
the
3.
Standard
If
an
y d
appli
c
ab
the
purcha
uch
def
4.
Exclusion
This
warr
JVC
for
or h
is,
it
exte
nd
5.
Disclaimer
To
the
ex
for
loss
or
any
oth
inconv
e
WARRANTY
Product
Pr
oj
ec
ti
on
Colou
r
TV
D-ILA
Rear
LCD
TV
In-Home
*
In-Home
Where
it
is
responsibility
and
a
ll
cos
a
nd
fr
om
the
Receiver
s
sep
a
ratel
y.
Audi
o
"ARSENAL
AC
Adapters
Headphones
lamps
Wood
Cone
All
Oth
er
Ca
INC.
Ontario,
L5T
Service
ail:
servi
ce@j
ct
you
dir
ec
upport
/War
re
a
r,
b
ot
tom or
Serial
No.:
Nam
e of
de
Canada
JVC
f
ollowing
s:
efec
ts sh
le
terms
se
r for
e
ct
s
are
of
ant
y
co
J
VC
pr
s or
th
or enla
rge
of
te
nt
the
of
time
er in
nien
ce.
TERM
TV
In-H
In
-
Hom
Pro
jecti
s
ervi
ce to be pro
not
avai
and
ts
associa
cl
osest
and
Ho
Fron
t
.
Rem
.
Micr
Sp
eake
tego
1
SB
to
ll
fre
e#
vc.
ca
tl
y
if
it is
ran
ty.
asp
si
de of the cabi
al
e
r:
by
JV
fo
r e
ac
pr
o
du
term
ou
ld
, n
ece
pa
rt
d
ue
All
Oth
nstit
od
uc
ts
ei
r
agen
this warra
Consequ
law
pe
or
use
di
r
ect
, incide
(VALID
o
me
e
(2
5"
on
Se
rvi
lab
le
exp
e
ted with
JV
me
Sp
Pr
oje
"
Se
ri
ote
cont
op
ho
rs
ri
es
Ca
nada
:
1-8
eve
r n
x
C
h
ct is
be
fou
ss
s or la
to fau
er
utes
and
t
or
rmits
of
Se
and
I
n-H
ce
.
the
nse
C
e
ak
cti
on
es
ne
00
-
ec
ne
Au
Canada
w
JVC
free,
s
and
nd
in a J
ar
y re
pair
bour
lty
material
Ex
press
the e
ntire
no d
ea
e
mploy
nty
on
e
ntial
JVC
its
product,
ntal
or
FROM
rvi
ce
abov
o
me
Se
(25"
and
vided
purchaser
f
or
the
the
thorized
ers
pu
and
ro
ls
.
s
and
Proje
96
4-
2
650
e
ssary
ne
t.
Reta
Inc
.
product
under
no
conditions:
VC
pr
oduct
s
sh
all
be ma
when
JV
C ack
or
wo
Warrant
ex
pre
ss
ler or
se
rvi
ee
i
s,
or
are
beha
ll
of
Damag
e:
discla
im
s
t
ran
spo
con
se
q
ue
THE
DATE
e)
rvic
e
ab
ove)
where
avai
must
proper
pa
delivery
of
Se
rvi
ce
rc
h
ase
d
Ca
r
c
tor
to
co
rr
ec
t a sa
in
this i
nf
di
st
ri
rmal
use
within
de
no
rk
man
ies:
wa
r
ran
ce
c
entr
auth
JVC
.
an
y res
rtati
on
nti
al
d
OF
P
ar
(Yea
1
l
abl
e.
as
su
ck
ing
t
he
eq
Cent
2 2
90
da
5 5
1 1
fety
o
rmat
b
ut
ed
in
and
the
at no c
os
t
ed
ges
sh
ip.
ty gi
ven
e p
ers
or
iz
ed
po
ns
co
sts
amage
that
o
to
ibility
,
or
to
by
nn
wl
PURCHASE)
ts
Lab
o
rs) (Ye
ur
ar
s)
1
me
t
he
, ship
ment
ui
pm
e
nt
to
re.
ys
90
da
ys
re
la
ted
i
on
f
or
f
ut
ur
el
e
La
ga
ra
ntl
s'
ap
pli
que
seule
ment aux
JVC
CANADA
INC.
au
Ca
nada
entr
et
ien norm
1.
Pour
obte
(a) Les
a
vec
(b
) Le
de
2. Re
st
rictions: 3. Cr
Cette
ga
(a)
Reparat
pa
n
de
h
au
projection
(b)
Tau
ut
ilisation
i
nco
(c)
Ta
us de
a
!'
omis
d
'i
n
(
d)
To
ut produitJ
entr
s
er
(e)
Tou
ou
(f)
l:en
(g)
La
d
ome
(h)
Tout produit
conforme aux
(i
)
Pour
in
s
Pieces .
Mai
(
j)
Tout
prop
(k)
Pr
odu
"f
a
il
(I
)
To
ut
u
ne
J
VC
Enregistrement
No
us vo
us
co
rr
iger
un
Pour
l'utlllsalion
Ent
re
z ci-
dessou
inform
at
i
ons
No. de m
Dat
par
JVC
al
nir
un
pr
o
du
it
s
Ia
pre
v
ue
pr
od
uit
JVC
se
rvi
ce
J
r
an
tie ne s'
i
on
ou rempl
nea
u a
va
pr
ote
ct
ion, bout
tpa
rl
eur.
et
s d
ef
a
ut
s occa
ab
r
rec
te
.
fau
ts
sio
n
str
uc
ti
o
n.
epr
i
se
que
vi
ce
au
to
t
pro
d
uit
enleve
.
t
re
tien, l
co
nve
rsi
on
s
ti
que.
tout
pr
ti
tutio
nn
e
....
......
n d'oeuv
produit
ri
et
e
de
it
a
chete
lit
e"
ou
d
om
mage
surten
sio
.
du
co
nseillons d'enr
p
rob
l
eme
s
le
po
ur
referen
od
e d'achat:
( ci-apres
,
de
JVC
VC
n
t.
ec
tous
usi
occas
de
VC
ri
se
JVC
es
JVC
no
o
du
ll
es
....
re
JVC
l'a
d'
un
n ou tout autre
des
n
e
le:
et
v
end
u par
tout defaut
se
rv
ice
nec
ess
d
'achat.
do it
etre
au
torise.
app
l
ique
ac
eme
c
ordons
ons
.
r
an
s
de pr
les
a
cc
si
onn
es
ve,
mauv
i
on
ne
s
ui
vre
l
es
alt
ere. aj
JV
C
ou
un
JV
C.
d
ont
le
veri
f
ica
tions
a
u
ne
frequ
n'
ay
a
nt
rms el
ec
it uti
li
se
,
de
l
oca
1 An (
Exc
...
90
Jo
ur
ay
ant
ete
ch
ete
ur
o
a
"l'
ex
terie
"liquidateur".
caus
e
pa
TE
prodult
eg
istre
li
e
a
Ia
sec
clients:
um
ero
de
ce
fu
ture.
app
ele
"JV
C")
en
on
ill
ant
et
de
i
ce
doit
r
se
rvi
ce
c
ab
inet
an
te
nn
es
ha
utpar
ot
ec
te
ur
on
s req
nte et/
ou
tion
s
requ
are
par t
rvi
ce
d'
se
ri
e
a
li
ues
et
ne
ten
sion
nt
ie
nnes
rci
a
des fins
ui
n'est
d
a"
.
pro
nd
a
tio
nt
ho
rs du
70
ke
str
-33
81
http:
it
, car
du
numero de
JVC
fabr
@tre p
ch
,
ba
.
le
u
s d'
ui
ses
i
out
en
tretien
te
tt
if
i
catio
al
es,
eo
-
ve
n. un
el
F
AX
//
it.
ce
au
ication so
ez un
tte
ho
us
r.
cO
ec
s
un
e utiliz
se
s sui
aut
al
t
ere
oy
age.
etrang
(
CSA
d'
90
plus
nant
con
Road,
:
(905)
www
il
nous
Vo
us
se
un
de
ta
mate
riel
de
ga
ra
ntie:
ita
nt un
se
rv
a
pp
o
rt
e p
ou
pa
s
aux
: Si
nt
de
lout
de
ra
cc
ord
.
co
uv
er
ts
de
ojec
ti
on
,
pr
es
so
ire
s.
ou reparati
ai
se
.
ne
gli
ge
s
ou
rep
ara
re
co
mm
andations du ma
ust
e
ou
rep
cen
tre
de
se
nume
ro
de
period
iq
ence
ou
u
ne
p
as
le
signe d'ide
tri
qu
es
Ca
d
es
fi
t
ion
ou
epte
s
reve
gin
al.
ur
du C
le
feu, une ino
eve
L:
(905)
r
vo
u
ri
te
de votre pro
mo
de
ns
u
l
es
n
n
tre
le et
nad
c
omme
ti
lise
teles vid
du
et q
ana
eme
60
6
70
produ
le
a
ri
r
GARANTIE
PROD
UIT
S
di
strl
Ia
gar
a
ntie
expr
e.
JV
C vous
us
r
ese
e
tre
4.
ne
ion
5.
lie
CONDITIONS
de
Toutes
si
s
aug
a,
-
72
44
E-
mai
e
tt
ra
de
z v
ou
s i
trou
ve s
es
rve
(m
ap
sa
d'
ca
Ex
Ce
JVC pour
detail I
ce
Dene
Dans
po
tra
acci
Pro
du
~
c
r
a
E
cra
TV pr
Ecrans
*
S
er
S'il
n'
Ia
respon
qu
e to
de
ta
Recepte
sepa
de
Ser
Ada
D'e
co
En
cei
Onta
Se
l:
vo
ns
cr
oi
No.
Nom
to
r
is
re
sen
te
cen
ri
es
,
ses
nes
de
r
an
de
uit
e
a
u
at
te
nu
el
re
ou
de
,
mo
di
ere
ou
n qui
).
eta
la
ge.
jou
rs)
Ia
d'
une
eclair.
t
r6
1e
JVC
CANADA
Mi
s
670
.jvc
.ca
perm
pou
ve
rie
qui se
bu
es
se
sui
gara
des
)PO
La gara
s
tat
l
es
l'enle
iteres
un
pli
cab
ns
coOts
ceuvr
us
ees
cl
us
tte
tte
ga
ur
pe
nsp
den
it
n
s
de
ns
de
ojec
de
v
ice
y a p
sa
us
l
ill
ant
urs
r
em
ie
plat
eurs
u
te
, M
nt
e
les
INC.
ri
o.
rvice
ser
vi
us
con
ire
a
l
a
l'a
de
se
du
au
Ca
n
ada
par JVC
v
ante
po
ur
ntit
que
ce
pro
mo
dali
te
s
UR LES
PR
ODU
nt
ie ne
couvr
ique
s ou
el
ec
ajus
vem
:
p
ro
les,
e lor
par une
ion de fo
garantie
a
nt
ra
gation
Ia
me
r
te
or
t ou tout
tel
pr
TV
Co
ti
on
LCD
a
dom
as
de
b
ili
es
c
JVC
et
en
t,
"A
RSE
ic
a
C6ne
autres cat
L5T
t
ol
ce
@jvc
ta
http:
rr
r
ie
reven
triq
teme
nts et les
ent
ou
a
du
it
JVC
s'a
vera
le
s
re
pa
ra
ad
d
ition
nels
sq
ue
JVC
defe
utes
co
n
st
it
les
pro
d
ui
ts
ou d'un
serv
ntie
au
n
om
des
do
su
re p
erm
de
t
em
ps
ou
au
tre
et c
onse
qu
DE
GARANTIE
oj
ect
ion Se
rv
ul
eu
r Service
arriere
D-
I
LA
Ser
vice
a
ic
i
le
fou
serv
ice
JVC
te et l
es
coO
ts
oO
ts
associe
s
auto
r
ise
le plus pr
H
aut
s-
Pa
rl
Proj
ec
teur A
NAL"
AC,
Te
l
eco
mm
rophon
es
et
en
Bo
is
eq
ori
1
SB
Can
ada
l
free#: 1-
800
.ca
ct
er
dir
ec
tem
//
ww
w.jvc.ca/www/Support/Warr
iere.
en
bas
:
de
ur
:
C
an
to
ut
no
duit
es
et co
ndi
ITS D'AU
e
pa
s
ues
de
co
Ots
Ia reinsta
it
de
tion
s n
a
l'
achete
re
con
na
ctuos
i
te
au
t
re
s garanties ex
ue
l'ent
JV
C.
Nul
ic
e d'en
de
JVC.
mmages
is
e
pa
r
Ia loi,
d'usa
do
mm
ent.
(
VALA
i
ce
a
Domi
a
Domi
ci
Se
rv
i
D
om
ic
il
e
rn
i
pa
r un
disp
on
ib
p
ou
r
un
a
Ia
liv
ra
es
po
eu
rs
achet
van
t et Aud
an
de
,
L
amp
e
es
-964-2650
ent
si
ou sur
le
a
da
In
uv
eau
t
de
gage
tions sui
TO
M
!'
e
li
minat
Ia
voiture,
de ma
ll
at
io
n
fectueux.
ecess
a
ur po
it
q
ue
de m
ate
ie
re
gar
re
pres
tr
et
ie
n n'est
in
di
rec
JV
ge
de
ses pr
age
ou inconveni
BLE
a
PARTIR
ci
le
le (
25
" et
ce
a
Dom
(2
5"
et pl
de
tai
le
a
proxi
emb
al
ison
de
ur
un
es
io
Casq
ue
de
Pr
ojec
jamais
cote
de
c.
pr
oduit
,
so
vantes
OB
IL
E
ion
d
le
in
d'
ce
de
I'
uni
se
t
on
ir
es
se
ron
ur
les
de tells def
ri
el ou
a
nt
ie expr
e
nt
ant
au
t
s:
C
nie
t
out
odu
DE
I
pl
us)
ic
il
e
us
)
ll
ant
disp
mi
te,
l'ac
l
ag
e
ade
q
l'
equipe
ment
s
er
vi
ce
d'e
d'Auto
t
eu
r
e
ll
e
est
!'
ar
moi
JVC
distri
us
ut
ilisati
:
'i
nt
er
ferenc
nett
oy
ag
uv
re
a
sso
te
p
ou
les
c
on
t e
ff
ec
pi
ec
es et
ec
tuosi
de
fabric
pr
esses :
ess
don
ou
em
tori
se
e respo
i
ts.
d
es
ent
indir
LA
DATE
P
ie
c
es
(Ann
ees
1 1
on
ible.
he
teu
ua
t,
l'
ex
ch
nt
reti
en
2 2
90
Jo
urs
5 5
1 1
nec
es
sa
an
ty.aspx
re.
Co
bu
on
es
e
de
tete.
ci
es
a
r
re
para
dit
ions
tu
es
Ia
main
tes
so
at
ion.
ne
e
pa
plo
ye
d'u
a
pr
olong
ns
ab
c
oo
ts de
ec
t,
D'
AC
Main-
O'
) (Annees)
r
do
it
ass
pediti
on.
ez
et
de
pu
.
90
Jou
ire
p
our
n
se
r
ve
z c
e
et
ti
on.
nt
n
er
ilite
H
oe
u
ain
is
r
me
es
AT
u
le
rs
)
ve
r
r
si
Page 35

U.S.A.
JVC
AMERICAS
CORP.
TO OUR VALUED CUSTOMER
THANK
WE WANT TO HELP YOU ACHIEVE A PERFECT EXPERIENCE.
YOU
FOR PURCHASING THIS JVC PRODUCT.
NEED HELP ON HOW TO HOOK UP?
NEED ASSISTANCE ON HOW TO OPERATE?
NEED TO LOCATE A JVC SERVICE CENTER?
LIKE
TO PURCHASE ACCESSORIES?
JVC IS HERE TO HELP!
TOLL
Remember to retain your Bill
Do
not
Caution
To prevent electrical shock, do not open the cabinet.
There are no user serviceable parts inside.
Please refer to qualified service personnel for repairs.
We suggest that you register your product since it will enable us
directly if it is ever necessary to correct a safety related condition
You can register at www.register.jvc.com
Please note that failure to register does not diminish any of your rights during the
warranty period.
BT-50004-1
(0313)
FREE: 1 (800)252-5722
http
attempt
://www.jvc.com
of
Sale for Warranty Service.
to
service
PRODUCT REGISTRATION
the
product
yourself
to
contact you
in
your product.
.JVC
JVC
Americas
Corp.
RETA
IL
PURCHASER
the
per
iod sh
THIS
LIMITED
COMMONWEALTH
WHAT
WE
If
this
produ
charge
s
autho
cases
WHAT
Pl
pr
the
ser
s
If
WHAT
This limited warranty
1. P
2.
3. O
4. D
5. Signal recep
6. User
7. A
8.
9.
1
T
T
THE DURATI
I
LIMITATIO
BREA
F
So
these
vary
R
WARRAN
For
Enter
re
ct is
to the original
ervice
cen
ters.
riz
ed
serv
. a
tec
hnician
YOU
ease
do not ret
odu
ct to
the
problem(s) and a copy
vice center.
er
vice
rep
res
you have any
IS
NOT
roduc
ts which
re
asonab
a
ny attachme
In
itial instal
perational a
amage that
Remov
ccessories
Ba
tteries
Produ
cts used
0. Loss
of
data res
here
are
no
HE DURATI
NCONVENIENC
N,
CH OF
ITNESS
FOR PARTICUL
me states
limitatio
from
state
EFURBISH
ED
TY,
customer
below the
fer
ence
.
Model No
Purch
(JVC)
own
below.
WARRANTY
OF
WILL
DO:
found
to
own
Parts
used
ice
cen
ter
will
come
MUST
DO
urn
your
service
cen
Service locations can al
enta
tive
will require
questions
COVERED:
provid
have been
le car
e,
or
if repair
nt
not
provided
lation,
installatio
djustments covere
occurs
in shi
tion
probl
al
Memory Devices/V
;
(except
that Rechargea
for
commercial purposes
ult
ant from mal
exp
ress
warranties except
ON
OF
ANY IMPLI
ON
OF
THE
E,
OR ANY
DAMAG
E TO
THIS WARRA
do
not
allow the exclusi
ns
or exclusi
to
state.
PRODUCTS
PLEASE
REFE
use:
Mode
l No.
.:
ase
date:
LIMITED
ONLY
FOR
warran
to
PUERTO
be
er. Such r
on a carry-in basis. Color
FOR
pro
ter
of
concerning your JVC Product, pl
ems
EXPRESS
NTY. ALL
AR PURPOS
ts this product
be
FREE
FROM
("T
he
Warranty
IS
VALID
ONLY
RICO
.
defective with
for replace
to
duct
, plea
the pro
ed
pmen
OTHER DAMAGES,
TAP
ons may
CARR
R TO T
and Ser
in the warra
epai
r and
men
t are warrant
you
r ho
me
and eith
WARRANTY
to
the retailer
se
be sure to
of
of purchase
so
be obtained
cle
ar acces
by
JVC
does not
subject
to
abuse, accident, alte
ed or
servic
ed
with ihe produc
n a
nd removal from cab
d in
the
t,
due
to
and
fail
ures
due to
ideo Pick
ble Batteries are cover
funct
ion
as
list
ED
WARRANTIES, INCLUDI
WARRANTY
ES,
RECORDS
EXP
RESS AND I
E,
ARE LIMITED
on
of incidental
not apply
Y A
SEPA
RATE
HE REF
URBISH
ial No.
which
DEFECTIVE
Period"
IN
THE
rep
lacement se
televisions with a
er repair the TV there
SERVICE
. I
nstead, ret
package
to verily purc
s to
the prod
cove
r
by
anyon
ts.
or
Own
er's Manual, normal mai
act
of God,
line power surg
-up Tubes/CCD Image
, includin
of hard
dri
ed
abov
HEREI
WHETHER
OR
DISC
MPLIED
or
to
you. Thi
17
00 Vall
WARRANTY
ED
PRODU
is located either
WARRANTY
PRODUCT
and
)
FIFTY
nty
period, JVC will repair
ed only f
:
it car
from o
uct.
e ot
if t
he
ine
and
g, but not limited
ve
or other
e.
N. JVC S
S) RESU
TO THE
consequential damages or limitations
s w
JVC
ey
PURCHASED
all
parts thereof
MATERIALS
(50)
rvices sha
or the
urn your
efully,
hase dat
ur
webs
ease
con
ration, modification, tamp
her than a service fac
mode
l or s
ts
or
mounting systems.
cosmetic damage;
e;
ed for
90
data storage devi
NG THE IMPLI
HALL NOT BE
DIRECT, INCIDENTAL
LTING FROM TH
WARRANTIE
WARRANTY PERIOD SET FOR
arranty gives you spec
AMERICAS
Road, Wayne,
h
ttp
://www.jvc.
, TH
IS WARRA
CT WARRANTY INFORMA
on
, except
AND
WORKMANSHIP
UNITED
STATES,
or
ll
remainder
scree
product to
preferably in the original
ite h
tact o
eri
Sens
days fr
the
replace defective
be rend
ered
of
the Warranty
n si
ze
of
37"clas
or remove
and return
the JVC aut
e. Please call1-800-252-5722
tlp://w
ww.jv
ur Customer
ili
ty
al
number
ntenance
, vid
ors
are
covered for
om
the date
to renta
l.
ce;
ED WARR
LIA
BLE FOR A
OR
E U
S. IN
CLUDING
ific
CORP.
New Jers
com
NTY
DOES NOT
rear, bottom
Serial
No.:
Na
me
of
dealer
IN
as
by
JVC duri
c.com
Care
authori
has bee
eo
of
ANT
CONSEQU
SE
OF THI
legal righ
ey
07470
TION
or
side
U.S.A.
set
forth
belo
w ON
LY
the date
h n
ew
l busin
ess
ll
prod
ucts may
be repaired
er
ncl
ude a bri
ate t
qua
lifi
suse
ed
with, defac
SE
OF THE
OR ARIS
TIES OF
g an impli
TH
EACH REFURBI
TO
of
original pur
COLUMBIA AND
or
rebuilt
hou
home serv
nearest
he
nearest
es for in-home serv
, faulty installati
uch
;
of purchas
Y, IS
ING
MERCHA
ed warr
from
THE
DISTRICT OF
parts wit
ng norma
Period
s or g
erin
and
purchas
Y OF
:
. A
reater
qualify for in-
it
if
it c
annot
horized
serv
ice cent
pack
aging, and i
.lf
Cente
g, n
zed
n altered, tamper
THE
APPLY. FOR DETAIL OF REFURBISH
PACKAG
to loc
your product
r at
800-252-5722
egligence, mi
by JVC
to render s
aud
io h
ead cleaning
90 days from the date
e);
MERCHANTABILIT
NY LOSS
OF U
ENTIAl (INCLUDING, WITH
S PRODUCT,
WARRAN
TH ABOV
E.
on how
lon
ts
and you may also have
ED WI
of
the
cabinet. Retain this i
THE
ORIGINA
equiva
rs
at JVC
aut
be
brought to a JVC
ice. In such
in
your home
you
. If shippi
ef description
JVC authori
service
, or if a
ed
or re
e;
LIMITE
D TO
PRODUCT,
OUT
OUT
OF
NTABILIT
anty l
asts
oth
er rights which
ED PRODUCT
SHED PRODUCT.
nformatio
n for f
Printed
L
chas
e for
IN
THE
lents at no
horized
.
ng
the
of
zed
ice, the
on,
lack of
ffix
ed
moved
;
ANY
Y AND
. so
utu
in Indon
to
re
esia
 Loading...