

Page 1
GreenStar™ 3
2630 Display
Documentation
PFP13051
Page 2

About This Document
This User Guide will help you learn how to set up and troubleshoot
documentation on the 2630 display. It is a supplement to the display’s
operator’s manual.
Read the operator’s manual for the following information:
• How to operate your machine safely
• Theory of operation
Copyright © 2013 Deere & Company. All Rights Reserved. THIS MATERIAL IS THE
PROPERTY OF DEERE & COMPANY. ALL USE AND/OR REPRODUCTION NOT
SPECIFICALLY AUTHORIZED BY DEERE & COMPANY IS PROHIBITED. All information,
illustrations and specifications in this manual are based on the latest information available
at the time of publication. The right is reserved to make changes at any time without notice.
Page 3

User Guide Documentation
User Guide
Section Contents
GENERAL DOCUMENTATION SETUP ..................................3
Setup Wizard ........................................................................................ 3
RESOURCES ................................................................................4
EQUIPMENT ................................................................................5
Machine ................................................................................................ 5
DOCUMENTATION RECORDING SOURCE ........................6
IMPLEMENT ...............................................................................8
OPERATION SPECIFIC SETUP .............................................10
General............................................................................................... 10
PLANTING AND SEEDING......................................................11
Planting and Seeding Without Prescription ........................................ 11
PLANTING AND SEEDING WITH PRESCRIPTION CREATED IN OFFICE FARM MANAGEMENT SOFTWARE...13
PRODUCT APPLICATION-SINGLE PRODUCT .................15
PRODUCT APPLICATION-TANK MIX.................................16
PRODUCT APPLICATION-PRESCRIPTION CREATED IN
OFFICE FARM MANAGEMENT SOFTWARE ....................18
HARVEST-COMBINE ...............................................................19
HARVEST-LOADS .....................................................................20
TILLAGE .....................................................................................21
OTHER .........................................................................................22
GREENSTAR SUMMARY .......................................................23
GreenStar Summary........................................................................... 23
GS3 2630 Display
1
GS3 2630 Display
Page 4

User Guide 2630 Display
User Guide
DIAGNOSTICS ...........................................................................26
Harvest ............................................................................................... 26
DIAGNOSTICS ...........................................................................29
Non-Harvest ....................................................................................... 29
GS3 2630 Display
2
GS3 2630 Display
Page 5
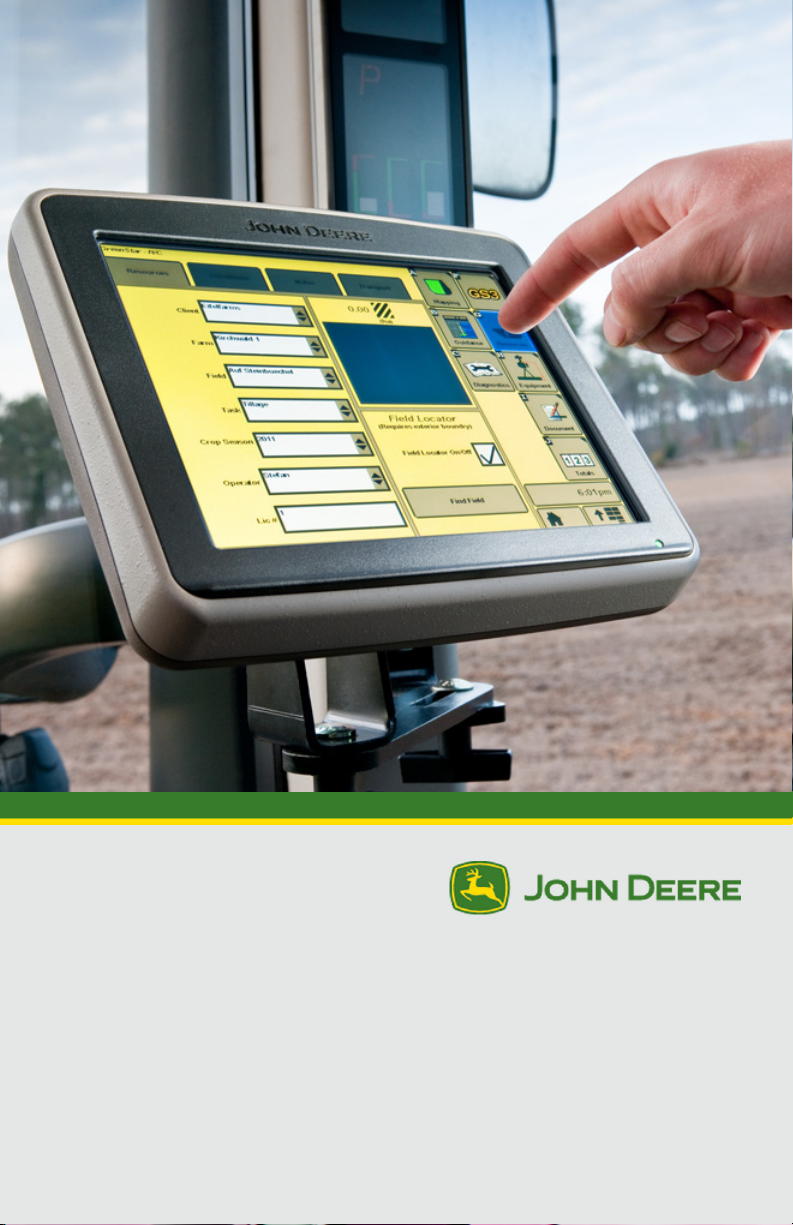
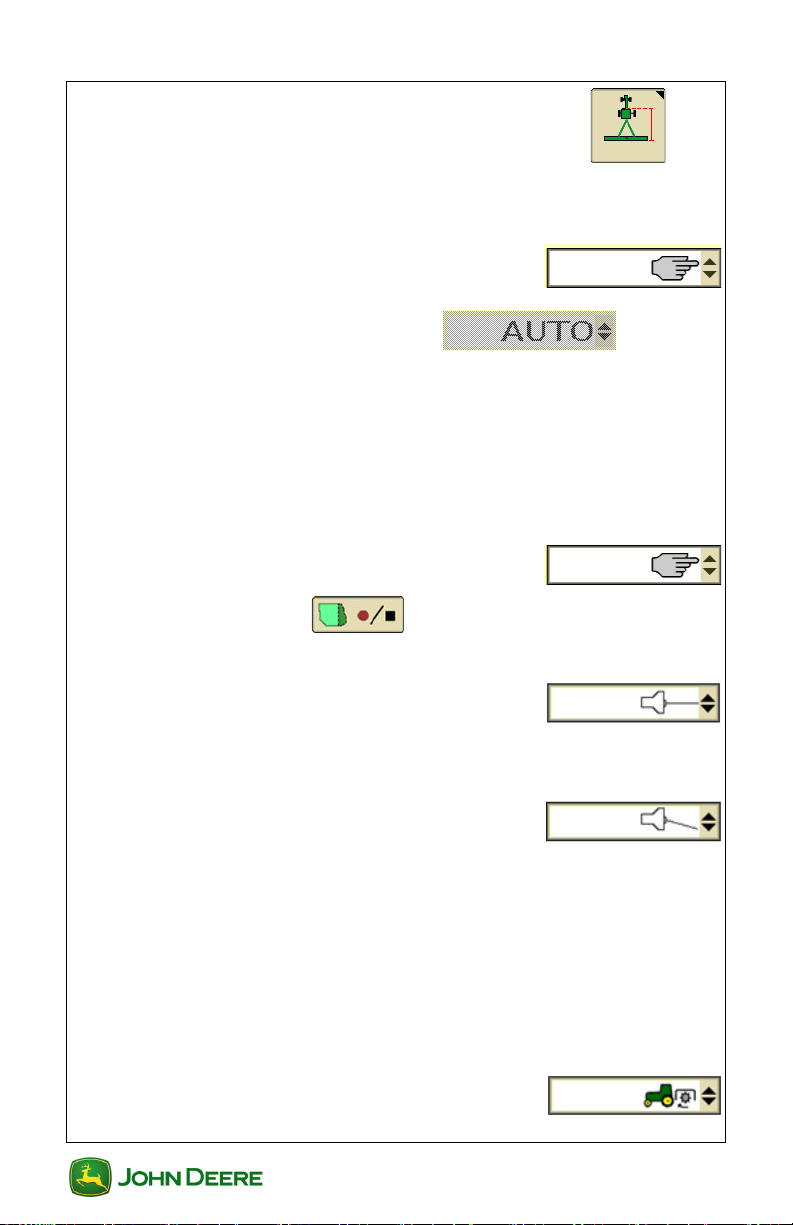
User Guide Documentation
Setup
Exit
Setup
User Guide
General Documentation Setup
Setup Wizard
1. Menu ............................................................................
2. GreenStar .......................................................
3. GreenStar Main .............................................................
4. Setup tab.................................................................
5. Documentation check box ....................................
6. Accept ..........................................................................
NOTE: Setup Wizard guides operator through the set up of resources,
machines and implements, and operations.
7. To navigate through Setup Wizard, press the following buttons
on the right side of screen:
• Exit Setup
•
Navigate to Next Page ................................................
• Navigate to Previous Page .....................................
•Press Accept twice when done .............................
.......................................................................
GS3 2630 Display
3
GS3 2630 Display
Page 6
User Guide 2630 Display
User Guide
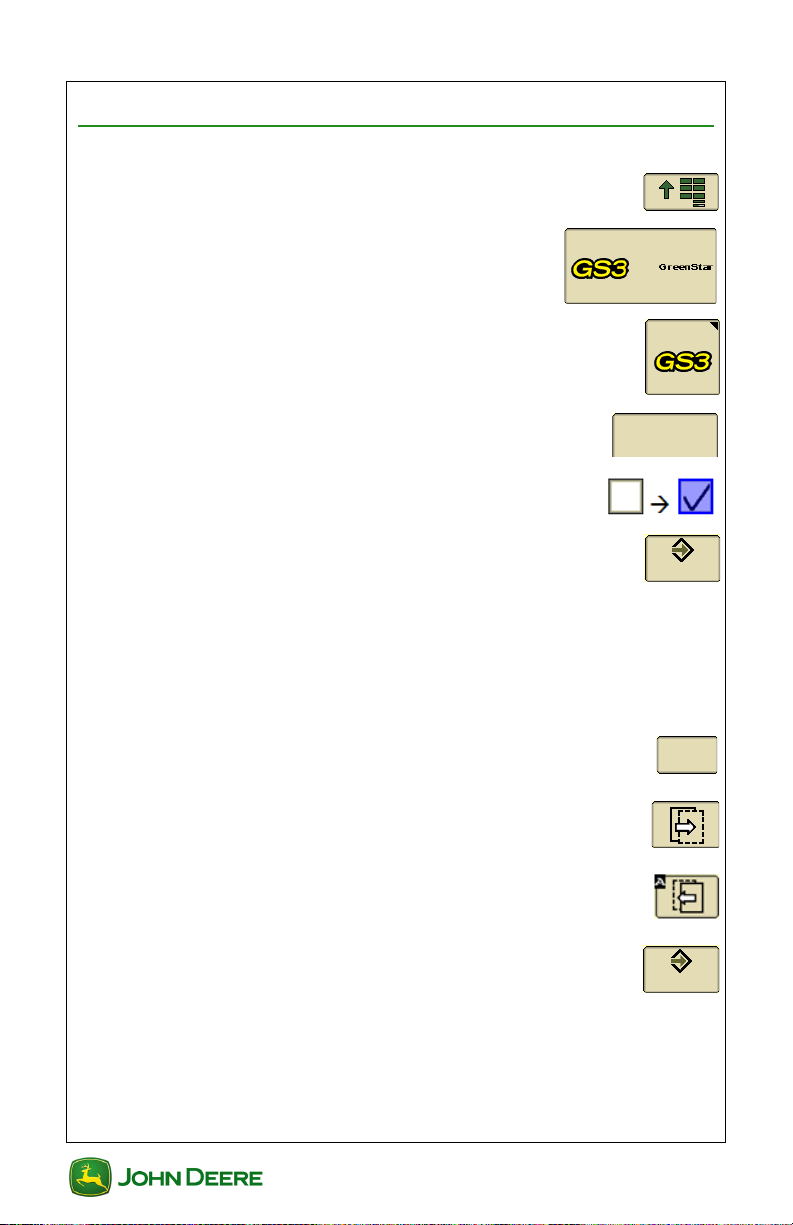
Resources
Resources describe where and who performed the work to be
documented. Documentation recording will not start if Client, Farm,
and Field are not set up.
1. Select Client ..............................................
2. Select Farm ...............................................
3. Select Field ...............................................
4. Select Task ................................................
IMPORTANT: To start documentation recording, task needs to
be set to any value other than “documentation off,” which is
the factory default setting.
IMPORTANT: Client, Farm, and Field are mandatory selections. If selections are not set, documentation recording will
not start.
NOTE: Use names for Client, Farms, and Field used in other parts of your
farming operation, such as daily conversations and office software.
Spelling names correctly will help you find the fields within the office
software.
GS3 2630 Display
4
GS3 2630 Display
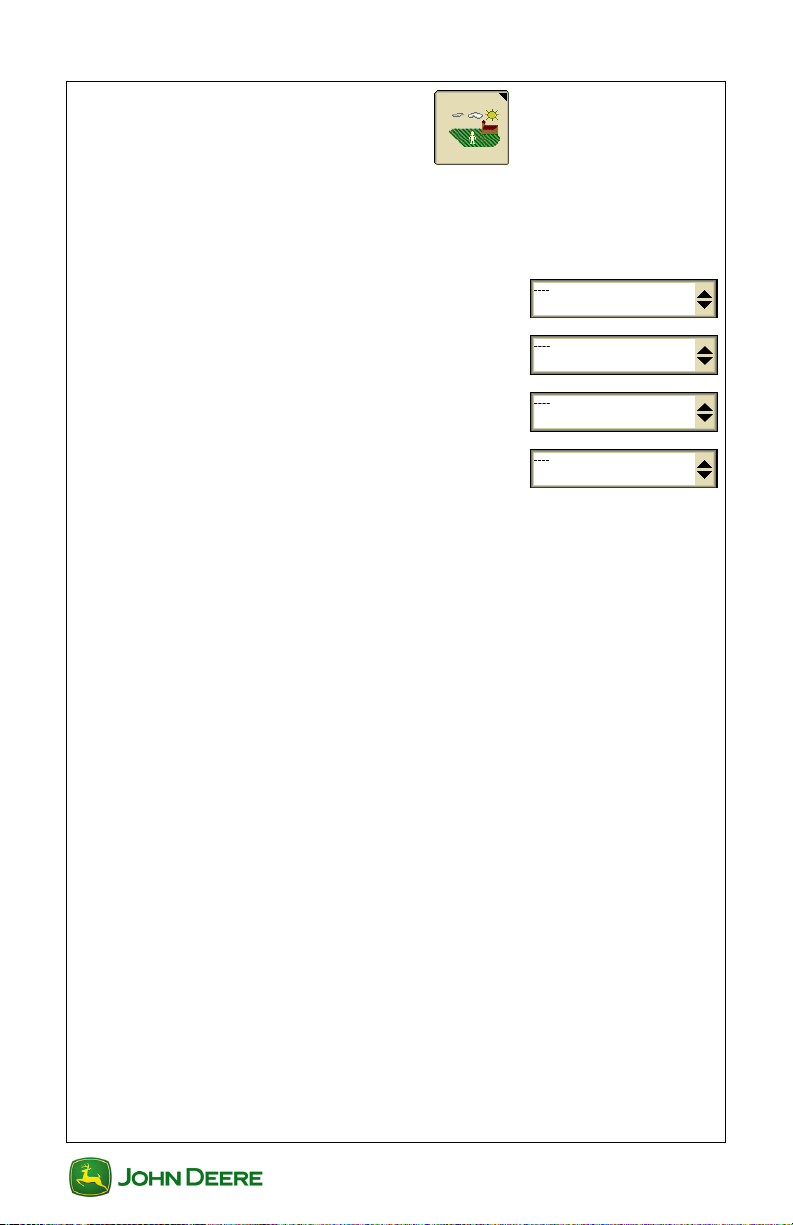
Page 7
User Guide Documentation
Change
Offsets
User Guide
Equipment
Machine
Machine Type and Name, as well as Implement Type and Name,
are mandatory input selections for documentation setup.
1. Machine Type ...........................................
2. Machine Model .........................................
3. Machine Name ..........................................
NOTE: Some machines will automatically populate Machine Type, Model,
and Name. John Deere combines or SPFHs automatically pre-populates
Machine Type. No input required for pre-populated selections.
4. Change Offsets .............................................................
5. Enter correct values for Offsets A, B, and C ................
NOTE: If machine information has been set up, offsets populate
automatically. To get information on how to measure offsets, refer to
Measuring Offsets User Guide on www.stellarsupport.com. Offsets A, B,
and C are required to calculate position of implement in relation to GPS
receiver. Offset D is only used for elevation recording.
NOTE: Accurately defined offsets result in precise documentation and
section control.
GS3 2630 Display
5
GS3 2630 Display
Page 8
User Guide 2630 Display
User Guide
Documentation Recording Source
Documentation Recording Source must be set up correctly for
recording.
1. Recording Source .......................................
NOTE: If Recording Source is set to Auto , it cannot
be changed and no input is required.
NOTE: Recording Source Auto means that either machine or implement
controls when recording is turned on. For example, recording starts when
header is down or sections of the implement are turned on.
2. If recording source is not set to Auto, the following options are
available:
• Manual: ...................................................
○ Press button on display to start and stop doc-
umentation recording.
• Implement switch 0: .................................
○ Documentation recording will turn on when switch is
moved in default position.
• Implement switch 1: ................................
○ Documentation recording will turn on when implement
switch is moved out of default position.
NOTE: To make implement switch options work, install implement switch.
Additional Options
John Deere and ISOBUS non-Deere tractors’ option availability
depends on the tractor’s equipment and display connection to
tractor. Some or all of the following options might be available:
• Rear PTO: ...............................................
GS3 2630 Display
6
GS3 2630 Display
Page 9
User Guide Documentation
Machine
User Guide
○ Recording starts when Rear PTO is switched on.
• Front PTO: ..............................................
○ Recording starts when Front PTO is switched on.
• Rear Hitch: ..............................................
○ Recording starts when Rear Hitch is lowered.
• SCVs: ......................................................
○ Recording begins and stops when indicated SCV is
moved.
NOTE: Any device not switched electronically, such as mechanical SCVs,
cannot be found in this drop-down list. Options are only visible if machine
supports these devices.
3. Press or select
GS3 2630 Display
7
GS3 2630 Display
Page 10
User Guide 2630 Display
Change
Widths
Change
Offsets
User Guide
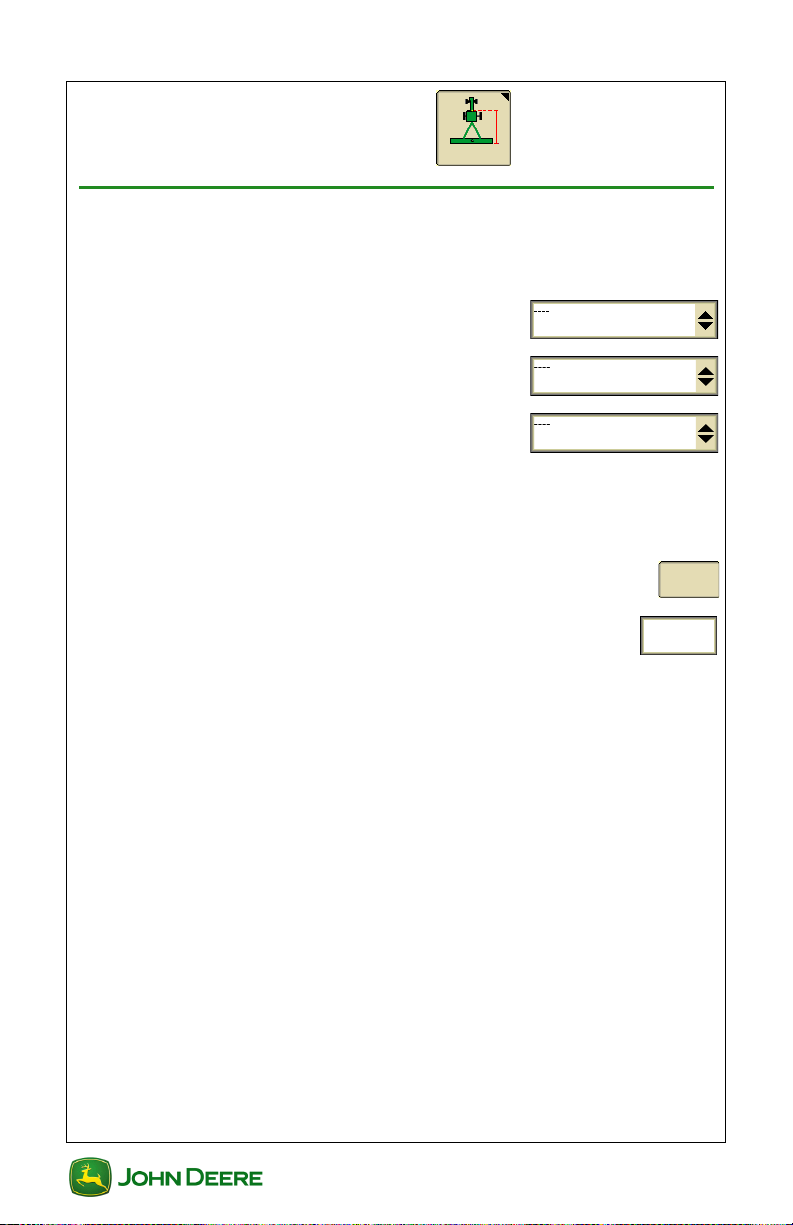
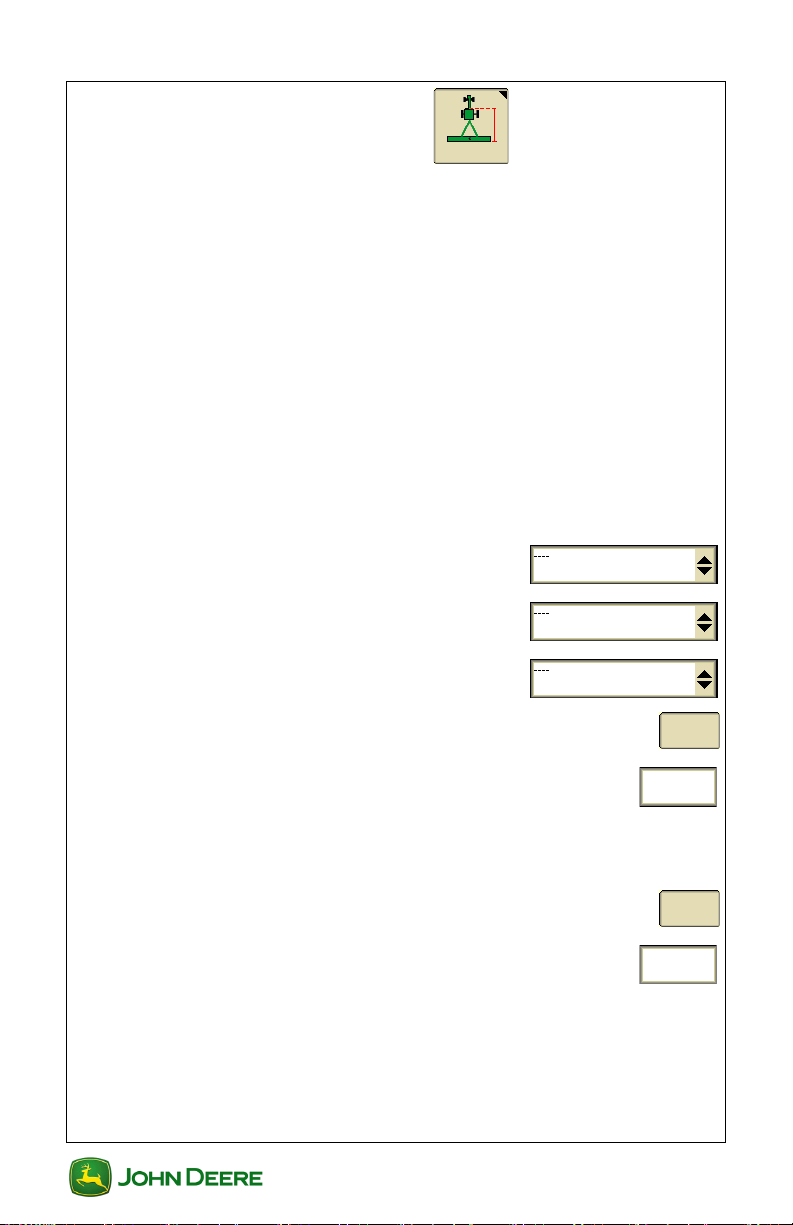
Implement
Implement Type and Name are mandatory input selections for
documentation setup. If those selections are not filled out,
documentation recording will not start.
NOTE: Some implements automatically populate implement type, model,
and name. Examples include John Deere planters or ISOBUS
implements. The name displayed in the input selection is a unique
identifier for the implement. Each name only exists once throughout the
entire John Deere and ISOBUS world.
NOTE: For documentation recording, input is not required if fields are prepopulated.
NOTE: Reuse names for Client, Farms, and Field in other parts of your
farming operation, such as daily conversations and office software.
Spelling names correctly will help you find fields within the office software.
1. Select Implement Type .............................
2. Select Implement Model ..........................
3. Select Implement Name ...........................
4. Change Widths ..............................................................
5. Enter correct values for implement width ..................
NOTE: This is the working width of implement. It is needed to calculate
how much area is worked and to display information on the map.
6. Change Offsets .............................................................
7. Enter correct values for Offsets A, B, C, and D ...........
GS3 2630 Display
8
GS3 2630 Display
Page 11
User Guide Documentation
Machine
User Guide
Offsets include the following characteristics:
• Documentation recording takes place at Offsets A + B (sum
of Offset A and Offset B). For example, the point where
grain is cut or seeds and fertilizer are put in the ground.
• Offsets A, B, and C are the base for implement drawing on
map.
• Offset D is important for drawn implements. It is needed for
calculating the position of implements in curves.
NOTE: If implement has been set up, offsets populate automatically. For
information on how to measure offsets, refer to Measuring Offsets User
Guide on www.stellarsupport.com.
NOTE: Accurately defined offsets result in precise documentation and
section control.
8. Press Accept to leave .................................................
9. Go to back to Machine ........................ OR
10. Select Connection Type .............................
NOTE: If implement has already been set up, connection type will
automatically populate as soon as an implement name is selected (2630
display only).
NOTE: To get information on which connection type, refer to Measuring
Offsets User Guide from www.stellarsupport.com.
11. Press twice or proceed with next section of this user
guide
GS3 2630 Display
9
GS3 2630 Display
Page 12

User Guide 2630 Display
New
Product
application
Planting/
Seeding
Tillage
Harvest
Wate r
Other
User Guide
Operation Specific Setup
General
Operation describes what work is done in the field, such as harvest
or planting.
To open Documentation Operation on main menu:
NOTE: If you are using Setup Wizard, move to step 5.
1. Menu .............................................................................
2. GreenStar .......................................................
3. Documentation ...........................................................
4. Select desired operation.........................................
OR
Select and select one of the following operations:
5. Select desired operation ............................
NOTE: If Setup Wizard is not used, skip step 5. For information on Setup
Wizard, refer to Setup Wizard section.
10
GS3 2630 Display
GS3 2630 Display
Page 13

User Guide Documentation
User Guide
Planting and Seeding
Planting and seeding describes what is done in the field. It is mandatory
input for documentation recording.
Planting and Seeding Without Prescription
1. Select Seed Type ........................................
NOTE: Seed Type is a crop that must be planted, such as corn, wheat, or
barley.
A. Prescription indicates which prescription is selected.
NOTE: If a Prescription has not been selected, “----” remain on page. To
use Prescriptions, see Planting or Seeding with Prescription section.
B. Implement Name indicates which implement is selected.
IMPORTANT: The 2630 display supports documentation for
individual row units only on planters for row crops. The correct implement type for the operation needs to be selected.
NOTE: For more information, refer to the Implement section.
2. Select Target Rate (seed/area) ....................................
NOTE: In case a John Deere planter or an ISOBUS planter is connected,
continue to step 5. Target Rate needs to be set up on user interface of
implement. The 2630 display reads this value and populates it
automatically.
A. Select Rate Unit .....................................
NOTE: Mass per area and seeds per area are available.
B. Select Rate .............................................................
IMPORTANT: Seed Rate does not control seed rate of
machine. It is for documentation purposes only.
C. Accept
............................................................................
GS3 2630 Display
11
GS3 2630 Display
Page 14

User Guide 2630 Display
Add Variety
Assign variety
to rows
User Guide
3. Add Variety ................................................................
4. Select Variety ..............................................
5. Select Color ......................................................
6. Accept .........................................................................
NOTE: For each variety that needs to be planted in different row units,
repeat steps 3-6.
7. Assign variety to rows ...........................................
NOTE: Step 7 can be skipped if one variety is assigned to all rows.
NOTE: The 2630 display supports documentation for individual row units
only on planters for row crops.
NOTE: Starting from left, variety will be assigned from row one through
the selected end row. For example, if only one variety was to be assigned
to all rows on a 12-row planter, end row would be 12.
NOTE: Repeat steps a and b for all varieties and rows.
a. Select Variety ..................................................
b. Select End Row ......................................................
c. Next ...........................................................................
d. Press Accept when all rows are assigned
GS3 2630 Display
12
GS3 2630 Display
Page 15

User Guide Documentation
Assign variety
to rows
User Guide
Planting and Seeding with Prescription Created
in Office Farm Management Software
Prescription can only be used in combination with an implement capable
of using prescriptions, such as John Deere sprayers or planters.
NOTE: Contact the manufacturer for more information if implement is
capable of performing prescriptions.
1. Prescription..............................................................
2. Select Prescription .....................................
IMPORTANT: Ensure connected implement supports rate unit
defined in the prescription. Use the implement user interface
to set up the implement correctly. If prescription is set up in
seeds per area, implement cannot be set up in mass per area.
3. Enter Look Ahead time ...............................................
NOTE: Look Ahead time is the time needed to adjust to a new rate when
driving from one rate area to the next. This value depends on the
implement and the seeds applied.
4. Accept .........................................................................
5. Verify Seed type ..........................................
6. Verify Prescription
7. Verify implement name, indicating if the correct implement is
NOTE: The 2630 display supports documentation for individual row units
only on planters for row crops. Correct implement type needs to be
selected.
NOTE: For more information, refer to Implement section.
8. Assign variety to rows ..........................................
used
13
GS3 2630 Display
GS3 2630 Display
Page 16

User Guide 2630 Display
User Guide
NOTE: Step 8 can be skipped if one variety is assigned to all rows.
a. Select Variety ..................................................
b. Select End Row
c. Next ..........................................................................
NOTE: Starting from left, variety will be assigned from row one through
the selected end row. For example, if only one variety was to be assigned
to all rows on a 12-row planter, end row would be 12.
NOTE: Repeat steps a and b for all varieties and rows.
d. Press Accept when all rows are assigned
.................................................
14
GS3 2630 Display
GS3 2630 Display
Page 17

User Guide Documentation
Add
Product
User Guide
Product Application-Single Product
Product application describes what is done in the field. it is
mandatory input for documentation recording.
1. Select Product Application Type ..............
2. Select single product from list
3. Add Product ..............................................................
A. Select Product Type ..............................
B. Select Product Name .............................
C. Select Rate Unit .....................................
NOTE: If a John Deere or ISOBUS implement is connected, no input is
needed if the selection is grayed out. Rate Unit is read from the
implement and populated automatically.
D. Accept ....................................................................
4. Select Target Rate ......................................................
NOTE: Target Rate entered here is for documentation purposes only, and
will not control Target Rate the implement actually applies.
NOTE: If a John Deere or ISOBUS implement is connected, no input is
needed if the selection is grayed out. Rate Unit is read from the
implement and populated automatically.
GS3 2630 Display
15
GS3 2630 Display
Page 18

User Guide 2630 Display
Add
Carrier
Add
Product
User Guide
Product Application-Tank Mix
Product application describes what is done in the field. it is a
mandatory input for documentation recording.
1. Select Product Application Type ..............
2. Select Tank Mix from list
3. Add Carrier ................................................................
A. Select Carrier Type ................................
B. Select Base Solution Rate ....................................
NOTE: If carrier is water, Base Solution Rate indicates how much water
needs to be sprayed per area.
C. Select Rate Unit .....................................
NOTE: If a John Deere or ISOBUS implement is connected, no input is
needed if the selection is grayed out. Rate Unit is read from the
implement and populated automatically.
D. Accept ....................................................................
4. Add Product ..............................................................
A. Select Product Type ..............................
B. Select Product Name .............................
C. Select Rate Unit .....................................
NOTE: If a John Deere or ISOBUS implement is connected, no input is
needed when the selection is grayed out. Rate Unit is read from the
implement and populated automatically.
GS3 2630 Display
16
GS3 2630 Display
Page 19

User Guide Documentation
User Guide
D. Select Rate .............................................................
NOTE: Rate entered here is for documentation purposes only, and will not
control target rate which the implement actually applies.
E. Accept ....................................................................
NOTE: Up to six different products can be selected. Repeat step 4 for
each product, which should be applied.
F. Ve r if y Target Rate ..................................................
NOTE: Sum up values of carrier and individual product to achieve the
correct target rate.
NOTE: Target rate entered here is for documentation purposes only, and
will not control target rate which the implement actually applies.
NOTE: If a John Deere or ISOBUS implement is connected, no input is
needed if selection is grayed out. Target rate adjustments need to be
made on the user interface of the implement.
17
GS3 2630 Display
GS3 2630 Display
Page 20

User Guide 2630 Display
User Guide
Product Application-Prescription Created in
Office Farm Management Software
Product application describes what is done in the field. It is a
mandatory input for documentation recording.
NOTE: Prescription can only be used in combination with an implement
capable of using prescriptions, such as John Deere sprayers or planters.
NOTE: Contact the manufacturer of the implement to find out if the
implement is capable of performing Prescriptions.
1. Prescription .............................................................
2. Select Prescription .....................................
3. Enter Look Ahead time ..............................................
NOTE: Look Ahead is the time the implement needs to adjust to a new
rate when driving from one rate-area to the next. This value depends on
the implement and the seeds applied.
4. Accept ........................................................................
5. Verify Prescription selected
6. Verify Prescription Rate, which indicates current rate applied
7. Move to”Product Application-Single Product” and “Product
Application Tank” sections of this user guide to finish set up of
product application operation
GS3 2630 Display
18
GS3 2630 Display
Page 21

User Guide Documentation
Change Harvest
Settings
User Guide
Harvest-Combine
Harvest describes what is done in the field. it is a mandatory input
for documentation recording.
NOTE: For more information about GreenStar 2630 Display and John
Deere Forage Harvesters, download GreenStar SPFH User Guide from
stellarsupport.deere.com.
IMPORTANT: Harvest documentation is only possible with
John Deere harvesting machines, such as cotton pickers,
combines, and SPFH. If Harvest is selected on a tractor or any
other machine type, documentation recording will not start.
1. Change Harvest Settings ......................................
2. Select Crop Type .........................................
3. Select Variety ..............................................
4. Check Variety Locator ................................................
NOTE: If needed, check Variety Locator. Variety Locator requires a
variety map, which needs to be imported from office desktop software.
5. Press Accept ..............................................................
GS3 2630 Display
19
GS3 2630 Display
Page 22

User Guide 2630 Display
User Guide
Harvest-Loads
In case individual load documentation is desired, follow instructions
to set up Load Documentation correctly. Loads are not mandatory
input for documentation recording.
IMPORTANT: Individual Load Documentation is only possible
with John Deere harvesting machines, such as combines and
SPFH.
1. Define Load Name ......................................
2. Define Load Destination ............................
NOTE: If load name is enough information, load destination can be left
blank.
3. Auto Increment Load Number .................................
NOTE: When Auto Increment Load Number is checked, load will be
saved and counted automatically every time unloading auger of combine
is started. If this is not desired, do not check box.
IMPORTANT: Auto Increment Load Number is only available
on John Deere combines. It will not be available on other
machines.
20
GS3 2630 Display
GS3 2630 Display
Page 23

User Guide Documentation
User Guide
Tillage
Tillage describes what is done in the field. It is a mandatory input
for documentation recording.
1. Select Tillage Type ......................................
NOTE: Tillage Type could be stubble breaking or seedbed preparation.
2. Enter Tillage Depth ......................................................
NOTE: Tillage Depth is only documented by the 2630 display. It does not
influence actual tillage depth.
IMPORTANT: If tillage is not selected, documentation recording will not start.
21
GS3 2630 Display
GS3 2630 Display
Page 24

User Guide 2630 Display
User Guide
Other
Operation describes what is done in the field. it is a mandatory
input for documentation recording.
1. Select Operation Type .................................
NOTE: Operation types include baling, mowing, and transport.
2. Enter Operation Name .................................
NOTE: To locate an operation using office desktop software, use a
meaningful name for the operation.
IMPORTANT: If operation is not started, documentation
recording will not start.
22
GS3 2630 Display
GS3 2630 Display
Page 25

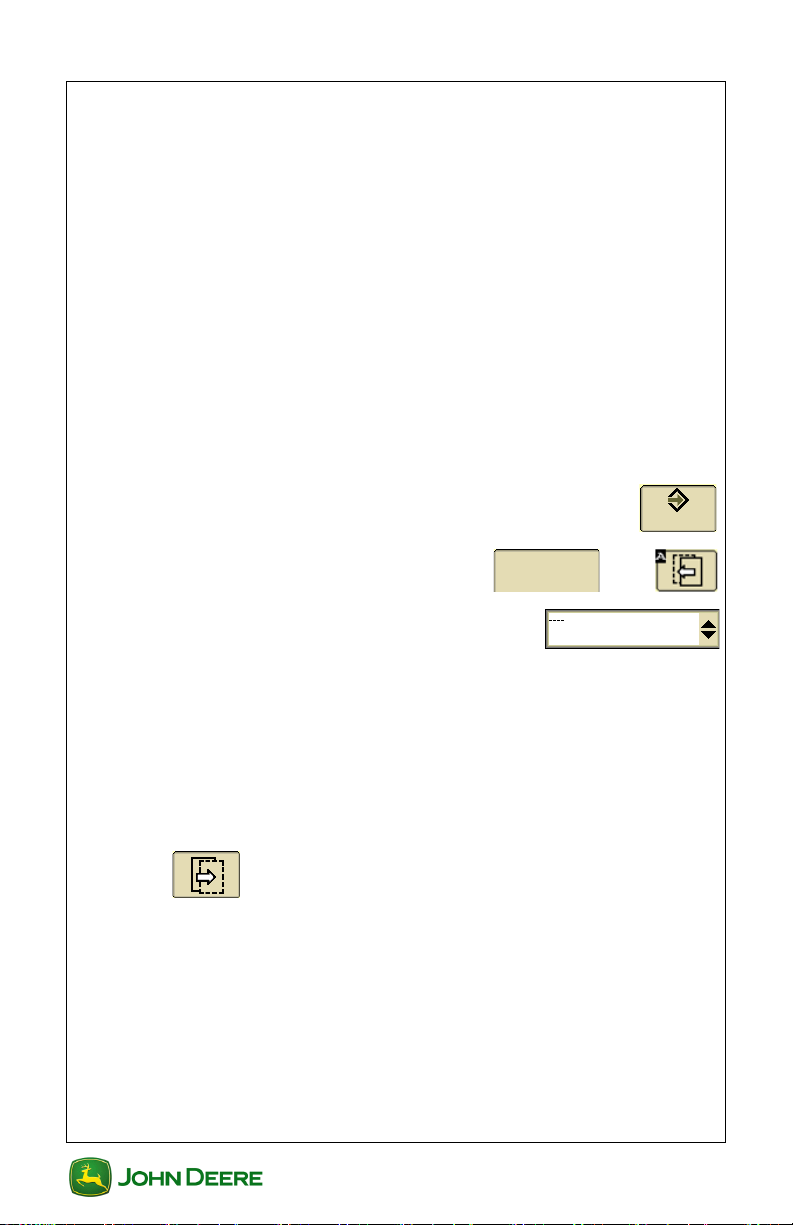
User Guide Documentation
Summary
Summary
Client
Farm
Field
Tas k
Operator name
User Guide
GreenStar Summary
Summary page is the easiest way to find missing data, such as field or
machine information. It will show why documentation recording will not
start.
GreenStar Summary
1. Menu .............................................................................
2. GreenStar .......................................................
3. GreenStar Main ............................................................
4. Summary tab .........................................................
5. Verify Client, Farm, Field, and Task setup
If Client, Farm, or Task show dashes “----,” press on the area to
open Resources page. On this page, setup can be made. Operator
is not a mandatory input.
NOTE: For correct setup information, refer to Resources section.
23
GS3 2630 Display
GS3 2630 Display
Page 26

User Guide 2630 Display
Machine:
Implement 1:
Implement width:
Var iet y:
Product type:
Product name:
Crop type:
Var iety :
Typ e:
Product type:
Product name:
User Guide
6. Verify Machine, Implement 1, and Implement Width
If Machine or Implement 1 shows dashes “----”, press on the area
to open the Equipment page. On this page, setup can be made.
NOTE: For correct setup information, refer to Equipment section of this
user guide.
7. Verify Operation
A. Select desired Operation: ......................
B. Planting or Seeding .................
C. Product application ..................
D. Harvest ......................................
E. Tillage.........................................
F. Other ..........................................
24
GS3 2630 Display
GS3 2630 Display
Page 27

User Guide Documentation
User Guide
IMPORTANT: If there are dashes “----” shown for any operation, documentation recording will not start. Press on the area
to open “Documentation” page where setup can be made.
NOTE: To set up the specific operation correctly, refer to the adequate
section of this guide for your operation.
All other values shown on summary page are not mandatory input
for documentation recording. Documentation recording will start
even if inputs are not filled out.
25
GS3 2630 Display
GS3 2630 Display
Page 28

User Guide 2630 Display
User Guide
Diagnostics
Select Diagnostics to find issues that are not covered in the GreenStar
Summary page.
Harvest
1. Menu .............................................................................
2. GreenStar .......................................................
3. Diagnostics ................................................................
4. Select Recording ........................................
5. Verify the following settings:
NOTE: If any of the values show “no” or if there are more operations
defined than “Harvest,” continue with step 6.
NOTE: If all values show “yes” and recording still will not start, contact
your John Deere dealer.
Field defined: yes
Task defined: yes
Operations properly defined:
Harvest: yes
N/A: ----
N/A: ----
N/A: ----
Recording space available: yes
GPS available: yes
Vehicle moving at minimum speed: yes
GS3 2630 Display
26
GS3 2630 Display
Page 29

User Guide Documentation
User Guide
Selected recording source state: active
Documentation and coverage: active
Recording source: Auto
6. Troubleshooting
Field defined: no
Task defined: no
NOTE: If the values are “no,” refer to “Resources” section of this user
guide for correct setup information.
Operations properly defined:
Harvest: no
N/A: ----
N/A: ----
N/A: ----
○ If “Harvest” is “no,” display is:
▪ Mounted on a machine other than a John Deere
harvest machine, such as cotton picker, combine,
or SPFH. In this case, “Harvest” cannot be
documented.
▪ Set up incorrectly. To set up operation, refer to
the Harvest Combine section.
○ If an operation is defined in addition to “Harvest,”
recording will not start. In order to solve the issue, use
the following steps:
a.Menu .......................................................
GS3 2630 Display
27
GS3 2630 Display
Page 30

User Guide 2630 Display
Remove
User Guide
b.GreenStar ..................................
•
c.Documentation .............................................
d.Operation tab .....................................
e.Remove ...........................................................
Recording space available: no
If there is no recording space available, copy data to a USB drive
and delete documentation data of the display.
NOTE: For more information, refer to GreenStar 32630 user guide
“GreenStar General-Delete Documentation Data.”
GPS available: no
If there is no GPS available, check connection to StarFire receiver
and ensure it has clear view of sky. If this does not help, contact
your John Deere dealer.
Vehicle moving at minimum speed: no
If vehicle is not moving at minimum speed, accelerate machine
until it is moving at minimum speed. For more applications, the
minimum speed is 0.5 km/h (0.3 mph).
Selected recording source state: inactive
Documentation and coverage: inactive
“Recording source state” and “Documentation and Coverage” are
inactive if coverage map is not painting. As soon as coverage map
is painting, both of them are active
Recording source: Auto
This is the recording source selected under “Equipment” in the
GreenStar menu. For more information, see the “EquipmentDocumentation Recording Source” section in this user guide.
28
.
GS3 2630 Display
GS3 2630 Display
Page 31

User Guide Documentation
User Guide
Diagnostics
Diagnostics shows how to find out why documentation recording does not
start.
Non-Harvest
1. Menu .............................................................................
2. GreenStar .......................................................
3. Diagnostics ................................................................
4. Select Recording ........................................
5. Verify the following settings:
NOTE: If any of the values show “no” or recording source is not correct,
continue to step 6.
NOTE: If all values show “yes” and recording still will not start, contact
your John Deere dealer.
Field defined: yes
Task defined: yes
Operations properly defined:
Product application: yes
Planting/Seeding: yes
Tillage: yes
N/A ----
Recording space available: yes
GPS available: yes
Vehicle moving at minimum speed: yes
GS3 2630 Display
29
GS3 2630 Display
Page 32

User Guide 2630 Display
User Guide
Selected recording source state: active
Documentation and coverage: active
Recording source:
6. Troubleshooting:
Field defined: no
Task defined: no
NOTE: If the values above are “no,” refer to “Resources” section in this
user guide for more correct setup information.
Operations properly defined:
Product application: yes
Planting/Seeding: no
Tillage: no
N/A: ----
If there is a “no,” the operation is not set up completely.
NOTE: Refer to “Operation-[specific operation to be performed]” section
of this user guide to set up the operation correctly.
Recording space available: no
If there is not recording space available, copy data to a USB drive
and delete documentation data of the display.
NOTE: For more information on how to delete data, refer to GreenStar 3
2630 user guide “GreenStar General-Delete Documentation Data.”
GPS available: no
If there is no GPS available, check connection to the StarFire
receiver. Ensure clear view of sky or contact your John Deere
dealer.
GS3 2630 Display
30
GS3 2630 Display
Page 33

User Guide Documentation
User Guide
Vehicle moving at minimum speed: no
If vehicle is not moving at minimum speed, accelerate machine
until it moves at minimum speed. For most applications, the
minimum speed is 0.5 km/h (0.3 mph).
Selected recording source state: inactive
“Recording source state” shows if recording source selected under
equipment is ready to document when all other items are “yes.” For
example, implement switch is in the correct position, but vehicle is
not moving at minimum speed.
Documentation and coverage: inactive
“Documentation and Coverage” shows current recording state.
“Inactive” means coverage map is not painting and recording is
“off.”
Recording source: ----
This is the recording source selected under “Equipment” in the
GreenStar menu. For more information, see “EquipmentDocumentation Recording Source” section of this user guide.
31
GS3 2630 Display
GS3 2630 Display
Page 34

User Guide 2630 Display
User Guide
NOTES
32
GS3 2630 Display
GS3 2630 Display
 Loading...