

Page 1
CosmoPost
Instructions for Use
Page 2

2
Table of Contents
3 CosmoPost – Basics first
4 Notes for dentists and dental technicians
4 Indication
4 Contraindication
5 IPS Empress Cosmo Ingot
5 Indication
5 Contraindication
6 Description of the assortments
6 CosmoPost
8 IPS Empress Cosmo Ingot
9 Instructions for Use for dentists
9 Post length and preparation
10 Cementation
11 1. Indirect method
11 A. Preparation of the tooth / root canal
11 B. Fabrication of the build-up in the dental laboratory
11 C. Try-in of the post build-up
11 D. Conditioning of the post build-up
12 E. Cementation of the post build-up
12 F. Preparation and temporary restoration
13 G. Adhesive cementation of the restoration
14 Example of the indirect method
15 2. Direct method
15 A. Preparation of the tooth / root canal
16 B. Direct modelling of the build-up
16 C. Preparation and temporary restoration
16 D. Adhesive cementation of the restoration
17 Instructions for Use for dental technicians
17 IPS Empress Cosmo Ingot – Instructions for Use
17 Model fabrication
18 Preparation for modelling
18 Modelling
19 Spruing
19 Investment
20 Preheating
20 Pressing
21 Divestment
21 Removing the pressed object / Finishing
Page 3
3
CosmoPost – Basics first
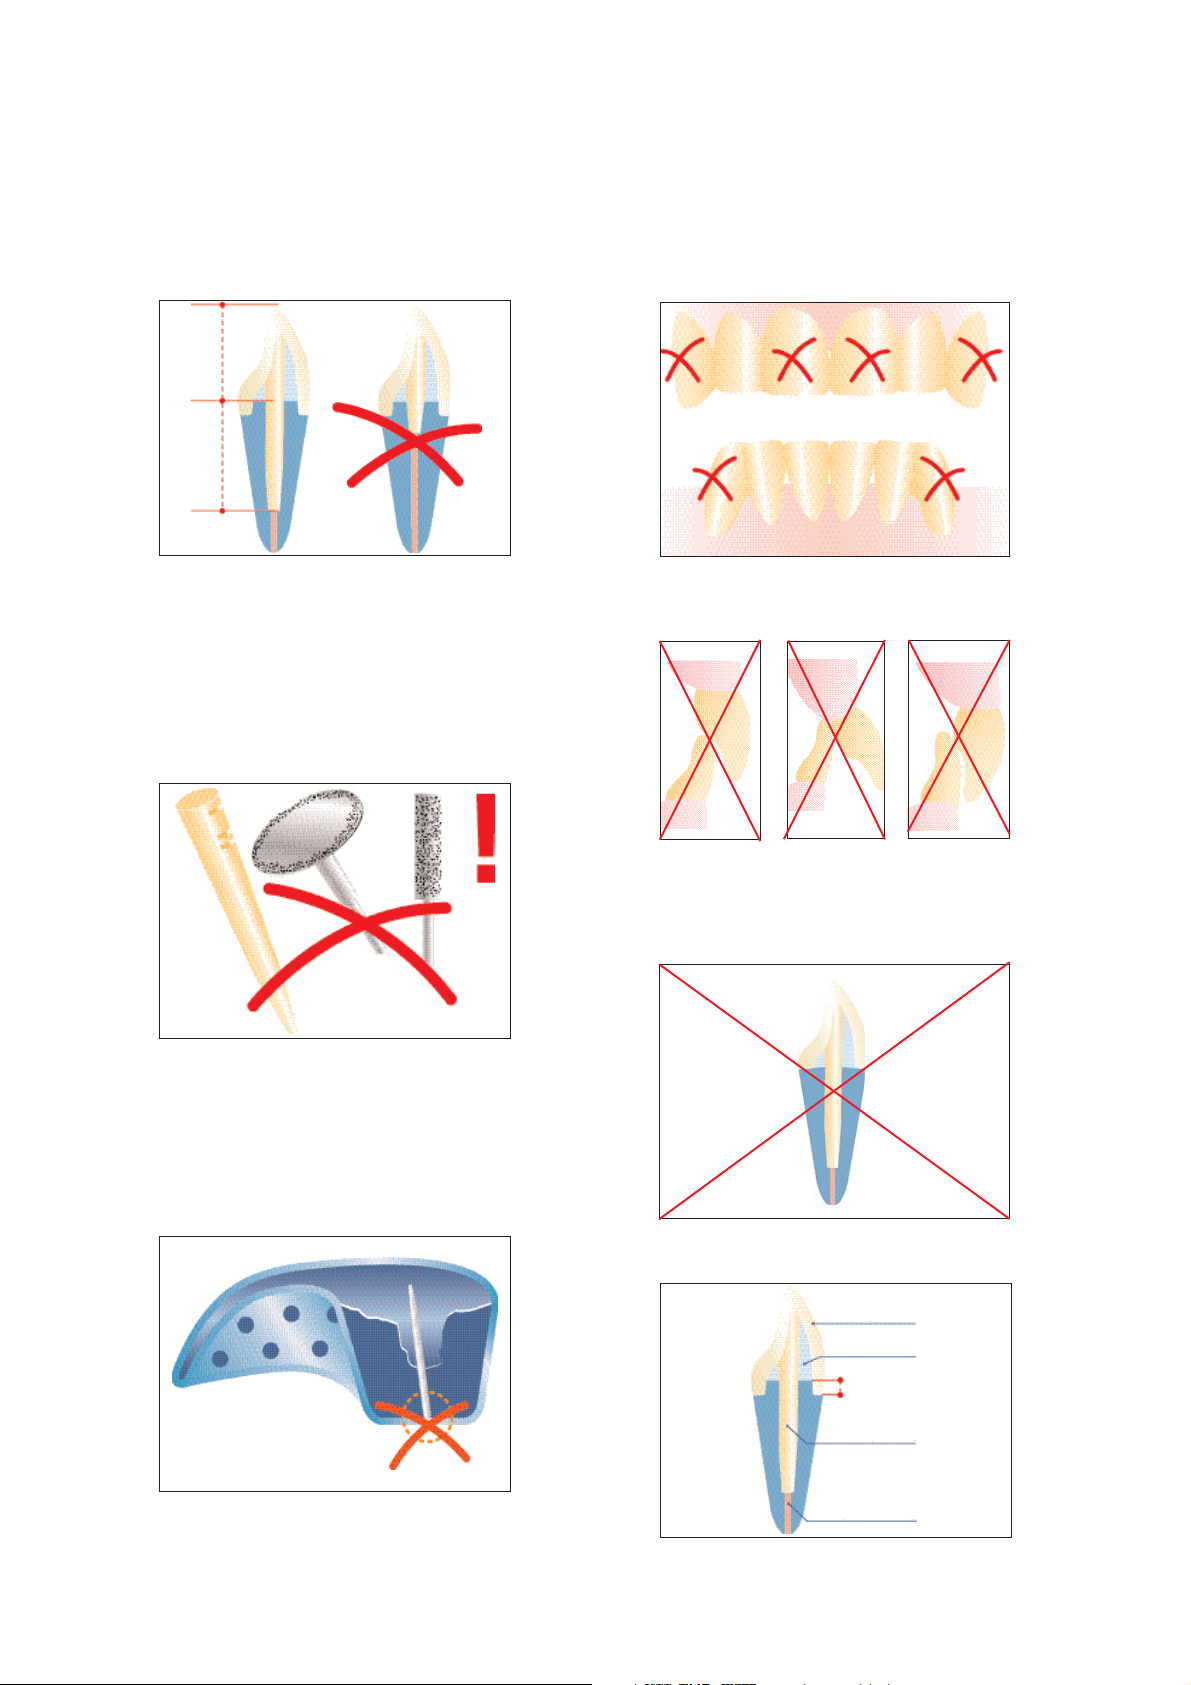
Make sure that… The following applications are absolutely
contraindicated:
… the length of the post within the canal at least corresponds to the coronal
length of the clinical crown,
Using the 1.4-mm CosmoPost for the following teeth:
FDI designation: 13, 11, 21,23, 33, 43
ADA designation: 6, 8, 9,11, 22, 27
… the CosmoPost is not provided with retention grooves under any
circumstances,
… the impression post does not come into contact with the impression tray.
Application for patients with a deep overbite, bruxism or suspected bruxism.
If there is insufficient supergingival dental hard tissue.
The supergingival dental hard tissue must measure at least 2–3 mm. In other
words, the preparation margin must be approx 2–3 mm below the build-up.
at least 2–3 mm
!
prosthetic crown
post build-up
root canal post (CosmoPost)
apical root filling
Page 4
4
Contraindication
CosmoPost – Notes for dentists
and dental technicians
Indication
Since CosmoPost is a ceramic post system, the main
indication is the aesthetically important anterior region, both
in the maxilla and the mandible.
l Anterior region
– 1.4-mm CosmoPost
Use:
1. In the maxilla: only for the lateral incisors, ie, teeth 12 and
22 (FDI); teeth 7 and 10 (ADA).
2. In the mandible: for the central and lateral incisors, ie,
teeth 32 to 42 (FDI); teeth 23 to 26 (ADA).
Any other application is contraindicated and may
compromise the success of the prosthetic restoration.
– 1.7-mm CosmoPost
Use:
The 1.7-mm CosmoPost is used for those teeth, for which
the diameter of the coronal part of the root or the coronal
endodontium clinically indicates a 1.7-mm root canal post.
These teeth are usually the four canines and the central
incisors in the maxilla.
II Posterior region
– Depending on the clinical situation, both the 1.7-mm and
1.4-mm CosmoPost can be used in the posterior region.
Generally, the 1.4-mm post is used for maxillary and
mandibular premolars, while the 1.7-mm post is used for
molars (distal canal in the mandible, palatal canal in the
maxilla).
Important
– The indications and working parameters must be
observed at all times
– The CosmoPost must not be adjusted by grinding,
tapered, or provided with retention grooves, since such
measures may result in predetermined breaking points
on the post.
– The post must not be blasted with aluminium oxide
(Al
2O3
). The surface of the post has already been
roughened.
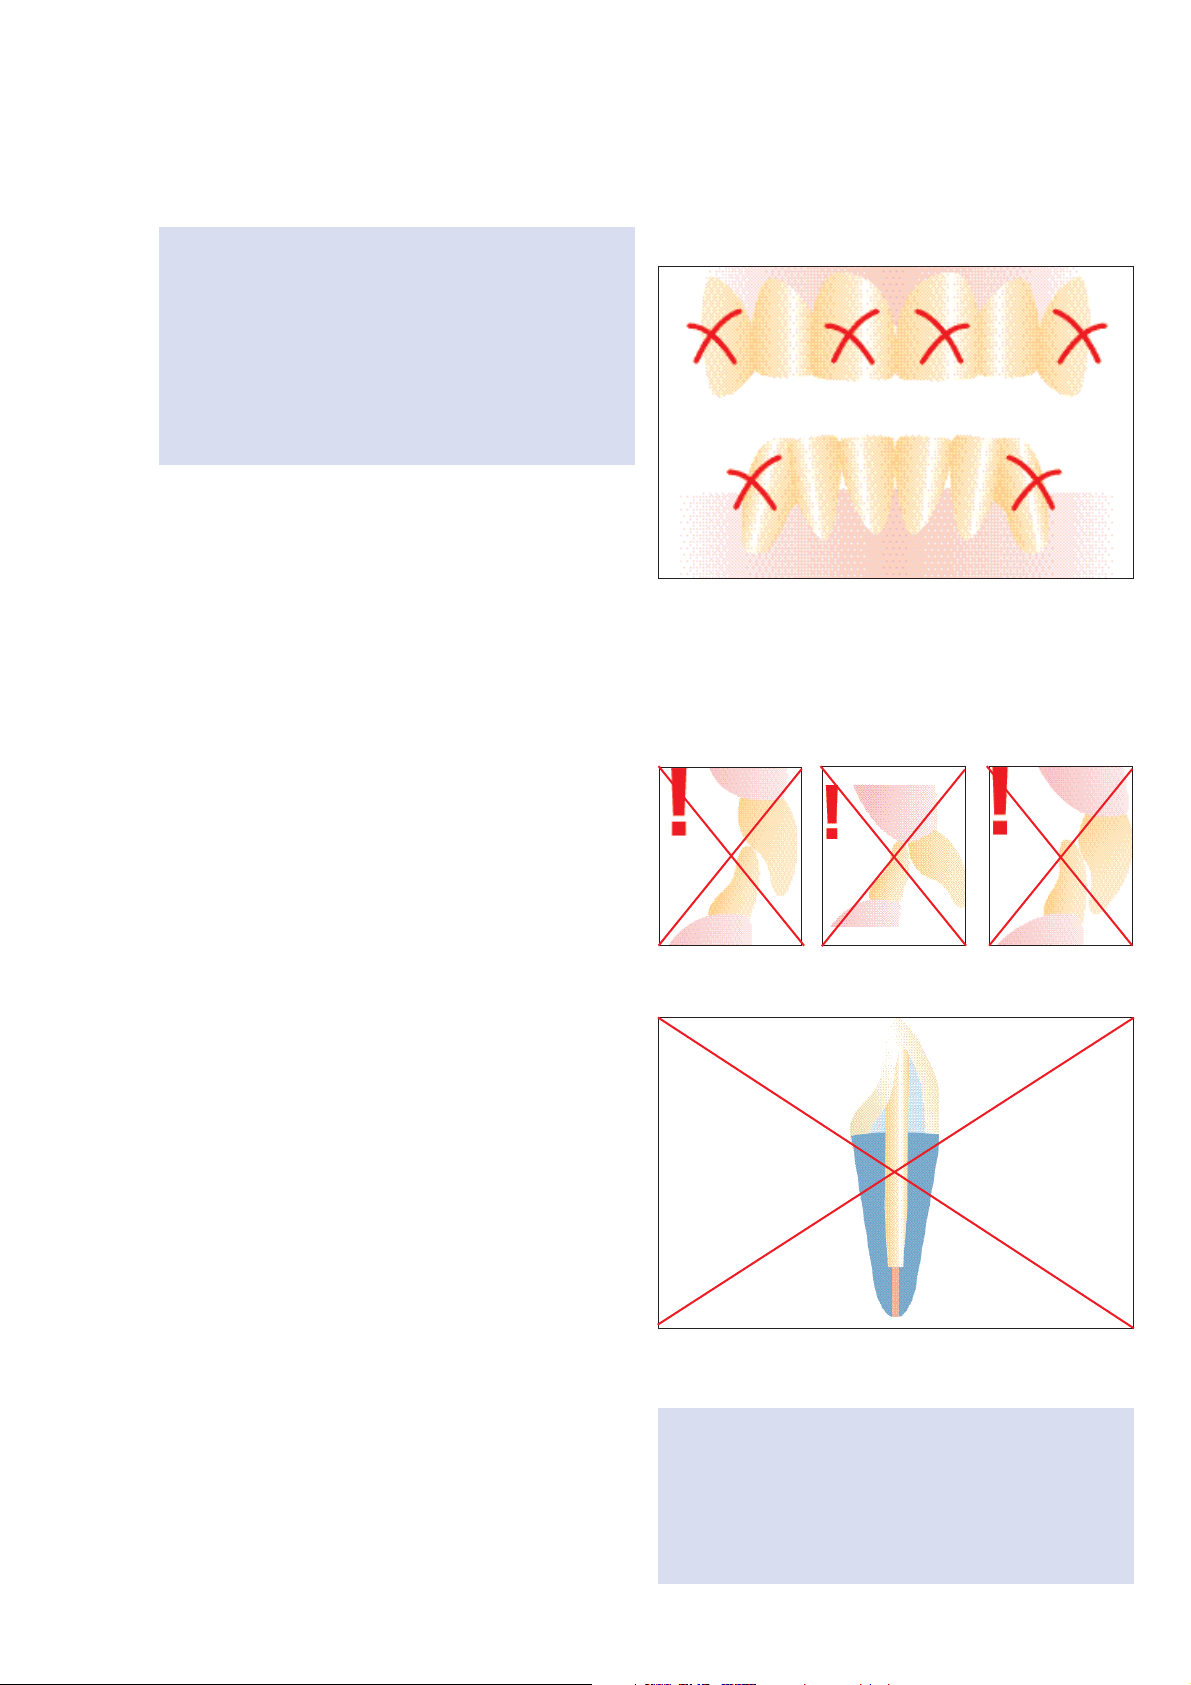
The use of the 1.4-mm CosmoPost is absolutely contraindicated for the marked teeth (FDI: 13, 11, 21, 23, 33,
43) (ADA: 6, 8, 9, 11, 22, 27).
Additional contraindications are as follows:
– Use of the CosmoPost for patients suffering from bruxism
or suspected bruxism
– Deep overbite
Important
If the defined preparation (residual dentin) is not possible
or one of the above contraindications is present, a metal
post must be used, since the risk of a post fracture is
clearly increased. A fractured post most often results in
the extraction of the root, since the post is virtually
impossible to remove.
– Less than 2–3 mm supergingival dental hard tissue
– Circular isogingival damage
– Allergy to any of the ingredients
!
Page 5

5
Indication
Core build-up in combination with the CosmoPost
(zirconium oxide root canal post).
Contraindication
– Neither metal alloys and metal-ceramics (eg IPS Classic,
IPS d.SIGN) nor all-ceramic layering materials
(eg IPS Empress, IPS Empress 2, IPS Eris for E2) may be
fused to the CosmoPost (root canal post).
– Conventional IPS Empress ingots cannot be used in
combination with the IPS Empress Cosmo Ingot.
– If patients are known to be allergic to any of the
ingredients, the IPS Empress Cosmo Ingot should not be
used.
IPS Empress Cosmo Ingot
Page 6

6
Description of the assortments
CosmoPost
Description of the material
The CosmoPost is a parallel-conical root canal post made of
zirconium oxide (ZrO
2
) ceramic, which consists of ZrO2, HfO2,
Y
2O3
and Al2O3.
The CosmoPost is available in two different sizes (1.4 mm
and 1.7 mm in diameter).
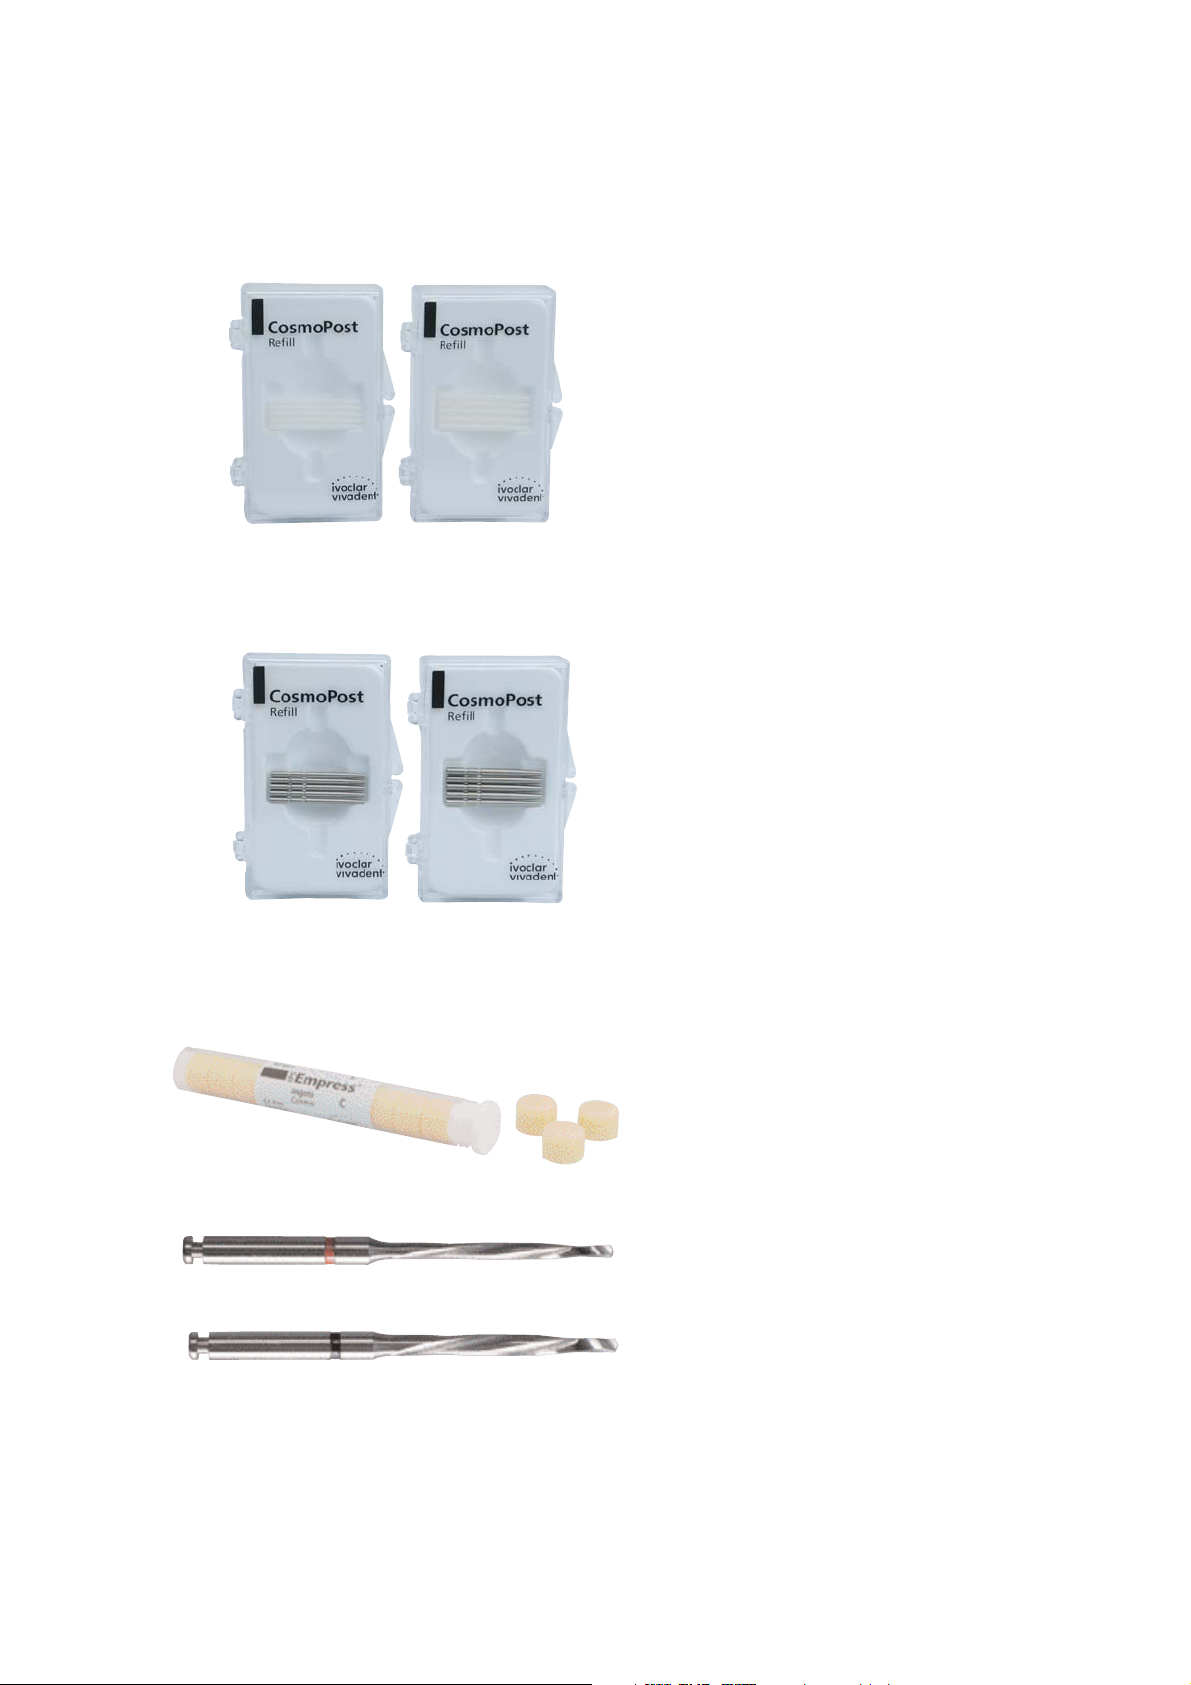
Delivery form
CosmoPost Kit
CosmoPost Kit mit Rohli
CosmoPost Kit including ingots
3 CosmoPosts, 1.4 mm diameter
3 CosmoPosts, 1.7 mm diameter
3 impression posts, 1.4 mm diameter
3 impression posts, 1.7 mm diameter
1 root canal bur, 1.4 mm diameter (red)
1 root canal bur, 1.7 mm diameter (black)
3 CosmoPosts, 1.4 mm diameter
3 CosmoPosts, 1.7 mm diameter
3 impression posts, 1.4 mm diameter
3 impression posts, 1.7 mm diameter
1 root canal bur, 1.4 mm diameter (red)
1 root canal bur, 1.7 mm diameter (black)
10 IPS Empress Cosmo Ingots
The impression posts can also be used as temporary posts in
provisional restorations.
Page 7
7
5 CosmoPosts, 1.4 mm diameter
5 CosmoPosts, 1.7 mm diameter
Refills
5 impression posts, 1.4 mm diameter
5 impression posts, 1.7 mm diameter
10 IPS Empress Cosmo Ingots
1 root canal bur, 1.4 mm diameter
1 root canal bur, 1.7 mm diameter
Page 8
8
Rotary instruments (2 root canal burs)
– 2 root canal burs (1.4 mm and 1.7 mm diameter) for the
standardized preparation of root canals
The rotary instruments are also available as Refill.
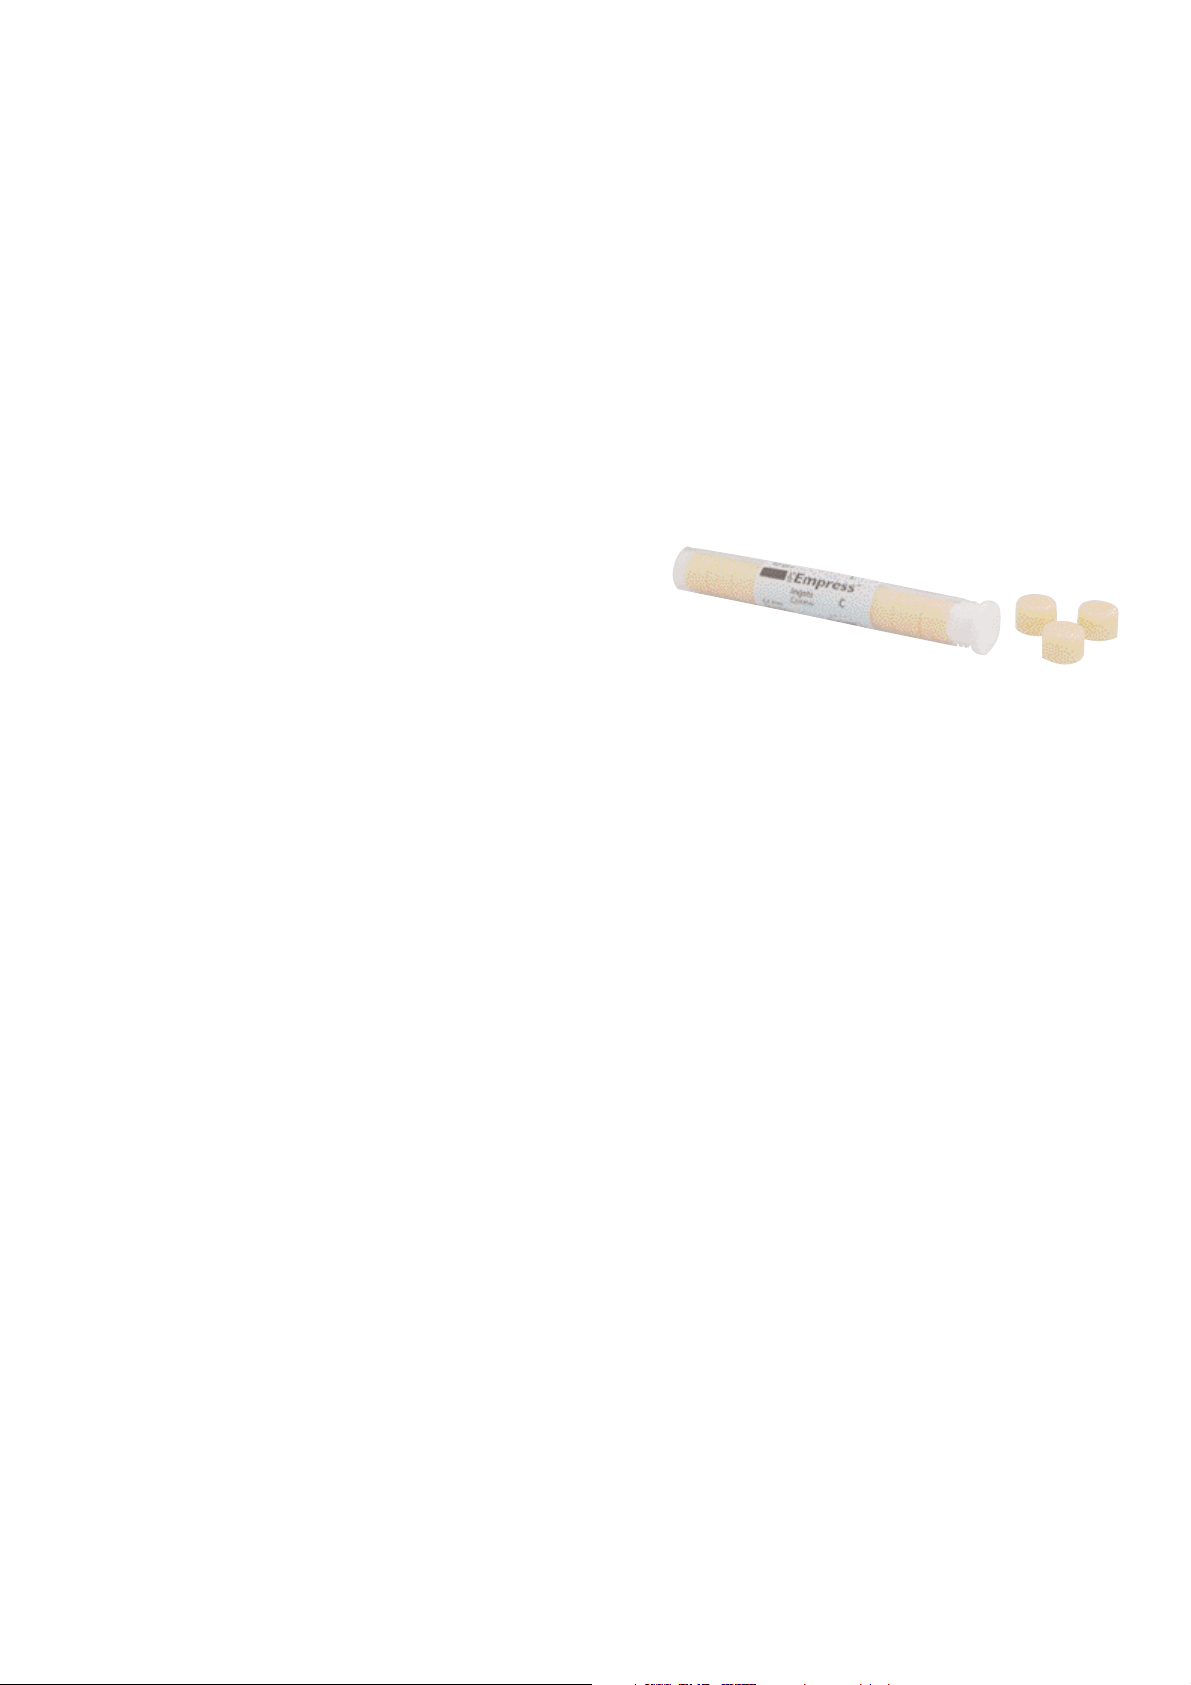
IPS Empress Cosmo Ingot
Description of the material
The IPS Empress Cosmo Ingot is made of IPS Empress glassceramic containing zirconium oxide. It is optimally
coordinated with the CosmoPost.
The main components are SiO
2
and ZrO2. Additionally, the
material contains: Al
2O3
, P2O5, Li2O, Na2O, K2O, F and
pigments.
Delivery form
The IPS Empress Cosmo Ingot is offered in vials containing
ten ingots.
Page 9

9
Instructions for Use
for dentists
Length of the post and preparation
It is essential that
During the preparation of the remaining tooth structure and
the contouring of the build-up, make sure that the build-up
is provided with sufficient retentive surface around the
entrance of the root canal: incorporation of an anti-rotation
device in the form of a canal inlay or retention box or
inclusion of a stable dentin lamella.
When preparing the core, the preparation margin must be located at least 2–3 mm below the build-up in
the residual dentin.
The preparation margin must be located 2–3 mm below the build-up.
– the coronal length of the post within the canal at least
corresponds to the coronal length of the prosthetic
restoration;
– the post demonstrates adequate mechanical friction in
the canal.
Important
If this procedure is not possible, a metal post must be
used, since the risk of a post fracture is clearly increased.
A fractured post most often results in the extraction of
the root, since the post is virtually impossible to remove.
The adequate length of the post within the canal must be observed.
Prof. Dr. Dipl.-Ing. E.-J. Richter,Würzburg, Germany.
The length of the post within the canal must at least correspond to the coronal length of the prosthetic
restoration.
Adequate length is particularly important for maxillary
anteriors, since the shearing forces in this area are very high
and may result in a loss of retention of the post build-up.
at least 2–3 mm
prosthetic crown
post build-up
root canal post (CosmoPost)
apical root filling
Page 10

10
Cementation
Generally, we recommend the adhesive cementation
technique for incorporating the CosmoPost. The chemicophysical bond generated by adhesive cementation increases
the retentive force. If conventional cements are used, an
adequate retention surface is particularly important. This is
achieved if friction is present even before cementation and
the post demonstrates adequate length and accuracy of fit.
We recommend a dual-curing composite cement (eg
Variolink II System, Ivoclar Vivadent) for cementing the post
and the post build-up. Self-curing composite cements and
conventional cements (phosphate, glass ionomer, hybrid
ionomer cements) may also be used. In such cases, the
setting time of the cement has to be observed before work
may proceed.
The Variolink II System is offered together with either the Syntac Classic or Excite DSC bonding agent.
Procedure with the Variolink II luting composite system
Mix the selected shade (base paste) with the desired viscosity
(catalyst paste). The mixed Variolink II is dual-curing, ie, the
polymerization of the surface areas is initiated with blue
light. In deeper areas, chemical polymerization takes place.
For the cementation of root canal posts, we recommend
using the low-viscosity catalyst, due to its flow properties.
The shade is generally not decisive for the cementation of
root canal posts. Nevertheless, the 6 shades offer ample
possibilities of meeting the requirements of the individual
clinical situation. For further information, please refer to
the Instructions for Use of the Variolink II System and the
following directions.
Page 11

11
1. Indirect method
Important
In the indirect method, the impression posts allow you to
take impressions quickly and easily. In addition, you can
use them as temporary posts in provisional restorations.
Observe safety precautions when working with
hydrofluoric acid.
A. Preparation of the tooth / root canal
If luting composites (eg Variolink II System) are used, the
application of a hydrophilic dentin primer in the canal is
recommended to facilitate the adaptation of the composite
to the canal walls. We recommend using the components of
the Syntac Classic or Excite DSC dentin bonding systems in
combination with Variolink II.
– Remove the coronal part of the root filling using the root
canal reamer. Stop about 4 mm from the apex (eg GatesGlidden or Peeso from Brasseler).
– Select the suitable post size (observe the above indications
and contraindications).
– Prepare the canal lumen with standardized CosmoPost root
canal burs.
– Try in the impression post. Make sure that the post fits
tightly in the canal without being able to move.
– Prepare the remaining tooth structure.
– No undercuts
– A defined insertion path of the core build-up must be
observed in remaining dentition.
– Prepare an inlay cavity in the pulp chamber.
– Place a retraction cord if necessary.
– Take an impression of the core including the impression
post with an addition cross-linked impression material,
using the double mix or single phase technique.
– Take an impression of the antagonist jaw in order to
determine the coronal height of the build-up.
– Fabricate a resin temporary with the help of the impression
post.
Important:
The tooth should not be subjected to masticatory or
parafunctional loading while the temporary restoration
is in place.
B. Fabrication of the build-up in the
dental laboratory
Provide the dental technician with clear instructions
regarding the fabrication of the build-up (occlusal distance to
the antagonist, circular chamfer, convergence of the buildup, etc). The root post is supplied in sandblasted form and
should not be additionally prepared in the dental laboratory.
After divesting the post and the build-up, only the build-up
should be sandblasted. The Instructions for Use for dental
technicians provide a detailed description of the fabrication
of the post build-up.
C. Try-in of the post build-up
– Remove the temporary and clean the core, eg with a
polishing brush and pumice or prophylactic paste (eg
Proxyt).
– Try in the post build-up.
– The post build-up should be positioned in the root canal in
its defined position without leaving any visible gaps.
D. Conditioning of the post build-up
– Condition the entire ceramic build-up with hydrofluoric
acid (IPS Ceramic Etching Gel):
– Apply the gel with a brush and let it react for 1 minute.
Rinse with water and dry. If the hydrofluoric acid is
accidentally spilled on the post, the quality of the post is
not compromised.
– Silanize the contact surface of the ceramic build-up with
Monobond S. Apply the liquid with a brush and let it react
for 1 minute. Blow off excess.
– Apply Heliobond on the contact surface of the build-up
using a brush. Disperse with blown air. Do not light cure.
– Store the conditioned build-up in a container protected
from light (eg Vivapad with cover).
Page 12

12
Important
The Variolink II catalyst must be refrigerated, since storage
at room temperature compromises the quality of the
material. Nevertheless, Variolink II must be applied at
room temperature, otherwise the working time (setting
time) of the material is extended by approx 1 minute. The
behaviour of the material during light-curing does not
depend on the storage temperature.
Important
– Use only eugenol-free cements (eg Provilink), as eugenol
may inhibit the polymerization of the luting composite
– When using resin-based temporary cements (eg
Provilink), isolate the core with Vaseline, to remove the
temporary without any problems.
E. Cementation of the post build-up
– Place a retraction cord.
– Rinse the root canal (eg 5% sodium hypochloride) and dry
with paper points.
– Etch the root canal with 37% phosphoric acid (eg Total
Etch) for 10–15 seconds, rinse and dry with paper points.
Etching is optional when using Syntac Classic, but
compulsory when using Excite DSC.
When using Syntac Classic:
– Wet the canal walls with Syntac Primer using a brush,
respectively Endo Brush. Let the material react for
15 seconds.
– Dry the canal with paper points.
– Wet the canal walls with Syntac Adhesive using a brush,
respectively Endo Brush. Disperse with blown air and let
react for 10 seconds.
– Dry the canal with paper points.
When using Excite DSC:
– Etch as described above.
– Using an endodontic brush, wet the canal walls with
Excite DSC for 15 seconds.
– Dry the canal with paper points.
Cementation:
– Mix Variolink II base and catalyst in a 1:1 ratio. Apply this
mixture to the post and the contact surface of the build-up
and place the post build-up in the canal. The working time
of Variolink II is approx 4 minutes as of the beginning of
mixing (at 37 °C / 98 °F).
– Remove excess cement with a suitable brush. Use a flat
condenser to keep the post build-up in place.
– Continue applying slight pressure to the post build-up and
cure Variolink II in the area of the cement border with a
polymerization light for 60 seconds each from the buccal
and lingual and from the mesial and distal, if possible.
Given the translucency of the dentin and the post build-
up, the composite can be light cured up to a depth of
approx 2–3 mm.
F. Preparation and temporary restoration
– Prepare the build-up
– Take impression
– Place temporary restoration
– Make sure that the preparation margin is located approx
2–3 mm below the build-up.
Page 13

13
G. Adhesive cementation of the
restoration
Preparation of the core and the remaining tooth structure:
– Remove the temporary and clean the core with a polishing
brush and pumice or with prophylactic paste (eg Proxyt).
– Ensure adequate relative isolation. Prevent contamination
with saliva. If possible, use a rubber dam.
– Etch enamel areas with 37% phosphoric acid (eg Total
Etch) for 15–30 seconds. Rinse with water spray and dry.
Depending on the dentin bonding system used, the dentin
may also be etched. Etching is optional when using Syntac
Classic, but compulsory when using Excite DSC.
– Apply Monobond S on the ceramic build-up and let it react
for 60 seconds. Distribute with blown air.
When using Syntac Classic:
– Apply Syntac Primer on the enamel and dentin, let it react
for 15 seconds and blow dry with air.
– Apply Syntac Adhesive on the enamel and dentin, let it
react for 10 seconds and blow dry with air.
– Apply Heliobond on the enamel, dentin and build-up and
disperse to a thin layer with blown air; do not light-cure.
When using Excite DSC:
– Etch with 37% phosphoric acid (eg Total Etch): enamel for
15–30 seconds, dentin for 10–15 seconds. Then, rinse and
dry.
– Apply Excite DSC on the enamel, dentin and the post
build-up, gently agitate the adhesive onto the surfaces for
15 seconds and disperse it to a thin layer using an air
syringe; do not light-cure
.
Preparation of the restoration
Condition the IPS Empress restoration according to the
instructions and insert with Variolink II. For a detailed
description of this procedure, please refer to the Instructions
for Use / Technique Guide of the Variolink II System.
Page 14

14
Example of the indirect method
Anterior trauma affecting teeth 23, 22, 21, and 11 (FDI) (ADA: 11, 10, 9, 8)
Standardized canal preparation with root canal burs*
Permanently incorporated ceramic build-ups with ComoPost.The preparation margin is located approx
2–3 mm below the build-up.
Situation after the incorporation of the all-ceramic crowns (IPS Empress).
Preparation for the impression using impression posts**
Pre-drilling with a root canal reamer (eg Gates-Glidden or Peeso from Brasseler)
* It must be noted that a 1.7-mm root bur was used for pre-drilling in tooth 23, 21 and 11(FDI)
(ADA: 11, 9, and 8),while a 1.4-mm root bur was used for tooth 22 (FDI) (ADA: 10).
** The original picture has been modified to show the impression posts.
Clinical pictures courtesy of
Dr D Edelhoff,Aachen, Germany
Page 15

15
The root canal post is supplied sandblasted. Further
preparation or silanization is unnecessary. If the root post is
contaminated, for example, with saliva during the try-in
procedure, it should be cleaned with commercially available
37% phosphoric acid (eg Total Etch). Apply the gel to the
CosmoPost, rinse and dry.
Retention grooves must not be applied to the CosmoPost under any circumstances.
2. Direct method
Important
The post must not be adjusted by grinding under any
circumstances. Retention grooves must not be applied.
Such measures may result in predetermined breaking
points on the post. However, shortening the post with
suitable diamond burs is possible.
Important
Variolink II catalyst must be refrigerated, since storage at
room temperature compromises the quality of the
material. Nevertheless, Variolink II must be applied at
room temperature, otherwise the working time (setting
time) of the material is extended by approx 1 minute. The
behaviour of the material during light-curing does not
depend on the storage temperature.
A. Preparation of the tooth / root canal
If luting composites (eg Variolink II System) are used, the
application of a hydrophylic dentin primer in the canal is
recommended to facilitate the adaptation of the composite
to the canal walls. We recommend using the components of
the Syntac Classic or Excite DSC dentin bonding systems in
combination with Variolink II.
– Remove the coronal part of the root filling using the root
canal reamer (e.g. Gates-Glidden or Peeso from Brasseler).
Stop about 4 mm before the apex.
– Select the adequate size of the post (observe the above
indications and contraindications).
– Prepare the canal lumen with standardized instruments.
– Try in the post.
– Ensure adequate relative isolation. Prevent contamination
with saliva. If possible, use a rubber dam.
– Rinse the root canal (eg 5% sodium hypochloride) and dry
with paper points.
– Etch the root canal with 37% phosphoric acid (eg Total
Etch) for 10-15 seconds. Rinse and dry with paper points.
Etching is optional when using Syntac Classic, but
compulsory when using Excite DSC.
When using Syntac Classic:
– Wet the canal walls with Syntac Primer using a brush. Let
the material react for 15 seconds.
– Dry the canal with paper points.
– Wet the canal walls with Syntac Adhesive using a brush.
Disperse the adhesive with blown air and let it react for
10 seconds.
– Dry the canal with paper points.
When using Excite DSC:
– Etch as described above.
– Wet the canal walls with Excite DSC for 15 seconds using
an endodontic brush.
– Dry the canal with paper points.
Cementation:
– Mix Variolink II base and catalyst in a 1:1 ratio and apply
the mixture to the root canal post. Insert the post into the
root canal with pumping movements to prevent air from
being trapped. The working time of Variolink II is approx
4 minutes as of the beginning of mixing (at 37 °C / 98 °F).
– Remove excess cement in the coronal region with a brush.
Apply slight pressure on the post to hold it in place in the
canal.
– Continue applying slight pressure on the post and cure
Variolink II in the area of the cement border with a
polymerization light for 60 seconds each from the buccal
and oral.
Page 16

16
B. Direct modelling of the build-up
Model the build-up on the cemented root canal post using a
suitable posterior composite (eg Tetric Ceram). Apply layers
of 2–3 mm only. Light-cure each layer for 60 seconds.
Example of the direct method
Starting point:
Partial loss of the remaining coronal tooth structure
Situation after crown preparation
CosmoPost in situ
C. Preparation and temporary restoration
– Prepare the build-up. The preparation margin must be
located 2–3 mm below the build-up in the residual dentin.
– Take the impression.
– Place the temporary restoration.
D. Adhesive cementation of the
restoration
Preparation of the core and the remaining tooth structure:
– Remove the temporary and clean the core, eg with a polis-
hing brush and pumice or prophylactic paste (eg Proxyt).
– Ensure adequate relative isolation. Contamination with sali-
va must be prevented.
– Etch enamel areas with 37% phosphoric acid (eg Total
Etch) for 15–30 seconds. Then rinse and dry. Depending on
the dentin bonding system used, the dentin may also be
etched. Etching is optional when using Sytnac Classic, but
compulsory when using Excite DSC.
– Silanize the composite build-up: Apply Monobond S on the
build-up and let it react for 60 seconds. Disperse with
blown air.
When using Syntac Classic:
– Apply Syntac Primer on the enamel and dentin. Let it react
for 15 seconds and blow dry with air.
– Apply Syntac Adhesive on the enamel and dentin. Let react
for 10 seconds and blow dry with air.
– Apply Heliobond on the enamel, dentin and build-up and
blow to a thin layer; do not light-cure.
When using Excite DSC:
– Etch with 37% phosphoric acid (eg Total Etch): enamel for
15–30 seconds, dentin for 10-15 seconds. Then, rinse and
dry.
– Apply Excite DSC on the enamel, dentin and build-up and
agitate it onto the surfaces for 15 seconds. Disperse to a
thin layer using an air syringe; do not light-cure.
Preparation of the restoration:
Condition the IPS Empress restoration according to the
instructions and insert with Variolink II. For a detailed
description of this procedure, please refer to the Instructions
for Use / Technique Guide of the Variolink II System.
Important
– Use only eugenol-free cements (eg Provilink, since
eugenol may inhibit the polymerization of the luting
composite.
– When using resin-based temporary cements (eg
Provilink), isolate the core with Vaseline to prevent the
cement from chemically bonding with the composite
build-up.
Page 17

17
IPS Empress Cosmo Ingot –
Instructions for Use
The dentist takes an impression using the impression posts
and passes the impression on to the dental laboratory.
Model fabrication
– The dental technician must check the accurate fit of the
impression post in the impression by exerting slight
pressure on the post using a suitable instrument.
– Isolate the impression post protruding from the impression
with IPS Empress die material separating liquid. This
prevents the plaster or the model material from bonding
with the impression post.
– Fabricate the master model as usual.
– Make sure that the master model is removed from the
impression in the direction of insertion of the impression
posts.
– Check the accuracy of fit of the impression post on the
completed model.
Instructions for Use
for dental technicians
Page 18

18
Preparation for modelling
– Remove the die from the model. Using pliers, carefully
remove the impression post from the master model by
slightly rotating it.
– Now, prepare the die for the spacer or the isolation and
mark the preparation margin.
– It is advisable to use a sealant (eg Margidur from Benzer).
– Apply two layers of the spacer (total layer thickness
approx. 15–20 mm) in the root cavity after the sealant has
set (see fig).
Modelling
– Modelling must be carried out with dental wax that burns
without leaving residue.
– During modelling, the subsequent preparation has to be
kept in mind. For shoulder preparations, the build-up
should end approx 1 mm before the preparation margin.
– Check the position of the CosmoPost in the die by slightly
rotating it. Carefully remove excess spacer.
– Isolate the die after curing of the Spacer (eg Die-Lub from
Dentaurum) and thoroughly disperse with blown air.
– Insert a CosmoPost of the correct size.
Important
The CosmoPost must be used in the length supplied. It
may only be shortened to a functional length once the
individual build-up has been pressed to it. This has the
advantage that the CosmoPost is stable in the investment
material. In this way, pressing errors can be prevented.
Furthermore, when working with very small pieces, make
sure to invest a dummy object together with the actual
build-up.
Page 19

19
Spruing
– Remove the modelled post build-up from the die and
remove any interfering areas. If necessary, carefully blow
off excess isolation material.
– Place the sprue in the direction of flow of the ceramic at
the thickest spot (use a round wax profile, 2.5–3 mm dia-
meter, depending on the size of the build-up).
Investment
Invest the pieces with the IPS Empress 2 Special Investment
Material or the IPS Empress 2 Speed Investment Material.
Investment with IPS Empress 2
Special Investment Material
Important
The pieces should be at least 3 mm apart. The distance of
at least 10 mm between the objects to be pressed and the
investment ring must be observed. Excess isolation material must be removed. Spruing must be carried out taking
the direction of flow of the ceramic into account. A
dummy object must be invested together with very small
individual pieces.
Important
Do not use debubblizers. Observe the corresponding
Instructions for Use of the IPS Empress 2 Special
Investment Material or IPS Empress 2 Speed Investment
Material. The IPS Empress Special Investment Material for
the layering technique cannot be used together with the
Cosmo Ingot. Observe the mixing times. Check the correct
fit of the paper ring around the ring base and the ring
gauge.
Indication Concen- Small ring (100 g) Large ring (200 g)
tration special liquid : special liquid :
distilled water distilled water
Preprosthetic 50–60% 11 ml : 11 ml (50%) 22 ml : 22 ml (50%)
build-up in 13 ml : 9 ml (60%) 26.5 ml : 17.5 ml (60%)
combination with
the CosmoPost
Investment with IPS Empress 2 Speed Investment
Material
Indication Concen- Small ring (100 g) Large ring (200 g)
tration special liquid : special liquid :
distilled water distilled water
Preprosthetic 40–50% 11 ml : 16 ml (40%) 22 ml : 32 ml (40%)
build-up in 13.5 ml : 13.5 ml (50%) 27 ml : 27 ml (50%)
combination with
the CosmoPost
When using the IPS Empress 2 Speed Investment Material
make sure to switch on the preheating furnace on time.
The investment material contains quartz powder.
Avoid inhalation of grinding dust because of the risk
of subsequent lung damage (silicosis).
Page 20

20
Preheating
Parameters
Preheat the investment ring, including the AlOx plunger, but
without the ingot, in a conventional preheating furnace.
Please refer to the Instructions for Use for the IPS Empress 2
Special Investment Material or the IPS Empress 2 Speed
Investment Material for the preheating parameters.
Given the low press temperature required, the IPS Empress
Cosmo Ingot is not preheated together with the investment
ring. The room temperature ingot is placed into the investment ring when preheating is completed. The material is
then pressed in the EP600 or EP500 press furnace.
Pressing
Switch the furnace on in good time.
Calibrate the furnace regularly. Please see the corresponding
information regarding the calibration of the furnace in the
Instructions for Use of the Temperature Checking Set 2 of
the EP 500 and the Automatic Temperature Checking Set 1
of the EP 600/EP 600 Combi.
Remove the investment ring from the preheating furnace and
place the cold IPS Empress Cosmo Ingot in the ring.
Next, position the AlOx plunger.
Important
Given the similar coefficients of thermal expansion of the
IPS Empress Cosmo Ingots and the AlOx plunger, make
sure to use a clean or new AlOx plunger to prevent the
pressed material from sticking to the AlOx plunger.
Important
– Carefully remove investment material and ceramic
residue from the AlOx plunger after each use. Always
keep the marked side of the AlOx plunger upwards.
– Clean the furnace regularly.
– If desired, preheating in conjunction with the
IPS Empress 2 Special Investment Material (but not in
conjunction with the IPS Empress 2 Speed Investment
Material) may also be performed overnight. Since the
investment material may be prone to crystallization,
however, preheating over the weekend should be
avoided.
Insertion of the cold ingot in the investment ring
Insertion of the pre-heated AlOx plunger in the investment ring
Pressing in the EP 600
Select Program 4 (Cosmo)
Pressing in the EP 500
Pressing temperature: 900 °C/1652 °F
Holding time: 10 min
Heating rate: 60 °C/108 °F min
Post pressing time: 0
Pressing power (indicator): 5 bar
Vacuum on: 500 °C/932 °F
Vacuum off: 900 °C/1652 °F
Stand-by temperature: 700 °C/1292 °F
P
11
11
B
700°C
1292°F
t
60°C
108°F
T
900°C
1652°F
H
10
10
V
1
500°C
932°F
V
2
900°C
1652°F
Pressure
5 bar
5 bar
N
–
–
→
Page 21

21
Pressed post build-up
Cutting
Carefully place the divested post build-up on the master
model.
Divestment
(at the earliest after approx 60 minutes)
– After cooling, the investment cylinder may show cracks.
These cracks developed (immediately around the AlOx
plunger) during cooling as a result of the different CTEs of
the various materials (AlOx plunger, investment material
and pressed materials). They do not compromise the result
of the pressing cycle.
– Once the pressing procedure has been completed,
divesting is carried out according to the usual IPS Empress
method (blasting with Ivoclar Vivadent special jet medium
at 1 bar pressure).
Removing the pressed object / Finishing
Important
Extensive grinding may produce microcracks in the
ceramic framework as a result of local overheating.
Consequently, grinding should be reduced to a minimum.
Page 22

22
Cutting of the CosmoPost.
Various views of the post build-up on the model.
Carefully cut the projecting ComoPost.
Finally, the pressed post build-up is finished with fine
diamonds.
Important
– The CosmoPost does not have to be etched with
IPS Ceramic Etching Gel. The post demonstrates a
microstructure that corresponds to that of etched
ceramic.
– The contact surface (Cosmo Ingot) of the post build-up
is conventionally etched with IPS Ceramic Etching Gel.
Page 23

23
Page 24

Ivoclar Vivadent AG
Bendererstrasse 2
FL-9494 Schaan
Liechtenstein
Tel. +423 235 35 35
Fax +423 235 33 60
www.ivoclarvivadent.com
Ivoclar Vivadent Pty. Ltd.
1 – 5 Overseas Drive
P.O. Box 367
Noble Park,Vic. 3174
Australia
Tel. +61 3 979 595 99
Fax +61 3 979 596 45
www.ivoclarvivadent.com.au
Ivoclar Vivadent GmbH
Bremschlstr. 16
Postfach 223
A-6706 Bürs
Austria
Tel. +43 5552 624 49
Fax +43 5552 675 15
www.ivoclarvivadent.com
Ivoclar Vivadent Ltda.
Rua Maestro João Gomes de
Araújo 50; Salas 92/94
Sao Paulo, CEP 02332-020
Brazil
Tel. +55 11 69 59 89 77
Fax +55 11 69 71 17 50
www.ivoclarvivadent.com
Ivoclar Vivadent Inc.
2785 Skymark Avenue, Unit 1
Mississauga
Ontario L4W 4Y3
Canada
Tel. +1 905 238 57 00
Fax +1 905 238 5711
www.ivoclarvivadent.us.com
Ivoclar Vivadent
Marketing Ltd.
Rm 603 Kuen Yang
International Business Plaza
No. 798 Zhao Jia Bang Road
Shanghai 200030
China
Tel. +86 21 5456 0776
Fax. +86 21 6445 1561
www.ivoclarvivadent.com
Ivoclar Vivadent
Marketing Ltd.
Calle 134 No. 13-83, Of. 520
Bogotá
Colombia
Tel. +57 1 627 33 99
Fax +57 1 633 16 63
www.ivoclarvivadent.com
Ivoclar Vivadent SAS
B.P. 118
F-74410 Saint-Jorioz
France
Tel. +33 450 88 64 00
Fax +33 450 68 91 52
www.ivoclarvivadent.fr
Ivoclar Vivadent GmbH
Dr. Adolf-Schneider-Str. 2
D-73479 Ellwangen, Jagst
Germany
Tel. +49 (0) 79 61 / 8 89-0
Fax +49 (0) 79 61 / 63 26
www.ivoclarvivadent.de
Ivoclar-Vivadent
Marketing Ltd
114, Janki Centre
Shah Industrial Estate
Veera Desai Road,
Andheri (West)
Mumbai 400 053
India
Tel. +91 (22) 673 0302
Fax. +91 (22) 673 0301
www.ivoclarvivadent.firm.in
Ivoclar Vivadent s.r.l.
Via dell’Industria 16
I-39025 Naturno (BZ)
Italy
Tel. +39 0473 67 01 11
Fax +39 0473 66 77 80
www.ivoclarvivadent.it
Ivoclar Vivadent S.A. de C.V.
Av. Mazatlán No. 61, Piso 2
Col. Condesa
06170 México, D.F.
Mexico
Tel. +52 (55) 55 53 00 38
Fax +52 (55) 55 53 14 26
www.ivoclarvivadent.com.mx
Ivoclar Vivadent Ltd
12 Omega St, Albany
PO Box 5243 Wellesley St
Auckland, New Zealand
Tel. +64 9 914 9999
Fax +64 9 630 61 48
www.ivoclarvivadent.co.nz
Ivoclar Vivadent
Polska Sp. z.o.o.
ul. Jana Pawla II 78
PL-01-501 Warszawa
Poland
Tel. +48 22 635 54 96
Fax +48 22 635 54 69
www.ivoclarvivadent.pl
Ivoclar Vivadent S.A.
c/Emilio Muñoz, 15
Esquina c/Albarracín
E-28037 Madrid
Spain
Tel. + 34 91 375 78 20
Fax + 34 91 375 78 38
www.ivoclarvivadent.com
Ivoclar Vivadent AB
Dalvägen 16
S-169 56 Solna
Sweden
Tel. +46 8 514 93 930
Fax +46 (0) 8 514 93 940
www.ivoclarvivadent.se
Ivoclar Vivadent UK Limited
Meridian South
Leicester
LE19 1WY
United Kingdom
Tel. +44 116 265 40 55
Fax +44 116 265 40 59
www.ivoclarvivadent.co.uk
Ivoclar Vivadent, Inc.
175 Pineview Drive
Amherst, N.Y. 14228
USA
Tel. +1 800 533 6825
Fax +1 716 691 2285
www.ivoclarvivadent.us.com
Dentigenix Inc.
551 N. 34th Street
Seattle, WA 98103
USA
Tel. +1 425 822 0902
Fax +1 425 822 3101
www.dentigenix.com
Ivoclar Vivadent – worldwide
Date information prepared:
05/2003
These materials have been developed solely for use
in dentistry. Processing should be carried out strictly
according to the Instructions for Use. Liability cannot
be accepted for damages resulting from failure to
observe the Instructions or the stipulated area of
application. The user is responsible for testing the
materials for their suitability and use for any purpose
not explicitly stated in the Instructions. These
regulations also apply if the materials are used in
conjunction with products of other manufacturers.
Descriptions and data constitute no warranty of
attributes and are not binding.
Printed in Liechtenstein
© Ivoclar Vivadent AG, Schaan / Liechtenstein
562902/0503/e/1/BVD
 Loading...