


FRAMTID GB
FR
IT
PT
ES
HGA2K
FR 
 IT
IT 
 PT
PT 
 ES
ES

|
ENGLISH |
4 |
FR |
FRANÇAIS |
12 |
|
||
IT |
ITALIANO |
27 |
|
||
|
|
|
PT |
PORTUGUÊS |
37 |
|
||
ES |
ESPAÑOL |
46 |
|
Language, Langue, Lingua, Idioma, Idioma
Country, pays, Paese, País, País

ENGLISH
Contents
Safety information |
4 |
Product description |
5 |
Daily use |
5 |
Helpful hints and tips |
6 |
Care and cleaning |
6 |
Subject to change without notice
 Safety information
 For your safety and correct operation of the appliance, read this manual carefully before installation and use. Always keep these instructions with the appliance even if you move or sell it. Users must fully know the oper-
ation and safety features of the appliance.
Correct use
•Do not leave the appliance unattended during operation.
•The appliance is designed exclusively for domestic use.
•The appliance must not be used as a work surface or as a storage surface.
•Do not place or store flammable liquids, highly inflammable materials or fusible objects (e.g. plastic film, plastic, aluminium) in or near the appliance.
•Watch out when connecting electric appliances to sockets nearby. Do not allow connecting leads to come into contact with or to catch underneath the appliance or hot cookware.
•Do not do repairs yourself to prevent injury and damage to the appliance. Always contact your local After Sales Service (refer to the Service chapter).
Child safety
•Only adults can use this appliance. Children must get supervision to make sure that they do not play with the appliance.
•Keep all packaging away from children. There is a risk of suffocation.
•Keep children away from the appliance when it is on.
4
What to do if… |
7 |
Technical data |
7 |
Installation |
8 |
Environment concerns |
11 |
General safety
•This appliance is not intended for use by persons (including children) with reduced physical, sensory or mental capabilities, or lack of experience and knowledge, unless they have been given supervision or instruction concerning use of the appliance by a person responsible for their safety.
•Ensure there is a continuous air supply while using the hob, keep air vents in good condition or install a cooker hood with a venting hose. Improve ventilation by opening a window or increasing the extractor speed.
•This appliance is supplied with safety device in form of the thermocouple. If after ignition of the burner or during use flame will go out and the thermocouple will not be heat up enough gas supply will be interrupted.
Installation
•Make sure that the appliance is not damaged because of transport. Do not connect a damaged appliance. If necessary, contact the After Sales Service (refer to the Service chapter).
•Only an authorized service engineer can install, connect or repair this appliance. Use only original spare parts.
•Built-in appliances can only be used after they are built into suitable built-in units and work surfaces that meet standards.
•Do not change the specifications or modify this product. Risk of injury and damage to the appliance.
Warning! Carefully obey the instructions for electrical and gas connections.

ENGLISH
•Do not install the appliance if it is damaged during the transportation.
Safety during use
•Remove all packaging, stickers and film from the appliance before the first use.
Warning! Fire hazard! Overheated fats and oils can ignite very quickly.
•Switch the burners off after each use.
•Risk of burns! Burners and accessible parts become hot during use. Make sure pots do not protrude over the edges of the cooktop.
Product description
1


 2 5
2 5 


4 3
1Rapid burner
2Auxiliary burner
3Rapid burner control knob
4Auxiliary burner control knob
5Removable pan support
Burner control knob
The burner control knobs are situated on the front of the hob.
Daily use
Ignition of the burners
Always ignite the burners before positioning pots or pans.
To ignite the burner:
1.Push the relevant control knob completely in and turn it counter-clockwise to the maximum position marked  .
.
5
How to avoid damage to the appliance
•To avoid damaging the hob, do not allow saucepans or frying pans to boil dry.
•Do not use the burners with empty cookware or without cookware.
•Never line any part of the appliance with aluminium foil. Never place plastic or any other material which may melt on the appliance.
Symbol Description
there is no gas supply / off position
there is maximum gas supply / Ignition setting
there is minimum gas supply
2.Keep the knob pushed for about 5 sec; this will allow thermocouple to heat up, and the safety device to switch off, otherwise the gas supply would be interrupted.
3.After the flame is regular, adjust it as preferred.

ENGLISH |
6 |
If after a few attempts the burner does not ignite, check that the crown and its cap
are in correct positions.
1
2
3
4
5
1Burner cap
2Burner crown
3Ignition candle
4Injector
5Thermocouple
Warning! Do not keep control knob pressed for more than 15 seconds.
If the burner does not light after 15 seconds, release the control knob, turn it into off position and wait for at least 1 minute before trying to light the burner again.
Important! In the absence of electricity You can ignite the burner without electrical device; in this case approach the burner with a flame, push the relevant knob down and turn it counter-clockwise to maximum gas release position.
Warning! Maintain extreme caution while operating with open fire in kitchen
environment. Manufacturer declines any responsibility in case of misuse of flame.
 If the burner accidentally goes out, turn the control knob to the off position and wait for at least 1 minute before trying to light
it again.
 When switching on the mains, after installation or a power cut, it is quite normal for the spark generator to be activated auto-
matically.
Turning the burners off
To put the flame out, turn the relevant control knob to the symbol  .
.
Warning! Always turn the flame down or switch it off before removing the pans of
the burner.
Helpful hints and tips
Energy savings
•If possible, always place lids on the pans.
•As soon as liquid starts boiling, turn down the flame to barley keep the liquid simmering.
Use pots and pans with bottom fitting the size of burner used.
Burner |
minimum di- |
maximum di- |
|
ameter of pots |
ameter of pots |
|
and pans |
and pans |
Rapid |
180 mm |
260 mm |
Care and cleaning
Burner |
minimum di- |
maximum di- |
|
ameter of pots |
ameter of pots |
|
and pans |
and pans |
Auxili- |
80 mm |
160 mm |
ary |
|
|
The bottom of the cookware should be as thick and flat as possible.
Warning! Switch the appliance off and let it cool down before you clean it.
Warning! For safety reasons, do not clean the appliance with steam blasters
or high-pressure cleaners.

ENGLISH |
7 |
Warning! Do not use abrasive cleaners, steel wool pads or acids, they will
damage the appliance.
To remove any food remains wash the enamelled elements, "caps" and "crowns", with warm soapy water.
Stainless steel elements wash with water, and then dry with a soft cloth.
This model is equipped with electrical ignition, it is obtained through ceramic "candle" and electrode.
Keep them well clean to avoid difficult lightning.
 Periodically ask your local Service Centre to check the conditions of the gas supply pipe and the pressure adjuster, if it is fitted (this
service is not free of charge).
After cleaning, be sure to wipe dry with a soft cloth.
What to do if…
Problem |
Possible cause |
Remedy |
There is no spark when light- |
There is no electrical supply |
Check that the unit is plugged |
ing the gas |
|
in and the electrical supply is |
|
|
switched on. |
|
|
Check the house electric in- |
|
|
stallation fuse. |
|
Burner cap and Crown are |
Check the burner cap and |
|
placed uneven |
crown have been replaced |
|
|
correctly, e.g. after cleaning. |
The flame is blowing out im- |
Thermocouple is not heated |
After lightning the flame, keep |
mediately after lightning |
enough |
the knob pushed for about 5 |
|
|
sec. |
The gas ring burns unevenly |
Burner crown is blocked with |
Check the main injector is not |
|
food residues |
blocked and the burner crown |
|
|
is clear of food particles. |
If there is a fault, first try to find a solution to |
If you operated the appliance wrongly, or |
the problem yourself. If you cannot find a sol- |
the installation was not carried out by a |
ution to the problem yourself, contact your |
registered engineer, the visit from the customer |
dealer or the After Sales Service. |
service technician or dealer may not take |
|
place free of charge, even during the warranty |
|
period. |
Technical data
Hob dimensions
width |
290 mm |
depth |
510 mm |
built in height |
30 mm |
Class Appliance: 3

ENGLISH |
8 |
Rating Plate
Made In Italy |
|
|
|
G20 |
20 mbar = |
4 kW |
II2H3B/P (CZ-RO-SK-RU-TR-BG) |
|
|
|
|
|
|
|
|||
© Inter IKEA Systems B.V. 1999 |
G20/G25 20/25 mbar = 4 kW |
III1c2E+3+ (FR) |
||||||
001-542-81 |
|
G31 |
37 mbar = |
271 g/h |
|
II2H3+ (IT-ES-PT) |
||
|
|
|
|
G30 |
28-30 mbar = 277 g/h |
|
|
|
PQM |
21552 |
|
|
|
||||
|
G30/G31 30/30 mbar = 277 g/h |
|
||||||
|
|
|
|
|
||||
|
|
|
|
G130 8 mbar = |
4 kW |
|
230 V ~50 Hz |
|
ZO 0694 |
|
|
PNC. 949738168 TYPE H3MF20-G/VI |
|
|
|
|
|
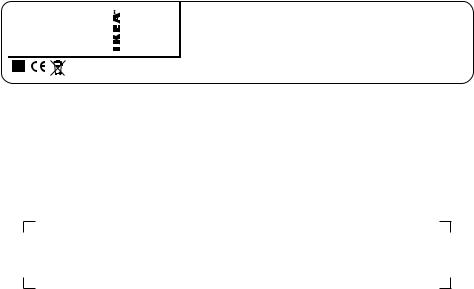
The graphic above represents rating plate of the appliance (without serial number which is generated dynamically during the production process), which is located at its underneath surface of the casing.
Dear Customer, please apply here aside the sticker you can find in the dedicate plastic bag inserted inside the hob packaging. This will allow us to assist you better, by identifying precisely your hob, in case you will need in future our assistance. Thank you for your help!
Installation
Manufacturer is not responsible for any injury to persons and pets or damage to property caused by failure to comply following requirements.
Caution! To proceed with the installation refer to the assembly instructions.
Warning! Installation process must follow the laws, ordinances, directives and
standards (electrical safety rules and regulations, proper recycling in accordance with the regulations, etc.) in force in the country of use!
 Ensure that the local distribution conditions (nature of the gas and gas pressure) and the adjustment of the appliance are compatible before proceeding with the installa-
tion.
The parameters of adjustment setting for this appliance are stated on the rating
plate (refer to the Technical data chapter).
Warning! The appliance must be earthed!
Warning! Risk of injury from electrical current.
•The electrical mains terminal is live.
•Make electrical mains terminal free of voltage.
•Loose and inappropriate plug and socket connections can make the terminal overheat.
•Have the clamping connections correctly installed.
•Use strain relief clamp on cable.
Important! You must observe the minimum distances to other appliances and furniture cabinets or other units according to Assembly Instruction.
If there is no oven beneath the hob insert a dividing panel at a minimum distance of 20 mm from the bottom of the hob.

ENGLISH |
9 |
Protect the cut surfaces of the worktop against moisture using a suitable sealant included in the product in fitting bag. The sealant seals the appliance to the work top with no gap. Do not use silicon sealant between the appliance and the worktop. Avoid installing the appliance next to doors and under windows as hot cookware may be knocked off the pan support when doors and windows are opened.
Only an authorized service engineer can install, connect or repair this appliance. Use only original spare parts.
Gas Connection
Warning! This appliance is not connected to a combustion products
evacuation device.
Installation must comply with current local regulation.
The connection of the cooktop to the gas pipe network or gas cylinder must be made by means of a rigid copper or steel pipe with fittings complying with local regulations, or by means of a continuous surface stainless steel hose complying with local regulations.
If you see any abnormalities do not repair the pipe, contact local After Sales Service
(refer to the Service chapter).
The connection must be installed correctly, fixed into hob connection pipe. Otherwise it will cause leakage of gas
Warning! Once the installation is complete, check the perfect seal of every
pipe fixing. Use soapy water, never flame.
Electrical connection
Before connecting, check that the nominal voltage of the appliance stated on the rating plate, corresponds to the available supply voltage. Also, check the power rating of the appliance and ensure that the wire is suitably sized to suit the appliance power rating (refer to the Technical data chapter).
The rating plate is located on the lower casing of the hob.
The appliance is supplied with a connection cable. This has to be provided with a proper plug, able to support the load marked on the identification plate (refer to the Technical data chapter).
The plug has to be fitted in a proper socket. If connecting the appliance directly to the electric system, it is necessary that you install a double pole switch between the appliance and the electricity supply, with a minimum gap of 3 mm between the switch contacts. The double pole has to be of a type suitable for the required load in compliance with the current rules.
The connection cable has to be placed in order that, in each part, it cannot reach a 90 °C temperature. The blue neutral cable must be connected to the terminal block marked with "N". The brown (or black) phase cable (fitted in the terminal block contact marked with "L") must always be connected to the live phase.
Replacement of the connection cable.
If the connection cable must be replaced, only a type H05V2V2-F T90 cable must be used. The cable section must be suitable to the voltage and the working temperature. The yellow/green earth wire must be approximately 2 cm. longer than the brown (or black) phase wire.
To open the terminal block and reach the terminals, proceed as follows:
1.insert the point of a screwdriver into one of the two visible protruding part of the terminal block
2.exert a light pressure and lift

ENGLISH |
10 |
The hob is supplied with a three pole terminal block designed for a 230 V connection. The yellow/green earth wire must always be connected to the terminal marked with the symbol
 .
.
Upon completion, secure the connection cable with the cable clamp and close the terminal block.
Gas setting conversion
 This model is designed for use with natural gas but can be converted for use with butane or propane gas providing the correct injectors. The injectors not supplied with the appliance have to be ordered from After Sales
Service (refer to the Service chapter).
For data concerning injector replacement, see chapter "Technical data"
Warning! Conversion or replacement can only be performed by a registered
installer.
To replace injectors:
1.Remove pan support.
2.Remove burner cap and crown.
3.With a socket spanner 7 unscrew and remove the injectors, replace them with the ones required for the type of gas in use.
4.Reassemble the parts, following the same procedure backwards.
Important! Replace the rating label (placed near gas supply pipe) with relevant one for the new type of gas supply before sealing the appliance. If the appliance is already sealed please stick it directly on the user manual booklet after Technical data chapter close to the rating plate drawing.
You can find this label in package supplied with appliance
 If the feeding gas pressure will be different or variable, comparing with the required, you must install an appropriate pressure adjuster, which is not supplied with the product and if needed must be ordered separately from the local After Sales Service (refer to the Service chapter). The pressure adjuster must be fitted on gas supply pipe, in compli-
ance with the rules of the force.
The rating plate is located on the lower casing of the hob.
Adjusting flame level
When hob has been fully installed, it is necessary to check the minimum flame setting:
1.Turn the gas tap to the maximum position and ignite.
2.Set the gas tap to the minimum flame position then turn the control knob from minimum to maximum several times. If the flame is unstable or extinguished, follow the procedure further.
3.Re-ignite the burner and set to minimum.
4.Remove the control knob.
ENGLISH |
11 |
5.To adjust, use a thin bladed screwdriver and turn the adjustment screw until the flame is steady and does not extinguish, when the knob is turned from minimum to maximum, and vice versa (see following picture).
Environment concerns
The symbol  on the product or on its packaging indicates that this product may not be treated as household waste. Instead it should be taken to the appropriate collection point for the recycling of electrical and electronic equipment. By ensuring this product is disposed of correctly, you will help prevent potential negative consequences for the environment and human health, which could otherwise be caused by inappropriate waste handling of this product. For more detailed information about recycling of this product, please contact your local council, your
6.Repeat this procedure for all burners.
7.Reassemble the knobs.
Warning! If the appliance is connected to liquid gas (G31 propane or G30
butane), the regulation screw must be fastened as tightly as possible.
IKEA of Sweden AB
SE-34381 Älmhult
household waste disposal service or the shop where you purchased the product.
Packaging materials
The materials with the symbol 
 are recyclable. Dispose the packaging in a suitable collection containers to recycle it.
Before disposal of appliance
Warning! Do these steps to dispose the appliance:
•Pull the mains plug out of the mains socket.
•Cut off the mains cable and discard it.

FRANÇAIS
Sommaire
Consignes de sécurité |
12 |
Description de l'appareil |
13 |
Utilisation quotidienne |
14 |
Conseils utiles |
15 |
Entretien et nettoyage |
15 |
En cas d'anomalie de fonctionnement |
16 |
Sous réserve de modifications
 Consignes de sécurité
 Pour votre sécurité et le bon fonctionnement de l'appareil, lisez attentivement ce manuel avant l'installation et l'utilisation. Conservez ces instructions à proximité de l'appareil. Les utilisateurs doivent connaître parfaitement le fonctionnement et les fonctions de
sécurité de l'appareil.
Utilisation
•Ne laissez pas l'appareil sans surveillance en cours de fonctionnement.
•Cet appareil est destiné à un usage domestique normal.
•L'appareil ne peut en aucun cas servir de plan de travail ou de support.
•Ne stockez pas de produits d'entretien ou de produits inflammables sur ou à proximité de l'appareil, notamment les objets susceptibles de fondre (le papier, l'aluminium), les matières plastiques (ustensiles en plastique,...) et les chiffons (torchons) ainsi que les liquides inflammables ou aérosols.
•Soyez prudent lorsque vous utilisez un appareil électrique à fil à proximité de votre appareil. Les câbles ne doivent pas être en contact avec les récipients chauds ou l'appareil, ou être coincés dessous.
•Vous ne devez pas réparer vous-même l'appareil. Une réparation non conforme peut être la cause de graves dommages (corporel ou matériel). Les réparations ne doivent être effectuées que par un service après-vente qualifié (reportez-vous au chapitre Service).
12
Caractéristiques techniques |
16 |
Installation |
18 |
En matière de protection de l'environnement
GARANTIE IKEA - FRANCE |
21 |
21 |
Sécurité des enfants
•Cet appareil a été conçu pour être utilisé par des adultes. Veillez à ce que les enfants n'y touchent pas et ne l'utilisent pas comme un jouet.
•Ne laissez pas les emballages à portée de main des enfants. Ils pourraient s'asphyxier !
•Tenez les enfants éloignés de l'appareil pendant son fonctionnement.
Consignes générales de sécurité
•Cet appareil n'est pas destiné à être utilisé par des enfants ou des personnes dont les capacités physiques, sensorielles ou mentales, ou le manque d'expérience et de connaissances les empêchent d'utiliser l'appareil sans risque lorsqu'ils sont sans surveillance ou en l'absence d'instructions d'une personne responsable qui puisse leur assurer une utilisation de l'appareil sans danger.
•L'utilisation d'un appareil de cuisson gaz conduit à la production de chaleur et d'humidité dans la pièce où il est installé. Veillez à assurer une bonne aération de la cuisine : maintenez ouverts les orifices d'aération naturelle ou installez un dispositif d'aération mécanique. Une utilisation intensive et prolongée de l'appareil peut nécessiter une aération supplémentaire en ouvrant la fenêtre, ou une aération plus efficace, par exemple en augmentant la puissance de ventilation mécanique si elle existe.
•Cet appareil est équipé d'un dispositif de sécurité de thermocouple. Si la flamme s'éteint accidentellement après l'allumage du brûleur (débordement, courant d'air, etc.), cette sécurité coupe l'arrivée de gaz.

FRANÇAIS |
13 |
Installation
•Vérifiez que l'appareil n'a pas été endommagé pendant le transport. Ne branchez jamais un appareil endommagé. Si besoin, contactez le service après-vente (reportezvous au chapitre "Service après-vente").
•Les opérations d'installation, de branchement et de réparation ne doivent être effectuées que par un professionnel qualifié. En cas d'intervention sur l'appareil, exigez du service après-vente les pièces de rechange Certifiées Constructeur.
•Les appareils encastrables ne peuvent être mis en fonctionnement qu'après avoir été installés dans des meubles et des plans de travail homologués et adaptés.
•Ne modifiez pas ou n'essayez pas de modifier les caractéristiques de cet appareil. Cela représenterait un danger pour vous.
Avertissement Les instructions de branchement électrique et au gaz
doivent être scrupuleusement respectées.
•N'installez pas l'appareil s'il a été endommagé pendant le transport.
Sécurité durant l'utilisation
•Retirez tous les emballages, les étiquettes (sauf la plaque signalétique) et les films protecteurs de l'appareil avant de l'utiliser pour la première fois.
Description de l'appareil
1


 2 5
2 5 


4 3
Avertissement Risque d'incendie ! Surveillez attentivement la cuisson lors de
friture dans l'huile ou la graisse : les graisses surchauffées s'enflamment facilement.
•Assurez-vous que les commandes des brûleurs sont toujours en position "arrêt" lorsque l'appareil n'est pas utilisé.
•Risque de brûlures ! La table de cuisson, les brûleurs et les récipients s'échauffent et peuvent rester chauds longtemps après l'arrêt de l'appareil. Vérifiez que les casseroles ne débordent pas des bords de la table de cuisson.
Pour éviter d'endommager l'appareil
•Afin de ne pas endommager la table de cuisson, ne faites pas brûler les récipients et ne laissez pas le contenu s'évaporer en totalité.
•N'utilisez jamais votre table à vide (sans récipient dessus) ou avec un récipient de cuisson vide.
•Ne recouvrez aucune partie de l'appareil avec du papier aluminium. Veillez à ne rien laisser sur la table pendant et après l'utilisation des zones de cuisosn (torchons, feuilles d'aliminium, plastique, etc.).
2Brûleur auxiliaire
3Manette de commande du brûleur rapide
4Manette de commande du brûleur auxiliaire
5Support de casseroles amovible
Manette de commande du brûleur
Les manettes de commande des brûleurs se situent à l'avant de la table de cuisson.
1 Brûleur rapide

FRANÇAIS |
14 |
Symbole Description
Pas d'alimentation en gaz / position d'arrêt
Symbole Description
Alimentation en gaz maximum / position d'allumage
Alimentation en gaz minimum
Utilisation quotidienne
Allumage des brûleurs
Allumez toujours le brûleur avant de poser les casseroles ou poêles.
Pour allumer le brûleur :
1.Enfoncez complètement la manette de commande et tournez-la dans le sens antihoraire, jusqu'à la position maximum  .
.
2.Maintenez la manette enfoncée environ 5 secondes ; ce qui permet au thermocouple de chauffer et au dispositif de sécurité de se couper ; à défaut de quoi, l'arrivée en gaz s'interrompt.
3.Une fois que la flamme brûle régulièrement, réglez-la selon vos préférences.
Si, après plusieurs tentatives, le brûleur ne s'allume pas, vérifiez que la couronne et
son chapeau sont dans la position correcte.
1
2
3
4
5
1Chapeau du brûleur
2Couronne du brûleur
3Bougie d'allumage
4Injecteur
5Thermocouple
Avertissement Ne maintenez pas la commande appuyée pendant plus de 15
secondes.
Si le brûleur ne s'allume pas après 15 secondes, relâchez la manette de commande et po- sitionnez-la sur la position "arrêt" et attendez au moins 1 minute avant d'essayer une nouvelle fois d'allumer le brûleur.
Important En cas de coupure d'électricité, vous pouvez utiliser votre table de cuisson sans avoir recours au système automatique. Pour cela, présentez une flamme au brûleur, maintenez la manette de commande correspondante et tournez-la dans le sens inverse des aiguilles d'une montre jusqu'au repère de débit maximum.
 Avertissement Soyez extrêmement prudent si vous utilisez le brûleur en présence d'une flamme nue. Le fabricant
décline toute responsabilité en cas d'utilisation abusive de la flamme.

FRANÇAIS |
15 |
 Si le brûleur s'éteint accidentellement, tournez la manette de commande sur la position "arrêt" et attendez au moins 1 minute avant d'essayer de nouveau d'allumer le brû-
leur.
 Lorsque vous rétablissez le courant après l'installation ou une coupure de courant, il est tout à fait normal que le générateur
d'étincelles s'active automatiquement.
Coupure des brûleurs
Pour couper la flamme, tournez la manette correspondante sur le symbole  .
.
Avertissement Baissez ou éteignez toujours la flamme avant de retirer un
récipient du brûleur.
Conseils utiles
Economies d'énergie
•Si possible, recouvrez toujours les récipients avec leur couvercle.
•Dès que le liquide commence à bouillir, baissez la flamme juste assez pour continuer la cuisson à feux doux.
Utilisez des casseroles et poêles dont le fond correspond à la taille du brûleur utilisé.
Brûleur |
Diamètre mini- |
Diamètre |
|
mum des cas- |
maximum des |
|
seroles et poê- |
casseroles et |
|
les |
poêles |
Rapide |
180 mm |
260 mm |
Brûleur |
Diamètre mini- |
Diamètre |
|
mum des cas- |
maximum des |
|
seroles et poê- |
casseroles et |
|
les |
poêles |
Auxiliai- |
80 mm |
160 mm |
re |
|
|
Le fond du récipient de cuisson doit être aussi plat et épais que possible.
Entretien et nettoyage
 Avertissement Avant de procéder au nettoyage de votre appareil, vérifiez qu'aucun élément n'est sous tension (toutes les commandes doivent se trouver sur la position
"arrêt") et que l'appareil soit suffisamment refroidi.
Avertissement N'utilisez jamais d'appareil à vapeur ou à haute pression
pour nettoyer l'appareil.
Avertissement N'utilisez pas de produits de nettoyage abrasifs ou corrosifs tels
que : bombes aérosols pour four, produits détachants, produit anti-rouille, poudres à récurer, substances acides ou d'objet tranchant (couteau, grattoir, tournevis, etc.) ou d'éponges à face abrasive.
Pour éliminer les résidus d'aliments, nettoyez les éléments en émail, le "chapeau" et la "couronne" avec de l'eau chaude savonneuse.
Lavez les éléments en acier inoxydable à l'eau, puis séchez-les à l'aide d'un chiffon doux.
Cet appareil est muni d'allumeur électrique. L'allumage est assuré par une "bougie" en céramique et une électrode métallique.
Pour éviter des difficultés d'allumage, maintenez ces deux éléments en parfait état de propreté et veillez à ce que les orifices des brûleurs ne soient pas obstrués.

FRANÇAIS |
16 |
Faites vérifier régulièrement par votre |
Après le nettoyage, veillez à bien sécher avec |
service après vente l'état du tuyau d'ar- |
un chiffon doux. |
rivée de gaz et du régulateur de pression, si votre installation en est équipée (cette intervention est à la charge du client et ce service vous sera facturé).
En cas d'anomalie de fonctionnement
Symptôme |
Cause possible |
Solution |
Aucune étincelle ne se produit |
Pas d'alimentation électrique |
Vérifiez que l'appareil est |
à l'allumage |
|
branché et que l'alimentation |
|
|
électrique est sous tension. |
|
|
Vérifiez le fusible. |
|
Le chapeau et la couronne du |
Vérifiez que le chapeau et la |
|
brûleur ne sont pas correcte- |
couronne du brûleur ont été |
|
ment mis en place. |
remis correctement en place, |
|
|
par ex. après le nettoyage. |
La flamme s'éteint immédia- |
Le thermocouple n'est pas suf- |
Après apparition de la flam- |
tement après l'allumage |
fisamment chaud |
me, maintenez la commande |
|
|
appuyée pendant 5 secondes |
|
|
environ. |
La flamme n'est pas répartie |
La orifices sur la couronne du |
Vérifiez que l'injecteur n'est |
de façon homogène autour de |
brûleur sont obstruées par des |
pas encrassé et que les orifi- |
la couronne du brûleur. |
résidus d'aliments |
ces sur la couronne ne sont |
|
|
pas bouchés par des résidus |
|
|
d'aliments. |
En cas d'anomalie, faites les vérifications mentionnées. Il se peut que le problème soit simple et que vous puissiez y remédier vous-même. Si après toutes ces vérifications le problème persiste, contactez votre service après vente.
 Si un problème résulte d'une mauvaise utilisation ou manipulation de la part de l'utilisateur, ou si l'installation de l'appareil n'a pas été réalisée par un professionnel qualifié, le déplacement du technicien du service après vente ou du vendeur pourra vous être facturé
même en cours de garantie.
Caractéristiques techniques
Dimensions de la table de cuisson
Largeur |
290 mm |
Profondeur |
510 mm |
Hauteur d'encastrement |
30 mm |
Classe de l'appareil : 3
Catégorie de l'appareil : : III1c2E+3+ Alimentation en gaz de l'appareil : Gaz naturel G20 (2E+) 20 mbar
Cet appareil est conçu pour fonctionner au gaz naturel, mais peut être converti pour fonctionner avec d'autres types de gaz, comme décrit dans le tableau ci-dessous.
FRANÇAIS |
17 |
|
|
|
|
|
|
|
Injec- |
|
Puis- |
Débit nominal g/h |
|
|
Puis- |
|
By-pass |
||
|
|
|
|
|
Type de |
teurs |
|
sance |
|
|
|
|
|
sance |
|
||
Type de gaz |
|
G30 |
|
G31 37 |
|
|
|
1/100 |
|||||||||
brûleur |
1/100 |
|
nomi- |
|
|
|
réduite |
|
|||||||||
|
|
|
|
|
|
28/30 |
mbar |
|
|
|
mm |
||||||
|
|
|
|
|
|
|
mm |
|
nale kW |
mbar |
|
|
|
kW |
|
|
|
G20/G25 20/25 |
Rapide |
119 |
|
3,0 |
- |
|
- |
|
|
0,75 |
|
42 |
|||||
mbar |
|
|
|
(large) |
|
|
|
|
|
||||||||
|
|
|
|
|
|
|
|
|
|
|
|
|
|
||||
|
|
|
|
|
Auxiliai- |
70 |
|
1,0 |
- |
|
- |
|
|
0,33 |
|
28 |
|
|
|
|
|
|
re (petit) |
|
|
|
|
|
|||||||
|
|
|
|
|
|
|
|
|
|
|
|
|
|
|
|
||
G130 8 mbar |
Rapide |
240 |
|
3,0 |
- |
|
- |
|
|
0,75 |
|
42 |
|||||
|
|
|
|
|
(large) |
|
|
|
|
|
|||||||
|
|
|
|
|
|
|
|
|
|
|
|
|
|
|
|
||
|
|
|
|
|
Auxiliai- |
127 |
|
1,0 |
- |
|
- |
|
|
0,33 |
|
28 |
|
|
|
|
|
|
re (petit) |
|
|
|
|
|
|||||||
|
|
|
|
|
|
|
|
|
|
|
|
|
|
|
|
||
G30/G31 |
Rapide |
86 |
|
2,8 |
240 |
|
200 |
|
|
0,75 |
|
42 |
|||||
28-30/37 mbar |
(large) |
|
|
|
|
|
|||||||||||
|
|
|
|
|
|
|
|
|
|
|
|||||||
|
|
|
|
|
Auxiliai- |
50 |
|
1,0 |
73 |
|
71 |
|
|
0,33 |
|
28 |
|
|
|
|
|
|
re (petit) |
|
|
|
|
|
|||||||
|
|
|
|
|
|
|
|
|
|
|
|
|
|
|
|
||
Plaque signalétique |
|
|
|
|
|
|
|
|
|
|
|
||||||
Made In Italy |
|
|
|
|
|
|
G20 20 mbar = 4 kW |
II2H3B/P (CZ-RO-SK-RU-TR-BG) |
|||||||||
|
|
|
|
|
|
|
|
||||||||||
|
© Inter IKEA Systems B.V. 1999 |
|
|
|
|
|
|
G20/G25 20/25 mbar = 4 kW |
|
III1c2E+3+ (FR) |
|||||||
|
001-542-81 |
|
|
|
|
|
|
G31 37 mbar = 271 g/h |
|
|
II2H3+ (IT-ES-PT) |
||||||
|
|
|
|
|
|
|
|
|
|
|
G30 28-30 mbar = 277 g/h |
|
|
|
|
|
|
|
PQM |
21552 |
|
|
|
|
|
|
|
|
|
|
|||||
|
|
|
|
|
|
G30/G31 30/30 mbar = 277 g/h |
|
|
|
||||||||
|
|
|
|
|
|
|
|
|
|
|
|
|
|
||||
|
|
|
|
|
|
|
|
|
|
|
G130 8 mbar = 4 kW |
|
|
|
230 V ~50 Hz |
||
|
ZO |
0694 |
|
|
|
PNC. 949738168 |
TYPE H3MF20-G/VI |
|
|
|
|
|
|||||
La figure ci-dessus illustre la plaque signalétique de l'appareil (sans le numéro de série qui est créé dynamiquement pendant le processus de production), située sous le boîtier de la table de cuisson.
Cher client, nous vous invitons à apposer sur le côté de l'appareil l'adhésif que vous trouverez dans le sachet en plastique présent dans l'emballage de la table de cuisson. Celui-ci nous permettra d'identifier votre appareil et de mieux vous prêter assistance chaque fois que vous en aurez besoin. Nous vous remercions de bien vouloir prendre en compte cette recommandation.
 Loading...