

Page 1
IDEAL INDUSTRIES, INC.
TECHNICAL MANUAL
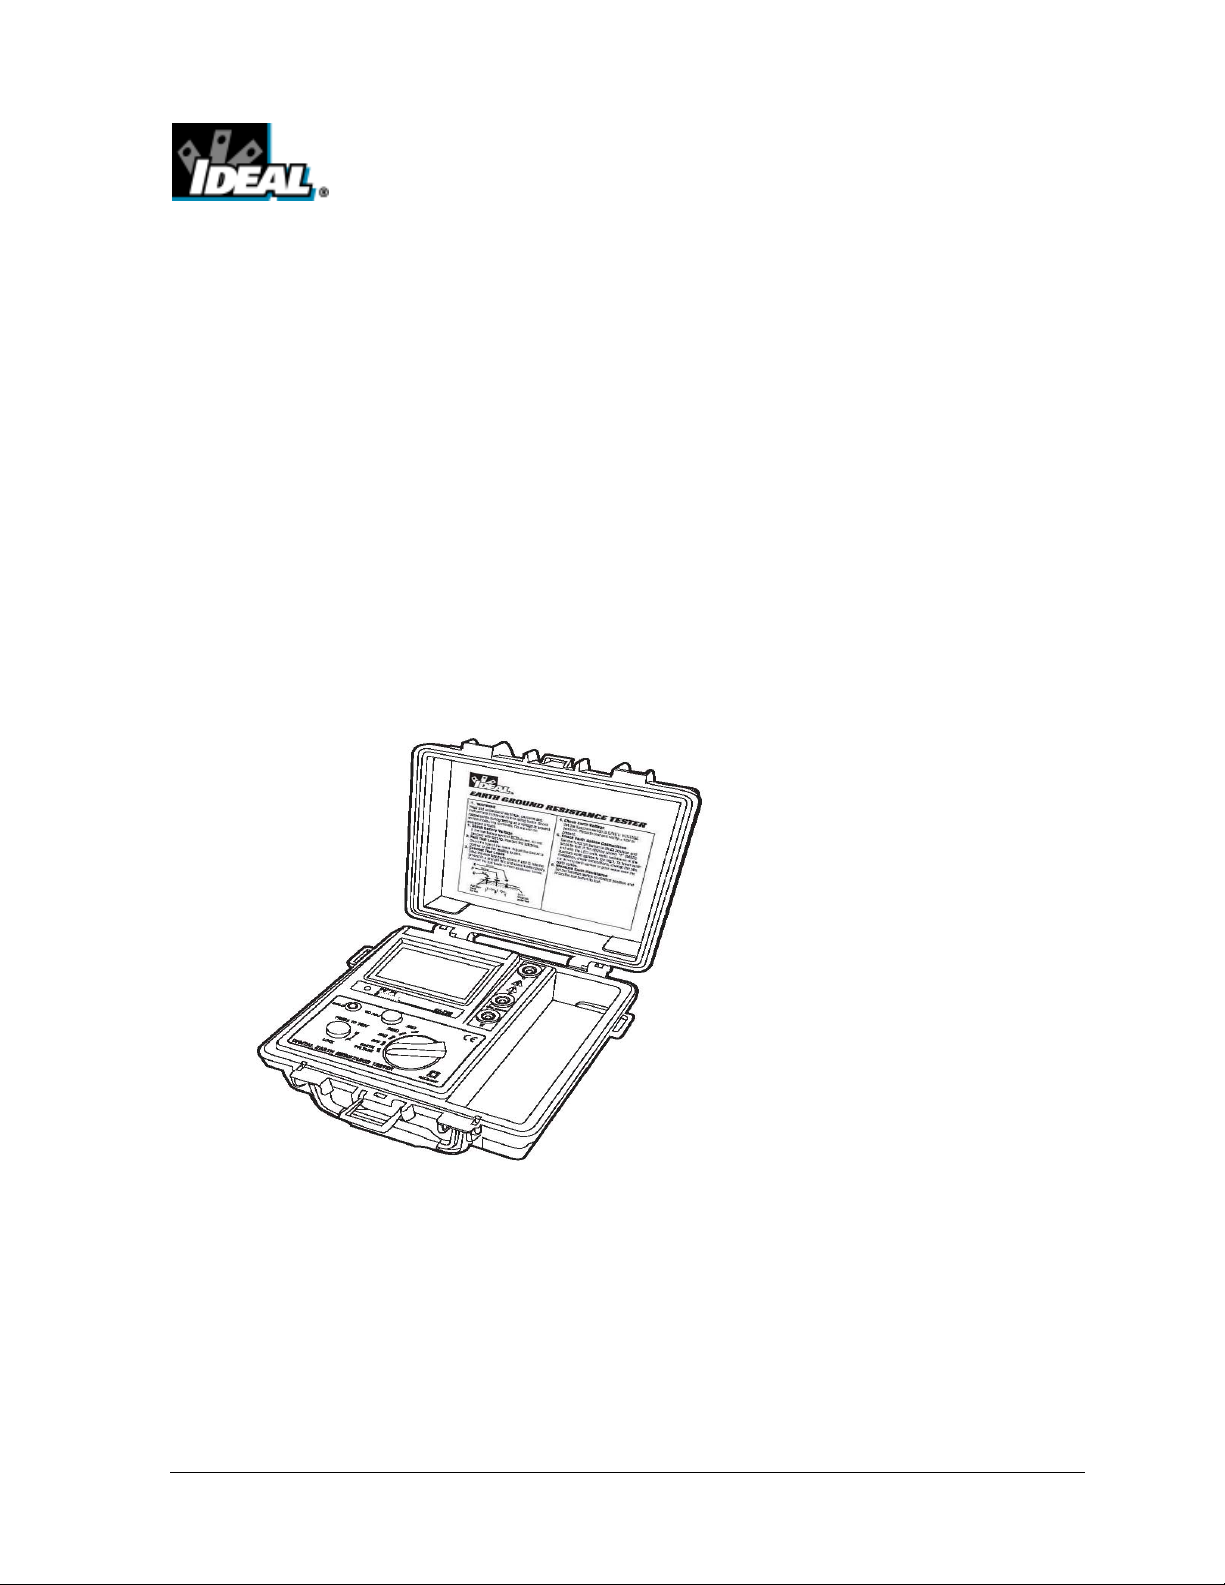
MODEL: 61-796
The Service Information provides the following information:
• Precautions and safety information
• Specifications
• Performance test procedure
• Calibration and calibration adjustment procedure
• Basic maintenance (Disassembly, Troubleshooting, Spare Parts list)
Form number: TM61796
Revision: 2. Date: May 2008
Form number TM61796 Rev 2 May 2008
Page 2

TABLE OF CONTENTS
Title Page
Introduction 1
Precautions and Safety Information 1
Symbols 1
Safety Information 1
Specifications 2
General Specification 2
Ground Resistance Specifications 2
Ground Voltage Potential Specifications 2
Required Standards and Equipment 3
Performance Verifications 3
Battery Test 3
Frequency Test 3
Resistance Test 3
AC Voltage Test 4
Disassembly and Setup For Calibration 4
Calibration 4
Procedure 4/5
Calibration Verification Test 5
Calibration Adjustment Locations 6
Component Layout 7
Troubleshooting 8
Spare Parts List 9
Form number TM61796 Rev 2 May 2008
Page 3
Page 1
Introduction
Warning
To avoid shock or injury, do not perform the verification tests or calibration
procedures described in this manual unless you are qualified to do so.
The information provided in this document is for the use of qualified personnel only.
Caution
The 61-796 Three Pole Ground Resistance Tester contains parts that can be damaged by static discharge.
Follow the standard practices for handling static sensitive devices.
For additional information about IDEAL INDUSTRIES, INC. and its products,
and services, visit IDEAL INDUSTRIES, INC. web site at:
www.idealindustries.com
Precautions and Safety Information
Use the meter only as described in the Users Manual. If you do not
do so, the protection provided by the meter may be impaired.
Read the “Safety Information” page before servicing this product.
In this manual, a Warning identifies conditions and actions that
pose hazard(s) to the user; a Caution identifies conditions and
actions that may damage the meter or the test instruments.
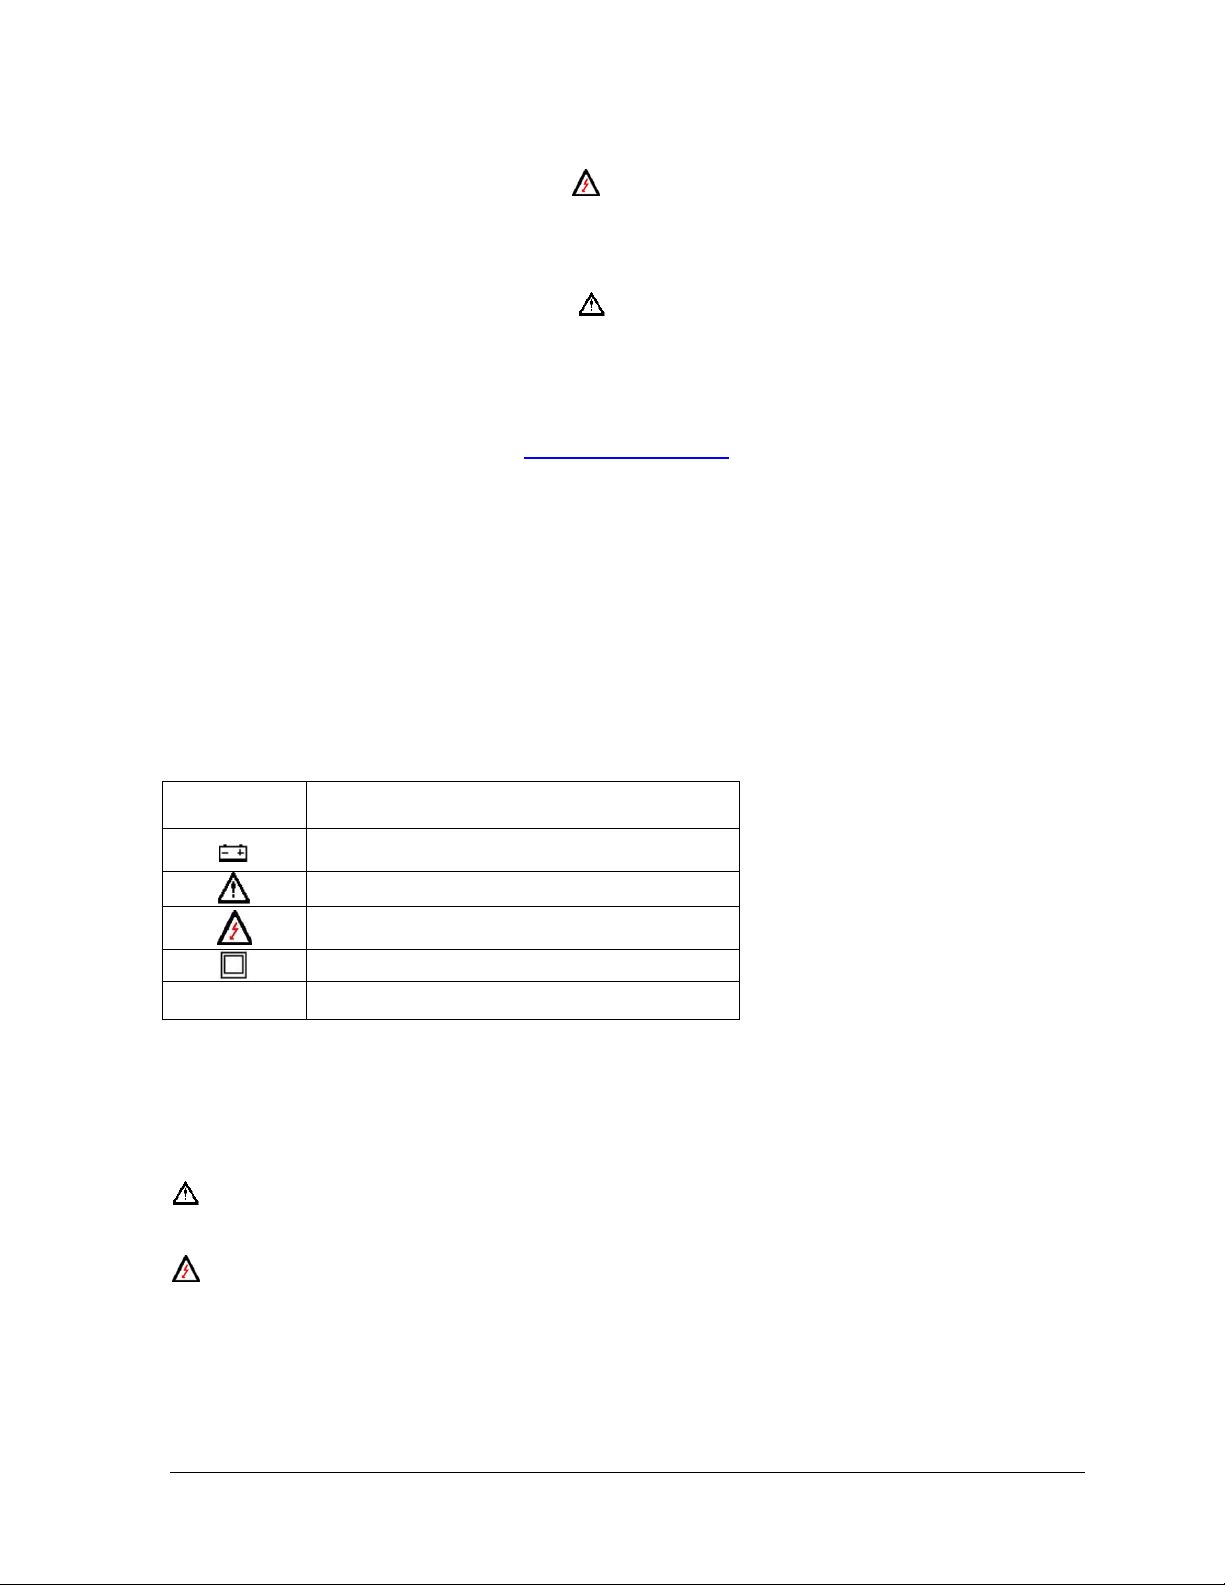
The Symbols
The symbols used on the meter and in this manual are explained in Table A.
Table A. Symbols
Meter Safety
Description
Symbol
Battery
CAT III
Cautionary or important information in manual
Danger - Risk of electrical shock
Double Insulation- Protection Class II
IEC Over-voltage Category III
SAFETY
Review the following safety precautions to avoid injury and prevent damage to this product or any products
connected to it. To avoid potential hazards, use the product only as specified.
CAUTION.
These statements identify conditions or practices that could result in damage to the equipment or other property.
WARNING.
These statements identify conditions or practices that could result in personal injury or loss of life.
Before beginning read all warnings and precautions stated in the “Instruction Manual”
Form number TM61796 Rev 2 May 2008
Page 4
Page 2
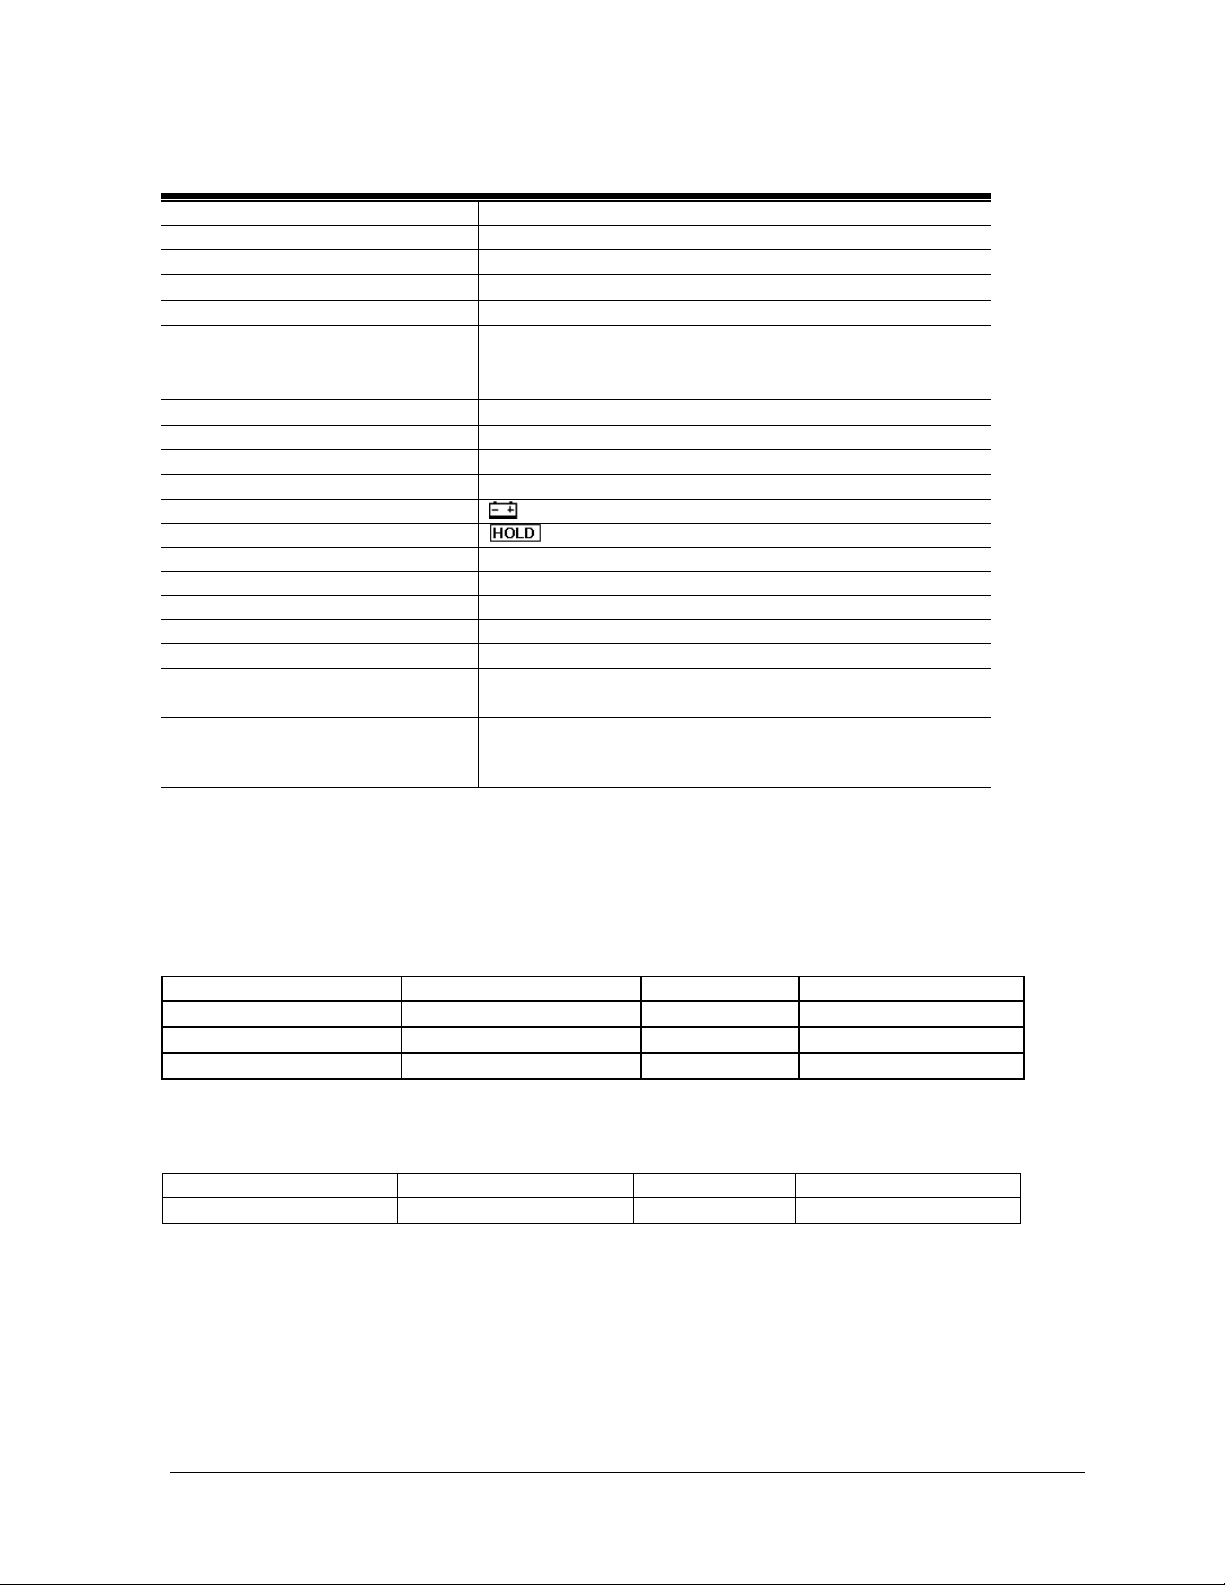
General Specifications
Characteristics Description
Display LCD 3 ½ with 2000 counts, maximum display count of 1999
Over-range Indication “1” in the Most Significant Digit (MSD)
Operation Frequency of Ω current
Earth Resistance Range
Resistance resolution
820Hz to 1.6kHz at approx. 2mA.
20Ω/200Ω/2000Ω
0.00 - 19.99 (0.01Ω)
00.0 - 199.9 (0.1Ω)
000 – 1999 (1Ω or .001KΩ)
Earth Resistance Accuracy
±(2% reading + 2 digits) or± 0.1Ω
Max Earth Voltage 0-200V AC, 40-500Hz
Earth Voltage Accuracy
± (1% reading + 2 digits)
Power on/off Switch only / No auto power off mode
Low Battery Indicator: Symbol indicates low battery voltage
Data Hold Indicator Symbol indicates data hold
Power 8 x 1.5V AA Batteries (Alkaline preferred)
Applicable standards IEC/EN 61010-1: (CAT III 200V) pollution degree2
Dimensions 8.3”H x 8.3”W x 4.0”D
Weight: Approximately 3.0 lbs. (1361g) including battery
Storage Environment:
Operating Environment:
Relative Humidity
32°F to 122°F at <80% relative humidity
32°F to 104°F
80% Relative Humidity
Accessories included Hard Case, Test Lead Set (red-33m, yellow- 33m, green 5m)
Red 1m dual input jack to alligator clip adapter lead,
2 Auxiliary earth spikes, and Instruction Manual
RANGES and ACCURACY SPECIFICATION
Measurement Characteristics
(All at 75°F ± 41°F, < 80% R.H.) Measurement accuracy is expressed as ±(% reading + digits) in the resistance
and voltage functions
RESISTANCE:
Range Measuring Range Resolution Accuracy
20Ω 0.00Ω - 19.99Ω 0.01Ω ±(2% reading+ 2 digits)1
200Ω 00.0Ω - 199.9Ω 0.1Ω ±(2% reading + 2 digits)
2000 Ω 000Ω - 1999Ω 1Ω or 0.001KΩ ±(2% reading + 2 digits)
1
Error is ± 2 digits or ± 0.1Ω, whichever is greater.
Operation frequency of current is 820Hz to 1.6kHz at approx. 2mA.
EARTH VOLTAGE POTENTIAL:
Range Measuring Range Resolution Accuracy
0-200V AC 00.0 – 199.9V .1mV
± 1.0% ± 2digits
Form number TM61796 Rev 2 May 2008
Page 5

Page 3
Required Standards and Equipment
• Precision AC voltage source with a range of 0 to 200V AC @60Hz with an accuracy of .25% or better.
• To test the performance of the 61-796, you will need a set of fixed standard resistors with an accuracy
of 0.5% or better. Values required are 1, 10, 100, and 1000.
• All three test leads should be of equal length. C and P lead connections should be made at
the standard resistors. This Source/Since method will reduce the lead resistance error in
the measurement. See Figure 1 below.
E, P, and C should be equal in length
and as short as possible
For best results P and C should be
connected together at the measurement
points as shown in this figure.
Figure 1
PERFORMANCE VERIFICATIONS
Perform the following analysis. If the meter conforms to the limits listed in Table 1, steps 1 - 6, the meter is
functioning correctly. If the meter does not conform to any of the listed limits, the calibration procedure must be
performed.
Battery Test
• Remove the battery cover and use a calibrated meter to ensure the battery pack measures a minimum of
11.5V DC. If the battery pack measures under 11.5V DC, replace all 8 x 1.5V batteries before
beginning the performance test.
Frequency Test
• Turn the function switch to 20Ω range,
• Connect a frequency counter to terminals E and P.
• Press and lock the TEST button. The output frequency should be 820Hz ±15Hz (805Hz~835Hz).
Resistance Test
• Connect the standard resistors to the unit under test as described in Figure 1.
• Select 20Ω range.
• Short E, P, and C together, adjust 0Ω adj dial for 0.00 ±0.01 ohms on the LCD display.
• Connect E, P, and C to the 1.0 standard resistor and verify the reading in Table 1, step 1.
• Repeat this process for steps 2 - 6 in Table 1.
• It is not necessary to do the 0Ω adj in the 200 and 2000 range.
• If the display reading falls outside of the range shown in Table 1, the meter does not meet specification.
Note: Error for the lead resistance is not included or accounted for in the test data in Table 1
Table 1. Resistance Test
Step Range Input Low Limit High Limit
1 20
2 20
3 200
4 200
5 2000
6 2000
1.00Ω
10.00Ω
10.0Ω
100.0Ω
100.0Ω
1000.0Ω
0.90 1.10
9.90 10.10
9.6 10.4
97.8 102.2
96 104
978 1022
Form number TM61796 Rev 2 May 2008
Page 6

Page 4
AC Voltage Test
• Connect meter terminals E and P to the output of a precision AC voltage source.
• Apply the AC voltage listed in Table 2, steps 1 - 3.
• If the display reading falls outside of the limits shown in Table 2, the meter does not meet specification.
Table 2. AC Voltage Test
Steps Range Input Low Limit High Limit
1 Earth Voltage 12V @ 60Hz 11.7 12.3
2 Earth Voltage 120V @ 60Hz 118.6 121.4
3 Earth Voltage 190V @ 60Hz 187.9 192.1
Disassembly Instructions and Setup for Calibration (refer to Figure 3)
• Start with the unit top case lid closed.
• From the bottom, remove the battery cover.
• Remove the 2 screws that hold the measurement unit into the case.
• One screw is in the top right corner of the battery compartment and one screw is in the
lower right, just left of the fuse.
• Replace the battery cover and loosely tighten the screws.
• Open the case and carefully lift the unit from the case. There are several sets of wires attached to the
bottom case so be very careful not to damage them.
• You should now have access to the main circuit board and adjustments.
Calibration
Qualified personnel should only perform calibration procedures described in this manual.
During this calibration it will be necessary to have the electronics of the instrument exposed.
A potential for hazardous voltage can be present during this procedure. Use extreme caution.
ACV Adjustment (refer to Figure 2)
Turn the function switch to EARTH VOLTAGE position.
• Press and lock the TEST button. The display should read AC 00.0V.
• Set the precision AC power source to standby with an output of 100V @ 60 Hz.
• Connect terminals E and P of the 61-796 to the output of the AC source. (C should be left open.)
• Energize the AC source.
• Adjust VR6 on the circuit board for a display reading of AC 100.0V.
• Change the AC source to 190V @ 60Hz.
• Displayed should be 190V ±1.5V.
• Maximum allowable error during calibration should not exceed ±0.7% reading ±2 digits.
• Release the TEST button. Turn off AC source and remove test leads. ACV calibration is complete.
Frequency Adjustment (refer to Figure 2)
• Turn the function switch to 20Ω range.
• Connect a frequency counter to terminals E and P.
• Press and lock the TEST button and adjust VR1 for a frequency output of 820Hz ±15Hz
(805Hz~835Hz).
• Release the TEST button and remove the counter. Frequency adjustment is complete.
Form number TM61796 Rev 2 May 2008
Page 7

Ω Adjustment (refer to Figure 2)
Connect the 61-796 to the standard resistors as described in the performance test section, Figure 1.
Select 20Ω Range.
• Short E, P, and C together, adjust 0Ω adj dial for 0.00 ±0.01 ohms on the LCD display.
• Connect E, P, and C to the 10 standard resistor; adjust VR3 for a reading of 10.00 ±0.02.
Select 200Ω Range.
• Short E, P, and C together, check that the display reads 00.0 ±.2
• Connect E, P, and C to the 100 standard resistor; adjust VR4 for a reading of 100. 0 ±0.2.
Select 2000Ω stage.
• Short E, P, and C together, check that the display reads 000 ±2
• Connect E, P, and C to the 1000 standard resistor; adjust VR5 for a reading of 1000 ±2.
Ω Calibration Verification Test
The maximum allowable error just after calibration should not exceed those listed in Table 3.
Table 3. Ω Verification Test
Ranges Ω Source Adjustment Accuracy LCD indication
20 10 VR3 ±1.0%rdg or± 0.1 9.90~ 10.10
200 100 VR4 ±0.5%rdg±1dgt 99.50~100.5
2000 1000 VR5 ±0.5%rdg±1dgt 995~1005
Page 5
Form number TM61796 Rev 2 May 2008
Page 8

Page 6
Calibration Adjustment Locations
VR6 ADJUST ACV
VR1 ADJUST Hz
VR3 ADJUST 10Ω
VR4 ADJUST 100Ω
VR5 ADJUST 1000Ω
Figure 2
Form number TM61796 Rev 2 May 2008
Page 9

Page 7
Figure 3
Form number TM61796 Rev 2 May 2008
Page 10

Page 8
Troubleshooting
Symptoms Possible Causes Remedies
The LCD has no display
No batteries Install the batteries
Faulty battery polarity Install the batteries in correct polarity
Battery terminal oxidized Replace new battery terminal
Wire broken Solder wire
Q1 or Q8 broken Replace Q1 (IC-7809FA) or Q8 (IC-
78L05)
Poor contact of battery
Replace the battery contacts
harness
Insufficient capacity of
Replace the batteries
battery
Unable to measure due
to unclear LCD
U4 or U21 broken Replace U4 (IC-27M2) or U21 (IC-
5106Q)
Digit incomplete U21 broken Replace U21 (IC-5106Q)
Vague font U4 broken Replace U4 (IC-27M2)
Reading not stable U21 or CON2 broken Replace U21 (IC-5106Q) or CON2
Power transformer broken Replace power transformer (PT-1505)Hz no reading
C6, C10 broken Replace C6 (CPE-220uF) C10 (CDM-
1uF)
ACV no reading
C21 or Z2 broken Replace C21 (CPE-22uF) or Z2 (TVS-
6.5CA)
Fuse broken Replace Fuse
U14 broken Replace U14 (IC-062)
ACV reading abnormal Diode broken Replace Diode
ACV 0 (no test) Z2 broken Replace Z2 (TVS-6.5CA)
reading shows “1”
Power transformer broken Replace power transformer (PT-1505)
L2 broken Replace L2 (IND-254K)
U4 broken Replace U4 (IC-27M2)
When measuring “”
LED no indication
When “2K” range, not
Q5 or Q6 broken Replace Q5 (TRA-A673) OR Q6
(TRA-A673)
U13 broken Replace U13 (IC-4053)
going to zero
When “20” range, not
going to zero
When measuring “”,
U3, Q6 broken Replace U3 (IC-LM358) Q6 (TRA-
A673)
U3 broken Replace U3 (IC-LM358)
the reading drops
gradually
Unable to measure “”
Fuse broken Replace Fuse
Form number TM61796 Rev 2 May 2008
Page 11

Spare Parts List
No. Description Parts No. Qty. Note
1 Nameplate 3
2 UP-cover 1
3 PCB 2
4 Function switch 1
5 Test button 1
6 Hold button 1
7 0 adjust 1
8 Housing case 1
9 Protection cover 4
10 Battery 8
11 Battery case 1
12 Handle 1
13 Latch 1
Others Test leads 1 Kit
Simplified measurement
1
probe
Auxiliary earth spikes 2
Shoulder belt 1
Instruction manual 1
Page 9
Form number TM61796 Rev 2 May 2008
 Loading...