

HP STOREONCE 5500 Maintenance And Service Manual

StoreOnce 5500 Maintenance and Service
Guide
Abstract
This guide is the Maintenance and Service guide for StoreOnce 5500 Systems. The architecture
of StoreOnce Systems is based upon established HPE hardware components, such as ProLiant
servers and HPE Disk Enclosure products, which have their own user and service and
maintenance guides. This document provides information on only those aspects that are not
covered in the existing guides. It assumes that readers are already familiar with maintaining
ProLiant servers and HPE Disk Enclosure products.
Part Number: BB917-90911
Published: March 2017
Edition: 3

©
2016, 2017 Hewlett Packard Enterprise Development LP
Notices
The information contained herein is subject to change without notice. The only warranties for Hewlett Packard
Enterprise products and services are set forth in the express warranty statements accompanying such
products and services. Nothing herein should be construed as constituting an additional warranty. Hewlett
Packard Enterprise shall not be liable for technical or editorial errors or omissions contained herein.
Confidential computer software. Valid license from Hewlett Packard Enterprise required for possession, use,
or copying. Consistent with FAR 12.211 and 12.212, Commercial Computer Software, Computer Software
Documentation, and Technical Data for Commercial Items are licensed to the U.S. Government under
vendor's standard commercial license.
Links to third-party websites take you outside the Hewlett Packard Enterprise website. Hewlett Packard
Enterprise has no control over and is not responsible for information outside the Hewlett Packard Enterprise
website.
Acknowledgments
Intel®, Itanium®, Pentium®, Intel Inside®, and the Intel Inside logo are trademarks of Intel Corporation in the
United States and other countries.
Microsoft® and Windows® are either registered trademarks or trademarks of Microsoft Corporation in the
United States and/or other countries.
Adobe® and Acrobat® are trademarks of Adobe Systems Incorporated.
Java® and Oracle® are registered trademarks of Oracle and/or its affiliates.
UNIX® is a registered trademark of The Open Group.

Contents
Finding part numbers for replacement parts............................................ 6
General information...................................................................................12
Introduction..........................................................................................................................................6
Server (ProLiant DL380p Gen9 Server).............................................................................................. 6
Accessing the HPE ProLiant documentation............................................................................6
Configurable parts.................................................................................................................... 6
Optional Hardware Components.............................................................................................. 7
ProLiant DL380p Gen9 Server component replacement process ........................................... 7
What type of replacement procedure is appropriate?.................................................... 8
Replacing server components....................................................................................... 8
Disk enclosures (HPE D6020 Disk Enclosure)....................................................................................9
Accessing the HPE D6020 Disk Enclosure documentation......................................................9
Configurable parts.................................................................................................................... 9
Replacement process.............................................................................................................10
Preparing for StoreOnce maintenance activities............................................................................... 12
HPE StoreOnce Remote Support...........................................................................................12
Power off.................................................................................................................................12
Power on.................................................................................................................................12
Upgrading BIOS or hardware firmware components.........................................................................13
Updating firmware using the StoreOnce GUI......................................................................... 13
Updating firmware using the StoreOnce CLI.......................................................................... 14
Upgrading StoreOnce software......................................................................................................... 14
POST messages and troubleshooting...............................................................................................15
HPresetpassword account.................................................................................................................15
The purpose of the HPresetpassword account ......................................................................15
Changing the password for the HPresetpassword account....................................................15
Resetting the password for the local Admin user................................................................... 16
Tasks that are unique to StoreOnce System..................................................................................... 16
Rack stability..................................................................................................................................... 16
Identifying problems................................................................................. 17
Example alert for a failed disk in a StoreOnce system...................................................................... 17
Using the StoreOnce GUI to identify a failed disk............................................................................. 17
Viewing the StoreOnce Events Log........................................................................................17
Viewing the failed disk in the StoreOnce Hardware tree........................................................ 17
Using the StoreOnce CLI to identify a failed disk.............................................................................. 18
Replacing the system motherboard ........................................................20
Overview............................................................................................................................................20
Motherboard spares part number and System Maintenance switch................................................. 20
DIMM locations..................................................................................................................................21
Identifying the Activation Key for the iLO4 license............................................................................ 22
iLO and BIOS configuration after replacing the motherboard............................................................22
Configuring iLO and RBSU settings....................................................................................... 22
RBSU settings........................................................................................................................ 23
Contents 3

iLO4 settings...........................................................................................................................23
The HP p1228 RAID controller..................................................................24
The p1228 RAID card in a StoreOnce server....................................................................................24
Spares part numbers.............................................................................................................. 24
Location of the RAID cards (server rear view)........................................................................25
RAID controller failures......................................................................................................................25
Replacing the HP p1228 controller....................................................................................................25
RAID cache module and SuperCapacitor failures............................................................................. 26
About the RAID cache module and SuperCapacitor.............................................................. 26
Replacing the RAID cache module and SuperCapacitor........................................................27
Replacing Optional Hardware...................................................................28
Error messages................................................................................................................................. 28
Replacing Optional Hardware cards..................................................................................................29
Fibre Channel card considerations....................................................................................................29
Removing and replacing a Fibre Channel or 10 GbE optical SFP.................................................... 29
Disk enclosures......................................................................................... 31
Disk enclosure components.............................................................................................................. 31
When replacing Drawer Assembly, Power Block Assembly and the I/O Module ...................31
Power on/off on the disk enclosure................................................................................................... 31
SAS cabling to disk enclosures......................................................................................................... 32
SAS cables........................................................................................................................................33
SAS cabling when storage is fully expanded.....................................................................................33
Factory-integrated SAS cabling configuration........................................................................ 33
Two enclosures above and two enclosures below the head server........................................34
Up to four enclosures below the head server......................................................................... 35
Disk replacement....................................................................................... 37
Overview............................................................................................................................................37
RAID configuration............................................................................................................................ 37
Overview.................................................................................................................................37
Hot spare disks for the 5500 and 6600 disk enclosures......................................................... 37
StoreOnce disk bay locations for 5500, 6500, and 6600 disk enclosures.............................. 37
Distributing the disk drives correctly....................................................................................... 38
Ordering the correct replacement disk for a failed disk..................................................................... 39
Identifying when a disk fails...............................................................................................................39
Replacing a hot plug disk in a disk enclosure....................................................................................40
Important Safety information...................................................................................................40
Installing the drives.................................................................................................................40
Rebuilding storage if multiple disks fail and a RAIDset is broken......................................................43
StoreOnce 5500 LEDs............................................................................... 44
Server LEDs...................................................................................................................................... 44
Disk enclosure LEDs......................................................................................................................... 45
Disk enclosure I/O module LEDs.......................................................................................................46
Display messages............................................................................................................................. 46
Power Supply module labels.................................................................................................. 46
B9, SAS cable hardware error................................................................................................47
BA, SAS cable unsupported by HPE......................................................................................47
4 Contents

C7, System shutdown - over temperature.............................................................................. 47
D0, Absent Power Supply Module 3.......................................................................................47
D1, Absent Power Supply Module 4.......................................................................................47
D2, Absent Power Supply Module 1.......................................................................................47
D3, Absent Power Supply Module 2.......................................................................................47
D5, Communication error - Power Supply Module 1.............................................................. 47
D6, Communication error - Power Supply Module 2.............................................................. 47
D7, Communication error - Power Supply Module 3.............................................................. 47
D8, Communication error - Power Supply Module 4.............................................................. 47
E9, Fan rotor failure - Fan Module 1.......................................................................................48
EA, Fan rotor failure - Fan Module 1...................................................................................... 48
Hot-plug drive LEDs.......................................................................................................................... 48
Server OS disks......................................................................................................................48
Disks in disk enclosure LEDs................................................................................................. 49
1 GbE LAN port LEDs....................................................................................................................... 50
10 GbE card LEDs.............................................................................................................................51
Fibre Channel card LEDs.................................................................................................................. 52
The QR ISO image..................................................................................... 54
The StoreOnce QR ISO image..........................................................................................................54
Download Quick Restore ISO Image ................................................................................................54
Create a bootable QR USB Stick...................................................................................................... 54
Delete storage................................................................................................................................... 55
Boot the appliance and install the StoreOnce software ....................................................................55
Performing a configuration restore ................................................................................................... 56
Support and other resources................................................................... 58
Accessing Hewlett Packard Enterprise Support................................................................................ 58
Accessing updates............................................................................................................................ 58
Customer self repair.......................................................................................................................... 58
Remote support.................................................................................................................................59
Warranty information......................................................................................................................... 59
Regulatory information...................................................................................................................... 59
Documentation feedback...................................................................................................................60
Additional regulatory information............................................................61
Belarus Kazakhstan Russia marking.................................................................................................61
Turkey RoHS material content declaration........................................................................................62
Ukraine RoHS material content declaration...................................................................................... 62
Contents 5
Finding part numbers for replacement parts
Introduction
This guide is the Maintenance and Service Guide for the StoreOnce 5500 System. This guide supplements
the HPE ProLiant DL380p G9 server Maintenance and Service Guide and the HPE D6020 Disk Enclosure
Maintenance and Service Guide, which are the primary sources of information for hardware issues. A
definitive list of spare part numbers is provided in each guide. This guide, the StoreOnce 5500 Maintenance
and Service Guide, contains only information that is not included in the ProLiant documentation.
The following tables provide a checklist with part numbers of all replaceable components that are unique to
StoreOnce 5500 Systems. These parts and their replacement procedures are not referenced in the ProLiant
DL380p G9 server guide and are described only in this guide.
IMPORTANT:
Always use the StoreOnce CLI commands or the StoreOnce GUI when upgrading the BIOS, hardware
firmware, and StoreOnce software.
Server (ProLiant DL380p Gen9 Server)
Accessing the HPE ProLiant documentation
For more information about replaceable components that are standard for base ProLiant servers:
Procedure
1. Go to http://www.hpe.com/info/enterprise/docs.
2. Select the Servers & Management Software link.
3. Select HPE ProLiant DL380p.
4. Scroll to the Service and maintenance section.
5. Open the guide and look at the Illustrated Parts Catalogue.
Configurable parts
The HPE ProLiant DL380p Gen9 server is the node component of a StoreOnce 6600 couplet.
This is an offline list, created from partsurfer. If there is a problem with these Spares Part Numbers, check the
online source at: http://partsurfer.hpe.com/search.aspx. If the problem exists in the online source, use the
feedback form to log the problem: http://partsurfer.hpe.com/ContactUs.aspx.
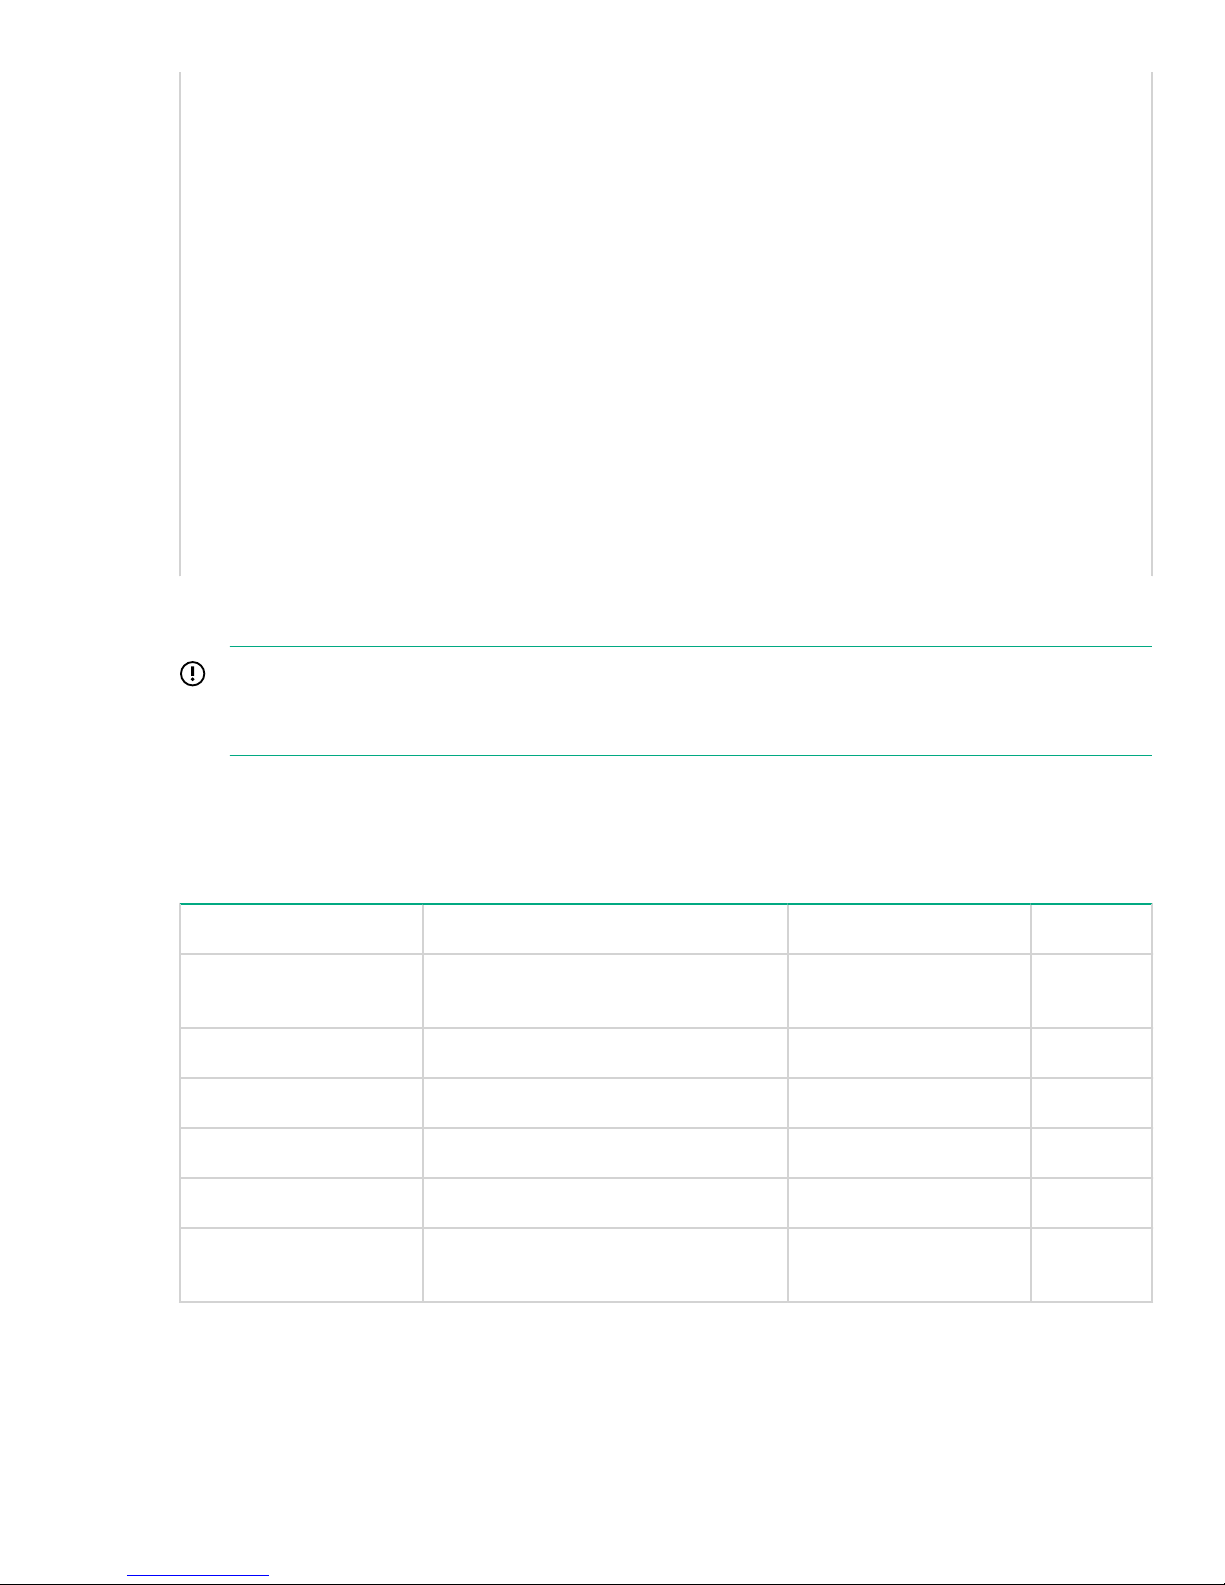
Table 1: StoreOnce server spare part numbers
Description
Processor
heatsink
Spare Part No Spare Part Description Hot plug
777291-001 SPS-Heatsink ASSY 120W & ABOVEDL380 No
Processor 762451-001 SPS-PRO E5-2680v3 12C 2.5GHz 120W No
Motherboard 775400-001 SPS-PCA dl380/dl360 Gen9 SYS I/O No
6 Finding part numbers for replacement parts
Table Continued
Memory
DIMM
774175-001 SPS-MEMORY DIMM 32GB 2Rx4
PC4-2133R-15
No
900 GB hard
disk for OS
RAID
controller
card
SuperCapacitor660093-001 SPS-CA CAPACITOR 36in FL No
RAID cache 633542-001 SPS-BD DDR3 MINI DIMM MOD 1Gx72 No
PSU 660185-001 SPS-POWER SUPPLY 1200W 1U HEPB Yes
10 GbE card
(two per
server node)
653971-001 SPS-DRV HD 900GB 6G SAS 10K 2.5 DP
842476-001 SPS-PCA p1228 w/o Encryption No
792834-001 SPS-PCA Ethernet 10Gb 2P 557SFP+Adaptr No
Optional Hardware Components
IMPORTANT:
Providing the replacement card is of the same type and is installed in the same slot, no re-activation or
re-licensing is required.
Yes
EN SC
All Optional Hardware PCIe cards and SFP transceivers that support connection to a 10 GbE network and/or
a FC SAN can be swapped like for like. The following table lists the part numbers for HPE StoreOnce
Optional Hardware.
Table 2: Optional Hardware Part Numbers
Description Part Part number Hot plug?
10GbE SFP network card SPS-PCA Ethernet 10Gb 2P 557 SFP-
ADPTR
10GbE SFP transceiver SPS-SFP+,10G BLc,SR 456096-001 Yes
8Gb FC card SPS-BD, HBA, 82q DP FC PCIe 489191-001 No
8Gb FC transceiver SPS-SFP, 8GB, FC SHORT WAVE 468508-001 Yes
16Gb FC card 16GB FC Card 699765-001 No
16Gb FC transceiver SPS-16Gb SFP+SW Industrial XCVR 1
Pack
792834-001 No
793443-001 Yes
ProLiant DL380p Gen9 Server component replacement process
Optional Hardware Components 7
What type of replacement procedure is appropriate?
• PSU and HDD:
These two items are hot-swappable. Order the correct replacement part as shown in the table and follow
the instructions in the HPE ProLiant DL380p Maintenance and Service guide.
IMPORTANT:
If changing a power supply, care must be taken to ensure that there is no interference with any of the
PDUs and power cabling.
• All other components:
When a hardware component requires replacing, please use the following process to complete the task.
NOTE:
Some of the following activities require access to the hpesupport account and may only be carried
out by or under the supervision of HPE service specialists.
Replacing server components
Procedure
1. Prepare for maintenance and power off the system.
See Preparing for StoreOnce maintenance activities on page 12.
2. Carefully remove cabling to the server, taking care not to disturb cabling to the ports on any other
hardware elements in the system.
See Server LEDs on page 44.
3. Slide out the failed server, replace the FRUs as required, and return the server to the rack.
See the HPE ProLiant DL380p Gen9 Maintenance and Service Guide.
4. Reconnect all cables to the server before powering on.
The system may not boot correctly, if some of the connections are not made, such as SAS cables to the
storage. See Server LEDs on page 44.
5. Connect power to the server ONLY and power on.
See iLO and BIOS configuration after replacing the motherboard on page 22.
a. During boot process, press F8 to enter the iLO Setup and update settings.
b. Press F9 to enter BIOS Setup-RBSU and update settings.
c. After power up, rewrite warranty serial numbers into BIOS.
6. If a StoreOnce Optional Hardware 10 GbE or FC card has been replaced, no further configuration is
required, unless using StoreOnce Catalyst over FC.
See Replacing Optional Hardware cards on page 29
7. If a SAS card has been replaced, no further configuration is required.
8. Carefully reconnect the FC, network and SAS cables, making sure to connect the ports correctly. Then
power on.
See Server LEDs on page 44.
9. Check firmware revision of the replacement part.
If necessary, update firmware revisions, see Upgrading BIOS or hardware firmware components on
page 13.
8 What type of replacement procedure is appropriate?
Disk enclosures (HPE D6020 Disk Enclosure)
Accessing the HPE D6020 Disk Enclosure documentation
Procedure
1. Order the correct replacement part.
IMPORTANT:
If changing a power supply, care must be taken to ensure that there is no interference with any of the
PDUs and power cabling.
2. Follow the instructions in the HPE D6020 Disk Enclosure Maintenance and Service Guide.
The HPE D6020 Enclosure Maintenance and Service Guide will be available initially from the StoreOnce
documentation page.
Configurable parts
The following table lists the replacement parts for the disk enclosure.
This is an offline list, created from partsurfer. If there is a problem with these Spares Part Numbers, check the
online source at: http://partsurfer.hpe.com/search.aspx. If the problem exists in the online source, use the
feedback form to log the problem: http://partsurfer.hpe.com/ContactUs.aspx.
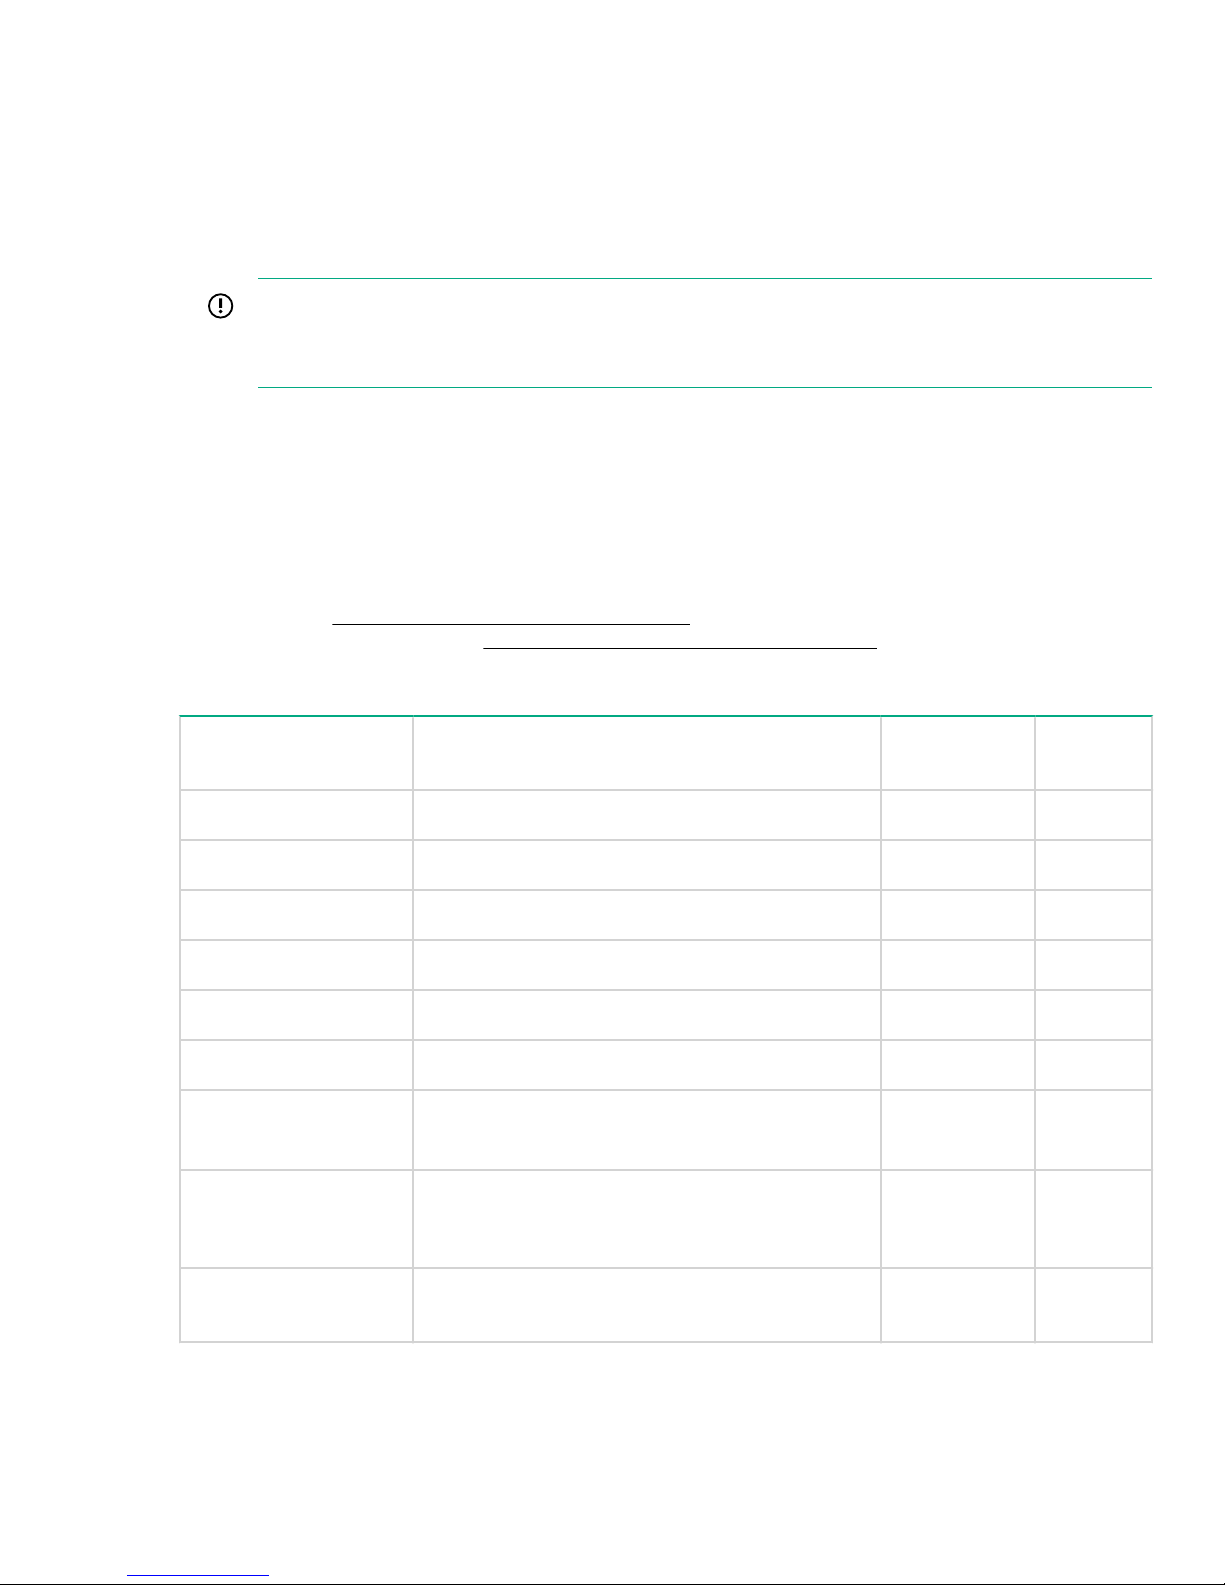
Table 3: Spares part numbers for the disk enclosure
Part Description Spare Part
number
I/O module SPS-PCA I/O Module:Carrier/2P/data cable 828613-001 No
Hard drive drawer SPS-PCA Backplane Assy: Drawer/Brick/HDD 828614-001 No
Power cord SPS-CORD AC PWR IEC RT A 142258-004 Yes
Hard disk blank SPS-BLANK HD SLIMLN INTR 389015-001 Yes
Fan SPS-FAN SYSTEM 413996-001 Yes
Power supply SPS-PWR SUPPLY, 1U 1200 660185–001 Yes
Power block
*
4 TB Hard disk 4 TB SAS Hard Drive Disk (HDD) - 6Gb/s per
SPS-ASSY D6000 POWER BLOCK w/POWER 689128-001 No
693721-001 Yes
second interface, 7,200 RPM, 3.5-inch form factor,
Dual-Port (DP), Midline (MDL)
Hot plug?
External 2m SAS cable,
server to disk enclosure
SPS-CBL 12Gb Mini-SAS HD 2m 717433-001 No
Table Continued
Disk enclosures (HPE D6020 Disk Enclosure) 9

Part Description Spare Part
number
Hot plug?
External SAS cable,
between drawers on
disk enclosure
External 1m SAS cable,
server to disk enclosure
IMPORTANT:
For the Drawer Assembly (828614-001), Power Block Assembly (689128-001) and the I/O Module
(828613-001) components, only replace one of these at a time and ensure the D6020 is powered up
for at least 5 minutes before replacing another component in order to preserve the D6020 system values
stored in each drawer.
Replacement process
Any service activity that requires SAS cabling to be disconnected in the D6020 disk enclosure requires the
server to be offline.
IMPORTANT:
Neither the Power Down options in the StoreOnce GUI nor the StoreOnce CLI system shutdown, and
system reboot commands power the disk enclosure(s) off and on. This must be done manually after
powering off the server.
SPS-CBL 12Gb Mini-SAS HD 0.5m 717431-001 No
SPS-CA EXT iPASS x4 HD to HD 3.0 1m 717432-001 No
Procedure
1. Power off the server and wait for it to power down completely (the Power buttons go amber), then power
2. Remove the cables from the unit and, if necessary, slide it out from the rack. Carry out the required
3. Slide the unit back into the rack, if it has been removed, when the maintenance activity is completed. Then
4. Reconnect cables from the replaced disk enclosure to the server.
5. Power on the disk enclosure, and then the server.
off the disk enclosure(s).
See Preparing for StoreOnce maintenance activities on page 12.
maintenance activity.
See the appropriate D6020 documentation.
WARNING:
Observe all warnings and cautions in the D6020 documentation with regard to lifting the unit.
connect power to it.
See Disk enclosure LEDs on page 45.
See SAS cabling to disk enclosures on page 32.
See Preparing for StoreOnce maintenance activities on page 12.
NOTE:
The recommended sequence MUST be followed.
6. Ensure that the enclosure and components are running the correct firmware revision.
10 Replacement process

See Upgrading BIOS or hardware firmware components on page 13.
Finding part numbers for replacement parts 11

General information
Preparing for StoreOnce maintenance activities
NOTE:
Make sure that you have the correct Maintenance and Service guide for your product. There are a
number of different models, and each product model has its own guide.
It is best practice to save the system configuration before carrying out maintenance activities. Use the
StoreOnce CLI command:
config save devices
If you also have the Security Pack license installed and have applied encryption to any VTL libraries, NAS
shares or Catalyst stores, ensure that the latest keystore has been saved. Use the StoreOnce CLI command:
config save keystore.
See the StoreOnce CLI Reference Guide at http://www.hpe.com/info/storeonce/docs for more details
about these commands.
HPE StoreOnce Remote Support
HPE StoreOnce Remote Support uses STaTS to send remote event notifications from the StoreOnce System
to HPE Support. If you have configured HPE StoreOnce Remote Support for use on your system, run the
following StoreOnce CLI command before commencing the maintenance activity to suppress remote event
reporting.
system enable remoteeventsuppression "XYZ Maintenance"
This prevents a support case being generated during the maintenance task.
To return to normal mode after maintenance, run the StoreOnce CLI command:
system disable remoteeventsuppression "XYZ Maintenance"
Power off
If the maintenance activity requires you to power down the system:
Procedure
1. Use the StoreOnce GUI to power down the server (from the Device Configuration — Maintenance
page).
Or shut down the server using the StoreOnce CLI command:
# system shutdown
2. Switch off the disk enclosures manually using the Power On/Off switch on the back of drawer 2 of each
disk enclosure.
Power on
If it has been necessary to power down the system for maintenance activities, observe the following sequence
to restore power.
12 General information
Procedure
1. Switch on the disk enclosures and wait for 30 seconds. The power-on button is on the rear of Drawer 2.
2. Switch on the server. The power-on button is on the front of the server.
3. Verify the status of the system from the StoreOnce GUI.
Upgrading BIOS or hardware firmware components
Do not upgrade BIOS or hardware firmware components individually using downloads from the HPE Support
website because currently supported firmware component updates are already embedded within the
StoreOnce software. Always use the StoreOnce CLI or the StoreOnce GUI to implement BIOS and hardware
firmware component checks and updates.
Updating firmware using the StoreOnce GUI
Procedure
1. Select Firmware to view the firmware versions for hardware components, and to update firmware versions
if required.
The Firmware window appears with the following tabs:
• Server: Contains firmware details for all server components.
• Storage: Contains firmware details for all storage components.
2. To perform a check on the currently installed firmware versions for all components, click Scan.
This action will populate the firmware tabs and may take several minutes to run.
NOTE:
If a firmware update is already in progress, the scan will fail.
After running a Scan, the Recommended Action field in the component list is updated to show whether
individual components require an upgrade or a downgrade. Components requiring an upgrade are
automatically selected. Components requiring a downgrade are not automatically selected. A downgrade
takes longer to complete and is optional for some components, such as hard drives. It may be carried out
separately, if required, after the upgrade has completed.
NOTE:
When the firmware updates are initiated, the backup devices will be taken offline. Before performing
this step, check that there are no outstanding backup jobs pending.
IMPORTANT:
Do not shutdown or reboot your system or any system component until the final step. Special
instructions may apply.
3. Click Update Selected or Update All. (Update All will attempt to update all components that are in the
state where there is an update recommended; it will not try to update components that do not need an
update.)
The Status field will show which components are being updated and which updates have been completed
In some cases, when the firmware update has been loaded, you will need to perform a reboot to complete
the firmware update. If a reboot is required, a pop-up message will appear on your GUI screen after
loading is completed. The message will also advise what type of reboot is required.
Upgrading BIOS or hardware firmware components 13
If a software reboot is needed, you will see a message asking if you want to reboot your system now or
later. If you click Yes, your system will be rebooted.
A power cycle, or cold reboot, requires that the system must be shut down for at least 60 seconds before
powering on using the Power-On buttons on the appliance.
Updating firmware using the StoreOnce CLI
Procedure
1. To show the status of firmware, run the StoreOnce CLI command:
# hardware show firmware <node|storage|all>
2. To see if any firmware needs upgrading, check the Action column.
IMPORTANT:
Do not shut down or reboot your system or any system component until the final step. Special
instructions may apply.
3. Use the hardware update firmware command, as required. For example, there may be instances
where replacement hardware may need a firmware downgrade to bring it in line with the supported
firmware version of the installed StoreOnce software on the system being maintained. (Use the force
parameter in the command to enable this action.)
The command syntax is:
hardware update firmware <node|storage|all>
The command will be applied across all server components or across all storage components. The all
parameter updates all firmware components across all components.
There may be instances where replacement hardware may need a firmware downgrade to bring it in line
with the supported firmware version of the installed StoreOnce software on the system being maintained.
Use the force parameter in the command to enable this, but be aware that the update will take longer to
complete.
4. In some cases, when the firmware update has been loaded, you will need to perform a reboot to complete
the firmware update. If a reboot is required, a pop-up message will appear on your GUI screen after
loading is completed. The message will also advise what type of reboot is required.
a. Reboot the system using the StoreOnce CLI command:
system reboot
b. Power down the nodes using the StoreOnce CLI command:
system shutdown
After the system has completely shutdown, wait at least 60 seconds before powering on using the
Power-On buttons on the appliance.
Upgrading StoreOnce software
To establish which StoreOnce software version is installed, click on StoreOnce in the Navigator and look at
the Software Revision under System Information.
To find out if a later software release is available, check HPE Support at http://www.hpe.com/support/
softwaredepot. If it is, download the software release and follow the instructions in the accompanying
Release Notes to install the software.
Supported web browsers for the StoreOnce Management GUI
14 Updating firmware using the StoreOnce CLI

• Internet Explorer 9, 10 and 11 (note that Internet Explorer 8 is not supported and some StoreOnce features
will not work)
• Mozilla Firefox v23 and above and Firefox ESR24
Refer to www.hpe.com/storage/spock for the latest information about which browser versions are
supported.
POST messages and troubleshooting
The StoreOnce Management Console (GUI and Command Line Interface) are the primary sources of
troubleshooting information. However, they do not capture power-on self-test hardware-related issues. Always
refer to the HPE ProLiant Maintenance and Service Guide for Power-On Self-Test (POST) information. To
view POST messages, you will need a system console attached to the HPE StoreOnce System.
HPresetpassword account
The purpose of the HPresetpassword account
The HPresetpassword account provides a method for the local Admin user to recover the Admin password
back to a default state.
• username = HPresetpassword
• default password = hpresetpassword
Best practice is to change the default password after installation.
This user account does not provide any access to StoreOnce functions or data that may already be on the
system.
Changing the password for the HPresetpassword account
Procedure
1. Gain access to the local system console either using a locally attached USB keyboard and monitor or via
the iLO remote console.
NOTE:
This account is not accessible via a remote ssh session.
2. At the Login prompt, type the username (HPresetpassword) and default password (hpresetpassword):
3. A list of available commands will be presented.
• reset: Reset the 'Admin' password to 'admin'
• manage: Change the 'HPresetpassword' user's password
• help: List available commands
• exit: Log out
4. Run the command manage to change the password for the HPresetpassword user. At the prompts,
provide:
a. (current) UNIX password: the default at installation is hpresetpassword.
b. New UNIX password: the new password must be strong and memorable. If it is weak, for example a
dictionary name, it will not be accepted.
c. Retype new UNIX password: re-enter the new password to confirm it
5. Type exit to log out.
6. Store the new password securely in an offline Password Security tool.
POST messages and troubleshooting 15

Resetting the password for the local Admin user
Procedure
1. Gain access to the local system console either using a locally attached USB keyboard and Monitor or via
iLO remote console.
2. At the Login prompt type: HPresetpassword
3. When prompted for the password enter the current password. The default is hpresetpassword, but if you
are following best practices you will have changed this Password after installation.
4. Once logged in a list of available commands will be presented.
5. Type reset; this will immediately reset the default password of the Admin user to admin.
6. Type exit to log out.
Tasks that are unique to StoreOnce System
The following tasks are described in this guide:
• Replacing the motherboard
• Replacing the HP RAID controller
• Replacing the Cache module and SuperCapacitor
• Replacing removable hard disks
• Understanding StoreOnce LEDs
• Running the QR ISO
Rack stability
To protect personnel and equipment, take the following steps to ensure that racks are stable.
WARNING:
To reduce the risk of personal injury or damage to equipment:
• Extend leveling jacks to the floor.
• Ensure that the full weight of the rack rests on the leveling jacks.
• Install stabilizing feet on the rack.
• In multiple-rack installations, fasten racks together securely.
• Extend only one rack component at a time. If more than one component is extended, racks can
become unstable.
16 Resetting the password for the local Admin user
Identifying problems
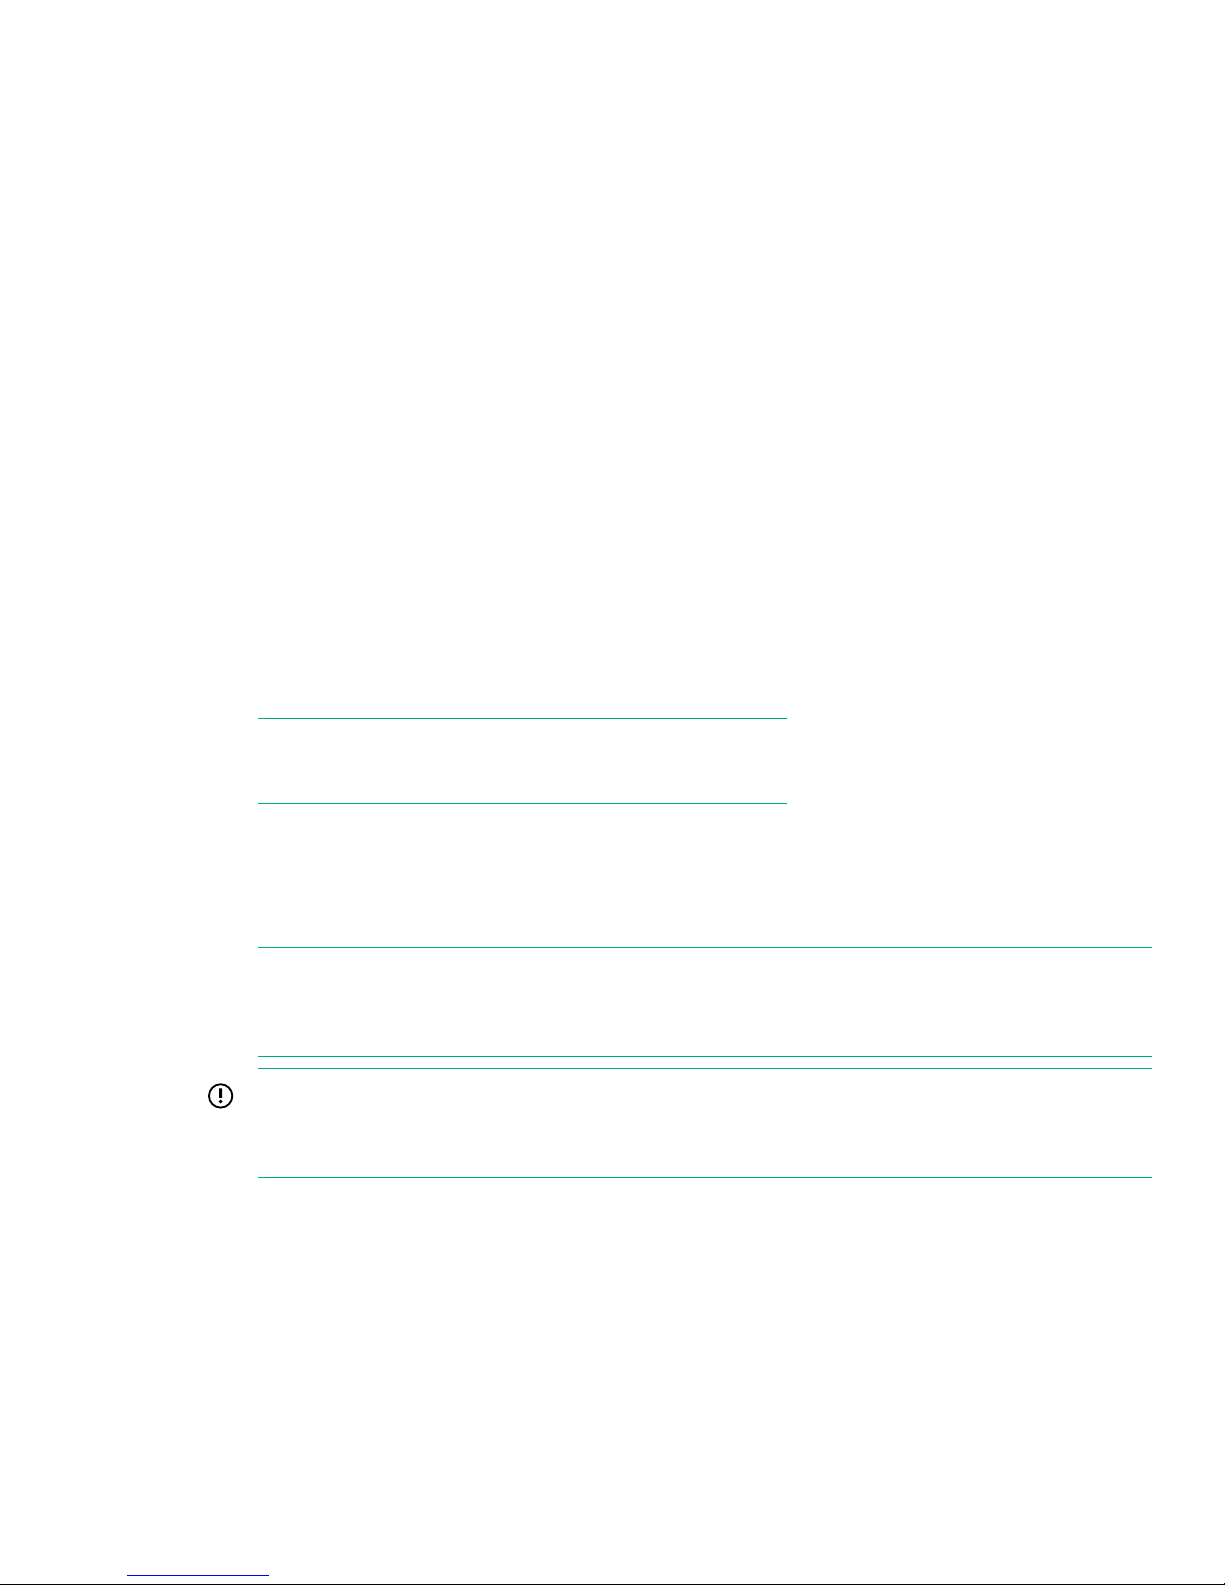
Example alert for a failed disk in a StoreOnce system
The following alert was triggered by a problem with a failed disk.
Using the StoreOnce GUI to identify a failed disk
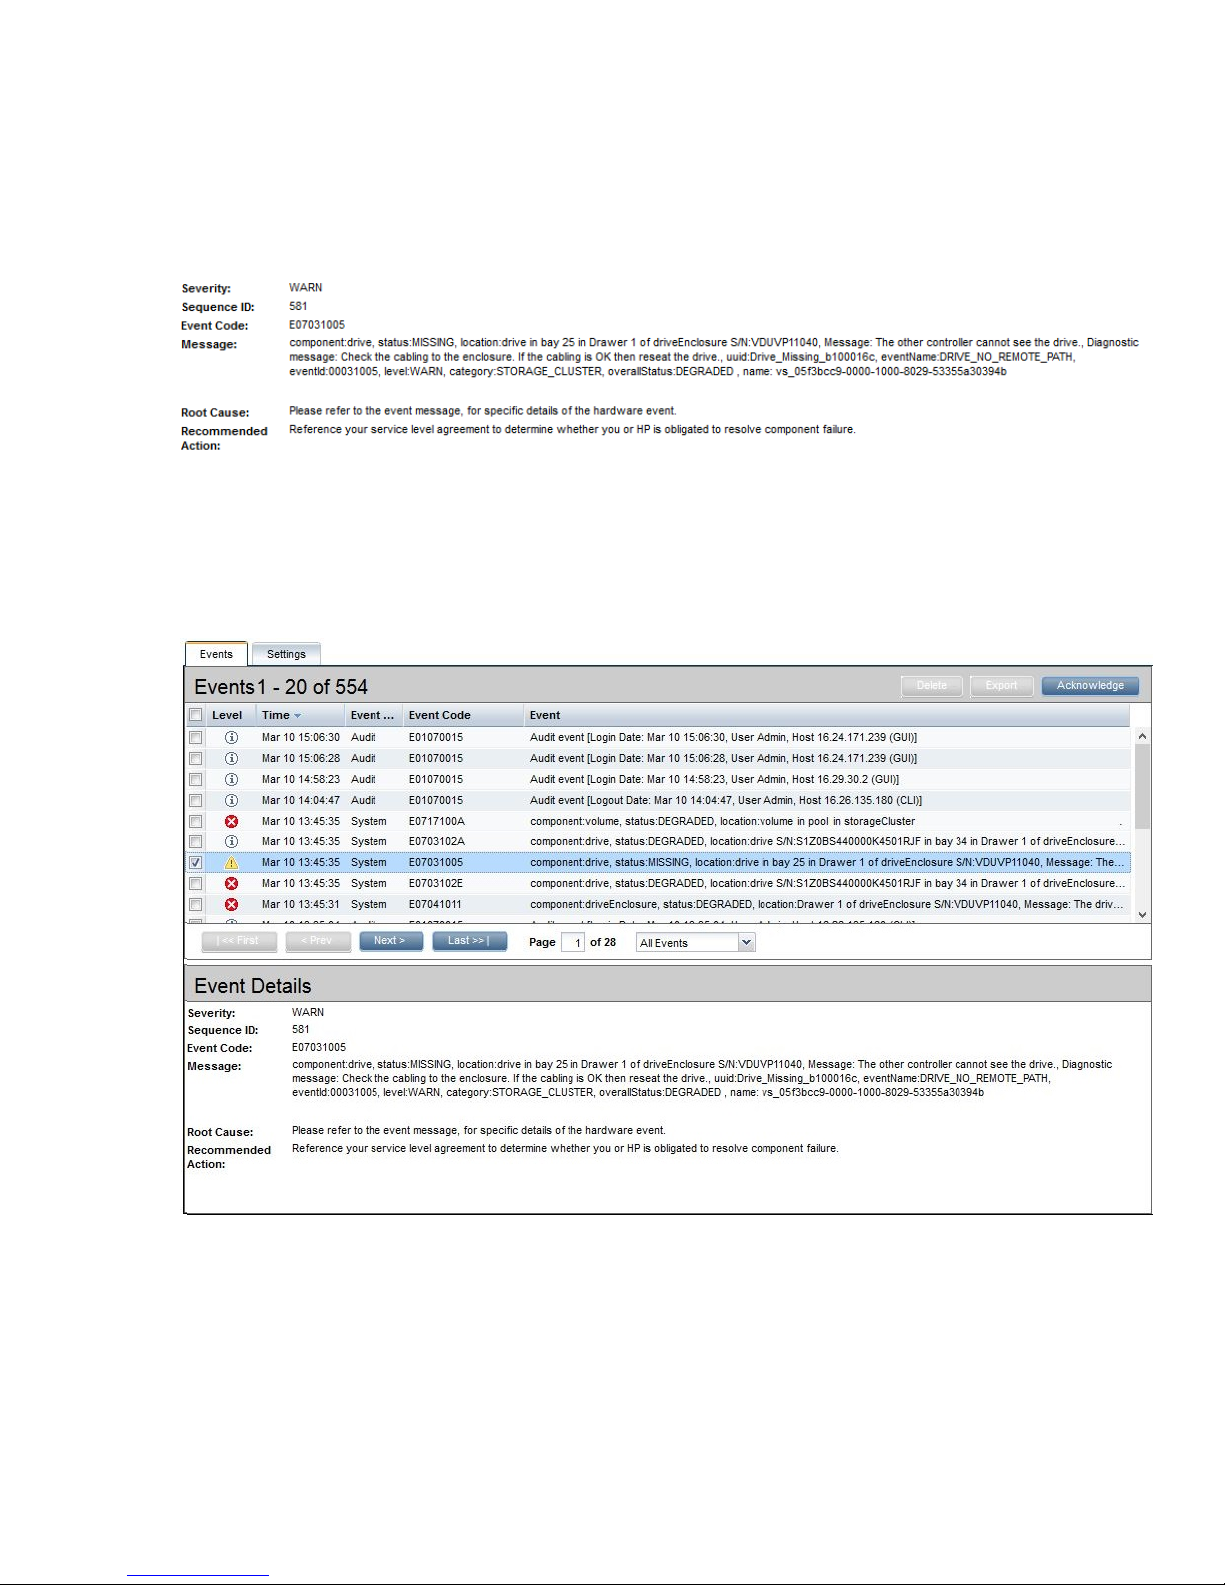
Viewing the StoreOnce Events Log
Select Events. The alert is recorded in the Events window with Event Details at the bottom of the window.
Viewing the failed disk in the StoreOnce Hardware tree
Procedure
• Display the tree.
The following example shows the Hardware tree expanded to show the disk failure in a disk enclosure
drawer.
Identifying problems 17

NOTE:
The disks in a head server unit are different from those in the expansion shelf. Be sure to order the
correct replacement disk.
Using the StoreOnce CLI to identify a failed disk
The following StoreOnce CLI commands can also be used to identify hardware problems and to navigate the
hardware tree for details about a specific component.
• hardware show problems
• hardware show status <Dev-id>
The following example illustrates how to use the StoreOnce CLI commands to find out more about the disk
failures we have identified on the StoreOnce GUI. See
on page 17.
Procedure
1. To display warnings for all hardware components, run the StoreOnce CLI command: hardware show
2. To drill down to the hardware component causing the problem run the StoreOnce CLI command,
Using the StoreOnce GUI to identify a failed disk
problems
The output from this command will assist you in identifying the storage cluster and component that is
causing a problem.
hardware show status <Dev-id> iteratively, where <Dev-id> is the component with a DEGRADED
status until the required component is displayed (it will have a status of FAILED or MISSING).
For example:
# hardware show status
Name Dev-id Status
-------------------- ------------------------------------ -------HPCZ230805V9 33363437-3535-5A43-3233-303830355639 OK
p1228 Storage System 051662fb-0000-1000-b027-53344a303131 DEGRADED
p1228 Storage System 02abd2f6-0000-1000-b044-53344a30314d OK
# hardware show status 051662fb-0000-1000-b027-53344a303131
Name Dev-id Status
-------------------- ------------------------------------ -------p1228 Storage System 051662fb-0000-1000-b027-53344a303131 DEGRADED
Enclosure CZ3320E200 DEGRADED
18 Using the StoreOnce CLI to identify a failed disk

Pools pools-1 OK
Controller 1 5001438025A26200 OK
# hardware show status CZ3320E200
Name Dev-id Status
----------------------- ---------------------- -------Enclosure CZ3320E200 DEGRADED
Drawer 1 50014380308ADB00 DEGRADED
Drawer 2 50014380308ADB80 OK
PowerSupplies powerSupplies-1–2 OK
# hardware show status 50014380308ABE00
Name Dev-id Status
----------------------- ---------------------- -------Drawer 1 50014380308ABE00 DEGRADED
Disk 5000C50059001B57 5000C50059001B57 OK
Disk 5000C50059065D1F 5000C50059065D1F OK
Disk 5000C500590686F7 5000C500590686F7 OK
- Drive_Missing_b10000d9 MISSING
Disk 5000C50059067767 5000C50059067767 OK
Disk 5000C50059001F3B 5000C50059001F3B OK
Disk 5000C5005906620F 5000C5005906620F OK
Disk 5000C5005907D57B 5000C5005907D57B OK
Disk 5000C5005906811B 5000C5005906811B OK
Disk 5000C5005906790B 5000C5005906790B OK
Disk 5000C5005906ACC7 5000C5005906ACC7 OK
Disk 5000C5005906A0E7 5000C5005906A0E7 OK
Disk 5000C500590822FB 5000C500590822FB OK
Fans fans-1-1 OK
TemperatureSensors tempsensors-1-1 OK
IOModule IOModule-1-1 OK
3. When you reach the faulty component, use the following command to display details and look at the
diagnostic message for more information. hardware show status <Dev-id> details
4. After identifying the issue to be corrected, follow the instructions in the relevant chapter of this guide.
5. Be sure to check that all problems have been resolved. Rerun the StoreOnce CLI command: hardware
show problems
The output returned should now be blank.
Identifying problems 19
 Loading...