

Page 1

Network Interface Upgrade
HP NETSTORAGE 6000
Configurations supported:
Any combination of one or two of the following
HP NICs is supported:
• 10/100 bT
• Dual 10/100 bT
• Gigabit 1000 Base SX
Each NIC port must be attached to a different subnet.
Trunking is not supported.
Parts required:
• New NIC card
Tools required:
• Phillips screwdriver
• Electrostatic protection device
NOTES:
• Use only HP NetStorage 6000 Network Interface Cards for upgrades.
• For this upgrade, you should choose a time when end-user access is not required for the unit.
Shut Down the System
Open the Case
A. Remove the two screws on the back of the unit that hold
the top in place.
B. Slide the top backwards, and lift to remove.
A. Shut down the unit using either the front panel interface
or the HP NetStorage web interface.
B. After system shutdown is complete, turn off the power
switch on the back panel of the unit.
C. Disconnect both power cords from the back panel of the
unit.
Page 2
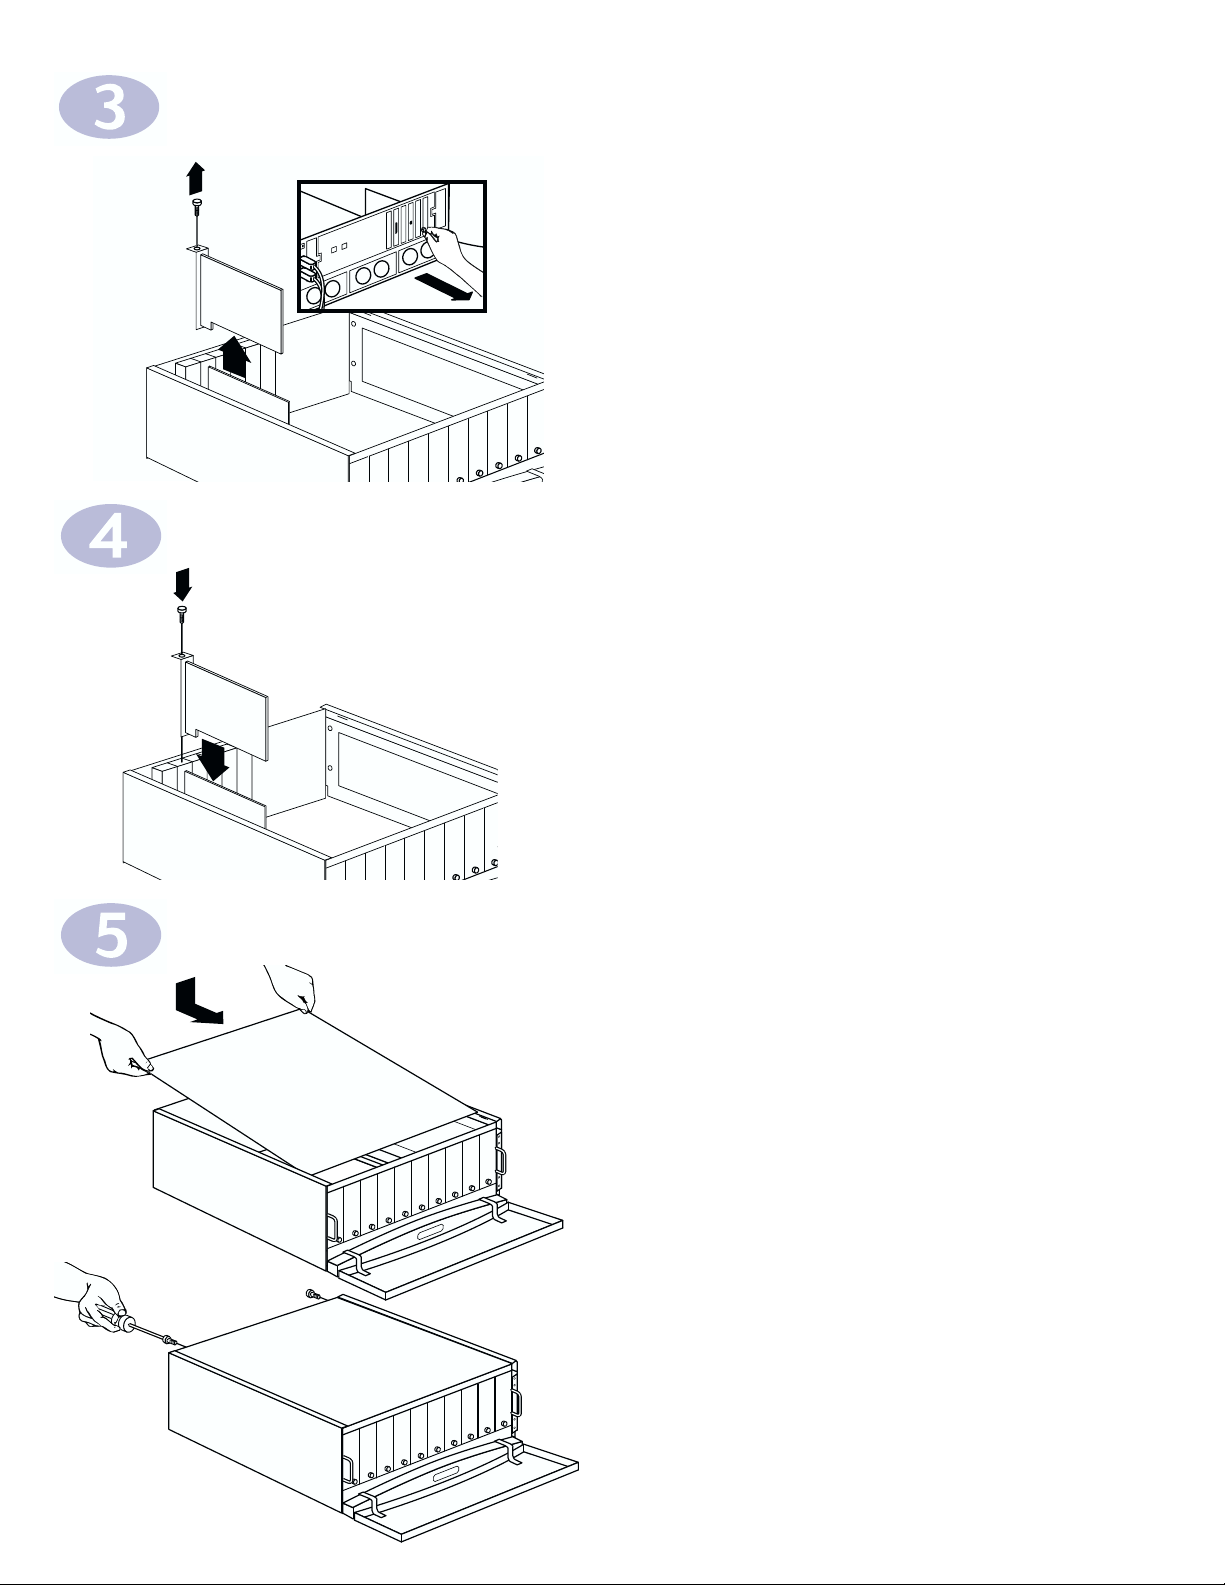
A. Unplug the network cable.
B. Unscrew the existing NIC and gently remove it.
NOTE: If you are installing the NIC in an unused PCI slot,
remove the expansion slot access panel.
A. Select an open PCI slot.
B. Gently place the new card in the slot, and screw it into
place.
A. Slide the top back into place.
B. Using the screwdriver, secure the top to the unit.
Add or Remove a NIC Card
Insert the New Card
Close the Case
A.
B.
Page 3

Connect the Unit
A. Connect a network cable to the new port(s).
B. Reconnect the two power cords on the back panel of the
HP NetStorage unit, and plug them into your power source.
C. Turn on the unit.
D. Press the alarm-reset button on the front panel to turn off
the alarm. The alarm sounds whenever the unit is powered on.
A. Follow one set of the directions below:
• If your system uses DHCP, the LCD panel will display the
IP address of the first NIC port. Move to Step 8.
• If your system does not use DHCP, use the LCD panel and
arrows to configure the IP address, Subnet mask, Broadcast
address, and Gateway address (if needed) for the newly installed
NIC. Move to Step 8.
NOTE: Only one Gateway address is supported, regardless of the
number of NIC ports installed.
Enter Network Information
A.
B.
D.
A. Using a computer on the network, open a web browser and enter
the unit's IP address in the browser's address or location field.
B. Select Configuration > Network Settings.
C. Type in or verify the IP address and Subnet Mask for each new NIC
you installed.
D. Click Apply.
Use a Web Browser to Enter Network Settings
Page 4

*C4480-90101*
C4480-90101
 Loading...