

HP Digital Sender
Module
Administrator’s Guide
English


HP Digital Sender Module
Administrator’s Guide ________

Copyright Information
© Copyright Hewlett-Packard
Company 2000
All rights reserved.
Reproduction, adaptation, or
translation without prior written
permission is prohibited, except
as allowed under copyright laws.
First Edition, July 2000
Warranty
The information contained in
this document is subject to
change without notice.
Hewlett-Packard makes no
warranty of any kind with
respect to this information.
HEWLETT-PACKARD
SPECIFICALLY DISCLAIMS
THE IMPLIED WARRANTY OF
MERCHANTABILITY AND
FITNESS FOR A PARTICULAR
PURPOSE.
Hewlett-Packard shall not be
liable for any direct, indirect,
incidental, consequential, or
other damage alleged in
connection with the furnishing or
use of this information.
NOTICE TO U.S.
GOVERNMENT
USERS: RESTRICTED
RIGHTS COMMERCIAL
COMPUTER SOFTWARE:
“Use, duplication, or disclosure
by the Government is subject to
restrictions as set forth in
subparagraph (c) (1) (ii) of the
Rights in Technical Data Clause
at DFARS 52.227-7013.”
Material scanned by this
product may be protected by
governmental laws and other
regulations, such as copyright
laws. The customer is solely
responsible for complying with
all such laws and regulations.
Trademark credits
Adobe is a trademark of Adobe
Systems Incorporated which
may be registered in certain
jurisdictions.
Microsoft, Windows, and
Windows NT are U.S. registered
trademarks of Microsoft
Corporation. Pentium is a U.S.
registered product of Intel
Corporation.
All other products mentioned
herein may be trademarks of
their respective companies.
Hewlett-Packard Company
11311 Chinden Boulevard
Boise, Idaho 83714 U.S.A.

Contents
1 The HP Digital Sender Module
Introduction . . . . . . . . . . . . . . . . . . . . . . . . . . . . . . . . . . . . . . . . . . . . 5
Architectural overview . . . . . . . . . . . . . . . . . . . . . . . . . . . . . . . . . . . . 7
Environments and protocols . . . . . . . . . . . . . . . . . . . . . . . . . . . . . . . 8
Network operating systems. . . . . . . . . . . . . . . . . . . . . . . . . . . . . 8
Client operating systems (ABM only) . . . . . . . . . . . . . . . . . . . . . 8
Novell NetWare support . . . . . . . . . . . . . . . . . . . . . . . . . . . . . . . 9
E-mail distribution services . . . . . . . . . . . . . . . . . . . . . . . . . . . . . . . 10
Fax distribution services . . . . . . . . . . . . . . . . . . . . . . . . . . . . . . . . . 11
2
Administrating
Introduction . . . . . . . . . . . . . . . . . . . . . . . . . . . . . . . . . . . . . . . . . . . 13
HP Digital Sender Module setup. . . . . . . . . . . . . . . . . . . . . . . . 14
HP Digital Sender Module tasks . . . . . . . . . . . . . . . . . . . . . . . . 15
Controlling notifications. . . . . . . . . . . . . . . . . . . . . . . . . . . . . . . . . . 19
Working with address books . . . . . . . . . . . . . . . . . . . . . . . . . . . . . . 20
Using the LDAP export tool. . . . . . . . . . . . . . . . . . . . . . . . . . . . . . . 21
Using the activity log . . . . . . . . . . . . . . . . . . . . . . . . . . . . . . . . . . . . 22
To view the activity log . . . . . . . . . . . . . . . . . . . . . . . . . . . . . . . 22
EN
3
Troubleshooting
Introduction . . . . . . . . . . . . . . . . . . . . . . . . . . . . . . . . . . . . . . . . . . . 25
Sources for information about problems . . . . . . . . . . . . . . . . . . . . . 26
Troubleshooting the HP Digital Sender Module . . . . . . . . . . . . . . . 27
General HP Digital Sender Module Troubleshoo ting . . . . . . . . 27
Checking the address book database. . . . . . . . . . . . . . . . . . . . 32
Event log messages . . . . . . . . . . . . . . . . . . . . . . . . . . . . . . . . . 33
Control panel messages . . . . . . . . . . . . . . . . . . . . . . . . . . . . . . 37
Troubleshooting network problems. . . . . . . . . . . . . . . . . . . . . . . . . 40
General network troubleshooting . . . . . . . . . . . . . . . . . . . . . . . 40
E-mail service troubleshooting . . . . . . . . . . . . . . . . . . . . . . . . . 40
Fax service troubleshooting . . . . . . . . . . . . . . . . . . . . . . . . . . . 40
Activity log messages . . . . . . . . . . . . . . . . . . . . . . . . . . . . . . . . . . . 41
Troubleshooting the software . . . . . . . . . . . . . . . . . . . . . . . . . . . . . 55
General software troubleshooting. . . . . . . . . . . . . . . . . . . . . . . 55
HP Address Book Manager messages. . . . . . . . . . . . . . . . . . . 56
3

4
Warranty information
Hewlett-Packard limited warranty statement . . . . . . . . . . . . . . . . . 61
Index
4
EN

The HP Digital Sender
1
Module
Introduction
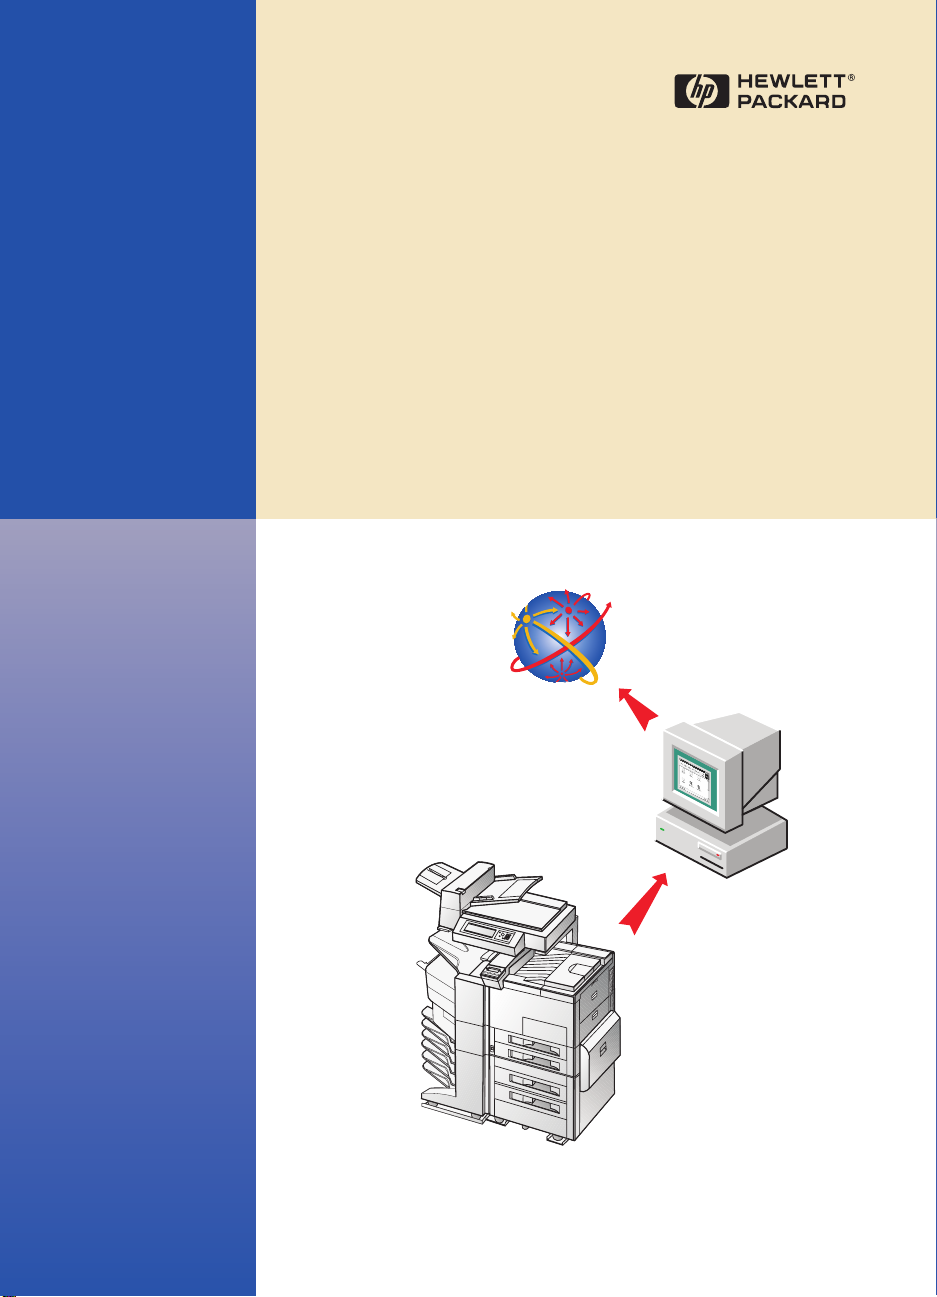
The HP Digital Sender Module is a software application that enables
HP Multi-Functional Peripherals (MFPs) to send scanned documents
directly to electronic mailboxes (e-mail) or to fax destinations,
transforming paper-based information into digital images that can be
shared, stored, or edited. Documents ar e initially scanned at the MFP
then transmitted to a network-connected PC where th e HP D igita l
Sender Module software is installed. This saves users from having to
create an electronic copy of a hard-copy document. The HP Digital
Sender Module can also be set up to require user authentication,
ensuring that only authorized persons use the Digital Sending
features of the MFP.
At the MFP control panel, users can
EN
● Select Scan to E-mail or Scan to Fax.
●
Input To:/From:/CC:/Subject: information using a soft keyboard on
the control panel. Users can also control duplex scanning, paper
size, and e-mail attachment format from the control panel.
●
Select names from an address book(s) the net w ork administr ator
has downloaded.
Introduction 5

The HP Digital Sender Module software
● Manages the simultaneous transmission of scanned images from
multiple MFPs on the network
●
Performs any image decompression, page decomposition, and
image format conversion necessary to transmit the document as
an e-mail attachment or fax
● Adds addressing information
●
Encodes the message
●
Communicates with an SMTP server that a network administr ator
has configured
●
Maintains each address book and transmits a copy to every
licensed MFP
6 Chapter 1 - The HP Digital Sender Module
EN

Architectural overview
A flow chart of the HP Digital Sender module components is included
below:
Scanner
Module
MFP
Firmware
NT/2000
Workstation
-Installer
-Configuration
Utility
Administrator/
Client PC
-Address Book
Manager
-LDAP Export
Tool
LAN fax
Server
SMTP
Gateway
The HP Digital Sender Module firmware components include:
●
Control panel firmware: manages the user interface and
general job control
●
Copy processor firmware: generates the desired data file
formats
●
Scanner Service Agent
●
Digital Service Provider (JetSend)
The HP Digital Sender Module software components include:
●
Job Management/E-mail Server
●
Image Pipeline (IP)
●
Multipurpose Internet Mail Extensions (MIME) encoder
●
Simple Mail Transfer Protocol (SMTP)
●
Installer
●
HP Configuration Utility: Once the software is installed, the user
configures the HP Digital Sender Module software using this
utility. The software cannot be used until it has been configured.
●
Address Book Manager: The Network Administrator can use
this software to set up address books.
●
LDAP Export Tool: Used to update address books from an
LDAP server automatically
EN
Architectural overview 7

Environments and protocols
Network operating systems
The HP Digital Sender Module is directly connected to TCP/IP
networks via a Windows NT
®
/Windows® 2000 server or workstation.
It operates independently within the network operating environments
listed below:
●
Windows 2000/Windows NT 4.0 ( or high er) w o rkstation or server
(TCP/IP only)
●
Fast Et hernet 100Base-TX, Ethernet 10Base-T, or 10Base-2
(BNC)
Note Ethernet connections are provided by the HPJetDirect Print Server
that comes installed in the HP MFP.
Client operating systems (ABM only)
The following client op erating systems are supported:
●
Windows NT 4.0 (or higher) PC (TCP/IP only)
● Windows 2000 (TCP/IP only)
●
Windows 9x (TCP/IP only)
The HP Digital Sender Module works with the Microsoft TCP/IP
protocol provided as part of these operating systems.
Note The ABM may not run correctly on some early versions of Windows 95.
An updated Common Control Library is needed and can be obtained
by running 50comupd.exe, which is included with the Digital Sender
Module CD, or by installing Microsoft Internet Explorer 4.0 (or higher).
8 Chapter 1 - The HP Digital Sender Module
EN

Novell NetWare support
In order to support access to Novell NetWare resources, the HP
Digital Sender Module requires
● Novell NetWare version 3.12, 3.2, 4.11, 4.2 or 5 running on the
Novell NetWare server and
●
Novell NetWare Client version 4.6 (or greater) running on the
Windows NT/Windows 2000 PC running the HP Digital Sender
Module software.
Note HP recommends that Novell print queues are not used as the print path
for HP Digital Sender-enabled MFPs. Instead, HP recommends that
you use a JetDirect IP connection.
EN
Environments and protocols 9

E-mail distribution services
The HP Digital Sender Module can send MIME-compliant e-mail
messages to Internet addresses. It uses SMTP-MIME to d eliver these
messages. SMTP is independent of the n etw ork oper atin g system on
which your e-mail server is running.
E-mail addresses are selected at the MFP control panel. Users can
specify e-mail destinations by:
●
selecting e-mail addresses from the addre ss book loaded at the
MFP.
●
typing e-mail addresses manually
The document that you scan at the HP Digital Sender becomes an
attachment to your e-mail message. The attachment can be sent as
one of the following file types:
●
Portable Document Format (.PDF)
●
Tagged Image File Format (.TIF)
●
Multipage Tagged Image File Format (.TIF)
Portable Document F o rmat (.pdf) is the file f ormat most often used f or
the attachmentsand gives recipients the ability to both view and print
the e-mail attachment. You can obtain a free copy of the Adobe
Acrobat
(http://www.adobe.com).
®
Reader from the Adobe Systems, Incorporated Website
®
If the attachment contains se v eral pages and is sent using th e Tagged
Image File Format, the e-mail will have one attachment f or each page.
This file format will generate single-page attachments and may be
used for scanning invoices for electronic archival, for example. Using
multiple pages allows the user to send multiple page images as one
file attachment.
Note Sending pages as photo quality and in either Tagged Image File F ormat
may result in attachments that cannot be read in some applications.
You can view .TIF files using the Windows Imaging application. This
application can be foun d under the Programs, Accessories menu.
If your SMTP size limit is exceeded, the e-mail will be distributed as
multiple e-mail attachments. This is ba sed on the limit selected on the
SMTP server page in the HP Configuration Utility. See page 14
for
more information.
10 Chapter 1 - The HP Digital Sender Module
EN

Fax distribu tion services
Users can send fax es directly from the MFP. To support this service, a
LAN fax product and a shared folder for the fax workarea are
required.
Users can specify fax destinations at the control panel in two ways:
●
Type fax numbers manually.
●
Select fax numbers from the address book loaded at the MFP.
Note The same document can be sent to multiple fax numbers.
Document can be sent to the LAN fax serve r in one of the following
file types:
●
Tagged Image Format (.TIF)
●
Multiple page Tagged Image Format (.TIF)
●
Printer Control Language 5 (PCL5) (uncompressed)
●
PCL5 (packbits)
Select these formats in the HP Configuration Utility.
EN
Fax distribution services 11

12 Chapter 1 - The HP Digital Sender Module
EN

2
Administrating
Introduction
System administrators can use a variety of tools to monitor an d
control the HP Digital Sender Module. The following is a list of tools
and their functions that can be used by the system administrator to
maintain the HP Digital Sender Module:
●
HP Address Book Manager (ABM)
Used to maintain public address books and view the activity log
messages
●
HP Configuration Utility
Used to configure the HP Digital Sender Module software
●
Windows NT/Windows 2000 Event Viewer
Used to view the event log messages. To use the Windows NT/
Windows 2000 Event Viewer click on Start, Programs,
Administrative Tools, and Event Viewer
●
LDAP Export Tool
Used to update address books from an LDAP server
automatically
EN
Introduction 13

HP Digital Sender Module setup
Before the HP Digital Sender Module can be used, some settings in
the HP Configuration Utility need to be set. The following table lists
the activities necessary for setting up the HP Digital Sender Module.
See the online help for more information regarding the
HP Configuration Utility.
Note To support HP Digital Sender Module features, the MFP must ap pear
in the Windows Printers folder. To add an MFP to the Printers folder,
select Add Printers in the Windows control panel.
HP Digital Sender setup activity
Add licenses In the HP Configuration Utility, Use the License tab to enter new
licenses. Licenses are required to enable HP Digital Sender
Module features on an MFP.
E-mail service setup activities
Set the SMTP server
location
Set the document size
generated
In the HP Configuration Utility, select the E-mail Settings tab and
click Add to add a ne w SMT P server.
In the HP Configuration Utility, select the E-mail Settings tab.
When you add or edit an SMTP server, use the Maximum File
Size drop down menu to indicate the maximum file size allowed
by the HP Digital Sender Module. This value should not exceed
the size limit allowed by your SMTP server. Note: If you specify
multiple SMTP servers with different maximum file size settings,
the HP Digital Sender Module software will always use the
smallest of these settings, regardless of which server is being
used.
Fax service setup activities
Set Faxing Method In the HP Configuration Utility, select the Fax Settings tab. Select
the method you will use for sending a fax. Currently, only LAN fax
is supported.
14 Chapter 2 - Administrating
EN

LAN fax service setup activities
Set product name In the HP Configuration Utility, select the Fax Settings tab. Select
the LAN fax vendor using the drop-down menu.
Set common folder In the HP Configuration Utility, select the Fax Settings tab. Enter
the folder that will be used as a common, working folder for
communication between the LAN fax Server software and the HP
Digital Sender Module software.
Set login properties In the HP Configuration Utility, select the Fax Settings tab. Click
Login Properties and select the network type (Microsoft NTLM,
Novell NDS, or Novell Bindery).
Set user log on settings In the HP Configuration Utility, select the Fax Settings tab. Click
Login Properties. Enter (or select) username, password, domain,
NDS tree, and NDS context, as necessary.
Set fax format In the HP Configuration Utility, select the Fax Settings tab. Click
the Advanced button to set the file format. This setting depends
on the LAN fax vendor’s capabilities, and you may not be able to
configure this setting.
Set transmission options In the HP Configuration Utility, select the Fax Settings tab. Click
the Advanced button to set the transmission options. Select
maximum speed, number of retries, and the interval (in minutes)
between retries. You can also enable or disable error correction
mode.
HP Digital Sender Module tasks
The following tables list some common HP Digital Sender Module
tasks and where you can accomplish the tasks.
Shutdown and restart activities
Shut the Digital Sender
Module down
Restart the Digital Sender
Module
EN
Stop the HP Digital Sender Module software using the Service
icon found in the Control Panel Programs group.
Stop and start the HP Digital Sender Module software using the
Service icon found in the Control Panel Programs group.
Introduction 15

Security activities
Change ABM password
administrator
In the ABM, select the Digital Sender menu/Security
Address book activities
Maintain the e-mail address
book
Maintain the e-mail
distribution lists address
book
Maintain the fax address
book
Maintain the fax distribution
lists address book
Import addresses from
another program
In the ABM, select Main menu/Public Email
In the ABM, select Main menu/Public Distribution Lists
In the ABM, select Main menu/Public Fax
In the ABM, select Main menu/Public Fax Distribu tion Lists
In the ABM, select Tools menu/Address Book Import
Check address books Shutdown and restart Windows NT/Windows 2000 PC and use
the ABM activity log to check the results.
Clear address books In the ABM, select Edit menu/Clear Address Books
E-mail service activities
Destinations in the public
e-mail address book
Change Enable/Disable
Send-to-E-mail Feature
Change default e-mail
attachment format
16 Chapter 2 - Administrating
In the ABM, select Main menu/Public Email
In the HP Configuration Utility, select the Configure Features tab/
Configure button/Send to E-mail tab/Disabled or Licensed
In the HP Configuration Utility, select the Configure Features tab/
Configure button/Send to E-mail tab/Advanced button/File Format
EN

E-mail service activities
Change default subject In the HP Configuration Utility, select the Configure Features tab/
Configure button/Send to E-mail tab/Default subject
Change default message
and default message
language
Change default resolution In the HP Configuration Utility, select the Configure Features tab/
Change default file format In the HP Configuration Utility, select the Configure Features tab/
Change default From
address
In the HP Configuration Utility, select the Configure Features tab/
Configure button/Send to E-mail tab/Advanced button/Message
Text
Configure button/Send to E-mail tab/Advanced button/Resolution
Configure button/Send to E-mail tab/Advanced button/File Format
In the HP Configuration Utility, select the Configure Features tab/
Configure button/Send to E-mail tab/Default ‘From:’ Address
Fax service activities
Destinations in the public
fax address book
Change Enable/Disable
Send-to-Fax F eature
In the ABM, select the Main menu/Public Fax
In the HP Configuration Utility, select the Configure Features tab/
Configure button/Send to Fax tab/Disabled or Licensed
Change notification default
action
Change notification report
language
Change fax quality In the HP Configuration Utility, select the Configure Features tab/
Change billing code In the HP Configuration Utility, select the Configure Features tab/
Destinations in the public
fax address book
EN
In the HP Configuration Utility, select the Configure Features tab/
Configure button/Send to Fax tab/No notification or Print
notification report at the MFP
In the HP Configuration Utility, select the Configure Features tab/
Configure button/Send to Fax tab/Notification Report Language
Configure button Send to Fax tab/ Resolution
Configure button/Send to Fax tab/Billing Code
In the HP Configuration Utility, select the Configure Features tab/
Configure button/Send to Fax tab/Disabled or Licensed
Introduction 17

Reset activities
Reset address books Delete all database files on Windows PC and restart the Windows
1 In a Typical Installation database files can be found in C:\Program
1
PC
Files\Hewlett-Packard\HP Digital Sender Module\db subdirectory
Miscellaneous activities
Use the activity log Tools menu/View Log
Change default document
size
Change default document
type
Set two-sided (duplexed)
document
In the HP Configuration Utility, select the Configure Features tab/
Configure button/MFP Settings tab/Document Size
In the HP Configuration Utility, select the Configure Features tab/
Configure button/MFP Settings tab/Document Type
In the HP Configuration Utility, select the Configure Features tab/
Configure button/MFP Settings tab/2-Sided Document
18 Chapter 2 - Administrating
EN

Controlling notifications
The HP Digital Sender Module software notifies administrators of
events in two ways:
●
Activity log entries
The activity log is a record of the HP Digital Sender Module and
system activities. See “Activity log messages” on page 41
list and description of entries. See “Using the activity log” on
page 22 for information on how to access the activity log.
●
E-mail messages
The administrator can choose to receive e-mail messages for
specific events that occur—for example, a critical error has
occurred.
for a
EN
Controlling notifications 19

Working with address books
When you log in to the HP Address Book Manager the main window
lists the following:
●
Public E-mail
Contains e-mail addresses available to any user. Only the
administrator can change information in this address book.
●
Public Distribution Lists
Contains predefined groups of e-mail addresses available to any
user . Only the administrator can change information in this
address book.
●
Public Fax
Contains fax destinations available to any user. Only the
administrator can change information in this address book.
●
Public Fax Distribution Lists
Contains predefined groups of fax destinations available to any
user . Only the administrator can change information in this
address book.
For more information about creating, adding, or deleting address
books, see the ABM online help.
20 Chapter 2 - Administrating
EN

Using the LDAP export tool
The LDAP Export Tool is a Microsoft Windows Console program used
to export addresses from an LDAP server. The addresses are saved
to an HPB file. This file can be imported into the HP Digital Sender
Module software using the ABM.
Because exporting from a large LDAP server can take a significant
amount of time, HP recommends that the LDAP export tool be used
as part of a batch configuration job.
This administrative tool, as well as information that documents the
tool, can be found in the Utilities\LDAPExport directory where the HP
Digital Sender Module software was installed.
EN
Using the LDAP export tool 21

Using the activity log
The activity log is an important tool for monitoring all HP Digital
Sender Module activities. System events are recorded on the
Administrator activity log. Other activities are recorded on the Guest
activity log. Up to 1,000 entries are stored in the activity log, new
events overwrite the oldest events.
See “Activity log messages” on page 41
for a list and explanation of
the messages.
Events recorded in the activity log
●
shutdown and restart
●
success or failure of an activity
●
deletion of address book contents
●
firmware downloads
●
system errors
●
results from send-to-e-mail job
●
results from send-to-fax job
Information recorded about each event
●
date
●
time
● description of event
●
severity of event (normal, warning, error, fatal)
To view the activity log
1 Start the ABM.
2 On the Tools menu, click View Log.
3 Choose ADMINISTRATOR or GUEST activity log.
4 You can keep the activity viewer open while you work on your
computer. To close it, on the File menu, click Exit.
22 Chapter 2 - Administrating
EN

To use the activity log
The activity viewer shows information about the messages arranged
in columns. You can sort the messages by the type of in formation (for
example, by se v erity in order to list all fatal messages first). To do this,
click the top of the column containing that information. The status bar
at the bottom of the view er sho w s ho w many messages are in the log
for each type of message.
Using the activity log
To do this Perform this action
Print the log On the File menu, click Print.
Copy the log You can copy all or parts of the log to the Windows
Clipboard and then paste it into another program (such as
Microsoft Excel). The progr am y ou pa ste the lo g into m ust
accept tab-delimited files.
Select the portion of the log you want to copy. On the Edit
menu, click Copy to place the information on the
Clipboard.
Save the log On the File menu, click Save As. Name the file using your
preferred format, choose a folder, and click OK.
Clear the log Clearing the log is useful if you are troubleshooting
problems. Once you clear the log, entries reflect only
current conditions. Clearing the log is also useful when
you have made major configuration changes.
EN
On the Edit menu, click Clear.
Refresh the log If you ha ve left the log open while you have been working,
you might need to refresh the log to see the most current
information.
On the Edit menu, click Refresh.
Using the activity log 23

24 Chapter 2 - Administrating
EN

3
Troubleshooting
Introduction
This chapter is your guide for resolving problems that might occur
while you are using the HP Digital Sender Module. The chapter is
divided into the following sections:
●
sources for information about problems (page 26)
●
troubleshooting the HP Digital Sender Module software (includes
a list and explanation of control panel messages) (page 27
●
event log messages (page 33)
●
activity log messages (page 41)
●
troubleshooting the software (includes lists and explanations of
messages from each program) (page 55
Typically, messages appear on the control panel of the MFP’s copy
module, in the event log of the Windows NT/Windows 2000 PC, or in
the activity log of the Address Book Manager (ABM). These
messages usually require some action before sending can continue.
All messages are listed in this chapter, along with recommended
actions.
)
)
EN
Introduction 25

Sources for information about problems
Sources for information about problems
Source Description
Activity log The activity log is a record of the HP Digital Sender Module software
usage and is probably your best tool for troubleshooting. It contains
messages (warning, error, or fatal) that can help you resolve prob lems.
See “Activity log messages” on page 41
recommended actions. These messages can be viewed using the
Address Book Manager’s Activity Log. To view the Activity Log, open the
ABM and go to Tools, View Log, Admin or Guest.
Event log The event log is a record of the startup procedure for the HP Digital
Sender Module software running on the Windows NT/Windows 2000
PC. These messages can be viewed by clicking on the Ev ent Viewer
icon found in the Administrative Tools program group on the PC. See
“Event log messages” on page 33
recommended actions.
for a list of messages and
for a list of messages and
Messages for
programs
Messages appear in the Address Book Manager when there are
problems. See “HP Address Book Manager messages” on page 56
list of these messages and recommended actions.
a
26 Chapter 3 - Troubleshooting
EN

Troubleshooting the HP Digital Sender Module
General HP Digital Sender Module Troubleshooting
Use the table below to solve common problems encountered while
using the HP Digital Sender.
Note As a general rule for all prob le ms, chec k b oth the control pa nel, event
log, and activity log for rele vant messa ges. You can find an e xplanation
of these messages under “Control panel messages” o n page 37
log messages” on page 33, and “Activity log messages” on page 41.
General HP Digital Sender Module troubleshooting
Problem Actions
“Event
Image quality is poor.
HP Digital Sender
Module is sending
items very slowly.
The envelope on the
control panel display is
flashing.
You have just
configured an MFP for
digital sending using
the HP Configuration
Utility, but digital
sending doesn’t appear
to work.
You have replaced a
printer component, and
digital sending doesn’t
appear to work.
●
Make sure the scanning glass is clean. If the glass is dirty , clean it
with a dry, soft cloth.
●
Increase the default resolution using the Configuration Utility.
● You might have selected a quality setting that is making the
document into a large file that is sending slowly (for example Fine
Photo). To speed up the sending process, try choosing a different
setting (for example, Standard Text).
●
No action is required. The flashing envelope on the MFP’s control
panel display indicates digital sending is in progress.
●
Turn the MFP and Copy Module off and then back on again.
●
If the MFP’s engine serial number has changed (because, for
example, a printer component has been replaced), the MFP must
be re-initialized.
EN
Troubleshooting the HP Digital Sender Module 27

General HP Digital Sender Module troubleshooting (cont inued)
Problem Actions
An e-mail transmission
you sent did not arrive
at the destination e-mail
address.
A fax transmission you
sent did not arrive at
the fax destination.
●
If you typed the e-mail address at the control panel, make sure
you typed it correctly.
●
The job might have been lost because of an internal problem.
Pending jobs are sometimes lost when this happens. Resend the
e-mail message.
●
Make sure the e-mail server is running. To do this, click the Test
button on the E-mail Settings tab in the HP Configuration Utility.
●
Verify that the HP Digital Sender Module software e-mail
configuration is correct by sending a test e-mail message to
yourself. (Refer to “E-mail service troubleshooting” on page 40
additional information.)
●
Check the “returned mail” message (if one was received) for the
reason the e-mail message was not delivered. If the attachment
was too big to transmit, raise the maximum e-mail message size
that your e-mail server accepts (see the documentation for that
server).
● If you typed the fax number at the control panel, make sure you
typed it correctly.
● The job might have been lost because of an internal problem.
Pending jobs are sometimes lost when this happens. Resend the
fax.
●
Make sure that the HP Digital Sender Module software has
network access to the work folder (common folder) set in the Fax
settings tab in the HP Configuration Utility. Click the Verify Folder
Access button on the F ax Settings tab.
● Check for a notification report at the MFP, if you have print
notification selected.
for
The following tab le lists some a dditional problems you may encounter
while you are using the Digital Sender Module. It includes a
description of the problem and the recommended actions.
General HP Digital Sender Module troubleshooting
Problem Description Action
The Send Icon does not
appear on MFP control
panel
Either the MFP’s firmware
has not been updated for
the HP Digital Sender
Module or the update failed
●
Verify that the Scanner Service
Agent (SSA) and Digital Sender
Service Provider (DSSP) ROFF’s
are on the MFP’s hard disk.
● Manually turn both the printer and
Copy Module off and then back on.
28 Chapter 3 - Troubleshooting
EN

General HP Digital Sender Module troubleshooting
The Send Icon appears
on the control panel but
is grayed out
●
The HP Digital Sender
Module software is not
installed.
● The HP Digital Sender
Module server is not
running.
●
The HP Digital Sender
Module has not been
configured to service this
MFP.
●
Contact has been lost
between the MFP and
the HP Digital Sender
Module software.
●
The MFP does not have
the correct IP address for
the HP Digital Sender
Module.
●
Install the HP Digital Sender Module
software.
●
Restart the HP Digital Sender
Module software using the Services
icon found in the Control Panel
program group on the PC.
●
Open the HP Digital Sender Module
HP Configuration Utility and verify
that the MFP has been licensed. In
order to configure an MFP using the
HP Configuration Utility, the MFP
must appear in the Printers folder.
●
Determine whether there is a
network failure between the HP
Digital Sender Module software and
MFP. Try sending a print job to the
MFP (or using Web JetAdmin to
inquire its status) from the PC
running the HP Digital Sender
Module software.
●
Verify the IP address of the HP
Digital Sender Module on the MFP’s
About screen and reconfigure the
MFP using the HP Configuration
Utility, if necessary.
The Send Icon is
selectable on the
control panel, but it
says that it cannot
contact the HP Digital
Sender Module.
While addressing, the
MFP no longer autocompletes e-mail
addresses.
EN
●
The HP Digital Sender
Module software is not
installed.
●
Contact has been lost
between the MFP and
the HP Digital Sender
Module.
●
The address book is
corrupt, or it was deleted.
●
The address was in the
local cache but was
removed when a recently
typed address caused
the cache to overflow,
and the oldest address
was removed.
Troubleshooting the HP Digital Sender Module 29
●
Install the HP Digital Sender Module
software.
●
Determine whether there is a
network failure between the HP
Digital Sender Module and MFP. Try
sending a print job to the MFP (or
using Web JetAdmin to inquire its
status) from the PC running HP
Digital Sender Module software.
●
Using the ABM, reload the address
book in the MFP.
●
Consider adding commonly used
addresses to the global address
book.

General HP Digital Sender Module troubleshooting
The From address
cannot be entered.
Due to network
problem, a previously
scanned document was
not received.
●
The administrator has
chosen to configure a
hard-coded From
address for this MFP.
●
Authentication has been
enabled for this MFP.
●
Once the document has
been completely
scanned, its contents will
be held within the MFP
until a successful
connection to the HP
Digital Sender Module is
made.
● Once the document
leaves the HP Digital
Sender Module,
subsequent delivery
errors will be reported by
the SMTP gateways.
●
The MFP must be reconfigured to
enable typing a From address.
●
Turn authentication off for this MFP.
●
The MFP will retry connecting to the
HP Digital Sender Module every (X)
seconds. (This default can be set in
the HP Configuration Utility.) Once
communication is reestablished,
processing will complete. If the MFP
loses power, the document will be
retained on the hard disk. However,
until the HP Digital Sender Module is
contacted, new jobs will not be
accepted.
● Transmission error e-mails occurring
after the document has been sent to
the SMTP server will be sent to the
address shown in the From field of
the original message. If the
administrator does not allow userprovided From addresses, error
messages will be e-mailed to the
administrator-configured e-mail
address.
An error, indicating that
the job failed, is
reported at the control
panel.
If there is insufficient space
to hold the scanned
document on the MFP’s
hard disk, the scanning
operation is aborted.
30 Chapter 3 - Troubleshooting
●
Disk space is consumed by private
jobs, held jobs, and e-mails that
have not yet been transmitted to the
HP Digital Sender Module. HP
Resource Manager can be used to
look at the contents of the disk to
determine disk contents. Jobs
waiting for e-mail transmission are
stored on the disk. Note: Deleting
files on the MFP’s hard disk may
cause unpredictable behavior, such
as lost e-mail messages without
sender notification.
EN

General HP Digital Sender Module troubleshooting
DSSP loses contact
between the initial
contact and when it
tries to send the job.
The MFP loses power
partially during digital
sending.
The user provides an
invalid e-mail address
in the From field.
One or more addresses
in the To field are
invalid.
The HP Digital Sender
Module server goes do wn, a
network problem occurs, or
for JetSend refuses the
connection.
If the e-mail is actually
delivered, the recipient will
be unable to reply to the
message. If the e-mail
bounces, an error message
will not be delivered.
SMTP will validate e-mail
addresses only if they reside
on the local SMTP gateway.
Otherwise, a gateway
further down the pipeline will
perform validation. Before a
document is scanned, the
HP Digital Sender Module
will verify with the local
SMTP gateway that at least
one e-mail address is valid.
If not, scanning will not
begin.
●
The job is held by SSA and retries
periodically until it eventually times
out, causing the job to fail.
●
Any partial job information stored on
the hard disk will be automatically
deleted by SSA when it reboots.
●
Resend the message using a valid
address in the From field.
●
The HP Digital Sender Module will
generate error e-mails to the sender
when it detects an “unknown user”
error from SMTP. Other SMTP
servers will be responsible for
generating error e-mail messages if
addresses are later found to be
invalid.
HP Digital Sender
Module, Image
Pipeline, or MIME
encoder generates an
error while processing
an e-mail.
HP Digital Sender
Module loses contact
with the SMTP server.
EN
Before the scanning process
begins, the HP Digital
Sender Module contacts the
SMTP gateway to ensure it
is available. If it is not
available, the job will not
proceed.
Troubleshooting the HP Digital Sender Module 31
●
HP Digital Sender Module will
generate an e-mail message to the
sender, indicating that an
unrecoverable error has occurred.
●
If it subsequently loses contact, HP
Digital Sender Module will
periodically retry the connection.
After a fixed period of time, it will
place an error message in the
activity log.

Checking the address book database
At any time, you can check the ABM database to correct problems
and inconsistencies in the information.
Perform the database check for the following reasons:
● The HP Digital Sender Module seems to be performing slowly for
no apparent reason.
●
The Windows NT/Windows 2000 PC running the HP Digital
Sender Module software was inadvertently turned off during a
critical operation (for example importing addresses).
●
You detect inconsistencies between address bo oks and
distribution lists
●
You are instructed to do so by troubleshooting steps.
Notes about the procedure:
●
Restart the Windows NT/Windows 2000 PC and then check the
Administrator activity log in the ABM for results.
Note If the check fails, the address book database is corrupt. Try resetting
the address book by deleting the database files and restarting the
Windows NT/Windows 2000 PC. If neither of these actions resolves
the problem, contact y our HP-authorized dealer.
32 Chapter 3 - Troubleshooting
EN

Event log messages
The following table lists the messages generated by the HP Digital
Sender Module software running on the Windows NT/Windows 2000
PC. The cause of the message and recommended actions are also
listed in the table.
These messages can be viewed by clicking on the Event Viewer icon
found in the Administrative Tools program group on the Windows NT/
Windows 2000 PC.
Event log messages
Message Description Action
HP Digital Sender Module 2.0
- Started with Warnings
HP Digital Sender Module 2.0
- Aborted
HP Digital Sender Module 2.0
- Internal Initialization Failed
HP Digital Sender Module 2.0
- TCP/IP Initialization Failed
HP Digital Sender Module 2.0
- IMSP Server Initialization
Failed
HP Digital Sender Module 2.0
- Email Server Initialization
Failed
HP Digital Sender Module 2.0
- Log Server Initialization
Failed
HP Digital Sender Module 2.0
- Downloader Initialization
Failed
The HP Digital Sender Module
software running on the PC
was unable to start due to
missing files or memory
limitations.
● Restart the HP Digital
Sender Module software
using the Services icon
found in the Control Panel
program group on the PC.
● Reboot the PC.
●
Uninstall and reinstall the
HP Digital Sender Module
software on the PC.
● Add more memory to the
PC.
● If the problem persists,
note the code and contact
your HP-authorized dealer.
EN
Troubleshooting the HP Digital Sender Module 33

Event log messages (continued)
Message Description Action
HP Digital Sender Module 2.0
- Job Manager Initialization
Failed
HP Digital Sender Module 2.0
- JetSend Initialization Failed
HP Digital Sender Module 2.0
- Timer Initialization Failed
HP Digital Sender Module 2.0
- Error Server Initialization
Failed
HP Digital Sender Module 2.0
- Pipe Server Initialization
Failed
HP Digital Sender Module 2.0
- Unknown Error X, Internal
(X, X,X) Mode X, Job ID X,
Gravity X
HP Digital Sender Module 2.0
- Internal Error IMSP Server,0
The HP Digital Sender Module
software running on the PC
was unable to start due to
missing files or memory
limitations.
Failure initializing address
books.
●
Restart the HP Digital
Sender Module software
using the Services icon
found in the Control Panel
program group on the PC.
●
Reboot the PC.
●
Uninstall and reinstall the
HP Digital Sender Module
software on the PC.
●
Add more memory to the
PC.
●
If the problem persists,
note the code and contact
your HP-authorized dealer.
● Restart the HP Digital
Sender Module software
using the Services icon
found in the Control Panel
program group on the PC.
● Reset address books.
●
If the problem persists,
note the code and contact
your HP-authorized dealer.
34 Chapter 3 - Troubleshooting
EN

Event log messages (continued)
Message Description Action
HP Digital Sender Module 2.0
- Internal Error
IMSP Server,50 through IMSP
Server,56
HP Digital Sender Module 2.0
- Internal Error IMSP
Server,57
HP Digital Sender Module 2.0
- Internal Error
IMSP Server,58 through IMSP
Server,59
Failure initializing address
books.
Internal error in managing
address books.
Unrecoverable problem with
address books
●
Restart the HP Digital
Sender Module software
using the Services icon
found in the Control Panel
program group on the PC.
●
Check the address book
database.
●
Reset address books.
●
If the problem persists,
note the code and contact
your HP-authorized dealer.
●
Restart the HP Digital
Sender Module software
using the Services icon
found in the Control Panel
program group on the PC.
●
If the problem persists,
note the code and contact
your HP-authorized dealer.
●
Note the code and contact
your HP-authorized dealer.
HP Digital Sender Module 2.0
- Internal Error IMSP
Server,60
HP Digital Sender Module 2.0
- Internal Error
IMSP Server,100 through
IMSP Server,206
EN
●
Address book contents lost.
Restart the HP Digital
Sender Module software
using the Services icon
found in the Control Panel
program group on the PC.
Re-import the addresses
into the address books.
●
Failure loading address books.
Restart the HP Digital
Sender Module software
using the Services icon
found in the Control Panel
program group on the PC.
●
If the problem persists,
note the code and contact
your HP-authorized dealer.
Troubleshooting the HP Digital Sender Module 35

Event log messages (continued)
Message Description Action
HP Digital Sender Module 2.0
- Internal Error
IMSP Server,300 through
IMSP Server,304
HP Digital Sender Module 2.0
- Internal Error
IMSP Server,400 through
IMSP Server,403
HP Digital Sender Module 2.0
- Address Book Error
The network link to the
address book is missing. This
indicates a possible problem
with the network connection.
Address book hard drive (PC)
problem, HP JetSend problem,
or other internal problem.
An internal problem accessing
address books has occurred.
●
Make sure all cabling is
securely connected.
●
Restart the HP Digital
Sender Module software
using the Services icon
found in the Control Panel
program group on the PC.
●
If the problem persists,
note the code and contact
your HP-authorized dealer.
●
Restart the HP Digital
Sender Module software
using the Services icon
found in the Control Panel
program group on the PC.
●
If the problem persists,
note the code and contact
your HP-authorized dealer.
●
Restart the HP Digital
Sender Module software.
●
Perform a database check
by shutting down and
restarting the HP Digital
Sender Module software.
●
Reset address books.
36 Chapter 3 - Troubleshooting
EN

Control panel messages
The following table lists the messages the MFP Copy Module’s
control panel displays while you are using the Digital Sender Module,
a description of the message, and the recommended actions.
Control panel messages
Message Description Actions
HP Digital Sender Module
Error: Hard disk full.
HP Digital Sender Module
Error: Insufficient
resources to process job.
HP Digital Sender Module
Error: Network session
rejected.
HP Digital Sender Module
Error: The system could
not log you on.
The MFP’s hard disk is
full.
The system was unable to
obtain sufficient resources
(RAM) to process the job.
●
The Digital Sender
Module was too busy
to handle the request.
● The MFP’s engine
serial number may
have change (for
example, a printer
component may have
been replaced).
● User authentication
failed.
●
Try sending the job later.
●
Use HP Web JetAdmin to delete
unnecessary files from the HP MFP
hard disk.
●
Try sending the job later.
● Turn the HP Digital Sender Module
off and then back on.
●
Try sending the job later.
●
In the HP Configuration Utility , select
the Configure tab then select the
MFP and click the Re-initialize
button.
● If the problem persists, contact your
HP-authorized dealer.
● Make sure the authentication
settings are configured properly in
the HP Configuration Utility.
●
Make sure the NT Domain server is
running.
●
Make sure the LDAP server is
running.
●
Make sure the user’s credentials
were entered correctly.
HP Digital Sender Module
Error: Unable to close
configuration file.
EN
The system was unable to
close the job configuration
file.
Troubleshooting the HP Digital Sender Module 37
●
Try sending the job later.
●
Verify write permissions on the
MFP’s hard disk to ensure they are
compatible with the HP Digital
Sender Module.
●
If the problem persists, contact your
HP-authorized dealer.

Control panel messages (continued)
Message Description Actions
HP Digital Sender Module
Error: Unable to open
configuration file.
HP Digital Sender Module
Error: Unable to write
configuration file.
HP Digital Sender Module
Error: Unexpected loss of
data
HP Digital Sender Module
Error: Unrecognizable
command received.
The Digital Sender
Service is temporarily
unable to accept more
jobs.
The system was unable to
open the job configuration
file.
The system was unable to
write the job configuration
file.
The MFP experienced an
unexpected loss of data.
The system received an
unrecognizable
command.
The Digital Sender
Module software is
currently processing the
maximum number of
active jobs allowed.
●
Try sending the job later.
● Verify write permissions on the
MFP’s hard disk to ensure they are
compatible with the HP Digital
Sender Module software.
●
If the problem persists, contact your
HP-authorized dealer.
●
Try sending the job later.
●
Verify write permissions on the
MFP’s hard disk to ensure they are
compatible with the HP Digital
Sender Module.
●
If the problem persists, contact your
HP-authorized dealer.
●
Try sending the item again.
● Turn the HP Digital Sender Module
off and then back on.
● If the problem persists, contact your
HP-authorized dealer.
●
Turn the HP Digital Sender Module
off and then back on.
●
If the problem persists, contact your
HP-authorized dealer.
●
Try sending the job later.
The HP Digital Sender
Module Service has not
been installed
The Send button on the
HP MFP control panel has
been pressed, but the
Digital Sender Module
software has not been
installed.
The HP Digital Sender
Module Service is
configured incorrectly
The HP Digital Sender
Module software’s current
configuration prevented a
connection from being
established.
38 Chapter 3 - Troubleshooting
● Restart the HP Digital Sender
Module.
●
Contact your HP-authorized dealer
for details regarding the HP Digital
Sender Module software and
ordering information.
●
Restart the HP Digital Sender
Module.
●
Use the HP Configuration Utility to
configure the HP Digital Sender
properly.
●
If the problem persists, contact your
HP-authorized dealer.
EN

Control panel messages (continued)
Message Description Actions
The HP Digital Sender
Module Service is
currently unavailable
The HP Digital Sender
Module Service is
temporarily unable to
send e-mail
There are currently no
licensed Digital Sender
services available
A connection could not be
established with the
Digital Sender Module.
E-mail server could not
contact SMTP server.
The Digital Sender
Module is unable to
provide e-mail or fax
services.
●
Try sending the job again
● Restart the HP Digital Sender
Module.
● Use the HP Configuration Utility to
configure the HP Digital Sender
software properly.
●
If the problem persists, contact your
HP-authorized dealer.
●
Verify SMTP server is running.
●
Try sending the job later.
●
If the problem persists, contact your
HP-authorized dealer.
● Restart the HP Digital Sender
Module.
● Use the HP Configuration Utility to
verify that the license for the
HP Digital Sender was entered
correctly.
●
If the problem persists, contact your
HP-authorized dealer.
EN
Troubleshooting the HP Digital Sender Module 39

Troubleshooting network problems
General network troubleshooting
Use network management and monitoring software to troubleshoot
general network problems.
E-mail service troubleshooting
The only way t o see if data has been successfully tr ansfe rred from the
HP Digital Sender Module software to the e-mail server is to check
the activity log (see “Using the activity log” on page 22
Fax service troubleshooting
The only way t o see if data has been successfully tr ansfe rred from the
HP Digital Sender Module software to the intended fax destination is
to check the activity log (see “Using the activity log” on page 22
).
).
40 Chapter 3 - Troubleshooting
EN

Activity log messages
The icons shown belo w appear in the activity log to identify the t ype of
message:
normal
Normal activity; no action required.
warning
The function completed partially. No action is required. For
example, you sent an e-mail message, but one recipient
could not be reached.
error
The function failed. Some action may be required.
Generally, the HP Digital Sender Module can still be used
for other functions.
fatal
A severe problem. This requires administrator intervention
and possibly a call to yo ur HP-authorized dealer.
See “Using the activity log” on page 22
for information on how to view,
save, copy, clear, and print the activity log.
Activity Log Messages
Message Description Actions
001/01
E-mail send report. Sender:
name. Subject: subject.
Status: Failed.
EN
The e-mail transmission was
unsuccessful. You may have
entered an incorrect e-mail
address.
●
Try the transmission again.
●
Make sure all cabling is
securely connected.
●
If the problem persists,
contact your HP-authorized
dealer.
Activity log messages 41

Activity Log Messages (continued)
001/02
E-mail send report. Sender:
name. Subject: subject.
Status: OK.
001/03
E-mail send report. Sender:
name. Subject: subject.
Status: Image processing
error.
003/00.) Document sent to the
HP Digital Sender Service.
Recipient(s): X Number: X # of
receipt: X. # of pages: X.
Result: OK. Code: X.
003/01.) Document sent to the
HP Digital Sender Service.
Recipient(s): X Number: X # of
receipt: X. # of pages: X.
Result: Local disk access
failure. Code: X.
Notification message only.
Your e-mail transmission was
successful.
The e-mail transmission was
unsuccessful. An internal error
occurred while the document
was being processed.
Notification message only. A
fax document was sent
successfully to the LAN fax
server.
The HP Digital Sender Module
experienced an error
accessing the local file
system.
●
No action required.
● Try the transmission again.
●
Restart the HP Digital
Sender Module.
●
If the problem persists,
contact your HP-authorized
dealer.
●
No action required.
●
Check the Event Log for
disk errors.
●
Resend the document.
003/02.) Document sent to the
HP Digital Sender Service.
Recipient(s): X Number: X # of
The HP Digital Sender Module
was not able to connect to the
fax server.
receipt: X. # of pages: X.
Result: Login fax daemon
failure. Code: X
003/03.) Document sent to the
HP Digital Sender Service.
Recipient(s): X Number: X # of
The HP Digital Sender Module
could not communicate with
the fax server.
receipt: X. # of pages: X.
Result: Failed. Open remote
file failure. Code: X.
42 Chapter 3 - Troubleshooting
●
Configure the Log In
properties in the HP
Configuration Utility
correctly.
● Resend the document.
●
Configure the Log In
properties in the HP
Configuration Utility
correctly.
●
Resend the document.
EN

Activity Log Messages (continued)
003/04.) Document sent to the
HP Digital Sender Service.
Recipient(s): X Number: X # of
receipt: X. # of pages: X.
Result: Failed. Write to remote
file failure. Code: X.
003/05.) Document sent to the
HP Digital Sender Service.
Recipient(s): X Number: X # of
receipt: X. # of pages: X.
Result: Failed. Close remote
file failure. Code: X.
003/06.) Document sent to the
HP Digital Sender Service.
Recipient(s): X Number: X # of
receipt: X. # of pages: X.
Result: Failed. Get fax
workarea failure. Code: X.
003/07.) Document sent to the
HP Digital Sender Service.
Recipient(s): X Number: X # of
receipt: X. # of pages: X.
Result: Failed. Missing fax
workarea. Code: X.
The HP Digital Sender Module
could not communicate with
the fax server.
The HP Digital Sender Module
is not communicating correctly
with the fax server.
The HP Digital Sender Module
is not communicating correctly
with the fax server.
The HP Digital Sender Module
is not communicating correctly
with the fax server.
●
Configure the Log In
properties in the HP
Configuration Utility
correctly.
●
Resend the document.
●
Configure the Log In
properties in the HP
Configuration Utility
correctly.
●
Configure the Log In
properties in the HP
Configuration Utility
correctly.
●
Configure the Log In
properties in the HP
Configuration Utility
correctly.
003/08.) Document sent to the
HP Digital Sender Service.
Recipient(s): X Number: X # of
receipt: X. # of pages: X.
Result: Failed. Out of memory.
Code: X.
003/09.) Document sent to the
HP Digital Sender Service.
Recipient(s): X Number: X # of
receipt: X. # of pages: X.
Result: Failed. Fax driver
configuration failure. Code: X.
EN
A fax could not be sent
because the HP Digital Sender
Module ran out of memory.
The HP Digital Sender Module
is not communicating correctly
with the LAN fax server.
●
Resend the document.
●
If the problem persists,
restart the HP Digital
Sender Module.
●
Configure fax settings in
the HP Configuration Utility .
Activity log messages 43

Activity Log Messages (continued)
003/12.) Document sent to the
HP Digital Sender Service.
Recipient(s): X Number: X # of
receipt: X. # of pages: X.
Result: Failed. Invalid job
descriptor. Code: X.
003/13.) Document sent to the
HP Digital Sender Service.
Recipient(s): X Number: X # of
receipt: X. # of pages: X.
Result: Failed. Image
processing error. Code: X.
004/00.) Fax transmission
result. Recipient(s): X.
Number: X. Accounting: X. #
of pages: X. Result: successful
transmission.
004/01.) Fax transmission
result. Recipient(s): X.
Number: X. Accounting: X. #
of pages: X. Result:
unsuccessful transmission.
The HP Digital Sender Module
software needs to be updated.
The HP Digital Sender Module
experienced an error while the
document was processed.
Notification message only. A
fax document was sent
successfully to one recipient.
A fax document could not be
sent to one recipient.
●
Reinstall the software.
Contact HP or download
the software from the
Internet.
●
Resend the document.
●
If the error persists, restart
the HP Digital Sender
Module.
●
No action required.
●
Verify that the number
entered is a valid fax
destination. Check the LAN
fax server’s log for details.
44 Chapter 3 - Troubleshooting
EN

Activity Log Messages (continued)
004/02.) Fax transmission
result. Recipient(s): X.
Number: X. Accounting: X. #
of pages: X. Result: missed
notification.
013/00
All Address Book cleared.
No notification was returned
by the LAN fax server.
Notification message only . The
procedure for resetting
address books was
successful.
●
If the LAN fax software y ou
are using does not support
notification, you will not
receive notification.
However, if the LAN fax
software does support
notification, make sure you
have configured the HP
Digital Sender software
correctly in the HP
Configuration Utility. Refer
to your LAN fax software
documentation to find out if
notification is suppor ted. If
not, select a different LAN
fax software in the HP
Configuration Utility and
configure the Digital
Sender software
appropriately.
●
No action required.
014/00
Public Email Address Book
cleared.
015/00.) Public Fax Address
Book cleared.
026/00
Address Book Import status:
begin.
EN
Notification message only.
The Clear Address Book
command in the ABM was
successful.
Notification message only . The
Clear Address Book command
in the ABM was successful.
Notification message only.
The ABM is being used to
import addresses into the
HP Digital Sender Module.
The HP Digital Sender Module
is locked from use until the
import has completed.
●
No action required.
● No action required.
●
No action required.
Activity log messages 45

Activity Log Messages (continued)
026/01
Address Book Import status:
end.
026/02
Address Book Import status:
interrupted. Code: code.
027/00
Address Book Import report
on entries. Added: number.
Duplicated: number.
Processed: number.
028/00
Address Book Import report
on entries. Deleted: number.
Not found: number.
Processed: number.
Notification message only.
The HP Digital Sender Module
successfully completed the
import.
The HP Digital Sender Module
encountered an internal
problem during the import.
Notification message only . The
HP Digital Sender Module
successfully imported the
addresses.
-Or-
Some addresses were not
imported because they were
duplicates.
Notification message only.
-Or-
Some addresses were not
deleted because they could
not be found.
●
No action required.
● Try the import again.
●
If the problem persists,
note the code and contact
your HP-authorized dealer.
●
No action required.
●
No action required.
029/00
Address Book clear status:
Public E-mail Address Book
Notification message only . The
Public e-mail address book
was successfully cleared.
cleared.
029/01
Address Book clear status:
Public E-mail Address Book
The address book you are
trying to clear cannot be
accessed for some reason.
not found.
030/00
Address Book checking:
begin.
Notification message only.
The HP Digital Sender Module
has started an internal check
of all address books and is
locked from use until the check
has been completed.
46 Chapter 3 - Troubleshooting
● No action required.
●
Try the procedure again.
●
If the problem persists,
contact your HP-authorized
dealer.
●
No action required.
EN

Activity Log Messages (continued)
030/01
Address Book checking:
completed with errors.
030/02
Address Book checking:
completed without errors.
031/00
Address Book checking. # of
cleared items: number.
032/00
Address Books checking
terminated with a severe
corruption indication.
The internal check of all
address books has completed.
Some problem entries were
found and deleted. Message
031/00 indicates how many
entries were cleared.
Notification message only . The
internal check of all address
books completed without
finding errors.
Notification message only.
During an internal check of
address books, the HP Digital
Sender Module found the
number of items reported in
the message and deleted
them.
Problems in the address
books prevented the internal
check of address books from
completing.
●
No action required.
●
No action required.
● No action required.
●
Reset address books. (See
the table in “HP Digital
Sender Module tasks” on
page 15 for more
information.)
035/00
Network error during e-mail
transmission. Code: code.
EN
The e-mail transmission failed
because of a problem with the
network.
● Make sure all cabling is
securely connected.
● Make sure the e-mail
server and SMTP service
are running.
●
Restart the HP Digital
Sender Module.
●
If the problem persists,
note the code and contact
your HP-authorized dealer.
Activity log messages 47

Activity Log Messages (continued)
036/00
Network error during SMTP
protocol negotiation. Code:
code.
037/00
E-mail not delivered to
destination name.
038/00
E-mail sender wasn’t accepted
from the SMTP server. Name:
name.
The e-mail transmission failed
because of a problem in the
network.
The e-mail message could not
be delivered to the named
destination. The message was
successfully delivered to at
least one of the destinations in
the message. There will be a
similar message in the log for
each destination that could not
be reached.
The e-mail server rejected the
e-mail address in the
message.
●
Make sure all cabling is
securely connected.
●
Make sure the e-mail
server and SMTP service
are running.
● Restart the HP Digital
Sender Module.
●
If the problem persists,
note the code and contact
your HP-authorized dealer.
● Check the accuracy of the
e-mail address.
● If the problem persists,
contact your HP-authorized
dealer.
● Make sure the e-mail
address is correct.
● Make sure the e-mail
address is in SMTP e-mail
format.
●
If the problem persists,
contact your HP-authorized
dealer.
041/00
The SMTP server is not
There is a problem with the
e-mail server.
available.
48 Chapter 3 - Troubleshooting
●
Make sure all cabling is
securely connected.
●
Make sure the e-mail
server is running.
●
Restart the HP Digital
Sender Module.
●
If the problem persists,
note the code and contact
your HP-authorized dealer.
●
Make sure the e-mail
server address is correct in
the HP Configuration Utility.
EN

Activity Log Messages (continued)
043/00
Notification message only.
The SMTP server is now
available.
046/00
The SMTP server didn’t
accept the e-mail message
because it was too big.
The e-mail server could not
accept the e-mail message the
HP Digital Sender Module
transmitted because it was
too big.
058/00
The default “From” e-mail
address is not set. Cannot
A default FROM e-mail
address is missing from the
configuration.
send e-mail messages if
“From” field is not provided
either at control panel or in
registered user profile.
066/00 Internal error (code) An internal error occurred
while trying to process a job.
●
No action required.
●
Make sure that the SMTP
server IP address matches
the IP address listed in the
HP Configuration Utility.
●
Increase the maximum
e-mail message size that
your e-mail server will
accept (see the
documentation for that
server).
●
Make sure the default
FROM e-mail address is
entered correctly in the
HP Configuration Utility.
● If the problem persists,
contact your HP-authorized
dealer
● Restart the HP Digital
Sender Module.
● If the problem persists,
note the code and contact
your HP-authorized dealer.
066/00 Internal error:
Sender: name
Subject: subject
066/00 Internal JetSend
Receiver subsystem error
(code).
EN
An internal error occurred
while processing this job.
An internal error occurred
while receiving data from the
HP MFP.
● Restart the HP Digital
Sender Module.
● If the problem persists,
note the code and contact
your HP-authorized dealer.
●
Restart the HP Digital
Sender Module.
●
If the problem persists,
note the code and contact
your HP-authorized dealer.
Activity log messages 49

Activity Log Messages (continued)
066/00 The JetSend Receiver
subsystem failed during
initialization (code).
075/00 A disk file was not
downloaded to the X printer.
075/00 A disk file has been
downloaded to the X printer.
075/01 The Address Book has
been downloaded to the X
printer.
075/01 The Address Book was
not downloaded to the X
printer.
An error occurred while the
JetSend subsystem was being
initialized.
A disk file has not been
downloaded to the MFP’s hard
disk. The workstation print
spooler may not be running.
The MFP associated with this
action may have been deleted
from the Printers folder.
A disk file has been
downloaded to the MFP’s hard
disk.
The public address books
have been downloaded to the
MFP’s hard disk.
The public address books
have not been downloaded to
the MFP’s hard disk. The
workstation print spooler may
not be running. The MFP
associated with this action
may have been deleted from
the Printers folder.
●
Restart the HP Digital
Sender Module.
●
If the problem persists,
note the code and contact
your HP-authorized dealer.
●
Start the PC print spooler
using the Services icon
found in the Control Panel
program group on the PC.
●
Add the MFP to the
Printers folder.
● No action required.
● No action required.
● Start the PC print spooler
using the Services icon
found in the Control Panel
program group on the PC.
●
Add the MFP to the
Printers folder.
075/02 The JetSend address
was not downloaded to the X
printer.
The JetSend address of the
PC has not been downloaded
to the MFP’s hard disk. The
workstation print spooler may
not be running. The MFP
associated with this action
may have been deleted from
the Printers folder.
075/02 The JetSend address
has been downloaded to the
printer.
The JetSend address of the
PC has been downloaded to
the MFP’s hard disk.
50 Chapter 3 - Troubleshooting
●
Start the PC print spooler
using the Services icon
found in the Control Panel
program group on the PC.
●
Add the MFP to the
Printers folder.
●
No action required.
EN

Activity Log Messages (continued)
075/04 The directories were
not created on the X printer.
075/04 The directories have
been created on the X printer.
075/05 The Copy Module was
not downloaded to the X
printer.
The MFP’s disk directories
have not been created on the
MFP’s hard disk for the
HP Digital Sender Module
firmware. The workstation
print spooler may not be
running. The MFP associated
with this action may have been
deleted from the Printers
folder.
The MFP’s disk directories
have been created on the
MFP’s hard disk for the HP
Digital Sender Module
firmware.
The HP Digital Sender Module
firmware has not been
downloaded to the MFP’s hard
disk. The workstation print
spooler may not be running.
The MFP associated with this
action may have been deleted
from the Printers folder.
●
Start the PC print spooler
using the Services icon
found in the Control Panel
program group on the PC.
●
Add the MFP to the
Printers folder.
●
No action required.
●
Start the PC print spooler
using the Services icon
found in the Control Panel
program group on the PC.
●
Add the MFP to the
Printers folder.
075/05 The Copy Module has
been downloaded to the X
printer.
075/08 The configuration file
was not downloaded to the X
printer.
EN
The HP Digital Sender Module
firmware has been
downloaded to the printer’s
hard disk.
The configuration file
containing the default Send To
e-mail setting has not been
downloaded to the MFP’s hard
disk. The workstation print
spooler may not be running.
The MFP associated with this
action may have been deleted
from the Printers folder.
●
No action required.
●
Start the PC print spooler
using the Services icon
found in the Control Panel
program group on the PC.
●
Add the MFP to the
Printers folder.
Activity log messages 51

Activity Log Messages (continued)
075/08 The configuration file
has been downloaded to the X
printer.
075/09 The X printer was not
power cycled.
075/09 The X printer was
power cycled.
075/10 The license file has
been downloaded to the X
printer.
The configuration file
containing the default Send To
e-mail setting has been
downloaded to the MFP’s hard
disk.
The HP MFP was not turned
off and on following a
complete download of the
configuration and firmware
files to the MFP’s hard disk.
The workstation print spooler
may not be running. The MFP
associated with this action
may have been deleted from
the Printers folder.
The HP MFP was turned off
and on following a complete
download of the configuration
and firmware files to the
printer’s hard disk.
The license file has been
downloaded to the MFP’s hard
disk.
●
No action required.
●
Turn the MFP off and then
back on.
●
Start the PC print spooler
using the Services icon
found in the Control Panel
program group on the PC.
● Add the MFP to the
Printers folder.
●
No action required.
●
No action required.
075/10 The license file was not
downloaded to the X printer.
The license file has not been
downloaded to the MFP’s hard
disk. The workstation print
spooler may not be running.
The MFP associated with this
action may have been deleted
from the Printers folder.
075/11.) The Copy Module
was power cycled on the %s
printer.
075/11.) The Copy Module
was not power cycled on the
%s printer.
Notification message only . The
HP Digital Sender Module was
restarted.
The HP Digital Sender Module
software could not restart the
Copy Module (scanner) on the
MFP.
52 Chapter 3 - Troubleshooting
●
Start the PC print spooler
using the Services icon
found in the Control Panel
program group on the PC.
● Add the MFP to the
Printers folder.
●
No action required.
●
Turn the HP Digital Sender
Module off and on.
●
Reinitialize the MFP using
the Configuration Utility.
EN

Activity Log Messages (continued)
076/00.) There is not enough
space on the disk. Insufficient
disk space to allow job.
077/00 Internal Email
subsystem error (code)
Sender: name
Subject: subject
077/00 Internal Email
subsystem error (code).
078/00 The Email subsystem
shutdown during job delivery
Sender: name
Subject: subject
There is insufficient disk space
on the drive where the HP
Digital Sender Module
software is installed.
An error occurred trying to
send an e-mail.
An error occurred trying to
send an e-mail.
The Digital Sender Module
software was shutdown while
sending this job. The Digital
Monitor will try to resend the
job when the service is
restarted.
●
Delete some files on your
disk drive.
●
Install the HP Digital
Sender Module software on
another disk drive.
●
Restart the HP Digital
Sender Module software.
●
If the problem persists,
note the code and contact
your HP-authorized dealer.
●
Restart the HP Digital
Sender Module software.
●
If the problem persists,
note the code and contact
your HP-authorized dealer.
●
No action required.
079/00 The JetSend Receiver
subsystem failed to start.
079/01 The Email subsystem
failed to start. (code)
EN
An error occurred trying to
start the JetSend Receiver
subsystem.
An error occurred trying to
start the e-mail subsystem.
●
Restart the HP Digital
Sender Module software.
●
If the problem persists,
contact your HP-authorized
dealer.
●
Restart the HP Digital
Sender Module software.
●
If the problem persists,
contact your HP-authorized
dealer.
Activity log messages 53

Activity Log Messages (continued)
079/05 The Email subsystem
failed during initialization.
080/00 Address Book error
reading entry: X
081/00 Job retry error. Cannot
read job information from the
disk.
An error occurred while the e-
mail subsystem was being
initialized.
An entry was not found in the
HP Digital Sender Module
database.
An error occurred while
retrying a previously
uncompleted job.
●
Make sure the PC has
enough memory.
●
Restart the HP Digital
Sender Module software.
●
If the problem persists,
contact your HP-authorized
dealer.
●
Use the Address Book
Manager to make sure the
database contains the
correct addresses.
●
Go to the Configuration
Utility and reinitialize the
installed devices.
●
If the problem persists,
contact your HP-authorized
dealer.
●
Make sure there are no
disk errors.
●
Restart the HP Digital
Sender Module software.
●
If the problem persists,
contact your HP-authorized
dealer.
081/01 Error writing job
information to the disk.
Cannot write job information to
the PC hard disk. Incapable of
retrying the job.
082/00 Firmware has not been
upgraded on the X printer.
The firmware on the MFP was
not updated when the HP
Digital Sender Module was
upgraded.
54 Chapter 3 - Troubleshooting
●
Make sure there are no
disk errors.
●
Make sure the disk where
the Digital Service Module
is installed is not full
●
Restart the HP Digital
Sender Module software.
●
If the problem persists,
contact your HP-authorized
dealer.
●
Go to the Configuration
Utility and reinitialize the
device
EN

Troubleshooting the software
Troubleshooting procedures are divided into these sections:
● General software troubleshooting (page 55)
●
HPAddress Book Manager messages (page 56)
General software troubleshooting
Use the table below to solve common problems encountered while
using the software. The HP Digital Sender module software does not
display messages for these types of problems.
Usage problems
Problem Actions
The ABM or HP Digital
Sender Module
software is running v ery
slowly.
●
There might be too many programs running on the computer. Try
closing open programs that you are not using. Also, try restarting
the computer.
● Run the ABM and HP Digital Sender Module software on the
same Windows NT/Windows 2000 PC.
● There might not be enough free space on your computer’s hard
drive. Free up space on your computer by removing unneeded
files.
●
Data on your computer’s hard drive might be fragmented. Run
Disk Defragmenter. Click Start, Programs, Accessories, System
Tools, and then click Disk Defragmenter. You ma y need to install a
disk defragmenter tool on your Windows NT/Windows 2000
machine. For more information, see the Windows documentation.
EN
Troubleshooting the software 55

HP Address Book Manager messages
The following table contains error messages that may appear when
you are using the ABM, a description of the messages, and any
appropriate actions to take.
HP Address Book Manager messages
Message Description Actions
ABM has found a number of
items greater than the
maximum supported.
Application may become
unstable.
The maximum number of
items that the ABM can
support has been exceeded.
(For example, the maximum
number of e-mail addresses
allowed has been exceeded.)
ABM internal error code. The ABM has experienced an
internal error.
Address Book locked. Someone else is using the
address book you are trying to
access.
An error occurred while
initializing sockets.
The application was unable to
allocate network resources.
Bind failed The ABM could not connect to
the directory server
●
Clear the address book
that was being used when
the message occurred (on
the Edit menu, click Clear
Address Books).
●
Reset all address books.
● Reset the ABM.
●
Restart the HP Digital
Sender Module software.
●
If the problem persists,
note the code and contact
your HP-authorized dealer.
●
Try accessing the address
book again later. The
address book is already in
use.
● Make sure the computer
where ABM is running is
connected to the network.
●
Turn the computer off and
then back on.
● Make sure the computer
where the ABM is running
is connected to the
network, using a network
command such as telnet.
●
In the directory
configuration, make sure all
fields are filled correctly.
56 Chapter 3 - Troubleshooting
EN

HP Address Book Manager messages (continued)
Message Description Actions
Failed to add the entry. During the procedure to import
e-mail addresses, the
addresses that were found
could not be added to the ABM
because the selected address
book is full.
In order to proceed, you have
to provide information for all
fields.
During the procedure to import
e-mail addresses, some of the
fields in the directory
configuration were not filled.
Initialization failed. During the procedure to import
e-mail addresses, the ABM
could not connect to the
server.
Network access failure. There is a problem connecting
to the HP Digital Sender
Module through the network.
●
Remove some entries from
the selected address book
to make room for new
entries. The limits for the
address books are as
follows:
Public Email: 200,000
Public Email Distribution
Lists: 512
Public Fax: 2,040
Public Fax Distribution
Lists: 512
●
In the directory
configuration, make sure all
fields are filled. See the
online help for information
on defining directories.
● In the directory
configuration, make sure
you typed the correct DNS
name or IP address for the
server you want. See the
online help for information
on defining directories.
●
Close the ABM and then
start it again.
●
Restart the HP Digital
Sender Module software.
●
Verify that the name or IP
address entered in the
ABM of the PC running the
HP Digital Sender Module
software is correct.
●
Check the address book
database (see “Checking
the address book
database” on page 32).
●
Make sure the computer
where the ABM is running
is connected to the
network, using a network
command such as telnet.
●
If the problem persists,
contact your HP-authorized
dealer.
EN
Troubleshooting the software 57

HP Address Book Manager messages (continued)
Message Description Actions
No items have been selected. During the procedure to import
e-mail addresses, you did not
select an address before
clicking Add.
Search failed!
No such object.
During the procedure to import
e-mail addresses, the
directory configuration may
not be correctly specified.
The password and the
confirmation text does not
match. Please enter them
again.
During the procedure to import
e-mail addresses, the
password for the server that
was specified in the Password
and Confirmation fields did not
match.
The port number you have
entered is wrong. Please type
in a different value.
During the procedure to import
e-mail addresses, you entered
an incorrect port number for
the server that contains the
directory to be searched.
The search has failed. The directory server failed
while processing your search.
Timeout expired. The directory server is not
responding.
●
Select an address and then
click Add.
●
In the directory
configuration, make sure all
fields are filled correctly.
See the online help fo r
information on defining
directories.
●
In the directory
configuration, retype the
password in both fields.
See the online help fo r
information on defining
directories.
●
In the directory
configuration, check the
port number. “389” is the
default and the standard.
See the online help fo r
information on defining
directories.
● Retry the search.
●
Restart the ABM.
●
Upgrade your directory
server to support advanced
searches.
●
Make sure the computer
where the ABM is running
is connected to the
network, using a network
command such as telnet.
●
Narrow the search so that
the directory server can
carry out the command in
the stipulated time.
●
In the directory
configuration, make sure all
fields are filled correctly.
58 Chapter 3 - Troubleshooting
EN

HP Address Book Manager messages (continued)
Message Description Actions
Wrong Login Name or
Password.
You entered a wrong
maximum of hits number.
Your query has exceeded the
size limit.
An invalid login name or
password was entered.
During the procedure to import
e-mail addresses, the number
of maximum hits (results) you
entered is more than the
search can return.
During the procedure to import
e-mail addresses, the search
found a greater number of
entries that match the search
criteria than allowed by the
server.
●
Make sure that your
password is entered
correctly.
●
Make sure the login name
is “ADMINISTRATOR.”
●
Enter a smaller number.
● Narrow the search in the
Directory search dialog
box. Narrow the Name or
E-mail address search
criteria to return fewer
entries. (For example,
search for “Smithson”
instead of “Smith.”) See the
online help for information
on how to search a
directory and import
addresses.
EN
Troubleshooting the software 59

60 Chapter 3 - Troubleshooting
EN

4
Warranty information
Hewlett-Packard limited warranty
statement
HP PRODUCT
HP Digital Sender Module Service
1 HP warrants to you that the HP SOFTWARE PRODUCT will not
fail to execute its programming instructions for 90 days after the
date of purchase due to defects in material and workmanship
when properly installed and used. If HP receives notice of such
defects during the warranty period, HP will replace SOFTWARE
PRODUCT media, which does not execute its programming
instructions due to such defects.
2 HP does not warrant that the operation of HP products will be
uninterrupted or error free. If HP is unable, within a reasonable
time, to replace the SOFTWARE PRODUCT to a condition as
warranted, HP may request that you uninstall the SOFTWARE
PRODUCT and return it to HP for a refund.
3 ANY IMPLIED WARRANTY OF MERCHANTABILITY OR
FITNESS FOR A PARTICULAR PURPOSE IS LIMITED TO THE
DURATION OF THE EXPRESS WARRANTY SET FORTH
ABOVE. Some states or provinces do not allow limitations on the
duration of an implied warranty, so the above limitation or
exclusion might not apply to y ou. This w arr anty gives you specific
legal rights and you might also have other rights that vary from
state to state, or province to province.
DURATION OF WARRANTY
90 days
EN
Hewlett-Packard limited warranty statement 61

4 THE REMEDIES IN THIS WARRANTY STATEMENT ARE YOUR
SOLE AND EXCLUSIVE REMEDIES. EXCEPT AS INDICATED
ABOVE, IN NO EVENT WILL HP BE LIABLE FOR LOSS OF
DATA OR FOR DIRECT, SPECIAL, INCIDENTAL,
CONSEQUENTIAL (INCLUDING LOST PROFIT), OR OTHER
DAMAGE, WHETHER BASED IN CONTRACT, TORT, OR
OTHERWISE. Some states or provinces do not allow the
exclusion or limitation of incid ental or con sequential dam ages , so
the above limitation or exclusion may not apply to you.
62 Chapter 4 - Warranty information
EN

Index
Numerics
100Base-TX support 8
10Base-2 support 8
10Base-T support 8
A
activities
address book 16
common HP Digital Sender Module 15
e-mail 16
fax 17
reset 18
security 16
shutdown and restart 15
activity log
clearing 23
contents 22
copying 23
description 22
messages 41
printing 23
refreshing 23
saving 23
using for troubleshooting 26
viewing 22
address book check
description and steps 32
Address Book Manager
client operating systems 8
common activities 15
messages 56
address books
activities 16
checking 32
control panel error messages 37
maintaining or importing 16
Public Distribution Lists 20
Public E-mail 20
Public Fax 20
administrator
activities 13
activity log 22
B
BNC support 8
C
checking the address book database 32
cleaning
scanning glass 27
clearing
activity log 23
components
Digital Sender Module 7
Configuration Utility
common activities 15
control panel
messages 37
copying
activity log 23
D
database of address books
checking 32
defaults
changing 18
distribution lists
description 20
distribution services
e-mail 10
fax 11
documents
changing size 18
sent as e-mail messages not arriving
28
duplexing 18
E
e-mail
activities 16
changing defaults 16
distribution services 10
file types supported 10
troubleshooting 40
e-mail transmissions
not arriving at destinations 28
enabling
notifications 19
error activity log messages 41
Ethernet support 8
EN
Index 63

event log
using for troubleshooting 26
export
LDAP export tool 13
F
Fast Ethernet
support 8
fatal activity log messages 41
fax
activities 17
changing defaults 17
distribution services 11
file types supported 11
troubleshooting 40
fax transmissions
not arriving at destinations 28
File types
e-mail supported 10
fax supported 11
G
glass, cleaning 27
guest
activity log 22
I
image quality
problems 27
L
LDAP export tool 13
limited warranty statement 61
M
messages
Address Book Manager 56
control panel 37
N
network
operating systems supported 8
troubleshooting 40
normal activity log messages 41
notifications
description 19
enabling 19
Novell Netware
support 9
O
operating systems supported 8
P
performance
slow Digital Sender Module 27
slow programs 55
printing the activity log 23
program messages
using for troubleshooting 26
Public Distribution Lists address book
description 20
Public E-mail addresses
description 20
Public Fax addresses
description 20
R
refreshing the activity log 23
reset activities 18
S
saving
activity log 23
security activities 16
shutdown and restart activities 15
slow
Digital Sender Module 27
programs 55
software
running slowly 55
speed
slow Digital Sender Module 27
slow in programs 55
statement of warranty 61
T
tasks
common HP Digital Sender Module 15
tools for troubleshooting 26
troubleshooting
e-mail transmissions 28
fax transmissions 28
general 27, 28
image quality 27
network 40
slow sending 27
sources for information 26
tools 26
two-sided documents 18
W
warning activity log messages 41
warranty statement 61
64 Index
EN


Copyright© 2000
Hewlett-Packard Co.
 Loading...